How Much Does It Cost to Spray Paint a Basement Ceiling?

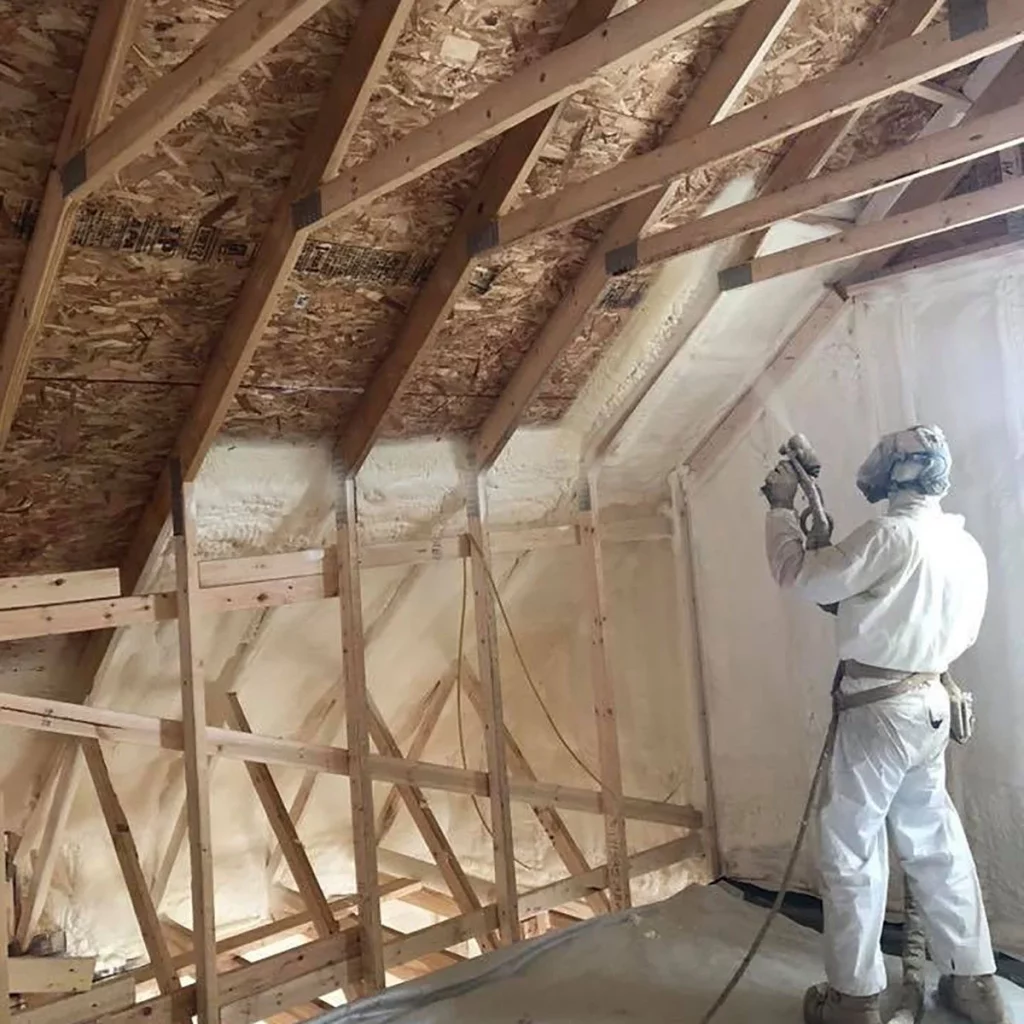
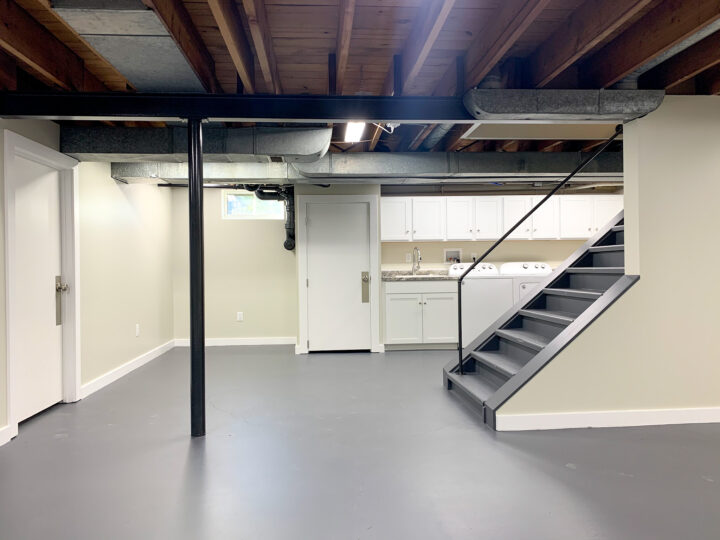
If you’re looking to update the look of your basement ceiling, spray painting is a great option. It’s a quick and easy way to give your basement a fresh new look, and it’s relatively inexpensive.

In this article, we’ll discuss the cost of spray painting a basement ceiling in detail. We’ll also cover some of the factors that can affect the cost, so you can get an accurate estimate for your project.

Cost To Spray Paint Basement Ceiling

Cost to Spray Paint a Basement Ceiling

The cost to spray paint a basement ceiling varies depending on a number of factors, including the size of the ceiling, the type of paint you use, the cost of labor in your area, and the level of difficulty of the project.

In general, you can expect to pay between $1 and $3 per square foot to have a basement ceiling painted. For a 1,000 square foot ceiling, this would cost between $1,000 and $3,000.

Factors that Affect Cost

The following factors can affect the cost of spray painting a basement ceiling:

  • Size of the ceiling: The larger the ceiling, the more expensive it will be to paint. For example, a 1,000 square foot ceiling will cost twice as much to paint as a 500 square foot ceiling.
  • Type of paint: Paints with higher quality finishes or special features, such as fire retardant paint, will cost more. For example, a paint with a high-gloss finish will cost more than a paint with a matte finish.
  • Cost of labor: Labor costs vary depending on your location and the availability of painters. For example, labor costs in a major metropolitan area will be higher than labor costs in a rural area.
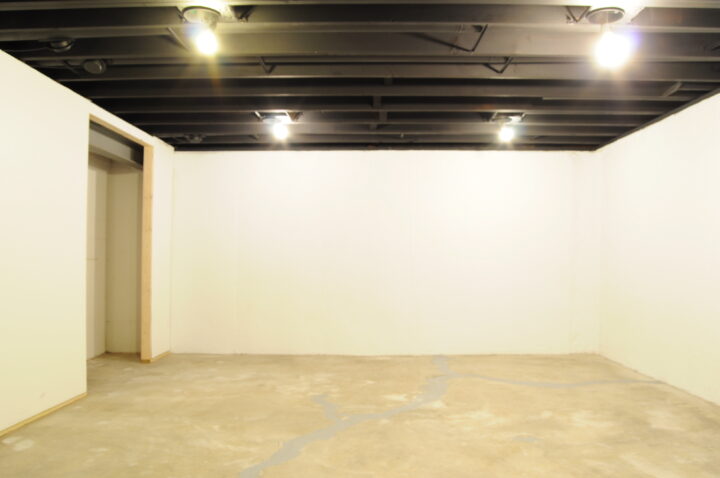
  • Level of difficulty of the project: Some basement ceilings are more difficult to paint than others. For example, a ceiling with a lot of beams or other obstructions will be more difficult to paint than a smooth ceiling.

DIY vs. Professional

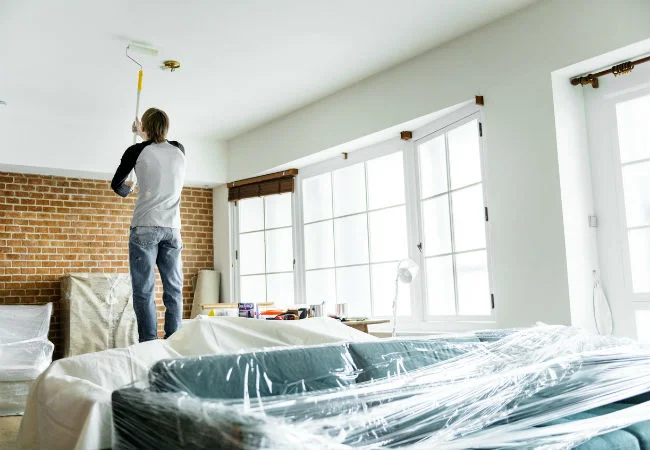
You can save money by painting your basement ceiling yourself. However, it’s important to note that spray painting can be a messy process. If you’re not comfortable working with spray paint, it’s best to hire a professional.

Tips for Saving Money

If you’re on a budget, there are a few things you can do to save money on your basement ceiling painting project:

  • Do it yourself: If you’re comfortable working with spray paint, you can save a significant amount of money by painting your basement ceiling yourself.
  • Choose a less expensive paint: There are a number of affordable paints available that will still give you a good finish.
  • Paint during the off-season: Labor rates are typically lower during the off-season.
  • Consider the level of difficulty of the project: If you’re not sure if you can handle the project yourself, it’s best to hire a professional.

Additional Information

  • Spray painting a basement ceiling is a relatively easy project that you can do yourself. However, it’s important to follow safety precautions when working with spray paint.
  • If you’re not comfortable working with spray paint, it’s best to hire a professional. A professional painter will have the experience and expertise to get the job done right.
  • There are a number of different types of paint available for basement ceilings. Choose a paint that is specifically designed for basements.
  • It’s important to prepare the surface before painting. This will help to ensure that the paint adheres properly.
  • Follow the manufacturer’s instructions when applying paint. This will help to ensure that you get the best results.
  • If you’re painting a dark ceiling, you may need to apply two coats of paint.
  • If you’re painting a textured ceiling, you may need to use a special type of paint.
  • Be sure to wear a respirator and goggles when painting.

Additional Tips

Here are a few additional tips for saving money on your basement ceiling painting project:

  • Get multiple estimates from different painters. This will help you to get the best price.
  • Ask about discounts for seniors or military personnel.
  • Consider painting the ceiling yourself if you’re comfortable working with spray paint.

Conclusion

Spray painting a basement ceiling is a great way to update the look of your basement. It’s relatively inexpensive, and it’s a quick and easy project. By considering the factors that affect cost, you can get an accurate estimate for your project and save money.

Can You Spray Foam Attic Ceiling?

If you’re looking for a way to improve the insulation in your attic, spray foam is a great option. Spray foam is a type of insulation that is applied as a liquid and expands to fill all the nooks and crannies in your attic. This can help to seal up air leaks and improve energy efficiency.

One of the most common questions about spray foam is whether it can be applied to attic ceilings. The answer is yes, spray foam can be applied to attic ceilings. In fact, it is one of the most effective ways to insulate an attic ceiling.

Can You Spray Foam Attic Ceiling

Can Spray Foam Be Applied to Attic Ceilings?

Yes, spray foam can be applied to attic ceilings. In fact, it is one of the most effective ways to insulate an attic ceiling. Spray foam is a versatile insulation that can be applied to a variety of surfaces, including ceilings, walls, and floors.

Benefits of Spray Foam Attic Ceilings

There are many benefits to using spray foam for attic ceilings. Some of the benefits include:

  • Improved energy efficiency: Spray foam can help to seal up air leaks and improve energy efficiency. This can save you money on your energy bills.
  • Reduced noise levels: Spray foam can help to reduce noise levels in your home. This can make your home more comfortable and peaceful.
  • Improved comfort: Spray foam can help to keep your home cooler in the summer and warmer in the winter. This can make your home more comfortable to live in.

How to Apply Spray Foam to Attic Ceilings

Applying spray foam to attic ceilings is a job that is best left to a professional. A professional will have the experience and expertise to apply the foam correctly.

The process of applying spray foam to attic ceilings typically involves the following steps:

  1. Preparing the attic: The attic will need to be cleaned and cleared of any debris.
  2. Installing baffles: Baffles are installed to help prevent the foam from blocking the soffit vents.
  3. Applying the foam: The foam is applied using a special sprayer.
  4. Finishing the job: Once the foam has cured, the attic can be cleaned up.

Cost of Spray Foam Attic Ceilings

The cost of spray foam attic ceilings varies depending on the size of the attic and the type of foam that is used. In general, spray foam attic ceilings are more expensive than other types of insulation.

Conclusion

If you’re looking for a way to improve the insulation in your attic, spray foam is a great option. Spray foam can be applied to attic ceilings and offers a number of benefits, including improved energy efficiency, reduced noise levels, and improved comfort.

Additional Information

  • Spray foam is a type of insulation that is applied as a liquid and expands to fill all the nooks and crannies in your attic. This is important because it helps to seal up air leaks, which can account for up to 30% of heat loss in a home.
  • Spray foam can help to reduce noise levels by up to 50%. This is because it creates a solid barrier that blocks sound waves.
  • Spray foam can help to keep your home cooler in the summer and warmer in the winter. This is because it helps to trap heat and cold air inside your home.
  • Applying spray foam to attic ceilings is a job that is best left to a professional. This is because it requires specialized equipment and expertise.

Additional Examples

Here are some examples of how spray foam can be used to improve the insulation in an attic ceiling:

  • In a home with a vented attic, spray foam can be applied to the underside of the roof sheathing. This will help to seal up air leaks and improve energy efficiency.
  • In a home with an unvented attic, spray foam can be applied to the attic floor. This will help to create a solid barrier that blocks heat and cold air from escaping.
  • In a home with a cathedral ceiling, spray foam can be applied to the underside of the rafters. This will help to improve energy efficiency and reduce noise levels.

Read too: Should You Insulate Your Garage Ceiling

Conclusion

Spray foam is a versatile and effective insulation that can be used to improve the insulation in an attic ceiling. It offers a number of benefits, including improved energy efficiency, reduced noise levels, and improved comfort.tunesharemore_vert

How to Turn High Ceilings Into Loft and Cost

If you have high ceilings in your home, you may be wondering if you can turn them into lofts. Lofts can be a great way to add extra living space, storage, or even a bedroom to your home.

In this article, we’ll discuss how to turn high ceilings into loft cost, as well as the cost involved.

Turn High Ceilings Into Loft Cost

Turning High Ceilings Into Lofts

The first step in turning high ceilings into lofts is to determine if your home is structurally sound enough to support the weight of a loft. You’ll need to consult with a structural engineer to get a professional opinion.

If your home is structurally sound, you can then begin planning the layout of your loft. You’ll need to consider the following factors:

  • Size and shape of the loft: How much space do you need? Do you want a loft with a specific shape?
  • Purpose of the loft: Will the loft be used for living space, storage, or something else?
  • Access to the loft: How will you get to the loft? Will you need stairs or a ladder?

Once you have a plan, you can then begin construction. The cost of construction will vary depending on the size and complexity of your loft.

Cost of Turning High Ceilings Into Lofts

The cost of turning high ceilings into lofts can range from a few thousand dollars to tens of thousands of dollars. The cost will depend on the following factors:

  • Size and complexity of the loft: The larger and more complex the loft, the more it will cost to build. For example, a loft with a skylight or a loft with a bathroom will be more expensive than a simple loft with a floor and walls.
  • Materials used: The type of materials you use will also affect the cost. For example, wood is more expensive than drywall.
  • Labor costs: The cost of labor will vary depending on your location and the availability of contractors.

Additional Costs

In addition to the cost of construction, you may also need to factor in the following costs:

  • Finishing materials: You’ll need to choose flooring, paint, and other finishing materials for your loft.
  • Furnishings: You’ll need to furnish your loft, if you plan to use it as living space.
  • Building permits: You may need to obtain building permits from your local government.

Conclusion

Turn high ceilings into loft cost can be a great way to add value and functionality to your home. However, it’s important to do your research and factor in all of the costs involved before you begin construction.

Read too: Is There Asbestos In Popcorn Ceiling

Tips for Saving Money

If you’re on a budget, there are a few things you can do to save money on your loft conversion project:

  • Do-it-yourself: If you’re comfortable with DIY projects, you can save a significant amount of money by doing the construction yourself.
  • Choose less expensive materials: There are a number of affordable materials available that will still give you a good finish.
  • Get multiple estimates: Get quotes from several contractors before you make a decision.

Additional Information

  • Lofts can be used for a variety of purposes, including living space, storage, and even a bedroom.
  • The size and shape of your loft will determine the amount of space you have available.
  • You’ll need to choose the right materials for your loft, depending on the purpose of the loft.
  • You’ll need to obtain building permits from your local government before you begin construction.

Conclusion

Turn high ceilings into loft cost can be a rewarding project that can add value and functionality to your home. By doing your research and planning carefully, you can save money and get the most out of your conversion.

Additional Examples

Here are a few examples of how high ceilings can be turned into lofts:

  • A loft can be used as a bedroom for an additional guest or child.
  • A loft can be used as a home office or workspace.
  • A loft can be used as a playroom for children.
  • A loft can be used as a storage area for seasonal items or belongings.

Dreams About Water Leaking From Ceiling: Meanings and Interpretations

Dreams about water leaking from the ceiling can be a common occurrence. These dreams can be interpreted in a variety of ways, depending on the individual’s personal circumstances and experiences.

In this article, we will explore the possible meanings and interpretations of dreams about water leaking from the ceiling. We will also provide some tips on how to deal with these dreams if they are causing you distress.

Dreams About Water Leaking From Ceiling

Possible Meanings

There are a number of possible meanings for dreams about water leaking from the ceiling. Some of these meanings include:

  • Feelings of insecurity or instability: Dreams about water leaking can represent feelings of insecurity or instability in your waking life. You may be feeling overwhelmed or stressed, or you may be unsure of your place in the world.
  • Fear of change: Dreams about water leaking from the ceiling can also represent fear of change. You may be facing a major life change, such as a new job or a move, and you are feeling anxious about the unknown.
  • Unresolved emotions: Dreams about water leaking from the ceiling can also be a sign of unresolved emotions. You may be holding onto anger, sadness, or fear, and these emotions are manifesting themselves in your dreams.
  • Spiritual cleansing: In some cases, dreams about water leaking from the ceiling can be seen as a sign of spiritual cleansing. The water represents the cleansing of your soul, and the ceiling represents the barriers that are holding you back.

Read too: What Causes Black Mold On Ceiling

Tips for Dealing with Dreams About Water Leaking

If you are having recurring dreams about water leaking, there are a few things you can do to deal with them:

  • Consider the possible meanings of your dreams: Take some time to reflect on your own life and experiences. What are you feeling insecure about? What changes are you facing? What unresolved emotions are you holding onto?
  • Talk to someone you trust: Talking to a therapist or counselor can help you to understand the meaning of your dreams and develop healthy coping mechanisms.
  • Practice relaxation techniques: Relaxation techniques, such as deep breathing or meditation, can help you to reduce stress and anxiety.

Conclusion

Dreams about water leaking can be a source of distress for some people. However, by understanding the possible meanings of these dreams, you can begin to deal with them in a healthy way.

Additional Information

In addition to the information provided above, here are a few additional tips for dealing with dreams:

  • If you are having trouble sleeping because of these dreams, you may want to try sleeping with a fan or other noise machine to drown out the sound of water dripping.
  • If you are particularly anxious about the meaning of your dreams, you may want to keep a dream journal to record your dreams and your thoughts and feelings about them.
  • Remember that dreams are just dreams. They are not a reflection of reality, and they do not necessarily mean anything bad.

By following these tips, you can learn to understand and deal with dreams about water leaking from the ceiling in a healthy way.

Should You Insulate Your Garage Ceiling?

Your garage is an important part of your home, and it can be used for a variety of purposes, from storing your car to working on projects. But if your garage is not insulated, it can be a source of wasted energy and discomfort.

Insulating your garage ceiling is a great way to save money on your energy bills, improve the comfort of your home, and protect your belongings from the elements. In this article, we will discuss the benefits of insulating your garage ceiling in more detail and answer the question, “Should you insulate your garage ceiling?

Should You Insulate Your Garage Ceiling

Benefits of Insulating Your Garage Ceiling

Reduced energy bills: Insulated garage ceilings can help to keep the heat in during the winter and the cool air in during the summer. This can save you money on your energy bills, especially if your garage is attached to your home.

For example, if you live in a cold climate and your garage is attached to your home, insulating your garage ceiling can save you up to 10% on your heating costs. This is because the insulation will help to prevent heat from escaping from your home through the garage ceiling.

Improved comfort: A well-insulated garage will be more comfortable to use, even in cold weather. This is because the insulation will help to trap heat inside the garage, making it warmer and more comfortable to work in.

For example, if you use your garage as a workshop, insulating your garage ceiling will make it more comfortable to work in during the winter. The insulation will help to keep you warm and comfortable, even if the temperature outside is cold.

Protection from the elements: Insulation protects garages from the elements, extending the lifespan of your belongings. This is because the insulation will help to keep out moisture and cold air, which can damage your belongings.

For example, if you store your car in your garage, insulating your garage ceiling will help to protect your car from the elements. The insulation will help to keep your car dry and warm, which can help to extend the life of your car.

Should You Insulate Your Garage Ceiling?

The answer to this question depends on a number of factors, including:

  • The climate in your area: If you live in a cold climate, insulating your garage ceiling is especially important. This will help to keep your home warmer and more comfortable in the winter.

For example, if you live in a cold climate, such as Minnesota or Wisconsin, insulating your garage ceiling is a good investment. The insulation will help to keep your home warmer and more comfortable in the winter, which can save you money on your energy bills.

  • The size of your garage: The larger your garage, the more insulation you will need, and the higher the cost will be.

For example, if you have a two-car garage, you will need about 800 square feet of insulation. The cost of insulation will vary depending on the type of insulation you choose.

  • Your budget: Insulating your garage ceiling can be a significant investment, so it is important to consider your budget before making a decision.

For example, the cost of insulating a two-car garage with fiberglass batts is about $500. The cost of insulating a two-car garage with spray foam insulation is about $2,000.

How to Insulate Your Garage Ceiling

If you decide to insulate your garage ceiling, there are a few things you will need to do:

  1. Remove any existing insulation. If your garage already has insulation, it is important to remove it before installing new insulation.
  2. Inspect the joists. Make sure the joists are in good condition and free of damage. You will need to repair the damaged joists before installing insulation.
  3. Measure the joists. You will need to measure the width and depth of the joists to determine the correct size of insulation.
  4. Cut the insulation to size. Use a sharp knife or saw to cut the insulation to the correct size.
  5. Install the insulation. Staple or screw the insulation to the joists, leaving a small gap between the insulation and the ceiling.
  6. Seal any gaps or cracks. Use insulation tape to seal any gaps or cracks in the insulation.

Conclusion

Insulating your garage ceiling is a wise investment that can save you money, improve your comfort, and protect your belongings. If you are considering insulating your garage ceiling, it is important to do your research and compare prices before making a decision.

How Much Does It Cost to Insulate a Garage Ceiling?

Insulating your garage ceiling is a great way to save money on your energy bills, improve the comfort of your home, and protect your belongings from the elements. But how much does it cost to insulate a garage ceiling?

How Much To Insulate Garage Ceiling

The cost of insulating a garage ceiling can vary depending on a number of factors, including:

  • The size of your garage: The larger your garage, the more insulation you will need, and the higher the cost will be.
  • The type of insulation you choose: Different types of insulation have different costs. Fiberglass batts are the most common type of insulation, and they are relatively inexpensive. Spray foam insulation is more expensive, but it is also more effective at blocking heat transfer.
  • The cost of labor in your area: The cost of labor can vary depending on the location. In general, labor costs are higher in urban areas than in rural areas.

In general, the cost of insulating a garage ceiling ranges from $250 to $3,900.

Here is a breakdown of the costs involved in insulating a garage ceiling:

  • Materials: The cost of insulation materials can range from $1 to $3 per square foot. For a typical 2-car garage, you will need about 800 square feet of insulation. The cost of insulation materials will depend on the type of insulation you choose.
  • Labor: The cost of labor can range from $25 to $50 per hour. The amount of labor required will depend on the size of your garage and the type of insulation you choose.

Here are some tips for reducing the cost of insulating your garage ceiling:

  • Do it yourself: If you are handy, you can insulate your garage ceiling yourself and save money on labor costs. There are many tutorials available online and in home improvement stores.
  • Choose the right insulation: There are a variety of insulation materials available, each with its own advantages and disadvantages. Choose the type of insulation that is best suited for your needs and budget.
  • Get multiple estimates: Get estimates from several contractors before making a decision. This will help you compare prices and find the best deal.

How to Insulate a Garage Ceiling

If you decide to insulate your garage ceiling yourself, you will need the following materials:

  • Insulation: You can choose from a variety of insulation materials, including fiberglass batts, cellulose insulation, and spray foam insulation.
  • Insulation staples or screws: You will need these to secure the insulation to the joists.
  • Insulation tape: You will need this to seal any gaps or cracks in the insulation.
  • Safety gear: You will need safety glasses, gloves, and a dust mask to protect yourself from insulation fibers.

Here are the steps involved in insulating a garage ceiling:

  1. Remove any existing insulation. If your garage already has insulation, it is important to remove it before installing new insulation.
  2. Inspect the joists. Make sure the joists are in good condition and free of damage. If the joists are damaged, you will need to repair them before installing insulation.
  3. Measure the joists. You will need to measure the width and depth of the joists to determine the correct size of insulation.
  4. Cut the insulation to size. Use a sharp knife or saw to cut the insulation to the correct size.
  5. Install the insulation. Staple or screw the insulation to the joists, leaving a small gap between the insulation and the ceiling.
  6. Seal any gaps or cracks. Use insulation tape to seal any gaps or cracks in the insulation.

Benefits of Insulating a Garage Ceiling

Reduced energy bills: Insulating your garage ceiling can help you save money on your energy bills by reducing the amount of heat that escapes from your home. This is especially important if your garage is attached to your home.

  • Improved comfort: A well-insulated garage will be more comfortable to use, even in cold weather. This is because the insulation will help to trap heat inside the garage, making it warmer and more comfortable to work in.
  • Protection from the elements: Insulated garages are better protected from the elements, which can help to extend the life of your belongings. This is because the insulation will help to keep out moisture and cold air, which can damage your belongings.

Conclusion

Insulating your garage ceiling is a wise investment that can save you money, improve your comfort, and protect your belongings. If you are considering insulating your garage ceiling, it is important to do your research and compare prices before making a decision.tunesharemore_vert

How Much Does It Cost to Paint an Exposed Basement Ceiling?

How Much Does It Cost to Paint an Exposed Basement Ceiling? An exposed basement ceiling can be a great way to add character and style to your home. It can also help to improve the appearance of a basement that is in need of a makeover. However, painting an exposed basement ceiling can be a bit of a challenge. The ceiling is often uneven and textured, which can make it difficult to get a smooth finish.

Cost To Paint Exposed Basement Ceiling

Cost Factors

The cost of painting an exposed basement ceiling will vary depending on a number of factors, including:

  • Size of the ceiling: The larger the ceiling, the more paint you will need, and the more time it will take to paint. For example, a 1,000 square foot ceiling will require about 10 gallons of paint if you are using a single coat.
  • Condition of the ceiling: If the ceiling is in poor condition, you may need to repair any cracks or holes before you can paint. This can add to the cost of the project.
  • Type of paint: The type of paint you choose will affect the cost. Latex paint is the most common type of paint used for exposed basement ceilings, and it is relatively inexpensive. Oil-based paint is more expensive and requires more time to dry.
  • Painting supplies: You will need to purchase paint brushes, rollers, and other painting supplies.
  • Labor costs: If you hire a professional painter, you will need to factor in labor costs.

DIY Costs

If you choose to paint your exposed basement ceiling yourself, you can expect to pay about $0.50 to $1 per square foot for materials. This includes the cost of paint, brushes, rollers, and other supplies.

For example, if you have a 1,000 square foot ceiling, you can expect to pay about $500 to $1,000 in materials.

Here are some additional details about the cost of materials for DIY painting:

  • Paint: Latex paint costs about $20 to $30 per gallon. You will need two coats of paint, so you will need about 20 gallons of paint for a 1,000 square foot ceiling.
  • Brushes and rollers: You will need a paint brush for cutting in around the edges of the ceiling and a roller for painting the larger areas. You can purchase a set of brushes and rollers for about $50.
  • Other supplies: You will also need a drop cloth to protect your floors and a ladder to reach the ceiling. You can purchase a drop cloth for about $20 and a ladder for about $50.

Professional Painting Costs

If you hire a professional painter, you can expect to pay about $2 to $3 per square foot for labor. This includes the cost of prep work, painting, and cleanup.

For example, if you have a 1,000 square foot ceiling, you can expect to pay about $2,000 to $3,000 in labor costs.

Here are some additional details about the cost of labor for professional painting:

  • Prep work: The painter will need to prepare the ceiling by cleaning it and repairing any cracks or holes. This can add about $100 to $200 to the cost of the project.
  • Painting: The painter will apply two coats of paint to the ceiling. This will take about two days to complete.
  • Cleanup: The painter will clean up the mess after they are finished painting. This includes removing the drop cloth and ladder.

Read too: Do All Popcorn Ceilings Contain Asbestos

Total Costs

The total cost of painting an exposed basement ceiling will depend on the size of the ceiling, the condition of the ceiling, the type of paint you choose, and whether you choose to do the work yourself or hire a professional painter.

DIY Tips

If you choose to paint your exposed basement ceiling yourself, here are a few tips to help you get a smooth finish:

  • Prepare the ceiling properly. Make sure the ceiling is clean and free of dirt, dust, and cobwebs. You can use a vacuum cleaner or a broom to clean the ceiling. If the ceiling is dirty or dusty, it will be difficult to get a smooth finish.
  • Apply a coat of primer. Primer will help the paint adhere to the ceiling. You can use a latex primer or an oil-based primer.
  • Apply two coats of paint. This will help to create a smooth, even finish. You can use a latex paint or an oil-based paint.

Should You Insulate Your Unfinished Basement Ceiling?

Your basement is a valuable part of your home, but it can be a cold and uncomfortable place if it’s not properly insulated. In fact, up to 25% of heat loss in a home can occur through the basement ceiling.

If you’re considering insulating your unfinished basement ceiling, there are a few things you need to know. In this article, we’ll discuss the pros and cons of insulating your basement ceiling, as well as the different types of insulation available.

Should You Insulate Unfinished Basement Ceiling

Should You Insulate Your Basement Ceiling?

There are several reasons why you might want to insulate your unfinished basement ceiling. Here are a few of the benefits:

  • Increased energy efficiency: Basement insulation can help to keep your home warm in the winter and cool in the summer. This can lead to lower energy bills.

For example, according to the U.S. Department of Energy, insulating your basement ceiling can save you up to 15% on your heating costs. This can add up to hundreds or even thousands of dollars over the lifetime of your home.

  • Improved comfort: A well-insulated basement will be more comfortable to use, whether you’re using it for storage, recreation, or finishing.

For example, if you use your basement for a home office or playroom, you’ll be more comfortable working or playing in a warm and dry environment.

  • Reduced noise levels: Basement insulation can help to reduce noise levels from the outside world. This can be especially important if you live in a noisy area.

For example, if you live near a busy road or train tracks, basement insulation can help to reduce the amount of noise that comes into your home.

Cons of Basement Ceiling Insulation

There are a few potential downsides to basement ceiling insulation. Here are a few things to consider:

The cost of basement ceiling insulation will vary depending on the size of your basement and the type of insulation you choose. However, in general, you can expect to pay between $1 and $2 per square foot.

  • Labor: If you’re not comfortable doing the work yourself, you’ll need to hire a contractor.

Insulating a basement ceiling is a relatively simple project, but it can be time-consuming. If you’re not comfortable doing the work yourself, you can hire a contractor to do it for you.

  • Space: Basement ceiling insulation can reduce the amount of storage space in your basement.

Depending on the type of insulation you choose, you may need to lose a few inches of headroom in your basement. This can reduce the amount of storage space you have available.

Types of Basement Ceiling Insulation

There are two main types of basement ceiling insulation:

  • Fiberglass: Fiberglass insulation is a popular option because it’s relatively inexpensive and easy to install.

Fiberglass insulation is made up of small, glass fibers that are held together by a binder. It comes in rolls or batts that can be cut to fit between the joists in your basement ceiling.

  • Foam insulation: Foam insulation is a more expensive option, but it’s also more effective at preventing heat loss.

Foam insulation comes in a variety of forms, including spray foam, rigid foam, and blown-in foam. Spray foam is the most effective type of foam insulation, but it’s also the most expensive. Rigid foam and blown-in foam are less expensive than spray foam, but they’re also less effective at preventing heat loss.

How to Insulate Your Basement Ceiling

If you’ve decided to insulate your basement ceiling, there are a few things you’ll need to do.

  1. Choose the right insulation: There are a variety of insulation materials and thicknesses available. Choose the type and thickness that’s right for your climate and needs.
  2. Measure and cut the insulation: Use a tape measure and a sharp knife to cut the insulation to the correct length and width.
  3. Install the insulation: There are a variety of ways to install basement ceiling insulation. Follow the instructions on the insulation packaging for specific instructions.

Conclusion

Should you insulate unfinished basement ceiling? Insulating your unfinished basement ceiling is a great way to improve the energy efficiency, comfort, and value of your home. If you’re considering this project, be sure to weigh the pros and cons carefully before making a decision.

How Much Does It Cost to Paint a Room and Ceiling?

Cost to Paint Room and Ceiling. Painting a room or ceiling is a great way to update the look of your home. It can be a relatively inexpensive project to do yourself, but it’s important to understand the costs involved before you get started.

In this article, we’ll discuss the average cost to paint a room and ceiling, as well as the factors that can affect the price. We’ll also provide some tips for saving money on your painting project.

Cost To Paint Room And Ceiling

Average Cost to Paint a Room and Ceiling

The average cost to paint a room and ceiling ranges from $300 to $1,000, depending on the size of the room, the type of paint, and the number of coats required.

For a small room, such as a bedroom or bathroom, the cost to paint the walls and ceiling is typically around $300 to $500. For a larger room, such as a living room or dining room, the cost can range from $500 to $1,000.

Factors Affecting Cost

The following factors can affect the cost to paint a room and ceiling:

  • Size of the room: The larger the room, the more paint you’ll need, which will increase the cost.
  • Type of paint: The type of paint you choose will also affect the cost. For example, latex paint is typically less expensive than oil-based paint.
  • Number of coats: The number of coats of paint you need will also affect the cost. In most cases, two coats of paint are required for a good finish.
  • Labor costs: If you hire a professional painter, you’ll need to factor in labor costs. The cost of professional painting varies depending on the location and the painter’s experience.

Tips for Saving Money

Here are a few tips for saving money on your painting project:

  • Do it yourself: If you’re handy, you can save money by painting the room yourself. There are many resources available to help you learn how to paint, including online tutorials and DIY books.
  • Choose the right paint: Latex paint is a good choice for most rooms. It’s easy to apply and clean up, and it’s available in a variety of colors and finishes.
  • Consider the number of coats: If you’re using a high-quality paint, you may be able to get away with one coat.
  • Shop around for paint and supplies: Compare prices from different retailers to find the best deal.

Call to Action

If you’re ready to start painting, be sure to do your research and get quotes from several painters before making a decision.

Additional Details

In addition to the factors mentioned above, there are a few other things to keep in mind when estimating the cost of painting a room and ceiling.

  • The condition of the walls and ceiling: If the walls or ceiling are in poor condition, you may need to repair or replace them before you can paint. This can add to the cost of the project.
  • The type of finish you want: Different types of finishes, such as flat, semi-gloss, or high-gloss, will affect the cost of the paint.
  • The time of year: Painting in the summer is typically more expensive than painting in the winter. This is because painters are in higher demand during the summer months.

Tips for Hiring a Professional Painter

If you decide to hire a professional painter, be sure to get quotes from several painters before making a decision. Compare the quotes carefully, and make sure you understand what is included in each quote. Here are a few questions to ask potential painters:

  • How much experience do you have painting rooms and ceilings?
  • What type of paint do you use?
  • How many coats of paint do you recommend?
  • What is your labor rate?
  • What is your estimated completion date?

Read too: Should You Insulate Unfinished Basement Ceiling

Conclusion

Painting a room or ceiling can be a great way to update the look of your home. By understanding the costs involved and following a few tips, you can save money on your painting project.tunesharemore_vert

How Much Does It Cost to Prime and Paint a Ceiling?

Painting your ceiling is a great way to update the look of your home. It can also help to hide any blemishes or damage. However, before you start painting, it is important to understand the cost involved.

In this article, we will discuss the cost to prime and paint a ceiling. We will also provide tips on how to save money on your project.

Cost To Prime And Paint Ceiling

Cost Factors

The cost to prime and paint a ceiling depends on a number of factors, including:

  • The size of the ceiling: The larger the ceiling, the more paint and primer you will need. This will increase the cost of your project.
  • The type of paint and primer: The type of paint and primer you choose will also affect the cost. For example, oil-based paint is more expensive than latex paint.
  • The location of your home: The cost of labor can vary depending on the location of your home.

Cost Range

The cost to prime and paint a ceiling can range from $1 to $2 per square foot. For a 12-foot by 12-foot room, this would mean a cost of $144 to $288.

Cost to Prime

The cost to prime a ceiling is typically about half the cost of painting. For a 12-foot by 12-foot room, this would mean a cost of $72 to $144.

Cost to Paint

The cost to paint a ceiling is typically about $1 per square foot. For a 12-foot by 12-foot room, this would mean a cost of $144.

How to Save Money

There are a few things you can do to save money on your ceiling painting project:

  • Do it yourself: If you are handy, you can save money by painting your ceiling yourself.
  • Buy paint and primer in bulk: Buying paint and primer in bulk can save you money.
  • Shop around for the best prices: Compare prices from different paint retailers to find the best deal.
  • Get quotes from multiple contractors: If you are hiring a contractor, get quotes from multiple contractors to compare prices.

Conclusion

The cost to prime and paint a ceiling can vary depending on a number of factors. By understanding the cost factors and following these tips, you can save money on your project.

Read too: What Causes Water Bubble In Ceiling

Additional Information

In addition to the cost factors listed above, there are a few other things you may need to consider when budgeting for your ceiling painting project. For example, if you need to repair any damage to the ceiling before painting, this will add to the cost of your project. Additionally, if you are painting a ceiling that is difficult to access, this may also increase the cost.

If you are unsure of how much it will cost to prime and paint your ceiling, it is always a good idea to get a quote from a professional. A qualified contractor can help you to determine the cost of your project and provide you with a quote that is accurate and fair.tunesharemore_vert

Unveiling the Secrets: How To Paint A Basement Ceiling

How to paint a basement ceiling? Your basement is a hidden gem in your home, offering valuable additional living space. However, many homeowners overlook the ceiling when it comes to renovation and design. A painted basement ceiling can add character and charm to the space, making it feel like an integral part of your home. In this article, we will guide you through the process of painting a basement ceiling, from preparation to execution, and reveal the magic of this transformation.

How To Paint A Basement Ceiling

The Importance of a Well-Designed Ceiling

Elevating the Aesthetics of Your Basement

The ceiling of your basement plays a crucial role in the overall aesthetics of the space. A well-designed ceiling can:

1. Enhance the Ambiance:

  • A carefully chosen color and design can make your basement feel warm and inviting.

2. Hide Imperfections:

  • A painted ceiling can conceal imperfections, pipes, wires, and ducts that are often present in basements.

3. Define Zones:

  • By using different colors or finishes, you can create distinct zones within your basement for various purposes.

Preparing for the Paint Job

Setting the Stage for Success

Before you dive into painting your basement ceiling, it’s essential to prepare adequately. Here are the steps to get you started:

1. Clean the Ceiling:

  • Dust and clean the ceiling to ensure that the paint adheres properly. Use a vacuum cleaner with a brush attachment or a duster to remove loose particles.

2. Repair Damage:

  • Inspect the ceiling for any damage, such as cracks or holes. Repair these issues using a suitable filler or patching compound.

3. Protect the Area:

  • Cover the floor and any items in your basement with drop cloths or plastic sheets to prevent paint splatters.

4. Choose the Right Paint:

  • Select a paint that is suitable for your ceiling’s material and your desired finish. Latex or water-based paints are typically recommended for basement ceilings.

Painting the Basement Ceiling

Turning Your Vision into Reality

Now that your basement ceiling is prepped and you’ve gathered the necessary materials, it’s time to start painting.

1. Start with a Primer:

  • Apply a coat of primer to the ceiling to create an even base for the paint. Primer helps the paint adhere better and provides a smoother finish.

2. Use a Roller:

  • A paint roller is an effective tool for applying paint to the ceiling. Use an extension pole to reach high or hard-to-access areas.

3. Work in Sections:

  • Divide the ceiling into manageable sections and work on one section at a time. This approach ensures even coverage and prevents the paint from drying too quickly.

4. Apply Multiple Coats:

  • Depending on the desired finish and the color you’re using, you may need to apply two or more coats of paint. Allow each coat to dry before applying the next.

5. Be Mindful of Drips:

  • Watch out for drips and streaks, especially when applying paint to an overhead surface. Correct any imperfections immediately.

Read too: How Much Ceiling Height For Treadmill

Finishing Touches and Ideas

Bringing Your Vision to Life

As you near the end of your basement ceiling painting project, consider these finishing touches and creative ideas:

1. Accent Colors:

2. Stencils or Patterns:

  • Add flair to your ceiling by using stencils or creating patterns that complement the overall design of your basement.

3. Incorporate Lighting:

  • Well-placed lighting fixtures can highlight your newly painted ceiling, creating a dynamic and appealing look.

Conclusion:

How to paint a basement ceiling? A painted basement ceiling can transform a neglected space into a captivating and functional part of your home. By following the steps outlined in this guide and considering creative ideas for your ceiling, you can achieve a unique and visually appealing basement that suits your style and needs. Don’t let your basement’s potential go to waste; start your ceiling painting project and unlock the beauty of this often-overlooked area.

Dealing with Dust on the Ceiling Around Air Vents

The presence of dust on the ceiling around air vents is a common issue that many homeowners face. Not only does it look unsightly, but it can also affect indoor air quality. In this article, we will explore the causes of dust accumulation around air vents on the ceiling and provide effective solutions for dealing with this problem.

Dust On Ceiling Around Air Vents

Understanding the Dust Dilemma

Why is Dust Accumulating Around Air Vents?

Before we delve into solutions, it’s important to understand why dust tends to collect around air vents on the ceiling.

1. Air Circulation:

  • Your HVAC system circulates air throughout your home, and this airflow can carry dust particles. When the air passes through the vents on the ceiling, it may deposit dust in the vicinity.

2. Gravity Effect:

  • Dust particles are naturally pulled down by gravity. As air is forced out of the vents, it can carry dust downward, where it settles on the ceiling.

3. Static Electricity:

  • The ceiling can develop a static charge, which attracts dust. This static charge can be enhanced by the presence of metal ducts or other materials near the vents.

The Downsides of Dust Accumulation

Why It Matters

Accumulated dust around air vents can have several negative consequences.

1. Reduced Air Quality:

  • Dust contains allergens and pollutants that can negatively affect indoor air quality, leading to respiratory issues and allergies.

2. HVAC Efficiency:

  • Dust buildup on the vents and surrounding areas can hinder the efficiency of your HVAC system, causing it to work harder and consume more energy.

3. Aesthetic Concerns:

  • Dust on the ceiling is unsightly and can diminish the overall appearance of your home.

Solutions for Dust Control

How to Tackle the Issue

Now that we understand the causes and consequences of dust on the ceiling around air vents, let’s explore some effective solutions.

1. Regular Cleaning:

  • The simplest way to address dust accumulation is through regular cleaning. Dust the area around the vents and use a vacuum cleaner with a nozzle attachment to remove dust from the vents themselves.

2. Air Purification:

  • Installing air purifiers in your home can help capture dust particles in the air, preventing them from settling around the vents.

3. Sealing Air Leaks:

  • Ensure that there are no leaks or gaps around the vents that could pull dust into the ceiling. Use sealant or caulk to seal any openings.

4. Duct Cleaning:

  • Periodically, have your HVAC ducts professionally cleaned to remove dust and debris from the system, reducing the amount of dust that is circulated in the first place.

Read too: How To Fix Condensation On Ceiling

Preventive Measures

Avoiding Future Dust Accumulation

Prevention is often more effective than constant cleaning. Here are some measures to prevent dust buildup around air vents.

1. Use High-Quality Filters:

  • Use high-efficiency air filters in your HVAC system to capture more dust and allergens.

2. Change Filters Regularly:

  • Replace air filters as recommended by the manufacturer to maintain proper airflow and filtration.

3. Keep Vents Closed:

  • When not in use, close the vents in less-used rooms to reduce the circulation of dust.

Conclusion:

Dust accumulation on the ceiling around air vents is a common problem that can affect indoor air quality and the appearance of your home. By understanding the causes and consequences of this issue and implementing effective cleaning and prevention measures, you can keep your home’s air clean and fresh while maintaining a dust-free ceiling. Regular maintenance and attention to these details can significantly improve your living environment.

Transforming Your Low Ceiling Basement: Before and After

Basements with low ceilings often leave homeowners feeling like they’re in cramped, dim spaces. However, with the right design and renovation, your low ceiling basement can be transformed into a functional and inviting area. In this article, we will explore the remarkable before-and-after journey of renovating a low ceiling basement, unlocking its full potential.

Low Ceiling Basement Before And After

The Challenges of Low Ceiling Basements

Making the Most of Limited Space

Low ceiling basements present several challenges, making them less appealing for everyday use.

1. Limited Headroom:

  • The primary challenge of low ceiling basements is the reduced headroom. This can create a feeling of confinement and limit your options for functional space.

2. Poor Lighting:

  • Low ceilings can make the basement feel darker, requiring additional lighting to compensate for the lack of natural light.

3. Dampness:

  • Many low ceiling basements struggle with moisture issues, which can lead to mold and damage over time.

Read too: How To Fix Condensation On Ceiling

Before: A Dark, Unusable Space

In their “before” state, low ceiling basements are often dark, damp, and underutilized areas. Homeowners may use them for storage, laundry, or simply avoid them altogether due to the lack of appeal.

1. Unfinished Walls:

  • In many cases, the walls in low ceiling basements are left unfinished, exposing concrete or cinder block surfaces.

2. Limited Flooring Options:

  • Flooring choices are often limited to concrete, which can be cold and uninviting.

3. Inadequate Lighting:

  • Inadequate lighting can make the space feel gloomy and unappealing.

After: A Transformed Oasis

The transformation of a low ceiling basement is nothing short of a metamorphosis. With some creative ideas and skilled renovations, the space can become an inviting extension of your home.

1. Clever Ceiling Solutions:

  • Drop ceilings or ceiling tiles can be installed to maximize headroom without compromising on style.

2. Lighting Magic:

  • Proper lighting design can make a low ceiling basement feel bright and spacious. Recessed lighting, wall sconces, and floor lamps can work wonders.

3. Finishing Touches:

  • Finishing the walls with paint or paneling and upgrading the flooring can completely change the atmosphere.

Functional Space:

  • After renovation, a low ceiling basement can be transformed into various functional spaces such as a home office, playroom, entertainment room, or even a cozy guest bedroom.

Creative Storage Solutions:

  • Utilize the available space intelligently for storage, ensuring that your basement remains clutter-free.

Effective Moisture Control:

  • Address moisture issues by waterproofing the basement, ensuring it stays dry and mold-free.

Before and After Inspirations

Real-Life Examples

To provide some inspiration for your low ceiling basement renovation, let’s explore a few real-life “before and after” scenarios:

1. The Cozy Home Theater:

  • The “before” basement had low ceilings and limited lighting, making it feel cramped. However, with a drop ceiling, recessed lighting, and comfortable seating, it became a cozy home theater.

2. The Playful Kids’ Paradise:

  • This basement went from an underused storage area to a vibrant playroom. Bright colors, wall decals, and creative storage solutions made it an ideal space for kids.

3. The Elegant Guest Suite:

  • By finishing the walls, upgrading the flooring, and adding stylish furnishings, a low ceiling basement was transformed into a welcoming guest suite.

Conclusion:

Renovating a low ceiling basement may seem like a daunting task, but the transformation can be nothing short of magical. With clever design choices, effective lighting, and proper moisture control, your basement can become a functional and inviting space. From home theaters to playrooms and guest suites, the possibilities are endless, and your basement’s “before and after” story could be the next inspiring tale of renovation success.

Unveiling the Mystery of Tiny Bugs on Walls and Ceiling

It’s a common scenario for homeowners: you spot tiny bugs crawling on your walls or congregating on your ceiling. These uninvited guests can be a nuisance and even a cause for concern. In this article, we will delve into the world of these tiny bugs, identifying common culprits and providing insights on how to deal with them.

Tiny Bugs On Walls And Ceiling

Identifying the Intruders

Getting to Know the Tiny Bugs

Before you can address the issue of tiny bugs on your walls and ceiling, it’s crucial to identify the type of insects you’re dealing with.

1. Ants:

  • Tiny ants may occasionally venture indoors, seeking food and shelter. They often form visible trails and are relatively easy to recognize.

2. Aphids:

  • Aphids are tiny, soft-bodied insects that may infest your indoor plants and, in some cases, find their way onto walls and ceilings.

3. Springtails:

  • Springtails are minuscule, jumping insects that thrive in damp conditions. They are often found in bathrooms or kitchens.

4. Fruit Flies:

  • Fruit flies, as their name suggests, are attracted to ripe or decaying fruit. They are tiny and tend to hover around food sources.

5. Silverfish:

  • Silverfish are small, wingless insects known for their silvery appearance. They are often found in damp, dark areas.

Reasons for Their Presence

Understanding the Attraction

Tiny bugs can make their way into your home for a variety of reasons. Knowing the factors that attract them can help you prevent infestations.

1. Food Sources:

  • Leftover food, spilled crumbs, and overripe fruit are attractive to many tiny bugs, especially ants and fruit flies.

2. Moisture:

  • Damp or humid conditions, such as those found in bathrooms and kitchens, can draw in springtails and silverfish.

3. Plants:

  • Aphids may come indoors on infested plants, and they can quickly spread to walls and ceilings.

Addressing the Issue

Effective Strategies for Bug Control

Once you’ve identified the type of tiny bugs you’re dealing with and the reason for their presence, it’s time to take action to address the issue.

1. Remove Attractive Conditions:

  • Start by eliminating what attracts these bugs. Clean up spilled food, fix plumbing leaks, and keep indoor plants healthy and pest-free.

2. Seal Entry Points:

  • Seal any cracks or openings that may serve as entry points for these insects. This includes gaps around windows, doors, and pipes.

3. Use Natural Remedies:

  • For minor infestations, consider natural remedies like vinegar or essential oils to deter bugs from specific areas.

4. Insecticides:

  • If the problem persists, you may need to use insecticides or contact a pest control professional for more severe infestations.

Read too: How To Fix Bubble In Ceiling

Preventive Measures

Keeping Tiny Bugs at Bay

To prevent future invasions of tiny bugs on your walls and ceiling, consider the following preventive measures:

1. Regular Cleaning:

  • Maintain a clean and hygienic living environment, reducing the attraction for these insects.

2. Proper Storage:

  • Store food in airtight containers, repair leaky plumbing promptly, and keep indoor plants free of pests.

3. Routine Inspection:

  • Regularly inspect your home for potential entry points and seal them as needed.

Conclusion:

Tiny bugs on your walls and ceiling can be a nuisance, but understanding their identity and attraction factors is the first step in dealing with them effectively. By implementing preventive measures and taking appropriate action, you can keep your home bug-free and enjoy a more pleasant living environment. Don’t let these tiny intruders take over; take control of your space and maintain a bug-free home.

Understanding Radiant Ceiling Heat Cost Per Month

Radiant ceiling heat is an energy-efficient and comfortable heating solution for your home. However, many homeowners wonder about the cost of operating this system each month. In this article, we will delve into the world of radiant ceiling heat, exploring its cost-effectiveness and factors that influence the monthly expenses.

Radiant Ceiling Heat Cost Per Month

How Radiant Ceiling Heat Works

Efficient, Silent, and Discreet

Radiant ceiling heat is a heating system that operates by using heating panels or cables installed in the ceiling. These panels emit infrared radiation, which heats the objects and surfaces in a room, creating a cozy and even warmth. Unlike traditional forced-air heating systems, radiant ceiling heat is virtually silent, discreet, and doesn’t rely on blowing hot air into the space.

Factors Affecting Monthly Costs

Understanding the Variables

Several factors can influence the monthly cost of operating radiant ceiling heat. Let’s take a closer look at these variables.

1. System Size:

  • The size of your radiant ceiling heat system is a primary determinant of your monthly costs. Larger systems will consume more energy, while smaller systems are more economical.

2. Ceiling Height:

  • The height of your ceiling can impact efficiency. Higher ceilings may require more energy to heat the room effectively.

3. Insulation:

  • The quality of insulation in your home is critical. Well-insulated spaces retain heat better, reducing the energy required to maintain a comfortable temperature.

4. Climate:

  • The climate in your region plays a significant role. Colder climates may demand more energy to keep your home warm, affecting monthly expenses.

5. Electricity Rates:

  • The cost of electricity in your area is a direct factor. Higher electricity rates will result in higher monthly expenses.

Calculating the Cost

Making the Numbers Add Up

To estimate the cost of operating radiant ceiling heat per month, you’ll need to consider the system’s wattage, your electricity rate, and the number of hours the system is in use. The formula is relatively simple:

Monthly Cost = System Wattage (kW) x Hours of Operation x Electricity Rate (per kWh)

Keep in mind that radiant ceiling heat systems are zoned, meaning you can heat specific areas or rooms independently. This allows for better control over your energy consumption and cost.

Tips for Cost-Effective Operation

Savings Without Sacrificing Comfort

While radiant ceiling heat offers efficient heating, there are several tips to make it more cost-effective:

1. Zone Heating:

  • Take advantage of the zoning feature to heat only the areas you’re using, saving energy in unoccupied rooms.

2. Set Thermostats Wisely:

  • Program your thermostats to maintain comfortable temperatures when you’re at home and reduce the heat when you’re away or asleep.

3. Ensure Proper Insulation:

  • Keep your home well-insulated to prevent heat loss and reduce the workload on the radiant ceiling heat system.

4. Regular Maintenance:

  • Schedule routine maintenance to ensure your system operates efficiently and avoids any potential issues that could increase energy consumption.

Conclusion:

Radiant ceiling heat is an efficient and effective way to heat your home, offering both comfort and energy savings. While the cost per month can vary depending on various factors, understanding these variables and following cost-effective practices can help you enjoy the benefits of this heating system without breaking the bank. It’s an investment in both your comfort and your wallet, ensuring that you have a warm and cozy home during the colder months.

Understanding the Air Gap Between Ceiling and Insulation

When it comes to your home’s insulation, the space between your ceiling and insulation is often overlooked. However, this air gap can significantly impact your home’s energy efficiency, comfort, and even your utility bills. In this article, we will delve into the concept of the air gap between your ceiling and insulation, explaining what it is, why it matters, and how to address it effectively.

Air Gap Between Ceiling And Insulation

What Is the Air Gap Between Ceiling and Insulation?

The air gap between your ceiling and insulation refers to the space or void that exists between the uppermost layer of insulation and the material covering it, which is typically the ceiling. This gap can vary in size, and its presence can result from several factors, such as improper insulation installation or gaps left during construction.

Why Does the Air Gap Matter?

The air gap between your ceiling and insulation matters for several reasons:

1. Reduced Energy Efficiency

If your home has a significant air gap between the ceiling and insulation, it can result in reduced energy efficiency. Warm or cool air can escape through this gap, leading to higher energy bills as your HVAC system works harder to maintain the desired temperature.

2. Temperature Variations

An air gap can cause temperature variations within your home. Rooms with a wider air gap may feel drafty or have inconsistent temperatures, making your living spaces less comfortable.

3. Condensation and Moisture Issues

In humid climates, the presence of an air gap can lead to condensation problems. Moisture may accumulate within the gap, potentially causing mold, mildew, and even structural damage over time.

Addressing the Air Gap

Now that we understand why the air gap between the ceiling and insulation is important, let’s explore how to address it:

1. Insulation Retrofit

One effective solution is to retrofit additional insulation. You can add more insulation material to fill the gap and improve the energy efficiency of your home. This is typically done by installing insulation over the existing layer to eliminate the air gap.

2. Spray Foam Insulation

Spray foam insulation is an excellent option for sealing air gaps. It can be sprayed directly into the gap, effectively sealing it and providing a moisture barrier. This method not only enhances energy efficiency but also helps prevent moisture-related issues.

3. Air Sealing

Properly sealing any gaps or cracks in the ceiling can minimize the air gap’s size. Use caulk or weatherstripping to seal any openings around light fixtures, ceiling fans, or other penetrations in the ceiling.

4. Professional Assessment

If you’re unsure about the extent of the air gap and how to address it, consider hiring a professional insulation contractor. They can assess your home’s insulation needs and recommend the most appropriate solutions.

Read too: How Much Ceiling Height For Treadmill

Conclusion

The air gap between your ceiling and insulation is a critical factor in your home’s energy efficiency, comfort, and overall well-being. By addressing this gap through insulation retrofits, spray foam insulation, air sealing, or professional assessment, you can improve your home’s insulation and enjoy a more comfortable, energy-efficient living environment. Don’t overlook this important aspect of your home’s insulation; it can make a significant difference in your comfort and energy bills.

Ceiling Fan Wiring with Red Wire: Demystifying the Electrical Connection

Ceiling fans are a great addition to any room, providing comfort and energy efficiency. However, installing or replacing a ceiling fan involves some electrical work, and it’s crucial to understand the wiring involved. One particular component that often confuses homeowners is the red wire in the ceiling. In this article, we’ll demystify ceiling fan wiring with a red wire, explaining its purpose and how to correctly connect it during installation.

Ceiling Fan Wiring With Red Wire

Understanding Ceiling Fan Wiring Components

Before delving into the red wire, let’s review the primary components of ceiling fan wiring:

  1. Black Wire: This wire is the hot wire that provides power to the fan.
  2. White Wire: The white wire is the neutral wire that completes the electrical circuit.
  3. Green or Bare Wire: This wire is the ground wire and serves to protect against electrical shock.
  4. Red Wire: The red wire, when present, is often a secondary hot wire, used for separate fan and light control.

The Role of the Red Wire

The red wire in ceiling fan wiring serves a specific purpose: it allows for separate control of the fan and the light fixture. When you have a ceiling fan with a red wire, it typically means that you can operate the fan and the light independently. The black wire is usually for the fan, and the red wire is for the light.

Installing a Ceiling Fan with a Red Wire

If you’re installing a ceiling fan with a red wire, follow these steps to ensure a safe and correct installation:

1. Turn Off the Power

Before working on any electrical project, it’s essential to turn off the power at the circuit breaker or fuse box. This ensures your safety while handling the wires.

2. Identify the Wires

After removing the existing fixture or exposing the ceiling wires, identify the wires. In most cases, you will see a black, white, and green (or bare) wire. If there is a red wire, it will be separate from these and should be easily distinguishable.

3. Connect the Wires

Connect the ceiling fan wires to the corresponding wires in your ceiling:

  • Black to Black: Connect the black wire from the fan to the black wire from the ceiling. This controls the fan motor.
  • Red to Red: Connect the red wire from the fan to the red wire from the ceiling. This controls the light kit.
  • White to White: Connect the white wire from the fan to the white wire from the ceiling. This is the neutral connection.
  • Green or Bare to Green or Bare: Connect the ground wire from the fan to the ground wire from the ceiling.

4. Secure the Connections

After connecting the wires, secure them using wire nuts and electrical tape. Ensure that all connections are tight and free from exposed wires.

5. Install the Fan

Follow the manufacturer’s instructions to install the fan blades, light kit, and any additional components. Make sure the fan is securely attached to the ceiling bracket.

6. Restore Power and Test

Once the fan is installed, turn the power back on and test the fan and light separately to ensure they operate correctly.

Conclusion

Ceiling fan wiring with a red wire may seem intimidating, but it’s a relatively straightforward process when you understand its purpose. The red wire allows you to control the fan and light independently, providing convenience and versatility. By following the correct wiring steps and observing safety precautions, you can install or replace your ceiling fan with confidence and enjoy the comfort it provides in your home.

Types of Ceiling Cracks with Pictures: A Comprehensive Guide

Ceiling cracks can be a common occurrence in many homes and can result from various factors, including structural settling, temperature fluctuations, or moisture issues. Understanding the types of ceiling cracks is essential for effective repair and maintenance. In this article, we will explore the various types of ceiling cracks, complete with pictures to help you identify and address them.

Types Of Ceiling Cracks With Pictures

1. Hairline Cracks

Description: Hairline cracks are extremely thin cracks that may appear in a straight line or a spiderweb pattern. They are often barely visible and can result from minor settling or temperature changes.

2. Settlement Cracks

Description: Settlement cracks are common in both old and new homes. They occur as the building settles, and they often follow the natural lines of construction materials. These cracks can be more noticeable than hairline cracks.

3. Expansion and Contraction Cracks

Description: These cracks occur due to the natural expansion and contraction of building materials in response to temperature and humidity changes. They are often more pronounced during extreme weather conditions.

4. Stair-Step Cracks

Description: Stair-step cracks form a pattern resembling a staircase. They are typical in masonry or brick ceilings and can indicate structural movement or settling issues.

5. Sagging Ceiling Cracks

Description: When a ceiling sags, it can develop cracks along the area of the sag. These cracks are often a sign of a more significant structural issue and should be addressed promptly.

6. Water Stain Cracks

Description: Water stain cracks occur when water infiltrates the ceiling, leaving behind a discolored mark along with the crack. Identifying the source of the water infiltration is crucial to prevent further damage.

7. Popcorn Ceiling Cracks

Description: Popcorn ceiling cracks appear in textured or popcorn ceilings. These cracks can be challenging to repair, as they require matching the texture of the surrounding area.

8. Drywall Joint Cracks

Description: Drywall joint cracks often occur at the seams of drywall sheets. They can result from poor installation, house settling, or temperature fluctuations. Proper taping and patching are essential for repairs.

How to Address Ceiling Cracks

Addressing ceiling cracks depends on the type and severity of the crack. Here are some general steps to consider:

  1. Assessment: Begin by identifying the type of crack and its cause. This will help determine the appropriate repair method.
  2. Surface Repair: For minor cracks, you can use a joint compound or patching material to fill the crack. Sand and paint the repaired area to match the ceiling.
  3. Structural Assessment: For significant cracks, especially those related to sagging or structural issues, consult a professional for a thorough assessment and repair.
  4. Moisture Control: If water stains are present, address the source of the water infiltration, whether it’s a roof leak, plumbing issue, or condensation problem.
  5. Texture Matching: When dealing with textured ceilings like popcorn ceilings, matching the texture can be challenging. Consider consulting a professional for these repairs.

Read too: Can Clogged Gutters Cause Ceiling Leaks

Conclusion

Ceiling cracks come in various types, each with its own causes and repair considerations. Identifying the type of crack and understanding its root cause is essential for effective repair and maintenance. Whether it’s a minor hairline crack or a more significant structural issue, addressing ceiling cracks promptly can help maintain the integrity and aesthetics of your home.

How Much Ceiling Height Do You Need for a Treadmill?

Treadmills are a popular choice for home exercise equipment. They allow you to walk or run indoors, providing a convenient and effective way to stay active. However, when setting up a treadmill in your home, it’s crucial to consider the available space, including the ceiling height. In this article, we will explore the importance of ceiling height when using a treadmill and provide guidance on how much clearance is required for safe and comfortable workouts.

How Much Ceiling Height For Treadmill

The Importance of Ceiling Height for Treadmills

Ceiling height may not be the first thing that comes to mind when shopping for a treadmill, but it’s a critical factor to consider. The reason is simple: when you’re using a treadmill, you’re not just moving horizontally; you’re also moving vertically. This vertical movement is created by the treadmill’s belt, which raises and lowers as you walk or run.

Insufficient ceiling height can lead to several issues when using a treadmill, including:

  1. Safety Concerns: A low ceiling height can increase the risk of accidents. Tall users may inadvertently hit their heads on the ceiling, lose balance, or feel cramped, leading to potential falls.
  2. Discomfort: Exercising in a confined space can be uncomfortable and discouraging. It limits your range of motion and can make your workouts less enjoyable.
  3. Limited Workout Options: Some treadmill workouts include incline settings that require additional vertical space. Inadequate ceiling height may prevent you from taking full advantage of these features.

How Much Ceiling Height Do You Need?

The ideal ceiling height for a treadmill can vary depending on your height and the treadmill’s specifications. As a general guideline, you should aim for a minimum ceiling height of 7 to 8 feet (2.13 to 2.44 meters) above the treadmill’s running surface. Here’s a breakdown of considerations for different treadmill users:

  1. Users of Average Height (Under 6 Feet): Most standard treadmills are designed to be used in rooms with 8-foot ceilings. This height allows for a safe and comfortable workout for individuals of average height.
  2. Tall Users (Over 6 Feet): If you are taller than 6 feet, you may require a higher ceiling clearance. In such cases, consider treadmills with lower deck heights or adjustable incline settings that can minimize the vertical space needed.
  3. Incline Workouts: If you plan to use the treadmill’s incline feature frequently, you may need more ceiling height. The steeper the incline, the more vertical space is required. Ensure that your ceiling can accommodate the highest point the treadmill reaches during incline workouts.

Measuring Ceiling Height

Before purchasing a treadmill or setting up an existing one, it’s essential to measure the ceiling height in the intended workout space. Follow these steps to determine if your ceiling height is sufficient:

  1. Find the Highest Point: Identify the highest point on the treadmill’s deck when it’s inclined at the steepest level you plan to use. Measure the distance from the floor to this point.
  2. Add User Height: To this measurement, add your height and a few extra inches to account for your arm movement and comfort during workouts.
  3. Compare to Ceiling Height: Measure the actual ceiling height in the room where you plan to place the treadmill. Ensure that it provides enough clearance based on the measurements you’ve taken.

Alternative Solutions

If your current ceiling height doesn’t meet the requirements for a treadmill, there are alternative solutions to consider:

  1. Lower the Deck: Some treadmills have adjustable deck heights. Lowering the deck can help you fit the treadmill in a room with limited ceiling height.
  2. Use a Folding Treadmill: Folding treadmills can be stored vertically when not in use, reducing the vertical space they occupy.
  3. Choose a Different Workout Location: If your current space doesn’t accommodate a treadmill, consider relocating it to a room with higher ceilings or using it in an outdoor space.

Read too: How To Dry A Ceiling Quickly

Conclusion

Ceiling height is a crucial factor to consider when setting up a treadmill in your home. Inadequate clearance can lead to safety concerns, discomfort, and limitations in your workout options. By measuring the ceiling height and choosing a treadmill that suits your available space, you can enjoy safe and effective indoor workouts without any ceiling-related constraints.

Are Floor-to-Ceiling Windows Expensive?

Are Floor To Ceiling Windows Expensive? Floor-to-ceiling windows have become an increasingly popular architectural feature in modern homes and commercial buildings. These expansive windows offer stunning views, ample natural light, and a seamless connection to the outdoors. However, one common question that arises is whether floor-to-ceiling windows come with a hefty price tag. In this article, we will explore the cost considerations associated with floor-to-ceiling windows, helping you understand whether they are an affordable option for your home or project.

Are Floor To Ceiling Windows Expensive

The Appeal of Floor-to-Ceiling Windows

Floor-to-ceiling windows are renowned for their aesthetic and functional benefits. Here’s why they have captured the imagination of architects and homeowners:

  1. Abundant Natural Light: These windows flood interiors with natural light, reducing the need for artificial lighting and creating a bright and welcoming atmosphere.
  2. Unobstructed Views: They provide uninterrupted views of the surroundings, whether it’s a picturesque landscape or a vibrant urban setting.
  3. Enhanced Space: Floor-to-ceiling windows create an illusion of larger interior spaces, making rooms feel more open and airy.
  4. Connection to Nature: They blur the line between indoors and outdoors, allowing you to enjoy the beauty of nature from the comfort of your home.

Factors Affecting the Cost

The cost of installing floor-to-ceiling windows can vary significantly depending on several factors:

  1. Window Material: The choice of window material plays a crucial role in cost. Common options include vinyl, wood, aluminum, and fiberglass. Each material comes with its own price point, with wood typically being more expensive than vinyl, for example.
  2. Glass Type: The type of glass used can also impact the cost. Double or triple-glazed windows, which offer better insulation and energy efficiency, tend to be more expensive than single-glazed options.
  3. Window Size: The larger the window, the higher the cost. Floor-to-ceiling windows, by nature, are expansive, so be prepared for a substantial investment.
  4. Installation Complexity: Installing floor-to-ceiling windows can be more complex than traditional window installations. The need for additional structural support, such as steel beams, can add to the overall cost.
  5. Location: Your geographic location can influence pricing. Cost variations may be due to local labor rates, building regulations, and climate considerations.

Budget-Friendly Alternatives

While floor-to-ceiling windows offer a luxurious and contemporary look, they may not fit everyone’s budget. However, there are alternatives to consider:

  1. Large Picture Windows: Large picture windows, while not floor-to-ceiling, can still offer unobstructed views and natural light. They tend to be more cost-effective.
  2. Sliding Glass Doors: Sliding glass doors can provide a similar indoor-outdoor connection and are often more budget-friendly than full-scale floor-to-ceiling windows.
  3. Transom Windows: Placing smaller transom windows above standard-sized windows can create a sense of height and openness without the expense of full floor-to-ceiling windows.

Cost vs. Value

When evaluating the cost of floor-to-ceiling windows, it’s essential to consider the long-term value they bring to your property. While the initial investment may be higher, these windows can enhance the resale value of your home, improve energy efficiency, and create a more appealing and comfortable living environment. They also provide a unique selling point if you decide to sell your home in the future.

Conclusion

Floor-to-ceiling windows offer an array of benefits, from natural light and stunning views to an enhanced sense of space. However, they can be expensive, and the overall cost depends on various factors. It’s essential to carefully assess your budget, needs, and priorities when considering these windows for your home or project. If floor-to-ceiling windows align with your vision and budget, they can be a valuable investment that transforms your living space and adds lasting value to your property.