Mid Century Modern Ceiling Fan With Light: Elevate Your Home Décor with a Stylish

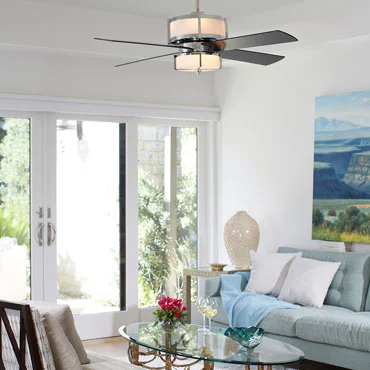
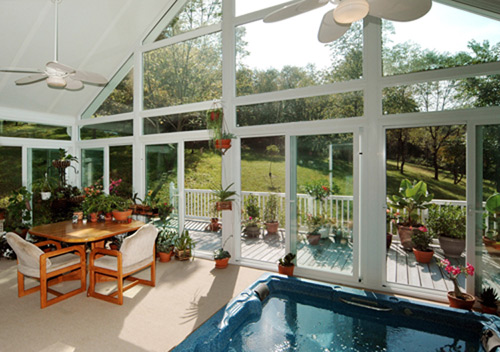
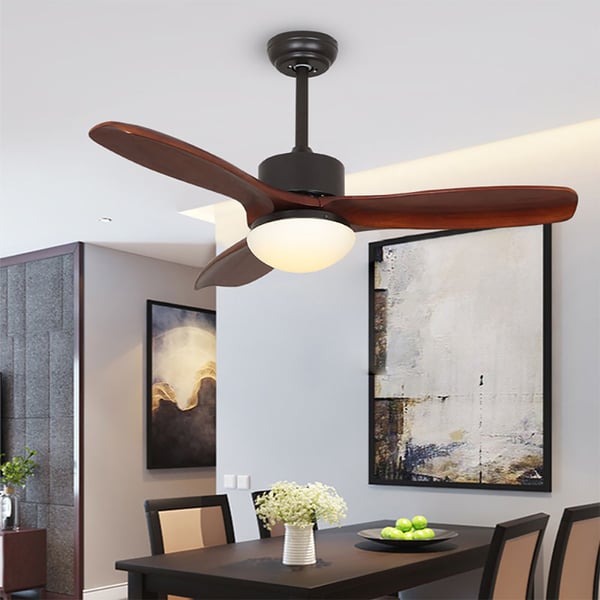
In the world of interior design, the mid-century modern aesthetic continues to captivate homeowners with its sleek lines, minimalist design, and timeless appeal. One iconic fixture that perfectly embodies this style is the Mid Century Modern Ceiling Fan With Light. Combining form and function, this stylish addition to your home not only provides efficient air circulation but also enhances your space with its sophisticated design and integrated lighting.

Mid Century Modern Ceiling Fan With Light

In this comprehensive guide, we’ll delve into the world of Mid Century Modern Ceiling Fans With Light, exploring their features, benefits, and how they can elevate your home décor to new heights.


Understanding the Mid Century Modern Ceiling Fan With Light

A Mid Century Modern Ceiling Fan With Light is more than just a functional fixture—it’s a statement piece that adds character and charm to any room. Here’s what sets it apart:
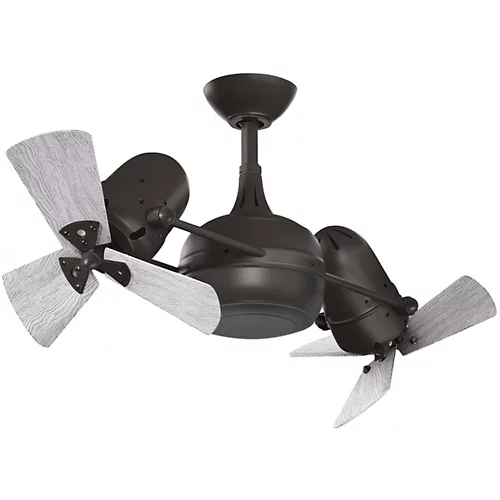
Iconic Design

Inspired by the clean lines and geometric shapes of mid-century modern design, these ceiling fans feature sleek blades, minimalist housings, and integrated lighting fixtures that exude sophistication and style.

Read too: Striped Schoolhouse Ceiling Light Fixtures: Unveiling the Timeless Charm

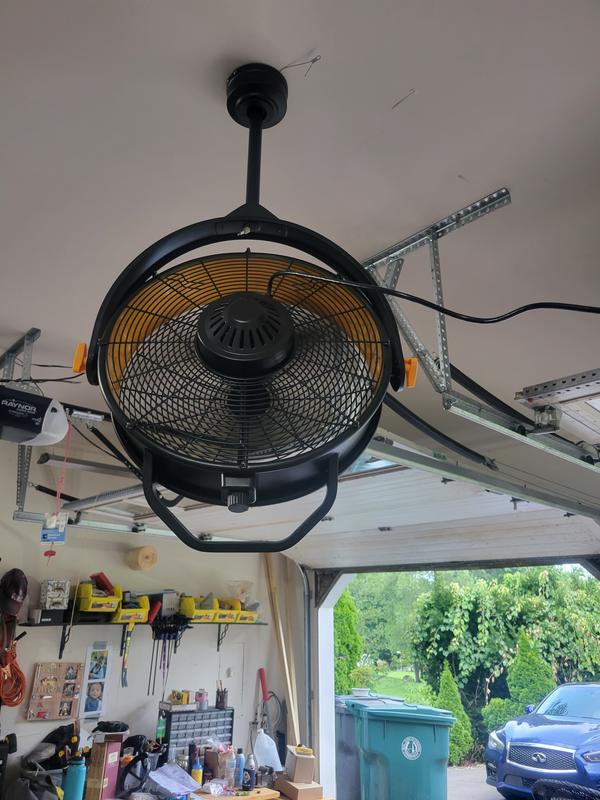
Efficient Air Circulation

Despite their stylish appearance, Mid Century Modern Ceiling Fans With Light are highly efficient at circulating air, keeping your space cool and comfortable year-round. With multiple speed settings and reversible blades, you can customize airflow to suit your preferences.
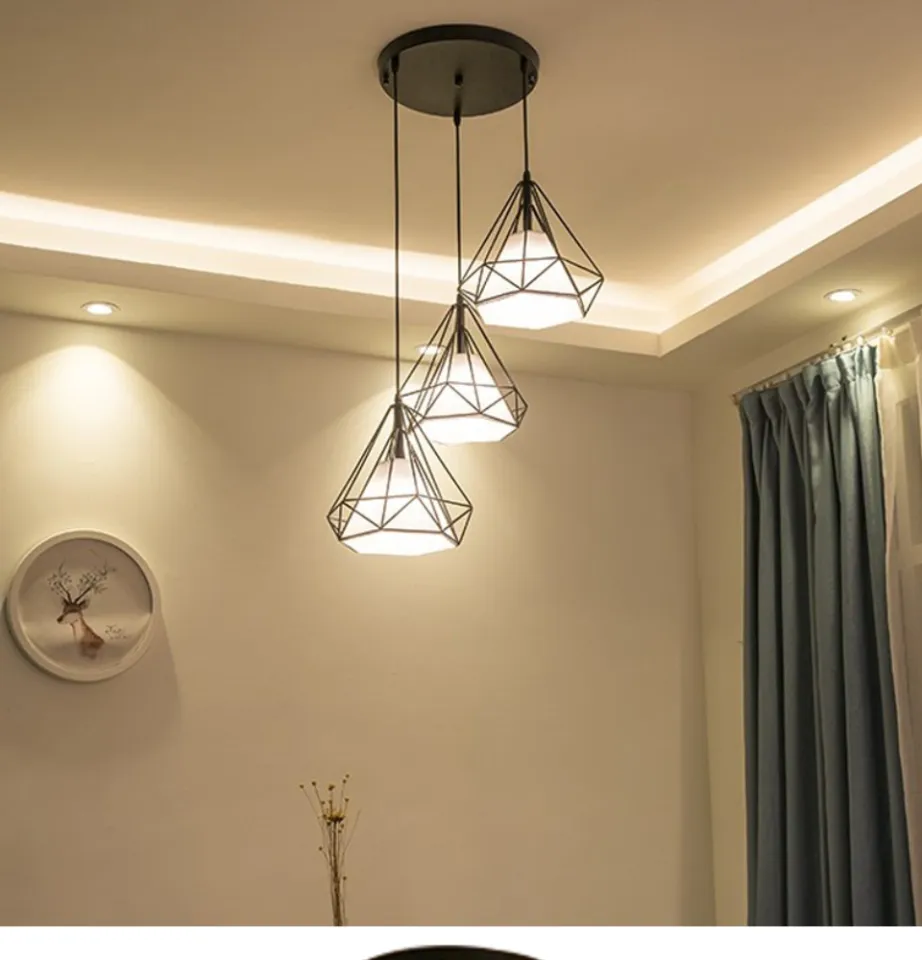
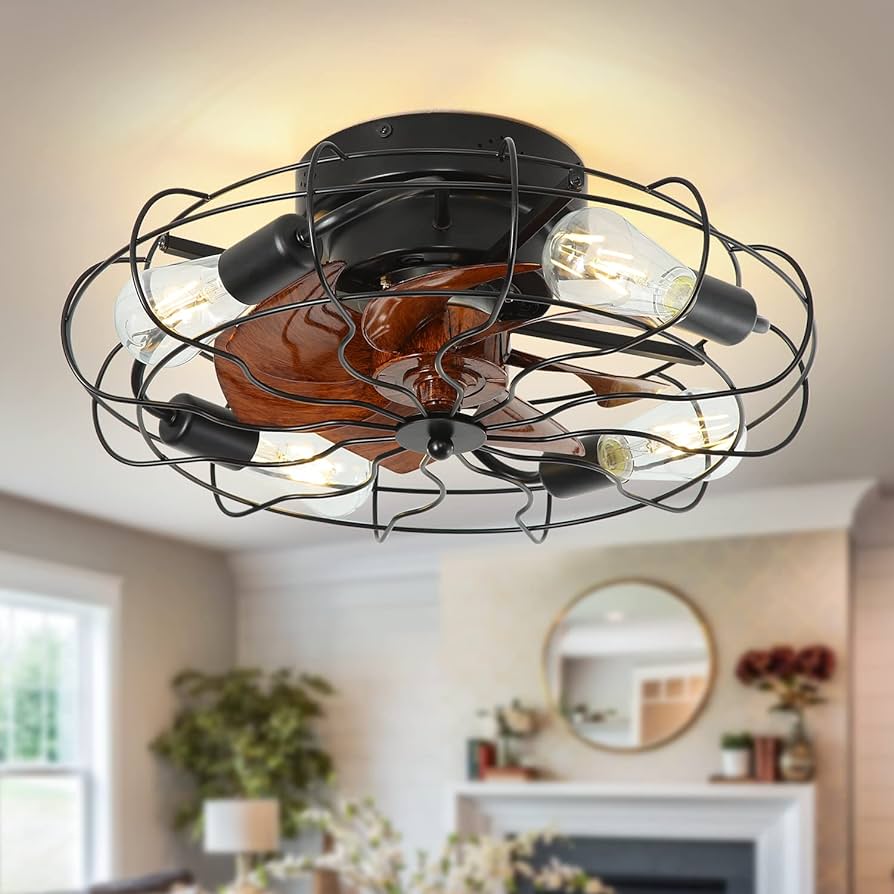
Integrated Lighting

The integrated light fixture adds an extra layer of functionality to the ceiling fan, providing ambient illumination for your space while eliminating the need for additional lighting fixtures. Choose from a variety of styles, including frosted glass shades, exposed bulbs, or sleek metal accents, to complement your décor scheme.


Benefits of Installing a Mid Century Modern Ceiling Fan With Light

Enhanced Style

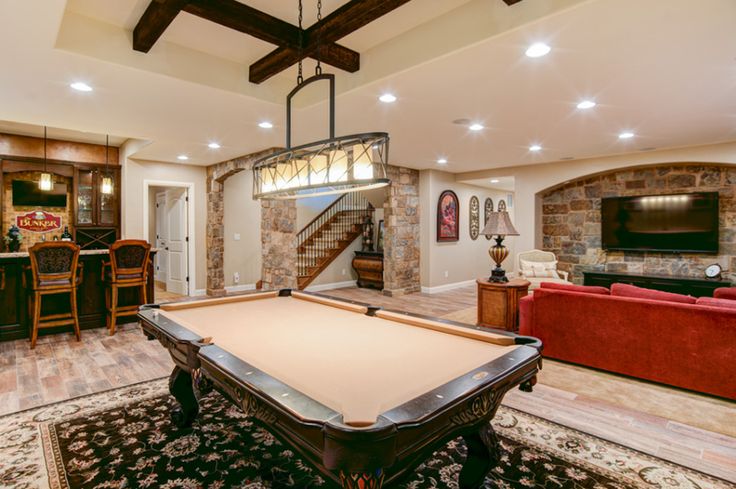
A Mid Century Modern Ceiling Fan With Light serves as a focal point in any room, adding a touch of retro-inspired charm and sophistication to your home décor. Whether you’re furnishing a living room, bedroom, or dining area, this stylish fixture is sure to make a statement.

Improved Comfort

In addition to their aesthetic appeal, Mid Century Modern Ceiling Fans With Light offer practical benefits, such as efficient air circulation and integrated lighting, that contribute to a more comfortable living environment. Say goodbye to stuffy rooms and harsh overhead lighting—these ceiling fans provide the perfect balance of form and function.

Energy Efficiency

Many Mid Century Modern Ceiling Fans With Light are equipped with energy-efficient LED bulbs and DC motors, helping you reduce electricity consumption and lower your utility bills. By choosing a ceiling fan with integrated lighting, you can illuminate your space while minimizing energy waste.

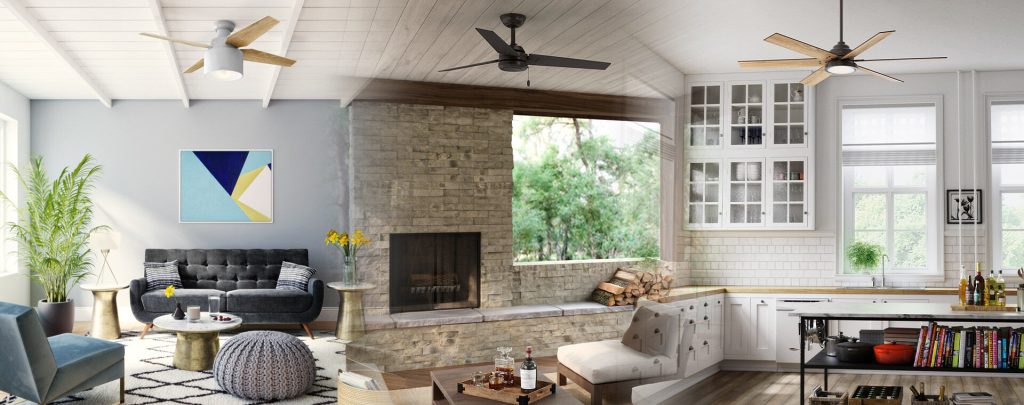
Versatile Design Options

With a wide range of styles, finishes, and blade configurations available, you can easily find a Mid Century Modern Ceiling Fan With Light that complements your existing décor and personal taste. Whether you prefer a matte black finish with walnut blades or a brushed nickel finish with frosted glass shades, there’s a ceiling fan to suit every aesthetic preference.


Conclusion

A Mid Century Modern Ceiling Fan With Lights is more than just a functional fixture—it’s a design statement that adds personality and charm to any room. With its iconic aesthetic, efficient air circulation, and integrated lighting, this stylish addition to your home décor is sure to enhance your living space and elevate your comfort level. Consider installing a Mid Century Modern Ceiling Fan With Light today to experience the perfect blend of form and function in your home.

Ceiling Fan with Uplight and Downlight: Enhance Your Home Comfort

A ceiling fan is a staple in many homes, providing comfort and air circulation throughout the year. But what if you could take your ceiling fan to the next level? Enter the ceiling fan with uplight and downlight—a modern fixture that combines functionality with style to enhance your home’s ambiance and comfort.

Ceiling Fan With Uplight And Downlight

In this comprehensive guide, we’ll explore the features and benefits of a ceiling fan with uplight and downlight, helping you understand why it’s a must-have addition to any modern home.


Understanding the Ceiling Fan with Uplight and Downlight

A ceiling fan with uplight and downlight offers the best of both worlds: ambient lighting and efficient air circulation. Here’s what sets this fixture apart:

Uplight Functionality

The uplight feature of a ceiling fan casts a soft glow upwards, illuminating the ceiling and creating a warm, inviting ambiance in your space. This indirect lighting adds depth and character to your room, making it feel more spacious and cozy.

Downlight Efficiency

In addition to the uplight, a ceiling fans with downlight provides focused task lighting for specific areas of your room. Whether you’re reading, working, or entertaining guests, the downlight offers bright, energy-efficient illumination exactly where you need it.

Read too: Striped Schoolhouse Ceiling Light Fixtures: Unveiling the Timeless Charm

Combined Benefits

By combining both uplight and downlight functions, this ceiling fan maximizes versatility and convenience. You can adjust the lighting to suit different activities and moods, whether you’re relaxing in the evening or hosting a gathering with friends.


Benefits of Installing a Ceiling Fan with Uplight and Downlight

Improved Ambiance

The combination of uplight and downlight creates a warm and inviting atmosphere in any room, enhancing the overall ambiance and comfort of your home.

Energy Efficiency

Modern ceiling fans with LED lighting are highly energy-efficient, helping you reduce electricity consumption and lower your utility bills.

Enhanced Style

Ceiling fans with uplight and downlight come in a variety of styles and finishes to complement any décor scheme, adding a touch of elegance and sophistication to your space.

Year-Round Comfort

In addition to providing lighting, a ceiling fans with uplight and downlight offers efficient air circulation, keeping your room cool in the summer and warm in the winter for year-round comfort.


Conclusion

A ceiling fans with uplight and downlight is more than just a functional fixture—it’s a stylish addition that enhances the ambiance and comfort of your home. With its versatile lighting options and efficient air circulation, this modern ceiling fan is sure to become a favorite feature in any room. Consider upgrading your home with a ceiling fans with uplight and downlight today to experience the benefits firsthand.

Ceiling Fan in Your Garage: Maximizing Comfort and Functionality

Garages are often overlooked when it comes to climate control and comfort. However, by installing a ceiling fan in the garage, you can transform this space into a more enjoyable and functional area. Here’s everything you need to know about the benefits and installation process of a ceiling fan in the garage.

Ceiling Fan In Garage

Introduction

The garage is more than just a space to park your car or store belongings; it can serve as a workshop, recreational area, or even a makeshift gym. However, without proper ventilation and temperature control, it can become uncomfortable, especially during hot summer months or intense DIY projects. This is where installing a ceiling fan in the garage can make a significant difference.

Why Install a Ceiling Fan in the Garage?

Enhanced Air Circulation

One of the primary reasons to install a ceiling fan in the garage is to improve air circulation. Unlike standing fans or air conditioning units, ceiling fans are strategically positioned to distribute air evenly throughout the space. This helps alleviate stuffiness and prevents pockets of hot air from forming in certain areas of the garage.

Temperature Regulation

During the summer, garages can become unbearably hot, making it unpleasant to spend time working on projects or engaging in hobbies. A ceiling fan in the garage can help regulate the temperature by creating a gentle breeze that cools the space. This can make it more comfortable to work in and prevent heat-related fatigue.

Moisture Control

Garages are susceptible to moisture buildup, especially in humid climates or during rainy seasons. Excess moisture can lead to mold growth, rust on tools and equipment, and damage to stored items. By installing a ceiling fan in the garage, you can help circulate air and reduce humidity levels, minimizing the risk of moisture-related issues.

Choosing the Right Ceiling Fan

When selecting a ceiling fan for your garage, there are several factors to consider:

  1. Size: Ensure the fan is appropriately sized for the space. Larger garages may require multiple fans or larger blade spans to effectively circulate air.
  2. Durability: Opt for a fan specifically designed for garage use, as it will be built to withstand dust, moisture, and temperature fluctuations.
  3. Airflow: Look for fans with adjustable speed settings to customize airflow based on your comfort needs.
  4. Energy Efficiency: Choose an energy-efficient model to minimize electricity consumption and reduce utility costs over time.

Installation Process

Installing a ceiling fan in the garage is a relatively straightforward process, but it may require basic electrical knowledge and tools. Here’s a general overview of the installation steps:

  1. Prepare the Area: Clear the space where the fan will be installed and ensure there is proper electrical wiring available.
  2. Mounting Bracket Installation: Securely anchor the mounting bracket to the ceiling following the manufacturer’s instructions.
  3. Assemble the Fan: Follow the included instructions to assemble the fan components, including the blades, motor housing, and light fixture (if applicable).
  4. Wiring: Connect the fan’s wiring to the electrical wiring in the ceiling, ensuring all connections are secure and insulated.
  5. Mount the Fan: Lift the fan assembly onto the mounting bracket and secure it in place using the provided hardware.
  6. Test Operation: Turn on the power and test the fan to ensure it is operating correctly, including adjusting the speed settings as needed.

Maintenance Tips

To keep your ceiling fan in the garage running smoothly and efficiently, consider the following maintenance tips:

  • Regularly dust the fan blades and motor housing to prevent dust buildup.
  • Check and tighten any loose screws or connections to ensure stability.
  • Lubricate moving parts, such as the motor bearings, according to the manufacturer’s recommendations.
  • Inspect the fan for any signs of damage or wear, such as warped blades or excessive wobbling, and address any issues promptly.

Read too: Striped Schoolhouse Ceiling Light Fixtures: Unveiling the Timeless Charm

Conclusion

Installing a ceiling fan in the garage can enhance comfort, improve air circulation, and prolong the life of your tools and equipment. Whether you use your garage for woodworking, automotive projects, or simply as a recreational space, a ceiling fan can make it a more enjoyable and functional environment. With the right fan selection and proper installation, you can maximize the potential of your garage and create a space that you’ll love spending time in.

Lighting New York Ceiling Fans: Illuminate Your Space

Are you looking to enhance the ambiance of your home while staying cool during those scorching summer days? Look no further than Lighting New York ceiling fans. In this comprehensive guide, we’ll explore everything you need to know about these stylish and functional fixtures, from their design versatility to their energy efficiency.

Lighting New York Ceiling Fans

Introduction

Lighting plays a crucial role in transforming the look and feel of any space, and ceiling fans are no exception. When it comes to combining functionality with style, Lighting New York ceiling fans are in a league of their own. Whether you’re revamping your living room, bedroom, or outdoor patio, these ceiling fans can elevate the aesthetic appeal of any room while keeping you comfortable.

The Evolution of Ceiling Fans

Ceiling fans have come a long way since their humble beginnings. Once viewed as purely utilitarian fixtures, they are now considered essential elements of interior design. Lighting New York has been at the forefront of this evolution, offering a wide range of ceiling fan designs to suit every taste and preference.

Exploring the Features

When choosing a ceiling fan, it’s essential to consider factors such as size, blade material, motor efficiency, and additional features. Lighting New York ceiling fans are available in various sizes to accommodate different room dimensions. Whether you have a cozy bedroom or a spacious living area, there’s a fan size that’s just right for you.

Design Versatility

One of the standout features of Lighting New York ceiling fans is their design versatility. From sleek and modern to classic and elegant, there’s a fan style to complement any interior aesthetic. Whether you prefer brushed nickel, matte black, or rustic wood finishes, you’ll find a wide array of options to choose from.

Enhanced Comfort and Energy Efficiency

In addition to their aesthetic appeal, Lighting New York ceiling fans are designed with energy efficiency in mind. With features like LED lighting and DC motors, these fans can help reduce energy consumption and lower utility bills. Plus, they provide much-needed airflow during the summer months, keeping you cool and comfortable without relying solely on air conditioning.

Installation and Maintenance Tips

Installing a ceiling fan may seem like a daunting task, but with the right tools and instructions, it can be a straightforward process. Lighting New York provides detailed installation guides for their ceiling fans, making it easier for homeowners to tackle the job themselves. Additionally, regular maintenance, such as cleaning the blades and lubricating the motor, can help prolong the life of your fan.

Choosing the Right Fan for Your Space

With so many options available, choosing the right ceiling fan for your space can be overwhelming. Consider factors such as room size, ceiling height, and existing decor when making your selection. If you’re unsure where to start, Lighting New York’s customer service team can provide expert advice and guidance to help you find the perfect fan for your needs.

Read too: Striped Schoolhouse Ceiling Light Fixtures: Unveiling the Timeless Charm

Conclusion

In conclusion, Lighting New York ceiling fans are not only functional but also stylish additions to any home. Whether you’re looking to cool down during the summer months or enhance the ambiance of your living space, these fans offer the perfect combination of form and function. With their design versatility, energy efficiency, and ease of installation, Lighting New York ceiling fans are sure to be a welcome addition to any home.

Armstrong Black Ceilings Grid: The Ultimate Guide to Stylish Interior Design

When it comes to interior design, every detail matters – including the often-overlooked ceiling. Elevate your space to new heights of sophistication with Armstrong Black Ceilings Grid. In this comprehensive guide, we’ll explore the versatility, elegance, and practicality of Armstrong’s black ceiling grid systems, offering insights into their benefits, installation techniques, and design possibilities.

Armstrong Black Ceiling Grid

Understanding Armstrong Black Ceiling Grid

Unveiling Armstrong’s Black Ceiling Grid

Armstrong Black Ceiling Grid systems offer a contemporary twist on traditional ceiling designs, providing a sleek and stylish alternative to standard white grids. Designed to complement modern interiors, the black finish adds depth, drama, and sophistication to any space, making it a popular choice for commercial and residential projects alike.

Read too: Discovering the Charm of Nautical Outdoor Ceiling Fans for Your Coastal Retreat: Sail into Style

Benefits of Armstrong Black Ceiling Grid

  1. Visual Impact: The bold contrast of black against white or colored ceiling tiles creates a striking visual impact, instantly drawing the eye upward and adding architectural interest to the space.
  2. Versatility: Armstrong Black Ceiling Grid is compatible with a wide range of ceiling tiles, allowing for endless design possibilities. Whether you prefer classic white tiles for a timeless look or opt for bold colors or patterns to make a statement, the black grid provides a versatile backdrop that enhances any aesthetic.
  3. Durability: Constructed from high-quality materials, Armstrong Black Ceiling Grid systems are built to last. The sturdy construction ensures stability and support for ceiling tiles, while the durable black finish resists scratches, dents, and corrosion, maintaining its sleek appearance over time.
  4. Customization: Armstrong offers a variety of black ceiling grid profiles and accessories to suit different design preferences and installation requirements. From standard flat grids to more intricate designs with curved or angled components, there’s a solution to fit every project.

Installation Tips for Armstrong Black Ceiling Grid

1. Proper Planning

Before starting the installation process, carefully plan the layout of the ceiling grid to ensure optimal performance and aesthetics. Take accurate measurements of the space, mark the placement of grid lines, and consider factors such as lighting fixtures, air vents, and architectural features that may affect the layout.

2. Use Quality Materials

Invest in high-quality materials, including Armstrong Black Ceiling Grid components and compatible ceiling tiles, to ensure a professional-looking finish that stands the test of time. Choose grid systems with sturdy construction and a durable black finish that complements the chosen ceiling tiles.

3. Follow Manufacturer Guidelines

Refer to Armstrong’s installation instructions and guidelines for proper assembly and installation of the black ceiling grid system. Follow recommended techniques for cutting, connecting, and securing grid components, and use appropriate tools and hardware as specified by the manufacturer.


Design Inspirations with Armstrong Black Ceiling Grid

1. Industrial Chic

Embrace the urban appeal of industrial design by pairing Armstrong Black Ceiling Grid with exposed ductwork, concrete floors, and metal accents. Opt for sleek, minimalist ceiling tiles in neutral tones to complement the black grid and create a cohesive, contemporary look.

2. Modern Elegance

Achieve a sense of modern elegance with Armstrong Black Ceiling Grid by pairing it with luxurious finishes such as marble or hardwood flooring, plush furnishings, and statement lighting fixtures. Choose ceiling tiles with subtle texture or metallic accents to add depth and sophistication to the space.


Conclusion

In conclusion, Armstrong Black Ceilings Grid offers a stylish and practical solution for enhancing interior spaces with its bold design and versatile functionality. The black grid enhances the aesthetic of commercial offices, retail spaces, or residential homes, adding sophistication and architectural interest. By following installation tips and exploring design inspirations, you can create a stunning ceiling design that makes a lasting impression.

Transform your space with Armstrong Black Ceiling Grid and experience the timeless elegance of contemporary design.

Sunroom With Vaulted Ceiling: Maximizing Comfort and Style

In the realm of home design, few features evoke the sense of airy spaciousness and architectural grandeur quite like a Sunroom With Vaulted Ceiling. This elegant addition to any home not only expands your living space but also floods it with natural light, creating a welcoming ambiance that invites relaxation and rejuvenation. In this comprehensive guide, we will delve into the myriad benefits and design possibilities offered by sunrooms with vaulted ceilings, inspiring you to elevate your living environment to new heights.

Sunroom With Vaulted Ceiling

Why Choose a Sunroom With Vaulted Ceiling?

Embracing Natural Light

One of the most compelling reasons to opt for a Sunroom With Vaulted Ceiling is its ability to harness the beauty and warmth of natural light. Unlike traditional enclosed spaces, sunrooms with vaulted ceilings feature expansive windows that stretch from floor to ceiling, allowing sunlight to filter in abundantly throughout the day. This infusion of natural light not only illuminates the interior but also creates a seamless connection with the outdoor landscape, blurring the boundaries between inside and outside.

Enhancing Visual Appeal

Beyond their functional benefits, sunrooms with vaulted ceilings are also visually stunning, serving as focal points that enhance the overall aesthetics of your home. The soaring ceiling height adds a sense of grandeur and spaciousness to the room, creating an open and airy atmosphere that is both inviting and elegant. Whether you prefer a modern minimalist design or a more traditional aesthetic, a sunroom with a vaulted ceiling provides a versatile canvas for expressing your personal style.

Expanding Living Space

In today’s fast-paced world, the need for versatile living spaces that can adapt to various activities and occasions is more important than ever. A Sunroom With Vaulted Ceiling offers the perfect solution, providing a multifunctional area that can serve as a cozy retreat for reading and relaxation, a vibrant entertainment space for hosting guests, or even a tranquil indoor garden for cultivating your favorite plants. With its seamless blend of indoor comfort and outdoor beauty, a sunroom with a vaulted ceiling adds value to your home and enhances your quality of life.

Read too: Discovering the Charm of Nautical Outdoor Ceiling Fans for Your Coastal Retreat: Sail into Style


Design Inspirations for Sunrooms With Vaulted Ceilings

1. Contemporary Elegance

For those with a penchant for modern design, a sunroom with a vaulted ceiling offers endless possibilities for creating a sleek and sophisticated space. Opt for clean lines, minimalist furnishings, and a neutral color palette to achieve a contemporary look that exudes understated luxury. Incorporate plush seating, statement lighting fixtures, and sleek accents to elevate the ambiance and create a stylish retreat that is perfect for both relaxation and entertaining.

2. Rustic Charm

If you prefer a more rustic aesthetic, embrace the natural beauty of wood and stone to infuse your sunroom with warmth and character. Exposed wooden beams paired with large windows create a cozy yet airy atmosphere, while comfortable furnishings and earthy accents add to the inviting feel. Consider incorporating elements such as a fireplace or reclaimed wood accents to enhance the rustic charm and create a space that feels like a cozy cabin retreat.

3. Mediterranean Oasis

Transport yourself to a sun-drenched paradise with a Mediterranean-inspired sunroom that channels the relaxed elegance of coastal living. Opt for whitewashed walls, tiled floors, and wrought iron accents to capture the essence of Mediterranean style, while vibrant textiles and lush greenery add pops of color and texture. Complete the look with comfortable seating, flowing curtains, and plenty of potted plants to create a tranquil oasis where you can unwind and escape the stresses of everyday life.


Conclusion

In conclusion, a Sunroom With Vaulted Ceiling offers a myriad of benefits and design possibilities that can transform your home into a sanctuary of comfort and style. Whether you seek to embrace the beauty of natural light, enhance your home’s visual appeal, or expand your living space, a sunroom with a vaulted ceiling provides the perfect solution. By incorporating elements of your personal style and design preferences, you can create a unique and inviting space that brings joy and inspiration to your everyday life.

Elevate your home experience today with a sunroom with a vaulted ceiling and discover the endless possibilities for comfort, style, and relaxation.

Retro Outdoor Ceiling Fans: Bring Back the Charm with Stylish

Upgrade your outdoor living space with the nostalgic charm of retro outdoor ceiling fans, combining vintage aesthetics with modern functionality.

Retro Outdoor Ceiling Fans

Introduction

As outdoor living spaces continue to gain popularity, homeowners are looking for ways to enhance their patios, porches, and decks with stylish and functional fixtures. Retro outdoor ceiling fans offer the perfect blend of vintage-inspired design and modern performance, adding a touch of nostalgia to any outdoor setting. In this comprehensive guide, we’ll explore the world of retro outdoor ceiling fans, discussing their features, benefits, and how to choose the perfect fan for your outdoor space.


Understanding Retro Outdoor Ceiling Fans

Retro outdoor ceiling fans are designed to evoke the classic charm of mid-century design while providing cooling airflow and illumination to outdoor areas. These fans often feature vintage-inspired details such as bold colors, streamlined shapes, and decorative accents, making them the perfect statement piece for retro-themed outdoor spaces. With their durable construction and weather-resistant finishes, retro outdoor ceiling fans are built to withstand the elements while adding character and style to your outdoor oasis.


Common Features of Retro Outdoor Ceiling Fans

  1. Vintage-Inspired Design: Retro outdoor ceiling fan often feature design elements inspired by iconic mid-century styles, including sleek lines, geometric shapes, and vibrant colors. These fans add a playful retro vibe to any outdoor setting.
  2. Weather-Resistant Construction: To withstand outdoor conditions, retro outdoor ceiling fan are constructed from durable materials such as stainless steel, aluminum, or ABS plastic. Weather-resistant finishes protect the fan from rust, corrosion, and fading, ensuring long-lasting performance.
  3. Integrated Lighting Options: Many retro outdoor ceiling fans come with integrated lighting options, allowing you to illuminate your outdoor space while providing cooling airflow. Choose from options such as LED bulbs or traditional incandescent lights to suit your needs.
  4. Multiple Speed Settings: Retro outdoor ceiling fans typically offer multiple speed settings, allowing you to adjust the airflow to your desired level of comfort. Whether you need a gentle breeze on a warm summer evening or powerful ventilation on a hot day, these fans have you covered.

Choosing the Right Retro Outdoor Ceiling Fan

When selecting a retro outdoor ceiling fan for your outdoor space, consider the following factors to ensure the perfect fit:

  1. Size: Choose a fan size that is appropriate for the size of your outdoor area. Measure the square footage of your space to determine the optimal blade span for maximum airflow and coverage.
  2. Style: Consider the overall aesthetic of your outdoor space and choose a fan style that complements your decor. Whether you prefer a sleek, minimalist design or a more ornate vintage look, there are retro outdoor ceiling fan to suit every taste.
  3. Finish: Select a fan finish that coordinates with your outdoor furniture, fixtures, and architectural elements. Choose from classic finishes such as brushed nickel, matte black, or vibrant colors to add a pop of personality to your outdoor oasis.
  4. Features: Consider any additional features you may need, such as remote control operation, reversible blade direction, or dimmable lighting options. These features can enhance the functionality and convenience of your retro outdoor ceiling fan.

Conclusion

Retro outdoor ceiling fan offer a stylish and functional solution for enhancing your outdoor living space with nostalgic charm and modern performance. With their vintage-inspired design, durable construction, and customizable features, these fans are sure to become a standout feature of your outdoor oasis. Whether you’re lounging on the patio, dining al fresco, or hosting outdoor gatherings, a retro outdoor ceiling fan adds comfort, style, and personality to your outdoor retreat.

Read too: Discovering the Charm of Nautical Outdoor Ceiling Fans for Your Coastal Retreat: Sail into Style

Pool Table Light with Ceiling Fan Combo: Elevate Your Game Room with a Stylish

Upgrade your game room experience with the perfect blend of style and functionality: a pool table light with a built-in ceiling fan.

Pool Table Light With Ceiling Fan

Introduction

Creating the ultimate game room requires attention to detail and thoughtful design choices. While a pool table is a centerpiece of any game room, proper lighting and climate control are equally important for an enjoyable gaming experience. Enter the pool table light with ceiling fan combo, a versatile fixture that combines overhead lighting with cooling airflow. In this comprehensive guide, we’ll explore the benefits, features, and installation considerations of pool table lights with ceiling fans, helping you elevate your game room to new heights of comfort and style.


Understanding Pool Table Light with Ceiling Fan Combos

Pool table lights with ceiling fans are innovative fixtures designed to provide both illumination and air circulation in game rooms and recreational spaces. These fixtures typically feature a central lighting element suspended over the pool table, surrounded by fan blades that provide cooling airflow. With their dual functionality, pool table lights with ceiling fans offer a convenient and space-saving solution for game rooms, ensuring optimal lighting and comfort for players and spectators alike.


Common Features of Pool Table Lights with Ceiling Fans

  1. Adjustable Lighting: Most pool table lights with ceiling fans feature adjustable lighting options, allowing you to customize the brightness and direction of the light to suit your preferences and gameplay needs.
  2. Integrated Ceiling Fan: The built-in ceiling fan provides cooling airflow, helping to regulate the temperature and create a comfortable environment for extended gaming sessions.
  3. Stylish Design: Pool table lights with ceiling fans come in a variety of styles and finishes to complement any game room decor. Whether you prefer a traditional billiard room aesthetic or a more modern look, there’s a fixture to suit your style.
  4. Remote Control: Many pool table lights with ceiling fans come with remote controls for easy operation of both the lighting and fan functions. This convenient feature allows you to adjust settings without leaving your seat, enhancing the gaming experience.

Choosing the Right Pool Table Light with Ceiling Fan

When selecting a pool table light with a ceiling fan for your game room, consider the following factors to ensure the perfect fit:

  1. Size: Choose a fixture that is proportionate to the size of your pool table and game room. The light should adequately illuminate the playing surface without overwhelming the space.
  2. Style: Select a design that complements your game room decor and personal aesthetic. Whether you prefer a classic Tiffany-style light or a sleek contemporary fixture, there are options to suit every taste.
  3. Finish: Consider the finish of the fixture and how it will coordinate with other elements in the room, such as the pool table, furniture, and flooring. Choose a finish that complements the overall color scheme and style of your game room.
  4. Functionality: Ensure that the pool table light with ceiling fan meets your functional needs, including adequate lighting for gameplay and effective cooling airflow. Look for features such as adjustable brightness, fan speed settings, and remote control operation for added convenience.

Conclusion

A pool table light with a ceiling fans is a practical and stylish addition to any game room, providing both illumination and cooling airflow for an enhanced gaming experience. With their adjustable lighting, integrated ceiling fans, and stylish designs, these fixtures offer the perfect blend of form and function. Whether you’re a serious pool player or just enjoy casual games with friends, investing in a pool table light with a ceiling fan is sure to take your game room to the next level.

Read too: Discovering the Charm of Nautical Outdoor Ceiling Fans for Your Coastal Retreat: Sail into Style

Industrial Drop Ceiling Tile: Transform Your Space with Durable and Stylish

Industrial spaces demand practical solutions that can withstand the rigors of daily use while maintaining a visually appealing environment. When it comes to ceiling options, industrial drop ceiling tile offer the perfect combination of durability, versatility, and aesthetic appeal. In this comprehensive guide, we explore the benefits, applications, and installation considerations of industrial drop ceiling tiles, empowering you to elevate your space with confidence.

Industrial Drop Ceiling Tiles

Introduction

The ceiling is often an overlooked aspect of interior design in industrial settings. However, the right choice of ceiling materials can significantly impact the functionality and aesthetics of the space. Industrial drop ceiling tiles are engineered to meet the unique requirements of industrial environments, providing superior performance and design versatility.

Read too: Exploring the Efficiency of Radiant Ceiling Heater Electric: A Comprehensive Guide

Understanding Industrial Drop Ceiling Tiles

Industrial drop ceiling tiles, also known as suspended ceiling tiles or acoustic ceiling panels, are modular panels designed to fit into a grid system suspended from the ceiling structure. These tiles are typically made from durable materials such as fiberglass, metal, or mineral fiber, offering excellent resistance to moisture, fire, and impact.

Benefits of Industrial Drop Ceiling Tiles

  1. Durability: Industrial environments often face heavy foot traffic, humidity, and temperature fluctuations. Industrial drop ceiling tiles are engineered to withstand these challenges, maintaining their structural integrity and appearance over time.
  2. Acoustic Performance: Proper acoustics are essential in industrial settings to reduce noise levels and improve communication. Many industrial drop ceiling tiles are designed with acoustic properties to absorb sound, creating a more comfortable and productive work environment.
  3. Design Versatility: From sleek and modern to rugged and industrial, industrial drop ceiling tiles are available in a wide range of styles, colors, and textures to suit various design preferences and architectural themes.
  4. Easy Installation and Maintenance: The modular nature of industrial drop ceiling tiles simplifies installation, allowing for quick and hassle-free upgrades or repairs. Routine maintenance, such as cleaning or replacing damaged tiles, can be performed with minimal disruption to daily operations.

Applications of Industrial Drop Ceiling Tiles

Industrial drop ceiling tiles find applications in various industrial settings, including:

  • Manufacturing facilities
  • Warehouses and distribution centers
  • Laboratories and clean rooms
  • Retail and commercial spaces
  • Educational institutions

Installing Industrial Drop Ceiling Tiles

Installing industrial drop ceiling tiles involves the following steps:

  1. Prepare the Ceiling: Ensure that the ceiling structure is clean, level, and free from any obstructions.
  2. Install the Grid System: Suspended ceiling grids are installed according to manufacturer guidelines, providing support for the ceiling tiles.
  3. Cut and Install Tiles: Measure and cut tiles to fit around perimeter walls and fixtures. Insert tiles into the grid system, starting from one corner and working across the ceiling.
  4. Secure Tiles: Secure tiles in place using clips or adhesive as recommended by the manufacturer.
  5. Finish and Inspect: Once all tiles are installed, inspect the ceiling for any gaps or irregularities. Make any necessary adjustments or replacements to ensure a seamless finish.

Conclusion

In conclusion, industrial drop ceiling tile offer a versatile and practical solution for enhancing the functionality and design of industrial spaces. With their durability, acoustic performance, and design versatility, these tiles provide an ideal ceiling solution for a wide range of applications. Whether you’re looking to improve the aesthetics of your warehouse, manufacturing facility, or retail space, industrial drop ceiling tiles deliver both style and substance.

Ceilings Hung Glass Shelves: Elevate Your Space with Stylish and Functional

When it comes to maximizing storage space and adding a touch of sophistication to your home, ceiling hung glass shelves offer a perfect solution. These versatile shelving units not only provide ample storage for your belongings but also create an illusion of floating elegance, enhancing the aesthetic appeal of any room. In this comprehensive guide, we’ll delve into everything you need to know about ceilings hung glass shelves, from their installation process and benefits to creative ways to incorporate them into your home decor.

Ceiling Hung Glass Shelves

Understanding Ceiling Hung Glass Shelves

Ceiling hung glass shelves are a contemporary storage solution that adds both functionality and style to any space. Unlike traditional shelving units that rely on brackets or supports attached to the walls, these shelves are suspended from the ceiling, giving them a sleek and modern look. Made from tempered glass, they offer durability and strength while allowing light to pass through, making them perfect for displaying decorative items, books, or personal belongings.

Read too: How To Extend Kitchen Cabinets To The Ceiling: A Complete Guide for Maximizing Space and Style

Key Features of Ceiling Hung Glass Shelves

  1. Sleek Design: The minimalist design of ceiling hung glass shelves creates a clean and uncluttered appearance, making them ideal for modern and minimalist interiors.
  2. Versatility: These shelves come in various shapes, sizes, and configurations, allowing you to customize them to suit your specific storage needs and aesthetic preferences.
  3. Durability: Made from tempered glass, ceiling hung glass shelves are highly durable and resistant to scratches, chips, and breakage, ensuring long-lasting performance and safety.
  4. Easy Maintenance: Glass shelves are easy to clean and maintain, requiring only regular dusting or wiping with a damp cloth to keep them looking like new.
  5. Space-Saving: By utilizing vertical space and hanging from the ceiling, these shelves help maximize floor space and create a sense of openness and airiness in any room.

Installation Process of Ceiling Hung Glass Shelves

Installing ceiling hung glass shelves requires careful planning and precision to ensure proper support and stability. Here’s an overview of the installation process:

  1. Determine Placement: Decide where you want to install the shelves and mark the location on the ceiling, taking into account factors such as ceiling joists, lighting fixtures, and room layout.
  2. Locate Ceiling Joists: Use a stud finder to locate ceiling joists or other structural supports in the ceiling where you plan to mount the shelves.
  3. Install Mounting Hardware: Securely attach the mounting hardware, such as ceiling anchors or brackets, to the ceiling joists using screws or bolts, ensuring they are level and properly aligned.
  4. Attach Shelves: Carefully place the glass shelves onto the mounting hardware, ensuring they are evenly spaced and securely supported.
  5. Test Stability: Once the shelves are installed, test their stability by gently placing weight on them and ensuring they can support the intended load without sagging or wobbling.

Benefits of Ceiling Hung Glass Shelves

  1. Enhanced Aesthetics: Ceiling hung glass shelves add a touch of elegance and sophistication to any room, creating a visually stunning display for your belongings.
  2. Space Optimization: By utilizing vertical space and hanging from the ceiling, these shelves help maximize storage space and keep floors clear, making rooms feel more spacious and organized.
  3. Light Reflection: Glass shelves reflect light and create a sense of openness, making rooms appear brighter and more inviting.
  4. Versatile Display: Whether used to showcase collectibles, artwork, or personal mementos, ceiling hung glass shelves offer endless possibilities for creative display and decor.

Creative Ways to Use Ceiling Hung Glass Shelves

  1. Kitchen Storage: Install glass shelves in the kitchen to store glassware, dishes, or cookbooks, creating an open and airy feel while keeping essentials within easy reach.
  2. Bathroom Organization: Use glass shelves in the bathroom to display toiletries, towels, or decorative accents, adding a touch of spa-like luxury to the space.
  3. Living Room Display: Create a focal point in the living room by installing glass shelves to showcase artwork, photo frames, or treasured keepsakes, turning an empty wall into a stylish gallery.
  4. Home Office Functionality: Install glass shelves in the home office to store books, files, or office supplies, keeping your workspace organized and clutter-free while adding a modern touch to the decor.

Conclusion

Ceilings hung glass shelves offer a stylish and practical storage solution for modern homes, adding both functionality and elegance to any room. With their sleek design, durability, and versatility, these shelves are sure to enhance your home decor while providing ample storage space for your belongings.

Ceiling Flush Mount Vents Hood: Upgrade Your Kitchen with the Sleek and Efficient

When it comes to kitchen ventilation, functionality and aesthetics are equally important. The ceiling flush mount vent hood offers a sleek and efficient solution to remove smoke, grease, and odors from your kitchen while seamlessly blending into your decor. In this comprehensive guide, we’ll explore everything you need to know about the ceiling flush mount vents hood, from its features and installation process to its benefits and why it’s the perfect choice for modern kitchens.

Ceiling Flush Mount Vent Hood

Understanding the Ceiling Flush Mount Vent Hood

The ceiling flush mount vent hood is a stylish and space-saving ventilation solution designed to be installed flush with the ceiling. Unlike traditional range hoods that protrude from the wall or hang above the cooktop, this innovative hood offers a streamlined look that enhances the overall aesthetic of your kitchen.

Key Features

  1. Space-Saving Design: The flush mount design allows the vent hood to blend seamlessly into the ceiling, maximizing space and creating a clean, uncluttered look.
  2. Powerful Ventilation: Despite its low-profile design, the ceiling flush mount vent hood delivers powerful ventilation, effectively removing smoke, steam, and cooking odors from your kitchen.
  3. Adjustable Speed Settings: Many models come with multiple speed settings, allowing you to adjust the ventilation intensity to suit your cooking needs.
  4. Energy-Efficient LED Lighting: Built-in LED lighting illuminates your cooktop, providing ample task lighting while reducing energy consumption and heat output.
  5. Easy-to-Clean Filters: The hood is equipped with durable and easy-to-clean filters that capture grease and debris, ensuring optimal ventilation performance.

Installation Process

Installing a ceiling flush mount vent hood requires careful planning and attention to detail. Here’s an overview of the installation process:

  1. Select the Right Location: Choose a central location above your cooktop or range for optimal ventilation performance.
  2. Prepare the Ceiling: Cut an opening in the ceiling according to the dimensions specified in the vent hood’s installation instructions.
  3. Mount the Hood: Securely mount the hood in the ceiling opening using the provided hardware and brackets.
  4. Connect Ductwork: Connect the ductwork from the vent hood to the exterior of your home to ensure proper ventilation.
  5. Test and Adjust: Once the installation is complete, test the hood to ensure it’s functioning correctly, and make any necessary adjustments to the speed settings or ductwork.

Benefits of Choosing a Ceiling Flush Mount Vent Hood

  1. Sleek Aesthetic: The flush mount design creates a seamless integration with your kitchen ceiling, enhancing the overall aesthetic of your space.
  2. Space-Saving: Ideal for kitchens with limited space or low ceilings, the flush mount design maximizes headroom and minimizes visual clutter.
  3. Efficient Ventilation: Despite its discreet appearance, the ceiling flush mount vent hood provides powerful and efficient ventilation, keeping your kitchen air clean and fresh.
  4. Easy to Clean: The hood’s removable filters and smooth surfaces make cleaning and maintenance a breeze, ensuring optimal performance and longevity.

Read too: How To Extend Kitchen Cabinets To The Ceiling: A Complete Guide for Maximizing Space and Style

Why Choose a Ceiling Flush Mount Vent Hood?

The ceiling flush mount vent hood offers a winning combination of style, functionality, and efficiency, making it an ideal choice for modern kitchens. Whether you’re renovating your existing kitchen or building a new home, this innovative ventilation solution provides the perfect blend of form and function.

In conclusion, the ceiling flush mount vents hood is a stylish and practical addition to any kitchen, offering powerful ventilation in a sleek and space-saving design. With its adjustable speed settings, energy-efficient LED lighting, and easy-to-clean filters, this innovative hood is sure to enhance your cooking experience while complementing your kitchen decor.

Vaulted Ceiling Kitchen Hood: Elevate Your Culinary Space with a Stylish

A vaulted ceiling adds architectural interest and spaciousness to any room, especially in the kitchen where functionality meets design. Pairing this architectural feature with a stylish kitchen hood not only enhances ventilation but also serves as a striking focal point. In this article, we’ll delve into the world of vaulted ceiling kitchen hoods, exploring their features, benefits, and how they can transform your culinary space.

Vaulted Ceiling Kitchen Hood

Understanding Vaulted Ceiling Kitchen Hoods

A vaulted ceiling kitchen hood is a specialized ventilation system designed to fit seamlessly into kitchens with high or sloped ceilings. Unlike traditional range hoods, which are typically mounted against flat ceilings, vaulted ceiling kitchen hoods are customized to accommodate the unique angles and dimensions of vaulted ceilings, ensuring efficient airflow and aesthetic harmony.

Key Features of Vaulted Ceiling Kitchen Hoods

  1. Customized Design: Vaulted ceiling kitchen hoods are available in a variety of designs and configurations to suit your kitchen’s layout and style. From sleek and modern stainless steel models to rustic and charming copper hoods, there’s a wide range of options to choose from to complement your decor.
  2. Optimal Ventilation: One of the primary functions of a kitchen hood is to remove smoke, steam, grease, and odors from the cooking area, promoting a healthier and more comfortable environment. Vaulted ceiling kitchen hoods feature powerful ventilation systems that efficiently capture and exhaust cooking byproducts, ensuring clean air and minimal buildup of grease and moisture.
  3. Enhanced Lighting: Many vaulted ceiling kitchen hoods come with built-in lighting features, illuminating the cooking surface below and adding ambiance to the kitchen space. LED lights are a popular choice for their energy efficiency and bright, even illumination, making cooking tasks easier and more enjoyable.
  4. Statement Piece: Beyond their practical function, vaulted ceiling kitchen hoods serve as striking visual elements that contribute to the overall design aesthetic of the kitchen. Whether you prefer a minimalist hood that blends seamlessly into the ceiling or a bold, decorative hood that makes a statement, there’s a hood style to suit every taste and preference.

Installing and Maintaining

Installing a vaulted ceiling kitchen hood requires careful planning and precise measurements to ensure a proper fit and optimal performance. It’s essential to consult with a qualified contractor or kitchen designer to determine the best placement and configuration for your specific kitchen layout.

Once installed, maintaining your vaulted ceiling kitchen hood is relatively straightforward. Regular cleaning of the hood filters and surfaces is essential to prevent the buildup of grease and debris and maintain optimal airflow and ventilation efficiency.

Benefits of Vaulted Ceiling Kitchen Hoods

  1. Improved Air Quality: By removing smoke, steam, and odors from the kitchen, vaulted ceiling kitchen hoods help maintain a cleaner and healthier indoor environment, free from cooking-related pollutants.
  2. Enhanced Design: Vaulted ceiling kitchen hoods add visual interest and elegance to the kitchen space, serving as both functional appliances and stylish design elements that elevate the overall aesthetic appeal of the room.
  3. Increased Home Value: A well-designed and properly installed vaulted ceiling kitchen hood can enhance the value of your home, making it more attractive to potential buyers and adding to its resale value.

Conclusion

A vaulted ceiling kitchen hood is more than just a ventilation appliance—it’s a design statement that enhances the beauty and functionality of your kitchen. With customizable designs, powerful ventilation capabilities, and aesthetic appeal, vaulted ceiling kitchen hoods are an essential addition to any culinary space.

Read too: Exploring the Efficiency of Radiant Ceiling Heater Electric: A Comprehensive Guide

Installing a Range Hood in a Vaulted Ceiling: Maximizing Kitchen Ventilation

Upgrade your kitchen’s ventilation system with a range hood designed for vaulted ceiling. Learn how to effectively install and optimize airflow in your kitchen space.

Range Hood In Vaulted Ceiling

Introduction

A well-functioning range hood is essential for maintaining a clean and comfortable kitchen environment by removing cooking odors, smoke, and grease from the air. However, installing a range hood in a vaulted ceilings presents unique challenges and considerations. In this guide, we’ll explore the benefits of installing a range hood in a vaulted ceiling, discuss installation methods, and provide tips for optimizing airflow in your kitchen space.

Understanding: Range Hood In Vaulted Ceiling

Range hoods are essential kitchen appliances that help to improve indoor air quality by venting out pollutants generated during cooking. In vaulted ceiling kitchens, where the ceiling slopes upward, installing a range hood requires careful planning and consideration. Here’s why:

  1. Improved Ventilation: A range hood mounted in a vaulted ceiling can effectively capture and remove airborne contaminants, ensuring that your kitchen remains fresh and odor-free.
  2. Enhanced Aesthetic Appeal: By integrating a range hood into the design of your vaulted ceiling, you can create a seamless and visually appealing kitchen space that blends style with functionality.
  3. Optimized Cooking Experience: Proper ventilation provided by a range hood helps to prevent the buildup of heat, steam, and grease, creating a more comfortable and enjoyable cooking environment.

Installing a Range Hood in a Vaulted Ceiling

Installing a range hood in a vaulted ceiling requires careful planning and execution to ensure optimal performance and aesthetics. Follow these steps for a successful installation:

  1. Choose the Right Range Hood: Select a range hood model that is suitable for vaulted ceilings and compatible with your kitchen layout and cooking needs.
  2. Determine Mounting Location: Identify the ideal location for mounting the range hood, considering factors such as the stove’s placement, ceiling slope, and available space for ductwork.
  3. Prepare the Installation Site: Clear the area where the range hood will be installed, ensuring that it is free from obstructions and obstacles. If necessary, consult with a professional contractor to assess any structural modifications required.
  4. Install the Ductwork: Depending on the configuration of your kitchen and the range hood model, you may need to install ductwork to vent the exhaust air to the exterior of your home. Ensure that the ductwork is properly sized and installed to minimize airflow resistance and maximize efficiency.
  5. Mount the Range Hood: Carefully follow the manufacturer’s instructions to mount the range hood securely to the ceiling, ensuring that it is level and properly anchored.
  6. Connect Electrical Wiring: If your range hood requires electrical power, hire a licensed electrician to safely connect the wiring and install any necessary switches or controls.
  7. Test and Adjust: Once the range hood is installed, test its operation to ensure that it is effectively capturing and venting out cooking fumes. Make any necessary adjustments to the fan speed or airflow direction to optimize performance.

Optimizing Airflow in Your Kitchen

To maximize the effectiveness of your range hood in a vaulted ceilings kitchen, consider the following tips:

  1. Use the Correct Fan Speed: Adjust the fan speed of your range hood based on the type and intensity of cooking you’re doing. Use higher speeds for frying or grilling and lower speeds for simmering or light cooking.
  2. Clean and Maintain Regularly: Keep your range hood and filters clean to ensure optimal airflow and ventilation efficiency. Remove grease buildup and debris regularly to prevent clogs and maintain peak performance.
  3. Consider Additional Ventilation Options: In addition to a range hood, consider installing additional ventilation solutions such as ceiling fans or skylights to further improve airflow and circulation in your kitchen space.
  4. Consult a Professional: If you’re unsure about installing or optimizing your range hood in a vaulted ceiling, consult with a professional contractor or kitchen designer for expert advice and assistance.

Read too: Striped Schoolhouse Ceiling Light Fixtures: Unveiling the Timeless Charm

Conclusion

Installing a range hood in a vaulted ceiling can significantly enhance the functionality and aesthetics of your kitchen while improving indoor air quality and ventilation. By following the steps outlined in this guide and implementing effective airflow optimization strategies, you can create a comfortable and enjoyable cooking environment that meets your needs and enhances your culinary experience.

Hunter Crescent Falls Ceiling Fan: A Stylish and Functional Cooling Solution

Upgrade your home’s ambiance and comfort with the Hunter Crescent Falls Ceiling Fan. Discover why this stylish and efficient cooling fixture is a must-have addition to any modern living space.

Hunter Crescent Falls Ceiling Fan

Introduction

The Hunter Crescent Falls Ceiling Fan combines innovative design, superior performance, and exceptional quality to provide homeowners with a stylish and functional cooling solution. With its sleek aesthetic and advanced features, this ceiling fan offers more than just air circulation—it enhances the overall ambiance of any room. In this comprehensive guide, we’ll delve into the features, benefits, and installation considerations of the Hunter Crescent Falls Ceiling Fan, helping you make an informed decision for your home.

Exploring the Hunter Crescent Falls Ceiling Fan

The Hunter Crescent Falls Ceiling Fan is more than just a cooling fixture—it’s a statement piece that elevates the look and feel of any room. Designed with precision engineering and attention to detail, this fan boasts a range of features that set it apart from the competition:

  1. Modern Design: The Crescent Falls Ceiling Fan features a contemporary design with clean lines, brushed nickel finishes, and reversible wood-finished blades, making it a versatile addition to any interior décor scheme.
  2. Quiet Operation: Equipped with Hunter’s exclusive WhisperWind motor technology, this fan operates quietly and efficiently, ensuring a peaceful and comfortable environment without disruptive noise.
  3. Integrated Light Kit: The Crescent Falls Ceiling Fan comes with an integrated light kit, allowing for customizable illumination options to suit your lighting preferences and needs.
  4. Remote Control Accessibility: With a handheld remote control included, you can easily adjust the fan speed, direction, and lighting settings from anywhere in the room for added convenience and comfort.

Benefits of the Hunter Crescent Falls Ceiling Fan

  1. Energy Efficiency: With its Energy Star certification and efficient motor design, the Crescent Falls Ceiling Fan helps reduce energy consumption and lower utility bills while keeping your home cool and comfortable.
  2. Year-Round Comfort: In addition to cooling in the summer months, this fan can be reversed to circulate warm air during the winter, providing year-round comfort and energy savings.
  3. Improved Air Circulation: The Crescent Falls Ceiling Fan promotes better air circulation throughout the room, helping to regulate temperature, reduce humidity, and eliminate stagnant air.
  4. Enhanced Décor: With its sleek and stylish design, this fan serves as a focal point in any room, adding visual interest and sophistication to your home’s interior.

Read too: Striped Schoolhouse Ceiling Light Fixtures: Unveiling the Timeless Charm

Installation Considerations

Installing the Hunter Crescent Falls Ceiling Fan is a straightforward process, but there are a few key considerations to keep in mind:

  1. Ceiling Height: Ensure that your ceiling is tall enough to accommodate the fan and provide sufficient clearance for safe operation.
  2. Sturdy Mounting Surface: Install the fan on a sturdy mounting surface, such as a reinforced ceiling joist or support bracket, to ensure stability and safety.
  3. Electrical Wiring: Follow the manufacturer’s instructions and local building codes when wiring the fan to ensure proper installation and compliance with safety standards.
  4. Professional Assistance: If you’re unsure about installing the fan yourself, it’s always best to seek professional assistance from a licensed electrician or experienced installer.

Conclusion

The Hunter Crescent Falls Ceiling Fans is more than just a cooling fixture—it’s a stylish and functional addition to any home. With its modern design, quiet operation, energy-efficient performance, and convenient features, this fan enhances both comfort and aesthetics in any room. Invest in the Hunter Crescent Falls Ceiling Fans to elevate your home’s ambiance and enjoy year-round comfort with ease.

Hanging Lights From Drop Ceiling: Creative Ideas

Discover innovative ways to brighten up your space with Hanging Lights From Drop Ceiling. Explore design tips, installation techniques, and creative inspiration for incorporating suspended lighting into your home or commercial environment!

Hanging Lights From Drop Ceiling

Introduction

Hanging lights from a drop ceiling can add a touch of elegance, warmth, and ambiance to any room. Whether you’re looking to illuminate a kitchen island, dining area, or office space, suspended lighting fixtures offer versatility and style. In this guide, we’ll explore creative ideas for hanging lights from drop ceilings, providing you with inspiration and practical tips for transforming your space into a well-lit and inviting environment.

Understanding Hanging Lights From Drop Ceiling

Hanging lights from a drop ceiling involves suspending lighting fixtures from the ceiling grid, creating a striking visual effect and providing ample illumination to the space below. These fixtures come in a variety of styles, shapes, and sizes, allowing for endless design possibilities to suit any aesthetic preference or functional requirement.

Hanging Lights From Drop Ceiling: Design Ideas

  1. Pendant Lights: Pendant lights are versatile fixtures that can be hung individually or in clusters to create a focal point in any room. Choose from a wide range of shapes, materials, and finishes to complement your decor style.
  2. Chandeliers: Chandeliers add a touch of sophistication and glamour to any space, making them ideal for dining rooms, entryways, or living areas. Opt for a statement chandelier with cascading crystals or a sleek, modern design for a contemporary look.
  3. Track Lighting: Track lighting systems allow for adjustable and directional lighting, making them perfect for highlighting artwork, architectural features, or task areas in kitchens and offices.
  4. Linear Suspended Lights: Linear suspended lights provide even illumination across a space, making them suitable for long countertops, conference tables, or office workstations.

Installation Techniques for Hanging Lights From Drop Ceiling

  1. Anchor Points: Identify suitable anchor points in the ceiling grid to support the weight of the lighting fixtures. Use sturdy hooks, cables, or mounting brackets to secure the fixtures in place.
  2. Electrical Wiring: Ensure that the electrical wiring is safely routed through the ceiling grid and connected to a suitable power source. Consult a licensed electrician for professional installation.
  3. Adjustable Heights: Consider installing adjustable suspension systems to customize the height of the lighting fixtures according to your preferences and the specific requirements of the space.
  4. Safety Measures: Follow manufacturer instructions and safety guidelines when installing hanging lights from drop ceilings to prevent accidents or damage to the fixtures and the ceiling grid.

Read too: Striped Schoolhouse Ceiling Light Fixtures: Unveiling the Timeless Charm

Creative Inspiration for Hanging Lights From Drop Ceiling

  1. Industrial Chic: Embrace an industrial aesthetic with exposed bulbs, metal shades, and raw materials for a contemporary look.
  2. Bohemian Vibes: Create a cozy and eclectic atmosphere with Moroccan-inspired lanterns, colorful glass pendants, and woven rattan shades.
  3. Minimalist Elegance: Opt for sleek and streamlined designs in neutral tones for a minimalist aesthetic that complements modern interiors.
  4. Vintage Glamour: Add a touch of vintage charm with ornate brass chandeliers, crystal accents, and frosted glass shades reminiscent of old-world glamour.

Conclusion

Hanging light from a drop ceiling offers a versatile and stylish lighting solution for any space. By exploring design ideas, installation techniques, and creative inspiration, you can enhance the ambiance and functionality of your home or commercial environment with suspended lighting fixtures that illuminate and elevate your surroundings.

Floor To Ceiling Sliding Door: A Modern Design Solution

Discover the allure of Floor To Ceiling Sliding Door and how they can transform your living space into a contemporary masterpiece. Explore design ideas, benefits, and installation tips for incorporating these stylish doors into your home!

Floor To Ceiling Doors Sliding Doors

Introduction

Floor to ceiling sliding doors have become a popular choice for homeowners and interior designers looking to create a modern and seamless living environment. These sleek and stylish doors offer a range of benefits, from maximizing natural light to optimizing space efficiency. In this guide, we’ll delve into the world of floor to ceiling sliding doors, exploring their design versatility, functional advantages, and installation considerations.

Exploring Floor To Ceiling Doors Sliding Doors

Floor to ceiling sliding doors, also known as full-height sliding doors or tall sliding doors, are characterized by their expansive height, reaching from the floor to the ceiling of a room. They typically feature large glass panels that slide horizontally along tracks, providing unobstructed views and easy access to outdoor spaces.

Benefits of Floor To Ceiling Sliding Doors

  1. Maximized Natural Light: Floor to ceiling sliding doors allow ample natural light to flood into interior spaces, creating a bright and airy ambiance.
  2. Seamless Indoor-Outdoor Connection: By seamlessly integrating indoor and outdoor living spaces, these doors enhance the flow and connectivity of a home.
  3. Space Optimization: Unlike traditional hinged doors, sliding doors do not require swing clearance, making them ideal for rooms with limited space.
  4. Modern Aesthetic: The sleek and minimalist design of floor to ceiling sliding doors adds a contemporary touch to any interior, enhancing the overall aesthetic appeal of a space.

Design Ideas for Floor To Ceiling Sliding Doors

  1. Room Dividers: Use floor to ceiling sliding doors to partition open-concept spaces, such as living rooms and dining areas, while maintaining a sense of openness and flexibility.
  2. Outdoor Access: Install sliding doors in bedrooms or living areas to provide direct access to outdoor patios, decks, or gardens, blurring the boundaries between indoor and outdoor living.
  3. Closet Doors: Opt for floor to ceiling sliding doors as closet doors to maximize storage space and streamline the visual appeal of a room.
  4. Office Partitions: Create private workspaces or meeting rooms within open office environments using sliding doors, allowing for greater privacy without sacrificing natural light.

Installation Considerations

When installing floor to ceiling sliding doors, consider the following factors:

  1. Structural Support: Ensure that your walls can support the weight of the doors, as floor to ceiling sliding doors require robust structural support.
  2. Track System: Choose a high-quality track system that can support the weight of the doors and provide smooth and effortless operation.
  3. Weatherproofing: If installing sliding doors in exterior applications, ensure proper weatherproofing to prevent air and water infiltration.
  4. Professional Installation: For optimal results, hire a professional contractor experienced in installing floor to ceiling sliding doors to ensure proper alignment, operation, and weather sealing.

Read too: Striped Schoolhouse Ceiling Light Fixtures: Unveiling the Timeless Charm

Conclusion

Floor to ceiling sliding door offer a perfect blend of style, functionality, and versatility, making them an ideal choice for modern homes and commercial spaces. Whether used as room dividers, patio doors, closet doors, or office partitions, these sleek doors can elevate the aesthetic appeal and functionality of any interior environment.

Adding a Stunning Cabinet Extension to the Ceiling: Transform Your Kitchen

Kitchen Cabinet Extension to Ceiling. Are you looking to elevate the design of your kitchen and make a bold statement? Consider adding a stunning cabinet extension to the ceiling. Not only does this design choice add visual interest to your space, but it also maximizes storage and creates a more cohesive look. In this guide, we’ll explore everything you need to know about kitchen cabinet extensions to the ceiling, from planning to execution.

Kitchen Cabinet Extension To Ceiling

Why Choose a Cabinet Extension to the Ceiling?

Maximizing Storage Space

One of the primary benefits of extending your kitchen cabinets to the ceiling is the additional storage space it provides. By utilizing the vertical space in your kitchen, you can free up valuable countertop and floor space, allowing for a more organized and clutter-free environment.

Read too: Understanding and Dealing with Ants in the Ceiling Spaces: Navigating the Intrusion

Enhanced Aesthetics

Cabinet extensions to the ceiling create a seamless and cohesive look in your kitchen. They draw the eye upward, making the room feel larger and more expansive. Additionally, this design choice can add a touch of elegance and sophistication to your kitchen, enhancing its overall aesthetic appeal.

Increased Property Value

Investing in kitchen renovations, such as cabinet extensions to the ceiling, can significantly increase the value of your home. Potential buyers are often drawn to kitchens with ample storage space and modern, stylish design elements, making this upgrade a wise investment.

Planning Your Cabinet Extension Project

Assessing Your Space

Before embarking on your cabinet extension project, take the time to assess your kitchen space thoroughly. Consider the layout, existing cabinetry, and ceiling height to determine the feasibility of extending your cabinets to the ceiling.

Design Considerations

Think about the design aesthetic you want to achieve with your cabinet extension. Consider factors such as cabinet style, color, and hardware to ensure that your new cabinets complement the overall look of your kitchen.

Budgeting and Timeline

Establish a realistic budget and timeline for your project, taking into account factors such as materials, labor costs, and any potential disruptions to your daily routine. Be sure to leave room for unexpected expenses and delays that may arise during the renovation process.

Executing Your Cabinet Extension Project: Kitchen Cabinet Extension to Ceiling

Removing Existing Cabinetry

If you’re replacing existing cabinets with new ones that extend to the ceiling, start by removing the old cabinetry carefully. Take precautions to protect your walls and countertops during this process to avoid any damage.

Installing New Cabinets

Once the old cabinets have been removed, it’s time to install the new ones. Work carefully to ensure that the cabinets are level and securely anchored to the wall and ceiling. Use shims and braces as needed to achieve a precise fit.

Finishing Touches

After the cabinets are installed, add any finishing touches, such as crown molding or trim, to complete the look. These details help to conceal any gaps between the cabinets and the ceiling, creating a polished and cohesive appearance.

Conclusion

Adding a cabinet extension to the ceiling is a transformative design choice that can elevate the look and functionality of your kitchen. By carefully planning and executing your project, you can create a stunning space that reflects your personal style and enhances the value of your home.

Dual Rotating Ceiling Fan: The Ultimate Cooling Solution

In the realm of home comfort and interior design, the ceiling fan plays a crucial role in maintaining optimal airflow and temperature regulation. Among the various types available, dual rotating ceiling fans stand out as a highly efficient and versatile option. In this article, we’ll delve into the world of dual rotating ceiling fans, exploring their features, benefits, and how they can elevate the comfort level of any space.

Dual Rotating Ceiling Fan

Introducing Dual Rotating Ceiling Fans

Understanding Dual Rotation

Dual rotating ceiling fans, as the name suggests, feature two sets of blades that operate independently or simultaneously. This innovative design allows for enhanced airflow distribution and increased coverage compared to traditional ceiling fans. By rotating in opposing directions, these fans create a more consistent breeze throughout the room, effectively circulating air and maintaining a comfortable environment.

The Benefits of Dual Rotation

Improved Air Circulation

One of the primary advantages of dual rotating ceiling fans is their ability to circulate air more effectively than single-blade models. By rotating in opposing directions, these fans create a gentle breeze that helps alleviate hot spots and maintain consistent temperatures throughout the room. This improved air circulation can also contribute to energy savings by reducing the need for air conditioning.

Read too: Exploring the Benefits and How-Tos of DIY Ceiling Cassette Mini Split Installation: Revolutionizing Comfort

Enhanced Comfort

Dual rotating ceiling fans offer customizable airflow options to suit individual preferences and room layouts. Whether you prefer a gentle breeze for relaxation or a more robust airflow for cooling, these fans can be adjusted to meet your needs. Additionally, the dual rotation feature allows for year-round use, with the option to reverse the direction of the blades for efficient heating during colder months.

Versatile Design

In addition to their functional benefits, dual rotating ceiling fans come in a variety of styles and finishes to complement any decor scheme. From sleek and modern designs to rustic and traditional options, there’s a dual rotating fan to suit every taste and aesthetic preference. Some models even feature integrated lighting fixtures for added convenience and versatility.

Choosing the Right Dual Rotating Ceiling Fan

Key Considerations

When selecting a dual rotating ceiling fan for your space, consider the following factors:

  • Size and Blade Length: Choose a fan size that corresponds to the dimensions of the room for optimal airflow coverage.
  • Motor Power: Look for fans with high-quality motors that provide reliable performance and quiet operation.
  • Control Options: Consider whether you prefer remote control, wall-mounted controls, or smart home integration for seamless operation.

Installation and Maintenance Tips

Proper Installation

Ensure the fan is installed securely to prevent wobbling or uneven rotation. If unsure, enlist the help of a professional installer to ensure proper mounting and wiring.

Regular Maintenance

Keep your dual rotating ceiling fan operating smoothly by cleaning the blades regularly and lubricating moving parts as needed. Check for any signs of wear or damage and address them promptly to prevent issues down the line.

Conclusion

Dual rotating ceiling fans offer a winning combination of style, functionality, and efficiency. By incorporating one of these innovative fixtures into your space, you can enjoy enhanced comfort and airflow year-round while adding a touch of elegance to your decor.

Stunning Chandeliers for Tall Ceilings: Elevate Your Space

Tall ceilings present a unique opportunity to create a sense of grandeur and sophistication within a space. One of the most striking ways to accentuate the height and elegance of tall ceilings is by incorporating chandeliers specifically designed for such environments. In this article, we’ll delve into the world of chandeliers for tall ceilings, exploring their design versatility, installation considerations, and how they can elevate the overall aesthetic of any room.

Chandeliers For Tall Ceilings

Introducing Chandeliers for Tall Ceilings

Chandeliers for Tall Ceilings: Enhancing Vertical Space

Chandeliers have long been revered for their ability to add drama and luxury to any interior setting. When it comes to tall ceilings, these lighting fixtures take on a whole new level of significance, becoming focal points that draw the eye upward and emphasize the vertical expanse of the room.

Read too: Exploring the Benefits and How-Tos of DIY Ceiling Cassette Mini Split Installation: Revolutionizing Comfort

Choosing the Perfect Chandelier for Your Space

Design Considerations

When selecting a chandelier for a room with tall ceilings, several factors come into play:

  • Size and Scale: Opt for a chandelier that complements the proportions of the room without overpowering it. For particularly tall ceilings, larger chandeliers with substantial vertical presence can make a bold statement.
  • Length and Drop: Consider the height of the chandelier and its placement within the space. A chandelier with a longer drop can help fill the vertical space and create a sense of balance.
  • Style and Aesthetic: Choose a chandelier that reflects the overall design scheme of the room. Whether your space leans towards modern minimalism or classic elegance, there are chandelier styles to suit every taste.

Installation and Placement Tips

Hanging Chandeliers in Tall Spaces

Proper installation is crucial when it comes to chandeliers for tall ceilings:

  • Professional Installation: Due to the height and weight of chandeliers for tall ceilings, it’s advisable to enlist the help of a professional installer who can ensure safe and secure mounting.
  • Optimal Placement: Consider the viewing angles from various vantage points within the room. The chandelier should be positioned in a way that maximizes its visual impact while providing adequate illumination throughout the space.

Enhancing Your Space with Chandeliers for Tall Ceilings

Applications in Different Settings

Chandeliers for tall ceiling are versatile enough to enhance a wide range of environments:

  • Grand Foyers and Entryways: Make a lasting impression on guests as soon as they enter your home with a dazzling chandelier suspended from a soaring ceiling.
  • Formal Dining Rooms: Elevate your dining experience with the soft glow of a chandelier hanging gracefully above the table, casting a warm ambiance for intimate gatherings.
  • Hotel Lobbies and Ballrooms: Create a sense of opulence and luxury in hospitality spaces by incorporating oversized chandeliers that command attention and set the tone for the entire venue.

Conclusion

Chandeliers for tall ceiling offer a captivating blend of elegance, functionality, and visual impact. By carefully selecting and installing the right chandelier for your space, you can transform even the most cavernous of rooms into inviting and awe-inspiring environments that leave a lasting impression.

Ceiling Fans With Wood Blades: Exploring the Beauty and Benefits

In the realm of home decor and comfort, few fixtures strike the perfect balance between functionality and aesthetics like ceiling fans with wood blades. These elegant and versatile additions to any room offer not only effective air circulation but also a touch of natural beauty. Let’s delve into the world of ceiling fans with wood blades, exploring their design options, benefits, and considerations for choosing the right one for your space.

Ceiling Fans With Wood Blades

Embracing Nature Indoors: Ceiling Fans With Wood Blades

Ceiling Fans With Wood Blades: Enhancing Aesthetics and Airflow

Ceiling fans with wood blades are prized for their ability to blend seamlessly with various interior design styles while providing efficient airflow. The incorporation of wooden blades adds warmth, texture, and a rustic charm to any room, making them a popular choice among homeowners and interior designers alike.

Advantages of Ceiling Fans With Wood Blades

  1. Natural Aesthetics: The organic appeal of wood blades brings a sense of warmth and tranquility to living spaces, creating a cozy ambiance.
  2. Versatility: Wood blades come in a wide range of finishes and colors, allowing homeowners to customize their ceiling fan to complement existing decor.
  3. Quiet Operation: High-quality wood blades contribute to the silent operation of ceiling fans, ensuring peaceful and uninterrupted airflow.
  4. Durability: Well-crafted wood blades are known for their durability and resistance to warping or sagging over time, ensuring long-lasting performance.
  5. Energy Efficiency: By promoting air circulation and assisting in maintaining a comfortable temperature, ceiling fans with wood blades can help reduce reliance on air conditioning systems, leading to energy savings.

Read too: Exploring the Benefits and How-Tos of DIY Ceiling Cassette Mini Split Installation: Revolutionizing Comfort

Design Options and Considerations

When selecting a ceiling fan with wood blades for your home, consider the following design options and factors:

  • Blade Finish: Choose from a variety of wood finishes, including light oak, dark walnut, cherry, and maple, to complement your decor scheme.
  • Blade Size: Select an appropriate blade size based on the dimensions of the room to ensure optimal airflow and circulation.
  • Motor Performance: Invest in a ceiling fan with a high-quality motor for efficient operation and longevity.
  • Additional Features: Explore options such as remote control operation, integrated lighting, and reversible blade rotation for added convenience and functionality.

Incorporating Ceiling Fan With Wood Blades Into Your Home

Whether you’re revamping your living room, bedroom, or outdoor patio, ceiling fan with wood blades can elevate the style and comfort of any space. Consider installing them in the following areas:

  • Living Room: Enhance the cozy atmosphere of your living room with a stylish ceiling fan featuring wooden blades that complement your furniture and decor.
  • Bedroom: Create a tranquil retreat by installing a ceiling fan with wood blades above your bed, providing gentle airflow for restful sleep.
  • Outdoor Spaces: Extend your living area outdoors with weather-resistant ceiling fans featuring wooden blades, perfect for patios, porches, and pergolas.

Conclusion

Ceiling fan with wood blades offer a harmonious blend of functionality and design, making them a versatile and appealing choice for any home. From their natural aesthetics to their practical benefits, these fixtures enhance comfort and style while promoting energy efficiency. Whether you’re seeking to cool a room or elevate its ambiance, consider incorporating a ceiling fan with wood blades into your home decor for an effortless blend of beauty and functionality.