Transform your home’s interior with the timeless elegance of white faux ceiling beam. Explore the versatility, beauty, and practicality of these stunning architectural elements.
Unveiling the Beauty of White Faux Ceiling Beams
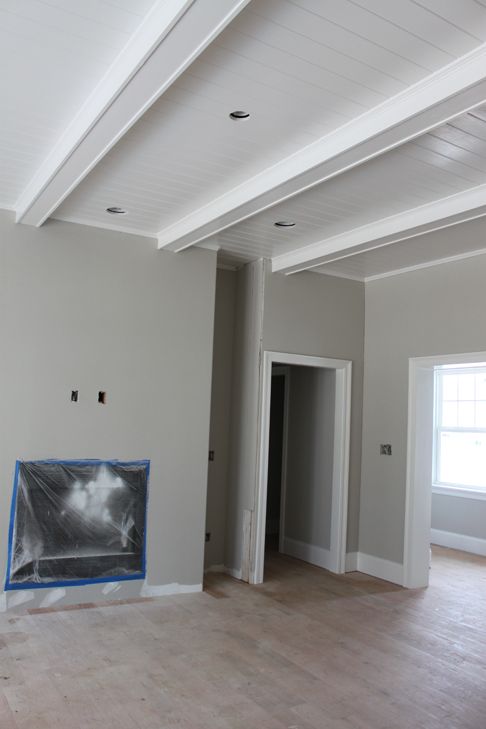
White faux ceiling beams are a stylish and versatile addition to any home, providing the charm and character of real wood without the maintenance or cost. These decorative beams can enhance the aesthetic appeal of any room while adding warmth and texture to the ceiling. Let’s delve into the features, benefits, and design ideas for incorporating white faux ceiling beams into your home:
Features of White Faux Ceiling Beams
- Authentic Appearance: White faux ceiling beams mimic the look and texture of real wood, providing a realistic and natural aesthetic for your home.
- Lightweight Construction: Made from high-quality polyurethane or composite materials, white faux ceiling beams are lightweight and easy to install, making them suitable for both DIY and professional projects.
- Versatile Design: Available in a variety of sizes, styles, and finishes, white faux ceiling beams can complement any décor style, from traditional to contemporary, adding character and depth to your space.
- Low Maintenance: Unlike real wood beams, white faux ceiling beams require minimal maintenance and upkeep. They are resistant to moisture, rot, and insect damage, ensuring long-lasting beauty and durability.
Read too: Discovering the Charm of Nautical Outdoor Ceiling Fans for Your Coastal Retreat: Sail into Style
Benefits of White Faux Ceiling Beams
- Cost-Effective: White faux ceiling beams are more affordable than real wood beams, allowing you to achieve the look of luxury without breaking the bank.
- Easy Installation: With their lightweight design and simple installation process, white faux ceiling beams can be installed quickly and easily, saving time and labor costs.
- Design Versatility: Whether you’re looking to add rustic charm to a farmhouse kitchen or contemporary elegance to a modern living room, white faux ceiling beams offer endless design possibilities to suit your style and preferences.
Installation Process for White Faux Ceiling Beams
Follow these steps to install white faux ceiling beams in your home:
1. Measure and Plan
- Measure the length and width of the ceiling where you plan to install the beams. Use these measurements to determine the number and size of beams needed for your project.
2. Prepare the Ceiling
- Clean the ceiling surface and remove any existing fixtures or obstacles that may interfere with the installation of the beams. Mark the locations where the beams will be installed using a pencil or chalk.
3. Install the Beams
- Cut the white faux ceiling beams to the desired length using a saw, if necessary. Apply construction adhesive to the back of each beam and press firmly against the ceiling, following the marked guidelines.
4. Secure the Beams
- Use screws or nails to secure the beams to the ceiling, ensuring a tight and secure fit. Fill any gaps or seams with wood filler or caulk to create a seamless finish.
Design Ideas for White Faux Ceiling Beams
- Rustic Charm: Install white faux ceiling beams in a farmhouse-style kitchen or dining room to add rustic charm and warmth to the space.
- Coastal Elegance: Create a coastal-inspired vibe in a living room or bedroom by pairing white faux ceiling beams with light, airy décor and beach-inspired accents.
- Modern Sophistication: For a contemporary look, install white faux ceiling beams in a minimalist or industrial-style space, adding architectural interest and visual appeal.
Conclusion
In conclusion, white faux ceiling beam are a versatile and cost-effective way to add style, charm, and architectural interest to any room in your home. With their authentic appearance, easy installation, and endless design possibilities, these decorative beams offer a timeless and elegant solution for enhancing your living space.