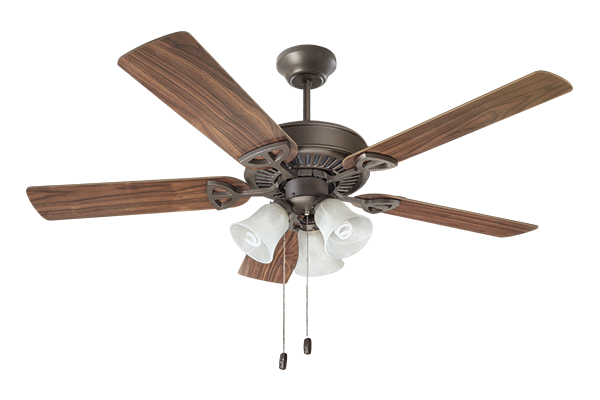
When it comes to keeping your home cool and comfortable, a ceiling fan is a must-have fixture. However, to ensure optimal airflow and performance, it’s essential to choose the right downrod length for your ceiling fan. In this comprehensive guide, we’ll delve into everything you need to know about ceiling fans downrod length, from understanding its importance to selecting the perfect size for your space.
Understanding the Importance of Ceiling Fan Downrod Length
Enhancing Airflow Efficiency
The downrod length plays a crucial role in maximizing the airflow efficiency of your ceiling fan. By selecting the appropriate length, you can ensure that the fan operates at its optimal speed and effectively circulates air throughout the room.
Factors to Consider When Choosing Ceiling Fan Downrod Length
Ceiling Height
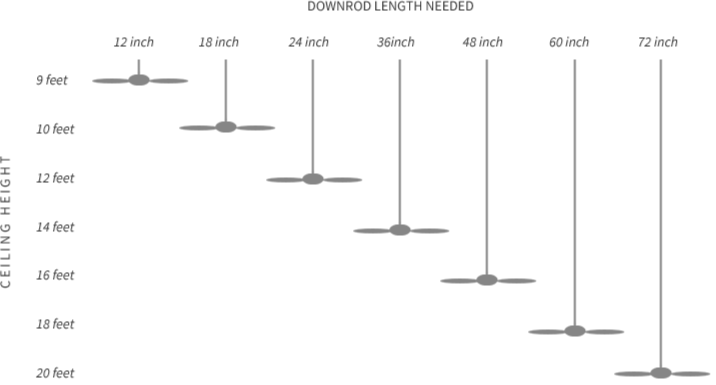
The height of your ceiling is the primary factor to consider when selecting the downrod length for your ceiling fan. Here’s a general guideline to help you determine the right length based on ceiling height:
- Standard Ceiling (8-9 feet): For standard ceiling heights, a flush-mount installation without a downrod is typically sufficient to provide adequate clearance and airflow.
- High Ceiling (10 feet or higher): In rooms with high ceilings, a longer downrod is necessary to bring the fan closer to the floor and ensure optimal airflow distribution.
Tips for Selecting the Right Ceiling Fan Downrod Length
Measuring and Calculating
Follow these steps to determine the appropriate downrod length for your ceiling fan:
- Measure Ceiling Height: Use a tape measure to determine the distance from the ceiling to the floor in the room where you plan to install the fan.
- Factor in Blade Clearance: Allow for at least 7 feet of clearance between the floor and the lowest point of the fan blades to prevent accidents and ensure safety.
- Calculate Downrod Length: Subtract the desired blade clearance (usually 7 feet) from the ceiling height to determine the ideal downrod length for your ceiling fan.
Read too: How To Extend Kitchen Cabinets To The Ceiling: A Complete Guide for Maximizing Space and Style
Benefits of Choosing the Right Ceiling Fan Downrod Length
Optimal Performance
Selecting the correct downrod length for your ceiling fan ensures that it operates at its full potential, providing efficient airflow and maximum comfort. With the right length, you can enjoy the benefits of a well-ventilated and comfortable living space year-round.
Conclusion
Choosing the right ceiling fans downrod length is essential for optimizing airflow and comfort in your home. By considering factors such as ceiling height and blade clearance, you can select the perfect length to ensure optimal performance and efficiency from your ceiling fan. Whether you’re installing a fan in a standard-height room or a soaring cathedral ceiling, following the guidelines outlined in this guide will help you achieve the perfect balance of form and function for your space.