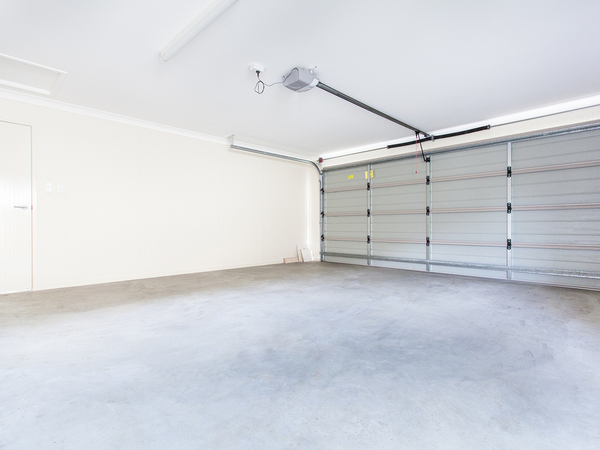
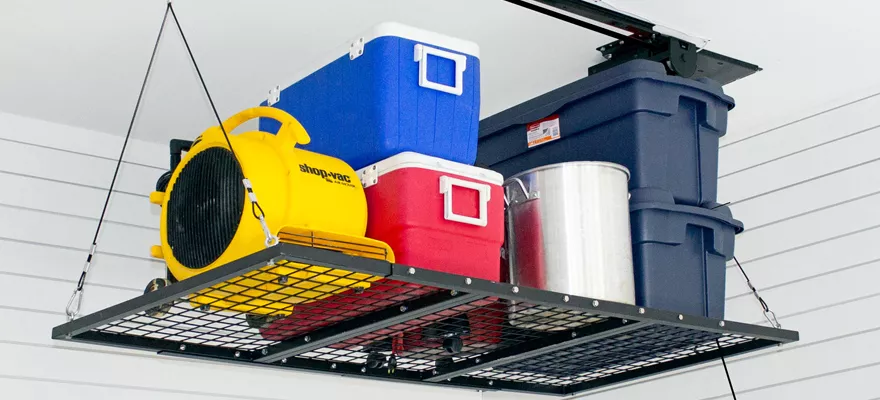
Coastal Ceiling Light Fixture: Enhance Your Coastal Decor with Stylish

Coastal ceiling light fixture can add a touch of seaside charm and illumination to your home decor. Discover the variety, benefits, and installation tips for integrating coastal-themed ceiling lights into your living space.

Coastal Ceiling Light Fixtures

Exploring Coastal Ceiling Light Fixtures

Coastal ceiling light fixtures are inspired by the relaxed and breezy atmosphere of coastal living. They often feature elements such as natural textures, nautical motifs, and weathered finishes that evoke feelings of beachside tranquility.

Read too: Bathroom Flooded Through the Ceiling: A Comprehensive Guide

Benefits of Coastal Ceiling Light Fixtures

Aesthetic Appeal

Coastal ceiling light fixtures are designed to complement coastal decor themes, including beach houses, seaside cottages, or rooms with a coastal-inspired interior design. They add character and style while enhancing the overall ambiance of the space.

Versatility in Design

These fixtures come in various designs, ranging from rustic lanterns and woven pendants to sleek, modern interpretations of coastal elements. This diversity allows homeowners to find fixtures that suit their specific decor preferences and lighting needs.

Functional Illumination

Beyond aesthetics, coastal ceiling light fixtures provide functional illumination that is essential for everyday living. Whether illuminating a dining area, hallway, or bedroom, these fixtures offer ample light while contributing to the room’s coastal-inspired atmosphere.

Features of Coastal Ceiling Light Fixtures

Materials and Finishes

Common materials used in coastal light fixtures include weathered metals like bronze or brass, natural fibers such as rattan or jute, and glass or frosted shades that mimic sea glass or beachside textures.

Seaside Motifs

Many coastal fixtures incorporate motifs like seashells, ropes, anchors, or maritime symbols into their design, reinforcing the coastal theme and adding visual interest to the fixture.

Energy Efficiency

Modern coastal ceiling light fixtures often utilize energy-efficient LED technology, which not only reduces energy consumption but also minimizes heat emission and extends the lifespan of the fixture.

Types of Coastal Ceiling Light Fixtures

Flush Mounts

Flush mount coastal ceiling lights are ideal for rooms with lower ceilings or where a streamlined look is desired. They provide ambient lighting without protruding too much from the ceiling.

Pendant Lights

Coastal pendant lights hang from the ceiling and are suitable for areas where focused task or accent lighting is needed, such as kitchen islands or dining tables. They come in various sizes and styles to fit different spaces.

Chandeliers

Coastal chandeliers add a touch of elegance and coastal charm to larger rooms or entryways. They often feature multiple lights arranged in tiers and may incorporate decorative elements like driftwood or shells.

Installation Tips

Proper installation ensures that coastal ceiling light fixtures enhance both the functionality and aesthetic of your space:

Consider Ceiling Height

Choose fixtures that are proportionate to the ceiling height to maintain visual balance in the room. For higher ceilings, opt for fixtures that can be suspended or feature adjustable hanging lengths.

Lighting Coverage

Determine the lighting needs of the room—whether you require ambient, task, or accent lighting. Select fixtures with appropriate bulb types and wattage to achieve the desired illumination.

Fixture Placement

Position coastal ceiling light fixtures strategically to maximize their decorative impact and functional use. Consider the room layout, furniture arrangement, and natural light sources when determining placement.

Maintaining Coastal Ceiling Light Fixtures

Regular maintenance preserves the beauty and functionality of coastal ceiling light fixtures:

  • Cleaning: Dust the fixture regularly using a soft cloth to remove debris and maintain its appearance.
  • Bulb Replacement: Replace bulbs as needed to ensure optimal light output and energy efficiency.
  • Inspecting Hardware: Periodically check the fixture’s hardware, including screws and mounting brackets, to ensure they are secure and stable.

Conclusion

Coastal ceiling light fixture offer a perfect blend of style and functionality for homeowners seeking to infuse their living spaces with coastal charm. Whether you prefer the rustic appeal of weathered metals or the natural elegance of woven textures, there’s a coastal-inspired fixture to complement every room. Explore the diverse options available and transform your home into a coastal retreat with these stylish and illuminating additions.

Ceiling Speaker Polk Audio for Immersive Audio Experience: Discover High-Quality Sound

Ceiling speaker by Polk Audio offer exceptional audio quality and seamless integration into any home audio setup. Learn about the benefits, features, and installation tips for maximizing your listening pleasure with Polk Audio ceiling speakers.

Ceiling Speakers Polk Audio

Understanding

Polk Audio is renowned for its commitment to delivering superior sound quality through innovative speaker designs. Ceiling speakers from Polk Audio are specifically engineered to provide immersive audio experiences without sacrificing aesthetics.

Read too: Bathroom Flooded Through the Ceiling: A Comprehensive Guide

Benefits of Ceiling Speakers Polk Audio

Superior Sound Quality

Polk Audio ceiling speakers are crafted with advanced audio technologies that deliver clear highs, detailed midranges, and deep bass, ensuring a rich and balanced sound experience. Whether you’re listening to music, watching movies, or gaming, these speakers enhance audio realism.

Wide Dispersion Design

Ceiling speakers by Polk Audio feature a wide dispersion pattern that distributes sound evenly throughout the room. This design minimizes audio “hot spots” and ensures consistent sound quality regardless of where you are in the listening area.

Easy Integration

Designed for seamless integration into ceilings, Polk Audio speakers boast a low-profile design that blends discreetly with any décor. They can be painted to match ceiling colors, providing a customized look that complements your interior aesthetics.

Features of Ceiling Speakers Polk Audio

Dynamic Balance Technology

Polk Audio incorporates Dynamic Balance technology in their speakers, which uses materials and design elements to ensure distortion-free audio reproduction across all frequencies.

Aimable Tweeters

Many Polk Audio ceiling speakers come with aimable tweeters, allowing you to direct the high frequencies toward your listening area for optimal sound staging and imaging.

Moisture-Resistant Materials

Certain models of Polk Audio ceiling speakers are constructed with moisture-resistant materials, making them suitable for installation in bathrooms, kitchens, or outdoor covered areas where humidity levels may be higher.

Installation Tips for Ceiling Speakers Polk Audio

Proper installation is crucial for maximizing the performance of Polk Audio ceiling speakers:

Location and Placement

Identify the ideal placement for your speakers based on room layout and seating arrangements. Consider speaker positioning to achieve balanced sound distribution and optimal listening experiences.

Wiring and Connectivity

Ensure proper wiring and connectivity to your audio system or amplifier. Use high-quality speaker cables and connectors to minimize signal loss and interference, which can affect sound quality.

Professional Installation

For optimal results, consider hiring a professional installer familiar with ceiling speaker installations. They can ensure proper placement, wiring, and acoustic calibration for the best audio performance.

Types of Polk Audio Ceiling Speakers

In-Ceiling Speakers

In-ceiling speakers by Polk Audio are flush-mounted into the ceiling for a seamless appearance. They are ideal for rooms where floor space is limited or where a clean, minimalist look is desired.

Dual Voice Coil Speakers

Dual voice coil ceiling speakers allow stereo sound from a single speaker, making them suitable for areas where installing multiple speakers is impractical or aesthetically undesirable.

Weather-Resistant Outdoor Speakers

Polk Audio offers weather-resistant ceiling speakers designed for outdoor installations. These speakers withstand exposure to elements such as rain, humidity, and temperature fluctuations while delivering high-quality audio performance.

Enhancing Your Audio Experience with Polk Audio

Whether you’re setting up a home theater, creating a multi-room audio system, or enhancing your listening experience, Polk Audio ceiling speaker offer versatility and exceptional sound quality. Their advanced features and durable construction make them a preferred choice among audio enthusiasts and homeowners alike.

Ceiling Mounted Outdoor Heaters for Your Patio: Exploring the Benefits

Outdoor heaters are essential for extending your outdoor living space’s usability, especially during cooler months. Discover the advantages of ceiling mounted outdoor heaters and how they can enhance comfort and ambiance on your patio.

Ceiling Mounted Outdoor Heaters

Understanding Ceiling Mounted Outdoor Heaters

Ceiling mounted outdoor heaters are designed to provide efficient heating while maximizing space on your patio or outdoor area. Installed overhead, these heaters offer directed warmth without occupying valuable floor space, making them ideal for both residential and commercial outdoor environments.

Benefits of Ceiling Mounted Outdoor Heaters

Space Efficiency

By mounting heaters on the ceiling, you free up valuable floor space that can be utilized for seating, dining, or other outdoor activities. This design maximizes the usable area on your patio while still providing effective heating.

Directional Heating

Ceiling mounted heaters emit warmth downward, ensuring targeted heating where it’s needed most. This directional heat distribution helps create a cozy environment for guests or customers without heating unnecessary areas.

Read too: Bathroom Flooded Through the Ceiling: A Comprehensive Guide

Aesthetic Appeal

Unlike portable heaters that can clutter your outdoor space, ceiling mounted heaters are discreet and blend seamlessly into your patio’s décor. They provide a sleek and modern appearance while delivering functional heating capabilities.

Types of Ceiling Mounted Outdoor Heaters

Electric Heaters

Electric ceiling mounted heaters are popular for their ease of use and efficiency. They are typically hardwired into your electrical system and operate quietly without emitting fumes or odors.

Infrared Heaters

Infrared ceiling mounted heaters use radiant heat to warm objects and people directly, similar to the warmth of the sun. They are energy-efficient and provide instant heat without needing to preheat.

Gas Heaters

Gas-powered ceiling mounted heaters utilize propane or natural gas to generate heat. They offer powerful heating capabilities and are often used in larger outdoor spaces where electrical connections may be limited.

Factors to Consider When Choosing Ceiling Mounted Outdoor Heaters

Heat Output

Select a heater with sufficient heat output to effectively warm your outdoor area. Consider factors such as the heater’s BTU (British Thermal Unit) rating and coverage area to ensure adequate heating.

Installation Requirements

Ensure your patio has sufficient structural support and electrical or gas connections necessary for installing ceiling mounted heaters. Consult with a professional installer to assess feasibility and safety.

Weather Resistance

Choose heaters constructed from durable materials that withstand outdoor conditions, including rain, wind, and UV exposure. Weather-resistant finishes and components ensure longevity and performance.

Installation and Maintenance Tips

Proper installation and maintenance are essential for maximizing the lifespan and efficiency of ceiling mounted outdoor heater:

  • Professional Installation: Hire a licensed electrician or HVAC technician to install ceiling mounted heaters to ensure safety and compliance with local codes.
  • Regular Cleaning: Clean heaters periodically to remove dust and debris that can affect performance. Follow manufacturer’s guidelines for maintenance.
  • Inspect Components: Check electrical connections, gas lines (if applicable), and heating elements regularly to identify and address potential issues promptly.

Popular Brands and Models

Explore some popular brands known for their quality ceiling mounted outdoor heaters:

  • Bromic Heating: Offers a range of stylish and efficient electric and gas ceiling mounted heaters suitable for residential and commercial use.
  • Infratech: Specializes in energy-efficient infrared heaters that provide customizable heating solutions for outdoor spaces.
  • Sunpak: Known for powerful gas-fired heaters designed to deliver reliable warmth in large outdoor areas.

Enhance Your Outdoor Living Experience

Ceiling mounted outdoor heater are a valuable addition to any patio or outdoor space, providing warmth and extending usability throughout the year. Whether you’re hosting guests, dining alfresco, or simply relaxing under the stars, these heaters create a comfortable environment regardless of the weather.

Ceiling Mounted Exit Sign: Essential Features and Installation Tips

Ceiling mounted exit sign play a crucial role in ensuring safety and compliance with building codes. Learn about the importance of these signs, their features, and installation tips to enhance emergency preparedness in your facility.

Ceiling Mounted Exit Sign

Understanding Ceiling Mounted Exit Signs

Ceiling mounted exit signs are essential safety fixtures designed to guide occupants to safety during emergencies, such as fires or power outages. Installed strategically above exit doors or in corridors, these signs provide clear directions and visibility in low-light conditions. Their placement on ceilings ensures visibility from various angles, enhancing their effectiveness in emergency situations.

Importance of Ceiling Mounted Exit Signs

Compliance with Building Codes

Building codes and regulations mandate the installation of exit signs to ensure occupant safety. Ceiling mounted exit signs not only meet these requirements but also contribute to a safe evacuation process by providing clear and visible guidance.

Visibility in Emergencies

During emergencies, visibility can be compromised due to smoke, darkness, or panic. Ceiling mounted exit signs are designed with bright, long-lasting LEDs or other illumination sources that remain visible even in adverse conditions, guiding occupants to the nearest exit.

Versatility and Design

Modern ceiling mounted exit signs come in various designs to suit different architectural styles and interior décors. They are available in different sizes, shapes, and materials, offering versatility without compromising on functionality.

Features of Ceiling Mounted Exit Signs

LED Technology

Most contemporary ceiling mounted exit signs utilize LED technology for illumination. LEDs offer several benefits, including energy efficiency, long lifespan, and brightness. They are also maintenance-free compared to traditional incandescent bulbs.

Read too: Bathroom Flooded Through the Ceiling: A Comprehensive Guide

Battery Backup

To ensure continuous operation during power outages, many ceiling mounted exit signs are equipped with battery backup systems. These batteries automatically activate when the main power source fails, providing reliable illumination until power is restored.

Self-Testing Capabilities

Some advanced exit signs feature self-testing capabilities, which automatically diagnose the functionality of LEDs, batteries, and circuitry. Regular self-tests ensure that the sign meets safety standards and is always ready for emergencies.

Installation Tips for Ceiling Mounted Exit Signs

Proper installation is crucial to the effectiveness of ceiling mounted exit signs. Follow these tips to ensure correct placement and functionality:

Location and Height

Install ceiling mounted exit signs above each exit door and along escape routes. Signs should be placed at a height that ensures clear visibility without obstruction, typically between 7 and 10 feet above the finished floor.

Wiring and Electrical Requirements

Ensure that the exit signs are connected to a reliable power source and comply with local electrical codes. Consider hiring a licensed electrician for installation to guarantee safety and compliance.

Accessibility and Maintenance

Position ceiling mounted exit signs in locations that are easily accessible for maintenance and inspections. Regularly clean the sign’s surface and lenses to maintain optimal visibility.

Types of Ceiling Mounted Exit Signs

Edge-Lit Exit Signs

Edge-lit exit signs feature LEDs along the edges of an acrylic panel, creating a uniform illumination. These signs are sleek and modern, blending well with contemporary interiors.

Surface-Mounted Exit Signs

Surface-mounted exit signs are directly mounted on the ceiling surface. They are robust and easy to install, making them suitable for various indoor environments.

Recessed Exit Signs

Recessed exit signs are installed into the ceiling, providing a flush appearance. These signs are ideal for spaces where aesthetics and space-saving are priorities.

Choosing the Right Ceiling Mounted Exit Sign

When selecting a ceiling mounted exit sign for your facility, consider the following factors:

Regulatory Compliance

Ensure the exit sign meets local building codes and safety regulations. Look for certifications such as UL (Underwriters Laboratories) listing to verify compliance with industry standards.

Visibility and Illumination

Select a sign with bright, visible illumination that remains effective in various lighting conditions. LEDs are preferred for their brightness and energy efficiency.

Durability and Maintenance

Choose a sign constructed from durable materials that withstand environmental conditions and require minimal maintenance. Opt for models with long-lasting LEDs and reliable battery backups.

Maintaining Ceiling Mounted Exit Signs

Regular maintenance ensures that ceiling mounted exit signs remain operational and compliant with safety standards:

  • Testing: Conduct periodic tests to ensure the sign illuminates properly during simulated power outages.
  • Cleaning: Clean the sign’s lenses and surfaces regularly to remove dust and debris that can obscure visibility.
  • Battery Replacement: Replace batteries according to manufacturer recommendations to maintain reliable backup power.

Conclusion

Ceiling mounted exit sign are indispensable safety features in any commercial or residential building. By providing clear guidance during emergencies, these signs enhance occupant safety and ensure compliance with building codes. Choose a sign that meets regulatory standards, offers reliable illumination, and fits your facility’s aesthetic requirements. Proper installation and regular maintenance are key to maximizing the effectiveness and lifespan of ceiling mounted exit signs, ensuring they remain ready to guide occupants to safety when needed most.

3 Blade Ceiling Fans With Lights for Your Home: Explore the Elegance

Ceiling fans are not only functional but also add to the aesthetics of your living space. Among the various options available, 3 blade ceiling fans with lights stand out for their sleek design and dual functionality. Discover how these ceiling fans can enhance your home’s ambiance while providing efficient cooling and lighting solutions.

3 Blade Ceiling Fans With Lights

Benefits of 3 Blade Ceiling Fans With Lights

3 blade ceiling fans with lights offer several advantages that make them a popular choice among homeowners:

  • Modern Design: These fans often feature a minimalist and modern design, making them ideal for contemporary interiors.
  • Space-Saving: With fewer blades, they take up less visual space and can be installed in rooms with lower ceilings.
  • Efficiency: They are designed to provide effective air circulation while also offering integrated lighting options, reducing the need for separate fixtures.
  • Versatility: Available in a variety of styles, sizes, and finishes, they can complement any room décor.

Choosing the Right 3 Blade Ceiling Fan With Lights

When selecting a 3 blade ceiling fan with lights for your home, consider the following factors:

Design and Style

Look for a fan that matches your interior décor and personal style. Whether you prefer a sleek, modern look or a more traditional design, there are options available to suit every taste.

Size and Blade Span

Ensure the fan you choose is appropriate for the size of your room. Measure the room’s dimensions and select a fan with an adequate blade span to effectively circulate air.

Read too: Bathroom Flooded Through the Ceiling: A Comprehensive Guide

Lighting Options

Evaluate the lighting options offered by the fan. Some models feature integrated LED lights, while others may allow you to customize with different bulb types. Choose lighting that meets your brightness preferences and energy efficiency goals.

Motor Quality

A high-quality motor ensures smooth and quiet operation. Look for fans with efficient motors that are designed to provide optimal airflow without excessive noise.

Installation and Maintenance Tips

Proper installation and maintenance are essential to ensure your ceiling fan operates efficiently and lasts longer. Here are some tips:

  • Follow Manufacturer’s Instructions: Always follow the installation guidelines provided by the manufacturer to ensure safety and proper functionality.
  • Regular Cleaning: Dust the blades and motor housing regularly to prevent dust buildup, which can affect performance.
  • Check for Balance: Ensure the fan is properly balanced to prevent wobbling and noise during operation.
  • Inspect Wiring and Connections: Periodically inspect wiring and connections to ensure they are secure and in good condition.

Popular Models and Brands

Explore some popular models and brands known for their quality 3 blade ceiling fans with lights:

  • Hunter Fan Company: Known for innovative designs and energy-efficient models.
  • Minka-Aire: Offers a range of stylish and functional ceiling fans with integrated lighting options.
  • Emerson: Provides fans with advanced motor technology and customizable features.

Enhance Your Home with 3 Blade Ceiling Fans With Lights

Adding a 3 blade ceiling fan with lights to your home can enhance both comfort and style. Whether you’re looking to cool a bedroom, living room, or kitchen, these fans offer a blend of functionality and aesthetics. Choose a fan that complements your décor while providing efficient air circulation and lighting.

Mitsubishi EZ Fit Ceilings Cassette: Enhancing Comfort and Efficiency

When it comes to improving indoor comfort and air distribution, the Mitsubishi EZ Fit Ceilings Cassette stands out as a top choice for both residential and commercial spaces. This advanced HVAC solution combines cutting-edge technology with sleek design to deliver optimal climate control and energy efficiency.

Mitsubishi Ez Fit Ceiling Cassette

Understanding the Mitsubishi EZ Fit Ceiling Cassette

The Mitsubishi EZ Fit Ceiling Cassette is a compact and versatile air conditioning unit designed to be installed in the ceiling, providing unobtrusive and efficient climate control. Its innovative design allows it to blend seamlessly into any space, making it an ideal choice for modern interiors where aesthetics and functionality are equally important.

Key Features of the Mitsubishi EZ Fit Ceiling Cassette

The Mitsubishi EZ Fit Ceiling Cassette offers several features that set it apart from traditional air conditioning units:

  • Compact Design: The slim and sleek design allows for easy installation in spaces with limited ceiling depth.
  • 360-Degree Airflow: The unit provides uniform air distribution throughout the room, ensuring consistent comfort.
  • Energy Efficiency: Advanced inverter technology and energy-saving modes help reduce electricity consumption and operating costs.
  • Quiet Operation: Engineered for minimal noise, the unit maintains a peaceful indoor environment.
  • Easy Maintenance: Accessible panels and filters make routine cleaning and maintenance straightforward.

Read too: Bathroom Flooded Through the Ceiling: A Comprehensive Guide

Benefits of Installing a Mitsubishi EZ Fit Ceiling Cassette

Opting for a Mitsubishi EZ Fit Ceiling Cassette brings numerous advantages:

  • Space-Saving: By being installed in the ceiling, the unit frees up valuable floor and wall space, allowing for more flexible interior design.
  • Enhanced Comfort: The 360-degree airflow ensures even temperature distribution, eliminating hot and cold spots.
  • Aesthetic Appeal: The discreet design complements modern decor, maintaining a clean and uncluttered look.
  • Improved Air Quality: Advanced filtration systems capture dust, allergens, and other pollutants, promoting healthier indoor air.

Installation Considerations for the Mitsubishi EZ Fit Ceiling Cassette

Proper installation is crucial to maximizing the performance and longevity of your Mitsubishi EZ Fit Ceiling Cassette. Consider the following factors:

  • Ceiling Space: Ensure there is sufficient space for the unit and its components within the ceiling cavity.
  • Airflow Optimization: Position the unit to maximize airflow and ensure even distribution throughout the room.
  • Professional Installation: Hiring a certified HVAC technician ensures the unit is installed correctly and operates efficiently.
  • Electrical Requirements: Verify that the electrical system can support the unit’s power needs.

Mitsubishi EZ Fit Ceiling Cassette vs. Traditional Air Conditioning Units

Comparing the Mitsubishi EZ Fit Ceiling Cassette to traditional air conditioning units highlights its advantages:

  • Design Flexibility: Unlike bulky wall-mounted units, the ceiling cassette blends seamlessly into the ceiling, preserving the room’s aesthetics.
  • Air Distribution: The 360-degree airflow design ensures more uniform air distribution compared to the directional airflow of traditional units.
  • Noise Levels: The ceiling cassette operates more quietly, making it suitable for environments where noise is a concern.

Maintenance Tips for Mitsubishi EZ Fit Ceiling Cassette

To keep your Mitsubishi EZ Fit Ceiling Cassette operating at peak performance, regular maintenance is essential:

  • Filter Cleaning: Clean or replace the filters periodically to ensure optimal air quality and airflow.
  • Inspect Ducts and Vents: Check for any obstructions or leaks in the ductwork and vents that could affect performance.
  • Scheduled Servicing: Arrange for professional servicing at least once a year to identify and address any potential issues.
  • Monitor Performance: Keep an eye on the unit’s performance and address any unusual noises or decreased efficiency promptly.

Conclusion

The Mitsubishi EZ Fit Ceilings Cassette is a versatile and efficient solution for modern climate control needs. Its sleek design, energy efficiency, and superior airflow distribution make it an excellent choice for both residential and commercial spaces. By understanding the features, benefits, and maintenance requirements, you can ensure your Mitsubishi EZ Fit Ceiling Cassette provides optimal comfort and performance for years to come.

Low Ceilings Island Range Hood Solutions and Tips: Maximizing Your Kitchen

Designing a functional and stylish kitchen with a Low Ceilings Island Range Hood requires creativity and careful planning. This guide will help you navigate the challenges and make the most of your space.

Low Ceiling Island Range Hood

Understanding Low Ceiling Island Range Hood

A Low Ceiling Island Range Hood is specifically designed for kitchens with limited ceiling height. These hoods ensure efficient ventilation while fitting seamlessly into your kitchen’s layout.

Benefits of a Low Ceiling Island Range Hood

Choosing the right Low Ceiling Island Range Hood offers several advantages:

  • Efficient Ventilation: These hoods effectively remove smoke, steam, and cooking odors, maintaining a clean and fresh kitchen environment.
  • Space Optimization: Designed for low ceilings, they save space while providing essential functionality.
  • Aesthetic Appeal: With various styles and finishes, they can enhance your kitchen’s visual appeal without overwhelming the space.

Selecting the Right Low Ceiling Island Range Hood

Key considerations for choosing a Low Ceiling Island Range Hood:

  • Height and Size: Ensure the hood fits comfortably within your ceiling height and kitchen island dimensions.
  • Ventilation Type: Decide between ducted and ductless models based on your kitchen’s layout and ventilation needs.
  • Style and Finish: Match the hood’s design to your kitchen’s aesthetic, considering options like stainless steel, glass, or custom finishes.

Read too: Bathroom Flooded Through the Ceiling: A Comprehensive Guide

Popular Styles of Low Ceiling Island Range Hoods

Explore different styles of Low Ceiling Island Range Hoods:

  1. Slimline Hoods: These sleek and compact hoods are perfect for modern kitchens with minimalist designs.
  2. Integrated Hoods: Built into the ceiling or cabinetry, these hoods offer a seamless look and save valuable space.
  3. Downdraft Hoods: Positioned beside or behind the cooktop, these hoods retract when not in use, providing a clutter-free appearance.

Installation Considerations for Low Ceiling Island Range Hoods

Installing a Low Ceiling Island Range Hood involves several important steps:

  • Professional Assessment: Consult with a professional to assess your kitchen’s ventilation needs and structural considerations.
  • Proper Height: Install the hood at the recommended height above the cooktop to ensure effective smoke and odor removal.
  • Electrical and Ductwork: Ensure proper electrical connections and ductwork are in place for optimal performance.

Enhancing Kitchen Functionality with a Low Ceiling Island Range Hood

Incorporate these tips to maximize the functionality and aesthetics of your kitchen:

  • Lighting Integration: Choose hoods with built-in lighting to illuminate your cooktop and enhance the kitchen’s ambiance.
  • Complementary Design: Match the hood’s style with your kitchen cabinets, countertops, and appliances for a cohesive look.
  • Regular Maintenance: Clean filters and surfaces regularly to maintain optimal performance and extend the hood’s lifespan.

Budgeting for a Low Ceiling Island Range Hood

Budget considerations for a Low Ceiling Island Range Hood:

  • Initial Costs: Factor in the cost of the hood, installation, and any necessary modifications to your kitchen’s layout.
  • Energy Efficiency: Invest in energy-efficient models to reduce long-term operating costs.
  • Warranty and Service: Consider hoods with comprehensive warranties and reliable customer service for added peace of mind.

Conclusion

Choosing the right Low Ceilings Island Range Hood can transform your kitchen into a functional and stylish space. By considering your specific needs, installation requirements, and design preferences, you can find a hood that enhances your kitchen’s performance and aesthetic appeal.

Low Ceiling Basement Remodel Ideas and Tips: Transforming Your Space

Embarking on a Low Ceiling Basement Remodel can unlock hidden potential in your home, providing functional and inviting spaces despite ceiling height challenges.

Low Ceiling Basement Remodel

Low Ceiling Basement Remodel: What You Need to Know

Remodeling a basement with low ceilings requires strategic planning and design considerations to maximize space and comfort.

Benefits of a Low Ceiling Basement Remodel

Remodeling a basement with low ceilings offers several advantages:

  • Expanded Living Space: Transforming an underutilized basement into functional living areas adds valuable square footage to your home.
  • Customization: Tailor the space to meet specific needs, whether creating a home office, entertainment area, or guest suite.
  • Value Addition: A well-executed basement remodel can increase the overall value and appeal of your property.

Planning Your Low Ceiling Basement Remodel

Key considerations for planning a successful Low Ceiling Basement Remodel:

  • Ceiling Height Management: Incorporate design elements that minimize the appearance of low ceilings, such as recessed lighting and strategic furniture placement.
  • Purposeful Layout: Define distinct zones within the basement to optimize functionality and flow, ensuring each area serves its intended purpose effectively.
  • Moisture Control: Address moisture issues and ensure proper insulation to create a comfortable and durable living space.

Read too: Bathroom Flooded Through the Ceiling: A Comprehensive Guide

Design Ideas for Low Ceiling Basements

Explore creative design solutions for low ceiling basements:

  1. Lighting Strategies: Use recessed lighting and wall sconces to illuminate the space evenly without compromising headroom.
  2. Vertical Elements: Incorporate vertical storage solutions and shelving units to maximize storage without occupying floor space.
  3. Mirrors and Reflective Surfaces: Install mirrors or use reflective materials to create the illusion of more space and amplify natural light.

Functional Areas to Consider

Ideas for functional areas in a Low Ceiling Basement Remodel:

  • Home Theater: Create a cozy entertainment area with comfortable seating and integrated sound systems.
  • Home Office: Design a productive workspace with ample storage, ergonomic furniture, and adequate lighting.
  • Mini Bar or Kitchenette: Install a compact bar area or kitchenette for entertaining guests and preparing snacks.

Budgeting and Project Management

Tips for budgeting and managing your Low Ceiling Basement Remodel project:

  • Prioritize Upgrades: Allocate budget resources to essential improvements like insulation, flooring, and moisture control.
  • DIY vs. Professional Help: Evaluate tasks that can be DIY versus those requiring professional expertise to ensure quality and safety.
  • Timeline and Milestones: Set realistic timelines and milestones to track progress and manage expectations throughout the remodeling process.

Conclusion

A Low Ceilings Basement Remodel presents an opportunity to enhance your home’s functionality and appeal. With careful planning, thoughtful design, and strategic execution, you can transform an underutilized basement into a valuable living space that meets your family’s needs and enhances your home’s overall value.

In Ceiling Center Channel Speaker: Enhance Your Home Theater Experience

Discovering the perfect In Ceiling Center Channel Speaker can significantly elevate your home theater setup, offering immersive audio quality without sacrificing space or aesthetics.

In Ceiling Center Channel Speaker

In Ceiling Center Channel Speaker: What You Need to Know

An In Ceiling Center Channel Speaker is designed to deliver clear dialogue and balanced sound reproduction, crucial for a captivating home theater experience.

Benefits of an In Ceiling Center Channel Speaker

Installing an In Ceiling Center Channel Speaker offers several advantages:

  • Space-Saving: Eliminates the need for floor-standing or cabinet speakers, optimizing room space while maintaining audio quality.
  • Aesthetic Appeal: Blends seamlessly into the ceiling, providing a discreet audio solution without compromising interior decor.
  • Sound Distribution: Enhances dialogue clarity and soundstage imaging, ensuring every seat in the room enjoys optimal audio performance.

Considerations When Choosing an In Ceiling Center Channel Speaker

Key factors to consider before purchasing an In Ceilings Center Channel Speaker:

  • Compatibility: Ensure compatibility with your existing audio system and other speakers for cohesive sound production.
  • Sound Quality: Look for speakers with high-frequency response and robust construction to minimize distortion and enhance audio fidelity.
  • Installation: Professional installation may be required to ensure proper positioning and acoustic performance of the center channel speaker.

Read too: Bathroom Flooded Through the Ceiling: A Comprehensive Guide

Types of In Ceiling Center Channel Speakers

Explore different types of In Ceiling Center Channel Speakers available:

  1. Flush-Mount Speakers: Designed to sit flush with the ceiling, offering a streamlined appearance and wide dispersion of sound.
  2. Adjustable Angle Speakers: Allows you to adjust the speaker directionality to direct sound towards the listening area for optimal audio performance.
  3. Slim Profile Speakers: Ideal for installations where ceiling space is limited, these speakers maintain audio quality while minimizing visual impact.

Integrating In Ceiling Center Channel Speakers into Your Home Theater

Tips for integrating In Ceiling Center Channel Speakers effectively:

  • Placement: Position the speaker above or below the display screen at ear level for optimal dialogue clarity and sound coherence.
  • Acoustic Treatment: Enhance sound quality by incorporating acoustic panels or treatments to minimize reflections and improve overall room acoustics.
  • Calibration: Use audio calibration tools or professional services to optimize speaker placement and settings for balanced sound distribution.

Maintenance and Care Tips

Maintaining your In Ceilings Center Channel Speaker ensures long-lasting performance:

  • Regular Cleaning: Dust the speaker grille and surrounding area to prevent buildup that can affect sound quality.
  • Inspection: Periodically check connections and speaker components to ensure everything is functioning properly.
  • Upgrades: Consider upgrading speaker components or technology as needed to keep pace with advancements in audio technology.

Conclusion

Choosing an In Ceilings Center Channel Speaker involves understanding your room layout, audio preferences, and installation considerations. Whether you’re designing a new home theater or upgrading an existing setup, selecting the right center channel speaker is essential for achieving immersive sound and enhancing your entertainment experience.

Chandelier for 20 Foot Ceiling: Tips and Inspiration

Finding the ideal Chandelier For 20 Foot Ceiling involves more than just aesthetics; it’s about balancing style, scale, and functionality to complement your space effectively.

Chandelier For 20 Foot Ceiling

Chandelier For 20 Foot Ceiling: What to Consider

Selecting a Chandelier For 20 Foot Ceiling requires careful consideration of several factors:

  • Size and Scale: A chandelier should proportionally fit the height and dimensions of a 20-foot ceiling without overwhelming the space or appearing too small.
  • Style and Design: From modern and minimalist to ornate and traditional, chandeliers come in various styles that can enhance the ambiance of any room.
  • Lighting Needs: Determine whether the primary function of the chandelier is ambient lighting, task lighting, or accent lighting to guide your choice.

Types of Chandeliers Suitable for 20 Foot Ceiling

Exploring different types of chandeliers that complement a 20-foot ceiling:

  1. Tiered Chandeliers: These chandeliers feature multiple levels or tiers of lights, creating a grand and dramatic effect that suits high ceilings.
  2. Linear Chandeliers: Ideal for longer spaces or dining areas, linear chandeliers provide ample lighting while elongating the visual lines of the room.
  3. Statement Pieces: Large, intricate chandeliers with bold designs can serve as focal points in rooms with high ceilings, adding personality and charm.

Read too: Bathroom Flooded Through the Ceiling: A Comprehensive Guide

Factors to Evaluate Before Purchase

Before investing in a Chandelier For 20 Foot Ceiling, consider the following:

  • Ceiling Height: Ensure the chandelier’s drop height and overall dimensions are appropriate for a 20-foot ceiling to maintain visual harmony.
  • Installation Requirements: Professional installation may be necessary due to the weight and size of chandeliers designed for taller ceilings.
  • Budget and Quality: Balance your budget with the quality and durability of the chandelier to ensure long-term satisfaction and performance.

Enhancing Your Space with Lighting

Choosing the right Chandelier For 20 Foot Ceiling can transform a room’s ambiance and functionality:

  • Dining Rooms: Opt for chandeliers that provide ample lighting over dining tables while complementing the room’s decor and style.
  • Entryways and Foyers: Make a grand impression with a stunning chandelier that welcomes guests and sets the tone for your home.
  • Living Areas: Select chandeliers that enhance relaxation or entertainment spaces, balancing aesthetics with practical lighting needs.

Maintenance and Care Tips

Maintaining a Chandelier For 20 Foot Ceilings ensures longevity and optimal performance:

  • Cleaning Routine: Regularly dust and clean the chandelier to maintain its sparkle and prevent dust buildup.
  • Professional Inspections: Schedule periodic inspections to check for loose components, wiring issues, or signs of wear and tear.
  • Light Bulb Replacement: Replace bulbs promptly to maintain consistent lighting quality and energy efficiency.

Conclusion

Choosing a Chandelier For 20 Foot Ceilings involves understanding your space, aesthetic preferences, and functional needs. Whether you seek a contemporary centerpiece or a timeless classic, selecting the right chandelier can elevate your home’s interior design while providing essential lighting solutions.

Ceiling Fan in a Drop Ceiling: Tips and Considerations for Optimal Airflow

Ceiling fans are a popular choice for enhancing air circulation and comfort in homes and offices alike. When it comes to installing a ceiling fan in a drop ceiling, there are specific considerations and techniques that can ensure proper functionality and efficiency. This comprehensive guide will explore the nuances of installing a Ceiling Fan in Drop Ceiling and provide valuable insights to help you make the most of your installation.

Ceiling Fan In Drop Ceiling

Key Considerations

Installing a ceiling fan in a drop ceiling involves unique challenges and considerations:

  1. Ceiling Strength: Drop ceilings, also known as suspended ceilings, consist of a lightweight grid framework. Ensure that the ceiling is capable of supporting the weight and movement of a ceiling fan. Reinforcements may be necessary for stability.
  2. Ceiling Height: Drop ceilings typically reduce the overall height of a room. Consider the clearance required for the fan blades to ensure optimal airflow without obstruction.
  3. Installation Method: There are specific methods and hardware designed for installing ceiling fans in drop ceilings. These include special mounting brackets and supports that integrate seamlessly with the ceiling grid.

Benefits of Ceiling Fans in Drop Ceilings

Ceiling fans offer several advantages when installed in drop ceilings:

  • Improved Air Circulation: Enhances airflow and ventilation in rooms with limited space.
  • Energy Efficiency: Helps in maintaining comfortable temperatures while potentially reducing heating and cooling costs.
  • Aesthetic Appeal: Adds a decorative element to the ceiling while serving a practical purpose.

Read too: Bathroom Flooded Through the Ceiling: A Comprehensive Guide

Installation Steps

Follow these steps for a successful installation:

1. Assess Ceiling Strength

Ensure that the drop ceiling can support the weight of the ceiling fans. Consult with a professional if reinforcement is needed.

2. Measure Ceiling Height

Determine the appropriate fan size and downrod length based on the reduced ceiling height caused by the drop ceiling.

3. Choose the Right Fan

Select a ceiling fan designed specifically for drop ceilings. These fans are typically lighter and have adapted mounting options.

4. Install Mounting Brackets

Use specialized mounting brackets that attach securely to the ceiling grid. These brackets provide stable support for the fan.

5. Wiring and Testing

Follow safety protocols for electrical wiring. Test the fan after installation to ensure proper functionality and balance.

Conclusion

Installing a ceiling fans in a drop ceiling requires careful planning and execution to ensure both safety and efficiency. By considering the unique challenges posed by drop ceilings and following the recommended installation steps, you can enjoy the benefits of improved air circulation and enhanced comfort in your living or working space.

Whether you’re upgrading an existing drop ceiling or planning a new installation, understanding the nuances of installing a Ceiling Fans in Drop Ceiling is essential for achieving optimal results.

Ceiling Fan Downrod Length Chart: Choosing the Right Size for Optimal Airflow Efficiency

Ceiling fans are not just a functional addition to your home; they can also enhance the aesthetic appeal of any room while providing much-needed ventilation. One crucial factor in ensuring your ceiling fan operates efficiently is the length of its downrod. This guide will delve into the importance of choosing the correct downrod length and provide a comprehensive Ceiling Fan Downrod Length Chart to aid you in making the right decision.

Ceiling Fan Downrod Length Chart

Importance of Downrod Length

The downrod of a ceiling fan plays a critical role in how effectively it circulates air in a room. Essentially, the downrod determines the distance between the ceiling and the fan blades. This distance significantly influences the fan’s ability to move air efficiently. Choosing the correct downrod length ensures optimal performance and comfort.

Read too: Bathroom Flooded Through the Ceiling: A Comprehensive Guide

Factors to Consider

When selecting a downrod length for your ceiling fan, several factors come into play:

  1. Ceiling Height: The height of your ceiling is the primary determinant of the downrod length you should choose. Taller ceilings require longer downrods to keep the fan at an optimal height from the floor.
  2. Room Size: The size of the room where the fan will be installed affects airflow. Larger rooms typically require fans positioned lower to effectively circulate air throughout the space.
  3. Blade Height: Consider the height of the fan blades themselves. For proper air circulation and safety, blades should be at least 7 feet above the floor.

Ceiling Fan Downrod Length Chart

To simplify the selection process, refer to the following Ceiling Fan Downrod Length Chart:

Ceiling Height (Feet)Recommended Downrod Length (Inches)
83
96
1012
1118
1224
1336
1448
1560
1672

Installation Tips

  • Measure Twice, Install Once: Always double-check your ceiling height measurements before purchasing a downrod.
  • Safety First: If you’re unsure about installation, consult a professional to ensure it’s done correctly and safely.

Conclusion

Choosing the right downrod length for your ceiling fan is crucial for both functionality and aesthetics. Refer to the Ceiling Fan Downrod Length Chart provided in this guide to make an informed decision that enhances both airflow efficiency and the overall look of your space.

By understanding the relationship between ceiling height, room size, and downrod length, you can optimize the performance of your ceiling fan to create a comfortable and stylish environment in any room of your home.

Benjamin Moore Muresco Ceilings Paint for Your Home: Ultimate Guide to Choose

Choosing the right ceiling paint can significantly impact the look and feel of your home. Benjamin Moore Muresco Ceilings Paint offers exceptional quality and aesthetics, making it a popular choice among homeowners and professionals alike.

Benjamin Moore Muresco Ceiling Paint

What is Benjamin Moore Muresco Ceiling Paint?

Benjamin Moore Muresco Ceiling Paint is renowned for its high-quality formulation specifically designed for ceilings. It provides a smooth, durable finish that enhances the overall appearance of any room.

Benefits of Benjamin Moore Muresco Ceiling Paint

Superior Coverage and Durability

With excellent hide and coverage capabilities, Muresco Ceiling Paint ensures fewer coats are needed, saving time and effort during painting projects.

Smooth Finish

Achieve a flawless finish that conceals imperfections on ceilings, creating a clean and polished look throughout your home.

Low VOC Formulation

Many Benjamin Moore paints, including Muresco Ceiling Paint, are low in volatile organic compounds (VOCs), making them a safer choice for indoor air quality.

Read too: Bathroom Flooded Through the Ceiling: A Comprehensive Guide

Features of Benjamin Moore Muresco Ceiling Paint

Formulation and Composition

Explore the unique composition of Muresco Ceiling Paint, designed to resist splattering and dripping, facilitating easier application.

Color Range and Options

Discover a wide range of colors and finishes available in the Muresco Ceiling Paint line, allowing you to match your ceiling to any decor scheme.

Using Benjamin Moore Muresco Ceiling Paint

Preparation and Application Tips

Ensure proper preparation of ceiling surfaces before painting. Follow Benjamin Moore’s application guidelines for best results and long-lasting performance.

Maintenance and Care

Learn how to maintain the beauty of your painted ceilings with simple cleaning and maintenance tips.

Choosing the Right

Considerations for Different Rooms

Understand which sheen level and color will work best in various rooms, considering factors like natural light and room size.

Customer Reviews and Recommendations

Read about experiences from homeowners and professionals who have used Benjamin Moore Muresco Ceiling Paint to inform your decision.

Conclusion

Benjamin Moore Muresco Ceilings Paint stands out as a premium choice for those seeking quality, durability, and aesthetic appeal in their ceiling paint. By understanding its features, benefits, and application tips, you can achieve beautiful, long-lasting results in your home.

6000 CFM Ceiling Fan Options for Efficient Home Cooling: Explore the Best

In the realm of home cooling solutions, the 6000 CFM ceiling fan stands out as a powerful and efficient choice. Whether you’re looking to enhance comfort or reduce energy costs, understanding the benefits and features of a 6000 CFM ceiling fan can make a significant difference in your living space.

6000 Cfm Ceiling Fan

What is a 6000 CFM Ceiling Fan?

A 6000 CFM ceiling fan refers to its airflow capacity, measured in cubic feet per minute. This metric indicates how much air the fan can move, crucial for effective air circulation in larger rooms or spaces.

Understanding Airflow Efficiency

Efficiency is key when choosing a ceiling fan. A 6000 CFM rating ensures ample airflow without excessive energy consumption, making it a sustainable choice for environmentally conscious homeowners.

Benefits of a 6000 CFM Ceiling Fans

Enhanced Cooling Performance

With a high CFM rating, these fans excel in providing superior cooling performance, ideal for hot climates or rooms with poor ventilation.

Energy Efficiency

Despite their powerful performance, 6000 CFM ceiling fans are designed to operate efficiently, reducing electricity usage compared to traditional air conditioning systems.

Cost Savings

Lower energy consumption translates to reduced utility bills, offering long-term savings while maintaining comfort levels.

Factors to Consider When Choosing a 6000 CFM Ceiling Fan

Room Size and Ceiling Height

Matching the fan’s CFM rating to your room size ensures optimal airflow distribution. Ceiling height also affects performance, with higher ceilings requiring fans designed for greater reach.

Blade Design and Materials

The design and materials of fan blades impact both airflow and noise levels. Choose blades that complement the fan’s CFM rating for optimal performance.

Read too: Bathroom Flooded Through the Ceiling: A Comprehensive Guide

Additional Features

Modern 6000 CFM ceiling fans may include remote controls, reversible motor functions, and energy-efficient LED lighting options, enhancing convenience and functionality.

Installation Tips for 6000 CFM Ceiling Fans

Proper Mounting

Follow manufacturer guidelines for ceiling fan mounting to ensure safety and efficiency. Incorrect installation can compromise performance and safety.

Maintenance

Regular cleaning and inspection of fan blades and motor components prolong the lifespan and efficiency of your ceiling fan.

Choosing the Right 6000 CFM Ceiling Fans for Your Home

Popular Models and Brands

Explore renowned brands known for their quality and performance in the ceiling fan market. Compare features and customer reviews to make an informed decision.

Style and Aesthetics

Ceiling fans contribute to interior decor. Choose a model that complements your home’s style while delivering on performance and functionality.

Conclusion

Investing in a 6000 CFM ceiling fans offers multiple benefits, from enhanced cooling and energy efficiency to long-term cost savings. By understanding the importance of CFM ratings and choosing a fan suited to your needs, you can create a more comfortable and sustainable living environment.

Tiffany Style Flush Mount Ceiling Lights Fixtures: Discover the Elegance

Tiffany style flush mount ceiling lights fixtures add a touch of timeless elegance to any room. Learn about their exquisite craftsmanship, versatility, and how they can enhance your home decor.

Tiffany Style Flush Mount Ceiling Light

Exploring Tiffany Style Flush Mount Ceiling Light Fixtures

Tiffany style flush mount ceiling light fixtures are renowned for their intricate designs and vibrant stained glass. These lights are inspired by the artistic vision of Louis Comfort Tiffany, who pioneered the use of stained glass in decorative lighting during the late 19th and early 20th centuries. Today, Tiffany style flush mount ceiling lights continue to captivate homeowners with their classic beauty and functional appeal.

The Beauty of Tiffany Style Flush Mount Ceiling Light Fixtures

Tiffany style flush mount ceiling light fixtures are characterized by:

  1. Stained Glass Artistry: Each fixture features handcrafted stained glass pieces, carefully assembled to create stunning patterns and motifs. The glass is often adorned with intricate designs, including floral motifs, geometric patterns, and nature-inspired elements.
  2. Variety of Designs: From traditional floral patterns to contemporary geometric designs, Tiffany style flush mount ceiling lights come in a wide range of styles to complement any interior decor theme.
  3. Versatile Lighting Solutions: These fixtures provide ambient lighting while adding a decorative focal point to the room. They are ideal for spaces where a low-profile lighting option is desired without sacrificing style.

Choosing the Right Tiffany Style Flush Mount Ceiling Light

When selecting a Tiffany style flush mount ceiling light for your home, consider the following factors:

  1. Room Size and Ceiling Height: Measure the room dimensions and ceiling height to ensure the fixture’s size and drop length are suitable for the space.
  2. Color Scheme: Choose a light fixture that complements the room’s color palette. Tiffany style lights are available in a spectrum of colors, from vibrant hues to subtle shades, allowing for customization.
  3. Decor Theme: Match the fixture’s design to your home’s decor theme. Whether your style is traditional, modern, or eclectic, there’s a Tiffany style flush mount ceiling light to suit every taste.
  4. Quality and Craftsmanship: Invest in high-quality craftsmanship. Handcrafted Tiffany style lights often boast superior craftsmanship and durability compared to mass-produced alternatives.

Benefits of Tiffany Style Flush Mount Ceiling Light Fixtures

Installing Tiffany style flush mount ceiling light fixtures offers numerous benefits:

  1. Enhanced Aesthetic Appeal: These lights serve as functional artworks, enhancing the visual appeal of any room with their intricate designs and warm, inviting glow.
  2. Ambient Lighting: Tiffany style lights provide soft, diffused lighting that creates a cozy atmosphere. They are ideal for bedrooms, living rooms, dining areas, and hallways.
  3. Long-Term Investment: Quality Tiffany style fixtures are durable and timeless, making them a worthwhile investment that adds value to your home.

Maintaining Tiffany Style Flush Mount Ceiling Light Fixtures

To preserve the beauty and functionality of your Tiffany style flush mount ceiling light, follow these maintenance tips:

  1. Regular Cleaning: Dust the fixture regularly with a soft cloth or feather duster to remove dirt and debris. Avoid abrasive cleaners that could damage the stained glass.
  2. Avoid Direct Sunlight: Position the fixture away from direct sunlight to prevent fading of the stained glass colors over time.
  3. Check for Loose Parts: Periodically check for loose screws or fittings and tighten them as needed to ensure the fixture remains securely installed.
  4. Professional Inspection: Consider professional cleaning and inspection every few years to maintain optimal performance and appearance.

Read too: Bathroom Flooded Through the Ceiling: A Comprehensive Guide

Conclusion

Tiffany style flush mount ceiling lights fixtures offer a blend of artistic beauty and functional lighting for your home. Whether you’re redecorating a room or enhancing existing decor, these timeless pieces add elegance and charm. By understanding their craftsmanship, choosing the right fixture, and maintaining it properly, you can enjoy the beauty of Tiffany style lighting for years to come.

Popcorn Ceiling Removal San Diego: Tips and Considerations

Discover everything you need to know about popcorn ceiling removal in San Diego, from reasons to remove it to the best practices and professionals for the job.

Popcorn Ceiling Removal San Diego

Popcorn Ceiling Removal San Diego: Why Consider It?

Understanding Popcorn Ceiling Removal

Popcorn ceilings, also known as acoustic or textured ceilings, were popular in the mid-20th century for their ability to hide imperfections and dampen sound. However, they have fallen out of favor due to their dated appearance and potential health risks associated with asbestos in older installations.

Benefits of Popcorn Ceiling Removal

  • Modern Aesthetic: Removing popcorn ceilings can instantly update the look of a room, giving it a more contemporary and spacious feel.
  • Increased Property Value: Homes with smooth ceilings tend to appeal more to buyers, potentially increasing resale value.
  • Health and Safety: Popcorn ceilings installed before 1980 may contain asbestos, a known carcinogen. Removal is essential to mitigate health risks, especially during renovations or repairs.

Popcorn Ceiling Removal Process

1. Inspection and Testing

Before removal, it’s crucial to determine if the popcorn ceiling contains asbestos. Professional testing can identify asbestos fibers, ensuring safe handling and disposal practices if necessary.

Read too: Kitchen Lighting For A Vaulted Ceiling: Illuminating Your Space with Style and Functionality

2. Preparation

Prepare the room by removing furniture, covering floors and walls with protective materials, and ensuring adequate ventilation. This minimizes dust and debris from spreading throughout the house.

3. Removal Techniques

  • Wet Scrape Method: The ceiling is lightly sprayed with water to loosen the texture, making it easier to scrape off without creating airborne dust.
  • Dry Scrape Method: In some cases, a dry scrape method may be used with careful containment to minimize dust and debris.

4. Repair and Refinishing

After removal, the ceiling may require patching, sanding, and refinishing to achieve a smooth surface. This stage may also involve applying primer and fresh paint for a polished look.

Hiring Professionals in San Diego

Choosing the Right Contractor

  • Experience: Look for contractors with experience in popcorn ceiling removal and asbestos abatement if needed.
  • Certification: Ensure the contractor is licensed and certified to handle asbestos removal if applicable, adhering to local regulations.
  • References: Check reviews and ask for references to gauge the contractor’s reliability and quality of workmanship.

Cost Considerations

Factors Influencing Cost

  • Ceiling Size: Larger rooms typically incur higher removal costs due to more labor and materials.
  • Asbestos Abatement: If asbestos is present, additional costs for testing, containment, and safe disposal will apply.
  • Complexity: Ceilings with intricate designs or in hard-to-reach areas may require more labor and specialized equipment.

Benefits of Professional Removal

1. Safety Compliance

Professional contractors follow safety protocols to minimize exposure to asbestos fibers and ensure proper disposal, protecting both occupants and the environment.

2. Efficiency

Experienced professionals can complete the removal process efficiently, minimizing disruption to your daily routine and ensuring thorough cleanup afterward.

3. Quality Results

Professional removal and refinishing result in a smooth, flawless ceiling finish that enhances the overall appearance and value of your home.

Conclusion

Popcorn ceiling removal in San Diego is a transformative home improvement project that enhances aesthetics, improves indoor air quality, and may increase property value. Whether motivated by modernizing your home or addressing health concerns, hiring a qualified professional ensures the job is done safely and effectively. By understanding the process, costs, and benefits associated with popcorn ceiling removal, homeowners can make informed decisions to achieve a refreshed and inviting living space.

Polk In Ceiling Speakers for Exceptional Audio Experience: Explore High-Quality Sound

Discover the immersive sound quality and sleek design of Polk in ceiling speakers, perfect for transforming your space into a premium audio environment. Learn about their features, installation tips, and why they are a popular choice among audio enthusiasts.

Polk In Ceiling Speakers

Understanding Polk In Ceiling Speakers

What are Polk In Ceiling Speakers?

Polk in ceiling speakers are audio devices designed to be mounted flush against the ceiling, providing high-fidelity sound without taking up floor or wall space. They are ideal for home theaters, living rooms, kitchens, and other areas where traditional floor-standing or bookshelf speakers may not be practical.

Key Features and Benefits

Polk in ceiling speakers offer several advantages:

  • Discreet Installation: They blend seamlessly into the ceiling, offering a clean and unobtrusive look that complements any decor.
  • Premium Sound Quality: Polk speakers are known for their rich, detailed sound reproduction, delivering clear highs, deep lows, and immersive audio experiences.
  • Versatility: Available in various sizes and configurations, Polk in ceiling speakers can be customized to suit different room sizes and acoustic requirements.
  • Durable Construction: Built with high-quality materials, Polk speakers are designed for long-term reliability and performance.

Read too: Kitchen Lighting For A Vaulted Ceiling: Illuminating Your Space with Style and Functionality

Types of Polk In Ceiling Speakers

Polk offers a range of in ceiling speaker models to cater to different audio preferences and room sizes:

  • Basic Models: Entry-level speakers that provide good sound quality for everyday listening.
  • Mid-Range Models: Enhanced features such as wider frequency response and improved bass for more immersive audio experiences.
  • Premium Models: High-end speakers with advanced technologies like dynamic balance drivers and tweeters for audiophile-grade sound reproduction.

Installation Tips

1. Positioning and Placement

Consider the room layout and seating arrangement when positioning Polk in ceiling speakers. Aim for optimal coverage and even sound distribution throughout the listening area.

2. Wiring and Connectivity

Ensure proper wiring and connectivity before installation. Consult the speaker’s manual for specific instructions on wiring setup and compatibility with your audio equipment.

3. Professional Installation

While DIY installation is possible for those familiar with electrical work, hiring a professional installer ensures precise placement and wiring, maximizing sound quality and safety.

Practical Applications

Residential Use

In homes, Polk in ceiling speakers are popular for home theaters, living rooms, bedrooms, and even outdoor spaces like patios and decks. They provide immersive audio for movies, music, and gaming without occupying floor space.

Commercial Use

In commercial settings such as restaurants, retail stores, and offices, Polk speakers offer background music and paging capabilities, enhancing the customer experience and ambiance.

Maintenance and Care

Maintaining Polk in ceiling speaker ensures optimal performance and longevity:

  • Regular Cleaning: Dust the speaker grilles and surfaces regularly to prevent buildup that can affect sound quality.
  • Check Connections: Periodically inspect wiring connections to ensure they are secure and free of corrosion.
  • Protect from Moisture: If installed in humid environments like bathrooms or kitchens, consider using moisture-resistant models and clean them with care.

Conclusion

Polk in ceiling speaker combine superior sound quality with discreet installation, making them an excellent choice for enhancing audio experiences in both residential and commercial settings. Whether you’re setting up a home theater or improving background music in a retail space, Polk speakers offer versatility, durability, and exceptional performance. By understanding their features, installation considerations, and maintenance tips, you can enjoy immersive sound that seamlessly integrates into your environment.

Lights For Cathedral Ceiling: Enhance Your Space with Elegant and Functional Lighting Solutions

Explore the best lighting options designed specifically for cathedral ceilings to illuminate your home with style and efficiency. Learn about different types of lights, installation tips, and considerations for maximizing the beauty of your cathedral ceiling.

Lights For Cathedral Ceiling

Understanding Lights For Cathedral Ceiling

What are Lights For Cathedral Ceiling?

Lights for cathedral ceilings are specially designed fixtures that complement the unique architectural features of cathedral or vaulted ceilings. These ceilings are characterized by their steep slopes and height, requiring lighting solutions that can effectively illuminate the space while accentuating its grandeur.

Read too: Kitchen Lighting For A Vaulted Ceiling: Illuminating Your Space with Style and Functionality

Types of Lighting Fixtures

Choosing the right lighting fixture is essential for cathedral ceilings to achieve optimal illumination and aesthetic appeal:

  • Chandeliers: Elegant and often dramatic, chandeliers add a touch of luxury and serve as a focal point in rooms with cathedral ceilings. They come in various sizes and styles, from traditional crystal designs to modern, minimalist options.
  • Pendant Lights: Pendant lights are versatile and can be adjusted to hang at different heights, making them suitable for cathedral ceilings. They provide focused task lighting or ambient illumination depending on the placement and design.
  • Recessed Lighting: Recessed lights are installed flush with the ceiling surface, offering a clean and unobtrusive look. They are ideal for providing overall ambient lighting in cathedral ceilings without detracting from the architectural beauty.
  • Track Lighting: Track lighting systems allow for adjustable spotlights along a track mounted on the ceiling. They are versatile and can be used to highlight specific areas or artworks in cathedral ceiling spaces.

Factors to Consider

1. Ceiling Height and Scale

Cathedral ceilings vary in height, which can impact the choice of lighting fixtures. Taller ceilings may require larger or more prominent fixtures to maintain proportion and provide adequate light coverage.

2. Architectural Style

Consider the architectural style of your home when selecting lighting fixtures for cathedral ceilings. Traditional homes may benefit from classic chandeliers, while modern residences might opt for sleek, minimalist designs.

3. Natural Light

Take into account the amount of natural light entering the space. Cathedral ceilings with ample natural light may require less artificial lighting during the day but still benefit from well-placed fixtures for evening and nighttime use.

Installation Tips

1. Professional Installation

Due to the height and often challenging accessibility of cathedral ceilings, consider hiring a professional electrician for installation. They can ensure fixtures are securely mounted and wired correctly.

2. Layered Lighting

Use a combination of lighting types to create layers of light in cathedral ceiling rooms. Combine overhead fixtures with wall sconces or floor lamps to enhance ambiance and functionality.

3. Dimming Options

Install dimmer switches for adjustable lighting levels. This allows you to control the brightness of fixtures based on the time of day, mood, or specific activities.

Practical Applications

Residential Use

In residential settings, cathedral ceilings are commonly found in living rooms, dining areas, master bedrooms, and entryways. Choosing the right lighting enhances these spaces, creating a welcoming and visually appealing atmosphere.

Commercial Use

Cathedral ceilings are also utilized in commercial settings such as churches, event venues, and hotel lobbies. Proper lighting not only illuminates these large spaces but also highlights architectural details and creates a memorable environment for visitors.

Maintenance and Care

Maintaining lighting fixtures in cathedral ceilings ensures longevity and continued performance:

  • Cleaning: Regularly dust and clean fixtures to remove debris and maintain optimal light output.
  • Bulb Replacement: Replace bulbs as needed to prevent dimming or flickering, and choose energy-efficient options for cost savings.
  • Inspections: Periodically inspect wiring and connections to ensure safety and functionality, especially in hard-to-reach areas.

Conclusion

Lights for cathedral ceilings play a crucial role in enhancing the beauty and functionality of expansive, vaulted spaces. By selecting appropriate fixtures, considering installation factors, and implementing maintenance practices, homeowners and designers can create stunning interiors that are well-lit and inviting. Whether for residential or commercial use, thoughtful lighting choices contribute to the overall ambiance and appeal of cathedral ceiling environments.

Ez Fit Ceiling Cassette: Simplifying Installation and Enhancing Comfort in Your Space

Discover the convenience and efficiency of Ez Fit ceiling cassette systems for your heating and cooling needs. Learn about their features, installation process, and benefits for residential and commercial applications.

Ez Fit Ceiling Cassette

Understanding Ez Fit Ceiling Cassette Systems

What are Ez Fit Ceiling Cassettes?

Ez Fit ceiling cassettes are innovative HVAC units designed for easy installation in suspended ceilings. They offer a compact, all-in-one solution that combines heating, cooling, and ventilation capabilities within a discreet cassette form factor. These systems are ideal for spaces where traditional ducted HVAC systems may not be feasible or practical.

Key Features and Benefits

Ez Fit ceiling cassettes come with several advantages:

  • Space-Saving Design: They are installed flush with the ceiling, maximizing floor space and maintaining aesthetic appeal.
  • Efficient Air Distribution: Cassettes typically feature multi-directional air vents, ensuring even air distribution throughout the room.
  • Quiet Operation: Advanced technology reduces noise levels, providing a comfortable indoor environment without disruption.
  • Energy Efficiency: Many models are equipped with energy-saving features such as programmable thermostats and eco-friendly refrigerants, helping to reduce utility costs.

Installation Process

1. Ceiling Placement

Ez Fit cassettes are designed to fit seamlessly into suspended ceilings. Installation begins with selecting the optimal location within the room’s ceiling grid to ensure proper airflow and accessibility for maintenance.

2. Electrical and Plumbing Connections

Once positioned, electrical and plumbing connections are made according to manufacturer specifications. It’s crucial to follow local building codes and regulations when wiring and connecting refrigerant lines to ensure safety and performance.

Read too: Kitchen Lighting For A Vaulted Ceiling: Illuminating Your Space with Style and Functionality

3. Testing and Commissioning

After installation, the system undergoes testing and commissioning to verify functionality and efficiency. This includes checking airflow, temperature control, and ensuring all components operate as intended.

Applications and Use Cases

Residential Applications

In homes, Ez Fit ceiling cassettes are popular for rooms where aesthetics and space are priorities, such as living rooms, bedrooms, or home offices. They offer quiet operation and efficient heating and cooling, enhancing indoor comfort year-round.

Commercial Applications

Ez Fit systems are widely used in commercial settings such as offices, retail stores, restaurants, and hotels. Their compact design and quiet operation make them suitable for environments where maintaining a comfortable climate without disrupting daily operations is essential.

Maintenance and Care

Maintaining Ez Fit ceiling cassette systems is essential for optimal performance and longevity:

  • Regular Cleaning: Keep air vents and filters clean to ensure unrestricted airflow and efficient operation.
  • Professional Inspections: Schedule periodic inspections by HVAC professionals to check for leaks, verify refrigerant levels, and perform any necessary maintenance tasks.
  • Software Updates: Stay updated with manufacturer recommendations and software updates to benefit from improved efficiency and performance enhancements.

Conclusion

Ez Fit ceiling cassette systems offer a versatile and efficient solution for heating and cooling needs in both residential and commercial environments. Their ease of installation, space-saving design, and quiet operation make them a preferred choice for modern building projects. By understanding their features, installation process, and maintenance requirements, homeowners and business owners can make informed decisions to enhance indoor comfort effectively.

Direct Mount Ceiling Tiles: Enhancing Your Space with Easy Installation and Durability

Direct mount ceiling tiles offer a convenient and durable solution for upgrading your interior spaces. Learn about their benefits, installation methods, and aesthetic options to make an informed choice for your next renovation project.

Direct Mount Ceiling Tiles

Understanding Direct Mount Ceiling Tiles

What are Direct Mount Ceiling Tiles?

Direct mount ceiling tiles, also known as glue-up or adhesive ceiling tiles, are designed to be installed directly onto a ceiling surface using adhesive or glue. This eliminates the need for a suspended grid system typically used with traditional drop ceiling tiles. These tiles come in various materials such as PVC, metal, or foam, each offering unique properties suited to different applications.

Benefits of Direct Mount Ceiling Tiles

Direct mount ceiling tiles offer several advantages over traditional ceiling systems:

  • Ease of Installation: They are easy to install without the need for a complex grid structure, making them suitable for DIY projects or quick renovations.
  • Durability: Many direct mount tiles are highly durable, resistant to moisture, mold, and mildew, making them ideal for environments like kitchens and bathrooms.
  • Aesthetic Versatility: They come in a wide range of styles, textures, and finishes, including options that mimic the look of tin, wood, or decorative patterns.

Types of Direct Mount Ceiling Tiles

1. PVC Ceiling Tiles

PVC (polyvinyl chloride) ceiling tiles are lightweight, water-resistant, and easy to clean. They are suitable for environments prone to moisture and humidity, such as basements and bathrooms. PVC tiles often come in a variety of designs and colors, offering flexibility in design choices.

2. Metal Ceiling Tiles

Metal ceiling tiles, typically made from aluminum or steel, provide a sleek, modern look and excellent durability. They are fire-resistant and can be used in commercial spaces or areas requiring a more industrial aesthetic. Metal tiles can be finished in various colors or textures to match different interior styles.

Read too: Kitchen Lighting For A Vaulted Ceiling: Illuminating Your Space with Style and Functionality

3. Foam Ceiling Tiles

Foam ceiling tiles are lightweight and easy to handle. They offer sound-absorbing properties, making them suitable for rooms where noise reduction is desired, such as offices or media rooms. Foam tiles can be painted or textured to achieve a customized look.

Installation Methods

1. Adhesive Application

The most common method for installing direct mount ceiling tiles is using adhesive or glue. The adhesive is applied to the back of each tile, which is then pressed firmly onto the ceiling surface. This method ensures a secure bond and eliminates the need for nails or screws, preserving the tile’s aesthetic appeal.

2. Mechanical Fastening

In some cases, direct mount tiles can also be installed using mechanical fasteners such as staples or nails. This method may be preferred for certain materials or to achieve a specific installation pattern. Mechanical fastening provides additional security, especially in environments where there may be concerns about adhesive strength over time.

Maintenance and Care

Maintaining direct mount ceiling tiles is relatively straightforward:

  • Regular Cleaning: Wipe tiles periodically with a damp cloth to remove dust or debris.
  • Avoid Harsh Chemicals: Use mild soap and water for tougher stains, avoiding abrasive cleaners that could damage the tile surface.
  • Inspect for Damage: Periodically inspect tiles for any signs of damage or loosening. Address any issues promptly to prevent further damage.

Practical Applications

Residential Use

Direct mount ceiling tiles are popular in residential settings for their ease of installation and versatility. Homeowners can use them to update the look of rooms such as kitchens, dining areas, or bedrooms without extensive renovation.

Commercial Use

In commercial environments, direct mount tiles are chosen for their durability and aesthetic appeal. They are suitable for retail spaces, offices, restaurants, and other high-traffic areas where both functionality and style are essential.

Conclusion

Direct mount ceiling tile offer a practical and stylish alternative to traditional ceiling systems. Whether you’re renovating your home or updating a commercial space, these tiles provide ease of installation, durability, and aesthetic versatility. By understanding the different types, installation methods, and maintenance requirements, you can choose the right direct mount ceiling tile to enhance your interior spaces effectively.