NFPA 13 Upright Sprinkler Head Distance from Ceiling

The installation of fire sprinkler systems is critical in safeguarding buildings and occupants from the devastating effects of fires. The National Fire Protection Association (NFPA) has established numerous codes and standards to ensure the proper design and installation of these systems. One important aspect is the distance of upright sprinkler heads from the ceiling. In this article, we will explore the NFPA 13 guidelines for upright sprinkler head placement and the significance of adhering to these regulations.

nfpa 13 upright sprinkler head distance from ceiling

Understanding NFPA 13 Guidelines

Ensuring Fire Safety

NFPA 13, titled “Standard for the Installation of Sprinkler Systems,” is a comprehensive standard that provides requirements for the design, installation, and maintenance of automatic fire sprinkler systems. It covers various types of sprinkler heads, including upright sprinklers, which are commonly used in many applications.

Types of Sprinkler Heads

An Overview

Before diving into the specific guidelines for upright sprinkler head distance from the ceiling, it’s essential to understand the different types of sprinkler heads:

  1. Upright Sprinkler Head: These sprinklers point upwards and are typically used in areas where obstructions might prevent the water spray from reaching the fire effectively.
  2. Pendant Sprinkler Head: Pendant sprinklers hang down from the ceiling and are commonly used in areas with unobstructed spaces.
  3. Sidewall Sprinkler Head: These are mounted on walls and used in areas where a ceiling-mounted sprinkler is not feasible.

Upright Sprinkler Head Distance from the Ceiling

The Guidelines

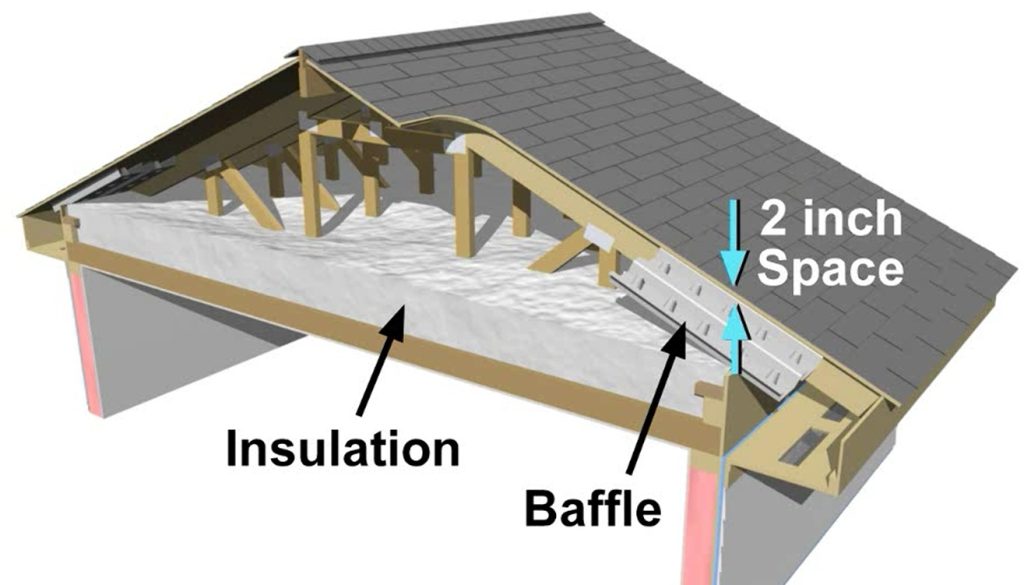
The NFPA 13 standard provides specific requirements for the distance between the deflector of an upright sprinkler head and the ceiling. These requirements are essential to ensure the proper operation of the sprinkler system in the event of a fire.

1. Minimum and Maximum Distances

The NFPA 13 standard stipulates that the minimum distance from the deflector of an upright sprinkler head to the ceiling should be no less than 1 inch (25 mm). On the other hand, the maximum distance should not exceed 12 inches (305 mm).

2. Importance of Consistency

Consistency in the installation of upright sprinkler heads is crucial. Maintaining uniform distances between the deflector and the ceiling helps ensure that the water distribution pattern is consistent, which is vital for effective fire control.

3. Adjustments for Specific Applications

While the general guidelines provide a solid framework, it’s important to note that specific applications or environments may necessitate variations in the sprinkler head distance from the ceiling. For instance, in areas with sloped ceilings, you might need to adjust the placement to ensure proper coverage.

Why These Guidelines Matter

Enhancing Fire Safety

The NFPA 13 guidelines for upright sprinkler head distance from the ceiling are not arbitrary; they are designed to enhance fire safety. Here’s why these regulations are important:

1. Efficient Water Distribution

Maintaining the appropriate distance ensures effective water distribution in the event of a fire. Too much distance can result in reduced water coverage, while too little distance can obstruct the water spray.

2. Adequate Cooling and Suppression

Properly positioned upright sprinkler heads help cool the surrounding air and suppress the fire, limiting its growth and spread.

3. Protection from Obstructions

In areas with potential obstructions, such as storage racks or equipment, the correct distance allows the water spray to clear these obstacles and reach the source of the fire.

4. Code Compliance

Adhering to NFPA 13 guidelines is essential for code compliance. Non-compliance can lead to legal and insurance issues in the event of a fire.

Conclusion

The NFPA 13 guidelines for upright sprinkler head distance from the ceiling are crucial for fire safety. Adhering to these regulations ensures an effective fire sprinkler system. Consult experienced professionals well-versed in NFPA standards for proper system design and installation, offering peace of mind for all stakeholders.

Who to Call for Brown Spots on Ceiling?

Finding brown spots on your ceiling can be a cause for concern. These unsightly stains are not only an eyesore but can also indicate underlying issues with your home. If you’re wondering, “Who to call for brown spots on the ceiling?” this article will provide insights into identifying the source of the problem and which professionals can help you address it.

who to call for brown spots on ceiling

Understanding Brown Spots on the Ceiling

Signs of a Problem

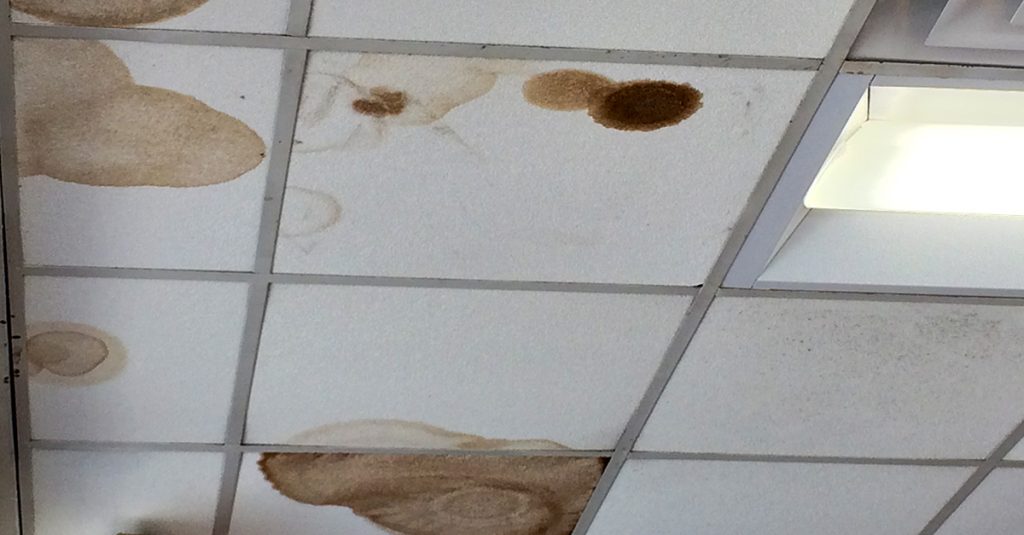
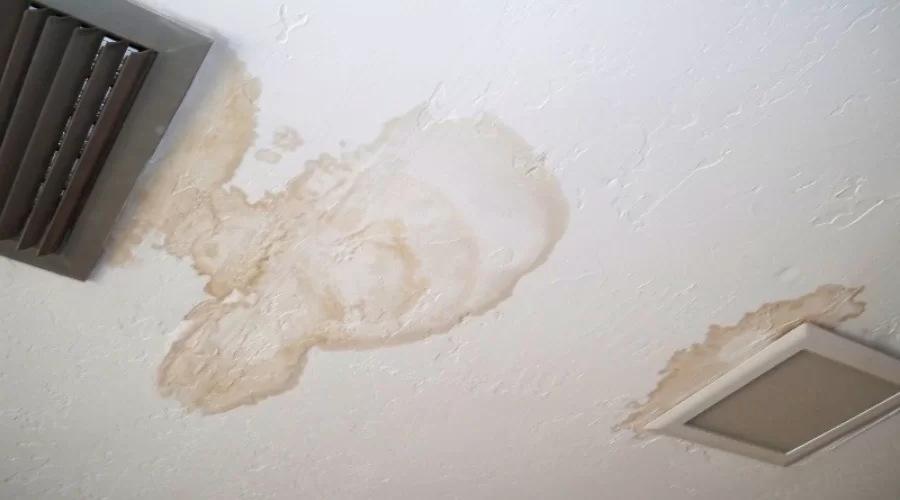
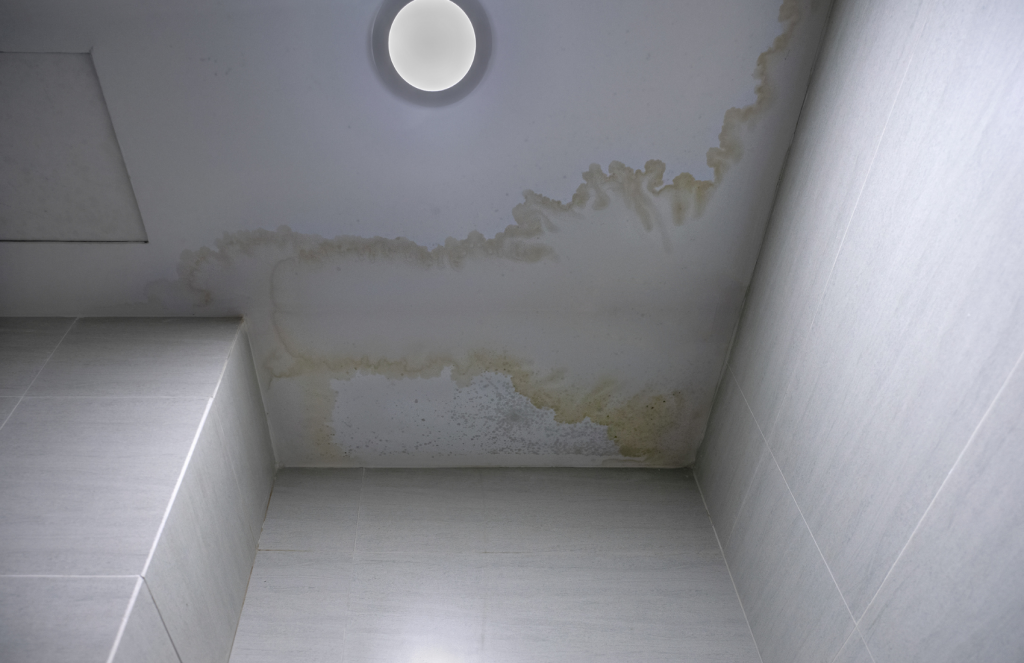
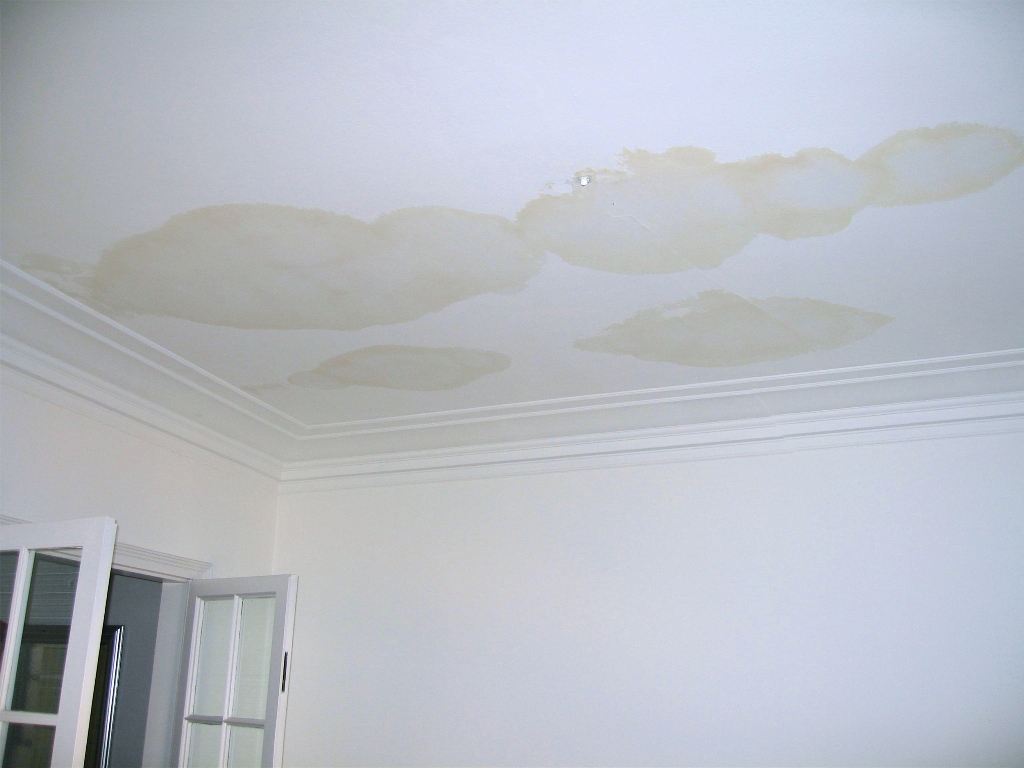
Brown spots on the ceiling can be caused by various issues, and it’s crucial to determine the source before taking action. Some common causes of brown spots include:

1. Water Leaks

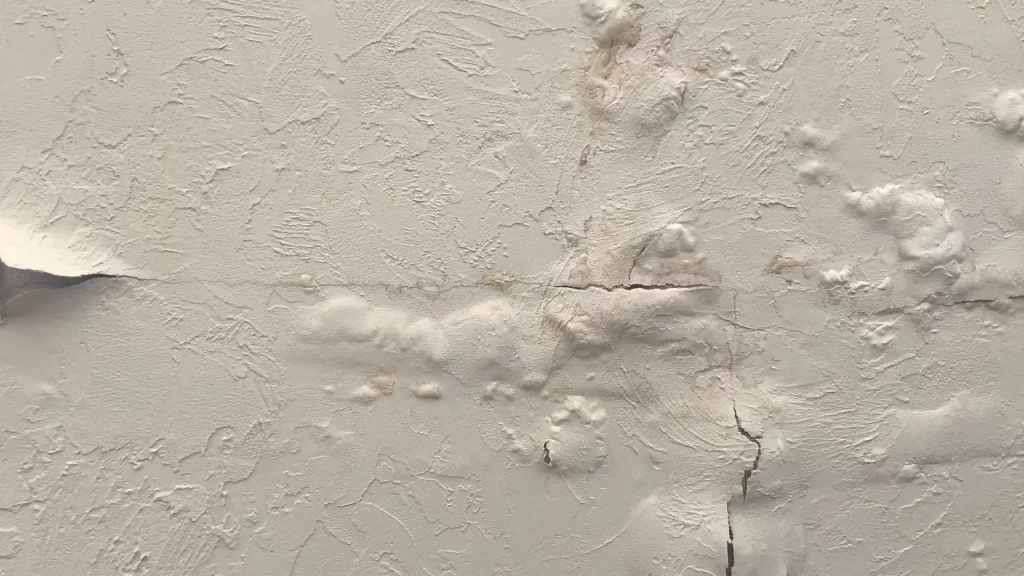
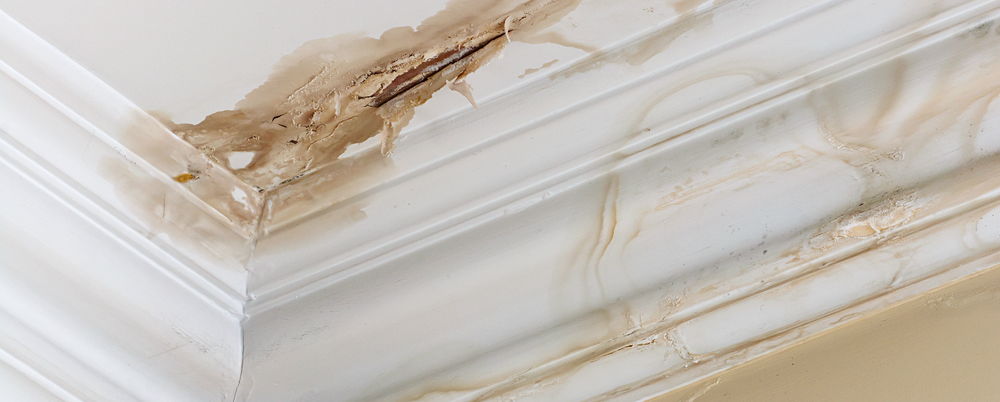
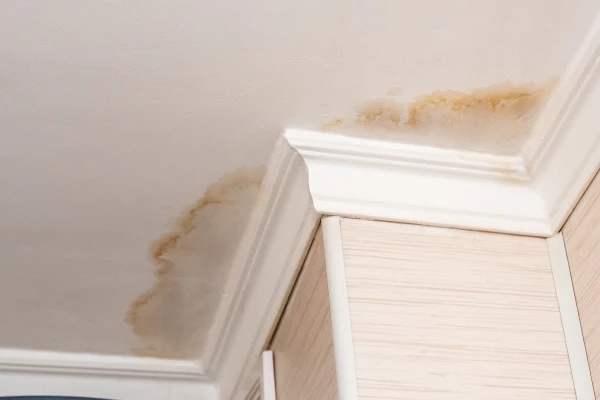
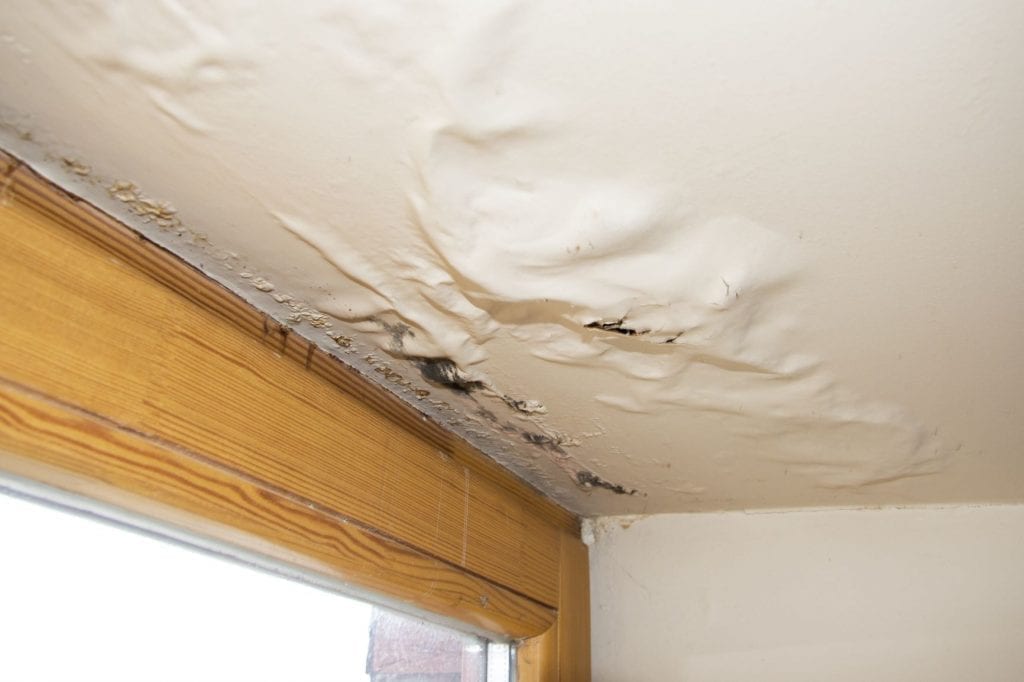
Water leaks from a roof, plumbing, or a damaged ceiling can lead to brown spots. These stains are often accompanied by water damage, such as peeling paint or bubbling drywall.

2. Mold or Mildew

Excessive moisture in the home can foster the growth of mold and mildew, which can manifest as brown spots on the ceiling. These spots are often accompanied by a musty odor.

3. Smoke or Soot

If you have a fireplace or use candles frequently, smoke or soot can accumulate on the ceiling, leading to brown stains. This is common in homes with inadequate ventilation.

4. Aging Paint or Materials

Over time, paint and building materials can deteriorate, resulting in discoloration or staining on the ceiling. This is more of an aesthetic concern and doesn’t necessarily indicate a major issue.

Who to Call for Different Situations

Professionals to Contact

The professional you should call for brown spots on your ceiling depends on the underlying cause:

1. For Water Leaks: A Roofing Contractor or Plumber

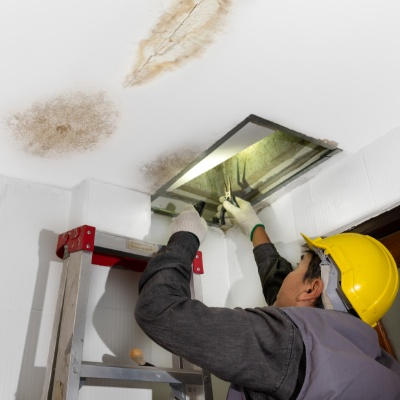
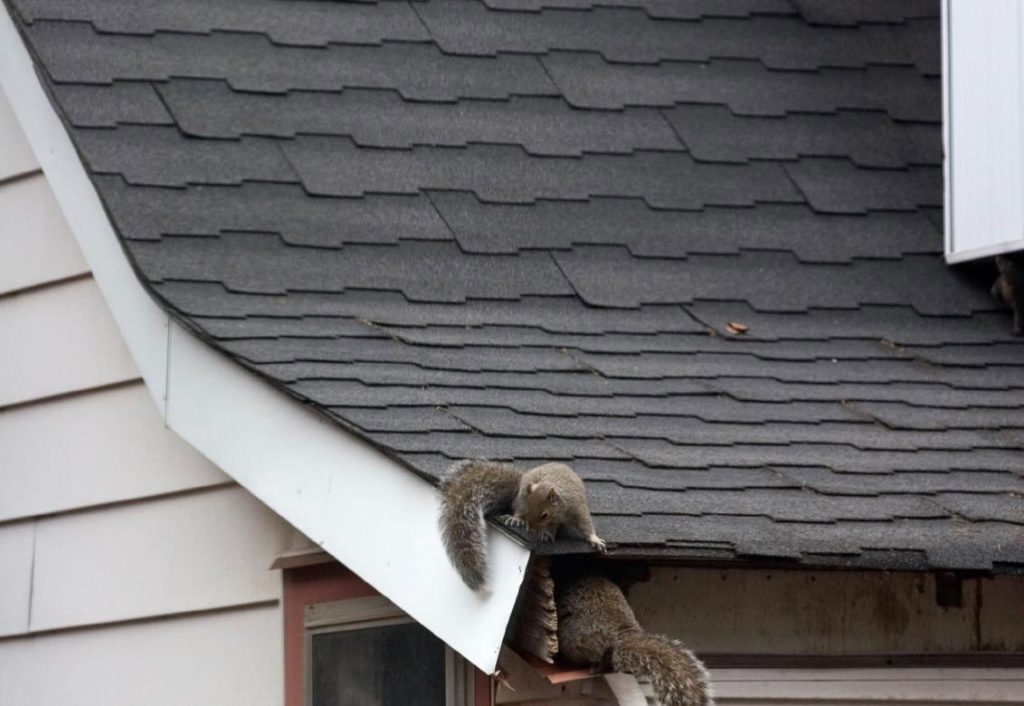
If water leaks are the culprit, a roofing contractor or a plumber is your go-to professional. A roofing contractor can inspect your roof for damaged shingles or flashing, while a plumber can assess your plumbing system for leaks. They will repair the source of the water intrusion and, if necessary, help with any necessary ceiling repairs.

2. For Mold or Mildew: Mold Remediation Specialist

If the brown spots are due to mold or mildew growth, it’s advisable to contact a mold remediation specialist. Mold can be harmful to your health, so it’s essential to have it professionally removed and take steps to prevent its return.

3. For Smoke or Soot: Professional Cleaner or Chimney Sweep

For brown spots caused by smoke or soot, a professional cleaner or chimney sweep can help. They will clean the affected areas and provide guidance on improving ventilation to prevent future staining.

4. For Aging Paint or Materials: Painters or Home Improvement Professionals

If the brown spots are merely due to aging paint or materials, you can hire a painter or a home improvement professional to address the cosmetic issue. They can repaint or refinish the ceiling to restore its appearance.

Preventing Future Brown Spots

Taking Preventative Measures

To avoid dealing with brown spots on your ceiling in the future, consider these preventive measures:

  • Regular Maintenance: Schedule regular inspections of your roof, plumbing, and chimney to catch potential issues before they lead to staining.
  • Proper Ventilation: Ensure your home is adequately ventilated, especially in areas prone to smoke or moisture, to minimize staining.
  • Mold Prevention: Take steps to reduce humidity levels in your home and address any water leaks promptly to prevent mold growth.
  • Timely Repainting: If your ceiling is showing signs of aging, consider repainting it before the stains become noticeable.

Conclusion

Brown spots on the ceiling are a common household issue, and understanding their causes is the first step in addressing them. Depending on the underlying problem, you may need to call different professionals, including roofing contractors, plumbers, mold remediation specialists, cleaners, chimney sweeps, or painters. By taking timely action and practicing preventive maintenance, you can keep your ceiling looking clean and free from unsightly stains.

Should I Pop A Water Bubble On My Ceiling?

Should i pop a water bubble on my ceiling? Finding a water bubble on your ceiling can be a concerning sight. It often raises the question: should I pop it? In this article, we’ll delve into the considerations and potential consequences of dealing with a water bubble on your ceiling.

should i pop a water bubble on my ceiling

Understanding Water Bubbles on Ceilings

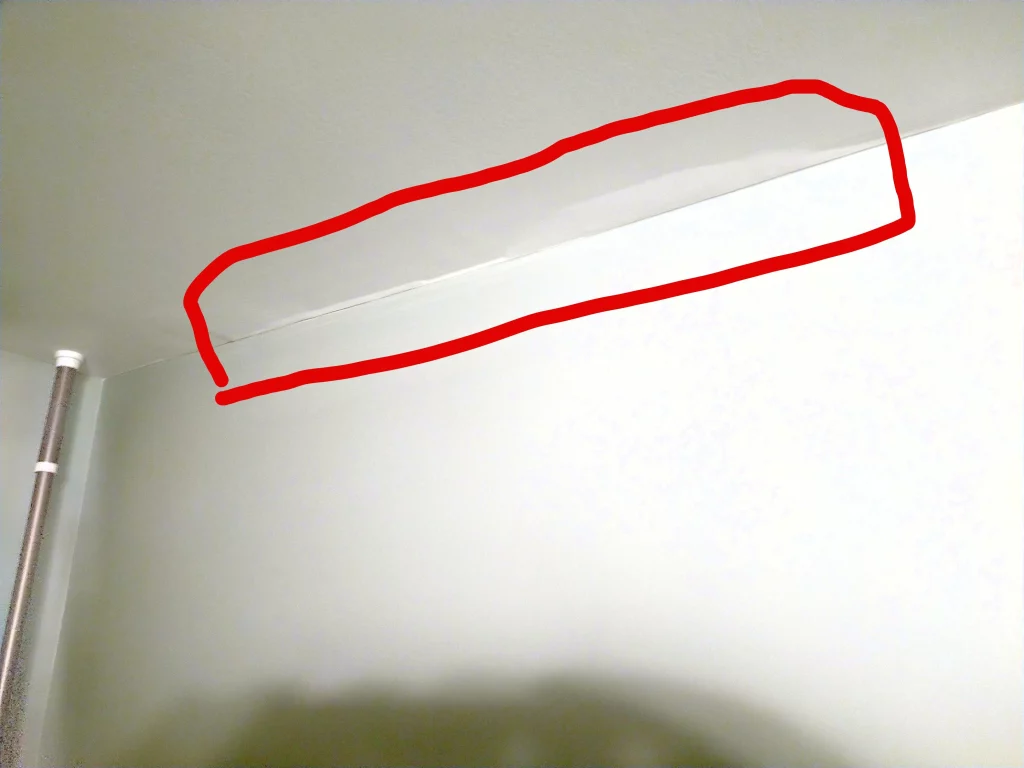
Water bubbles on your ceiling usually result from a leak in the roof, plumbing, or a burst pipe. The bubble forms when water infiltrates the ceiling material, causing it to swell and create a visible bulge. While the immediate instinct may be to pop the bubble to release the trapped water, it’s essential to assess the situation carefully.

When to Pop a Water Bubble:

  1. Safety First: Before taking any action, ensure your safety. If the bubble is large or the ceiling material is sagging significantly, there’s a risk of it collapsing and causing injury. In such cases, it’s best to stay clear and avoid the area until professional help arrives.
  2. Small Bubbles: If the water bubble is relatively small, less than a few inches in diameter, it may be possible to address it carefully. You can use a small pin or needle to create a tiny hole at the bubble’s lowest point. This should allow the trapped water to drain slowly without causing further damage.
  3. Controlled Drainage: When popping a small water bubble, be prepared with a bucket or container to catch the draining water. This helps prevent water from splashing onto the floor or furnishings.

When Not to Pop a Water Bubble:

  1. Structural Damage: If the water bubble has caused significant structural damage to the ceiling, it’s best not to pop it. Popping it could lead to further damage, including a complete collapse of the ceiling.
  2. Electrical Hazards: Avoid popping a water bubble if it’s in close proximity to electrical fixtures, such as ceiling lights or fans. Water and electricity do not mix, and you could risk electrocution.
  3. Mold Concerns: Popping the bubble may release water that has seeped into the ceiling material. This can create an environment conducive to mold growth. To prevent mold issues, it’s essential to address the root cause of the leak and thoroughly dry the affected area.
  4. Professional Help: When in doubt or if the situation is complex, it’s best to seek professional assistance. A qualified contractor or restoration specialist can assess the damage, locate the source of the leak, and recommend the appropriate course of action.

Addressing the Root Cause

While addressing a water bubble on the ceiling is a temporary fix, the most crucial step is to determine and rectify the source of the leak. Once the leak is repaired, the ceiling can be properly restored or replaced.

Conclusion: Safety and Prevention

When faced with a water bubble on your ceiling, safety and prevention should be your top priorities. Carefully assess the size and condition of the bubble and consider the potential risks and consequences before deciding to pop it. In many cases, it’s best to consult with professionals who can address the root cause of the issue and ensure a safe and effective solution, preventing further damage and potential hazards in your home.

Why Would Bed Bugs Be On The Ceiling?

Bed bugs, those pesky little insects that feed on blood, are notorious for causing discomfort and distress among homeowners. Typically, we associate bed bugs with hiding in mattresses, box springs, and cracks and crevices in furniture. However, have you ever wondered, “Why would bed bugs be on the ceiling?” In this article, we’ll delve into this intriguing question and explore the reasons behind this unexpected behavior.

why would bed bugs be on the ceiling

Understanding Bed Bug Behavior

The Typical Hideouts

Bed bugs are known for their excellent hiding abilities. They prefer to stay close to their hosts (which are often humans) while remaining concealed during daylight hours. Common hiding spots for bed bugs include the seams and folds of mattresses, behind headboards, inside electrical outlets, and in the crevices of wooden furniture.

The Unusual Spot: Bed Bugs on the Ceiling

Exception to the Rule

While bed bugs typically gravitate toward the areas where their hosts sleep, there are situations where they may end up on the ceiling. Here are some reasons why bed bugs might find their way there:

1. Desperation for a Meal

Bed bugs feed on blood, and they can detect the carbon dioxide we exhale from our breath, which signals the presence of a potential meal. If they are unable to find a host on the bed or nearby furniture, they may crawl up the walls and ultimately end up on the ceiling in search of a blood meal.

2. Overcrowding

Bed bugs reproduce rapidly, and infestations can quickly become overcrowded. When there are too many bed bugs in one hiding spot, they may start spreading out to nearby areas, including the ceiling, in an attempt to find more space.

3. Traveling Bed Bugs

Bed bugs are excellent hitchhikers and can be unknowingly transported from one place to another. If an infestation is present in a room, bed bugs might crawl up walls and onto the ceiling, hoping to hitch a ride on a passerby, such as a person or a pet, and be transported to another location.

4. Seeking Cooler Temperatures

Bed bugs are sensitive to temperature and humidity. In some cases, if the temperature near their hiding spot becomes too warm or uncomfortable, they may move to a cooler spot, which could be the ceiling.

5. Seeking Safety from Pesticides

When bed bug infestations are treated with pesticides or other control methods, bed bugs may flee to less treated areas, such as the ceiling, in an attempt to escape the threat. This behavior can make them harder to eradicate.

Dealing with Bed Bugs on the Ceiling

Addressing the Issue

If you find bed bugs on your ceiling, it’s essential to take action promptly. Here are steps to address the issue:

  1. Professional Pest Control: Consider hiring a professional pest control expert who specializes in bed bug extermination. They have the knowledge and tools to effectively eliminate the infestation.
  2. Inspection: Carefully inspect the entire room to identify the extent of the infestation. Look for other hiding spots, such as cracks, crevices, and furniture.
  3. Washing and Heat Treatment: Launder all bedding, clothing, and curtains in hot water and dry them on the highest heat setting. This will kill any bed bugs and their eggs.
  4. Vacuuming: Thoroughly vacuum the room, including the ceiling, to remove any bed bugs. Dispose of the vacuum bag or clean the vacuum’s canister outside of your home.
  5. Sealing Cracks: Seal any cracks, gaps, or openings in the walls or ceiling to prevent bed bugs from moving between rooms.

Conclusion

While it may seem unusual to find bed bugs on the ceiling, these insects are adaptable and will seek out new hiding spots when necessary. If you encounter bed bugs in your home, it’s crucial to take swift action to address the infestation. Consulting a professional pest control expert is often the most effective way to eliminate bed bugs and prevent their return. Understanding their behavior and how they end up on the ceiling can aid in keeping your home bed bug-free.

How Much Should I Charge To Paint A Ceiling?

Painting a ceiling can be a challenging task that requires skill and patience. Whether you’re a professional painter or a homeowner looking to tackle a DIY project, one of the most important questions you’ll face is, “How much should I charge to paint a ceiling?” In this article, we’ll explore the factors that influence the cost of ceiling painting and provide guidance on how to determine a fair price for your services.

how much should i charge to paint a ceiling

Factors Affecting Ceiling Painting Costs

Understanding the Variables

The cost of painting a ceiling can vary significantly based on several factors. It’s essential to consider these variables when determining how much to charge for your painting services:

1. Ceiling Size and Height

The size of the ceiling is a fundamental factor in pricing. Larger ceilings will require more paint and time to complete. Additionally, if the ceiling is unusually high, it may necessitate specialized equipment or scaffolding, which can increase the cost.

2. Ceiling Condition

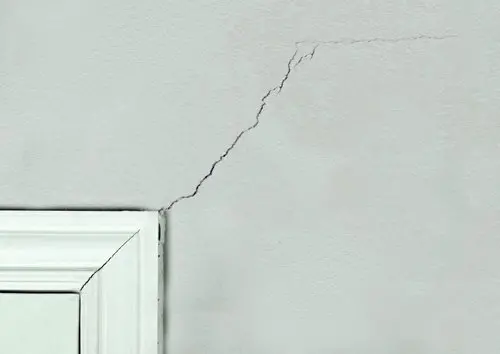
The condition of the ceiling plays a crucial role in pricing. A ceiling with extensive cracks, stains, or peeling paint may require additional preparation work, such as patching and priming. This will add to the overall cost.

3. Ceiling Material

The material of the ceiling can impact the cost. Painting a smooth, flat drywall ceiling is generally less labor-intensive than painting a textured or popcorn ceiling, which may require more attention to detail.

4. Ceiling Height and Design

Ceilings with intricate designs or architectural features, such as coffers or tray ceilings, may require more time and skill to paint. These factors can influence the pricing significantly.

5. Paint Type and Quality

The type and quality of paint chosen will affect the overall cost. High-quality paint brands often come at a higher price, but they can provide better coverage and durability, resulting in a longer-lasting finish.

6. Labor and Professional Expertise

If you’re a professional painter, your hourly rate or flat fee for labor will contribute to the overall cost. Homeowners tackling a DIY project should consider the value of their time and effort when determining the cost.

Calculating the Cost

Steps to Determine Your Rate

To determine how much you should charge to paint a ceiling, follow these steps:

1. Measure the Ceiling

Begin by measuring the size of the ceiling in square feet. Multiply the length by the width to calculate the square footage.

2. Assess the Ceiling Condition

Evaluate the ceiling’s condition and any necessary repairs or preparation work. Factor in the time and materials needed for these tasks.

3. Consider Labor

Determine your hourly rate or the amount you want to charge for your labor. Be sure to account for the time required to paint the ceiling, including setup and cleanup.

4. Estimate Paint Costs

Calculate the cost of paint based on the type and quantity needed. Don’t forget to include primer if necessary.

5. Account for Additional Costs

Consider any additional expenses, such as equipment rental, drop cloths, painter’s tape, and brushes or rollers.

6. Add a Profit Margin

To ensure you’re compensated fairly for your skills and expertise, add a profit margin to your calculations.

7. Provide a Detailed Quote

Present your potential clients with a detailed quote that outlines all the costs involved in painting their ceiling. This transparency builds trust and helps clients understand the value of your services.

Conclusion

Determining how much to charge to paint a ceiling involves a careful assessment of various factors, including ceiling size, condition, and materials, as well as labor and paint costs. By following a structured approach to pricing and providing clear, detailed quotes, you can offer fair and competitive pricing for your ceiling painting services. Remember that delivering high-quality work and excellent customer service will contribute to your reputation and success in the painting industry.

Can A Handyman Install A Ceiling Fan In Texas?

When the scorching Texas summer arrives, the idea of having a ceiling fan in your home becomes more than just a luxury; it’s a necessity. But as you look up at your ceiling, you might be wondering: Can a handyman install a ceiling fan in Texas? In this article, we’ll explore the regulations, skills, and considerations involved in hiring a handyman to install a ceiling fan in the Lone Star State.

can a handyman install a ceiling fan in texas

Understanding the Role of a Handyman

What Does a Handyman Do?

Before we delve into the specifics of ceiling fan installation, let’s clarify the role of a handyman. A handyman is a versatile professional who performs various tasks around the house, from minor repairs to simple installations. They are typically skilled in plumbing, electrical work, carpentry, and other trades, making them a go-to option for homeowners seeking assistance with small to medium-sized home improvement projects.

Ceiling Fan Installation in Texas: The Regulations

The Importance of Compliance

In Texas, like in many other states, electrical work is heavily regulated due to safety concerns. When it comes to ceiling fan installation, there are specific rules and regulations that must be followed to ensure safety. The Texas Department of Licensing and Regulation (TDLR) oversees electrical licensing in the state.

Can a Handyman Handle Electrical Work?

Understanding the Limitations

The key question remains: Can a handyman install a ceiling fan in Texas, considering the electrical work involved? The answer is somewhat nuanced. While handymen are generally skilled in various trades, including electrical work, they are not licensed electricians.

Hiring a Licensed Electrician

The Safer Route

To ensure your ceiling fan is installed safely and in compliance with Texas regulations, it is recommended to hire a licensed electrician. Licensed electricians have undergone extensive training and certification processes, making them experts in electrical work. They are well-versed in the specific codes and regulations of the state and can provide a safe and reliable installation.

Benefits of Hiring a Licensed Electrician

  1. Compliance with Regulations: Licensed electricians are well-informed about the latest electrical codes and regulations in Texas, ensuring that your ceiling fan installation meets all safety standards.
  2. Safety First: Electrical work can be hazardous when not done correctly. Hiring a licensed electrician reduces the risk of electrical accidents, fires, and other safety issues.
  3. Warranty and Guarantee: Many licensed electricians offer warranties or guarantees on their work. If any issues arise after installation, they will typically return to rectify the problem at no extra cost.
  4. Peace of Mind: Knowing that your ceiling fan is installed by a professional provides peace of mind, allowing you to enjoy its benefits without worry.

Considerations When Hiring a Handyman

When a Handyman Might Be Suitable

While hiring a licensed electrician is recommended for ceiling fan installation in Texas, there may be circumstances where a handyman can assist:

  1. Pre-Installation Preparation: A handyman can help with tasks like assembling the fan, preparing the ceiling mount, and ensuring all necessary components are ready for the electrician to install.
  2. After Installation Tasks: Once the electrician has installed the fan, a handyman can handle additional tasks such as painting, patching holes, or installing decorative elements.

Conclusion

In Texas, whether a handyman can install a ceiling fan depends on the scope of work and local regulations. To ensure safety and code compliance, it’s wise to hire a licensed electrician. While handymen can help with preparation and post-installation, electrical work should be handled by a professional. Prioritize safety and peace of mind by choosing a licensed electrician for your ceiling fan installation in Texas.

Can A Handyman Install A Ceiling Fan In Florida

Can a handyman install a ceiling fan in florida? Ceiling fans are a common fixture in Florida homes, providing relief from the sweltering heat and helping to reduce cooling costs. If you’re considering installing a ceiling fan in your Florida home, you might be wondering whether a handyman can handle the job. In this article, we’ll delve into the guidelines and considerations surrounding ceiling fan installation by a handyman in the Sunshine State.

Can A Handyman Install A Ceiling Fan In Florida

Understanding Florida’s Licensing Requirements

Florida has specific licensing requirements for individuals performing electrical work, including ceiling fan installation. The state takes electrical safety seriously, and for good reason. Faulty electrical work can lead to safety hazards, including fire risks and electrocution.

  1. Licensed Electricians: In Florida, only licensed electricians are authorized to perform electrical installations, repairs, or modifications. This includes ceiling fan installation, as it involves electrical wiring and connections.
  2. Limited Handyman Exemptions: Florida does provide exemptions for handymen when it comes to minor electrical tasks. A handyman can perform certain electrical work, such as replacing a ceiling fan that is already in place, as long as it doesn’t require new wiring or significant modifications.

Handyman Ceiling Fan Installation Limitations

While a handyman can replace an existing ceiling fan, there are limitations to what they can do without an electrical license:

  1. Existing Wiring: If the necessary wiring and electrical connections are already in place for the ceiling fan, a handyman can typically replace the fan without the need for additional electrical work.
  2. No New Wiring: Handymen cannot run new electrical wiring or make significant modifications to existing electrical systems. If the ceiling fan installation requires additional wiring or changes to the electrical setup, it must be performed by a licensed electrician.
  3. Compliance: Any ceiling fan installation, even a replacement, must comply with local building codes and safety regulations. It’s essential to ensure that the installation meets all legal requirements.

When to Hire a Licensed Electrician

In Florida, it’s advisable to hire a licensed electrician for ceiling fan installation in the following situations:

  1. New Installation: For new fan installations or rooms without existing wiring, hire a licensed electrician.
  2. Wiring Modifications: Licensed electricians should handle any changes to existing wiring, like relocating a ceiling fan or adding new switches.
  3. Electrical Panel Upgrades: For electrical panel changes or upgrades during installation, use a licensed electrician.
  4. Complex Installations: For fans with extras like remotes, lighting, or complex installation, hire a licensed pro to ensure correct setup.

Conclusion: Prioritizing Safety and Compliance

Handymen in Florida can assist with ceiling fan installation, but prioritize safety and state compliance. For new installations, wiring modifications, or complex setups, hiring a licensed electrician is the safest and most responsible choice. Enjoy a well-installed ceiling fan, ensuring home and family safety.

The Expert’s Touch: An Electrician Is Hired to Install a Ceiling Fan

Ceiling fans are a popular addition to homes for their ability to improve comfort and energy efficiency. While many homeowners are adept at DIY projects, installing a ceiling fan can be a bit more complex, especially when electrical work is involved. In this article, we’ll explore why an electrician is hired to install a ceiling fan is a smart decision and what to expect during the installation process.

an electrician is hired to install a ceiling fan

Why Hire an Electrician for Ceiling Fan Installation

Ceiling fan installation is not just about aesthetics; it involves electrical work that should be done by a trained professional for several reasons:

  1. Electrical Safety: Electricians are well-versed in electrical safety standards. They can ensure the wiring is done correctly, preventing fire hazards and electrocution risks.
  2. Code Compliance: Electrical work must comply with local building codes and regulations. Electricians are familiar with these requirements and can ensure your installation meets all standards.
  3. Proper Wiring: Ceiling fans often require new wiring or modifications to existing wiring. Electricians have the expertise to handle this safely and efficiently.
  4. Structural Considerations: Electricians can assess the ceiling’s structural integrity and make any necessary reinforcements to support the ceiling fan’s weight.

The Ceiling Fan Installation Process

When you hire an electrician to install a ceiling fan, you can expect the following steps:

  1. Assessment: The electrician will assess the room to determine the best location for the ceiling fan. Factors like room size, ceiling height, and existing electrical connections will be considered.
  2. Wiring: If the room doesn’t already have the necessary wiring, the electrician will run new electrical lines to the desired location. This step is critical to ensure the fan operates safely and efficiently.
  3. Mounting Bracket: The electrician will install a mounting bracket securely to the ceiling. This bracket provides the foundation for the fan and helps distribute its weight.
  4. Assembly: Your electrician will carefully assemble the ceiling fan, ensuring that all components are properly connected and balanced.
  5. Installation: With the fan assembled, it will be securely attached to the mounting bracket. This step is crucial for safety and stability.
  6. Wiring Connections: The electrician will connect the fan’s wiring to the electrical supply. They’ll also ensure that the wall switch and remote control (if applicable) are correctly integrated into the electrical system.
  7. Testing: After installation, the electrician will test the fan’s operation to confirm that it functions correctly and without any issues.
  8. Cleanup: The electrician will clean up the installation area, removing any debris and ensuring that your space is left tidy.

Benefits of Hiring an Electrician

Hiring an electrician for ceiling fan installation offers numerous benefits:

  1. Safety: An electrician ensures that the fan is safely installed, reducing the risk of electrical problems or accidents.
  2. Efficiency: Electricians have the knowledge and tools to complete the installation efficiently, saving you time and effort.
  3. Compliance: They ensure the installation adheres to local building codes and regulations, preventing potential legal issues.
  4. Warranty: Many ceiling fans come with warranties that require professional installation for them to remain valid. An electrician can provide the necessary documentation to support any warranty claims.

Conclusion: Professional Quality and Peace of Mind

An electrician is hired to install a ceiling fan not only ensures the safety of your home but also guarantees that the fan operates at its best. With the expertise and knowledge of a qualified electrician, you can enjoy the benefits of a ceiling fan with confidence, knowing that it’s been professionally installed to enhance your comfort and energy efficiency.

My Apartment Ceiling Caved In. What Are My Rights?

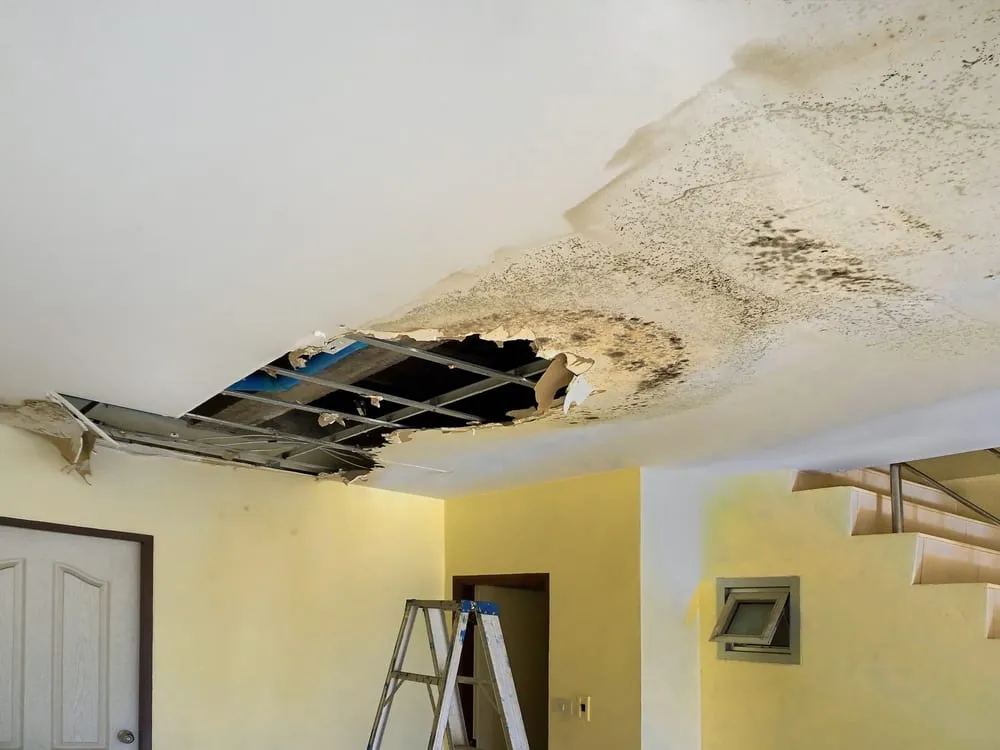
My apartment ceiling caved in what are my rights? Experiencing a ceiling collapse in your apartment can be a terrifying and inconvenient situation. Besides the immediate safety concerns, you may wonder about your rights and responsibilities in such a situation. This article aims to provide you with essential insights on what to do when your apartment ceiling caves in and how to protect your rights as a tenant.

My Apartment Ceiling Caved In What Are My Rights

The Immediate Steps to Take

When your apartment ceiling caves in, your first priorities are safety and documentation:

  1. Ensure Safety: Before doing anything else, make sure you and any other occupants are safe. Move away from the affected area and assess if there are any hazards, such as falling debris.
  2. Document the Damage: Take photos and videos of the collapsed ceiling and any damaged belongings. This documentation can serve as crucial evidence in the future.
  3. Contact Your Landlord or Property Manager: Report the incident to your landlord or property manager immediately. It’s essential to notify them as soon as possible, both for your safety and to initiate the process of repairs.

Understanding Landlord Responsibilities

Landlords have a legal obligation to maintain the habitability of rental properties. When your apartment ceiling caves in, it’s generally the landlord’s responsibility to address the situation. Here’s what you can expect from your landlord:

  1. Repairs: The landlord should arrange and pay for the necessary repairs to restore the safety and habitability of your apartment.
  2. Temporary Housing: If your apartment is uninhabitable due to the ceiling collapse, the landlord should provide you with alternative accommodation until repairs are complete. This might include putting you up in a hotel or providing a temporary rental unit.
  3. Compensation for Damages: Your landlord should cover any damages to your personal belongings, such as furniture, electronics, or other possessions that were affected by the ceiling collapse.
  4. Insurance Claims: Your landlord’s insurance policy should cover the cost of repairs and property damage. Ensure that the necessary claims are filed promptly.

Understanding Tenant Rights

As a tenant, you also have rights in this situation:

  1. Right to Habitability: You have the right to a habitable dwelling, meaning your apartment should be safe, sanitary, and free from defects that could endanger your health and safety.
  2. Right to Repairs: If your landlord fails to make necessary repairs promptly, you have the right to withhold rent or make repairs yourself and deduct the cost from your rent, depending on local laws.
  3. Right to Terminate Lease: In severe cases where the apartment is left uninhabitable for an extended period, you may have the right to terminate your lease without penalty.
  4. Right to Legal Action: If your landlord doesn’t fulfill their responsibilities, you have the right to take legal action to enforce your rights.

Filing an Insurance Claim

Your own renter’s insurance policy may cover personal property damages, so be sure to contact your insurance provider to initiate a claim. Even if your landlord’s policy covers damages, your policy can help expedite the process.

Conclusion: Protecting Your Rights

Experiencing a ceiling collapse in your apartment can be a stressful event, but understanding your rights and responsibilities is crucial. In such situations, swift communication with your landlord, documenting the damage, and ensuring the necessary repairs and compensation are provided are vital steps to protect your rights as a tenant. If you encounter resistance from your landlord, consider seeking legal advice or contacting local tenant advocacy organizations to help resolve the issue and ensure you can live in a safe and habitable environment.

How Much Does It Cost To Paint A Popcorn Ceiling?

Popcorn ceilings, also known as acoustic ceilings or textured ceilings, were once a popular choice in home construction due to their noise-reducing and light-reflecting properties. However, they have fallen out of favor over the years, and many homeowners are now looking to update or refresh their popcorn ceilings. If you’re considering painting your popcorn ceiling, you might be wondering, “How much does it cost to paint a popcorn ceiling?” In this article, we’ll explore the various cost factors and provide you with insights into this home improvement project.

How Much Does It Cost To Paint A Popcorn Ceiling
Young Painter In White Uniform Painting With Paint Roller

The Appeal of Painting a Popcorn Ceiling

Popcorn ceilings became less popular as they were associated with an outdated look and, in some cases, concerns about asbestos. However, painting a popcorn ceiling can offer several benefits:

  1. Modernization: Painting can give your popcorn ceiling a more contemporary and refreshed appearance.
  2. Improved Maintenance: Painted surfaces are easier to clean and maintain, making your ceiling more durable.
  3. Asbestos Encapsulation: If your popcorn ceiling contains asbestos, painting it can encapsulate the fibers, preventing them from becoming airborne.

Factors Influencing the Cost of Painting a Popcorn Ceiling

The cost of painting a popcorn ceiling varies based on several factors:

  1. Ceiling Size: The size of the ceiling, measured in square feet, directly affects the amount of paint and labor required. Larger ceilings naturally cost more to paint.
  2. Ceiling Condition: The condition of the popcorn texture is a significant factor. If the ceiling is in good condition, it might require minimal surface preparation. Ceilings with stains, cracks, or peeling texture may need more extensive prep work, affecting the cost.
  3. Paint Type: The type of paint you choose, including quality and specific properties, can impact the cost. Paint with stain-blocking and mildew-resistant features may be more expensive.
  4. Labor Costs: Labor costs depend on your location and the complexity of the project. Hiring a professional painter can be more costly but ensures a high-quality finish.
  5. Equipment and Supplies: Budget for additional costs such as paint rollers, brushes, drop cloths, and other tools and supplies.

Estimating the Cost to Paint a Popcorn Ceiling

On average, the cost to paint a popcorn ceiling can range from $1.00 to $3.00 per square foot, with the majority of expenses attributed to paint and labor. Here’s a general breakdown of estimated costs:

  • Material: A gallon of ceiling paint typically costs $20 to $50 and covers around 350 to 400 square feet.
  • Labor: Professional labor costs can range from $1.00 to $2.50 per square foot for a painter’s service, depending on your location and the complexity of the project.
  • Equipment and Supplies: Budget an additional $20 to $50 for brushes, rollers, drop cloths, and other necessary tools.

For a smaller room with a standard-sized popcorn ceiling, the cost may be closer to the lower end of the range. Larger rooms or those with more extensive surface preparation may fall toward the higher end.

Conclusion: A Fresh and Updated Look

How much does it cost to paint a popcorn ceiling? Painting a popcorn ceiling can be an effective way to modernize your space and improve its overall appeal. By considering the size, condition, paint type, and labor costs for your ceiling, you can better estimate the project’s expenses. Whether you decide to hire a professional or tackle the task yourself, a freshly painted popcorn ceiling can provide a fresh and updated look for your home.

How Much Does It Cost To Remove Asbestos Popcorn Ceiling?

Popcorn ceilings, once a popular choice in home design, have lost their appeal due to their dated appearance and potential health risks. If you have an older home with a popcorn ceiling that might contain asbestos, you might be wondering, “How much does it cost to remove asbestos popcorn ceiling?” In this article, we’ll explore the factors that influence the cost and provide you with insights into this essential home improvement project.

how much does it cost to remove asbestos popcorn ceiling

The Dangers of Asbestos in Popcorn Ceilings

Asbestos was commonly used in popcorn ceiling texture for its fire-resistant properties and soundproofing capabilities. However, asbestos is a known carcinogen, and inhaling asbestos fibers can lead to serious health issues, including lung cancer and mesothelioma. As a result, many homeowners are opting to remove popcorn ceilings that may contain asbestos, especially when renovations or repairs are planned.

Factors Affecting Asbestos Popcorn Ceiling Removal Costs

The cost of removing an asbestos popcorn ceiling can vary significantly depending on various factors. Here’s a breakdown of these cost considerations:

  1. Ceiling Size: The size of the ceiling, measured in square footage, directly affects the amount of material and labor required. Larger ceilings will naturally cost more to remove.
  2. Containment: Proper containment is essential when removing asbestos to prevent the spread of asbestos fibers. The level of containment, including sealing off the area and using specialized equipment, can affect the cost.
  3. Abatement Method: There are two primary methods for asbestos popcorn ceiling removal: wet removal and dry removal. Wet removal involves misting the ceiling to prevent asbestos fibers from becoming airborne, while dry removal can be faster but riskier due to the potential for fiber release.
  4. Testing and Inspection: Before removal, it’s necessary to test and confirm the presence of asbestos. The time and cost of testing and inspection can add to the overall expense.
  5. Repairs and Refinishing: After removal, the ceiling may require repairs and refinishing, further extending the project’s cost.

Estimating Asbestos Popcorn Ceiling Removal Costs

On average, the cost to remove an asbestos popcorn ceiling can range from $3 to $7 per square foot, with the majority of the expenses attributed to material and labor. Here’s a general breakdown of estimated costs:

  • Material: This includes the cost of asbestos removal supplies, such as containment materials and disposal bags, and can range from $1 to $2 per square foot.
  • Labor: Professional labor costs can range from $2 to $5 per square foot, depending on your location and the complexity of the project. Labor includes the removal, proper disposal, and cleanup.
  • Equipment and Supplies: Budget an additional $200 to $500 for necessary tools and supplies, including safety gear and asbestos testing.

For a smaller room with a standard-sized ceiling, the cost may be closer to the lower end of the range. Larger rooms or those with extensive repairs or refinishing needs may fall toward the higher end.

Conclusion: A Wise Investment in Health and Home Value

Removing an asbestos popcorn ceiling is a critical project that not only ensures your family’s safety but also enhances the overall aesthetics and value of your home. While the cost can vary, it’s essential to prioritize safety and compliance with asbestos regulations during the removal process. Hiring professionals experienced in asbestos abatement is strongly recommended to ensure the safe and efficient removal of your popcorn ceiling, protecting your family’s health and adding value to your home.

What Is The Red Wire For In A Ceiling Fan?

Ceiling fans are a common fixture in many homes, providing comfort and ventilation. However, when it comes to installing or replacing one, the wiring can be a bit puzzling. Among the wires you might encounter, the red wire often raises questions. What is the red wire for in a ceiling fan? In this article, we’ll delve into the role of the red wire, its importance, and how to correctly handle it during ceiling fan installation.

what is the red wire for in a ceiling fan

Understanding the Ceiling Fan Wiring

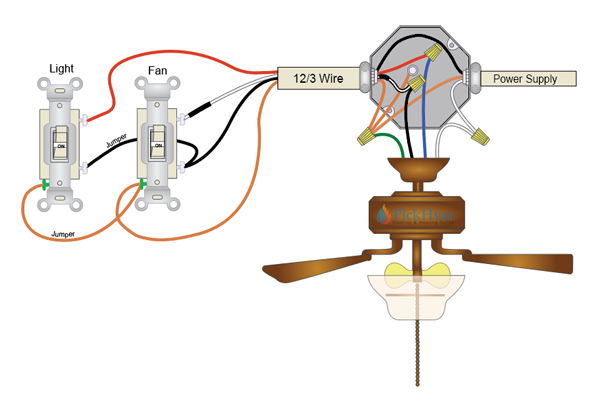
Before we tackle the red wire, let’s get familiar with the typical wiring in a ceiling fan. Most ceiling fans come with three main wires: black, white, and green or bare copper.

  • Black Wire: The black wire is the live or hot wire, carrying electrical current from the switch to power the fan.
  • White Wire: The white wire is the neutral wire, providing a return path for the current to complete the circuit.
  • Green or Bare Copper Wire: This wire is the ground wire, which serves as a safety feature, directing any electrical faults safely to the ground.

Now, where does the red wire fit into this setup?

The Role of the Red Wire

The red wire in a ceiling fan’s wiring is non-standard and can perform various functions depending on your fan’s design and the type of switch in use. Its typical roles include:

  1. Light Kit Power: In some ceiling fans, the red wire is used to power the light kit. If your fan has a light fixture, this wire may connect to the wiring of the light assembly. This setup allows you to control the fan and light separately with two switches, one for the fan motor and another for the lights.
  2. Multiple Fan Speeds: Some ceiling fans offer multiple fan speed settings. In such cases, the red wire can be used to control the fan’s speed. By connecting the red wire to a specific terminal on the fan’s motor, you can vary the speed by adjusting the switch connected to it.
  3. Alternative Functions: Depending on the manufacturer and model, the red wire might serve other functions or be capped off if not needed. Always consult the fan’s manual or instructions for specific guidance.

Dealing with the Red Wire During Installation

When installing or replacing a ceiling fan, it’s crucial to handle the red wire correctly. Here are some general steps to follow:

  1. Turn Off Power: Always turn off the power at the circuit breaker or fuse box before working on electrical wiring. This ensures your safety during installation.
  2. Identify the Function: Determine the function of the red wire in your ceiling fan. Consult the manufacturer’s instructions or manual for guidance.
  3. Proper Connections: Make sure to connect the red wire to the appropriate terminal on the fan, whether it’s for the light kit or fan speed control.
  4. Secure Wiring: Ensure that all wire connections are secure and properly insulated to prevent any electrical issues.
  5. Test the Setup: After installation, turn the power back on and test the fan and light, if applicable, to confirm that they are functioning correctly.

Conclusion: Red Wire, a Valuable Component

Understanding the red wire in a ceiling fan’s wiring can make the installation process smoother and more efficient. While its function can vary, it often plays a crucial role in providing options for fan speed control or powering the light kit. By following proper installation procedures and consulting the manufacturer’s instructions, you can enjoy the full functionality of your ceiling fan and the comfort it brings to your home.

How Long Does It Take To Remove Asbestos Popcorn Ceiling?

Asbestos popcorn ceilings, once a popular choice in home design, are now recognized for their potential health hazards. If you have one in your home and are considering removal, you may wonder how long it takes to remove an asbestos popcorn ceiling. In this article, we’ll explore the factors influencing the timeline and provide you with insights into this essential home improvement project.

how long does it take to remove asbestos popcorn ceiling

The Concerns Surrounding Asbestos Popcorn Ceilings

Before we dive into the time frame for asbestos popcorn ceiling removal, it’s essential to understand the health concerns associated with these ceiling types. Asbestos was commonly used in popcorn ceiling texture because of its fire-resistant properties and soundproofing capabilities. However, asbestos is a known carcinogen, and inhaling asbestos fibers can lead to serious health issues, including lung cancer and mesothelioma.

Due to these health risks, many homeowners are opting to remove asbestos popcorn ceilings. When the ceiling remains intact and undisturbed, it may not pose an immediate threat. But if renovations or repairs are planned, removal becomes a priority.

Factors Affecting Asbestos Popcorn Ceiling Removal Time

The timeline for removing an asbestos popcorn ceiling depends on several factors:

  1. Ceiling Size: The size of the ceiling, measured in square footage, directly impacts the time required for removal. Larger ceilings naturally take longer to complete.
  2. Containment: Asbestos removal requires strict containment to prevent the spread of asbestos fibers. The level of containment, including sealing off the area and using specialized equipment, can affect the timeline.
  3. Abatement Method: There are two primary methods for asbestos popcorn ceiling removal: wet removal and dry removal. Wet removal involves misting the ceiling to keep asbestos fibers from becoming airborne, while dry removal can be faster but is riskier due to the potential for fiber release.
  4. Testing and Inspection: Before removal, it’s necessary to test and confirm the presence of asbestos. The time it takes for testing and inspection can add to the overall duration.
  5. Repairs and Refinishing: After removal, the ceiling may require repairs and refinishing. These additional tasks can extend the project timeline.

Estimating the Time for Asbestos Popcorn Ceiling Removal

The time to remove an asbestos popcorn ceiling can vary widely based on the factors mentioned above. On average, the process can take anywhere from several days to a few weeks. Here’s a general breakdown of the time frame:

  1. Testing and Inspection: This stage can take a few days to confirm the presence of asbestos and plan the removal process.
  2. Containment Setup: Setting up containment measures usually takes a day or two to ensure the area is sealed off properly.
  3. Removal: The actual removal process can vary but generally takes several days to a week. Wet removal methods tend to be more time-consuming.
  4. Cleanup: Once the asbestos is removed, thorough cleaning and decontamination are essential and can take a day or two.
  5. Repairs and Refinishing: Depending on the extent of damage or the desired finish, this stage can take an additional several days to a week.
  6. Final Testing: Testing and inspection may be repeated to ensure the space is free of asbestos, which adds a few more days.

Conclusion: A Careful and Thorough Process

Removing an asbestos popcorn ceiling is a critical project that requires a careful and thorough approach. While the timeline can vary, it’s essential to prioritize safety and compliance with asbestos regulations during the removal process. Hiring professionals experienced in asbestos abatement is strongly recommended to ensure the safe and efficient removal of your popcorn ceiling, protecting the health of your household and adding value to your home.

How Much Does It Cost To Paint A Kitchen Ceiling?

Your kitchen is the heart of your home, and a fresh coat of paint on the ceiling can breathe new life into this essential space. But how much does it cost to paint a kitchen ceiling? In this article, we’ll explore the various factors that influence the cost and provide you with an estimate for this common home improvement project.

how much does it cost to paint a kitchen ceiling

Why Paint Your Kitchen Ceiling

Before we delve into the cost considerations, let’s understand why painting your kitchen ceiling is a worthwhile investment:

  1. Enhanced Aesthetics: A freshly painted ceiling can make your kitchen look brighter and more inviting. It’s an excellent way to update the overall appearance of your kitchen.
  2. Improved Hygiene: Kitchens can accumulate grease and grime over time. Painting the ceiling helps maintain a clean and hygienic environment.
  3. Prevent Stains: Kitchens are prone to stains and water damage, especially in areas near sinks and stovetops. A new coat of paint can hide these imperfections.
  4. Value Addition: A well-maintained and aesthetically pleasing kitchen can add value to your home, making it more appealing to potential buyers.

Factors Affecting Kitchen Ceiling Painting Costs

Several factors can influence the cost of painting a kitchen ceiling. Here’s a breakdown of these cost considerations:

  1. Ceiling Size: The size of your kitchen ceiling, measured in square footage, directly affects the amount of paint and labor required. Larger ceilings naturally cost more to paint.
  2. Ceiling Condition: Ceilings in poor condition may require more prep work, including patching cracks, addressing water damage, or removing old paint. This can increase the overall cost.
  3. Paint Type: The type of paint you choose, such as standard latex paint or specialty kitchen paint with moisture and stain resistance, affects costs. Specialized paints may be more expensive.
  4. Labor Costs: Labor costs depend on your location and the complexity of the project. Hiring a professional painter can be more costly but ensures a high-quality finish.

Estimating Kitchen Ceiling Painting Costs

On average, the cost to paint a kitchen ceiling can range from $100 to $300, with most costs attributed to paint and labor. Here’s a general breakdown of estimated costs:

  • Material: A gallon of quality kitchen paint typically costs $30 to $50 and covers approximately 350 square feet.
  • Labor: Professional labor costs can range from $50 to $150 for a painter’s service per hour, depending on your location and the complexity of the project.
  • Equipment and Supplies: Budget an additional $20 to $50 for brushes, rollers, drop cloths, and other necessary tools.

For a smaller kitchen with a standard-sized ceiling, the cost may be closer to the lower end of the range. Larger kitchens or those with more extensive repairs may fall toward the higher end.

Conclusion: A Fresh and Inviting Kitchen Space

Painting your kitchen ceiling is an effective and budget-friendly way to enhance your kitchen’s appearance and maintain a clean, inviting space. By considering the size, condition, and paint type for your ceiling, you can better estimate the project’s expenses. Whether you decide to hire a professional or take on the task yourself, a freshly painted kitchen ceiling provides a fresh and appealing environment for your cooking and dining activities.

How Much Does It Cost To Skim Coat A Ceiling?

A fresh coat of paint can transform the look of a room, but sometimes, the condition of the ceiling may require more attention. If your ceiling has imperfections, cracks, or an uneven surface, skim coating can provide the smooth, polished look you desire. But how much does it cost to skim coat a ceiling? In this article, we’ll explore the factors influencing the cost and help you estimate the expenses for this home improvement project.

how much does it cost to skim coat a ceiling

The Significance of Skim Coating a Ceiling

Skim coating is a technique used to create a smooth, uniform surface on a ceiling. It involves applying a thin layer of joint compound or plaster to the entire ceiling to hide imperfections, seams, and create a fresh canvas for paint or other finishes. Skim coating is essential for the following reasons:

  • Enhanced Aesthetics: A smooth ceiling looks more attractive and contributes to an overall polished appearance in a room.
  • Improved Paint Adhesion: Skim coating provides a suitable surface for paint, ensuring it adheres evenly and prevents splotches or streaks.
  • Hiding Imperfections: If your ceiling has visible cracks, uneven textures, or damage from previous repairs, skim coating can conceal these flaws.
  • Added Value: Skim coating can increase the value of your home and make it more appealing to potential buyers.

Factors Affecting Skim Coating Costs

Several factors can influence the cost of skim coating a ceiling. Here’s a breakdown of these cost considerations:

  1. Ceiling Size: The size of the ceiling, measured in square footage, significantly impacts the cost. Larger ceilings require more material and labor, leading to higher expenses.
  2. Ceiling Condition: Ceilings in poor condition may require more prep work, which can include patching cracks, addressing water damage, or repairing previous mistakes. This can increase the overall cost.
  3. Skim Coating Material: The type of skim coating material you choose affects costs. Joint compound is a common choice, but some projects may require specialized products, like plaster, which can be more expensive.
  4. Labor Costs: Labor costs depend on your location and the complexity of the project. Hiring a professional ensures a high-quality finish but may be more costly.

Estimating Skim Coating Ceiling Costs

On average, the cost to skim coat a ceiling can range from $1 to $2 per square foot, with the majority of costs attributed to material and labor. Here’s a general breakdown of estimated costs:

  • Material: Joint compound or plaster typically costs $20 to $40 for a 5-gallon bucket, which covers about 500 square feet.
  • Labor: Professional labor costs can range from $1 to $2 per square foot, depending on your location and the extent of the work.
  • Equipment and Supplies: Budget an additional $20 to $50 for brushes, rollers, drop cloths, and other necessary tools.

For a small room with a standard-sized ceiling, the cost may be closer to the lower end of the range. Larger rooms or those with more extensive repairs may fall toward the higher end.

Conclusion: A Smooth and Polished Finish

Skim coating a ceiling is a valuable home improvement project that can enhance the aesthetics and value of your home. By considering the size, condition, and material for your ceiling, you can better estimate the project’s expenses. Whether you decide to hire a professional or take on the task yourself, a freshly skim-coated ceiling provides a smooth and polished finish, creating an attractive and pristine space in your home.

How Much Does It Cost To Paint A Basement Ceiling?

The basement is often an underutilized space in many homes. However, with some thoughtful renovations, it can become a valuable addition to your living area. One way to transform the look and feel of your basement is by painting the ceiling. But, how much does it cost to paint a basement ceiling? In this article, we’ll provide you with insights into the factors that influence the cost and help you estimate the expenses for this home improvement project.

how much does it cost to paint a basement ceiling

The Importance of Painting a Basement Ceiling

Before we dive into the cost considerations, it’s essential to understand the significance of painting a basement ceiling. Basements are notorious for having low ceilings and exposed pipes, ducts, and other utilities. Painting the ceiling not only enhances the aesthetics but also offers practical benefits:

  • Brightening the Space: A fresh coat of paint can make your basement look brighter and more inviting. Light colors can help reflect the limited natural light in the space.
  • Hiding Imperfections: Painting can cover up unsightly marks, stains, and imperfections on the ceiling, creating a smoother and more finished appearance.
  • Protecting Surfaces: Painting can help protect ceiling materials from moisture, reducing the risk of mold or mildew growth in damp basement environments.
  • Adding Value: A well-painted basement ceiling can add value to your home, making it more appealing to potential buyers.

Factors Affecting Basement Ceiling Painting Costs

Several factors can influence the cost of painting a basement ceiling. Here’s a breakdown of these cost considerations:

  1. Ceiling Size: The size of your basement ceiling, measured in square footage, directly affects the amount of paint and labor required. Larger ceilings will naturally cost more to paint.
  2. Ceiling Height: The height of your basement ceiling plays a role in the cost. Higher ceilings may require additional equipment, such as ladders or scaffolding, which can add to labor costs.
  3. Ceiling Condition: If the ceiling requires repairs or significant preparation work, such as removing old paint or addressing water damage, this will increase the overall cost.
  4. Paint Type: The type of paint you choose, such as standard latex paint or a specialty basement paint, can impact costs. Some basement paints are designed to resist moisture and mold, but they may be more expensive.
  5. Labor Costs: Labor costs vary depending on your location and the complexity of the project. Hiring a professional painter can be more costly but ensures a high-quality finish.

Estimating Basement Ceiling Painting Costs

On average, the cost to paint a basement ceiling can range from $300 to $600, with most costs attributed to paint and labor. Here’s a general breakdown of estimated costs:

  • Paint: $30 to $50 per gallon for a quality paint suitable for basement ceilings.
  • Primer: $20 to $30 per gallon if needed for preparation.
  • Labor: $200 to $400 or more for a professional painter’s service, depending on the scope of work.
  • Equipment and Supplies: $20 to $50 for brushes, rollers, drop cloths, and other painting supplies.

For a smaller basement with a standard ceiling, the cost may be closer to the lower end of the range. Larger basements, those requiring extensive repairs, or specialty paints may fall toward the higher end.

Conclusion: Enhancing Your Basement Space

Painting your basement ceiling is a cost-effective and transformative way to enhance your basement space. By considering the size, height, condition, and paint type for your ceiling, you can better estimate the project’s expenses. Whether you decide to hire a professional or take on the task yourself, a freshly painted basement ceiling can make a significant difference in the overall appearance and functionality of your basement, turning it into a more inviting and valuable part of your home.

How Much Does It Cost To Paint A Bathroom Ceiling?

When it comes to bathroom renovations, painting is a cost-effective and transformative way to freshen up the space. Painting the bathroom ceiling, in particular, can breathe new life into the room. However, you may wonder how much it costs to paint a bathroom ceiling. In this article, we’ll break down the factors that influence the cost and provide you with an estimate for this common home improvement project.

how much does it cost to paint a bathroom ceiling

Understanding the Bathroom Ceiling Painting Process

Before we delve into the cost considerations, let’s briefly outline the steps involved in painting a bathroom ceiling. Painting a ceiling, especially in a bathroom, requires careful preparation and attention to detail:

  1. Preparation: Clear the bathroom of any obstacles, including shower curtains, fixtures, and personal items. Cover the floor and any remaining fixtures with drop cloths or plastic sheets to protect them from paint splatter.
  2. Cleaning: Ensure the ceiling is clean and free from dust, dirt, and any mold or mildew. If necessary, clean the surface and allow it to dry completely.
  3. Priming: Apply a coat of primer to the ceiling. Primer helps the paint adhere better and provides a uniform surface for the paint to cover.
  4. Painting: Once the primer is dry, apply the paint. Using a roller or paintbrush, paint the ceiling with your chosen paint color.
  5. Drying: Allow the paint to dry completely before removing any protective coverings and reassembling the bathroom.

Factors Affecting Bathroom Ceiling Painting Costs

Several factors can influence the cost of painting a bathroom ceiling. Let’s explore these considerations:

  1. Ceiling Size: The size of your bathroom ceiling is a primary cost factor. Larger ceilings require more paint and time, which increases the cost.
  2. Ceiling Height: Higher ceilings may require special equipment, such as ladders or scaffolding, which can add to the labor costs.
  3. Paint Type: The type of paint you choose, such as standard latex paint or a special bathroom paint with mold and mildew resistance, affects the cost.
  4. Repairs: If your bathroom ceiling has damage, such as cracks or water stains, repairs are necessary before painting. Repair costs are an additional expense.
  5. Labor Costs: Labor costs depend on the complexity of the project and the rates charged by professional painters. DIY painting may save on labor costs.

Estimating Bathroom Ceiling Painting Costs

On average, the cost to paint a bathroom ceiling can range from $100 to $300, with the majority of costs going towards paint and labor. Here’s a general breakdown of estimated costs:

  • Paint: $30 to $50 for a gallon of quality bathroom paint.
  • Primer: $20 to $30 for a gallon.
  • Labor: $50 to $150 for a professional painter per hour, depending on your location and the complexity of the job.
  • Repairs: Varies based on the extent of damage but can add $50 to $200 to the cost.
  • Equipment and Supplies: $20 to $50 for brushes, rollers, drop cloths, and other painting supplies.

For a small bathroom with a standard ceiling, the cost may be closer to the lower end of the range, while larger bathrooms or those with extensive repairs may fall toward the higher end.

Conclusion: Refreshing Your Bathroom on a Budget

Paint a bathroom ceiling is a simple and cost-effective way to give your bathroom a fresh look and feel. While the cost of this project can vary, estimating the expenses based on the size of your ceiling, required repairs, and the type of paint you choose will help you budget accordingly. Whether you decide to hire a professional or tackle the project yourself, a freshly painted bathroom ceiling can make a significant difference in the overall aesthetics of your bathroom space.

How Tall Do Ceilings Need To Be For Golf Simulator?

How Tall Do Ceilings Need To Be For Golf Simulator? Golf simulators have revolutionized the way golf enthusiasts practice and enjoy their favorite sport. These advanced systems offer a realistic golfing experience, allowing players to tee off from the comfort of their own homes or indoor facilities. One critical factor to consider when setting up a golf simulator is the height of the ceilings. In this article, we’ll explore how tall your ceilings need to be for a golf simulator and why it matters.

how tall do ceilings need to be for golf simulator

The Importance of Ceiling Height for Golf Simulators

Before we dive into the specific ceiling height requirements, let’s understand why ceiling height is a crucial consideration for your golf simulator setup.

1. Swing Space:

One of the primary reasons for adequate ceiling height is providing enough clearance for your golf swing. When you take a swing with a driver or any other golf club, your arms and club extend both backward and upward. If the ceiling is too low, you risk hitting the ceiling, which not only disrupts your game but can also damage the equipment and the ceiling itself.

2. Realism and Comfort:

To enjoy a realistic golfing experience, it’s essential to have enough overhead space. A taller ceiling allows for a more authentic feel, especially when using projection screens or high-quality monitors. Additionally, it provides a comfortable and safe environment for your swing.

3. Simulated Ball Flight:

Many golf simulators are designed to calculate ball flight and simulate the trajectory of your shots. To do this accurately, the system needs sufficient space for the ball to travel and gather data. Inadequate ceiling height can limit the system’s ability to provide accurate feedback on your shots.

Ceiling Height Requirements for Golf Simulators

The ideal ceiling height for a golf simulator can vary depending on several factors, including your height, the length of your golf clubs, and your swing characteristics. However, as a general guideline, a minimum ceiling height of 9 to 10 feet (2.7 to 3 meters) is recommended. This height should accommodate most golfers comfortably and allow for a full swing with standard-sized clubs.

For taller individuals or those who want more room for their swing, a ceiling height of 12 feet (3.7 meters) or more is preferable. This height provides extra clearance, ensuring that even the tallest golfers can swing freely without any concerns about hitting the ceiling.

Measuring Your Ceiling Height

Before purchasing or setting up a golf simulator, it’s essential to measure your ceiling height accurately. Here’s how you can do it:

  1. Gather your equipment: You’ll need a tape measure, a step ladder, and a friend or family member to assist you.
  2. Find a suitable location: Choose the spot where you plan to set up your golf simulator.
  3. Position the tape measure: Place the ladder in the selected location and extend the tape measure vertically from the floor to the ceiling. Ensure it’s level.
  4. Measure the height: Have your friend or family member read the measurement at the highest point where the ceiling meets the wall.
  5. Record the measurement: Note down the height in feet or meters.

Conclusion: Creating the Ideal Golf Simulator Space

To fully enjoy the benefits of a golf simulator, including improving your game and practicing from the comfort of your own space, it’s crucial to have the right ceiling height. A minimum height of 9 to 10 feet is typically recommended, but taller ceilings, such as 12 feet or more, can provide an even better experience. Measure your ceiling height accurately before investing in a golf simulator to ensure that you have the space needed for a realistic and enjoyable golfing experience at home.