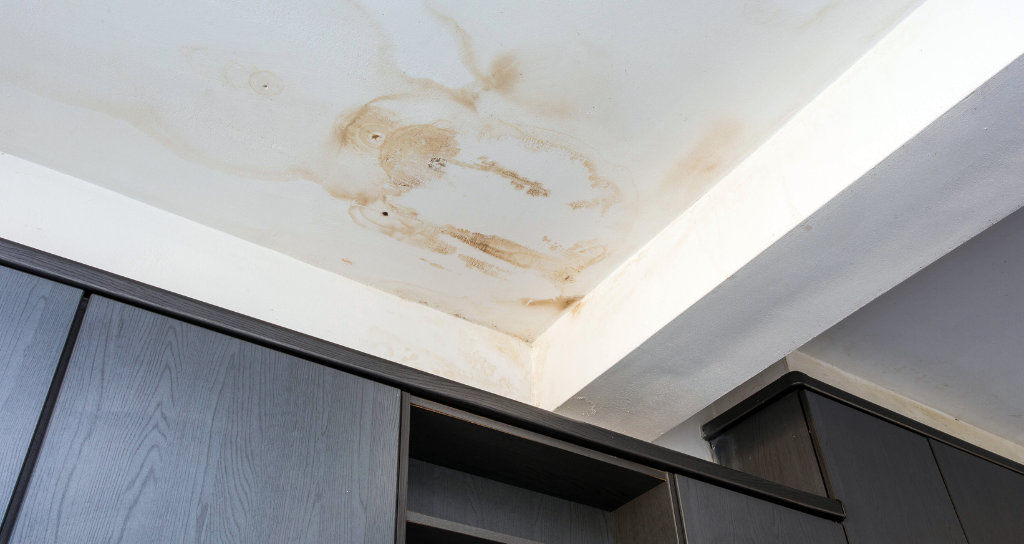
Wet Spot on Ceiling After Heavy Rain: Causes and Solutions

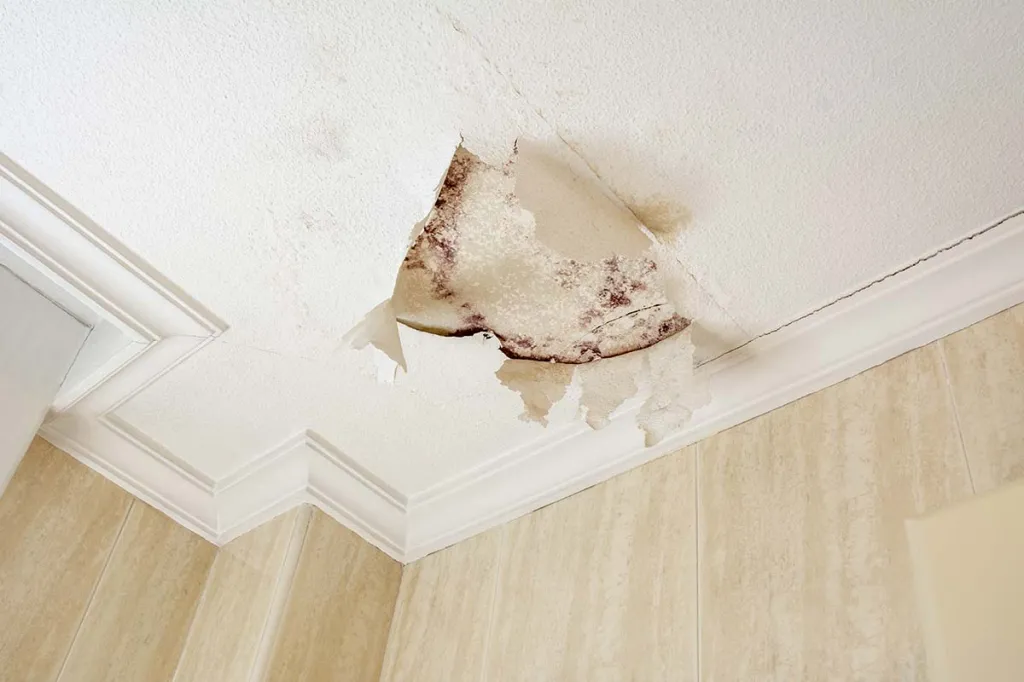
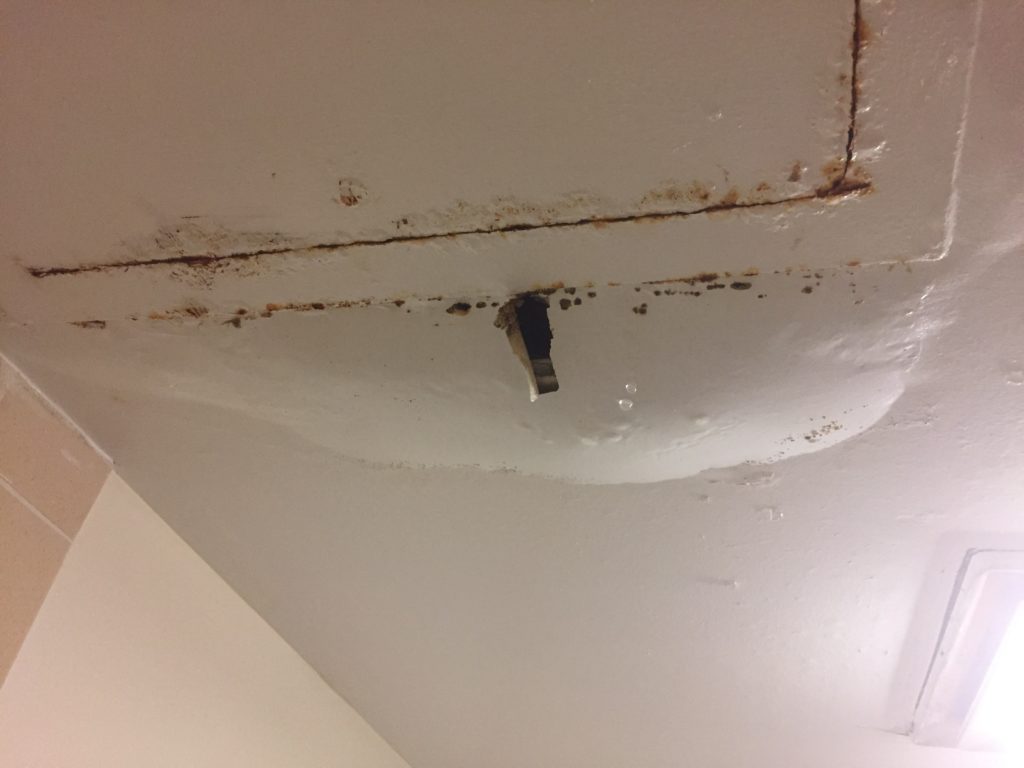
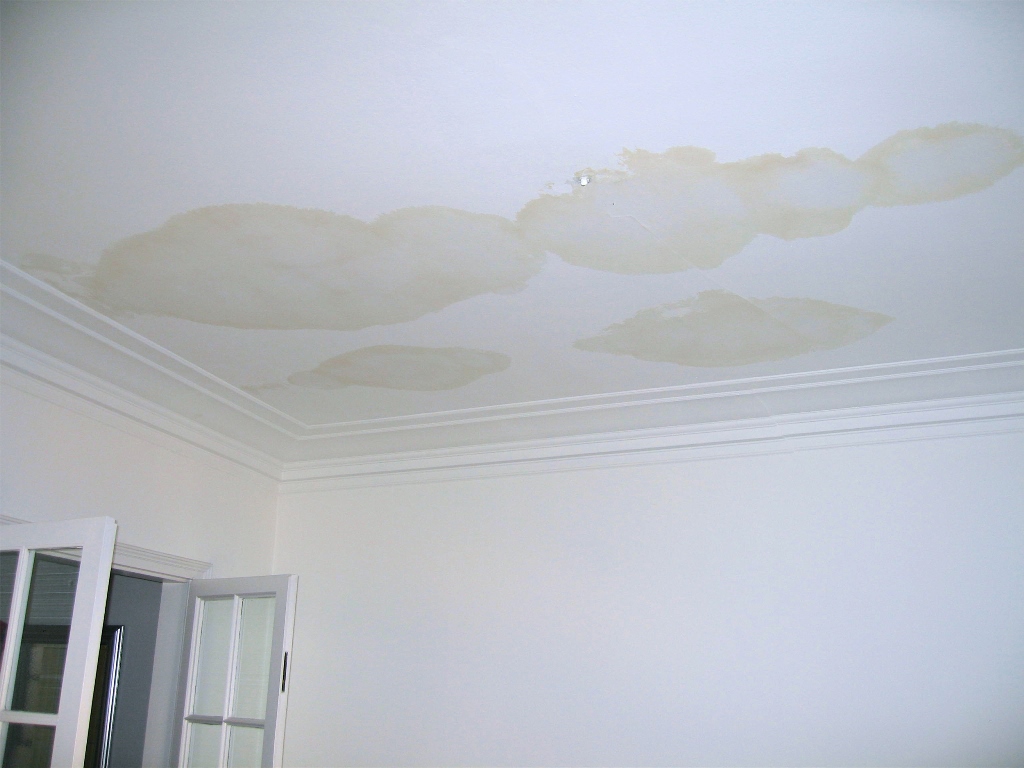
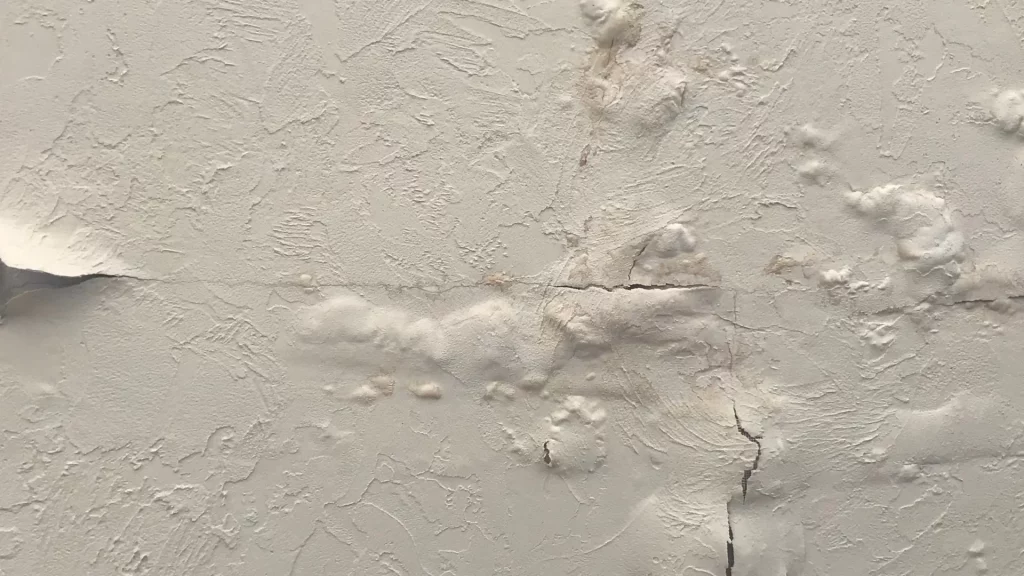
If you’ve noticed a wet spot on your ceiling after heavy rain, it’s essential to address the issue as soon as possible. Water spots can indicate several potential problems, from minor leaks to serious structural issues. Ignoring these warning signs can lead to increased damage, costly repairs, and health risks from mold or mildew growth. In this article, we’ll explore the possible causes of a wet spot on the ceiling after heavy rain, methods to prevent future leaks, and steps for handling water damage before it becomes a more significant problem.

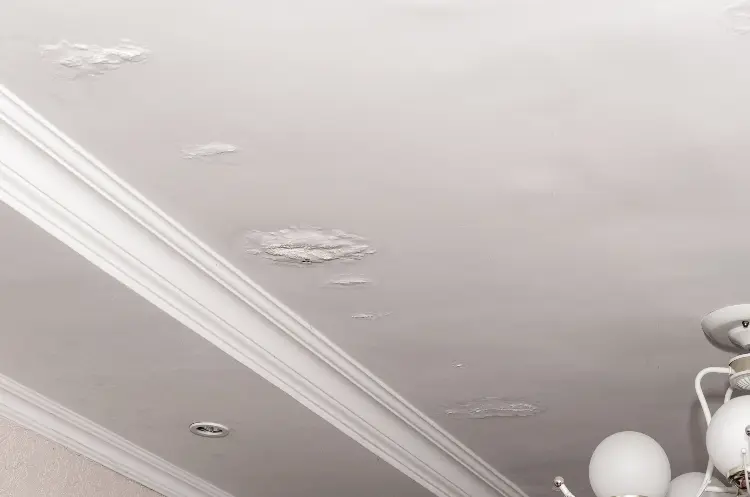
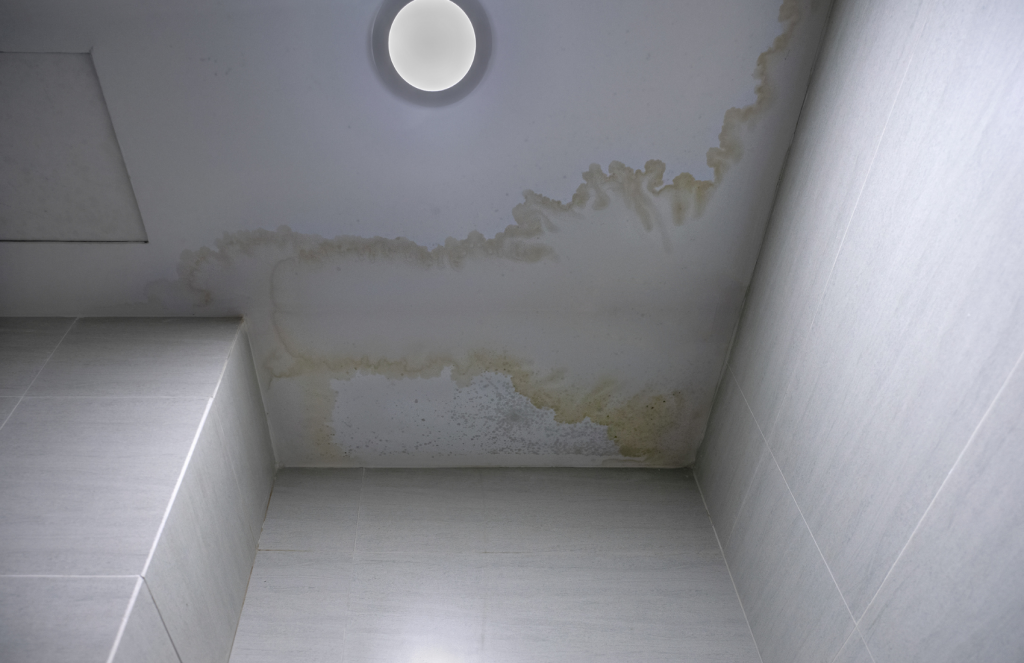
Wet Spot On Ceiling After Heavy Rain

Common Causes of a Wet Spot on Ceiling After Heavy Rain

A wet spot on the ceiling can stem from several sources. Understanding these causes can help you determine the necessary repairs and prevent future issues.

1. Roof Leaks

Roof leaks are one of the most common reasons for water spots on ceilings. Heavy rain can cause water to seep through any weak spots, holes, or gaps in the roof. Even a small crack or misaligned shingle can allow water to penetrate, resulting in a wet spot inside your home. Common causes of roof leaks include:

  • Damaged or missing shingles: High winds or heavy rain can loosen or break shingles, allowing water to seep through.
  • Worn flashing: Flashing is used around vents, chimneys, and other roof openings to create a watertight seal. Over time, flashing can corrode or wear out, leading to leaks.
  • Clogged gutters: When gutters are clogged with leaves or debris, water may not flow away from the roof correctly, potentially causing it to back up under the shingles.
  • Improper installation: Poorly installed roofing materials or flashing can create gaps where water can enter, especially during heavy rains.

Read too: Discovering the Charm of Nautical Outdoor Ceiling Fans for Your Coastal Retreat: Sail into Style

2. Plumbing Leaks

Sometimes, the issue isn’t the roof itself but rather plumbing pipes running through the attic or above the ceiling. After a period of heavy rain, increased humidity may lead to pipe sweating, causing water to drip onto the ceiling below. Alternatively, if there is a minor leak in a pipe joint, it may only show up as a wet spot on the ceiling under high moisture conditions.

3. Condensation Issues

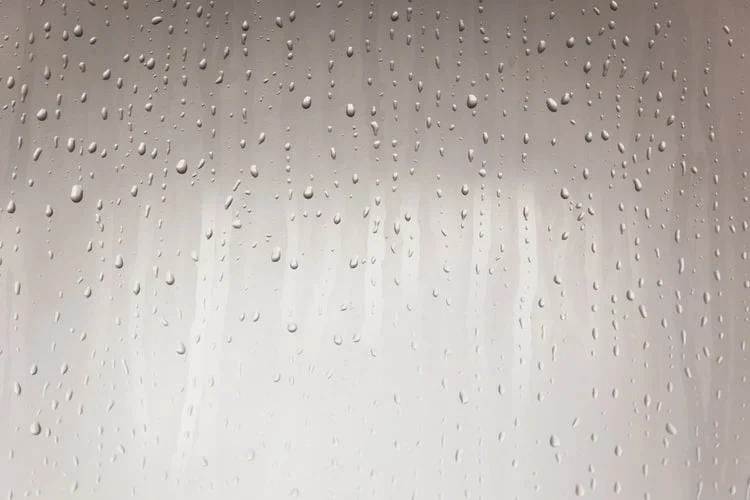
Condensation can occur when warm, moist air in the home meets a cold surface, like the attic or ceiling. During heavy rain, if the air in your attic becomes more humid and the temperature cools rapidly, condensation may form, eventually causing a wet spot on the ceiling. Poor attic ventilation can exacerbate this problem, especially in homes with insufficient insulation or in colder climates.

4. Chimney Leaks

If your home has a chimney, it’s another potential source of leaks. Heavy rain can seep through the chimney flashing, or water can penetrate cracks in the chimney structure. This water can travel down and reach the ceiling, creating a wet spot. Chimneys that lack a proper cap or crown are particularly vulnerable to water intrusion during heavy rain.

5. Window or Siding Leaks

In multi-level homes, water spots on a lower ceiling could be caused by leaks around windows or siding on an upper floor. When rainwater enters through small cracks or gaps around windows or poorly sealed siding, it can flow down the walls and accumulate on the ceiling below, leading to a visible wet spot.


What to Do When You Notice a Wet Spot on Ceiling After Heavy Rain

Seeing a wet spot on your ceiling after rain is concerning, but prompt action can help you minimize damage. Here’s a step-by-step approach to handle the situation:

Step 1: Identify the Source

The first step is identifying the source of the leak. Start by inspecting the roof, attic, and any areas above the ceiling where water might be seeping in. Look for visible damage, such as missing shingles, rusted flashing, or clogged gutters. If you’re unable to locate the source on your own, consider hiring a professional roofing contractor to perform a thorough inspection.

Step 2: Dry Out the Area

If the wet spot is relatively small, you may be able to dry it out with a fan or dehumidifier. Removing moisture from the area as quickly as possible can help prevent mold growth. Avoid using heaters, as they can cause the area to dry unevenly and potentially warp the ceiling.

Step 3: Make Temporary Repairs

While waiting for professional repairs, consider making temporary fixes to stop water from entering. For example:

  • Cover leaks: If you’ve identified roof damage, place a tarp over the affected area to block additional rainwater from entering.
  • Seal minor leaks: Use a water-resistant sealant to temporarily close small gaps in the flashing or roof until more permanent repairs can be arranged.

Step 4: Assess for Mold or Mildew

Excess moisture can lead to mold or mildew growth within 24 to 48 hours, especially in porous materials like drywall. After drying the wet spot, check for any signs of mold around the area. If you detect mold, it’s essential to clean it immediately or call a professional for more extensive remediation if necessary.


Preventing a Wet Spot on Ceiling After Heavy Rain

Prevention is the best way to protect your home from water damage after heavy rain. Here are some proactive measures you can take to keep your ceiling dry:

Regular Roof Maintenance

Routine roof maintenance is key to preventing leaks. Schedule an annual roof inspection to identify and address any damage before it leads to interior water problems. Replace missing or damaged shingles, repair flashing, and clean out gutters regularly to ensure rainwater flows away from your home.

Proper Attic Ventilation and Insulation

Good attic ventilation prevents condensation and reduces moisture buildup, helping to protect your ceiling from wet spots. Ensure that your attic is adequately ventilated and insulated, as this will help to maintain a consistent temperature and reduce condensation. Adding additional insulation or upgrading existing insulation may also help prevent moisture problems.

Install a Chimney Cap

For homes with a chimney, a chimney cap is a worthwhile investment to prevent rainwater from entering the chimney and leaking onto the ceiling. The cap also keeps out debris and small animals, which can cause blockages or contribute to leaks.

Check Windows and Siding

To prevent leaks from windows or siding, inspect these areas periodically and seal any cracks or gaps. Use weather-resistant caulk around windows and ensure siding is properly sealed. Proper maintenance of windows and siding can prevent water from seeping into the walls and down to the ceiling below.


Signs You Need Professional Help for a Wet Spot on Ceiling After Heavy Rain

While some issues can be handled on your own, there are situations where calling a professional is the best option. Here are some signs it’s time to consult a pro:

  • Persistent or Growing Water Spots: If the wet spot remains or grows larger over time, it indicates an ongoing issue that needs professional intervention.
  • Multiple Wet Spots: Multiple spots suggest there may be multiple points of entry for water, which can be challenging to address without a professional inspection.
  • Mold or Musty Odors: If you notice mold or a musty smell, it’s crucial to call a mold remediation expert, as mold can pose serious health risks.
  • Visible Roof Damage: If your roof has extensive damage, such as missing shingles or warped flashing, hire a roofing contractor to perform a full inspection and make necessary repairs.

How to Repair a Water Damaged Ceiling

Once the source of the leak has been addressed, you’ll need to repair the water-damaged ceiling to restore it to its original condition.

Step 1: Remove Damaged Materials

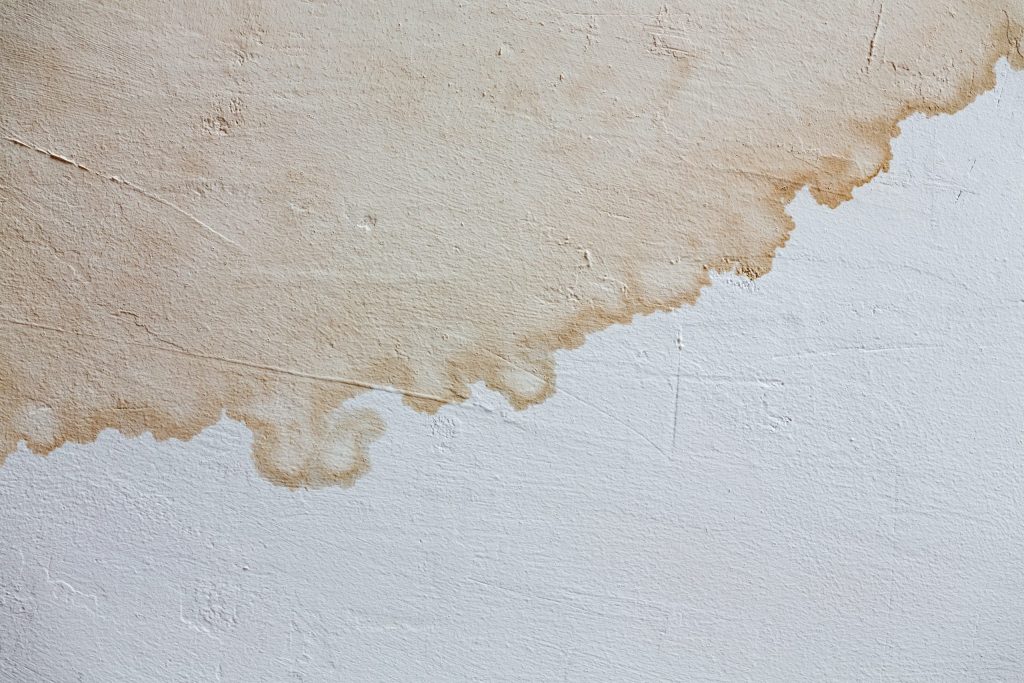
If the ceiling material is significantly damaged, you may need to remove the affected section. For minor discoloration, a good cleaning and a fresh coat of stain-blocking primer and paint may suffice.

Step 2: Patch and Sand

If you’ve removed any damaged drywall or plaster, replace it with a new piece, making sure it fits securely. Use joint compound to smooth out any rough edges and sand the area until it blends seamlessly with the rest of the ceiling.

Step 3: Prime and Paint

Once the area is dry and smooth, apply a stain-blocking primer to prevent future discoloration. Finish by repainting the area to match the rest of the ceiling.


Conclusion

A wet spot on the ceiling after heavy rain can be more than a minor inconvenience; it can signal significant issues that, if left unresolved, may lead to costly repairs and health risks. By understanding the causes of these water spots, taking immediate action to identify the source, and addressing any resulting damage, you can prevent future problems and keep your home safe and dry. Regular maintenance, such as checking your roof, gutters, and attic, can go a long way in protecting your home from water damage. When in doubt, don’t hesitate to contact a professional for inspection and repairs—catching problems early can save you time, money, and frustration in the long run.
Understanding and Managing Moisture on Ceiling for a Healthier Home Environment: Unveiling the Intricacies

Discovering signs of moisture on your ceiling? Explore the intricacies of “Moisture on Ceiling,” learn about potential causes, and acquire practical insights to address and prevent this concern for a healthier living space.

Moisture On Ceiling

Navigating the Challenge: Moisture on Ceiling

Witnessing moisture on your ceiling can be perplexing and requires immediate attention. In this comprehensive guide, we will delve into the nuances of “Moisture on Ceiling,” unraveling the reasons behind its occurrence, and providing actionable steps to mitigate and prevent this issue.

Read too: Understanding and Addressing Termite Ceiling Damage: Unveiling the Hidden Threat

Causes and Consequences

1. Leaky Roof:

  • Roof leaks are a common culprit for ceiling moisture.
  • Inspect and repair damaged or missing shingles, flashing, or compromised roofing materials promptly.

2. Poor Ventilation:

  • Inadequate ventilation can lead to trapped moisture in the ceiling space.
  • Enhance ventilation systems and ensure proper airflow to minimize moisture accumulation.

3. Condensation Issues:

  • Excessive condensation can contribute to moisture on ceilings.
  • Identify and address factors such as temperature differentials and humidity levels.

Spotting and Assessing Moisture on Ceiling

1. Visible Signs:

  • Observe for water stains, discoloration, or sagging on the ceiling.
  • Early detection of visible signs allows for prompt intervention.

2. Soft Spots:

  • Gently press on areas of the ceiling to identify soft or damp spots.
  • Soft spots indicate moisture infiltration and potential damage.

3. Mold and Mildew Growth:

  • Moist conditions foster mold and mildew growth.
  • Address and remediate mold promptly to prevent health risks.

Managing Moisture on Ceiling

1. Identifying and Repairing Leaks:

  • Thoroughly inspect the roof for leaks and address any issues.
  • Promptly repair damaged roofing materials to prevent further moisture ingress.

2. Improving Ventilation:

  • Upgrade ventilation systems to enhance airflow.
  • Consider the installation of exhaust fans in areas prone to moisture accumulation.

3. Using Dehumidifiers:

  • Employ dehumidifiers in areas with high humidity levels.
  • These devices help extract excess moisture from the air, minimizing the risk of ceiling moisture.

Preventive Measures for a Dry Home

1. Regular Roof Inspections:

  • Schedule regular inspections by roofing professionals.
  • Identify and address potential issues before they lead to moisture problems.

2. Proactive Maintenance:

  • Conduct routine maintenance on ventilation systems.
  • Clean and clear gutters regularly to ensure proper drainage.

3. Monitoring Indoor Humidity:

  • Use humidity meters to monitor indoor humidity levels.
  • Aim for optimal humidity levels to prevent condensation and moisture issues.

Professional Consultation and Advice

1. Roofing Experts:

  • Consult with roofing experts for comprehensive assessments.
  • Professionals can provide insights into potential roofing issues contributing to moisture.

2. Mold Remediation Specialists:

  • If mold is present, seek assistance from mold remediation specialists.
  • Professional remediation ensures thorough removal and prevention.

Conclusion: A Drier, Healthier Home

In conclusion, addressing “Moisture on Ceiling” requires a proactive and multi-faceted approach. By understanding the causes, conducting regular inspections, and implementing preventive measures, homeowners can create a drier, healthier living environment. Whether through roof repairs, enhanced ventilation, or the use of dehumidifiers, mitigating moisture-related concerns is essential for preserving the integrity of your home.

Remember, early intervention is key to preventing extensive damage and safeguarding the well-being of your living space. Embrace a vigilant approach to moisture management, and enjoy the benefits of a dry, comfortable home.

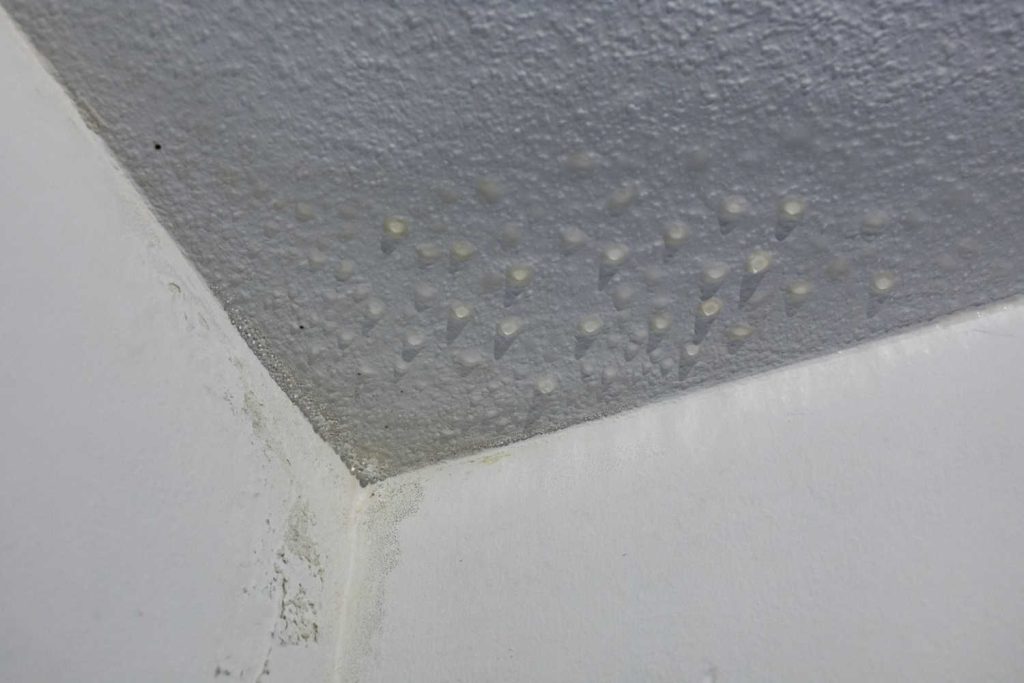
Understanding and Resolving Ceiling Water Bubbles for a Dry and Secure Home: Dealing with Dilemmas

Are unexpected ceiling water bubbles causing concern in your home? Explore the reasons behind “Ceiling Water Bubble” occurrences and discover effective solutions to safeguard your living space.

Ceiling Water Bubble

Unraveling the Mystery: Ceiling Water Bubble

Discovering a water bubble on your ceiling can be alarming and necessitates immediate attention. In this comprehensive guide, we will delve into the phenomenon of “Ceiling Water Bubbles,” exploring the potential causes, implications, and practical steps to address and prevent this issue.

Read too: Understanding and Addressing Termite Ceiling Damage: Unveiling the Hidden Threat

Ceiling Water Bubble: Causes and Concerns

1. Leaking Roof:

  • Roof leaks are a common culprit behind ceiling water bubbles.
  • Identify and repair damaged or missing shingles, flashing issues, or compromised roofing materials.

2. Plumbing Leaks:

  • Water leaks from plumbing systems can lead to water accumulation in ceilings.
  • Regularly inspect and address any plumbing issues promptly.

3. Condensation:

  • Excessive condensation in the ceiling space can result in water bubbles.
  • Improve ventilation and insulation to minimize condensation.

Identifying and Assessing Ceiling Water Bubbles

1. Visual Inspection:

  • Regularly inspect your ceilings for any signs of water bubbles.
  • Address any visible water damage promptly to prevent further issues.

2. Soft Spots:

  • Gently press on the bubble to identify soft or damp areas.
  • Soft spots indicate moisture infiltration and potential water damage.

3. Staining and Discoloration:

  • Stains or discoloration on the ceiling are indicative of water damage.
  • Investigate the source of the water and address it to prevent further damage.

Dealing with Ceiling Water Bubbles

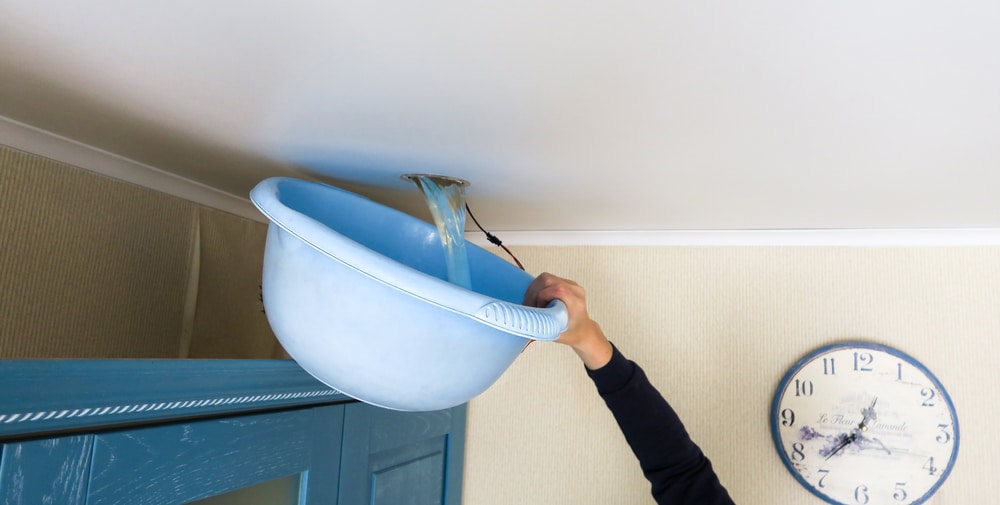
1. Draining the Bubble:

  • Safely puncture the bubble to release trapped water.
  • Use a bucket to collect water and ensure proper drainage.

2. Ceiling Repairs:

  • Once the bubble is drained, assess the extent of damage.
  • Repair or replace damaged ceiling materials as needed.

3. Addressing the Root Cause:

  • Identify and address the root cause of the water infiltration.
  • Repair roof leaks, plumbing issues, or improve ventilation as necessary.

Preventive Measures for a Dry Home

1. Regular Inspections:

  • Conduct routine inspections of your roof and ceilings.
  • Proactive identification of issues can prevent extensive damage.

2. Prompt Repairs:

  • Address any signs of water damage promptly.
  • Timely repairs minimize the risk of water bubbles and related issues.

3. Improved Ventilation:

  • Enhance ventilation in your home to reduce the likelihood of condensation.
  • Proper airflow helps maintain a dry and healthy living environment.

Professional Assistance and Consultation

1. Roofing Experts:

  • Consult with roofing experts for thorough roof inspections.
  • Professionals can identify and address potential issues that may lead to water infiltration.

2. Plumbing Professionals:

  • Seek assistance from plumbing professionals for comprehensive plumbing inspections.
  • Timely detection and repair of leaks are crucial to preventing water damage.

Conclusion: A Dry and Secure Home

In conclusion, understanding and addressing “Ceiling Water Bubbles” is essential for maintaining a dry, secure, and comfortable home. By identifying the causes, promptly draining and repairing bubbles, and implementing preventive measures, homeowners can safeguard their living spaces from water damage.

Remember, regular inspections and proactive maintenance are key to preventing and addressing issues before they escalate. Embrace a proactive approach, and enjoy the peace of mind that comes with a dry and secure home environment.

Understanding and Addressing Straight Cracks in Ceiling Structures: A Comprehensive Guide

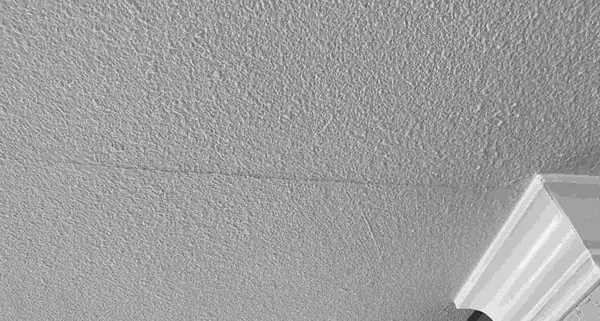
Discovering straight cracks in your ceiling can be disconcerting, hinting at potential structural concerns. In this detailed guide, we’ll delve into the causes behind “Straight Cracks in Ceiling” scenarios and provide practical insights on identifying, addressing, and preventing such issues. Gain a deeper understanding of the complexities surrounding straight cracks and learn how to safeguard your home from potential damages.

Straight Cracks In Ceiling

Decoding the Indications: Straight Cracks in Ceiling Structures

Before exploring solutions, let’s decipher the issue of straight cracks forming in ceiling structures. These distinct cracks can manifest due to various factors, serving as visible signs of underlying problems that demand attention.

Common Causes of Straight Cracks in Ceiling Structures

  1. Foundation Settlement: Uneven settling of the foundation can lead to stress on the house structure, resulting in straight cracks. Professional foundation inspections are crucial.
  2. Temperature and Humidity Fluctuations: Drastic changes in temperature and humidity levels can cause materials in the house to expand and contract, leading to straight cracks.
  3. Structural Movements: House structures naturally experience movements over time. Excessive movements, however, can contribute to straight cracks. Professional assessment is vital.
  4. Roof Leaks: Water damage from roof leaks can weaken the ceiling structure, leading to straight cracks. Regularly inspect and repair any roof issues promptly.
  5. Poor Construction Practices: Inadequate construction practices, such as insufficient support or the use of subpar materials, can contribute to straight cracks. Professional evaluations can identify these issues.

Addressing the Issue

  1. Foundation Repairs: If foundation settlement is identified, seek professional foundation repairs to stabilize and level the structure, reducing stress on the ceiling.
  2. Temperature and Humidity Control: Implement measures to control indoor temperature and humidity levels. Use HVAC systems, dehumidifiers, and proper insulation to minimize material expansion and contraction.
  3. Structural Reinforcements: Professional structural reinforcements can be implemented to enhance the stability of the house. Consult with experts to determine the appropriate solutions.
  4. Prompt Roof Repairs: Address any roof leaks promptly. Regular roof inspections and repairs will prevent water damage and subsequent straight cracks.
  5. Quality Construction Practices: During renovations or constructions, prioritize quality materials and practices. Professional builders can ensure proper support and construction techniques.

Preventive Measures: Safeguarding Against Straight Cracks in Ceiling Structures

  1. Regular Structural Inspections: Conduct regular inspections of your house structure. Early identification of issues can prevent severe damage and potential straight cracks.
  2. Timely Repairs: Address any visible damage or wear promptly. Timely repairs can prevent minor issues from escalating into major problems, avoiding straight crack.
  3. Professional Guidance: Consult with structural engineers or architects for professional guidance on maintaining the integrity of your house structure.

Read too: Understanding and Addressing a Leaky Ceiling in Your Apartment: Navigating the Drips

Conclusion

In conclusion, addressing “Straight Cracks in Ceiling” scenarios requires a strategic and comprehensive approach to identify and resolve root causes. Regular maintenance, prompt repairs, and proactive measures are crucial in preventing and mitigating this issue. By understanding common culprits and implementing the suggested solutions, homeowners can maintain a structurally sound and aesthetically pleasing home.

Understanding and Addressing Cracks Forming In Ceiling Structures: Unveiling the Signs

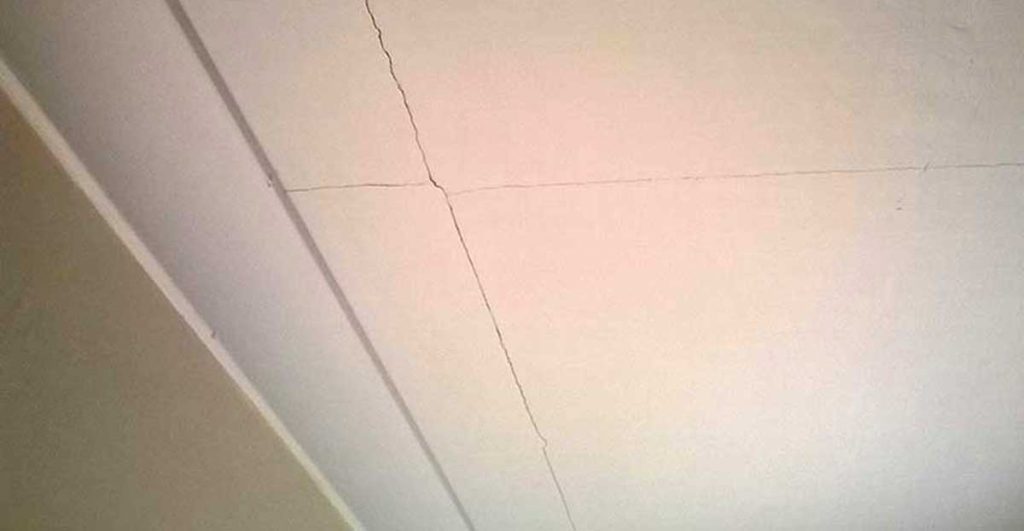
Discovering cracks forming in your ceiling can be a cause for concern, indicative of potential structural issues. In this comprehensive guide, we’ll delve into the causes behind “Cracks Forming In Ceiling” scenarios and provide practical insights on identifying, addressing, and preventing such concerns. Gain a deeper understanding of the complexities surrounding ceiling cracks and learn how to safeguard your home from potential damages.

Cracks Forming In Ceiling

Decoding the Indications:

Deciphering the Issue: Cracks Forming In Ceiling Structures Unveiled

Before exploring solutions, let’s decipher the issue of cracks forming in ceiling structures. These cracks can manifest for various reasons, serving as visible signs of underlying problems that demand attention.

Common Causes of Cracks Forming In Ceiling Structures

  1. Foundation Settlement: Uneven settling of the foundation can lead to stress on the house structure, resulting in cracks forming. Professional foundation inspections are crucial.
  2. Temperature and Humidity Fluctuations: Drastic changes in temperature and humidity levels can cause materials in the house to expand and contract, leading to cracks forming.
  3. Structural Movements: House structures naturally experience movements over time. Excessive movements, however, can contribute to cracks forming in the ceiling. Professional assessment is vital.
  4. Roof Leaks: Water damage from roof leaks can weaken the ceiling structure, leading to cracks. Regularly inspect and repair any roof issues promptly.
  5. Poor Construction Practices: Inadequate construction practices, such as insufficient support or the use of subpar materials, can contribute to cracks forming. Professional evaluations can identify these issues.

Addressing the Issue:

  1. Foundation Repairs: If foundation settlement is identified, seek professional foundation repairs to stabilize and level the structure, reducing stress on the ceiling.
  2. Temperature and Humidity Control: Implement measures to control indoor temperature and humidity levels. Use HVAC systems, dehumidifiers, and proper insulation to minimize material expansion and contraction.
  3. Structural Reinforcements: Professional structural reinforcements can be implemented to enhance the stability of the house. Consult with experts to determine the appropriate solutions.
  4. Prompt Roof Repairs: Address any roof leaks promptly. Regular roof inspections and repairs will prevent water damage and subsequent cracks forming.
  5. Quality Construction Practices: During renovations or constructions, prioritize quality materials and practices. Professional builders can ensure proper support and construction techniques.

Preventive Measures: Safeguarding Against Cracks Forming In Ceiling Structures

  1. Regular Structural Inspections: Conduct regular inspections of your house structure. Early identification of issues can prevent severe damage and potential cracks forming.
  2. Timely Repairs: Address any visible damage or wear promptly. Timely repairs can prevent minor issues from escalating into major problems, avoiding cracks forming.
  3. Professional Guidance: Consult with structural engineers or architects for professional guidance on maintaining the integrity of your house structure.

Read too: Understanding and Addressing a Leaky Ceiling in Your Apartment: Navigating the Drips

Conclusion

In conclusion, addressing “Cracks Forming In Ceiling” scenarios requires a strategic and comprehensive approach to identify and resolve root causes. Regular maintenance, prompt repairs, and proactive measures are crucial in preventing and mitigating this issue. By understanding common culprits and implementing the suggested solutions, homeowners can maintain a structurally sound and aesthetically pleasing home.

Dealing with Water Damage on Your Popcorn Ceiling: Unveiling the Consequences

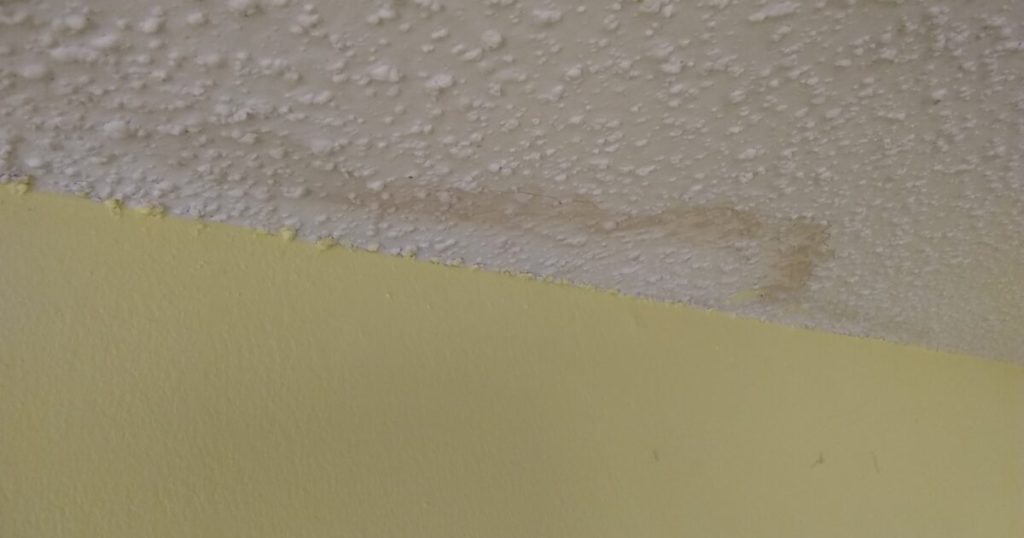
Discovering water damage on your popcorn ceiling can be an alarming situation, requiring immediate attention. In this comprehensive guide, we’ll explore the intricacies of “Water Damage Popcorn Ceiling,” shedding light on the causes, identifying the signs, and offering effective solutions. Learn how to safeguard your ceiling from water-related issues and restore the aesthetic appeal of your home.

Water Damage Popcorn Ceiling

Understanding the Impact: Water Damage Popcorn Ceiling

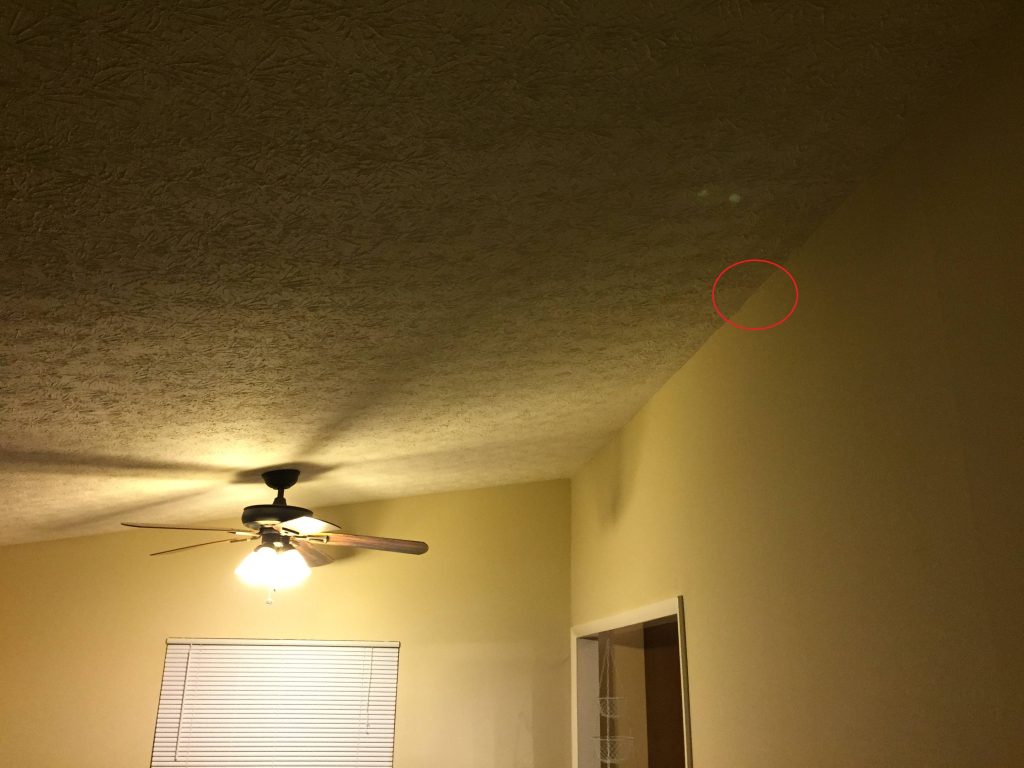
Before delving into solutions, let’s decipher the issue of water damage on popcorn ceilings. This textured ceiling style is particularly susceptible to water-related problems, leading to discoloration, peeling, and potential structural damage.

Common Causes of Water Damage on Popcorn Ceilings

  1. Roof Leaks: Damaged or deteriorating roofs can allow water to seep through, impacting the popcorn ceiling below. Regular roof inspections are essential to identify and address leaks promptly.
  2. Plumbing Leaks: Leaky pipes within the home can result in water accumulation on ceilings, causing damage to popcorn textures. Regularly inspect plumbing systems for potential issues.
  3. Bathroom Water Damage: Leaks from bathrooms, especially on upper floors, can lead to water damage on popcorn ceilings below. Inspect fixtures, pipes, and shower enclosures for potential leaks.
  4. Condensation Issues: Poor ventilation and high humidity levels can cause condensation on ceilings, leading to water damage on popcorn textures. Improve ventilation to minimize this risk.
  5. Appliance Leaks: Malfunctioning appliances, such as water heaters or air conditioning units, can cause water leakage and damage popcorn ceilings. Regularly inspect and maintain appliances.

Addressing the Issue: Solutions for Water Damage Popcorn Ceiling

  1. Roof Repairs: Identify and address any issues with the roof promptly. Repair or replace damaged shingles and ensure proper drainage to prevent water from reaching the popcorn ceiling.
  2. Plumbing Inspections: Regularly inspect plumbing systems for leaks. Address any identified issues promptly, and consider professional assistance for complex plumbing problems.
  3. Bathroom Repairs: Inspect bathrooms for potential leaks. Repair damaged fixtures, address plumbing issues, and use waterproofing solutions to prevent water infiltration.
  4. Improved Ventilation: Enhance ventilation in your home to reduce condensation. Use exhaust fans, open windows, and consider dehumidifiers in areas prone to excess moisture.
  5. Appliance Maintenance: Schedule regular maintenance for appliances prone to leaks. Ensure proper functioning and address any issues promptly to prevent water damage on popcorn ceilings.

Read too: Understanding and Addressing a Leaky Ceiling in Your Apartment: Navigating the Drips

Preventive Measures: Safeguarding Your Popcorn Ceiling

  1. Regular Inspections: Conduct routine inspections of your ceiling for any signs of water damage. Early detection allows for prompt intervention and prevents extensive damage.
  2. Timely Repairs: Address any visible damage or wear promptly. Timely repairs can prevent minor issues from turning into major problems, avoiding water damage on popcorn ceilings.
  3. Waterproofing: Consider applying waterproofing solutions to your popcorn ceiling, especially in areas prone to water exposure. This adds an extra layer of protection against potential damage.

Conclusion

In conclusion, dealing with “Water Damage Popcorn Ceiling” requires a proactive and systematic approach to identify and address the root causes. Regular maintenance, prompt repairs, and preventive measures are crucial in preserving the integrity and aesthetics of your popcorn ceiling. By understanding common culprits and implementing the suggested solutions, homeowners can ensure the longevity and visual appeal of their ceilings.

Understanding and Resolving Ceiling Cracking in House Structures: Navigating the Rifts

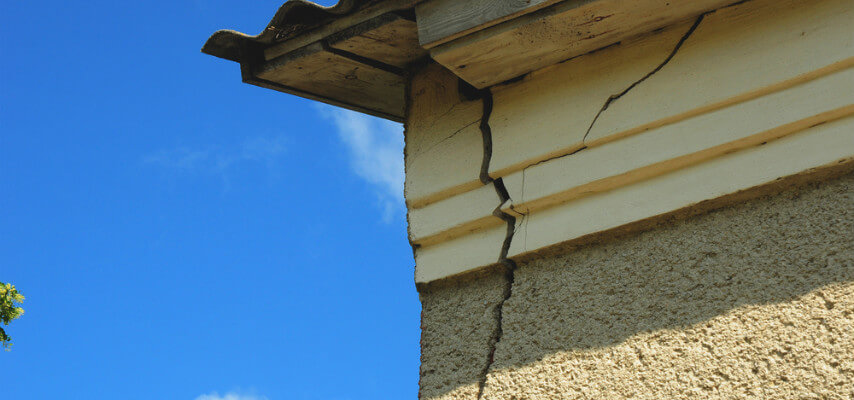
Discovering cracks in your ceiling can be unnerving, signaling potential structural issues. In this comprehensive guide, we’ll delve into the causes behind “Ceiling Cracking in House” scenarios and provide practical insights on identifying, addressing, and preventing such concerns. Gain a deeper understanding of the complexities surrounding ceiling cracking and learn how to safeguard your home from potential damages.

Ceiling Cracking In House

Unveiling the Challenge: Ceiling Cracking in House Structures

Before exploring solutions, let’s decode the issue of ceiling cracking in house structures. These cracks can manifest in various forms, from fine lines to more severe rifts, indicating underlying problems that need attention.

Common Causes of Ceiling Cracking in House Structures

  1. Settling Foundations: Uneven settling of the foundation can lead to stress on the house structure, resulting in ceiling cracks. Identify foundation issues through professional inspections.
  2. Temperature and Humidity Fluctuations: Drastic changes in temperature and humidity levels can cause materials in the house to expand and contract, leading to cracks in the ceiling.
  3. Structural Movements: House structures naturally experience movements over time. Excessive movements, however, can contribute to ceiling cracking. Professional assessment is vital.
  4. Roof Leaks: Water damage from roof leaks can weaken the ceiling structure, leading to cracks. Regularly inspect and repair any roof issues promptly.
  5. Poor Construction Practices: Inadequate construction practices, such as insufficient support or the use of subpar materials, can contribute to ceiling cracking. Professional evaluations can identify these issues.

Addressing the Issue:

  1. Foundation Repairs: If settling foundations are identified, seek professional foundation repairs to stabilize and level the structure, reducing stress on the ceiling.
  2. Temperature and Humidity Control: Implement measures to control indoor temperature and humidity levels. Use HVAC systems, dehumidifiers, and proper insulation to minimize material expansion and contraction.
  3. Structural Reinforcements: Professional structural reinforcements can be implemented to enhance the stability of the house. Consult with experts to determine the appropriate solutions.
  4. Prompt Roof Repairs: Address any roof leaks promptly. Regular roof inspections and repairs will prevent water damage and subsequent ceiling cracking.
  5. Quality Construction Practices: During renovations or constructions, prioritize quality materials and practices. Professional builders can ensure proper support and construction techniques.

Read too: Dealing with Water Damage on Your Popcorn Ceiling: Unveiling the Consequences

Preventive Measures: Safeguarding Against Ceiling Cracking in House Structures

  1. Regular Structural Inspections: Conduct regular inspections of your house structure. Early identification of issues can prevent severe damage and potential ceiling cracking.
  2. Timely Repairs: Address any visible damage or wear promptly. Timely repairs can prevent minor issues from escalating into major problems, avoiding ceiling cracking.
  3. Professional Guidance: Consult with structural engineers or architects for professional guidance on maintaining the integrity of your house structure.

Conclusion

In conclusion, addressing “Ceiling Cracking in House” scenarios requires a strategic and comprehensive approach to identify and resolve root causes. Regular maintenance, prompt repairs, and proactive measures are crucial in preventing and mitigating this issue. By understanding common culprits and implementing the suggested solutions, homeowners can maintain a structurally sound and aesthetically pleasing home.

Ceiling Bubbling From Water Issues Unveiled: Troubleshooting Tips for a Disturbing Dilemma

Discovering your ceiling bubbling from water can be a distressing sight, signaling potential water damage. In this comprehensive guide, we’ll delve into the common causes behind “Ceiling Bubbling From Water” and provide practical insights on identifying, addressing, and preventing this issue. Learn about the intricacies of ceiling bubbling and safeguard your home from the consequences of water infiltration.

Ceiling Bubbling From Water

Understanding the Phenomenon: Ceiling Bubbling From Water

Before exploring solutions, let’s unravel the phenomenon of a ceiling bubbling from water. This occurrence typically indicates water accumulating between the ceiling and the paint or drywall, potentially causing visible bulges or blisters.

Common Causes

  1. Roof Leaks: A damaged or aging roof may allow water to penetrate, leading to ceiling bubbling. Inspect your roof for missing shingles, cracks, or other signs of damage.
  2. Plumbing Leaks: Leaky pipes within the walls or ceiling can result in water accumulation, causing the ceiling to bubble. Regularly inspect plumbing for any signs of leaks.
  3. Condensation Issues: Excessive moisture in the air can lead to condensation on the ceiling, causing bubbling. Improve ventilation and address humidity concerns to mitigate this issue.
  4. Leaking HVAC Systems: Faulty HVAC systems can contribute to water leakage. Inspect your air conditioning units and ensure proper drainage to prevent water buildup.
  5. Bathroom Water Damage: Leaks from bathrooms, especially those on upper floors, can seep into ceilings below, causing bubbling. Inspect fixtures, pipes, and shower enclosures for potential issues.

Addressing the Issue:

  1. Roof Repairs: If the source is a damaged roof, consider professional roof repairs or replacement. Address issues promptly to prevent further water infiltration.
  2. Plumbing Inspections: Regularly inspect plumbing systems for leaks. Address any identified issues promptly, and consider professional assistance for complex plumbing problems.
  3. Improved Ventilation: Enhance ventilation in your home to reduce condensation. Use exhaust fans, open windows, and consider dehumidifiers in areas prone to excess moisture.
  4. HVAC Maintenance: Schedule regular maintenance for your HVAC systems. Ensure proper drainage and address any issues promptly to prevent water leaks.
  5. Bathroom Repairs: Inspect bathrooms for potential leaks. Repair damaged fixtures, address plumbing issues, and use waterproofing solutions to prevent water infiltration.

Read too: Dealing with Water Damage on Your Popcorn Ceiling: Unveiling the Consequences

Preventive Measures: Safeguarding Against Ceiling Bubbling From Water

  1. Regular Home Inspections: Conduct regular home inspections to identify potential issues before they escalate. Pay attention to ceilings, walls, and other susceptible areas.
  2. Timely Repairs: Address any visible damage or wear promptly. Timely repairs can prevent minor issues from turning into major problems, avoiding ceiling bubbling.
  3. Proper Roof Maintenance: Perform regular roof inspections and maintenance. Replace damaged shingles, fix any issues promptly, and consider professional roofing services.

Conclusion

In conclusion, addressing “Ceiling Bubbling From Water” requires a systematic approach to identify and resolve the root causes. Regular maintenance, prompt repairs, and proactive measures are crucial in preventing and mitigating this issue. By understanding common culprits and implementing the suggested solutions, homeowners can maintain a dry and damage-free environment within their homes.

Understanding Roof Leak Ceiling Bubble Issues: Unraveling the Mystery

Roof leaks can lead to unexpected problems, and one common issue homeowners face is the formation of a “Roof Leak Ceiling Bubble.” In this comprehensive guide, we will explore the causes, identification, and solutions for this particular concern.

Roof Leak Ceiling Bubble

The Menace of Roof Leak Ceiling Bubbles

When water infiltrates the roof and causes a ceiling bubble, it’s a clear sign of a more significant issue. Understanding the potential causes and addressing them promptly can prevent further damage to your home.

Potential Causes of Roof Leak Ceiling Bubbles

  1. Roof Damage:
    • Missing or damaged shingles
    • Cracked or deteriorating flashing
    • Punctures or holes in the roof surface
  2. Poor Ventilation:
    • Inadequate attic ventilation leading to moisture buildup
    • Condensation issues causing water to seep into the ceiling
  3. Leaky Pipes or Plumbing Issues:
    • Faulty plumbing or leaking pipes in the attic or ceiling space
    • Water damage from plumbing fixtures on higher floors

Identifying Roof Leak Ceiling Bubbles

1. Visual Inspection:

Perform a thorough visual inspection of your ceilings for any unusual bulges or discoloration. Bubbles in the ceiling are often a clear indicator of trapped water.

2. Touch Test:

Gently touch the affected area. If it feels soft or spongy, there’s likely trapped water beneath the surface.

3. Water Stains:

Look for water stains on the ceiling or nearby walls, as these can provide additional clues about the source of the leak.

Roof Leak Ceiling Bubble Solutions

1. Locate and Repair the Roof Leak:

Identify the source of the roof leak and repair it promptly. This may involve patching up damaged shingles, replacing flashing, or addressing any structural issues.

2. Improve Attic Ventilation:

Enhance attic ventilation to prevent moisture buildup. Proper ventilation helps regulate temperature and reduces the risk of condensation.

3. Plumbing Repairs:

If the leak is attributed to plumbing issues, consult a plumber to repair or replace faulty pipes, fixtures, or connections.

Read too: Dealing with Water Damage on Your Popcorn Ceiling: Unveiling the Consequences

Prevention Tips

1. Regular Roof Inspections:

Schedule regular roof inspections to identify and address potential issues before they escalate.

2. Adequate Ventilation:

Ensure proper attic ventilation to prevent moisture buildup and reduce the risk of condensation-related leaks.

3. Prompt Repairs:

Address any signs of roof damage or plumbing issues promptly. Timely repairs can prevent extensive water damage and the formation of ceiling bubbles.

Conclusion

A “Roof Leak Ceiling Bubble” is a visible indication of a roof leak, and addressing it promptly is crucial to prevent further damage to your home. By understanding the potential causes, identifying the issue early, and implementing effective solutions, homeowners can protect their property from the detrimental effects of water damage.

Regular maintenance, prompt repairs, and a proactive approach to potential issues can contribute to the longevity and structural integrity of your roof. Stay vigilant, conduct inspections regularly, and ensure that your home remains a safe and dry haven for you and your family.

Understanding and Addressing Wet Marks on Ceiling: Decoding the Damp Dilemma

Discovering wet marks on your ceiling can be a cause for concern, signifying potential issues that need attention. In this comprehensive guide, we will delve into the common reasons behind wet marks on the ceiling and provide practical solutions to address and prevent further damage.

Wet Marks On Ceiling
508587208

Understanding Wet Marks on Ceiling: A Troubling Sign

Detecting the Issue

The first step in addressing wet marks is understanding what they indicate. Whether it’s a subtle discoloration or noticeable water streaks, these signs suggest the presence of moisture, and identifying the source is crucial.

Potential Causes

Several factors can contribute to wet marks on the ceiling. Roof leaks, plumbing issues, condensation, or even poor ventilation can result in the accumulation of moisture, leading to unsightly and potentially damaging marks.

Investigating Wet Marks on Ceiling: Identifying the Culprit

Roof Leaks

Inspect your roof for missing or damaged shingles, as well as cracked flashing around chimneys and vents. Addressing these issues promptly can prevent further water penetration and damage to the ceiling.

Plumbing Issues

Leaks from plumbing fixtures or pipes can lead to wet marks. Check for visible leaks, water stains, or mold growth around pipes and fixtures. Address any plumbing issues promptly to prevent further damage.

Condensation Concerns

Poor ventilation can lead to condensation, especially in areas with high humidity. Check for signs of condensation on windows, walls, and ceilings. Improving ventilation and using dehumidifiers can help mitigate this issue.

Practical Solutions:

Locate and Repair the Source

Once the source of the moisture is identified, take necessary steps to repair it. Whether it’s fixing a roof leak, addressing plumbing issues, or improving ventilation, repairing the source is essential to prevent recurrence.

Remove Mold and Mildew

Wet marks can lead to mold and mildew growth. Clean affected areas with a mixture of water and mild detergent. For persistent mold issues, consider consulting professionals for thorough remediation.

Repaint and Restore

After addressing the root cause and ensuring the affected area is thoroughly dry, consider repainting the ceiling to restore its appearance. Use moisture-resistant paint to prevent future issues.

Preventing Future Wet Marks on Ceiling: Maintenance Tips

Regular Inspections

Schedule regular inspections of your roof, plumbing, and ventilation systems to catch potential issues before they escalate.

Ensure Proper Ventilation

Proper ventilation is crucial in preventing moisture buildup. Use exhaust fans in bathrooms and kitchens, and ensure attic spaces are adequately ventilated.

Read too: Condo Ceiling Leak Responsible and How to Address It: Unveiling the Culprit

Conclusion: A Dry and Secure Home

In conclusion, wet marks on the ceiling can be a red flag indicating potential issues that require prompt attention. By understanding the causes, identifying the source, and implementing practical solutions, you can maintain a dry and secure home, free from the troubles of water damage.

Understanding and Addressing Bubbles in the Ceiling: Unveiling the Issue

Embark on a journey to decipher the perplexing problem of “Bubbles in the Ceiling.” Learn about the causes, potential risks, and effective solutions to restore the aesthetic appeal and structural integrity of your living space.

Bubbles In The Ceiling

Bubbles in the Ceiling: A Visual Anomaly

Introduction to the Dilemma

Delve into the visual anomaly of bubbles, a puzzling issue that can detract from the beauty of your home and signal underlying concerns.

The Significance of Prompt Attention

  1. Visual Disruption: Explore how bubbles disrupt the smooth and flawless appearance of the ceiling, drawing attention to potential issues.
  2. Structural Implications: Understand how bubbles may indicate underlying structural or moisture-related problems that require prompt attention.

Causes of Bubbles in the Ceiling

Moisture Intrusion

  1. Roof Leaks: Understand how roof leaks can lead to moisture intrusion, causing bubbles.
  2. Condensation Issues: Explore the impact of condensation on the ceiling, contributing to the development of bubbles.

Poor Ventilation

  1. Inadequate Air Circulation: Learn about the role of poor ventilation in creating an environment conducive to moisture buildup and bubble formation.
  2. Bathroom and Kitchen Concerns: Explore how areas with high humidity, such as bathrooms and kitchens, can contribute to ceiling bubbles.

Detecting and Diagnosing Bubbles in the Ceiling

Visual Inspection

  1. Identifying Bubble Characteristics: Learn how to visually identify different types of bubbles and understand their potential causes.
  2. Surveying the Entire Ceiling: Explore the importance of conducting a comprehensive visual inspection to detect the extent of the issue.

Read too: Condo Ceiling Leak Responsible and How to Address It: Unveiling the Culprit

Moisture and Humidity Testing

  1. Using Moisture Meters: Understand the application of moisture meters to identify areas of increased moisture content.
  2. Monitoring Indoor Humidity: Explore the benefits of monitoring indoor humidity levels to preemptively address potential causes of ceiling bubbles.

Addressing Bubbles in the Ceiling: Solutions and Strategies

Repairing Roof Leaks

  1. Identifying and Patching Leaks: Understand the process of identifying and patching roof leaks to prevent further moisture intrusion.
  2. Professional Roof Inspection: Explore the benefits of hiring professionals for a thorough roof inspection and repair.

Improving Ventilation

  1. Installation of Ventilation Systems: Learn about the installation of proper ventilation systems to enhance air circulation and reduce moisture buildup.
  2. Use of Exhaust Fans: Explore how exhaust fans in bathrooms and kitchens can mitigate humidity and prevent ceiling bubbles.

Ceiling Repair Techniques

  1. Popping and Patching Bubbles: Understand the technique of popping and patching bubbles to restore its smooth surface.
  2. Applying Sealants: Explore the use of sealants to reinforce repaired areas and prevent future bubble formation.

Preventive Measures for Long-Term Success

Regular Maintenance

  1. Roof Inspections: Learn about the importance of regular roof inspections as part of home maintenance to identify and address potential issues.
  2. Upkeep of Ventilation Systems: Explore the regular upkeep of ventilation systems to ensure continuous and effective air circulation.

Educating Homeowners

  1. Awareness of Warning Signs: Educate homeowners about the warning signs of moisture intrusion and poor ventilation that may lead to ceiling bubbles.
  2. Promoting Timely Repairs: Encourage a proactive approach to home repairs, emphasizing the importance of addressing issues promptly.

Conclusion: Restoring Beauty and Functionality

Bubbles in the ceiling may seem like a mere aesthetic concern, but they often point to deeper issues that require attention. By understanding the causes, detecting problems early, and implementing effective solutions, homeowners can restore the beauty and functionality of their ceilings while ensuring the long-term integrity of their homes.

Understanding and Addressing the Wet Spot on Ceiling Dilemma: Unlocking the Mystery

Have you ever noticed an unsightly wet spot on your ceiling that seemed to appear out of nowhere? If so, you’re not alone. The perplexing issue of a wet spot on the ceiling can be a cause for concern for many homeowners. In this comprehensive guide, we’ll delve into the various aspects of this phenomenon, exploring its potential causes, consequences, and effective solutions.

Wet Spot On Ceiling

Read too: Understanding and Addressing a Condensation Leak in the Ceiling: Decoding the Drip

Unveiling the Mystery:

A wet spot on the ceiling can be a disconcerting sight, leaving homeowners puzzled and anxious about potential damage to their property. This phenomenon is often an indicator of an underlying issue that requires prompt attention.

Causes of Wet Spots On Ceiling: Decoding the Culprits

  1. Roof Leaks: One of the primary culprits behind a wet spot on the ceiling is a roof leak. Whether it’s a damaged shingle, compromised flashing, or an aging roof, water infiltration can lead to persistent wet spots.
  2. Plumbing Issues: Faulty plumbing can also contribute to wet spots on the ceiling. Leaking pipes, dripping fixtures, or even a burst pipe within the walls can result in water seepage, manifesting as wet spots overhead.
  3. Condensation Concerns: In some cases, condensation may be the root cause. Poor ventilation and insulation can lead to moisture buildup, forming unsightly wet spots on the ceiling.

Consequences of Ignoring Wet Spots On Ceiling: The Price of Neglect

Ignoring a wet spot on the ceiling can have severe consequences, both structurally and aesthetically. Mold growth, compromised structural integrity, and damage to belongings are among the potential outcomes. Addressing the issue promptly is crucial to preventing further deterioration.

Addressing the Issue: Solutions for Wet Spot On Ceiling

  1. Roof Repairs: If a roof leak is identified as the source, prompt repairs are imperative. This may involve patching up damaged areas, replacing shingles, or even investing in a new roof if necessary.
  2. Plumbing Inspection and Repairs: A thorough inspection of the plumbing system is essential. Any leaks or issues should be repaired promptly to prevent further water damage and the formation of wet spots on the ceiling.
  3. Improving Ventilation: Adequate ventilation is crucial in preventing condensation-related wet spots. Installing vents, exhaust fans, or improving overall ventilation in affected areas can help mitigate the issue.

Conclusion: Taking Action Against Wet Spots On Ceiling

In conclusion, a wet spot on the ceiling is not merely a cosmetic concern; it’s a symptom of underlying issues that demand attention. By understanding the potential causes and consequences, homeowners can take proactive steps to address the problem and safeguard their homes from further damage.

Remember, a vigilant approach to maintenance and timely repairs can save you from the headaches and expenses associated with neglecting the wet spots on your ceiling. If you notice this issue in your home, don’t hesitate to investigate and take corrective action promptly.

Don’t let a wet spot on your ceiling turn into a major headache. By staying informed and addressing the root causes, you can maintain a dry, comfortable, and structurally sound home for years to come.

Causes and Solutions for Water Droplets on Ceiling: Unveiling the Mystery

Witnessing water droplets on the ceiling can be a cause for alarm, prompting questions about the underlying issues. In this comprehensive guide, we will delve into the potential causes of water droplets, offering valuable insights and practical tips to safeguard your home.

Water Droplets On Ceiling

Investigating the Issue: Understanding Water Droplets on Ceiling

To effectively address the presence of water droplets on the ceiling, it’s crucial to understand the root causes behind this phenomenon. Let’s explore the possible reasons and proactive measures to mitigate the problem.

*1. Condensation and Humidity Buildup

One common cause of water droplets is condensation resulting from high humidity levels. In areas with poor ventilation, especially bathrooms and kitchens, warm air meeting a cold surface can lead to condensation.

Solution:

  • Improve ventilation by using exhaust fans or opening windows.
  • Consider using a dehumidifier to regulate indoor humidity levels.

*2. Roof Leaks and Water Infiltration

Roof leaks are a significant contributor to water droplets on the ceiling. Damaged or compromised roofing materials allow water to seep into the structure, leading to visible signs of moisture on the ceiling.

Solution:

  • Inspect the roof for any signs of damage or missing shingles.
  • Repair leaks promptly and ensure proper roof maintenance.

*3. Plumbing Issues and Pipe Leaks

Leaking pipes within the ceiling or walls can result in water droplets appearing on the ceiling. This may occur due to aging pipes, corrosion, or accidental damage.

Solution:

  • Regularly inspect plumbing systems for leaks and address them immediately.
  • Consider replacing old or deteriorating pipes to prevent future issues.

*4. Improper Insulation

Inadequate insulation can lead to temperature differentials between the interior and exterior surfaces, causing condensation and water droplets.

Solution:

  • Evaluate and improve insulation in the attic and other relevant areas.
  • Ensure a consistent thermal barrier to prevent temperature variations.

*5. Ceiling Ventilation Issues

Poor ceiling ventilation can contribute to stagnant air, increasing the likelihood of condensation and water droplets.

Solution:

Steps to Address and Prevent Water Droplets on Ceiling

  1. Regular Inspection Routine: Conduct regular inspections of your home, focusing on the roof, plumbing, and ceilings. Promptly address any signs of water damage or leaks.
  2. Effective Ventilation Practices: Implement effective ventilation strategies in high-humidity areas such as bathrooms and kitchens. Ensure exhaust fans are in good working condition.
  3. Roof Maintenance: Schedule routine roof inspections and address any damage promptly. Replace missing shingles, repair leaks, and maintain the overall integrity of the roofing system.
  4. Plumbing System Checks: Regularly inspect plumbing systems for leaks or signs of wear. Upgrade or replace aging pipes to prevent water-related issues.
  5. Insulation Improvement: Evaluate the insulation in your home, especially in the attic. Enhance insulation to maintain consistent temperatures and prevent condensation.
  6. Professional Assistance: If water droplets persist despite preventive measures, consult with professionals such as roofers or plumbers for a thorough assessment and targeted solutions.

Read too: Troubleshooting and Addressing a Water Bubble in Ceiling: Causes and Solutions Revealed

Conclusion: Safeguarding Your Home from Water Droplets on Ceiling

In conclusion, water droplets on the ceiling can indicate underlying issues that require attention and resolution. By understanding the potential causes and implementing proactive measures, homeowners can protect their homes from water-related damage.

Regular maintenance, timely repairs, and a vigilant approach to potential issues contribute to a secure and dry living environment. Remember, addressing water droplets on the ceiling promptly not only preserves the aesthetics of your home but also ensures the structural integrity and longevity of your property.

Uncover the Mystery: Why Is My Ceiling Wet and What You Can Do About It

A wet ceiling can be an alarming sight, leaving homeowners puzzled and concerned about the potential causes behind this issue. In this comprehensive guide, we will delve into the common reasons for a wet ceiling, explore the implications, and offer practical solutions to address the problem. If you’ve ever asked yourself, “Why is my ceiling wet?” you’re not alone. Let’s unravel the mystery together.

Why Is My Ceiling Wet

Understanding the Signs: Why Is My Ceiling Wet?

Have you noticed water stains on your ceiling? Perhaps there’s a damp or spongy texture when you touch it? These are clear indicators that something is amiss. To address the issue effectively, we first need to identify the root cause.

Common Culprits Behind a Wet Ceiling

  1. Roof Leaks: The Silent InvaderA damaged or aging roof is a leading cause of water intrusion into your home. Missing shingles, cracked flashing, or compromised seals can allow rainwater to seep through, leading to a wet ceiling. Regular roof inspections and timely repairs are crucial in preventing this issue.
  2. Leaky Pipes: Concealed DangersUndetected leaks in plumbing pipes can wreak havoc on your ceiling. Whether it’s a slow drip or a sudden burst, water damage can accumulate over time, leading to a wet and discolored ceiling. Regular plumbing maintenance and inspections are vital to catch these issues early.
  3. Condensation Woes: Humidity Takes Its TollHigh humidity levels within your home can result in condensation forming on the ceiling. This moisture buildup can eventually lead to a wet ceiling. Adequate ventilation, proper insulation, and the use of dehumidifiers can help control indoor humidity and prevent this issue.
  4. Faulty HVAC Systems: Cooling Down, Dripping UpAir conditioning units generate condensate as they cool the air. If the condensate drainage system is faulty or clogged, it can lead to water dripping onto your ceiling. Regular HVAC maintenance, including cleaning and inspecting drainage lines, can prevent this from happening.

Addressing the Issue: What to Do When Your Ceiling is Wet

Now that we’ve explored the possible culprits, it’s time to take action. Depending on the cause, there are several steps you can take to remedy a wet ceiling.

1. Roof Repairs

If the issue lies with your roof, consult a professional roofer to assess and repair any damage. Prompt action can prevent further water damage to your ceiling and the structural integrity of your home.

2. Plumbing Fixes

For plumbing-related issues, enlist the services of a qualified plumber. They can identify and repair leaks, ensuring your plumbing system is in top condition and preventing future ceiling wetness.

3. Humidity Control

Invest in proper ventilation and insulation to control indoor humidity levels. Additionally, consider using dehumidifiers in areas prone to excess moisture, such as basements or bathrooms.

4. HVAC Maintenance

Schedule regular maintenance for your HVAC system to prevent condensate-related issues. This includes cleaning or replacing filters and ensuring proper drainage from the unit.

Conclusion: A Dry and Secure Home Awaits

Understanding the causes of a wet ceiling empowers homeowners to take proactive steps in preventing and addressing this issue. Whether it’s a leaking roof, faulty plumbing, condensation, or HVAC-related problems, early detection and timely action are key.

Remember, if you ever find yourself wondering, “Why is my ceiling wet?” it’s crucial to investigate and address the root cause promptly. By doing so, you not only protect the structural integrity of your home but also ensure a dry and comfortable living space for you and your family.

Unveiling the Mystery: Causes and Solutions for Small Water Bubbles on Ceiling Surfaces

Are you noticing small water bubbles on your ceiling? Dive into the intricacies of “Small Water Bubbles on Ceiling” to understand the underlying issues and discover effective solutions for a dry and intact ceiling.

Small Water Bubbles On Ceiling

Unmasking the Culprits

Explore the various factors contributing to the appearance of small water bubbles and gain insights into their origins.

Common Causes of Small Water Bubbles On Ceiling:

  1. Roof Leaks: Roof leaks are a frequent culprit. Water seeping through the roof can accumulate in the ceiling, forming bubbles as it disrupts the surface.
  2. Plumbing Issues: Faulty plumbing, such as leaking pipes or water buildup in the ceiling, can manifest as small water bubbles. Regular plumbing inspections are essential.
  3. Condensation: Excessive moisture in the air can lead to condensation on the ceiling, resulting in small water bubbles. This is common in areas with poor ventilation.

Understanding the Impact

Grasp the potential consequences of small water bubbles and why immediate action is crucial.

  1. Structural Damage: Small water bubbles, if left unattended, can lead to structural damage. This includes compromised drywall, weakened ceiling materials, and even potential hazards like mold growth.
  2. Aesthetic Issues: Beyond structural concerns, water bubbles on the ceiling affect the aesthetic appeal of your space. Stains, discoloration, and peeling paint are common consequences.

Dealing with Small Water Bubbles On Ceiling

Discover practical solutions to address existing water bubbles and prevent their recurrence in the future.

Identifying and Fixing the Source: Small Water Bubbles

Learn the step-by-step process to identify the source of the issue and implement effective fixes.

  1. Inspecting the Roof: Begin with a thorough inspection of your roof. Look for missing or damaged shingles, cracks, or any signs of water entry. Addressing roof issues can prevent further water damage to your ceiling.
  2. Checking Plumbing Systems: Enlist the help of a professional plumber to inspect your plumbing systems. Identify and fix any leaks promptly, preventing water from accumulating in the ceiling.
  3. Improving Ventilation: Enhance ventilation in your home to minimize condensation-related issues. Use exhaust fans, ensure proper attic ventilation, and consider a dehumidifier in humid climates.

Preventive Measures

Implement proactive measures to prevent the recurrence of small water bubbles.

  1. Regular Inspections: Conduct regular inspections of your roof and plumbing systems. Early detection and intervention can prevent small issues from evolving into major problems.
  2. Maintaining Indoor Humidity: Control indoor humidity levels to reduce the likelihood of condensation. Proper insulation and ventilation contribute to a balanced indoor environment.
  3. Prompt Repairs: Address any water damage or leaks promptly. Quick repairs can prevent the formation of small water bubbles and mitigate potential structural damage.

Read too: How To Dry Wet Ceiling

Conclusion: A Dry and Pristine Ceiling Awaits

In conclusion, addressing small water bubbles on your ceiling requires a combination of identifying the root cause, implementing effective solutions, and adopting preventive measures. By understanding the common causes and consequences, you can take proactive steps to ensure a dry, intact, and aesthetically pleasing ceiling in your home. Remember, early intervention is key to preserving the structural integrity and visual appeal of your living space.

Dealing with a Roof Leaking Through Ceiling Fan: Causes and Solutions

A leaky roof can be a homeowner’s worst nightmare, and when that water starts coming through your ceiling fan, it’s a clear sign of trouble. In this comprehensive guide, we’ll explore the issue of a “Roof Leaking Through Ceiling Fan,” understanding the causes, the potential damage, and the necessary steps to address this critical problem.

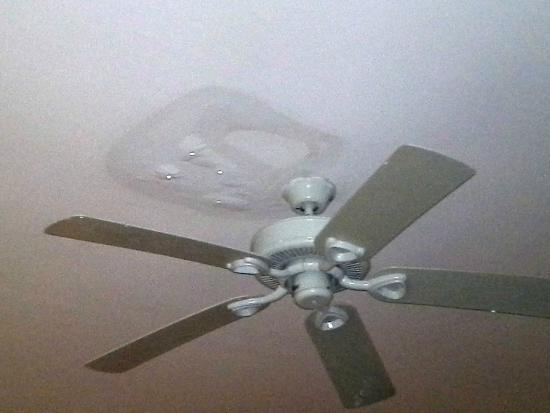
Roof Leaking Through Ceiling Fan

Understanding Roof Leaks Through Ceiling Fans

Roof leaks can manifest in various ways, and one alarming indication is water dripping or seeping through your ceiling fan. This problem not only damages your ceiling and fan but can also lead to more extensive issues like structural damage and mold growth.

Causes of Roof Leaking Through Ceiling Fan

Let’s delve into some common causes of this issue:

  1. Damaged Roofing Materials: Over time, roofing materials can deteriorate due to exposure to weather, debris, and UV rays. When these materials break down, they become more susceptible to leaks.
  2. Flashing Issues: The flashing around roof penetrations, such as the area where your ceiling fan’s electrical box is installed, can degrade or become loose, allowing water to infiltrate.
  3. Ice Dams: In colder climates, ice dams can form on the roof’s edge, preventing melting snow from properly draining. This water can then back up under the roof and find its way into your home.
  4. Clogged Gutters: When gutters become clogged with leaves, debris, or ice, rainwater has nowhere to go but onto your roof, potentially leading to leaks.
  5. Improper Roof Installation: If your roof was not installed correctly, it can be more prone to leaks. Inadequate sealing or improper flashing can be major culprits.
  6. Hail or Storm Damage: Severe weather, such as hail or strong winds, can damage your roof’s surface, making it more susceptible to leaks.

Recognizing the Signs

How do you know if your ceiling fan is experiencing a roof leak? Look out for the following signs:

  1. Water Drips: Visible water dripping through the ceiling fan or pooling around it.
  2. Ceiling Stains: Water stains or discoloration on the ceiling, which can indicate the path of the leak.
  3. Mold or Mildew: The development of mold or mildew on the ceiling or in the attic space.
  4. Wet Insulation: In the attic, you may find wet or damaged insulation near the area of the leak.

Addressing the Issue

If you suspect a roof leak through your ceiling fan, it’s crucial to take immediate action to prevent further damage. Here are the steps you should follow:

  1. Identify the Source: Try to locate the source of the leak, which may involve inspecting the attic and the roof itself.
  2. Temporary Measures: Use buckets or containers to catch the dripping water to prevent further damage to your home’s interior.
  3. Call a Roofing Professional: Contact a qualified roofing professional to assess the damage and provide an estimate for repair or replacement.
  4. Repair or Replace: Depending on the extent of the damage and the age of your roof, you may need to repair specific areas or consider a complete roof replacement.
  5. Inspect and Prevent: After repairs, conduct regular roof inspections and maintenance to prevent future leaks.

Conclusion

A roof leaking through a ceiling fan is a pressing issue that requires immediate attention. Ignoring the problem can lead to more extensive damage, including structural issues and mold growth. To protect your home and maintain its integrity, promptly identify the source of the leak, seek professional help, and take the necessary steps to address the problem. A well-maintained roof is essential for safeguarding your home from water intrusion and ensuring its longevity.

When Rain Water Coming Through Ceiling Fan: Causes and Solutions

When you least expect it, rainwater infiltrating your home through a ceiling fan can be a shocking and stressful experience. Understanding the causes and finding effective solutions are crucial in such a situation. In this article, we’ll explore the phenomenon of “Rain Water Coming Through Ceiling Fan” and provide valuable insights to help you protect your home from this unexpected intrusion.

Rain Water Coming Through Ceiling Fan

The Mystery of Rainwater Through Ceiling Fans

Rain Water Coming Through Ceiling Fan: A Troublesome Scenario

Experiencing rainwater pouring through your ceiling fan can be puzzling and concerning. To tackle this issue effectively, let’s first understand the possible reasons behind it:

1. Roof Leaks

One of the primary culprits when rainwater infiltrates your ceiling fan is a roof leak. Damage to your roof, such as missing or damaged shingles, cracked flashing, or deteriorated sealant, can allow rainwater to seep through and into your home.

2. Inadequate Roof Drainage

Poor roof drainage can lead to water pooling, especially during heavy rain. This accumulation of water can eventually find its way through your ceiling fan, causing a mess in your living space.

3. Damaged Ceiling Fan

In some cases, the problem might originate from the ceiling fan itself. A malfunctioning or improperly installed ceiling fan can allow water to enter the house. Ensuring your ceiling fan is properly sealed and functioning is essential.

Addressing Rainwater Through Ceiling Fans

If you find yourself dealing with rainwater infiltrating through your ceiling fan, it’s crucial to act swiftly. Here are some steps to help you tackle the issue:

1. Identify the Source

Start by identifying the source of the issue. Is it a roof leak, poor drainage, or a damaged ceiling fan? Thoroughly inspect your ceiling and attic to pinpoint the problem.

2. Roof Repairs

If the issue is a roof leak, it’s advisable to consult with a professional roofer. They can assess the extent of the damage and recommend the necessary repairs, which may involve fixing the damaged area, replacing shingles, or resealing seams.

3. Roof Drainage

To prevent water accumulation on the roof, ensure your roof’s drainage system is functioning correctly. Clean gutters and downspouts regularly to allow water to flow freely and away from your home.

4. Ceiling Fan Inspection

Inspect your ceiling fan to ensure it is well-sealed and properly installed. If you suspect a problem with the fan, consult with an electrician to address any electrical issues or leaks.

Prevention is Key

Preventing rainwater from entering your home through the ceiling fan is more preferable than dealing with the aftermath. Here are some proactive measures to minimize the risk:

  1. Regular Roof Inspections: Schedule routine roof inspections to catch and address any potential issues early.
  2. Proper Maintenance: Keep up with roof maintenance, including replacing damaged shingles and addressing any roof-related problems promptly.
  3. Improved Roof Drainage: Consider installing additional roof drainage systems, like roof gutters, to channel water away from your home.
  4. Quality Ceiling Fan Installation: Ensure your ceiling fan is correctly installed and well-sealed to prevent leaks.

Conclusion

Rain Water Coming Through Ceiling Fan” can be a distressing experience for any homeowner. By understanding the causes of this issue and taking appropriate preventive measures, you can safeguard your home from this unexpected intrusion. If you find yourself facing this problem, acting promptly to identify and address the source of the issue is essential to prevent further damage. Don’t let rainwater through your ceiling fan disrupt your peace of mind; take action to keep your home dry and secure.

Dealing with Mold in the Ceiling from a Leaky Roof

Discovering mold in your ceiling can be a distressing sight, especially when it’s the result of a leaky roof. Mold not only affects the aesthetics of your home but also poses health risks to your family. In this comprehensive guide, we will explore the causes of mold in the ceiling from a leaky roof and provide practical steps to address and prevent this issue.

Mold In Ceiling From Leaky Roof
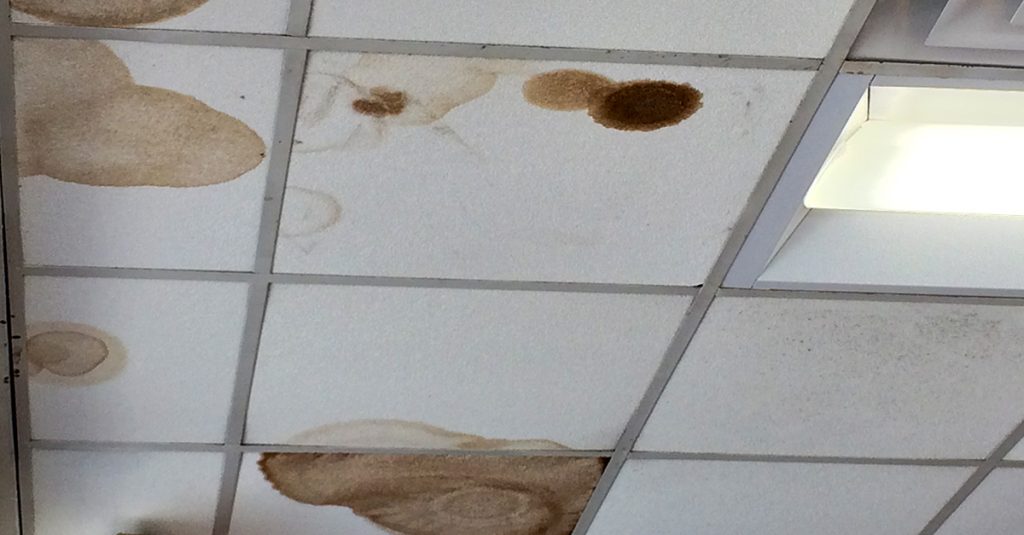
Water stains on ceiling tiles showing leaks above

Understanding Mold Growth

Before we dive into the specifics of mold in the ceiling due to a leaky roof, it’s essential to understand why mold forms and the potential risks it presents.

Causes of Mold Growth:

  1. Moisture: Mold thrives in damp environments, making leaks and high humidity prime culprits for mold growth.
  2. Poor Ventilation: Insufficient airflow and ventilation can trap moisture and exacerbate the conditions conducive to mold.
  3. Leaky Roof: A roof leak allows water to seep into your home’s structure, including the ceiling, creating the ideal environment for mold to flourish.

Health Risks of Mold:

Exposure to mold can lead to various health problems, particularly for individuals with allergies, respiratory issues, or weakened immune systems. Common symptoms include coughing, sneezing, congestion, skin irritation, and eye irritation.

Read too: What Causes Water Stains On Ceiling

Identifying Mold in the Ceiling

Before addressing the issue, you must confirm that you are dealing with mold. Signs of mold in the ceiling include:

  1. Visible Mold: Look for discolored patches or spots on your ceiling. Mold can be black, green, or brown, and it often appears in clusters.
  2. Musty Odor: Mold growth is often accompanied by a musty, earthy smell. If you detect an unpleasant odor in the affected area, it may be due to mold.
  3. Water Stains: Water stains or discoloration on your ceiling can be an indicator of a leak and potential mold growth.

Addressing Mold from a Leaky Roof

Step 1: Fix the Roof Leak

Addressing the source of the problem is paramount. If you have a leaky roof, consult a professional roofer to assess and repair the damage. Proper roof repair is crucial to preventing future mold growth.

Step 2: Isolate the Affected Area

Before you begin the cleanup, ensure the affected area is isolated. Seal off the room and use plastic sheeting and duct tape to create a barrier to prevent the spread of mold spores to other parts of your home.

Step 3: Safety Gear

Safety should be a top priority when dealing with mold. Wear protective gear, including a mask, goggles, gloves, and clothing that covers your arms and legs.

Step 4: Mold Removal

Mold can be removed from non-porous surfaces with a mixture of soap and water or a commercial mold remover. For porous materials, such as drywall, it may be necessary to remove and replace the affected sections.

Step 5: Cleanup

Thoroughly clean and disinfect the area, including any materials or surfaces that had mold growth. Use fans and dehumidifiers to help dry the area.

Step 6: Preventative Measures

To prevent future mold growth:

  • Maintain proper ventilation in your home.
  • Fix any plumbing or roof leaks promptly.
  • Keep humidity levels in check.
  • Insulate your attic to prevent condensation on the ceiling.

Conclusion

Mold in the ceiling from a leaky roof is a serious issue that requires prompt attention. By understanding the causes, identifying the presence of mold, and taking the necessary steps to address the problem, you can safeguard your home and the health of your family. Remember, fixing the roof leak is the first and most critical step in preventing mold growth in the future. With proper precautions and swift action, you can effectively combat mold and restore a safe and healthy living environment in your home.

Understanding and Dealing with Water Spots on the Ceiling After Rain

Rainy weather can be a source of comfort, but it can also bring unwelcome surprises. One common issue that homeowners face is the appearance of water spots on their ceilings after a heavy rain. These spots not only affect the aesthetics of your home but can also signal potential roof or structural problems. In this article, we will delve into the causes of water spots on the ceiling after rain and provide guidance on how to address and prevent this issue.

Water Spots On Ceiling After Rain

Why Do Water Spots Appear After Rain?

Water spots on the ceiling are often a sign of a leak in your roof or another part of your home’s structure. When it rains, water can infiltrate your home through various pathways, including:

  1. Roof Leaks: The most common cause of water spots is a leaky roof. Missing or damaged shingles, compromised flashing, or improper sealing can allow rainwater to penetrate your home.
  2. Clogged Gutters: Gutters that are clogged with debris can’t effectively divert rainwater away from your home. As a result, water can overflow and seep into your roof and walls.
  3. Condensation: In some cases, water spots may not be caused by leaks but by condensation. When warm, moist air from inside your home meets a cold ceiling, it can create condensation that appears as water spots.

Identifying the Source of the Problem

To address water spots on your ceiling, you first need to identify the source of the issue. Here are some steps to help you pinpoint the problem:

  1. Inspect the Attic: Start by examining your attic during or immediately after a rain shower. Look for signs of moisture or dripping water. This can help you identify the location of the leak.
  2. Check the Roof: If it’s safe to do so, inspect your roof for missing or damaged shingles, cracked flashing, or other visible damage. Pay attention to areas where water spots are present on the ceiling.
  3. Examine the Gutters: Ensure that your gutters and downspouts are clear of debris and properly functioning. Clogged gutters can lead to water overflow, which may be the source of the problem.

Read too: What Causes Water Stains On Ceiling

Addressing Water Spots

Once you’ve identified the source of the issue, you can take steps to address water spots on your ceiling:

  1. Repair Roof Leaks: If the problem is a roof leak, it’s essential to address it promptly. Depending on the extent of the damage, you may need to patch the area or replace damaged shingles. Consider consulting a professional roofer for more extensive repairs.
  2. Clean Gutters: If clogged gutters are the issue, clean them out to ensure proper water drainage. Regular gutter maintenance can prevent future water spots.
  3. Improve Ventilation: If condensation is the culprit, consider improving the ventilation in your home. Proper insulation and ventilation can reduce condensation and prevent water spots from forming.

Preventing Future Water Spots

Prevention is key to avoiding the recurrence of water spots on your ceiling after rain. Here are some preventative measures to consider:

  1. Regular Roof Inspections: Schedule annual roof inspections to catch and address potential issues before they result in water spots.
  2. Gutter Maintenance: Keep your gutters clean and in good condition to prevent water overflow and roof leaks.
  3. Seal Gaps: Ensure that your home is well sealed to prevent rainwater from entering through gaps or cracks in the structure.
  4. Improve Attic Insulation: Adequate attic insulation can help reduce condensation and moisture buildup.

Conclusion

Water spots on the ceiling after rain are a common issue, and they often indicate a problem with your roof or home’s structure. Identifying the source of the issue and taking prompt action can prevent further damage and maintain the integrity of your home. Regular maintenance and preventative measures are key to keeping your home dry and free from water spots.

Water Spot On Ceiling After Heavy Rain – Causes and Solutions

A water spot on your ceiling after heavy rain can be a cause for concern, and it’s not something you should ignore. While it may seem like a minor issue, it can lead to more significant problems if left unaddressed. In this article, we will explore the common causes of water spots on ceilings after heavy rain and provide practical solutions to tackle this issue effectively.

Water Spot On Ceiling After Heavy Rain

Understanding Water Spots on Ceiling

Water spots on the ceiling are often telltale signs of a leak or water infiltration. These spots can vary in size, from small discolored patches to larger, more noticeable marks. When they appear after heavy rain, it’s a clear indication that water from the rain has made its way into your home. Here are the common reasons behind these water spots:

  • Roof Leaks Heavy rain can expose weaknesses in your roof, leading to leaks. This is particularly true if your roof is old or hasn’t been properly maintained. Water can find its way through damaged shingles, gaps in the flashing, or compromised sealant around roof penetrations like chimneys and vents.
  • Damaged Gutters and Downspouts Faulty gutters and downspouts can exacerbate the problem. If they are clogged, broken, or improperly installed, rainwater may overflow or spill close to your home’s foundation. This excess water can seep into the walls and find its way to your ceiling.
  • Attic Condensation Sometimes, water spots on the ceiling aren’t related to external leaks. Poor attic ventilation and insulation can lead to condensation issues. When warm, moist air from inside your home rises into a cold attic, it can condense and cause water spots on the ceiling.

Dealing with Water Spots on Ceiling

Now that we understand the potential causes of water spots on the ceiling, it’s time to explore how to address and prevent this issue.

  1. Identify the Source of the Leak The first step in addressing water spots on the ceiling is to identify the source of the leak. This may involve inspecting your attic or crawl space, checking the roof, and examining your gutters and downspouts. Look for signs of water damage, such as wet insulation, stained rafters, or mold growth. Once you’ve pinpointed the source, you can take appropriate action to fix it.
  2. Repair Roof Leaks If your roof is the source of the problem, it’s essential to repair it promptly. Depending on the severity of the damage, you may need to replace missing or damaged shingles, repair flashing, or reseal vulnerable areas. Consider hiring a professional roofer to ensure the job is done correctly.
  3. Maintain Gutters and Downspouts Regular maintenance of your gutters and downspouts is crucial. Clean them at least twice a year to remove debris and ensure proper water flow. Inspect for any damage and repair or replace damaged sections. Ensure that downspouts direct water away from your home’s foundation.
  4. Improve Attic Ventilation and Insulation To prevent attic condensation, ensure your attic is properly ventilated and insulated. This will help regulate temperature and humidity, reducing the likelihood of moisture buildup. Installing ridge and soffit vents and adding more insulation can make a significant difference.

Read too: What To Do With Ceiling After Removing Popcorn

Conclusion

A water spot on the ceiling after heavy rain is not something to be taken lightly. It’s a clear sign of water infiltration and potential damage to your home. By identifying the source of the leak and taking appropriate steps to address it, you can prevent further issues and maintain the integrity of your home. Regular maintenance of your roof, gutters, and attic is key to preventing water spots and the problems they represent. Don’t wait; tackle this issue promptly to keep your home in top condition.