Floor-to-Ceiling Shower Doors: The Ultimate Guide to a Luxurious Bathroom

Floor-to-Ceiling Shower Doors. When it comes to creating a luxurious bathroom, there are many elements to consider. From the pemilihan bathtub dan shower, hingga the pemilihan tile dan fixtures, every detail plays a role in creating a space that is both stylish and functional.

Floor To Ceiling Shower Doors

One of the most important decisions you will make is the type of shower door you will install. While there are many different options available, floor-to-ceiling shower doors are quickly becoming the most popular choice for homeowners who want to create a truly luxurious bathroom.

What are Floor-to-Ceiling Shower Doors?

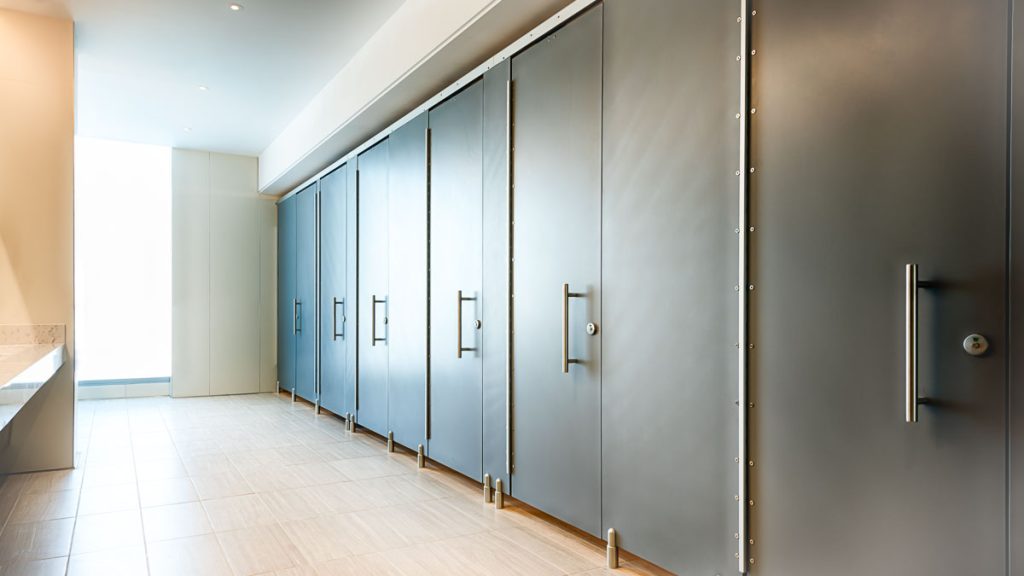
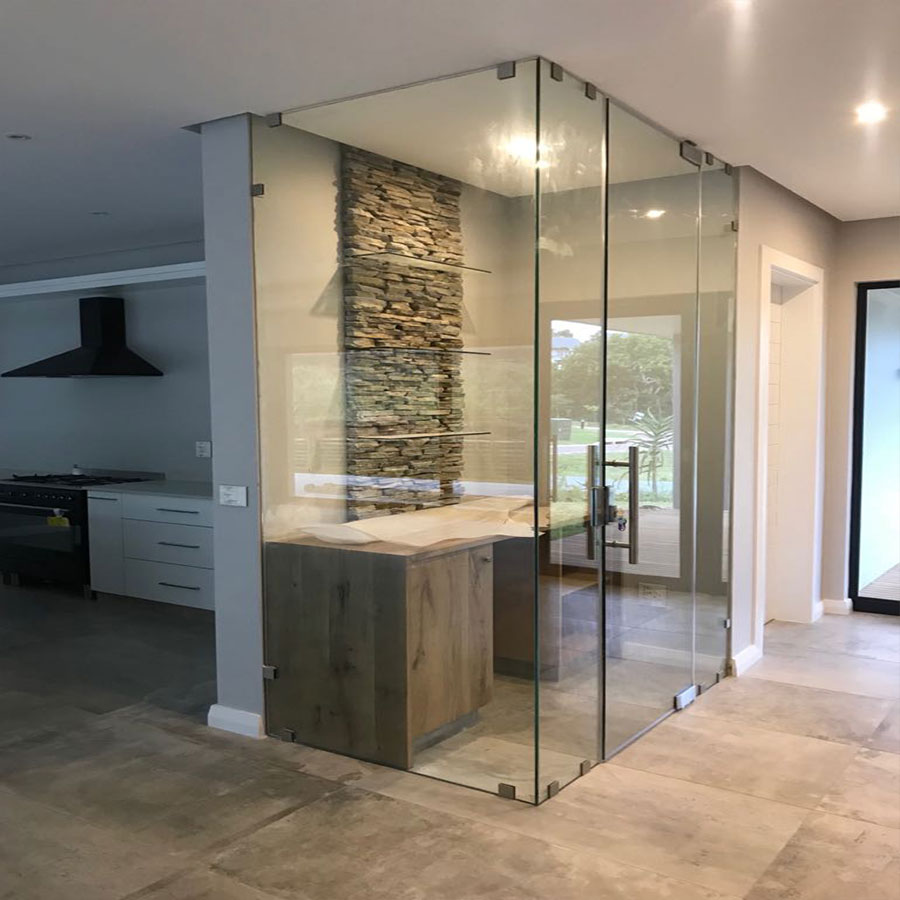
Floor-to-ceiling shower door are exactly what they sound like: shower doors that extend from the floor to the ceiling. They are typically made of glass or acrylic and can be either framed or frameless.

Benefits

There are many benefits to choosing floor-to-ceiling shower door for your bathroom. Some of the most notable benefits include:

  • A more spacious feel: Floor-to-ceiling shower door can make your bathroom feel larger and more open. This is especially beneficial in small bathrooms, where every square foot counts.
  • A more luxurious look: Floor-to-ceiling shower door add a touch of luxury to any bathroom. They are sleek, modern, and stylish, and they can instantly elevate the look of your space.
  • A more custom fit: Floor-to-ceiling shower doors can be custom-made to fit the exact dimensions of your shower. This means that you will get a door that fits perfectly and looks great.
  • A more durable option: Floor-to-ceiling shower doors are made from high-quality materials that are designed to last. They are also easy to clean and maintain, which means that they will look good for years to come.

Types of Floor-to-Ceiling Shower Doors

There are a few different types of floor-to-ceiling shower doors available. Some of the most common types include:

  • Framed shower doors: Framed shower doors have a metal frame that surrounds the glass. This type of door is less expensive than frameless shower doors, but it can also be more difficult to clean.
  • Frameless shower doors: Frameless shower doors do not have a metal frame. This type of door is more expensive than framed shower doors, but it is also easier to clean and maintain.
  • Sliding shower doors: Sliding shower doors are a good option for small bathrooms. They do not take up any extra space when they are opened, which can make a small bathroom feel larger.
  • Pivot shower doors: Pivot shower doors are a good option for large bathrooms. They open outward, which can make a large bathroom feel more spacious.

How to Choose the Right Floor-to-Ceiling Shower Door

When choosing a floor-to-ceiling shower door, there are a few factors to consider. Some of the most important factors include:

  • The size of your shower: The door should be the right size for your shower. It should not be too big or too small.
  • The type of door: The type of door should be chosen based on your personal preferences and the style of your bathroom.
  • The material of the door: The material of the door should be chosen based on your budget and your desired level of durability.

Conclusion

Floor-to-ceiling shower door are a great way to add luxury and style to your bathroom. They are available in a variety of styles and materials to suit any taste or budget. When choosing a floor-to-ceiling shower door, it is important to consider the size of your shower, the type of door, and the material of the door.

Read too: Exploring the Innovation and Efficiency of Ceiling Mounted Surgical Light Solutions: Illuminating Precision

Floor-to-Ceiling Bathroom Stalls: The Ultimate Guide

When it comes to bathroom stalls, there are a few different types to choose from. One of the most popular options is the floor-to-ceiling stall. These stalls offer a number of advantages over other types of stalls, including privacy, security, and cleanliness.

Floor To Ceiling Bathroom Stalls

What are Floor-to-Ceiling Bathroom Stalls?

Floor-to-ceiling bathroom stalls are exactly what they sound like: stalls that extend from the floor to the ceiling. They are typically made of metal or plastic and have a door that can be closed for privacy.

Benefits

There are many benefits to using floor-to-ceiling bathroom stalls. Some of the most notable benefits include:

  • Privacy: Floor-to-ceiling stalls offer maximum privacy. The walls of the stall extend all the way to the ceiling, so there are no gaps for people to see through. This is especially important in high-traffic areas, such as public restrooms.
  • Security: Floor-to-ceiling stalls also offer a greater sense of security. The walls of the stall are sturdy and difficult to climb over, which can help to deter crime.
  • Cleanliness: Floor-to-ceiling stalls are easier to keep clean than other types of stalls. The walls are smooth and non-porous, which makes it difficult for dirt and grime to build up.

Types of Floor-to-Ceiling Bathroom Stalls

There are a few different types of floor-to-ceiling bathroom stalls available. Some of the most common types include:

  • Standard stalls: These are the most basic type of floor-to-ceiling stall. They have a door that can be closed for privacy and walls that extend all the way to the ceiling.
  • ADA-compliant stalls: These stalls are designed to be accessible to people with disabilities. They have wider doors and larger stalls to accommodate wheelchairs.
  • Family stalls: These stalls are larger than standard stalls and have a changing table for babies.

How to Choose the Right Floor-to-Ceiling Bathroom Stall

When choosing a floor-to-ceiling bathroom stall, there are a few factors to consider. Some of the most important factors include:

  • The size of the stall: The stall should be large enough to accommodate the needs of the users.
  • The type of stall: The type of stall should be chosen based on the needs of the users. For example, an ADA-compliant stall may be necessary if the restroom will be used by people with disabilities.
  • The material of the stall: The material of the stall should be chosen based on the desired level of durability and cleanliness.

Read too: Exploring the Innovation and Efficiency of Ceiling Mounted Surgical Light Solutions: Illuminating Precision

Conclusion

Floor-to-ceiling bathroom stalls offer a number of advantages over other types of stalls. They are more private, secure, and easier to keep clean. When choosing a floor-to-ceiling bathroom stall, it is important to consider the size, type, and material of the stall.

Bring Elegance and Charm to Your Space with Faux Ceiling Beam White

Faux ceiling beam white are a great way to add a touch of elegance and charm to any room. They can be used to create a variety of looks, from rustic to modern, and they can be installed in just a few hours.

Faux Ceiling Beams White

If you’re considering adding faux ceiling beams to your home, here are a few things you need to know:

What are faux ceiling beams?

Faux ceiling beam are made of a variety of materials, including wood, polyurethane, and PVC. They are designed to look like real wood beams, but they are much lighter and easier to install.

Why choose faux ceiling beams white?

White faux ceiling beam are a popular choice because they can make a room feel larger and brighter. They also go with a variety of décor styles.

Where can I buy faux ceiling beams white?

Faux ceiling beams white can be purchased from a variety of retailers, including home improvement stores, online retailers, and specialty stores.

How to install faux ceiling beams white?

Installing faux ceiling beams white is a relatively easy process. The beams can be attached to the ceiling with screws or nails, and they can be painted or stained to match your décor.

Benefits of Faux Ceiling Beams White

There are many benefits to adding faux ceiling beams white to your home. These benefits include:

  • Increased home value: Faux ceiling beams can add value to your home. This is because they are a desirable feature that can make your home more attractive to potential buyers.
  • Improved curb appeal: Faux ceiling beams can also improve the curb appeal of your home. This is because they can make your home look more elegant and inviting.
  • Added character: Faux ceiling beams can add character to your home. This is because they can create a unique and stylish look.
  • Versatile: Faux ceiling beams can be used in a variety of rooms, including living rooms, dining rooms, bedrooms, and kitchens.
  • Easy to install: Faux ceiling beams are easy to install. This is because they are lightweight and can be attached to the ceiling with screws or nails.

Faux Ceiling Beams White

Faux ceiling beams white are a great way to add a touch of elegance and charm to any room. They are available in a variety of styles and sizes, so you can find the perfect beams to match your décor.

How to Choose the Right Faux Ceiling Beams White

When choosing faux ceiling beams white, there are a few things you need to consider:

  • The size of your room: The size of your room will determine the size of the beams you need. If you have a small room, you’ll want to choose smaller beams. If you have a large room, you can choose larger beams.
  • The style of your décor: The style of your décor will also determine the type of beams you choose. If you have a traditional décor, you’ll want to choose beams with a traditional look. If you have a modern décor, you can choose beams with a more modern look.
  • Your budget: Faux ceiling beams white can range in price from a few dollars to a few hundred dollars per beam. The price will depend on the size, style, and material of the beams.

Where to Buy Faux Ceiling Beams White

Faux ceiling beams white can be purchased from a variety of retailers, including:

  • Home improvement stores: Home improvement stores like The Home Depot and Lowe’s sell a variety of faux ceiling beams white.
  • Online retailers: Online retailers like Amazon and Wayfair sell a variety of faux ceiling beams white.
  • Specialty stores: Specialty stores like Restoration Hardware and Pottery Barn sell a variety of faux ceiling beams white.

How to Install Faux Ceiling Beams White

Installing faux ceiling beams white is a relatively easy process. The beams can be attached to the ceiling with screws or nails, and they can be painted or stained to match your décor.

Here are the steps on how to install faux ceiling beams white:

  1. Measure the width and length of your room. This will help you determine the size of the beams you need.
  2. Purchase the beams. You can purchase faux ceiling beams white from a variety of retailers.
  3. Mark the location of the beams on the ceiling. Use a pencil to mark the location of the beams on the ceiling.
  4. Attach the beams to the ceiling. Use screws or nails to attach the beams to the ceiling.
  5. Paint or stain the beams. You can paint or stain the beams to match your décor.

Conclusion

Faux ceiling beams white are a great way to add a touch of elegance and charm to any room. They are available in a variety of styles and sizes, so you can find the perfect beams to match your décor.

Faux Ceiling Beams White: Design Inspiration and Styling Tips

Now that you understand the basics of faux ceiling beams white, let’s explore some creative ways to incorporate them into your home:

Design Inspiration:

  • Rustic Charm: Achieve a cozy cabin feel with thick, textured white beams. Layer them with exposed brick or stone accents, and pair them with warm lighting and natural wood furniture.
  • Modern Farmhouse: Opt for clean lines and a minimalist aesthetic with sleek, white beams. Complement them with shiplap walls, industrial lighting, and pops of greenery.
  • Coastal Chic: Create a breezy beach vibe with distressed white beams. Combine them with light-colored furniture, woven textures, and nautical accents.
  • Industrial Loft: Embrace the raw, unfinished look with exposed white beams. Add metal accents, concrete floors, and reclaimed wood furniture for a touch of urban grit.
  • French Countryside: Channel the rustic elegance of French countryside with whitewashed beams. Pair them with exposed stone walls, vintage furniture, and floral patterns.

Styling Tips:

  • Play with Beam Sizes and Spacing: Varying the size and spacing of your beams can create visual interest and define different areas within a room.
  • Highlight Architectural Features: Use beams to draw attention to fireplaces, windows, or other architectural details.
  • Incorporate Lighting: Install recessed lights or pendant lights within the beams for an extra layer of ambiance.
  • Accessorize with Greenery: Hang plants or vines from the beams to add a touch of nature and soften the space.
  • Consider Color Accents: For a bolder statement, paint the beams a contrasting color to create a focal point.
  • Mix and Match Materials: Combine white beams with other materials like wood, metal, or stone for a layered and textured look.

Remember:

  • Measure twice, cut once! Ensure you have accurate measurements before purchasing or installing your beams.
  • Seek professional help if needed. Installing beams can be challenging, so don’t hesitate to consult a contractor or handyman for assistance.
  • Have fun and experiment! Don’t be afraid to get creative and personalize your space with faux ceiling beams white.

Read too: Exploring the Innovation and Efficiency of Ceiling Mounted Surgical Light Solutions: Illuminating Precision

Elevate Your Space with Craftmade Decorative Ceiling Fan: A Perfect Blend of Style and Functionality

Discover the perfect marriage of style and functionality with Craftmade Decorative Ceiling Fan. Transform your living spaces with these elegant and versatile fans that not only provide superior air circulation but also serve as stunning decorative accents. Explore the world of Craftmade Decorative Ceiling Fans and elevate the ambiance of your home with effortless charm.

Craftmade Decorative Ceiling Fan

Introduction to Craftmade Decorative Ceiling Fans

Craftmade has long been synonymous with quality craftsmanship and innovative design in the ceiling fan industry. Craftmade Decorative Ceiling Fans are no exception, offering a wide range of styles, finishes, and features to suit any interior decor scheme. Whether you’re looking to add a touch of traditional elegance, contemporary flair, or rustic charm to your home, Craftmade Decorative Ceiling Fans provide the perfect solution.

Key Features of Craftmade Decorative Ceiling Fans

  1. Variety of Styles: Craftmade offers a diverse selection of Decorative Ceiling Fans to suit every taste and preference. From classic designs with ornate detailing to sleek and modern models with clean lines, there’s a Craftmade fan to complement any decor style.
  2. High-Quality Materials: Craftmade Decorative Ceiling Fans are crafted from premium materials such as high-grade wood, brushed nickel, bronze, and wrought iron. Each fan is built to withstand the test of time, ensuring years of reliable performance and durability.
  3. Customizable Options: Many Craftmade Decorative Ceiling Fans come with customizable features such as reversible blades, adjustable fan speeds, and optional light kits. This allows homeowners to tailor their fan to meet their specific needs and preferences.
  4. Quiet and Efficient Operation: Craftmade fans are equipped with high-performance motors that deliver powerful yet whisper-quiet operation. Advanced motor technology ensures optimal airflow and energy efficiency, keeping your home comfortable while reducing energy costs.

Benefits of Installing Craftmade Decorative Ceiling Fans

  1. Enhanced Aesthetic Appeal: Craftmade Decorative Ceiling Fans serve as stylish focal points in any room, enhancing the overall aesthetic appeal of your home. Whether installed in the living room, bedroom, or outdoor patio, these fans add a touch of elegance and sophistication to any space.
  2. Improved Air Circulation: In addition to their decorative function, Craftmade fans provide superior air circulation and ventilation. By circulating air effectively throughout the room, these fans help maintain a comfortable indoor environment and reduce the need for air conditioning.
  3. Energy Efficiency: Craftmade Decorative Ceiling Fans are designed to be energy-efficient, helping homeowners reduce their energy consumption and utility bills. By using less energy than traditional HVAC systems, these fans offer a cost-effective and environmentally friendly cooling solution.
  4. Year-Round Comfort: Many Craftmade Decorative Ceiling Fans come with reversible motor options, allowing them to be used year-round. In the summer, fans can be set to rotate counterclockwise to create a cooling breeze, while in the winter, they can be set to rotate clockwise to circulate warm air trapped near the ceiling.

Installing and Maintaining Craftmade Decorative Ceiling Fans

Installing and maintaining Craftmade Decorative Ceiling Fans is simple and straightforward:

  1. Pre-Installation Planning: Before installing a Craftmade fan, carefully read the manufacturer’s instructions and ensure that you have all the necessary tools and hardware. Choose an appropriate location for the fan that allows for adequate clearance and airflow.
  2. Mounting the Fan: Follow the manufacturer’s instructions for mounting the fan to the ceiling bracket. Use a sturdy support structure and ensure that the fan is securely anchored to prevent wobbling or shaking during operation.
  3. Wiring and Electrical Connections: Connect the fan’s wiring to the electrical supply according to local building codes and regulations. Use wire connectors to secure the connections and ensure proper insulation.
  4. Balancing and Testing: Once the fan is installed, use a balancing kit to ensure that the blades are evenly weighted and the fan operates smoothly. Test the fan’s operation and adjust the speed and direction as needed to achieve optimal airflow and comfort.
  5. Regular Maintenance: To keep your Craftmade Decorative Ceiling Fan looking and performing its best, perform regular maintenance tasks such as dusting the blades, cleaning the motor housing, and tightening any loose screws or fittings. Additionally, lubricate the motor bearings annually to ensure smooth and quiet operation.

Conclusion

Craftmade Decorative Ceiling Fans offer the perfect combination of style, functionality, and performance, making them an ideal addition to any home. Whether you’re looking to enhance the aesthetic appeal of your living spaces, improve air circulation and comfort, or reduce energy costs, Craftmade fans provide a versatile and elegant solution. Invest in the timeless charm and superior quality of Craftmade Decorative Ceiling Fans and elevate the ambiance of your home with effortless style.

Read too: Black Friday Genie Garage Door Openers Extravaganza for Smart Home Security: Unveiling Exclusive Deals

Enhance Your Outdoor Space with the Timeless Elegance of Copper Outdoor Ceiling Light Fixtures

Elevate the ambiance of your outdoor area with the timeless charm and durability of Copper Outdoor Ceiling Light fixtures. Explore how these stylish and weather-resistant lighting options can add warmth, sophistication, and functionality to your porch, patio, or gazebo. Discover the beauty and versatility of Copper Outdoor Ceiling Lights and transform your outdoor space into a welcoming oasis.

Copper Outdoor Ceiling Light

Introduction to Copper Outdoor Ceiling Light

Copper has long been prized for its beauty and versatility in architectural and decorative applications, and outdoor lighting is no exception. Copper Outdoor Ceiling Light fixtures offer a unique combination of aesthetic appeal, durability, and corrosion resistance, making them an ideal choice for illuminating outdoor spaces. Whether you’re looking to enhance curb appeal, improve safety and security, or create a cozy ambiance, Copper Outdoor Ceiling Lights provide an elegant solution.

Key Features of Copper Outdoor Ceiling Lights

  1. Timeless Aesthetic: Copper has a rich, warm hue that develops a beautiful patina over time, giving Copper Outdoor Ceiling Lights a timeless, rustic appeal. Whether installed in traditional, contemporary, or eclectic settings, these fixtures add character and charm to any outdoor space.
  2. Durable Construction: Copper is naturally resistant to corrosion, rust, and decay, making it well-suited for outdoor environments. Copper Outdoor Ceiling Lights are built to withstand the elements, including rain, snow, humidity, and UV exposure, ensuring long-lasting performance and beauty.
  3. Versatile Designs: From classic lantern-style fixtures to modern geometric designs, Copper Outdoor Ceiling Lights are available in a wide range of styles and configurations to suit any aesthetic preference. Whether you prefer understated elegance or eye-catching statement pieces, there’s a Copper Outdoor Ceiling Light to complement your outdoor decor.
  4. Functional Illumination: In addition to their aesthetic appeal, Copper Outdoor Ceiling Lights provide practical illumination for outdoor activities, entertaining, and enhancing safety and security. With options for integrated LED technology, dimmable features, and adjustable brightness levels, these fixtures offer customizable lighting solutions for any outdoor space.

Benefits of Installing Copper Outdoor Ceiling Lights

  1. Enhanced Curb Appeal: The warm glow of Copper Outdoor Ceiling Lights adds instant curb appeal to your home, making it more inviting and welcoming to guests and passersby. Whether installed on the front porch, entryway, or garage, these fixtures make a memorable first impression.
  2. Improved Safety and Security: Outdoor lighting plays a crucial role in enhancing safety and security around your home. Copper Outdoor Ceiling Lights illuminate pathways, staircases, and entry points, reducing the risk of trips, falls, and accidents. Additionally, well-lit outdoor areas deter intruders and provide peace of mind for homeowners.
  3. Extended Outdoor Living: With the right lighting, your outdoor space can become an extension of your indoor living area, allowing you to enjoy al fresco dining, relaxation, and entertainment year-round. Copper Outdoor Ceiling Lights create a cozy and inviting atmosphere for gatherings with family and friends, even after the sun sets.
  4. Low Maintenance: Unlike other materials that require regular cleaning and maintenance, Copper Outdoor Ceiling Lights are relatively low maintenance. The natural patina that develops over time adds to their character and beauty, and occasional cleaning with a mild detergent is all that’s needed to keep them looking their best.

Installing Copper Outdoor Ceiling Lights

Installing Copper Outdoor Ceiling Lights is a straightforward process:

  1. Selecting the Right Fixture: Choose Copper Outdoor Ceiling Lights that complement the style and scale of your outdoor space. Consider factors such as mounting height, bulb type, and lighting requirements to ensure optimal performance and aesthetics.
  2. Preparation: Before installation, ensure that the ceiling or overhead surface is structurally sound and capable of supporting the weight of the fixture. Turn off power to the existing light fixture at the breaker panel to prevent electrical accidents.
  3. Mounting the Fixture: Follow the manufacturer’s instructions for mounting the Copper Outdoor Ceiling Light fixture. Use appropriate hardware and mounting methods to secure the fixture to the ceiling or overhead surface, ensuring a stable and secure installation.
  4. Electrical Connections: Connect the wiring of the Copper Outdoor Ceiling Light fixture to the electrical supply according to local building codes and regulations. Use wire connectors to secure the connections and ensure proper insulation.
  5. Testing and Adjustment: Once the installation is complete, turn on the power to the fixture and test its functionality. Make any necessary adjustments to the positioning, angle, or brightness of the light to achieve the desired illumination.

Maintaining Copper Outdoor Ceiling Lights

To maintain the beauty and performance of Copper Outdoor Ceiling Lights, follow these tips:

  1. Cleaning: Periodically clean the fixture with a soft cloth or sponge and mild detergent to remove dirt, debris, and oxidation. Avoid abrasive cleaners or harsh chemicals, as they may damage the copper finish.
  2. Polishing: If desired, you can polish Copper Outdoor Ceiling Lights to restore their original luster and shine. Use a commercial copper polish or a homemade solution of vinegar and salt to gently polish the surface, then buff with a soft cloth.
  3. Protective Coatings: Consider applying a protective coating or sealant to Copper Outdoor Ceiling Lights to prevent tarnishing and oxidation. Choose a product specifically designed for outdoor use and follow the manufacturer’s instructions for application.
  4. Inspecting for Damage: Regularly inspect the fixture for any signs of damage, corrosion, or loose components. Address any issues promptly to prevent further deterioration and ensure the longevity of the fixture.

Conclusion

Copper Outdoor Ceiling Lights offer a winning combination of aesthetic appeal, durability, and functionality, making them an ideal choice for illuminating outdoor spaces. Whether you’re looking to enhance curb appeal, improve safety and security, or create a cozy outdoor oasis, Copper Outdoor Ceiling Lights provide a stylish and practical lighting solution. Invest in the timeless elegance of Copper Outdoor Ceiling Lights and transform your outdoor space into a haven of beauty and comfort.

Read too: Black Friday Genie Garage Door Openers Extravaganza for Smart Home Security: Unveiling Exclusive Deals

Efficient Cirrus DC Ceiling Fans: Elevate Your Space with the Sleek and Energy

Discover the perfect blend of style, functionality, and energy efficiency with the innovative Cirrus DC Ceiling Fans. Explore how this modern ceiling fan can enhance the comfort and ambiance of your home while saving energy and reducing utility costs. Dive into the world of Cirrus DC Ceiling Fan and experience a new level of cooling comfort.

Cirrus Dc Ceiling Fan

Introduction to Cirrus DC Ceiling Fan

The Cirrus DC Ceiling Fan represents the pinnacle of ceiling fan technology, combining sleek design aesthetics with cutting-edge DC motor technology. Designed to deliver superior performance, energy efficiency, and quiet operation, the Cirrus DC Ceiling Fan is the ideal choice for modern homes and commercial spaces.

Key Features of Cirrus DC Ceiling Fan

  1. DC Motor Technology: Unlike traditional ceiling fans that use AC motors, the Cirrus DC Ceiling Fan utilizes advanced DC motor technology. This allows for smoother operation, variable speed control, and up to 70% energy savings compared to conventional fans.
  2. Sleek Design: The Cirrus DC Ceiling Fan boasts a sleek and contemporary design, featuring clean lines, minimalist aesthetics, and high-quality materials. Available in a variety of finishes and blade options, it seamlessly complements any interior decor style.
  3. Remote Control Operation: With convenient remote control operation, adjusting the speed and direction of the Cirrus DC Ceiling Fan is effortless. Users can easily customize the airflow to their preference, whether they’re looking to cool down a room or improve air circulation.
  4. Integrated LED Lighting: Many models of the Cirrus DC Ceiling Fan come equipped with integrated LED lighting, providing both illumination and energy efficiency. LED lights consume significantly less energy than traditional incandescent bulbs and have a longer lifespan, reducing maintenance requirements.

Benefits of Installing Cirrus DC Ceiling Fan

  1. Energy Efficiency: The use of DC motor technology and LED lighting makes the Cirrus DC Ceiling Fan highly energy efficient. By reducing energy consumption, homeowners can lower their electricity bills and minimize their environmental impact.
  2. Improved Comfort: With its powerful airflow and variable speed control, the Cirrus DC Ceiling Fan helps maintain a comfortable indoor environment year-round. Whether it’s circulating cool air during the summer months or distributing warm air in the winter, this fan enhances comfort levels in any season.
  3. Quiet Operation: The advanced DC motor technology used in the Cirrus DC Ceiling Fan ensures whisper-quiet operation, allowing users to enjoy cooling comfort without disruptive noise. This makes it an ideal choice for bedrooms, living rooms, and other quiet spaces where noise is a concern.
  4. Enhanced Style: Beyond its functionality, the Cirrus DC Ceiling Fan adds a touch of sophistication and style to any room. Its sleek design and modern aesthetic make it a focal point of interior design, enhancing the overall ambiance of the space.

Installing and Maintaining

Installing and maintaining a Cirrus DC Ceiling Fan is straightforward and hassle-free:

  1. Installation: Follow the manufacturer’s instructions for assembling and installing the fan. Ensure that the ceiling mounting bracket is securely anchored to a stable support structure, and that the fan blades are balanced and properly aligned.
  2. Regular Cleaning: To maintain optimal performance, clean the fan blades and motor housing regularly to remove dust and debris buildup. Use a soft, damp cloth or brush to gently wipe down the surfaces, taking care not to damage the finish or components.
  3. Lubrication: Periodically lubricate the motor bearings and moving parts according to the manufacturer’s recommendations. This helps ensure smooth operation and prolongs the lifespan of the fan.
  4. Safety Checks: Regularly inspect the fan for any signs of damage or wear, such as loose screws, frayed wires, or unusual noises. Address any issues promptly to prevent accidents or malfunctions.

Conclusion

The Cirrus DC Ceiling Fans represents a revolutionary advancement in ceiling fan technology, offering unmatched performance, energy efficiency, and style. Whether you’re looking to cool down a room, improve air circulation, or enhance the aesthetics of your space, the Cirrus DC Ceiling Fan delivers on all fronts. Invest in the future of home comfort with this innovative and stylish ceiling fan solution.

Read too: Black Friday Genie Garage Door Openers Extravaganza for Smart Home Security: Unveiling Exclusive Deals

Unveiling the Beauty of Ceiling Tile Reveal Edge: A Comprehensive Guide

Explore the elegance and functionality of Ceiling Tile Reveal Edge solutions for your interior spaces. Learn how this innovative design element can enhance the aesthetics and architectural appeal of your ceilings while providing practical benefits. Dive into the world of Ceiling Tile Reveal Edge and discover its endless possibilities for elevating your space.

Ceiling Tile Reveal Edge

Introduction to Ceiling Tile Reveal Edge

Ceiling tiles are a staple in interior design, offering a versatile solution for covering unsightly ceilings while providing acoustic and thermal insulation. However, traditional ceiling installations often lack a finished look, with visible edges that can detract from the overall aesthetic. Enter Ceiling Tile Reveal Edge, a design feature that adds sophistication and refinement to any space.

Understanding Ceiling Tile Reveal Edge

Ceiling Tile Reveal Edge refers to a specialized trim or edging system designed to create a seamless transition between ceiling tiles and the surrounding surfaces. Unlike standard ceiling installations where the edges of tiles are exposed, reveal edge solutions conceal these edges, resulting in a clean and polished appearance. This design feature can be achieved through various methods, including specialized trim pieces, shadow lines, or recessed channels.

Benefits of Ceiling Tile Reveal Edge

  1. Enhanced Aesthetics: One of the primary benefits of Ceiling Tiles Reveal Edge is its ability to elevate the visual appeal of interior spaces. By concealing the raw edges of ceiling tiles, reveal edge solutions create a sleek and modern look that enhances the overall design aesthetic.
  2. Architectural Detailing: Ceiling Tile Reveal Edge allows for creative architectural detailing, enabling designers to incorporate geometric patterns, linear accents, and visual interest into ceilings. Whether used in residential, commercial, or institutional settings, reveal edge solutions add depth and dimension to the space.
  3. Seamless Integration: Reveal edge systems seamlessly integrate with various ceiling materials, including acoustical tiles, metal panels, wood planks, and gypsum boards. This versatility allows designers to achieve their desired aesthetic while maintaining consistency and cohesion throughout the space.
  4. Easy Maintenance: In addition to their aesthetic benefits, Ceiling Tiles Reveal Edge solutions are practical and easy to maintain. The concealed edges of ceiling tiles are less prone to accumulation of dust, dirt, and debris, making cleaning and maintenance more manageable.

Types of Ceiling Tile Reveal Edge Systems

  1. Aluminum Trim: Aluminum reveal edge trim offers a durable and lightweight solution for achieving clean, crisp edges on ceiling tiles. Available in a variety of profiles and finishes, aluminum trim adds a contemporary touch to interior spaces while providing long-lasting performance.
  2. Vinyl Reveal Edge: Vinyl reveal edge strips are flexible and easy to install, making them ideal for curved or irregular ceiling configurations. These versatile strips come in a range of colors and textures, allowing for customized design options to suit any decor style.
  3. Wooden Trim: For a warm and organic look, wooden reveal edge trim adds natural beauty and warmth to interior spaces. Whether stained to match existing wood finishes or painted to contrast with ceiling tiles, wooden trim provides a timeless aesthetic that complements a variety of design themes.

Installation and Maintenance Tips

  1. Proper Alignment: Ensure that Ceiling Tiles Reveal Edge components are installed with precision and attention to detail to achieve seamless transitions between tiles. Use leveling tools and spacers as needed to maintain consistent alignment and spacing.
  2. Regular Cleaning: While reveal edge solutions require less maintenance than exposed tile edges, regular cleaning is still necessary to preserve their appearance. Use a soft brush or vacuum attachment to remove dust and debris, and gently wipe down surfaces with a mild detergent solution as needed.
  3. Inspect for Damage: Periodically inspect Ceiling Tiles Reveal Edge components for signs of damage, such as dents, scratches, or corrosion. Replace any damaged or worn-out trim pieces promptly to ensure the integrity and aesthetics of the ceiling system.

Conclusion

Ceiling Tiles Reveal Edge offers a stylish and practical solution for achieving polished and sophisticated ceilings in any space. Whether used in residential, commercial, or institutional settings, reveal edge systems enhance the aesthetics and architectural detailing of interior spaces while providing practical benefits such as easy maintenance and seamless integration. Explore the possibilities of Ceiling Tile Reveal Edge and transform your ceilings into works of art.

Read too: Black Friday Genie Garage Door Openers Extravaganza for Smart Home Security: Unveiling Exclusive Deals

Transform Your Space with Professional Ceiling Tile Cleaning Service Solutions

Discover the transformative power of professional Ceiling Tile Cleaning Service for your home or business. Say goodbye to dingy, discolored ceilings and hello to a fresh, revitalized space. Learn how expert cleaning services can restore the beauty and cleanliness of your ceiling tiles with ease.

Ceiling Tile Cleaning Service

Introduction to Ceiling Tile Cleaning Service

Ceiling tiles play a crucial role in the aesthetics and functionality of any indoor space. However, over time, they can accumulate dirt, dust, grime, and even mold, detracting from the overall appearance and air quality of the room. Regular cleaning and maintenance are essential to preserve the integrity and hygiene of ceiling tiles. That’s where professional Ceiling Tile Cleaning Service comes in.

Benefits of Professional Ceiling Tile Cleaning

  1. Improved Indoor Air Quality: Clean ceiling tiles contribute to better indoor air quality by removing allergens, dust, and pollutants that can accumulate over time. This is especially important for individuals with allergies or respiratory conditions.
  2. Enhanced Aesthetic Appeal: Dirty or stained ceiling tiles can make a space look outdated, neglected, and unappealing. Professional cleaning services can restore the original brightness and color of ceiling tiles, instantly revitalizing the entire room.
  3. Extended Lifespan: Regular cleaning and maintenance can prolong the lifespan of ceiling tiles by preventing premature deterioration and damage. By removing dirt and contaminants, professional cleaning helps protect the integrity of the tiles and prevents the need for costly replacements.
  4. Healthier Environment: Mold and mildew growth on ceiling tiles not only detract from the visual appeal but also pose health risks to occupants. Professional cleaning services can effectively remove mold spores and prevent their recurrence, creating a safer and healthier indoor environment.

The Process of Ceiling Tile Cleaning Service

Professional Ceiling Tile Cleaning Service providers employ advanced techniques and equipment to achieve optimal results:

  1. Assessment: The cleaning process begins with a thorough assessment of the condition of the ceiling tiles, including the extent of dirt, stains, and damage. This allows the technicians to determine the most appropriate cleaning methods and products.
  2. Preparation: Before cleaning begins, the surrounding area is prepared to prevent any damage or contamination. Furniture and fixtures are covered or moved, and protective measures are taken to safeguard walls, floors, and other surfaces.
  3. Cleaning: Depending on the type of ceiling tiles and the severity of the stains, various cleaning methods may be employed, including dry cleaning, wet cleaning, steam cleaning, or chemical cleaning. Specialized cleaning solutions are used to dissolve and remove stubborn stains, grease, and mold.
  4. Rinse and Dry: After cleaning, the ceiling tiles are thoroughly rinsed to remove any remaining residue and cleaning agents. Proper drying techniques are then employed to ensure that the tiles are completely dry before reinstallation or use.
  5. Finishing Touches: Once the cleaning process is complete, any necessary repairs or touch-ups are performed to ensure that the ceiling tiles look pristine and uniform. This may include patching holes, replacing damaged tiles, or applying protective coatings for added durability.

Maintaining Clean Ceiling Tiles

To prolong the results of professional Ceiling Tile Cleaning Service, consider the following maintenance tips:

  1. Regular Dusting: Prevent dust buildup by dusting ceiling tiles regularly with a microfiber cloth or duster. This helps maintain cleanliness between professional cleanings and reduces the risk of staining.
  2. Prompt Stain Removal: Address spills, stains, and water damage promptly to prevent them from becoming permanent. Use mild detergent solutions or specialized stain removers recommended by professionals.
  3. Ventilation: Ensure proper ventilation in the room to minimize moisture buildup and inhibit mold growth on ceiling tiles. Use exhaust fans, dehumidifiers, or open windows as needed to promote air circulation.
  4. Scheduled Cleaning: Schedule periodic professional Ceiling Tile Cleaning Service to keep your ceiling tiles looking their best and maintain a healthy indoor environment for occupants.

Conclusion

Investing in professional Ceiling Tile Cleaning Service is a cost-effective way to rejuvenate your space and enhance its cleanliness, appearance, and longevity. Whether you’re a homeowner, business owner, or property manager, regular maintenance of ceiling tiles is essential to create a welcoming and hygienic environment for occupants. Trust the expertise of professional cleaners to deliver exceptional results and transform your space with pristine, sparkling ceiling tiles.

Read too: Black Friday Genie Garage Door Openers Extravaganza for Smart Home Security: Unveiling Exclusive Deals

Stay Cool and Comfortable with a Ceiling Fan for Drop Ceilings

If you have a drop ceiling in your home, you may be wondering if you can still install a ceiling fan. The answer is yes! There are a few things you need to keep in mind when installing a ceiling fan with a drop ceiling, but it is definitely possible.

Ceiling Fan With Drop Ceiling

In this article, we will discuss the different types of ceiling fans that are available for drop ceilings, as well as the steps involved in installing one. We will also provide some tips on how to choose the right fan for your needs.

Types of Ceiling Fans for Drop Ceilings

There are two main types of ceiling fans that are available for drop ceilings:

  • Ceiling hugger fans: Ceiling hugger fans are designed to be installed as close to the ceiling as possible. This makes them a good option for rooms with low ceilings.
  • Flush mount fans: Flush mount fans are similar to ceiling hugger fans, but they are installed flush with the ceiling. This makes them a good option for rooms with very low ceilings.

Installing a Ceiling Fan with a Drop Ceiling

Installing a ceiling fan with a drop ceiling is a relatively simple process. However, it is important to follow the instructions carefully to ensure a safe and proper installation.

The following are the basic steps involved in installing a ceiling fan with a drop ceiling:

  1. Locate the ceiling joists: The first step is to locate the ceiling joists. This is important because you will need to attach the mounting bracket to the joists.
  2. Install the mounting bracket: Once you have located the ceiling joists, you can install the mounting bracket. The mounting bracket will come with instructions on how to install it.
  3. Attach the fan to the mounting bracket: Once the mounting bracket is installed, you can attach the fan to the bracket. The fan will come with instructions on how to attach it.
  4. Wire the fan: Once the fan is attached to the mounting bracket, you need to wire the fan. The fan will come with instructions on how to wire it.
  5. Turn on the fan and test it: Once the fan is wired, you can turn on the fan and test it to make sure it is working properly.

Tips for Choosing a Ceiling Fan for a Drop Ceiling

When choosing a ceiling fan for a drop ceiling, there are a few things you need to keep in mind:

  • The size of the room: The size of the room will determine the size of the fan you need.
  • The height of the ceiling: The height of the ceiling will determine the type of fan you can install.
  • The style of the fan: Ceiling fans come in a variety of styles, so you can find one that will complement the décor of your home.
  • The features of the fan: Ceiling fans come with a variety of features, such as light kits and remote controls.

Conclusion

Ceiling fans are a great way to stay cool and comfortable in your home. If you have a drop ceiling, you can still install a ceiling fan. By following the tips in this article, you can choose the right fan for your needs and install it safely and properly.

Read too: A Comprehensive Mr Cool Ceiling Cassette Review: Unveiling Excellence

Create a Warm and Inviting Atmosphere with Cedar Wood Ceiling Planks

If you’re looking for a way to add warmth and character to your home, consider installing cedar wood ceiling planks. Cedar is a naturally beautiful and durable wood that can give any room a rustic, yet elegant look. In addition to its aesthetic appeal, cedar also offers a number of practical benefits, including:

Cedar Wood Ceiling Planks
  • Natural insulation: Cedar is a good insulator, which can help to keep your home cooler in the summer and warmer in the winter.
  • Moisture resistance: Cedar is naturally resistant to moisture, making it a good choice for high-humidity areas such as bathrooms and kitchens.
  • Aromatherapy: Cedar has a pleasant, natural aroma that some people find to be relaxing and therapeutic.

If you’re considering installing cedar wood ceiling plank, there are a few things you need to keep in mind:

  • The type of cedar: There are two main types of cedar that are used for ceiling planks: Eastern cedar and Western cedar. Eastern cedar is a lighter color and has a more pronounced grain pattern. Western cedar is a darker color and has a more uniform grain pattern.
  • The finish: Cedar ceiling planks can be left unfinished or they can be stained or painted. If you choose to leave them unfinished, they will eventually weather to a silvery gray color.
  • The installation: Cedar ceiling planks can be installed by a professional or by a do-it-yourselfer. If you’re not comfortable installing them yourself, it’s best to hire a professional.

Cost of Cedar Wood Ceiling Planks

Cedar wood ceiling plank cost varies based on cedar type, finish, and plank size. In general, you can expect to pay between $2 and $5 per square foot for cedar ceiling planks.

Where to Buy Cedar Wood Ceiling Planks

Cedar wood ceiling plank can be purchased from a variety of retailers, including home improvement stores, lumber yards, and online retailers.

Conclusion

Cedar wood ceiling plank are a beautiful and durable way to add warmth and character to your home. If you’re looking for a way to improve the look and feel of your home, consider installing cedar wood ceiling planks.

Read too: A Comprehensive Mr Cool Ceiling Cassette Review: Unveiling Excellence

Cathedral Ceiling Stove Pipe Kit: Everything You Need to Know

A cathedral ceiling stove pipe kit is a system of pipes and fittings that allows you to safely vent your stove or fireplace through a cathedral ceiling. These kits are designed to meet all safety codes and regulations, and they come with everything you need for a complete installation.

Cathedral Ceiling Stove Pipe Kit

In this article, we will discuss the different components of a cathedral ceiling stove pipe kit, as well as the steps involved in installing one. We will also provide some tips on how to choose the right kit for your needs.

Components of a Cathedral Ceiling Stove Pipe Kit

A cathedral ceiling stove pipe kit typically includes the following components:

  • Stove pipe: The stove pipe is the main component of the kit. It is a metal pipe that carries the smoke and fumes from your stove or fireplace to the outside.
  • Ceiling support box: The ceiling support box is a metal box that is attached to the ceiling joists. It supports the stove pipe and provides a safe passage for the smoke and fumes.
  • Flashing: The flashing is a metal sheet that is installed around the stove pipe where it penetrates the ceiling. It prevents water from leaking into your home.
  • Chimney cap: The chimney cap is a metal cover that is installed on the top of the stove pipe. It prevents rain, snow, and debris from entering the chimney.

Installing a Cathedral Ceiling Stove Pipe Kits

Installing a cathedral ceiling stove pipe kits is a relatively simple process. However, it is important to follow the instructions carefully to ensure a safe and proper installation.

The following are the basic steps involved in installing a cathedral ceiling stove pipe kits:

  1. Measure the distance from your stove or fireplace to the ceiling. This will help you determine the length of stove pipe you need.
  2. Cut the stove pipe to the desired length.
  3. Attach the ceiling support box to the ceiling joists.
  4. Install the flashing around the stove pipe where it penetrates the ceiling.
  5. Attach the stove pipe to the ceiling support box.
  6. Install the chimney cap on the top of the stove pipe.

Tips for Choosing a Cathedral Ceiling Stove Pipe Kit

When choosing a cathedral ceiling stove pipe kits, there are a few things you need to keep in mind:

  • The size of your stove or fireplace: The size of your stove or fireplace will determine the size of the stove pipe kit you need.
  • The type of fuel you use: If you use wood, you will need a kit that is designed for wood-burning stoves. If you use gas, you will need a kit that is designed for gas-burning stoves.
  • The climate you live in: If you live in a cold climate, you will need a kit that is insulated to prevent heat loss.

Conclusion

A cathedral ceiling stove pipe kits is a safe and effective way to vent your stove or fireplace through a cathedral ceiling. By following the tips in this article, you can choose the right kit for your needs and install it safely and properly.

Read too: A Comprehensive Mr Cool Ceiling Cassette Review: Unveiling Excellence

Best Elliptical for Low Ceilings: Stay Fit in Any Space

If you’re looking for a way to get fit at home but have limited space, an elliptical machine is a great option. Ellipticals offer a low-impact workout that’s easy on your joints, and they don’t take up a lot of space. However, if you have low ceilings, you’ll need to find an elliptical machine that’s specifically designed for low-ceiling spaces.

Best Elliptical For Low Ceilings

In this article, we’ll review the best ellipticals for low ceilings and provide a buying guide to help you choose the right machine for your needs.

Best Ellipticals for Low Ceilings

1. Sunny Health & Fitness Magnetic Elliptical Cross Trainer

The Sunny Health & Fitness Magnetic Elliptical Cross Trainer is a great option for those looking for an affordable and compact elliptical machine. This machine has a 220-pound weight capacity and a 20-inch stride length. It also features 16 levels of magnetic resistance, a heart rate monitor, and an LCD display.

2. Schwinn 411 Compact Elliptical

The Schwinn 411 Compact Elliptical is another great option for those looking for a compact elliptical machine. This machine has a 250-pound weight capacity and a 18-inch stride length. It also features 16 levels of magnetic resistance, a heart rate monitor, and an LCD display.

3. Nautilus E616 Elliptical

The Nautilus E616 Elliptical is a great option for those looking for a more premium elliptical machine. This machine has a 300-pound weight capacity and a 20-inch stride length. It also features 20 levels of magnetic resistance, a heart rate monitor, and an LCD display.

4. NordicTrack SpaceSaver SE7i Elliptical

The NordicTrack SpaceSaver SE7i Elliptical is a great option for those looking for an elliptical machine with a built-in iFit coach. This machine has a 300-pound weight capacity and a 20-inch stride length. It also features 22 levels of magnetic resistance, a heart rate monitor, and an LCD display.

How to Choose the Best Elliptical for Low Ceilings

When choosing an elliptical machine for low ceilings, there are a few things you need to keep in mind:

  • Height: The first thing you need to do is measure the height of your ceiling. Once you know the height of your ceiling, you can start looking for ellipticals that are short enough to fit in your space.
  • Stride length: The stride length is the distance that the pedals travel on each elliptical stroke. A longer stride length will provide a more natural and comfortable workout. However, if you have low ceilings, you may need to choose an elliptical with a shorter stride length.
  • Weight capacity: The weight capacity is the maximum amount of weight that the elliptical can support. Make sure to choose an elliptical with a weight capacity that is greater than your weight.
  • Features: Ellipticals come with a variety of features, such as heart rate monitors, LCD displays, and built-in workout programs. Decide which features are important to you and choose an elliptical that has those features.

Conclusion

An elliptical machine is a great way to get fit at home, even if you have low ceilings. There are a number of great ellipticals on the market that are designed for low-ceiling spaces. By following the tips in this article, you can choose the best elliptical for your needs.

Read too: A Comprehensive Mr Cool Ceiling Cassette Review: Unveiling Excellence

Unveiling the Wonders of the 42-Inch Outdoor Ceiling Fans: Elevate Your Outdoor Spaces with Style

Transform your outdoor haven into a breezy paradise with the Outdoor Ceiling Fans 42 Inch. This comprehensive guide navigates through the benefits, design options, and installation tips, helping you make an informed decision for the perfect addition to your alfresco spaces.

Outdoor Ceiling Fan 42 Inch

Introduction: Embracing Outdoor Comfort with the 42-Inch Ceiling Fan

Discover the world of outdoor comfort as we explore the versatility and functionality of the 42-Inch Outdoor Ceiling Fan. This article unveils the charm of these compact yet powerful fans, designed to enhance your outdoor living experience.

Outdoor Ceiling Fan 42 Inch – Compact Powerhouse for Outdoor Comfort

Compact Size, Powerful Performance

Dive into the efficiency of the 42-Inch Outdoor Ceiling Fan. Explore how its compact size doesn’t compromise on performance, providing optimal airflow for a cool and comfortable outdoor environment.

Design Options for Every Style

Uncover the diverse design options available for the 42-Inch Outdoor Ceiling Fan. From modern sleek designs to rustic and traditional styles, find the perfect match that complements your outdoor decor and style preferences.

Installing Outdoor Comfort – A Guide to Setting Up Your 42-Inch Ceiling Fan

Choosing the Right Location

Understand the importance of choosing the right location for your outdoor ceiling fan. From porches to patios, learn how placement can impact airflow and overall comfort in your outdoor spaces.

Installation Tips for Optimal Performance

Get practical installation tips to ensure optimal performance. From the ideal mounting height to wiring considerations, this section guides you through the process, making the installation of your 42-Inch Outdoor Ceiling Fan a breeze.

Weather-Resistant Design – A Key Feature for Outdoor Longevity

Understanding Weather-Resistant Materials

Explore the significance of weather-resistant design in outdoor ceiling fans. Learn about the materials used, such as rust-resistant finishes and UV-resistant blades, ensuring longevity and durability in various weather conditions.

Maintenance Tips for Outdoor Fans

Delve into maintenance tips to keep your outdoor ceiling fan in top-notch condition. From regular cleaning routines to seasonal inspections, these practices ensure your fan continues to provide reliable performance.

Energy Efficiency and Cost Savings – The Advantages of 42-Inch Outdoor Ceiling Fans

Energy-Efficient Operation

Uncover the energy-efficient features of the 42-Inch Outdoor Ceiling Fan. From ENERGY STAR ratings to advanced motor technologies, understand how these fans contribute to reducing energy consumption and environmental impact.

Cost Savings in Outdoor Comfort

Explore the cost-saving benefits of using outdoor ceiling fans. Learn how these fans can complement your HVAC system, allowing you to enjoy outdoor comfort without significantly impacting your energy bills.

Read too: Exploring the Benefits and How-Tos of DIY Ceiling Cassette Mini Split Installation: Revolutionizing Comfort

Conclusion:

As we conclude our exploration, embrace the outdoor comfort and style that the 42-Inch Outdoor Ceiling Fans brings. Whether you’re looking to cool your patio or add a decorative touch to your outdoor spaces, these fans are the perfect blend of functionality and aesthetics.

Unveiling the Allure of Nautical Ceiling Fans with Light: Setting Sail in Style

Embark on a journey of coastal charm and practical illumination with Nautical Ceiling Fans with Light. This comprehensive guide explores the captivating design, functionality, and versatile applications of these maritime-inspired fixtures, turning your living spaces into nautical retreats.

Nautical Ceiling Fans With Light

Introduction: Nautical Elegance Meets Functional Illumination

Dive into the world of Nautical Ceiling Fans with Lights, where timeless elegance meets the practicality of efficient illumination. This article unveils the seamless fusion of maritime aesthetics and modern technology, creating a captivating addition to any home.

Nautical Ceiling Fans with Lights – A Beacon of Style

Design Elements Inspired by the Sea

Explore the design elements that draw inspiration from the sea, making Nautical Ceiling Fans with Lights a beacon of style. From ship wheel motifs to coastal finishes, understand how these fans capture the essence of maritime aesthetics.

Versatile Lighting Solutions

Delve into the versatile lighting solutions offered by these fans. Discover how integrated lights complement the nautical theme, providing both ambient and functional illumination for a well-lit and stylish living space.

Illuminating Every Setting – Nautical Fans in Action

Coastal Homes and Beachfront Retreats

Uncover the ideal settings for Nautical Ceiling Fans with Lights, with a focus on coastal homes and beachfront retreats. Learn how these fans enhance the nautical ambiance, creating a seamless connection between interior and exterior spaces.

Nautical Themed Rooms

Explore the application of Nautical Ceiling Fans with Lights in nautical-themed rooms. From bedrooms to living areas, understand how these fans become focal points, tying together the overall design and creating a cohesive atmosphere.

Technological Innovation – Beyond Aesthetics

Efficient Cooling Performance

Delve into the technological innovation behind Nautical Ceiling Fans with Lights, focusing on their efficient cooling performance. Understand how advanced motor technology ensures optimal airflow, providing comfort in style.

Smart Lighting Control

Explore the smart lighting control features integrated into these fans. From remote controls to smart home compatibility, learn how users can customize their lighting experience for different moods and occasions.

Read too: Exploring the Benefits and How-Tos of DIY Ceiling Cassette Mini Split Installation: Revolutionizing Comfort

Conclusion: Navigate Your Style with Nautical Ceiling Fans

As we conclude our exploration, embrace the allure of Nautical Ceiling Fans with Light. Whether you’re looking to infuse coastal charm or seeking practical illumination, these fans are a perfect marriage of style and functionality, setting sail into a world of timeless elegance.

Embrace Elegance with the Minka Aire Delano Ceiling Fan: A Fusion of Style and Comfort

Discover unparalleled sophistication as we delve into the world of the Minka Aire Delano Ceiling Fan. This article unveils the exquisite design, advanced features, and versatile applications that make the Minka Aire Delano a statement piece for any living space.

Minka Aire Delano Ceiling Fan

Introduction: Minka Aire Delano Ceiling Fan – Where Style Meets Functionality

Step into a realm of luxury with the Minka Aire Delano Ceiling Fan. This article serves as your comprehensive guide to understanding the seamless integration of style and functionality, making the Delano a standout choice for those who appreciate the finer things in life.

Minka Aire Delano – A Visual Masterpiece

Defining Elegance

Explore the essence of the Minka Aire Delano and its defining features that contribute to an aura of elegance. Learn how this ceiling fan becomes a visual masterpiece, enhancing the aesthetic appeal of any room.

Craftsmanship and Materials

Dive into the meticulous craftsmanship and premium materials used in the creation of the Minka Aire Delano. From high-quality blades to exquisite finishes, understand the attention to detail that sets this fan apart.

Technological Marvel

Innovative Motor Technology

Discover the innovative motor technology that powers the Minka Aire Delano. Uncover how this fan delivers optimal performance, combining powerful airflow with whisper-quiet operation for an unparalleled user experience.

Intelligent Control Systems

Explore the intelligent control systems integrated into the Minka Aire Delano. From remote controls to smart home compatibility, learn how technology enhances the convenience and customization options for users.

Applications and Placement – Elevating Every Space

Residential Oasis

Understand how the Minka Aire Delano transforms residential spaces into havens of comfort and style. Explore ideal placements within bedrooms, living rooms, and other areas, creating a perfect balance of form and function.

Commercial Sophistication

Delve into the applications of the Minka Aire Delano in commercial environments. Learn how this fan contributes to the sophistication of spaces such as restaurants, hotels, and offices.

Read too: Exploring the Benefits and How-Tos of DIY Ceiling Cassette Mini Split Installation: Revolutionizing Comfort

Conclusion: Elevate Your Lifestyle with Minka Aire Delano

As we conclude our exploration of the Minka Aire Delano Ceiling Fan, embrace the perfect fusion of elegance and cutting-edge technology. Elevate your living space with this masterpiece, creating an environment that epitomizes both style and comfort.

The Allure of Minka Aire Cirque Ceiling Fan: Unveiling Elegance

Experience the epitome of sophistication with the Minka Aire Cirque Ceiling Fan. This article delves into the mesmerizing world of ceiling fans, exploring the features, design elements, and applications that make the Minka Aire Cirque a standout choice for those seeking both style and functionality.

Minka Aire Cirque Ceiling Fan

Introduction:

Discover the perfect blend of form and function as we explore the Minka Aire Cirque Ceiling Fan. From its sleek design to advanced features, this article serves as your guide to elevating your living space with the epitome of modern ceiling fan technology.

Minka Aire Cirque – A Design Marvel

Definition and Aesthetic Appeal

Uncover the definition of the Minka Aire Cirque Ceiling Fan and delve into its aesthetic appeal. Learn how this design marvel seamlessly integrates into various interior styles, adding a touch of sophistication to any room.

Materials and Craftsmanship

Explore the materials and craftsmanship behind the Minka Aire Cirque. From premium quality blades to the finest finishes, understand the meticulous attention to detail that goes into creating this elegant ceiling fan.

Read too: Exploring the Benefits and How-Tos of DIY Ceiling Cassette Mini Split Installation: Revolutionizing Comfort

The Technology Behind Minka Aire Cirque – Elevating Performance

Advanced Motor Technology

Delve into the advanced motor technology that powers the Minka Aire Cirque. Learn how this fan delivers optimal performance, providing powerful and silent airflow to keep your space cool and comfortable.

Intelligent Control Systems

Explore the intelligent control systems integrated into the Minka Aire Cirque. From remote controls to smart home compatibility, understand how technology enhances the user experience, allowing for effortless customization.

Applications and Placement – Enhancing Every Room

Residential Spaces

Discover how the Minka Aire Cirque elevates the ambiance of residential spaces. From bedrooms to living rooms, explore the ideal placements for this fan, creating a perfect blend of style and comfort.

Commercial Environments

Explore the applications of the Minka Aire Cirque in commercial settings. Learn how this fan contributes to the overall aesthetic and functionality of spaces like restaurants, hotels, and offices.

Conclusion: Elevate Your Space with Minka Aire Cirque Elegance

As we conclude our exploration of the Minka Aire Cirque Ceiling Fan, embrace the perfect synergy of design and technology. Elevate your living space with the timeless elegance and modern features that this fan brings, creating an environment that is both stylish and comfortable.

Exploring the Allure of Mercury Glass Flush Mount Ceiling Light: Illuminating Elegance

Uncover the enchanting world of lighting as we delve into the sophistication of “Mercury Glass Flush Mount Ceiling Light.” From their timeless appeal to the modern applications, this article is your guide to understanding and appreciating the artistry behind these illuminating fixtures.

Mercury Glass Flush Mount Ceiling Light

Introduction: The Timeless Charm of Mercury Glass Flush Mount Ceiling Lights

Step into a world of timeless elegance with Mercury Glass Flush Mount Ceiling Lights. This article aims to unravel the magic these fixtures bring to interior spaces, from classic to contemporary.

Mercury Glass Flush Mount Ceiling Light – A Captivating Overview

Definition and Design Elements

Explore the definition and unique design elements that distinguish Mercury Glass Flush Mount Ceiling Lights. Gain insights into the craftsmanship that goes into creating these captivating fixtures.

Historical Significance

Uncover the historical significance of Mercury Glass and its evolution into contemporary interior design. Learn how this material has stood the test of time, adding a touch of vintage charm to modern spaces.

The Artistry Behind Mercury Glass Flush Mounts – Crafting Perfection

Materials and Production Process

Delve into the materials used and the intricate production process involved in crafting Mercury Glass Flush Mount Ceiling Lights. Understand the artistry and attention to detail that makes each piece a work of functional art.

Versatility in Design

Explore the versatility in design, from classic to modern interpretations. Discover how Mercury Glass Flush Mounts seamlessly blend into various interior styles, adding a touch of sophistication to any space.

Applications and Placement – Elevating Interior Spaces

Residential Spaces

Learn how Mercury Glass Flush Mount Ceiling Lights enhance the ambiance of residential spaces. From bedrooms to living rooms, explore the ideal placements for these fixtures, creating a harmonious and well-lit environment.

Commercial Environments

Discover the impact of Mercury Glass Flush Mounts in commercial settings. Whether in hotels, restaurants, or offices, explore how these fixtures contribute to the overall aesthetic and functionality of the space.

Conclusion: Elevate Your Space with Mercury Glass Elegance

As we conclude our exploration of “Mercury Glass Flush Mount Ceiling Light,” embrace the timeless elegance and versatility these fixtures bring to interior design. Illuminate your space with the captivating allure of Mercury Glass, creating an ambiance that is both sophisticated and welcoming.

Read too: Exploring the Benefits and How-Tos of DIY Ceiling Cassette Mini Split Installation: Revolutionizing Comfort

Exploring the Importance of a 6 Inch Ceilings Support Box for Your Installations: Enhance Stability and Safety

In the world of ceiling installations, the 6 Inch Ceilings Support Box emerges as a crucial component, ensuring both stability and safety. This comprehensive guide will delve into the significance of this support box, its applications, and the role it plays in maintaining the integrity of your ceiling installations.

6 Inch Ceiling Support Box

6 Inch Ceiling Support Box: Reinforcing Your Ceiling Infrastructure

Unveiling Strength: The 6 Inch Ceiling Support Box

At the core of our exploration is the sturdy and reliable 6 Inch Ceiling Support Box. Let’s unravel its significance, understanding how it provides the necessary support for various ceiling installations, ensuring durability and safety.

1. Structural Support: The Backbone of Ceiling Installations:

The 6 Inch Ceiling Support Box serves as the backbone of ceiling installations, providing essential structural support. Explore the materials and construction that make these support boxes robust, ensuring they can withstand the weight and stress associated with ceiling-mounted fixtures.

2. Versatile Applications: A Support System for Various Fixtures:

Delve into the versatile applications of the 6 Inch Ceiling Support Box. From ceiling fans and light fixtures to chandeliers and exhaust fans, this support box caters to a wide range of fixtures. Learn about its adaptability and how it becomes a reliable support system for different installations.

3. Installation Guidelines: Ensuring Proper Placement and Support:

Understanding the correct installation of a 6 Inch Ceiling Support Box is paramount for its effectiveness. This section provides comprehensive guidelines, covering aspects such as placement, mounting, and ensuring proper alignment. Learn the best practices for a secure and stable installation.

Safeguarding Your Investments: Importance of a 6 Inch Ceiling Support Box

Now that we’ve explored the basics, let’s delve into the importance of incorporating a 6 Inch Ceiling Support Box into your ceiling installations. From protecting your fixtures to ensuring the long-term integrity of your ceilings, these support boxes play a vital role.

1. Fixture Stability: Preventing Wobbling and Shifting:

One of the primary roles of a 6 Inch Ceiling Support Box is to ensure the stability of ceiling-mounted fixtures. Explore how the proper installation of this support box prevents fixtures such as ceiling fans from wobbling or shifting, providing a safe and secure environment.

2. Load Distribution: Mitigating Stress on Ceilings:

Ceiling-mounted fixtures exert weight and stress on the ceiling structure. The 6 Inch Ceiling Support Box plays a crucial role in distributing this load evenly, preventing concentrated stress points that could compromise the integrity of the ceiling over time. Understand how load distribution contributes to long-term stability.

3. Electrical Safety: Securing Wiring Connections:

In addition to providing physical support, a 6 Inch Ceiling Support Box contributes to electrical safety. Learn about how these support boxes secure wiring connections, preventing strain or damage that could lead to electrical hazards. Ensure a safe and reliable electrical system within your ceiling installations.

Choosing the Right 6 Inch Ceiling Support Box for Your Needs

Not all support boxes are created equal, and choosing the right one for your specific needs is crucial. This section guides you through the considerations and features to look for when selecting a 6 Inch Ceiling Support Box.

1. Material Matters: Durability and Resistance:

Explore the materials used in manufacturing 6 Inch Ceiling Support Boxes and their impact on durability and resistance. From metal to plastic, each material has its advantages and considerations. Learn how to choose a support box that aligns with the specific requirements of your ceiling installation.

2. Adjustable vs. Fixed: Adapting to Installation Needs:

Consider the adaptability of 6 Inch Ceiling Support Boxes, whether adjustable or fixed. Understand the advantages of each type and how they cater to different installation scenarios. This section provides insights into making an informed decision based on the specifics of your ceiling-mounted fixtures.

3. Load Capacity: Matching Support to Fixture Weight:

The load capacity of a 6 Inch Ceiling Support Box is a critical factor in its effectiveness. Explore how to match the support box’s load capacity with the weight of your ceiling-mounted fixtures. Learn about industry standards and guidelines for ensuring optimal support.

Conclusion:

In conclusion, the 6 Inch Ceilings Support Box stands as an unsung hero in the realm of ceiling installations. From providing structural support to safeguarding your fixtures and ensuring electrical safety, this support box plays a vital role in maintaining the longevity and stability of your ceiling infrastructure. Prioritize the inclusion of a reliable 6 Inch Ceiling Support Box in your installations, and reinforce your ceilings with strength and durability.

Read too: Exploring the Benefits and How-Tos of DIY Ceiling Cassette Mini Split Installation: Revolutionizing Comfort

Exploring the Beauty of a 4 Light Pendant Ceiling Lights Fixture: Illuminate Your Space in Style

Step into a world of radiant elegance with the enchanting glow of a 4 Light Pendant Ceiling Lights. In this comprehensive guide, we will unravel the allure of these fixtures, exploring their design versatility, installation considerations, and how they can elevate the ambiance of your living spaces.

4 Light Pendant Ceiling Light

4 Light Pendant Ceiling Light: A Symphony of Radiance

Embracing Radiance: The 4 Light Pendant Ceiling Light

At the heart of our exploration is the captivating allure of the 4 Light Pendant Ceiling Light. Let’s delve into the radiance that these fixtures bring, understanding how they serve as both functional lighting solutions and exquisite design elements within your home.

1. Design Versatility and Aesthetic Appeal:

The 4 Light Pendant Ceiling Light stands as a testament to design versatility and aesthetic appeal. Explore the diverse styles, materials, and finishes available, allowing you to choose a fixture that complements your interior design theme while creating a focal point that captivates attention.

2. Illuminating Every Corner: The Power of Four Lights:

Delve into the functional brilliance of a 4 Light Pendant Ceiling Light. Understand how the arrangement of four lights within a single fixture provides ample illumination, making it an ideal choice for various settings, from dining rooms and kitchens to entryways and living spaces.

3. Installation Considerations: A Guide to Hanging Elegance:

Master the art of hanging elegance with a 4 Light Pendant Ceiling Light. This section provides a comprehensive guide to the installation process, covering aspects such as height considerations, wiring, and the importance of choosing the right ceiling mount. Ensure a seamless and visually stunning addition to your space.

Read too: Exploring the Benefits and How-Tos of DIY Ceiling Cassette Mini Split Installation: Revolutionizing Comfort

Elevating Design: Where to Use a 4 Light Pendant Ceiling Light

Now that we’ve explored the radiance and functionality, let’s discuss the various applications and spaces where a 4 Light Pendant Ceiling Light can shine brightest. From residential settings to commercial spaces, these fixtures add a touch of sophistication and charm.

1. Dining Delight: Enhancing the Culinary Experience:

Discover how a 4 Light Pendant Ceiling Light becomes the centerpiece in dining areas, creating an inviting ambiance for shared meals and special occasions. Explore the recommended height for hanging over dining tables and the visual impact it brings to the overall dining experience.

2. Kitchen Brilliance: Illuminating Culinary Creativity:

In the kitchen, functionality meets design with a 4 Light Pendant Ceiling Light. Explore the ways these fixtures enhance task lighting over countertops or kitchen islands, adding a layer of brilliance to culinary spaces. Learn about the ideal placement and design considerations for maximum impact.

3. Living Room Elegance: Creating a Cozy Ambiance:

Transform your living room into a cozy haven with the warm glow of a 4 Light Pendant Ceiling Light. Explore creative ways to integrate these fixtures into your living space, whether as a central lighting element or as part of a layered lighting design. Understand the design possibilities that elevate the overall aesthetics.

Design Harmony: Matching Your Style with a 4 Light Pendant Ceiling Light

Choosing the perfect 4 Light Pendant Ceiling Light involves understanding how it harmonizes with your existing design elements. From contemporary to traditional, this section guides you through the process of finding a fixture that seamlessly blends with your unique style.

1. Contemporary Chic: Sleek Lines and Modern Appeal:

For contemporary interiors, explore 4 Light Pendant Ceiling Light options that feature sleek lines, minimalist designs, and modern finishes. Discover how these fixtures contribute to the overall chic aesthetic, creating a harmonious balance within contemporary living spaces.

2. Traditional Elegance: Timeless Designs and Rich Finishes:

In traditional settings, embrace the timeless elegance of a 4 Light Pendant Ceiling Light with classic designs and rich finishes. Explore options that incorporate ornate details, vintage-inspired elements, and warm tones, adding a touch of sophistication to traditional interiors.

3. Industrial Edge: Raw Materials and Urban Flair:

For those drawn to industrial aesthetics, consider 4 Light Pendant Ceiling Lights with raw materials and urban flair. Explore fixtures featuring exposed bulbs, metal accents, and a rugged charm that complements the industrial design theme, creating a visually striking impact.

Conclusion:

In conclusion, a 4 Light Pendant Ceiling Lights transcends the ordinary, merging functionality with exquisite design. Whether it’s illuminating your dining space, kitchen, or living room, these fixtures add a layer of sophistication and charm. Embrace the radiance and design versatility of a 4 Light Pendant Ceiling Light, and let your space shine with timeless elegance.

Exploring the Beauty and Versatility of 2Nd Look Ceiling Tile: Elevate Your Space with Style

Transforming your space into a masterpiece of design and sophistication begins with the captivating allure of 2Nd Look Ceiling Tile. In this extensive guide, we will delve into the intricacies of these tiles, unraveling their unique features, installation possibilities, and the impact they can have on the aesthetics of your surroundings.

2Nd Look Ceiling Tile

2Nd Look Ceiling Tile: A Second Glance at Elegance

Unveiling Elegance: Exploring 2Nd Look Ceiling Tile

At the heart of our exploration lies the enchanting world of 2Nd Look Ceiling Tiles. Let’s uncover the elegance behind these tiles, understanding how they bring a touch of sophistication and charm to ceilings, making every glance a second look.

1. Visual Appeal and Aesthetic Charm:

The primary allure of 2Nd Look Ceiling Tiles lies in their visual appeal and aesthetic charm. Explore the diverse designs, textures, and finishes available, allowing you to choose tiles that resonate with your personal style and complement the overall design of your space.

2. Recycled Beauty: An Environmentally Friendly Choice:

Dive into the eco-friendly aspect of 2Nd Look Ceiling Tiles. Discover how these tiles contribute to sustainable design by utilizing recycled materials. Learn about the environmental impact of choosing recycled tiles and how 2Nd Look is paving the way for a greener approach to interior design.

3. Easy Installation and Customization:

One of the standout features of 2Nd Look Ceiling Tiles is their ease of installation and customization. Explore the user-friendly installation process, making it accessible for DIY enthusiasts. Delve into the ways you can customize these tiles to create a unique and personalized ceiling that reflects your individual taste.

Installation Mastery: Tips and Tricks for 2Nd Look Ceiling Tile

Now that we’ve unraveled the elegance of these tiles, it’s essential to understand the art of installation. From preparation to execution, mastering the installation of 2Nd Look Ceiling Tiles ensures a seamless and visually stunning result.

1. Surface Preparation:

Begin the installation journey with proper surface preparation. Learn about the importance of a clean and level surface for optimal tile adhesion. Understand the different types of surfaces that are suitable for 2Nd Look Ceiling Tiles, ensuring a flawless installation process.

2. Adhesive Selection and Application:

Explore the world of adhesives and their role in securing 2Nd Look Ceiling Tiles. Understand the recommended adhesives for different surfaces and the correct application techniques. This section provides insights into ensuring a strong and long-lasting bond between the tiles and the ceiling.

3. Cutting Techniques for a Perfect Fit:

Achieving a professional finish requires mastering cutting techniques. Dive into the various tools and methods available for cutting 2Nd Look Ceiling Tiles to fit specific areas of your ceiling. Whether it’s intricate corners or curved edges, learn how to achieve a perfect fit with precision.

Applications of Elegance: Where to Use 2Nd Look Ceiling Tile

The versatility of 2Nd Look Ceiling Tiles extends to various applications, allowing you to infuse elegance into different spaces. From residential to commercial settings, these tiles find their place in elevating the ambiance of any room.

1. Residential Elegance:

Explore how 2Nd Look Ceiling Tiles bring a touch of elegance to residential spaces. From living rooms to bedrooms, these tiles enhance the visual appeal of ceilings, creating a luxurious and stylish atmosphere within the comfort of your home.

2. Commercial Sophistication:

In commercial settings, the elegance of 2Nd Look Ceiling Tiles becomes a statement of sophistication. Explore applications in offices, hotels, restaurants, and retail spaces, where these tiles elevate the overall aesthetic and contribute to a welcoming environment for clients and customers.

3. Creative Design Possibilities:

Unleash your creativity with 2Nd Look Ceiling Tiles by exploring various design possibilities. From accentuating specific areas to creating unique patterns, these tiles offer a canvas for innovative design ideas. Learn how to play with shapes, colors, and layouts to achieve a visually stunning ceiling.

Read too: Exploring the Benefits and How-Tos of DIY Ceiling Cassette Mini Split Installation: Revolutionizing Comfort

Conclusion:

In conclusion, 2Nd Look Ceiling Tiles redefine the concept of elegance in interior design. From their visual appeal to their eco-friendly features and ease of installation, these tiles offer a versatile solution for transforming ceilings into works of art. Elevate your space with the enduring elegance of 2Nd Look Ceiling Tiles and make every glance a second look.