Understanding and Resolving Ceiling Water Bubbles for a Dry and Secure Home: Dealing with Dilemmas

Are unexpected ceiling water bubbles causing concern in your home? Explore the reasons behind “Ceiling Water Bubble” occurrences and discover effective solutions to safeguard your living space.

Ceiling Water Bubble

Unraveling the Mystery: Ceiling Water Bubble

Discovering a water bubble on your ceiling can be alarming and necessitates immediate attention. In this comprehensive guide, we will delve into the phenomenon of “Ceiling Water Bubbles,” exploring the potential causes, implications, and practical steps to address and prevent this issue.

Read too: Understanding and Addressing Termite Ceiling Damage: Unveiling the Hidden Threat

Ceiling Water Bubble: Causes and Concerns

1. Leaking Roof:

  • Roof leaks are a common culprit behind ceiling water bubbles.
  • Identify and repair damaged or missing shingles, flashing issues, or compromised roofing materials.

2. Plumbing Leaks:

  • Water leaks from plumbing systems can lead to water accumulation in ceilings.
  • Regularly inspect and address any plumbing issues promptly.
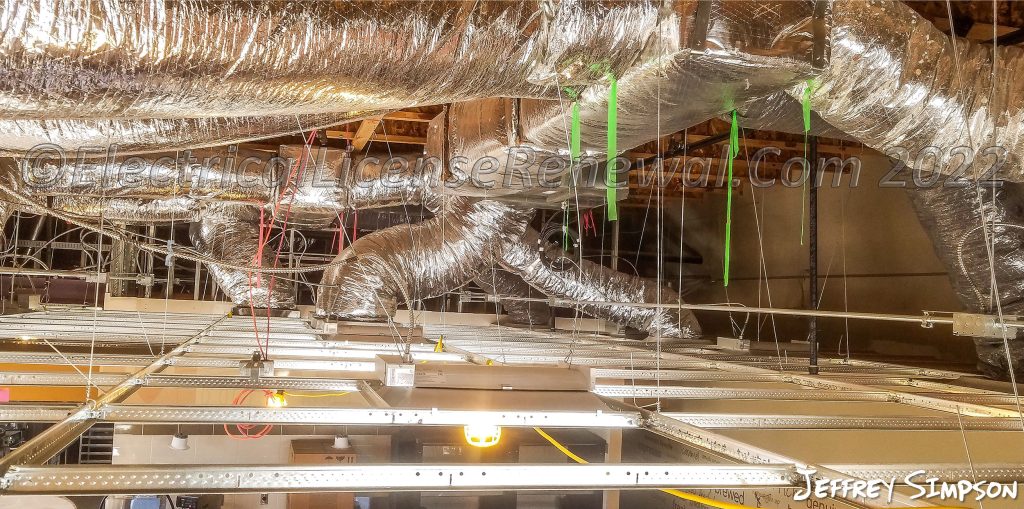
3. Condensation:

  • Excessive condensation in the ceiling space can result in water bubbles.
  • Improve ventilation and insulation to minimize condensation.

Identifying and Assessing Ceiling Water Bubbles

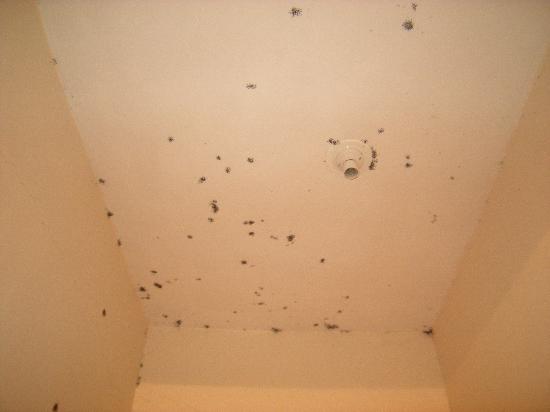
1. Visual Inspection:

  • Regularly inspect your ceilings for any signs of water bubbles.
  • Address any visible water damage promptly to prevent further issues.

2. Soft Spots:

  • Gently press on the bubble to identify soft or damp areas.
  • Soft spots indicate moisture infiltration and potential water damage.

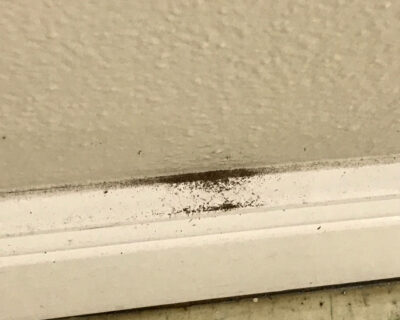
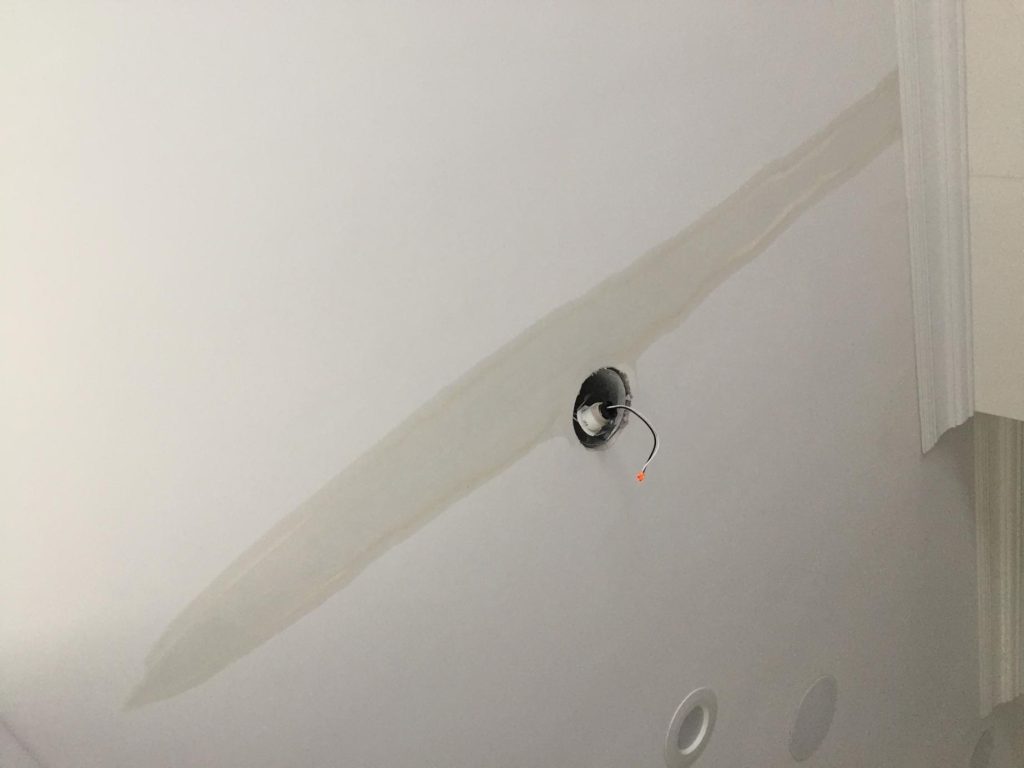
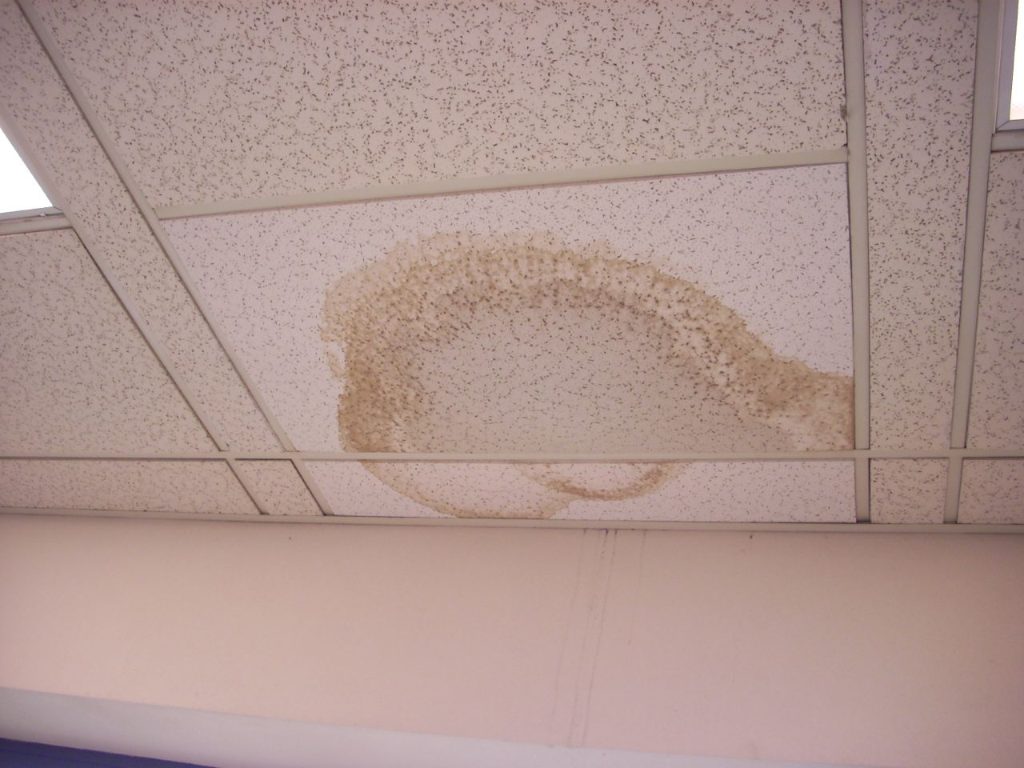
3. Staining and Discoloration:

  • Stains or discoloration on the ceiling are indicative of water damage.
  • Investigate the source of the water and address it to prevent further damage.

Dealing with Ceiling Water Bubbles

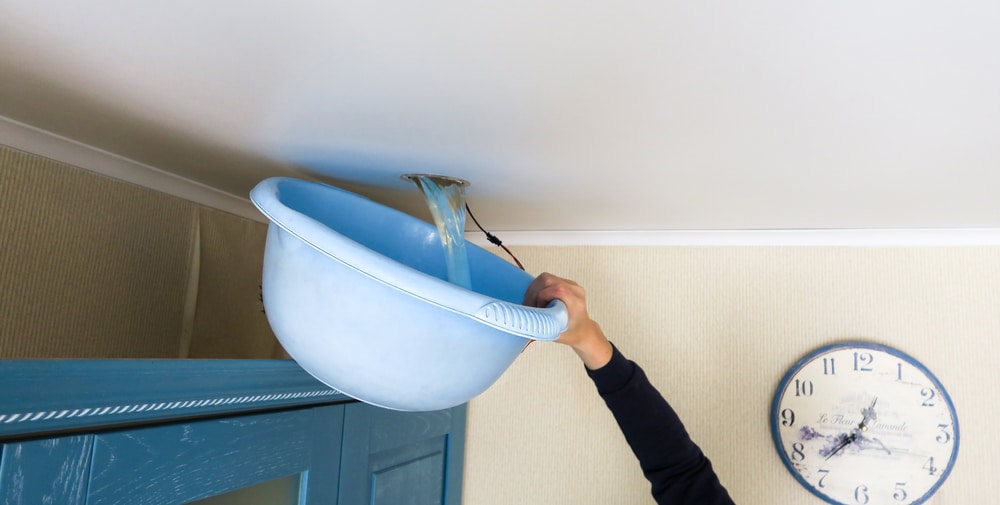
1. Draining the Bubble:

  • Safely puncture the bubble to release trapped water.
  • Use a bucket to collect water and ensure proper drainage.
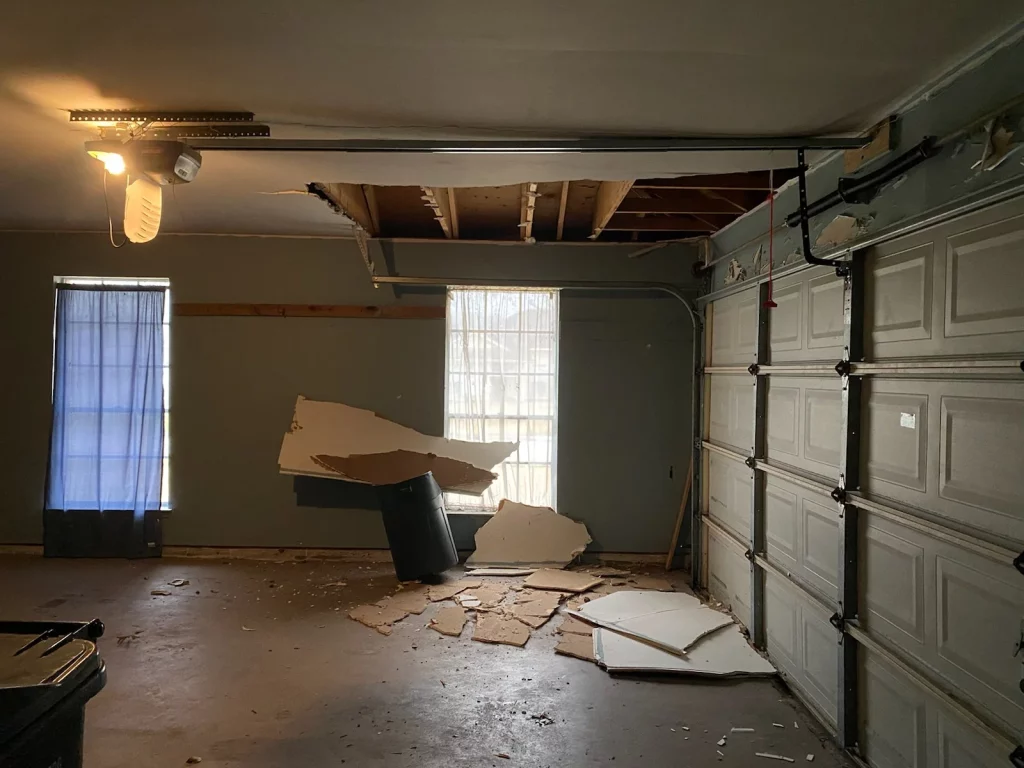
2. Ceiling Repairs:

  • Once the bubble is drained, assess the extent of damage.
  • Repair or replace damaged ceiling materials as needed.

3. Addressing the Root Cause:

  • Identify and address the root cause of the water infiltration.
  • Repair roof leaks, plumbing issues, or improve ventilation as necessary.

Preventive Measures for a Dry Home

1. Regular Inspections:

  • Conduct routine inspections of your roof and ceilings.
  • Proactive identification of issues can prevent extensive damage.

2. Prompt Repairs:

  • Address any signs of water damage promptly.
  • Timely repairs minimize the risk of water bubbles and related issues.

3. Improved Ventilation:

  • Enhance ventilation in your home to reduce the likelihood of condensation.
  • Proper airflow helps maintain a dry and healthy living environment.

Professional Assistance and Consultation

1. Roofing Experts:

  • Consult with roofing experts for thorough roof inspections.
  • Professionals can identify and address potential issues that may lead to water infiltration.

2. Plumbing Professionals:

  • Seek assistance from plumbing professionals for comprehensive plumbing inspections.
  • Timely detection and repair of leaks are crucial to preventing water damage.

Conclusion: A Dry and Secure Home

In conclusion, understanding and addressing “Ceiling Water Bubbles” is essential for maintaining a dry, secure, and comfortable home. By identifying the causes, promptly draining and repairing bubbles, and implementing preventive measures, homeowners can safeguard their living spaces from water damage.

Remember, regular inspections and proactive maintenance are key to preventing and addressing issues before they escalate. Embrace a proactive approach, and enjoy the peace of mind that comes with a dry and secure home environment.

Dealing with Roaches on the Ceiling and Safeguarding Your Home: Uninvited Guests

Are unwelcome visitors making their way onto your ceiling? Explore effective strategies for managing and preventing the presence of “Roaches on Ceiling” to ensure a pest-free and comfortable living environment.

Roaches On Ceiling

Understanding the Dilemma: Roaches on Ceiling

Discovering roaches on your ceiling can be disconcerting, and addressing this issue promptly is crucial for maintaining a hygienic home. In this guide, we will delve into the challenges posed by roaches on the ceiling, the potential causes, and effective methods to eradicate and prevent their presence.

Read too: Understanding and Addressing Termite Ceiling Damage: Unveiling the Hidden Threat

Roaches on Ceiling: Causes and Concerns

1. High Moisture Levels:

  • Roaches are attracted to areas with high humidity, making ceilings susceptible to infestations.
  • Addressing moisture issues is crucial to create an inhospitable environment for roaches.

2. Inadequate Sealing:

  • Gaps or cracks in ceilings provide entry points for roaches to crawl in.
  • Conduct a thorough inspection and seal any potential entryways to prevent roach infiltration.

3. Food Residue:

  • Roaches are drawn to food particles and residues.
  • Regularly clean ceilings and surrounding areas to eliminate potential food sources.

Identifying Roaches on Ceiling

1. Visible Signs:

  • Roaches may be spotted crawling on the ceiling, especially during the night.
  • Small, dark droppings and shed skin are indicative of roach activity.

2. Unpleasant Odor:

  • A musty or oily odor may be present in areas with a significant roach population.
  • Identifying and addressing this odor is crucial for detecting hidden infestations.

3. Nocturnal Activity:

  • Roaches are nocturnal creatures, so their presence may go unnoticed during the day.
  • Conduct inspections during nighttime to increase the chances of spotting roaches.

Dealing with Roaches on Ceiling

1. Natural Repellents:

  • Use natural repellents like bay leaves, cucumber slices, or catnip to deter roaches.
  • These substances emit scents that roaches find unpleasant.

2. Boric Acid:

  • Boric acid is an effective insecticide for roaches.
  • Apply boric acid powder strategically on the ceiling and potential entry points.

3. Professional Pest Control:

  • Consult with a pest control professional for severe infestations.
  • Professionals can assess the situation and implement targeted treatment plans.

Preventing Future Infestations

1. Maintain Cleanliness:

  • Regularly clean and sanitize ceilings, especially in kitchens and bathrooms.
  • Remove any food residue and fix leaks promptly.

2. Seal Entry Points:

  • Seal gaps, cracks, and openings in walls and ceilings.
  • Use caulk or weatherstripping to close off potential entryways.

3. Reduce Moisture Levels:

  • Use dehumidifiers to maintain optimal humidity levels.
  • Fix leaks, improve ventilation, and address any water accumulation.

Professional Inspection and Advice

1. Consult with Experts:

  • If roach infestations persist, seek professional inspection and advice.
  • Experts can identify root causes and recommend targeted solutions.

2. Regular Monitoring:

  • Implement a routine for monitoring roach activity.
  • Early detection allows for prompt intervention and prevents escalation.

Conclusion: A Roach-Free Haven

In conclusion, dealing with “Roaches on Ceiling” requires a combination of preventive measures, vigilant monitoring, and strategic interventions. By understanding the causes and implementing effective solutions, you can create a home environment that is unwelcoming to roaches. Whether opting for natural repellents, chemical treatments, or professional assistance, taking proactive steps ensures the well-being of your living space.

Remember, maintaining cleanliness, sealing entry points, and addressing moisture issues are fundamental to preventing future infestations. Embrace a comprehensive approach, and reclaim your home from unwanted roach guests, creating a roach-free haven for you and your family.

A Comprehensive Guide to Raising Basement Ceiling for Added Comfort and Functionality: Elevate Your Space

Are you looking to transform your basement into a more inviting and spacious area? Explore the possibilities of “Raising Basement Ceiling” and discover the key considerations, benefits, and methods to elevate your basement’s aesthetics and functionality.

Raising Basement Ceiling

Understanding the Vision: Raising Basement Ceiling

Creating a comfortable and welcoming basement involves strategic planning, and one key element to consider is the height of your basement ceiling. In this guide, we will delve into the concept of “Raising Basement Ceiling,” exploring the reasons behind this transformation and providing valuable insights to help you make informed decisions.

Read too: Understanding and Addressing Termite Ceiling Damage: Unveiling the Hidden Threat

Raising Basement Ceiling: Why Consider It?

1. Enhanced Aesthetics:

  • A higher ceiling creates an illusion of more space and openness, making the basement feel less confined.
  • The visual impact of an elevated ceiling can contribute to a more appealing and modern aesthetic.

2. Improved Air Circulation:

  • Higher ceilings facilitate better air circulation, preventing the basement from feeling stuffy or cramped.
  • Adequate ventilation contributes to a healthier and more comfortable living environment.

3. Increased Resale Value:

  • Investing in raising the basement ceiling can add value to your home, making it more attractive to potential buyers.
  • A finished basement with an elevated ceiling is often seen as a desirable feature in real estate.

Key Considerations Before Raising Basement Ceiling

1. Structural Implications:

  • Consult with a structural engineer to assess the feasibility of raising the basement ceiling.
  • Identify any potential challenges or modifications needed to ensure structural integrity.

2. Building Codes and Permits:

  • Check local building codes and regulations to determine if there are any restrictions on raising basement ceilings.
  • Obtain the necessary permits before starting any construction or renovation work.

3. HVAC Adjustments:

  • Evaluate the impact of raising the ceiling on your heating, ventilation, and air conditioning (HVAC) system.
  • Ensure that adjustments are made to maintain optimal temperature and airflow.

Methods for Raising Basement Ceiling

1. Drop Ceilings:

  • Drop ceilings, also known as suspended ceilings, offer a versatile and cost-effective option.
  • They allow easy access to wiring and plumbing, making maintenance more convenient.

2. Drywall Installation:

  • Installing drywall directly to the ceiling joists is a more permanent solution.
  • This method provides a seamless and polished finish for a modern look.

3. Coffered Ceilings:

  • Coffered ceilings add architectural interest to the space while providing the desired height.
  • This decorative option can enhance the overall design of your basement.

Professional Assistance and DIY Considerations

1. Hiring Contractors:

  • Engage experienced contractors who specialize in basement renovations and ceiling modifications.
  • Obtain multiple quotes and references before making a decision.

2. DIY Approach:

  • For those with construction skills, a DIY approach is possible for simpler ceiling-raising projects.
  • However, complex structural modifications may require professional assistance.

Conclusion: Elevate Your Basement Living Experience

In conclusion, “Raising Basement Ceiling” is a transformative endeavor that can elevate your basement from a mere storage space to a functional and inviting area. Careful planning, adherence to building codes, and consideration of structural implications are crucial aspects of this renovation project. Whether you opt for drop ceilings, drywall installations, or coffered ceilings, the decision to raise your basement ceiling is an investment in comfort, aesthetics, and property value.

Remember to consult with professionals, obtain the necessary permits, and prioritize safety throughout the renovation process. With the right approach, your raised basement ceiling can become the highlight of your home, providing a more expansive and enjoyable living space.

Understanding the Causes Behind Ceiling Stains and How to Address Them: Decoding the Mystery

Ceiling stains can be an unsightly and perplexing issue in any home. If you’ve ever wondered about the “Ceiling Stain Cause” in your living space, this comprehensive guide will delve into the various factors contributing to ceiling stains and provide insights on how to address them effectively.

Ceiling Stain Cause

Unveiling the Culprits: Ceiling Stain Cause

Ceiling stains are not only an aesthetic concern but can also signal underlying issues that require attention. Let’s explore the common causes behind ceiling stains and gain a better understanding of how to identify and resolve them.

Read too: Understanding and Addressing Termite Ceiling Damage: Unveiling the Hidden Threat

Leaky Roof or Water Damage

Identifying Characteristics:

  • Water stains on the ceiling often appear as brown or yellowish discolorations.
  • Stains may be accompanied by peeling paint or bubbling plaster.

Possible Causes:

  • Leaky Roof: Damaged or missing shingles, deteriorated flashing, or compromised roof materials can allow water to penetrate and cause stains.
  • Water Damage: Plumbing leaks, burst pipes, or condensation issues can contribute to ceiling stains.

Resolution:

  • Address roof leaks promptly by inspecting and repairing damaged areas.
  • Identify and fix plumbing issues to prevent ongoing water damage.
  • Consider improving ventilation to reduce condensation-related stains.

Ceiling Stain Cause: Mold and Mildew Growth

Identifying Characteristics:

  • Stains accompanied by a musty odor may indicate mold or mildew growth.
  • Black or greenish discolorations are common indicators of fungal growth.

Possible Causes:

  • Excess Moisture: Poor ventilation, high humidity, or water infiltration can create conditions conducive to mold and mildew.
  • Water Seepage: Leaks from roofs, pipes, or windows can lead to persistent moisture and fungal growth.

Resolution:

  • Identify and address the source of excess moisture.
  • Clean and remove mold or mildew using appropriate cleaning solutions.
  • Improve ventilation in affected areas to discourage future growth.

Ceiling Stain Cause: Smoke or Soot Accumulation

Identifying Characteristics:

  • Stains near light fixtures or ventilation openings.
  • Dark, sooty marks on the ceiling.

Possible Causes:

  • Smoking Indoors: Tobacco smoke can leave residue on ceilings.
  • Candle Burning: Burning candles, especially in confined spaces, can produce soot that accumulates on surfaces.

Resolution:

  • Avoid smoking indoors to prevent further soot accumulation.
  • Use smokeless candles or ensure proper ventilation when burning candles.

Ceiling Stain Cause: Pest Infestation

Identifying Characteristics:

  • Stains accompanied by visible signs of pest activity, such as droppings or nesting materials.
  • Scratching or scurrying sounds may indicate the presence of pests in the ceiling.

Possible Causes:

  • Roof Rats or Mice: Infestations in attics or crawl spaces can lead to staining.
  • Insects: Termites, carpenter ants, or other insects may cause damage that results in stains.

Resolution:

  • Address pest infestations promptly by consulting with a pest control professional.
  • Seal entry points to prevent further infestations.

Ceiling Stain Cause: Structural Issues

Identifying Characteristics:

  • Stains accompanied by visible cracks or sagging in the ceiling.
  • Structural deformities may be evident in severe cases.

Possible Causes:

  • Foundation Issues: Uneven settling or structural problems in the foundation can impact the ceiling.
  • Overloaded Ceiling Joists: Excessive weight on the ceiling may lead to structural damage.

Resolution:

  • Consult with a structural engineer to assess and address foundation issues.
  • Reinforce or redistribute weight on ceiling joists as necessary.

Conclusion

In conclusion, understanding the “Ceiling Stain Cause” is crucial for effective resolution. By identifying the underlying factors contributing to ceiling stains, homeowners can take targeted steps to address the root causes and prevent further damage. Regular inspections, prompt repairs, and appropriate maintenance are key to maintaining a clean and structurally sound ceiling. If uncertain about the cause or extent of ceiling stains, consulting with professionals can provide valuable insights and guidance for a lasting solution.

Remember, addressing the cause is as important as treating the visible stain to ensure a comprehensive and effective solution.

Exploring the Differences Between Roof VS Ceiling: Demystifying the Dynamics

Embark on a journey to comprehend the nuanced disparities between “Roof vs Ceiling” and unlock the secrets behind these fundamental components of any structure.

Roof Vs Ceiling

Roof vs Ceiling: Unveiling Distinctions in Construction

Delve into the intricate world of construction as we unravel the differences and purposes that define “Roof vs Ceiling.”

Understanding the Role of a Roof

The roof stands as the protective shield, shielding the structure from external elements such as rain, sunlight, and snow. It is the outermost layer, crucial for the integrity of the building.

Materials and Construction

Roofs are constructed using a variety of materials, including asphalt shingles, metal, tiles, or even thatch, depending on climate, budget, and aesthetic preferences.

Slope and Design Variations

Roofs come in diverse designs, each serving a unique purpose. From flat roofs ideal for urban settings to pitched roofs that efficiently drain water, the design is tailored to the function.

The Essence of a Ceiling in Interior Spaces

Shift your focus from the exterior to the interior as we explore the significance of ceilings in creating functional and aesthetically pleasing living spaces.

Insulation and Temperature Regulation

Ceilings play a crucial role in insulating indoor spaces, regulating temperatures, and preventing heat loss or gain, contributing to energy efficiency.

Aesthetic Appeal and Design Elements

Ceilings offer a canvas for design creativity. From coffered ceilings to tray ceilings, the design possibilities are vast, adding character and style to interiors.

Read too: Understanding and Dealing with Ants in the Ceiling Spaces: Navigating the Intrusion

Comparing Construction, Materials, and Maintenance

Construction Complexity

While roofs demand structural robustness to withstand weather conditions, ceilings focus on intricate design and aesthetic appeal within the enclosed space.

Material Variations

Roofs prioritize weather resistance, often utilizing durable materials, while ceilings explore a wide array, including gypsum board, wood, or even metal, to achieve desired aesthetics.

Maintenance Considerations

Roofs require regular inspections for wear and tear, especially in harsh weather conditions, while ceilings may need periodic checks for issues like leaks or cosmetic repairs.

Conclusion: Harmonizing the Roof-Ceiling Symphony

In conclusion, “Roof vs Ceiling” embodies a symbiotic relationship, each contributing distinctively to the functionality and aesthetics of a structure. Understanding these differences empowers homeowners and builders to make informed decisions, ensuring a harmonious blend of durability, design, and comfort.

Embark on your construction journey equipped with the knowledge to appreciate the synergy between roof and ceiling, creating spaces that seamlessly balance protection and aesthetics.

Unveiling the Allure of a 17-Foot Ceiling for Your Space: Embrace Grandeur

Embark on a journey of elegance as we explore the enchanting possibilities and considerations when adorning your space with a magnificent 17-foot ceiling.

17 Foot Ceiling

Elevating Spaces to New Heights

Discover the captivating charm of a “17-Foot Ceiling” and how it transforms the ambiance of any space into a realm of grandeur.

Unveiling the Majesty of 17-Foot Ceilings

Ample Vertical Space

A 17-foot ceiling provides a sense of spaciousness, creating an open and airy atmosphere. The abundance of vertical space allows for a variety of design possibilities.

Natural Light Magnificence*

Larger windows accompanying a lofty ceiling enable an influx of natural light, enhancing the overall brightness and vibrancy of the space.

Considerations for Designing

Statement Lighting Fixtures*

Capitalizing on the height, opt for statement chandeliers or pendant lights that not only illuminate but serve as exquisite focal points.

Vertical Design Elements*

Incorporate vertical design elements such as tall bookshelves, art installations, or floor-to-ceiling drapes to accentuate the height of the room.

Ensuring Comfort in 17-Foot Spaces

Effective Temperature Management*

Consider the impact of increased vertical space on temperature. Implementing effective heating and cooling systems ensures comfort in these lofty environments.

Acoustic Considerations*

Address potential acoustic challenges in spacious areas by incorporating rugs, curtains, or acoustic panels to prevent sound echoes.

Read too: Understanding and Dealing with Ants in the Ceiling Spaces: Navigating the Intrusion

Making a Statement with 17-Foot Ceilings: Inspirational Ideas

Double-Height Windows*

Install double-height windows to maximize natural light and provide breathtaking views, creating a seamless connection with the outdoors.

Mezzanine or Loft Spaces*

Explore the possibility of incorporating mezzanine or loft spaces to optimize the functionality of a room with a 17-foot ceiling.

Conclusion: Elevating Your Living Experience with a 17-Foot Ceiling

In conclusion, a “17-Foot Ceiling” is not merely a structural feature; it’s a canvas for creativity and an invitation to redefine your living experience. From design considerations to inspirational ideas, the allure of a lofty ceiling beckons you to elevate your space to new heights.

Discover the magic of vertical expanse and embark on a design journey that transcends the ordinary, creating a living space that reflects your unique style and appreciation for grandeur.

Understanding and Addressing Termite Tube Ceiling Infestations: Decoding the Threat

Explore the mysterious world of termite tube ceiling and empower yourself with knowledge on detection, prevention, and elimination strategies.

Termite Tube Ceiling

Termite Tube Ceiling: Unraveling the Enigma

Discover the nuances of “Termite Tube Ceiling” as we delve into its signs, underlying causes, and effective solutions to protect your home from this elusive threat.

Recognizing Signs of Termite Tube Ceiling Infestations

Intricate Mud Tubes

Termites often construct mud tubes as shelter. Identifying these intricate structures on ceilings is a key indicator of termite presence.

Discoloration or Stains*

Termite activity can cause discoloration or stains on ceilings. Regularly inspect your ceilings for any unusual marks or changes in appearance.

Understanding the Causes of Termite Tube Ceiling Infestations

Subterranean Termite Habits*

Subterranean termites, known for building mud tubes, are often responsible for tube ceiling infestations. Understanding their habits is crucial for prevention.

Moisture and Accessibility*

Ceilings with persistent moisture issues or easy accessibility become prime targets for termite infestations. Addressing these factors is essential for prevention.

Read too: Understanding and Dealing with Ants in the Ceiling Spaces: Navigating the Intrusion

Dealing with Termite Tube Ceiling Infestations: Prevention and Treatment

Regular Inspections*

Frequent inspections by pest control professionals are crucial for early detection of termite tube ceilings. Professionals can identify potential issues and implement preventive measures.

Addressing Moisture Concerns*

Reducing moisture in your home is an effective preventive measure. Fix leaks promptly, ensure proper ventilation, and use dehumidifiers to maintain optimal humidity levels.

Professional Treatment Options

Termiticide Applications*

Professional pest control services often employ termiticides to eliminate termites. Liquid applications or bait systems can be used depending on the severity of the infestation.

Localized Treatments*

In cases of isolated tube ceiling infestations, localized treatments may suffice. This involves targeting the affected area with specific termiticides or treatments.

DIY Prevention Measures

Sealing Entry Points*

Take proactive measures to seal potential entry points for termites. This includes sealing cracks, gaps, and ensuring a well-maintained exterior to prevent termite access.

Using Termite-Resistant Materials*

Choose building materials that are resistant to termites when constructing or renovating. These materials act as a deterrent, reducing the risk of termite tube ceilings.

Conclusion: Shielding Your Home from Termite Tube Ceiling Threats

Termite tube ceilings pose a unique challenge, demanding vigilance and swift action. By staying informed, recognizing signs, addressing causes, and implementing preventive measures, you can safeguard your home from the elusive threat of termite tube infestations.

For comprehensive protection, consult with pest control professionals to tailor solutions based on your home’s specific needs.

Understanding and Addressing Termite Ceiling Damage: Unveiling the Hidden Threat

Discover the potential dangers of termite ceiling damage and learn effective strategies to identify, prevent, and remedy this silent yet destructive issue.

Termite Ceiling Damage

Termite Ceiling Damage: Navigating the Silent Menace

Termite on ceiling can go unnoticed until significant harm is done. In this article, we delve into the intricacies of “Termite Ceiling Damage,” shedding light on the signs, causes, and preventative measures to safeguard your home.

Recognizing Signs of Termite Ceiling Damage

Blistering or Bubbling Paint

Termites often create moisture as they feed on wood, causing paint to blister or bubble on the ceiling. This visual cue can be an early sign of termite activity.

Sagging or Warped Ceiling*

As termites consume the wooden structure, ceilings may start to sag or warp. Regularly inspect your ceilings for any unusual changes in shape or alignment.

Understanding the Causes

Wooden Structural Components

Ceilings with wooden components, such as beams, joists, or trusses, are particularly susceptible to termite damage. Termites feast on these wooden structures, compromising their integrity.

Moisture and Humidity*

Termites thrive in moist environments. Ceilings with persistent leaks or high humidity levels become attractive targets for termite infestations.

Dealing with Termite Ceiling Damage: Prevention and Treatment

Regular Inspections*

Frequent inspections by pest control professionals are vital for early detection of termite activity. Professionals can identify potential issues and take preventive measures.

Moisture Control*

Addressing moisture issues is crucial. Fix leaks promptly, ensure proper ventilation, and use dehumidifiers to reduce humidity levels in your home.

Professional Treatment Options

Chemical Treatments

Professional pest control services often employ chemical treatments to eliminate termites. Liquid termiticides or termite bait systems are common methods.

Fumigation*

In severe cases, fumigation may be necessary. This involves tenting the entire structure and introducing gas to eradicate the termite population.

Read too: Understanding and Dealing with Ants in the Ceiling Spaces: Navigating the Intrusion

DIY Prevention Measures

Use of Termite-Resistant Materials

Opt for termite-resistant building materials when constructing or renovating. These materials act as a deterrent, reducing the risk of termite damage.

Regular Cleaning and Maintenance*

Keep your home clutter-free and conduct regular cleaning to minimize hiding spots for termites. Maintain a clear perimeter around your home to reduce the likelihood of termite entry.

Conclusion: Safeguarding Your Home from Termite Ceiling Damage

Termite ceiling damage is a serious threat to the structural integrity of your home. By staying vigilant, understanding the signs, addressing causes, and implementing preventive measures, you can protect your home from the silent menace of termite damage.

Early intervention is key, and consulting with professionals for thorough inspections and tailored treatments is recommended for significant termite infestations.

Understanding and Addressing the Issue of Termites on Ceiling: A Comprehensive Guide

Discovering termites on your ceiling can be a cause for concern. In this detailed guide on “Termites On Ceiling,” we delve into the signs, prevention, and treatment options for safeguarding your home from these wood-devouring pests.

Termites On Ceiling

Termites On Ceiling: Recognizing the Signs and Taking Action

Termites are silent invaders that can wreak havoc on your home, and finding them on your ceiling is an alarming situation. This article aims to shed light on “Termites On Ceiling,” offering insights into identifying signs, understanding causes, and providing effective solutions.

Signs of Termites On Ceiling

Hollow Sounds and Tapping Noises

Termites are notorious for consuming wood from the inside out. If you notice hollow sounds or tapping noises when you tap on your ceiling, it could indicate termite activity.

Discarded Wings

Reproductive termites, also known as swarmers, shed their wings after establishing a new colony. Discovering discarded wings on your ceiling or around your home is a strong indicator of termite presence.

Understanding the Causes of Termites On Ceiling

Moisture and Water Leaks

Termites thrive in environments with high moisture levels. Ceiling leaks, whether from plumbing issues or roof damage, create the ideal conditions for termites to infest.

Wood-to-Ground Contact

Direct contact between wooden structures and the ground provides termites with easy access. This can occur in the form of untreated wooden supports or foundations.

Prevention and Treatment

Moisture Control

Addressing moisture issues is paramount in termite prevention. Fix leaks promptly, ensure proper ventilation, and use dehumidifiers if needed to reduce humidity levels in your home.

Regular Inspections

Regular inspections by pest control professionals are crucial for early termite detection. Professionals can identify signs of infestation before extensive damage occurs.

Read too: Understanding and Dealing with Ants in the Ceiling Spaces: Navigating the Intrusion

Professional Treatment Options

Chemical Treatments

Professional pest control services often use chemical treatments to eliminate termites. These treatments may include liquid termiticides or termite bait systems.

Heat Treatment

Heat treatment is an eco-friendly option that involves raising the temperature in infested areas to levels lethal to termites. This method is effective for localized infestations.

DIY Prevention Measures

Use of Borate-Treated Wood

Borate-treated wood is a natural termite deterrent. Using this type of wood for construction or applying borate treatments to existing wooden structures can help prevent infestations.

Application of Nematodes

Nematodes are microscopic organisms that feed on termites. Introducing nematodes to your garden or affected areas can help control termite populations.

Conclusion: Protecting Your Home from Termites On Ceiling

Termites on the ceiling pose a threat to the structural integrity of your home. By understanding the signs, addressing the causes, and implementing prevention and treatment measures, you can safeguard your home from these destructive pests.

Remember, early intervention is key, and seeking professional assistance for a thorough inspection and targeted treatment is recommended for severe infestations.

Exploring the Wonders of Solatube Vaulted Ceiling Lighting Solutions: Illuminating Elegance

Experience the brilliance of natural light with our guide on “Solatube Vaulted Ceiling.” Discover how this innovative lighting solution transforms your space into a haven of elegance and functionality.

Solatube Vaulted Ceiling

Solatube Vaulted Ceiling: Infusing Light into Elevated Spaces

In the realm of lighting solutions, Solatube Vaulted Ceiling emerges as a beacon of innovation, providing a seamless blend of natural light and architectural beauty. This comprehensive guide navigates the intricacies of “Solatube Vaulted Ceiling,” shedding light on its features and transformative impact on elevated spaces.

Understanding Solatube Vaulted Ceiling Lighting Systems

Harnessing Natural Light

Solatube Vaulted is designed to harness and amplify natural light, bringing the beauty of the outdoors into your interior spaces. The system captures sunlight from rooftops and directs it through a highly reflective tube, creating a radiant and energy-efficient lighting solution.

Architectural Versatility

The architectural versatility of Solatube Vaulted is a hallmark of its design. Whether your space boasts high ceilings, slopes, or vaulted designs, Solatube seamlessly integrates, ensuring a uniform and aesthetically pleasing distribution of natural light.

Benefits of Choosing Solatube Vaulted Ceiling Lighting

Energy Efficiency

Solatube Vaulted contributes to energy efficiency by reducing the need for artificial lighting during daylight hours. This not only lowers energy consumption but also aligns with sustainable practices, making it an eco-friendly lighting solution.

Enhanced Visual Comfort

Experience enhanced visual comfort with Solatube Vaulted. The system’s advanced technology minimizes glare and hotspots, creating a balanced and soothing illumination that promotes well-being and productivity.

Versatility in Design and Application

Tailored Solutions for Every Space

Solatube Vaulted offers tailored lighting solutions for various spaces, including residential homes, commercial buildings, and institutional settings. Whether you desire a cozy ambiance or a bright and lively atmosphere, Solatube adapts to your lighting preferences.

Integration with Architectural Elements

The seamless integration of Solatube Vaulted with architectural elements enhances the overall design of your space. From modern to traditional settings, Solatube complements diverse interior styles while maintaining its commitment to functionality.

Installation and Maintenance

Efficient Installation Process

Solatube Vaulted boasts an efficient installation process. The compact and adaptable design simplifies the installation, minimizing disruption to your daily activities. Professional installers ensure a seamless integration that maximizes the benefits of natural light.

Low Maintenance Requirements

Once installed, Solatube Vaulted demands minimal maintenance. The durable materials and streamlined design mitigate the risk of dust buildup, ensuring a consistently bright and clear lighting source.

Read too: Understanding and Addressing a Troublesome Water Pocket in Ceiling: Navigating the Dangers

Applications Across Elevated Spaces

Residential Grandeur

In residential settings with vaulted ceilings, Solatube transforms living rooms, kitchens, and bedrooms into inviting spaces filled with natural light. Experience the grandeur of elevated living with Solatube Vaulted.

Commercial Excellence

Solatube’s versatility extends to commercial spaces with vaulted ceilings, such as atriums, lobbies, and office areas. Create a dynamic and inspiring work environment with the infusion of natural light.

Conclusion: Elevate Your Space with Solatube Vaulted Ceiling Lighting

As you embark on a journey to redefine your illuminated spaces, consider the transformative power of Solatube Vaulted Ceiling Lighting. Elevate your surroundings with a harmonious blend of natural radiance and architectural brilliance, creating an atmosphere that resonates with modern design principles. Whether you’re redesigning a home, office, or institutional space, Solatube Vaulted Lighting promises to infuse your environment with unparalleled elegance and functionality. Illuminate your elevated spaces and embrace the beauty of Solatube.

Exploring the Wonders of Armstrong Techzone Ceiling Solutions: Elevate Your Space with Innovation

Are you ready to transform your space into a realm of sophistication and functionality? Dive into our guide on “Armstrong Techzone Ceiling” to discover cutting-edge solutions that redefine your interior aesthetic.

Armstrong Techzone Ceiling

Armstrong Techzone Ceiling: Redefining Elegance and Functionality

In the realm of interior design, Armstrong Techzone Ceiling emerges as a beacon of innovation, seamlessly blending aesthetics and functionality. This guide delves into the intricacies of “Armstrong Techzone Ceiling,” unraveling its features and benefits for those seeking a transformative and modernized space.

Understanding Armstrong Techzone Ceiling Systems

Architectural Brilliance

Armstrong Techzone Ceiling is synonymous with architectural brilliance. The system goes beyond conventional ceilings, offering a versatile canvas to architects and designers for crafting visually stunning and functional spaces.

Modular Precision

At the core of Armstrong Techzone is its modular precision. The system comprises interlocking components that allow for easy installation and customization, enabling designers to bring their creative visions to life.

Benefits of Choosing Armstrong Techzone

Enhanced Aesthetics

Armstrong Techzone systems contribute to enhanced aesthetics, elevating the visual appeal of any space. Choose from a variety of designs, textures, and finishes to match the overall theme of your interior.

Acoustic Comfort

Experience a new level of acoustic comfort with Armstrong Techzone . The modular components are designed to absorb sound, reducing noise levels and creating a more serene and enjoyable environment.

Versatility in Design and Application

Customization Options

One of the key advantages of Armstrong Techzone is its customization options. Tailor the system to suit the unique requirements of your space, whether it’s a commercial office, healthcare facility, educational institution, or any other environment.

Integration of Lighting and HVAC Systems

Armstrong Techzone seamlessly integrates with lighting and HVAC systems, providing a cohesive and streamlined appearance. This integration not only enhances the overall design but also ensures efficient functionality.

Installation and Maintenance

Efficient Installation Process

The installation of Armstrong Techzone is known for its efficiency. The modular nature of the system allows for a quicker and smoother installation process, minimizing disruptions to your daily activities.

Minimal Maintenance Requirements

Once installed, Armstrong Techzone demands minimal maintenance. The durable materials used in the system are resistant to stains, mold, and other environmental factors, ensuring a long-lasting and pristine appearance.

Applications Across Industries

Corporate Spaces

In corporate environments, Armstrong Techzone adds a touch of sophistication and modernity. Create inspiring workspaces that reflect your brand identity and foster a positive atmosphere for employees.

Healthcare Facilities

In healthcare settings, the acoustic comfort and customizable designs of Armstrong Techzone contribute to a calming environment, supporting the well-being of patients and staff.

Read too: Understanding and Addressing a Troublesome Water Pocket in Ceiling: Navigating the Dangers

Conclusion: Elevate Your Space with Armstrong Techzone Ceiling

As you embark on a journey to redefine your interior spaces, consider the transformative power of Armstrong Techzone Ceiling. Elevate your surroundings with a harmonious blend of aesthetics and functionality, creating an atmosphere that resonates with modern design principles. Whether you’re an architect, designer, or business owner, the allure of Armstrong Techzone lies in its ability to turn visions into reality, one modular component at a time.

Understanding and Dealing with Ants in the Ceiling Spaces: Navigating the Intrusion

Discover the nuances of dealing with unwanted guests with our guide on “Ants In Ceiling.” Learn how to address and prevent ant infestations for a pest-free environment.

Ants In Ceiling

Ants In Ceiling: Unraveling the Invasion

Ants infiltrating the ceiling spaces can be a pesky problem, impacting both residential and commercial environments. This comprehensive guide on “Ants In Ceiling” aims to unravel the complexities of ant infestations, offering insights into prevention and elimination strategies.

Understanding the Attraction to Ceiling Spaces

Seeking Shelter and Nesting

Ceiling spaces provide a hidden refuge for ants, offering shelter and a potential nesting site. Understanding the factors that attract ants to these spaces is crucial in developing effective prevention measures.

Tracing Food Sources

Ants are often drawn to ceiling spaces in search of food sources. Leaky pipes, crumbs, or improperly sealed containers can attract these pests, creating an environment conducive to infestations.

Identifying Types of Ants Invading Ceilings

Distinguishing Carpenter Ants

Carpenter ants, known for their ability to nest in wood, are a common culprit in ceiling infestations. Recognizing their distinctive appearance and behavior is key to implementing targeted control measures.

Combatting Odorous House Ants

Odorous house ants, attracted to sweets and food debris, are another frequent invader of ceiling spaces. Identifying their trails and entry points aids in effective eradication.

Signs of Ant Infestation in Ceiling Spaces

Visible Ant Trails

Observing visible ant trails on walls or ceilings is a clear indication of an infestation. These trails may lead to nesting sites or food sources.

Audible Rustling Sounds

Ant colonies in ceiling spaces may produce audible rustling sounds, especially during periods of high activity. Listening for these sounds can help locate nesting sites.

Read too: Understanding and Addressing a Troublesome Water Pocket in Ceiling: Navigating the Dangers

Preventive Measures for Ant Infestations

Sealing Entry Points

Thoroughly inspect and seal any potential entry points in the ceiling, including cracks, gaps, or openings around utility lines. This helps prevent ants from gaining access to the interior.

Proper Food Storage

Maintain proper food storage practices to eliminate potential food sources for ants. Seal food containers, clean up spills promptly, and dispose of garbage regularly.

DIY Ant Control Methods: Ants In Ceiling

Vinegar and Water Solution

A vinegar and water solution sprayed along ant trails can disrupt their pheromone trails, deterring them from returning to the area.

Diatomaceous Earth

Applying diatomaceous earth in ceiling voids can be an effective method for controlling ant infestations. This natural substance dehydrates ants upon contact.

Professional Ant Extermination Services: Ants In Ceiling

Consulting Pest Control Professionals

For severe ant infestations in ceiling spaces, consulting with pest control professionals is advisable. They can conduct a thorough inspection, identify the ant species, and implement targeted extermination methods.

Regular Pest Inspections

Schedule regular pest inspections, especially in areas prone to ant infestations. Early detection allows for prompt intervention and prevents infestations from escalating.

Conclusion: Regaining Control Over Your Ceiling Space

Ants In Ceiling” can be a persistent issue, but with proactive measures and a comprehensive understanding of ant behavior, you can regain control over your living or working environment. Implement preventive strategies, identify signs of infestations, and, when necessary, seek professional assistance for effective ant eradication. By addressing ant issues promptly, you ensure a pest-free and comfortable space for yourself and those around you.

The Importance of Above Ceiling Inspection for a Safer Environment: Unlocking Hidden Spaces

Are you aware of the concealed areas above your ceiling? Delve into the significance of “Above Ceiling Inspection” to ensure a secure and well-maintained environment.

Above Ceiling Inspection

Above Ceiling Inspection: Revealing the Unseen

Exploring the often-overlooked realm above your ceiling can unveil potential issues and pave the way for a safer environment. This guide on “Above Ceiling Inspection” sheds light on the importance of proactive inspection for optimal safety and maintenance.

Understanding the Purpose of Above Ceiling Spaces

Concealed Systems and Infrastructure

Above ceiling spaces house critical building systems such as HVAC, electrical wiring, plumbing, and more. Regular inspection is crucial to identify potential issues and ensure the efficient functioning of these systems.

Fire Safety Considerations

In commercial and industrial settings, above ceiling spaces play a vital role in fire safety. Inspection helps assess the condition of fire-rated materials, sprinkler systems, and other components to maintain compliance with safety standards.

The Process of Above Ceiling Inspection

Identifying Access Points

Before conducting an inspection, identify accessible entry points to above ceiling spaces. These may include removable ceiling tiles, access panels, or designated entryways specifically designed for maintenance personnel.

Safety Precautions

Prioritize safety during above ceiling inspections. Ensure the use of appropriate personal protective equipment (PPE) and adhere to safety guidelines. If unsure, consult with a safety professional to establish best practices.

Common Components to Inspect Above the Ceiling

Ductwork and Ventilation Systems

Examine the condition of ductwork and ventilation systems. Look for signs of damage, corrosion, or leaks, as these issues can impact indoor air quality and system efficiency.

Electrical Wiring and Components

Inspect electrical wiring and components for wear, damage, or potential fire hazards. Identify any exposed or improperly secured wiring that may pose a safety risk.

Benefits of Regular Above Ceiling Inspection

Early Detection of Issues

Proactive inspection allows for the early detection of issues such as leaks, equipment malfunctions, or structural concerns. Addressing these problems promptly can prevent extensive damage and costly repairs.

Enhanced Fire Safety

Regular inspections contribute to enhanced fire safety by ensuring that fire-rated materials, sprinkler systems, and other fire suppression components are in optimal condition and compliant with regulations.

Read too: Understanding and Addressing a Troublesome Water Pocket in Ceiling: Navigating the Dangers

Professional Above Ceiling Inspection Services

Engaging Certified Inspectors

Consider engaging certified inspectors or building maintenance professionals for comprehensive above ceiling inspections. Their expertise ensures a thorough assessment of critical systems and adherence to safety standards.

Utilizing Technology for Efficiency

Explore the use of technology, such as drones or remote cameras, for above ceiling inspections in large or challenging spaces. This approach can enhance efficiency and provide detailed visual assessments.

Conclusion: Securing Spaces Above and Beyond

Incorporating regular “Above Ceiling Inspection” into your maintenance routine is a proactive measure that contributes to the overall safety and functionality of your built environment. Whether in a commercial, industrial, or residential setting, unveiling the unseen above ceiling spaces ensures a secure and well-maintained atmosphere. Prioritize inspections, embrace safety protocols, and navigate the uncharted territories above your ceiling for a safer and more resilient built environment.

A Comprehensive Guide to Arktura Ceiling Installation for a Stylish Interior: Elevate Your Space

Are you considering enhancing your interior with Arktura ceiling designs? Dive into our guide on “Arktura Ceiling Installation” for a seamless and stylish transformation.

Arktura Ceiling Installation

Arktura Ceiling Installation: Crafting a Stylish Interior

Elevate your space with the sophistication of Arktura ceiling designs. In this comprehensive guide, we explore the intricate process of “Arktura Ceiling Installation,” providing insights into creating a stylish and captivating interior.

Understanding Arktura Ceiling Systems

Before delving into the installation process, familiarize yourself with Arktura ceiling systems. Known for their architectural beauty and innovative designs, Arktura ceilings offer a unique way to redefine the aesthetics of your space.

Preparing for Arktura Ceiling Installation

Assessing Structural Compatibility

Ensure that your space is structurally compatible with the chosen Arktura ceiling design. Assess the existing ceiling structure and make any necessary modifications to accommodate the installation.

Selecting the Right Arktura Design

Arktura offers a diverse range of ceiling designs, each with its own aesthetic appeal. Select a design that complements the overall theme of your space and meets your stylistic preferences.

Step-by-Step Guide

Step 1: Gathering Materials and Tools

Before starting the installation, gather all the necessary materials and tools. This may include the chosen Arktura ceiling system, mounting hardware, measuring tape, a level, and safety equipment.

Step 2: Marking and Measuring

Accurate measurements are crucial for a flawless Arktura ceiling installation. Use a measuring tape and a level to mark reference points on the ceiling, ensuring precise alignment.

Step 3: Preparing the Ceiling Surface

Prepare the ceiling surface by ensuring it is clean and free from any debris. Depending on the ceiling material, you may need to make adjustments or apply a primer to enhance adhesion.

Step 4: Installing the Arktura Ceiling System

Follow the manufacturer’s instructions for installing the specific Arktura ceiling system you have chosen. This may involve attaching panels or modules using the provided mounting hardware. Ensure a secure and level installation.

Step 5: Finishing Touches

After the primary installation is complete, add any finishing touches recommended by Arktura. This may include paint, coatings, or additional decorative elements to enhance the visual impact of the ceiling.

Benefits of Arktura Ceiling Systems

Architectural Elegance

Arktura ceiling systems are celebrated for their architectural elegance. The installation of these systems adds a unique and visually striking dimension to any space, making a lasting impression.

Sustainable Design

Many Arktura ceiling systems are crafted with sustainability in mind. Choose designs that utilize eco-friendly materials and contribute to a more environmentally conscious interior.

Maintenance and Care

Regular Cleaning

Maintain the beauty of your Arktura ceiling by implementing a regular cleaning routine. Dust the surface with a soft brush or use a gentle cleaner recommended by Arktura to keep the design looking pristine.

Read too: Understanding and Addressing a Troublesome Water Pocket in Ceiling: Navigating the Dangers

Conclusion: Transforming Spaces with Arktura Ceiling Elegance

Embrace the artistry of Arktura ceiling designs with our insightful guide on “Arktura Ceiling Installation.” Whether you’re aiming for a modern, industrial, or timeless aesthetic, the installation process is a key step in bringing sophistication and style to your interior. Explore the possibilities, elevate your space, and indulge in the transformative power of Arktura ceilings.

Ceiling Collapse Compensation Guide for Homeowners: Navigating the Aftermath

Embark on a comprehensive journey to understand Ceiling Collapse Compensation, ensuring you are well-informed and prepared for recovery.

Ceiling Collapse Compensation

Unraveling the Complexities

Understanding the Basics

  1. Legal Implications: Ceiling Collapse Compensation involves legal considerations. Delve into the legal framework surrounding property damage claims to comprehend your rights and responsibilities.
  2. Insurance Coverage: Your homeowners’ insurance plays a pivotal role in Ceiling Collapse Compensation. Explore the terms of your policy, including coverage limits, exclusions, and the claims process.
  3. Documentation Importance: Thorough documentation is key to securing Ceiling Collapse Compensation. Learn what evidence is crucial, including photos, videos, and any professional assessments of the damage.

Navigating the Claims Process

Step-by-Step Guide

  1. Immediate Reporting: Notify your insurance provider promptly about the ceiling collapse. Provide a detailed account of the incident and initiate the claims process as soon as possible.
  2. Professional Assessment: Engage a structural engineer to assess the damage. Their expert opinion will strengthen your claim and provide a clear understanding of the necessary repairs.
  3. Claims Submission: Compile all necessary documents and submit a detailed claim to your insurance company. Timely and thorough submission increases the likelihood of swift compensation.

Ceiling Collapse Compensation: Legal Considerations

Seeking Professional Guidance

  1. Legal Consultation: In complex cases, consult with an attorney specializing in property damage claims. Their expertise can be invaluable in navigating legal intricacies and maximizing your compensation.
  2. Negotiation Strategies: Insurance companies may offer settlements that require negotiation. Equip yourself with negotiation strategies to ensure fair and comprehensive compensation.
  3. Litigation as a Last Resort: If negotiations fail, litigation may be considered. Understand the potential costs, timelines, and implications of pursuing legal action for compensation.

Ceiling Collapse Compensation: Maximizing Your Recovery

Proactive Measures

  1. Emergency Repairs: Undertake immediate emergency repairs to prevent further damage. Keep records of expenses, as these costs may be recoverable as part of your compensation.
  2. Professional Quotes: Obtain multiple quotes from reputable contractors for the repair work. These quotes serve as evidence of the costs associated with your compensation claim.
  3. Maintaining Communication: Stay in regular communication with your insurance adjuster. Provide updates on repairs and any additional findings that may impact your compensation.

Read too: Unveiling the Essentials of Vaulted Ceiling Insulation Requirements: Elevate Your Space

Moving Forward

Rebuilding and Beyond

  1. Rebuilding Process: Use your compensation to initiate the rebuilding process. Prioritize structural improvements to prevent future incidents and enhance the overall safety of your home.
  2. Documentation for Future Claims: Continue documenting repairs and improvements made as a result of the compensation. This documentation may prove beneficial for future claims or policy renewals.
  3. Home Safety Measures: Implement preventative measures to safeguard against potential ceiling collapses. Regular inspections, maintenance, and addressing issues promptly contribute to long-term home safety.

Conclusion: Empowered Recovery Through Ceiling Collapse Compensation

In conclusion, understanding the nuances of Ceiling Collapse Compensation is crucial for homeowners facing such unforeseen challenges. From navigating insurance claims to legal considerations and proactive recovery measures, being well-informed empowers you to effectively recover and rebuild. Embrace the process, seek professional guidance when needed, and turn the adversity of a ceiling collapse into an opportunity for a safer and more resilient home.

Dealing with a Garage Ceiling Collapse – What You Need to Know: Unexpected Challenges

Discover the ins and outs of handling a Garage Ceiling Collapse and learn essential tips for ensuring safety and effective recovery.

Garage Ceiling Collapse

Garage Ceiling Collapse: Unraveling the Causes

Understanding the Triggers

  1. Structural Issues: Garage Ceiling Collapse often results from underlying structural problems, including weakened beams or compromised support structures. Identifying these issues is crucial for preventing future incidents.
  2. Water Damage: Moisture infiltration over time can compromise the integrity of garage ceilings. Leaks from the roof or plumbing issues contribute to water damage, making the ceiling susceptible to collapse.
  3. Heavy Load: Accumulation of heavy items or improper storage on the garage ceiling can exceed its load-bearing capacity, leading to a collapse. It’s essential to be mindful of weight limitations and conduct regular checks.

Garage Ceiling Collapse: Immediate Response

Prioritizing Safety First

  1. Evacuation: If aceiling collapse occurs, prioritize safety by evacuating the area immediately. Ensure that everyone in the vicinity is aware of the potential danger and exits the garage promptly.
  2. Utilities Shutdown: Turn off utilities such as electricity and gas in the affected area. This precautionary measure minimizes the risk of accidents and ensures a safer environment for recovery efforts.
  3. Structural Assessment: After evacuation, assess the overall structural integrity of the garage. Refrain from entering until a professional inspection is conducted to identify potential hazards.

Read too: Unveiling the Essentials of Vaulted Ceiling Insulation Requirements: Elevate Your Space

Dealing with the Aftermath

Seeking Professional Assistance

  1. Emergency Services Contact: Reach out to emergency services to report the incident and seek immediate assistance. They can guide you on the next steps and help address safety concerns.
  2. Structural Inspection: Hire a structural engineer to conduct a thorough inspection of the garage. This professional assessment is vital for understanding the extent of the damage and devising an effective recovery plan.
  3. Documentation for Insurance Claims: Take photographs and videos of the collapsed garage ceiling and any related damage. This documentation is crucial for insurance claims and provides evidence for discussions with contractors.

Navigating Insurance Procedures

  1. Prompt Notification to Insurance Provider: Notify your insurance company promptly about the Garage Ceiling Collapse. Provide them with detailed information about the incident, including documentation and any initial assessments.
  2. Understanding Coverage: Familiarize yourself with your insurance policy to comprehend the extent of coverage for the damage. This understanding will guide you through the claims process and help manage expectations.
  3. Temporary Accommodation Arrangements: If the garage is a crucial part of your living space, inquire about coverage for temporary accommodation. Many insurance policies include provisions for such situations during the recovery period.

Conclusion: Rebuilding After a Garage Ceiling Collapse

Experiencing a Garage Ceiling Collapse is undoubtedly a stressful situation, but with the right steps, recovery is possible. From prioritizing safety and seeking professional assistance to navigating insurance procedures, taking a systematic approach is key.

In the aftermath of a Garage Ceiling Collapse, remember that a careful assessment of structural issues, collaboration with professionals, and adherence to safety protocols are paramount. Use the experience as an opportunity to reinforce and upgrade the structural integrity of your garage, ensuring a safer and more resilient space for the future.

Transforming Your Space with Stunning Indoor Pool Ceilings: Dive into Luxury

Imagine the serenity of a private indoor pool oasis – now, picture elevating that experience with breathtaking Indoor Pool Ceilings. In this comprehensive guide, we’ll explore the mesmerizing world of indoor pool designs and how the right ceiling choices can enhance the aesthetics, functionality, and overall allure of your aquatic haven.

Indoor Pool Ceilings

Indoor Pool Ceilings: A Splash of Elegance

Understanding the Importance of Indoor Pool Ceilings

  1. Aesthetic Appeal: Indoor pool ceilings contribute significantly to the overall visual appeal of the space. From intricate designs to sleek modern styles, the ceiling sets the tone for the entire area.
  2. Functionality: Beyond aesthetics, the ceiling plays a crucial role in maintaining a comfortable and practical indoor pool environment. Proper ventilation, lighting, and moisture resistance are essential considerations.
  3. Personalization: Pool ceilings offer an opportunity for personalization. Whether you prefer a classic, resort-inspired look or a contemporary, minimalist design, the ceiling can reflect your unique style.

Choosing the Right Materials for Indoor Pool Ceilings

Balancing Style and Practicality

  1. Moisture-Resistant Materials: Given the humid environment of indoor pools, opt for moisture-resistant materials like PVC, vinyl, or metal. These materials prevent water damage and mold growth.
  2. Ventilation Considerations: Adequate ventilation is crucial to prevent moisture buildup. Consider ceiling materials that allow for proper airflow while complementing the overall design.
  3. Aesthetic Versatility: Explore a variety of materials that offer both aesthetic appeal and functionality. Wood paneling, suspended ceilings, or acoustic tiles can add character while serving a practical purpose.

Elevating the Experience

Design Inspirations for Your Indoor Pool

  1. Skylights and Glass Ceilings: Bring the outdoors in with skylights or glass ceilings. Not only do they provide natural light, but they also create a seamless connection with the surrounding environment.
  2. LED Lighting Effects: Incorporate LED lighting into your indoor pool ceiling for a mesmerizing ambiance. Choose colors that complement the overall design and can be adjusted to suit different moods.
  3. Mosaic Tile Ceilings: Add a touch of luxury with mosaic tile ceilings. Create intricate patterns or choose a simple yet elegant design that enhances the sophistication of your indoor pool area.

Maintenance Tips

Preserving the Beauty and Functionality

  1. Regular Inspections: Conduct routine inspections of your pool ceilings to identify any signs of water damage, mold, or structural issues. Prompt attention to these issues can prevent larger problems.
  2. Cleaning Protocols: Establish a regular cleaning routine to remove any buildup of moisture, dust, or debris. The cleaning methods will depend on the specific materials used for the ceiling.
  3. Professional Maintenance: Schedule professional maintenance checks to ensure the structural integrity of your indoor pool ceilings. Professionals can identify and address issues that may go unnoticed during routine inspections.

Read too: Unveiling the Essentials of Vaulted Ceiling Insulation Requirements: Elevate Your Space

Conclusion: Dive into Luxury with Indoor Pool Ceilings

In conclusion, Indoor Pool Ceilings are not just functional components; they are design elements that can elevate your indoor pool experience to new heights of luxury. Whether you prefer a contemporary aesthetic, a classic look, or a fusion of styles, the right ceiling choice can transform your space into a captivating retreat.

Investing time and consideration into the design, material selection, and maintenance of your pool ceilings ensures that your aquatic haven remains a source of relaxation and enjoyment for years to come. Dive into the world of indoor pool design, and let your ceilings be the crowning jewel of your luxurious aquatic escape.

My Ceiling Collapsed – A Homeowner’s Guide to Recovery: When Disaster Strikes

Experiencing a ceiling collapse can be a homeowner’s nightmare, turning your safe haven into a chaotic scene. In this article, we’ll delve into the reasons behind “My Ceiling Collapsed,” the immediate steps to take, and a comprehensive guide to navigating the aftermath of this unexpected disaster.

My Ceiling Collapsed
Man Collecting Water In basin From Ceiling. Ceiling panels damaged huge hole in roof from rainwater leakage.Water damaged ceiling .

My Ceiling Collapsed: Unraveling the Causes

Understanding the Triggers

Ceiling collapses can happen for various reasons, and identifying the cause is crucial for effective resolution.

  1. Water Damage: One of the leading causes is water damage, often resulting from leaks in the roof or plumbing issues. Over time, water weakens the structural integrity of the ceiling, leading to a collapse.
  2. Structural Issues: Aging homes may experience ceiling collapses due to structural problems. In some cases, inadequate construction materials or poor workmanship can contribute to this alarming event.
  3. Heavy Load: Excessive weight from items stored in the attic or on the ceiling itself can lead to a collapse. It’s essential to be mindful of the load-bearing capacity of your ceiling.

My Ceiling Collapsed: Immediate Actions to Take

Ensuring Safety First

  1. Evacuate Safely: If your ceiling has collapsed, prioritize safety. Evacuate the affected area immediately, especially if there is visible damage.
  2. Shut Off Utilities: Turn off gas, water, and electricity in the affected area to prevent further damage and reduce the risk of accidents.
  3. Assess Structural Integrity: Once safely outside, assess the structural integrity of your home. If there are concerns about stability, do not re-enter until a professional inspection is conducted.

Dealing with the Aftermath: My Ceiling Collapsed

Seeking Professional Help

  1. Contacting Emergency Services: Reach out to emergency services to report the incident and seek assistance. They can guide you on the next steps and ensure a safe environment.
  2. Structural Assessment: Hire a structural engineer to assess the extent of the damage and provide recommendations for repairs. This step is crucial for preventing future incidents.
  3. Documenting the Damage: Take photos and videos of the collapsed ceiling and any related damage. This documentation will be valuable for insurance claims and discussions with contractors.

Navigating Insurance Claims

  1. Contacting Your Insurance Provider: Notify your insurance company as soon as possible. Provide them with the necessary documentation and information about the incident.
  2. Understanding Coverage: Familiarize yourself with your insurance policy to understand what is covered. This knowledge will help you navigate the claims process more effectively.
  3. Securing Temporary Accommodation: If your home is uninhabitable, inquire about coverage for temporary accommodation. Many insurance policies include provisions for such situations.

Conclusion: Rebuilding After “My Ceiling Collapsed”

Experiencing a ceiling collapse is undoubtedly a stressful situation, but with the right steps, recovery is possible. By understanding the causes, taking immediate actions, and navigating the aftermath systematically, homeowners can rebuild and create a safer, more resilient living space.

In the aftermath of “My Ceiling Collapsed,” remember that professional assistance, proper documentation, and a proactive approach to insurance claims are essential elements in the journey toward recovery. While the experience may be daunting, it also presents an opportunity to fortify your home against future challenges and ensure a secure environment for you and your loved ones.

Read too: Unveiling the Essentials of Vaulted Ceiling Insulation Requirements: Elevate Your Space

Understanding and Tackling Condensation in Ceiling Issues: Unveiling the Mystery

Embark on a journey to uncover the nuances of “Condensation In Ceiling” and discover effective solutions to keep your space dry and pristine.

Condensation In Ceiling

Condensation In Ceiling: The Invisible Intruder

Grasping the Basics

  1. What is Condensation?: Condensation occurs when warm air comes into contact with a cold surface, leading to the conversion of moisture vapor into liquid water. Understanding this fundamental concept is crucial for addressing condensation issues.
  2. Common Causes: Explore the various factors contributing to Condensation In Ceiling, such as inadequate ventilation, temperature differentials, and the presence of moisture sources within the living space.
  3. Impact on Structures: Delve into the potential consequences of untreated condensation issues in ceilings, including mold growth, structural damage, and compromised indoor air quality.

Identifying the Signs

Early Detection is Key

  1. Water Stains: Learn to recognize water stains on the ceiling as a potential indicator of condensation issues. These stains often manifest as discoloration and may signal a more extensive problem.
  2. Musty Odors: Unpleasant odors can accompany condensation problems, suggesting the presence of mold or mildew. Understanding these olfactory cues can aid in early detection.
  3. Peeling Paint or Wallpaper: Investigate instances of peeling paint or wallpaper, as these could be signs of excess moisture accumulating on the ceiling due to condensation issues.

Read too: Unveiling the Essentials of Vaulted Ceiling Insulation Requirements: Elevate Your Space

Causes and Solutions

Addressing the Root of the Problem

  1. Poor Ventilation: Explore the role of ventilation in condensation issues. Discover ways to improve airflow, such as the installation of exhaust fans, air vents, or opening windows to promote better air circulation.
  2. Temperature Control: Understand the importance of maintaining consistent temperatures to minimize condensation risks. Explore heating options and insulation methods to create a more stable indoor climate.
  3. Moisture Management: Implement effective moisture control measures to mitigate condensation problems. This includes addressing leaks, repairing damaged roofs, and utilizing dehumidifiers to reduce excess humidity.

Condensation In Ceiling: DIY Prevention Techniques

Empowering Homeowners with Solutions

  1. Regular Inspections: Foster a habit of conducting regular ceiling inspections to identify early signs of condensation. Timely detection allows for prompt intervention and prevention.
  2. Proper Insulation: Explore the benefits of proper insulation in preventing condensation. Insulation helps regulate temperatures and reduces the likelihood of moisture condensation on surfaces.
  3. Humidity Monitoring: Invest in humidity monitors to keep track of indoor moisture levels. These devices offer valuable insights into the environment and assist in preventing excessive humidity that can lead to Condensation In Ceiling.

Conclusion: A Dry and Healthy Living Space

In conclusion, unraveling the mysteries of Condensation In Ceiling is essential for maintaining a dry, structurally sound, and healthy living space. From understanding the causes and signs to implementing effective prevention techniques, homeowners can take proactive steps to combat this invisible intruder.

Embrace a proactive approach, conduct regular inspections, and address issues promptly to create an environment where Condensation In Ceiling is a rarity. By doing so, you not only preserve the integrity of your home but also ensure the well-being of those who inhabit it.

Decoding the Causes and Solutions for a Wet Stain On Ceiling: Unveiling the Mystery

Discover the insights behind a common household issue – the “Wet Stain On Ceiling.” Unravel the mysteries, understand the root causes, and explore effective solutions for a dry and pristine home.

Wet Stain On Ceiling

Wet Stain On Ceiling: When Water Leaves Its Mark

Introduction: Shedding Light on the Stain

  1. Identifying the Culprit: Understanding the Causes of a Wet Stain On CeilingBegin by recognizing the potential causes behind a wet stain on your ceiling. Explore the various factors, from leaks to condensation, that can leave an unsightly mark.

The Impact Unveiled

1. Structural Damage: The Silent Undermining of Your Home’s Integrity

Delve into the structural implications of neglecting a wet stain. Understand how prolonged exposure to water can compromise the integrity of your home.

2. Mold and Mildew: The Unwelcome Intruders

Explore the health hazards associated with mold and mildew growth resulting from a wet stain. Learn about their impact on indoor air quality and respiratory health.

Tracing the Source: Investigating the Origins of the Wet Stain On Ceiling

1. Roof Leaks: An Overhead Menace

Uncover the primary culprit behind many ceiling stains – roof leaks. Learn to identify, address, and prevent roof issues to eliminate the source of water intrusion.

2. Plumbing Problems: The Hidden Dangers

Investigate how plumbing issues can lead to wet stains on the ceiling. Identify common plumbing-related causes and implement preventive measures.

Read too: Unveiling the Essentials of Vaulted Ceiling Insulation Requirements: Elevate Your Space

Effective Solutions: Bidding Farewell to the Wet Stain

1. Prompt Repairs: Tackling the Issue Head-On

Emphasize the importance of timely repairs to address a wet stain. Explore DIY fixes and know when to seek professional assistance.

2. Waterproofing Measures: Building a Shield Against Water Intrusion

Discover the significance of waterproofing in preventing future ceiling stains. Explore various waterproofing techniques to fortify your home against water damage.

Conclusion: A Dry and Healthy Home Awaits

As we conclude our exploration of the “Wet Stain On Ceiling,” empower yourself with the knowledge to identify, address, and prevent this common household issue. Ensure a dry, structurally sound, and healthy living environment for you and your loved ones.