Dealing with Pesky Ants on My Ceiling: Effective Solutions and Prevention Tips

Are you noticing a trail of tiny invaders marching across your ceiling? Dealing with ants on my ceiling can be a frustrating and unsightly issue for homeowners. In this guide, we’ll explore effective solutions and prevention tips to address this common household problem and maintain a pest-free environment.

Ants On My Ceiling

Understanding the Presence of Ants on My Ceiling

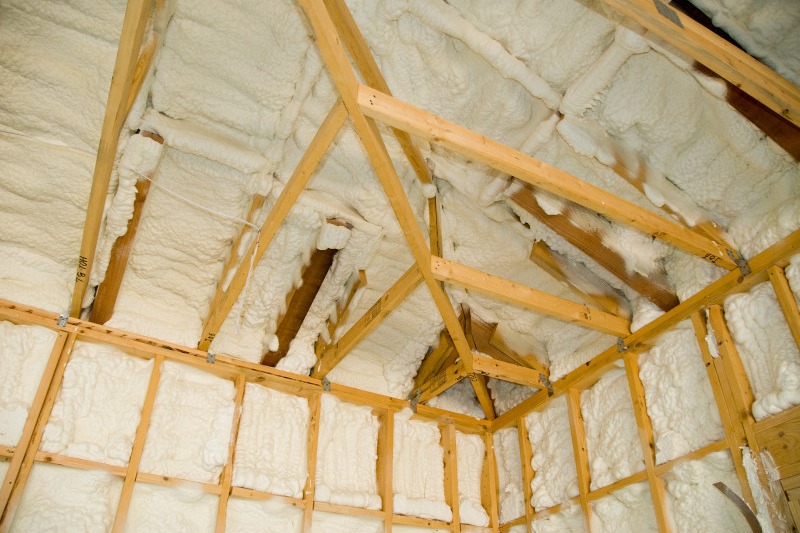
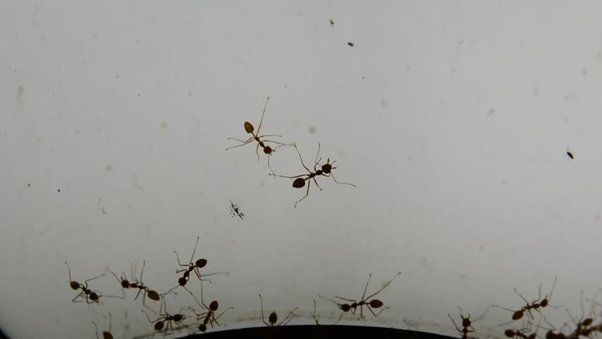
Ants are social insects known for their ability to infiltrate homes in search of food, water, and shelter. While they typically nest outdoors, certain species may find their way indoors, including onto ceilings, attracted by crumbs, spills, or moisture. Common species that may invade ceilings include carpenter ants, odorous house ants, and pavement ants.

Identifying Ants on My Ceiling

Before implementing any control measures, it’s essential to confirm that the insects on your ceiling are indeed ants. Look for the following characteristics to identify ants:

  1. Body Shape: Ants have three distinct body segments: head, thorax, and abdomen, with a narrow waist between the thorax and abdomen.
  2. Antennae: Ants have elbowed antennae, which may be bent or curved.
  3. Legs: Ants have six legs attached to their thorax.
  4. Color: Ants come in various colors, including black, brown, red, or a combination thereof.

If you’re unsure whether the insects on your ceiling are ants, consider contacting a pest control professional for identification and assistance.

Read too: How To Extend Kitchen Cabinets To The Ceiling: A Complete Guide for Maximizing Space and Style

Causes of Ant Infestation on My Ceiling

Several factors can contribute to ants finding their way onto your ceiling:

  1. Food Sources: Crumbs, spills, and food residue left unattended can attract ants searching for sustenance.
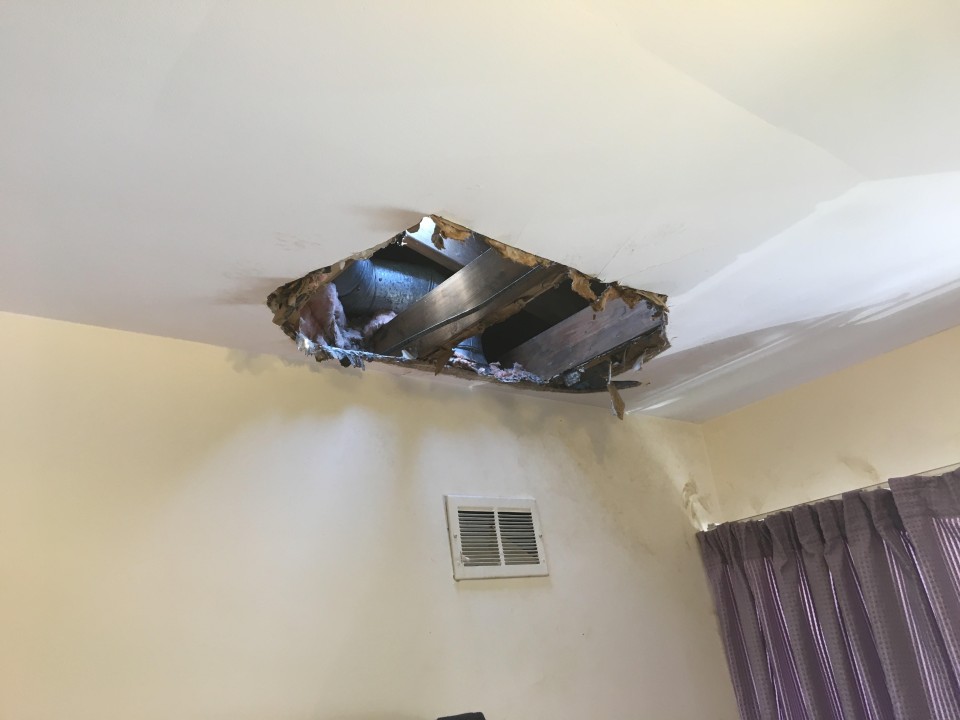
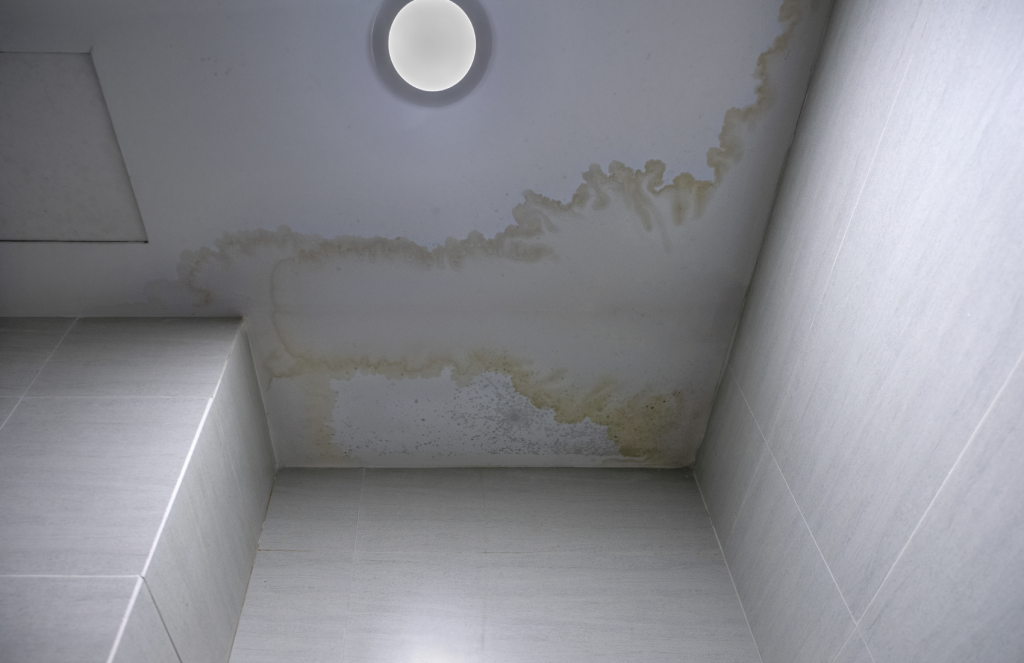
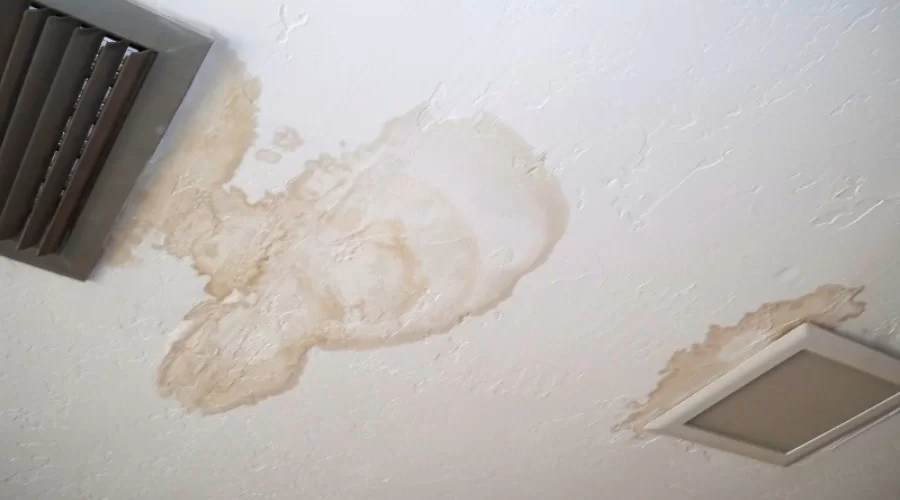
  2. Moisture: Leaks, condensation, or damp areas in the ceiling provide ants with a water source, making them more likely to inhabit the area.
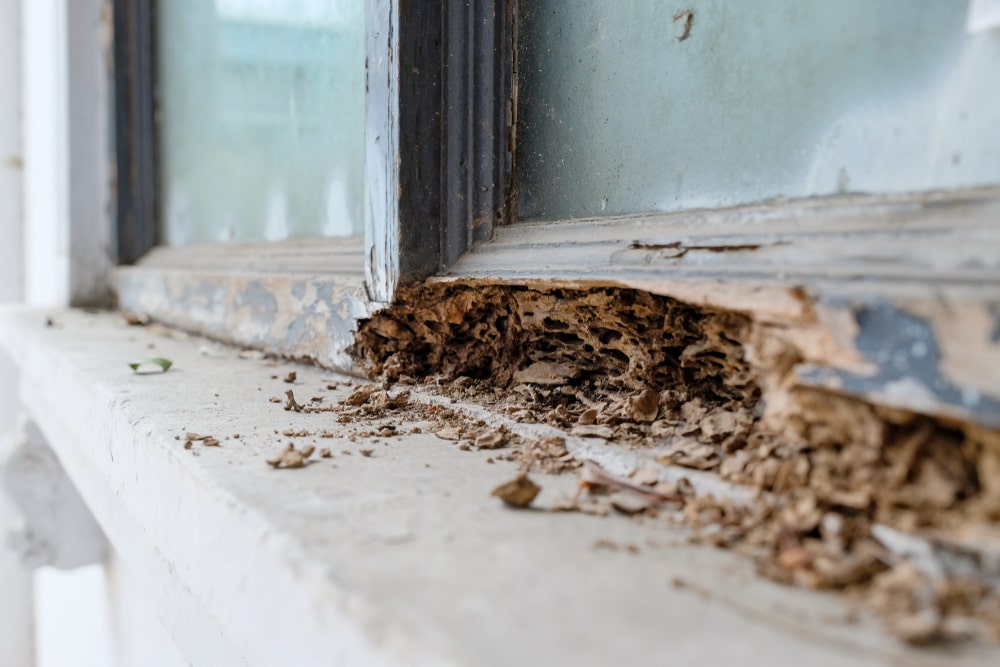
  3. Access Points: Gaps, cracks, or openings in walls, ceilings, or windows serve as entry points for ants to infiltrate your home.
  4. Nesting Sites: Certain species of ants, such as carpenter ants, may establish satellite colonies within the structure of your home, including ceilings and walls.

Effective Solutions for Ants on My Ceiling

Once you’ve confirmed the presence of ants on your ceiling, it’s essential to take prompt action to address the infestation. Here are some effective solutions:

  1. Cleanliness: Maintain a clean and tidy home by promptly wiping up spills, storing food in airtight containers, and regularly vacuuming or sweeping to eliminate crumbs and food residue.
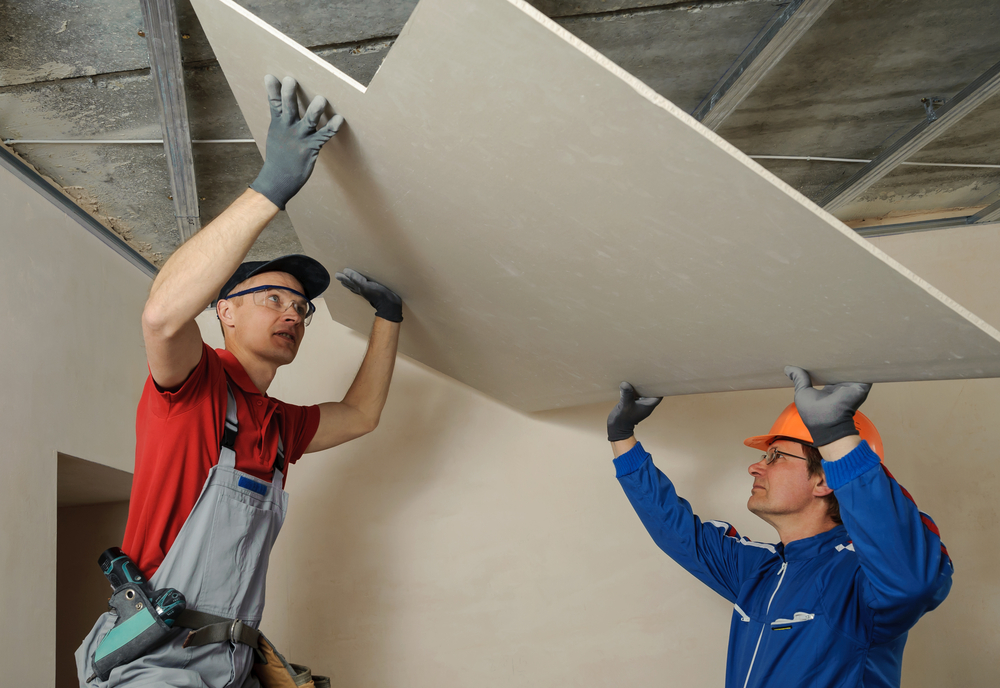
  2. Seal Entry Points: Inspect your home for gaps, cracks, or openings that may serve as entry points for ants, especially around windows, doors, pipes, and utility lines. Seal any openings with caulk or weatherstripping to prevent ants from gaining access.
  3. Eliminate Moisture: Repair any leaks, fix plumbing issues, and reduce humidity levels in your home to eliminate moisture sources that attract ants. Ensure proper ventilation in bathrooms, kitchens, and basements to discourage ant infestations.
  4. Use Ant Baits: Place ant baits or traps near areas where ants are active, such as along baseboards, near entry points, or on countertops. Ant baits contain slow-acting insecticides that ants carry back to the colony, effectively eliminating the entire nest.

Preventing Ant Infestations on My Ceiling

Taking proactive measures to prevent ant infestations can help safeguard your home against future invasions. Here are some prevention tips:

  1. Regular Maintenance: Conduct routine inspections of your home’s exterior and interior to identify and address potential entry points, moisture issues, and nesting sites.
  2. Landscaping: Keep vegetation trimmed and away from the perimeter of your home to prevent ants from using branches or foliage as a bridge to access your property.
  3. Storage: Store firewood, mulch, and organic debris away from the foundation of your home to reduce harborage areas for ants and other pests.
  4. Professional Pest Control: Consider scheduling regular pest control treatments with a licensed exterminator to proactively manage ant populations and prevent infestations.

Conclusion

Dealing with ants on your ceiling can be a challenging task, but with the right strategies and preventative measures, you can effectively eliminate these pesky invaders and keep your home pest-free. By maintaining cleanliness, sealing entry points, using ant baits, and implementing preventive measures, you can enjoy a comfortable and ant-free living environment.

Insulate Your Garage Ceiling Without Drywall: Creative Ways

Are you looking to enhance the comfort and energy efficiency of your garage without the hassle of drywall installation? Insulating your garage ceiling without drywall can be a practical and effective solution. In this guide, we’ll explore creative methods to insulate your garage ceiling, keeping it comfortable and functional in any season.

Insulate Garage Ceiling Without Drywall

Insulate Garage Ceiling Without Drywall: Exploring Your Options

1. Foam Board Insulation

Foam board insulation is a popular choice for insulating garage ceilings without drywall. Available in various thicknesses and R-values, foam board insulation provides excellent thermal resistance and can help reduce heat transfer between the garage and living space above. To install foam board insulation, simply cut the panels to size and secure them to the ceiling joists using adhesive or mechanical fasteners.

2. Spray Foam Insulation

Spray foam insulation offers superior coverage and can effectively seal gaps and cracks in the garage ceiling. This type of insulation expands upon application, filling cavities and creating a seamless thermal barrier. Spray foam insulation is typically installed by professionals, but DIY kits are also available for smaller projects. Be sure to follow proper safety precautions when working with spray foam insulation.

3. Reflective Insulation

Reflective insulation, also known as radiant barrier insulation, is designed to reflect radiant heat away from the garage ceiling. This type of insulation typically consists of a layer of reflective foil laminated to a substrate material such as foam or bubble wrap. Reflective insulation is easy to install and can be stapled or taped directly to the underside of the garage ceiling joists.

Read too: Discovering the Charm of Nautical Outdoor Ceiling Fans for Your Coastal Retreat: Sail into Style

Benefits of Insulating Your Garage Ceiling Without Drywall

  • Improved Comfort: Proper insulation helps regulate the temperature in your garage, making it more comfortable to work in year-round.
  • Energy Savings: By reducing heat transfer, insulation can lower your energy bills by minimizing the need for heating and cooling.
  • Moisture Control: Insulation can help prevent condensation and moisture buildup in the garage, reducing the risk of mold and mildew growth.
  • Noise Reduction: Insulation can dampen sound transmission, making your garage quieter and more peaceful.

DIY Tips for Insulating Your Garage Ceiling

  • Measure Twice, Cut Once: Take accurate measurements of your garage ceiling before purchasing insulation materials to ensure proper coverage and fit.
  • Seal Air Leaks: Before installing insulation, seal any gaps or cracks in the garage ceiling with caulk or spray foam to maximize energy efficiency.
  • Safety First: Wear appropriate safety gear, such as gloves, goggles, and a respirator, when handling insulation materials to protect yourself from irritation and airborne particles.

Conclusion

Insulating your garage ceiling without drywall can provide numerous benefits, from improved comfort and energy savings to moisture control and noise reduction. By exploring innovative insulation methods and following DIY tips, you can create a more comfortable and functional garage space that enhances your home’s overall efficiency and value.

The Advantages of Having a Microphone Hanging From Ceiling: Enhancing Sound Quality

Are you looking to take your audio recording setup to the next level? Consider the advantages of having a microphone hanging from the ceiling. This innovative technique offers numerous benefits and practical applications that can enhance sound quality and elevate your recording experience. In this guide, we’ll explore the advantages of using a microphone hanging from the ceiling and provide insights into its effective implementation.

Microphone Hanging From Ceiling

Understanding the Concept of Microphone Hanging From Ceiling

A microphone hanging from the ceiling is exactly as it sounds – a microphone suspended from the ceiling to capture audio with precision and clarity. This setup is commonly used in recording studios, podcasting spaces, and performance venues to achieve optimal sound quality without the need for bulky microphone stands or tripods. By positioning the microphone overhead, it can capture sound from various angles while minimizing interference and background noise.

Read too: Discovering the Charm of Nautical Outdoor Ceiling Fans for Your Coastal Retreat: Sail into Style

Advantages of Using a Microphone Hanging From Ceiling

There are several advantages to using a microphone hanging from the ceiling in your recording setup:

  1. Improved Sound Quality: By positioning the microphone overhead, you can capture audio with greater depth, clarity, and detail. This setup allows for a more natural and immersive sound experience, making it ideal for music recording, podcasting, and voiceover work.
  2. Enhanced Room Acoustics: Ceiling-mounted microphones can capture the ambient sound of the room more accurately, resulting in a richer and more dynamic recording. This is especially beneficial in acoustically treated spaces where room ambiance plays a significant role in the final sound output.
  3. Increased Versatility: Unlike traditional microphone stands that are limited in their positioning options, a microphone hanging from the ceiling offers greater flexibility and versatility. You can easily adjust the height and angle of the microphone to suit different recording scenarios and microphone techniques.
  4. Space Saving: Ceiling-mounted microphones help conserve floor space and eliminate clutter in your recording area. This is particularly advantageous in small studios or home recording setups where space is limited and every square inch counts.

Practical Applications of Microphone Hanging From Ceiling

The versatility of ceiling-mounted microphones lends itself to a wide range of practical applications:

  1. Music Recording: Capture the nuances of musical performances with precision and clarity by positioning microphones overhead. This setup is commonly used for recording vocals, drums, acoustic instruments, and ensemble performances.
  2. Podcasting: Create professional-quality podcasts with ease by using a microphone hanging from the ceiling. This setup allows podcasters to capture clear and balanced audio without the need for bulky microphone stands.
  3. Live Sound Reinforcement: In live performance settings, ceiling-mounted microphones can be used to amplify sound from speakers, performers, and instruments with minimal visual distraction. This is especially useful in theaters, auditoriums, and concert halls.
  4. Broadcasting and Voiceover: Ensure clear and consistent audio quality for broadcasting, voiceover recording, and audio production projects by utilizing ceiling-mounted microphones. This setup helps capture the speaker’s voice with clarity and fidelity, making it ideal for radio, television, and film production.

Conclusion

A ceiling-mounted microphone provides benefits such as improved sound quality, enhanced room acoustics, versatility, and space-saving advantages for audio recording. Whether you’re a musician, podcaster, broadcaster, or audio engineer, this technique can elevate your recordings. Understanding the advantages and applications of ceiling-mounted microphones helps optimize your setup for professional-quality results.

Outdoor Tongue And Groove Ceiling: Elevate Your Outdoor Space

When it comes to enhancing the beauty and functionality of your outdoor space, few features can rival the elegance and charm of an Outdoor Tongue And Groove Ceiling. Whether you’re looking to create a cozy patio, a welcoming porch, or an inviting outdoor kitchen, a tongue and groove ceiling adds a touch of sophistication while offering practical benefits such as durability and weather resistance. In this article, we’ll explore the ins and outs of outdoor tongue and groove ceilings, from their construction and installation to their advantages and design possibilities.

Outdoor Tongue And Groove Ceiling

What is an Outdoor Tongue And Groove Ceiling?

An outdoor tongue and groove ceiling is a type of ceiling treatment characterized by interlocking wooden boards that fit together seamlessly, creating a smooth, uniform surface. The “tongue” refers to a protruding edge along one side of the board, while the “groove” refers to a recessed edge along the other side. When installed, the tongue of one board fits into the groove of the adjacent board, creating a tight, secure connection.

Construction and Materials

Outdoor tongue and groove ceilings are typically constructed using high-quality, moisture-resistant wood species such as cedar, redwood, or cypress. These woods are naturally resistant to rot, decay, and insect damage, making them ideal for outdoor applications. The boards are milled with precision to ensure a perfect fit, and they may be pre-finished with a protective sealant to enhance durability and weather resistance.

Installation Process

The installation process for an outdoor tongue and groove ceiling involves several steps:

  1. Preparation: Ensure that the ceiling surface is clean, dry, and free from any debris or protrusions. Install furring strips or a solid substrate to provide a stable base for the tongue and groove boards.
  2. Board Layout: Determine the direction and pattern in which the boards will be installed. Consider factors such as the orientation of the ceiling joists, the desired aesthetic, and the length of the boards.
  3. Cutting and Fitting: Measure and cut each board to size, accounting for any obstacles such as light fixtures or vents. Test-fit each board to ensure a snug fit and make any necessary adjustments.
  4. Fastening: Secure the tongue and groove boards to the ceiling substrate using corrosion-resistant nails or screws. Place fasteners at regular intervals along the length of each board, ensuring that they penetrate the substrate and provide sufficient support.
  5. Finishing Touches: Fill any gaps between the boards with wood filler or caulk to create a seamless appearance. Sand the surface smooth and apply a final coat of sealant or exterior-grade paint to protect the wood from moisture and UV damage.

Advantages of Outdoor Tongue And Groove Ceilings

Outdoor tongue and groove ceilings offer numerous benefits, including:

  • Weather Resistance: The tight interlocking design of tongue and groove boards provides excellent protection against moisture, making them ideal for outdoor use.
  • Durability: High-quality wood species such as cedar or redwood are naturally resistant to rot, decay, and insect damage, ensuring long-term durability and low maintenance.
  • Aesthetic Appeal: Tongue and groove ceilings add a touch of elegance and sophistication to any outdoor space, enhancing its visual appeal and creating a warm, inviting atmosphere.
  • Versatility: Outdoor tongue and groove ceilings are suitable for a wide range of applications, from covered patios and porches to outdoor kitchens and gazebos. They can be customized to suit any design style or architectural theme.

Design Possibilities

With outdoor tongue and groove ceilings, the design possibilities are virtually endless. Whether you prefer a rustic, natural look or a more modern, sleek aesthetic, you can achieve the perfect ambiance for your outdoor space. Consider incorporating decorative elements such as exposed beams, recessed lighting, or ceiling fans to enhance the functionality and visual appeal of your tongue and groove ceiling.

Read too: A Comprehensive Mr Cool Ceiling Cassette Review: Unveiling Excellence

Maintenance and Care

While outdoor tongue and groove ceilings are relatively low maintenance, they still require periodic care to ensure their longevity and beauty. Here are some maintenance tips to keep your ceiling looking its best:

  • Regular Cleaning: Remove dirt, dust, and debris from the surface of the ceiling with a soft-bristle brush or a gentle spray of water. Avoid using harsh chemicals or abrasive cleaners, as they can damage the wood.
  • Inspect for Damage: Periodically inspect the ceiling for signs of damage, such as cracks, splits, or water stains. Repair any issues promptly to prevent further damage and maintain the integrity of the ceiling.
  • Reapply Sealant: Depending on the type of finish applied to the wood, you may need to reapply sealant or paint every few years to protect the wood from moisture and UV exposure. Follow the manufacturer’s recommendations for proper application and maintenance.

Conclusion

An outdoor tongue and groove ceiling is a versatile and stylish addition to any outdoor space, providing beauty, durability, and weather resistance for years to come. Whether you’re relaxing on your porch, entertaining guests on your patio, or cooking in your outdoor kitchen, a tongue and groove ceiling adds a touch of elegance and sophistication while enhancing the functionality and comfort of your outdoor living area. Consider incorporating this timeless ceiling treatment into your next outdoor renovation project and create a stunning backdrop for all your outdoor activities.

Exploring the Differences Between Roof VS Ceiling: Demystifying the Dynamics

Embark on a journey to comprehend the nuanced disparities between “Roof vs Ceiling” and unlock the secrets behind these fundamental components of any structure.

Roof Vs Ceiling

Roof vs Ceiling: Unveiling Distinctions in Construction

Delve into the intricate world of construction as we unravel the differences and purposes that define “Roof vs Ceiling.”

Understanding the Role of a Roof

The roof stands as the protective shield, shielding the structure from external elements such as rain, sunlight, and snow. It is the outermost layer, crucial for the integrity of the building.

Materials and Construction

Roofs are constructed using a variety of materials, including asphalt shingles, metal, tiles, or even thatch, depending on climate, budget, and aesthetic preferences.

Slope and Design Variations

Roofs come in diverse designs, each serving a unique purpose. From flat roofs ideal for urban settings to pitched roofs that efficiently drain water, the design is tailored to the function.

The Essence of a Ceiling in Interior Spaces

Shift your focus from the exterior to the interior as we explore the significance of ceilings in creating functional and aesthetically pleasing living spaces.

Insulation and Temperature Regulation

Ceilings play a crucial role in insulating indoor spaces, regulating temperatures, and preventing heat loss or gain, contributing to energy efficiency.

Aesthetic Appeal and Design Elements

Ceilings offer a canvas for design creativity. From coffered ceilings to tray ceilings, the design possibilities are vast, adding character and style to interiors.

Read too: Understanding and Dealing with Ants in the Ceiling Spaces: Navigating the Intrusion

Comparing Construction, Materials, and Maintenance

Construction Complexity

While roofs demand structural robustness to withstand weather conditions, ceilings focus on intricate design and aesthetic appeal within the enclosed space.

Material Variations

Roofs prioritize weather resistance, often utilizing durable materials, while ceilings explore a wide array, including gypsum board, wood, or even metal, to achieve desired aesthetics.

Maintenance Considerations

Roofs require regular inspections for wear and tear, especially in harsh weather conditions, while ceilings may need periodic checks for issues like leaks or cosmetic repairs.

Conclusion: Harmonizing the Roof-Ceiling Symphony

In conclusion, “Roof vs Ceiling” embodies a symbiotic relationship, each contributing distinctively to the functionality and aesthetics of a structure. Understanding these differences empowers homeowners and builders to make informed decisions, ensuring a harmonious blend of durability, design, and comfort.

Embark on your construction journey equipped with the knowledge to appreciate the synergy between roof and ceiling, creating spaces that seamlessly balance protection and aesthetics.

Can Raccoons Break Through Ceiling? What You Need to Know

Can Raccoons Break Through Ceiling? Raccoons are clever and resourceful animals that can find their way into a variety of places, including your home. If you think you may have a raccoon in your attic, you may be wondering if they can break through your ceiling.

The answer is yes, raccoons can break through ceilings. They are strong and agile animals with sharp claws and teeth. They can use their claws to tear through drywall or plaster, and their teeth to chew through wood.

Can Raccoons Break Through Ceiling

Can Raccoons Break Through Drywall Ceilings?

Drywall is a common type of ceiling material. It is made of a layer of gypsum board sandwiched between two layers of paper. Drywall is not very strong, and raccoons can easily tear through it.

Raccoons can also break through plaster ceilings. Plaster is a type of mortar that is applied to a wire mesh. It is stronger than drywall, but it is still possible for raccoons to break through it.

Raccoons can break through drywall or plaster ceilings in a variety of ways. They may use their claws to tear through the material, or they may use their teeth to chew through it. They may also use their hands to pull the material down.

Can Raccoons Break Through Wood Ceilings?

Wood ceilings are less common than drywall or plaster ceilings, but they are still possible. Raccoons can chew through wood, so they can break through a wood ceiling if they are determined.

Raccoons can break through wood ceilings in a variety of ways. They may use their teeth to chew through the material, or they may use their claws to tear through it. They may also use their hands to pry the material up.

Read too: Hunter Douglas Linear Metal Ceiling

What Can You Do to Prevent Raccoons from Breaking Through Your Ceiling?

There are a few things you can do to prevent raccoons from breaking through your ceiling:

  • Seal any openings in your attic. Raccoons can fit through very small openings, so it is important to seal any gaps or cracks in your attic. You can use caulk, weatherstripping, or metal flashing to seal these openings.

Raccoons can enter your attic through a variety of openings, including:

* Vents
* Soffits
* Flashing
* Roofing
* Eaves
* Electrical outlets
* Plumbing pipes

It is important to seal all of these openings to prevent raccoons from entering your attic.

  • Install a raccoon guard. A raccoon guard is a metal mesh that is installed over an opening to prevent raccoons from entering. Raccoon guards are available at most hardware stores.

Raccoon guards are a good way to prevent raccoons from entering your attic through a specific opening. They are also a good way to keep raccoons out of your chimney or fireplace.

  • Remove any food or water sources from your attic. Raccoons are attracted to food and water, so it is important to remove any sources of food or water from your attic. This will make your attic less attractive to raccoons.

Raccoons will eat a variety of foods, including:

* Fruit
* Nuts
* Seeds
* Garbage
* Pet food

It is important to remove all of these food sources from your attic to prevent raccoons from being attracted to it.

What to Do If You Think You Have a Raccoon in Your Attic

If you think you may have a raccoon in your attic, it is important to take action to remove the raccoon. Raccoons can cause damage to your home, and they can also carry diseases.

There are a few things you can do if you think you have a raccoon in your attic:

  • Contact a professional wildlife removal company. A professional wildlife removal company will have the experience and equipment to safely remove the raccoon.

A professional wildlife removal company will use a variety of methods to remove the raccoon, including:

* Trapping
* Shooting
* Relocating
  • Try to remove the raccoon yourself. If you are comfortable working with animals, you can try to remove the raccoon yourself. However, it is important to be careful, as raccoons can be aggressive.

If you choose to remove the raccoon yourself, you will need to use a trap or a humane cage. You will also need to be prepared to handle the raccoon once you have captured it.

Conclusion

Raccoons can break through ceilings, so it is important to take steps to prevent them from entering your home. By sealing any openings in your attic, installing a raccoon guard, and removing any food or water sources, you can help to keep raccoons out of your home.tunesharemore_vert

Yagmin Ceiling & Drywall Co.: Your One-Stop Shop for Ceiling and Drywall Services

Yagmin Ceiling & Drywall Co. is a locally owned and operated business that has been serving the Tampa Bay area for over 30 years. We specialize in ceiling and drywall installation, repair, and maintenance.

Yagmin Ceiling & Drywall Co

Services

We offer a wide range of services, including:

  • Ceiling installation and repair: We can install new ceilings or repair damaged ceilings. We can install a variety of ceiling materials, including drywall, plaster, and acoustic ceilings.
  • Drywall installation and repair: We can install new drywall or repair damaged drywall. We can install drywall in a variety of applications, including walls, ceilings, and partitions.
  • Ceiling and drywall painting: We can paint new or existing ceilings and drywall. We can paint a variety of colors and finishes.
  • Ceiling and drywall texture: We can texture new or existing ceilings and drywall. We can create a variety of textures, including knockdown, orange peel, and suede.
  • Ceiling and drywall insulation: We can insulate new or existing ceilings and drywall. We can use a variety of insulation materials, including fiberglass, cellulose, and spray foam.

Why Choose Yagmin Ceiling & Drywall Co.?

There are many reasons why you should choose Yagmin Ceiling & Drywall Co. for your ceiling and drywall needs. Here are just a few:

  • We are locally owned and operated, so we understand the needs of our community. We are committed to providing our customers with the best possible service, and we understand that each customer’s needs are different. We work with our customers to create a solution that meets their specific needs.
  • We have over 30 years of experience, so we know what we’re doing. We have a team of experienced professionals skilled in all aspects of ceiling and drywall work. We are confident that we can provide you with the highest quality workmanship.
  • We use only the highest quality materials and workmanship. We use only the highest quality materials and workmanship in all of our projects. We commit to providing our customers with a finished product that combines beauty and durability.
  • We are committed to providing our customers with a level of service that is second to none. We understand that our customers’ time is valuable, and we commit to providing them with a hassle-free experience. We will work with you to schedule your project at a time that is convenient for you, and we will keep you informed of our progress throughout the project.

Testimonials

“Yagmin Ceiling & Drywall Co. did a fantastic job of installing a new ceiling in my home. They were very professional and efficient, and they did a great job of cleaning up after themselves. I would definitely recommend them to anyone looking for ceiling and drywall services.” – John Smith

“Yagmin Ceiling & Drywall Co. repaired a damaged ceiling in my office. They did a great job of matching the existing ceiling, and they were very careful not to disturb my business. I was very impressed with their work.” – Jane Doe

Contact Us

To learn more about our services or to schedule an appointment, please contact us today. We would be happy to answer any questions you may have.

Yagmin Ceiling & Drywall Co.

12695 Automobile Blvd. Clearwater, FL 33765

(727) 555-1212

Additional Details

In addition to the services listed above, Yagmin Ceiling & Drywall Co. also offers a variety of other services, including:

  • Ceiling fan installation and repair: We can install new ceiling fans or repair damaged ceiling fans.
  • Lighting installation and repair: We can install new lighting fixtures or repair damaged lighting fixtures.
  • Soundproofing: We can soundproof ceilings and drywall to reduce noise levels.
  • Fireproofing: We can fireproof ceilings and drywall to meet fire safety regulations.

Yagmin Ceiling & Drywall Co. is a full-service company that can handle all of your ceiling and drywall needs. We commit to providing our customers with the best possible service, and we have confidence in our ability to meet your needs.

Read too: Insulating Sloped Ceiling Finished Attic

Conclusion

If you are looking for a reliable and experienced company to handle your ceiling and drywall needs, then Yagmin Ceiling & Drywall Co. is the right choice for you. We offer a wide range of services, and we commit to providing our customers with the best possible service.

Dream of Water Leak From Ceiling: Meanings and Interpretations

Dreams about water leaks from the ceiling can be a disturbing experience. They can be a sign of financial problems, emotional turmoil, or even physical health issues.

In this article, we will explore the possible meanings and interpretations of dreams about water leaks from the ceiling. We will also provide some tips on how to cope with these dreams if they are causing you distress.

Dream Of Water Leak From Ceiling

What do dreams about water leaks from the ceiling mean?

There are many possible meanings and interpretations of dreams about water leaks from the ceiling. Some common interpretations include:

  • Financial problems: A water leak from the ceiling can symbolize financial problems. The water represents money, and the leak represents the loss of money. This type of dream may be a warning sign that you are spending too much money or that you are at risk of losing your job.

For example, you may dream of a water leak from the ceiling in your home. This could represent a financial problem, such as a debt that you are struggling to pay off. The water could represent the money that you are losing, and the leak could represent the fact that you are unable to control your finances.

  • Emotional turmoil: A water leak from the ceiling can also symbolize emotional turmoil. The water represents your emotions, and the leak represents the release of those emotions. This type of dream may be a sign that you are feeling stressed, anxious, or depressed.

For example, you may dream of a water leak from the ceiling in your workplace. This could represent emotional stress, such as feeling overwhelmed by your job. The water could represent your emotions, and the leak could represent the fact that you are feeling overwhelmed.

  • Physical health issues: In some cases, dreams about water leaks from the ceiling can be a sign of physical health issues. The water represents bodily fluids, and the leak represents a problem with your body. This type of dream may be a warning sign that you are experiencing a medical condition.

For example, you may dream of a water leak from the ceiling in your bathroom. This could represent a medical problem, such as a kidney infection. The water could represent the bodily fluids that are being released, and the leak could represent the problem with your body.

Of course, the meaning of a dream about a water leak from the ceiling will vary depending on the individual dreamer. It is important to consider your own personal circumstances and experiences when interpreting your dream.

How to cope with dreams about water leaks from the ceiling

If you are having dreams about water leaks from the ceiling that are causing you distress, there are a few things you can do to cope:

  • Talk to a therapist or counselor: A therapist can help you to understand the meaning of your dreams and develop coping mechanisms.

Talking to a therapist or counselor can be a helpful way to understand the meaning of your dreams and develop healthy coping mechanisms. A therapist can help you to identify the underlying causes of your dreams and develop strategies for dealing with them.

  • Keep a dream journal: Keeping a dream journal can help you to track your dreams and identify any patterns.

Writing down your dreams as soon as you wake up can help you to remember them in more detail. This can be helpful for identifying any patterns or themes in your dreams.

  • Practice relaxation techniques: Relaxation techniques such as deep breathing and meditation can help to reduce stress and anxiety.

Stress and anxiety can often contribute to nightmares. Practicing relaxation techniques can help to reduce stress and anxiety, which can make it less likely that you will have nightmares.

Read too: How To Paint A Basement Ceiling

Conclusion

Dreams about water leaks from the ceiling can be a disturbing experience, but they can also be a valuable source of insight. By understanding the possible meanings and interpretations of these dreams, you can gain a better understanding of yourself and your life.

Troubleshooting a Wet Spot on Your Ceiling After Heavy Rain: Causes and Solutions

Imagine this: a heavy rainstorm has just passed, and you’re enjoying the sound of raindrops outside your window. However, as you look up at your ceiling, you notice an unwelcome sight – a wet spot. The appearance of a wet spot on your ceiling after heavy rain can be distressing, but understanding the possible causes and knowing how to address the issue is crucial. In this article, we’ll explore the common reasons behind wet spots on your ceiling and provide solutions to prevent further damage.

Wet Spot On Ceiling After Heavy Rain

Why Is There a Wet Spot on Your Ceiling After Heavy Rain?

The presence of a wet spot on your ceiling following heavy rain can be attributed to various factors. Let’s delve into the most common causes:

1. Roof Leaks

One of the primary culprits for wet spots on your ceiling is a roof leak. Over time, exposure to the elements can cause wear and tear on your roof, leading to the development of gaps, cracks, or damaged shingles. Heavy rain can infiltrate these vulnerabilities and make its way into your home, resulting in a wet spot on the ceiling.

2. Clogged Gutters and Downspouts

When your gutters and downspouts are clogged with debris, such as leaves and twigs, rainwater can overflow and pool on your roof. This excess water can seep through the roof’s protective layers and into your ceiling, causing wet spots.

3. Flashing Problems

Roof flashing is a protective barrier installed at vulnerable points, such as chimneys, vents, and skylights. If the flashing is improperly installed, damaged, or deteriorating, it can allow rainwater to enter your home.

4. Condensation Issues

While less common, condensation problems can also result in wet spots on your ceiling. High humidity levels in your home can lead to condensation forming on the ceiling, which may be mistaken for a roof leak.

Addressing a Wet Spot on Your Ceiling

Now that you know some of the causes, here’s how to address a wet spot on your ceiling after heavy rain:

1. Inspect Your Roof

If you suspect a roof leak, it’s essential to inspect your roof. Look for damaged or missing shingles, cracked flashing, and any visible signs of wear and tear. Consider hiring a professional roofer for a thorough inspection and necessary repairs.

2. Clear Your Gutters and Downspouts

Regularly clean your gutters and downspouts to prevent rainwater overflow. Make sure to direct water away from your home’s foundation to minimize the risk of water infiltration.

3. Examine Roof Flashing

Inspect the flashing around chimneys, vents, and skylights for any issues. If you find problems, consult a roofing professional to address them promptly.

4. Check for Interior Condensation

If the wet spot doesn’t appear to be related to a roof issue, consider the possibility of interior condensation. Ensure proper ventilation and consider using a dehumidifier to maintain optimal humidity levels.

Preventing Future Wet Spots

To prevent future wet spots on your ceiling after heavy rain, consider the following preventive measures:

1. Regular Roof Maintenance

Schedule regular roof inspections and maintenance to identify and address potential issues before they become major problems.

2. Keep Gutters Clean

Regularly clear your gutters and downspouts to prevent water overflow and roof leaks.

3. Maintain Flashing

Ensure that roof flashing is installed correctly and remains in good condition to prevent leaks.

4. Manage Indoor Humidity

Control indoor humidity levels to minimize condensation issues. Install exhaust fans in bathrooms and kitchens, and make sure your home has proper ventilation.

Read too: What To Do With Water Bubble In Ceiling

Conclusion

A wet spot on your ceiling after heavy rain can be a sign of various issues, with roof leaks being the most common culprit. It’s crucial to promptly identify and address the cause to prevent further damage to your home. Regular roof maintenance, clean gutters, proper flashing, and managing indoor humidity levels are essential steps to keep your ceiling dry and your home protected during heavy rains.

Dealing with Drips: Water Leaking From AC Vent in Ceiling

The sound of water dripping in your home can be concerning, and when it’s coming from an AC vent in your ceiling, it’s a clear sign that something is amiss. This article will guide you through the common causes of water leaking from an AC vent in the ceiling, how to identify the issue, and steps to remedy it.

Water Leaking From Ac Vent In Ceiling

Understanding the Causes

Water leaking from an AC vent is not only annoying but also potentially damaging to your home. To address the issue, you first need to understand what might be causing it:

  1. Condensation Buildup: One of the primary causes of water dripping from AC vents is condensation. When warm, moist air meets the cold air inside your air conditioning system, condensation can form and lead to dripping.
  2. Clogged Drain Line: The AC unit has a drain line that removes excess condensation. If this drain line becomes clogged or damaged, it can lead to water backing up and dripping from the vent.
  3. Refrigerant Leak: A refrigerant leak can cause your AC unit to freeze over, resulting in excess water when it thaws. This water may find its way into the vent.

Identifying the Issue

If you notice water dripping from an AC vent in your ceiling, it’s crucial to identify the root cause. Here are some steps to help you pinpoint the problem:

  1. Inspect the Condensation: Check if the water dripping is clear and cold. If it is, the issue is likely condensation. This usually happens in hot and humid weather.
  2. Examine the Vent Grille: Look at the vent grille and its surroundings. If you see water stains, it can indicate a recurring issue.
  3. Check the AC Unit: Inspect the AC unit, specifically the drain line. Ensure it is not clogged, disconnected, or damaged.
  4. Schedule Professional Inspection: If you’re unable to determine the cause or it involves complex internal components, it’s best to call a professional HVAC technician to inspect your system.

Read too: What To Do About Mice In Ceiling

Remedying the Issue

Once you’ve identified the cause of the water leakage, you can take appropriate steps to remedy it:

  1. Condensation Buildup: If condensation is the problem, you can reduce it by lowering the thermostat temperature or installing a dehumidifier in your home. Proper insulation and sealing ductwork can also help.
  2. Clogged Drain Line: If the drain line is clogged, you can try flushing it with a mixture of water and vinegar or by using a wet/dry vacuum. However, it’s advisable to have a professional handle this to avoid further damage.
  3. Refrigerant Leak: If the issue is a refrigerant leak, you’ll need a professional HVAC technician to locate and repair the leak, then recharge the system with the appropriate refrigerant.

Preventing Future Leaks

To avoid water leaking from your AC vent in the ceiling in the future, consider these preventive measures:

  1. Regular Maintenance: Schedule regular maintenance for your AC system, which should include cleaning the drain line and ensuring proper insulation.
  2. Change Filters: Replace or clean your air filters regularly to ensure the air flows freely through the system, reducing the likelihood of condensation.
  3. Seal Ductwork: Properly seal and insulate ductwork to minimize temperature differences that can lead to condensation.
  4. Monitor the Thermostat: Be mindful of your thermostat settings and make sure they are appropriate for the weather conditions.

Conclusion

Water leaking from an AC vent in your ceiling can be a sign of various issues, from condensation to more severe problems like a refrigerant leak. Identifying the cause is the first step in addressing the issue effectively. While some problems can be resolved with simple maintenance, others may require professional assistance. By taking preventive measures, you can reduce the risk of future leaks and keep your home comfortable and dry.

Unveiling the Silent Invaders: Drywall Early Stage Signs of Termites in Ceiling

Termites, the silent destroyers, are a homeowner’s worst nightmare. These tiny, relentless insects can cause massive structural damage before you even realize they’ve invaded your home. While termites can infest various areas of your house, one often overlooked location is the ceiling. In this article, we’ll explore the drywall early stage signs of termites in your ceiling and how to identify them before the infestation becomes a full-blown disaster.

Drywall Early Stage Signs Of Termites In Ceiling

Understanding Termites: The Silent Invaders

Termites are social insects that live in colonies, and they are known for their insatiable appetite for cellulose, a component found in wood and other plant materials. They work silently, often remaining hidden until the damage is extensive. To protect your home from their destructive tendencies, you need to be vigilant and look for early signs of infestation.

Signs of Termites in the Ceiling

  1. Hollow Sounds and Weakened StructureWhen termites infiltrate the ceiling, they hollow out the wood, causing it to become weaker. You might notice a hollow sound when you tap on the affected area. If you ever detect this in your ceiling, it’s a strong indicator that termites are at work.
  2. Swarmer WingsTermites have different castes in their colonies, including swarmer termites. Swarmer termites are responsible for creating new colonies. When they find a suitable location, they shed their wings, leaving them behind as evidence of their presence. Finding discarded wings in your home, especially near the ceiling, is a clear sign of a termite infestation.
  3. Mud Tubes and Tunneling PatternsSubterranean termites build mud tubes to travel from their nests to their food source. These tubes can extend to the ceiling. If you notice mud tubes running along your walls or ceiling, it’s a strong indication of termite activity. Additionally, termites create intricate tunneling patterns within wood, which can weaken the structure further.
  4. Bubbling or Peeling PaintTermites can cause moisture buildup in the affected area, which can result in paint bubbling or peeling. If you observe such issues on your ceiling, especially in a concentrated area, it’s time to investigate for termites.
  5. Tiny Holes and FrassTermites create small holes in the wood, known as kick-out holes, through which they push out their waste, called frass. Finding these holes and the accompanying powdery frass can be a clear sign of termite presence. Inspect your ceiling carefully for these telltale signs.

Read too: Unmasking the Mystery: I Hear Scratching In My Ceiling At Night

Preventing Termites in Your Ceiling

Now that we’ve identified the early stage signs of termites in your ceiling, it’s essential to discuss preventive measures. Prevention is always better than dealing with a full-blown infestation. Here are some steps you can take to protect your home:

  1. Regular InspectionsConduct routine inspections of your home, including the ceiling. Look for any of the signs mentioned above, and if you find them, take action immediately.
  2. Minimize MoistureTermites thrive in a moist environment. Ensure your home is well-ventilated and repair any leaks promptly. This will make your home less attractive to these pests.
  3. Eliminate Wood-to-Soil ContactTermites can easily access your home if wood is in direct contact with soil. Create a barrier between the two by using materials like concrete or metal.
  4. Remove Termite AttractantsStore firewood, mulch, and other cellulose-rich materials away from your home. These items can attract termites and provide a bridge for them to enter.
  5. Professional HelpConsider seeking professional pest control services to inspect your home and implement preventive treatments. They have the expertise and tools to protect your home effectively.

Conclusion

Drywall early stage signs of termites in the ceiling can be a nightmare for homeowners, as they often go unnoticed until extensive damage has been done. By being vigilant and looking for early stage signs of termites, you can protect your home from these silent invaders. Regular inspections and preventive measures are key to ensuring your ceiling remains free from termite damage. Don’t let these tiny pests undermine the integrity of your home – take action to keep them at bay. Remember, when it comes to termites, early detection can save you from costly repairs and sleepless nights.