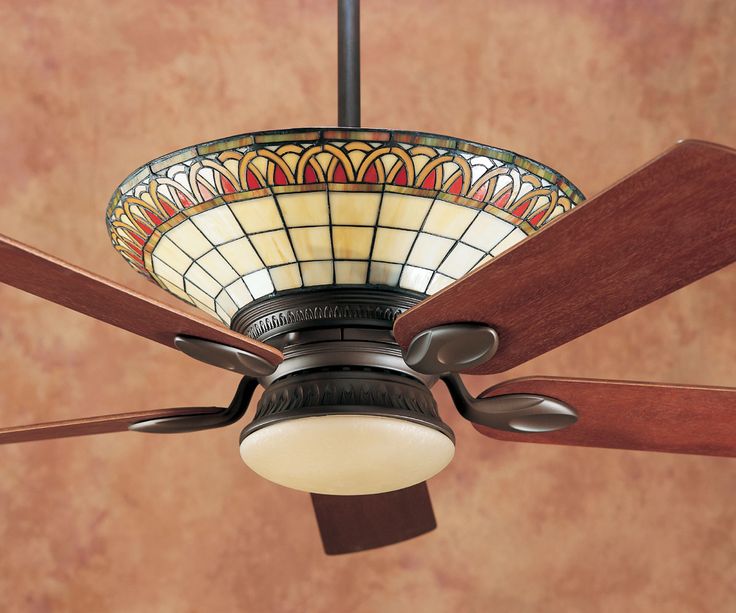
When it comes to enhancing your home’s comfort and style, Savoy House Ceiling Fans stand out as a blend of elegance and functionality. Explore how these exquisite fans can elevate your living spaces with their superior design and performance.
Why Choose Savoy House Ceiling Fans?
Savoy House Ceiling Fans are renowned for their craftsmanship and innovation, offering a wide range of options to suit various interior styles and preferences. Whether you’re looking for a classic fan to complement traditional decor or a modern piece to add flair to contemporary settings, Savoy House has something for every taste.
The Legacy of Savoy House
With a rich history dating back to 1965, Savoy House has consistently delivered high-quality lighting and ceiling fan solutions. Their commitment to excellence is reflected in each product, including their diverse collection of ceiling fans designed to meet the needs of today’s homeowners.
Features and Benefits
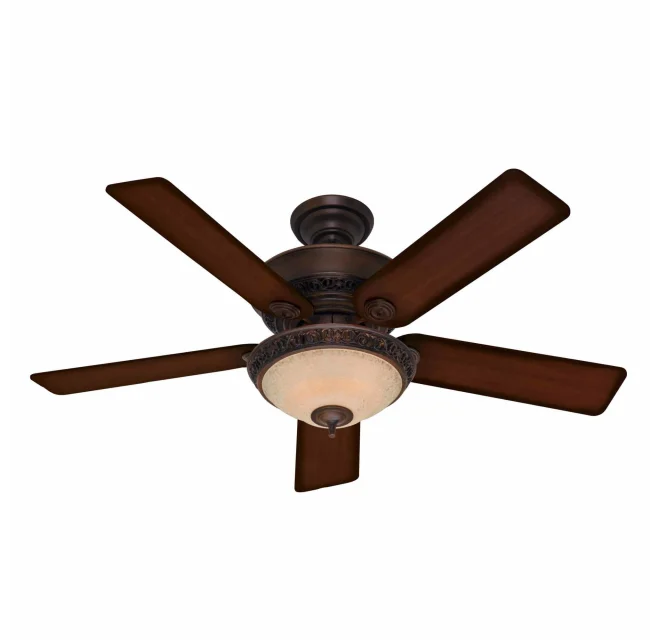
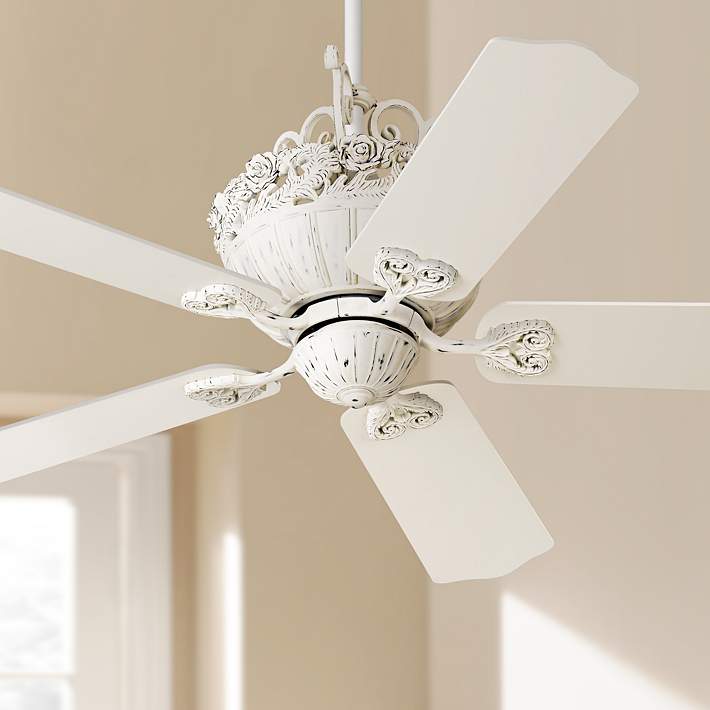
Design Variety: From sleek and understated models to ornate and decorative options, Savoy House Ceiling Fans offer a range of designs crafted from premium materials such as wood, metal, and glass.
Energy Efficiency: Many Savoy House fans are ENERGY STAR® certified, ensuring energy savings without compromising performance.
Advanced Technology: Enjoy features like remote control operation, dimmable LED lighting, and reversible motor functionality for year-round comfort.
Choosing the Right Savoy House Ceiling Fan
Selecting the perfect Savoy House Ceiling Fan involves considering factors such as room size, ceiling height, and design preferences. Here’s a guide to help you make an informed decision:
Size and Blade Span: Match the fan size to your room dimensions for optimal air circulation. Savoy House offers various blade spans to suit different room sizes.
Style and Finish: Coordinate the fan’s style and finish with your existing decor. Choose from classic finishes like brushed nickel, bronze, or matte black to complement your interior aesthetic.
Additional Features: Decide on additional features based on your needs, such as integrated lighting, remote control options, or adjustable fan speeds.
Installation and Maintenance Tips
Installing a Savoy House Ceiling Fan is straightforward, but proper installation ensures optimal performance and safety. Follow these installation and maintenance tips:
Read the Manual: Always refer to the manufacturer’s installation instructions for guidance.
Balance the Fan: Use a balancing kit to eliminate any wobbling for smooth operation.
Regular Cleaning: Dust the fan blades regularly to maintain airflow efficiency and cleanliness.
In conclusion, Savoy House Ceiling Fans combine timeless elegance with modern functionality, making them a worthwhile investment for any home. Whether you’re seeking to improve air circulation, enhance energy efficiency, or simply elevate your home’s aesthetic appeal, Savoy House offers a diverse selection to meet your needs.
Explore the enduring quality and style of Savoy House Ceiling Fans—your gateway to a more comfortable and stylish living environment.
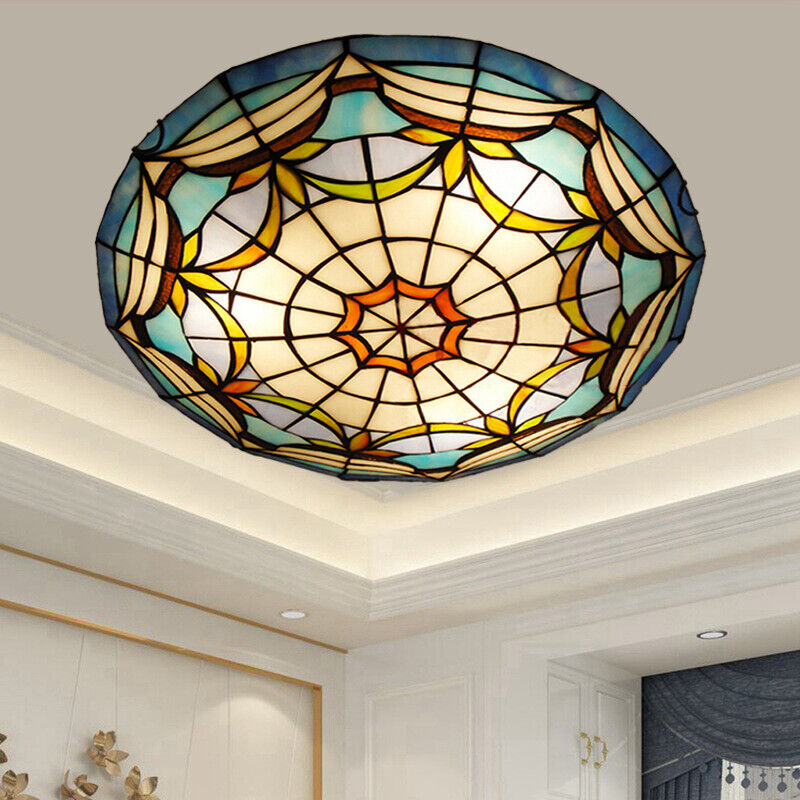
Lighting plays a crucial role in interior design, influencing the ambiance, functionality, and aesthetic appeal of a space. Among the myriad of lighting options available, blown glass ceiling lights stand out for their unique craftsmanship and artistic beauty. These fixtures not only illuminate your home but also serve as striking decorative pieces. This article will explore the allure of blown glass ceiling light, factors to consider when choosing one, and tips on integrating them into various rooms in your home.
The Allure of Blown Glass Ceiling Lights
Blown glass ceiling lights are renowned for their exquisite artistry and unique designs. Here’s why they are an excellent addition to any home:
Artistic Craftsmanship
Handcrafted Beauty: Each blown glass ceiling light is individually crafted by skilled artisans, resulting in one-of-a-kind pieces with distinct patterns and colors.
Timeless Elegance: The intricate designs and vibrant hues of blown glass add a timeless elegance to any room, making these lights a focal point of your decor.
Versatility
Variety of Styles: Blown glass ceiling lights come in a wide range of styles, from contemporary to traditional, ensuring you can find a design that complements your decor.
Color Options: The extensive color palette available allows you to choose lights that match or contrast with your room’s color scheme.
Functional and Aesthetic Appeal
Ambient Lighting: Blown glass ceiling lights provide soft, diffused light that creates a warm and inviting atmosphere.
Decorative Accent: These lights double as decorative accents, enhancing the aesthetic appeal of your space even when they are turned off.
Choosing the Perfect Blown Glass Ceiling Light
Selecting the right blown glass ceiling light involves considering several factors to ensure it meets your aesthetic and functional needs. Here are some key points to keep in mind:
Size and Proportion
Room Size: Choose a light fixture that is appropriately sized for your room. Larger rooms may require bigger or multiple fixtures, while smaller rooms can be enhanced with a single, smaller piece.
Ceiling Height: Consider the height of your ceiling. High ceilings can accommodate larger fixtures or chandeliers, whereas low ceilings may benefit from flush or semi-flush mounts.
Design and Color
Style: Match the light’s design with your room’s decor. Whether you prefer a modern, minimalist look or a classic, ornate design, there is a blown glass ceiling light to suit your taste.
Color Scheme: Choose colors that complement or accentuate your existing color palette. Clear or neutral-toned glass can blend seamlessly, while vibrant colors can make a bold statement.
Lighting Needs
Brightness: Consider the level of brightness you need. Some blown glass ceiling lights are designed to provide ambient lighting, while others can be fitted with brighter bulbs for task lighting.
Light Bulb Type: Determine the type of bulb the fixture supports. LED bulbs are energy-efficient and long-lasting, making them a popular choice.
Installation and Maintenance
Ease of Installation: Ensure the light is easy to install, especially if you plan to do it yourself. Some models come with detailed instructions and all necessary hardware.
Maintenance Requirements: Consider the maintenance needs of the fixture. Blown glass lights may require occasional cleaning to keep them looking their best.
Integrating Blown Glass Ceiling Lights into Your Home Decor
Blown glass ceiling lights can enhance various rooms in your home, adding both functionality and aesthetic appeal. Here are some ideas for different spaces:
Living Room
Focal Point: Use a blown glass ceiling light as a centerpiece in your living room. Pair it with complementary decor elements such as glass vases or art pieces to create a cohesive look.
Layered Lighting: Combine the ceiling light with other lighting sources, such as floor lamps and table lamps, to create layered lighting that adds depth and warmth to the room.
Dining Room
Elegant Ambiance: Install a blown glass chandelier above the dining table to create an elegant and inviting ambiance. Choose a design that complements your dining furniture and decor.
Adjustable Lighting: Opt for a fixture with dimmable bulbs to adjust the lighting intensity according to the occasion, from bright for family dinners to soft and romantic for intimate gatherings.
Bedroom
Soft Lighting: Use a blown glass ceiling light to provide soft, ambient lighting in the bedroom. Choose warm-toned bulbs to create a cozy and relaxing atmosphere.
Decorative Accent: Select a light with intricate designs or vibrant colors to serve as a decorative accent, adding a touch of elegance to your personal retreat.
Kitchen
Task Lighting: Install blown glass pendant lights above kitchen islands or countertops to provide task lighting. These lights not only illuminate the workspace but also add a stylish touch to your kitchen decor.
Color Coordination: Choose colors that match or contrast with your kitchen cabinetry and countertops for a harmonious look.
Bathroom
Functional Elegance: Use blown glass ceiling lights in the bathroom to combine functionality with elegance. Opt for fixtures that provide sufficient illumination for grooming tasks while adding a decorative element to the space.
Moisture-Resistant Designs: Ensure the fixtures are suitable for bathroom use, with designs that can withstand moisture and humidity.
Maintenance Tips for Blown Glass Ceiling Lights
Proper maintenance ensures your blown glass ceiling lights remain beautiful and functional for years to come. Here are some tips:
Regular Cleaning
Dusting: Regularly dust the glass shades using a soft cloth or duster to prevent dust buildup.
Deep Cleaning: Occasionally, remove the glass shades and wash them with mild soap and water. Ensure they are completely dry before reattaching them.
Bulb Replacement
Check Bulbs: Periodically check the bulbs and replace them as needed. Use energy-efficient bulbs to save on electricity costs and reduce heat emission.
Compatibility: Ensure the replacement bulbs are compatible with the fixture’s specifications.
Electrical Safety
Wiring Check: Regularly inspect the wiring and connections to ensure they are secure. If you notice any issues, contact a professional electrician for repairs.
Switch Off Power: Always switch off the power supply before cleaning or replacing bulbs to ensure safety.
Blown Glass Ceiling Light: A Statement of Elegance
Blown glass ceiling lights are more than just functional fixtures; they are works of art that enhance the beauty and ambiance of your home. By carefully selecting a design that complements your decor and meets your lighting needs, you can transform any room into a stylish and inviting space. Regular maintenance will ensure your light remains a stunning centerpiece for years to come.
Conclusion
Blown glass ceiling lights offer a perfect blend of artistry and functionality, making them a valuable addition to any home. Whether you’re looking to create a focal point in your living room, add elegance to your dining area, or enhance the ambiance in your bedroom, these unique fixtures can elevate your home decor. By considering factors such as size, design, lighting needs, and maintenance, you can choose the ideal blown glass ceiling light that complements your style and enhances your living space.
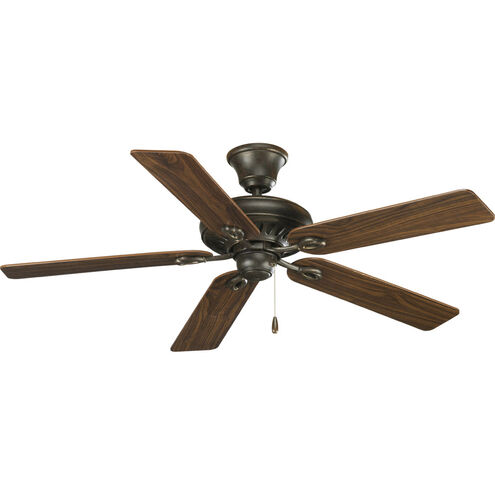
Ceiling fans are more than just functional fixtures; they can also add style and sophistication to any room. Among the top choices for homeowners and interior designers are Progress Lighting ceiling fans. These fans combine innovative design, energy efficiency, and reliable performance to elevate your home’s ambiance. In this comprehensive guide, we will explore everything you need to know about Progress Lighting ceiling fans, including their benefits, popular models, installation tips, and maintenance.
Why Choose Progress Lighting Ceiling Fans?
Progress Lighting is renowned for its commitment to quality and innovation. Here are some reasons why you should consider Progress Lighting ceiling fans for your home:
Stylish Designs
Progress Lighting ceiling fans are available in a variety of styles, from contemporary to traditional. Whether you’re looking to complement modern décor or add a touch of elegance to a classic room, there’s a fan design that will match your aesthetic preferences.
Energy Efficiency
Many Progress Lighting ceiling fans come with energy-efficient motors and blades designed to maximize airflow while minimizing energy consumption. This not only reduces your electricity bills but also contributes to environmental sustainability.
Integrated Lighting
One of the standout features of Progress Lighting ceiling fans is their integrated lighting options. These fans often come with built-in LED lights or are compatible with various lighting kits, allowing you to illuminate your space while keeping it cool.
Quiet Operation
Progress Lighting ceiling fans are engineered for quiet performance. The advanced motor technology ensures smooth and silent operation, making them ideal for bedrooms, living rooms, and other quiet spaces.
Durability
Made from high-quality materials, Progress Lighting ceiling fans are built to last. They are designed to withstand daily use and maintain their appearance and functionality over time.
Popular Models of Progress Lighting Ceiling Fans
Progress Lighting offers a wide range of ceiling fans, each with unique features and designs. Here are some of the popular models that have garnered positive reviews from homeowners and interior designers alike:
1. Progress Lighting Springer Collection
The Springer collection features rustic, farmhouse-style ceiling fans with a distinctive design. These fans have a large blade span, making them ideal for spacious rooms. The Springer fans come with an integrated LED light kit and are available in various finishes to match your home decor.
2. Progress Lighting Trevina Collection
The Trevina collection offers modern ceiling fans with sleek lines and contemporary finishes. These fans are perfect for adding a touch of modern elegance to any room. The Trevina fans come with reversible blades, allowing you to change the look of your fan with ease.
3. Progress Lighting Vast Collection
The Vast collection is designed for large spaces and offers a powerful airflow. These fans feature a minimalist design with a sleek silhouette. The Vast fans include an integrated LED light kit and are available in several finishes, making them a versatile choice for different room styles.
4. Progress Lighting Gulliver Collection
The Gulliver collection is known for its unique, industrial-inspired design. These fans feature open-cage frames and vintage-style bulbs, adding character to any room. The Gulliver fans are ideal for lofts, industrial-themed spaces, and eclectic interiors.
Installation Tips for Progress Lighting Ceiling Fans
Installing a ceiling fan might seem daunting, but with the right tools and instructions, it can be a manageable DIY project. Here are some tips to help you install your Progress Lighting ceiling fan:
Gather Your Tools and Materials
Before you begin, make sure you have all the necessary tools and materials. You’ll need a ladder, screwdriver, wire cutters, pliers, and a voltage tester. Additionally, ensure that the fan kit includes all the required components, such as the mounting bracket, screws, and blades.
Turn Off the Power
Safety is paramount when working with electrical components. Turn off the power to the room where you’ll be installing the fan at the circuit breaker. Use a voltage tester to confirm that the power is off before proceeding.
Install the Mounting Bracket
The mounting bracket is the foundation of your ceiling fan installation. Securely attach the bracket to the ceiling joist using the provided screws. Ensure that the bracket is level and firmly attached to support the weight of the fan.
Assemble the Fan
Follow the manufacturer’s instructions to assemble the fan components. Attach the blades, motor, and lighting kit (if applicable) to the fan housing. Be sure to tighten all screws and bolts to ensure stability.
Wiring the Fan
Carefully connect the fan’s wiring to the existing electrical wires in the ceiling. Match the wire colors (black to black, white to white, and green or bare copper to the ground wire). Use wire nuts to secure the connections and wrap them with electrical tape for added safety.
Attach the Fan to the Bracket
Lift the assembled fan and attach it to the mounting bracket. Secure it with the provided screws and ensure that it’s firmly in place. Double-check all connections and make sure the fan is level.
Test the Fan
Once the fan is securely installed, restore power to the room and test the fan’s operation. Check the fan speed, direction, and lighting to ensure everything is working correctly. If there are any issues, turn off the power and recheck your connections.
Maintenance Tips for Progress Lighting Ceiling Fans
To keep your Progress Lighting ceiling fan in optimal condition, regular maintenance is essential. Here are some maintenance tips to prolong the lifespan of your fan and ensure its continued performance:
Regular Cleaning
Dust and dirt can accumulate on the blades and motor housing, affecting the fan’s efficiency. Clean the blades and housing regularly with a soft cloth or a vacuum cleaner with a brush attachment. Avoid using harsh chemicals that could damage the finish.
Check for Loose Screws
Over time, the screws and bolts that hold the fan together may become loose. Periodically check all connections and tighten any loose screws to prevent wobbling or noise.
Lubricate Moving Parts
If your fan’s motor or bearings start to make noise, they may need lubrication. Refer to the manufacturer’s instructions for the appropriate type of lubricant and apply it as needed to ensure smooth operation.
Inspect the Wiring
Check the wiring connections periodically to ensure they are secure and free of corrosion. If you notice any frayed wires or signs of wear, contact a professional electrician for repairs.
Balance the Blades
If your fan starts to wobble, the blades may be out of balance. Use a balancing kit (usually included with the fan) to adjust the blades and restore smooth operation.
Progress Lighting ceiling fans are a perfect blend of style, efficiency, and durability. Whether you’re looking to enhance your living room, bedroom, or any other space, these fans offer a versatile solution that meets both aesthetic and functional needs. By following the installation and maintenance tips provided in this guide, you can enjoy the benefits of your Progress Lighting ceiling fan for years to come. Embrace the combination of lighting and cooling in one elegant fixture and transform your home with Progress Lighting ceiling fans.
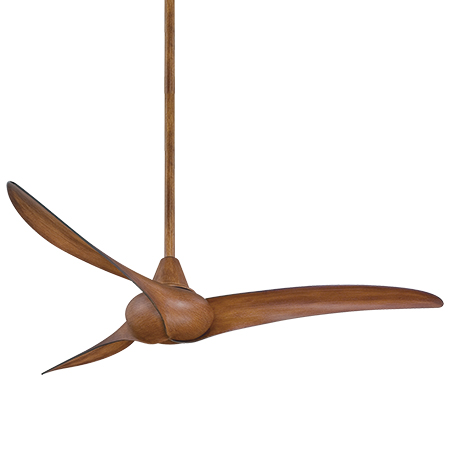
When it comes to enhancing your home’s comfort and style, choosing the right ceiling fan can make all the difference. The Minka Aire Wave Ceiling Fans stands out as a remarkable option, blending innovative design with superior performance. In this comprehensive guide, we’ll delve into the features, benefits, and installation tips for the Minka Aire Wave Ceiling Fan, helping you understand why it might be the perfect addition to your living space.
Why Choose the Minka Aire Wave Ceiling Fan?
The Minka Aire Wave Ceiling Fan is renowned for its unique design and exceptional functionality. Here are some reasons why this fan is a top choice for many homeowners:
1. Unique Design
One of the standout features of the Minka Aire Wave Ceiling Fan is its distinctive design. Inspired by the graceful motion of ocean waves, the fan’s blades are intricately curved, creating a modern and elegant look. This fan is more than just a cooling device; it’s a statement piece that can elevate the aesthetic of any room.
2. Energy Efficiency
In an era where energy conservation is crucial, the Minka Aire Wave Ceiling Fan excels with its energy-efficient performance. The fan is designed to provide maximum airflow while consuming minimal electricity, helping you reduce your energy bills and environmental footprint.
3. High-Quality Construction
The Minka Aire Wave Ceiling Fan is constructed with high-quality materials, ensuring durability and longevity. The fan blades are made from robust, lightweight materials that are resistant to warping and damage, while the motor is designed for quiet, reliable operation.
4. Versatile Functionality
This ceiling fan offers versatile functionality with multiple speed settings and a reverse function. The reverse function is particularly useful in winter, as it helps to circulate warm air throughout the room, enhancing your heating system’s efficiency.
5. Easy Installation
The Minka Aire Wave Ceiling Fan is designed for easy installation. With clear instructions and all necessary hardware included, even those with basic DIY skills can install this fan without much hassle.
Features of the Minka Aire Wave Ceiling Fan
1. Three Distinctive Blades
The Minka Aire Wave Ceiling Fan features three uniquely curved blades, each designed to optimize airflow and enhance the fan’s visual appeal. The aerodynamic design of the blades ensures efficient air movement, providing a cooling breeze throughout the room.
2. Powerful Motor
Equipped with a high-performance motor, the Minka Aire Wave Ceiling Fan delivers powerful airflow while operating quietly. This makes it an ideal choice for bedrooms, living rooms, and other spaces where noise levels need to be minimal.
3. Remote Control
For added convenience, the Minka Aire Wave Ceiling Fan comes with a remote control that allows you to adjust the fan’s speed and direction from anywhere in the room. This feature is particularly useful for high-ceiling installations where manual adjustments would be impractical.
4. Multiple Finish Options
To suit a variety of interior styles, the Minka Aire Wave Ceiling Fan is available in several finishes, including distressed koa, white, and silver. Whether you have a modern, traditional, or eclectic decor, there’s a finish that will complement your space beautifully.
5. Energy Star Rated
The Minka Aire Wave Ceiling Fan is Energy Star rated, meaning it meets strict energy efficiency guidelines set by the U.S. Environmental Protection Agency. This certification underscores the fan’s eco-friendly design and cost-saving performance.
Installation Tips for the Minka Aire Wave Ceiling Fan
Installing the Minka Aire Wave Ceiling Fan is a straightforward process, but following these tips can ensure a smooth and successful installation:
1. Choose the Right Location
Select a location that allows for optimal air circulation. The fan should be installed at least 7 feet above the floor and 18 inches away from walls. For sloped ceilings, make sure to use the appropriate mounting kit to ensure a secure installation.
2. Gather Necessary Tools
Before starting the installation, gather all necessary tools, including a ladder, screwdriver, pliers, wire stripper, and electrical tape. Having everything on hand will make the process more efficient.
3. Turn Off Power
For safety, turn off the power to the circuit where you’ll be installing the fan. Use a voltage tester to ensure there’s no electrical current before proceeding.
4. Follow the Instructions
Carefully follow the manufacturer’s instructions included with the fan. These instructions provide detailed steps for assembling and mounting the fan. Pay close attention to wiring instructions to avoid any electrical issues.
5. Test the Fan
Once installed, turn the power back on and test the fan to ensure it operates correctly. Check all speed settings and the reverse function to confirm everything is working as intended.
Maintaining Your Minka Aire Wave Ceiling Fan
Proper maintenance can extend the lifespan of your Minka Aire Wave Ceiling Fan and ensure it continues to perform efficiently. Here are some maintenance tips:
1. Regular Cleaning
Dust and debris can accumulate on the fan blades, reducing efficiency and air quality. Regularly clean the blades with a soft cloth or vacuum with a brush attachment. Ensure the fan is turned off and completely stationary before cleaning.
2. Check for Loose Parts
Periodically check the fan for any loose screws or parts. Tighten any loose components to prevent rattling or wobbling during operation.
3. Lubricate the Motor
If your fan’s motor is not sealed, apply a few drops of lubricant to keep it running smoothly. Refer to the manufacturer’s guidelines for the recommended type of lubricant.
4. Balance the Blades
If the fan starts to wobble, it may need balancing. Use a blade balancing kit or adjust the weights on the blades to eliminate wobbling and ensure smooth operation.
5. Professional Servicing
For any complex issues or if the fan is under warranty, consider professional servicing. A qualified technician can address problems effectively without voiding the warranty.
Enhancing Your Home with the Minka Aire Wave Ceiling Fan
The Minka Aire Wave Ceiling Fan is more than just a functional appliance; it’s an elegant addition to any home. Here are some ideas on how to integrate this fan into your decor:
1. Living Room
In the living room, the Minka Aire Wave Ceiling Fan can serve as a central decorative element. Choose a finish that complements your furniture and decor, and enjoy the added comfort and style it brings to your space.
2. Bedroom
Install the fan in your bedroom to create a serene and comfortable environment. The quiet operation and remote control make it ideal for maintaining a restful atmosphere.
3. Patio or Outdoor Space
For covered outdoor areas, the Minka Aire Wave Ceiling Fans can provide much-needed airflow on hot days. Ensure the fan is rated for damp or wet locations if you plan to use it outdoors.
4. Dining Area
In the dining area, the fan can help circulate air and keep the space comfortable during meals. Its stylish design can also enhance the dining room’s overall aesthetic.
A ceiling fan in your home office can improve air circulation and maintain a comfortable temperature, boosting productivity and comfort while you work.
Conclusion
The Minka Aire Wave Ceiling Fans is a perfect blend of form and function, offering stylish design and efficient performance. Whether you’re looking to upgrade your living space, enhance your home’s energy efficiency, or add a modern touch to your decor, this ceiling fan is an excellent choice. With its unique wave-inspired blades, energy-saving features, and versatile functionality, the Minka Aire Wave Ceiling Fan stands out as a superior option for any home.
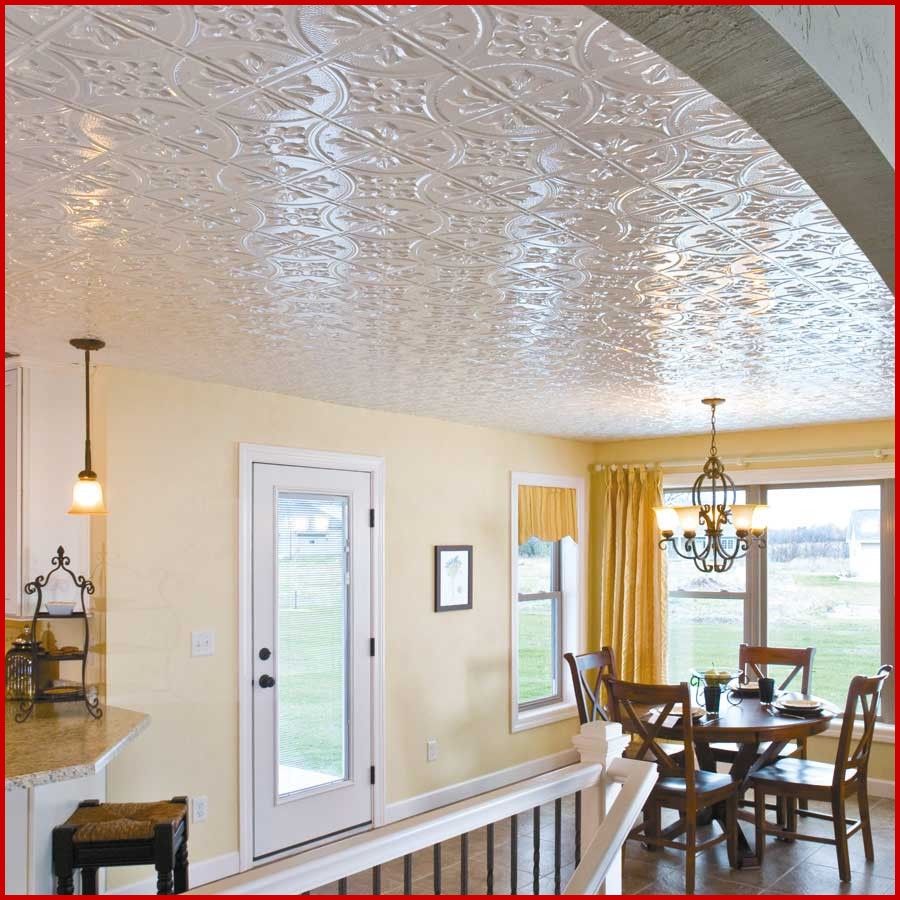
When it comes to home decor, ceilings often get overlooked. However, they hold the potential to dramatically transform a space. One of the most elegant and stylish ways to enhance your ceilings is by using white tin ceiling tile. These tiles not only add a touch of vintage charm but also bring in a sense of sophistication and timeless beauty to any room. In this article, we’ll explore everything you need to know about white tin ceiling tiles, from their history to installation tips, and why they might be the perfect choice for your next home improvement project.
A Brief History of White Tin Ceiling Tiles
White tin ceiling tiles have a rich history that dates back to the late 19th and early 20th centuries. During this period, tin ceilings became popular in North America, particularly in the United States and Canada. These tiles were initially used as a more affordable alternative to the expensive, ornate plaster ceilings found in European homes.
The Industrial Revolution played a significant role in the popularity of tin ceiling tiles. Mass production made these decorative elements more accessible to the middle class, allowing homeowners to achieve the luxurious look of intricate plasterwork without the hefty price tag. The tiles were often painted white to mimic the appearance of traditional plaster ceilings, which added to their widespread appeal.
The Benefits of White Tin Ceiling Tiles
White tin ceiling tiles offer a range of benefits that make them a great choice for any home or commercial space. Here are some of the key advantages:
1. Aesthetic Appeal
White tin ceiling tiles are known for their classic and elegant appearance. They can add a touch of vintage charm to any room, making them ideal for those who appreciate historical or Victorian-style decor. The intricate patterns and embossed designs on the tiles can create a stunning focal point in any space.
2. Durability
Tin ceiling tiles are incredibly durable and long-lasting. Made from metal, they are resistant to cracking, peeling, and other common forms of ceiling damage. This makes them a great investment for homeowners looking for a long-term solution.
3. Easy Maintenance
One of the practical benefits of white tin ceiling tiles is their low maintenance. They are easy to clean and do not require frequent upkeep. A simple wipe with a damp cloth is usually enough to keep them looking fresh and new.
4. Fire Resistance
Tin ceiling tiles are naturally fire-resistant, providing an added layer of safety to your home. This can be particularly beneficial in kitchens and other areas where fire hazards are a concern.
5. Versatility
White tin ceiling tiles are incredibly versatile and can be used in a variety of settings. Whether you’re looking to enhance a living room, kitchen, bedroom, or even a commercial space like a restaurant or retail store, these tiles can fit seamlessly into any design scheme.
How to Choose the Right White Tin Ceiling Tiles
When selecting white tin ceiling tiles for your space, there are several factors to consider to ensure you make the right choice:
1. Design and Pattern
White tin ceiling tiles come in a wide range of designs and patterns. From simple, geometric shapes to intricate, floral motifs, there’s something to suit every taste. Consider the overall style of your room and choose a pattern that complements your existing decor.
2. Size and Layout
The size of the tiles and the layout of your ceiling will also play a role in your decision. Tin ceiling tiles are typically available in standard sizes, but custom options are also available if you have specific requirements. Make sure to measure your ceiling accurately and plan the layout to achieve the best results.
3. Finish and Coating
While white is a popular choice for tin ceiling tiles, there are also other finishes available. Some tiles come with a plain white finish, while others may have a more antique or distressed look. Additionally, consider whether you want a glossy or matte finish, as this can affect the overall appearance of your ceiling.
4. Installation Method
There are different methods for installing tin ceiling tiles, including nail-up, drop-in, and snap-lock systems. Each method has its own advantages and considerations. Nail-up tiles are installed directly onto a wooden substrate, while drop-in tiles are designed for suspended ceilings. Snap-lock tiles offer a more modern and straightforward installation process. Choose the method that best suits your skill level and the requirements of your space.
Installation Tips for White Tin Ceiling Tiles
Installing white tin ceiling tiles can be a rewarding DIY project, but it requires careful planning and attention to detail. Here are some tips to help you achieve a professional-looking result:
1. Prepare the Surface
Before you begin, make sure the ceiling surface is clean, dry, and free from any debris. If you’re installing the tiles over an existing ceiling, ensure it is structurally sound and capable of supporting the additional weight.
2. Plan the Layout
Take the time to plan the layout of your tiles carefully. Start by finding the center of the ceiling and work your way outwards. This will help ensure a balanced and symmetrical installation. Use a chalk line or laser level to mark guidelines on the ceiling.
3. Cut Tiles to Fit
In some cases, you’ll need to cut tiles to fit around edges, corners, or fixtures. Use tin snips or a utility knife to make precise cuts. Be sure to wear gloves and eye protection when cutting metal tiles to avoid injury.
4. Secure the Tiles
Depending on the installation method you’ve chosen, secure the tiles to the ceiling using nails, screws, or adhesive. For nail-up installations, use decorative nails that match the style of your tiles. Make sure each tile is properly aligned and level before securing it in place.
5. Finishing Touches
Once all the tiles are installed, add any necessary finishing touches. This may include painting the tiles (if desired), caulking seams, or adding trim and moldings to complete the look. Be sure to allow any paint or adhesive to dry thoroughly before using the room.
Creative Uses for White Tin Ceiling Tiles
White tin ceiling tiles are not limited to just ceilings. Their versatility allows them to be used in a variety of creative ways throughout your home. Here are some ideas to inspire you:
1. Accent Walls
Create a stunning accent wall by installing white tin ceiling tiles vertically. This can add texture and visual interest to a living room, bedroom, or hallway.
2. Backsplashes
In the kitchen, use white tin ceiling tiles as a backsplash to add a touch of vintage elegance. The tiles are easy to clean and can withstand heat and moisture, making them a practical choice for this area.
3. Cabinet Inserts
Enhance the look of your cabinetry by using white tin ceiling tiles as inserts for cabinet doors. This can give your kitchen or bathroom a unique and custom look.
4. Headboards
Create a one-of-a-kind headboard for your bed by mounting white tin ceiling tiles onto a wooden frame. This can add a touch of luxury and sophistication to your bedroom decor.
5. Art Pieces
Turn individual tiles into standalone art pieces by framing them or mounting them on a board. Hang them on your walls to create a unique and eye-catching display.
White tin ceiling tile are a timeless and elegant addition to any home. Their aesthetic appeal, durability, and versatility make them a popular choice for homeowners looking to enhance their interiors. Whether you’re aiming to create a vintage-inspired space or simply want to add a touch of sophistication to your decor, white tin ceiling tiles are an excellent option. With the right planning and installation, these tiles can transform your ceilings and add a unique charm to your home.
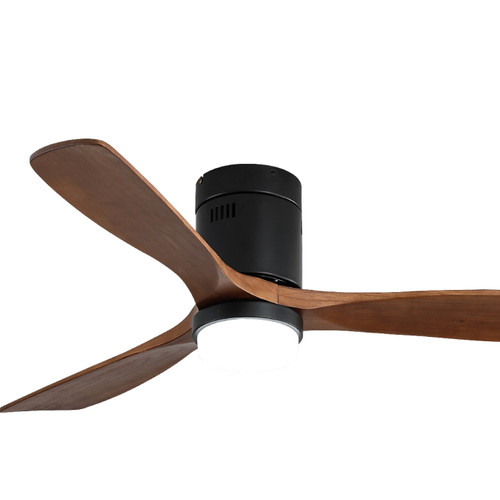
Wood blade ceiling fans combine functionality with aesthetic appeal, offering a refreshing addition to any room. Discover the benefits, design options, installation tips, and maintenance advice for integrating a wood blade ceiling fan into your home decor.
Understanding Wood Blade Ceiling Fan
A wood blade ceiling fan is a type of ceiling fan that features blades made from wood or wood-like materials. These fans are renowned for their natural and rustic charm, making them a popular choice among homeowners seeking both cooling efficiency and visual appeal.
Benefits of Wood Blade Ceiling Fan
Wood blade ceiling fans offer several advantages that set them apart from other types of ceiling fans. Here are some key benefits:
1. Natural Aesthetic
The primary allure of wood blade ceiling fans lies in their natural aesthetic. The wooden blades add warmth and character to a room, creating a cozy and inviting atmosphere. They are available in various wood finishes, from light oak to dark walnut, allowing you to match the fan with your existing decor effortlessly.
2. Quiet Operation
Many wood blade ceiling fans are equipped with high-quality motors and blade designs that ensure quiet operation. This makes them ideal for bedrooms, living rooms, and other areas where noise levels are a concern.
3. Energy Efficiency
Wood blade ceiling fans are designed to improve airflow and circulation, which can help reduce reliance on air conditioning during warmer months. By circulating air effectively, these fans promote energy efficiency and can lower utility costs.
4. Versatility in Design
From traditional to modern interiors, wood blade ceiling fans complement a wide range of decor styles. Whether you prefer a rustic farmhouse look or a sleek contemporary design, there’s a wood blade fan to suit every taste and preference.
5. Durability
Wood blade ceiling fans are typically crafted from durable materials that withstand wear and tear over time. The blades are treated to resist warping, cracking, and fading, ensuring longevity and continued performance.
Choosing the Right Wood Blade Ceiling Fan
Selecting the perfect wood blade ceiling fan involves considering several factors to ensure it meets your functional and aesthetic needs. Here are some considerations:
Blade Material and Finish
Evaluate the type of wood or wood-like material used for the fan blades. Common options include solid wood, plywood, or composite materials with wood veneers. Choose a finish that complements your decor while ensuring durability and maintenance ease.
Size and Room Coverage
Determine the appropriate fan size based on the dimensions of the room where it will be installed. Larger rooms may require fans with longer blades to effectively circulate air, while smaller rooms benefit from compact fan designs.
Motor Quality and Performance
Investigate the motor quality and performance features such as speed settings, reversible rotation, and energy efficiency ratings (e.g., ENERGY STAR® certified). A powerful motor ensures optimal airflow and reliable operation.
Design and Style
Consider the overall design and style of the fan, including blade shape, fan body finish, and additional features such as integrated lighting or remote control operation. Choose a fan that complements your existing decor and enhances the room’s aesthetic appeal.
Installation of Wood Blade Ceiling Fan
Installing a wood blade ceiling fan requires careful planning and adherence to safety guidelines. Here’s a step-by-step overview of the installation process:
Step 1: Preparation
Turn off the power to the ceiling fan circuit at the breaker panel. Gather necessary tools, including a ladder, screwdrivers, wire strippers, and electrical tape.
Step 2: Remove Existing Fixture (if applicable)
If replacing an existing ceiling fixture or fan, carefully disconnect the wiring and remove the old fixture. Dispose of any old parts responsibly according to local regulations.
Step 3: Install Mounting Bracket
Attach the ceiling fan mounting bracket to the electrical junction box using the provided screws. Ensure the bracket is securely fastened and level to support the weight of the fan.
Step 4: Wire the Fan
Follow the manufacturer’s instructions to wire the ceiling fan, connecting the fan’s wires to the corresponding wires in the junction box (typically black to black, white to white, and ground to ground). Secure connections with wire nuts and electrical tape.
Step 5: Attach Fan Blades and Canopy
Attach the fan blades to the motor housing using the supplied hardware. Align each blade evenly for balanced airflow. Install the fan canopy to cover the mounting bracket and wiring connections.
Turn the power back on at the breaker panel and test the fan operation, including speed settings and rotation direction. Adjust as necessary to ensure smooth and quiet operation. Secure all screws and components tightly.
Maintenance Tips for Wood Blade Ceiling Fan
Regular maintenance helps preserve the performance and appearance of your wood blade ceiling fan. Follow these tips to keep it in top condition:
Clean Blades Regularly
Dust the fan blades regularly using a soft cloth or duster. For stubborn dirt or debris, use a mild cleaning solution diluted in water and avoid harsh chemicals that could damage the wood finish.
Check and Tighten Components
Periodically inspect the fan blades, motor housing, and mounting hardware for signs of wear or loosening. Tighten screws and bolts as needed to maintain stability and prevent noise during operation.
Balance Fan Blades
Use a balancing kit (often included with the fan or available separately) to check and correct any blade imbalance. Balanced blades ensure smooth rotation and reduce vibration.
Lubricate Moving Parts
Apply lubricant to the fan motor as recommended by the manufacturer to ensure smooth operation and extend the lifespan of the motor.
Conclusion
Wood blade ceiling fans offer a blend of functionality and aesthetic appeal, making them a valuable addition to any home or office space. Whether you’re seeking to enhance air circulation, reduce energy costs, or elevate the decor of a room, these fans provide a versatile solution. By understanding their benefits, selecting the right fan for your needs, and following proper installation and maintenance practices, you can enjoy the comfort and beauty of a wood blade ceiling fan for years to come.
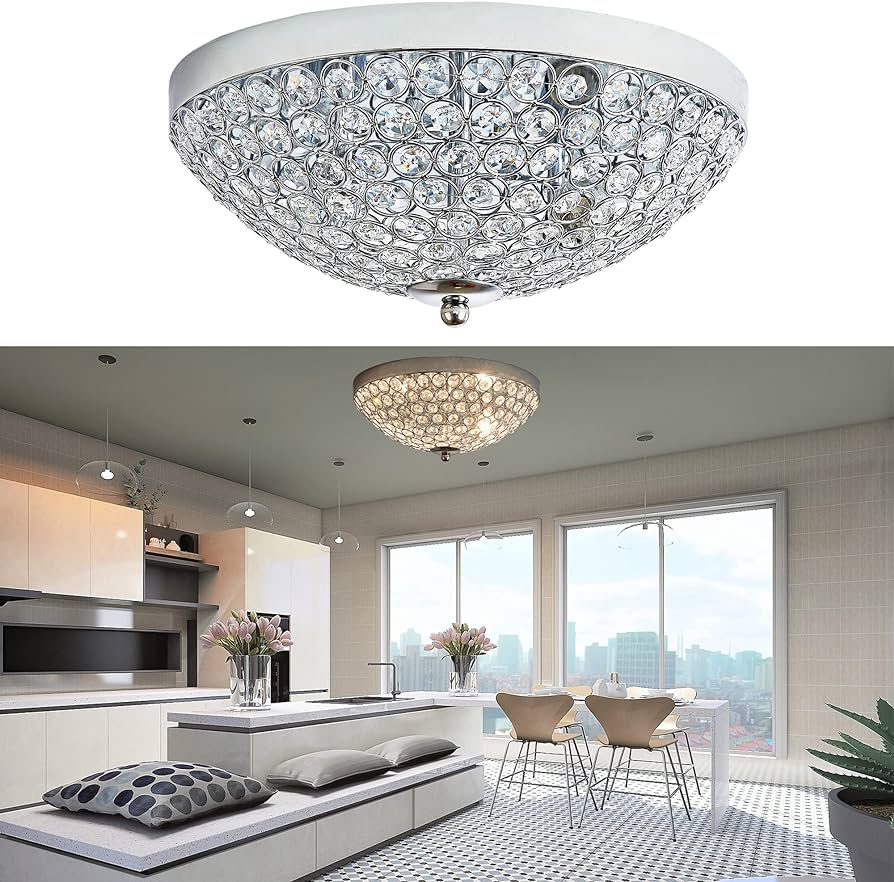
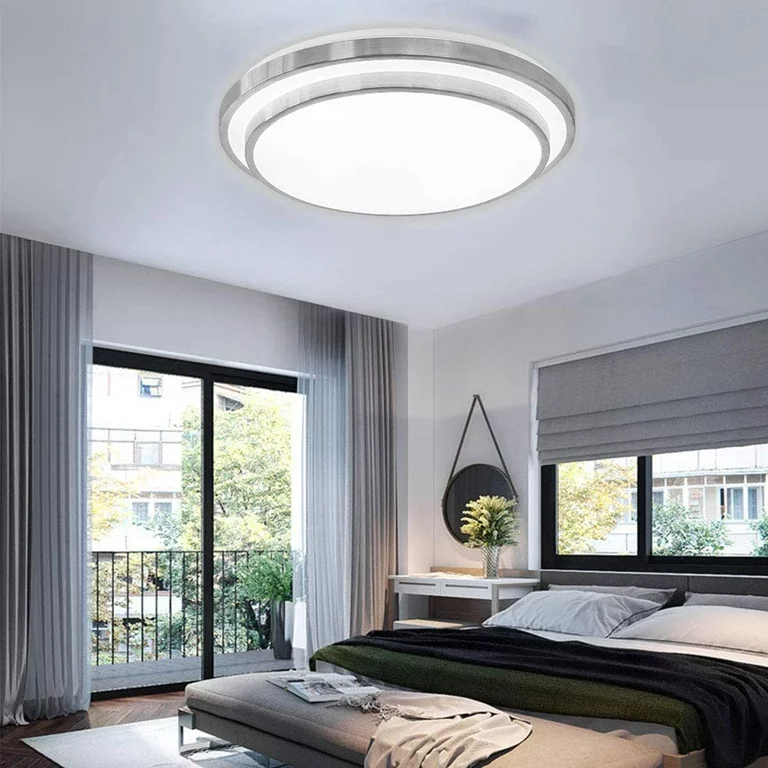
Crystal ceiling lights flush mount fixtures are not just functional lighting solutions but also exquisite pieces that can elevate the ambiance of any room. Discover the beauty, versatility, and practicality of crystal ceiling light flush mount in this comprehensive guide. From understanding their unique features to installation tips and maintenance advice, explore how these luxurious fixtures can transform your home decor.
Exploring Crystal Ceiling Lights Flush Mount
Crystal ceiling lights flush mount fixtures are designed to be mounted directly onto the ceiling, offering a seamless integration that enhances the aesthetic appeal of any space. These lights are adorned with crystal accents that refract light, creating dazzling displays of illumination and adding a touch of elegance to interiors.
Benefits of Crystal Ceiling Lights Flush Mount
Crystal ceiling lights flush mount fixtures offer numerous advantages that make them a popular choice among homeowners and interior designers alike. Here are some key benefits:
1. Aesthetic Appeal
One of the primary reasons to choose crystal ceiling lights flush mount fixtures is their stunning visual appeal. The crystals refract light in a myriad of patterns, creating a sparkling effect that enhances the overall decor of the room. Whether you prefer a traditional, contemporary, or glamorous style, crystal ceiling lights can complement various interior themes.
2. Space-Saving Design
Flush mount fixtures are ideal for rooms with lower ceilings or where you prefer a minimalist appearance. Unlike pendant or chandelier styles that hang lower, flush mount crystal lights sit snugly against the ceiling, providing ample illumination without occupying overhead space.
3. Versatile Lighting Options
Crystal ceiling lights flush mount fixtures come in a range of sizes, shapes, and crystal types, allowing you to find the perfect match for your room’s dimensions and decor. From small, understated designs to large, intricate fixtures, there’s a flush mount option to suit every aesthetic preference.
4. Functional Illumination
Beyond their decorative appeal, crystal ceiling lights provide functional illumination that can brighten up entire rooms or provide focused light in specific areas. Consider the type and wattage of bulbs used in these fixtures to achieve the desired ambiance and brightness level.
5. Easy Maintenance
Maintaining crystal ceiling lights flush mount fixtures is relatively straightforward. Regular dusting with a soft cloth keeps the crystals clean and ensures optimal light refraction. Periodically check the fixture’s integrity and tighten any loose components to maintain its appearance and functionality.
Choosing the Right Crystal Ceiling Lights Flush Mount
Selecting the perfect crystal ceiling lights flush mount fixture involves considering several factors to ensure it complements your space effectively. Here are some tips to help you make an informed decision:
Size and Proportion
Measure the dimensions of your room and ceiling height to determine the appropriate size of the flush mount fixture. Choose a size that provides adequate light coverage without overwhelming the space or appearing too small.
Crystal Type and Design
Crystal ceiling lights flush mount fixtures come in various crystal types, including Swarovski crystals, glass crystals, and acrylic crystals. Each type offers different levels of clarity, sparkle, and cost. Select a crystal type that aligns with your budget and desired aesthetic.
Fixture Finish and Style
Consider the finish and style of the fixture, including the metal frame and decorative elements. Common finishes include chrome, brushed nickel, bronze, and brass, each contributing to the fixture’s overall look and compatibility with your existing decor.
Installation Requirements
Evaluate the installation requirements of crystal ceiling lights flush mount fixtures, particularly if you plan to replace existing lighting. Ensure the ceiling junction box can support the weight of the fixture and follow manufacturer guidelines for proper installation to ensure safety and stability.
Installation of Crystal Ceiling Lights Flush Mount
Installing crystal ceiling lights flush mount fixtures requires careful attention to detail to achieve optimal results. Here’s a general overview of the installation process:
Step 1: Preparation
Turn off the power to the ceiling fixture at the circuit breaker to prevent electrical accidents. Gather necessary tools and components, including a ladder, screwdrivers, wire strippers, and safety glasses.
Step 2: Remove Existing Fixture (if applicable)
If replacing an existing fixture, carefully remove it by unscrewing the mounting screws and disconnecting the wiring. Dispose of the old fixture according to local regulations.
Step 3: Mounting the Fixture
Secure the mounting bracket to the ceiling junction box using screws provided with the fixture. Ensure the bracket is level and firmly attached to support the weight of the crystal ceiling light flush mount.
Step 4: Wiring
Connect the wiring according to the manufacturer’s instructions, typically matching color-coded wires (black to black, white to white, and ground to ground). Use wire nuts to secure connections and ensure there are no exposed wires.
Step 5: Install the Fixture
Attach the crystal ceiling light fixture to the mounting bracket by aligning screws or hooks. Double-check the fixture’s stability and adjust as needed to ensure it hangs evenly.
Maintenance Tips for Crystal Ceiling Lights Flush Mount
To keep your crystal ceiling lights flush mount fixtures looking their best and functioning properly, follow these maintenance tips:
Clean Regularly
Dust the crystals and fixture frame regularly using a soft, dry cloth or duster. Avoid abrasive cleaners or cloths that could scratch or damage the crystals.
Check Stability
Periodically inspect the fixture’s mounting hardware and connections to ensure they remain secure. Tighten screws or bolts as needed to prevent loosening over time.
Adjust Lighting
Replace bulbs as recommended by the manufacturer to maintain optimal brightness and energy efficiency. Consider using LED bulbs for longer life and lower energy consumption.
Professional Inspection
Schedule an annual inspection by a qualified electrician to check wiring, connections, and overall fixture condition. They can identify and address any potential issues before they escalate.
Crystal ceiling light flush mount fixtures are not just sources of illumination; they are statements of elegance and sophistication in interior design. Whether you’re illuminating a living room, dining area, or bedroom, these fixtures add a touch of glamour while providing functional lighting. By understanding their benefits, selecting the right fixture for your space, and following proper installation and maintenance practices, you can enjoy the beauty and brilliance of crystal ceiling lights flush mount for years to come.
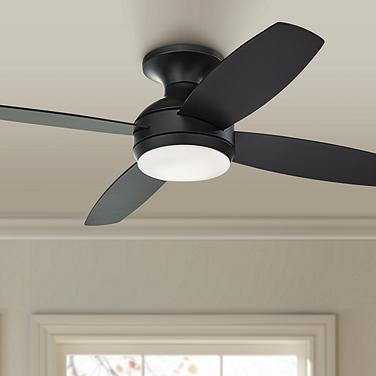
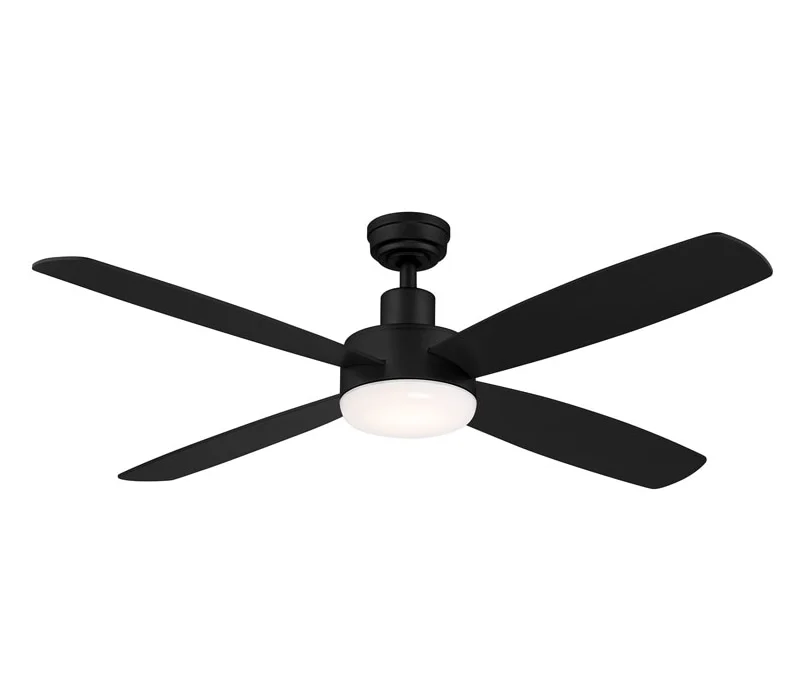
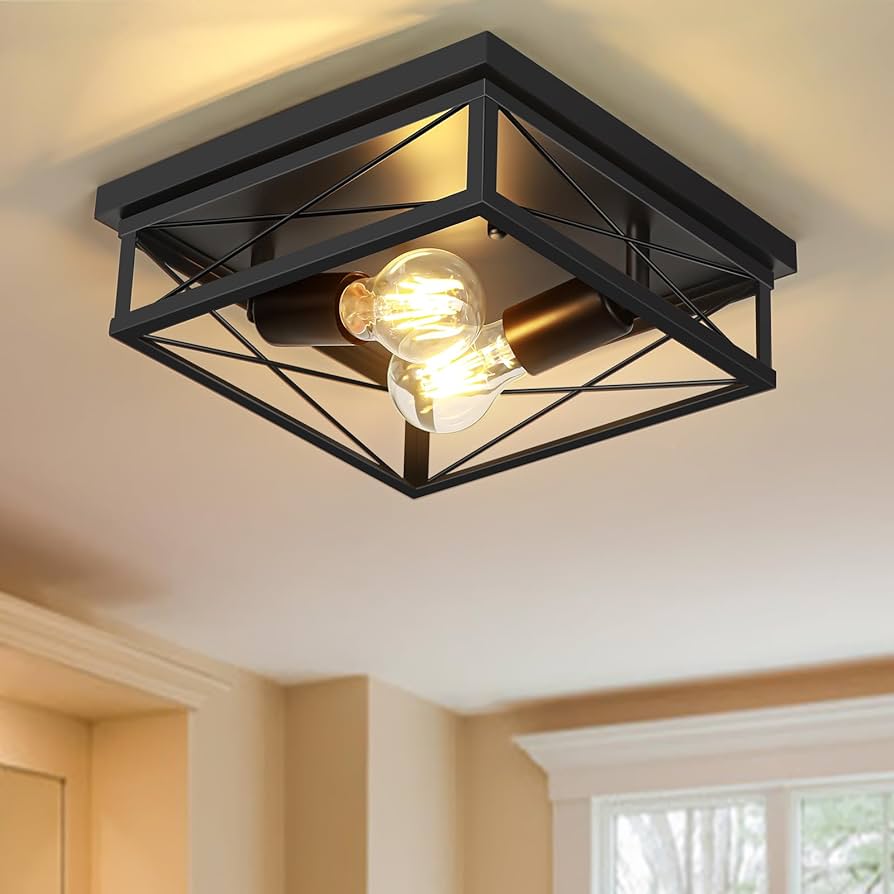
A black flush mount ceiling fan can be more than just a functional addition to your home; it can also serve as a stylish statement piece that complements your interior decor. In this comprehensive guide, we delve into everything you need to know about black flush mount ceiling fans. From their design and benefits to installation tips and maintenance, discover how these fans can elevate the comfort and aesthetics of any room.
Understanding Black Flush Mount Ceiling Fans
Black flush mount ceiling fans are designed to be mounted close to the ceiling, without the use of a downrod. This installation style makes them ideal for rooms with low ceilings or for those who prefer a sleek, seamless look. The black finish adds a touch of sophistication and versatility, blending well with various interior styles from modern to industrial.
Benefits of Black Flush Mount Ceiling Fans
Black flush mount ceiling fans offer several advantages that make them a popular choice among homeowners. Here are some key benefits:
1. Space-Saving Design
The flush mount design allows the fan to be installed closer to the ceiling, maximizing space in the room. This is particularly beneficial in rooms with low ceilings where a traditional fan with a downrod may not be practical.
2. Stylish Appearance
Black finish adds a contemporary and elegant touch to any room. It complements a wide range of color schemes and decor styles, making it easy to integrate into your existing interior design.
3. Improved Air Circulation
Ceiling fans are effective in improving air circulation and maintaining a comfortable temperature in any season. The black flush mount design ensures efficient airflow without compromising on style.
Modern black flush mount ceiling fans are engineered for quiet operation, ensuring that they do not disrupt the ambiance of the room while providing comfort.
5. Energy Efficiency
Many black flush mount ceiling fans are equipped with energy-efficient motors and blades. They can help reduce energy consumption and utility costs compared to using air conditioning alone.
Applications of Black Flush Mount Ceiling Fans
Black flush mount ceiling fans are versatile and suitable for various rooms and settings. Here are some common applications:
1. Bedrooms
In bedrooms, black flush mount ceiling fans provide gentle airflow without taking up valuable space. They can enhance comfort during both warm and cool nights, promoting better sleep.
2. Living Rooms
Black flush mount ceiling fans make a stylish addition to living rooms, offering both functionality and aesthetic appeal. They can serve as a focal point or blend seamlessly into the room’s decor.
3. Dining Areas
Dining areas benefit from the gentle breeze provided by a black flush mount ceiling fan, creating a comfortable atmosphere for meals and gatherings.
4. Home Offices
In home offices, where temperature control is essential for productivity, a black flush mount ceiling fan can help maintain a comfortable working environment.
Installing a Black Flush Mount Ceiling Fan
Installing a black flush mount ceiling fan is generally straightforward, but it requires careful planning and attention to detail. Here are the steps to guide you through the installation process:
Step 1: Choose the Right Fan
Select a black flush mount ceiling fan that suits the size and style of your room. Consider factors such as blade span, motor size, and additional features like remote control or light kit compatibility.
Step 2: Turn Off Power
Before you begin installation, turn off the power to the existing ceiling light fixture at the circuit breaker box. Use a voltage tester to ensure that the power is off before proceeding.
Step 3: Remove Existing Fixture
Remove the existing ceiling light fixture and disconnect it from the electrical wiring. Save any mounting hardware that may be reused for installing the new fan.
Step 4: Install Mounting Bracket
Follow the manufacturer’s instructions to install the mounting bracket provided with the fan. Secure the bracket to the ceiling junction box using screws and ensure it is stable and level.
Step 5: Wire the Fan
Carefully wire the fan according to the manufacturer’s instructions. Connect the wires from the fan to the corresponding wires in the ceiling junction box, ensuring a secure connection with wire nuts.
Step 6: Attach Fan Blades and Canopy
Attach the fan blades to the motor housing using the screws provided. Install the canopy to cover the ceiling bracket and wiring, securing it with screws.
Step 7: Test and Adjust
Turn the power back on and test the fan to ensure it operates correctly. Adjust the fan settings and direction as needed for optimal airflow and comfort.
Maintaining Your Black Flush Mount Ceiling Fan
Proper maintenance helps ensure your black flush mount ceiling fan operates efficiently and lasts longer. Here are some maintenance tips:
1. Regular Cleaning
Dust the fan blades and motor housing regularly using a soft cloth or duster. Avoid using abrasive cleaners or water directly on the fan.
2. Check for Loose Parts
Periodically check for any loose screws or bolts and tighten them as needed to prevent noise or wobbling.
3. Lubricate Moving Parts
Apply a small amount of lubricating oil to the motor bearings annually to keep the fan running smoothly.
4. Inspect Wiring and Connections
Inspect the electrical wiring and connections annually to ensure they are secure and in good condition.
Conclusion
A black flush mount ceiling fan is not just a practical addition to your home; it’s a stylish and functional investment that enhances comfort and aesthetics. Whether you’re looking to cool down your bedroom, improve airflow in your living room, or add a contemporary touch to any space, a black flush mount ceiling fan offers the perfect blend of form and function. By choosing the right fan, following proper installation procedures, and maintaining it regularly, you can enjoy the benefits of a black flush mount ceiling fan for years to come.
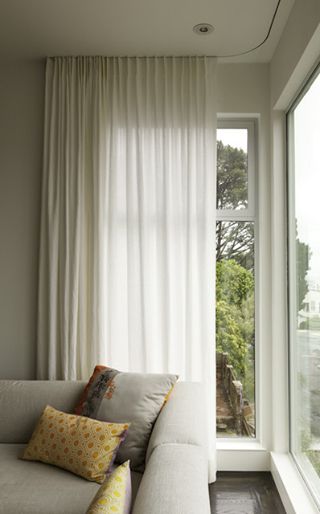
When it comes to interior design, the details can make a significant difference. One such detail is how you hang your curtains. Using a ceiling mount curtain track offers both aesthetic and functional benefits, making it a popular choice for many homeowners. In this comprehensive guide, we will explore everything you need to know about ceiling mount curtain tracks, from their benefits and applications to installation and maintenance tips.
The Benefits of a Ceiling Mount Curtain Track
Ceiling mount curtain tracks offer a range of advantages that make them an excellent choice for both residential and commercial spaces. Here are some of the key benefits:
1. Clean and Modern Aesthetic
A ceiling mount curtain track provides a sleek and minimalist look. Unlike traditional curtain rods, ceiling tracks are less obtrusive and blend seamlessly with the ceiling, creating a clean and modern aesthetic. This makes them ideal for contemporary and minimalist interior designs.
2. Maximizes Space
Ceiling-mounted tracks allow curtains to be hung closer to the ceiling, which can make rooms appear taller and more spacious. This is particularly beneficial in rooms with low ceilings or in small spaces where maximizing vertical space is crucial.
3. Versatility
Ceiling mount curtain tracks are incredibly versatile and can be used in a variety of settings. They are suitable for both straight and curved installations, making them perfect for bay windows, room dividers, and even hospital cubicles.
4. Improved Functionality
Ceiling tracks offer smooth and easy operation, allowing curtains to glide effortlessly. This is especially useful for heavy or large curtains that can be cumbersome to move on traditional rods. Additionally, ceiling tracks can support motorized systems for even greater convenience.
5. Enhanced Privacy and Light Control
By mounting curtains closer to the ceiling, you can achieve better light control and privacy. Ceiling tracks enable the curtains to cover the entire window area, blocking out more light and providing greater privacy.
Applications of Ceiling Mount Curtain Tracks
Ceiling mount curtain tracks are suitable for a wide range of applications, both in residential and commercial settings. Here are some common uses:
1. Living Rooms and Bedrooms
In living rooms and bedrooms, ceiling mount curtain tracks create a streamlined and elegant look. They are ideal for hanging floor-to-ceiling curtains that add a touch of luxury and sophistication to the space.
2. Home Theaters
Ceiling mount tracks are perfect for home theaters, where blackout curtains are often used to block out light and enhance the viewing experience. The tracks allow for easy operation of heavy blackout curtains.
3. Offices and Workspaces
In office settings, ceiling mount curtain tracks can be used to create flexible partitions or to cover large windows. They offer a professional and clean look, suitable for modern office interiors.
4. Hospitals and Clinics
Ceiling mount curtain tracks are commonly used in hospitals and clinics to create privacy partitions around patient beds. Their smooth operation and ease of cleaning make them ideal for healthcare environments.
5. Hotels and Hospitality
In hotels, ceiling mount curtain tracks are used to create luxurious window treatments and room dividers. They offer a high-end look and feel, enhancing the overall guest experience.
Installing a Ceiling Mount Curtain Track
Installing a ceiling mount curtain track may seem daunting, but with the right tools and instructions, it can be a straightforward process. Here are the steps to follow:
Step 1: Measure and Plan
Before you start, measure the area where you want to install the curtain track. Determine the length of the track and the height at which it will be mounted. Consider the type of curtains you will be using and ensure the track can support their weight.
Step 2: Gather Materials
You will need the following materials:
Ceiling mount curtain track kit (includes track, brackets, gliders, and end caps)
Drill
Screws and anchors
Measuring tape
Pencil
Level
Ladder
Step 3: Mark the Mounting Points
Using a measuring tape and pencil, mark the points on the ceiling where the brackets will be mounted. Ensure that the marks are evenly spaced and level. Use a level to double-check that the marks are aligned correctly.
Step 4: Drill Holes and Install Anchors
Drill holes at the marked points and insert the appropriate anchors. This step is crucial, especially if you are mounting the track into drywall or plaster, to ensure a secure installation.
Step 5: Attach the Brackets
Attach the brackets to the ceiling using screws. Make sure you securely fasten and align the brackets with the marked points.
Step 6: Install the Curtain Track
Attach the curtain track to the brackets. Depending on the type of track, this may involve snapping the track into place or securing it with additional screws. Ensure the track is firmly attached and level.
Step 7: Hang the Curtains
Slide the gliders onto the track and attach the curtains. Make sure the curtains move smoothly along the track. If necessary, adjust the track or brackets to ensure proper operation.
Maintaining Your Ceiling Mount Curtain Track
Proper maintenance of your ceiling mount curtain track will ensure its longevity and smooth operation. Here are some maintenance tips:
1. Regular Cleaning
Dust and debris can accumulate on the track and affect the smooth movement of the curtains. Clean the track regularly using a soft cloth or a vacuum with a brush attachment. For stubborn dirt, use a mild detergent solution and a damp cloth.
2. Lubrication
To keep the gliders moving smoothly, apply a silicone-based lubricant to the track occasionally. Avoid using oil-based lubricants, as they can attract dust and cause buildup.
3. Inspect for Wear and Tear
Periodically inspect the track, brackets, and gliders for signs of wear and tear. Tighten any loose screws and replace any damaged components to ensure the track remains secure and functional.
4. Adjustments
If you notice the curtains are not moving smoothly or the track has become misaligned, make the necessary adjustments. This may involve tightening the brackets or realigning the track.
A ceiling mount curtain track is a versatile and stylish solution for hanging curtains in both residential and commercial settings. It offers numerous benefits, including a clean and modern aesthetic, space maximization, and improved functionality. Whether you’re looking to enhance your living room, create flexible office partitions, or add a touch of luxury to a hotel room, a ceiling mount curtain track is an excellent choice. By following the installation and maintenance tips provided in this guide, you can enjoy the many advantages of ceiling mount curtain tracks for years to come.
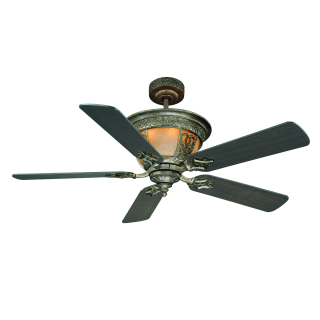
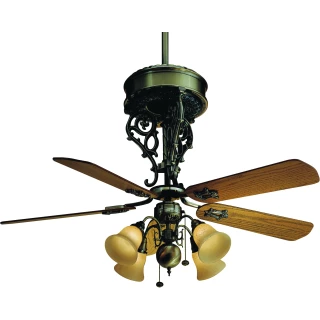
The New Orleans Ceiling Fan is not just a cooling device but a statement piece that combines elegance, functionality, and the spirit of New Orleans’ rich heritage. Whether you’re looking to enhance your home’s decor or seeking an efficient way to cool your space, the New Orleans Ceiling Fan offers a blend of style and performance that is hard to beat. In this comprehensive guide, we’ll explore everything you need to know about the New Orleans Ceiling Fan, from its features and benefits to installation and maintenance tips.
Why Choose a New Orleans Ceiling Fan?
The New Orleans Ceiling Fan stands out for several reasons. Its design captures the essence of New Orleans’ charm, while its functionality ensures you get the best in air circulation and energy efficiency. Here are some compelling reasons to consider a New Orleans Ceiling Fan for your home:
Timeless Design
Inspired by the architectural beauty and cultural richness of New Orleans, these ceiling fans feature intricate designs and finishes that add a touch of sophistication to any room. Whether you prefer a vintage look or a modern twist, there’s a New Orleans Ceiling Fan to match your style.
Superior Air Circulation
Designed with advanced aerodynamics, New Orleans Ceiling Fans provide optimal air movement, ensuring your space stays cool and comfortable. The fan blades are engineered to maximize airflow while minimizing noise, making them perfect for both living areas and bedrooms.
Energy Efficiency
In today’s eco-conscious world, energy efficiency is a top priority. New Orleans Ceiling Fans are built with high-efficiency motors that consume less power, helping you reduce your energy bills while enjoying superior performance.
Versatility
These fans are suitable for various settings, including homes, offices, and commercial spaces. With multiple size options and customizable features, you can find the perfect New Orleans Ceiling Fan to meet your specific needs.
Features of the New Orleans Ceiling Fan
The New Orleans Ceiling Fan comes with a host of features that enhance its functionality and aesthetic appeal. Here are some key features to look out for:
Multiple Speed Settings
Enjoy customizable comfort with multiple speed settings. Whether you need a gentle breeze or a powerful airflow, the New Orleans Ceiling Fan can be adjusted to your preferred level of comfort.
Reversible Motor
Many models come with a reversible motor, allowing you to change the direction of the fan blades. This feature is particularly useful for circulating warm air during the winter months, making the fan a year-round asset.
Integrated Lighting
Some New Orleans Ceiling Fans include integrated lighting options, combining the benefits of a ceiling fan with those of a stylish light fixture. These models often come with dimmable settings and energy-efficient LED lights.
Remote Control
For added convenience, many New Orleans Ceiling Fans come with a remote control, allowing you to adjust the fan speed, direction, and lighting without leaving your seat.
Installing Your New Orleans Ceiling Fan
Proper installation is crucial to ensure your ceiling fan operates safely and efficiently. Here’s a step-by-step guide to help you install your New Orleans Ceiling Fan:
Step 1: Gather Your Tools
Before you begin, make sure you have all the necessary tools:
Screwdrivers (Phillips and flathead)
Pliers
Wire strippers
Electrical tape
Ladder
Mounting hardware (usually included with the fan)
Step 2: Turn Off the Power
Ensure the power is turned off at the circuit breaker to avoid electrical shock. Double-check with a voltage tester to confirm that the wires are not live.
Step 3: Assemble the Fan
Follow the instructions in the manual to assemble the fan. This usually involves attaching the blades to the motor housing and connecting any light fixtures.
Step 4: Install the Mounting Bracket
Secure the mounting bracket to the ceiling box using screws and washers. Make sure it is firmly attached and can support the weight of the fan.
Step 5: Wire the Fan
Connect the fan’s wires to the ceiling wires. Typically, you’ll match the colors (black to black, white to white, and green/bare to ground). Use wire nuts and electrical tape to secure the connections.
Step 6: Attach the Fan Motor
Attach the fan motor to the mounting bracket. Ensure it is securely fastened and that all screws are tightened.
Step 7: Test the Fan
Once everything is connected, turn the power back on and test the fan to ensure it is working correctly. Check all speed settings, the direction of the blades, and any integrated lighting.
Maintenance Tips for Your New Orleans Ceiling Fan
To keep your New Orleans Ceiling Fan in optimal condition, regular maintenance is essential. Here are some tips to help you maintain your fan:
Regular Cleaning
Dust and dirt can accumulate on the fan blades and motor, affecting performance. Clean the blades regularly with a damp cloth and use a vacuum cleaner to remove dust from the motor housing.
Tighten Screws
Over time, screws can become loose due to the fan’s operation. Periodically check and tighten all screws to ensure the fan remains secure.
Check Electrical Connections
Inspect the electrical connections periodically to ensure they remain secure and free of corrosion. If you notice any issues, turn off the power and make the necessary repairs.
Lubricate the Motor
Some fans may require periodic lubrication of the motor bearings. Refer to the manual for specific instructions on how to lubricate your fan.
Enhancing Your Space with a New Orleans Ceiling Fan
A New Orleans Ceiling Fan is more than just a functional appliance; it’s a piece of decor that can enhance the ambiance of any room. Here are some ways to make the most of your ceiling fan:
Match the Decor
Choose a fan that complements your room’s decor. Whether you have a modern, vintage, or eclectic style, there’s a New Orleans Ceiling Fan to suit your taste. Consider the finish, blade style, and lighting options to ensure a cohesive look.
Optimize Placement
Place the fan in the center of the room for optimal air circulation. In larger spaces, consider multiple fans to ensure even airflow.
Use Complementary Lighting
If your fan includes integrated lighting, use it to enhance the room’s ambiance. Choose warm or cool light bulbs based on the mood you want to create.
Seasonal Adjustments
Make the most of the reversible motor feature by adjusting the fan direction based on the season. In summer, run the fan counterclockwise to create a cooling breeze. In winter, run it clockwise to circulate warm air.
The New Orleans Ceiling Fans is a perfect blend of style, functionality, and efficiency. Whether you’re looking to enhance your home’s decor, improve air circulation, or save on energy costs, this ceiling fan offers a versatile solution that meets all your needs. By following the installation and maintenance tips outlined in this guide, you can ensure your New Orleans Ceiling Fans provides years of reliable service and enhances the comfort and beauty of your space.
Selecting a chandelier that complements a 9 ft ceiling involves understanding scale, design, and functionality. This guide explores key considerations to help you find the ideal chandelier for your space, balancing style with practicality.
Understanding Chandeliers for 9 Ft Ceiling Heights
Chandeliers designed for 9 ft ceilings are tailored to fit lower spaces while still adding elegance and illumination. These fixtures come in various styles, sizes, and materials, catering to different aesthetic preferences and room sizes.
Factors to Consider When Choosing a Chandelier for 9 Ft Ceilings
Choosing the right chandelier involves several important factors:
Size and Proportion: Opt for a fixture that complements the room size without overwhelming it.
Ceiling Clearance: Ensure the chandelier hangs at an appropriate height to avoid feeling cramped.
Lighting Needs: Consider the brightness and type of lighting required for the space.
Style and Design: Match the chandelier’s design to the room’s decor and ambiance.
Types of Chandeliers Suitable for 9 Ft Ceilings
Explore different chandelier styles that work well with lower ceilings:
Mini Chandeliers: Compact designs that add sparkle without dominating the space.
Linear Chandeliers: Sleek designs that span horizontally, fitting well in dining or kitchen areas.
Sputnik Chandeliers: Modern, space-age designs that provide ample light and style.
Installation Tips for Chandeliers in 9 Ft Ceiling Rooms
Installing a chandelier requires attention to detail for safety and aesthetics:
Measurement: Determine the ideal height for hanging the chandelier to maintain balance.
Electricity and Support: Ensure proper wiring and ceiling support to handle the fixture’s weight.
Professional Assistance: Consider hiring a professional for installation to ensure correct placement and safety compliance.
Maintaining Your Chandelier
Keep your chandelier looking its best with these maintenance tips:
Regular Cleaning: Dust and clean the fixture and crystals regularly to maintain sparkle.
Inspect for Damage: Check for loose parts or signs of wear that may affect performance.
Bulb Replacement: Replace bulbs promptly to ensure consistent lighting.
Cost Considerations and Budgeting
Chandelier costs vary based on size, materials, and design intricacy. Factor in installation costs and long-term maintenance when budgeting for your chandelier purchase.
Choosing a chandelier for a 9 ft ceiling involves balancing aesthetics with practical considerations. By understanding size proportions, design styles, and installation requirements, you can enhance your space with a chandelier that adds both beauty and functionality.
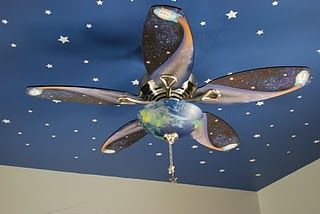
Ceiling fans have long been a staple in home cooling and air circulation, but modern designs have taken this functional fixture to new heights. One of the latest trends that is captivating homeowners is the ceiling fan with stars. This unique design not only cools your space but also adds a magical, starry ambiance to any room. In this comprehensive guide, we will explore everything you need to know about ceiling fans with stars, including their benefits, features, how to choose the right one, and how to integrate them into your home decor.
Why Choose a Ceiling Fan With Stars?
Combining Functionality and Aesthetics
Ceiling fans with stars are a perfect blend of functionality and aesthetics. They provide the essential cooling and air circulation benefits of traditional ceiling fans, while also offering a unique decorative element. The starry design can transform a mundane room into a captivating and enchanting space.
Creating a Magical Atmosphere
The starry effect created by these ceiling fans can mimic a night sky, making any room feel more magical and serene. This is especially beneficial for bedrooms, children’s rooms, and relaxation spaces where a calming environment is desired. The gentle twinkling effect can also serve as a soothing night light.
Versatility in Design
Ceiling fans with stars come in various designs, sizes, and finishes, allowing you to choose one that perfectly matches your decor style. Whether you prefer a modern, sleek look or a more whimsical, playful design, there’s a starry ceiling fan to suit your taste.
Features of Ceiling Fans With Stars
LED Lighting
Most ceiling fans with stars feature integrated LED lights that create the starry effect. LED lights are energy-efficient, long-lasting, and available in various color temperatures. Some models offer adjustable lighting settings, allowing you to change the intensity and color of the stars to match your mood.
Remote Control
Convenience is a key feature of modern ceiling fans, and many starry designs come with remote control options. This allows you to easily adjust the fan speed, lighting, and star effects without having to get up. Some advanced models even offer smart home integration, enabling you to control the fan with your smartphone or voice commands.
Multiple Fan Speeds
To provide optimal comfort, ceiling fans with stars typically offer multiple speed settings. This allows you to adjust the airflow to your preference, whether you need a gentle breeze or a more powerful cooling effect.
Reversible Motor
A reversible motor is a valuable feature that allows you to use your ceiling fan year-round. In the summer, the fan can be set to rotate counterclockwise, creating a cooling breeze. In the winter, reversing the direction to clockwise helps circulate warm air trapped near the ceiling, enhancing your home’s heating efficiency.
Choosing the Right Ceiling Fan With Stars
Room Size and Fan Size
Selecting the right size ceiling fan is crucial for effective cooling and air circulation. The size of the fan should be proportional to the size of the room. Here are some general guidelines:
Small rooms (up to 100 square feet): 36-inch fan
Medium rooms (100-200 square feet): 42-48 inch fan
Large rooms (200-400 square feet): 52-60 inch fan
Extra-large rooms (over 400 square feet): 60-inch or larger fan
Design and Finish
When choosing a ceiling fan with stars, consider the overall design and finish to ensure it complements your decor. Popular finishes include brushed nickel, matte black, white, and wood tones. The blades can also vary in design, from sleek, modern lines to more intricate, decorative shapes.
Star Effect and Lighting Options
Different ceiling fans with stars offer varying levels of starry effects and lighting options. Some fans feature subtle, scattered star patterns, while others create a more dramatic, immersive night sky effect. Consider how prominent you want the star effect to be and choose a fan that meets your preferences.
Energy Efficiency
Energy efficiency is an important consideration, especially if you plan to use the fan frequently. Look for fans with Energy Star certification or high energy-efficiency ratings. LED lighting is also a more energy-efficient option compared to traditional incandescent bulbs.
Installation and Maintenance of Ceiling Fans With Stars
Professional Installation
While some homeowners may be comfortable installing ceiling fans themselves, it’s often best to hire a professional for installation. This ensures the fan is properly secured and wired, reducing the risk of accidents or electrical issues. Professional installation is particularly recommended for fans with complex features or larger models.
Regular Cleaning
To keep your ceiling fan with stars looking and functioning its best, regular cleaning is essential. Dust the blades and light fixtures regularly to prevent dust buildup. For a deeper clean, use a mild detergent and water to wipe down the blades and fixtures. Be sure to turn off the fan and disconnect it from the power source before cleaning.
Maintenance Tips
Check for Loose Screws: Periodically check that all screws and bolts are tight to prevent wobbling or noise.
Lubricate the Motor: If your fan’s motor requires lubrication, follow the manufacturer’s instructions to keep it running smoothly.
Replace Bulbs as Needed: If your fan uses replaceable LED bulbs, make sure to replace them promptly when they burn out to maintain the starry effect.
Integrating Ceiling Fans With Stars Into Your Home Decor
Bedroom Bliss
A ceiling fan with stars is an excellent addition to a bedroom, creating a relaxing and dreamy atmosphere. Choose a fan with adjustable lighting to use the star effect as a night light. Pair the fan with soft, neutral bedding and calming wall colors to enhance the tranquil ambiance.
Enchanting Children’s Rooms
Children will love the magical touch of a ceiling fan with stars in their room. Opt for a playful design with vibrant colors to match the rest of the room’s decor. The gentle starry light can serve as a comforting night light, helping kids feel safe and secure at bedtime.
Elegant Living Rooms
For living rooms, choose a ceiling fan with stars that complements your decor style. A sleek, modern fan with subtle star effects can add a touch of sophistication. Coordinate the fan with other lighting fixtures and decor elements to create a cohesive look.
Serene Outdoor Spaces
If you have a covered outdoor space, such as a patio or gazebo, a ceiling fan with stars can enhance the ambiance. The starry effect can create a cozy, inviting atmosphere for evening gatherings. Make sure to choose a fan rated for outdoor use to withstand the elements.
Benefits of a Ceiling Fan With Stars
Enhanced Comfort
The primary benefit of any ceiling fan is improved comfort through better air circulation. A ceiling fan with stars offers the added bonus of creating a visually pleasing environment, making your space more enjoyable.
Aesthetic Appeal
Ceiling fans with stars are unique decor pieces that can elevate the look of any room. They add a whimsical, magical touch that can make your home feel more inviting and personalized.
Energy Savings
Using a ceiling fan can help reduce your reliance on air conditioning, leading to energy savings. The starry LED lights are also energy-efficient, providing ambient lighting without significantly increasing your electricity bill.
Versatility
Ceiling fans with stars are versatile and can be used in various settings, from bedrooms and living rooms to outdoor spaces. Their unique design makes them a conversation piece and a focal point in any room.
A ceiling fan with stars is more than just a functional fixture; it’s a statement piece that can transform your space. Whether you want to create a magical bedroom retreat, an enchanting children’s room, or a serene outdoor oasis, a ceiling fan with stars offers both practicality and aesthetic appeal. By choosing the right design, size, and features, you can enjoy the benefits of improved air circulation, energy efficiency, and a captivating atmosphere. Embrace the magic of a ceiling fan with stars and elevate your home decor to new heights.
When it comes to lighting up your living spaces, nothing combines functionality and aesthetics quite like the 20 Flush Mount Ceiling Light. Explore the top designs and considerations for integrating these stylish fixtures into your home.
Understanding 20 Flush Mount Ceiling Light Fixtures
20 Flush Mount Ceiling Lights refer to a specific category of lighting fixtures that are installed directly onto the ceiling without any gaps or spaces between the fixture and the ceiling surface. These lights are ideal for rooms with lower ceilings or where a sleek, minimalistic look is desired.
In conclusion, 20 Flush Mount Ceiling Lights are more than just functional lighting fixtures—they are essential elements in interior design that enhance the ambiance and functionality of any room. Whether you prefer a modern look or a classic style, there’s a wide range of options to suit every taste and budget. By understanding the features, installation process, and maintenance tips, you can confidently select and install the perfect 20 Flush Mount Ceiling Light for your home.
Discover the sophistication and functionality of Wind River ceiling fan, perfect for enhancing your living spaces with style and comfort.
Introducing Wind River Ceiling Fan
The Wind River brand stands out in the realm of ceiling fans, known for its blend of aesthetic appeal and efficient performance. A Wind River ceiling fan not only circulates air effectively but also adds a touch of elegance to any room.
Why Choose a Wind River Ceiling Fan?
Wind River ceiling fans offer several compelling reasons for consideration:
Design Excellence: Crafted with attention to detail, these fans boast sleek designs that complement various interior styles.
Energy Efficiency: Many models are ENERGY STAR® certified, ensuring efficient energy use and cost savings.
Quiet Operation: Enjoy the breeze without the noise, thanks to advanced motor technology.
Remote Control Options: Conveniently adjust fan settings from anywhere in the room with included remote controls.
Lighting Integration: Some models feature integrated lighting options for added functionality.
Types of Wind River Ceiling Fans
Explore the diversity of Wind River ceiling fan options to find the perfect match for your space:
Traditional Ceiling Fans: Featuring classic designs with wood finishes and timeless appeal.
Contemporary Styles: Sleek, modern designs that blend seamlessly with minimalist and contemporary interiors.
Outdoor Ceiling Fans: Durable fans designed to withstand outdoor conditions while maintaining performance and style.
Dual Motor Fans: Unique designs with dual motors for increased airflow and visual impact.
Installation and Maintenance Tips
Ensure optimal performance and longevity with these installation and maintenance tips:
Installation Considerations: Follow manufacturer instructions carefully for safe and efficient installation.
Ceiling Height: Choose the appropriate downrod length for optimal airflow based on your ceiling height.
Balance and Stability: Use a balancing kit to ensure your fan operates smoothly and quietly.
Regular Maintenance: Clean fan blades regularly to prevent dust buildup and maintain performance.
Motor Care: Lubricate the motor as recommended to prolong its lifespan and ensure quiet operation.
When it comes to combining functionality and style in your home, Craftsman Ceiling Fans With Lights stand out as an excellent choice. These fans are not only practical for improving air circulation and lighting up a room but also add a touch of elegance and charm with their distinctive design. In this comprehensive guide, we will explore the benefits, features, installation process, and maintenance tips for Craftsman Ceiling Fans With Lights. By the end of this article, you’ll have all the information you need to make an informed decision and enhance your home’s comfort and aesthetic appeal.
Why Choose Craftsman Ceiling Fans With Lights?
Craftsman Ceiling Fans With Lights offer numerous advantages that make them a popular choice among homeowners:
Aesthetic Appeal: The Craftsman style is known for its timeless elegance, characterized by clean lines, rich materials, and a handcrafted look. These fans can complement various interior designs, from traditional to modern.
Functionality: Combining a ceiling fan with a light fixture provides dual functionality, helping to keep your room cool while also providing essential illumination.
Energy Efficiency: Ceiling fans can help reduce energy costs by circulating air efficiently, making your heating and cooling systems more effective. The addition of lights can also reduce the need for extra lighting fixtures.
Durability: Craftsman ceiling fans are typically built with high-quality materials, ensuring longevity and reliable performance.
Variety: Available in various designs, finishes, and sizes, these fans can fit any room and cater to different aesthetic preferences.
Key Features of Craftsman Ceiling Fans With Lights
When choosing a Craftsman Ceiling Fan With Lights, it’s essential to consider the key features that enhance their performance and visual appeal:
Blade Design and Material
Craftsman ceiling fans often feature wooden or wood-like blades that add a rustic charm to the room. The blade design may include intricate patterns or simple, clean lines that reflect the Craftsman style.
Light Fixtures
The integrated light fixtures in these fans usually come with frosted or clear glass shades that diffuse light beautifully. Some models offer dimmable lights, allowing you to adjust the brightness to suit different occasions.
Motor Quality
A high-quality motor ensures smooth, quiet operation and long-lasting performance. Look for fans with energy-efficient motors that provide powerful airflow without consuming too much electricity.
Control Options
Modern Craftsman ceiling fans may come with various control options, including remote controls, wall switches, and smart home integration. These options offer convenience and ease of use.
Finishes
Craftsman fans are available in multiple finishes, such as oil-rubbed bronze, brushed nickel, or antique brass. These finishes enhance the fan’s aesthetic appeal and help it blend seamlessly with your existing decor.
Installation of Craftsman Ceiling Fans With Lights
Proper installation is crucial for the performance and safety of your Craftsman Ceiling Fan With Lights. Here’s a step-by-step guide to help you through the process:
Turn Off Power: Before starting, turn off the power to the room where you will install the fan at the circuit breaker to ensure safety.
Prepare the Ceiling: Remove any existing light fixture or fan. Use a voltage tester to confirm that the power is off. If the ceiling does not have a fan-rated electrical box, install one that can support the fan
Install the Mounting Bracket: Attach the mounting bracket provided with your fan to the electrical box in the ceiling. Make sure it is securely fastened and capable of supporting the weight of the fan.
Assemble the Fan: Follow the manufacturer’s instructions to assemble the fan. This typically includes attaching the blades and the light fixture to the motor housing.
Wire the Fan: Connect the fan’s wiring to the house wiring. Generally, this involves matching the colors of the wires: black to black (fan), blue to blue (light), white to white (neutral), and green or bare wire to the grounding wire. Use wire nuts to secure the connections and wrap them with electrical tape for added safety.
Attach the Fan to the Bracket: Once wired, lift the fan motor and attach it to the mounting bracket. Secure it in place with the screws provided. Double-check that all screws are tight and the fan is securely attached.
Install the Light Kit: If the light kit is separate, connect the light fixture wiring according to the manufacturer’s instructions. Attach the light kit to the fan housing and secure it with the provided screws.
Install Bulbs and Shades: Insert the recommended light bulbs and attach the glass shades or covers to the light fixture.
Turn On Power and Test: Restore power at the circuit breaker and test the fan and lights to ensure everything works correctly. Test different speed settings and light controls to confirm proper operation.
Benefits of Using Craftsman Ceiling Fans With Lights
Energy Efficiency
Ceiling fans help circulate air, making your heating and cooling systems more effective. This can lead to significant energy savings. During the summer, ceiling fans create a wind-chill effect, making you feel cooler without lowering the thermostat. In the winter, you can reverse the fan’s direction to push warm air down from the ceiling, improving heating efficiency.
Improved Aesthetics
Craftsman ceiling fans add a distinctive touch of elegance to any room. Their handcrafted look and quality materials make them a focal point, enhancing the overall décor. Whether you choose a fan with intricate woodwork or a sleek, modern design, these fans can complement a wide range of interior styles.
Enhanced Comfort
By providing both cooling and lighting, Craftsman ceiling fans enhance the comfort and functionality of your living spaces. They can help create a pleasant ambiance while ensuring proper air circulation and illumination.
Durability and Reliability
Craftsman ceiling fans are known for their durable construction and high-quality materials. Investing in a well-made fan means you’ll enjoy reliable performance and longevity, reducing the need for frequent replacements.
Maintenance Tips
Regular maintenance is essential to keep your Craftsman Ceiling Fans With Lights in top condition. Here are some tips to help you maintain your fan:
Regular Cleaning
Dust the fan blades and light fixtures regularly to prevent dust buildup. Use a soft cloth or a duster to clean the blades, and avoid using harsh chemicals that could damage the finish.
Tighten Screws
Periodically check and tighten any screws that may have loosened over time. This includes the mounting bracket, blade screws, and any other hardware.
Check Electrical Connections
Ensure all electrical connections are secure and free from corrosion. If you notice any frayed wires or loose connections, turn off the power and address the issue promptly.
Balance the Blades
If your fan starts to wobble, it may be out of balance. Use a blade balancing kit to adjust the blades and ensure smooth operation. This will also reduce wear on the motor and extend the life of the fan.
Replace Light Bulbs
When a light bulb burns out, replace it with the recommended wattage and type. Using the correct bulbs ensures optimal performance and prevents damage to the light fixture.
Choosing the Right Craftsman Ceiling Fan With Lights
Selecting the perfect Craftsman Ceiling Fan With Lights involves considering several factors:
Room Size
The size of the fan should be proportional to the room size. For smaller rooms, a fan with a blade span of 36 to 44 inches is suitable. For larger rooms, consider a fan with a blade span of 52 inches or more to ensure adequate air circulation.
Ceiling Height
The height of your ceiling will determine the type of mounting you need. For standard ceilings, a flush mount or low-profile fan is ideal. For high or vaulted ceilings, an extended downrod will help position the fan at the optimal height for air circulation.
Style and Finish
Choose a fan that complements your room’s décor. Craftsman fans come in various finishes such as oil-rubbed bronze, brushed nickel, or antique brass. Select a finish that matches your existing hardware and furnishings.
Light Kit Options
Consider the type of lighting you need. Some fans come with integrated LED lights that offer energy efficiency and long lifespan. Others may use traditional bulbs or provide dimmable options for adjustable lighting.
Craftsman Ceiling Fans With Lights are a perfect blend of functionality and style, providing both comfort and aesthetic appeal to any room. By understanding their benefits, key features, and proper installation and maintenance, you can make an informed decision that enhances your home’s ambiance and energy efficiency. Whether you’re looking to upgrade your current ceiling fan or install a new one, Craftsman ceiling fans are an excellent investment that will provide years of reliable performance and timeless beauty.
A ceiling fan can be more than just a functional appliance; it can also elevate the style of your living space. Discover the allure of the Hunter Italian Countryside Ceiling Fan and how it can add charm and comfort to your home.
Introducing: Hunter Italian Countryside Ceiling Fan
The Hunter Italian Countryside Ceiling Fan embodies timeless elegance with its classic design and superior craftsmanship. Ideal for both traditional and modern interiors, this fan blends functionality with aesthetic appeal seamlessly.
Features and Benefits: Hunter Italian Countryside Ceiling Fan
Design Aesthetic: Inspired by the rustic charm of the Italian countryside, this ceiling fan features intricate detailing, premium finishes, and artisan-inspired craftsmanship.
Performance: Equipped with a powerful motor and balanced blades, the Hunter Italian Countryside Ceiling Fans delivers exceptional airflow while operating quietly, ensuring comfort without noise disruption.
Versatility: Available in various sizes and finishes, including aged ivory, cocoa, and bronze patina, allowing you to choose the perfect option that complements your interior decor.
Installation and Setup: Hunter Italian Countryside Ceiling Fan
Installing the Hunter Italian Countryside Ceiling Fans is straightforward with included instructions and mounting hardware. Ensure the fan is securely anchored to the ceiling to prevent wobbling and ensure optimal performance.
Energy Efficiency
With its Energy Star certification, the Hunter Italian Countryside Ceiling Fans is designed to maximize energy savings without compromising on performance. Enjoy reduced utility costs while maintaining a comfortable environment year-round.
Users appreciate the Hunter Italian Countryside Ceiling Fans for its:
Elegant design that enhances any room decor.
Quiet operation and effective air circulation.
Durability and reliability backed by Hunter’s reputation for quality.
Conclusion
The Hunter Italian Countryside Ceiling Fans is not just a cooling solution but a statement piece that enhances the aesthetic appeal and comfort of your home. Whether you’re looking to upgrade your living room, bedroom, or outdoor space, this fan offers both style and functionality in one beautifully crafted package.
Choosing the right ceiling fan can significantly impact both the aesthetic appeal and comfort of your home. An antique white ceiling fan with light combines timeless design with modern functionality, making it a versatile choice for various interior styles. Whether you’re looking to add a touch of vintage charm or complement a traditional decor scheme, this type of ceiling fan offers both illumination and cooling solutions in one elegant package.
Understanding Antique White Ceiling Fan With Light
What Makes an Antique White Ceiling Fan With Light Special?
An antique white ceiling fan with light is distinguished by its classic color and design elements reminiscent of early 20th-century craftsmanship. It typically features intricate detailing on the fan blades and a soft, subdued white finish that blends seamlessly with vintage-inspired or rustic interiors. The integrated light kit provides additional functionality, illuminating your space while circulating air for optimal comfort.
Benefits of Choosing an Antique White Ceiling Fan With Light
Enhanced Decor: Adds a nostalgic charm and visual interest to any room, serving as a focal point or complementing existing decor elements.
Dual Functionality: Combines overhead lighting with efficient air circulation, ideal for bedrooms, living rooms, and dining areas.
Energy Efficiency: Many models come equipped with energy-saving features such as LED bulbs and efficient motors, reducing electricity consumption.
Factors to Consider When Buying
Design and Style Options
Antique white ceiling fans with lights are available in various styles, from ornate Victorian-inspired designs to simpler, more streamlined options suitable for contemporary homes. Consider the overall aesthetic of your room and choose a fan that enhances its ambiance.
Size and Blade Span
The size of the fan and its blade span are crucial factors for effective air circulation. Measure your room’s dimensions and select a fan with an appropriate blade span to ensure sufficient airflow without overpowering the space.
Installation and Maintenance Tips
Installation Guide
Installing an antique white ceiling fan with light requires basic electrical knowledge and tools. Follow the manufacturer’s instructions carefully and ensure the fan is securely mounted to the ceiling joist or support bracket. If unsure, consult a professional electrician for safe installation.
Maintenance Requirements
Regular maintenance prolongs the lifespan and performance of your ceiling fan. Clean the blades, motor housing, and light fixtures periodically to remove dust and debris. Lubricate moving parts as recommended by the manufacturer to prevent noise and ensure smooth operation.
Applications and Uses
Residential Spaces
In homes, antique white ceiling fans with lights are popular choices for bedrooms, living rooms, and even kitchens, blending functionality with decorative appeal. They provide gentle illumination and cooling during hot summer months while complementing various interior styles.
Commercial Settings
Some businesses, particularly those with vintage-themed decor or historical significance, also opt for antique white ceiling fans to create a welcoming atmosphere for customers and employees alike.
Conclusion
An antique white ceiling fan with lights offers a perfect blend of vintage elegance and practical functionality for any home. Whether you prefer a classic Victorian design or a more modern interpretation, this type of ceiling fan enhances both the aesthetic appeal and comfort of your living space. Explore different styles, sizes, and features available to find the ideal choice that suits your decor and cooling needs.
Investing in an antique white ceiling fan with light not only adds character to your home but also provides efficient air circulation and lighting solutions year-round. Make a statement with timeless design and enjoy the benefits of a comfortable and stylish living environment.
In modern interior design, lighting plays a crucial role not only in illuminating spaces but also in enhancing the overall ambiance and style. One popular choice for lighting fixtures, especially in areas with lower ceiling heights or where a sleek, minimalist look is desired, is the 2 light flush mount ceiling lights. These fixtures offer practicality and elegance, making them suitable for various rooms throughout the home.
Understanding 2 Light Flush Mount Ceiling Lights
Before delving into specific recommendations, it’s essential to understand what constitutes a 2 light flush mount ceiling lights. These fixtures typically feature two light sources arranged in a compact design that sits close to the ceiling without any gaps or hanging elements. This flush mount style ensures a seamless integration into the ceiling while providing adequate illumination.
2 light flush mount ceiling lights offer several advantages:
Space-Saving: Ideal for rooms with limited ceiling height where pendant or chandelier lights may not be practical.
Versatility: Suitable for various rooms including bedrooms, kitchens, hallways, and even bathrooms.
Aesthetic Appeal: Available in a wide range of styles from modern and minimalist to traditional and decorative, allowing you to find one that complements your home decor.
The size of the room and the height of the ceiling will influence the size and style of the fixture. For smaller rooms, choosing a compact and understated design can prevent the space from feeling cramped.
Light Output and Bulb Type
Evaluate the amount of light needed in the room and choose fixtures that accommodate the appropriate bulb wattage or type (e.g., LED for energy efficiency).
Style and Design
Match the fixture’s style to the overall decor of the room. Whether you prefer a contemporary chrome finish or a more traditional brushed nickel look, there are options to suit every taste.
Installation Tips
Installing a 2 light flush mount ceiling light is typically straightforward, but it’s essential to follow manufacturer instructions and safety guidelines. If you’re unsure, consider hiring a professional electrician to ensure proper installation.
Popular Choices in 2 Light Flush Mount Ceiling Light
Here are some highly recommended 2 light flush mount ceiling light currently popular among homeowners:
Modern LED Flush Mount: Sleek and energy-efficient, perfect for minimalist interiors.
Traditional Glass Flush Mount: Featuring a classic design with frosted glass shades, ideal for traditional or transitional decor.
Contemporary Drum Style Fixture: Provides a stylish focal point with a fabric or metal drum shade, suitable for modern living spaces.
Maintenance and Care
To keep your 2 light flush mount ceiling light looking its best, dust regularly and clean any glass or metal surfaces as needed. Avoid using harsh chemicals or abrasives that could damage the fixture’s finish.
Conclusion
In conclusion, choosing the right lighting fixtures such as 2 light flush mount ceiling lights can significantly enhance the functionality and aesthetic appeal of your home. Whether you’re upgrading existing lighting or selecting fixtures for a new build, consider the size, style, and practicality to achieve the desired effect.
By following these guidelines and exploring the recommended options, you can find the perfect 2 light flush mount ceiling light to illuminate and beautify your living spaces.
In the realm of interior design, lighting serves as both a practical necessity and a powerful tool for creating ambiance and mood. When it comes to high-ceilinged living rooms, finding the right lighting solutions can be a transformative experience. Let’s explore a variety of High Ceiling Living Room Lighting Ideas to help you elevate your space and make a statement.
Understanding: High Ceiling Living Room Lighting Ideas
High ceilings offer a sense of grandeur and spaciousness, but they also present unique challenges when it comes to lighting. Properly illuminating a high-ceilinged living room requires strategic placement of fixtures and thoughtful consideration of design elements.
One of the most iconic lighting fixtures for high-ceilinged spaces is the statement chandelier. Opt for a chandelier with a bold design and ample size to make a striking focal point in your living room. Whether you prefer a modern crystal chandelier or a classic wrought iron fixture, choose a style that complements your decor aesthetic.
2. Floor-to-Ceiling Lighting:
Embrace the verticality of your space by incorporating floor-to-ceiling lighting elements. Install wall sconces or recessed lighting fixtures along the perimeter of the room to create a wash of ambient light that highlights the height of the ceiling. This technique not only enhances the sense of spaciousness but also adds visual interest to the walls.
3. Layered Lighting Scheme:
Create depth and dimension in your high-ceilinged living room with a layered lighting scheme. Combine overhead fixtures with task lighting, such as floor lamps or table lamps, to provide functional illumination at different levels. Incorporate dimmer switches to adjust the intensity of light according to the time of day and mood.
4. Pendant Lights:
Pendant lights are versatile fixtures that can be used to add style and functionality to your living room. Hang multiple pendant lights at varying heights to create visual interest and draw the eye upward. Choose pendant designs that complement the overall decor scheme and provide adequate task lighting for specific areas, such as seating areas or dining spaces.
5. Natural Light Enhancement:
Take advantage of natural light sources, such as large windows or skylights, to enhance the ambiance of your high-ceilinged living room. Use sheer curtains or blinds to control the amount of incoming light and minimize glare. Consider positioning furniture to maximize natural light exposure and create a bright and airy atmosphere.
Conclusion
High Ceiling Living Room Lighting presents a unique opportunity to showcase your design prowess and create a truly unforgettable space. Whether you opt for a statement chandelier, floor-to-ceiling lighting, or a layered lighting scheme, the key is to balance functionality with aesthetics to achieve a stunning ambiance. By incorporating these High Ceiling Living Room Lighting Ideas into your design repertoire, you can elevate your space to new heights and enjoy a living room that is both practical and visually captivating.
In the realm of interior design, lighting plays a crucial role in setting the ambiance and mood of a space. Among the myriad of lighting options available, Flush Mount Tiffany Ceiling Lights stand out for their timeless elegance and exquisite craftsmanship. Let’s delve into the world of Tiffany style lighting and explore the beauty and versatility of Flush Mount Tiffany Ceiling Light fixtures.
Understanding Flush Mount Tiffany Ceiling Lights
Flush Mount Tiffany Ceiling Lights are characterized by their classic Tiffany glass shades and flush mount design, which allows them to be installed directly onto the ceiling without the use of a chain or rod. These fixtures typically feature intricate stained glass patterns inspired by nature, geometric shapes, or Art Nouveau motifs, adding a touch of sophistication to any room.
The Beauty of Flush Mount Tiffany Ceiling Light
1. Timeless Elegance:
Flush Mount Tiffany Ceiling Lights exude timeless elegance and charm. The combination of stained glass shades and ornate metalwork creates a mesmerizing interplay of light and color, casting a warm and inviting glow throughout the space.
2. Artistic Craftsmanship:
Each Flush Mount Tiffany Ceiling Light is a testament to the skill and craftsmanship of artisans. The meticulous process of hand-cutting, soldering, and assembling the stained glass panels results in a truly unique and artisanal piece that adds character and personality to any room.
One of the key advantages of Flush Mount Tiffany Ceiling Lights is their versatility. Whether you prefer traditional floral motifs, geometric patterns, or abstract designs, there is a Tiffany style fixture to suit every taste and décor aesthetic.
4. Warm and Ambient Lighting:
Tiffany glass has a unique quality of diffusing light, creating a soft and ambient glow that enhances the atmosphere of any room. Whether used in the living room, dining room, bedroom, or hallway, Flush Mount Tiffany Ceiling Lights provide both functional illumination and decorative flair.
Choosing the Right Fixture
Factors to Consider:
When selecting a Flush Mount Tiffany Ceiling Light, consider factors such as the size and height of the room, the existing décor style, and the desired ambiance. Additionally, pay attention to the color palette and design motifs of the Tiffany glass shade to ensure it complements the overall aesthetic of the space.
Installation Tips:
Before installing a Flush Mount Tiffany Ceiling Light, ensure that the ceiling is capable of supporting the weight of the fixture. If necessary, consult a professional electrician for proper installation to ensure safety and functionality.
Incorporating Tiffany Style Lighting into Your Space
Living Room:
Enhance the cozy ambiance of your living room with a Flush Mount Tiffany Ceiling Light featuring warm hues and intricate floral patterns. Pair it with coordinating Tiffany table lamps or floor lamps for a cohesive look.
Dining Room:
Make a statement in your dining room with a bold and vibrant Flush Mount Tiffany Ceiling Light. Choose a fixture with rich jewel tones and geometric designs to create a captivating focal point above the dining table.
Bedroom:
Create a tranquil retreat in your bedroom with a soft and romantic Flush Mount Tiffany Ceiling Lights. Opt for shades in muted pastel tones or delicate floral motifs to promote relaxation and serenity.
Conclusion
Flush Mount Tiffany Ceiling Lights are more than just lighting fixtures; they are works of art that elevate the beauty and ambiance of any space. With their timeless elegance, artistic craftsmanship, and versatile design, these fixtures add a touch of sophistication to homes and commercial settings alike. Whether used as a statement piece or as part of a cohesive lighting scheme, Flush Mount Tiffany Ceiling Lights are sure to leave a lasting impression.