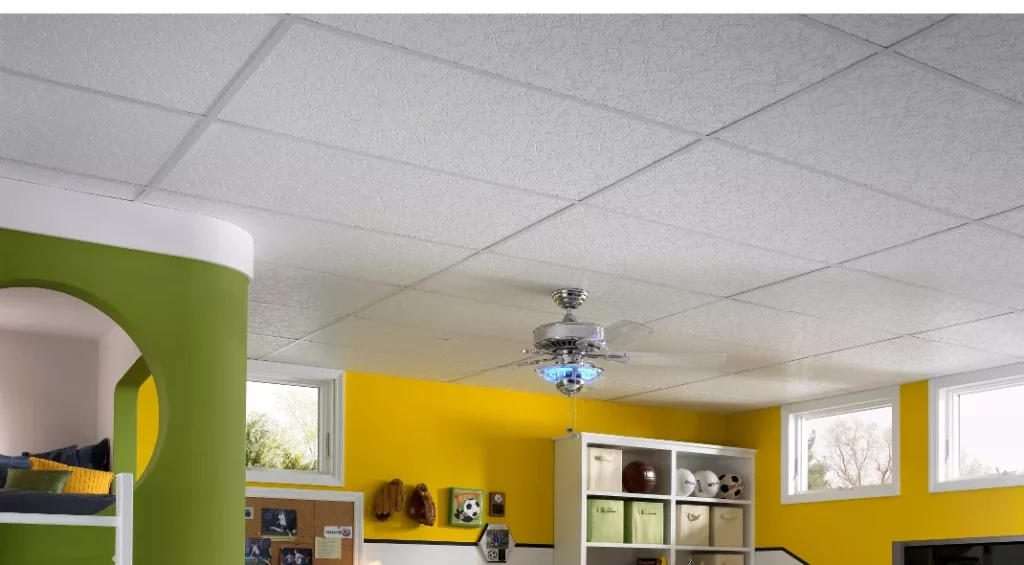
Drop Ceiling Tiles for Basements: A Complete Guide to Installation and Benefits

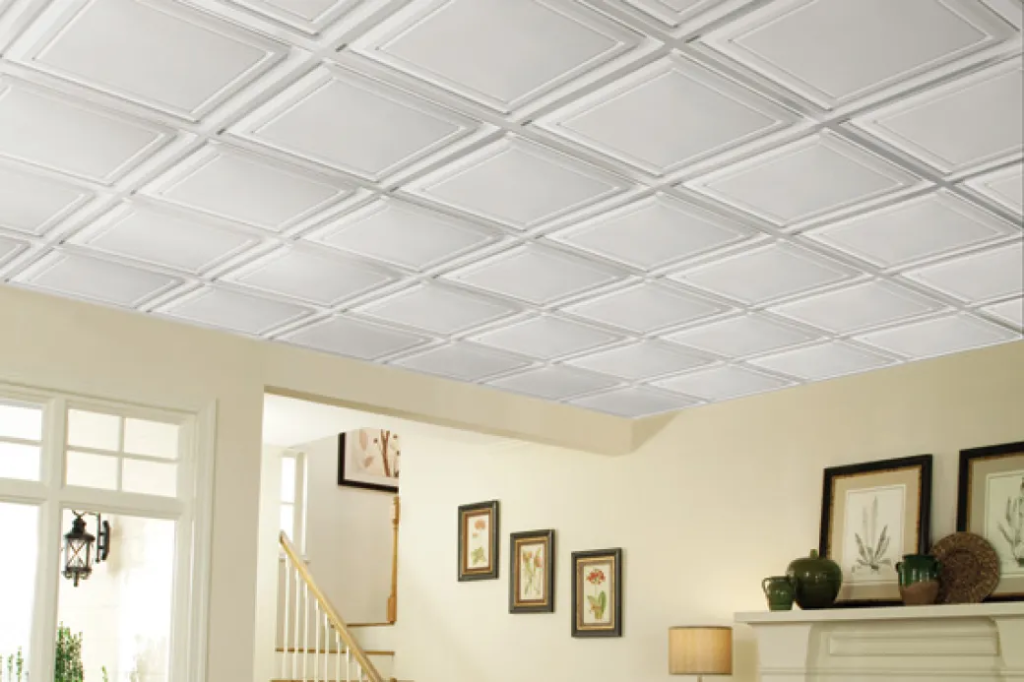
When finishing a basement, one of the most important decisions you’ll make is how to handle the ceiling. Drop ceilings are a popular choice for basement remodels due to their ease of installation, versatility, and accessibility. They are an effective solution for concealing wiring, pipes, and ducts while providing a polished look. But when it comes to drop ceiling tiles for basements, choosing the right material, size, and design can make all the difference.

Drop Ceiling Tiles For Basements

This guide will walk you through the advantages of drop ceiling tiles for basements, how to select the best tiles for your space, and the factors to consider for a successful installation.


Why Choose Drop Ceiling Tiles for Basements?

Basements present unique challenges for ceiling design. Since many basements contain exposed plumbing, ducts, and wiring, a drop ceiling is a practical solution to hide these elements while maintaining accessibility for future repairs. But beyond their functional advantages, drop ceiling tiles for basements also offer several aesthetic and acoustic benefits.

1. Concealing Utilities

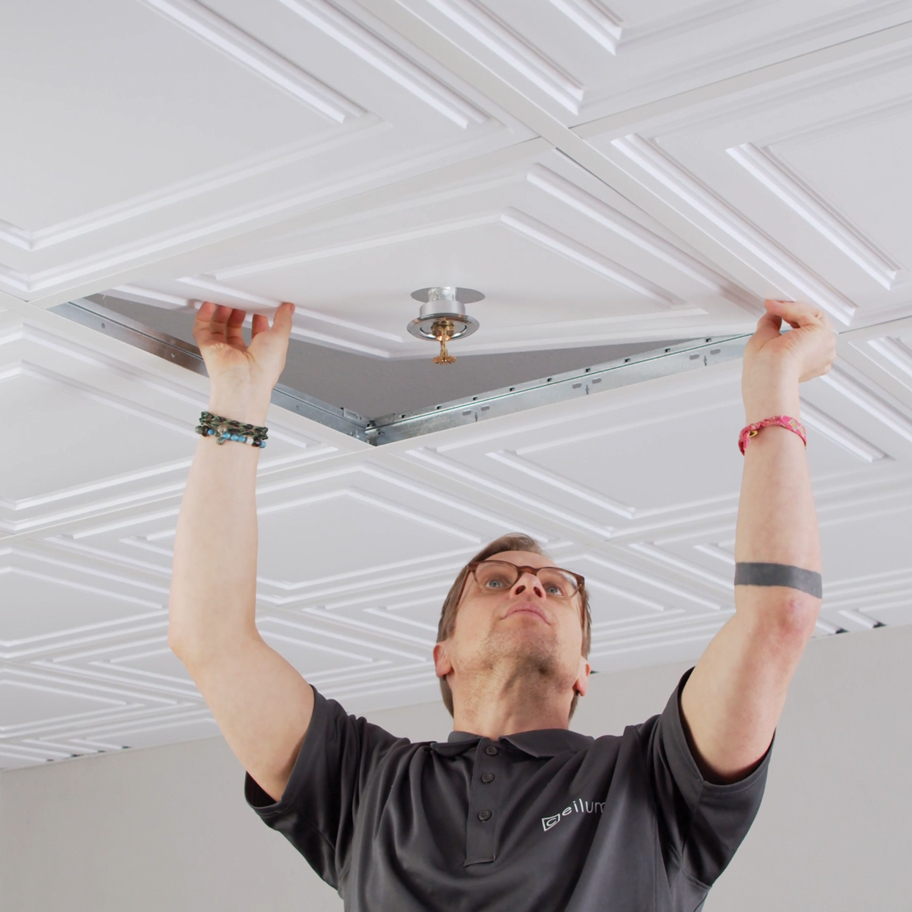
A key reason to install drop ceiling tiles in your basement is to conceal the plumbing, electrical wiring, and HVAC ducts that are often present. With a drop ceiling, these components are hidden behind the tiles, creating a clean and organized look. Additionally, drop ceilings allow for easy access to these systems if repairs are needed, as individual tiles can be removed without disturbing the entire ceiling.

Read too: Kitchen Lighting For A Vaulted Ceiling: Illuminating Your Space with Style and Functionality

2. Moisture Resistance

Basements are often prone to high humidity, which can lead to mold and mildew. Many drop ceiling tiles are designed to resist moisture, making them a good choice for this type of environment. Moisture-resistant tiles help prevent damage and extend the life of your ceiling.

3. Sound Absorption

Basements, especially if used as a home theater, gym, or recreation room, can benefit from the soundproofing properties of drop ceiling tiles. Many tiles are made from materials that absorb sound, reducing echoes and noise transfer between rooms. If you plan to use your basement as a media room, this can significantly enhance your experience.

4. Aesthetic Versatility

Drop ceiling tiles are available in a variety of colors, textures, and finishes, allowing you to choose the perfect look for your basement. Whether you prefer a modern, sleek design or a more traditional appearance, drop ceiling tiles offer flexibility in style. You can select tiles that complement the overall design of your basement, from bright white tiles that reflect light to darker tiles that create a cozier feel.


Factors to Consider When Choosing Drop Ceiling Tiles for Basements

When selecting drop ceiling tiles for your basement, several factors come into play. It’s essential to choose tiles that meet both aesthetic and functional requirements. Here are some of the key considerations:

1. Tile Material

The material of the drop ceiling tiles plays a significant role in their performance. Popular materials include:

  • Mineral Fiber: Mineral fiber tiles are highly absorbent, making them ideal for soundproofing and moisture resistance. They are often used in basements where acoustics and humidity are a concern.
  • PVC (Plastic): PVC tiles are waterproof and resistant to mold and mildew, making them a good choice for wet basements. They are also available in a wide variety of styles and finishes.
  • Fiberglass: Fiberglass tiles are lightweight, moisture-resistant, and durable. They also provide excellent sound absorption and are often used in areas where acoustic performance is a priority.
  • Metal: For a more industrial or modern look, metal tiles are available. They are durable and moisture-resistant, though they may not offer the same acoustic benefits as fiber-based materials.

2. Tile Size

The most common sizes for drop ceiling tiles are 24 x 24 inches (2 x 2 feet) and 24 x 48 inches (2 x 4 feet). Both sizes can be used in basement spaces, but each has distinct advantages:

  • 24 x 24-inch tiles: Smaller tiles create a grid pattern that offers a more detailed, intricate look. They are ideal for smaller rooms or areas where you want a more visually complex ceiling.
  • 24 x 48-inch tiles: Larger tiles create a more modern, streamlined appearance. They are often used in larger basement spaces where fewer tiles are needed, and the larger format can help create a more open feel.

3. Acoustics

If your basement is being converted into a home theater, music studio, or entertainment room, soundproofing is a key consideration. Some drop ceiling tiles are designed specifically to absorb sound, reducing echoes and improving sound quality. Acoustical tiles with high NRC (Noise Reduction Coefficient) ratings are your best option for achieving optimal sound control.

4. Fire Resistance

In basements, where electrical wiring and other hazards may be present, fire-resistant drop ceiling tiles can provide added peace of mind. Many ceiling tiles come with fire-resistant coatings or are made from naturally fire-resistant materials.

5. Aesthetic Preferences

Your aesthetic preferences will play a role in choosing the right tile. Drop ceiling tiles for basements come in various colors, patterns, and textures, allowing you to customize the look of your basement. Choose from traditional white tiles, more contemporary black tiles, or textured finishes that replicate wood, stone, or even metal.


Advantages of Using Drop Ceiling Tiles for Basements

Installing drop ceiling tiles in your basement offers numerous benefits, both functional and aesthetic. Here are some of the key advantages:

1. Easy Access to Utilities

The most significant benefit of drop ceilings is the easy access to plumbing, wiring, and HVAC ducts. In a basement where these utilities are often visible, having a drop ceiling provides the ability to maintain and repair systems without the hassle of removing large sections of drywall.

2. Better Lighting

Because drop ceiling tiles are suspended below the main ceiling, they can also be used to conceal lighting fixtures like recessed lights. This creates a more polished, modern look. Additionally, the reflective surfaces of some tiles can help brighten the basement by bouncing light off the ceiling.

3. Cost-Effective Solution

Compared to traditional drywall ceilings, drop ceilings are generally more affordable to install. The tiles are inexpensive, and the installation process is straightforward, making it a cost-effective solution for basement ceiling needs.

4. Quick Installation

Installing a drop ceiling is often quicker and easier than installing drywall. Since the tiles simply drop into the grid system, it requires less labor and can be completed in less time, especially if the basement’s ceiling is relatively small.

5. Moisture Protection

Basements are notorious for their humidity and moisture problems. Many drop ceiling tiles are specifically designed to resist moisture and mold growth. If moisture does become a problem, tiles can be easily replaced without having to redo the entire ceiling.


How to Install Drop Ceiling Tiles in Your Basement

Once you’ve chosen the best drop ceiling tiles for your basement, the next step is installation. While the process may seem complex, it is relatively simple with the right tools and preparation.

Step 1: Measure the Basement Ceiling

Start by measuring the length and width of the ceiling. This will help you calculate how many tiles you need, as well as the layout of the grid system.

Step 2: Install the Grid System

The grid system is the framework that holds the drop ceiling tiles in place. Use a level to mark a reference line along the perimeter of the room. Once the reference line is set, you can install the main runners and cross tees to create the grid structure.

Step 3: Cut the Tiles

Depending on the size of your basement, you may need to cut the tiles to fit around the edges of the room or around obstacles like light fixtures or vents. Use a utility knife to make straight cuts.

Step 4: Place the Tiles

Once the grid is installed and the tiles are cut to size, simply drop the tiles into the grid. Ensure that they sit securely in place and that all seams align properly.

Step 5: Add Finishing Touches

After installing the tiles, consider adding finishing touches like lighting fixtures, crown molding, or trim to complete the look.


Conclusion

Drop ceiling tiles for basements are a practical, cost-effective, and aesthetically versatile solution for improving your basement’s appearance and functionality. By considering factors like material, tile size, acoustics, and moisture resistance, you can choose the perfect tiles for your space. Whether you’re looking to conceal utilities, improve soundproofing, or simply enhance the design of your basement, drop ceiling tiles are an excellent choice for a finished basement ceiling. With easy installation and maintenance, they offer long-lasting benefits that enhance both the look and function of your basement.

Drop Ceiling Tile Sizes: A Complete Guide to Choosing the Right Fit for Your Space

When planning a ceiling upgrade, drop ceilings, also known as suspended ceilings, are popular for their versatility, cost-effectiveness, and easy installation. A crucial factor in creating a visually appealing and functional drop ceiling is choosing the correct tile size. Drop ceiling tile sizes vary, and selecting the right size can impact the room’s aesthetics, acoustics, and even lighting. This article will walk you through the different drop ceiling tile sizes available, factors to consider when choosing, and the advantages of each size for different types of spaces.

Drop Ceiling Tile Sizes

What are Drop Ceiling Tiles?

Drop ceiling tiles are panels suspended below the actual ceiling using a grid framework. These tiles offer a range of benefits, including easy access to electrical wiring, HVAC systems, and other overhead fixtures, while also allowing for quick tile replacements if damaged. They come in a variety of sizes, patterns, and materials to suit aesthetic preferences and functional needs.

Drop ceilings are often used in commercial spaces, but they are also becoming popular in residential areas like basements, kitchens, and home offices. To create the right look and functionality, it’s essential to choose drop ceiling tile sizes that fit both the space and your practical needs.

Read too: Kitchen Lighting For A Vaulted Ceiling: Illuminating Your Space with Style and Functionality


Drop Ceiling Tile Sizes Overview

The most common drop ceiling tile sizes are:

  1. 24 x 24 inches (2 x 2 feet)
  2. 24 x 48 inches (2 x 4 feet)

These two sizes are widely used because they fit standard grid systems and offer flexibility in design. Other custom sizes are available, but the above dimensions are the most prevalent and easiest to source.

Each of these tile sizes has distinct benefits and is suitable for different spaces. Let’s explore each option in more detail.


Common Drop Ceiling Tile Sizes and Their Applications

Understanding the most popular drop ceiling tile sizes and how they perform in different environments is crucial for a successful installation.

1. 24 x 24 Inch Tiles

Tiles with dimensions of 24 x 24 inches are widely popular because they provide a balanced look in both small and large spaces. This size is ideal for offices, hallways, kitchens, and smaller rooms where a compact and symmetrical appearance is desired.

  • Benefits:
    • Versatility: Due to their smaller size, they can fit in almost any room without overwhelming the space.
    • Easy to Replace: The 24 x 24-inch tiles are generally easier to remove and replace than larger tiles, making maintenance convenient.
    • Improved Sound Absorption: Smaller tiles offer better sound-dampening properties, making them a good choice for offices or study rooms where reducing noise is essential.

2. 24 x 48 Inch Tiles

For larger spaces like auditoriums, conference rooms, and commercial spaces, 24 x 48-inch tiles are a popular choice. Their larger surface area means fewer tiles are needed, resulting in faster installation.

  • Benefits:
    • Enhanced Aesthetic Flow: These tiles create a continuous look and reduce the appearance of gridlines, which can be distracting in larger rooms.
    • Cost-Effective Installation: With fewer tiles to install, the labor cost is often lower, especially in expansive spaces.
    • Good for High Ceilings: In rooms with higher ceilings, 24 x 48-inch tiles provide a seamless look that’s hard to achieve with smaller tiles.

Factors to Consider When Choosing Drop Ceiling Tile Sizes

When choosing the right drop ceiling tile size, it’s important to consider factors such as room dimensions, function, aesthetic preferences, and acoustic needs. Here are some points to keep in mind:

Room Size and Shape

For smaller rooms, smaller tiles (like 24 x 24 inches) often work best, while larger tiles (24 x 48 inches) can be more effective in larger, open spaces. The tile size should complement the room’s layout without overwhelming it.

Aesthetic Preferences

The appearance of your drop ceiling can dramatically impact the feel of a space. Smaller tiles create a more intricate look, while larger tiles give a streamlined, modern feel. Decide whether you want the ceiling tiles to stand out as a design feature or to blend seamlessly with the room’s decor.

Acoustic Needs

If sound control is a priority, like in an office or study room, smaller tiles may offer better sound absorption. Many 24 x 24-inch tiles are made with noise-reducing materials, making them ideal for creating a quieter environment.

Lighting Requirements

Incorporating lighting into drop ceilings is another key factor. Smaller tiles allow for more grid options to place recessed lighting. For larger tiles, ensure that lighting placement aligns with your functional needs.

Maintenance and Accessibility

If you anticipate regular maintenance or access to overhead wiring, smaller tiles may be more convenient for easier removal and replacement. Larger tiles, however, reduce the number of access points, which can simplify the grid structure.


Materials and Styles for Drop Ceiling Tiles

Drop ceiling tiles are available in various materials, each offering different benefits in terms of appearance, sound control, and durability. Here are a few popular options:

Acoustic Tiles

Acoustic ceiling tiles are usually made from fiberglass or mineral fiber, both excellent for sound absorption. They’re ideal in settings where noise control is essential, like offices or classrooms.

Metal Tiles

Metal tiles are durable and give a modern, industrial aesthetic. Often available in both 24 x 24 and 24 x 48-inch sizes, metal tiles are more popular in commercial and industrial spaces due to their sleek look and durability.

Wood-Look Tiles

For a warmer, more natural feel, wood-look tiles are available. These tiles offer a rustic look suitable for cafes, residential basements, or home offices. They may not have the same acoustic properties but can enhance the ambiance.


Drop Ceiling Tile Sizes: Making the Right Choice

When choosing between 24 x 24-inch and 24 x 48-inch tiles, consider both practical and aesthetic factors:

  • For small rooms or spaces with frequent maintenance, 24 x 24-inch tiles are often better.
  • For large rooms where a continuous aesthetic is preferred, 24 x 48-inch tiles offer a more streamlined look.

Ultimately, the tile size should enhance the room’s function, acoustic needs, and design style.


Drop Ceiling Tile Installation Tips

Proper installation ensures that your ceiling is stable and visually appealing. Here are some basic tips for installing drop ceiling tiles:

  1. Measure the Room Accurately: Determine the total area and grid size needed for a precise fit.
  2. Choose the Right Grid System: Ensure the grid you choose is compatible with your tile size.
  3. Install Supports Properly: Use support wires to secure the grid and tiles in place.
  4. Cut Tiles Carefully: For edges or areas around fixtures, use a sharp utility knife for clean cuts.

Following these steps can ensure your drop ceiling looks professional and functions as intended.


Conclusion

Selecting the correct drop ceiling tile size is an essential part of creating a functional, aesthetically pleasing space. By understanding the benefits and applications of 24 x 24-inch and 24 x 48-inch tiles, you can make an informed choice that aligns with your needs. Consider factors like room size, aesthetics, acoustics, and accessibility to determine the best fit for your space.

Whether for a home office, commercial space, or a school classroom, the right drop ceiling tile size can elevate your interior while addressing practical considerations. With a bit of planning, you can achieve a drop ceiling that not only looks great but also enhances the room’s functionality and comfort.

Drop Ceiling Light Fixture: Illuminate Your Space with Style and Efficiency

Lighting is one of the most important aspects of interior design, yet it is often overlooked when people plan or renovate their spaces. A well-lit room not only enhances the aesthetics but also improves functionality, safety, and mood. If you’re working with a drop ceiling, you may find yourself in need of a lighting solution that complements both the space’s design and its function. In this case, a Drop Ceiling Light Fixture could be the perfect addition.

Drop Ceiling Light Fixture

A Drop Ceiling Light Fixture is a light fixture designed to be mounted in the ceiling grid system of a drop ceiling, offering a seamless and aesthetically pleasing lighting solution. This article will explore the various types of drop ceiling light fixtures, the benefits of installing them, and how to choose the right one for your space.


What is a Drop Ceiling?

Before diving into the specifics of Drop Ceiling Light Fixtures, it’s important to understand what a drop ceiling is and why it’s commonly used in various types of spaces.

A drop ceiling, also known as a suspended ceiling, consists of a grid system suspended from the original ceiling, with tiles or panels placed within the grid. This type of ceiling is often used in commercial spaces, basements, and garages, where access to pipes, wires, and HVAC systems is necessary but needs to be concealed for aesthetic reasons. A drop ceiling can create a clean, uniform look while also making it easier to install lighting, ventilation, and other utilities without disrupting the integrity of the original ceiling.

Read too: Discovering the Charm of Nautical Outdoor Ceiling Fans for Your Coastal Retreat: Sail into Style


The Role of Drop Ceiling Light Fixtures

Drop Ceiling Light Fixtures are designed specifically to be installed within the grid of a drop ceiling. These fixtures can range from simple, functional designs to more stylish and decorative options, depending on the style of your space and the lighting effect you’re trying to achieve. Whether you’re lighting an office, a conference room, a basement, or even a garage, a drop ceiling light fixture can provide optimal lighting solutions.

Here are some key benefits of using Drop Ceiling Light Fixtures:

1. Space Efficiency

A drop ceiling allows you to utilize the space below the ceiling grid, which can be particularly useful in rooms with low ceilings. A Drop Ceiling Light Fixture is designed to fit within this limited space while providing the necessary illumination. Unlike traditional ceiling-mounted lights, which require additional clearance or can make the ceiling appear lower, drop ceiling fixtures fit seamlessly into the grid, making the space feel more open.

2. Improved Aesthetics

Drop Ceiling Light Fixtures are available in a wide range of designs, from basic fluorescent lights to sleek and modern LED panels. This variety makes it easy to find a lighting solution that complements the decor of your space. The fixtures are integrated into the ceiling grid, which helps create a clean, uniform look without bulky or obtrusive light fixtures hanging down.

3. Energy Efficiency

Many Drop Ceiling Light Fixtures are designed with energy efficiency in mind. For instance, LED light fixtures are popular options for drop ceilings because they consume less power than traditional lighting while providing a brighter, more consistent light. Installing energy-efficient lighting can help reduce your electricity bills and lower your environmental footprint.

4. Ease of Installation

Installing a Drop Ceiling Light Fixture is relatively straightforward, especially for those who already have a drop ceiling in place. The grid system is designed to accommodate various types of fixtures, including lights, which makes it simple to add or replace lights as needed. This flexibility is particularly beneficial for spaces that require frequent updates or upgrades.


Types of Drop Ceiling Light Fixtures

There are several types of Drop Ceiling Light Fixtures to choose from, each with its own unique advantages. Let’s take a look at some of the most popular options available on the market:

1. Recessed Lighting Panels

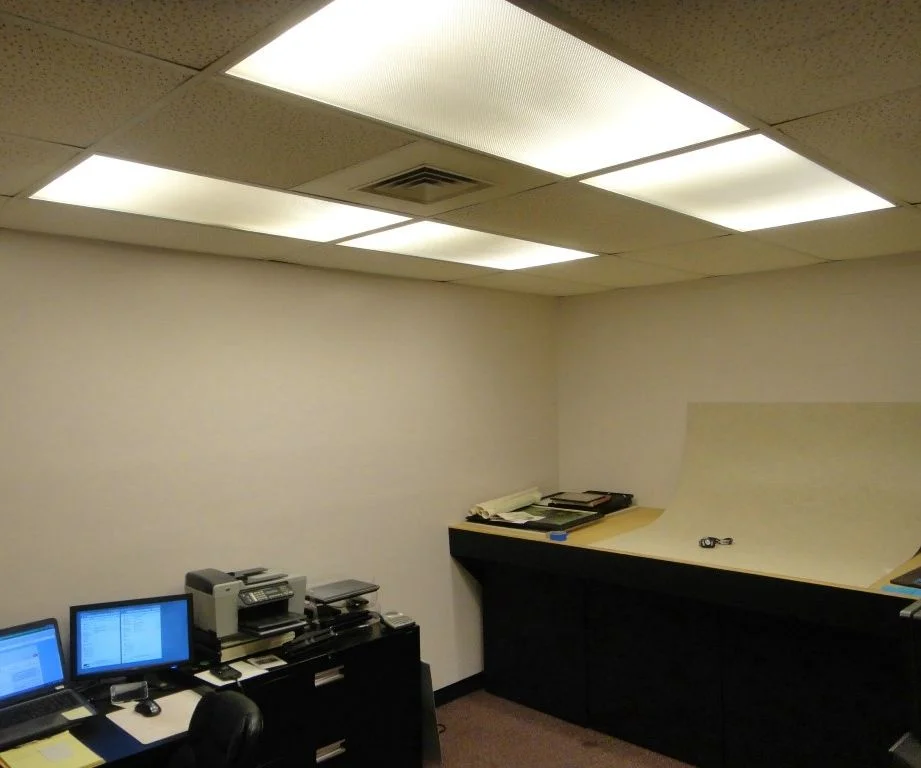
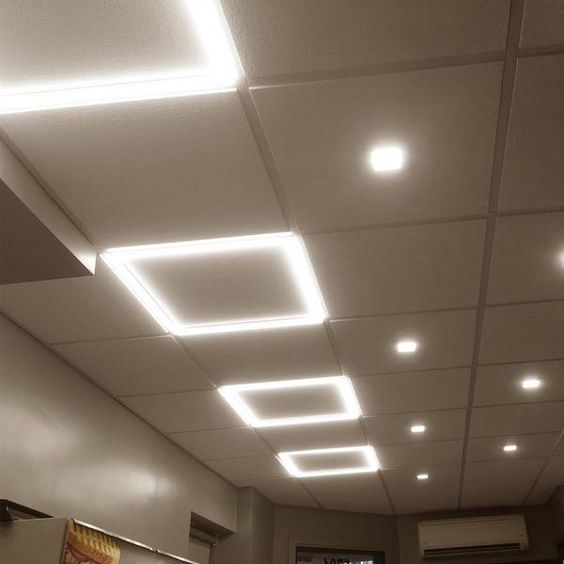
Recessed lighting panels are a popular choice for drop ceiling installations, especially in commercial spaces like offices or conference rooms. These fixtures are embedded directly into the ceiling grid, offering a sleek and modern look. Recessed lighting panels are available in various sizes and can be fitted with LED bulbs for energy efficiency. These lights provide a clean, uniform distribution of light and are perfect for illuminating larger spaces without creating harsh shadows.

2. Fluorescent Light Fixtures

Fluorescent light fixtures are a traditional option for Drop Ceiling Light Fixtures, and they have been widely used in office buildings, warehouses, and other commercial settings. And fluorescent lights are known for their bright and even illumination, making them a practical choice for spaces where visibility is essential. Though they are not as energy-efficient as LED options, they are still widely used because of their cost-effectiveness.

3. LED Troffers

LED troffers are an energy-efficient alternative to fluorescent light fixtures and are commonly used in drop ceiling applications. These fixtures are designed to fit into standard ceiling grids and provide bright, even light. LED troffers last longer than fluorescent lights, making them a more sustainable option. They are also available in various color temperatures, allowing you to choose the right lighting for your space. Whether you prefer a cool white light for a more energetic vibe or a warm white light for a more relaxed atmosphere, LED troffers provide flexibility.

4. Cove Lighting

Cove lighting is a lighting style that uses Drop Ceiling Light Fixtures to direct light upwards, creating a soft, ambient glow around the edges of a room. This type of lighting is often used for decorative purposes and can add a touch of elegance to your space. Cove lighting can be achieved with specialized fixtures or by installing LED strips along the perimeter of the drop ceiling.

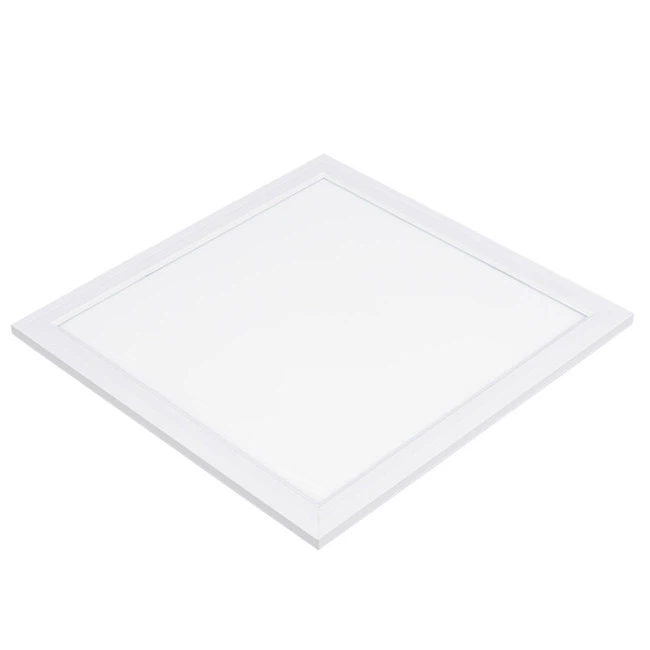
5. Panel Lights

Panel lights are flat light fixtures that offer a contemporary, low-profile look. These are great for spaces where you want a minimalist, modern design. Panel lights can be installed in place of traditional drop ceiling tiles and are available in both LED and fluorescent options. They provide even, glare-free light and are perfect for both residential and commercial spaces.

6. Suspended Light Fixtures

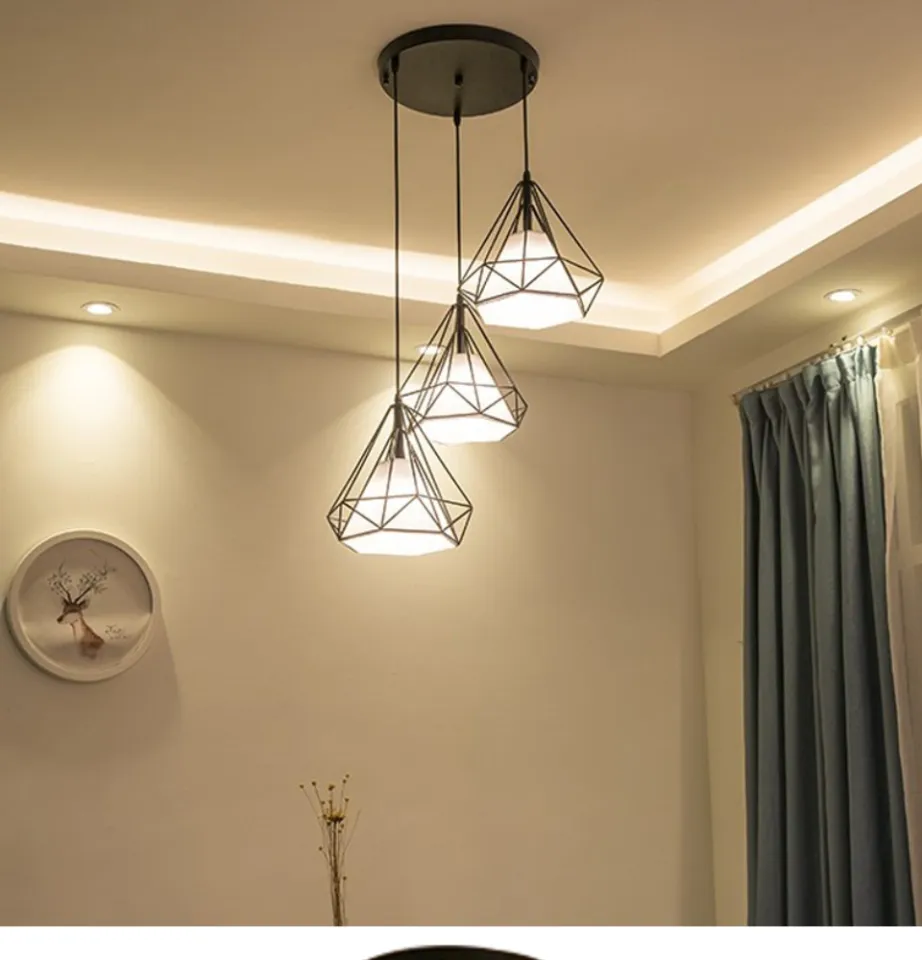
For a more dramatic and stylish effect, suspended Drop Ceiling Light Fixtures can be used. These fixtures hang down slightly below the ceiling grid, providing a modern design element to the room. Suspended fixtures are available in a wide range of styles, from simple pendants to more intricate, chandelier-like designs.


How to Choose the Right Drop Ceiling Light Fixture

Choosing the right Drop Ceiling Light Fixture for your space can be a bit challenging due to the many options available. Here are a few tips to help you make the right decision:

1. Consider the Size of Your Space

The size of the room should influence your choice of light fixtures. For larger spaces, such as offices or warehouses, you may want to opt for fixtures that provide bright, widespread light, such as LED troffers or recessed lighting panels. For smaller spaces, panel lights or fluorescent fixtures may be sufficient.

2. Think About the Desired Lighting Effect

What kind of ambiance do you want to create in the room? If you’re looking for bright, task-oriented lighting, recessed or troffer lights may be the best option. For a softer, more ambient light, cove lighting or suspended fixtures can provide a more relaxing atmosphere.

3. Energy Efficiency

Energy efficiency is an important factor to consider, especially if you’re looking to save on electricity bills. LED light fixtures are the most energy-efficient option, offering long-lasting illumination while consuming less power. If energy efficiency is a priority, opt for LED Drop Ceiling Light Fixtures.

4. Aesthetic Preferences

The aesthetic of your space should also guide your decision. For modern, sleek spaces, recessed lighting or panel lights may be ideal. For a more decorative touch, suspended fixtures or cove lighting may be better suited to your needs.


Conclusion

A Drop Ceiling Light Fixture is an essential component for illuminating and enhancing any room with a drop ceiling. Whether you’re looking to improve the aesthetics, functionality, or energy efficiency of your space, the right light fixture can make all the difference. From recessed lighting panels to LED troffers and suspended fixtures, there are numerous options available to suit various needs and preferences.

When selecting a light fixture, be sure to consider factors such as the size of the room, the type of lighting effect you desire, and your aesthetic preferences. With the right Drop Ceiling Light Fixture, you can create a well-lit, stylish, and efficient space that enhances both form and function.

Drop Ceiling In Garage: A Practical and Stylish Solution for Your Space

Garages are often some of the most overlooked spaces in a home when it comes to design and functionality. However, with the right improvements, a garage can be transformed from a simple storage area into a well-organized, usable, and visually appealing space. One such improvement that can make a significant difference is installing a Drop Ceiling In Garage.

Drop Ceiling In Garage

A drop ceiling, also known as a suspended ceiling, offers both practical and aesthetic benefits, from hiding unsightly pipes and wires to enhancing lighting and improving acoustics. This type of ceiling installation is a popular choice for basements, office spaces, and even garages. In this article, we will explore the advantages of installing a Drop Ceiling In Garage, how to install it, and the various options available for your garage renovation.


What is a Drop Ceiling?

A Drop Ceiling In Garage is a ceiling system that is suspended below the main structural ceiling of a room, usually by metal grids and ceiling tiles. The tiles used for drop ceilings are lightweight and easy to replace, making maintenance relatively simple. Unlike traditional ceiling types, which are directly attached to the ceiling structure, drop ceilings leave a gap between the tiles and the original ceiling, allowing access to electrical wiring, plumbing, and HVAC systems without having to remove the entire ceiling.

These ceilings are particularly useful in spaces like garages where utility lines, pipes, or ducts are visible. A Drop Ceiling In Garage can effectively conceal these components, offering a cleaner, more organized look while still allowing easy access for repairs or adjustments.


Benefits of Installing a Drop Ceiling In Garage

1. Concealment of Utilities

One of the primary reasons homeowners opt for a Drop Ceiling In Garage is the ability to hide exposed pipes, wires, and ducts that may be running across the ceiling. This not only makes the space look more organized and tidy but also eliminates the eyesore of unsightly infrastructure. Whether you have air ducts, electrical wires, or water pipes in your garage, a drop ceiling can easily cover them up without hindering accessibility.

Read too: Discovering the Charm of Nautical Outdoor Ceiling Fans for Your Coastal Retreat: Sail into Style

2. Improved Aesthetics

Garages are often considered utilitarian spaces, but a Drop Ceiling In Garage can dramatically improve the overall aesthetics of the room. The smooth, uniform surface created by the ceiling tiles gives the garage a clean and polished look. By choosing tiles in various colors, textures, and finishes, you can customize the ceiling to match the overall style of your home, making the garage feel like an integrated part of the living space rather than a neglected area.

3. Enhanced Lighting Options

Lighting can make a huge difference in the functionality of a garage. A Drop Ceiling In Garage allows you to install recessed lighting or LED fixtures, which can be more effective and energy-efficient than traditional light fixtures. The ceiling tiles can also be fitted with lighting panels that provide uniform illumination, ensuring that the entire garage is well-lit, whether you’re working on a project, parking your car, or storing items.

Additionally, drop ceilings often help diffuse light, reducing harsh shadows and creating a more evenly distributed light source, which is especially beneficial when working in the garage.

4. Improved Acoustic Performance

Garages can often be noisy environments due to their concrete floors, metal surfaces, and the sounds of car engines or tools in use. Installing a Drop Ceiling In Garage can help dampen noise by absorbing sound, making the space quieter. Ceiling tiles designed for soundproofing are available and can significantly reduce the noise level in your garage, making it a more comfortable place to work or spend time.

5. Easier Maintenance and Access

The space between the drop ceiling tiles and the original ceiling provides a convenient area to house electrical wiring, pipes, or other utilities. This allows for easy access in case of repairs, upgrades, or adjustments. Instead of cutting into the ceiling or tearing out drywall, you can simply lift the tiles to reach what’s behind them. Additionally, individual tiles can be easily replaced if they become damaged or stained, making maintenance a breeze.

6. Energy Efficiency

A drop ceiling can also help improve the energy efficiency of your garage. By installing insulation within the ceiling system, you can help regulate the temperature of the space, keeping it cooler in the summer and warmer in the winter. This can make a noticeable difference in energy bills, particularly if your garage is attached to your home and shares a wall with your living space.


How to Install a Drop Ceiling In Garage

While installing a Drop Ceiling In Garage is a manageable DIY project for those with some basic carpentry or construction experience, it’s important to approach it step by step. Here’s a basic overview of the installation process:

1. Prepare the Space

Before beginning the installation, clear out any items in your garage that may be in the way. Remove any existing light fixtures, ceiling fans, or other accessories. Measure the dimensions of your garage to determine how much material you’ll need.

2. Install the Suspension System

A drop ceiling is typically suspended from a metal grid system. The grid system is mounted to the ceiling using suspension wires or clips. The first step is to mark the position of the grid on the walls and ceiling, ensuring that it’s level. Then, install the suspension wires and hang the grid system according to the manufacturer’s instructions.

3. Cut and Install Ceiling Tiles

Once the grid system is in place, cut the ceiling tiles to fit the openings in the grid. The tiles should fit snugly within the grid, and any gaps should be minimal. Ceiling tiles come in various materials, such as mineral fiber, fiberglass, and PVC, each offering different aesthetic and performance features.

Install the tiles one by one by placing them into the grid, ensuring they are properly aligned. If you’re installing recessed lighting, make sure to cut out holes in the tiles where the light fixtures will be placed.

4. Install Lighting and Other Accessories

After the tiles are in place, you can install recessed lighting, ventilation fans, or any other fixtures that you want to incorporate into the ceiling system. Ensure that the electrical work is done safely, and consider hiring a licensed electrician if needed.

5. Final Touches

Once the tiles and lights are installed, do a final check to ensure everything is secure and functioning properly. Clean the tiles and remove any dust or debris that may have accumulated during the installation process.


Types of Drop Ceiling Tiles for Your Garage

When selecting ceiling tiles for your Drop Ceiling In Garage, there are several options to consider based on the look, durability, and performance features you want. Here are a few popular types:

1. Mineral Fiber Tiles

These are the most common type of ceiling tiles and offer a good balance of affordability, acoustic performance, and aesthetic appeal. Mineral fiber tiles are typically lightweight and easy to install, and they come in a variety of finishes, from smooth to textured.

2. Fiberglass Tiles

Fiberglass tiles are durable, moisture-resistant, and ideal for garages that may be prone to humidity or temperature fluctuations. They also offer good acoustic properties and come in a variety of designs.

3. PVC Tiles

PVC tiles are known for their durability and resistance to moisture, making them a great choice for garages with high humidity or exposure to the elements. They are also easy to clean and maintain, making them ideal for spaces that may accumulate dust and grime.

4. Acoustic Tiles

If noise reduction is a priority, consider installing acoustic tiles that are specifically designed to absorb sound. These tiles are ideal for reducing noise in a busy garage with tools, machines, and vehicles.


Conclusion

A Drop Ceiling In Garage is a practical and stylish solution for transforming your garage into a more organized and functional space. From concealing unsightly pipes and wires to improving lighting and acoustics, a drop ceiling offers numerous benefits for homeowners looking to upgrade their garage. Whether you’re planning a DIY installation or hiring a professional, a drop ceiling can significantly enhance both the aesthetics and functionality of your garage.

With a variety of tile options and design choices available, you can customize your Drop Ceiling In Garage to suit your needs and preferences, making it an investment that adds value and convenience to your home.

How to Paint Drop Ceiling Tiles Like a Pro? Transform Your Space

Drop ceilings, also known as suspended ceilings, are a common feature in basements, offices, and commercial buildings. While they are practical for hiding plumbing and electrical systems, they can sometimes appear outdated or dull. If you want to give your space a fresh look without a complete renovation, painting drop ceiling tiles is a cost-effective and straightforward solution. In this guide, we will delve into how to paint drop ceiling tiles, covering everything from preparation to the final touches.

How To Paint Drop Ceiling Tiles

Why Paint Drop Ceiling Tiles?

Before diving into the process, it’s essential to understand why painting your drop ceiling tiles can be a beneficial choice. Here are a few compelling reasons:

1. Enhanced Aesthetic Appeal

One of the primary reasons homeowners and business owners choose to paint drop ceiling tiles is to enhance the aesthetic appeal of the room. A fresh coat of paint can completely transform the look of the ceiling, making it more visually appealing and modern.

Read too: Kitchen Lighting For A Vaulted Ceiling: Illuminating Your Space with Style and Functionality

2. Cost-Effectiveness

Replacing drop ceiling tiles can be costly and labor-intensive. Painting is a fraction of the price, allowing you to achieve a new look without breaking the bank.

3. Customization Options

Painting gives you the freedom to customize the color and finish of your ceiling tiles. Whether you want a bright white for a clean look or a bold color to make a statement, the options are endless.

4. Conceal Stains and Damage

Over time, drop ceiling tiles can accumulate stains, water damage, or discoloration. Painting can effectively conceal these imperfections, giving your ceiling a fresh, clean appearance.


How to Prepare for Painting Drop Ceiling Tiles

Step 1: Gather Your Supplies

Before you start, gather all the necessary supplies. Here’s what you’ll need:

  • Paint: Choose a high-quality ceiling paint or a paint designed specifically for drop ceilings.
  • Primer: A good primer will help the paint adhere better, especially if the tiles are porous.
  • Paint Roller: A roller with a long handle is best for reaching high ceilings.
  • Brush: Use a paintbrush for cutting in around edges and corners.
  • Drop Cloths: Protect your furniture and floor by laying down drop cloths.
  • Ladder: Ensure you have a sturdy ladder to reach the ceiling comfortably.
  • Masking Tape: Use this to tape off any areas you don’t want to paint.

Step 2: Prepare the Area

  • Remove Obstructions: Clear any furniture or items from the area below the drop ceiling. If possible, remove any tiles that are stained or damaged and replace them.
  • Cover Surfaces: Use drop cloths to cover the floor and any remaining furniture to protect them from paint splatters.

Step 3: Inspect and Clean the Tiles

Before painting, inspect the tiles for damage. If you notice any mold or mildew, clean the tiles with a mixture of water and mild detergent. For tough stains, you may need to use a specialized cleaner. Once cleaned, allow the tiles to dry completely before proceeding.


How to Paint Drop Ceiling Tiles

Now that you’re prepared, let’s walk through the steps on how to paint drop ceiling tiles effectively.

Step 4: Prime the Tiles

If you are using a primer, it’s essential to apply it first. Here’s how:

  1. Apply Primer: Using a roller, apply the primer evenly across the tiles. For corners and edges, use a brush for better precision.
  2. Drying Time: Allow the primer to dry completely according to the manufacturer’s instructions. This usually takes about an hour, but check the label for specifics.

Step 5: Choose the Right Paint

For painting drop ceiling tiles, select a high-quality paint that is specifically designed for ceilings or a semi-gloss finish. Semi-gloss paints are more durable and easier to clean.

Step 6: Painting Process

  1. Start with Edges: Use a brush to carefully paint the edges of the tiles first. This step ensures that you have clean lines along the perimeter.
  2. Roll the Main Areas: Once the edges are done, use a roller to paint the flat surfaces of the tiles. Work in small sections to maintain a wet edge, preventing roller marks.
  3. Apply Multiple Coats: Depending on the color and finish, you may need to apply multiple coats of paint. Allow the first coat to dry completely before applying the second coat.

Step 7: Final Touches

After the final coat is dry, inspect your work. Touch up any spots that may need additional paint or attention.

Step 8: Clean Up

Once you’re satisfied with the painting, remove any masking tape carefully while the paint is still slightly wet to ensure clean lines.


Maintenance Tips for Painted Drop Ceiling Tiles

Once your drop ceiling tiles are painted, proper maintenance can help keep them looking fresh and new.

1. Regular Cleaning

Dust and dirt can accumulate on your ceiling tiles, so make it a habit to dust them regularly. Use a microfiber cloth or a soft duster to gently wipe the tiles.

2. Avoid Harsh Chemicals

When cleaning, avoid using harsh chemicals that could damage the paint finish. A mixture of mild soap and water is usually sufficient.

3. Check for Damage

Periodically inspect your tiles for any signs of damage, such as cracks or discoloration. Address any issues promptly to maintain the overall appearance.


Conclusion: Revitalize Your Space with Painted Drop Ceiling Tiles

Painting your drop ceiling tiles can significantly enhance the overall look and feel of your space. Not only does it offer a cost-effective solution to outdated ceilings, but it also provides an opportunity for customization and creativity.

By following the steps outlined in this guide on how to paint drop ceiling tiles, you can transform your room into a more inviting and aesthetically pleasing environment. With a little effort and the right tools, you can enjoy a fresh and stylish ceiling that enhances your home or office.

2 X 4 Drop Ceiling LED Light: Illuminate Your Space Efficiently

Lighting plays a crucial role in the design and functionality of any space, whether it’s an office, retail environment, or your own home. One of the most popular lighting solutions for commercial and residential settings is the 2 X 4 Drop Ceiling LED Light. These lights offer energy efficiency, longevity, and flexibility in installation, making them a top choice for various applications. In this comprehensive guide, we’ll delve into everything you need to know about 2 X 4 Drop Ceiling LED Lights—from their benefits and installation to design tips and maintenance.

2 X 4 Drop Ceiling Led Lights

What Are 2 X 4 Drop Ceiling LED Lights?

Overview

2 X 4 Drop Ceiling LED Lights are rectangular LED fixtures designed to fit into drop ceiling grids, which are commonly found in offices, schools, and commercial buildings. The “2 X 4” refers to the size of the light fixture, which measures 2 feet by 4 feet. These lights are an upgrade from traditional fluorescent lights, offering superior energy efficiency, brighter illumination, and a more modern aesthetic.

Key Features

  • Energy Efficiency: LED lights use significantly less energy than traditional fluorescent lights, reducing electricity costs and environmental impact.
  • Long Lifespan: LED lights can last up to 50,000 hours or more, reducing the frequency of replacements and maintenance costs.
  • Uniform Lighting: These fixtures provide even, consistent lighting across a wide area, minimizing shadows and dark spots.
  • Dimmability: Many 2 X 4 Drop Ceiling LED Lights are dimmable, allowing for customizable lighting levels to suit different activities or times of day.

Read too: Kitchen Lighting For A Vaulted Ceiling: Illuminating Your Space with Style and Functionality

Benefits of 2 X 4 Drop Ceiling LED Lights

1. Cost Savings

One of the most compelling reasons to switch to 2 X 4 Drop Ceiling LED Lights is the cost savings. Although the initial investment may be higher than traditional lighting options, the long-term savings on energy bills and reduced maintenance make LEDs a more economical choice. On average, LED lights consume 30-50% less energy than fluorescent lights, which can result in significant savings, especially in large facilities.

2. Improved Light Quality

2 X 4 Drop Ceiling LED Lights provide superior light quality compared to older fluorescent fixtures. They offer a higher color rendering index (CRI), which means colors appear more vibrant and true to life under LED lighting. This is particularly important in settings like retail stores or offices, where the appearance of products or workspaces is crucial.

3. Environmental Benefits

LED lighting is environmentally friendly for several reasons. First, LEDs use less energy, which reduces greenhouse gas emissions from power plants. Second, they contain no hazardous materials like mercury, which is present in fluorescent bulbs. Finally, the long lifespan of LEDs means fewer light bulbs end up in landfills.

4. Design Flexibility

The sleek design of 2 X 4 Drop Ceiling LED Lights makes them a versatile choice for various applications. Whether you’re looking for a clean, modern look in an office or a bright, welcoming atmosphere in a retail space, these lights can be easily integrated into your existing ceiling grid system. Additionally, the availability of different color temperatures (ranging from warm to cool white) allows for customization based on the needs of the space.

5. Enhanced Productivity

Studies have shown that proper lighting can significantly impact productivity and mood. 2 X 4 Drop Ceiling LED Lights provide bright, even illumination that reduces eye strain and fatigue, creating a more comfortable and productive environment. This is particularly beneficial in workplaces, schools, and other settings where concentration and focus are essential.

How to Install 2 X 4 Drop Ceiling LED Lights

Step 1: Gather Your Tools and Materials

Before starting the installation, make sure you have all the necessary tools and materials. You will need:

  • 2 X 4 Drop Ceiling LED Lights
  • A ladder
  • A screwdriver or drill
  • Wire connectors
  • Electrical tape
  • A voltage tester
  • Safety glasses and gloves

Step 2: Turn Off the Power

Safety first! Always turn off the power to the area where you’ll be installing the lights. Use a voltage tester to ensure there’s no electrical current running through the wires before you begin working.

Step 3: Remove the Existing Fixture

If you’re replacing an existing light fixture, carefully remove it by disconnecting the wires and unscrewing the fixture from the ceiling grid. Be sure to support the fixture as you remove it to prevent it from falling.

Step 4: Connect the Wires

Once the old fixture is removed, you’ll need to connect the wires of the new 2 X 4 Drop Ceiling LED Lights to the electrical wires in the ceiling. Typically, this involves connecting the black wire to the black (hot) wire, the white wire to the white (neutral) wire, and the green or bare wire to the ground wire. Use wire connectors to secure the connections and wrap them with electrical tape for added safety.

Step 5: Secure the Fixture

Carefully place the new LED light fixture into the ceiling grid. Align the fixture so that it fits securely within the grid opening. Once in place, secure the fixture using screws or clips as required by the manufacturer.

Step 6: Restore Power and Test

After the fixture is securely installed, restore power to the area and test the light to ensure it’s working properly. If the light doesn’t turn on, double-check your wiring connections and make sure the fixture is properly secured in the ceiling grid.

Design Tips for Using 2 X 4 Drop Ceiling LED Lights

1. Office Spaces

In office settings, 2 X 4 Drop Ceiling LED Lights are ideal for providing bright, even illumination across large work areas. For an optimal work environment, consider using LED lights with a color temperature of around 4000K to 5000K, which provides a cool, daylight-like quality that enhances focus and reduces eye strain.

2. Retail Environments

For retail spaces, lighting plays a crucial role in showcasing products and creating an inviting atmosphere. 2 X 4 Drop Ceiling LED Lights with a higher CRI can make products look more appealing, while a mix of warm and cool color temperatures can be used to create contrast and highlight specific areas.

3. Educational Institutions

Schools and universities can benefit from the energy savings and improved light quality offered by LED lights. Installing 2 X 4 Drop Ceiling LED Lights in classrooms and libraries can create a bright, welcoming environment that promotes learning and concentration.

4. Healthcare Facilities

In healthcare settings, lighting must be both functional and comfortable. 2 X 4 Drop Ceiling LED Lights can be used to create a calm, soothing environment in patient rooms while providing the necessary illumination for medical tasks in operating rooms and labs.

Maintenance Tips for 2 X 4 Drop Ceiling LED Lights

Regular Cleaning

To maintain the efficiency and appearance of your 2 X 4 Drop Ceiling LED Lights, it’s important to clean them regularly. Dust and dirt can accumulate on the surface of the lights, reducing their brightness and lifespan. Use a soft, damp cloth to wipe down the fixtures, and avoid using harsh chemicals that could damage the LEDs.

Periodic Inspections

While 2 X 4 Drop Ceiling LED Lights require less maintenance than traditional lighting, it’s still important to perform periodic inspections. Check for any signs of wear or damage, such as flickering lights or loose connections. Address any issues promptly to prevent further damage and ensure the safety of your lighting system.

Replacement

Even though LED lights have a long lifespan, they will eventually need to be replaced. When it’s time for a replacement, make sure to recycle your old LED lights properly, as they contain components that can be harmful to the environment if not disposed of correctly.

Conclusion

2 X 4 Drop Ceiling LED Light are an excellent choice for anyone looking to upgrade their lighting system with a more energy-efficient, cost-effective, and visually appealing option. Whether you’re outfitting an office, a retail space, or another commercial setting, these lights offer numerous benefits that make them a smart investment. With proper installation, design, and maintenance, you can enjoy the bright, even illumination of LED lights for years to come.

LED for Drop Ceiling: Brighten Your Space Efficiently

Drop ceilings, also known as suspended ceilings, have become a popular choice in both residential and commercial spaces for their versatility and ease of installation. When it comes to illuminating these spaces, choosing the right lighting is crucial. LED lights have emerged as a top choice due to their energy efficiency, longevity, and the quality of light they produce. In this article, we’ll explore everything you need to know about selecting and installing LED for drop ceiling, ensuring that your space is both well-lit and energy-efficient.

Led For Drop Ceiling

Why Choose LED for Drop Ceiling?

LED lights have transformed the lighting industry, offering numerous benefits over traditional lighting options. When considering LED for drop ceiling, it’s important to understand the advantages they bring to the table.

1. Energy Efficiency

One of the primary reasons for choosing LED lights is their unparalleled energy efficiency. LEDs consume significantly less power than traditional incandescent or fluorescent lights, which can result in substantial energy savings, especially in commercial settings where lighting is a major part of the energy expenditure.

2. Longevity

LED lights boast an impressive lifespan, often lasting up to 50,000 hours or more. This means less frequent replacements, reducing maintenance costs and the hassle of constantly changing bulbs in hard-to-reach drop ceilings.

Read too: Kitchen Lighting For A Vaulted Ceiling: Illuminating Your Space with Style and Functionality

3. Quality of Light

LEDs offer superior light quality, providing bright, consistent illumination without the flicker associated with older fluorescent tubes. They also come in a range of color temperatures, allowing you to choose the type of light that best suits your space—whether it’s a warm, inviting glow for a home or a cool, bright light for an office.

4. Eco-Friendly

LED lights are free from harmful chemicals like mercury, which is commonly found in fluorescent bulbs. They are also fully recyclable, making them a more environmentally friendly option.

5. Versatility

LED lights are available in a variety of shapes and sizes, making them a versatile choice for drop ceilings. Whether you need slim panels, troffers, or recessed lights, there’s an LED solution that will fit seamlessly into your ceiling design.

Understanding the Types of LED Lights for Drop Ceilings

When it comes to choosing LED for drop ceiling, you’ll encounter several different types of lights. Each has its own unique features and benefits, making it important to choose the right type for your specific needs.

1. LED Troffers

LED troffers are one of the most common types of lighting used in drop ceilings. These rectangular or square fixtures are designed to fit into the grid of a suspended ceiling and provide widespread, even illumination.

  • Advantages: They are highly efficient and can provide a significant amount of light, making them ideal for offices, schools, and commercial spaces.
  • Disadvantages: The installation process can be complex, often requiring professional assistance.

2. LED Panels

LED panels are slim, lightweight, and easy to install. They offer a modern aesthetic and are often used in residential settings or modern commercial spaces.

  • Advantages: Their sleek design allows for a flush fit within the drop ceiling, and they provide even light distribution.
  • Disadvantages: They can be more expensive than other LED options.

3. LED Recessed Lights

Recessed lights, also known as downlights, are installed directly into the ceiling, providing focused light that can be directed to specific areas.

  • Advantages: They are ideal for task lighting or highlighting specific areas of a room.
  • Disadvantages: They provide less overall illumination compared to troffers or panels and may require more fixtures to light a space effectively.

4. LED Strip Lights

LED strip lights are flexible, allowing them to be installed in a variety of configurations. They are often used for accent lighting or to highlight architectural features.

  • Advantages: They are highly customizable and can be used to create unique lighting effects.
  • Disadvantages: They are not typically used as the primary source of light and are better suited for supplementary lighting.

How to Choose the Right LED for Drop Ceiling

Selecting the right LED for your drop ceiling involves considering several factors, including the size of your space, the amount of light you need, and the desired aesthetic.

1. Determine the Purpose of the Lighting

The first step in choosing LED for drop ceiling is to determine the purpose of the lighting. Are you looking to illuminate a large office space, provide task lighting in a kitchen, or create ambient lighting in a living room? The purpose of the lighting will guide your choice of fixtures and the amount of light you need.

2. Calculate the Lumens Needed

Lumens measure the amount of light emitted by a bulb. To ensure your space is well-lit, calculate the total lumens needed based on the size of your room and the type of activities that will take place there.

  • General Lighting: For general lighting in a living room or bedroom, aim for around 10-20 lumens per square foot.
  • Task Lighting: In areas where tasks like reading or cooking are performed, you’ll need brighter lighting, around 50-70 lumens per square foot.
  • Accent Lighting: Accent lighting can be lower, around 5-10 lumens per square foot, as it is often used to highlight specific areas rather than provide overall illumination.

3. Consider the Color Temperature

LED lights are available in various color temperatures, measured in Kelvins (K). The color temperature you choose will affect the mood and functionality of the space.

  • Warm White (2700K-3000K): Ideal for living rooms, bedrooms, and dining areas where a cozy, inviting atmosphere is desired.
  • Cool White (3500K-4100K): Suitable for kitchens, bathrooms, and offices where a bright, clean light is needed.
  • Daylight (5000K-6500K): Best for spaces that require very bright, natural light, such as garages, workshops, or basements.

4. Check Compatibility with Your Ceiling Grid

Before purchasing LED lights, ensure they are compatible with your ceiling grid. Measure the dimensions of your ceiling tiles and compare them with the size of the LED fixtures you plan to install.

5. Energy Efficiency Ratings

Look for LED lights that have high energy efficiency ratings. Products with ENERGY STAR certification are tested for efficiency and performance, ensuring that you get the most out of your investment.

6. Installation Considerations

Consider whether you’ll be installing the lights yourself or hiring a professional. Some LED fixtures, like recessed lights, may require more complex installation processes that are best handled by an electrician.

How to Install LED for Drop Ceiling

Installing LED lights in a drop ceiling is a straightforward process if you have the right tools and knowledge. Below is a general guide to help you through the installation process.

1. Gather Your Tools and Materials

Before you begin, gather all the necessary tools and materials:

  • LED lights (troffers, panels, or recessed lights)
  • Ladder
  • Measuring tape
  • Screwdriver
  • Wire connectors
  • Wire stripper
  • Voltage tester

2. Turn Off the Power

Safety first! Turn off the power to the area where you’ll be working at the circuit breaker to prevent any electrical accidents.

3. Remove the Existing Tiles

If you’re replacing old lighting fixtures, start by carefully removing the ceiling tiles where the new LED lights will be installed.

4. Install the LED Fixtures

  • Troffers and Panels: Fit the LED fixture into the ceiling grid where the tile was removed. Secure it in place according to the manufacturer’s instructions.
  • Recessed Lights: Cut holes in the ceiling tiles for the recessed lights using a hole saw. Insert the lights into the holes and secure them in place with clips.

5. Connect the Wiring

Using wire connectors, connect the wires from the LED fixture to the corresponding wires in the ceiling. Use a voltage tester to ensure the connections are secure and that there is no power running through the wires before connecting them.

6. Replace the Tiles

Once the fixtures are installed and wired, replace the surrounding ceiling tiles. Ensure everything is aligned and secure.

7. Turn the Power Back On

After the installation is complete, turn the power back on and test the lights to ensure they are functioning properly.

Benefits of LED for Drop Ceiling in Different Settings

1. Commercial Spaces

In commercial spaces like offices and retail stores, LED troffers and panels provide bright, even lighting that enhances productivity and displays products effectively. The energy savings and reduced maintenance costs make LEDs a smart investment for businesses.

2. Residential Spaces

For residential settings, LED panels or recessed lights offer a sleek, modern look. They are perfect for kitchens, living rooms, and bathrooms, providing a clean, bright light that can be customized to suit the ambiance of the room.

3. Industrial Settings

In industrial settings such as warehouses or workshops, LED lights provide the bright, durable lighting needed to perform tasks safely and efficiently. Their long lifespan and energy efficiency are especially beneficial in environments where lights are on for extended periods.

Conclusion

Choosing the right LED for drop ceiling is crucial for creating a well-lit, energy-efficient space. Whether you’re outfitting a commercial office, a cozy living room, or a bustling kitchen, LED lights offer versatility, durability, and exceptional light quality. By considering factors like the purpose of the lighting, the amount of lumens needed, color temperature, and installation requirements, you can ensure that your LED lighting solution meets your needs and enhances the overall look and feel of your space.

2×4 LED Lights for Drop Ceiling: A Comprehensive Guide

In the quest for energy efficiency and modern aesthetics, many homeowners and businesses are turning to LED lighting solutions. Among these, 2×4 LED lights for drop ceilings stand out as a popular choice due to their ability to deliver bright, even illumination while fitting seamlessly into existing ceiling grids. Whether you’re renovating a commercial office space, upgrading your home’s basement, or simply looking to reduce energy costs, 2×4 LED lights offer numerous benefits. This article explores everything you need to know about 2×4 LED lights for drop ceilings, from their advantages and installation process to selecting the right model for your needs.

2X4 Led Lights For Drop Ceiling

What Are 2×4 LED Lights for Drop Ceilings?

2×4 LED lights are flat, rectangular light fixtures specifically designed to fit within the grid of a drop ceiling. They replace traditional fluorescent tube fixtures, offering improved energy efficiency, longer lifespan, and a sleek, modern appearance. These lights measure 2 feet by 4 feet, making them ideal for large areas that require ample illumination, such as offices, classrooms, retail spaces, and even residential basements.

Why Choose 2×4 LED Lights for Drop Ceilings?

Opting for 2×4 LED lights for your drop ceiling comes with several advantages, including:

  • Energy Efficiency: LED lights consume significantly less power compared to traditional fluorescent or incandescent lighting, helping you save on energy bills.
  • Longer Lifespan: LEDs have a longer operational life, often lasting up to 50,000 hours or more, reducing the frequency of replacements.
  • Improved Light Quality: LEDs provide bright, consistent light with better color rendering, which enhances the visual appeal and functionality of any space.
  • Environmental Benefits: LED lights are eco-friendly, containing no harmful substances like mercury, and they generate less heat, contributing to a lower carbon footprint.
  • Modern Aesthetics: With their sleek design and variety of color temperatures, 2×4 LED lights can enhance the overall look and feel of any room.

Read too: Kitchen Lighting For A Vaulted Ceiling: Illuminating Your Space with Style and Functionality

Installing 2×4 LED Lights for Drop Ceilings: A Step-by-Step Guide

Installing 2×4 LED lights in a drop ceiling is a straightforward process, but it’s essential to follow the correct steps to ensure proper installation and optimal performance. Here’s a step-by-step guide:

1. Preparation and Safety Measures

Before starting the installation, gather all necessary tools and materials, including a ladder, screwdriver, wire cutters, and wire connectors. Ensure that the power to the area where you’ll be working is turned off to prevent any electrical hazards.

2. Remove the Existing Fixture

If you’re replacing old fluorescent lights, carefully remove the existing fixtures from the ceiling grid. Disconnect the wiring, and safely dispose of or recycle the old lights according to local regulations.

3. Prepare the Wiring

Inspect the wiring in the ceiling to ensure it is in good condition and compatible with your new LED lights. Most 2×4 LED lights are designed to work with standard 120V or 277V wiring. If you’re not confident in handling electrical work, it’s best to hire a licensed electrician for this step.

4. Install the LED Light Fixture

Place the new 2×4 LED light fixture into the ceiling grid, ensuring it fits securely. Most fixtures are lightweight and easy to handle. Once in place, connect the wiring according to the manufacturer’s instructions. Typically, this involves connecting the black wire to the hot wire, the white wire to the neutral wire, and the green or bare wire to the ground.

5. Secure and Test the Installation

After the wiring is connected, secure the fixture in place with screws or clips as needed. Once the fixture is securely installed, restore power to the area and test the light to ensure it’s working correctly. If the light doesn’t turn on, double-check the wiring connections.

6. Final Adjustments

Finally, adjust the light fixture as necessary to ensure it’s level and evenly positioned within the ceiling grid. If the fixture includes a diffuser or lens, attach it according to the manufacturer’s instructions to complete the installation.

Selecting the Right 2×4 LED Lights for Drop Ceilings

When choosing 2×4 LED lights for your drop ceiling, several factors should be considered to ensure you select the right fixtures for your needs. Here are some key aspects to keep in mind:

1. Brightness and Lumens

The brightness of an LED light is measured in lumens, with higher lumen ratings indicating brighter light output. Consider the size and purpose of the room when selecting the brightness level. For example, a large office or classroom might require lights with 4,000 to 5,000 lumens, while a smaller room could suffice with lower lumen output.

2. Color Temperature

LED lights are available in various color temperatures, typically ranging from warm white (around 3000K) to cool white (up to 5000K or higher). Warm white lights create a cozy atmosphere, making them ideal for residential spaces, while cool white lights are more suitable for work environments where bright, focused light is needed.

3. Dimmability

If you want the flexibility to adjust the brightness of your lighting, choose dimmable 2×4 LED lights. These fixtures can be paired with compatible dimmer switches to create a customizable lighting environment that suits different activities and times of day.

4. Energy Efficiency and Certifications

Look for energy-efficient LED lights with certifications such as ENERGY STAR, which indicate that the product meets strict energy efficiency guidelines. These lights not only reduce energy consumption but also often come with longer warranties, providing better value over time.

5. Design and Aesthetics

Consider the design of the LED fixture, especially if aesthetics are important for your space. Some 2×4 LED lights come with sleek, modern designs, including edge-lit or back-lit panels that provide a more even light distribution. Additionally, consider the type of diffuser or lens used, as this can impact the appearance of the light.

6. Price and Warranty

While price is always a factor, it’s essential to balance cost with quality. Investing in higher-quality LED lights might have a higher upfront cost, but they often offer better performance, durability, and longer warranties, making them a more economical choice in the long run.

Benefits of Upgrading to 2×4 LED Lights for Drop Ceilings

Switching to 2×4 LED lights offers numerous benefits beyond just energy savings. Here’s why upgrading to LED lighting can be a smart move:

1. Reduced Maintenance Costs

LED lights require less maintenance than traditional lighting solutions. Their longer lifespan means fewer replacements, and they’re less prone to issues like flickering or buzzing, which are common with older fluorescent lights.

2. Enhanced Lighting Quality

LED lights provide consistent, high-quality light that can improve visibility and comfort in any space. This is particularly important in work environments where proper lighting can enhance productivity and reduce eye strain.

3. Environmental Impact

LED lights are more environmentally friendly, using less energy and producing less heat. They also contain no hazardous materials, like mercury, found in fluorescent lights, making them safer and easier to dispose of.

4. Increased Property Value

Upgrading to LED lighting can increase the value of your property by modernizing its appearance and improving energy efficiency. This can be an attractive feature for potential buyers or tenants, especially in commercial spaces.

5. Versatility in Applications

2×4 LED lights are versatile and can be used in various settings, from commercial offices and retail spaces to residential basements and garages. Their ability to fit seamlessly into drop ceilings makes them a practical choice for many different applications.

Common Myths About 2×4 LED Lights for Drop Ceilings

Despite their many benefits, there are still some misconceptions about LED lighting that may cause hesitation when considering an upgrade. Let’s debunk some common myths:

1. Myth: LED Lights Are Too Expensive

While the initial cost of LED lights can be higher than traditional lighting, the long-term savings on energy bills and reduced maintenance costs make them more cost-effective over time. Additionally, prices for LED technology have decreased significantly in recent years, making them more accessible.

2. Myth: LEDs Don’t Provide Enough Light

LED lights are available in a wide range of brightness levels, and many models provide as much or even more light than traditional fixtures. By selecting the right lumen output, you can achieve the desired level of brightness for any space.

3. Myth: LED Lights Have Poor Color Quality

Modern LED lights offer excellent color rendering, with many options for color temperature. Whether you prefer warm, soft lighting or bright, cool lighting, LEDs can deliver high-quality light that meets your needs.

4. Myth: LEDs Are Difficult to Install

Installing 2×4 LED lights in a drop ceiling is generally straightforward, especially when replacing existing fixtures. Many LED panels are designed to fit directly into standard ceiling grids, and their lightweight construction makes installation easier.

Conclusion

2×4 LED lights for drop ceilings are an excellent choice for anyone looking to enhance their space with energy-efficient, long-lasting, and aesthetically pleasing lighting. Whether you’re updating an office, classroom, or residential area, these LED fixtures offer numerous benefits, from reduced energy consumption to improved light quality. By understanding the installation process, selecting the right fixtures, and debunking common myths, you can make an informed decision that will brighten your space for years to come.

Drop Ceiling Lighting Fixtures: Illuminate Your Space with Style

When it comes to creating a well-lit and visually appealing environment, Drop Ceiling Lighting Fixtures offer a versatile and effective solution. These fixtures are designed to integrate seamlessly into drop ceilings, providing both functionality and aesthetic appeal. Whether you’re renovating your office, upgrading your home, or designing a new space, understanding the benefits, types, and installation of drop ceiling lighting fixtures will help you make informed decisions. In this guide, we’ll explore everything you need to know about Drop Ceiling Lighting Fixtures.

Drop Ceiling Lighting Fixtures

What Are Drop Ceiling Lighting Fixtures?

Drop Ceiling Lighting Fixtures are lighting solutions specifically designed to be installed within a drop ceiling system. Also known as suspended or grid ceilings, drop ceilings are a type of ceiling that consists of a metal grid suspended from the structural ceiling above. The lighting fixtures are mounted within this grid, offering a clean, streamlined look and often providing diffuse, even illumination.

These fixtures are commonly used in commercial spaces such as offices, retail stores, and schools, but they are also increasingly popular in residential settings. Their design allows for easy integration with ceiling tiles and often features modern aesthetics and advanced lighting technology.

Read too: Bathroom Flooded Through the Ceiling: A Comprehensive Guide

Benefits of Drop Ceiling Lighting Fixtures

1. Easy Installation and Maintenance

One of the primary advantages of Drop Ceiling Lighting Fixtures is their ease of installation. The fixtures are designed to fit seamlessly into the grid system of a drop ceiling, simplifying the process of adding or replacing lighting. Additionally, because the fixtures are easily accessible, maintenance and bulb replacements are straightforward.

2. Uniform Illumination

Drop ceiling lighting fixtures are engineered to provide even and consistent illumination across the space. This uniform lighting reduces shadows and enhances visibility, making it ideal for environments where clarity and brightness are important.

3. Aesthetic Appeal

Modern Drop Ceiling Lighting Fixtures come in a variety of styles and finishes, allowing you to choose fixtures that complement the design of your space. Whether you prefer sleek and minimalist designs or more decorative options, there are fixtures available to match your aesthetic preferences.

4. Energy Efficiency

Many contemporary drop ceiling lighting fixtures are equipped with energy-efficient lighting technologies, such as LED or fluorescent bulbs. These options consume less energy compared to traditional incandescent bulbs, helping to lower your energy bills and reduce your environmental impact.

5. Flexibility in Lighting Design

Drop ceiling lighting fixtures offer flexibility in lighting design. You can choose from a range of fixture types, including troffers, panel lights, and recessed lights, to achieve the desired lighting effect. Additionally, some fixtures come with adjustable features, such as dimming capabilities, to further customize the lighting to your needs.

Types of Drop Ceiling Lighting Fixtures

1. Troffer Lights

Troffer lights are a common type of Drop Ceiling Lighting Fixture that fits into the ceiling grid system. They are rectangular or square fixtures that provide broad, even illumination. Troffers are often used in commercial settings and are available in various sizes and lighting options, including LED and fluorescent.

2. Panel Lights

Panel lights are flat, slim fixtures that offer a sleek and modern appearance. They provide even, diffuse light and are ideal for creating a clean and contemporary look. Panel lights are often used in both commercial and residential spaces and are available in various sizes and configurations.

3. Recessed Lights

Recessed lights, also known as can lights or downlights, are installed within the ceiling grid, creating a flush, unobtrusive look. These fixtures are designed to provide focused lighting and are often used to highlight specific areas or create a more dramatic lighting effect. Recessed lights are versatile and can be used in a variety of settings.

4. Pendant Lights

Pendant lights are a stylish option for drop ceilings, offering both functional lighting and decorative appeal. These fixtures hang down from the ceiling grid and are available in various styles and sizes. Pendant lights are often used in areas where you want to create a focal point or add visual interest.

5. Linear Lights

Linear lights are long, narrow fixtures that provide continuous illumination along a length. They are often used in commercial spaces to provide uniform lighting across long areas, such as hallways or open office spaces. Linear lights can also be used in residential settings to create a modern and streamlined look.

Choosing the Right Drop Ceiling Lighting Fixture

1. Assess Your Lighting Needs

Before selecting Drop Ceiling Lighting Fixtures, consider the lighting needs of your space. Determine the type of lighting required, such as general, task, or accent lighting, and choose fixtures that meet these needs. For example, troffers and panel lights are ideal for general illumination, while recessed and pendant lights are better suited for task or accent lighting.

2. Consider the Size and Layout

The size of your space and the layout of your ceiling grid will influence the type and number of fixtures you need. For larger spaces, you may require multiple fixtures or larger models to provide adequate illumination. Ensure that the fixtures you choose fit well within the grid system and complement the overall design of the room.

3. Choose the Right Lighting Technology

Select lighting technology that aligns with your energy efficiency goals and lighting preferences. LED fixtures are a popular choice due to their energy efficiency and long lifespan. Fluorescent fixtures are also energy-efficient but may require more frequent replacement of bulbs. Consider the color temperature of the lighting as well, as it can affect the ambiance of the space.

4. Aesthetic Considerations

Choose fixtures that match the style and design of your space. Drop ceiling lighting fixtures are available in various styles, finishes, and designs, so you can find options that complement your decor. Whether you prefer a modern, minimalist look or a more decorative style, there are fixtures available to suit your tastes.

5. Installation and Maintenance

Ensure that the fixtures you choose are compatible with your ceiling grid system and can be installed easily. If you’re not comfortable with DIY installation, consider hiring a professional to ensure that the fixtures are installed correctly and safely. Additionally, plan for regular maintenance and cleaning to keep the fixtures in good working condition.

Installation Tips for Drop Ceiling Lighting Fixtures

1. Prepare the Ceiling Grid

Before installing Drop Ceiling Lighting Fixtures, ensure that the ceiling grid is clean and in good condition. Check that the grid is securely mounted and that there are no obstructions or damage that could affect the installation.

2. Follow Manufacturer Instructions

Carefully read and follow the manufacturer’s instructions for installing the fixtures. This includes any specific requirements for mounting, wiring, and securing the fixtures within the grid system.

3. Ensure Proper Wiring

If your fixtures require electrical wiring, ensure that the connections are made correctly and safely. If you’re not experienced with electrical work, it’s best to hire a licensed electrician to handle the wiring and installation.

4. Test the Fixtures

Once installed, test the fixtures to ensure that they are functioning properly. Check the lighting output, adjust any settings or controls, and make sure that the fixtures are securely mounted and level.

5. Perform Regular Maintenance

Regular maintenance is essential for keeping your drop ceiling lighting fixtures in good working condition. Clean the fixtures regularly to remove dust and debris, and inspect them periodically for any signs of wear or damage.

Conclusion

Drop Ceiling Lighting Fixtures offer a practical and stylish solution for illuminating a variety of spaces. Their ease of installation, uniform illumination, and energy efficiency make them a popular choice for both commercial and residential settings. By understanding the different types of fixtures available and considering your specific lighting needs, you can select the perfect fixtures to enhance the functionality and appearance of your space.

Exploring Drop Ceiling Outside Corner Solutions: Enhancing Aesthetics and Functionality

Upgrade the look and feel of your space with innovative solutions for Drop Ceiling Outside Corner. Discover the benefits and options available for adding style and functionality to your drop ceiling corners.

Drop Ceiling Outside Corner

Introduction

Drop ceilings, also known as suspended ceilings, are a popular choice for commercial and residential spaces due to their versatility and ease of installation. However, when it comes to outside corners, traditional solutions may not provide the desired aesthetic or functionality. In this article, we’ll explore innovative solutions for Drop Ceiling Outside Corners and how they can enhance the look and performance of your space.

Understanding Drop Ceiling Outside Corners

Drop ceiling outside corners refer to the areas where two ceiling panels meet at an external angle, such as around the perimeter of a room or at architectural features. These corners play a crucial role in the overall appearance and structural integrity of the ceiling system.

Drop Ceiling Outside Corner Solutions

  1. Prefabricated Corner Molding: Prefabricated corner molding is specifically designed to fit over outside corners, providing a seamless transition between ceiling panels. Available in various materials and finishes, such as vinyl, metal, or wood, prefabricated corner molding offers durability and aesthetic appeal.
  2. Flexible Vinyl Trim: Flexible vinyl trim is a versatile option for creating smooth transitions around outside corners. Its pliable nature allows for easy installation and ensures a snug fit against irregular surfaces. Vinyl trim is available in a range of colors and profiles to complement any design aesthetic.
  3. Corner Caps: Corner caps are designed to cover and protect outside corners while providing a decorative accent. Available in various styles, including sleek modern designs and traditional motifs, corner caps add visual interest to drop ceiling corners and can help conceal imperfections.
  4. Integrated Lighting Solutions: Some drop ceiling outside corner solutions feature integrated lighting options, such as LED strips or recessed fixtures. These lighting elements not only enhance the aesthetics of the space but also provide functional illumination for task or ambient lighting needs.

Benefits of Innovative Drop Ceiling Outside Corner Solutions

  • Enhanced Aesthetics: Innovative outside corner solutions add a polished and professional look to drop ceilings, enhancing the overall aesthetics of the space.
  • Improved Durability: Prefabricated molding, flexible trim, and corner caps provide added protection to outside corners, reducing the risk of damage and wear over time.
  • Ease of Installation: Many innovative outside corner solutions are designed for easy installation, allowing for quick and hassle-free upgrades to drop ceilings.
  • Customization Options: With a wide range of materials, finishes, and profiles available, it’s easy to find outside corner solutions that match your design preferences and project requirements.

Installing Drop Ceiling Outside Corner Solutions

  • Measure Carefully: Take accurate measurements of your outside corners to ensure a precise fit for the chosen solution.
  • Prepare the Surface: Clean and prepare the surface of the outside corners before installation to ensure proper adhesion and a smooth finish.
  • Follow Manufacturer Instructions: Follow the manufacturer’s instructions carefully when installing prefabricated molding, flexible trim, or corner caps to achieve the best results.

Conclusion

Upgrade your drop ceiling with innovative solutions for outside corners to create a more polished, functional, and aesthetically pleasing space. Whether you prefer prefabricated molding, flexible trim, or decorative corner caps, there are plenty of options available to suit your needs and style preferences. Invest in innovative drop ceiling outside corner solutions to enhance the look and performance of your space today.

Read too: Striped Schoolhouse Ceiling Light Fixtures: Unveiling the Timeless Charm

Fluorescent Drop Ceiling Light: Enhancing Ambiance and Efficiency

Fluorescent lighting has long been a staple in indoor illumination, offering a balance of efficiency and functionality. Among the diverse array of lighting options available, fluorescent drop ceiling light stand out for their versatility and aesthetic appeal. This comprehensive guide delves into the features, benefits, and installation considerations of fluorescent drop ceiling lights, providing valuable insights for those looking to enhance their interior lighting setup.

Fluorescent Drop Ceiling Lights

Introduction

Lighting plays a crucial role in shaping the ambiance and functionality of any indoor space. Whether it’s a residential, commercial, or institutional setting, the right lighting solution can transform the atmosphere and improve productivity. Fluorescent drop ceiling lights offer a practical and stylish lighting solution that caters to a wide range of applications, from offices and retail spaces to classrooms and healthcare facilities.

Understanding Fluorescent Drop Ceiling Lights

Fluorescent drop ceiling lights are fixtures designed to be installed into suspended ceiling systems, also known as drop ceilings or false ceilings. These fixtures typically consist of a fluorescent lamp housed within a decorative or utilitarian casing, suspended from the ceiling grid. The design allows for even distribution of light across the space, minimizing glare and shadows.

Benefits of Fluorescent Drop Ceiling Lights

  1. Energy Efficiency: One of the primary advantages of fluorescent drop ceiling lights is their energy efficiency. Compared to traditional incandescent bulbs, fluorescent lamps consume significantly less energy while producing the same amount of light, resulting in lower utility bills and reduced environmental impact.
  2. Uniform Illumination: The design of fluorescent drop ceiling lights ensures uniform illumination throughout the space, eliminating dark spots and creating a visually appealing environment conducive to productivity and comfort.
  3. Longevity: Fluorescent lamps have a longer lifespan compared to incandescent bulbs, reducing the frequency of replacements and maintenance costs. This durability makes fluorescent drop ceiling lights a cost-effective lighting solution in the long run.
  4. Versatility: From sleek and modern designs to traditional and decorative styles, fluorescent drop ceiling lights are available in a variety of options to suit different aesthetic preferences and architectural themes.

Installation Considerations

Proper installation is essential to maximize the performance and longevity of fluorescent drop ceiling lights. It’s crucial to ensure that the fixtures are compatible with the existing ceiling grid and electrical infrastructure. Additionally, attention should be paid to factors such as spacing, placement, and wiring to achieve optimal lighting results.

Read too: Exploring the Efficiency of Radiant Ceiling Heater Electric: A Comprehensive Guide

Conclusion

In conclusion, fluorescent drop ceiling light offer a winning combination of efficiency, functionality, and aesthetics for indoor lighting applications. Whether you’re looking to brighten up your workspace, retail store, or educational facility, these versatile fixtures provide an ideal solution. By investing in fluorescent drop ceiling lights, you can enhance the ambiance, improve energy efficiency, and elevate the overall visual appeal of your space.

Hanging Lights From Drop Ceiling: Creative Ideas

Discover innovative ways to brighten up your space with Hanging Lights From Drop Ceiling. Explore design tips, installation techniques, and creative inspiration for incorporating suspended lighting into your home or commercial environment!

Hanging Lights From Drop Ceiling

Introduction

Hanging lights from a drop ceiling can add a touch of elegance, warmth, and ambiance to any room. Whether you’re looking to illuminate a kitchen island, dining area, or office space, suspended lighting fixtures offer versatility and style. In this guide, we’ll explore creative ideas for hanging lights from drop ceilings, providing you with inspiration and practical tips for transforming your space into a well-lit and inviting environment.

Understanding Hanging Lights From Drop Ceiling

Hanging lights from a drop ceiling involves suspending lighting fixtures from the ceiling grid, creating a striking visual effect and providing ample illumination to the space below. These fixtures come in a variety of styles, shapes, and sizes, allowing for endless design possibilities to suit any aesthetic preference or functional requirement.

Hanging Lights From Drop Ceiling: Design Ideas

  1. Pendant Lights: Pendant lights are versatile fixtures that can be hung individually or in clusters to create a focal point in any room. Choose from a wide range of shapes, materials, and finishes to complement your decor style.
  2. Chandeliers: Chandeliers add a touch of sophistication and glamour to any space, making them ideal for dining rooms, entryways, or living areas. Opt for a statement chandelier with cascading crystals or a sleek, modern design for a contemporary look.
  3. Track Lighting: Track lighting systems allow for adjustable and directional lighting, making them perfect for highlighting artwork, architectural features, or task areas in kitchens and offices.
  4. Linear Suspended Lights: Linear suspended lights provide even illumination across a space, making them suitable for long countertops, conference tables, or office workstations.

Installation Techniques for Hanging Lights From Drop Ceiling

  1. Anchor Points: Identify suitable anchor points in the ceiling grid to support the weight of the lighting fixtures. Use sturdy hooks, cables, or mounting brackets to secure the fixtures in place.
  2. Electrical Wiring: Ensure that the electrical wiring is safely routed through the ceiling grid and connected to a suitable power source. Consult a licensed electrician for professional installation.
  3. Adjustable Heights: Consider installing adjustable suspension systems to customize the height of the lighting fixtures according to your preferences and the specific requirements of the space.
  4. Safety Measures: Follow manufacturer instructions and safety guidelines when installing hanging lights from drop ceilings to prevent accidents or damage to the fixtures and the ceiling grid.

Read too: Striped Schoolhouse Ceiling Light Fixtures: Unveiling the Timeless Charm

Creative Inspiration for Hanging Lights From Drop Ceiling

  1. Industrial Chic: Embrace an industrial aesthetic with exposed bulbs, metal shades, and raw materials for a contemporary look.
  2. Bohemian Vibes: Create a cozy and eclectic atmosphere with Moroccan-inspired lanterns, colorful glass pendants, and woven rattan shades.
  3. Minimalist Elegance: Opt for sleek and streamlined designs in neutral tones for a minimalist aesthetic that complements modern interiors.
  4. Vintage Glamour: Add a touch of vintage charm with ornate brass chandeliers, crystal accents, and frosted glass shades reminiscent of old-world glamour.

Conclusion

Hanging light from a drop ceiling offers a versatile and stylish lighting solution for any space. By exploring design ideas, installation techniques, and creative inspiration, you can enhance the ambiance and functionality of your home or commercial environment with suspended lighting fixtures that illuminate and elevate your surroundings.

Drop Ceiling Lighting 2X2: Exploring the World

Are you looking to brighten up your space with stylish and functional lighting? Dive into the world of drop ceiling lighting 2×2 and discover how this versatile lighting solution can transform any room. From homes to offices, drop ceiling lighting 2×2 offers an array of benefits and design possibilities that can elevate your space to new heights.

Drop Ceiling Lighting 2X2

Understanding Drop Ceiling Lighting 2X2

What is Drop Ceiling Lighting 2X2?

Drop ceiling lighting 2×2 refers to lighting fixtures specifically designed to fit into standard 2×2 ceiling grids commonly found in residential and commercial spaces. These fixtures are typically recessed into the ceiling, providing a seamless and integrated lighting solution.

Types of Drop Ceiling Lighting 2X2

  1. LED Panel Lights: LED panel lights are popular choices for drop ceiling lighting 2×2 due to their energy efficiency, long lifespan, and uniform light distribution. These fixtures offer bright, glare-free illumination, making them ideal for various applications, including offices, classrooms, and healthcare facilities.
  2. Fluorescent Troffer Lights: Fluorescent troffer lights are another common option for drop ceilings lighting 2×2. Available in various lamp configurations, including T8 and T5 fluorescent tubes, these fixtures provide ample illumination and are often used in commercial settings such as retail stores, warehouses, and industrial facilities.
  3. Recessed LED Downlights: Recessed LED downlights offer a sleek and modern lighting solution for drop ceilings. These fixtures are installed flush with the ceiling surface, creating a clean and minimalist look. With adjustable beam angles and color temperatures, recessed LED downlights allow for customizable lighting effects to suit different environments.

Read too: Discovering the Charm of Nautical Outdoor Ceiling Fans for Your Coastal Retreat: Sail into Style

Installation and Design Tips

Installation Methods

  • Surface Mounting: Surface mounting involves attaching the lighting fixture directly to the surface of the drop ceiling grid. This method is straightforward and requires minimal modifications to the ceiling structure.
  • Recessed Installation: Recessed installation involves cutting an opening in the ceiling panel to accommodate the lighting fixture. Recessed fixtures sit flush with the ceiling surface, creating a seamless and integrated look.

Design Considerations

  • Lighting Layout: Plan the layout of your drop ceilings lighting 2×2 to ensure even illumination throughout the space. Consider factors such as the room’s dimensions, function, and desired ambiance when determining the placement of lighting fixtures.
  • Color Temperature: Choose the appropriate color temperature for your lighting fixtures to create the desired atmosphere. Warmer color temperatures (e.g., 2700K-3000K) are ideal for creating a cozy and inviting ambiance, while cooler temperatures (e.g., 4000K-5000K) are suitable for task-oriented spaces.

Conclusion

Elevate your space with the versatility and functionality of drop ceilings lighting 2×2. Whether you’re illuminating a home office, commercial workspace, or retail environment, these lighting fixtures offer a seamless blend of style and performance. With a range of options to choose from and easy installation methods, you can create the perfect lighting solution for any room.

Ceilume Drop Ceiling Tiles for Your Interior Design: Exploring the Versatility

Are you looking to transform the look and feel of your space with an innovative ceiling solution? Ceilume drop ceiling tiles offer a versatile and stylish option for enhancing the aesthetics of any room. In this comprehensive guide, we’ll delve into the world of Ceilume drop ceiling tiles, exploring their features, benefits, and how they can elevate your interior design.

Ceilume Drop Ceiling Tiles

Introducing Ceilume Drop Ceiling Tiles

What are Ceilume Drop Ceiling Tiles?

Ceilume drop ceiling tiles are high-quality, lightweight tiles designed to be suspended from the ceiling grid to create a sleek and polished look. Made from durable materials such as vinyl or PVC, these tiles are known for their versatility, ease of installation, and ability to mimic the appearance of various materials like metal, wood, or plaster.

Benefits of Ceilume Drop Ceiling Tiles

  1. Aesthetic Appeal: Ceilume tiles come in a wide range of styles, patterns, and finishes, allowing you to achieve the desired look for your space. Whether you prefer a classic, modern, or industrial aesthetic, there’s a Ceilume tile to suit your taste.
  2. Durability: Constructed from robust materials, Ceilume drop ceiling tiles are resistant to moisture, mold, mildew, and sagging, ensuring long-lasting performance and durability.
  3. Easy Installation: With their lightweight design and interlocking edges, Ceilume tiles are easy to install, making them suitable for both DIY enthusiasts and professional contractors. They can be quickly and securely fitted into the ceiling grid without the need for specialized tools or equipment.
  4. Acoustic Benefits: Ceilume drop ceiling tiles can help improve the acoustics of a room by absorbing sound and reducing echo, creating a more pleasant and comfortable environment.
  5. Low Maintenance: Once installed, Ceilume tiles require minimal maintenance. They can be easily cleaned with a damp cloth or sponge to remove dust and dirt, helping to keep your space looking fresh and inviting.

Exploring Ceilume Drop Ceiling Tile Options

Styles and Designs

Ceilume offers a diverse selection of drop ceiling tile to suit various design preferences and architectural styles. From traditional to contemporary, you can choose from an array of patterns, textures, and colors to enhance the visual appeal of your space.

Installation Process

To install Ceilume drop ceiling tile, follow a few simple steps:

  1. Prepare the Ceiling Grid: Ensure that the ceiling grid is clean, level, and free from any obstructions.
  2. Measure and Cut Tiles: Measure the dimensions of the ceiling space and cut the tiles to fit using a utility knife or scissors.
  3. Install Edge Trim: Secure edge trim pieces along the perimeter of the ceiling to create a clean and finished look.
  4. Insert Tiles: Place the tiles into the ceiling grid, starting from one corner and working your way across the room.
  5. Secure Tiles: Make sure to securely seat each tile in the grid and align it properly with adjacent tiles.

Maintenance Tips

To keep your Ceilume drop ceiling tile looking their best, follow these maintenance tips:

  • Regularly dust or vacuum the tiles to remove surface dirt and debris.
  • Clean stains or marks promptly with a mild soap solution and water.
  • Avoid using abrasive cleaners or harsh chemicals, as they may damage the surface of the tiles.
  • Inspect the tiles periodically for any signs of damage or wear, and replace any damaged tiles as needed.

Read too: Discovering the Charm of Nautical Outdoor Ceiling Fans for Your Coastal Retreat: Sail into Style

Conclusion

Ceilume drop ceiling tiles offer a stylish, practical, and cost-effective solution for enhancing the look and feel of any interior space. With their wide range of styles, easy installation, and low maintenance requirements, they are an excellent choice for residential, commercial, and industrial applications. Consider incorporating Ceilume drop ceiling tile into your next interior design project to create a visually stunning and functional environment.

Enhance Your Space with Innovative Drop Ceiling Curtain Track Systems

Are you looking to add privacy, enhance acoustics, or divide spaces in your home or office? Explore the possibilities of drop ceiling curtain track systems! In this comprehensive guide, we’ll delve into the world of drop ceiling curtain tracks, from their functionality and versatility to installation tips and design ideas.

Drop Ceiling Curtain Track

Exploring Drop Ceiling Curtain Track Systems

Understanding Drop Ceiling Curtain Tracks

Drop ceiling curtain tracks are innovative systems designed to provide a sleek and functional solution for hanging curtains or draperies from a suspended ceiling. These tracks are typically installed flush with the ceiling grid, allowing curtains to hang seamlessly without obstructing the view or interfering with the ceiling’s aesthetic.

Versatility and Functionality

One of the key advantages of drop ceiling curtain tracks is their versatility. Whether you’re looking to create private spaces in an open-concept office, divide a large room into smaller sections, or add visual interest to a space, these systems offer flexible solutions to meet your needs. Additionally, drop ceiling curtain tracks can be used to control light, improve acoustics, and enhance the overall ambiance of a room.

Read too: Discovering the Charm of Nautical Outdoor Ceiling Fans for Your Coastal Retreat: Sail into Style

Advantages of Drop Ceiling Curtain Tracks

Space Optimization

Drop ceiling curtain tracks are an ideal solution for maximizing space utilization in both residential and commercial settings. By dividing large areas into smaller zones, you can create separate work areas, meeting spaces, or relaxation areas without the need for permanent walls or partitions.

Easy Installation

Unlike traditional curtain rods or tracks that require wall mounting, drop ceiling curtain tracks are installed directly into the ceiling grid, making for a quick and hassle-free installation process. With the right tools and instructions, DIY enthusiasts and professionals alike can easily install these systems in a fraction of the time it takes to install traditional curtain tracks.

Design Ideas for Drop Ceiling Curtain Tracks

Office Privacy Solutions

Create private workspaces or meeting areas in an open-concept office environment using drop ceiling curtain tracks. Opt for opaque or sound-absorbing curtains to enhance privacy and improve acoustics, allowing employees to focus and collaborate more effectively.

Room Dividers

Divide a large room into smaller sections with drop ceiling curtain tracks. This is particularly useful in multifunctional spaces such as living rooms or studio apartments, where you can easily separate sleeping areas from living areas or create temporary guest quarters when needed.

Decorative Accents

Use drop ceiling curtain tracks as decorative accents to add texture, color, and visual interest to a room. Choose curtains with bold patterns, vibrant colors, or luxurious fabrics to make a statement and elevate the overall aesthetic of your space.

Installation Tips

Measure Twice, Cut Once

Before installing drop ceiling curtain tracks, carefully measure the length and width of the space to determine the required track length and placement. Double-check your measurements to ensure accuracy before making any cuts or modifications to the tracks.

Use Proper Tools and Hardware

Ensure that you have the necessary tools and hardware on hand before beginning the installation process. This may involve using a drill, screws, anchors, and a level to ensure installing the tracks securely and evenly.

Conclusion

Drop ceiling curtain tracks offer a versatile, functional, and stylish solution for a variety of design challenges. Whether you’re looking to create private spaces, divide rooms, or add decorative accents, these innovative systems provide endless possibilities for enhancing your space. Explore the options available and transform your home or office with drop ceiling curtain tracks.

Drop Ceiling Return Grille: Enhance Your Space

Drop ceilings are a popular choice for commercial and residential spaces alike, offering a sleek and modern look while also providing practical benefits. One essential component of a drop ceiling system is the return grille, which plays a crucial role in maintaining air circulation and ventilation. In this article, we’ll explore everything you need to know about drop ceiling return grilles, from their functionality to their design options and installation process.

Drop Ceiling Return Grille

Understanding Drop Ceiling Return Grilles

What Is a Drop Ceiling Return Grille?

A drop ceiling return grille, also known as a ceiling air return, is a vent cover installed in the ceiling to allow air to flow back into the HVAC system. Unlike supply vents, which deliver conditioned air into a room, return grilles extract air from the room and return it to the heating or cooling system for reconditioning.

Functionality of Drop Ceiling Return Grilles

  • Air Circulation: Return grilles help maintain proper air circulation in a space by allowing air to flow freely between rooms and the HVAC system.
  • Ventilation: By extracting air from the room, return grilles help remove pollutants, odors, and excess moisture, contributing to better indoor air quality.
  • Temperature Control: Efficient air return systems aid in maintaining consistent temperatures throughout a building, enhancing comfort for occupants.

Types of Drop Ceiling Return Grilles

1. Standard Return Grilles

Standard return grilles feature a simple design with straight louvers or slats for airflow. They are available in various sizes to accommodate different airflow requirements and can be made from materials like aluminum, steel, or plastic.

2. Decorative Return Grilles

For spaces where aesthetics are a priority, decorative return grilles offer a stylish alternative. These grilles come in a wide range of designs, including intricate patterns, geometric shapes, and custom finishes, allowing them to blend seamlessly with the surrounding decor.

3. Filtered Return Grilles

Filtered return grilles feature built-in filters to capture dust, pollen, and other airborne particles before they enter the HVAC system. These grilles help improve indoor air quality and reduce the need for frequent duct cleaning and maintenance.

Installing Drop Ceiling Return Grilles

Installing a drop ceiling return grille is a relatively straightforward process that can be completed with basic tools and equipment. Here’s a general overview of the installation steps:

  1. Measure the Opening: Determine the size of the return grille opening in the drop ceiling.
  2. Choose the Grille: Select a return grille that matches the dimensions of the opening and suits your design preferences.
  3. Cut an Opening: If necessary, use a utility knife or saw to cut a hole in the ceiling tile for the grille.
  4. Attach the Grille: Place the grille over the opening and secure it in place using screws or clips.
  5. Connect to Ductwork: Ensure that the ductwork is properly connected to the back of the grille to facilitate air circulation.

Maintaining Drop Ceiling Return Grilles

To keep your drop ceiling return grilles functioning effectively, regular maintenance is essential. This includes:

  • Cleaning: Remove dust and debris from the grilles regularly to prevent airflow obstruction.
  • Replacing Filters: If your return grilles have built-in filters, replace them according to the manufacturer’s recommendations.
  • Inspecting for Damage: Periodically check the condition of the grilles for any signs of damage or corrosion and replace them if necessary.

Conclusion

Drop ceiling return grilles are indispensable components of HVAC systems, ensuring efficient air circulation and ventilation in commercial and residential spaces. By understanding their functionality, design options, and installation process, you can select the right return grilles to enhance both the aesthetic appeal and functionality of your drop ceiling system.

Read too: Exploring the Efficiency of Radiant Ceiling Heater Electric: A Comprehensive Guide

Exploring the Benefits of 2X2 LED Light Fixture Drop Ceilings: Illuminate Your Space with Style

The 2X2 LED Light Fixture Drop Ceilings is a versatile and efficient lighting solution that offers both functionality and style. In this article, we’ll delve into the features, benefits, and applications of the 2X2 LED Light Fixture Drop Ceiling, exploring how it can transform your space with its superior illumination and sleek design.

2X2 Led Light Fixture Drop Ceiling

Introducing the 2X2 LED Light Fixture Drop Ceiling

The 2X2 LED Light Fixture Drop Ceiling is specifically designed to fit into standard 2X2 drop ceiling grids, making it an ideal choice for commercial spaces, offices, classrooms, and other areas with suspended ceilings. These fixtures feature integrated LED technology, providing bright and uniform illumination while minimizing energy consumption and maintenance requirements.

Features and Benefits of 2X2 LED Light Fixture Drop Ceiling

Here are some key features and benefits of the 2X2 LED Light Fixture Drop Ceilings:

  1. Energy Efficiency: LED technology offers significant energy savings compared to traditional lighting sources, reducing electricity bills and environmental impact.
  2. Long Lifespan: LED bulbs have an extended lifespan, lasting up to 50,000 hours or more, which translates to reduced maintenance and replacement costs over time.
  3. Uniform Illumination: The 2X2 LED Light Fixture Drop Ceiling provides even and consistent lighting distribution, eliminating glare and hotspots for a comfortable and visually pleasing environment.
  4. Slim Profile: These fixtures have a sleek and low-profile design, seamlessly integrating into drop ceiling grids without protruding or creating visual clutter.
  5. Dimmable Options: Many 2X2 LED Light Fixture Drop Ceiling models offer dimmable capabilities, allowing users to adjust the brightness levels to suit their preferences and lighting needs.
  6. Instant On: LED lights provide instant illumination with no warm-up time, ensuring immediate visibility and productivity in your space.

Read too: A Comprehensive Mr Cool Ceiling Cassette Review: Unveiling Excellence

Installation and Compatibility

Installing a 2X2 LED Light Fixture Drop Ceiling is a straightforward process that typically involves the following steps:

  1. Prepare the Ceiling Grid: Ensure that the drop ceiling grid is clean and free from debris or obstructions before installing the light fixture.
  2. Remove Ceiling Tile: Carefully remove the ceiling tile from the grid where you intend to install the fixture, taking care not to damage surrounding tiles.
  3. Mount Fixture: Align the mounting brackets or clips on the fixture with the grid channels and gently push upward until the fixture is securely in place.
  4. Connect Wiring: Follow the manufacturer’s instructions to connect the fixture’s wiring to the building’s electrical system, ensuring proper polarity and insulation.
  5. Replace Ceiling Tile: Once the fixture is installed and wired, replace the ceiling tile, ensuring it is properly seated in the grid.

Applications in Various Settings

The 2X2 LED Light Fixture Drop Ceiling is suitable for a wide range of applications and settings, including:

  • Office Spaces: Illuminate workspaces with bright and energy-efficient LED lighting, enhancing productivity and comfort for employees.
  • Retail Stores: Highlight merchandise and create an inviting atmosphere for customers with vibrant and uniform lighting throughout the store.
  • Classrooms: Provide optimal lighting conditions for learning and concentration in educational settings, improving student focus and engagement.
  • Healthcare Facilities: Ensure bright and comfortable lighting in healthcare facilities, promoting a sense of well-being and safety for patients and staff.

Maintenance and Care

To maximize the performance and longevity of your 2X2 LED Light Fixture Drop Ceiling, consider the following maintenance tips:

  • Regular Cleaning: Wipe the fixture and surrounding area with a soft cloth or sponge to remove dust and debris, preventing buildup and maintaining optimal illumination.
  • Check for Damage: Periodically inspect the fixture for any signs of damage, such as cracked lenses or loose connections, and repair or replace as needed to ensure safety and functionality.
  • Replace Bulbs as Needed: While LED bulbs have a long lifespan, they will eventually need to be replaced when they reach the end of their operational life. Follow the manufacturer’s recommendations for bulb replacement intervals.

Conclusion

The 2X2 LED Light Fixture Drop Ceiling offers a versatile, efficient, and stylish lighting solution for a variety of commercial and residential spaces. With its energy-efficient LED technology, uniform illumination, and easy installation, this fixture provides superior lighting performance while reducing energy consumption and maintenance costs. Whether you’re looking to upgrade your office lighting, enhance the ambiance of your retail store, or improve visibility in educational facilities, the 2X2 LED Light Fixture Drop Ceiling is a reliable and cost-effective choice for all your lighting needs.

Experience the benefits of the 2X2 LED Light Fixture Drop Ceiling and transform your space with superior illumination and style.

Armstrong Grenoble 2×4 Ceiling Tiles: The Perfect Choice for Your Drop Ceiling

Armstrong Grenoble 2×4 ceiling tiles are a popular choice for drop ceilings in both residential and commercial settings. They are made of mineral fiber, which is a durable and lightweight material that is resistant to moisture and sag. The tiles have a lightly textured finish that provides a subtle visual interest, and they are available in a variety of colors to match any décor.

Armstrong Grenoble Ceiling Tiles 2X4

What are the benefits of using Armstrong Grenoble 2×4 ceiling tiles?

There are many benefits to using Armstrong Grenoble 2×4 ceiling tiles, including:

  • Durability: Mineral fiber is a very durable material that is resistant to damage from moisture, sag, and mold. This makes Armstrong Grenoble ceiling tiles a good choice for areas that are prone to moisture, such as kitchens and bathrooms.
  • Sound absorption: Armstrong Grenoble ceiling tiles have a noise reduction coefficient (NRC) of 0.50, which means that they absorb 50% of the sound that hits them. This makes them a good choice for areas where noise control is important, such as offices and classrooms.
  • Light reflectance: Armstrong Grenoble ceiling tiles have a light reflectance value (LRV) of 80%, which means that they reflect 80% of the light that hits them. This makes them a good choice for areas where you want to maximize the amount of light, such as basements and attics.
  • Fire resistance: Armstrong Grenoble ceiling tiles are fire-resistant and have a Class A fire rating. This means that they will not contribute to the spread of fire, making them a safe choice for any application.

How to install Armstrong Grenoble 2×4 ceiling tiles

Armstrong Grenoble 2×4 ceiling tile are easy to install. They can be installed in a standard 15/16″ suspended grid system. To install the tiles, simply place them in the grid and then push them up until they are flush with the grid.

Where to buy Armstrong Grenoble 2×4 ceiling tiles

Armstrong Grenoble 2×4 ceiling tile are available for purchase from a variety of retailers, including home improvement stores, online retailers, and specialty ceiling stores.

Read too: Exploring the Efficiency of Radiant Ceiling Heater Electric: A Comprehensive Guide

The Perfect Choice for Your Drop Ceiling

Armstrong Grenoble 2×4 ceiling tile are a popular choice for drop ceilings for a reason. They are durable, easy to install, and offer a variety of benefits, including sound absorption, light reflectance, and fire resistance. If you are looking for a high-quality ceiling tile for your drop ceiling, Armstrong Grenoble 2×4 ceiling tile are a great option.