Tegular Edge Ceiling Tile: Enhance Your Space with Stylish

In the realm of interior design, every detail matters. From the flooring to the walls, each element contributes to the overall aesthetic and ambiance of a space. When it comes to ceilings, one option that stands out for its versatility and style is tegular edge ceiling tiles. In this comprehensive guide, we’ll delve into the world of tegular edge ceiling tile, exploring their characteristics, installation process, and how they can transform any room.

Tegular Edge Ceiling Tiles

Understanding Tegular Edge Ceiling Tiles

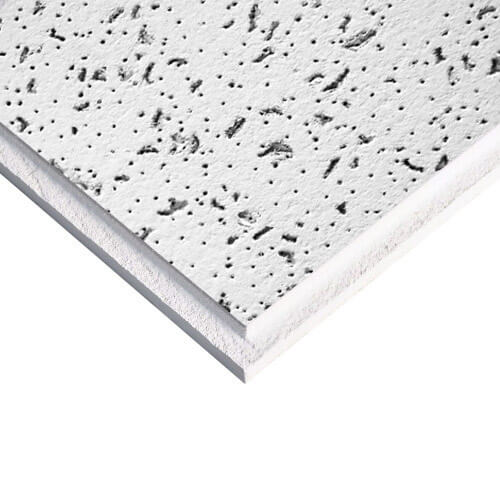
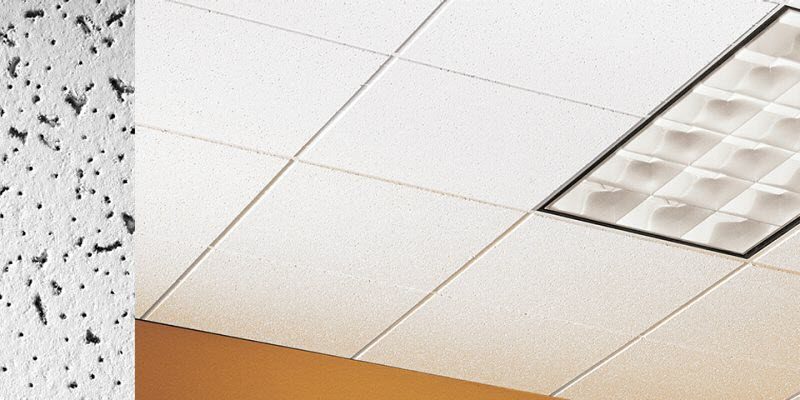
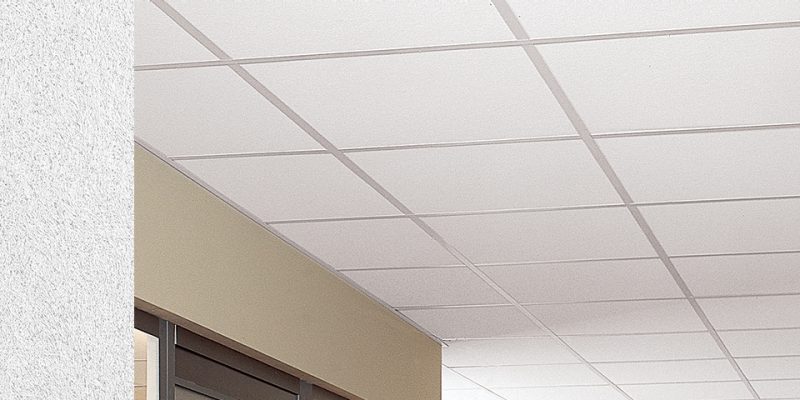
Tegular edge ceiling tiles are a type of ceiling tile characterized by their unique edge design. Unlike traditional square or rectangular tiles, tegular edge tiles feature a recessed edge that creates a subtle reveal between each tile. This design adds depth and dimension to the ceiling, resulting in a more visually appealing and sophisticated look.

The Benefits of Tegular Edge Ceiling Tiles

  1. Enhanced Aesthetics: The recessed edge of tegular ceiling tiles creates a shadow line that adds visual interest to the ceiling. This subtle detail can elevate the overall aesthetic of any room, giving it a more polished and refined appearance.
  2. Improved Acoustic Performance: Tegular edge ceiling tiles are often available with acoustic properties, helping to reduce noise levels within a space. This makes them an ideal choice for offices, classrooms, and other environments where sound control is important.
  3. Easy Installation: Tegular edge ceiling tiles are designed for easy installation, allowing them to be quickly and efficiently installed in both new construction and renovation projects. They can be installed using a variety of methods, including adhesive, grid systems, or direct attachment to the ceiling substrate.

Read too: How To Extend Kitchen Cabinets To The Ceiling: A Complete Guide for Maximizing Space and Style

Applications of Tegular Edge Ceiling Tiles

  • Commercial Spaces: Tegular edge ceiling tiles are commonly used in commercial settings such as offices, retail stores, and restaurants. Their stylish design and acoustic properties make them well-suited for these environments.
  • Residential Settings: In residential applications, tegular edge ceiling tiles can add a touch of elegance to living rooms, dining areas, and bedrooms. They are available in a variety of styles and finishes to complement any decor.

Installing Tegular Edge Ceiling Tiles

Installing tegular edge ceiling tiles requires careful planning and attention to detail. Here are some key steps to ensure a successful installation:

  1. Prepare the Ceiling: Ensure that the ceiling surface is clean, dry, and free of any debris or contaminants.
  2. Measure and Cut Tiles: Measure the dimensions of the ceiling area and cut the tiles to fit using a utility knife or tile cutter.
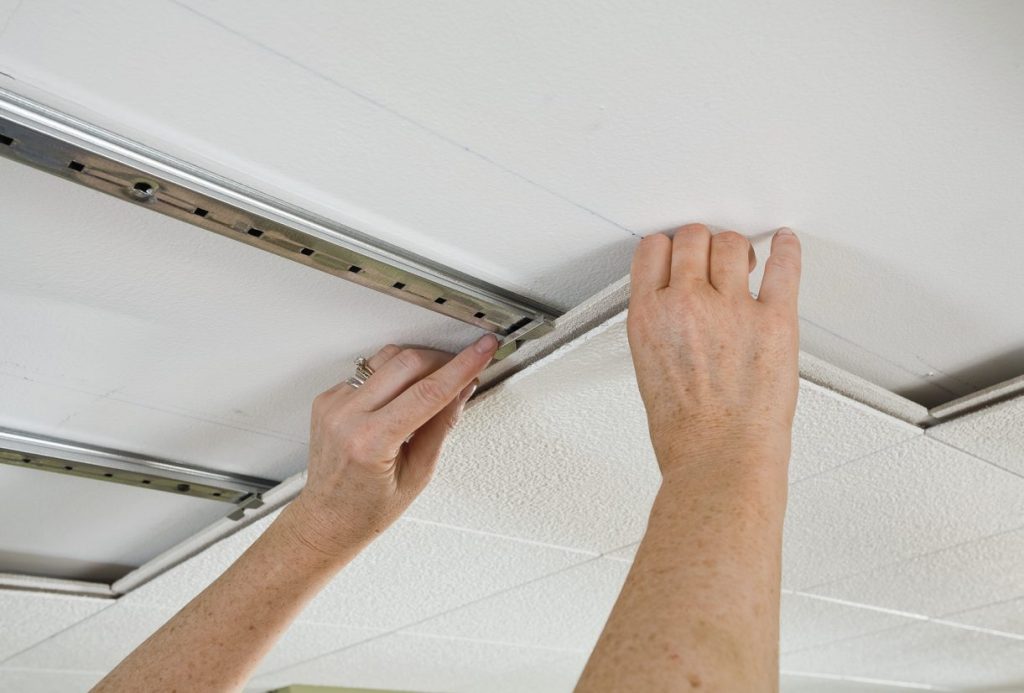
  3. Install Tiles: Begin by installing the perimeter tiles, followed by the field tiles. Use adhesive or a grid system to secure the tiles in place, ensuring that they are properly aligned and spaced.
  4. Finish Edges: Once all tiles are installed, add trim pieces or molding to finish the edges and create a clean, polished look.

Maintenance of Tegular Edge Ceiling Tiles

  • Regularly clean the tiles with a mild detergent and water solution to remove dust and dirt.
  • Avoid using abrasive cleaners or harsh chemicals, as they can damage the finish of the tiles.
  • Inspect the tiles periodically for signs of damage or wear, and replace any damaged tiles as needed.

Conclusion

Tegular edge ceiling tile offer a perfect combination of style, functionality, and ease of installation. Whether you’re renovating a commercial space or updating your home decor, consider incorporating tegular edge tiles to add a touch of sophistication and elegance to your ceilings.

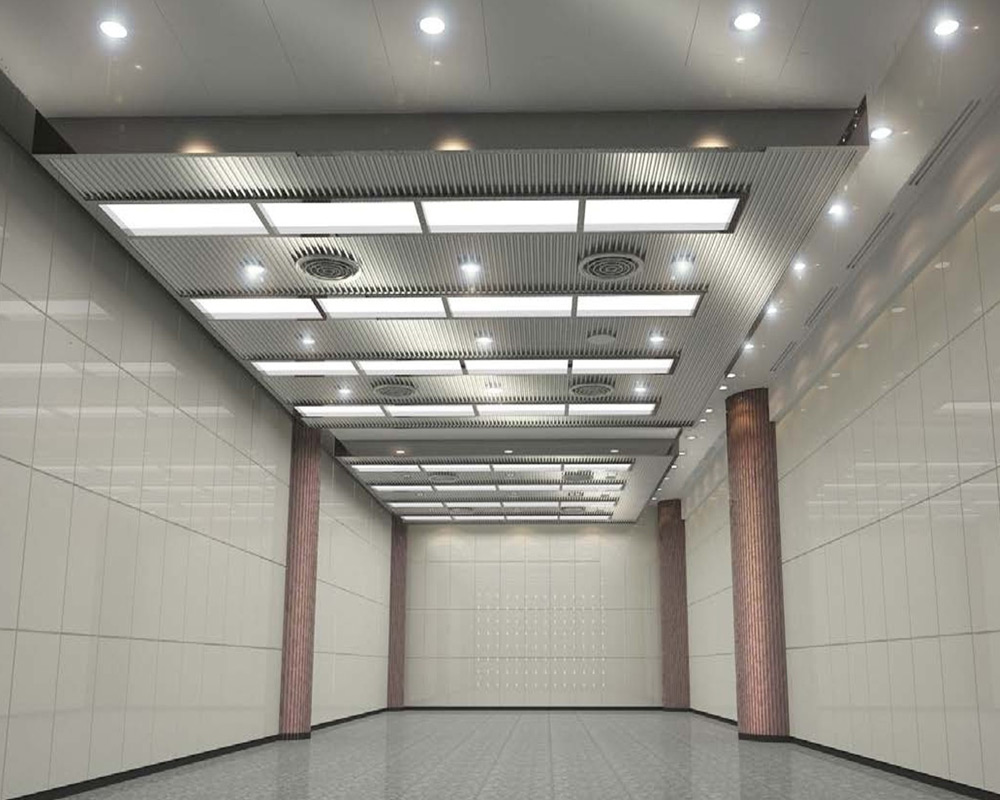
Silver Metal Ceiling Tile: Enhance Your Space with Stunning

Silver metal ceiling tile offer a sophisticated and modern aesthetic that can elevate any space. Whether you’re looking to add a touch of glamour to your home or create a sleek commercial environment, silver metal ceiling tiles are a versatile and stylish option. In this comprehensive guide, we’ll explore everything you need to know about silver metal ceiling tiles, including their benefits, installation techniques, design inspirations, and maintenance tips.

Silver Metal Ceiling Tiles

Understanding Silver Metal Ceiling Tiles

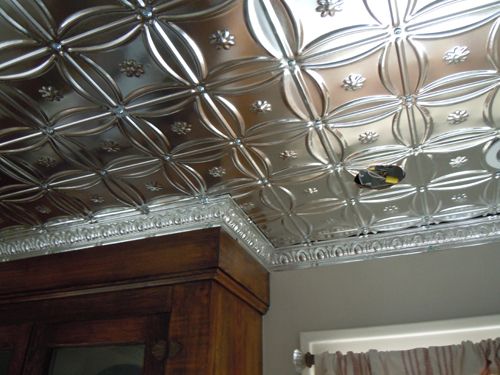
Silver metal ceiling tiles are crafted from high-quality aluminum or steel, providing durability and longevity. These tiles are available in a variety of finishes, including brushed silver, polished silver, and matte silver, allowing you to customize the look to suit your space. Whether you prefer a contemporary, industrial, or minimalist design aesthetic, silver metal ceiling tiles can complement a wide range of interior styles.

Benefits of Silver Metal Ceiling Tiles

There are several benefits to choosing silver metal ceiling tiles for your space:

  • Elegant Appearance: Silver metal ceiling tiles add a touch of sophistication and luxury to any room, making them ideal for both residential and commercial applications.
  • Durability: Metal ceiling tiles are highly durable and resistant to moisture, mold, and mildew, making them suitable for use in kitchens, bathrooms, and other high-humidity areas.
  • Easy Maintenance: Silver metal ceiling tiles are easy to clean and maintain, requiring only occasional dusting or wiping with a damp cloth to keep them looking pristine.

Read too: Understanding and Dealing with Ants in the Ceiling Spaces: Navigating the Intrusion

Installation Techniques

Installing silver metal ceiling tiles requires careful planning and attention to detail. Follow these steps for a successful installation:

  1. Prepare the Surface: Ensure that the ceiling surface is clean, dry, and free of any debris or imperfections. Repair any cracks, holes, or uneven areas before beginning the installation process.
  2. Measure and Mark: Measure the dimensions of the ceiling and mark the layout for the tiles, taking into account any obstacles such as light fixtures or vents. Use a chalk line or laser level to create straight guidelines for accurate placement.
  3. Cut Tiles to Size: Use tin snips or a metal cutting saw to cut the tiles to fit around the perimeter of the ceiling and accommodate any obstructions. Wear appropriate safety gear, such as gloves and goggles, when cutting metal tiles.
  4. Install Tiles: Starting from one corner of the room, begin attaching the tiles to the ceiling using adhesive, nails, or screws, depending on the type of tile and the manufacturer’s recommendations. Ensure that each tile is aligned properly and securely fastened to the ceiling.

Design Inspirations

Silver metal ceiling tiles offer endless design possibilities for enhancing your space:

  • Modern Elegance: Create a sleek and sophisticated ambiance with polished silver metal ceiling tiles in a minimalist interior.
  • Vintage Charm: Add a touch of nostalgia to your space with brushed silver metal ceiling tiles that evoke the glamour of the Art Deco era.
  • Industrial Chic: Embrace the industrial trend with matte silver metal ceiling tiles in a loft-style apartment or commercial space.

Maintenance Tips

To keep your silver metal ceiling tiles looking their best, follow these maintenance tips:

  • Regular Cleaning: Dust the tiles regularly with a soft cloth or vacuum attachment to remove any buildup of dirt or debris.
  • Avoid Harsh Chemicals: Use mild soap and water for cleaning, avoiding abrasive cleaners or solvents that could damage the finish of the tiles.
  • Inspect for Damage: Periodically inspect the tiles for signs of damage or wear, such as dents, scratches, or corrosion, and repair or replace any damaged tiles as needed.

Conclusion

Silver metal ceiling tile are a stylish and practical choice for enhancing the beauty and functionality of any space. Whether you’re renovating your home, updating a commercial property, or designing a new construction project, silver metal ceiling tiles offer versatility, durability, and aesthetic appeal that can’t be beaten.

By understanding the benefits, installation techniques, design inspirations, and maintenance tips outlined in this guide, you can confidently incorporate silver metal ceiling tiles into your interior design scheme and create a stunning and timeless space that reflects your unique style and personality.

Armstrong Sahara Ceiling Tile: Elevate Your Space

When it comes to enhancing the aesthetics and functionality of interior spaces, Armstrong Sahara ceiling tiles stand out as a top choice for architects, designers, and homeowners alike. In this comprehensive guide, we’ll explore the beauty and versatility of Armstrong Sahara ceiling tile, providing valuable insights into their features, benefits, and installation process, allowing you to transform any space with ease.

Armstrong Sahara Ceiling Tiles

Introducing Armstrong Sahara Ceiling Tiles

1. Elegance and Style:

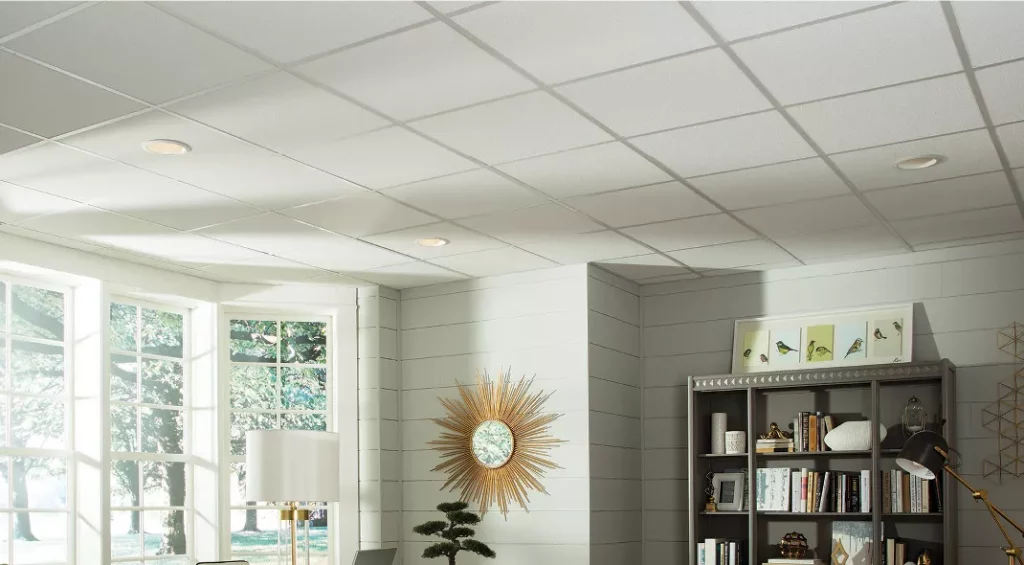
Armstrong Sahara ceiling tiles are renowned for their timeless elegance and sophisticated style, making them a popular choice for a wide range of commercial and residential applications. Featuring a subtle textured surface and clean lines, Sahara tiles add a touch of sophistication to any space, enhancing its overall aesthetics.

2. Versatility and Functionality:

One of the key advantages of Armstrong Sahara ceiling tiles is their versatility and functionality. Available in a variety of sizes, colors, and edge details, Sahara tiles can be customized to suit any design vision or architectural style. Whether you’re creating a contemporary office space, a classic retail environment, or a cozy residential setting, Sahara tiles offer the flexibility to bring your vision to life.

3. Acoustic Performance:

In addition to their visual appeal, Armstrong Sahara ceiling tiles are designed to enhance acoustic comfort in interior spaces. Featuring sound-absorbing properties, Sahara tiles help reduce noise levels, creating a quieter and more comfortable environment for occupants. This makes them an ideal choice for spaces such as offices, classrooms, healthcare facilities, and more.
Features and Benefits of Armstrong Sahara Ceiling Tiles

1. Durable Construction:

Constructed from high-quality materials, Armstrong Sahara ceiling tiles are built to withstand the rigors of daily use while maintaining their beauty and integrity over time. Their durable construction makes them resistant to sagging, warping, and discoloration, ensuring long-lasting performance in any environment.

2. Easy Installation:

Installing Armstrong Sahara ceiling tiles is a straightforward process that requires minimal time and effort. With a variety of installation options, including drop-in, concealed, and surface mount, Sahara tiles can be easily integrated into new construction or renovation projects. Their lightweight design and precise dimensions make them easy to handle and install, saving time and labor costs.

3. Low Maintenance:

Maintaining Armstrong Sahara ceiling tiles is simple and hassle-free, thanks to their smooth, non-porous surface. Routine cleaning with a mild detergent and water is all that’s needed to keep Sahara tiles looking fresh and vibrant for years to come. Their resistance to mold, mildew, and bacteria makes them an ideal choice for spaces where hygiene is a priority.

Installing Armstrong Sahara Ceiling Tiles

1. Preparation:

Before installing Armstrong Sahara ceiling tiles, ensure that the ceiling grid is properly installed and leveled. Remove any existing ceiling tiles or panels and clean the surface to remove dust, dirt, and debris.

2. Cutting and Fitting:

Measure the dimensions of the ceiling area and cut the Sahara tiles to size using a sharp utility knife or a specialized ceiling tile cutter. Take care to make precise cuts to achieve a seamless fit.

3. Installation:

Place the cut Sahara tiles into the ceiling grid, starting from one corner and working your way across the ceiling. Ensure that the tiles are properly aligned and securely seated within the grid.

4. Finishing Touches:

Once all Sahara tiles are installed, inspect the ceiling for any gaps or unevenness. Make any necessary adjustments and add trim or molding as desired to complete the installation.

Conclusion

Armstrong Sahara ceiling tile offer a perfect blend of style, versatility, and functionality, making them an excellent choice for enhancing interior spaces. Whether you’re designing a commercial office, a retail store, or a residential home, Sahara tiles provide the aesthetic appeal, acoustic comfort, and durability needed to create a truly exceptional environment. Explore the endless design possibilities with Armstrong Sahara ceiling tiles and elevate your space to new heights of sophistication and style.

Read too: Exploring Craftsman Style Ceiling Fans for Your Home: Embracing Timeless Elegance

Armstrong 1912 Ceiling Tile: Exploring the Beauty and Durability

Armstrong 1912 ceiling tile are renowned for their timeless design and superior quality. In this article, we’ll delve into the history of these iconic tiles, explore their features, and provide valuable insights into their installation and maintenance. Whether you’re renovating a historic building or updating your home with classic charm, Armstrong 1912 ceiling tiles offer unmatched beauty and durability.

Armstrong 1912 Ceiling Tile

Unveiling Armstrong 1912 Ceiling Tiles

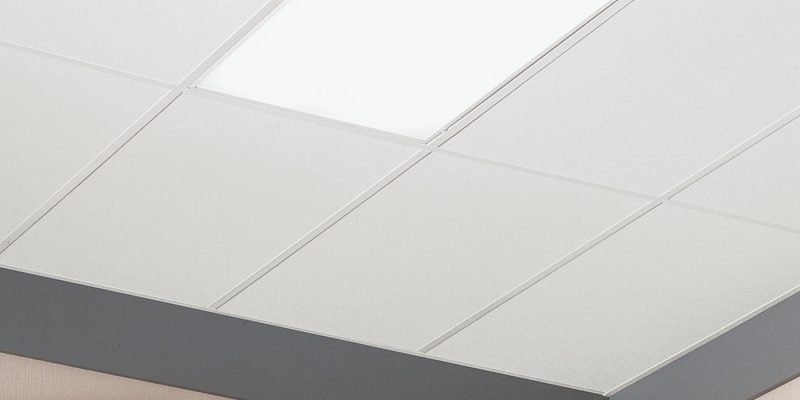
Armstrong 1912 ceiling tiles are inspired by the elegance and sophistication of early 20th-century design. Crafted with meticulous attention to detail, these tiles capture the essence of a bygone era while offering modern performance and durability. With their intricate patterns, textured surfaces, and rich colors, Armstrong 1912 ceiling tiles add a touch of vintage charm to any space.

Features of Armstrong 1912 Ceiling Tiles

  1. Timeless Design: Armstrong 1912 ceiling tiles feature classic designs inspired by architectural styles from the early 20th century, including Art Deco, Victorian, and Craftsman.
  2. Durable Construction: Constructed from high-quality materials, such as mineral fiber and fiberglass, Armstrong 1912 ceiling tiles are designed to withstand the test of time and maintain their beauty for years to come.
  3. Variety of Patterns: These tiles are available in a wide range of patterns, including geometric motifs, floral designs, and intricate textures, allowing for endless design possibilities.
  4. Easy Installation: Armstrong 1912 ceiling tiles are designed for easy installation, with options for direct-mount or drop-ceiling applications, making them suitable for both residential and commercial projects.
  5. Fire and Moisture Resistance: Many Armstrong 1912 ceiling tiles are engineered to meet stringent fire and moisture resistance standards, ensuring safety and peace of mind.

Installation Methods for Armstrong 1912 Ceiling Tiles

  1. Direct Mount: Direct-mount installation involves attaching the ceiling tiles directly to the ceiling substrate using adhesive or screws. This method is ideal for ceilings with minimal clearance or where a seamless look is desired.
  2. Drop Ceiling Grid: Drop ceiling installation involves suspending the tiles from a grid system mounted to the ceiling joists. This method allows for easy access to utilities and ductwork while providing a clean and polished appearance.

Read too: Exploring the Innovation and Efficiency of Ceiling Mounted Surgical Light Solutions: Illuminating Precision

Maintenance Tips for Armstrong 1912 Ceiling Tiles

  1. Regular Cleaning: Keep Armstrong 1912 ceiling tiles looking their best by regularly dusting or vacuuming them to remove dirt and debris.
  2. Avoid Moisture Exposure: Minimize exposure to moisture to prevent water damage and mold growth. Use a mild detergent and water solution for cleaning, and avoid harsh chemicals or abrasive cleaning tools.
  3. Inspect for Damage: Periodically inspect the tiles for signs of damage, such as cracks, stains, or warping, and replace any damaged tiles as needed to maintain the integrity of the ceiling system.

Conclusion

Armstrong 1912 ceiling tile embody the timeless elegance and exceptional craftsmanship of a bygone era, making them a perfect choice for adding classic style to any space. With their durable construction, versatile designs, and easy installation, these tiles offer both aesthetic appeal and practical functionality. Whether you’re restoring a historic building or renovating a modern home, Armstrong 1912 ceiling tiles provide a timeless solution for enhancing your space with enduring beauty.

Now that you’re familiar with the features, installation methods, and maintenance tips for Armstrong 1912 ceiling tiles, why not incorporate these classic tiles into your next design project?

Clean Room Ceiling Tile: Maintenance, Installation, and Benefits

Are you looking to create a pristine environment in your clean room facility? Clean room ceiling tile play a crucial role in maintaining cleanliness and controlling contaminants. In this comprehensive guide, we’ll delve into the world of clean room ceiling tiles, covering their maintenance, installation, and the benefits they provide.

Clean Room Ceiling Tile

Understanding Clean Room Ceiling Tiles

Clean room ceiling tiles are specially designed to meet the stringent requirements of controlled environments, such as pharmaceutical facilities, laboratories, and manufacturing plants. These tiles are engineered to minimize particulate contamination, resist microbial growth, and maintain a sterile environment.

Maintenance of Clean Room Ceiling Tiles

Regular Cleaning

Routine cleaning is essential to prevent the accumulation of dust, debris, and other contaminants on the surface of clean room ceiling tiles. Use a mild detergent solution and a non-abrasive cloth to gently wipe down the tiles, taking care not to scratch or damage them.

Inspection and Replacement

Regular inspection of clean room ceiling tiles is necessary to identify any signs of damage, discoloration, or degradation. Promptly replace damaged tiles to maintain the integrity of the clean room environment and prevent the spread of contaminants.

Installation Guidelines

Proper Sealing

Ensure that clean room ceiling tiles are properly sealed to prevent air leakage and minimize the infiltration of contaminants from the plenum space above. Use appropriate sealants and gaskets to create an airtight seal around the perimeter of each tile.

Read too: Discovering the Charm of Nautical Outdoor Ceiling Fans for Your Coastal Retreat: Sail into Style

Grid Alignment

Proper alignment of the ceiling grid is crucial for the installation of clean room ceiling tiles. Use a laser level or string line to ensure that the grid is perfectly square and level, minimizing gaps and inconsistencies between tiles.

Benefits of Clean Room Ceiling Tiles

Contamination Control

Clean room ceiling tiles help to minimize the presence of airborne particles and contaminants, creating a controlled environment suitable for sensitive manufacturing processes and research activities.

Sterility Maintenance

Clean room ceiling tiles’ non-porous surface prevents moisture and microbial growth, crucial for sterile environments in pharmaceutical and biotech production.

Ease of Maintenance

Designed for easy cleaning and maintenance, clean room ceiling tiles reduce downtime and labor costs associated with facility upkeep.

Conclusion

Clean room ceiling tile are an integral component of controlled environments, providing contamination control, sterility maintenance, and ease of maintenance. Follow maintenance and installation guidelines to keep your clean room facility compliant with regulations and running efficiently.

Egg Crate Ceiling Tile: Enhance Your Ceiling with Style and Functionality

Egg Crate Ceiling Tiles offer a unique blend of style and functionality, making them a popular choice for homeowners and designers alike. In this comprehensive guide, we’ll delve into the world of Egg Crate Ceiling Tile, exploring their versatility, benefits, and how they can transform any space with their distinctive design.

Egg Crate Ceiling Tiles

Unveiling Egg Crate Ceiling Tiles

Egg Crate Ceiling Tiles are characterized by their distinctive pattern of alternating ridges and recesses, reminiscent of an egg crate. This unique design not only adds visual interest to ceilings but also serves practical purposes such as improving acoustics and airflow.

The Benefits of Egg Crate Ceiling Tiles

Egg Crate Ceiling Tiles offer several benefits for homeowners and designers:

  1. Improved Acoustics: The ridges and recesses of Egg Crate Ceiling Tiles help diffuse sound waves, reducing echo and improving the overall acoustics of a room.
  2. Enhanced Airflow: The open design of Egg Crate Ceiling Tiles promotes airflow, making them an ideal choice for spaces that require ventilation, such as offices, lobbies, and commercial kitchens.
  3. Visual Interest: The unique texture and pattern of Egg Crate Ceiling Tiles add visual interest to ceilings, creating a dynamic and engaging atmosphere.
  4. Easy Installation: Egg Crate Ceiling Tiles are lightweight and easy to install, making them a cost-effective solution for ceiling renovations and remodeling projects.

Read too: Exploring the Innovation and Efficiency of Ceiling Mounted Surgical Light Solutions: Illuminating Precision

Design Options

Egg Crate Ceiling Tiles are available in a variety of materials, sizes, and finishes to suit different aesthetic preferences and design requirements. Common materials include plastic, aluminum, and foam, each offering unique advantages in terms of durability, maintenance, and acoustical performance. Additionally, Egg Crate Ceiling Tiles can be painted or customized to match any decor scheme, providing endless design possibilities for residential and commercial spaces alike.

Incorporating Egg Crate Ceiling Tiles into Your Space

When incorporating Egg Crate Ceiling Tiles into your space, consider the following tips:

  1. Choose the Right Material: Select a material that suits your budget, aesthetic preferences, and functional needs. Plastic tiles are durable and easy to clean, while foam tiles offer superior sound absorption.
  2. Consider Color and Finish: Opt for tiles that complement your existing decor and architectural style. Matte finishes create a subtle and understated look, while glossy finishes add a touch of sophistication and elegance.
  3. Plan for Installation: Proper installation is crucial for achieving the desired results with Egg Crate Ceiling Tiles. Consult with a professional installer to ensure the tiles are installed correctly and securely.
  4. Experiment with Layout: Get creative with the layout and arrangement of Egg Crate Ceiling Tiles to create unique patterns and visual effects. Consider alternating tile orientations or mixing different colors and finishes for added visual interest.

Maintenance and Care

To maintain the beauty and functionality of your Egg Crate Ceiling Tiles, follow these maintenance tips:

  1. Regular Cleaning: Dust the tiles regularly with a soft brush or vacuum attachment to remove any accumulated debris or dust.
  2. Spot Cleaning: For stubborn stains or spills, gently wipe the affected area with a damp cloth or sponge using mild soap and water.
  3. Avoid Harsh Chemicals: Refrain from using abrasive cleaners or harsh chemicals, as they may damage the surface of the tiles.
  4. Inspect for Damage: Periodically inspect the tiles for any signs of damage or wear, such as cracks, dents, or discoloration. Replace damaged tiles as needed to maintain the integrity of the ceiling.

Conclusion

Egg Crate Ceiling Tile offer a versatile and practical solution for enhancing the aesthetics and functionality of any space. Whether you’re looking to improve acoustics, promote airflow, or simply add visual interest to your ceiling, Egg Crate Ceiling Tiles are a stylish and cost-effective option to consider. With their unique design, customizable options, and easy installation, Egg Crate Ceiling Tiles are sure to make a lasting impression in any residential or commercial setting.

Ceiling Tile Hold Down Clip: Installation, Types, and Benefits

Discover the essential information about ceiling tile hold down clip, including their installation process, different types available, and the benefits they offer for various applications.

Ceiling Tile Hold Down Clip

Introduction

Ceiling tile hold down clips play a crucial role in securing ceiling tiles in place, preventing them from shifting or falling. Whether you’re installing new ceiling tiles or replacing existing ones, understanding the importance of hold down clips and how to use them effectively is essential for achieving a professional-looking and durable ceiling installation. In this comprehensive guide, we’ll explore everything you need to know about ceiling tile hold down clips, from their installation process to the benefits they provide.

Understanding Ceiling Tile Hold Down Clips

Ceiling tile hold down clips are small devices designed to secure ceiling tiles in place, preventing them from lifting or shifting due to factors such as air movement, temperature fluctuations, or vibrations. These clips are typically made of durable materials such as metal or plastic and are installed at strategic intervals along the edges of ceiling tiles to provide stability and support.

Types of Ceiling Tile Hold Down Clips

There are several types of ceiling tile hold down clips available, each designed for specific ceiling tile materials and installation methods. Some common types include:

  1. Spring Clips: Spring clips feature a spring-loaded design that allows them to grip the edges of ceiling tiles securely. These clips are easy to install and provide strong hold-down force to keep tiles in place.
  2. Twist Clips: Twist clips consist of a threaded rod and a metal bracket that are twisted together to secure the ceiling tile in place. These clips offer adjustable tension, making them suitable for various tile thicknesses and installation preferences.
  3. Snap Clips: Snap clips feature a snap-on design that allows them to be quickly and easily attached to the edges of ceiling tiles. These clips provide a secure hold and are ideal for use with lightweight or thin tiles.
  4. Adhesive Clips: Adhesive clips utilize strong adhesive backing to attach to the ceiling tile edges, providing a secure hold without the need for screws or fasteners. These clips are ideal for use with delicate or decorative ceiling tiles.

Installation Process for Ceiling Tile Hold Down Clips

Installing ceiling tile hold down clips is a straightforward process that requires basic tools and a systematic approach. Here’s a step-by-step guide to installing hold down clips:

  1. Prepare the Ceiling Surface: Ensure that the ceiling surface is clean, dry, and free of debris before beginning the installation process.
  2. Determine Clip Placement: Determine the appropriate spacing and placement for the hold down clips based on the size and weight of the ceiling tiles, as well as the manufacturer’s recommendations.
  3. Attach the Clips: Use screws, adhesive, or other fasteners provided with the clips to attach them securely to the ceiling surface. Ensure proper alignment and firm attachment of the clips to prevent movement or dislodging.
  4. Secure the Ceiling Tiles: After installing the clips, carefully position the ceiling tiles over them and firmly press them into place. Ensure you securely and evenly seat the tiles to achieve a uniform appearance.
  5. Test for Stability: After installing the ceiling tiles, gently test them to ensure they are securely held in place by the clips. Make any necessary adjustments or additional installations as needed to achieve the desired stability.

Benefits of Using Ceiling Tile Hold Down Clips

Using ceiling tile hold down clips offers several benefits, including:

  1. Enhanced Stability: Hold down clips provide additional support and stability for ceiling tiles, reducing the risk of sagging, shifting, or falling.
  2. Improved Aesthetic Appearance: By securing ceiling tiles in place, hold down clips help maintain a smooth and uniform ceiling surface, enhancing the overall aesthetic appearance of the space.
  3. Prevention of Damage: Hold down clips help prevent damage to ceiling tiles caused by movement, vibrations, or environmental factors, prolonging the lifespan of the ceiling installation.
  4. Ease of Maintenance: Securely held ceiling tiles are easier to clean and maintain, as they are less likely to become dislodged or damaged during routine maintenance activities.

Conclusion

Ceiling tile hold down clip play a vital role in ensuring the stability, durability, and aesthetic appearance of ceiling installations. By understanding the different types of hold down clips available, the installation process, and the benefits they offer, you can achieve a professional-looking and long-lasting ceiling that enhances the overall functionality and appeal of any space.

Read too: Exploring the Efficiency of Radiant Ceiling Heater Electric: A Comprehensive Guide

2 X 2 Black Ceiling Tiles: A Comprehensive Guide

Are you looking to upgrade the look and feel of your interior space? Discover the versatility and elegance of 2 X 2 Black Ceiling Tiles. In this comprehensive guide, we’ll explore everything you need to know about these sleek and modern ceiling tiles, from their features and benefits to installation tips and more.

2 X 2 Black Ceiling Tiles

Introducing

2 X 2 Black Ceiling Tiles are a popular choice for homeowners, interior designers, and business owners alike. Their timeless black finish adds a touch of sophistication to any room, while their practical design offers numerous benefits for both residential and commercial applications.

Key Features of 2 X 2 Black Ceiling Tiles

  • Sleek Appearance: The black finish of these ceiling tiles creates a bold and modern aesthetic that complements a wide range of interior styles and color schemes. Whether used in a residential living space or a commercial office environment, these tiles make a striking visual statement.
  • Durable Construction: Constructed from high-quality materials such as PVC, vinyl, or mineral fiber, 2 X 2 Black Ceiling Tiles are designed to withstand the rigors of daily use while maintaining their appearance over time. Their durable construction ensures long-lasting performance and durability.
  • Easy Installation: With their standard 2 X 2 size and lightweight construction, these ceiling tiles are easy to install using standard ceiling grid systems. Whether you’re a DIY enthusiast or a professional contractor, you’ll appreciate the simplicity and convenience of installing these tiles.
  • Acoustic Benefits: In addition to their visual appeal, 2 X 2 Black Ceiling Tiles offer acoustic benefits by helping to absorb sound and reduce noise levels within a room. This makes them an excellent choice for spaces where noise control is a priority, such as offices, conference rooms, or home theaters.

Installing 2 X 2 Black Ceiling Tiles

Installing 2 X 2 Black Ceiling Tiles is a straightforward process that can be completed in just a few simple steps. Here’s an overview of the installation process:

  1. Prepare the Ceiling Grid: Ensure that the existing ceiling grid is clean, level, and free from any obstructions. Remove any old ceiling tiles or debris from the grid to create a smooth surface for the new tiles.
  2. Measure and Cut Tiles: Measure the dimensions of the ceiling grid openings and use a utility knife or scissors to cut the ceiling tiles to the appropriate size. Be sure to wear protective eyewear and gloves when cutting the tiles.
  3. Install Tiles: Carefully insert the cut tiles into the ceiling grid openings, making sure they fit snugly and securely. Use gentle pressure to press the tiles into place, ensuring a flush and uniform appearance.
  4. Repeat the Process: Continue installing tiles until the entire ceiling grid is covered. Double-check the alignment and spacing of the tiles to ensure a professional-looking finish.
  5. Final Touches: After installing all the tiles, actively inspect the ceiling for any gaps or irregularities. Make any necessary adjustments to ensure a seamless and uniform appearance.

Benefits of 2 X 2 Black Ceiling Tile

  • Enhanced Aesthetics: The sleek black finish of these ceiling tiles adds a touch of elegance and sophistication to any room, making them a versatile choice for a variety of interior design styles.
  • Improved Acoustics: By helping to absorb sound and reduce noise levels, 2 X 2 Black Ceiling Tile create a more comfortable and pleasant environment for occupants, whether at home or in the workplace.
  • Easy Maintenance: These tiles are easy to clean and maintain, requiring only periodic dusting or wiping with a damp cloth to keep them looking their best.
  • Cost-Effective Solution: Compared to more expensive ceiling materials such as wood or metal, 2 X 2 Black Ceiling Tile offer an affordable alternative without compromising on quality or style.

Conclusion

In conclusion, 2 X 2 Black Ceiling Tile offer a stylish, durable, and cost-effective solution for enhancing the look and feel of any interior space. Whether you’re renovating your home, updating a commercial property, or simply looking to add a touch of elegance to your surroundings, these versatile ceiling tiles are sure to impress.

Read too: Enhance Your Space with Acoustic Ceiling Tiles Paint: A Comprehensive Guide

Enhance Your Space with Stylish Faux Wood Drop Ceiling Tile: A Complete Guide

When it comes to interior design, the ceiling often gets overlooked as a potential canvas for creativity. However, with the rise of innovative solutions like Faux Wood Drop Ceiling Tile, homeowners and designers alike are discovering new ways to transform their spaces. In this comprehensive guide, we’ll delve into the world of Faux Wood Drop Ceiling Tiles, exploring their benefits, installation process, and design possibilities.

Faux Wood Drop Ceiling Tiles

Understanding Faux Wood Drop Ceiling Tiles

Faux Wood Drop Ceiling Tiles are decorative panels designed to mimic the look and texture of real wood while offering the practicality and affordability of synthetic materials. These tiles are typically made from high-quality PVC or vinyl and are available in a variety of finishes and designs, ranging from rustic reclaimed wood to sleek modern patterns. Unlike traditional wooden ceiling tiles, Faux Wood Drop Ceiling Tiles are lightweight, easy to install, and resistant to moisture, making them suitable for use in a wide range of indoor environments.

Advantages of Faux Wood Drop Ceiling Tiles

  • Affordability: Faux Wood Drop Ceiling Tiles are a cost-effective alternative to real wood, offering the same aesthetic appeal at a fraction of the price. This makes them an ideal choice for budget-conscious homeowners and commercial property owners looking to achieve a high-end look without breaking the bank.
  • Durability: Unlike natural wood, which is susceptible to warping, rotting, and insect damage, Faux Wood Drop Ceiling Tiles are engineered to withstand the test of time. They are resistant to moisture, mold, and mildew, making them suitable for use in areas with high humidity or moisture exposure, such as bathrooms, kitchens, and basements.
  • Ease of Installation: Installing Faux Wood Drop Ceiling Tiles is a straightforward process that requires minimal tools and expertise. The tiles are designed to fit seamlessly into standard drop ceiling grid systems, allowing for quick and hassle-free installation. With proper preparation and planning, DIY enthusiasts can easily tackle this project over a weekend.
  • Versatility: Faux Wood Drop Ceiling Tiles are available in a wide range of colors, patterns, and textures, making them suitable for virtually any design aesthetic. Whether you prefer the rustic charm of weathered barn wood or the sleek elegance of modern oak, there’s a Faux Wood Drop Ceiling Tile to suit your style and preferences.

Read too: Exploring the Benefits and How-Tos of DIY Ceiling Cassette Mini Split Installation: Revolutionizing Comfort

Design Inspiration and Applications

Faux Wood Drop Ceiling Tiles offer endless design possibilities for residential and commercial spaces alike. Here are some creative ways to incorporate these versatile tiles into your interior design:

  • Rustic Retreat: Create a cozy cabin-inspired retreat by installing Faux Wood Drop Ceiling Tiles with a distressed finish and exposed wood grain. Pair them with rustic furnishings, cozy textiles, and warm lighting for a welcoming ambiance that exudes charm and character.
  • Modern Elegance: Achieve a sleek and sophisticated look with Faux Wood Drop Ceiling Tiles in a smooth, contemporary finish. Opt for minimalist furniture, clean lines, and neutral color palettes to create a modern oasis that feels fresh and inviting.
  • Coastal Chic: Embrace coastal vibes with Faux Wood Drop Ceiling Tiles in whitewashed or weathered finishes. Pair them with nautical accents, natural textures, and breezy fabrics for a relaxed beach house aesthetic that feels light, airy, and effortlessly chic.
  • Industrial Edge: Add an edgy urban vibe to your space with Faux Wood Drop Ceiling Tiles in industrial-inspired finishes like aged metal or distressed concrete. Pair them with raw materials, exposed pipes, and vintage furnishings for a loft-like atmosphere that’s equal parts rugged and refined.

Installation Tips and Considerations: Faux Wood Drop Ceiling Tile

Before installing Faux Wood Drop Ceiling Tiles, it’s essential to consider the following tips and considerations to ensure a successful and long-lasting installation:

  • Preparation: Ensure that the ceiling surface is clean, flat, and free of any debris or imperfections before installing the tiles. This will ensure a smooth and seamless finish and prevent issues such as unevenness or adhesion problems.
  • Proper Alignment: Take the time to properly align and position the tiles within the drop ceiling grid system to ensure a uniform and professional-looking installation. Use a level and measuring tape to achieve precise alignment and spacing between tiles.
  • Adhesive Selection: Choose a high-quality adhesive specifically designed for use with Faux Wood Drop Ceiling Tiles to ensure optimal adhesion and durability. Follow the manufacturer’s instructions for application and curing times to achieve the best results.
  • Maintenance: Once installed, Faux Wood Drop Ceiling Tiles require minimal maintenance to keep them looking their best. Simply wipe them down periodically with a damp cloth to remove dust and debris, and avoid using harsh chemicals or abrasive cleaners that could damage the finish.

Conclusion

In conclusion, Faux Wood Drop Ceiling Tile offer a versatile and cost-effective solution for enhancing the aesthetic appeal of any interior space. With their realistic wood look, durability, and ease of installation, these innovative tiles are an excellent choice for homeowners, designers, and contractors alike. Whether you’re looking to add rustic charm to a cabin retreat or achieve a sleek modern look in a commercial office space, Faux Wood Drop Ceiling Tiles provide endless design possibilities and lasting beauty.

Armstrong Vinyl Faced Ceiling Tile: A Comprehensive Guide

Armstrong Vinyl Faced Ceiling Tile offers more than just a ceiling covering; it provides a versatile and durable solution for enhancing the aesthetics and functionality of any space. In this comprehensive guide, we’ll delve into the world of Armstrong Vinyl Faced Ceiling Tile, exploring its features, installation process, benefits, and much more.

Armstrong Vinyl Faced Ceiling Tile

Exploring Armstrong Vinyl Faced Ceiling Tile

Armstrong Vinyl Faced Ceiling Tile is engineered to meet the demands of modern interior design while providing exceptional performance. These tiles feature a vinyl facing that not only adds a sleek and contemporary look to any room but also offers easy maintenance and durability.

Features and Benefits

  • Durability: Armstrong Vinyl Faced Ceiling Tile is designed to withstand the rigors of daily wear and tear, making it ideal for high-traffic areas such as commercial spaces, offices, and healthcare facilities.
  • Easy Maintenance: The vinyl facing of these ceiling tiles repels dust and dirt, making them easy to clean with just a damp cloth or mild detergent solution.
  • Versatility: Available in a variety of colors, patterns, and textures, Armstrong Vinyl Faced Ceiling Tiles allows you to create customized designs that complement your overall interior decor.
  • Moisture Resistance: The vinyl facing of these tiles provides excellent moisture resistance, making them suitable for installation in areas with high humidity levels, such as kitchens, bathrooms, and basements.
  • Acoustic Performance: Armstrong Vinyl Faced Ceiling Tile helps improve the acoustic quality of a room by reducing noise transmission and reverberation, creating a more comfortable and productive environment.

Read too: Exploring the Efficiency of Radiant Ceiling Heater Electric: A Comprehensive Guide

Installation Process

Installing Armstrong Vinyl Faced Ceiling Tiles is a straightforward process that can be completed by both professionals and DIY enthusiasts. Here’s a basic overview of the installation steps:

  1. Preparation: Ensure the ceiling surface is clean, dry, and free from any debris. Repair any damaged areas as needed.
  2. Measurement: Measure the dimensions of the ceiling and calculate the number of tiles required for the installation.
  3. Cutting: Use a sharp utility knife to cut the tiles to fit around light fixtures, vents, and other obstacles.
  4. Adhesive Application: Apply a suitable adhesive to the back of each tile, following the manufacturer’s instructions.
  5. Installation: Carefully place each tile onto the ceiling grid, pressing firmly to ensure proper adhesion.
  6. Finishing Touches: Install trim pieces or molding around the perimeter of the ceiling for a polished look.

Maintenance Tips

To keep your Armstrong Vinyl Faced Ceiling Tiles looking its best, follow these maintenance tips:

  • Regularly dust or vacuum the tiles to remove any surface debris.
  • Clean stains or spills promptly using a mild detergent solution and a soft cloth.
  • Avoid using abrasive cleaners or harsh chemicals, as they may damage the vinyl facing.
  • Inspect the tiles periodically for any signs of damage or wear and replace as needed.

Conclusion

Armstrong Vinyl Faced Ceiling Tiles offers a perfect blend of style, durability, and functionality, making it an excellent choice for residential and commercial applications. Whether you’re renovating your home, office, or retail space, these versatile ceiling tiles are sure to enhance the overall look and feel of the environment. Invest in Armstrong Vinyl Faced Ceiling Tiles today and transform your space into something truly exceptional.

Armstrong Grenoble 2×4 Ceiling Tiles: The Perfect Choice for Your Drop Ceiling

Armstrong Grenoble 2×4 ceiling tiles are a popular choice for drop ceilings in both residential and commercial settings. They are made of mineral fiber, which is a durable and lightweight material that is resistant to moisture and sag. The tiles have a lightly textured finish that provides a subtle visual interest, and they are available in a variety of colors to match any décor.

Armstrong Grenoble Ceiling Tiles 2X4

What are the benefits of using Armstrong Grenoble 2×4 ceiling tiles?

There are many benefits to using Armstrong Grenoble 2×4 ceiling tiles, including:

  • Durability: Mineral fiber is a very durable material that is resistant to damage from moisture, sag, and mold. This makes Armstrong Grenoble ceiling tiles a good choice for areas that are prone to moisture, such as kitchens and bathrooms.
  • Sound absorption: Armstrong Grenoble ceiling tiles have a noise reduction coefficient (NRC) of 0.50, which means that they absorb 50% of the sound that hits them. This makes them a good choice for areas where noise control is important, such as offices and classrooms.
  • Light reflectance: Armstrong Grenoble ceiling tiles have a light reflectance value (LRV) of 80%, which means that they reflect 80% of the light that hits them. This makes them a good choice for areas where you want to maximize the amount of light, such as basements and attics.
  • Fire resistance: Armstrong Grenoble ceiling tiles are fire-resistant and have a Class A fire rating. This means that they will not contribute to the spread of fire, making them a safe choice for any application.

How to install Armstrong Grenoble 2×4 ceiling tiles

Armstrong Grenoble 2×4 ceiling tile are easy to install. They can be installed in a standard 15/16″ suspended grid system. To install the tiles, simply place them in the grid and then push them up until they are flush with the grid.

Where to buy Armstrong Grenoble 2×4 ceiling tiles

Armstrong Grenoble 2×4 ceiling tile are available for purchase from a variety of retailers, including home improvement stores, online retailers, and specialty ceiling stores.

Read too: Exploring the Efficiency of Radiant Ceiling Heater Electric: A Comprehensive Guide

The Perfect Choice for Your Drop Ceiling

Armstrong Grenoble 2×4 ceiling tile are a popular choice for drop ceilings for a reason. They are durable, easy to install, and offer a variety of benefits, including sound absorption, light reflectance, and fire resistance. If you are looking for a high-quality ceiling tile for your drop ceiling, Armstrong Grenoble 2×4 ceiling tile are a great option.

Unveiling the Beauty of Armstrong Canyon Ceiling Tile: A Comprehensive Guide to Installation and Design

Ceilings play a crucial role in the overall aesthetics and functionality of any space, and choosing the right ceiling tiles is paramount in achieving the desired ambiance. Among the plethora of options available in the market, Armstrong Canyon Ceiling Tile stands out for its unparalleled blend of style, durability, and versatility.

Armstrong Canyon Ceiling Tile

Introduction to Armstrong Canyon Ceiling Tile

Armstrong Canyon Ceiling Tile is a testament to innovation in interior design. Crafted with precision and attention to detail, these tiles offer a perfect balance of form and function. Whether you’re renovating a residential space or designing a commercial establishment, Armstrong Canyon Ceiling Tile adds a touch of sophistication and elegance.

Exploring the Features

  • Durability: One of the standout features of Armstrong Canyon Ceiling Tile is its durability. Constructed using high-quality materials, these tiles are built to withstand the test of time, making them ideal for areas with high foot traffic or exposure to moisture.
  • Design Versatility: From classic designs to contemporary patterns, Armstrong Canyon Ceiling Tile offers a wide array of options to suit every style preference. Whether you prefer a minimalist aesthetic or intricate detailing, there’s a design to complement any decor theme.
  • Easy Installation: Installing Armstrong Canyon Ceiling Tile is a hassle-free process, thanks to its innovative design and user-friendly installation methods. Whether you’re a seasoned professional or a DIY enthusiast, you can achieve professional-looking results with ease.

Enhancing Aesthetic Appeal

The design possibilities with Armstrong Canyon Ceiling Tiles are virtually endless. Whether you’re aiming for a sleek and modern look or a rustic charm, these tiles can transform any space into a visual masterpiece. Incorporating elements such as recessed lighting or decorative molding can further enhance the aesthetic appeal of your ceiling design.

Creating a Lasting Impression

Whether it’s a commercial office space, a hospitality venue, or a residential setting, the ceiling plays a pivotal role in shaping the overall ambiance. With Armstrong Canyon Ceiling Tiles, you can create a lasting impression on your guests or clients, leaving them in awe of the impeccable craftsmanship and attention to detail.

Installation Guide for Armstrong Canyon Ceiling Tile

Installing Armstrong Canyon Ceiling Tiles is a straightforward process that can be completed in a few simple steps:

  1. Preparation: Ensure that the ceiling surface is clean, dry, and free of any debris or obstructions.
  2. Measurement: Measure the dimensions of the ceiling to determine the number of tiles needed for the installation.
  3. Cutting: If necessary, use a utility knife or a specialized tile cutter to trim the tiles to fit around corners or obstructions.
  4. Adhesive Application: Apply a recommended adhesive to the back of each tile, following the manufacturer’s instructions.
  5. Installation: Carefully place each tile onto the ceiling surface, ensuring a snug fit and uniform alignment.
  6. Finishing Touches: Once all tiles are in place, use a roller or a flat tool to smooth out any air bubbles or wrinkles in the adhesive.
  7. Final Inspection: Step back and inspect the installation to ensure that all tiles are securely in place and that the overall appearance meets your expectations.

Conclusion

Armstrong Canyon Ceiling Tiles is more than just a functional element; it’s a statement of style and sophistication. With its unmatched durability, design versatility, and ease of installation, these tiles offer a seamless blend of form and function. Whether you’re revamping a residential space or designing a commercial establishment, Armstrong Canyon Ceiling Tiles is the epitome of timeless elegance.

Read too: Exploring the Efficiency of Radiant Ceiling Heater Electric: A Comprehensive Guide

Exploring the Beauty and Versatility of 2Nd Look Ceiling Tile: Elevate Your Space with Style

Transforming your space into a masterpiece of design and sophistication begins with the captivating allure of 2Nd Look Ceiling Tile. In this extensive guide, we will delve into the intricacies of these tiles, unraveling their unique features, installation possibilities, and the impact they can have on the aesthetics of your surroundings.

2Nd Look Ceiling Tile

2Nd Look Ceiling Tile: A Second Glance at Elegance

Unveiling Elegance: Exploring 2Nd Look Ceiling Tile

At the heart of our exploration lies the enchanting world of 2Nd Look Ceiling Tiles. Let’s uncover the elegance behind these tiles, understanding how they bring a touch of sophistication and charm to ceilings, making every glance a second look.

1. Visual Appeal and Aesthetic Charm:

The primary allure of 2Nd Look Ceiling Tiles lies in their visual appeal and aesthetic charm. Explore the diverse designs, textures, and finishes available, allowing you to choose tiles that resonate with your personal style and complement the overall design of your space.

2. Recycled Beauty: An Environmentally Friendly Choice:

Dive into the eco-friendly aspect of 2Nd Look Ceiling Tiles. Discover how these tiles contribute to sustainable design by utilizing recycled materials. Learn about the environmental impact of choosing recycled tiles and how 2Nd Look is paving the way for a greener approach to interior design.

3. Easy Installation and Customization:

One of the standout features of 2Nd Look Ceiling Tiles is their ease of installation and customization. Explore the user-friendly installation process, making it accessible for DIY enthusiasts. Delve into the ways you can customize these tiles to create a unique and personalized ceiling that reflects your individual taste.

Installation Mastery: Tips and Tricks for 2Nd Look Ceiling Tile

Now that we’ve unraveled the elegance of these tiles, it’s essential to understand the art of installation. From preparation to execution, mastering the installation of 2Nd Look Ceiling Tiles ensures a seamless and visually stunning result.

1. Surface Preparation:

Begin the installation journey with proper surface preparation. Learn about the importance of a clean and level surface for optimal tile adhesion. Understand the different types of surfaces that are suitable for 2Nd Look Ceiling Tiles, ensuring a flawless installation process.

2. Adhesive Selection and Application:

Explore the world of adhesives and their role in securing 2Nd Look Ceiling Tiles. Understand the recommended adhesives for different surfaces and the correct application techniques. This section provides insights into ensuring a strong and long-lasting bond between the tiles and the ceiling.

3. Cutting Techniques for a Perfect Fit:

Achieving a professional finish requires mastering cutting techniques. Dive into the various tools and methods available for cutting 2Nd Look Ceiling Tiles to fit specific areas of your ceiling. Whether it’s intricate corners or curved edges, learn how to achieve a perfect fit with precision.

Applications of Elegance: Where to Use 2Nd Look Ceiling Tile

The versatility of 2Nd Look Ceiling Tiles extends to various applications, allowing you to infuse elegance into different spaces. From residential to commercial settings, these tiles find their place in elevating the ambiance of any room.

1. Residential Elegance:

Explore how 2Nd Look Ceiling Tiles bring a touch of elegance to residential spaces. From living rooms to bedrooms, these tiles enhance the visual appeal of ceilings, creating a luxurious and stylish atmosphere within the comfort of your home.

2. Commercial Sophistication:

In commercial settings, the elegance of 2Nd Look Ceiling Tiles becomes a statement of sophistication. Explore applications in offices, hotels, restaurants, and retail spaces, where these tiles elevate the overall aesthetic and contribute to a welcoming environment for clients and customers.

3. Creative Design Possibilities:

Unleash your creativity with 2Nd Look Ceiling Tiles by exploring various design possibilities. From accentuating specific areas to creating unique patterns, these tiles offer a canvas for innovative design ideas. Learn how to play with shapes, colors, and layouts to achieve a visually stunning ceiling.

Read too: Exploring the Benefits and How-Tos of DIY Ceiling Cassette Mini Split Installation: Revolutionizing Comfort

Conclusion:

In conclusion, 2Nd Look Ceiling Tiles redefine the concept of elegance in interior design. From their visual appeal to their eco-friendly features and ease of installation, these tiles offer a versatile solution for transforming ceilings into works of art. Elevate your space with the enduring elegance of 2Nd Look Ceiling Tiles and make every glance a second look.

Exploring the Versatility of 16X16 Interlocking Ceiling Tile: Elevate Your Space with Style

In the realm of interior design, discover the transformative power of 16X16 Ceiling Tile Interlocking, as we unravel the beauty, functionality, and endless possibilities they bring to your living or working space.

16X16 Ceiling Tiles Interlocking

Introduction:

Step into a world of design innovation with 16X16 Ceiling Tiles Interlocking. In this comprehensive guide, we will delve into the intricacies of these tiles, exploring their unique features and how they can redefine the aesthetics of any room. From residential to commercial spaces, the versatility of 16X16 Interlocking Ceiling Tiles knows no bounds.

16X16 Ceiling Tiles Interlocking: A Symphony of Style and Functionality

Unraveling the Design Marvel: 16X16 Ceiling Tiles Interlocking

At the heart of this exploration is the beauty and functionality of 16X16 Ceiling Tiles Interlocking. Let’s unravel the design marvel behind these tiles and how they can effortlessly enhance the ambiance of your space.

1. Impeccable Design Aesthetics:

The 16X16 Interlocking Ceiling Tiles boast impeccable design aesthetics that seamlessly blend with various interior styles. Explore the patterns, textures, and finishes available, allowing you to create a visually stunning ceiling that becomes a focal point in any room.

2. Easy Installation and Customization:

One of the key advantages of 16X16 Ceiling Tiles Interlocking is their user-friendly installation process. We’ll guide you through the steps, highlighting the interlocking mechanism that simplifies the customization of your ceiling. Discover how easy it is to achieve a tailored look without the need for complicated tools or professional assistance.

3. Durability and Maintenance:

Beyond their visual appeal, these tiles are designed for durability. Explore the materials used, their resistance to wear and tear, and how they stand the test of time. Additionally, learn about the minimal maintenance required to keep your 16X16 Interlocking Ceiling Tiles looking pristine for years to come.

Transforming Spaces with 16X16 Ceiling Tiles Interlocking

Now that we’ve explored the design and functionality, let’s shift our focus to the transformative power of 16X16 Ceiling Tiles Interlocking. Whether it’s a residential living room or a commercial office space, these tiles have the potential to elevate any environment.

1. Residential Applications:

In the realm of home design, 16X16 Ceiling Tiles Interlocking bring a touch of sophistication to various rooms. Explore how these tiles can be incorporated into living rooms, bedrooms, or even kitchens, creating a luxurious and stylish atmosphere within the comfort of your home.

2. Commercial Impressions:

For businesses seeking to make a statement with their interiors, the 16X16 Interlocking Ceiling Tiles offer a solution. Delve into the ways these tiles can enhance the aesthetics of offices, restaurants, or retail spaces, leaving a lasting impression on clients and customers.

3. Creative Patterns and Layouts:

Unlock your creativity by exploring the diverse patterns and layouts achievable with 16X16 Ceiling Tiles Interlocking. From classic symmetrical designs to modern and eclectic arrangements, the possibilities are limitless. Learn how to play with patterns to suit your desired aesthetic.

Read too: Exploring the Benefits and How-Tos of DIY Ceiling Cassette Mini Split Installation: Revolutionizing Comfort

Choosing the Perfect 16X16 Ceiling Tiles Interlocking for Your Space

With a plethora of options available, choosing the perfect 16X16 Ceiling Tiles Interlocking for your space requires thoughtful consideration. Let’s delve into the factors to consider, ensuring you make an informed decision that aligns with your design vision.

1. Matching Your Interior Style:

Consider the existing design elements of your space and choose 16X16 Ceiling Tiles Interlocking that complement your interior style. Whether it’s a contemporary, traditional, or minimalist theme, there are tiles available to suit every taste.

2. Size and Room Proportions:

Take into account the size of the room and the proportions of your ceiling when selecting these tiles. Understand how the 16X16 size can impact the visual perception of the space and choose accordingly to create a harmonious and balanced atmosphere.

3. Budget Considerations:

While these tiles offer a touch of luxury, it’s essential to consider your budget. Explore various options within your price range and find the perfect balance between quality and affordability. This section provides insights into cost-effective choices without compromising on style.

Conclusion:

In conclusion, 16X16 Ceiling Tile Interlocking stand as a testament to the marriage of form and function in interior design. From their impeccable aesthetics to their transformative capabilities, these tiles open a world of possibilities for creating visually stunning and personalized spaces. Elevate your surroundings with the beauty of 16X16 Interlocking Ceiling Tiles.

The Beauty of Stainless Steel Ceiling Tile: Elevate Your Space with Modern Elegance

Discover the epitome of sophistication for your interiors with “Stainless Steel Ceiling Tile.” Explore the versatility and contemporary charm of these tiles, perfect for transforming any space into a stylish and refined environment.

Stainless Steel Ceiling Tiles

Unveiling the Allure of Stainless Steel Ceiling Tiles

Stainless Steel Ceiling Tiles have become a sought-after choice in interior design for their sleek and modern appeal. In this section, we delve into the unique characteristics that set stainless steel tiles apart, from their durability to the reflective surfaces that add a touch of luxury to any room.

The Enduring Durability of Stainless Steel

Stainless steel is renowned for its durability and resistance to corrosion, making it an ideal material for ceiling tiles. Learn how these tiles can withstand the test of time, maintaining their pristine appearance even in high-moisture environments. Discover the benefits of choosing a material that not only looks stunning but also stands the test of time.

Versatility in Design: Stainless Steel Ceiling Tiles

One of the standout features of stainless steel ceiling tiles is their versatility in design. Explore the various patterns, finishes, and shapes available, allowing you to customize your space according to your aesthetic preferences. From classic to contemporary, stainless steel tiles can effortlessly complement any interior style.

Transforming Spaces with Stainless Steel Elegance

In this section, we showcase real-life examples of how stainless steel ceiling tiles have been used to transform spaces. Whether it’s a commercial setting, a modern home, or a creative workspace, the adaptability of these tiles shines through. Witness the versatility of stainless steel as it takes center stage in diverse design scenarios.

Installing Stainless Steel Ceiling Tiles: A Step-by-Step Guide

Installing stainless steel ceiling tiles may seem like a daunting task, but fear not. Our comprehensive guide breaks down the installation process into simple steps, ensuring that even DIY enthusiasts can achieve professional-looking results. From preparation to finishing touches, empower yourself with the knowledge to enhance your space with stainless steel elegance.

Maintenance Tips for Long-Lasting Brilliance

While stainless steel is known for its durability, proper maintenance is key to preserving its brilliance. Learn practical tips for cleaning, preventing fingerprints, and addressing any potential issues that may arise over time. With the right care, your stainless steel ceiling tiles will continue to exude elegance for years to come.

Read too: A Comprehensive Mr Cool Ceiling Cassette Review: Unveiling Excellence

Conclusion: Elevate Your Interiors with Stainless Steel Elegance

In conclusion, Stainless Steel Ceiling Tile offer a perfect blend of durability, versatility, and modern elegance. Whether you’re looking to upgrade a commercial space or add a touch of luxury to your home, these tiles are a timeless choice. Follow our guide to make informed decisions and embark on a journey to elevate your interiors with the enduring beauty of stainless steel.

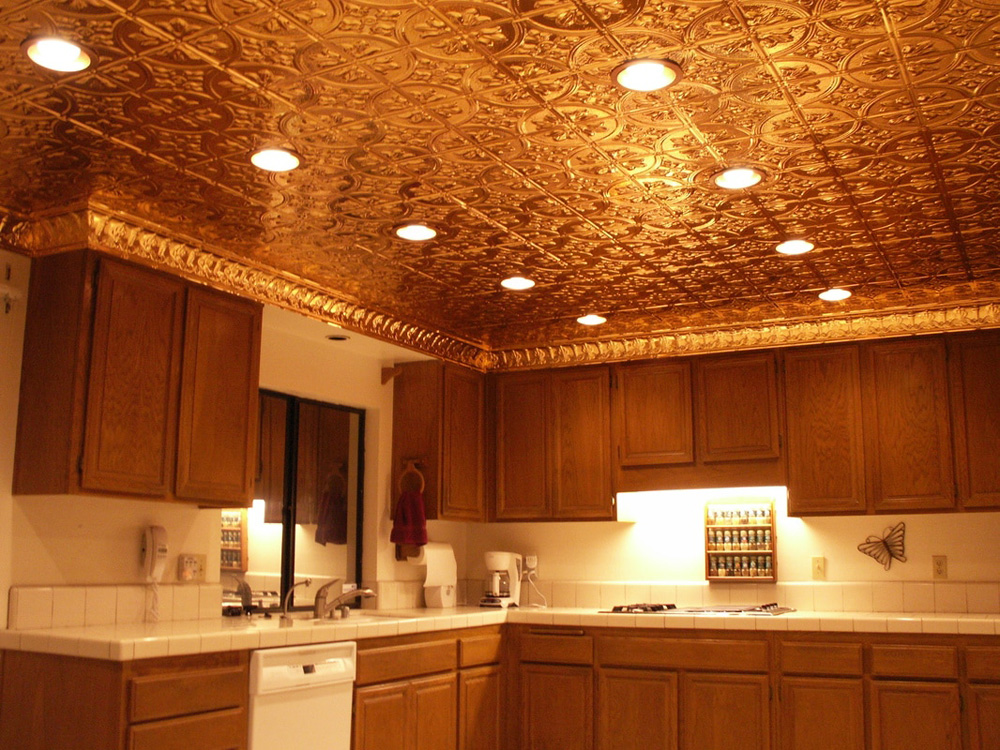
5 Reasons to Consider Real Copper Ceiling Tile for Your Home

Add a touch of luxury and sophistication with real copper ceiling tiles.

Copper ceiling tile are a unique and stylish way to add a touch of luxury and sophistication to your home. They are available in a variety of styles and finishes, so you can find the perfect look to match your décor.

Real Copper Ceiling Tiles

If you are considering installing copper ceiling tiles, here are five reasons why you should:

  1. They are beautiful.

Copper ceiling tiles are simply stunning. They add a warm, inviting glow to any room, and they can really make a space stand out.

  1. They are durable.

Copper is a very durable metal, so your copper ceiling tiles will last for many years to come. They are also resistant to moisture and fire, so they are a good choice for areas that are prone to these elements.

  1. They are easy to maintain.

Copper ceiling tiles are very easy to maintain. They can be cleaned with a damp cloth and do not require any special cleaning products.

  1. They are affordable.

Copper ceiling tiles are more affordable than you might think. They are less expensive than many other types of ceiling tiles, such as tin and coffered ceilings.

  1. They are environmentally friendly.

Copper is a sustainable material, so copper ceiling tiles are an environmentally friendly choice. They are also recyclable, so you can feel good knowing that you are doing your part to help the environment.

Real Copper Ceiling Tiles

Copper ceiling tiles are made from sheets of copper that have been stamped or embossed with a design. They are available in a variety of styles and finishes, including:

  • Antique copper: This finish has a warm, aged look that is perfect for traditional homes.
  • Polished copper: This finish has a bright, shiny look that is perfect for modern homes.
  • Brushed copper: This finish has a soft, satin look that is perfect for contemporary homes.

Copper ceiling tiles can be installed in any room of your home, including:

  • Kitchens: Copper ceiling tiles can add a touch of luxury to your kitchen. They are also easy to clean and maintain, which is important in a busy kitchen.
  • Bathrooms: Copper ceiling tiles can add a touch of warmth and sophistication to your bathroom. They are also resistant to moisture, which is important in a bathroom.
  • Living rooms: Copper ceiling tiles can add a touch of elegance to your living room. They are also a great way to make a small space feel larger.
  • Bedrooms: Copper ceiling tiles can add a touch of luxury and relaxation to your bedroom. They are also a great way to create a focal point in the room.

How to Install Copper Ceiling Tiles

Copper ceiling tiles can be installed by a professional or a do-it-yourselfer. If you are installing the tiles yourself, there are a few things you will need:

  • Copper ceiling tiles: You will need to purchase enough tiles to cover the area you are installing them in.
  • Adhesive: You will need to use an adhesive that is specifically designed for copper ceiling tiles.
  • Tools: You will need a few basic tools, such as a hammer, a saw, and a level.

Once you have gathered your supplies, you can begin the installation process:

  1. Prepare the surface: The surface you are installing the tiles on must be clean, dry, and smooth. If the surface is not smooth, you will need to sand it down.
  2. Apply the adhesive: Apply the adhesive to the back of the copper ceiling tiles.
  3. Install the tiles: Start by installing the tiles in the center of the ceiling. Then, work your way out to the edges.
  4. Trim the tiles: If necessary, you can trim the tiles to fit around obstacles, such as light fixtures.
  5. Admire your work: Once the tiles are installed, you can step back and admire your work.

Read too: A Comprehensive Mr Cool Ceiling Cassette Review: Unveiling Excellence

Conclusion

Copper ceiling tile are a beautiful, durable, and affordable way to add a touch of luxury and sophistication to your home. If you are considering installing copper ceiling tiles, be sure to do your research to find the right tiles for your needs.