Water Leaking Through Ceiling Light Fixture: Causes, Risks, and Solutions

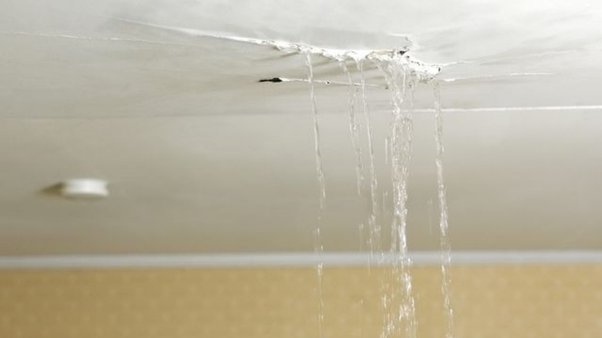
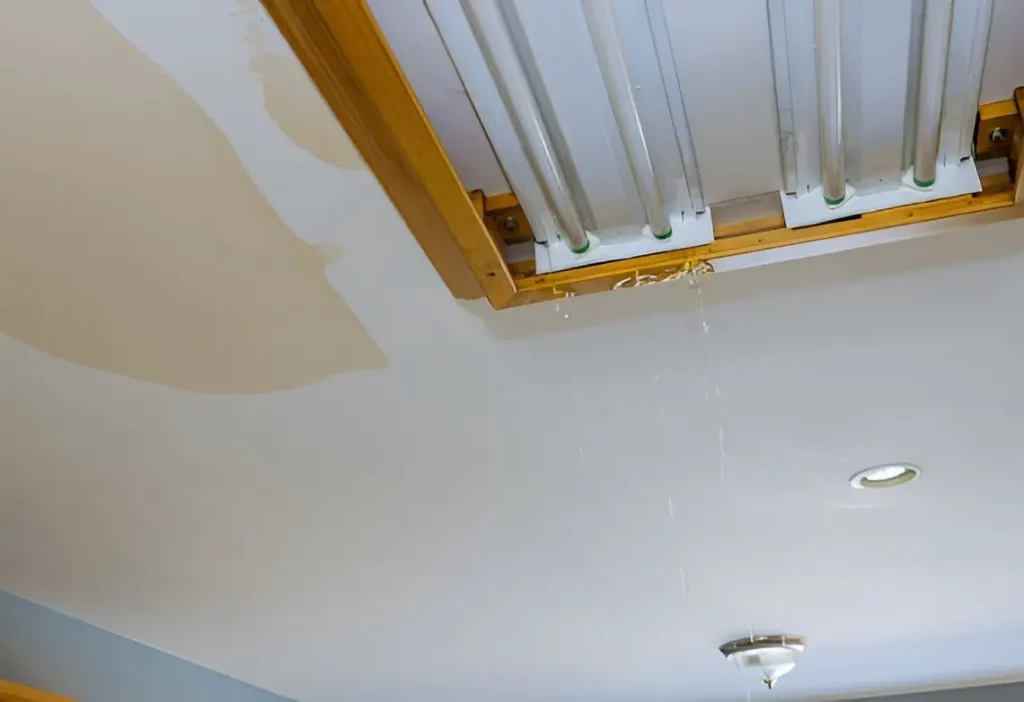
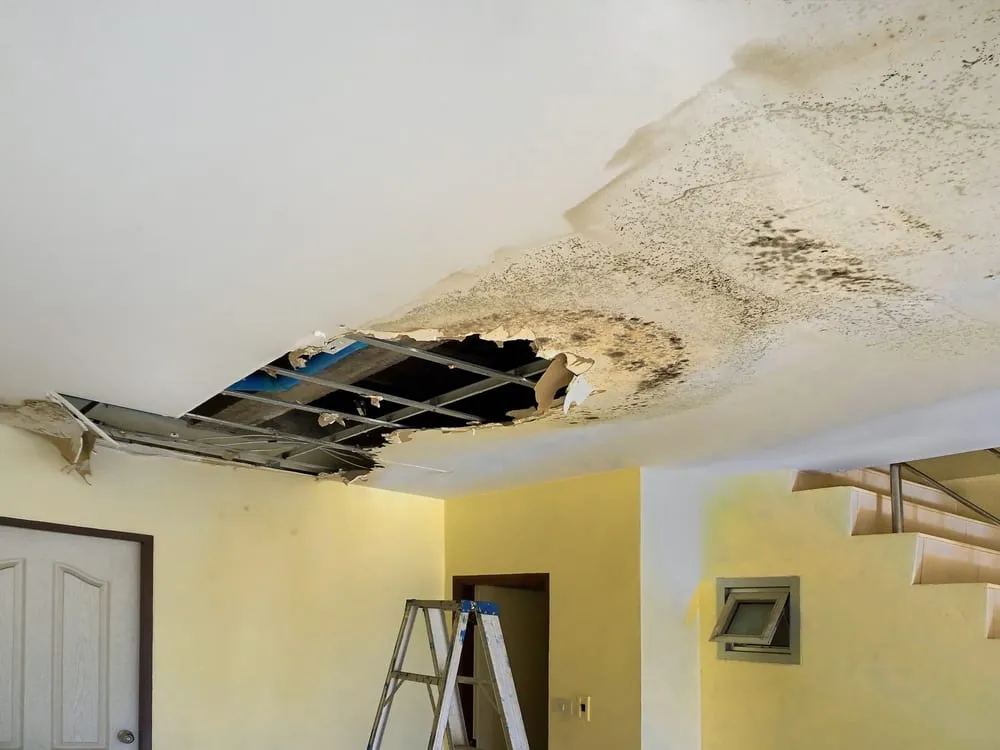
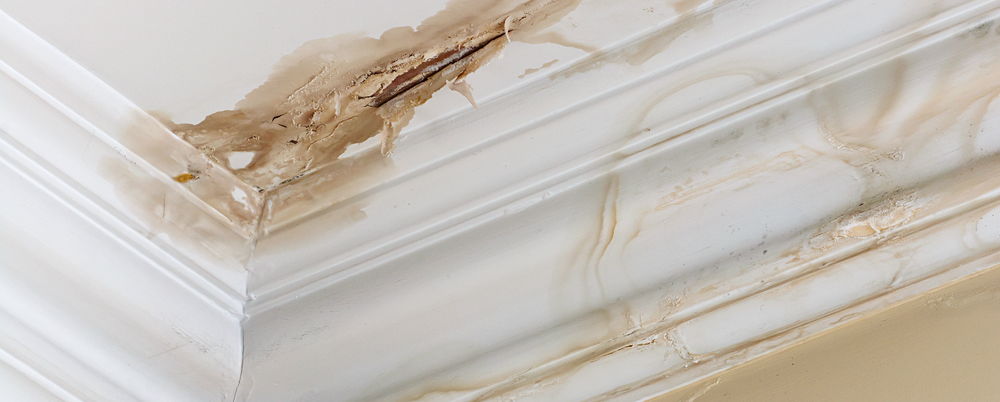
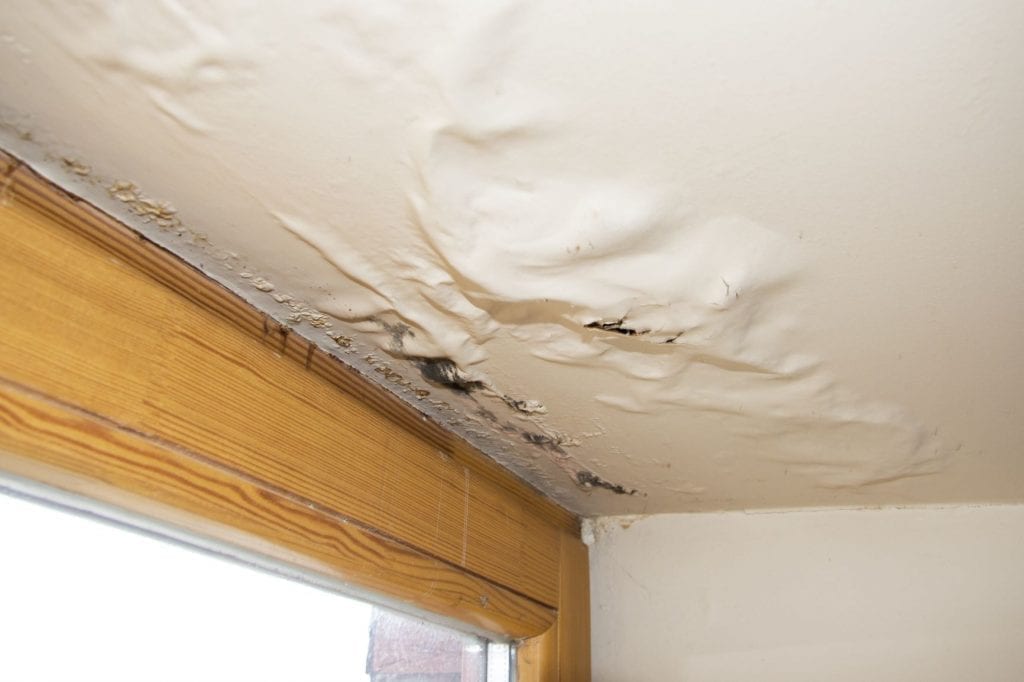
Water leaking through a ceiling light fixture is a concerning and potentially hazardous issue that requires immediate attention. Beyond the apparent water damage, this situation presents electrical hazards and risks to the structural integrity of your home. Understanding the causes and solutions for this problem can help you address it effectively and prevent future occurrences.

Water Leaking Through Ceiling Light Fixture

In this article, we’ll explore the causes, risks, and detailed steps to resolve water leaking through a ceiling light fixture.


Why Is Water Leaking Through Ceiling Light Fixture?

If you notice water dripping or pooling around a ceiling light fixture, it usually indicates a water leak in the plumbing or roof above the ceiling. Here are some common reasons for this issue:

1. Roof Leaks

A damaged or deteriorated roof can allow rainwater to seep into the attic and eventually into your ceiling, reaching the light fixture. This problem is common in older homes or those that have experienced recent storms or hail damage.

2. Plumbing Issues

Leaks in plumbing pipes that run above the ceiling, such as water supply or drainage lines, can lead to water accumulation near the light fixture. Burst pipes, loose connections, or worn-out seals are frequent culprits.

3. Clogged Gutters

When gutters are clogged with leaves, debris, or ice, water can overflow and find its way into the attic or walls. This water can pool near the ceiling and make its way to light fixtures.

Read too: Kitchen Lighting For A Vaulted Ceiling: Illuminating Your Space with Style and Functionality

4. Condensation Issues

In humid environments, condensation can build up in poorly insulated ceilings, leading to water drips. Over time, this moisture can accumulate around ceiling fixtures.

5. Faulty Appliances or HVAC Systems

Appliances like washing machines, dishwashers, or air conditioners with water lines running above the ceiling can develop leaks. HVAC systems with damaged condensation lines may also contribute to this problem.


Water Leaking Through Ceiling Light Fixture: The Risks

Water leaking through a ceiling light fixture is not just a cosmetic issue. It poses serious risks, including:

1. Electrical Hazards

Water and electricity are a dangerous combination. Leaks around light fixtures can lead to short circuits, electrical fires, or the risk of electrocution.

2. Structural Damage

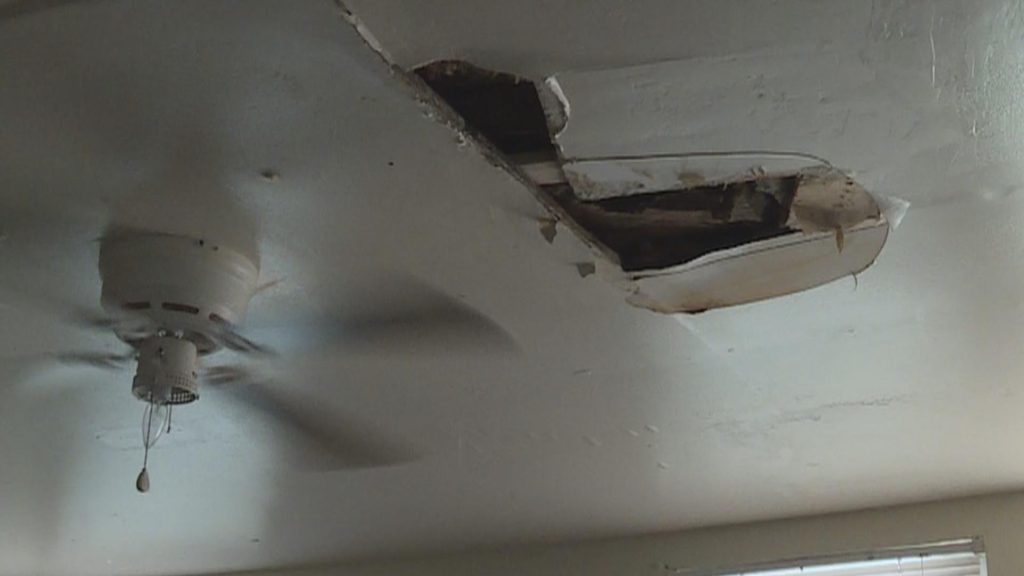
Prolonged exposure to water can weaken ceiling materials, causing sagging, cracks, or even a collapse in severe cases.

3. Mold and Mildew Growth

Moisture from leaks creates an ideal environment for mold and mildew. These fungi can spread rapidly, affecting air quality and causing health issues like allergies and respiratory problems.

4. Increased Repair Costs

Ignoring the problem can lead to extensive damage, requiring costly repairs to ceilings, electrical systems, and other affected areas.


What to Do When You Notice Water Leaking Through Ceiling Light Fixture

Acting quickly when you see water leaking through a ceiling light fixture can minimize damage and hazards. Follow these steps to address the issue:

1. Turn Off Electricity Immediately

Water coming into contact with electrical fixtures is extremely dangerous. Turn off the power to the affected area at your circuit breaker to avoid electrical hazards. Do not attempt to touch the light fixture or switch until the power is off.

2. Stop the Water Source

If you suspect the water is coming from a plumbing leak, turn off the main water supply to your home. For roof leaks, try to prevent further water entry by covering the damaged area with a tarp or other waterproof material until repairs can be made.

3. Contain the Water

Place buckets, towels, or containers under the leak to catch dripping water and prevent it from spreading further.

4. Inspect for Immediate Damage

Examine the ceiling for signs of sagging or cracks. If the ceiling appears unstable, avoid the area and contact professionals for assistance.

5. Call a Professional

Whether the leak originates from plumbing, the roof, or other sources, it’s important to consult a professional. Licensed plumbers, electricians, or roofers can accurately diagnose and fix the underlying problem.


How to Fix Water Leaking Through Ceiling Light Fixture

Once the immediate risks have been mitigated, it’s time to address the root cause of the leak and repair the damage.

1. Repair Roof Leaks

If the issue is due to a damaged roof:

  • Inspect the roof for damage: Look for missing shingles, cracks, or holes.
  • Seal minor leaks: Use roofing cement or sealant to patch small holes.
  • Hire a roofer for major repairs: For significant damage, contact a professional roofer to replace sections of the roof or install new materials.

2. Fix Plumbing Issues

For plumbing-related leaks:

  • Identify the source: Trace the water flow to find the damaged pipe or connection.
  • Repair or replace pipes: Tighten loose fittings, seal leaks with plumber’s tape, or replace broken pipes.
  • Call a plumber: For extensive plumbing issues, a licensed plumber can ensure repairs are done correctly.

3. Clean Gutters and Downspouts

If clogged gutters are causing water overflow:

  • Clear debris: Remove leaves, dirt, and ice from gutters and downspouts.
  • Install gutter guards: These can help prevent future clogs.

4. Improve Insulation

For condensation issues:

  • Upgrade insulation: Add insulation to areas prone to moisture buildup.
  • Use a dehumidifier: Reduce indoor humidity levels to prevent condensation.

5. Repair the Ceiling and Fixture

Once the leak has been resolved:

  • Dry the area: Use fans or dehumidifiers to dry out the ceiling and surrounding areas thoroughly.
  • Replace damaged materials: Remove and replace water-damaged drywall, insulation, or ceiling tiles.
  • Inspect electrical components: Have an electrician check and repair the light fixture or wiring before restoring power.

Preventing Future Water Leaks

Taking proactive steps can help you avoid future instances of water leaking through a ceiling light fixture:

  • Regular Roof Maintenance: Inspect your roof annually for damage and clean gutters regularly to ensure proper drainage.
  • Plumbing Inspections: Check for leaks or worn-out pipes and address issues promptly.
  • HVAC Maintenance: Service your HVAC system regularly to prevent condensation line problems.
  • Proper Insulation: Ensure your attic and ceiling are well-insulated to prevent condensation and water seepage.

Final Thoughts

Water leaking through a ceiling light fixture is a serious issue that should never be ignored. Prompt action can help prevent electrical hazards, structural damage, and costly repairs. By understanding the causes, addressing the problem effectively, and implementing preventive measures, you can protect your home from further damage and ensure safety for you and your family.

Why Is My Ceiling Leaking When AC Is On? Understanding the Causes and Solutions

Experiencing a ceiling leak while your air conditioning (AC) is running can be both alarming and frustrating. You might wonder why this is happening, what it means, and how to fix it. In this article, we’ll explore the reasons behind a ceiling leaking when AC is on, common solutions, and tips to prevent future issues. By the end, you’ll be equipped with the knowledge needed to address this annoying problem.

Ceiling Leaking When Ac Is On

Understanding the Problem: Ceiling Leaking When AC Is On

When your ceiling starts to leak while the AC is operating, it can signify a variety of issues, ranging from minor inconveniences to major repairs. Understanding the root cause of the problem is essential for effective remediation.

Read too: Bathroom Flooded Through the Ceiling: A Comprehensive Guide

Common Causes of Ceiling Leaking When AC Is On

  1. Condensation Build-Up
    • One of the most frequent reasons for leaks is condensation. When warm, humid air comes into contact with the cold surfaces of the AC ductwork, condensation forms. If the drainage system isn’t functioning properly, this moisture can drip down and create the appearance of a leak on your ceiling.
  2. Clogged Drain Line
    • Your air conditioning unit has a drain line designed to remove excess moisture. If this line becomes clogged with dirt, mold, or other debris, it can cause water to back up and leak from the ceiling. Regular maintenance can help prevent this issue.
  3. Improper Installation
    • If your AC system was not installed correctly, it may not function as intended. Ducts that are improperly sealed or insulated can allow cool air to escape, leading to condensation and subsequent leaks. If you suspect this might be the case, a professional inspection is advisable.
  4. Refrigerant Issues
    • Low refrigerant levels can cause the evaporator coil to freeze. When it thaws, it can produce excess water that may not be adequately drained, resulting in a leak. This issue requires immediate attention from a qualified technician.
  5. Roof or Ceiling Damage
    • Sometimes, the problem is not with the AC system at all but rather with the integrity of the roof or ceiling itself. If there are pre-existing leaks in the roof, the extra moisture generated by the AC could exacerbate the issue, leading to visible water damage on your ceiling.
  6. Humidity Levels
    • High indoor humidity levels can also contribute to leaks. If your home is not adequately dehumidified, the increased moisture in the air can lead to condensation on the AC components, resulting in leaks.

Identifying the Source of the Leak

If you notice a leak when your AC is on, the first step is to identify its source. Here are a few methods to help you pinpoint the problem:

  • Visual Inspection: Check the area around the leak for any obvious signs of moisture, discoloration, or mold. Look for damp spots on the ceiling or walls.
  • Inspect the AC Unit: Examine your air conditioning unit, particularly the drain pan and drain line. Look for blockages or damage that could be causing water to overflow.
  • Check for Ice: If you see ice on the AC coils, this may indicate a refrigerant issue or airflow problem.
  • Monitor Humidity Levels: Use a hygrometer to measure indoor humidity. High levels can lead to condensation problems.

Solutions for Ceiling Leaking When AC Is On

Once you’ve identified the potential causes of the leak, the next step is implementing solutions.

  1. Clear the Drain Line
    • Use a wet/dry vacuum to clear any blockages in the drain line. Regular maintenance, including cleaning the line, can prevent future clogs.
  2. Improve Insulation
    • Ensure that your ducts are well-insulated to prevent condensation. Adding insulation can significantly reduce the temperature difference that leads to moisture build-up.
  3. Adjust Humidity Levels
    • Invest in a dehumidifier to maintain optimal indoor humidity levels, especially in humid climates. This can reduce the risk of condensation-related leaks.
  4. Repair or Replace Damaged Components
    • If the leak is due to damaged ducts, coils, or other AC components, repairs or replacements may be necessary. Consult with a qualified HVAC technician for assessment and recommendations.
  5. Inspect Roof and Ceiling
    • If you suspect roof damage, have a professional inspect it for leaks or deterioration. Repairing any damage can help prevent moisture issues.

Preventive Measures to Avoid Future Leaks

Taking proactive steps can save you time and money in the long run. Here are some preventive measures to consider:

  • Regular Maintenance: Schedule regular check-ups for your AC system. A qualified technician can clean the drain line, check for refrigerant levels, and ensure everything is functioning properly.
  • Install a Drain Pan: Consider installing a drain pan under your AC unit. If the primary drain line fails, the pan will catch excess water and prevent leaks.
  • Monitor Indoor Conditions: Use humidity monitors to keep an eye on indoor humidity levels. Aim to keep levels between 30% and 50%.
  • Educate Yourself: Understanding how your HVAC system works can help you identify potential issues before they become major problems.

When to Call a Professional

If you’ve tried troubleshooting the issue but the leak persists, it may be time to call in a professional. A certified HVAC technician can perform a thorough inspection and diagnose complex problems that may not be apparent to an untrained eye.

Conclusion

A ceiling leaking when AC is on is a situation no homeowner wants to face. However, by understanding the potential causes and taking the necessary steps to address them, you can mitigate the risks and prevent future leaks. Regular maintenance, proper installation, and proactive monitoring are key to keeping your home safe and comfortable.

By staying informed and proactive, you can tackle issues before they escalate, ensuring that your AC system functions effectively and your ceiling remains leak-free.

Water Spot On Ceiling Below Bathroom: Causes, Solutions, and Prevention Tips

A water spot on the ceiling below a bathroom can be more than just an unsightly blemish—it’s often a sign of underlying issues that need to be addressed promptly. Water spots indicate that water is leaking from somewhere above, and if left unresolved, these leaks can lead to significant damage and costly repairs. This article will delve into the causes of water spots, how to address them, and preventative measures to avoid future problems.

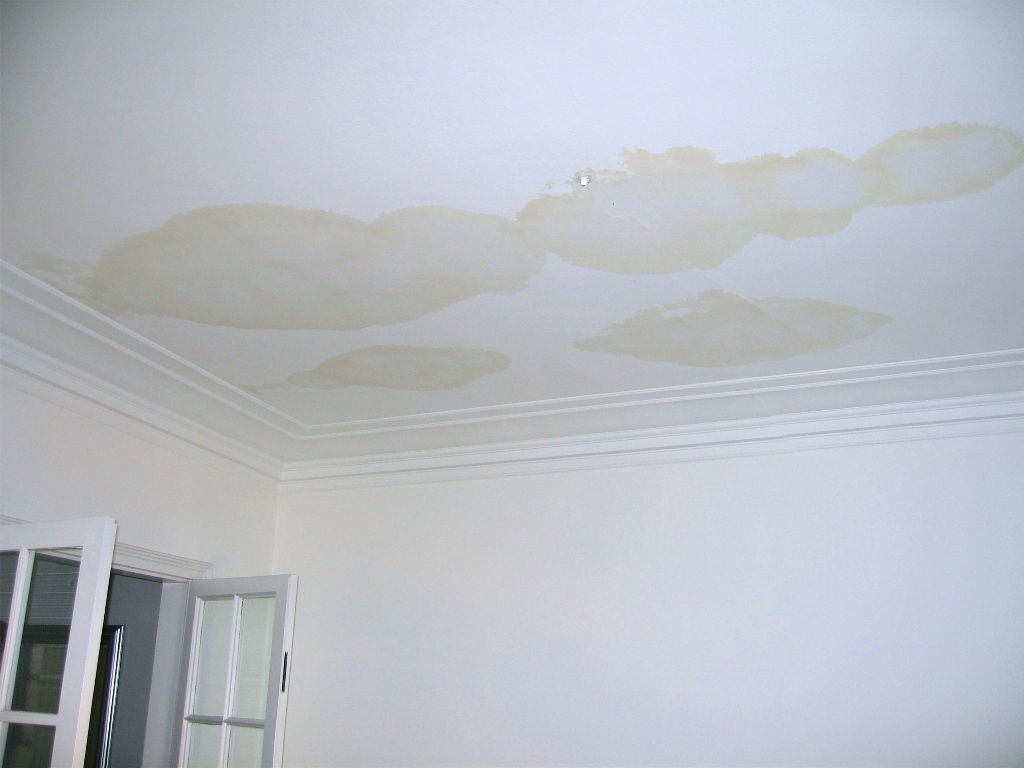
Water Spot On Ceiling Below Bathroom

Understanding the Causes of Water Spots on the Ceiling

A water spot on the ceiling below a bathroom typically results from water leakage or condensation. Understanding the common causes can help you diagnose the issue and determine the best course of action.

1. Leaking Pipes

One of the most common causes of a water spot is leaking pipes. Bathrooms often have numerous pipes running through the walls and ceiling, including those for sinks, showers, and toilets. If any of these pipes develop a leak, water can drip down onto the ceiling below, causing spots and stains.

2. Faulty Bathroom Fixtures

Bathroom fixtures such as toilets, sinks, and showers can sometimes fail or become damaged. For example, a worn-out wax seal around the base of a toilet can allow water to leak out, while a cracked sink or shower pan can lead to water seeping through.

Read too: Discovering the Charm of Nautical Outdoor Ceiling Fans for Your Coastal Retreat: Sail into Style

3. Roof Leaks

If the bathroom is located directly under the roof, a leak in the roof can also cause water spots on the ceiling below. Roof leaks might be due to damaged shingles, poor flashing, or clogged gutters.

4. Condensation Issues

High humidity levels in the bathroom can lead to condensation, especially if the bathroom lacks proper ventilation. This condensation can sometimes accumulate and cause water spots on the ceiling below if not managed properly.

5. Poorly Installed or Damaged Flashing

Flashing is used to direct water away from areas where the roof meets vertical surfaces. If flashing around vents, skylights, or chimneys is improperly installed or damaged, it can lead to leaks and water spots on the ceiling below.

Identifying the Source of the Leak

To effectively address a water spot on the ceiling below a bathroom, it’s crucial to identify the exact source of the leak. Here’s a step-by-step guide to help you find the source:

1. Inspect the Bathroom Fixtures

Start by examining the bathroom fixtures for any signs of damage or leakage. Check the toilet, sink, and shower for any leaks or drips. Ensure that the wax seal around the toilet is intact and that there are no visible cracks or damage to the fixtures.

2. Check the Pipes

Look at the visible pipes in the bathroom, including those under the sink and around the shower or bathtub. If you notice any wet spots, drips, or corrosion, it could indicate a leak.

3. Examine the Roof and Attic

If you suspect the leak might be coming from the roof, inspect the attic for any signs of water infiltration. Look for wet insulation, water stains on the rafters, or mold growth, which can indicate roof leaks.

4. Assess Ventilation

Ensure that the bathroom has adequate ventilation to prevent excessive humidity and condensation. Check if the exhaust fan is functioning properly and that there are no obstructions in the vents.

How to Fix a Water Spot on the Ceiling

Once you’ve identified the source of the leak, you can take steps to fix the water spot on the ceiling below a bathroom. Here’s a general guide on how to address the issue:

1. Repair Leaking Pipes

If a leaking pipe is the cause, you’ll need to repair or replace the damaged pipe. This might involve tightening connections, replacing sections of the pipe, or using pipe sealant. If you’re not comfortable with plumbing repairs, consider hiring a professional plumber.

2. Fix Bathroom Fixtures

For issues with bathroom fixtures, you may need to replace damaged components or re-seal areas around the toilet or sink. For instance, you might need to install a new wax ring for the toilet or reseal the edges of the sink.

3. Address Roof Leaks

If the problem is related to roof leaks, you’ll need to repair the roof or replace damaged shingles or flashing. This may involve patching up leaks or replacing sections of roofing material. Roof repairs can be complex, so it’s often best to consult a roofing professional.

4. Improve Ventilation

To manage condensation issues, improve bathroom ventilation by installing or upgrading an exhaust fan. Ensure the fan is appropriately sized for the room and that it vents outside rather than into the attic.

5. Repaint the Ceiling

After addressing the leak, you’ll need to repair the ceiling where the water spot has occurred. This involves cleaning the area, applying a primer to seal any stains, and repainting the ceiling to restore its appearance.

Preventing Future Water Spots

Preventing water spots from recurring involves addressing the underlying issues and implementing measures to reduce the risk of leaks and damage. Here are some tips to help you keep your bathroom and ceiling in good condition:

1. Regular Maintenance

Perform regular maintenance on your plumbing fixtures, pipes, and roof to catch and address potential issues before they become major problems. Check for signs of wear and tear and address any issues promptly.

2. Proper Ventilation

Ensure that your bathroom is well-ventilated to prevent excessive humidity and condensation. Install or upgrade exhaust fans and make sure they are functioning properly.

3. Inspect Roof and Flashing

Regularly inspect your roof and flashing for signs of damage or wear. Replace damaged shingles, and repair or replace flashing as needed to prevent leaks.

4. Address Leaks Promptly

If you notice any signs of leaks or water spots, address them promptly to prevent further damage. Early intervention can help minimize repair costs and prevent more significant issues.

Conclusion

A water spot on the ceiling below a bathroom is more than just a cosmetic issue—it often signals underlying problems that need to be addressed. By understanding the common causes of water spots, identifying the source of the leak, and taking appropriate steps to fix and prevent future issues, you can protect your home from water damage and maintain a safe and comfortable living environment. Regular maintenance, proper ventilation, and prompt repairs are key to keeping your bathroom and ceiling in top condition.

Understanding and Addressing Ice Dam Ceiling Leak Issues: Defending Your Home

Uncover the complexities surrounding an “Ice Dam Ceiling Leak” and explore proactive measures to safeguard your home. Learn about the causes, consequences, and effective solutions to prevent and address ice dam-related ceiling leaks.

Ice Dam Ceiling Leak

Ice Dam Ceiling Leak: An Unwelcome Intruder

Ice Dam Ceiling Leak: Navigating the Winter Menace

Delve into the challenge of an ice dam ceiling leak and understand why it becomes a winter menace for homeowners. Gain insights into the potential causes and consequences, setting the stage for effective prevention and resolution.

Decoding the Signs: Recognizing an Ice Dam Ceiling Leak

Learn to recognize the signs of an ice dam ceiling leak. From visible water stains to dripping water, understand the indicators that signal potential damage and the need for immediate attention during the winter months.

Understanding the Causes of an Ice Dam Ceiling Leak

1. Formation of Ice Dams

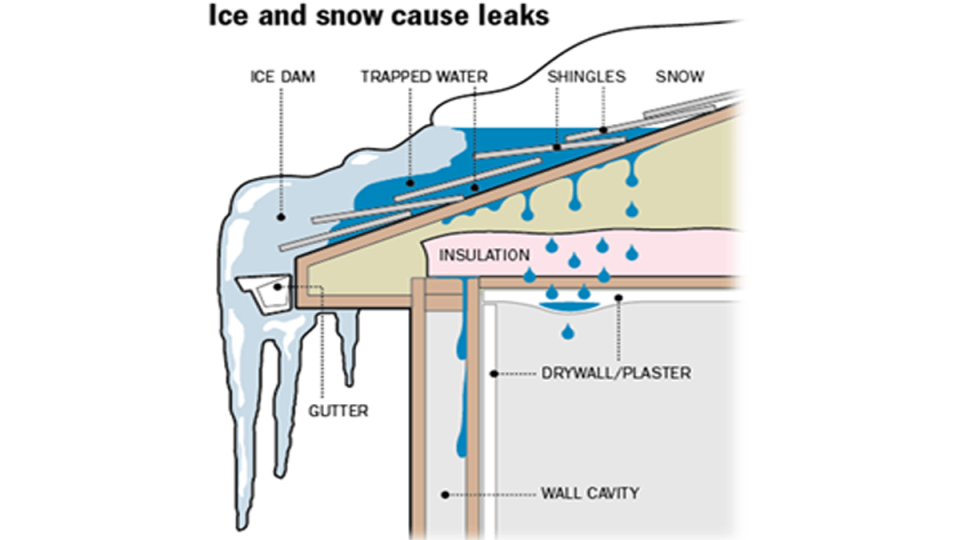
Explore the role of ice dams in causing ceiling leaks. Understand how ice dams form on roofs, creating barriers that trap melting snow and lead to water infiltration into your home.

2. Roofing Material and Insulation Issues

Delve into the consequences of roofing material and insulation issues contributing to ice dam-related leaks. Learn how inadequate insulation and roofing materials can exacerbate the formation of ice dams and compromise your ceiling’s integrity.

3. Temperature Fluctuations

Understand the impact of temperature fluctuations on ice dam formation. Explore how the freeze-thaw cycle can contribute to the creation of ice dams, leading to potential leaks and water damage to your ceiling.

The Consequences of Neglected Ice Dam Ceiling Leaks

1. Structural Compromises

Uncover the potential structural compromises resulting from prolonged ice dam-related leaks. Learn how untreated issues can weaken the integrity of your ceiling and the overall structure of your home.

2. Mold and Mildew Growth

Explore the risk of mold and mildew growth associated with ice dam ceiling leaks. Understand the health hazards and the importance of addressing water leaks promptly to prevent these issues.

3. Aesthetic Deterioration

Beyond structural concerns, ice dam-related leaks affect the aesthetics of your home. Learn about the impact on the appearance of your ceiling, including discoloration, peeling paint, and potential damage to decorative elements.

Dealing with Ice Dam Ceiling Leaks: Effective Solutions

1. Immediate Action: Emergency Measures

In the event of an ice dam ceiling leak, take immediate action to contain the issue. Explore emergency measures, including identifying and addressing the source of water infiltration, drying the affected area, and preventing further damage.

2. Professional Assessment: Seeking Expert Advice

Consult with professionals for a thorough assessment of the damage. Learn about the importance of seeking expert advice to identify the extent of the ice dam-related leaks and determine the most effective resolution methods.

3. Roof and Insulation Upgrades: Long-term Solutions

Explore roof and insulation upgrades as long-term solutions to prevent ice dam-related leaks. Learn about the benefits of enhancing your roof’s insulation, improving ventilation, and upgrading roofing materials to minimize the risk of ice dams.

Preventive Measures: Safeguarding Your Home

1. Adequate Insulation and Ventilation

Implement adequate insulation and ventilation to prevent ice dam formation. Explore the significance of maintaining proper attic temperatures and air circulation to reduce the risk of ice dams on your roof.

2. Snow Removal Strategies

Consider effective snow removal strategies to mitigate ice dam formation. Explore safe methods for removing snow from your roof, preventing the buildup that contributes to the creation of ice dams.

3. Professional Roof Inspection

Prioritize professional roof inspections to identify vulnerabilities. Learn about the importance of regular inspections to detect potential issues and address them before they lead to ice dam-related ceiling leaks.

Read too: Exploring Hunter Douglas Architectural Ceilings for Modern Design: Elevate Your Space with Elegance

Conclusion: Defending Against Winter’s Wrath

In conclusion, dealing with an “Ice Dam Ceiling Leak” requires a combination of vigilance, immediate action, and professional expertise. By understanding the causes, consequences, and effective resolution methods, you can safeguard your home from the challenges of ice dam-related leaks. Remember, early intervention is key to minimizing damage and ensuring the longevity and safety of your home during the winter months.

Dealing with the Challenges of Rain Coming Through Ceiling in Your Home: Unexpected Woes

As homeowners, we often face unexpected challenges, and one of the most disconcerting experiences is discovering “Rain Coming Through Ceiling.” In this comprehensive guide, we’ll explore the causes, potential damages, and effective solutions to address this alarming issue and safeguard your home.

Rain Coming Through Ceiling

Understanding the Phenomenon: Rain Coming Through Ceiling

Rain Coming Through Ceiling: A Troubling Intrusion into Your Home

Discovering rainwater infiltrating your home through the ceiling can be a distressing sight. Let’s delve into the potential causes and consequences of this phenomenon, ensuring you have the knowledge to address the issue promptly and effectively.

Identifying the Causes: Why Is Rain Coming Through My Ceiling?

1. Damaged Roofing Materials

Examine the impact of damaged roofing materials on your home’s structural integrity. Learn how wear and tear, severe weather, or aging can compromise the protective barrier of your roof, allowing rainwater to seep through.

2. Missing or Damaged Shingles

Explore the role of shingles in safeguarding your roof. Discover how missing or damaged shingles can create vulnerable spots, leading to leaks and ultimately resulting in rainwater making its way into your home.

3. Clogged or Damaged Gutters

Understand the importance of well-maintained gutters in diverting rainwater away from your home. Explore the consequences of clogged or damaged gutters, which can contribute to water pooling on your roof and finding its way through the ceiling.

Dealing with Rain Coming Through Ceiling: Effective Solutions

1. Emergency Measures: Containing the Damage

In the immediate aftermath of discovering rain coming through your ceiling, take swift action to contain the damage. Learn how to identify and safely address the affected areas, minimizing the impact on your home’s interior.

2. Identifying the Source: Roof Inspection

To effectively address the issue, conduct a thorough inspection of your roof. Explore steps to identify the source of the leak, whether it’s damaged flashing, missing shingles, or compromised roofing materials.

3. Temporary Fixes: Tarping and Sealants

In emergency situations, temporary fixes can be implemented to prevent further water intrusion. Understand the use of tarps and sealants as effective measures to provide immediate relief while awaiting permanent repairs.

4. Professional Repairs: Roofing Experts to the Rescue

Consulting with roofing professionals is crucial for a long-term solution. Explore the benefits of hiring experts to assess the extent of the damage, recommend necessary repairs, and restore the integrity of your roof.

The Cost of Ignoring the Issue

1. Structural Damage

Learn about the potential structural damage caused by prolonged exposure to rainwater. Understand how untreated leaks can compromise the stability of your home, leading to costly repairs.

2. Mold and Mildew Growth

Explore the risk of mold and mildew growth resulting from moisture intrusion. Understand the health hazards associated with mold and the importance of addressing leaks promptly to prevent these issues.

3. Compromised Insulation and Energy Efficiency

Discover how rain coming through the ceiling can compromise your home’s insulation. Explore the implications for energy efficiency and the potential increase in utility costs if the issue is not addressed promptly.

Read too: Exploring Hunter Douglas Architectural Ceilings for Modern Design: Elevate Your Space with Elegance

Preventive Measures: Safeguarding Your Home

Regular Roof Maintenance

Implementing a routine roof maintenance schedule is essential for preventing rainwater leaks. Explore the importance of inspecting your roof regularly, addressing minor issues before they escalate into major problems.

Gutter Maintenance

Understand the role of gutters in preventing rainwater damage. Learn about the significance of regular gutter maintenance, including cleaning and repairs, to ensure proper water drainage.

Conclusion: Taking Control of Rain Coming Through Ceiling

In conclusion, discovering rain coming through your ceiling is a homeowner’s nightmare, but with proactive measures and prompt action, you can take control of the situation. From identifying the causes to implementing effective solutions and preventive measures, this guide empowers you to safeguard your home from the challenges of rainwater intrusion. Remember, early intervention is key to preventing extensive damage and maintaining the comfort and integrity of your living space.

Troubleshooting Tips for Ceiling Leaking After Shower: Causes and Solutions

Experiencing a “Ceiling Leaking After Shower” can be concerning and requires immediate attention. In this comprehensive guide, we’ll delve into the common causes behind ceiling leaks after a shower, offering insights on identifying, addressing, and preventing such issues. Learn about potential culprits and effective solutions to keep your bathroom dry and your ceiling intact.

Ceiling Leaking After Shower

Understanding the Issue: Ceiling Leaking After Shower

Before delving into solutions, let’s explore the phenomenon of a ceiling leaking after a shower. This occurrence is often indicative of water seeping through various layers, causing damage to the ceiling and potentially leading to more significant issues like mold growth and structural damage.

Common Causes of Ceiling Leaks After Shower

  1. Faulty Shower Pan: A damaged or improperly installed shower pan can allow water to penetrate the flooring and subfloor, eventually reaching the ceiling below.
  2. Leaking Shower Enclosure: Cracks or gaps in the shower enclosure can permit water to escape and find its way into the surrounding walls and ceiling.
  3. Damaged Grout and Caulking: Worn-out grout or deteriorated caulking in the shower area can result in water leakage, especially in the corners and joints.
  4. Blocked or Damaged Drains: If shower drains are blocked or damaged, water may accumulate and overflow, causing leaks through the ceiling below.
  5. Leaking Plumbing Pipes: Faulty plumbing pipes within the walls or ceiling can be a hidden source of water leaks, impacting the ceiling after each shower.

Dealing with Ceiling Leaks: Solutions and Fixes

  1. Inspecting and Repairing Shower Pan: If the shower pan is identified as the culprit, inspect for cracks or damage. Professional repair or replacement may be necessary to ensure a watertight seal.
  2. Sealing Shower Enclosure Gaps: Address any visible gaps or cracks in the shower enclosure. Apply waterproof sealant to create a barrier against water infiltration.
  3. Regrouting and Recaulking: Renewing grout and caulking in the shower area is essential. Remove old materials, thoroughly clean the joints, and reapply new grout and caulk for a secure seal.
  4. Clearing and Maintaining Drains: Regularly clean and maintain shower drains to prevent blockages. Use drain cleaners or seek professional assistance if needed.
  5. Professional Plumbing Inspection: If the source of the leak is suspected to be within the plumbing system, consult with a plumber for a thorough inspection. Address any damaged or leaking pipes promptly.

Preventive Measures: Avoiding Future Ceiling Leaks

  1. Regular Maintenance Routine: Implement a routine for inspecting and maintaining your shower, including checking for any signs of wear or damage.
  2. Proper Ventilation: Ensure proper ventilation in the bathroom to reduce humidity. Use exhaust fans or open windows during and after showers to allow moisture to dissipate.
  3. Waterproofing Materials: Invest in quality waterproofing materials during shower installations. This includes waterproof membranes and proper sealing of joints.
  4. Timely Repairs: Address any visible damage or wear in your bathroom promptly. Timely repairs can prevent minor issues from escalating into major problems.

Read too: Dealing with Water Damage on Your Popcorn Ceiling: Unveiling the Consequences

Conclusion

In conclusion, dealing with a “Ceiling Leaking After Shower” requires a systematic approach to identify and address the root causes. Regular maintenance, proper installation, and swift repairs are key elements in preventing and resolving this issue. By understanding the common culprits and implementing proactive measures, homeowners can enjoy a dry and damage-free environment in their bathrooms.

Exploring the Causes of Ceiling Leaks: Unveiling the Culprits Behind Common Water Intrusions

Ceiling leaks can be a homeowner’s nightmare, causing damage to property and requiring costly repairs. Understanding “What Causes Ceiling Leaks” is crucial for preventing and addressing these issues effectively. In this comprehensive guide, we will delve into the various factors contributing to ceiling leaks and provide valuable insights for homeowners.

What Causes Ceiling Leaks

Introduction

Ceiling leaks are a common household problem that can arise from a variety of sources. Identifying the root cause is essential for implementing timely and effective solutions. In this article, we will explore the key factors behind ceiling leaks and shed light on how they can be prevented.

Understanding What Causes Ceiling Leaks

The Role of Roof Damage

One of the primary culprits behind ceiling leaks is roof damage. Whether it’s missing shingles, cracked tiles, or damaged flashing, a compromised roof allows water to infiltrate and seep into the ceiling. Regular roof inspections and prompt repairs are crucial for preventing such leaks.

Faulty Plumbing Systems

Leaky pipes and plumbing issues can contribute significantly to ceiling leaks. Over time, pipes may deteriorate, develop cracks, or burst, leading to water seepage into the ceilings. Regular maintenance and inspections of plumbing systems can help identify and address potential issues before they escalate.

Condensation and Humidity

Excessive condensation and high humidity levels within a property can also result in ceiling leaks. When warm air meets a cold surface, condensation forms, potentially causing water damage. Proper ventilation and insulation are key in mitigating these issues and preventing moisture-related ceiling leaks.

Flashing Failures

Flashing, the material used to seal joints in a building, is crucial for preventing water intrusion. If flashing is improperly installed or deteriorates over time, it can compromise its effectiveness, leading to ceiling leaks. Regular inspections and maintenance of flashing are essential for a leak-free home.

Gutter Problems

Clogged or damaged gutters can contribute significantly to ceiling leaks. When gutters fail to channel water away from the roof, it can accumulate and seep into the ceiling. Regular cleaning and maintenance of gutters are vital for preventing water-related damage to ceilings and roofs.

Read too: Condo Ceiling Leak Responsible and How to Address It: Unveiling the Culprit

What Causes Ceiling Leaks: A Closer Look

Understanding Roof Leaks

Roof leaks are a major contributor to ceiling water damage. They can result from various issues, such as damaged shingles, worn-out roofing materials, or inadequate sealing around vents and chimneys. Regular roof inspections by professionals can help identify potential vulnerabilities and prevent leaks before they occur.

Preventing Ceiling Leaks: Tips for Homeowners

  1. Regular Roof Inspections: Schedule professional roof inspections at least once a year to identify and address potential issues promptly.
  2. Plumbing Maintenance: Regularly inspect and maintain your plumbing system, checking for leaks, and repairing any damaged pipes promptly.
  3. Control Humidity Levels: Invest in proper ventilation and dehumidifiers to control indoor humidity levels, reducing the risk of condensation-related ceiling leaks.
  4. Flashing Checks: Ensure that flashing is correctly installed and regularly inspect it for any signs of wear or damage.
  5. Gutter Maintenance: Clean gutters regularly and inspect them for damage. Ensure that water is properly channeled away from the roof and foundation.

Conclusion

In conclusion, understanding “What Causes Ceiling Leaks” is essential for homeowners seeking to protect their property from water damage. By addressing issues such as roof damage, faulty plumbing, condensation, flashing failures, and gutter problems, individuals can take proactive measures to prevent ceiling leaks. Regular maintenance, inspections, and prompt repairs are key to maintaining a dry and secure home.

By staying informed about the causes of ceiling leaks and implementing preventive measures, homeowners can safeguard their investment and enjoy peace of mind knowing that their ceilings are protected from potential water intrusions.

Why You Might Hear Water Dripping in Your Ceiling and What to Do About It? Unveiling the Mystery

Have you ever wondered, “Hear Water Dripping in Ceiling?” This comprehensive guide explores the potential causes behind this unsettling sound, the risks it poses, and actionable steps to address the issue promptly.

Hear Water Dripping In Ceiling

The Concern: Hear Water Dripping in Ceiling

Understanding the Source of the Sound

Plumbing Issues:

One common reason you might hear water dripping in your ceiling is plumbing problems. Leaks in pipes can occur in hidden spaces, and the sound of water dripping may be the first indication of a potential issue.

Roof Leaks:

Another culprit could be roof leaks. Rainwater infiltrating through a damaged roof can find its way into your home, causing water damage and creating the distinct sound of dripping water.

Risks Associated with Water Dripping in Ceiling

Structural Damage:

Ignoring the sound of water dripping can lead to severe structural damage. Persistent leaks weaken the ceiling, potentially causing it to sag or collapse.

Mold and Mildew:

Accumulated moisture from a leak can create an ideal environment for mold and mildew growth. This not only compromises indoor air quality but also poses health risks.

Investigating and Identifying the Issue

Visual Inspection:

Stains and Discoloration:

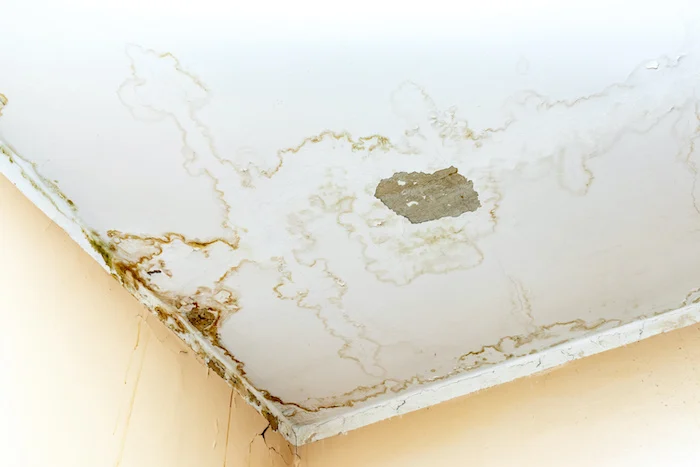
Inspect your ceiling for any visible stains or discoloration, as these could indicate water damage. Discolored patches often point to the source of the leak.

Sagging:

A sagging ceiling is a clear sign of water damage. If you notice any irregularities in your ceiling’s appearance, it’s crucial to investigate further.

Hear Water Dripping in Ceiling? Take Action!

Seeking Professional Help:

Plumber Inspection:

If plumbing issues are suspected, consult with a licensed plumber. They can conduct a thorough inspection to identify and address any leaks in the plumbing system.

Roof Inspection:

For potential roof leaks, hire a professional roofing contractor to inspect your roof. Prompt repairs can prevent further water damage to your home.

Read too: Discover the Allure of Hunter Douglas Wood Ceiling Designs: Enhancing Spaces with Elegance

DIY Tips for Temporary Solutions

Temporary Leak Mitigation:

Buckets or Towels:

Place buckets under the dripping water to catch it and use towels to absorb excess moisture. This provides a temporary solution until professional help arrives.

Ceiling Fan or Dehumidifier:

Using a ceiling fan or dehumidifier can help reduce moisture in the affected area, preventing the growth of mold and mildew.

Conclusion

In conclusion, hearing water dripping in your ceiling is not just an auditory inconvenience – it’s a warning sign of potential water damage that demands immediate attention. Whether the culprit is plumbing issues or a leaky roof, swift action is crucial to prevent further harm to your home’s structure and your health.

Remember, identifying and addressing the root cause of the issue is paramount. If you hear water dripping in your ceiling, don’t ignore it. Take proactive steps to investigate, seek professional assistance, and implement necessary repairs. By doing so, you can safeguard your home from extensive damage and ensure a safe living environment for you and your family.

Brown Water Dripping From Ceiling – Causes, Prevention, and Solutions: Troubleshooting Home Woes

Have you ever experienced the unnerving sight of brown water dripping from your ceiling? It’s a scenario that can send any homeowner into a panic. In this article, we will delve into the causes, prevention methods, and effective solutions for the concerning issue of “Brown Water Dripping From Ceiling.” Understanding the root of the problem is crucial for maintaining the integrity of your home and ensuring the safety of your loved ones.

Brown Water Dripping From Ceiling
508587208

Unveiling the Causes

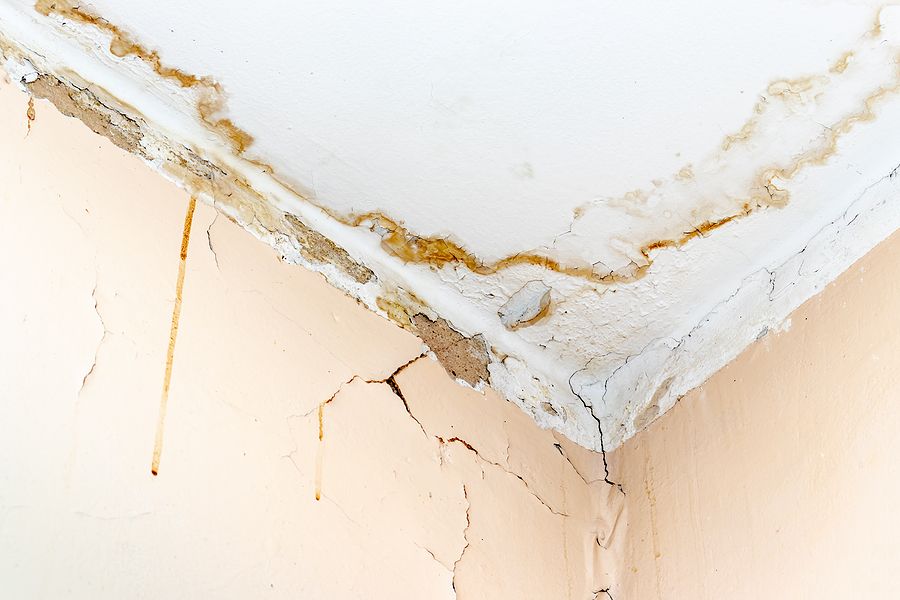
Brown water dripping can be attributed to various causes, each requiring a unique approach for resolution. One common culprit is a leaky roof. When rainwater infiltrates through damaged shingles or compromised roofing, it can lead to discoloration and the alarming brown water dripping into your living space.

Other potential causes include burst pipes within the walls or ceiling, leading to water discoloration due to rust or other contaminants. Additionally, poorly sealed windows and doors can allow water to seep in, causing damage over time.

Identifying Signs of Brown Water Dripping From Ceiling

Detecting the early signs of brown water dripping is crucial for timely intervention. Look out for water stains on the ceiling, which can gradually darken and change in color. Sagging or bulging areas on the ceiling may indicate water accumulation, leading to the ominous brown drips.

If you notice a musty odor or mold growth in conjunction with the brown water, it’s a clear sign of a persistent moisture issue that requires immediate attention. Being proactive in identifying these signs can save you from more extensive damage and costly repairs in the long run.

Prevention Techniques

Preventing brown water from dripping through your ceiling involves a combination of regular maintenance and prompt action. Regular roof inspections can help identify and address any issues before they escalate. Ensure that your gutters are free from debris, allowing proper drainage during heavy rainfall.

Sealing any gaps around windows and doors can prevent water infiltration, maintaining the structural integrity of your home. Insulating pipes and monitoring for leaks can also play a pivotal role in preventing the occurrence of brown water from the ceiling.

Solutions for Brown Water Dripping From Ceiling

When faced with the distressing situation of brown water dripping from your ceiling, quick and effective solutions are imperative. Start by locating the source of the issue – whether it’s a leaky roof, burst pipe, or another cause. Addressing the root problem is essential for a lasting solution.

Repairing damaged roofing, fixing leaks, and replacing faulty pipes are critical steps in resolving the issue. After resolving the source, it’s essential to address the water damage by drying the affected areas thoroughly and repairing any structural harm that may have occurred.

Read too: Help! My Ceiling Is Falling Down: Understanding Causes and Solutions for a Deteriorating Ceiling

Conclusion:

Dealing with brown water dripping is undoubtedly a homeowner’s nightmare, but understanding the causes, signs, prevention techniques, and effective solutions can empower you to tackle the issue head-on. Regular maintenance, vigilant inspection, and swift action are your allies in maintaining a safe and dry home environment. By staying informed and proactive, you can safeguard your home from the distressing sight of brown water dripping from the ceiling.

Shedding Light on a Watery Mystery – Ceiling Leaking From Light Fixture

Unlock the secrets behind a perplexing issue: “Ceiling Leaking From Light Fixture.” Discover the causes, solutions, and preventive measures for a dry and secure home.

Ceiling Leaking From Light Fixture

Delving Into the Dilemma: Understanding Ceiling Leaking From Light Fixture

Explore the intricacies of “Ceiling Leaking From Light Fixture” and empower yourself with insights on identifying, addressing, and preventing this unexpected water-related challenge in your home.

Tracing the Origins – Ceiling Leaking From Light Fixture

Understand the root causes of a ceiling leak originating from a light fixture and explore effective strategies to remedy the situation.

Common Causes of Ceiling Leaks From Light Fixtures

  1. Roof Leaks:
    • Damaged or deteriorated roofing materials can allow water to penetrate, causing leaks that manifest near light fixtures.
  2. Condensation Issues:
    • Inadequate ventilation or insulation in the attic can lead to condensation buildup, resulting in water dripping from light fixtures.
  3. Plumbing Leaks:
    • Water pipes running above the ceiling may develop leaks, and the water can find its way to light fixtures, causing damage.
  4. Improperly Sealed Fixtures:
    • In some cases, poorly sealed light fixtures can allow water infiltration, especially during heavy rainfall.

Confronting the Challenge – Ceiling Leaking From Light Fixture

Equip yourself with practical solutions to address a ceiling leak originating from a light fixture and ensure a dry and secure home environment.

Effective Solutions for Ceiling Leaks From Light Fixtures

  1. Roof Inspection and Repairs:
    • Regularly inspect the roof for damaged shingles, flashing, or other issues. Promptly repair any damage to prevent water ingress.
  2. Improve Attic Ventilation:
    • Enhance attic ventilation to reduce condensation. Proper ventilation helps maintain a consistent temperature and prevents water buildup.
  3. Address Plumbing Issues:
    • If the source of the leak is traced to plumbing, enlist the services of a plumber to identify and repair the leak promptly.
  4. Re-Seal Light Fixtures:
    • Ensure that light fixtures are properly sealed during installation. Re-seal any fixtures that show signs of wear or poor sealing.

Preventive Measures – Safeguarding Against Ceiling Leaks From Light Fixtures

Implement preventive measures to avoid the recurrence of ceiling leaks from light fixtures and maintain a water-resistant home.

Preventive Tips for Ceiling Leak Prevention

  1. Regular Roof Maintenance:
    • Schedule regular roof inspections and maintenance to catch and address potential issues before they lead to leaks.
  2. Insulate and Ventilate the Attic:
    • Adequate attic insulation and ventilation help regulate temperature and minimize condensation, preventing water-related problems.
  3. Professional Fixture Installation:
    • Ensure light fixtures are installed professionally with proper sealing to prevent water infiltration.

Conclusion: A Brighter, Drier Future Awaits

In conclusion, understanding and addressing “Ceiling Leaking From Light Fixture” is crucial for maintaining a dry and secure home environment. By identifying the causes, implementing effective solutions, and adopting preventive measures, homeowners can confront this watery challenge head-on. Regular inspections, timely repairs, and proactive maintenance are key to ensuring that your home stays bright and dry, free from the unexpected inconvenience of ceiling leaks originating from light fixtures.

Unveiling the Drip Dilemma: AC Condensation Leaking Through Ceiling Solutions

Picture this: you’re enjoying a cool, comfortable space thanks to your trusty air conditioner, but suddenly, you notice water dripping from your ceiling. The culprit? AC condensation. In this comprehensive guide, we’ll explore the reasons behind AC condensation leaking through the ceiling and provide practical solutions to address this common issue.

Ac Condensation Leaking Through Ceiling

Understanding the Puddle Predicament: AC Condensation Leaking Through Ceiling

Delve into the details of why your AC might be causing an unwanted indoor rain and discover effective ways to put a stop to it.

Common Causes of AC Condensation Leaks:

  1. Clogged Drain Line: One of the primary reasons for AC condensation leaks is a clogged drain line. Over time, dirt, algae, and debris can accumulate, obstructing the drainage system and causing water to back up.
  2. Faulty Condensate Pan: The condensate pan is designed to collect water droplets formed during the cooling process. If the pan is damaged or improperly installed, it can lead to leaks as water escapes instead of draining away.
  3. Dirty Air Filters: Dirty or clogged air filters restrict airflow, causing the evaporator coil to freeze. When the coil subsequently thaws, excess water is produced, overwhelming the system and potentially leaking through the ceiling.

Solutions to Halt the Ceiling Seepage: AC Condensation Leaking Through Ceiling

Now that we’ve identified the reasons behind AC condensation leaks, let’s explore practical steps to resolve the issue and prevent further damage.

  1. Clearing the Drain Line: Regularly clean the AC drain line to prevent clogs. A mixture of vinegar and water is an effective DIY solution. If the blockage persists, consider professional maintenance.
  2. Inspecting the Condensate Pan: Ensure the condensate pan is intact and correctly positioned. If it shows signs of damage, such as cracks or rust, replace it promptly. Regular inspections can prevent leaks caused by pan issues.
  3. Changing Air Filters: Make it a habit to check and replace air filters regularly. This simple maintenance task not only improves indoor air quality but also prevents issues like frozen coils and subsequent leaks.
  4. Professional AC Maintenance: Schedule regular professional maintenance for your AC unit. Certified technicians can identify and address potential problems before they escalate, saving you from unexpected leaks and costly repairs.

Preventing Future Leaks: AC Condensation Leaking Through Ceiling

Proactive measures to ensure a dry and trouble-free environment.

  1. Regular Inspections: Conduct routine inspections of your AC unit, especially before the summer season. Look for signs of wear, corrosion, or leaks and address any issues promptly.
  2. Proper Insulation: Ensure your home is adequately insulated. Proper insulation helps regulate indoor humidity levels, reducing the workload on your AC unit and minimizing the risk of condensation leaks.
  3. Humidity Control: Invest in a dehumidifier to control indoor humidity. Maintaining optimal humidity levels not only enhances comfort but also reduces the likelihood of condensation-related problems.

Read too: How To Dry Wet Ceiling

Conclusion: Nipping AC Condensation Leaks in the Bud

In conclusion, addressing AC condensation leaking through the ceiling requires a combination of regular maintenance, proactive measures, and timely solutions to identified issues. By understanding the common causes and implementing the suggested solutions, you can enjoy the benefits of a cool, comfortable home without the worry of unexpected indoor rainfall. Remember, a dry and leak-free ceiling starts with a well-maintained air conditioning system.

Exploring the Causes of Water Leaking From Ceiling

A water leak from the ceiling can be a homeowner’s nightmare. Not only does it signal a potential issue with your roof or plumbing, but it can also lead to costly damage to your property. In this article, we will investigate the various causes of water leaking from the ceiling, helping you understand the source of the problem and how to address it effectively.

Causes Of Water Leaking From Ceiling

Understanding the Gravity of Ceiling Water Leaks

Water leaks from the ceiling are more than just an inconvenience. They can cause significant damage to your home, including:

  1. Structural Damage: Prolonged exposure to water can weaken the structural integrity of your home. It can lead to rot, mold, and even compromise the safety of your property.
  2. Cosmetic Damage: Stains, peeling paint, and unsightly watermarks on your ceiling are not only aesthetically displeasing but also diminish your property’s value.
  3. Health Concerns: Excessive moisture can promote mold growth, which can lead to health issues for you and your family.
  4. Electrical Hazards: Water leaks can pose electrical risks if they come into contact with wiring or fixtures.

Common Causes of Water Leaks from the Ceiling

  1. Roof Issues:a. Missing or Damaged Shingles: If your roof’s shingles are missing or damaged, water can seep into the underlying layers and find its way into your home.b. Flashing Problems: Flashing is the metal material that seals roof joints and other vulnerable areas. Damaged or improperly installed flashing can lead to leaks.c. Ice Dams: In colder climates, ice dams can form on the roof, causing water to back up and infiltrate the interior.d. Aging Roofs: Over time, even well-maintained roofs can deteriorate, making them susceptible to leaks.
  2. Plumbing Issues:a. Leaking Pipes: A common cause of ceiling leaks, leaking pipes can be due to wear and tear, corrosion, or even frozen pipes in the winter.b. Blocked Drains: Clogged or blocked drains can cause water to overflow, affecting not only plumbing fixtures but also potentially damaging your ceiling.c. Burst Water Heaters: A burst water heater can release a significant amount of water into your home, causing ceiling damage.
  3. HVAC System Problems:a. Condensation: If your HVAC system is not functioning correctly, condensation can build up, leading to ceiling leaks.
  4. Attic Issues:a. Poor Ventilation: Inadequate attic ventilation can lead to moisture buildup, which can eventually result in water leaks.b. Inadequate Insulation: Poor insulation can cause temperature fluctuations in the attic, leading to condensation and water issues.

Dealing with Ceiling Water Leaks

  1. Identify the Source: The first step is to identify the source of the leak. This may require a professional inspection, especially for roof-related issues.
  2. Temporary Measures: In the event of a ceiling leak, use buckets or containers to catch the dripping water. You can also poke a small hole in the ceiling to allow the water to drain into a container rather than spreading across a larger area.
  3. Turn Off the Water: If the leak is caused by a plumbing issue, turn off the water supply to the affected area or your entire home if necessary.
  4. Call a Professional: For many of these issues, it’s crucial to consult with a professional roofer, plumber, or HVAC technician to address the problem effectively.
  5. Preventive Measures: Consider taking preventive measures to avoid future leaks. This may include regular roof maintenance, plumbing inspections, and ensuring proper attic ventilation.

Read too: Are Floor To Ceiling Windows Expensive

Conclusion

Water leaking from the ceiling is a situation that demands immediate attention. By understanding the potential causes of such leaks, you can take swift action to mitigate damage and prevent future incidents. Whether it’s a roofing issue, plumbing problem, or HVAC malfunction, addressing the root cause is essential for safeguarding the integrity of your home and the well-being of your family. If you encounter a ceiling leak, don’t delay in seeking professional assistance to resolve the issue promptly and effectively.

Can Clogged Gutters Cause Ceiling Leaks?

Can Clogged Gutters Cause Ceiling Leaks? When it comes to home maintenance, the condition of your gutters often plays a more significant role than you might think. Clogged gutters can lead to a cascade of issues, and one of the most concerning problems is ceiling leaks. In this article, we will explore the relationship between clogged gutters and ceiling leaks and provide insights into how you can prevent this common household headache.

Can Clogged Gutters Cause Ceiling Leaks

The Role of Gutters in Home Protection

Gutters are an integral part of your home’s drainage system. They serve to collect rainwater from your roof and direct it away from the foundation, preventing water from pooling around your home. While gutters may not be the most glamorous feature of your house, they play a vital role in safeguarding it against water damage.

How Clogged Gutters Cause Ceiling Leaks

Clogged gutters can result in several problems that, if left unaddressed, can lead to ceiling leaks. Here’s how it happens:

  1. Overflowing Gutters: When gutters are clogged with leaves, twigs, and debris, rainwater cannot flow through them as intended. Instead, it spills over the sides of the gutters and runs down the exterior walls.
  2. Water Infiltration: As rainwater cascades down your walls, it can find its way into the smallest cracks and gaps. Over time, water can penetrate your home’s exterior, including your attic and ceilings.
  3. Ceiling Stains: Once water makes its way into your attic and ceiling, it can lead to unsightly water stains. These stains are often the first visible sign that something is amiss.
  4. Structural Damage: Prolonged exposure to water can cause structural damage to your ceilings and roof. This damage can lead to costly repairs and pose safety risks.

Read too: How To Dry A Ceiling Quickly

Preventing Ceiling Leaks Caused by Clogged Gutters

Preventing ceiling leaks caused by clogged gutters is more straightforward than dealing with the aftermath. Here are some tips to keep your gutters clean and your ceilings dry:

  1. Regular Gutter Cleaning: The most effective way to prevent clogs and their associated problems is to clean your gutters regularly. Depending on your location and the surrounding trees, this may be a bi-annual or quarterly task.
  2. Gutter Guards: Consider installing gutter guards or leaf screens to keep debris out of your gutters while allowing water to flow freely. While not entirely maintenance-free, these systems can significantly reduce the frequency of cleaning.
  3. Professional Inspection: It’s a good idea to have a professional inspect your gutters and roofing system regularly. They can identify issues early and provide the necessary maintenance and repairs.
  4. Trim Overhanging Branches: Trees that overhang your roof are a common source of gutter clogs. Regularly trim branches to prevent leaves and twigs from falling into your gutters.
  5. Downspout Maintenance: Ensure your downspouts are directing water away from your home’s foundation. Extensions can be added to downspouts to carry water further from your home.
  6. Check for Roof Leaks: In addition to maintaining your gutters, regularly inspect your roof for missing shingles or other damage that can lead to leaks.

Addressing Ceiling Leaks

If you’ve already noticed water stains on your ceiling, it’s essential to take action promptly:

  1. Find the Source: Determine the source of the water infiltration by inspecting your roof, gutters, and attic. This will help you identify and address the underlying issue.
  2. Ceiling Repairs: Repair any damaged or weakened sections of your ceiling to prevent further leaks and structural damage.
  3. Professional Help: In some cases, it may be necessary to consult a professional to assess the extent of the damage and provide appropriate repairs.

Conclusion

Ceiling leaks caused by clogged gutters are preventable with proper maintenance and attention. By keeping your gutters clean and your home’s drainage system in good working order, you can avoid the headache of water stains on your ceilings and the costly repairs that can follow. Regular inspections and maintenance of your gutters and roofing system are key to keeping your home dry and your ceilings leak-free.

Is A Leaking Ceiling An Emergency?

Few household issues can send shivers down a homeowner’s spine as quickly as a leaking ceiling. The sound of water dripping, the sight of unsightly stains, and the fear of water damage can be overwhelming. But not all ceiling leaks are created equal. In this article, we will explore the question: Is a leaking ceiling an emergency? We’ll help you understand the severity of the situation and how to respond effectively.

Is A Leaking Ceiling An Emergency

Understanding the Severity of Ceiling Leaks

1. Minor Drips from Condensation

Not all moisture on your ceiling is a cause for panic. Sometimes, especially in humid climates, minor condensation can form on the ceiling’s surface. This can give the appearance of a leak, but it’s usually not a structural issue. You can address this by improving ventilation and insulation in your home.

2. Roof Leaks

Roof leaks are a common cause of ceiling leaks. The severity of a roof leak can range from minor to major:

  • Minor Roof Leak: A minor roof leak, often caused by damaged shingles, may result in isolated ceiling stains or minor dripping during heavy rain. While not an emergency, it should be addressed promptly to prevent further damage.
  • Major Roof Leak: A significant roof leak, such as one affecting a large area of your ceiling or causing substantial water flow, is more urgent. In this case, it’s advisable to place buckets to collect water and immediately contact a roofing professional.

3. Plumbing Leaks

Ceiling leaks due to plumbing issues are usually urgent. A burst or leaking pipe can quickly lead to severe water damage and should be addressed immediately. Turn off the water supply to the affected area and call a plumber to fix the issue.

4. HVAC System Condensation

Sometimes, leaks can result from condensation in your HVAC system. While not typically an emergency, these leaks should still be addressed to prevent mold growth or damage to your ceiling.

Immediate Steps When You Discover a Ceiling Leak

Regardless of the cause, when you discover a ceiling leak, there are immediate steps you should take:

  1. Locate the Source: Try to identify the source of the leak. Is it coming from the ceiling directly, or is water traveling along pipes or beams?
  2. Contain the Water: Place buckets, pots, or towels under the leak to prevent further damage or water from spreading to other areas.
  3. Turn Off Electricity: If the leak is severe and water is pooling near electrical fixtures or wiring, turn off the electricity in the affected area to avoid potential electrical hazards.
  4. Contact Professionals: If the leak is beyond a minor condensation issue, contact a professional, such as a plumber or roofer, depending on the suspected source of the leak.

Is It Covered by Insurance?

Whether your homeowner’s insurance covers a ceiling leak depends on the cause of the leak and the specifics of your policy. Generally, sudden and accidental leaks, like those caused by a burst pipe, are more likely to be covered. Gradual leaks or those resulting from lack of maintenance may not be covered.

Preventing Ceiling Leaks

The best way to deal with a leaking ceiling is to prevent it from happening in the first place. Here are some preventive measures:

  • Regularly inspect your roof for damaged shingles and have them repaired promptly.
  • Maintain your plumbing system and address any issues immediately.
  • Ensure your HVAC system is well-maintained and not producing excessive condensation.
  • Improve home ventilation and insulation to reduce condensation on your ceilings.

Read too: How To Dry Water Leak In Ceiling

Conclusion: Is It an Emergency?

In conclusion, the urgency of a leaking ceiling depends on the cause and severity of the leak. While minor condensation may not be an emergency, significant roof leaks, plumbing leaks, or HVAC leaks demand immediate attention to prevent further damage to your home. Quick action and professional assistance can help mitigate the situation and save you from costly repairs in the long run.