Are you looking to take your basketball game to new heights? Consider investing in Ceiling Mounted Basketball Goals for your home or facility. In this comprehensive guide, we’ll delve into the advantages of ceiling-mounted basketball goals, from maximizing playing space to enhancing safety and convenience.
Understanding Ceiling Mounted Basketball Goals
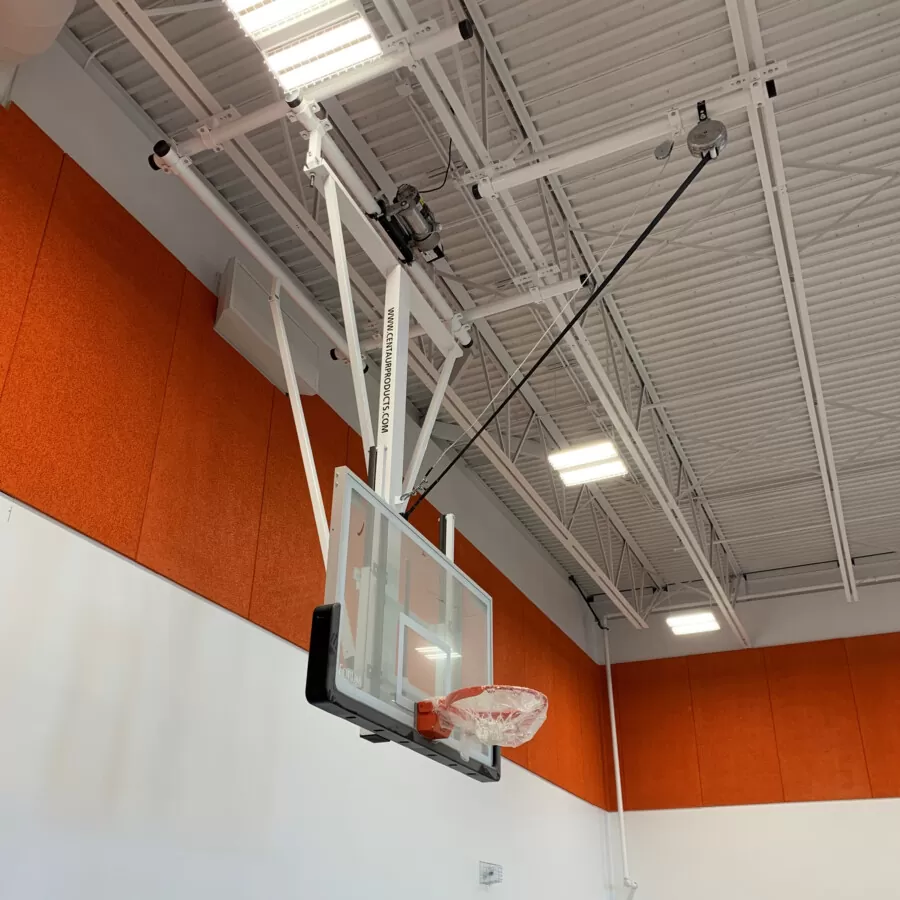
Space-Saving Design
One of the primary benefits of ceiling-mounted basketball goals is their space-saving design. By mounting the hoop directly to the ceiling, you free up valuable floor space that would otherwise be occupied by traditional basketball systems. This makes ceiling-mounted goals ideal for indoor facilities with limited space, such as gyms, recreation centers, and home courts.
Uninterrupted Gameplay
Unlike portable or in-ground basketball hoops, ceiling-mounted goals provide uninterrupted gameplay without the risk of players colliding with the base or support structure. This ensures a safer playing environment, especially in high-traffic areas where collisions are more likely to occur.
Adjustable Height and Versatility
Many ceiling-mounted basketball goals feature adjustable height mechanisms, allowing players of all ages and skill levels to enjoy the game. Whether you’re hosting a youth basketball camp or a competitive adult league, the ability to adjust the hoop height ensures that everyone can participate and compete at their preferred level.
Factors to Consider When Choosing Ceiling Mounted Basketball Goals
Ceiling Height and Structural Integrity
Before installing a ceiling-mounted basketball goal, it’s essential to consider the height of your ceiling and the structural integrity of the mounting surface. Ensure that your ceiling is high enough to accommodate the desired playing height and that the mounting surface can support the weight of the goal and withstand the force of gameplay.
Backboard Material and Size
Select a ceiling-mounted basketball goal with a durable backboard material, such as tempered glass or acrylic, to withstand repeated use and weather conditions. The size of the backboard should also be proportional to the playing area, with larger backboards providing a more authentic playing experience.
Installation and Assembly
Proper installation is crucial for the safety and performance of your ceiling-mounted basketball goal. Follow manufacturer instructions carefully and consider hiring a professional installer if you’re not comfortable with DIY assembly. Additionally, ensure that the goal is securely anchored to the ceiling to prevent accidents or injuries during gameplay.
Enhancing Your Basketball Experience
Customization Options
Many ceiling-mounted basketball goals offer customization options, allowing you to personalize your playing experience. From team colors and logos to padding and accessories, you can customize your goal to match your facility’s aesthetic and create a professional-grade playing environment.
Integrated Features
Some ceiling-mounted basketball goal come equipped with integrated features such as scoreboards, shot clocks, and remote-controlled height adjustment systems. These additional features enhance gameplay and add a level of sophistication to your basketball facility, making it more attractive to players and spectators alike.
Read too: Exploring the Efficiency of Radiant Ceiling Heater Electric: A Comprehensive Guide
Conclusion
Ceiling-mounted basketball goal offer numerous benefits for players, coaches, and facility owners alike. From maximizing playing space to enhancing safety and convenience, these innovative hoops elevate the basketball experience to new heights. By choosing the right ceiling-mounted goal and following proper installation guidelines, you can create a top-tier basketball facility that fosters skill development, competition, and camaraderie.