Understanding the Cost To Repaint Ceiling and Enhance Your Living Space: Unveiling the True Investment

When it comes to home improvement, one often overlooked yet transformative aspect is the ceiling. Repainting your ceiling can breathe new life into a room, giving it a fresh and vibrant look. However, before embarking on this journey, it’s crucial to understand the cost implications involved. In this comprehensive guide, we will delve into the intricacies of the “Cost To Repaint Ceiling,” providing you with valuable insights to make informed decisions for your home.

Cost To Repaint Ceiling

Introduction

Repainting a ceiling is more than just a cosmetic upgrade; it can significantly impact the overall aesthetics and ambiance of a room. Before we explore the cost aspects, let’s understand why repainting the ceiling is a worthwhile investment.

Enhancing Aesthetics and Ambiance

Ceilings are often referred to as the “fifth wall” of a room. A freshly painted ceiling can make the space look brighter, larger, and more inviting. It serves as a blank canvas, allowing you to experiment with colors and finishes that complement your interior design.

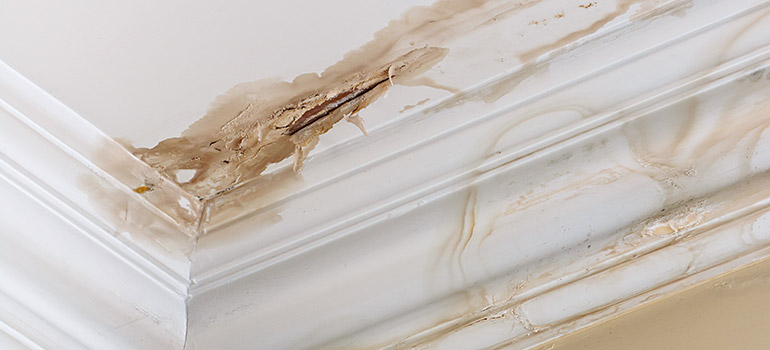
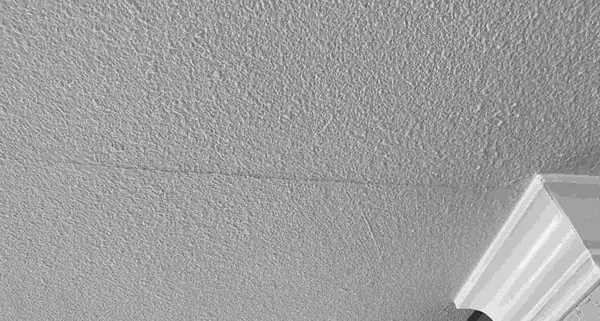
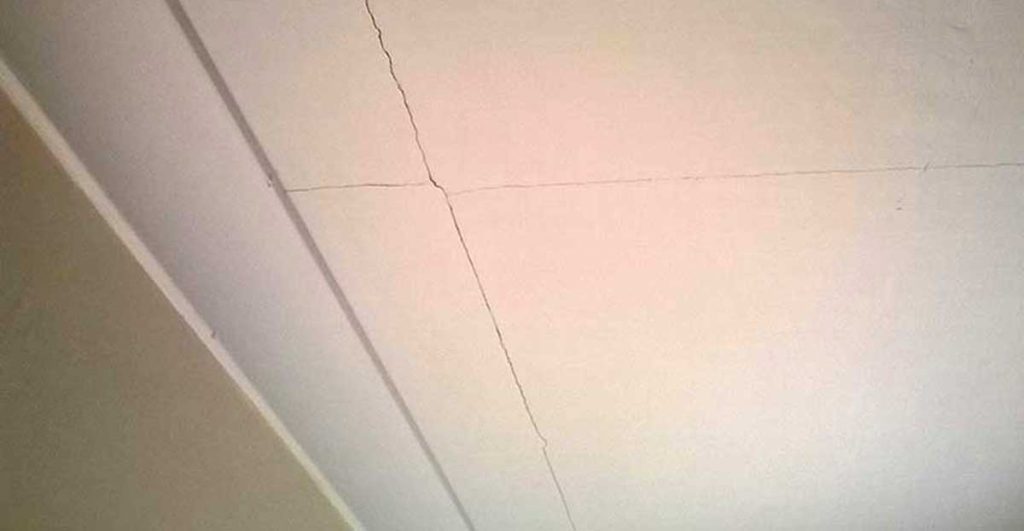
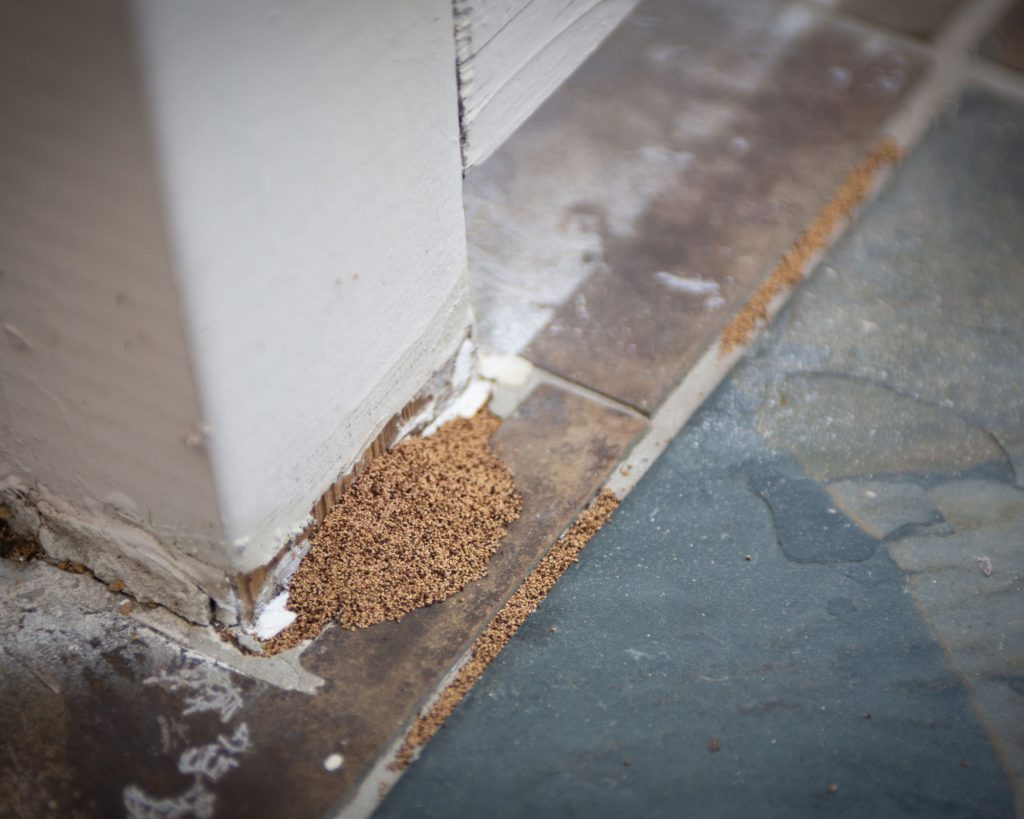
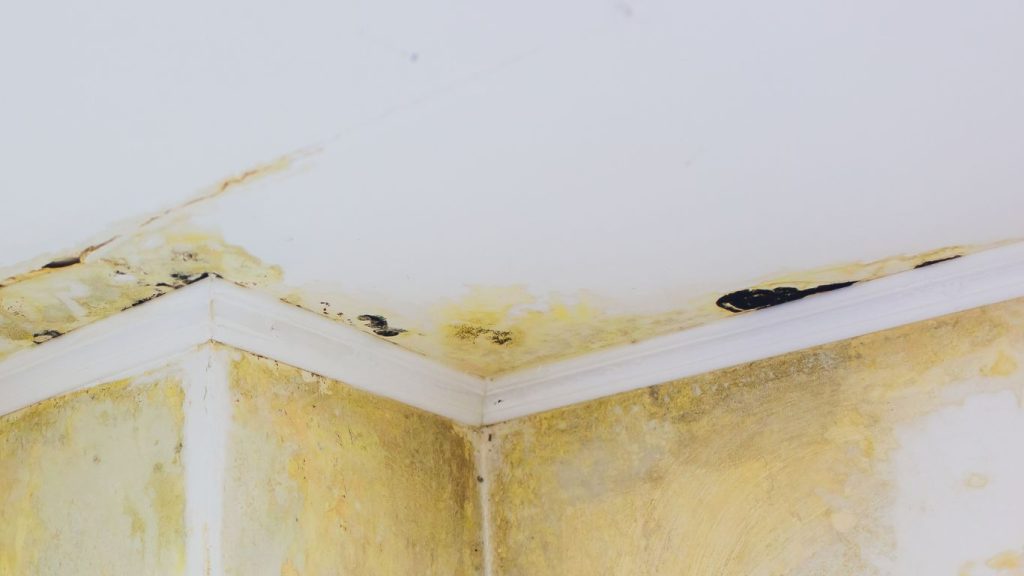
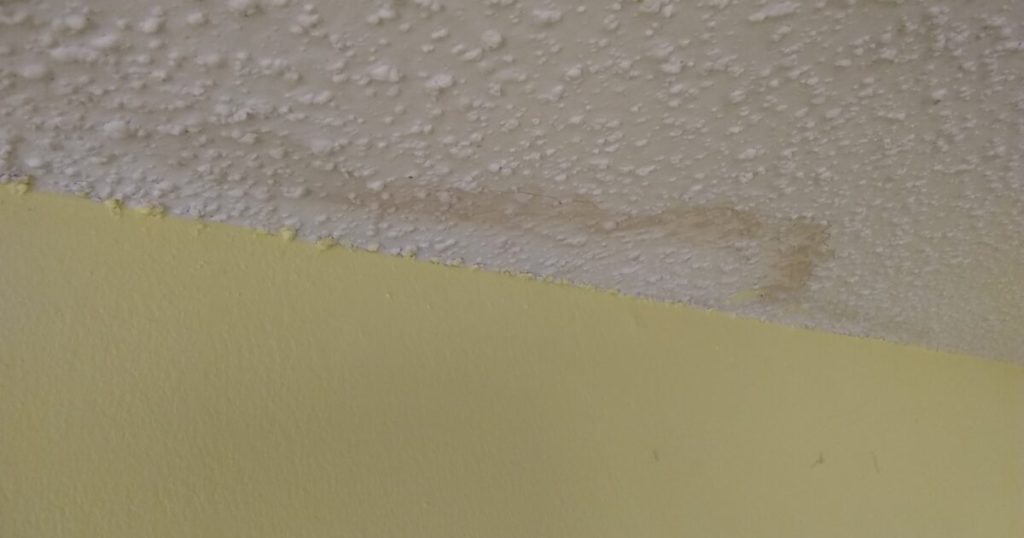
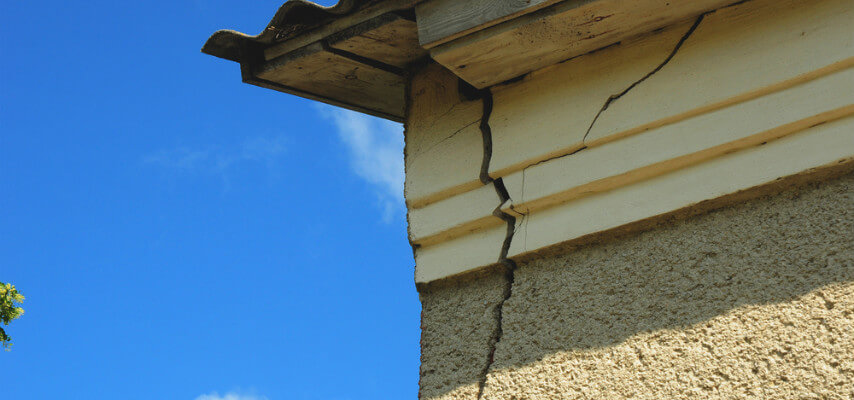
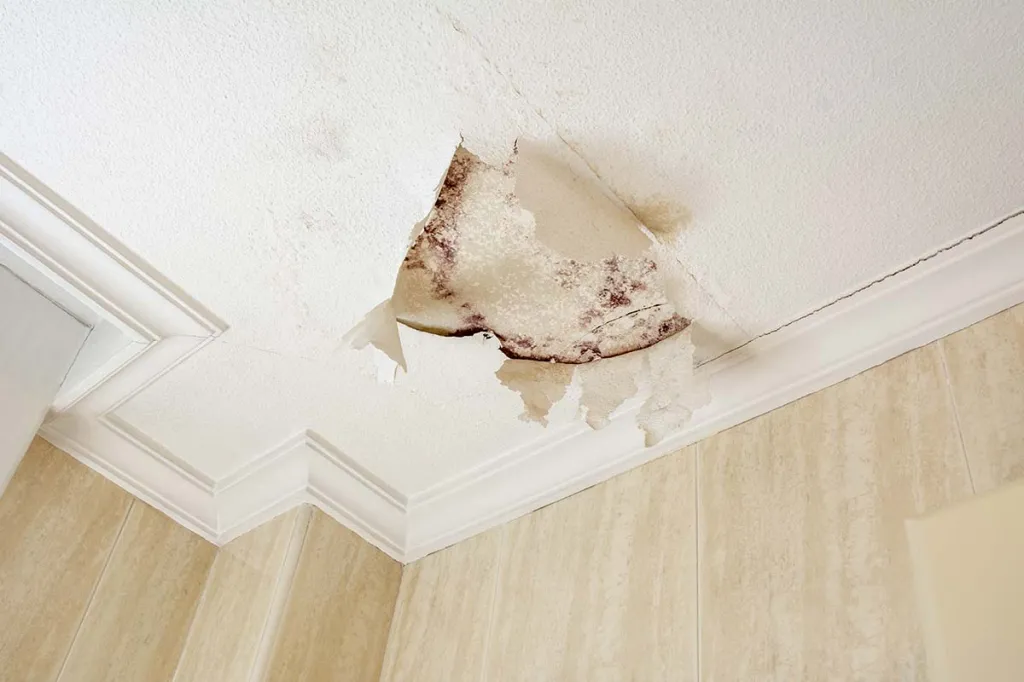
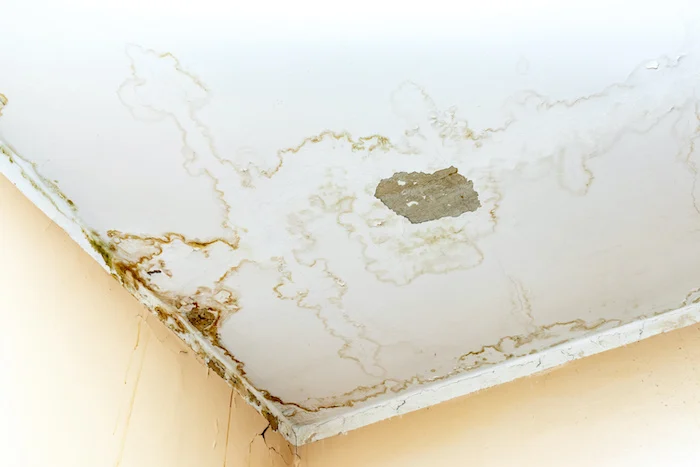
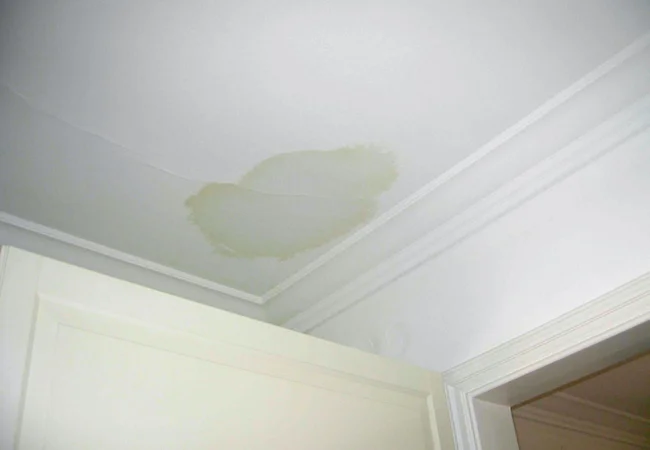
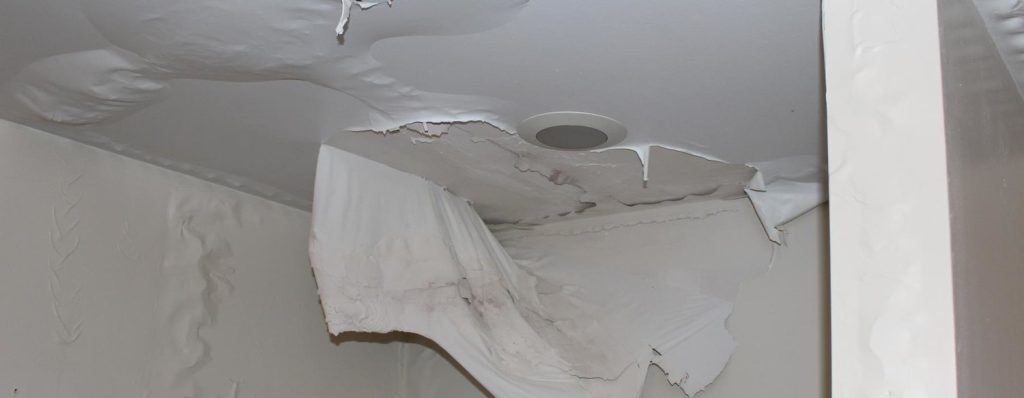
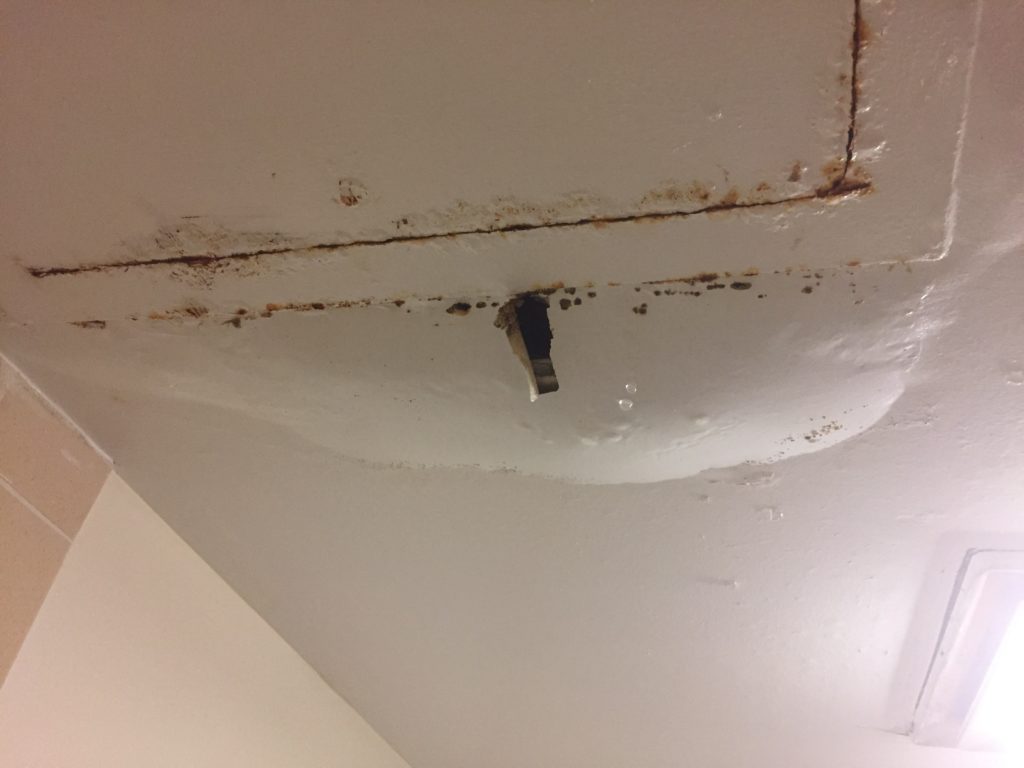
Concealing Imperfections

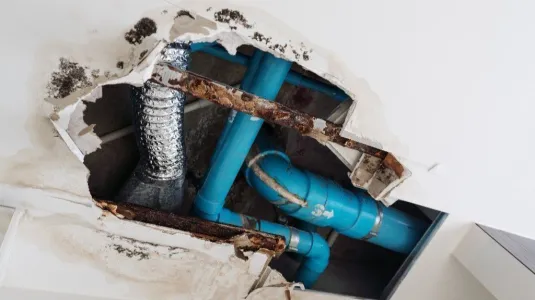
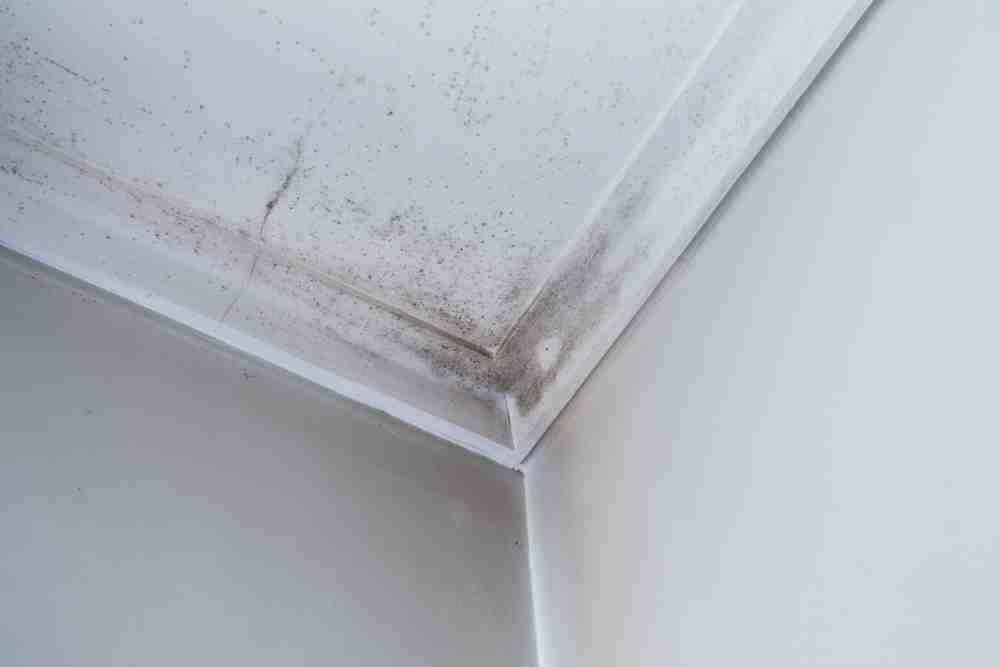
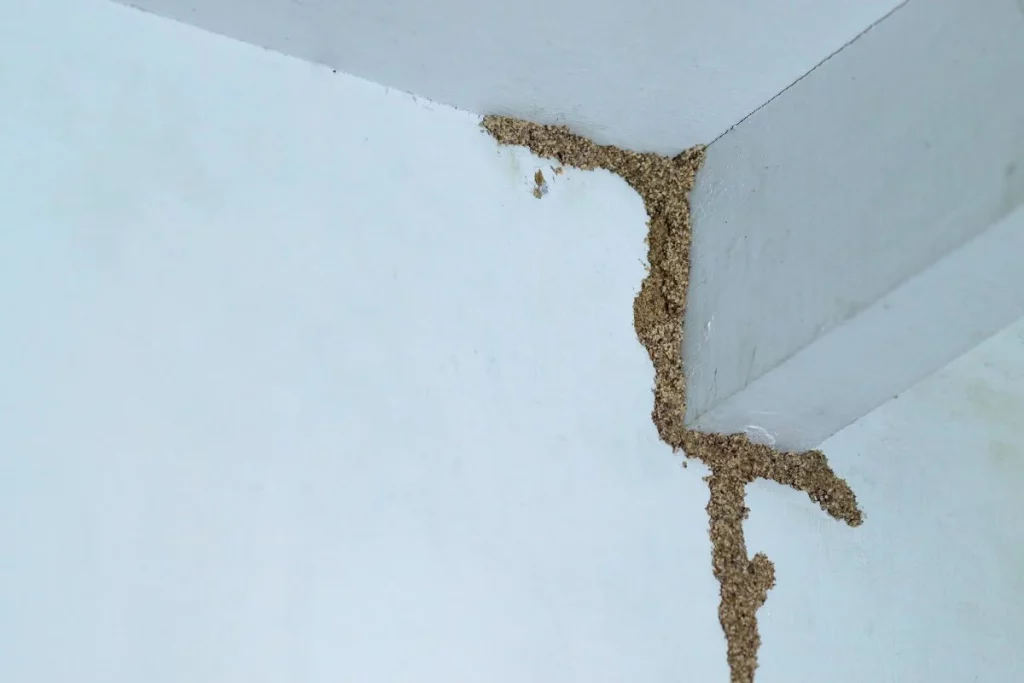
Over time, ceilings may develop cracks, stains, or other imperfections. Repainting not only conceals these flaws but also prevents further damage. It’s a practical way to maintain the structural integrity of your home while elevating its visual appeal.

Boosting Property Value

If you’re considering selling your home, a well-maintained and aesthetically pleasing interior can significantly enhance its market value. Prospective buyers are often drawn to homes that look well-cared-for, and a freshly painted ceiling can contribute to that impression.

Factors Influencing the Cost To Repaint Ceiling

Now that we understand the benefits of repainting a ceiling, let’s dive into the factors that influence the cost. By being aware of these elements, you can better estimate the budget required for your project.

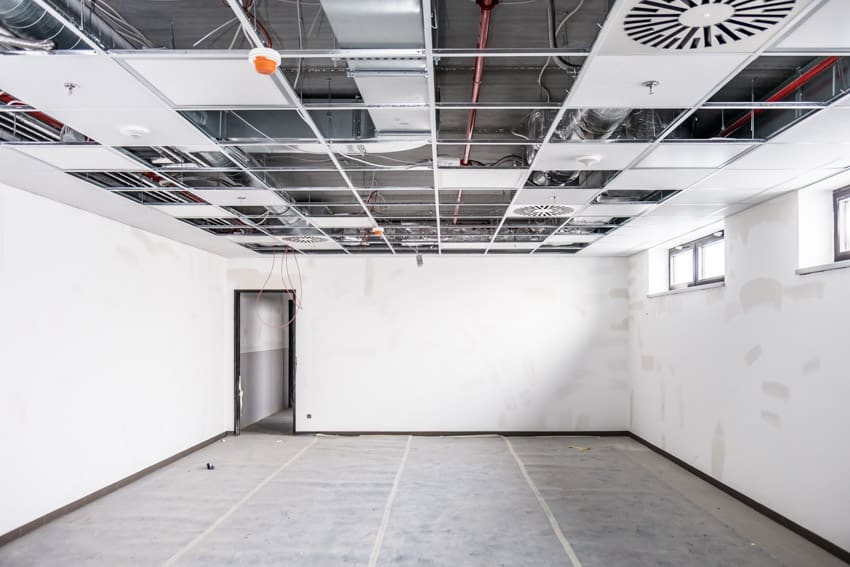
Ceiling Size and Height

The size of the ceiling is a fundamental factor in determining the cost of repainting. Larger ceilings require more paint, time, and effort. Additionally, if your ceiling is exceptionally high, the painter may need specialized equipment, impacting the overall cost.
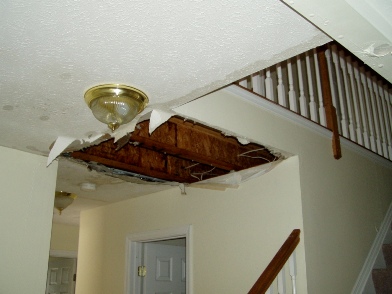
Surface Condition

The condition of the existing ceiling surface plays a crucial role. If there are extensive repairs or preparations needed, such as patching holes or sanding, it can increase the labor hours and, consequently, the cost.

Type of Paint and Finish

The type of paint and finish you choose can significantly affect the cost. High-quality paints and specialty finishes may come with a higher price tag, but they often provide better durability and a more refined appearance.
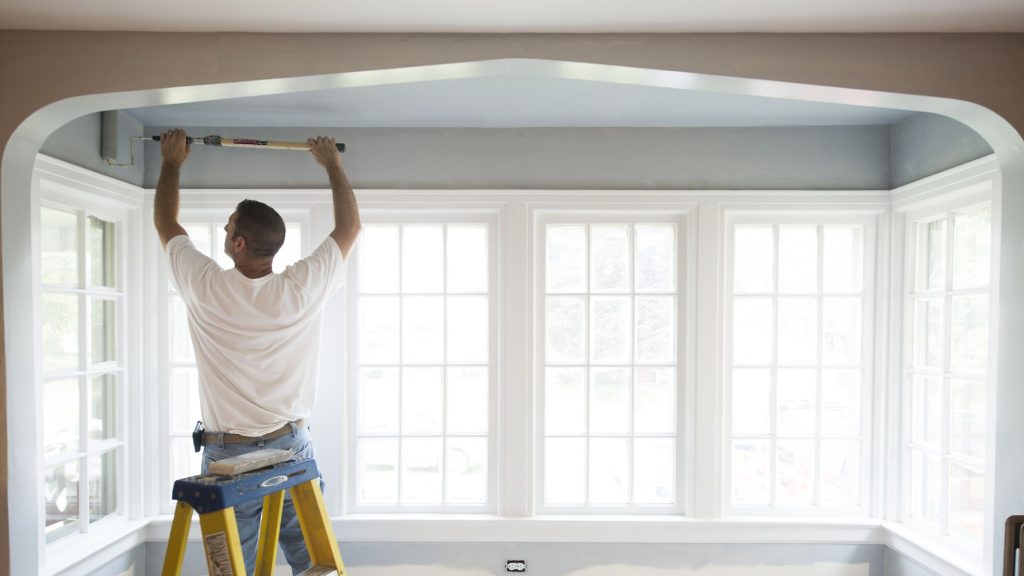
Labor Costs

Labor costs are a substantial portion of the overall expense. Experienced painters may charge higher rates, but their expertise can ensure a smooth and professional finish. It’s essential to obtain multiple quotes from reputable painters to compare costs and services.

Read too: Understanding and Addressing a Leaky Ceiling in Your Apartment: Navigating the Drips

Calculating the Cost To Repaint Ceiling

To estimate the cost of repainting your ceiling, you can use a straightforward formula:

Total Cost=Ceiling Size×Cost per Square Foot+Additional CostsTotal Cost=Ceiling Size×Cost per Square Foot+Additional Costs

Example:

If your ceiling is 300 square feet and the cost per square foot is $2, the estimated cost would be 300×2+Additional Costs300×2+Additional Costs.

Choosing the Right Contractor

When hiring a contractor for your ceiling painting project, it’s crucial to consider factors beyond cost. Look for professionals with a proven track record, positive reviews, and proper licensing. A reliable contractor will provide you with a detailed estimate, transparently outlining all costs involved.

Conclusion

Investing in repainting your ceiling is a decision that goes beyond aesthetics; it’s an investment in your home’s overall appeal and value. By understanding the factors influencing the “Cost To Repaint Ceiling” and making informed choices, you can embark on this home improvement journey with confidence. Remember to prioritize quality and expertise when choosing a contractor, ensuring a result that not only looks impressive but stands the test of time. Transform your living space today with a fresh coat of paint and experience the difference it can make.

Demystifying Ceiling Fan Wires, Especially the Elusive Red Wires: Unraveling the Mystery

Embark on a journey to understand the nuances of ceiling fan wiring, with a special focus on the elusive red wires. In this comprehensive guide, we delve into the significance of “Ceiling Fan Wires Red” and empower you with the knowledge to navigate your fan’s wiring system confidently.

Ceiling Fan Wires Red

Unveiling the Secrets: Understanding “Ceiling Fan Wires Red”

Explore the intricate details of ceiling fan wiring, with a particular emphasis on the role and significance of red wires in your fan’s electrical setup.

Decoding the Ceiling Fan Wiring System

1. Standard Ceiling Fan Wiring Colors

Ceiling fans typically come with a standardized color code for their wires. Understanding these colors is crucial for successful installation and troubleshooting.

2. Significance of Red Wires in Ceiling Fans

Red wires in ceiling fans often serve specific functions. Commonly, red wires are associated with the lighting system or additional features such as a separate fan switch.

3. Red Wire Variations

The role of red wires may vary based on the fan model and manufacturer. While some red wires are designated for the lighting kit, others may connect to a separate fan switch or have different functionalities.

Navigating the Wiring Maze:

Enhance your ceiling fan installation and troubleshooting skills with practical tips for handling red wires and the overall wiring system.

1. Refer to the Manufacturer’s Instructions

Always consult the manufacturer’s instructions that accompany your ceiling fan. These instructions provide specific details about the wiring configuration, including the role of red wires.

2. Use a Voltage Tester

Prior to handling any wires, ensure the power is turned off. Use a voltage tester to confirm that the wires are not live before starting the installation or troubleshooting process.

3. Separate Controls for Fan and Light

In ceiling fans with separate controls for the fan and light, the red wire may be used to connect to the light kit. Understanding this distinction is essential for proper functionality.

Read too: Understanding and Addressing a Leaky Ceiling in Your Apartment: Navigating the Drips

Troubleshooting Tips for

Address common issues related to red wires with practical troubleshooting tips for a smooth and functional fan system.

1. Check the Wiring Connections

Inspect the wiring connections to ensure they are secure and properly aligned. Loose or faulty connections, including those involving red wires, can impact the performance of your fan.

2. Verify the Functionality of the Red Wire

If your ceiling fan features a red wire, confirm its intended functionality. In some cases, it may be designated for a specific purpose, such as connecting to a separate fan switch or controlling the lighting kit.

Conclusion: Mastering the Art of Ceiling Fan Wiring, One Red Wire at a Time

Empower yourself with the knowledge of “Ceiling Fan Wires Red” and navigate the intricate wiring system of your ceiling fan with confidence. By understanding the significance and variations of red wires, you gain control over your fan’s functionality and can troubleshoot issues effectively.

Embrace the journey of mastering ceiling fan wiring, and let the elusive red wires become a source of empowerment rather than confusion.

Dealing with the aftermath of Plaster Ceiling Water Damage: Salvaging Elegance

Embark on a journey of restoration as we explore the intricacies of “Plaster Ceiling Water Damage.” This comprehensive guide offers insights into identifying, addressing, and remedying the impact of water damage on your plaster ceiling, ensuring your living space remains a testament to elegance.

Plaster Ceiling Water Damage

Understanding the Impact: Plaster Ceiling Water Damage Demystified

Delve into the world of plaster ceiling water damage as we uncover the signs, causes, and effective solutions for a seamless restoration process.

1. Staining and Discoloration*

Water stains and discoloration on your plaster ceiling are telltale signs of water damage. These marks often appear as brown or yellowish patches, indicating a need for prompt attention.

2. Sagging or Bubbling*

Excess water can weaken the plaster, causing it to sag or bubble. If you notice irregularities in the ceiling surface, it may be a sign of water infiltration.

3. Peeling Paint or Wallpaper*

Water damage can compromise the adhesion of paint or wallpaper on your ceiling. Peeling or bubbling of these materials may signal underlying water issues.

4. Musty Odors*

The presence of water in your ceiling can lead to mold growth, resulting in musty odors. If you detect a persistent, unpleasant smell, it could be indicative of hidden water damage.

Read too: Understanding and Addressing a Leaky Ceiling in Your Apartment: Navigating the Drips

Addressing Plaster Ceiling Water Damage: Steps to Restoration

Navigate the restoration process with confidence by following these practical steps to address and repair this damage.

1. Identify and Fix the Source of Water Infiltration

Begin by identifying and addressing the source of water infiltration. Whether it’s a leaky roof, plumbing issue, or condensation problem, resolving the root cause is paramount to preventing future damage.

2. Assess the Extent of Damage

Thoroughly inspect the plaster ceiling to determine the extent of the damage. Identify areas that require repair or replacement and prioritize the restoration process accordingly.

3. Remove Damaged Plaster and Materials

Carefully remove any damaged plaster, as well as compromised paint or wallpaper. This step ensures a clean slate for the restoration process and prevents further deterioration.

4. Allow for Proper Drying

Before initiating repairs, allow the affected areas to dry completely. Adequate drying time prevents the growth of mold and ensures a solid foundation for restoration efforts.

5. Patch and Restore

Patch any holes or cracks in the plaster using a suitable repair compound. Once the patching is complete, restore the aesthetic appeal of your plaster ceiling with a fresh coat of paint or wallpaper.

Conclusion: Restoring Elegance, One Patch at a Time

By understanding the nuances of “Plaster Ceiling Water Damage” and implementing proactive restoration measures, you can preserve the elegance of your living space. Swift identification, targeted repairs, and a meticulous restoration process ensure that your plaster ceiling remains a symbol of sophistication and charm.

Embrace the journey of restoring elegance, and witness the transformation of your space as you bid farewell to the lingering effects of water damage.

Understanding Ceiling Fans Wiring Colors for Effortless Installation: Decoding the Puzzle

Step into the world of ceiling fan installations with our guide on “Ceiling Fans Wiring Colors.” Unlock the mysteries behind the different wire colors, ensuring a seamless and error-free installation process for optimal performance.

Ceiling Fans Wiring Colors

Navigating the Spectrum: Ceiling Fans Wiring Colors Demystified

Explore the intricate world of ceiling fan wiring colors as we delve into the details of each hue and its significance in the installation process.

Understanding Ceiling Fans Wiring Colors

1. The Common Color Codes*

Ceiling fan wires typically follow a standard color code, including black, white, green, and sometimes a blue or red wire. Each color serves a specific purpose in the wiring system, allowing for organized and efficient connections.

2. Black Wire: The Hot Wire*

The black wire is the hot wire and carries the electrical current from the power source to the fan. It is crucial to connect the black wire to the corresponding hot wire in your electrical supply.

3. White Wire: The Neutral Wire*

The white wire is the neutral wire, completing the electrical circuit and providing a return path for the current. Connect the white wire to the neutral wire in your electrical system.

4. Green Wire: The Ground Wire*

The green wire is the ground wire, responsible for providing a safe path for electrical currents in the event of a malfunction. Connect the green wire to the grounding system or a designated grounding wire.

5. Blue or Red Wire: The Light Kit Wire*

In ceiling fans with light kits, a blue or red wire may be present. This wire is dedicated to the lighting system and should be connected to the corresponding wire in the light kit or electrical supply.

Tips for Efficient Ceiling Fan Installation

Explore practical tips to enhance your ceiling fan installation experience and ensure a successful wiring process.

1. Read the Manufacturer’s Instructions

Always refer to the manufacturer’s instructions provided with your ceiling fan. These instructions often include specific details about the wiring colors and configurations for your particular model.

2. Turn Off Power Before Installation

Safety is paramount. Before starting the installation process, turn off the power to the circuit where you’ll be connecting the ceiling fan. This minimizes the risk of electrical shock during the installation.

3. Use Wire Connectors

Securely connect wires using wire connectors. These connectors help create reliable and safe connections, preventing loose or exposed wires that could lead to electrical issues.

4. Double-Check Connections

Before finalizing the installation, double-check all wire connections. Ensure that each wire is properly matched and securely connected according to the color codes.

Read too: Understanding and Addressing a Leaky Ceiling in Your Apartment: Navigating the Drips

Conclusion: Mastering Ceiling Fans Wiring Colors for a Breezy Installation

By understanding the intricacies of “Ceiling Fans Wiring Colors,” you gain the knowledge needed for a smooth and efficient installation process. Follow the color codes, adhere to safety practices, and reference manufacturer instructions to ensure a successful connection and optimal performance of your ceiling fan.

Embrace the confidence that comes with mastering ceiling fan wiring colors, and enjoy the cool breeze of a well-installed fan in your space.

Understanding and Addressing Straight Cracks in Ceiling Structures: A Comprehensive Guide

Discovering straight cracks in your ceiling can be disconcerting, hinting at potential structural concerns. In this detailed guide, we’ll delve into the causes behind “Straight Cracks in Ceiling” scenarios and provide practical insights on identifying, addressing, and preventing such issues. Gain a deeper understanding of the complexities surrounding straight cracks and learn how to safeguard your home from potential damages.

Straight Cracks In Ceiling

Decoding the Indications: Straight Cracks in Ceiling Structures

Before exploring solutions, let’s decipher the issue of straight cracks forming in ceiling structures. These distinct cracks can manifest due to various factors, serving as visible signs of underlying problems that demand attention.

Common Causes of Straight Cracks in Ceiling Structures

  1. Foundation Settlement: Uneven settling of the foundation can lead to stress on the house structure, resulting in straight cracks. Professional foundation inspections are crucial.
  2. Temperature and Humidity Fluctuations: Drastic changes in temperature and humidity levels can cause materials in the house to expand and contract, leading to straight cracks.
  3. Structural Movements: House structures naturally experience movements over time. Excessive movements, however, can contribute to straight cracks. Professional assessment is vital.
  4. Roof Leaks: Water damage from roof leaks can weaken the ceiling structure, leading to straight cracks. Regularly inspect and repair any roof issues promptly.
  5. Poor Construction Practices: Inadequate construction practices, such as insufficient support or the use of subpar materials, can contribute to straight cracks. Professional evaluations can identify these issues.

Addressing the Issue

  1. Foundation Repairs: If foundation settlement is identified, seek professional foundation repairs to stabilize and level the structure, reducing stress on the ceiling.
  2. Temperature and Humidity Control: Implement measures to control indoor temperature and humidity levels. Use HVAC systems, dehumidifiers, and proper insulation to minimize material expansion and contraction.
  3. Structural Reinforcements: Professional structural reinforcements can be implemented to enhance the stability of the house. Consult with experts to determine the appropriate solutions.
  4. Prompt Roof Repairs: Address any roof leaks promptly. Regular roof inspections and repairs will prevent water damage and subsequent straight cracks.
  5. Quality Construction Practices: During renovations or constructions, prioritize quality materials and practices. Professional builders can ensure proper support and construction techniques.

Preventive Measures: Safeguarding Against Straight Cracks in Ceiling Structures

  1. Regular Structural Inspections: Conduct regular inspections of your house structure. Early identification of issues can prevent severe damage and potential straight cracks.
  2. Timely Repairs: Address any visible damage or wear promptly. Timely repairs can prevent minor issues from escalating into major problems, avoiding straight crack.
  3. Professional Guidance: Consult with structural engineers or architects for professional guidance on maintaining the integrity of your house structure.

Read too: Understanding and Addressing a Leaky Ceiling in Your Apartment: Navigating the Drips

Conclusion

In conclusion, addressing “Straight Cracks in Ceiling” scenarios requires a strategic and comprehensive approach to identify and resolve root causes. Regular maintenance, prompt repairs, and proactive measures are crucial in preventing and mitigating this issue. By understanding common culprits and implementing the suggested solutions, homeowners can maintain a structurally sound and aesthetically pleasing home.

Understanding and Addressing Cracks Forming In Ceiling Structures: Unveiling the Signs

Discovering cracks forming in your ceiling can be a cause for concern, indicative of potential structural issues. In this comprehensive guide, we’ll delve into the causes behind “Cracks Forming In Ceiling” scenarios and provide practical insights on identifying, addressing, and preventing such concerns. Gain a deeper understanding of the complexities surrounding ceiling cracks and learn how to safeguard your home from potential damages.

Cracks Forming In Ceiling

Decoding the Indications:

Deciphering the Issue: Cracks Forming In Ceiling Structures Unveiled

Before exploring solutions, let’s decipher the issue of cracks forming in ceiling structures. These cracks can manifest for various reasons, serving as visible signs of underlying problems that demand attention.

Common Causes of Cracks Forming In Ceiling Structures

  1. Foundation Settlement: Uneven settling of the foundation can lead to stress on the house structure, resulting in cracks forming. Professional foundation inspections are crucial.
  2. Temperature and Humidity Fluctuations: Drastic changes in temperature and humidity levels can cause materials in the house to expand and contract, leading to cracks forming.
  3. Structural Movements: House structures naturally experience movements over time. Excessive movements, however, can contribute to cracks forming in the ceiling. Professional assessment is vital.
  4. Roof Leaks: Water damage from roof leaks can weaken the ceiling structure, leading to cracks. Regularly inspect and repair any roof issues promptly.
  5. Poor Construction Practices: Inadequate construction practices, such as insufficient support or the use of subpar materials, can contribute to cracks forming. Professional evaluations can identify these issues.

Addressing the Issue:

  1. Foundation Repairs: If foundation settlement is identified, seek professional foundation repairs to stabilize and level the structure, reducing stress on the ceiling.
  2. Temperature and Humidity Control: Implement measures to control indoor temperature and humidity levels. Use HVAC systems, dehumidifiers, and proper insulation to minimize material expansion and contraction.
  3. Structural Reinforcements: Professional structural reinforcements can be implemented to enhance the stability of the house. Consult with experts to determine the appropriate solutions.
  4. Prompt Roof Repairs: Address any roof leaks promptly. Regular roof inspections and repairs will prevent water damage and subsequent cracks forming.
  5. Quality Construction Practices: During renovations or constructions, prioritize quality materials and practices. Professional builders can ensure proper support and construction techniques.

Preventive Measures: Safeguarding Against Cracks Forming In Ceiling Structures

  1. Regular Structural Inspections: Conduct regular inspections of your house structure. Early identification of issues can prevent severe damage and potential cracks forming.
  2. Timely Repairs: Address any visible damage or wear promptly. Timely repairs can prevent minor issues from escalating into major problems, avoiding cracks forming.
  3. Professional Guidance: Consult with structural engineers or architects for professional guidance on maintaining the integrity of your house structure.

Read too: Understanding and Addressing a Leaky Ceiling in Your Apartment: Navigating the Drips

Conclusion

In conclusion, addressing “Cracks Forming In Ceiling” scenarios requires a strategic and comprehensive approach to identify and resolve root causes. Regular maintenance, prompt repairs, and proactive measures are crucial in preventing and mitigating this issue. By understanding common culprits and implementing the suggested solutions, homeowners can maintain a structurally sound and aesthetically pleasing home.

Dealing with Termites in Ceiling Drywall: Unveiling the Silent Invaders

Discovering termites in your ceiling drywall can be a distressing revelation, as these silent invaders can cause significant structural damage. In this comprehensive guide, we’ll delve into the intricacies of “Termites in Ceiling Drywall,” exploring the signs, causes, and effective methods to eradicate and prevent termite infestations. Learn how to protect your home from these destructive pests and ensure the longevity of your ceilings.

Termites In Ceiling Drywall

Decoding the Threat: Termites in Ceiling Drywall

Before delving into solutions, let’s understand the issue of termites infesting ceiling drywall. Recognizing the signs and knowing the potential causes are crucial steps in effectively addressing and preventing termite damage.

Common Signs of Termites in Ceiling Drywall

  1. Hollow Sounds: Tap on your ceiling, and if it produces hollow sounds, it could indicate termite damage within the drywall.
  2. Discarded Wings: Termites shed their wings after swarming. Finding discarded wings on the floor or windowsills is a potential sign of an infestation.
  3. Mud Tubes: Termites often create mud tubes for travel. Check for these tubes on walls, ceilings, or other surfaces connected to the ground.
  4. Visible Termite Trails: Sometimes, termites may be visible on the surface of the drywall, especially during swarming seasons.

Causes of Termites in Ceiling Drywall

  1. Moisture Issues: Excess moisture in and around your home can attract termites. Fix any leaks promptly and ensure proper ventilation.
  2. Wood-to-Ground Contact: Direct contact between wood and soil creates an entry point for termites. Maintain a gap between soil and wooden structures.
  3. Infested Wood Sources: If you have untreated or infested wood in or around your home, termites may be drawn to it, eventually spreading to the drywall.

Read too: Understanding and Addressing a Leaky Ceiling in Your Apartment: Navigating the Drips

Addressing the Issue: Effective Removal of Termites in Ceiling Drywall

  1. Professional Inspection: Hire a licensed pest control professional to conduct a thorough inspection and assess the extent of termite infestation.
  2. Localized Treatments: Targeted treatments such as liquid termiticides or foams may be applied directly to affected areas within the ceiling drywall.
  3. Termite Baiting Systems: Install baiting systems around your home to attract and eliminate termites. These systems help prevent further infestations.
  4. Repair and Replace: Remove and replace severely damaged drywall. Ensure that the source of the infestation is eliminated before making repairs.

Preventive Measures:

  1. Regular Inspections: Conduct routine inspections for signs of termites in and around your home. Early detection allows for prompt intervention.
  2. Termite-Resistant Materials: Consider using termite-resistant drywall or treating drywall with termite-resistant coatings during construction or renovations.
  3. Moisture Control: Maintain proper ventilation and address any moisture issues promptly. Termites are attracted to damp environments.

Conclusion

In conclusion, dealing with “Termites in Ceiling Drywall” requires a proactive and informed approach. By understanding the signs, causes, and effective removal methods, homeowners can protect their homes from termite damage. Regular inspections, preventive measures, and professional assistance are key components in maintaining a termite-free home.

Understanding and Eliminating Yellow Mold on Ceiling Surfaces: Unveiling the Intricacies

Discovering yellow mold on your ceiling can be a cause for concern, and it’s essential to address it promptly. In this comprehensive guide, we’ll explore the nuances of “Yellow Mold on Ceiling,” delving into its causes, signs, and effective removal methods. Learn how to identify, prevent, and eradicate yellow mold, ensuring a healthier living environment.

Yellow Mold On Ceiling

Decoding the Presence: Yellow Mold on Ceiling Surfaces

Before diving into solutions, let’s understand the issue of yellow mold on ceiling surfaces. Recognizing the signs and knowing the potential causes are crucial steps in effectively addressing and preventing its recurrence.

Common Causes of Yellow Mold on Ceiling Surfaces

  1. Excessive Moisture: Yellow mold thrives in damp environments. Identify and address sources of excess moisture, such as leaks, condensation, or poor ventilation, to prevent mold growth.
  2. Roof Leaks: Roof leaks can introduce water into your home, leading to mold growth on ceilings. Regularly inspect and maintain your roof to prevent leaks and subsequent mold issues.
  3. Humidity Imbalance: Inconsistent humidity levels can contribute to mold growth. Use dehumidifiers, ensure proper ventilation, and address indoor humidity imbalances to deter yellow mold.
  4. Poor Ventilation: Insufficient airflow can create pockets of stagnant air, promoting mold growth. Improve ventilation in affected areas to discourage yellow mold from taking hold.
  5. Previous Water Damage: Areas previously affected by water damage are susceptible to mold growth. Thoroughly dry and repair any water-damaged sections to prevent yellow mold recurrence.

Addressing the Issue: Effective Removal of Yellow Mold on Ceiling Surfaces

  1. Cleaning Solutions: Utilize mold-specific cleaning solutions or a mixture of water and mild detergent to scrub away yellow mold. Ensure the affected area is thoroughly cleaned and dried.
  2. Vinegar and Baking Soda: A mixture of vinegar and baking soda can be effective in removing yellow mold. Apply the solution, scrub gently, and rinse the area thoroughly.
  3. Hydrogen Peroxide: Hydrogen peroxide is an excellent mold remover. Apply it to the affected area, let it sit for some time, and then scrub and rinse.
  4. Professional Mold Remediation: For extensive or stubborn mold infestations, consider hiring professional mold remediation services to ensure thorough and safe removal.

Read too: Understanding Roof Leak Ceiling Bubble Issues: Unraveling the Mystery

Preventive Measures: Safeguarding Against Yellow Mold on Ceiling Surfaces

  1. Regular Inspections: Conduct regular inspections of ceilings and surrounding areas for signs of moisture or mold. Early detection allows for prompt intervention.
  2. Prompt Repairs: Address any leaks, water damage, or ventilation issues promptly. Timely repairs prevent conditions conducive to yellow mold growth.
  3. Improved Ventilation: Enhance ventilation in your home to maintain consistent airflow and discourage mold. Use exhaust fans, open windows, and ensure proper ventilation systems.

Conclusion

In conclusion, dealing with “Yellow Mold on Ceiling” requires a proactive and informed approach. By understanding the causes, signs, and effective removal methods, homeowners can create a healthier living environment and prevent the recurrence of yellow mold. Regular inspections, prompt repairs, and improved ventilation are key components in maintaining a mold-free home.

Dealing with Water Damage on Your Popcorn Ceiling: Unveiling the Consequences

Discovering water damage on your popcorn ceiling can be an alarming situation, requiring immediate attention. In this comprehensive guide, we’ll explore the intricacies of “Water Damage Popcorn Ceiling,” shedding light on the causes, identifying the signs, and offering effective solutions. Learn how to safeguard your ceiling from water-related issues and restore the aesthetic appeal of your home.

Water Damage Popcorn Ceiling

Understanding the Impact: Water Damage Popcorn Ceiling

Before delving into solutions, let’s decipher the issue of water damage on popcorn ceilings. This textured ceiling style is particularly susceptible to water-related problems, leading to discoloration, peeling, and potential structural damage.

Common Causes of Water Damage on Popcorn Ceilings

  1. Roof Leaks: Damaged or deteriorating roofs can allow water to seep through, impacting the popcorn ceiling below. Regular roof inspections are essential to identify and address leaks promptly.
  2. Plumbing Leaks: Leaky pipes within the home can result in water accumulation on ceilings, causing damage to popcorn textures. Regularly inspect plumbing systems for potential issues.
  3. Bathroom Water Damage: Leaks from bathrooms, especially on upper floors, can lead to water damage on popcorn ceilings below. Inspect fixtures, pipes, and shower enclosures for potential leaks.
  4. Condensation Issues: Poor ventilation and high humidity levels can cause condensation on ceilings, leading to water damage on popcorn textures. Improve ventilation to minimize this risk.
  5. Appliance Leaks: Malfunctioning appliances, such as water heaters or air conditioning units, can cause water leakage and damage popcorn ceilings. Regularly inspect and maintain appliances.

Addressing the Issue: Solutions for Water Damage Popcorn Ceiling

  1. Roof Repairs: Identify and address any issues with the roof promptly. Repair or replace damaged shingles and ensure proper drainage to prevent water from reaching the popcorn ceiling.
  2. Plumbing Inspections: Regularly inspect plumbing systems for leaks. Address any identified issues promptly, and consider professional assistance for complex plumbing problems.
  3. Bathroom Repairs: Inspect bathrooms for potential leaks. Repair damaged fixtures, address plumbing issues, and use waterproofing solutions to prevent water infiltration.
  4. Improved Ventilation: Enhance ventilation in your home to reduce condensation. Use exhaust fans, open windows, and consider dehumidifiers in areas prone to excess moisture.
  5. Appliance Maintenance: Schedule regular maintenance for appliances prone to leaks. Ensure proper functioning and address any issues promptly to prevent water damage on popcorn ceilings.

Read too: Understanding and Addressing a Leaky Ceiling in Your Apartment: Navigating the Drips

Preventive Measures: Safeguarding Your Popcorn Ceiling

  1. Regular Inspections: Conduct routine inspections of your ceiling for any signs of water damage. Early detection allows for prompt intervention and prevents extensive damage.
  2. Timely Repairs: Address any visible damage or wear promptly. Timely repairs can prevent minor issues from turning into major problems, avoiding water damage on popcorn ceilings.
  3. Waterproofing: Consider applying waterproofing solutions to your popcorn ceiling, especially in areas prone to water exposure. This adds an extra layer of protection against potential damage.

Conclusion

In conclusion, dealing with “Water Damage Popcorn Ceiling” requires a proactive and systematic approach to identify and address the root causes. Regular maintenance, prompt repairs, and preventive measures are crucial in preserving the integrity and aesthetics of your popcorn ceiling. By understanding common culprits and implementing the suggested solutions, homeowners can ensure the longevity and visual appeal of their ceilings.

Understanding and Resolving Ceiling Cracking in House Structures: Navigating the Rifts

Discovering cracks in your ceiling can be unnerving, signaling potential structural issues. In this comprehensive guide, we’ll delve into the causes behind “Ceiling Cracking in House” scenarios and provide practical insights on identifying, addressing, and preventing such concerns. Gain a deeper understanding of the complexities surrounding ceiling cracking and learn how to safeguard your home from potential damages.

Ceiling Cracking In House

Unveiling the Challenge: Ceiling Cracking in House Structures

Before exploring solutions, let’s decode the issue of ceiling cracking in house structures. These cracks can manifest in various forms, from fine lines to more severe rifts, indicating underlying problems that need attention.

Common Causes of Ceiling Cracking in House Structures

  1. Settling Foundations: Uneven settling of the foundation can lead to stress on the house structure, resulting in ceiling cracks. Identify foundation issues through professional inspections.
  2. Temperature and Humidity Fluctuations: Drastic changes in temperature and humidity levels can cause materials in the house to expand and contract, leading to cracks in the ceiling.
  3. Structural Movements: House structures naturally experience movements over time. Excessive movements, however, can contribute to ceiling cracking. Professional assessment is vital.
  4. Roof Leaks: Water damage from roof leaks can weaken the ceiling structure, leading to cracks. Regularly inspect and repair any roof issues promptly.
  5. Poor Construction Practices: Inadequate construction practices, such as insufficient support or the use of subpar materials, can contribute to ceiling cracking. Professional evaluations can identify these issues.

Addressing the Issue:

  1. Foundation Repairs: If settling foundations are identified, seek professional foundation repairs to stabilize and level the structure, reducing stress on the ceiling.
  2. Temperature and Humidity Control: Implement measures to control indoor temperature and humidity levels. Use HVAC systems, dehumidifiers, and proper insulation to minimize material expansion and contraction.
  3. Structural Reinforcements: Professional structural reinforcements can be implemented to enhance the stability of the house. Consult with experts to determine the appropriate solutions.
  4. Prompt Roof Repairs: Address any roof leaks promptly. Regular roof inspections and repairs will prevent water damage and subsequent ceiling cracking.
  5. Quality Construction Practices: During renovations or constructions, prioritize quality materials and practices. Professional builders can ensure proper support and construction techniques.

Read too: Dealing with Water Damage on Your Popcorn Ceiling: Unveiling the Consequences

Preventive Measures: Safeguarding Against Ceiling Cracking in House Structures

  1. Regular Structural Inspections: Conduct regular inspections of your house structure. Early identification of issues can prevent severe damage and potential ceiling cracking.
  2. Timely Repairs: Address any visible damage or wear promptly. Timely repairs can prevent minor issues from escalating into major problems, avoiding ceiling cracking.
  3. Professional Guidance: Consult with structural engineers or architects for professional guidance on maintaining the integrity of your house structure.

Conclusion

In conclusion, addressing “Ceiling Cracking in House” scenarios requires a strategic and comprehensive approach to identify and resolve root causes. Regular maintenance, prompt repairs, and proactive measures are crucial in preventing and mitigating this issue. By understanding common culprits and implementing the suggested solutions, homeowners can maintain a structurally sound and aesthetically pleasing home.

Ceiling Bubbling From Water Issues Unveiled: Troubleshooting Tips for a Disturbing Dilemma

Discovering your ceiling bubbling from water can be a distressing sight, signaling potential water damage. In this comprehensive guide, we’ll delve into the common causes behind “Ceiling Bubbling From Water” and provide practical insights on identifying, addressing, and preventing this issue. Learn about the intricacies of ceiling bubbling and safeguard your home from the consequences of water infiltration.

Ceiling Bubbling From Water

Understanding the Phenomenon: Ceiling Bubbling From Water

Before exploring solutions, let’s unravel the phenomenon of a ceiling bubbling from water. This occurrence typically indicates water accumulating between the ceiling and the paint or drywall, potentially causing visible bulges or blisters.

Common Causes

  1. Roof Leaks: A damaged or aging roof may allow water to penetrate, leading to ceiling bubbling. Inspect your roof for missing shingles, cracks, or other signs of damage.
  2. Plumbing Leaks: Leaky pipes within the walls or ceiling can result in water accumulation, causing the ceiling to bubble. Regularly inspect plumbing for any signs of leaks.
  3. Condensation Issues: Excessive moisture in the air can lead to condensation on the ceiling, causing bubbling. Improve ventilation and address humidity concerns to mitigate this issue.
  4. Leaking HVAC Systems: Faulty HVAC systems can contribute to water leakage. Inspect your air conditioning units and ensure proper drainage to prevent water buildup.
  5. Bathroom Water Damage: Leaks from bathrooms, especially those on upper floors, can seep into ceilings below, causing bubbling. Inspect fixtures, pipes, and shower enclosures for potential issues.

Addressing the Issue:

  1. Roof Repairs: If the source is a damaged roof, consider professional roof repairs or replacement. Address issues promptly to prevent further water infiltration.
  2. Plumbing Inspections: Regularly inspect plumbing systems for leaks. Address any identified issues promptly, and consider professional assistance for complex plumbing problems.
  3. Improved Ventilation: Enhance ventilation in your home to reduce condensation. Use exhaust fans, open windows, and consider dehumidifiers in areas prone to excess moisture.
  4. HVAC Maintenance: Schedule regular maintenance for your HVAC systems. Ensure proper drainage and address any issues promptly to prevent water leaks.
  5. Bathroom Repairs: Inspect bathrooms for potential leaks. Repair damaged fixtures, address plumbing issues, and use waterproofing solutions to prevent water infiltration.

Read too: Dealing with Water Damage on Your Popcorn Ceiling: Unveiling the Consequences

Preventive Measures: Safeguarding Against Ceiling Bubbling From Water

  1. Regular Home Inspections: Conduct regular home inspections to identify potential issues before they escalate. Pay attention to ceilings, walls, and other susceptible areas.
  2. Timely Repairs: Address any visible damage or wear promptly. Timely repairs can prevent minor issues from turning into major problems, avoiding ceiling bubbling.
  3. Proper Roof Maintenance: Perform regular roof inspections and maintenance. Replace damaged shingles, fix any issues promptly, and consider professional roofing services.

Conclusion

In conclusion, addressing “Ceiling Bubbling From Water” requires a systematic approach to identify and resolve the root causes. Regular maintenance, prompt repairs, and proactive measures are crucial in preventing and mitigating this issue. By understanding common culprits and implementing the suggested solutions, homeowners can maintain a dry and damage-free environment within their homes.

Bathroom Leaking Into Ceiling – Causes and Solutions: Unveiling the Dilemma

Discovering that your bathroom is leaking into the ceiling can be both alarming and challenging to address. In this in-depth guide, we’ll explore the common reasons behind “Bathroom Leaking Into Ceiling” and provide comprehensive solutions to help you identify, rectify, and prevent this issue. Gain insights into the intricacies of bathroom leaks and safeguard your home from potential water damage.

Bathroom Leaking Into Ceiling

Understanding the Predicament: Bathroom Leaking Into Ceiling

Before delving into solutions, let’s dissect the problem of a bathroom leaking into the ceiling. This occurrence often signifies water seepage from the bathroom, leading to potential structural damage, mold growth, and other issues.

Common Causes of Bathroom Leaks Into Ceiling

  1. Faulty Caulking and Grout: Deteriorated or poorly applied caulking and grout in the bathroom can allow water to penetrate walls and floors, eventually reaching the ceiling below.
  2. Damaged Pipe Joints: Leaks may occur at joints connecting water pipes in the bathroom. Aging or damaged seals can result in water escaping and causing ceiling damage.
  3. Cracked Shower Pans: A cracked or damaged shower pan can permit water to seep into the subfloor and walls, leading to leaks into the ceiling below.
  4. Leaking Bathroom Fixtures: Faulty faucets, showerheads, or pipes within bathroom fixtures can contribute to water leaks, affecting the ceiling.
  5. Inadequate Waterproofing: Improper waterproofing during bathroom construction or renovations can leave vulnerable areas exposed to water intrusion, leading to ceiling leaks.

Addressing the Issue: Solutions for Bathroom Leaking Into Ceiling

  1. Recaulking and Regrouting: Renew caulking and grout in the bathroom to create a watertight seal. Remove old materials, clean surfaces, and reapply new caulking and grout to prevent water seepage.
  2. Inspecting and Repairing Pipe Joints: Regularly inspect and maintain pipe joints in the bathroom. Replace damaged seals promptly to prevent leaks into the ceiling.
  3. Shower Pan Repair or Replacement: If a damaged shower pan is identified, consider professional repair or replacement to ensure a secure and waterproof enclosure.
  4. Fixing Leaky Bathroom Fixtures: Address any leaks from faucets, showerheads, or other fixtures promptly. Replace damaged components or seek professional plumbing assistance.
  5. Enhancing Waterproofing Measures: During renovations or construction, prioritize proper waterproofing. Use quality materials and ensure thorough waterproofing to safeguard against future leaks.

Preventive Measures: Safeguarding Against Bathroom Leaks

  1. Regular Maintenance Routine: Implement a routine for inspecting and maintaining bathroom fixtures and components. Check for signs of wear, corrosion, or damage.
  2. Adequate Ventilation: Ensure proper bathroom ventilation to reduce humidity. Use exhaust fans or open windows during and after showers to minimize moisture buildup.
  3. Timely Repairs: Address any visible damage or wear in your bathroom promptly. Timely repairs can prevent minor issues from escalating into major problems.

Read too: Dealing with Water Damage on Your Popcorn Ceiling: Unveiling the Consequences

Conclusion

In conclusion, addressing a “Bathroom Leaking Into Ceiling” scenario requires a systematic approach to identify and rectify the root causes. Regular maintenance, proper construction practices, and swift repairs are key elements in preventing and resolving this issue. By understanding the common culprits and implementing proactive measures, homeowners can ensure a dry and damage-free environment in their bathrooms.

Troubleshooting Tips for Ceiling Leaking After Shower: Causes and Solutions

Experiencing a “Ceiling Leaking After Shower” can be concerning and requires immediate attention. In this comprehensive guide, we’ll delve into the common causes behind ceiling leaks after a shower, offering insights on identifying, addressing, and preventing such issues. Learn about potential culprits and effective solutions to keep your bathroom dry and your ceiling intact.

Ceiling Leaking After Shower

Understanding the Issue: Ceiling Leaking After Shower

Before delving into solutions, let’s explore the phenomenon of a ceiling leaking after a shower. This occurrence is often indicative of water seeping through various layers, causing damage to the ceiling and potentially leading to more significant issues like mold growth and structural damage.

Common Causes of Ceiling Leaks After Shower

  1. Faulty Shower Pan: A damaged or improperly installed shower pan can allow water to penetrate the flooring and subfloor, eventually reaching the ceiling below.
  2. Leaking Shower Enclosure: Cracks or gaps in the shower enclosure can permit water to escape and find its way into the surrounding walls and ceiling.
  3. Damaged Grout and Caulking: Worn-out grout or deteriorated caulking in the shower area can result in water leakage, especially in the corners and joints.
  4. Blocked or Damaged Drains: If shower drains are blocked or damaged, water may accumulate and overflow, causing leaks through the ceiling below.
  5. Leaking Plumbing Pipes: Faulty plumbing pipes within the walls or ceiling can be a hidden source of water leaks, impacting the ceiling after each shower.

Dealing with Ceiling Leaks: Solutions and Fixes

  1. Inspecting and Repairing Shower Pan: If the shower pan is identified as the culprit, inspect for cracks or damage. Professional repair or replacement may be necessary to ensure a watertight seal.
  2. Sealing Shower Enclosure Gaps: Address any visible gaps or cracks in the shower enclosure. Apply waterproof sealant to create a barrier against water infiltration.
  3. Regrouting and Recaulking: Renewing grout and caulking in the shower area is essential. Remove old materials, thoroughly clean the joints, and reapply new grout and caulk for a secure seal.
  4. Clearing and Maintaining Drains: Regularly clean and maintain shower drains to prevent blockages. Use drain cleaners or seek professional assistance if needed.
  5. Professional Plumbing Inspection: If the source of the leak is suspected to be within the plumbing system, consult with a plumber for a thorough inspection. Address any damaged or leaking pipes promptly.

Preventive Measures: Avoiding Future Ceiling Leaks

  1. Regular Maintenance Routine: Implement a routine for inspecting and maintaining your shower, including checking for any signs of wear or damage.
  2. Proper Ventilation: Ensure proper ventilation in the bathroom to reduce humidity. Use exhaust fans or open windows during and after showers to allow moisture to dissipate.
  3. Waterproofing Materials: Invest in quality waterproofing materials during shower installations. This includes waterproof membranes and proper sealing of joints.
  4. Timely Repairs: Address any visible damage or wear in your bathroom promptly. Timely repairs can prevent minor issues from escalating into major problems.

Read too: Dealing with Water Damage on Your Popcorn Ceiling: Unveiling the Consequences

Conclusion

In conclusion, dealing with a “Ceiling Leaking After Shower” requires a systematic approach to identify and address the root causes. Regular maintenance, proper installation, and swift repairs are key elements in preventing and resolving this issue. By understanding the common culprits and implementing proactive measures, homeowners can enjoy a dry and damage-free environment in their bathrooms.

Step-by-Step Guide to Remove Drop Ceiling in the Basement: Transform Your Space

Thinking about a basement makeover? Learn the ins and outs of “Remove Drop Ceiling Basement” and discover how to revitalize your space effortlessly.

Remove Drop Ceiling Basement

Unveiling the Process: How to Remove Drop Ceiling in the Basement

1. Understanding Drop Ceilings:

Before embarking on the removal process, familiarize yourself with the components of a drop ceiling. This includes tiles, grid systems, and supporting structures.

2. Safety First:

Ensure your safety by wearing protective gear, including gloves and safety glasses. Turn off electricity to the basement to avoid any mishaps during the removal.

3. Prepare the Space:

Clear the area below the drop ceiling of furniture and other belongings. Lay down protective coverings to safeguard the floor from falling debris.

4. Start Removing Tiles:

Gently remove the ceiling tiles by pushing them up and twisting to release them from the grid. Work systematically to avoid unnecessary damage.

5. Detach the Grid:

After removing the tiles, proceed to detach the grid system. Use a pry bar or screwdriver to carefully disengage the grid from the ceiling.

6. Addressing Electrical Fixtures:

If there are electrical fixtures attached to the drop ceiling, disconnect and carefully remove them. Exercise caution to avoid damage or electrical issues.

7. Dispose of Materials:

Dispose of the removed tiles and grid responsibly. Check local regulations for proper disposal methods or recycling options.

Read too: Dealing with Water Damage on Your Popcorn Ceiling: Unveiling the Consequences

Benefits of Removing Drop Ceiling in the Basement

1. Increased Ceiling Height:

Removing the drop ceiling creates an illusion of increased height, making the basement feel more spacious and inviting.

2. Enhanced Aesthetics:

Exposed beams and pipes can contribute to an industrial or modern aesthetic, allowing for creative design possibilities.

3. Improved Lighting Options:

Without the constraints of a drop ceiling, explore various lighting options to brighten up the basement space.

Common Challenges and Solutions

1. Dealing with Asbestos:

If your drop ceiling contains asbestos, consult with professionals for safe removal and disposal.

2. Addressing Mold Issues:

In cases of mold growth, identify and address the source before removal. Wear protective gear and consider professional assistance.

3. Navigating Wiring and Pipes:

Plan ahead to reroute or camouflage exposed wiring and pipes for a polished look.

Conclusion

Removing a drop ceiling in the basement is a transformative project that opens up new design possibilities. By following the step-by-step guide on “Remove Drop Ceiling Basement,” you can revitalize your space, create a more inviting atmosphere, and enjoy the benefits of an exposed ceiling.

Whether you’re aiming for an industrial vibe or seeking to maximize the perceived height of your basement, this process offers flexibility and room for creative expression. Take the plunge, transform your basement, and enjoy the enhanced aesthetics and functionality that come with removing the drop ceiling.

Understanding and Tackling the Water Spot On Ceiling Mystery: Decoding the Dilemma

Water spots on the ceiling can be more than just unsightly; they might indicate underlying issues. In this comprehensive guide, we’ll delve into the causes, identification, and effective solutions for the enigmatic “Water Spot On Ceiling.” Unravel the mystery and safeguard your home from potential water damage.

Water Spot On Ceiling

The Significance of Water Spots On Ceiling

Water spots on the ceiling are not just cosmetic concerns; they can be indicative of more profound issues within your home. Identifying the causes and addressing them promptly is crucial to preventing further damage and maintaining the structural integrity of your living space.

Potential Causes of Water Spots On Ceiling

  1. Roof Leaks:
    • Damaged or missing shingles
    • Faulty flashing or compromised roof structure
  2. Plumbing Issues:
    • Leaky pipes within the ceiling or walls
    • Plumbing fixture malfunctions leading to water seepage
  3. Condensation Concerns:
    • Excessive moisture and condensation in the ceiling space
    • Lack of proper ventilation causing water buildup

Identifying Water Spots On Ceiling

1. Visual Inspection:

Conduct a thorough visual examination of your ceilings for any water stains or discoloration. Water spots are often visible indicators of an ongoing or past leak.

2. Check for Texture Changes:

Feel the affected area for any changes in texture. Soft or spongy spots may suggest the presence of trapped water beneath the surface.

3. Trace the Source:

Trace the source of the water spot, either from the roof, plumbing, or potential condensation issues. Understanding the origin is crucial for effective and targeted solutions.

Read too: Dealing with Water Damage on Your Popcorn Ceiling: Unveiling the Consequences

Water Spot On Ceiling Solutions

1. Address Roof Leaks:

Identify and repair any issues with the roof, including damaged shingles, compromised flashing, or structural problems. Prompt roof repairs are essential for preventing water spots.

2. Plumbing Repairs:

If the water spot is linked to plumbing issues, seek assistance from a professional plumber to repair or replace faulty pipes, fixtures, or connections.

3. Enhance Ventilation:

Improve ventilation in your home, particularly in areas prone to moisture buildup. Adequate ventilation helps prevent condensation-related water spots on the ceiling.

Preventive Measures

1. Regular Roof Maintenance:

Schedule routine inspections and maintenance for your roof to identify and address potential issues before they lead to water spots.

2. Timely Plumbing Checks:

Regularly inspect plumbing fixtures and pipes for leaks or malfunctions. Timely repairs can prevent water spots on the ceiling.

3. Proper Ventilation:

Ensure proper ventilation throughout your home to minimize condensation and reduce the risk of water spots forming on the ceiling.

Conclusion

A “Water Spot On Ceiling” is not just a cosmetic concern; it’s a potential indicator of underlying issues that demand attention. By understanding the potential causes, identifying the issue early, and implementing effective solutions, homeowners can protect their homes from the detrimental effects of water damage.

Regular maintenance, prompt repairs, and a proactive approach to potential issues can contribute to the longevity and structural integrity of your home. Stay vigilant, conduct inspections regularly, and ensure that your living spaces remain free from the threat of water spots on the ceiling.

Understanding and Addressing Water Leak Ceiling Bubble Issues: Troubleshooting Tips

Water leaks can turn into serious problems, especially when they result in a concerning “Water Leak Ceiling Bubble.” In this comprehensive guide, we’ll delve into the causes, identification, and effective solutions for this issue, ensuring you can safeguard your home from potential water damage.

Water Leak Ceiling Bubble

The Enigma of Water Leak Ceiling Bubbles

Discovering a bubble forming on your ceiling is often a clear indication of an underlying water leak. Unraveling the mystery behind the causes and promptly addressing the issue can prevent further damage and maintain the structural integrity of your home.

Potential Causes of Water Leak Ceiling Bubbles

  1. Roof Issues:
    • Damaged or missing shingles
    • Cracks in the roof flashing
    • Penetrating roof leaks from external elements
  2. Plumbing Problems:
    • Leaky pipes within the ceiling or walls
    • Faulty plumbing fixtures leading to water seepage
  3. Condensation Concerns:
    • Excessive moisture and condensation in the ceiling space
    • Lack of proper ventilation causing water buildup

Read too: Dealing with Water Damage on Your Popcorn Ceiling: Unveiling the Consequences

Identifying Water Leak Ceiling Bubbles

1. Visual Inspection:

Conduct a visual examination of your ceilings for any unusual bulges or discoloration. Water leak ceiling bubbles often manifest as visible anomalies.

2. Touch Test:

Gently touch the affected area. A soft or spongy sensation may indicate the presence of trapped water beneath the surface.

3. Water Stains:

Look for water stains on the ceiling or nearby walls, as they can provide additional clues about the source and extent of the leak.

Water Leak Ceiling Bubble Solutions

1. Locate and Repair the Leak Source:

Identify the source of the water leak and address it promptly. This may involve roof repairs, fixing damaged pipes, or addressing plumbing fixture issues.

2. Enhance Ventilation:

Improve ventilation in the affected area to reduce moisture buildup. Proper ventilation helps prevent condensation-related leaks in the ceiling.

3. Professional Plumbing Assistance:

If the leak is traced to plumbing issues, seek assistance from a professional plumber to repair or replace faulty pipes, fixtures, or connections.

Preventive Measures for Water Leak Ceiling Bubbles

1. Regular Roof Maintenance:

Schedule routine inspections and maintenance for your roof to identify and address potential issues before they lead to leaks.

2. Adequate Ventilation:

Ensure proper ventilation in your home, particularly in spaces prone to moisture buildup, to prevent the formation of water leak ceiling bubbles.

3. Timely Repairs:

Address any signs of roof damage, plumbing leaks, or condensation issues promptly. Early intervention can prevent extensive water damage and the formation of bubbles on the ceiling.

Conclusion

A “Water Leak Ceiling Bubble” is a visible indication of an underlying water issue that demands attention. By understanding the potential causes, identifying the issue early, and implementing effective solutions, homeowners can protect their homes from the detrimental effects of water damage.

Regular maintenance, prompt repairs, and a proactive approach to potential issues can contribute to the longevity and structural integrity of your home. Stay vigilant, conduct inspections regularly, and ensure that your living spaces remain free from the threat of water leaks and ceiling bubbles.

Understanding Roof Leak Ceiling Bubble Issues: Unraveling the Mystery

Roof leaks can lead to unexpected problems, and one common issue homeowners face is the formation of a “Roof Leak Ceiling Bubble.” In this comprehensive guide, we will explore the causes, identification, and solutions for this particular concern.

Roof Leak Ceiling Bubble

The Menace of Roof Leak Ceiling Bubbles

When water infiltrates the roof and causes a ceiling bubble, it’s a clear sign of a more significant issue. Understanding the potential causes and addressing them promptly can prevent further damage to your home.

Potential Causes of Roof Leak Ceiling Bubbles

  1. Roof Damage:
    • Missing or damaged shingles
    • Cracked or deteriorating flashing
    • Punctures or holes in the roof surface
  2. Poor Ventilation:
    • Inadequate attic ventilation leading to moisture buildup
    • Condensation issues causing water to seep into the ceiling
  3. Leaky Pipes or Plumbing Issues:
    • Faulty plumbing or leaking pipes in the attic or ceiling space
    • Water damage from plumbing fixtures on higher floors

Identifying Roof Leak Ceiling Bubbles

1. Visual Inspection:

Perform a thorough visual inspection of your ceilings for any unusual bulges or discoloration. Bubbles in the ceiling are often a clear indicator of trapped water.

2. Touch Test:

Gently touch the affected area. If it feels soft or spongy, there’s likely trapped water beneath the surface.

3. Water Stains:

Look for water stains on the ceiling or nearby walls, as these can provide additional clues about the source of the leak.

Roof Leak Ceiling Bubble Solutions

1. Locate and Repair the Roof Leak:

Identify the source of the roof leak and repair it promptly. This may involve patching up damaged shingles, replacing flashing, or addressing any structural issues.

2. Improve Attic Ventilation:

Enhance attic ventilation to prevent moisture buildup. Proper ventilation helps regulate temperature and reduces the risk of condensation.

3. Plumbing Repairs:

If the leak is attributed to plumbing issues, consult a plumber to repair or replace faulty pipes, fixtures, or connections.

Read too: Dealing with Water Damage on Your Popcorn Ceiling: Unveiling the Consequences

Prevention Tips

1. Regular Roof Inspections:

Schedule regular roof inspections to identify and address potential issues before they escalate.

2. Adequate Ventilation:

Ensure proper attic ventilation to prevent moisture buildup and reduce the risk of condensation-related leaks.

3. Prompt Repairs:

Address any signs of roof damage or plumbing issues promptly. Timely repairs can prevent extensive water damage and the formation of ceiling bubbles.

Conclusion

A “Roof Leak Ceiling Bubble” is a visible indication of a roof leak, and addressing it promptly is crucial to prevent further damage to your home. By understanding the potential causes, identifying the issue early, and implementing effective solutions, homeowners can protect their property from the detrimental effects of water damage.

Regular maintenance, prompt repairs, and a proactive approach to potential issues can contribute to the longevity and structural integrity of your roof. Stay vigilant, conduct inspections regularly, and ensure that your home remains a safe and dry haven for you and your family.

Condo Ceiling Leak Responsible and How to Address It: Unveiling the Culprit

Condo living offers comfort, but a ceiling leak can turn it into a nightmare. In this insightful guide, we explore the intricate details of “Condo Ceiling Leak Responsible” to help you identify, address, and prevent this common issue.

Condo Ceiling Leak Responsible

Understanding Condo Ceiling Leak Causes

1. Plumbing Issues

Leaky pipes or damaged plumbing fixtures within your condo unit can be a primary culprit. Faulty connections or deteriorating pipes can lead to water seepage, manifesting as ceiling leaks.

2. Roof Problems

Issues with the condo’s roof, such as damaged shingles or compromised waterproofing, can allow rainwater to infiltrate. This can lead to leaks that affect multiple units, requiring prompt attention from the condo management.

3. HVAC System Faults

Improperly maintained HVAC systems, including air conditioning units, can cause condensation buildup. If not addressed, this moisture can contribute to ceiling leaks over time.

Identifying Condo Ceiling Leak Responsible: A Proactive Approach

Step 1: Conduct a Visual Inspection

Regularly inspect your condo for any signs of water stains, discoloration, or bulging on the ceiling. These may indicate an ongoing or past leak.

Step 2: Check Plumbing Fixtures

Examine sinks, toilets, and appliances connected to water lines for any visible leaks. Pay attention to watermarks or dampness in nearby areas.

Step 3: Inspect the Roof

If safe to do so, visually inspect the roof for any visible damage, missing shingles, or signs of wear. Addressing roof issues promptly can prevent widespread water damage.

Step 4: Evaluate HVAC Systems

Ensure that your HVAC systems are well-maintained. Clean or replace filters regularly and address any condensation issues promptly to prevent water-related problems.

Condo Ceiling Leak Responsible: Addressing the Issue

1. Notify Condo Management

If the issue extends beyond your unit, promptly notify the condo management of the ceiling leak. They may need to assess and address the problem on a larger scale.

2. Contact a Professional

For leaks originating within your unit, contact a professional plumber or contractor to conduct a thorough inspection. They can identify and address the source of the leak efficiently.

3. Document the Damage

Take photos of the affected areas and any belongings damaged by the leak. This documentation can be crucial for insurance claims or discussions with the condo management.

Read too: Dealing with Water Damage on Your Popcorn Ceiling: Unveiling the Consequences

Preventive Measures for Future Leak Prevention

1. Regular Maintenance Checks

Perform routine checks on plumbing fixtures, the roof, and HVAC systems. Timely identification of potential issues can prevent more significant problems.

2. Seal Potential Entry Points

Ensure that windows, doors, and other potential entry points for water are properly sealed. This can help prevent leaks during heavy rain or storms.

3. Communicate with Neighbors

Establish open communication with neighbors to share information about any observed issues. This collaborative approach can lead to early detection and resolution of shared problems.

Conclusion

Understanding what makes a “Condo Ceiling Leak Responsible” is crucial for maintaining a safe and comfortable living environment. Whether the issue stems from plumbing, roof, or HVAC system problems, addressing it promptly is key to preventing extensive damage.

By adopting a proactive approach, conducting regular inspections, and collaborating with condo management and neighbors, you can contribute to the overall well-being of your condo community. Stay vigilant, address issues promptly, and enjoy a leak-free and comfortable condo living experience.

Understanding and Tackling Ceiling Condensation in Winter for a Cozier Home: Decoding the Dilemma

As the winter chill sets in, homeowners often encounter a common yet perplexing issue – ceiling condensation. In this comprehensive guide, we will delve into the intricacies of “Ceiling Condensation in Winter,” exploring the causes, potential damage, and effective strategies to maintain a comfortable and dry living space during the colder months.

Ceiling Condensation In Winter

Unraveling the Mystery: Ceiling Condensation in Winter

Understanding the Phenomenon

Ceiling condensation occurs when warm, moist air comes into contact with a cold surface, causing the moisture to condense into water droplets. During winter, this phenomenon is exacerbated as temperature differentials between the indoor and outdoor environments intensify.

Ceiling Condensation in Winter: Causes and Culprits

Poor Ventilation

Inadequate ventilation is a primary contributor to ceiling condensation. When warm, moisture-laden air is unable to escape, it can accumulate and lead to condensation on colder surfaces, including ceilings. Improving ventilation is a key step in preventing this issue.

Temperature Imbalances

Temperature disparities within a home can also contribute to ceiling condensation. Cold spots, often found near windows, poorly insulated areas, or areas with limited heating, can create an environment conducive to condensation. Addressing these temperature imbalances is crucial for maintaining a comfortable indoor climate.

Strategies to Combat

Optimizing Ventilation

Enhance ventilation by using exhaust fans in kitchens and bathrooms to expel moisture-laden air. Ensure that vents and ducts are unobstructed, allowing for efficient airflow and preventing the accumulation of humidity.

Maintaining Consistent Temperatures

Address temperature differentials by maintaining consistent heating throughout the home. Consider using space heaters in colder areas and optimizing your central heating system to create uniform warmth, minimizing the likelihood of condensation.

Insulating Ceilings and Attics

Improving insulation in ceilings and attics helps regulate temperature and reduce the risk of condensation. Ensure that insulation materials are in good condition and properly installed to provide an effective barrier against temperature variations.

Read too: Condo Ceiling Leak Responsible and How to Address It: Unveiling the Culprit

Preventing and Resolving Ceiling Condensation in Winter

Monitoring Humidity Levels

Keep an eye on indoor humidity levels using hygrometers. Ideally, indoor humidity should be maintained between 30% and 50%. Using dehumidifiers can help control excessive moisture, reducing the likelihood of condensation.

Sealing Air Leaks

Identify and seal air leaks around windows, doors, and other openings. By minimizing drafts and cold air infiltration, you create a more consistent indoor environment, reducing the potential for ceiling condensation in winter.

Conclusion

In conclusion, tackling the issue of ceiling condensation in winter requires a multifaceted approach. By understanding the causes, implementing effective strategies, and maintaining a comfortable indoor environment, homeowners can create a cozier living space during the colder months.

Take proactive measures to optimize ventilation, address temperature imbalances, and implement insulation improvements. By doing so, you’ll not only prevent the inconvenience of ceiling condensation but also ensure a warm and dry home throughout the winter season. Embrace these strategies, and transform your living space into a haven of comfort and well-being.

Understanding and Addressing Termite Tunnel on Ceiling Infestations: Unveiling the Hidden Threat

Termite infestations can wreak havoc on a home, and when these tiny destroyers create tunnels on the ceiling, the situation becomes even more critical. In this comprehensive guide, we will delve into the world of “Termite Tunnel on Ceiling,” shedding light on the signs, causes, and effective solutions to safeguard your home.

Termite Tunnel On Ceiling

The Silent Invaders: Termite Tunnel on Ceiling

Understanding Termite Behavior

Termites are notorious for their silent yet destructive nature. These pests often go unnoticed until significant damage is done. When termites establish tunnels on the ceiling, the structural integrity of your home is at risk, making it crucial to recognize the signs early on.

Identifying Termite Tunnels on the Ceiling: A Closer Look

Visual Signs of Infestation

Termite tunnels on the ceiling are often characterized by mud tubes that the pests use for travel. These tubes may appear as small, brown lines running along the ceiling surface. Regular inspections are essential to spot these visual indicators and address the issue promptly.

The Causes of Termite Tunnel on Ceiling Infestations

Moisture and Wood Decay

Termites are attracted to moisture and decaying wood. Leaky roofs, plumbing issues, or poorly ventilated spaces can create conditions ideal for termite infestations. Addressing these issues is crucial to preventing and eliminating termite tunnels on the ceiling.

Dealing with Termite Tunnel on Ceiling: Effective Solutions

Professional Inspection and Treatment

Engage the services of a professional pest control expert for a thorough inspection. If termite tunnels on the ceiling are identified, targeted treatment methods can be employed to eliminate the infestation and prevent further damage.

Repairing Structural Damage

Once the termites are eradicated, it’s essential to repair any structural damage caused by the infestation. This may involve replacing damaged wood and reinforcing weakened areas to restore the integrity of the ceiling.

Read too: Condo Ceiling Leak Responsible and How to Address It: Unveiling the Culprit

Proactive Measures

Regular Inspections*

Schedule regular termite inspections to catch potential issues before they escalate. Early detection is key to preventing extensive damage and the formation of tunnels on the ceiling.

Addressing Moisture Issues

Eliminate sources of excess moisture, such as leaks or inadequate ventilation. By creating a dry environment, you discourage termites from establishing colonies and tunnels on the ceiling.

Wood Treatment and Protection*

Treat wooden structures with termite-resistant solutions and consider using termite barriers to protect vulnerable areas. This proactive approach can significantly reduce the risk of termite infestations.

Conclusion

In conclusion, understanding the threat of termite tunnels on the ceiling is essential for homeowners looking to protect their investment. By recognizing the signs, addressing underlying causes, and implementing preventive measures, you can safeguard your home from the silent destruction of termite infestations.

Don’t wait until the damage is extensive; take proactive steps to ensure your home remains termite-free. With regular inspections, prompt treatment, and preventive measures, you can enjoy peace of mind knowing that your home is protected from the threat of termite tunnels on the ceiling.