For wine enthusiasts, having an organized and stylish wine storage solution is essential. Among the many options available, a Ceiling Mount Wine Rack stands out for its unique blend of practicality and aesthetics. This article explores the benefits of ceiling-mounted wine racks, offers guidance on choosing the right one, and provides tips on installation and maintenance.
What is a Ceiling Mount Wine Rack?
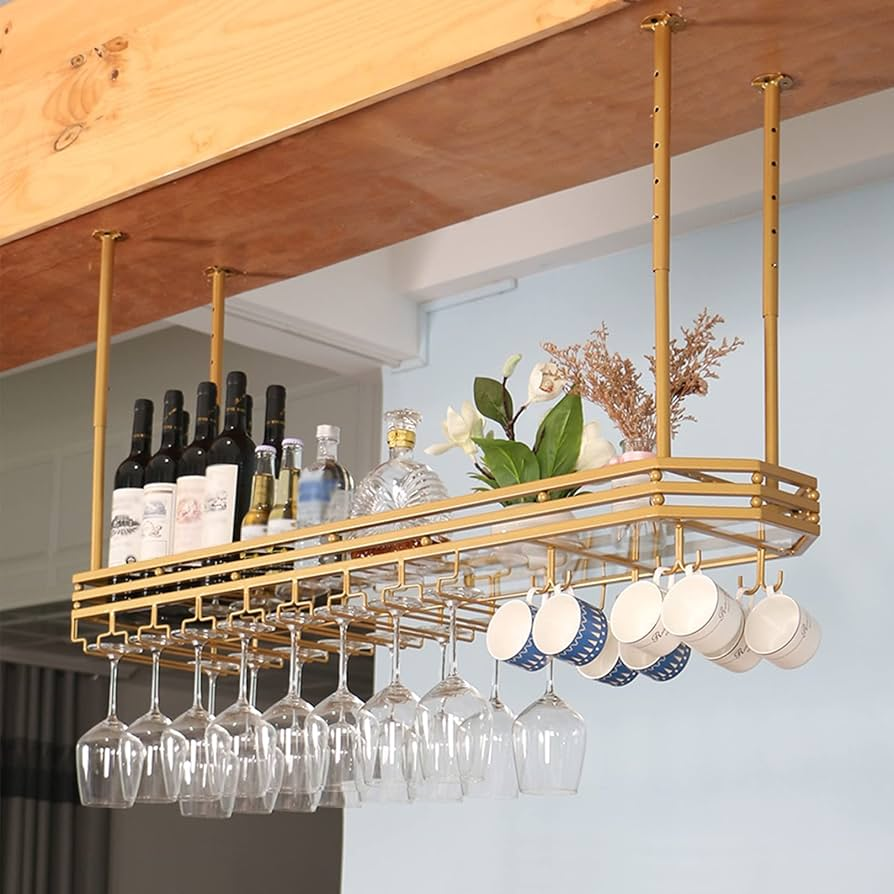
A Ceiling Mount Wine Rack is a wine storage solution designed to be mounted on the ceiling of a room or space. Unlike traditional wine racks that sit on the floor or wall-mounted racks, ceiling-mounted options utilize vertical space efficiently and offer a distinctive visual appeal. These racks are ideal for showcasing your wine collection while freeing up valuable floor and wall space.
Benefits of a Ceiling Mount Wine Rack
Opting for a Ceiling Mount Wine Rack can offer several advantages that make it a smart choice for wine storage:
- Maximizes Space: By utilizing ceiling space, these racks free up valuable floor and wall space, making them ideal for smaller rooms or areas where space is at a premium.
- Stylish Display: A ceiling-mounted rack can serve as a striking centerpiece, adding a touch of elegance and sophistication to your space. It allows you to showcase your wine collection in a visually appealing manner.
- Easy Access: Depending on the design, ceiling mount racks can provide easy access to your wine bottles. You can conveniently reach for your favorite bottle without having to bend down or reach into a crowded shelf.
- Customizable Design: Ceiling mount racks come in various styles and sizes, allowing you to choose one that fits your specific needs and complements your interior décor. Whether you prefer a modern, minimalist look or a classic, ornate design, there’s a ceiling mount rack to match your style.
- Enhanced Visibility: Displaying your wine collection on a ceiling mount rack can enhance visibility and make it easier to select the right bottle for any occasion. It’s a great way to show off your collection to guests and make it a conversation piece.
Choosing the Right Ceiling Mount Wine Rack
Selecting the ideal Ceiling Mount Wine Rack involves considering several factors to ensure it meets your needs and complements your space. Here are some key considerations:
1. Size and Capacity
Determine the size and capacity of the rack based on your wine collection. Ceiling mount racks come in various sizes, from small racks that hold a few bottles to larger racks designed for extensive collections. Choose a size that accommodates your current collection and allows for future expansion if needed.
2. Material
Ceiling mount wine racks are available in a variety of materials, including:
- Metal: Metal racks are durable and often feature modern designs. They can add a sleek, contemporary touch to your space.
- Wood: Wooden racks offer a classic and elegant look. They can be crafted from various types of wood, such as oak, walnut, or mahogany, and can be finished to match your interior décor.
- Glass: Glass racks provide a minimalist and stylish appearance, allowing you to showcase your wine bottles without obstruction.
Consider the material that best matches your interior design and offers the durability you need.
3. Design and Style
The design and style of the ceiling mount rack should complement your overall décor. Options include:
- Horizontal Racks: These racks hold bottles horizontally, which is ideal for storing wine long-term and ensuring the cork remains moist.
- Vertical Racks: Vertical racks display bottles upright, which can be more suitable for wines that are meant to be consumed within a shorter period.
- Hanging Racks: Some ceiling mount racks feature a hanging design, allowing bottles to dangle from the ceiling. This can create a unique visual effect and add a touch of modernity.
Choose a design that aligns with your personal taste and enhances the look of your space.
4. Installation Requirements
Consider the installation requirements for the ceiling mount rack. Some racks come with installation instructions and hardware, while others may require professional installation. Ensure that your ceiling can support the weight of the rack and that the installation is performed correctly to avoid any safety issues.
5. Budget
Ceiling mount wine racks are available at various price points, depending on the material, size, and design. Set a budget that aligns with your needs and preferences, and look for options that offer the best value for your investment.
Installation of a Ceiling Mount Wine Rack
Proper installation is crucial for ensuring that your Ceiling Mount Wine Rack is secure and functional. Here is a general guide to installing a ceiling mount rack:
1. Plan the Location
Choose an appropriate location on the ceiling where the rack will be installed. Consider the height of the ceiling and ensure that the rack will be at a convenient level for accessing your wine bottles. Avoid placing the rack in areas where it might obstruct movement or be in the way.
2. Measure and Mark
Accurate measurements are essential for proper installation. Measure the dimensions of the rack and mark the locations for the mounting brackets on the ceiling. Ensure that the marks are level and evenly spaced.
3. Install the Mounting Brackets
Use appropriate anchors and screws to secure the mounting brackets to the ceiling. Follow the manufacturer’s instructions for installation to ensure a secure and stable attachment. If the rack requires additional support, consider using a stud finder to locate ceiling joists.
4. Mount the Rack
Once the brackets are in place, attach the ceiling mount wine rack to the brackets. Ensure that the rack is level and securely attached. Test the stability of the rack by gently applying pressure to ensure it is firmly mounted.
5. Arrange Your Wine Bottles
After installation, arrange your wine bottles on the rack. Consider organizing the bottles by type, vintage, or personal preference. Ensure that the bottles are securely placed and that the rack is easily accessible.
Maintenance and Care for Ceiling Mount Wine Racks
Proper maintenance and care are essential for keeping your Ceiling Mount Wine Rack in good condition. Here are some tips for maintaining your rack:
1. Regular Cleaning
Dust and clean the rack regularly to keep it looking its best. Use a soft cloth and gentle cleaner suitable for the material of the rack. Avoid using abrasive cleaners that could damage the finish.
2. Check for Stability
Periodically check the stability of the rack to ensure that it remains securely mounted. Tighten any loose screws or bolts as needed and address any signs of wear or damage promptly.
3. Monitor for Damage
Inspect the rack for any signs of damage, such as bent or broken parts. Address any issues immediately to prevent further damage and ensure the safety of your wine bottles.
4. Keep Bottles Organized
Maintain organization of your wine bottles to prevent clutter and ensure easy access. Avoid overcrowding the rack, as this can strain the structure and make it difficult to retrieve bottles.
Conclusion
A Ceiling Mount Wine Rack offers a stylish and space-efficient solution for displaying and storing your wine collection. With its ability to maximize space, enhance visibility, and add elegance to your space, it’s an excellent choice for wine enthusiasts. By considering factors such as size, material, design, and installation requirements, you can select the perfect rack for your needs. Proper installation and maintenance will ensure that your ceiling mount rack remains a beautiful and functional addition to your home. Embrace the charm and practicality of a Ceiling Mount Wine Rack and enjoy an elevated wine storage experience.