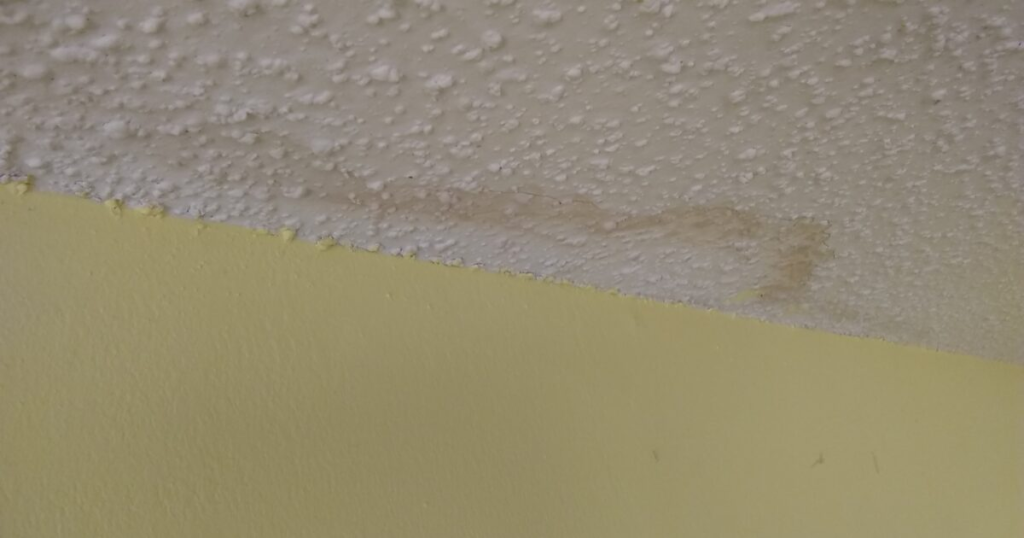
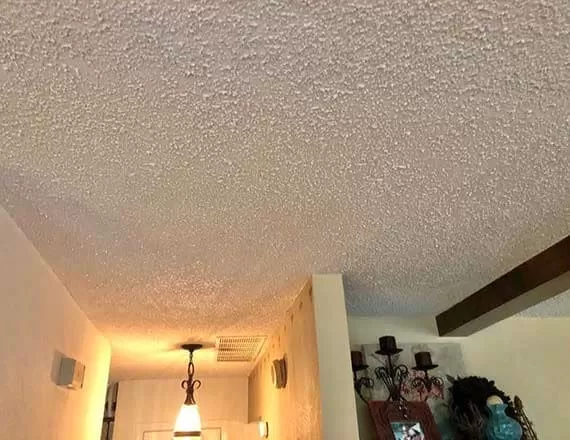
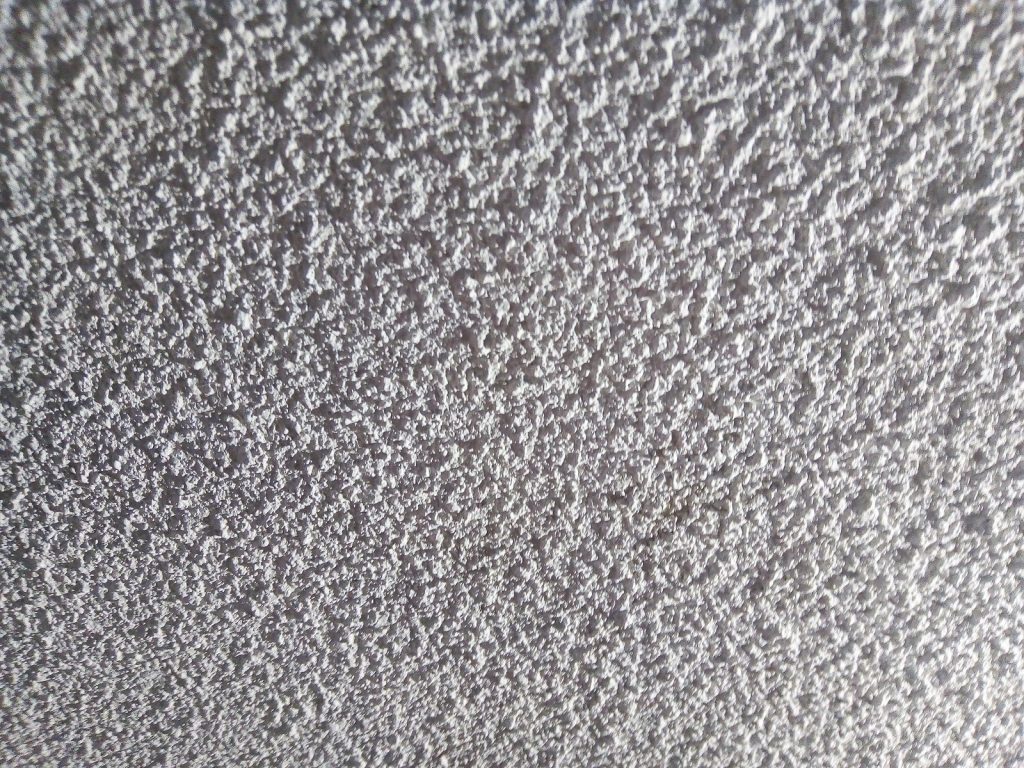
Denver Popcorn Ceiling Removal: A Comprehensive Guide to Transform Your Space

If you’re a homeowner in Denver, you may be considering updating your home’s interior, particularly if it features the once-popular popcorn ceilings. While these textured ceilings were trendy in the mid-20th century, many homeowners are now opting for a cleaner, more modern look. This article will delve into the process of Denver popcorn ceiling removal, the benefits of eliminating this texture, and important considerations to keep in mind.

Denver Popcorn Ceiling Removal

What Is a Popcorn Ceiling?

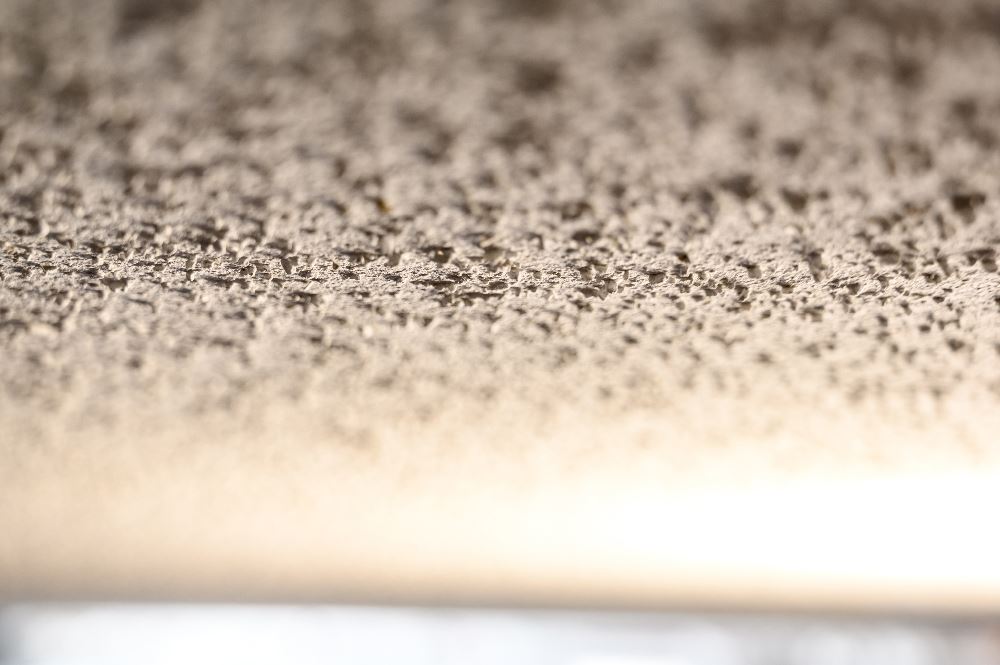
Before diving into the specifics of popcorn ceiling removal, it’s essential to understand what a popcorn ceiling is. Also known as an “acoustic ceiling,” a popcorn ceiling is a spray-on texture applied to the ceiling surface to create a bumpy, textured finish. This texture was popular for several reasons:

  1. Acoustic Properties: The texture helps to absorb sound, making it a popular choice in homes and commercial buildings for noise reduction.
  2. Hiding Imperfections: The bumps and ridges can conceal imperfections in the ceiling, such as cracks or uneven surfaces.
  3. Easy Installation: Popcorn ceilings were relatively quick and inexpensive to install.

Despite these advantages, many homeowners are choosing to remove popcorn ceilings due to the dated look and potential health risks associated with asbestos.

Read too: Shiplap Ceiling in Kitchen: A Timeless Trend for a Stylish and Cozy Space

Why Remove Popcorn Ceilings?

There are several compelling reasons to consider Denver popcorn ceiling removal:

  1. Aesthetic Appeal: Modern interior design trends favor smooth, clean ceilings that can make spaces look larger and more open. Removing popcorn ceilings can instantly update the look of your home.
  2. Increased Home Value: Homes with smooth ceilings are often more appealing to potential buyers, which can increase your property’s resale value.
  3. Health Concerns: Many popcorn ceilings installed before the 1980s contain asbestos, a hazardous material that can lead to serious health issues. If your popcorn ceiling has not been tested, it’s advisable to do so before proceeding with any removal.
  4. Ease of Cleaning: Popcorn ceilings can be challenging to clean and maintain. Smooth ceilings are generally easier to dust and wipe down, leading to less maintenance in the long run.

The Process of Denver Popcorn Ceiling Removal

Removing a popcorn ceiling can be a daunting task, but with the right approach, it can be accomplished successfully. Here’s a step-by-step guide to Denver popcorn ceiling removal.

Step 1: Prepare Your Space

Before you start the removal process, it’s crucial to prepare the area:

  • Clear the Room: Remove furniture and any items from the room that could get damaged during the process. Cover any remaining furniture with drop cloths or plastic sheeting to protect against dust and debris.
  • Turn Off Power: If you have ceiling lights or fans, turn off the power to the room at the circuit breaker to avoid any accidents.
  • Cover Floors: Lay down drop cloths or plastic sheeting on the floor to catch any falling debris.

Step 2: Test for Asbestos

If your home was built before the 1980s, it’s essential to test the popcorn ceiling for asbestos. You can either hire a professional to conduct the test or use an at-home kit. If asbestos is detected, it’s recommended to hire a certified asbestos abatement contractor for safe removal.

Step 3: Gather Your Supplies

You will need the following supplies for the popcorn ceiling removal process:

  • A spray bottle filled with water
  • A putty knife or scraper
  • A ladder
  • Drop cloths or plastic sheeting
  • A dust mask or respirator
  • Safety goggles
  • A bucket for debris
  • Paint roller or textured ceiling spray (for touch-ups afterward)

Step 4: Remove the Popcorn Texture

Now that your space is prepared and you’ve confirmed there’s no asbestos, it’s time to start removing the popcorn texture:

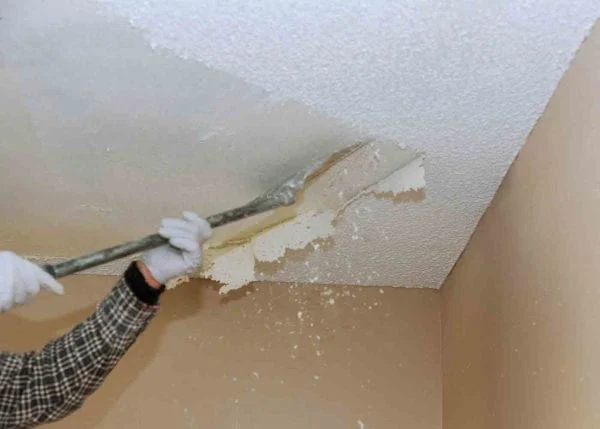
  1. Moisten the Ceiling: Fill a spray bottle with water and lightly mist a small section of the popcorn ceiling. Allow it to soak in for a few minutes to soften the texture.
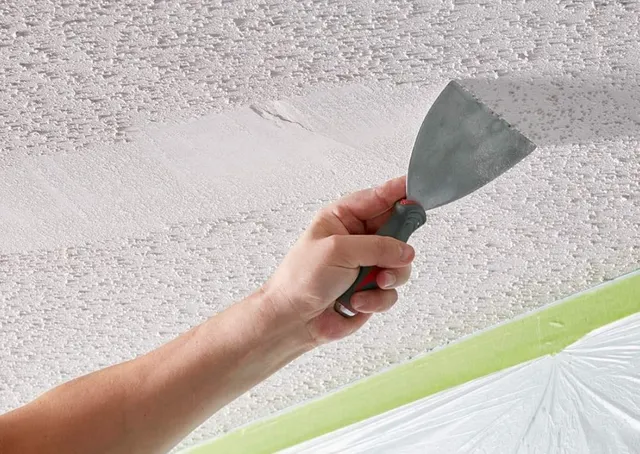
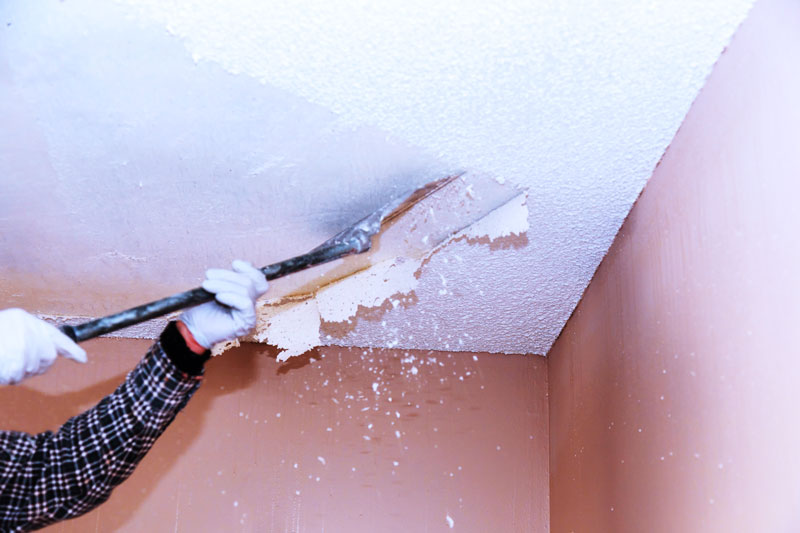
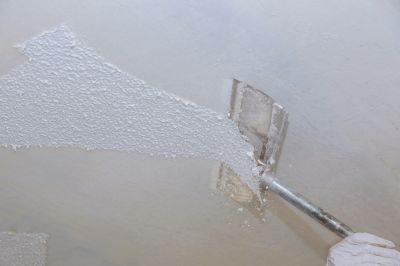
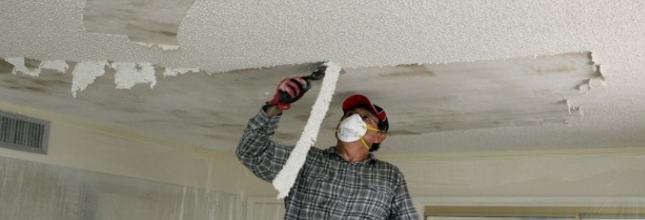
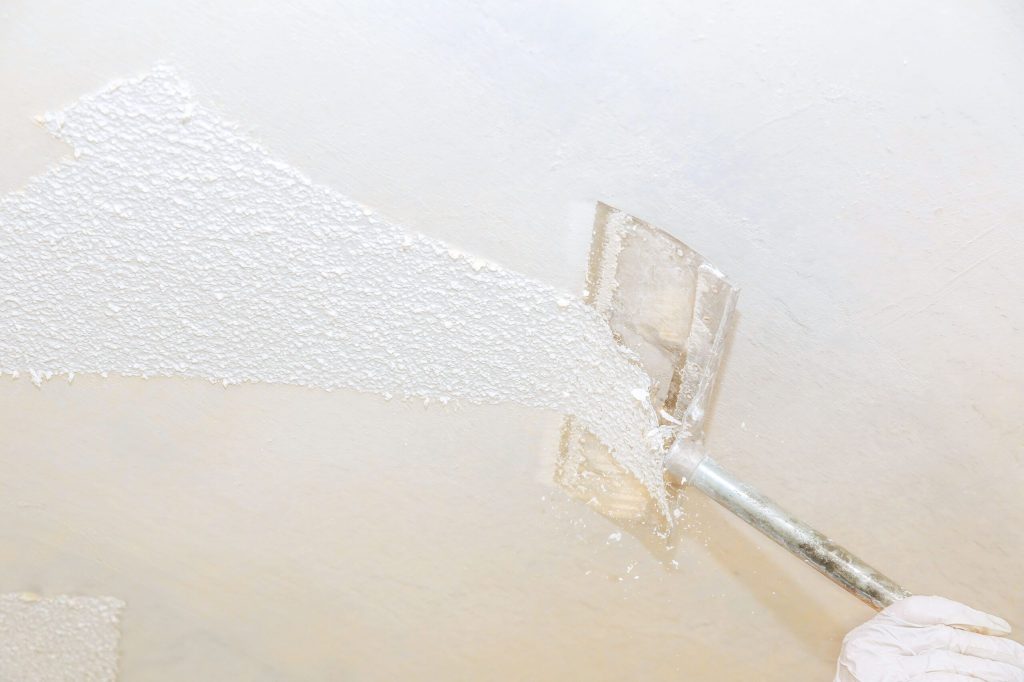
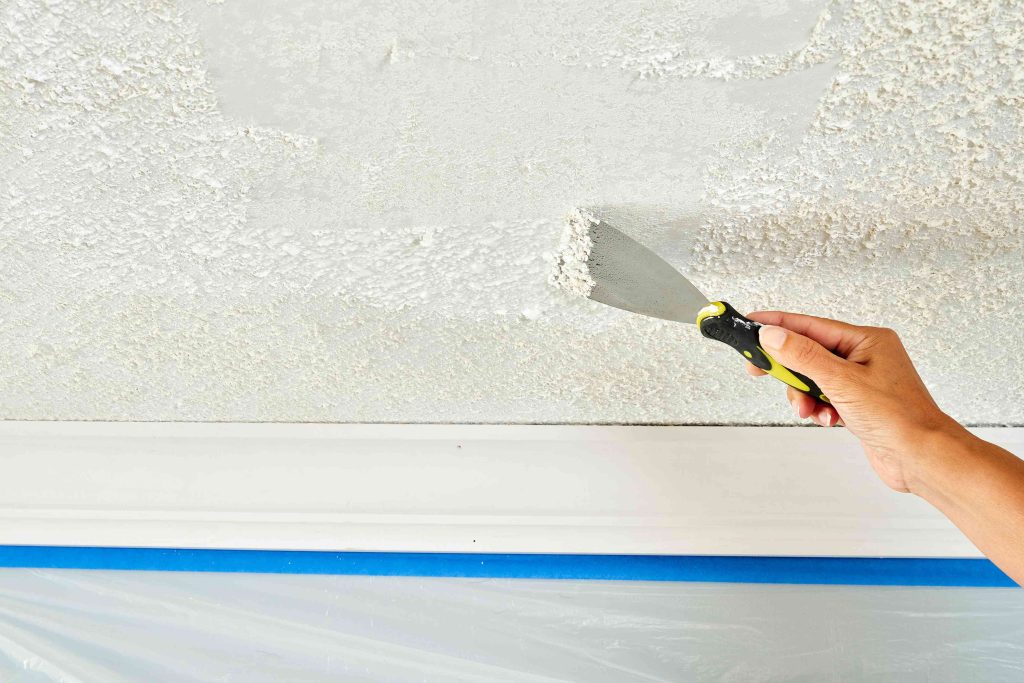
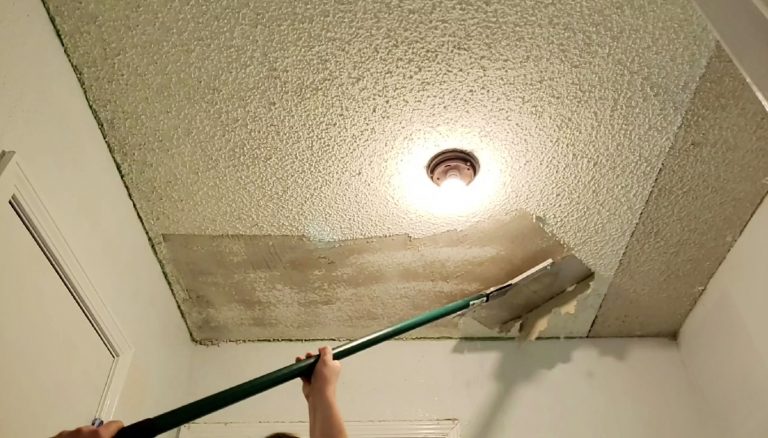
  2. Scrape Off the Texture: Use a putty knife or scraper to gently lift and remove the popcorn texture from the ceiling. Be careful not to gouge the drywall beneath. Work in small sections for more manageable removal.
  3. Repeat the Process: Continue misting and scraping sections of the ceiling until the entire popcorn texture is removed. You may need to clean your scraper frequently to ensure effective removal.

Step 5: Smooth the Ceiling

After you’ve removed the popcorn texture, the ceiling may have some imperfections. Here’s how to smooth it out:

  1. Fill in Imperfections: Use joint compound to fill any gouges or holes in the drywall. Apply with a putty knife, and let it dry according to the manufacturer’s instructions.
  2. Sand the Surface: Once the joint compound is dry, use sandpaper to smooth the surface of the ceiling. Wear a dust mask to protect yourself from drywall dust.
  3. Prime and Paint: After sanding, prime the ceiling to create an even surface for painting. Once the primer is dry, you can apply the paint color of your choice for a fresh, modern look.

Tips for Successful Popcorn Ceiling Removal

Here are some additional tips to ensure a smooth Denver popcorn ceiling removal process:

  • Take Your Time: Removing popcorn ceilings can be time-consuming, especially in larger rooms. Be patient and work methodically to avoid damaging the drywall.
  • Consider Professional Help: If you’re not comfortable with DIY projects or if asbestos is present, it’s best to hire a professional contractor who specializes in popcorn ceiling removal.
  • Plan for Cleanup: The removal process can create a significant mess. Have a plan in place for cleanup, including trash bags for debris and a vacuum for any remaining dust.
  • Allow for Touch-Ups: After the popcorn is removed and the ceiling is painted, you may want to consider adding a new texture or finish to give your ceiling a unique look.

Final Thoughts on Denver Popcorn Ceiling Removal

Denver popcorn ceiling removal can significantly enhance the aesthetics of your home, making it feel more modern and inviting. While the process may seem daunting, taking it step by step and being well-prepared can lead to successful results. Whether you choose to tackle the project yourself or hire a professional, removing popcorn ceilings is a worthwhile investment in your home’s value and appearance.

With the right preparation and tools, you can transform your living space and enjoy a fresh, updated look for years to come.

Kilz for Popcorn Ceilings: Transform Your Space with Ease

Popcorn ceilings, once a popular choice for their texture and sound-dampening qualities, can often become outdated and difficult to maintain. If you’re considering updating or repairing your popcorn ceiling, Kilz for popcorn ceiling is a product worth exploring. Kilz offers effective solutions for various ceiling treatments, including those with the classic popcorn texture. This comprehensive guide will delve into the benefits of using Kilz for popcorn ceilings, provide detailed application instructions, and offer tips for achieving a flawless finish.

Kilz For Popcorn Ceiling

What is Kilz?

Kilz is a well-known brand in the world of home improvement, specializing in high-quality primers and paints. Their products are designed to address various painting and sealing challenges, including stain-blocking, odor-blocking, and surface preparation. Kilz for popcorn ceiling refers to the specific Kilz products that are suitable for preparing and painting over popcorn ceilings.

Read too: A Comprehensive Mr Cool Ceiling Cassette Review: Unveiling Excellence

Types of Kilz Products for Popcorn Ceilings

  1. Kilz Original Primer: A versatile, oil-based primer known for its excellent stain-blocking properties. It’s ideal for sealing and preparing surfaces before painting.
  2. Kilz 2 Multi-Surface Primer: A water-based primer that offers excellent adhesion and stain-blocking properties. It’s suitable for a wide range of surfaces, including popcorn ceilings.
  3. Kilz Premium Primer: This high-quality primer provides exceptional coverage and adhesion, making it a great choice for surfaces with heavy texture like popcorn ceilings.

Benefits of Using Kilz for Popcorn Ceilings

Using Kilz for popcorn ceilings offers several advantages, particularly if you’re looking to refresh or completely transform your ceiling. Here’s why Kilz is an excellent choice:

1. Stain and Odor Blocking

Popcorn ceilings can often harbor stains or odors that are difficult to remove. Kilz primers are known for their stain-blocking and odor-eliminating properties, ensuring that your ceiling looks clean and fresh.

2. Improved Adhesion

Kilz products are designed to provide a strong bond with various surfaces. This is especially important for textured ceilings like popcorn, as it ensures that your topcoat will adhere properly and last longer.

3. Enhanced Coverage

Kilz primers are formulated to cover uneven surfaces and hide imperfections. This is particularly useful for popcorn ceilings, which can have a lumpy texture that makes it challenging to achieve a smooth finish.

4. Ease of Application

Kilz products are designed to be user-friendly, making them accessible for DIY enthusiasts and professional painters alike. Their ease of application helps streamline the process of updating your popcorn ceiling.

5. Durable Finish

Applying Kilz as a primer ensures a durable and long-lasting finish. This is essential for maintaining the appearance of your ceiling over time, especially in high-traffic areas or rooms prone to moisture.

How to Prepare and Apply Kilz to a Popcorn Ceiling

Proper preparation and application are key to achieving a successful result when using Kilz for popcorn ceilings. Follow these steps to ensure the best outcome:

1. Prepare the Room

Before you start, ensure the room is properly prepared. Remove all furniture or cover it with drop cloths. Protect the floors with plastic sheeting or drop cloths to avoid spills.

2. Clean the Ceiling

Dust and clean the popcorn ceiling thoroughly. Use a vacuum with a brush attachment to remove loose debris and dirt. For stubborn stains, use a mild detergent solution and a sponge. Allow the ceiling to dry completely before proceeding.

3. Repair Any Damage

Inspect the popcorn ceiling for any damage, such as cracks or peeling. Repair these areas using a suitable filler or patching compound. Once the repairs are dry, sand the area lightly to ensure a smooth surface.

4. Apply Kilz Primer

Choose the appropriate Kilz primer for your popcorn ceiling. Using a roller with a long nap, apply a generous coat of primer to the ceiling. Make sure to cover all areas evenly, including the textured parts. For best results, use a paintbrush to cut in around the edges and corners.

5. Allow to Dry

Allow the primer to dry completely according to the manufacturer’s instructions. This typically takes a few hours but can vary based on the product and environmental conditions.

6. Apply Topcoat

Once the primer is dry, apply your chosen topcoat paint. Choose a high-quality ceiling paint that complements your room’s decor. Apply the paint using a clean roller or brush, and make sure to cover all areas evenly.

7. Inspect and Touch Up

After the topcoat has dried, inspect the ceiling for any missed spots or imperfections. Touch up these areas as needed to achieve a flawless finish.

Tips for Achieving the Best Results

  1. Use the Right Tools: Invest in high-quality rollers and brushes designed for textured surfaces. This will help you achieve an even application and avoid streaks.
  2. Work in Sections: To ensure even coverage, work in small sections of the ceiling. This will help you manage the application process more effectively and avoid overlapping.
  3. Maintain Good Ventilation: Ensure that the room is well-ventilated during and after application to help the primer and paint dry properly and to reduce any potential odors.
  4. Check for Mildew: If your popcorn ceiling has been exposed to moisture, check for signs of mildew. If present, treat the mildew before applying Kilz to prevent it from affecting the finish.
  5. Test a Small Area: Before applying Kilz to the entire ceiling, test a small, inconspicuous area to ensure compatibility with the popcorn texture and to check the color of the primer and topcoat.

Common Mistakes to Avoid with Kilz for Popcorn Ceilings

Avoiding common mistakes can help ensure a successful project when using Kilz for popcorn ceilings:

1. Skipping Preparation

Neglecting to clean and prepare the ceiling can result in poor adhesion and an uneven finish. Proper preparation is crucial for achieving the best results.

2. Using the Wrong Primer

Using a primer that is not suitable for textured surfaces like popcorn ceilings can lead to poor coverage and adhesion. Choose a Kilz product specifically designed for this purpose.

3. Overloading the Roller

Applying too much primer or paint to the roller can cause drips and uneven application. Use a roller with an appropriate nap length for textured surfaces and avoid overloading.

4. Not Allowing Proper Drying Time

Rushing the drying process can lead to issues with adhesion and finish quality. Follow the manufacturer’s instructions for drying times and avoid applying additional coats too soon.

Conclusion

Kilz for popcorn ceiling offers an effective solution for transforming outdated or damaged popcorn ceilings. With its stain-blocking, adhesion-enhancing, and coverage-improving properties, Kilz products are well-suited for this type of project. By following the preparation and application steps outlined in this guide, you can achieve a smooth, clean finish that revitalizes your ceiling and enhances your living space.

Popcorn Ceiling Removal San Diego: Tips and Considerations

Discover everything you need to know about popcorn ceiling removal in San Diego, from reasons to remove it to the best practices and professionals for the job.

Popcorn Ceiling Removal San Diego

Popcorn Ceiling Removal San Diego: Why Consider It?

Understanding Popcorn Ceiling Removal

Popcorn ceilings, also known as acoustic or textured ceilings, were popular in the mid-20th century for their ability to hide imperfections and dampen sound. However, they have fallen out of favor due to their dated appearance and potential health risks associated with asbestos in older installations.

Benefits of Popcorn Ceiling Removal

  • Modern Aesthetic: Removing popcorn ceilings can instantly update the look of a room, giving it a more contemporary and spacious feel.
  • Increased Property Value: Homes with smooth ceilings tend to appeal more to buyers, potentially increasing resale value.
  • Health and Safety: Popcorn ceilings installed before 1980 may contain asbestos, a known carcinogen. Removal is essential to mitigate health risks, especially during renovations or repairs.

Popcorn Ceiling Removal Process

1. Inspection and Testing

Before removal, it’s crucial to determine if the popcorn ceiling contains asbestos. Professional testing can identify asbestos fibers, ensuring safe handling and disposal practices if necessary.

Read too: Kitchen Lighting For A Vaulted Ceiling: Illuminating Your Space with Style and Functionality

2. Preparation

Prepare the room by removing furniture, covering floors and walls with protective materials, and ensuring adequate ventilation. This minimizes dust and debris from spreading throughout the house.

3. Removal Techniques

  • Wet Scrape Method: The ceiling is lightly sprayed with water to loosen the texture, making it easier to scrape off without creating airborne dust.
  • Dry Scrape Method: In some cases, a dry scrape method may be used with careful containment to minimize dust and debris.

4. Repair and Refinishing

After removal, the ceiling may require patching, sanding, and refinishing to achieve a smooth surface. This stage may also involve applying primer and fresh paint for a polished look.

Hiring Professionals in San Diego

Choosing the Right Contractor

  • Experience: Look for contractors with experience in popcorn ceiling removal and asbestos abatement if needed.
  • Certification: Ensure the contractor is licensed and certified to handle asbestos removal if applicable, adhering to local regulations.
  • References: Check reviews and ask for references to gauge the contractor’s reliability and quality of workmanship.

Cost Considerations

Factors Influencing Cost

  • Ceiling Size: Larger rooms typically incur higher removal costs due to more labor and materials.
  • Asbestos Abatement: If asbestos is present, additional costs for testing, containment, and safe disposal will apply.
  • Complexity: Ceilings with intricate designs or in hard-to-reach areas may require more labor and specialized equipment.

Benefits of Professional Removal

1. Safety Compliance

Professional contractors follow safety protocols to minimize exposure to asbestos fibers and ensure proper disposal, protecting both occupants and the environment.

2. Efficiency

Experienced professionals can complete the removal process efficiently, minimizing disruption to your daily routine and ensuring thorough cleanup afterward.

3. Quality Results

Professional removal and refinishing result in a smooth, flawless ceiling finish that enhances the overall appearance and value of your home.

Conclusion

Popcorn ceiling removal in San Diego is a transformative home improvement project that enhances aesthetics, improves indoor air quality, and may increase property value. Whether motivated by modernizing your home or addressing health concerns, hiring a qualified professional ensures the job is done safely and effectively. By understanding the process, costs, and benefits associated with popcorn ceiling removal, homeowners can make informed decisions to achieve a refreshed and inviting living space.

Water Damage on Popcorn Ceiling: Causes, Remediation, and Prevention

Water damage on popcorn ceiling can be a troubling issue for homeowners, leading to unsightly stains, structural issues, and potentially hazardous mold growth. In this comprehensive guide, we delve into the causes of water damage on popcorn ceilings, effective remediation strategies, and essential tips for prevention.

Water Damage Popcorn Ceiling

What is Water Damage on Popcorn Ceilings?

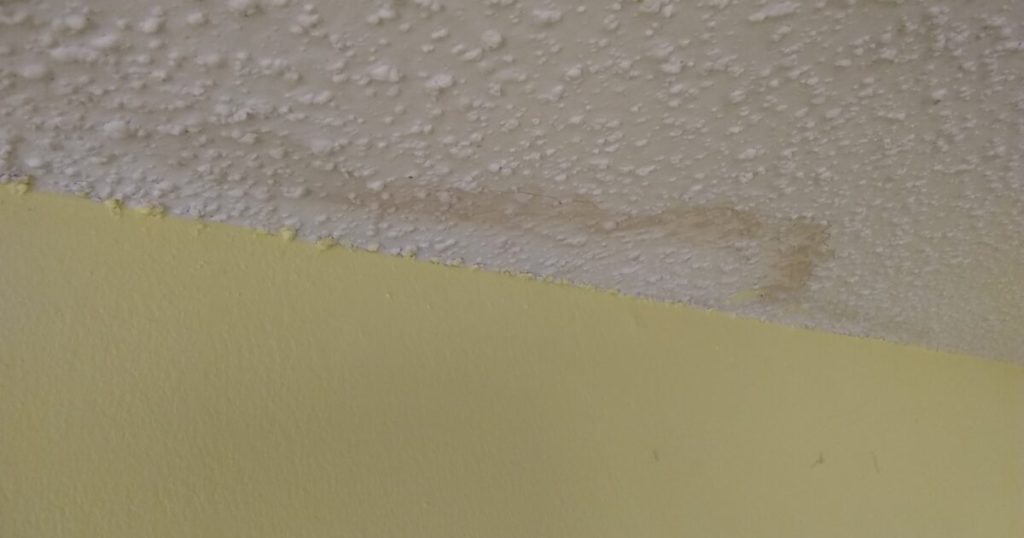
Water damage on popcorn ceilings refers to any form of moisture infiltration that compromises the integrity and appearance of the textured surface. Popcorn ceilings, also known as acoustic or stipple ceilings, are characterized by their rough, bumpy texture, which can absorb and retain moisture when exposed to water leaks or high humidity levels.

Causes of Water Damage on Popcorn Ceilings

Plumbing Leaks

One of the most common causes of water damage on popcorn ceilings is plumbing leaks. Leaky pipes, whether from supply lines or drain lines, can release water into ceiling cavities, gradually saturating the popcorn texture and causing it to sag, discolor, or even collapse in severe cases.

Roof Leaks

Roof leaks are another frequent culprit behind water damage on popcorn ceilings. Damaged shingles, improper flashing, or clogged gutters can allow rainwater to seep into the attic space and eventually penetrate through to the ceiling below, compromising the popcorn texture and underlying materials.

Read too: Kitchen Lighting For A Vaulted Ceiling: Illuminating Your Space with Style and Functionality

Condensation

Excessive condensation due to poor ventilation or high humidity levels can also contribute to water damage on popcorn ceilings. When warm, moist air comes into contact with cooler ceiling surfaces, condensation forms, leading to damp spots, staining, and deterioration of the popcorn texture over time.

Bathroom Moisture

In bathrooms, inadequate ventilation during showers or baths can cause moisture to accumulate on popcorn ceilings. This moisture can gradually degrade the texture and create an environment conducive to mold growth, posing health risks and further compromising the ceiling’s structural integrity.

Signs of Water Damage on Popcorn Ceilings

Recognizing the signs of water damage early can help prevent extensive repairs and mitigate potential health hazards. Common indicators include:

  • Staining: Discoloration or yellowing spots on the ceiling surface.
  • Sagging: Visible bulging or softening of the popcorn texture.
  • Peeling or Bubbling: Texture that appears to peel away or form bubbles.
  • Musty Odor: Mold or mildew growth often accompanies water damage and emits a distinct musty smell.

Remediation and Repair Options

Assessing the Extent of Damage

Before proceeding with repairs, assess the extent of water damage on your popcorn ceiling. Determine whether the damage is localized or widespread, and identify the source of the water intrusion to prevent future issues.

Repairing Small Areas of Damage

For minor water stains or small areas of popcorn texture damage, consider spot cleaning and patching techniques. Use a stain-blocking primer to cover water stains, and carefully apply new popcorn texture to blend with the existing ceiling.

Removing and Replacing Damaged Areas

In cases of extensive water damage or significant mold growth, it may be necessary to remove and replace sections of the popcorn ceiling. Hire a professional contractor experienced in handling textured ceiling repairs to ensure safe removal and proper installation of new materials.

Addressing Underlying Issues

Address the underlying causes of water damage to prevent future incidents. Repair leaking pipes, fix roof issues, improve ventilation in bathrooms, and consider installing dehumidifiers or exhaust fans to reduce moisture levels.

Prevention Tips for Water Damage on Popcorn Ceilings

Regular Maintenance

Perform routine inspections of your home’s plumbing and roofing systems to detect and repair leaks promptly. Check for signs of water stains or mold growth on ceilings and walls, as these can indicate hidden water damage.

Roof Maintenance

Inspect your roof regularly for damaged or missing shingles, deteriorated flashing, and clogged gutters. Clean gutters and downspouts to ensure proper drainage and prevent water from seeping into the attic and ceilings.

Ventilation Improvement

Improve ventilation in bathrooms, kitchens, and attics to reduce humidity levels and minimize condensation on ceilings. Use exhaust fans during showers or cooking, and consider installing roof vents or ridge vents to promote airflow.

Professional Inspections

Schedule annual inspections with qualified professionals to assess the condition of your home’s plumbing, roofing, and HVAC systems. Address any issues promptly to prevent costly repairs and potential water damage to ceilings and other structural components.

Conclusion

Water damage on popcorn ceilings can compromise the aesthetic appeal, structural integrity, and indoor air quality of your home. By understanding the causes of water damage, recognizing early signs of moisture infiltration, and implementing effective prevention and remediation strategies, you can protect your popcorn ceilings and maintain a safe and comfortable living environment.

Whether you’re dealing with a minor water stain or significant ceiling damage, taking proactive measures and seeking professional assistance when needed will help preserve the beauty and value of your home for years to come.

Popcorn Ceiling Removal in Tucson: Transform Your Home Today!

Are you tired of the outdated popcorn ceilings in your Tucson home? Popcorn ceilings, also known as acoustic ceilings or textured ceilings, were once popular but are now considered unattractive and outdated. If you’re ready to give your home a fresh, modern look, popcorn ceiling removal is the way to go. In this comprehensive guide, we’ll provide expert tips and advice for popcorn ceiling removal in Tucson.

Popcorn Ceiling Removal Tucson

Popcorn Ceiling Removal Tucson: A Step-by-Step Guide

1. Assessment and Preparation

Before starting the popcorn ceiling removal process, assess the condition of the ceiling and prepare the room accordingly. Cover floors and furniture with plastic sheeting to protect them from dust and debris. Additionally, ensure proper ventilation by opening windows and using fans to minimize dust buildup.

2. Moistening the Ceiling

To make the popcorn texture easier to remove, moisten the ceiling with water before scraping. Use a garden sprayer or spray bottle to apply water evenly across the surface, allowing it to soak in for several minutes. This helps soften the texture and reduces the risk of releasing harmful particles into the air.

3. Scraping the Texture

Once the ceiling is adequately moistened, use a wide putty knife or specialized popcorn ceiling scraper to gently remove the texture. Work in small sections, taking care not to damage the underlying surface. If stubborn areas remain, apply additional water and allow it to soak before scraping again.

Read too: Discovering the Charm of Nautical Outdoor Ceiling Fans for Your Coastal Retreat: Sail into Style

4. Finishing Touches

After removing the popcorn texture, inspect the ceiling for any imperfections or rough patches. Use a drywall compound or joint compound to fill in gaps or holes, then sand the surface smooth once the compound has dried. Finally, prime the ceiling with a quality primer before applying your desired finish, such as paint or a new texture.

Benefits of Popcorn Ceiling Removal

  • Enhanced Aesthetic: Removing popcorn ceilings instantly modernizes the look of your home, creating a cleaner and more contemporary space.
  • Improved Lighting: Smooth ceilings reflect light more effectively than textured ceilings, brightening up the room and making it feel more spacious.
  • Healthier Indoor Environment: Popcorn ceilings can trap dust, allergens, and other pollutants, contributing to poor indoor air quality. Removing them can help create a healthier living environment for you and your family.

Cost Considerations

The cost of popcorn ceiling removal in Tucson can vary depending on factors such as the size of the room, the condition of the ceiling, and the extent of preparation and finishing work required. On average, homeowners can expect to pay between $1 and $3 per square foot for professional popcorn ceiling removal services.

Conclusion

Popcorn ceiling removal is a worthwhile investment that can significantly improve the look and feel of your Tucson home. By following our expert tips and best practices, you can tackle this renovation project with confidence and achieve stunning results that you’ll enjoy for years to come.

Popcorn Ceiling Removal in Dallas: Expert Tips

Are you considering removing the popcorn ceiling in your Dallas home? Popcorn ceilings, also known as acoustic ceilings or textured ceilings, were popular in the past but have fallen out of favor in recent years due to their outdated appearance and potential health hazards. If you’re ready to update your space and enhance its aesthetic appeal, popcorn ceiling removal is a great place to start. In this comprehensive guide, we’ll provide expert tips and advice for popcorn ceiling removal in Dallas.

Popcorn Ceiling Removal Dallas

Popcorn Ceiling Removal Dallas: Understanding the Process

1. Assessment and Preparation

Before beginning the popcorn ceiling removal process, it’s essential to assess the condition of the ceiling and prepare the area accordingly. This involves covering floors and furniture with plastic sheeting to protect them from dust and debris. Additionally, ensure that the room is well-ventilated by opening windows and using fans to minimize dust accumulation.

2. Moistening the Ceiling

To make the popcorn texture easier to remove, it’s recommended to moisten the ceiling with water before scraping. Use a garden sprayer or a spray bottle to apply water evenly to the surface, allowing it to soak in for several minutes. This helps soften the texture and reduces the risk of releasing asbestos fibers into the air.

Read too: Discovering the Charm of Nautical Outdoor Ceiling Fans for Your Coastal Retreat: Sail into Style

3. Scraping the Texture

Once the ceiling is adequately moistened, use a wide putty knife or a specialized popcorn ceiling scraper to gently scrape away the texture. Work in small sections, being careful not to damage the underlying drywall or plaster. If you encounter stubborn areas, apply additional water and let it soak in before attempting to scrape again.

4. Finishing Touches

After removing the popcorn texture, inspect the ceiling for any remaining imperfections or rough patches. Use a drywall compound or joint compound to fill in any gaps or holes, then sand the surface smooth once the compound has dried. Finally, prime the ceiling with a quality primer before applying your desired finish, such as paint or a new texture.

Benefits of Popcorn Ceiling Removal

  • Modernization: Removing popcorn ceilings can instantly modernize the look of your home, giving it a cleaner and more updated appearance.
  • Increased Property Value: Homes with smooth ceilings are more attractive to buyers and may command a higher resale value than those with popcorn ceilings.
  • Improved Air Quality: Popcorn ceilings can trap dust, allergens, and other pollutants, contributing to poor indoor air quality. Removing them can help create a healthier living environment for you and your family.

Cost Considerations

The cost of popcorn ceiling removal in Dallas can vary depending on factors such as the size of the room, the condition of the ceiling, and the extent of preparation and finishing work required. On average, homeowners can expect to pay between $1 and $3 per square foot for professional popcorn ceiling removal services.

Conclusion

Popcorn ceiling removal is a worthwhile investment that can enhance the beauty, value, and overall livability of your Dallas home. By following expert tips and best practices, you can tackle this home improvement project with confidence and achieve stunning results that you’ll enjoy for years to come.

Where To Get Popcorn Ceiling Tested For Asbestos: Essential Guide and Tips

Popcorn ceilings, once a popular choice in home design, now raise concerns due to potential asbestos content. Homeowners seeking peace of mind may wonder, “Where to get popcorn ceiling tested for asbestos?” Understanding the risks and options available is crucial for a safe living environment.

Where To Get Popcorn Ceiling Tested For Asbestos

Introduction

Popcorn ceilings, also known as acoustic or textured ceilings, were prevalent in homes from the 1950s to the 1980s. While they served as a fashionable design choice in their time, concerns have arisen regarding the presence of asbestos in their composition. Asbestos, a naturally occurring mineral fiber, was commonly used in building materials for its heat resistance and durability. However, its adverse health effects, including lung cancer and mesothelioma, have led to its ban in construction materials. Consequently, homeowners are increasingly seeking ways to determine if their popcorn ceilings contain asbestos and how to address any potential risks.

Understanding the Risks of Asbestos in Popcorn Ceilings

Popcorn ceilings installed before the 1980s are more likely to contain asbestos. When these ceilings are disturbed, such as during renovations or repairs, asbestos fibers can become airborne and pose a health hazard when inhaled. Therefore, it’s essential for homeowners to assess the presence of asbestos before undertaking any activities that could disturb the ceiling.

Where To Get Popcorn Ceiling Tested For Asbestos

Finding a reputable service to test popcorn ceilings for asbestos is paramount for accurate results and peace of mind. Several options are available:

  1. Certified Asbestos Testing Laboratories: These specialized laboratories employ trained professionals and state-of-the-art equipment to accurately detect asbestos fibers in popcorn ceiling samples. Homeowners can collect samples themselves following proper safety protocols or hire professionals to do so.
  2. Environmental Testing Companies: Many environmental testing companies offer asbestos testing services for residential properties. These companies typically have experience in assessing various building materials for asbestos content and can provide detailed reports to homeowners.
  3. Local Health Departments: Some local health departments provide information and resources regarding asbestos testing. While they may not offer testing services directly, they can often recommend certified laboratories or testing companies in the area.

Factors to Consider When Choosing a Testing Service

When selecting a service to test popcorn ceilings for asbestos, homeowners should consider the following factors:

  • Accreditation and Certification: Ensure that the testing laboratory or company is accredited and employs certified asbestos inspectors. This ensures the accuracy and reliability of the test results.
  • Turnaround Time: Consider the time it takes for the testing service to provide results. While expedited options may be available at an additional cost, timely results are crucial, especially if renovation or repair plans are pending.
  • Cost: Obtain quotes from multiple testing services and compare their prices. However, prioritize quality and accuracy over cost alone, as the health risks associated with asbestos exposure are significant.
  • Customer Reviews and Reputation: Research the reputation of the testing service through customer reviews and testimonials. A trustworthy service will have positive feedback and a history of satisfied customers.

Read too: How To Extend Kitchen Cabinets To The Ceiling: A Complete Guide for Maximizing Space and Style

Taking Action Based on Test Results

Once the popcorn ceiling has been tested for asbestos, homeowners can determine the appropriate course of action based on the results:

  • If Asbestos is Detected: If asbestos is found in the popcorn ceiling, it’s essential to consult with asbestos remediation professionals to safely remove or encapsulate the material. DIY removal is strongly discouraged due to the health risks involved.
  • If No Asbestos is Detected: If the test results come back negative for asbestos, homeowners can proceed with renovations or repairs as planned, taking appropriate safety precautions to minimize any potential hazards.

Conclusion

Knowing where to get popcorn ceiling tested for asbestos is crucial for a safe home. Partnering with reputable testing services and acting on results mitigates asbestos exposure risks and ensures family well-being.

Expert Guide to Popcorn Ceiling Removal in Hawaii: Tips and Techniques

Popcorn ceilings, also known as acoustic ceilings or textured ceilings, were once a popular choice for homes in Hawaii and beyond. However, many homeowners now opt to remove popcorn ceilings due to their outdated appearance and potential health concerns associated with asbestos. If you’re considering popcorn ceiling removal in Hawaii, this expert guide is for you. We’ll cover everything you need to know, from the benefits of removal to the best techniques for tackling this project in the Aloha State.

Popcorn Ceiling Removal Hawaii

Understanding Popcorn Ceiling Removal in Hawaii

Popcorn ceiling removal involves the process of scraping off the textured surface to reveal a smooth ceiling underneath. In Hawaii, where the climate can be humid and prone to mold growth, removing popcorn ceilings can also improve indoor air quality and reduce the risk of mold and mildew accumulation.

The Benefits of Popcorn Ceiling Removal

There are several benefits to removing popcorn ceilings in Hawaii:

  • Improved Aesthetics: Popcorn ceiling removal can modernize the look of your home and make rooms feel brighter and more spacious.
  • Healthier Indoor Air Quality: Popcorn ceilings can trap dust, allergens, and other particles, contributing to poor indoor air quality. Removing them can help create a healthier living environment.
  • Reduced Maintenance: Popcorn ceilings are difficult to clean and prone to collecting dust and cobwebs. Removing them eliminates the need for frequent maintenance and upkeep.

Popcorn Ceiling Removal Techniques

When it comes to removing popcorn ceilings in Hawaii, there are several techniques to consider:

  1. Scraping: The most common method involves scraping the popcorn texture off the ceiling using a wide putty knife or ceiling scraper. This technique requires careful attention to avoid damaging the underlying drywall.
  2. Wetting and Scraping: Wetting the popcorn texture with a spray bottle or garden sprayer before scraping can help soften the material and make it easier to remove. Be sure to protect floors and furniture from water damage during this process.
  3. Professional Removal: For large or challenging projects, hiring a professional popcorn ceiling removal company in Hawaii may be the best option. Professionals have the expertise and equipment to safely and efficiently remove popcorn ceilings with minimal disruption to your home.

Read too: Understanding and Dealing with Ants in the Ceiling Spaces: Navigating the Intrusion

Precautions and Safety Measures

Before attempting popcorn ceiling removal in Hawaii, it’s essential to take proper precautions to protect yourself and your home:

  • Asbestos Testing: If your home was built before 1980, there is a risk that the popcorn ceiling texture may contain asbestos. Before disturbing the ceiling, have it tested for asbestos by a certified professional.
  • Personal Protective Equipment: Wear protective clothing, goggles, and a respirator mask to shield yourself from dust and debris during the removal process.
  • Ventilation: Ensure adequate ventilation in the room by opening windows and using fans to help dissipate dust and fumes.

Post-Removal Finishing

Once the popcorn texture is removed, the ceiling may require patching, sanding, and painting to achieve a smooth and uniform finish. Consider hiring a professional painter or contractor in Hawaii to ensure professional results and a flawless finish.

Conclusion

Removing popcorn ceilings in Hawaii can enhance the beauty and air quality of your home while reducing maintenance and upkeep. By understanding the benefits, techniques, and safety precautions associated with popcorn ceiling removal, you can tackle this project with confidence and transform your living space into a brighter and more inviting environment.

Whether you choose to DIY or hire a professional, popcorn ceiling removal in Hawaii is a worthwhile investment that can add value and comfort to your home for years to come.

Shiplap Over Popcorn Ceiling: A Modern Update for Your Home

Popcorn ceilings were once a popular trend in home design, but they have since fallen out of favor. Many homeowners are now looking for ways to update their popcorn ceilings with a more modern look.

Shiplap Over Popcorn Ceiling

One option is to install shiplap over the popcorn ceiling. Shiplap is a type of wood paneling that is made up of narrow boards that are joined together. It can be installed on walls, ceilings, and even backsplashes.

Why Choose Shiplap Over Popcorn Ceiling?

There are several reasons why you might choose to install shiplap over a popcorn ceiling:

  • It’s a modern look: Shiplap is a popular trend in home design, and it can give your home a more modern look.
  • It’s easy to install: Shiplap is relatively easy to install, and it can be done as a DIY project.
  • It’s affordable: Shiplap is a relatively affordable option for updating your ceiling.
  • It’s versatile: Shiplap can be painted or stained to match your décor.

How to Install Shiplap Over Popcorn Ceiling

If you are interested in installing shiplap over your popcorn ceiling, there are a few things you will need to do:

  1. Remove the popcorn ceiling: The first step is to remove the popcorn ceiling. This can be done with a popcorn ceiling removal tool.
  2. Prepare the surface: Once the popcorn ceiling has been removed, you will need to prepare the surface for the shiplap. This includes sanding the surface and filling in any holes or cracks.
  3. Install the shiplap: Once the surface is prepared, you can begin installing the shiplap. Start by installing the furring strips, which will provide a base for the shiplap. Then, install the shiplap boards, starting at the bottom of the ceiling and working your way up.
  4. Finish the shiplap: Once the shiplap is installed, you can finish it by painting or staining it to match your décor.

Tips for Installing Shiplap Over Popcorn Ceiling

Here are a few tips for installing shiplap over a popcorn ceilings:

  • Use a popcorn ceiling removal tool: This will make the job of removing the popcorn ceiling much easier.
  • Prepare the surface carefully: This will ensure that the shiplap adheres properly to the ceiling.
  • Use a level: This will help you to install the shiplap straight.
  • Use a nail gun: This will make the job of installing the shiplap much faster and easier.
  • Finish the shiplap: This will protect the shiplap from the elements and give it a finished look.

Conclusion

Installing shiplap over a popcorn ceilings is a great way to update your home with a more modern look. It is a relatively easy and affordable project that can be done by a DIYer.

Read too: Exploring the Benefits and How-Tos of DIY Ceiling Cassette Mini Split Installation: Revolutionizing Comfort

Ultimate Guide to Popcorn Ceiling Removal in Tampa, FL: Tips and Techniques

Are you looking to update your home in Tampa, FL, by removing the outdated popcorn ceiling? Dive into our detailed guide for everything you need to know about Popcorn Ceiling Removal Tampa Fl. From preparation to finishing touches, we’ve got you covered.

Popcorn Ceiling Removal Tampa Fl

Exploring Popcorn Ceiling Removal in Tampa, FL

Popcorn ceilings, also known as acoustic or textured ceilings, were once a popular choice for their sound-absorbing properties and ability to hide imperfections. However, many homeowners in Tampa, FL, are now opting to remove them due to their outdated appearance and potential health concerns. Here’s why popcorn ceiling removal in Tampa, FL, is gaining popularity:

  • Enhanced Aesthetic: Removing popcorn ceilings can instantly modernize the look and feel of a room, giving it a more updated appearance.
  • Health Benefits: Popcorn ceilings installed before the 1980s may contain asbestos, a known carcinogen. Removing these ceilings can eliminate the health risks associated with asbestos exposure.
  • Increased Property Value: Homes with updated ceilings are often more attractive to buyers and may command a higher resale value in the Tampa, FL, real estate market.

Popcorn Ceiling Removal Tampa, FL: Key Steps

1. Inspection

Before beginning the removal process, it’s crucial to have the ceiling tested for asbestos, especially in older homes. If asbestos is present, professional abatement may be necessary.

2. Preparation

Clear the room of furniture and cover floors and walls with plastic sheeting to protect them from dust and debris. Wear appropriate protective gear, including goggles, gloves, and a mask, to safeguard against exposure.

3. Wetting the Ceiling

Using a pump sprayer, thoroughly saturate the popcorn texture with water. This helps soften the material and minimize the release of dust particles during removal.

4. Scrape Off the Texture

Once the texture has softened, gently scrape it off using a ceiling texture scraper or putty knife. Work in small sections to avoid damaging the underlying drywall.

5. Repair and Smooth

After removing the popcorn texture, inspect the ceiling for any imperfections or damage. Make necessary repairs, such as filling in holes or cracks, and sand the surface smooth.

6. Paint or Finish

Once the ceiling is smooth and dry, apply a fresh coat of paint or your desired finish to complete the renovation.

Read too: Elevate Your Home Décor with Exquisite Japanese Style Ceiling Lamp Designs

Expert Tips for Success

  • Take breaks as needed to avoid fatigue during the removal process.
  • Use caution when working on ladders or scaffolding, and follow safety guidelines to prevent accidents.
  • Consider hiring a professional contractor for larger or more complex popcorn ceiling removal projects in Tampa, FL.

Conclusion

Removing popcorn ceilings can significantly improve the appearance and value of your home in Tampa, FL. By following the steps outlined in this guide and taking appropriate safety precautions, you can achieve professional-looking results and enjoy a fresh, updated living space.

Expert Guide to Popcorn Ceiling Removal in Spokane: Tips and Techniques

Are you considering removing the outdated popcorn ceiling in your Spokane home? Learn about the essential steps, techniques, and tips for a successful popcorn ceiling removal project in Spokane with our comprehensive guide.

Popcorn Ceiling Removal Spokane

Understanding Popcorn Ceiling Removal Spokane

Popcorn ceilings, also known as acoustic or textured ceilings, were once popular for their sound-absorbing properties and ability to hide imperfections. However, they are now considered outdated and can detract from the overall aesthetic of a space. Here’s why popcorn ceiling removal in Spokane is a popular choice for homeowners:

  • Modernization: Removing popcorn ceilings can instantly modernize the look and feel of a room, giving it a more updated appearance.
  • Health Concerns: Popcorn ceilings installed before the 1980s may contain asbestos, posing health risks if disturbed. Removal is necessary to eliminate this hazard.
  • Increased Property Value: Homes with updated ceilings are often more attractive to buyers and may command a higher resale value.

Popcorn Ceiling Removal Spokane: Key Steps

1. Inspection

Before starting the removal process, it’s essential to have the ceiling tested for asbestos, especially in older homes. If asbestos is present, professional abatement may be necessary.

Read too: Elevate Your Home Décor with Exquisite Japanese Style Ceiling Lamp Designs

2. Preparation

Clear the room of furniture, cover floors and walls with plastic sheeting, and wear appropriate protective gear, including goggles, gloves, and a mask.

3. Wetting the Ceiling

Using a pump sprayer, thoroughly saturate the popcorn texture with water. This helps loosen the material and minimize the release of dust particles.

4. Scrape Off the Texture

Once the texture has softened, gently scrape it off using a ceiling texture scraper or putty knife. Work in small sections to avoid damaging the underlying drywall.

5. Repair and Smooth

After removing the popcorn texture, inspect the ceiling for any imperfections or damage. Make necessary repairs, such as filling in holes or cracks, and sand the surface smooth.

6. Paint or Finish

Once the ceiling is smooth and dry, apply a fresh coat of paint or your desired finish to complete the renovation.

Expert Tips for Success

  • Take breaks as needed to avoid fatigue during the removal process.
  • Use caution when working on ladders or scaffolding, and follow safety guidelines.
  • Consider hiring a professional contractor for larger or more complex popcorn ceiling removal projects.

Conclusion

Removing popcorn ceilings can significantly enhance the appearance and value of your Spokane home. By following the steps outlined in this guide and taking appropriate safety precautions, you can achieve professional-looking results and enjoy a fresh, updated living space.

Professional Popcorn Ceiling Removal in Concord NC: Upgrade Your Home

Are you ready to give your home in Concord, NC, a modern update? Say goodbye to outdated popcorn ceilings and hello to smooth, sleek surfaces with professional popcorn ceiling removal services in Concord NC. In this comprehensive guide, we’ll explore everything you need to know about popcorn ceiling removal, including the process, benefits, costs, and tips for finding the right contractor in Concord NC.

Popcorn Ceiling Removal Concord Nc

Understanding Popcorn Ceiling Removal in Concord NC

Popcorn ceiling removal involves the elimination of the textured finish commonly found in homes built in past decades. Here’s what you need to know about popcorn ceiling removal in Concord NC:

The Process of Popcorn Ceiling Removal

  1. Preparation: Prepare the room by covering furniture and floors to minimize dust and debris.
  2. Moistening: The popcorn texture is moistened with water to soften it, making it easier to scrape off.
  3. Scraping: Using specialized tools, the textured material is carefully scraped away from the ceiling.
  4. Smoothing: Smooth out the ceiling to create a flat surface after removing the popcorn texture.
  5. Finishing: After smoothing, the ceiling may require patching, sanding, and painting to achieve a seamless finish.

Benefits of Popcorn Ceiling Removal in Concord NC

  • Enhanced Aesthetic: Removing popcorn ceilings instantly updates the look of your home, giving it a more modern and refined appearance.
  • Improved Lighting: Smooth ceilings reflect light more evenly, brightening up your space and making it feel larger and more inviting.
  • Healthier Environment: Popcorn ceilings can trap dust, allergens, and even mold. Removing them can improve indoor air quality and create a healthier living environment.

Finding Popcorn Ceiling Removal Services in Concord NC

When searching for popcorn ceiling removal services in Concord NC, consider the following factors:

  • Experience: Look for contractors with experience in popcorn ceilings removal and a track record of satisfied customers in Concord NC.
  • Licensing and Insurance: Ensure that the contractor is licensed and insured to perform the work in Concord NC.
  • References: Ask for references or read reviews from past clients in Concord NC to gauge the quality of their workmanship.
  • Cost: Get quotes from multiple contractors in Concord NC and compare prices to ensure you’re getting a fair deal for the services provided.

Read too: Flush Mount Rustic Ceiling Lights: Illuminate Your Space with Stunning

DIY vs. Professional Popcorn Ceiling Removal

While some homeowners may attempt to remove popcorn ceilings themselves, hiring a professional contractor in Concord NC is often the safer and more efficient option. Here’s why:

  • Safety: Popcorn ceiling removal can release harmful substances such as asbestos, especially in older homes. Professional contractors have the expertise and equipment to safely handle hazardous materials in Concord NC.
  • Time and Efficiency: Professionals can complete the job more quickly and efficiently, minimizing disruption to your home and daily routine in Concord NC.
  • Quality Results: Professional contractors have the skills and experience to achieve smooth, flawless ceilings that enhance the overall look of your home in Concord NC.

Conclusion

Say goodbye to popcorn ceilings and hello to a fresh, modern look for your home in Concord NC with expert popcorn ceilings removal services. Whether you’re looking to update your space for personal enjoyment or preparing to sell your home, removing popcorn ceilings is a worthwhile investment that can enhance the aesthetic appeal and value of your property in Concord NC. So why wait? Contact a reputable popcorn ceilings removal contractor in Concord NC today and transform your ceilings into sleek, smooth surfaces that you’ll love for years to come.

Professional Popcorn Ceiling Removal in Clearwater: Transform Your Space

Are you ready to give your home in Clearwater a modern makeover? Say goodbye to outdated popcorn ceilings and hello to smooth, sleek surfaces with professional popcorn ceiling removal services in Clearwater. In this comprehensive guide, we’ll explore everything you need to know about popcorn ceiling removal, including the process, benefits, costs, and tips for finding the right contractor in Clearwater.

Popcorn Ceiling Removal Clearwater

Understanding Popcorn Ceiling Removal in Clearwater

Popcorn ceiling removal involves the elimination of the textured finish commonly found in homes built in past decades. Here’s what you need to know about popcorn ceiling removal in Clearwater:

The Process of Popcorn Ceiling Removal

  1. Preparation: The room is prepared by covering furniture and floors to minimize dust and debris.
  2. Moistening: The popcorn texture is moistened with water to soften it, making it easier to scrape off.
  3. Scraping: Using specialized tools, the textured material is carefully scraped away from the ceiling.
  4. Smoothing: Once the popcorn texture is removed, the ceiling is smoothed out to create a flat surface.
  5. Finishing: After smoothing, the ceiling may require patching, sanding, and painting to achieve a seamless finish.

Benefits of Popcorn Ceiling Removal in Clearwater

  • Enhanced Aesthetic: Removing popcorn ceilings instantly updates the look of your home, giving it a more modern and refined appearance.
  • Improved Lighting: Smooth ceilings reflect light more evenly, brightening up your space and making it feel larger and more inviting.
  • Healthier Environment: Popcorn ceilings can trap dust, allergens, and even mold. Removing them can improve indoor air quality and create a healthier living environment.

Finding Popcorn Ceiling Removal Services in Clearwater

When searching for popcorn ceiling removal services in Clearwater, consider the following factors:

  • Experience: Look for contractors with experience in popcorn ceiling removal and a track record of satisfied customers in Clearwater.
  • Licensing and Insurance: Ensure that the contractor is licensed and insured to perform the work in Clearwater.
  • References: Ask for references or read reviews from past clients in Clearwater to gauge the quality of their workmanship.
  • Cost: Get quotes from multiple contractors in Clearwater and compare prices to ensure you’re getting a fair deal for the services provided.

DIY vs. Professional Popcorn Ceiling Removal

While some homeowners may attempt to remove popcorn ceilings themselves, hiring a professional contractor in Clearwater is often the safer and more efficient option. Here’s why:

  • Safety: Popcorn ceiling removal can release harmful substances such as asbestos, especially in older homes. Professional contractors have the expertise and equipment to safely handle hazardous materials in Clearwater.
  • Time and Efficiency: Professionals can complete the job more quickly and efficiently, minimizing disruption to your home and daily routine in Clearwater.
  • Quality Results: Professional contractors have the skills and experience to achieve smooth, flawless ceilings that enhance the overall look of your home in Clearwater.

Conclusion

Say goodbye to popcorn ceilings and hello to a fresh, modern look for your home in Clearwater with expert popcorn ceilings removal services. Whether you’re looking to update your space for personal enjoyment or preparing to sell your home, removing popcorn ceilings is a worthwhile investment that can enhance the aesthetic appeal and value of your property in Clearwater. So why wait? Contact a reputable popcorn ceilings removal contractor in Clearwater today and transform your ceilings into sleek, smooth surfaces that you’ll love for years to come.

Read too: Flush Mount Rustic Ceiling Lights: Illuminate Your Space with Stunning

Expert Popcorn Ceiling Removal in Buffalo NY: Say Goodbye to Textured Ceilings

Are you tired of the outdated look of popcorn ceilings in your Buffalo, NY home? Say goodbye to textured ceilings and hello to a modern, smooth finish with expert popcorn ceiling removal services in Buffalo NY. In this comprehensive guide, we’ll explore everything you need to know about popcorn ceiling removal, including the process, benefits, costs, and tips for finding the right contractor in Buffalo NY.

Popcorn Ceiling Removal Buffalo Ny

Understanding Popcorn Ceiling Removal in Buffalo NY

Popcorn ceiling removal is the process of eliminating the textured finish from ceilings, commonly found in homes built in past decades. Here’s what you need to know about popcorn ceilings removal in Buffalo NY:

The Process of Popcorn Ceiling Removal

  1. Preparation: Cover furniture and floors with protective sheeting to minimize dust and debris, preparing the room.
  2. Moistening: The popcorn texture is moistened with water to soften it, making it easier to scrape off.
  3. Scraping: Carefully scrape away the textured material from the ceiling using specialized tools.
  4. Smoothing: Smooth out the ceiling to create a flat surface after removing the popcorn texture.
  5. Finishing: After smoothing, the ceiling may require patching, sanding, and painting to achieve a seamless finish.

Benefits of Popcorn Ceiling Removal in Buffalo NY

  • Enhanced Aesthetic: Removing popcorn ceilings instantly updates the look of your home, giving it a more modern and refined appearance.
  • Improved Lighting: Smooth ceilings reflect light more evenly, brightening up your space and making it feel larger and more inviting.
  • Healthier Environment: Popcorn ceilings can trap dust, allergens, and even mold. Removing them can improve indoor air quality and create a healthier living environment.

Finding Popcorn Ceilings Removal Services in Buffalo NY

When searching for popcorn ceiling removal services in Buffalo NY, consider the following factors:

  • Experience: Look for contractors with experience in popcorn ceiling removal and a track record of satisfied customers in Buffalo NY.
  • Licensing and Insurance: Ensure that the contractor is licensed and insured to perform the work in Buffalo NY.
  • References: Ask for references or read reviews from past clients in Buffalo NY to gauge the quality of their workmanship.
  • Cost: Get quotes from multiple contractors in Buffalo NY and compare prices to ensure you’re getting a fair deal for the services provided.

DIY vs. Professional Popcorn Ceiling Removal

While some homeowners may attempt to remove popcorn ceilings themselves, hiring a professional contractor in Buffalo NY is often the safer and more efficient option. Here’s why:

  • Safety: Popcorn ceiling removal can release harmful substances such as asbestos, especially in older homes. Professional contractors have the expertise and equipment to safely handle hazardous materials in Buffalo NY.
  • Time and Efficiency: Professionals can complete the job more quickly and efficiently, minimizing disruption to your home and daily routine in Buffalo NY.
  • Quality Results: Professional contractors have the skills and experience to achieve smooth, flawless ceilings that enhance the overall look of your home in Buffalo NY.

Read too: Flush Mount Rustic Ceiling Lights: Illuminate Your Space with Stunning

Conclusion

Ditch popcorn ceilings for a modern look in Buffalo, NY with expert removal services. Whether for personal enjoyment or home selling prep, it’s a valuable investment that boosts aesthetic appeal and property value. Don’t wait – contact a trusted removal contractor today for sleek, smooth ceilings you’ll love.

Expert Popcorn Ceiling Removal in Austin Tx: Say Goodbye to Popcorn Ceilings

Are you tired of the outdated look of popcorn ceilings in your Austin, TX home? Say goodbye to textured ceilings and hello to a modern, smooth finish with expert popcorn ceiling removal services in Austin Tx. In this comprehensive guide, we’ll explore everything you need to know about popcorn ceiling removal, including the process, benefits, costs, and tips for finding the right contractor.

Popcorn Ceiling Removal Austin Tx

Understanding Popcorn Ceiling Removal in Austin Tx

Popcorn ceiling removal is the process of eliminating the textured finish from ceilings, typically found in homes built in the mid-20th century. Here’s what you need to know about popcorn ceiling removal in Austin Tx:

The Process of Popcorn Ceiling Removal

  1. Preparation: Protecting the room from dust and debris is essential. Furniture should be covered or removed, and floors should be protected with plastic sheeting.
  2. Moistening: Spraying the popcorn texture with water helps to soften it, making it easier to scrape off.
  3. Scraping: Using a scraper tool, the textured material is carefully scraped away from the ceiling.
  4. Smoothing: Once the popcorn texture is removed, the ceiling is smoothed out to create a flat surface.
  5. Finishing: After smoothing, the ceiling may require patching and sanding to achieve a seamless finish.

Benefits of Popcorn Ceiling Removal

  • Modernize Your Home: Removing popcorn ceilings instantly updates the look of your home, giving it a more modern and polished appearance.
  • Improved Lighting: Smooth ceilings reflect light more evenly, brightening up your space and making it feel larger and more inviting.
  • Healthier Environment: Popcorn ceilings can trap dust, allergens, and even mold. Removing them can improve indoor air quality and create a healthier living environment.

Read too: Flush Mount Rustic Ceiling Lights: Illuminate Your Space with Stunning

Finding Popcorn Ceiling Removal Services in Austin Tx

When searching for popcorn ceiling removal services in Austin Tx, consider the following factors:

  • Experience: Look for contractors with experience in popcorn ceiling removal and a track record of satisfied customers.
  • Licensing and Insurance: Ensure that the contractor is licensed and insured to perform the work in your area.
  • References: Ask for references or read reviews from past clients to gauge the quality of their workmanship.
  • Cost: Get quotes from multiple contractors and compare prices to ensure you’re getting a fair deal for the services provided.

DIY vs. Professional Popcorn Ceiling Removal

While some homeowners may attempt to remove popcorn ceilings themselves, hiring a professional contractor is often the safer and more efficient option. Here’s why:

  • Safety: Popcorn ceiling removal can release harmful substances such as asbestos, especially in older homes. Professional contractors have the expertise and equipment to safely handle hazardous materials.
  • Time and Efficiency: Professionals can complete the job more quickly and efficiently, minimizing disruption to your home and daily routine.
  • Quality Results: Professional contractors have the skills and experience to achieve smooth, flawless ceilings that enhance the overall look of your home.

Conclusion

Say goodbye to popcorn ceilings and hello to a fresh, modern look for your Austin, Tx home with expert popcorn ceiling removal services. Whether you’re looking to update your space for personal enjoyment or preparing to sell your home, removing popcorn ceilings is a worthwhile investment that can enhance the aesthetic appeal and value of your property. So why wait? Contact a reputable popcorn ceiling removal contractor in Austin Tx today and transform your ceilings into sleek, smooth surfaces that you’ll love for years to come.

Understanding and Dealing with Mold in Popcorn Ceiling – A Comprehensive Guide: Unveiling the Silent Menace

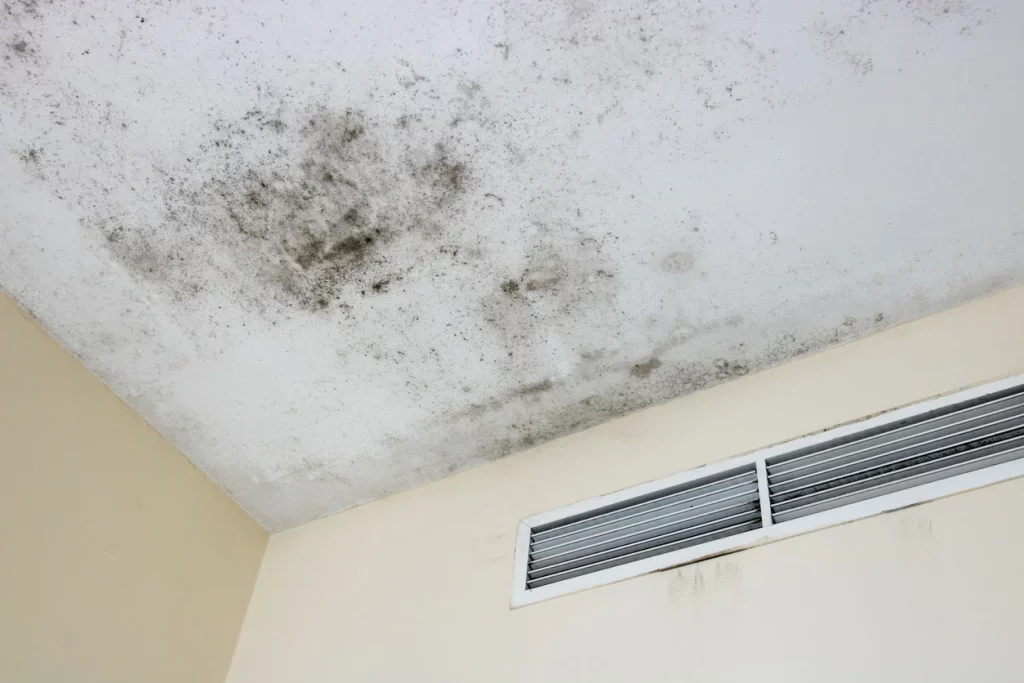
The charm of popcorn ceilings is undeniable, adding a touch of nostalgia to many homes. However, lurking behind the textured allure might be an unseen threat – “Mold in Popcorn Ceiling.” In this informative guide, we delve into the nuances of mold growth in popcorn ceilings, exploring its causes, signs, and effective remediation methods. Stay informed to protect your home and loved ones from this stealthy invader.

Mold In Popcorn Ceiling

Introduction: The Hidden Dangers of Mold in Popcorn Ceiling

Popcorn ceilings, once a popular design choice, are now raising concerns due to the potential presence of mold. “Mold in Ceiling” is not just an aesthetic issue; it poses health risks and can compromise the structural integrity of your home. Let’s uncover the mysteries surrounding this silent menace and empower homeowners with knowledge to address the issue head-on.

Understanding Mold Growth in Popcorn Ceilings

“Mold in Popcorn Ceiling” is a result of moisture infiltration, creating a breeding ground for mold spores. Popcorn ceilings, with their irregular texture, can trap moisture more easily than smooth surfaces, leading to the ideal conditions for mold to thrive. Understanding the factors contributing to mold growth is the first step in effective prevention and remediation.

Causes of Mold in Popcorn Ceiling

Several factors contribute to the development of mold in popcorn ceilings. Leaky roofs, plumbing issues, high humidity levels, or inadequate ventilation can create an environment where mold spores find a welcoming home. Identifying and addressing these root causes are crucial in preventing mold growth in the first place.

Signs of Mold in Popcorn Ceiling

Recognizing the signs of mold in popcorn ceilings is vital for early intervention. Discoloration, a musty odor, or visible spots on the ceiling are common indicators. Homeowners should regularly inspect their popcorn ceilings, especially in areas prone to moisture, to catch mold growth in its early stages.

Health Implications of Mold Exposure

“Mold in Popcorn Ceiling” doesn’t just affect the aesthetics of your home; it can also impact your health. Mold spores can trigger respiratory issues, allergies, and other health problems, especially in individuals with compromised immune systems. Prompt action is necessary to mitigate health risks associated with mold exposure.

Remediation Strategies for Mold in Popcorn Ceiling

Effectively dealing with mold in popcorn ceilings requires a systematic approach. From identifying and fixing the source of moisture to removing and replacing affected materials, homeowners can take several steps to remediate mold growth. Professional assistance may be necessary for extensive or severe cases of mold infestation.

Preventive Measures and Maintenance Tips

Prevention is key when it comes to “Mold in Popcorn Ceiling.” Regular maintenance, prompt repairs of leaks, and ensuring proper ventilation can significantly reduce the risk of mold growth. Homeowners should also consider alternatives to popcorn ceilings that are less prone to trapping moisture.

Read too: Understanding and Addressing a Leaky Ceiling in Your Apartment: Navigating the Drips

DIY vs. Professional Remediation: Making Informed Choices

While some cases of mold in popcorn ceilings may be manageable through do-it-yourself methods, others require professional intervention. Knowing the extent of the infestation and understanding the limitations of DIY approaches are essential for making informed decisions in dealing with “Mold in Popcorn Ceiling.”

Conclusion: Safeguarding Your Home from Mold in Popcorn Ceiling

In conclusion, the presence of mold in popcorn ceilings is a serious concern that demands attention. By arming yourself with knowledge about the causes, signs, and remediation strategies, you can take proactive steps to protect your home and loved ones. Regular inspections and maintenance are key in ensuring a healthy living environment and preserving the integrity of your home.

Dealing with Water Damage on Your Popcorn Ceiling: Unveiling the Consequences

Discovering water damage on your popcorn ceiling can be an alarming situation, requiring immediate attention. In this comprehensive guide, we’ll explore the intricacies of “Water Damage Popcorn Ceiling,” shedding light on the causes, identifying the signs, and offering effective solutions. Learn how to safeguard your ceiling from water-related issues and restore the aesthetic appeal of your home.

Water Damage Popcorn Ceiling

Understanding the Impact: Water Damage Popcorn Ceiling

Before delving into solutions, let’s decipher the issue of water damage on popcorn ceilings. This textured ceiling style is particularly susceptible to water-related problems, leading to discoloration, peeling, and potential structural damage.

Common Causes of Water Damage on Popcorn Ceilings

  1. Roof Leaks: Damaged or deteriorating roofs can allow water to seep through, impacting the popcorn ceiling below. Regular roof inspections are essential to identify and address leaks promptly.
  2. Plumbing Leaks: Leaky pipes within the home can result in water accumulation on ceilings, causing damage to popcorn textures. Regularly inspect plumbing systems for potential issues.
  3. Bathroom Water Damage: Leaks from bathrooms, especially on upper floors, can lead to water damage on popcorn ceilings below. Inspect fixtures, pipes, and shower enclosures for potential leaks.
  4. Condensation Issues: Poor ventilation and high humidity levels can cause condensation on ceilings, leading to water damage on popcorn textures. Improve ventilation to minimize this risk.
  5. Appliance Leaks: Malfunctioning appliances, such as water heaters or air conditioning units, can cause water leakage and damage popcorn ceilings. Regularly inspect and maintain appliances.

Addressing the Issue: Solutions for Water Damage Popcorn Ceiling

  1. Roof Repairs: Identify and address any issues with the roof promptly. Repair or replace damaged shingles and ensure proper drainage to prevent water from reaching the popcorn ceiling.
  2. Plumbing Inspections: Regularly inspect plumbing systems for leaks. Address any identified issues promptly, and consider professional assistance for complex plumbing problems.
  3. Bathroom Repairs: Inspect bathrooms for potential leaks. Repair damaged fixtures, address plumbing issues, and use waterproofing solutions to prevent water infiltration.
  4. Improved Ventilation: Enhance ventilation in your home to reduce condensation. Use exhaust fans, open windows, and consider dehumidifiers in areas prone to excess moisture.
  5. Appliance Maintenance: Schedule regular maintenance for appliances prone to leaks. Ensure proper functioning and address any issues promptly to prevent water damage on popcorn ceilings.

Read too: Understanding and Addressing a Leaky Ceiling in Your Apartment: Navigating the Drips

Preventive Measures: Safeguarding Your Popcorn Ceiling

  1. Regular Inspections: Conduct routine inspections of your ceiling for any signs of water damage. Early detection allows for prompt intervention and prevents extensive damage.
  2. Timely Repairs: Address any visible damage or wear promptly. Timely repairs can prevent minor issues from turning into major problems, avoiding water damage on popcorn ceilings.
  3. Waterproofing: Consider applying waterproofing solutions to your popcorn ceiling, especially in areas prone to water exposure. This adds an extra layer of protection against potential damage.

Conclusion

In conclusion, dealing with “Water Damage Popcorn Ceiling” requires a proactive and systematic approach to identify and address the root causes. Regular maintenance, prompt repairs, and preventive measures are crucial in preserving the integrity and aesthetics of your popcorn ceiling. By understanding common culprits and implementing the suggested solutions, homeowners can ensure the longevity and visual appeal of their ceilings.

How to Safely Encapsulate Asbestos Popcorn Ceiling for a Healthy Home? Unlocking Safety

Dealing with asbestos in popcorn ceilings can be a concern for homeowners, but encapsulating the material provides a safe and effective solution. In this comprehensive guide, we will explore the process of “Encapsulate Asbestos Popcorn Ceiling,” ensuring your home remains a healthy and secure environment.

Encapsulate Asbestos Popcorn Ceiling

Understanding the Risks: Encapsulate Asbestos Popcorn Ceiling

Asbestos, once a common component in popcorn ceiling textures, poses health risks when disturbed. Inhalation of asbestos fibers can lead to severe respiratory issues and even cancer. Recognizing the need to address this concern, encapsulation becomes a valuable method to contain and manage asbestos in place.

Let’s delve into the specifics of encapsulating asbestos in popcorn ceilings, understanding the risks, advantages, and step-by-step instructions for a successful encapsulation process.

Recognizing the Need for Encapsulation:

  1. Asbestos Testing:
    • Before any encapsulation efforts, it’s crucial to conduct asbestos testing to confirm its presence in the popcorn ceiling. Professional testing provides accurate results and guides your approach to encapsulation.
  2. Health Risks:
    • Understanding the health risks associated with asbestos exposure underscores the importance of addressing the issue promptly. Encapsulation serves as a proactive measure to mitigate these risks without the need for extensive removal.

Advantages of Encapsulation:

  1. Cost-Effective Solution:
    • Compared to asbestos removal, encapsulation is a more cost-effective solution. It eliminates the need for expensive asbestos removal procedures while providing a safe environment.
  2. Minimized Disruption:
    • Encapsulation minimizes disruption to your home during the process. Unlike removal, which can be invasive and time-consuming, encapsulation allows you to maintain your daily routine with minimal interference.
  3. Long-Term Stability:
    • Once encapsulated, the asbestos in the popcorn ceiling is effectively sealed, providing long-term stability. This ensures that asbestos fibers remain contained, reducing the risk of exposure.

Read too: How Gutters Causing Ceiling Leak Can Wreak Havoc in Your Home? Unveiling the Hidden Dangers

The Encapsulation Process: Encapsulate Asbestos Popcorn Ceiling

Now, let’s explore the practical steps involved in encapsulating asbestos in popcorn ceilings.

  1. Preparation:
    • Begin by preparing the room. Cover furniture and floors with plastic sheets to prevent any potential contamination.
  2. Cleaning:
    • Thoroughly clean the popcorn ceiling to remove dust and debris. This ensures better adhesion of the encapsulating material.
  3. Priming:
    • Apply a primer specifically designed for asbestos encapsulation. This prepares the surface and enhances the bond with the encapsulating material.
  4. Encapsulation Material:
    • Choose a high-quality encapsulation material, such as a specialized paint or coating designed for asbestos containment. Apply the encapsulant evenly, ensuring complete coverage.
  5. Multiple Coats:
    • Apply multiple coats of encapsulant as recommended by the product manufacturer. This ensures a robust and effective seal.
  6. Monitoring:
    • After the encapsulation process, monitor the ceiling for any signs of damage or wear. Promptly address any issues to maintain the integrity of the encapsulation.

Conclusion:

In conclusion, “Encapsulate Asbestos Popcorn Ceiling” is a proactive and cost-effective approach to address asbestos concerns in your home. By understanding the risks, advantages, and following the step-by-step encapsulation process, you can create a safer living environment without the need for extensive and invasive removal procedures. Always prioritize safety and consider consulting with professionals for a thorough assessment and guidance.

Understanding and Remedying the Issue of Black Mold on Popcorn Ceiling: A Comprehensive Guide

Black Mold on Popcorn Ceiling. Popcorn ceilings were once a popular design choice, but their textured surface can create an environment conducive to mold growth, particularly black mold. In this article, we’ll delve into the challenges associated with black mold on popcorn ceilings, providing valuable insights and solutions for homeowners.

Black Mold On Popcorn Ceiling

The Menace of Black Mold on Popcorn Ceiling

Identifying Black Mold

Black mold, scientifically known as Stachybotrys chartarum, is a type of toxic mold that can thrive in damp and humid environments. Popcorn ceilings, with their porous nature, can become a breeding ground for mold if the conditions are right. Identifying black mold early is crucial, as it poses health risks and can compromise the structural integrity of the ceiling.

Recognizing the Signs

Musty Odor

One of the first signs of black mold on popcorn ceilings is a musty, unpleasant odor. This odor is a result of the mycotoxins produced by the mold, which can have adverse effects on respiratory health.

Discoloration

Black mold often manifests as dark patches on the ceiling. These patches can spread rapidly if left unaddressed, leading to a visually unappealing and potentially hazardous situation.

Respiratory Symptoms

Individuals exposed to black mold may experience respiratory symptoms such as coughing, sneezing, and difficulty breathing. Those with existing respiratory conditions may be particularly vulnerable.

Read too: Understanding the Labor Cost to Texture Ceiling and Enhance Your Home: Unveiling the Secrets

Understanding the Causes

Moisture Accumulation

The primary factor contributing to black mold growth on popcorn ceilings is moisture accumulation. Leaks from the roof or plumbing, high humidity levels, or inadequate ventilation can create the perfect conditions for mold to flourish.

Popcorn Ceiling Texture

The textured surface of popcorn ceilings, while aesthetically pleasing to some, can trap moisture and provide an ideal habitat for mold. The small crevices and irregularities in the texture create hiding spots for spores to proliferate.

Dealing with Black Mold on Popcorn Ceiling

Safety Precautions

Before attempting any mold remediation, it’s essential to prioritize safety. Wear protective gear, including a mask, gloves, and goggles, to minimize exposure to mold spores.

Moisture Source Identification

Address the source of moisture to prevent future mold growth. This may involve repairing leaks, improving ventilation, or addressing any water damage.

Cleaning and Removal

For small areas of black mold, a mixture of water and mild detergent can be used to clean the surface. However, extensive or recurring mold issues may require professional remediation to ensure thorough removal.

Preventive Measures

Proper Ventilation

Improving ventilation in the home can help prevent moisture buildup. Ensure that bathrooms, kitchens, and other areas prone to humidity have adequate ventilation systems in place.

Regular Inspections

Regularly inspect your popcorn ceiling for any signs of water damage, leaks, or mold growth. Early detection can save you from more extensive remediation efforts later on.

Consider Popcorn Ceiling Removal

If the mold problem persists, consider removing the popcorn ceiling altogether. This not only eliminates the mold-friendly texture but also provides an opportunity to address any underlying issues in the ceiling structure.

Conclusion

Black mold on popcorn ceilings is a serious issue that requires prompt attention. By understanding the signs, causes, and effective remediation strategies, homeowners can safeguard their health and property. Remember, prevention is key, and addressing moisture sources is fundamental to keeping black mold at bay. If you suspect black mold in your home, take action promptly to create a safe and healthy living environment.

Does All Popcorn Ceiling Have Asbestos?

Popcorn ceilings were a popular home improvement trend in the United States from the 1950s to the 1980s. Their reputation stemmed from their sound-absorbing and fire-resistant properties, as well as their cost-effective installation. Nevertheless, popcorn ceilings frequently contained asbestos, a naturally occurring mineral that poses health hazards to humans.

Does All Popcorn Ceiling Have Asbestos

What is asbestos?

Asbestos comprises thin, fibrous crystals that occur naturally. Inhaling or ingesting these fibers can lead to severe health issues, such as lung cancer, mesothelioma, and asbestosis.

Did all popcorn ceilings contain asbestos?

No, not all popcorn ceilings contained asbestos. However, it’s estimated that up to 90% of popcorn ceilings installed before 1980 contained asbestos. This is because asbestos was a common ingredient in many building materials during that time, including popcorn ceilings, drywall, and insulation.

How can you tell if your popcorn ceiling contains asbestos?

The only way to determine if your popcorn ceiling contains asbestos is to have it tested. However, there are some signs that may indicate the presence of asbestos, including:

  • The ceiling was installed before 1980.
  • The ceiling has a rough, textured surface.
  • The ceiling is discolored or damaged.

If you are concerned that your popcorn ceiling may contain asbestos, you should have it tested by a professional.

What are the risks of asbestos exposure?

Asbestos exposure can cause a number of serious health problems, including:

  • Lung cancer
  • Mesothelioma
  • Asbestosis

Lung cancer is the most common type of cancer caused by asbestos exposure. Mesothelioma is a rare cancer of the lining of the lungs, abdomen, or chest. Asbestosis is a chronic lung disease that can cause shortness of breath, coughing, and chest pain.

How can you protect yourself from asbestos exposure?

If you think your popcorn ceiling may contain asbestos, you should take steps to protect yourself from exposure. These steps include:

  • Avoiding disturbing the ceiling.
  • Wearing a respirator when you are in the same room as the ceiling.
  • Having the ceiling removed by a professional.

How to remove popcorn ceilings safely

If you decide to have your popcorn ceiling removed, it is important to do so safely. Only a licensed professional trained in safe asbestos handling should undertake asbestos removal.

Conclusion

Popcorn ceilings were a popular home improvement trend in the past, but they may contain asbestos, a hazardous material. If you think your popcorn ceiling may contain asbestos, you should have it tested by a professional.tunesharemore_vert