When it comes to creating a functional and aesthetically pleasing interior space, every detail matters, including the size of your ceiling tiles. In this comprehensive guide, we’ll explore the ins and outs of Standard Ceiling Tile Size, providing you with valuable information to help you make informed decisions for your next project.
Understanding Standard Ceiling Tile Size
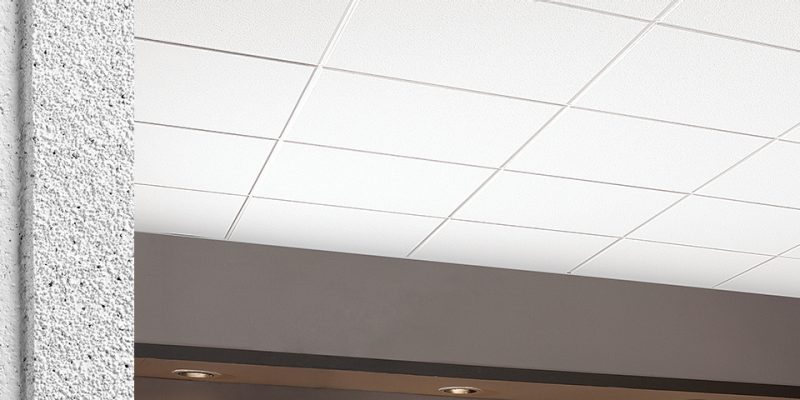
Standard Ceiling Tile Size refers to the typical dimensions of ceiling tiles commonly used in residential and commercial applications. These tiles are designed to fit into standard grid systems, making installation straightforward and efficient. While variations in size may exist depending on the manufacturer and specific requirements of a project, certain dimensions are considered standard across the industry.
The Importance of Standard Ceiling Tile Size
Choosing the right size ceiling tiles is essential for achieving a balanced and cohesive look in your space. Tiles that are too large or too small can disrupt the visual harmony of a room and may not fit properly within the grid system, leading to installation challenges. By adhering to Standard Ceiling Tile Size guidelines, you can ensure compatibility with existing grid systems and achieve professional-looking results.
Read too: Discovering the Charm of Nautical Outdoor Ceiling Fans for Your Coastal Retreat: Sail into Style
Common Standard Ceiling Tile Sizes
1. 2′ x 2′ Tiles
2′ x 2′ tiles are among the most common standard sizes used in both residential and commercial settings. These tiles are versatile and well-suited for a wide range of applications, including offices, classrooms, and retail spaces. Their square shape allows for easy installation and replacement, making them a popular choice for ceiling renovations.
2. 2′ x 4′ Tiles
Another standard size commonly found in commercial buildings and larger spaces is 2′ x 4′ tiles. These rectangular tiles provide ample coverage and are often used in areas with high ceilings or expansive layouts. Their elongated shape can help visually elongate a room and create a sense of continuity across the ceiling surface.
3. 1′ x 1′ Tiles
For smaller areas or decorative accents, 1′ x 1′ tiles offer a compact and versatile solution. These smaller tiles are often used in residential kitchens, bathrooms, or utility rooms, where precise sizing is necessary to accommodate fixtures and appliances. Additionally, 1′ x 1′ tiles can be combined with larger tiles to create intricate patterns or custom designs.
Factors to Consider When Choosing Ceiling Tiles
1. Room Size and Layout
Consider the size and layout of the room when selecting ceiling tiles. Larger rooms may benefit from larger tiles to minimize the number of seams and create a cohesive appearance, while smaller rooms may require smaller tiles for proportional coverage.
2. Acoustic Properties
Certain ceiling tiles are designed to improve acoustics by reducing noise and sound transmission within a space. If acoustic performance is a priority, consider selecting tiles with built-in sound-absorbing properties or explore additional acoustic treatments for optimal results.
3. Aesthetic Preferences
Beyond size, consider the aesthetic qualities of the ceiling tiles, including texture, color, and pattern. Choose tiles that complement the overall design scheme of the room and contribute to the desired atmosphere, whether it’s modern and minimalist or classic and ornate.
Conclusion
Standard Ceiling Tile Size plays a crucial role in the design and functionality of interior spaces. By understanding the dimensions, applications, and considerations associated with ceiling tiles, you can make informed decisions that enhance the beauty and functionality of your home or commercial environment. Whether you’re renovating an existing space or embarking on a new construction project, selecting the right ceiling tiles is key to achieving your design goals.