Condensation Leak In Ceiling: Causes, Effects, and Solutions

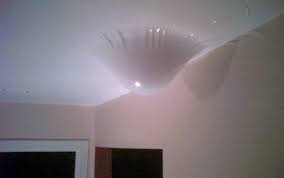
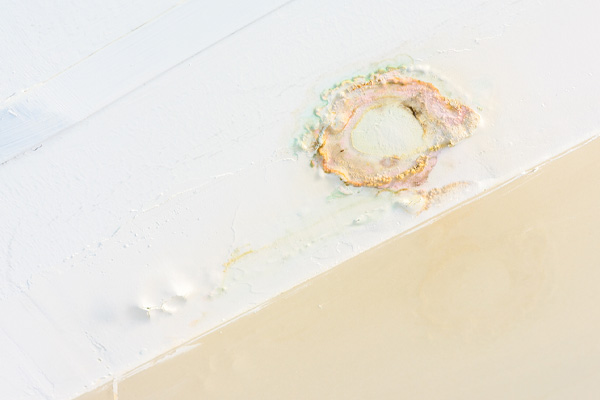
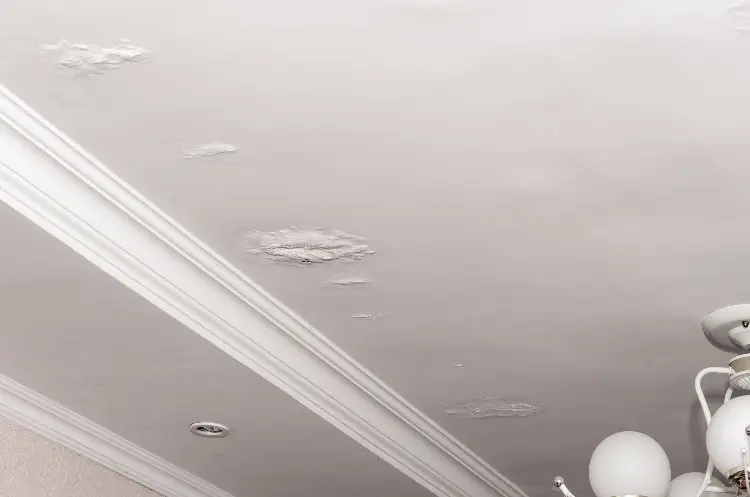
condensation leak in ceiling can be an alarming issue for homeowners. The appearance of water spots, drips, or mold growth on the ceiling often signals an underlying problem, and ignoring it could lead to more severe damage to your home. Condensation leaks are typically the result of excess moisture accumulating in the air and finding its way into your ceiling or attic. This type of issue is most common in areas with fluctuating temperatures and high humidity levels.

Condensation Leak In Ceiling

In this comprehensive guide, we will explore the causes of condensation leaks in ceilings, the potential effects on your home, how to identify them, and most importantly, the solutions you can implement to fix the problem. Whether you’re a homeowner experiencing a leak or someone looking to learn more about this issue, understanding the causes and solutions of condensation leak in ceiling is crucial to maintaining a safe, dry, and healthy home.

What is a Condensation Leak in Ceiling?

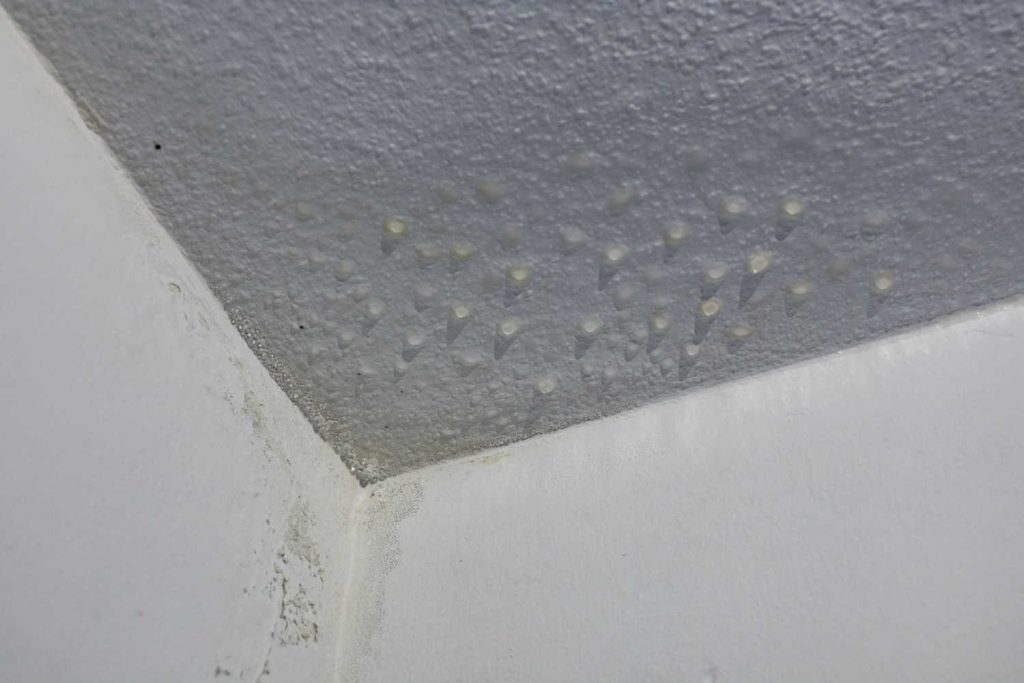
condensation leak in ceiling occurs when warm, moist air in your home meets cold surfaces, such as the ceiling or the roof of your attic. The moisture in the air condenses into water droplets, which accumulate and may seep through insulation and drywall, causing leaks and water stains on your ceiling. Over time, this moisture can lead to mold growth, wood rot, and even structural damage.

Unlike water leaks caused by rain or pipe bursts, condensation leaks typically happen gradually and can be difficult to detect at first. They are more common in certain areas of the house, such as kitchens, bathrooms, and laundry rooms, where there’s frequent moisture buildup due to cooking, showering, or washing clothes.

Causes of Condensation Leaks in Ceiling

Understanding the root causes of condensation leaks is essential for finding the right solution. Below are the most common causes of condensation leaks in ceilings:

1. Excess Humidity in the Home

Humidity plays a significant role in condensation. When warm, moist air from activities such as cooking, showering, or drying clothes rises and comes into contact with a cold ceiling or attic, the moisture in the air condenses. This is especially problematic in areas with poor ventilation, where the humidity cannot escape and accumulates in the ceiling space.

Read too: Kitchen Lighting For A Vaulted Ceiling: Illuminating Your Space with Style and Functionality

2. Improper Ventilation

Lack of ventilation in your attic or home can significantly contribute to condensation problems. Without proper ventilation, warm, moist air becomes trapped in areas such as the attic, creating an environment where condensation is more likely to occur. The lack of airflow prevents moisture from escaping, leading to increased humidity and condensation buildup on cold surfaces.

3. Poor Insulation

Inadequate or improper insulation in the attic or ceiling can allow warm air from the living spaces to rise and meet cold surfaces. This temperature difference can cause condensation to form, especially if the insulation is damaged or insufficient. Insulation helps regulate temperature and keeps warm air inside, preventing condensation from forming on the ceiling.

4. Roof Leaks

In some cases, roof leaks can contribute to ceiling damage and the appearance of water stains. If rainwater enters the attic or ceiling through a damaged roof or flashing, it can mix with the moisture from condensation, leading to visible leaks. While roof leaks and condensation leaks are different issues, they can both lead to similar damage to the ceiling.

5. Improper Installation of Ventilation Systems

A poorly installed ventilation system can create uneven airflow in your attic or roof space. If the vents are placed incorrectly or there is inadequate venting, moist air can become trapped, leading to condensation. Inadequate venting can also cause an increase in temperature differences between the inside and outside of the home, which promotes condensation buildup.

Symptoms of a Condensation Leak in Ceiling

Detecting a condensation leak early can help prevent long-term damage. Here are some common signs that may indicate you have a condensation leak in your ceiling:

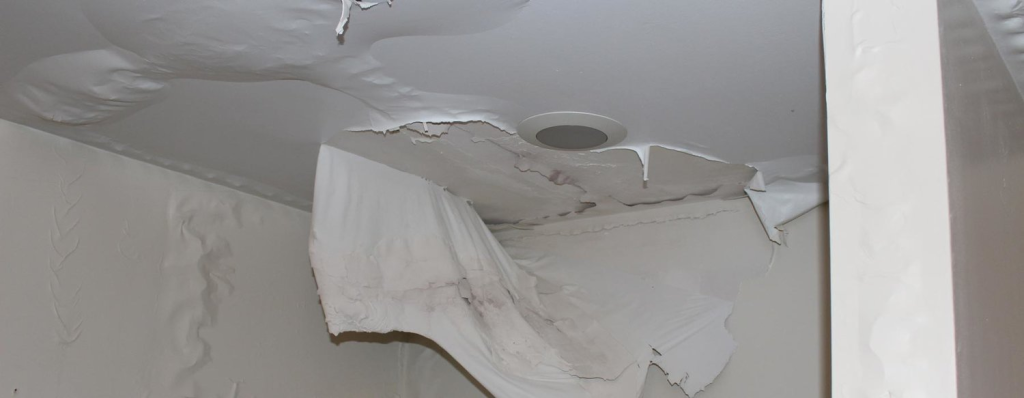
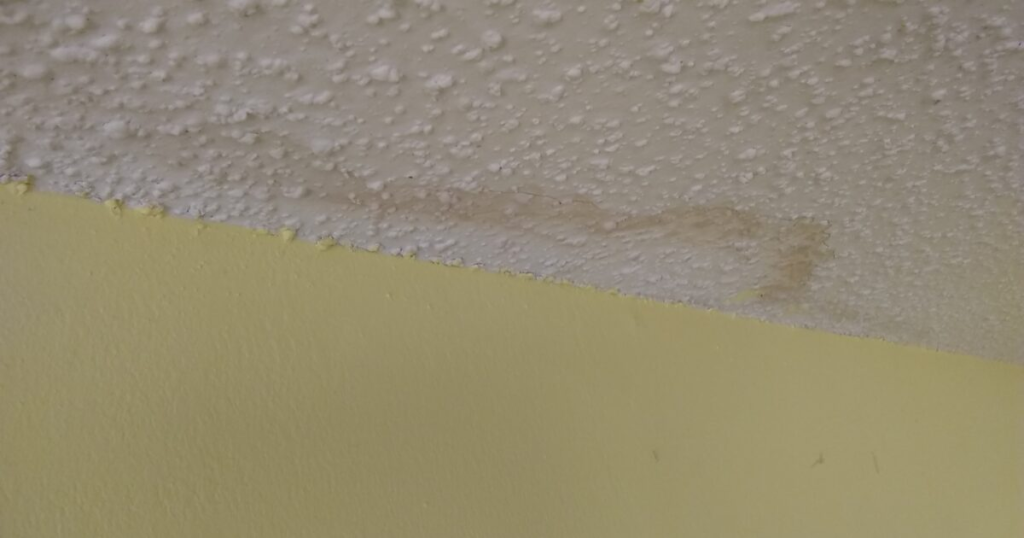
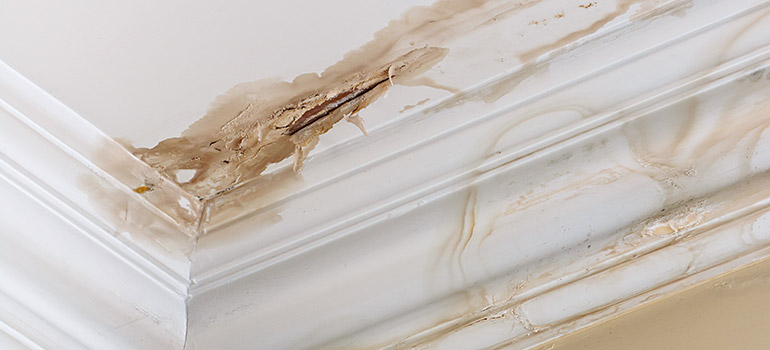
  • Water Stains: Brown or yellowish water stains on the ceiling or walls are one of the most obvious signs of a condensation leak. These stains often appear as rings or patches, indicating water accumulation.
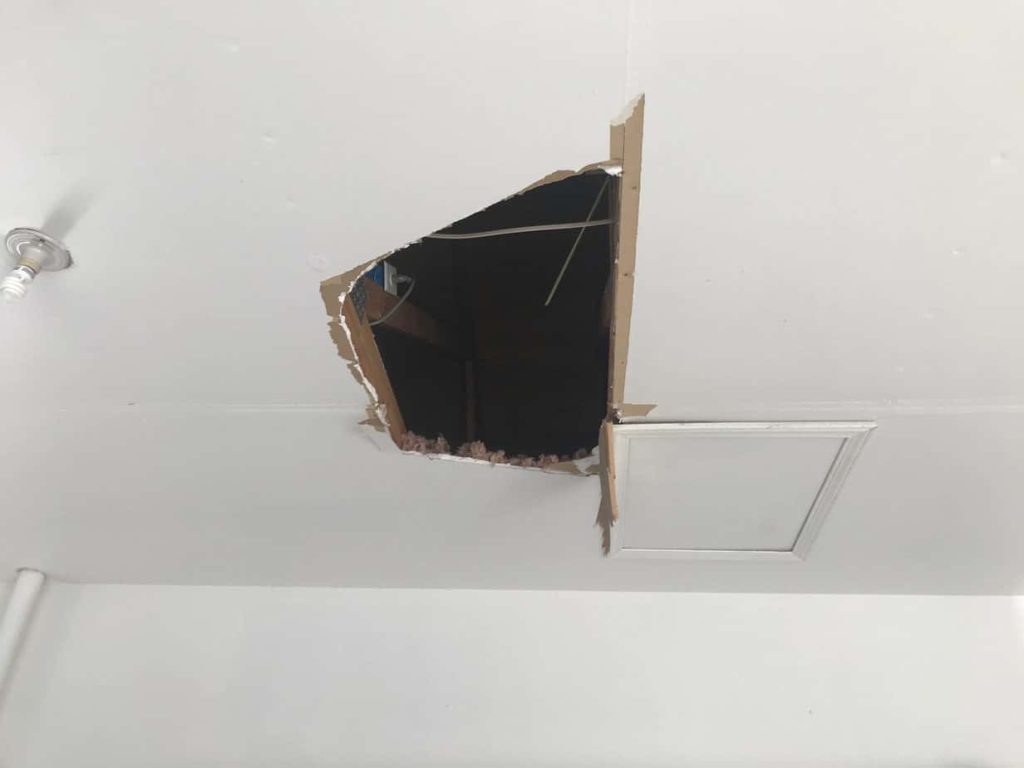
  • Sagging Ceiling: If the ceiling feels soft or spongy to the touch, it may be an indication that moisture has accumulated behind the drywall or plaster, weakening the structure.
  • Mold or Mildew Growth: Moisture from condensation can create an ideal environment for mold and mildew to grow. If you notice a musty smell or visible mold on your ceiling or walls, it could be a sign of a condensation problem.
  • Increased Humidity Levels: If you notice that the air in your home feels damp or heavy, especially in certain rooms like the kitchen or bathroom, it may be due to high humidity levels that contribute to condensation issues.
  • Puddles of Water: If water begins to pool on the floor beneath the ceiling, it may indicate a more severe condensation problem or a combination of condensation and roof leaks.

Effects of a Condensation Leak in Ceiling

If left unchecked, a condensation leak in ceiling can lead to significant damage to your home. Here are some potential effects:

1. Mold and Mildew Growth

The presence of moisture on your ceiling and inside your walls can lead to mold and mildew growth. Mold not only damages the materials in your home but can also pose health risks. Prolonged exposure to mold can cause respiratory issues, allergies, and other health problems.

2. Structural Damage

Moisture can weaken structural components, such as wooden beams, rafters, and drywall. Over time, the accumulated moisture can cause wood to rot and drywall to deteriorate. This can result in costly repairs to the ceiling, walls, or even the entire roof structure.

3. Increased Energy Costs

Condensation can create an inefficient temperature balance in your home. As moisture builds up in the attic or ceiling, insulation may become less effective, and the overall energy efficiency of your home can decrease. This can result in higher heating and cooling costs.

4. Aesthetic Damage

Water stains, mold, and sagging ceilings can affect the overall aesthetic of your home. If left untreated, a condensation leak can ruin the appearance of your ceiling and reduce the value of your home.

How to Fix a Condensation Leak in Ceiling

Once you’ve identified a condensation leak, it’s crucial to take immediate action to prevent further damage. Below are the steps to address a condensation leak in ceiling:

1. Address the Source of Moisture

The first step in fixing a condensation leak is to control the moisture levels in your home. This could involve:

  • Using a dehumidifier to reduce humidity in the affected area.
  • Ensuring proper ventilation in high-moisture areas like kitchens, bathrooms, and laundry rooms.
  • Installing an exhaust fan to vent moist air outside the house.

2. Repair Roof or Attic Leaks

If the condensation is caused by a roof leak, it’s important to have the roof professionally inspected and repaired. Ensure that any damage to the roof, flashing, or attic is addressed to prevent further moisture intrusion.

3. Improve Ventilation and Insulation

Ensure that your attic is well-ventilated to allow warm air to escape and reduce moisture buildup. Adding or replacing insulation can also help regulate temperature and prevent condensation from forming on cold surfaces.

4. Fix the Ceiling and Drywall

Once the source of the condensation is addressed, you may need to repair the ceiling and drywall. If the drywall is sagging or damaged, you may need to replace it. Be sure to allow the area to dry completely before making repairs to prevent mold growth.

5. Prevent Future Condensation

After repairing the leak, take steps to prevent future condensation issues. This may include installing vapor barriers, improving attic insulation, or ensuring that ventilation systems are properly installed and maintained.

Conclusion

condensation leak in ceiling can be a serious issue for homeowners, but with the right knowledge and solutions, it’s entirely preventable and fixable. By addressing the root causes of condensation—such as excess humidity, poor ventilation, and inadequate insulation—you can protect your home from long-term damage, mold growth, and costly repairs.

Regular maintenance, proper ventilation, and timely repairs are essential to keeping your ceiling and home dry and safe. If you notice signs of condensation, it’s best to act quickly to avoid more severe damage and maintain the structural integrity of your home.

Ceiling Repair in Fort Myers: What Homeowners Need to Know

When it comes to maintaining the integrity of your home, Ceiling Repair Fort Myers is a crucial aspect that should not be overlooked. Whether it’s due to water damage, cracks, or general wear and tear, a damaged ceiling can detract from the beauty of your home and potentially lead to more severe structural issues if not addressed promptly. In this guide, we will delve into the various causes of ceiling damage, the steps involved in repairing ceilings, and how to choose the right professionals for ceiling repair in Fort Myers.

Ceiling Repair Fort Myers

Understanding the Importance of Ceiling Repair

A ceiling is more than just an overhead surface; it plays a vital role in the overall aesthetics, insulation, and safety of your home. When ceilings are damaged, they can lead to various problems, including:

  • Reduced Home Value: A well-maintained ceiling adds to the overall appeal of your home. Damage can deter potential buyers and reduce market value.
  • Structural Issues: Unaddressed ceiling damage can lead to structural instability, which may compromise the safety of your home.
  • Health Concerns: Water damage can lead to mold growth, posing health risks to you and your family.

Common Causes of Ceiling Damage in Fort Myers

Before diving into repair solutions, it’s essential to understand the common causes of ceiling damage, particularly in Fort Myers, where humidity and tropical storms can be significant factors.

  1. Water Damage: One of the leading causes of ceiling damage is water intrusion from leaks in the roof, plumbing issues, or even condensation. Fort Myers, with its frequent rainstorms, is particularly vulnerable to this type of damage.
  2. Cracks: Over time, ceilings can develop cracks due to settling, temperature changes, or improper installation. These cracks can be unsightly and indicate underlying issues.
  3. Moisture Issues: High humidity levels can cause ceilings to warp, sag, or bubble, particularly if proper ventilation is lacking.
  4. Pest Infestation: Rodents and insects can cause damage to ceilings, especially in older homes. They may create holes or nests that lead to further damage.
  5. Poor Installation: Sometimes, ceilings are damaged due to poor installation practices, resulting in sagging or misalignment.

Read too: Shiplap Ceiling in Kitchen: A Timeless Trend for a Stylish and Cozy Space

Signs Your Ceiling Needs Repair

Recognizing the signs of ceiling damage early can save you time and money in the long run. Here are some indicators that you may need Ceiling Repair Fort Myers services:

  • Visible Water Stains: Brown or yellow stains are often the first sign of water damage.
  • Cracks or Holes: Look for any visible cracks or holes that may have developed over time.
  • Bubbling or Peeling Paint: This can indicate moisture behind the ceiling surface.
  • Sagging Ceiling: If the ceiling appears to be sagging, it may be a sign of structural issues or water damage.
  • Mold Growth: Any visible mold is a serious concern that needs immediate attention.

Steps for Ceiling Repair

Once you’ve identified the need for repair, it’s essential to follow a systematic approach to ensure the problem is resolved effectively. Below are the general steps involved in ceiling repair.

Step 1: Assess the Damage

Before you begin repairs, assess the extent of the damage. This may involve:

  • Inspecting the ceiling for visible signs of damage.
  • Checking for leaks or moisture issues.
  • Determining whether the damage is localized or widespread.

Step 2: Address the Source of Damage

Before any repair work begins, it’s critical to address the underlying cause of the damage. For example:

  • Water Leaks: If the damage is due to a roof or plumbing leak, fix the leak before proceeding with ceiling repairs.
  • Ventilation: If high humidity is an issue, consider improving ventilation in the affected area.

Step 3: Prepare the Area

Once you’ve addressed the source of the damage, prepare the area for repair:

  • Remove Furniture: Clear the area of any furniture or belongings to prevent damage during the repair process.
  • Protect the Floor: Use drop cloths or plastic sheeting to protect your floors from dust and debris.

Step 4: Make the Repairs

The method of repair will depend on the type of damage:

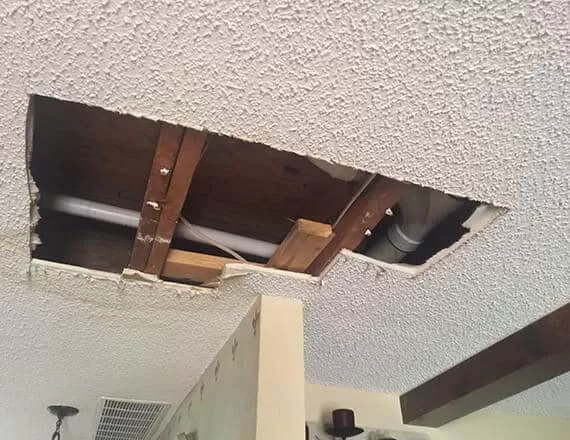
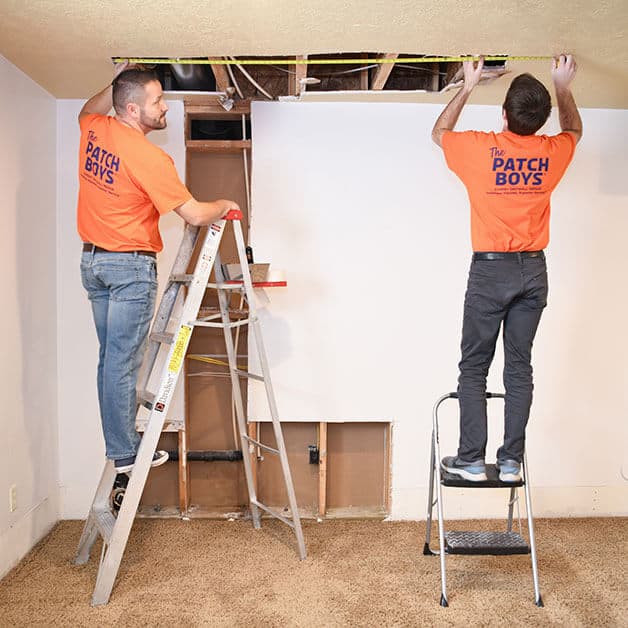
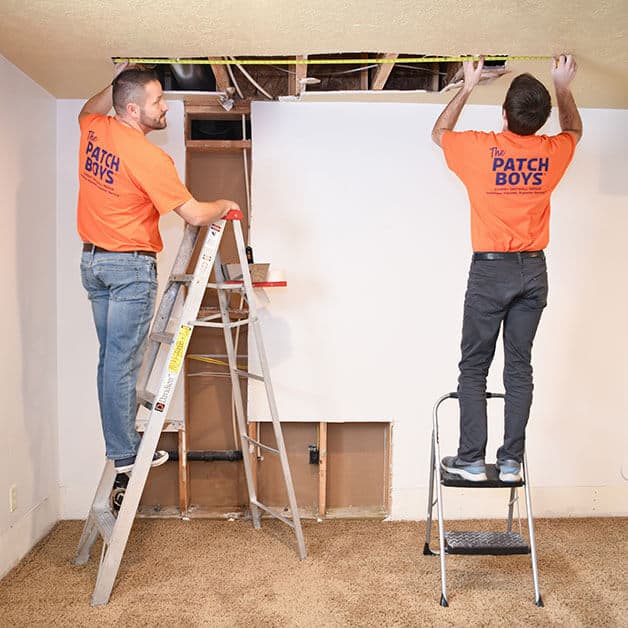
  • Water Damage: For water-damaged ceilings, you may need to replace affected drywall or ceiling tiles. Cut out the damaged area, ensuring that you remove all affected materials, and replace them with new drywall.
  • Cracks: For minor cracks, you can use joint compound to fill the gaps. For larger cracks, consider using a patching material and then applying joint compound over it for a smooth finish.
  • Sagging Ceilings: If your ceiling is sagging, it may require reinforcing the support structure. This may involve adding additional screws or installing new ceiling joists.
  • Mold Removal: If you encounter mold, make sure to use appropriate safety measures. Use a mold removal solution and ensure the area is well-ventilated during this process.

Step 5: Finish the Surface

After repairs are complete, finish the surface to match the rest of the ceiling:

  • Sanding: Once the joint compound is dry, sand it down to create a smooth surface.
  • Priming: Apply primer to the repaired area to help the paint adhere better.
  • Painting: Finally, repaint the ceiling to blend the repaired area with the rest of the ceiling.

Step 6: Clean Up

After repairs are finished, clean up the work area, removing any debris and protective coverings. Make sure to inspect your work to ensure everything is finished to your satisfaction.

Choosing the Right Professionals for Ceiling Repair in Fort Myers

While some homeowners may choose to tackle ceiling repairs themselves, hiring a professional can save time and ensure quality workmanship. Here are some tips for finding the right ceiling repair service in Fort Myers:

1. Look for Experience

When searching for a contractor, look for someone with extensive experience in ceiling repair. Check reviews and ask for references to gauge their expertise.

2. Verify Credentials

Ensure the contractor is licensed and insured. This protects you in case of accidents or damage during the repair process.

3. Get Multiple Quotes

Don’t settle for the first quote you receive. Get multiple estimates to compare pricing and services offered.

4. Ask About Warranties

Inquire whether the contractor offers warranties on their work. A reputable contractor should stand behind their repairs.

5. Check for Reviews and Testimonials

Read online reviews and testimonials from previous customers to gain insight into the quality of the contractor’s work.

Preventing Ceiling Damage

Preventing ceiling damage is always preferable to addressing repairs after they occur. Here are some tips to help you avoid ceiling issues in the future:

1. Regular Inspections

Conduct regular inspections of your roof, plumbing, and ceilings to catch any signs of damage early.

2. Improve Ventilation

Ensure that your home has adequate ventilation, especially in areas prone to high humidity, such as kitchens and bathrooms.

3. Use Quality Materials

When performing repairs or renovations, use high-quality materials designed to withstand moisture and other environmental factors.

4. Maintain Your Roof

Keep your roof well-maintained by cleaning gutters, repairing leaks promptly, and replacing damaged shingles.

Conclusion

A Ceiling Repair Fort Myers is an essential task for maintaining the beauty and safety of your home. By understanding the causes of ceiling damage, recognizing the signs that repairs are needed, and taking proactive steps to address issues, you can protect your home from further harm. Whether you choose to tackle repairs yourself or hire a professional, staying informed and vigilant is the key to maintaining your ceiling’s integrity. Regular maintenance and inspections can help prevent many common ceiling issues, ensuring your home remains a safe and beautiful place for years to come.

Water Stain on Ceiling Below Bathroom: A Comprehensive Guide

Water stains on the ceiling below a bathroom can be alarming for homeowners. These unsightly marks can indicate underlying problems that, if left unaddressed, may lead to significant damage and costly repairs. Understanding the causes, identifying the signs, and knowing how to effectively deal with a water stain on the ceiling below your bathroom are crucial for maintaining the integrity of your home. In this guide, we will delve deep into the topic, covering everything from identification to prevention.

Water Stain On Ceiling Below Bathroom

What Causes Water Stains on the Ceiling Below the Bathroom?

Before addressing the issue, it is essential to understand what typically causes water stains. Here are some common culprits:

1. Leaky Plumbing Fixtures

One of the primary causes of water stains in ceilings below bathrooms is leaks from plumbing fixtures. Toilets, sinks, and bathtubs are often connected to complex plumbing systems that can develop leaks over time. Common signs of leaking plumbing include:

  • Dripping sounds
  • Increased water bills
  • Wet spots around fixtures

2. Shower and Tub Leaks

Showers and bathtubs can also be sources of water damage. Improper sealing or caulking around these fixtures can allow water to seep through and accumulate in the ceiling below. This type of leak may not be immediately noticeable but can lead to significant staining over time.

Read too: Shiplap Ceiling in Kitchen: A Timeless Trend for a Stylish and Cozy Space

3. Roof Leaks

In some cases, water stains can be attributed to issues with the roof rather than plumbing. If your bathroom is located near an exterior wall, rainwater may be seeping in through the roof or siding and causing stains on the ceiling below.

4. Condensation Issues

Bathrooms are typically humid environments due to showering and bathing. If your bathroom lacks adequate ventilation, condensation can form on pipes and ceilings, leading to water stains.

5. Faulty Ventilation

Without proper ventilation, warm, moist air can collect in the bathroom, leading to increased humidity and condensation. This moisture can accumulate on ceilings and eventually lead to water stains.

6. Faulty Appliances

Appliances such as washing machines and dishwashers that are located near the bathroom can also contribute to water stains. If a hose bursts or a connection leaks, the resulting water can seep into the ceiling below.

Signs of Water Damage to Look For

Identifying a water stain on the ceiling below the bathroom is the first step in addressing the issue. Here are some signs that you may have a water problem:

1. Discoloration

Water stains often appear as brown or yellow spots on the ceiling. These stains can grow larger over time, indicating an ongoing leak.

2. Peeling or Bubbling Paint

If the paint on your ceiling is peeling, bubbling, or flaking, it could be a sign of moisture accumulation. This is often seen in conjunction with visible water stains.

3. Mold Growth

Excess moisture can lead to mold growth, which is not only unsightly but also poses health risks. If you see black or green patches on your ceiling, it is essential to address the moisture problem immediately.

4. Soft Spots or Sagging

If you notice any soft spots or sagging areas on your ceiling, it may indicate that water has saturated the drywall or plaster. This situation is more serious and requires immediate attention.

Steps to Take When You Notice a Water Stain on the Ceiling Below Bathroom

1. Investigate the Source

The first step in addressing a water stain is to investigate its source. Look for visible signs of leaks from plumbing fixtures, including:

  • Inspecting under sinks and around toilets for moisture.
  • Checking shower and bathtub seals for any gaps.
  • Examining the roof and walls for leaks or damage.

2. Turn Off the Water Supply

If you suspect that the water stain is due to a plumbing issue, turn off the water supply to the affected area to prevent further damage. This will help mitigate the risk of additional water leaking into your ceiling.

3. Fix the Underlying Issue

Once you have identified the source of the leak, it’s crucial to repair it promptly. Depending on the cause, this may involve:

  • Replacing damaged pipes or fittings.
  • Resealing shower or tub fixtures.
  • Repairing any roofing issues.
  • Improving bathroom ventilation to reduce condensation.

4. Dry the Affected Area

After repairing the source of the leak, it is essential to dry the affected area thoroughly. Use fans, dehumidifiers, and good ventilation to help remove moisture. This step is crucial to prevent mold growth and further damage to your ceiling.

5. Repair the Ceiling

Once the area is dry, you can address the visible water stain. Here are some repair steps:

  • Clean the Area: Remove any mold or mildew with a mixture of water and bleach or a specialized cleaner.
  • Patch Holes or Cracks: If there are any cracks or holes in the ceiling, patch them with a suitable filler.
  • Repaint: After the patching compound has dried, repaint the affected area with a moisture-resistant ceiling paint to ensure a uniform appearance and prevent future stains.

6. Monitor for Recurrence

After addressing the issue, it’s essential to monitor the area for any signs of recurring water stains. Regularly check plumbing fixtures and inspect the ceiling for any new discoloration.

Preventing Water Stains on Ceiling Below Bathroom

Once you’ve addressed the existing water stains, consider implementing preventative measures to avoid future issues:

1. Regular Inspections

Conduct regular inspections of your plumbing fixtures and appliances to catch potential leaks early. Look for any signs of moisture around pipes and connections.

2. Maintain Proper Ventilation

Ensure your bathroom has proper ventilation to reduce humidity levels. This can be achieved through:

  • Installing exhaust fans that vent outside.
  • Opening windows to allow fresh air to circulate.
  • Using dehumidifiers in particularly humid climates.

3. Use Moisture-Resistant Materials

When remodeling or renovating, consider using moisture-resistant materials, such as:

  • Mold-resistant drywall for ceilings.
  • Waterproof paint for high-moisture areas.

4. Seal Gaps and Cracks

Regularly check for and seal any gaps or cracks in your bathroom’s plumbing and fixtures. This will help prevent moisture from escaping into the ceiling.

5. Proper Appliance Maintenance

Ensure that appliances such as washing machines are properly maintained and that hoses are checked for leaks regularly.

Conclusion

Dealing with a water stain on the ceiling below the bathroom can be a daunting task, but with the right approach, you can effectively address and prevent these issues. By identifying the source of the leak, fixing it, and taking preventive measures, you can ensure that your home remains a safe and comfortable environment. Regular maintenance and inspections will go a long way in avoiding future water stains, protecting both your ceiling and your peace of mind.

If you find yourself overwhelmed or unable to locate the source of the leak, don’t hesitate to reach out to a professional plumber or contractor. Addressing these issues early will save you time and money in the long run, ensuring the longevity of your home.

How To Repair Ceiling Tiles With Water Damage: A Comprehensive Guide

Water damage is a common problem that can affect any part of your home, but ceiling tiles are particularly vulnerable. Whether caused by a leaking roof, burst pipe, or excessive humidity, water damage can lead to unsightly stains, warping, and even mold growth on your ceiling tiles. Fortunately, repairing ceiling tiles with water damage is a manageable task that can restore the appearance and integrity of your ceiling. In this comprehensive guide, we’ll walk you through the steps on how to repair ceiling tiles with water damage, offering practical tips and insights to help you get the job done right.

How To Repair Ceiling Tiles With Water Damage

Understanding Water Damage in Ceiling Tiles

Before diving into the repair process, it’s essential to understand the nature of water damage and its impact on ceiling tiles. Water can cause various types of damage depending on the material of your ceiling tiles, the extent of the water exposure, and how quickly the issue is addressed.

Common Types of Ceiling Tiles

  • Acoustic Tiles: Often found in commercial buildings, these tiles are designed to reduce noise. They are usually made from porous materials that can absorb water, leading to stains and mold.
  • Drywall Ceiling Tiles: Common in residential homes, these tiles are prone to warping, sagging, and staining when exposed to water.
  • Metal Ceiling Tiles: Less susceptible to water damage, but they can rust if exposed to moisture over time.
  • Mineral Fiber Ceiling Tiles: Made from a mix of mineral fibers, these tiles can absorb water and become discolored or warped.

Signs of Water Damage

  • Stains: Yellow or brown stains are often the first visible sign of water damage.
  • Warping: Ceiling tiles may bulge, warp, or sag due to water absorption.
  • Cracks: Excessive moisture can cause tiles to crack or break apart.
  • Mold Growth: In areas with high humidity, mold can develop on damp ceiling tiles, posing health risks.

Read too: Kitchen Lighting For A Vaulted Ceiling: Illuminating Your Space with Style and Functionality

How To Repair Ceiling Tiles With Water Damage

Repairing ceiling tiles with water damage involves several steps, from assessing the damage to replacing or restoring the affected tiles. Follow these instructions to ensure a successful repair.

1. Assess the Damage

Before you start any repairs, assess the extent of the damage:

  • Determine the Source: Identify where the water is coming from. It could be a leaky roof, plumbing issue, or condensation problem. Address the source of the water to prevent future damage.
  • Evaluate the Damage: Check how many tiles are affected and whether they are stained, warped, or cracked. If mold is present, take extra precautions, as mold can spread and cause health issues.

2. Remove the Damaged Tiles

If the damage is severe, you may need to remove and replace the damaged tiles:

  • Cut Around the Damaged Area: Use a utility knife to cut around the damaged tile if it’s a drywall or mineral fiber tile. For acoustic or metal tiles, you may be able to simply lift the tile out of the grid system.
  • Carefully Remove the Tile: Gently remove the tile to avoid damaging the surrounding tiles or ceiling structure. If the tile is wet, handle it with care as it may be fragile.

3. Dry and Clean the Area

Once the damaged tiles are removed, it’s crucial to dry and clean the area to prevent further issues:

  • Dry the Ceiling: Use fans or a dehumidifier to thoroughly dry the area where the tiles were removed. This step is vital to prevent mold growth.
  • Clean the Surrounding Area: Wipe down the ceiling structure with a damp cloth to remove any dust, debris, or mold spores. If mold is present, use a mixture of water and mild detergent or a specialized mold cleaner to disinfect the area.

4. Repair or Replace the Ceiling Tiles

Depending on the extent of the damage, you can either repair the existing tiles or replace them entirely.

Repairing Stained or Warped Tiles

If the tiles are only slightly stained or warped, you may be able to salvage them:

  • Stain Removal: For minor stains, apply a stain-blocking primer to the affected area before repainting. This will prevent the stain from bleeding through the new paint. Use a paintbrush or roller to apply a fresh coat of paint that matches the original color.
  • Flatten Warped Tiles: If the tiles are slightly warped, try to flatten them by placing a heavy object on top of the tile while it’s drying. Alternatively, dampen the back of the tile and gently press it flat before allowing it to dry completely.

Replacing the Tiles

For tiles that are beyond repair, replacement is the best option:

  • Measure and Cut New Tiles: Measure the size of the existing tiles and cut the new tiles to match. Ensure that the new tiles are the same material and thickness as the originals.
  • Install the New Tiles: For grid systems, simply drop the new tiles into place. For drywall or glued tiles, apply adhesive to the back of the tile and press it firmly onto the ceiling.

5. Prevent Future Water Damage

After repairing the ceiling tiles, take steps to prevent future water damage:

  • Fix Leaks: Ensure that any leaks in the roof or plumbing are repaired promptly to avoid further damage.
  • Improve Ventilation: In areas prone to high humidity, such as bathrooms or kitchens, improve ventilation by installing exhaust fans or using a dehumidifier.
  • Regular Inspections: Periodically inspect your ceiling for signs of water damage, especially after heavy rain or if you notice any leaks.

6. Repaint and Finish

Once the repairs are complete, finish the ceiling to restore its original appearance:

  • Repaint the Ceiling: Apply a fresh coat of paint to the entire ceiling for a uniform look. Use a paint that is resistant to moisture and stains to extend the life of your ceiling.
  • Reapply Texture: If your ceiling has a textured finish, use a texture spray or brush to reapply the texture to the repaired area.

How To Repair Ceiling Tiles With Water Damage: Additional Tips

1. Safety First

When dealing with water-damaged ceiling tiles, always prioritize safety:

  • Wear Protective Gear: Wear gloves, safety goggles, and a dust mask to protect yourself from mold spores and debris.
  • Turn Off Power: If the water damage is near electrical fixtures, turn off the power to the area to prevent electrical hazards.

2. Choose the Right Materials

Selecting the right materials for repair is crucial:

  • Water-Resistant Tiles: Consider using water-resistant ceiling tiles, especially in areas prone to moisture.
  • Stain-Resistant Paint: Use stain-resistant paint to help prevent future stains from appearing.

3. Consider Professional Help

If the water damage is extensive or if you’re dealing with mold, it may be wise to hire a professional. A contractor can provide expert advice and ensure that the repairs are done correctly.

Conclusion

Water damage to ceiling tiles can be a frustrating issue, but with the right approach, it can be effectively repaired. By following these steps on how to repair ceiling tiles with water damage, you can restore your ceiling’s appearance and prevent future problems. Whether you’re dealing with minor stains or extensive damage, taking prompt action and using the right materials will ensure a successful repair.

Water Damaged Ceiling Tiles: Causes, Solutions, and Prevention Tips

Water damaged ceiling tiles are a common issue in both residential and commercial properties. Whether caused by a leaky roof, plumbing issues, or condensation, water damage not only affects the aesthetic appeal of your ceilings but can also indicate more severe underlying problems. In this comprehensive guide, we’ll explore the causes of water damage in ceiling tiles, how to address and repair the issue, and essential tips for preventing future damage.

Water Damaged Ceiling Tiles

Understanding the Causes of Water Damaged Ceiling Tiles

Before diving into solutions and prevention strategies, it’s crucial to understand the common causes of water damaged ceiling tiles. Identifying the root cause is the first step in effectively addressing and preventing further damage.

1. Roof Leaks

One of the most common causes of water damaged ceiling tiles is a leaking roof. Whether due to aging materials, storm damage, or poor installation, a compromised roof can allow water to seep into your home or office. Over time, this water accumulates in the ceiling, eventually leading to noticeable damage in the form of stains, discoloration, and sagging tiles.

2. Plumbing Leaks

Plumbing issues, such as leaking pipes or faulty plumbing fixtures, can also lead to water damaged ceiling tiles. Water from leaking pipes often finds its way into ceilings, especially if the pipes are located directly above them. This can result in localized damage, typically appearing as brown or yellow stains on the ceiling tiles.

3. Condensation

In some cases, condensation from HVAC systems or high humidity levels can cause water damage. When warm, moist air comes into contact with cold surfaces, condensation forms and can eventually lead to water accumulation. This is especially common in areas with poor ventilation, where moisture cannot escape, leading to the deterioration of ceiling tiles over time.

4. Poor Insulation

Insufficient insulation can also contribute to water damage in ceiling tiles. Poor insulation allows warm air to escape, causing condensation on the underside of the roof or in the attic. This moisture can then drip onto ceiling tiles, leading to gradual water damage.

Read too: Kitchen Lighting For A Vaulted Ceiling: Illuminating Your Space with Style and Functionality

5. Roofing Material Degradation

Over time, roofing materials can degrade, especially in areas with harsh weather conditions. Shingles can crack, and waterproof membranes can lose their effectiveness, allowing water to penetrate into the structure of the building. As the water seeps through, it can accumulate and cause damage to the ceiling tiles below.

Signs of Water Damaged Ceiling Tiles

Recognizing the signs of water damaged ceiling tiles early on can prevent more extensive damage and costly repairs. Here are some common indicators that your ceiling tiles have been compromised by water:

1. Discoloration

One of the first signs of water damage is discoloration. Affected ceiling tiles often develop brown, yellow, or dark stains, typically in irregular shapes. These stains are caused by water soaking into the material and can be a clear indication of a leak above the ceiling.

2. Sagging or Warping

When ceiling tiles absorb water, they can become heavy and start to sag or warp. This is particularly noticeable in drop ceilings, where the tiles are not securely fixed in place. Sagging tiles are not only unsightly but can also pose a safety risk if they fall out of the ceiling grid.

3. Peeling Paint or Wallpaper

In some cases, water damage can cause paint or wallpaper on the ceiling to peel or bubble. This is often a sign that water has been seeping into the ceiling for some time, causing the adhesive holding the paint or wallpaper to fail.

4. Mold and Mildew Growth

Mold and mildew thrive in damp environments, making water damaged ceiling tiles a prime breeding ground. If you notice black, green, or white spots on your ceiling tiles, it could be a sign of mold growth. Mold not only damages the tiles further but also poses health risks, particularly for those with respiratory conditions or allergies.

5. Musty Odors

A musty smell in the room can also indicate water damage. This odor is often caused by mold or mildew growing in the damp environment created by water damage. If you detect a persistent musty smell, it’s essential to investigate the cause and address any underlying water damage.

How to Address Water Damaged Ceiling Tiles

Once you’ve identified water damaged ceiling tiles, it’s important to address the issue promptly to prevent further damage. Here’s a step-by-step guide to repairing or replacing your water damaged ceiling tiles:

1. Identify and Fix the Source of the Water

Before you begin repairing the ceiling tiles, it’s crucial to identify and fix the source of the water. Whether it’s a leaky roof, plumbing issue, or condensation problem, addressing the root cause will prevent future damage. If you’re unsure where the water is coming from, consider hiring a professional to conduct a thorough inspection.

2. Assess the Extent of the Damage

Next, assess the extent of the damage to determine whether the tiles can be repaired or if they need to be replaced. If the damage is minor, such as small stains or slight discoloration, cleaning and repainting the tiles may be sufficient. However, if the tiles are sagging, warped, or moldy, it’s best to replace them entirely.

3. Remove Damaged Tiles

If replacement is necessary, carefully remove the damaged tiles. For drop ceilings, this involves lifting the tiles out of the grid. For fixed ceilings, you may need to cut out the damaged section using a utility knife or drywall saw. Be sure to wear protective gear, such as gloves and a mask, to avoid contact with mold or other contaminants.

4. Clean and Disinfect the Area

After removing the damaged tiles, clean and disinfect the area to remove any mold, mildew, or bacteria. Use a mixture of water and bleach or a commercial mold remover to thoroughly clean the affected area. Allow the area to dry completely before proceeding with repairs.

5. Install New Ceiling Tiles

Once the area is clean and dry, install new ceiling tiles. For drop ceilings, simply place the new tiles into the grid. For fixed ceilings, you may need to cut the new tiles to size and secure them in place with adhesive or screws. Be sure to match the new tiles as closely as possible to the existing ones to maintain a uniform appearance.

6. Paint or Finish the Ceiling

If the new tiles do not match the existing ceiling color, consider painting the entire ceiling for a consistent look. Use a stain-blocking primer to cover any remaining stains before applying the paint. This will ensure that the water stains do not bleed through the new paint.

Preventing Future Water Damage in Ceiling Tiles

Preventing water damage to your ceiling tiles is essential for maintaining the integrity and appearance of your home or office. Here are some tips to help you avoid future issues:

1. Regular Roof Inspections

Regular roof inspections are key to preventing water damage. Inspect your roof at least twice a year, or after major storms, to check for signs of damage, such as missing shingles, cracks, or loose flashing. Address any issues promptly to prevent water from seeping into your ceiling.

2. Maintain Plumbing Systems

Proper maintenance of your plumbing systems can also help prevent water damage. Check for leaks in pipes, faucets, and fixtures regularly, and repair any issues immediately. If you have plumbing running through your ceiling, consider insulating the pipes to prevent condensation.

3. Improve Ventilation

Improving ventilation in your home or office can help reduce the risk of condensation-related water damage. Ensure that bathrooms, kitchens, and attics are well-ventilated to allow moisture to escape. Installing exhaust fans or dehumidifiers in high-humidity areas can also help reduce condensation.

4. Upgrade Insulation

Upgrading your insulation can prevent condensation and water damage. Proper insulation helps regulate temperature and reduces the likelihood of moisture buildup. Consider adding insulation to your attic, walls, and ceilings to protect against water damage.

5. Monitor Humidity Levels

High humidity levels can contribute to condensation and water damage. Monitor the humidity levels in your home or office, and use a dehumidifier if necessary to keep levels within a safe range. Aim for a relative humidity level between 30% and 50% to prevent moisture-related issues.

6. Address Water Damage Promptly

If you notice any signs of water damage, such as discoloration or musty odors, address the issue promptly. Delaying repairs can lead to more extensive damage, including mold growth and structural issues. Take immediate action to fix the source of the water and repair or replace damaged ceiling tiles.

When to Call a Professional for Water Damaged Ceiling Tiles

While minor water damage can often be addressed with DIY repairs, more severe cases may require professional intervention. Here are some scenarios where you should consider calling a professional:

1. Extensive Water Damage

If the water damage is extensive, affecting multiple tiles or large areas of the ceiling, it’s best to call a professional. They can assess the damage, identify the source, and recommend the most effective repair solutions.

2. Mold Growth

Mold growth is a serious issue that requires professional remediation. If you notice mold on your ceiling tiles, contact a mold remediation specialist to safely remove the mold and prevent it from spreading.

3. Structural Damage

If the water damage has compromised the structural integrity of your ceiling, such as causing sagging or weakening the support beams, a professional contractor should be called. They can repair the structural damage and ensure the ceiling is safe and secure.

4. Reoccurring Issues

If you’ve addressed water damage before but the issue keeps reoccurring, it’s time to bring in a professional. They can conduct a thorough inspection to identify the underlying cause and provide long-term solutions to prevent future damage.

Conclusion

Water damaged ceiling tiles are not only an eyesore but can also be indicative of more significant problems within your home or office. By understanding the causes of water damage, recognizing the signs early, and taking prompt action, you can effectively address and prevent further damage. Regular maintenance, proper ventilation, and timely repairs are essential in keeping your ceiling tiles in good condition and your property safe from water-related issues.

Bathroom Flood Ceiling Damage: Understanding and Addressing

Bathroom flood ceiling damage can be a serious issue that not only impacts the aesthetics of your home but also poses significant risks to its structural integrity. Whether caused by a leaky pipe, an overflowing bathtub, or an improper ventilation system, water damage to your bathroom ceiling needs prompt and effective intervention. This guide will explore the causes, impacts, and solutions for bathroom flood ceiling damage to help you address this problem efficiently.

Bathroom Flood Ceiling Damage

What is Bathroom Flood Ceiling Damage?

Bathroom flood ceiling damage occurs when water from a bathroom leaks or overflows onto the ceiling of a room below. This can result from various issues such as plumbing failures, appliance malfunctions, or inadequate waterproofing. The damage typically manifests as discoloration, warping, or peeling of the ceiling material and may also lead to mold growth and structural issues.

Common Causes of Bathroom Flood Ceiling Damage

Understanding the common causes of bathroom flood ceiling damage can help in preventing and addressing these issues effectively:

  1. Leaky Pipes: One of the most common causes of water damage in bathrooms is a leaky pipe. Over time, pipes can corrode, crack, or become loose, leading to slow leaks that can cause significant damage if not addressed promptly.
  2. Overflowing Bathtub or Sink: An overflowing bathtub or sink can lead to a large volume of water spilling onto the bathroom floor and potentially seeping through the ceiling of the room below.
  3. Faulty Toilets: Toilets that are improperly installed or malfunctioning can cause water to leak onto the floor, which may then find its way to the ceiling below.
  4. Broken or Clogged Ventilation: Inadequate ventilation can lead to excessive moisture buildup, which can eventually cause ceiling damage. This is often seen in bathrooms without proper exhaust fans or with clogged vents.
  5. Roof Leaks: Although less common, a roof leak directly above the bathroom can also cause water to seep into the ceiling, leading to damage over time.

Read too: Bathroom Flooded Through the Ceiling: A Comprehensive Guide

Identifying Bathroom Flood Ceiling Damage

Early identification of bathroom flood ceiling damage is crucial for preventing further issues. Here are some signs to look for:

1. Discoloration and Stains

One of the first signs of water damage is discoloration or stains on the ceiling. These stains may appear as yellowish or brownish patches and often indicate that water has been present for some time.

2. Peeling or Bubbling Paint

If the paint on your bathroom ceiling starts to peel, bubble, or flake off, it could be a sign of underlying water damage. This occurs as moisture gets trapped beneath the paint layer, causing it to lose adhesion.

3. Warping or Sagging

Warping or sagging of the ceiling indicates that the material has absorbed significant amounts of water and may be structurally compromised. This is a serious sign that immediate action is required.

4. Mold Growth

Mold and mildew thrive in damp environments. If you notice a musty odor or visible mold growth on the ceiling, it is a clear indicator of persistent water damage.

5. Dripping Water

In severe cases, you may observe actual dripping water from the ceiling. This indicates a significant leak and requires immediate attention to prevent further damage.

The Impact of Bathroom Flood Ceiling Damage

Bathroom flood ceiling damage can have several adverse effects on your home:

1. Structural Damage

Water damage can weaken the structural integrity of your home. Prolonged exposure to moisture can cause wood and drywall to deteriorate, leading to potential safety hazards.

2. Health Risks

Mold and mildew resulting from water damage can pose health risks, particularly to individuals with respiratory conditions or allergies. It is important to address mold issues promptly to ensure a healthy living environment.

3. Increased Repair Costs

The longer you wait to address water damage, the more extensive and costly the repairs can become. Early intervention can help mitigate repair costs and prevent further damage.

4. Decreased Property Value

Water damage can affect the overall appearance and condition of your home, potentially decreasing its value. Addressing the damage promptly can help maintain your property’s value.

How to Address Bathroom Flood Ceiling Damage

Addressing bathroom flood ceiling damage involves several steps, from identifying the source of the problem to repairing and preventing future issues. Here’s a comprehensive guide to handling the situation:

1. Identify and Fix the Source of Water Damage

The first step is to identify the source of the water leak or overflow. Once identified, make necessary repairs to the plumbing, fixtures, or roof to stop further water intrusion.

  • Leaky Pipes: Repair or replace damaged pipes. Ensure that all connections are secure and check for signs of corrosion.
  • Overflowing Fixtures: Address any issues with overflowing bathtubs or sinks. Ensure that drains are clear and functioning properly.
  • Faulty Toilets: Repair or replace faulty toilets and ensure proper installation.

2. Dry Out the Affected Area

Once the source of the water damage is addressed, it is essential to dry out the affected area to prevent mold growth and further damage.

  • Remove Standing Water: Use a wet/dry vacuum or towels to remove any standing water from the floor and ceiling.
  • Use Dehumidifiers and Fans: Employ dehumidifiers and fans to accelerate the drying process and reduce moisture levels in the air.

3. Repair the Ceiling

After the area is thoroughly dried, repair the damaged ceiling. Depending on the extent of the damage, you may need to:

  • Patch Small Holes: Use a joint compound to patch small holes or cracks in the ceiling.
  • Replace Damaged Sections: For larger areas of damage, you may need to replace sections of drywall or ceiling tiles.
  • Repaint: Once the repairs are complete and the ceiling is fully dry, repaint the ceiling to restore its appearance.

4. Prevent Future Damage

To prevent future bathroom flood ceiling damage, consider implementing the following measures:

  • Install Proper Ventilation: Ensure that your bathroom has an effective ventilation system to reduce moisture buildup. Install or clean exhaust fans as needed.
  • Regular Maintenance: Regularly inspect plumbing fixtures and pipes for signs of wear and tear. Address any issues promptly.
  • Check for Leaks: Periodically check for leaks in your bathroom and address them before they cause significant damage.

Professional Help for Severe Damage

In cases of extensive damage or if you’re unsure how to handle the repairs, it’s advisable to seek professional help. Water damage restoration specialists can assess the situation, perform necessary repairs, and ensure that your home is safe and structurally sound.

Conclusion

Bathroom flood ceiling damage can have serious implications for your home’s safety, value, and aesthetics. By understanding the causes, identifying the damage early, and taking prompt action, you can effectively address and prevent further issues. Whether you handle the repairs yourself or seek professional assistance, addressing bathroom flood ceiling damage ensures that your home remains a safe and comfortable environment.

Ceiling Repair Fort Lauderdale: Ensuring a Safe and Beautiful Home

Ceiling repair is a crucial aspect of maintaining a safe and aesthetically pleasing home. In Fort Lauderdale, where the weather can be both beautiful and unpredictable, keeping your ceiling in top condition is essential. This article will explore the various aspects of ceiling repair in Fort Lauderdale, including common issues, repair techniques, costs, and tips for finding the right professionals. Whether you’re dealing with water damage, cracks, or outdated textures, understanding the intricacies of ceiling repair will help you make informed decisions.

Ceiling Repair Fort Lauderdale

Understanding the Need for Ceiling Repair in Fort Lauderdale

Common Ceiling Issues

Ceilings in Fort Lauderdale homes are susceptible to several common issues, including:

  1. Water Damage: Given the region’s humidity and occasional storms, water damage is a frequent problem. Leaks from the roof or plumbing can cause stains, sagging, and mold growth on the ceiling.
  2. Cracks and Holes: Over time, ceilings can develop cracks and holes due to settling, structural shifts, or accidental damage. These imperfections not only look unsightly but can also indicate more severe structural issues.
  3. Popcorn Ceiling Removal: Many older homes in Fort Lauderdale still feature popcorn ceilings, which have fallen out of favor due to their dated appearance and potential asbestos content. Removing or repairing popcorn ceilings is a common renovation project.
  4. Sagging Ceilings: Poor installation, water damage, or structural problems can cause ceilings to sag. This issue not only looks bad but can also pose safety risks if left unaddressed.

Read too: Understanding and Dealing with Ants in the Ceiling Spaces: Navigating the Intrusion

The Importance of Timely Repairs

Timely ceiling repairs are crucial for several reasons:

  • Safety: Damaged ceilings can pose serious safety risks, including the potential for collapse or falling debris. Prompt repairs ensure the safety of your home and its occupants.
  • Aesthetics: A well-maintained ceiling enhances the overall appearance of your home. Unsightly cracks, stains, or sagging can detract from your property’s beauty and value.
  • Preventing Further Damage: Addressing ceiling issues promptly can prevent minor problems from escalating into more extensive and costly repairs. For instance, fixing a small leak can prevent significant water damage and mold growth.

Types of Ceiling Repairs in Fort Lauderdale

1. Water Damage Repair

Water damage repair is one of the most common ceiling repair tasks in Fort Lauderdale. The process typically involves:

  • Identifying and Fixing the Source: Before repairing the ceiling, it’s crucial to identify and fix the source of the water leak, whether it’s a plumbing issue, roof leak, or condensation.
  • Drying and Cleaning: The affected area must be thoroughly dried and cleaned to prevent mold growth. This may involve using fans, dehumidifiers, and cleaning agents.
  • Repairing or Replacing Damaged Material: Depending on the extent of the damage, you may need to repair or replace the affected drywall, plaster, or ceiling tiles. This may involve patching, sanding, and painting to restore the ceiling’s appearance.

2. Crack and Hole Repair

Repairing cracks and holes in the ceiling typically involves:

  • Assessing the Damage: Small cracks and holes can often be fixed with spackling paste or joint compound, while larger issues may require more extensive repairs.
  • Filling and Sanding: The damaged area is filled with the appropriate material, allowed to dry, and then sanded smooth. Multiple layers may be necessary for larger repairs.
  • Finishing: The repaired area is primed and painted to match the surrounding ceiling, ensuring a seamless appearance.

3. Popcorn Ceiling Removal

Removing a popcorn ceiling can dramatically improve the look of your home. The process generally involves:

  • Testing for Asbestos: Before removal, it’s essential to test the ceiling for asbestos, especially in homes built before the 1980s. If asbestos is present, professional abatement is required.
  • Preparing the Area: The room is prepped by covering floors and furniture, and the ceiling is sprayed with water to loosen the popcorn texture.
  • Scraping and Smoothing: The popcorn texture is carefully scraped off, and the ceiling is sanded smooth. This can be a messy and time-consuming process but yields a modern, flat ceiling.
  • Finishing: The newly smoothed ceiling is primed and painted to achieve the desired finish.

4. Sagging Ceiling Repair

Repairing a sagging ceiling may involve:

  • Identifying the Cause: The first step is to identify the cause of the sagging, such as water damage, poor installation, or structural issues.
  • Reinforcing or Replacing Joists: In some cases, reinforcing or replacing the ceiling joists may be necessary to provide adequate support.
  • Reattaching or Replacing Ceiling Material: The sagging material is reattached or replaced, ensuring a secure and level ceiling. This may involve using additional fasteners, adhesives, or support structures.

Finding the Right Ceiling Repair Professionals in Fort Lauderdale

1. Research and Referrals

Start by researching local ceiling repair professionals online and asking for referrals from friends, family, or neighbors who have had similar work done. Reading reviews and testimonials can provide valuable insights into the quality of work and customer satisfaction.

2. Verify Credentials

Ensure that any contractor you consider is licensed, insured, and bonded. This protects you in case of accidents or subpar work. Check with the Florida Department of Business and Professional Regulation (DBPR) to verify licenses and credentials.

3. Get Multiple Quotes

Obtain quotes from several contractors to compare pricing and services. Be wary of extremely low bids, as they may indicate subpar materials or workmanship. A detailed, written estimate should include labor, materials, and any additional costs.

4. Ask for References

Request references from previous clients to get a sense of the contractor’s reliability, professionalism, and quality of work. Contact these references to ask about their experience and satisfaction with the repair process.

5. Review Contracts Carefully

Before signing a contract, review it carefully to ensure all aspects of the project are clearly outlined, including the scope of work, timeline, payment schedule, and warranty information. Don’t hesitate to ask questions or seek clarification on any points.

Cost of Ceiling Repair in Fort Lauderdale

Factors Affecting Cost

Several factors can influence the cost of ceiling repair in Fort Lauderdale, including:

  • Type and Extent of Damage: The severity of the damage and the type of repair required will significantly impact the cost. Minor repairs like filling small cracks will be less expensive than extensive water damage restoration or sagging ceiling repairs.
  • Materials and Labor: The cost of materials and labor can vary based on the complexity of the job and the quality of materials used. High-quality materials and experienced labor typically come at a higher price but offer better results and longevity.
  • Accessibility: Ceilings that are difficult to access, such as those in high or hard-to-reach areas, may require additional equipment and labor, increasing the overall cost.

Average Cost Estimates

While costs can vary widely, here are some average cost estimates for common ceiling repairs in Fort Lauderdale:

  • Water Damage Repair: $500 to $1,500, depending on the extent of the damage and the need for mold remediation.
  • Crack and Hole Repair: $200 to $800, based on the size and number of cracks or holes.
  • Popcorn Ceiling Removal: $1 to $3 per square foot, with additional costs for asbestos testing and abatement if necessary.
  • Sagging Ceiling Repair: $1,000 to $2,500, depending on the cause and extent of the sagging and the necessary structural repairs.

Conclusion

Ceiling repair is an essential aspect of maintaining a safe and beautiful home in Fort Lauderdale. Understanding common ceiling issues, repair techniques, and costs can help you make informed decisions and ensure your home remains in top condition. Whether you’re dealing with water damage, cracks, popcorn ceilings, or sagging, addressing these issues promptly and hiring qualified professionals will enhance the safety and aesthetics of your living space.

Water Damage on Popcorn Ceiling: Causes, Remediation, and Prevention

Water damage on popcorn ceiling can be a troubling issue for homeowners, leading to unsightly stains, structural issues, and potentially hazardous mold growth. In this comprehensive guide, we delve into the causes of water damage on popcorn ceilings, effective remediation strategies, and essential tips for prevention.

Water Damage Popcorn Ceiling

What is Water Damage on Popcorn Ceilings?

Water damage on popcorn ceilings refers to any form of moisture infiltration that compromises the integrity and appearance of the textured surface. Popcorn ceilings, also known as acoustic or stipple ceilings, are characterized by their rough, bumpy texture, which can absorb and retain moisture when exposed to water leaks or high humidity levels.

Causes of Water Damage on Popcorn Ceilings

Plumbing Leaks

One of the most common causes of water damage on popcorn ceilings is plumbing leaks. Leaky pipes, whether from supply lines or drain lines, can release water into ceiling cavities, gradually saturating the popcorn texture and causing it to sag, discolor, or even collapse in severe cases.

Roof Leaks

Roof leaks are another frequent culprit behind water damage on popcorn ceilings. Damaged shingles, improper flashing, or clogged gutters can allow rainwater to seep into the attic space and eventually penetrate through to the ceiling below, compromising the popcorn texture and underlying materials.

Read too: Kitchen Lighting For A Vaulted Ceiling: Illuminating Your Space with Style and Functionality

Condensation

Excessive condensation due to poor ventilation or high humidity levels can also contribute to water damage on popcorn ceilings. When warm, moist air comes into contact with cooler ceiling surfaces, condensation forms, leading to damp spots, staining, and deterioration of the popcorn texture over time.

Bathroom Moisture

In bathrooms, inadequate ventilation during showers or baths can cause moisture to accumulate on popcorn ceilings. This moisture can gradually degrade the texture and create an environment conducive to mold growth, posing health risks and further compromising the ceiling’s structural integrity.

Signs of Water Damage on Popcorn Ceilings

Recognizing the signs of water damage early can help prevent extensive repairs and mitigate potential health hazards. Common indicators include:

  • Staining: Discoloration or yellowing spots on the ceiling surface.
  • Sagging: Visible bulging or softening of the popcorn texture.
  • Peeling or Bubbling: Texture that appears to peel away or form bubbles.
  • Musty Odor: Mold or mildew growth often accompanies water damage and emits a distinct musty smell.

Remediation and Repair Options

Assessing the Extent of Damage

Before proceeding with repairs, assess the extent of water damage on your popcorn ceiling. Determine whether the damage is localized or widespread, and identify the source of the water intrusion to prevent future issues.

Repairing Small Areas of Damage

For minor water stains or small areas of popcorn texture damage, consider spot cleaning and patching techniques. Use a stain-blocking primer to cover water stains, and carefully apply new popcorn texture to blend with the existing ceiling.

Removing and Replacing Damaged Areas

In cases of extensive water damage or significant mold growth, it may be necessary to remove and replace sections of the popcorn ceiling. Hire a professional contractor experienced in handling textured ceiling repairs to ensure safe removal and proper installation of new materials.

Addressing Underlying Issues

Address the underlying causes of water damage to prevent future incidents. Repair leaking pipes, fix roof issues, improve ventilation in bathrooms, and consider installing dehumidifiers or exhaust fans to reduce moisture levels.

Prevention Tips for Water Damage on Popcorn Ceilings

Regular Maintenance

Perform routine inspections of your home’s plumbing and roofing systems to detect and repair leaks promptly. Check for signs of water stains or mold growth on ceilings and walls, as these can indicate hidden water damage.

Roof Maintenance

Inspect your roof regularly for damaged or missing shingles, deteriorated flashing, and clogged gutters. Clean gutters and downspouts to ensure proper drainage and prevent water from seeping into the attic and ceilings.

Ventilation Improvement

Improve ventilation in bathrooms, kitchens, and attics to reduce humidity levels and minimize condensation on ceilings. Use exhaust fans during showers or cooking, and consider installing roof vents or ridge vents to promote airflow.

Professional Inspections

Schedule annual inspections with qualified professionals to assess the condition of your home’s plumbing, roofing, and HVAC systems. Address any issues promptly to prevent costly repairs and potential water damage to ceilings and other structural components.

Conclusion

Water damage on popcorn ceilings can compromise the aesthetic appeal, structural integrity, and indoor air quality of your home. By understanding the causes of water damage, recognizing early signs of moisture infiltration, and implementing effective prevention and remediation strategies, you can protect your popcorn ceilings and maintain a safe and comfortable living environment.

Whether you’re dealing with a minor water stain or significant ceiling damage, taking proactive measures and seeking professional assistance when needed will help preserve the beauty and value of your home for years to come.

Ceiling Repair Charlotte NC: Everything You Need to Know

Learn about professional ceiling repair services in Charlotte NC and how to address common issues effectively. Whether you’re dealing with water damage, cracks, or sagging ceilings, understanding the repair process is essential for maintaining your home’s structural integrity and aesthetics. This guide covers important considerations, techniques, and expert tips to ensure your ceiling is restored to its original condition.

Ceiling Repair Charlotte Nc

Understanding Ceiling Repair Charlotte NC

Ceiling repair services in Charlotte NC encompass a range of solutions aimed at fixing damage and restoring the structural integrity of residential and commercial ceilings. Key aspects of ceiling repair include:

  • Water Damage Restoration: Addressing leaks and moisture issues that can lead to stains, mold growth, and structural damage.
  • Crack Repair: Fixing cracks caused by settling, temperature fluctuations, or structural movement.
  • Drywall Replacement: Replacing damaged drywall sections to eliminate unsightly blemishes and ensure a smooth ceiling surface.
  • Texture Matching: Blending repaired areas with existing textures to maintain uniformity throughout the ceiling.

Common Causes of Ceiling Damage

Identifying the root cause of ceiling damage helps in determining the appropriate repair method. Common causes include:

  • Water Leaks: From plumbing issues, roof leaks, or condensation buildup, leading to stains and structural weakness.
  • Poor Ventilation: Inadequate airflow can result in moisture buildup, contributing to mold growth and deterioration.
  • Age and Settlement: Older homes may experience settling over time, causing cracks and uneven surfaces.
  • Impact Damage: Accidental impacts or heavy objects falling on the ceiling can cause cracks or even structural damage.

Types of Ceiling Repair Techniques

Ceiling repair techniques vary depending on the extent and type of damage. Professional contractors use specialized methods to ensure effective repairs:

  • Patch and Paint: For minor cracks and holes, patching with joint compound followed by painting can restore the ceiling’s appearance.
  • Drywall Replacement: Sections of damaged drywall are cut out and replaced, followed by finishing with joint compound and texture matching.
  • Water Damage Restoration: Addressing the source of water intrusion, drying the affected area, and replacing damaged materials as necessary.
  • Structural Repair: Addressing more serious issues such as sagging ceilings or structural instability, which may require additional support or reinforcement.

Hiring a Professional Ceiling Repair Service in Charlotte NC

When selecting a contractor for ceiling repair, consider the following factors to ensure quality service and results:

  • Experience and Expertise: Look for contractors with a proven track record in ceiling repair, especially in handling specific issues like water damage or textured ceilings.
  • Licensing and Insurance: Verify that the contractor is licensed to operate in North Carolina and carries adequate insurance coverage.
  • References and Reviews: Check online reviews and ask for references from past clients to gauge the contractor’s reputation and reliability.
  • Cost Estimates: Obtain detailed cost estimates that outline the scope of work, materials, and labor involved in the repair process.

DIY vs. Professional Ceiling Repair

While minor repairs like patching small holes may be tackled as DIY projects, more extensive damage or structural issues should be left to professionals. Benefits of hiring a professional include:

  • Expertise and Equipment: Professionals have the knowledge, tools, and materials to perform repairs effectively and efficiently.
  • Time Savings: Professional contractors can complete repairs in a timely manner, minimizing disruption to your daily routine.
  • Quality Assurance: Professionals ensure that repairs are done correctly, addressing underlying issues to prevent future damage.

Maintaining Your Repaired Ceiling

After repairs are completed, follow these tips to maintain your ceiling’s condition:

  • Monitor for Signs of Damage: Regularly inspect your ceiling for new cracks, stains, or changes in texture that may indicate ongoing issues.
  • Address Leaks Promptly: If you notice signs of water intrusion, such as stains or dripping water, investigate and address the source immediately.
  • Maintain Proper Ventilation: Ensure adequate airflow in your home to prevent moisture buildup, which can lead to mold growth and damage.
  • Schedule Inspections: Consider scheduling periodic inspections with a professional to assess your ceiling’s condition and address any emerging issues early.

Read too: Elevate Your Home Décor with Exquisite Japanese Style Ceiling Lamp Designs

Conclusion

Ceiling repair in Charlotte NC requires careful assessment and expert execution to restore your home’s ceilings to their original condition. By understanding the causes of damage, selecting the right repair techniques, and hiring qualified professionals, you can ensure a safe and aesthetically pleasing environment for years to come.

Ceiling Repair in St Louis: Expert Tips for Efficient and Reliable

Are you facing ceiling issues in your St Louis home that require immediate attention? Whether it’s water damage, cracks, or sagging, timely ceiling repair is essential to prevent further deterioration and maintain the structural integrity of your property. In this comprehensive guide, we’ll explore everything you need to know about ceiling repair in St Louis, from common problems to professional solutions.

Ceiling Repair St Louis

Understanding Ceiling Repair in St Louis

Ceilings are an integral part of any building’s structure, providing support and insulation while enhancing the aesthetic appeal of interior spaces. However, they are susceptible to various issues over time, including water damage, mold growth, cracks, and structural instability. In St Louis, where weather conditions can be unpredictable, addressing these issues promptly is crucial to prevent more extensive damage and costly repairs down the line.

Read too: How To Extend Kitchen Cabinets To The Ceiling: A Complete Guide for Maximizing Space and Style

Common Causes of Ceiling Damage

Water Damage

Water leaks from roof leaks, plumbing issues, or severe weather events can cause extensive damage to ceilings, including staining, peeling paint, and structural weakening. Identifying and repairing the source of the water intrusion is essential to prevent further damage and mold growth.

Structural Settling

Over time, buildings may experience settling or shifting, resulting in cracks, gaps, and uneven ceilings. Structural repairs may be necessary to address underlying issues and stabilize the ceiling structure.

Aging Materials

As buildings age, materials such as drywall, plaster, and ceiling tiles may deteriorate, leading to cracks, sagging, and other visible signs of wear and tear. Repairing or replacing damaged materials can help restore the appearance and functionality of the ceiling.

Professional Ceiling Repair Services in St Louis

Inspection and Assessment

A professional ceiling repair contractor will conduct a thorough inspection of the damaged area to assess the extent of the damage and identify underlying issues. They will provide recommendations for repairs based on their findings and provide a detailed cost estimate.

Water Damage Restoration

For ceilings affected by water damage, restoration specialists will identify and repair the source of the water intrusion, remove damaged materials, and dry the affected area thoroughly to prevent mold growth and structural damage.

Crack Repair and Patching

Cracks in ceilings can be unsightly and may indicate underlying structural issues. Professional repair technicians will fill and patch cracks using specialized materials to restore the smooth and uniform appearance of the ceiling.

Structural Reinforcement

In cases of severe damage or structural instability, contractors may recommend reinforcing the ceiling with additional support beams or braces to ensure structural integrity and prevent further damage.

DIY Ceiling Repair Tips

Small Patching and Painting

For minor cosmetic issues such as small cracks or stains, homeowners can attempt DIY patching and painting using ceiling repair kits available at hardware stores. However, for more extensive damage or structural issues, professional assistance is recommended.

Regular Maintenance

Preventive maintenance, such as inspecting for signs of water damage, repairing leaks promptly, and keeping gutters clean, can help prolong the life of your ceiling and prevent costly repairs in the future.

Conclusion

Ceiling repair in St Louis requires careful attention to detail and professional expertise to ensure a safe and effective outcome. Whether you’re dealing with water damage, cracks, or structural issues, seeking prompt professional assistance is essential to protect your investment and restore the beauty and functionality of your home.

How To Fix Mobile Home Ceiling: Tips and Techniques

Mobile homes offer flexibility and affordability, but they may require occasional maintenance, including fixing ceiling issues. Knowing how to fix mobile home ceiling problems can save you time and money while ensuring your home remains safe and comfortable. In this comprehensive guide, we’ll explore various techniques and tips for repairing mobile home ceilings, empowering you to tackle common issues with confidence.

How To Fix Mobile Home Ceiling

Understanding Common Mobile Home Ceiling Issues

Mobile home ceilings are prone to several issues, including water damage, sagging, cracks, and discoloration. Identifying the underlying cause of the problem is crucial for determining the appropriate repair method.

How To Fix Mobile Home Ceiling: Step-by-Step Guide

  1. Assessment and Preparation: Begin by assessing the extent of the damage to your mobile home ceiling. Look for signs of water damage, such as stains or mold growth, and identify any areas that are sagging or cracked. Prepare the workspace by removing furniture and covering the floor with a drop cloth to catch debris.
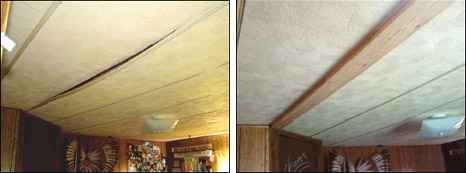
  2. Repairing Water Damage: If your mobile home ceiling has water damage, it’s essential to address the source of the water intrusion before repairing the ceiling. Once the source is fixed, remove any damaged ceiling panels or tiles and replace them with new ones. Ensure that the area is properly dried and treated for mold before installing the new panels.
  3. Fixing Sagging Ceilings: Sagging ceilings in mobile homes are often caused by the settling of the home or insufficient support. To fix a sagging ceiling, locate the ceiling joists and install additional support beams or braces as needed. Use a level to ensure that the ceiling is properly aligned before securing it in place.
  4. Repairing Cracks and Holes: Small cracks and holes in the ceiling can be repaired using patching compound or spackling paste. Fill the cracks and holes with the compound, smooth it out with a putty knife, and allow it to dry completely. Sand the area lightly to blend it with the surrounding ceiling texture before painting or applying a finishing coat.
  5. Painting and Finishing: Once the repairs are complete, consider painting the ceiling to give it a fresh look. Choose a paint color that complements your mobile home’s interior design and apply it evenly using a roller or paintbrush. Allow the paint to dry thoroughly before reapplying furniture or decorations.

Tips for Success

  • Wear appropriate safety gear, such as gloves and goggles, when working on ceiling repairs to protect yourself from debris and fumes.
  • Use high-quality materials and tools for more durable and long-lasting repairs.
  • Consider consulting a professional if you’re unsure about the extent of the damage or the repair process.

Conclusion

Knowing how to fix mobile home ceiling issues is essential for maintaining the integrity and appearance of your home. By following the steps outlined in this guide and taking proactive measures to address common issues, you can keep your mobile home ceiling in excellent condition for years to come.

Read too: Exploring the Benefits and How-Tos of DIY Ceiling Cassette Mini Split Installation: Revolutionizing Comfort

Expert Guide to Ceiling Repair in Columbus Ohio: Tips and Techniques for a Flawless Restoration

Ceilings play a crucial role in the structural integrity and aesthetic appeal of any home. However, over time, ceilings can suffer from various issues such as water damage, cracks, or sagging, requiring professional repair and restoration. If you’re facing ceiling problems in your Columbus, Ohio residence, understanding the intricacies of ceiling repair is essential to ensure a successful restoration. In this comprehensive guide, we’ll explore expert tips and techniques for ceiling repair in Columbus, Ohio, covering everything you need to know to restore your ceiling to its former glory.

Ceiling Repair Columbus Ohio

Understanding Ceiling Repair Columbus Ohio

Common Ceiling Issues in Columbus Homes

Before delving into repair solutions, it’s essential to identify common ceiling problems prevalent in Columbus, Ohio homes:

  • Water Damage: Columbus experiences a range of weather conditions throughout the year, making homes susceptible to water damage from leaks or flooding.
  • Cracks and Settlement: Older homes in Columbus may experience settling over time, leading to cracks and imperfections in the ceiling.
  • Mold and Mildew: Humidity levels in Columbus can promote mold and mildew growth, especially in poorly ventilated areas like attics or basements.

Read too: Exploring Craftsman Style Ceiling Fans for Your Home: Embracing Timeless Elegance

Benefits of Professional Ceiling Repair

While DIY ceiling repair may seem tempting, enlisting the services of a professional for ceiling repair in Columbus, Ohio offers several advantages:

  • Expertise and Experience: Professional contractors have the skills and experience to assess ceiling damage accurately and implement effective repair solutions.
  • Quality Materials: Professionals use high-quality materials and techniques to ensure durable and long-lasting repairs.
  • Time and Cost Savings: Hiring a professional saves time and effort, allowing homeowners to focus on other priorities while the experts handle the repair process efficiently.

Ceiling Repair Columbus Ohio: Expert Solutions

1. Water Damage Repair

  • Identify and Stop the Source: The first step in water damage repair is to identify and stop the source of water intrusion, whether it’s a leaky roof, plumbing issue, or condensation buildup.
  • Dry Out the Area: Thoroughly dry out the affected area using fans, dehumidifiers, or professional drying equipment to prevent mold growth and further damage.
  • Repair and Replace Damaged Materials: Replace water-damaged ceiling panels, drywall, or insulation as needed, ensuring proper sealing and waterproofing to prevent future issues.

2. Cracks and Settlement

  • Assess Structural Integrity: Assess the structural integrity of the ceiling to determine the extent of settlement and identify any underlying issues that may need to be addressed.
  • Fill and Seal Cracks: Fill cracks and gaps with a high-quality joint compound or spackling paste, smoothing the surface for a seamless finish.
  • Stabilize and Reinforce: Install ceiling joist reinforcements or support systems as needed to stabilize the ceiling and prevent further settlement.

3. Mold and Mildew Remediation

  • Remove Mold and Mildew: Use appropriate cleaning solutions and techniques to remove mold and mildew from the ceiling surface and surrounding areas.
  • Improve Ventilation: Enhance ventilation in the affected area to reduce humidity levels and inhibit mold growth. Consider installing exhaust fans or increasing airflow with open windows or vents.

Conclusion

Ceiling repair in Columbus, Ohio, requires careful assessment, planning, and execution to ensure optimal results and long-term durability. By understanding common ceiling issues and implementing expert repair solutions, homeowners can restore their ceilings to pristine condition and maintain the structural integrity and beauty of their homes. Whether dealing with water damage, cracks, or mold growth, entrusting your ceiling repair to experienced professionals ensures peace of mind and satisfaction with the outcome.

Mastering Radiant Ceiling Heat Repair: Solutions and Tips for a Warm Home

Radiant ceiling heat systems are a popular choice for homeowners looking for efficient and effective heating solutions. However, like any system, they can encounter issues over time. If you’re experiencing problems with your radiant ceiling heat, don’t worry. In this comprehensive guide, we’ll explore common issues, troubleshooting techniques, and repair strategies to keep your home comfortable and warm.

Radiant Ceiling Heat Repair

Understanding Radiant Ceiling Heat Systems

Before delving into repair techniques, it’s essential to understand how radiant ceiling heat systems work. These systems consist of heating elements installed in the ceiling panels, which radiate heat downward to warm the room below. Unlike forced-air systems, radiant ceiling heat provides even heating without the need for ductwork.

Common Issues with Radiant Ceiling Heat

  1. Uneven Heating: If you notice that certain areas of your home are warmer or cooler than others, it could indicate an issue with your radiant ceiling heat system. This may be caused by damaged heating elements, insulation problems, or airflow restrictions.
  2. No Heat: A lack of heat from your radiant ceiling panels could be due to various factors, including electrical issues, thermostat malfunctions, or damaged heating elements.
  3. Thermostat Problems: A malfunctioning thermostat can lead to temperature fluctuations or an inability to control the heating system effectively.

Radiant Ceiling Heat Repair Techniques

1. Inspect Heating Elements: Begin by visually inspecting the heating elements in your ceiling panels for signs of damage or wear. Look for cracks, breaks, or discoloration, which may indicate a problem. If you notice any issues, contact a professional for repair or replacement.

2. Check Insulation: Proper insulation is crucial for the efficient operation of radiant ceiling heat systems. Inspect the insulation in your ceiling panels to ensure it is intact and not compromised. Replace any damaged insulation to improve heating efficiency.

3. Test Thermostat: Verify that your thermostat is functioning correctly by testing it with a separate heating source, such as a portable heater. If the thermostat is not responding or is displaying inaccurate temperatures, it may need to be recalibrated or replaced.

4. Clear Airflow: Ensure that there are no obstructions blocking airflow around your radiant ceiling panels. Furniture, curtains, or other objects can impede airflow and prevent efficient heating. Rearrange furniture and remove obstacles to improve airflow.

Read too: Discovering the Charm of Nautical Outdoor Ceiling Fans for Your Coastal Retreat: Sail into Style

Hiring a Professional

While some radiant ceiling heat repairs can be performed DIY, complex issues may require the expertise of a professional HVAC technician. If you’re unsure about the cause of your heating problems or if repairs are beyond your skill level, don’t hesitate to seek professional assistance.

Conclusion

In conclusion, Radiant Ceiling Heat Repair requires careful diagnosis and troubleshooting to identify and resolve issues effectively. By understanding how your radiant ceiling heat system works and implementing appropriate repair techniques, you can ensure that your home remains warm and comfortable throughout the colder months.

Dealing with the aftermath of Plaster Ceiling Water Damage: Salvaging Elegance

Embark on a journey of restoration as we explore the intricacies of “Plaster Ceiling Water Damage.” This comprehensive guide offers insights into identifying, addressing, and remedying the impact of water damage on your plaster ceiling, ensuring your living space remains a testament to elegance.

Plaster Ceiling Water Damage

Understanding the Impact: Plaster Ceiling Water Damage Demystified

Delve into the world of plaster ceiling water damage as we uncover the signs, causes, and effective solutions for a seamless restoration process.

1. Staining and Discoloration*

Water stains and discoloration on your plaster ceiling are telltale signs of water damage. These marks often appear as brown or yellowish patches, indicating a need for prompt attention.

2. Sagging or Bubbling*

Excess water can weaken the plaster, causing it to sag or bubble. If you notice irregularities in the ceiling surface, it may be a sign of water infiltration.

3. Peeling Paint or Wallpaper*

Water damage can compromise the adhesion of paint or wallpaper on your ceiling. Peeling or bubbling of these materials may signal underlying water issues.

4. Musty Odors*

The presence of water in your ceiling can lead to mold growth, resulting in musty odors. If you detect a persistent, unpleasant smell, it could be indicative of hidden water damage.

Read too: Understanding and Addressing a Leaky Ceiling in Your Apartment: Navigating the Drips

Addressing Plaster Ceiling Water Damage: Steps to Restoration

Navigate the restoration process with confidence by following these practical steps to address and repair this damage.

1. Identify and Fix the Source of Water Infiltration

Begin by identifying and addressing the source of water infiltration. Whether it’s a leaky roof, plumbing issue, or condensation problem, resolving the root cause is paramount to preventing future damage.

2. Assess the Extent of Damage

Thoroughly inspect the plaster ceiling to determine the extent of the damage. Identify areas that require repair or replacement and prioritize the restoration process accordingly.

3. Remove Damaged Plaster and Materials

Carefully remove any damaged plaster, as well as compromised paint or wallpaper. This step ensures a clean slate for the restoration process and prevents further deterioration.

4. Allow for Proper Drying

Before initiating repairs, allow the affected areas to dry completely. Adequate drying time prevents the growth of mold and ensures a solid foundation for restoration efforts.

5. Patch and Restore

Patch any holes or cracks in the plaster using a suitable repair compound. Once the patching is complete, restore the aesthetic appeal of your plaster ceiling with a fresh coat of paint or wallpaper.

Conclusion: Restoring Elegance, One Patch at a Time

By understanding the nuances of “Plaster Ceiling Water Damage” and implementing proactive restoration measures, you can preserve the elegance of your living space. Swift identification, targeted repairs, and a meticulous restoration process ensure that your plaster ceiling remains a symbol of sophistication and charm.

Embrace the journey of restoring elegance, and witness the transformation of your space as you bid farewell to the lingering effects of water damage.

Troubleshooting and Addressing a Water Bubble in Ceiling: Causes and Solutions Revealed

Discovering a mysterious “Water Bubble in Ceiling” can be alarming for homeowners. Uncover the reasons behind it and explore effective solutions in this comprehensive guide. Learn how to address the issue and prevent potential water damage to your ceiling.

Water Bubble In Ceiling

Understanding the Issue – Water Bubble in Ceiling

Before delving into solutions, understanding why a water bubble forms in the ceiling is crucial. This section will provide insights into the possible causes and signs that indicate the presence of water damage in your ceiling.

Common Causes of Water Bubbles in Ceilings: A Detailed Exploration

Water bubbles can result from various issues, including leaks, plumbing problems, or roof damage. Explore the common causes such as roof leaks, burst pipes, or condensation issues that may lead to the formation of water bubbles in your ceiling.

Identifying the Source – Water Bubble in Ceiling

To effectively address the issue, identifying the source of the water bubble is essential. This part of the guide will guide you through the process of locating the source, whether it’s from the roof, plumbing, or other potential areas.

Potential Signs of Water Damage: Beyond the Visible Bubble

Water damage often extends beyond the visible water bubble. Learn to recognize additional signs such as discoloration, sagging, or peeling paint that may indicate a more extensive problem. Early detection is key to preventing further damage.

Solutions for Addressing a Water Bubble in Ceiling

Now that you’ve identified the issue, let’s explore effective solutions for addressing a water bubble in the ceiling. This section will guide you through step-by-step processes, empowering you to take corrective measures.

Immediate Actions: Mitigating Further Damage

As soon as you notice a water bubble, taking immediate actions is crucial. This part of the guide will provide a checklist of actions to mitigate further damage, including safely draining the water and protecting your belongings.

DIY Repair Strategies for Water Bubbles in Ceilings

For minor water bubbles, DIY repair strategies can be effective. Explore techniques such as puncturing the bubble, drying the affected area, and applying ceiling patches. Follow step-by-step instructions to address the issue on your own.

Professional Assistance: When to Seek Help

In some cases, seeking professional assistance is necessary, especially for extensive water damage. This section will highlight situations where contacting a professional plumber, roofer, or water damage restoration specialist is advisable.

Preventive Measures for Future Protection

After addressing the current issue, implementing preventive measures is crucial to avoid future water bubbles in the ceiling. Learn about routine maintenance, inspections, and proactive measures to protect your home from potential water damage.

Read too: Understanding and Addressing a Condensation Leak in the Ceiling: Decoding the Drip

Conclusion: Safeguarding Your Home from Water Damage

In conclusion, discovering a water bubble in the ceiling can be concerning, but armed with the knowledge from this guide, you can take proactive steps to address the issue. Whether through DIY repairs or professional assistance, safeguarding your home from water damage is essential for its longevity and your peace of mind.

Troubleshooting Water Through Ceiling From Bathroom: Causes, Fixes, and Prevention Tips

Water damage is a homeowner’s nightmare, and one of the most distressing scenarios is discovering water seeping through the ceiling from the bathroom. This unexpected issue not only poses immediate concerns but also demands swift action to prevent further damage. In this article, we will delve into the causes behind “Water Through Ceiling From Bathroom,” offering insights into troubleshooting, fixing the issue, and providing prevention tips to safeguard your home.

Water Through Ceiling From Bathroom

Understanding the Causes of Water Through Ceiling From Bathroom

One of the primary steps in addressing this problem is identifying the root causes. Leaks, poor waterproofing, and plumbing issues are often culprits. A leaking pipe or a faulty seal around the shower can allow water to infiltrate the ceiling, leading to visible stains and structural damage over time.

Dealing with Plumbing Leaks: Water Through Ceiling From Bathroom

Plumbing leaks are a common source of water-related problems in households. Inspecting the pipes in and around your bathroom can reveal issues such as corrosion, rust, or visible leaks. If left unattended, these can result in water seeping through the ceiling. Regular maintenance and timely repairs can help mitigate this risk.

Shower and Bath Seal Inspection

Faulty seals around showers and baths are notorious for causing water damage. Over time, seals can deteriorate, leading to water escaping and causing damage to the surrounding areas. Checking and replacing these seals as part of routine maintenance can prevent water infiltration and subsequent ceiling issues.

Identifying and Repairing Roof Leaks

Sometimes, the source of the problem may not be within the bathroom itself but rather a roof leak that manifests as water through the ceiling. Conducting a thorough inspection of your roof, especially after heavy rains or storms, is crucial. Repairing any damaged or missing shingles and addressing other roof issues promptly can prevent water from entering your home.

Fixing Water Damage and Stains on Ceilings

Addressing the aftermath of water damage is as important as preventing it. If you notice water stains on your ceiling, it’s essential to take prompt action. Begin by locating the source of the leak and fixing it. Once the issue is resolved, you can focus on repairing the damaged ceiling. This may involve removing affected drywall, applying a stain-blocking primer, and repainting the area.

Prevention Tips for Water Through Ceiling From Bathroom

Prevention is undoubtedly the best approach when it comes to water damage. Implementing the following tips can help safeguard your home from “Water Through Ceiling From Bathroom”:

  1. Regular Inspections: Conduct routine inspections of your bathroom plumbing, including pipes and seals, to catch potential issues before they escalate.
  2. Proactive Maintenance: Address any leaks or plumbing issues promptly. Don’t delay repairs, as even minor leaks can lead to significant water damage over time.
  3. Waterproofing: Ensure proper waterproofing in areas prone to water exposure, such as around showers and baths. This can involve reapplying sealant and checking for gaps regularly.
  4. Roof Maintenance: Keep your roof in good condition by addressing any damage promptly. Regularly clean gutters to prevent water from pooling and causing leaks.
  5. Proper Ventilation: Ensure your bathroom has adequate ventilation to prevent moisture buildup, which can contribute to mold growth and damage over time.

Read too: Understanding the Labor Cost to Texture Ceiling and Enhance Your Home: Unveiling the Secrets

Conclusion

Discovering water through the ceiling from the bathroom can be a stressful situation, but understanding the causes and implementing preventative measures can save you from extensive damage. Regular inspections, proactive maintenance, and timely repairs are key to keeping your home dry and secure. By following these guidelines, you can maintain a watertight home and enjoy peace of mind, knowing that you’re taking steps to prevent “Water Through Ceiling From Bathroom” issues.

Dealing with a Hole in the Ceiling from the Attic: Patching Up the Puzzle

Discovering a hole in the ceiling from the attic can be a homeowner’s nightmare. In this comprehensive guide, we’ll delve into the complexities of addressing a “Hole in Ceiling from Attic,” exploring the potential causes, assessing the damage, and providing step-by-step solutions to restore your home’s integrity.

Hole In Ceiling From Attic

Understanding the Dilemma: Hole in Ceiling from Attic

A hole in the ceiling not only compromises the aesthetic appeal of your home but also poses potential structural and safety concerns. Whether it’s a small puncture or a more significant breach, addressing the issue promptly is crucial. Let’s delve into the various aspects of a hole in the ceiling from the attic, unraveling its causes and offering practical insights into remediation.

Common Causes of a Hole in Ceiling from Attic

  1. Water Damage: Water leaks from the roof can gradually weaken the ceiling materials, leading to the formation of a hole. This is often exacerbated by long-term neglect or unnoticed leaks.
  2. Pest Infestation: Insects or rodents nesting in the attic can burrow through ceiling materials, creating holes. Identifying and addressing the pest issue is vital to prevent further damage.
  3. Structural Issues: If the attic floor joists are compromised or if there’s excessive weight on the ceiling, it can result in structural damage, including the formation of holes.
  4. Wear and Tear: Aging homes may experience wear and tear, causing the ceiling materials to weaken and develop holes. This is common in properties with outdated or poorly maintained ceilings.

Assessing the Severity of a Hole in Ceiling from Attic

  1. Size and Location: Measure the size of the hole and note its location. Larger holes or those closer to structural components may require more extensive repairs.
  2. Potential Structural Damage: Assess the area around the hole for any signs of structural damage. Sagging, cracks, or additional holes may indicate broader issues that need attention.
  3. Inspect Attic Conditions: Examine the attic to identify the root cause of the hole. Look for leaks, pests, or structural problems that may have contributed to the damage.

Read too: Understanding the Labor Cost to Texture Ceiling and Enhance Your Home: Unveiling the Secrets

Step-by-Step Solutions

  1. Temporary Patching: For immediate relief, use a temporary patch to cover the hole. This can include using plywood, drywall, or a combination of materials to secure the area until a permanent fix is implemented.
  2. Identify and Repair the Cause: Investigate the attic to identify and address the root cause. Fix any water leaks, eliminate pests, and reinforce structural components to prevent further damage.
  3. Permanent Patching: Once the cause is resolved, proceed with a permanent patch for the hole. Cut out the damaged section, replace it with new material, and seal the area with joint compound.
  4. Ceiling Finishing: After patching, sand the repaired area and apply a primer and paint to match the surrounding ceiling. This ensures a seamless finish that blends with the existing aesthetics.

Preventive Measures for Future Holes in Ceiling from Attic

  1. Regular Inspections: Conduct regular attic inspections to identify and address issues before they escalate. Look for signs of leaks, pests, or structural concerns.
  2. Proactive Maintenance: Implement proactive maintenance measures, including roof inspections, pest control, and reinforcing attic structures, to prevent future holes from forming.
  3. Prompt Repairs: Address any signs of damage or wear and tear promptly. Timely repairs can prevent small issues from developing into more significant problems.

Conclusion

A hole in the ceiling from the attic demands immediate attention to safeguard your home’s structural integrity and aesthetics. By understanding the potential causes, assessing the severity of the damage, and following the step-by-step solutions provided in this guide, you can navigate the challenge of a hole in the ceiling with confidence. Remember, proactive maintenance and timely intervention are essential for ensuring the longevity and safety of your home.

How to Identify and Fix a Soft Spot in Ceiling Drywall: Unveiling the Signs

Discovering a soft spot in your ceiling drywall can be alarming, but understanding the causes and solutions is crucial. In this comprehensive guide, we’ll delve into the intricacies of “Soft Spot In Ceiling Drywall,” empowering you with knowledge to address this issue promptly and effectively.

Soft Spot In Ceiling Drywall

Understanding Soft Spots in Ceiling Drywall

Soft spots in ceiling drywall can manifest for various reasons, ranging from water damage to structural issues. Recognizing the signs early on is key to preventing further damage and costly repairs. Let’s explore the common causes and solutions.

  1. Water Damage: Water is a common culprit behind soft spots in ceiling drywall. Leaky roofs, plumbing issues, or even condensation can lead to water seeping into the drywall, causing it to soften and weaken. Look for discoloration, sagging, or a mushy feel when pressing on the affected area.
  2. Roof Leaks: A damaged roof can allow water to penetrate and compromise your ceiling drywall. Check for missing shingles, damaged flashing, or visible signs of water entry in the attic. Addressing roof leaks promptly is essential to prevent extensive damage to the drywall and other structural components.
  3. Plumbing Leaks: Leaky pipes or plumbing fixtures located above the ceiling can lead to soft spots. Conduct a thorough inspection of your plumbing system, paying attention to any signs of water stains, dripping, or dampness. Addressing plumbing issues early can mitigate damage to the drywall.
  4. Condensation Issues: Excessive moisture in the air can lead to condensation on ceilings, especially in humid climates. Over time, this moisture can be absorbed by the drywall, causing soft spots. Improve ventilation in affected areas and consider using dehumidifiers to control moisture levels.

Addressing Soft Spots: Soft Spot In Ceiling Drywall

  1. Locate and Fix the Source: Before repairing the drywall, identify and resolve the underlying issue causing the soft spot. This may involve fixing roof leaks, repairing plumbing, or addressing ventilation problems. Ensure that the root cause is thoroughly addressed to prevent future soft spots.
  2. Cut Out and Replace Damaged Drywall: Once the source of the issue is resolved, carefully cut out the damaged drywall. Use a utility knife to create a clean edge, ensuring that the replacement piece will fit seamlessly. Install a new piece of drywall, securing it with screws or nails, and finish with joint compound and paint.
  3. Reinforce Structural Integrity: If the soft spot is indicative of more significant structural issues, consult with a professional. Reinforcing the structural integrity of your ceiling may be necessary to prevent future occurrences of soft spots.

Preventive Measures:

  1. Regular Inspections: Conduct regular inspections of your roof, plumbing, and ceilings. Look for early signs of water damage, such as stains, discoloration, or softness in the drywall. Prompt detection can prevent extensive damage.
  2. Maintain Proper Ventilation: Ensure adequate ventilation in your home to minimize condensation. Use exhaust fans in kitchens and bathrooms, and consider installing ventilation systems in attics to reduce humidity.

Conclusion: Protecting Your Home from Soft Spots

In conclusion, identifying and addressing a soft spot in your ceiling drywall is crucial for maintaining the structural integrity of your home. By understanding the common causes and taking preventive measures, you can protect your home from potential water damage and structural issues. Stay vigilant, conduct regular inspections, and address any signs of soft spots promptly to ensure a safe and well-maintained living space.

Addressing the Issue: Drywall Tape Separating from Ceiling – Causes, Solutions, and Prevention

Discover the reasons behind and effective solutions for “Drywall Tape Separating from Ceiling.” This comprehensive guide provides insights and actionable steps to tackle the issue, ensuring a lasting and seamless ceiling finish.

Drywall Tape Separating From Ceiling

Drywall Tape Separating From Ceiling: Understanding the Dilemma

Before diving into solutions, it’s essential to understand why drywall tape may separate from the ceiling. In this section, we’ll explore common causes such as poor installation, humidity, or structural movement, providing readers with a comprehensive understanding of the issue.

Common Causes of Separation:

  1. Poor Installation Practices: Recognizing signs of improper tape application.
  2. Humidity and Moisture Impact: Assessing the influence of environmental factors.
  3. Structural Movement: Understanding how shifts can affect tape adhesion.

Drywall Tape Separating From Ceiling: Diagnosing the Problem

This H2-heading section will guide readers through the diagnostic process. Identifying the specific cause of drywall tape separation is crucial for implementing targeted solutions. We’ll discuss visual cues and considerations to help readers diagnose the issue accurately.

Diagnostic Steps:

  1. Visual Inspection: Examining visible signs of tape separation.
  2. Moisture Testing: Checking for humidity or water-related concerns.
  3. Structural Assessment: Identifying any shifts or movements affecting the ceiling.

Solutions for Drywall Tape Separating From Ceiling

Once the cause is determined, this part of the guide will provide actionable solutions to address the problem effectively. From simple repairs to more extensive interventions, readers will gain insights into restoring the integrity of their ceiling.

Repair and Restoration Techniques:

  1. Re-Taping: Steps for properly reapplying tape for a secure bond.
  2. Joint Compound Application: Smoothing and blending to achieve a seamless finish.
  3. Addressing Structural Issues: Solutions for underlying structural concerns.

Preventing Future Tape Separation: Proactive Measures

To ensure a lasting solution, it’s crucial to adopt preventive measures. This section will guide readers on how to prevent future occurrences of drywall tape separating from the ceiling. Tips on proper installation practices and ongoing maintenance will be emphasized.

Preventive Measures:

  1. Proper Installation Techniques: Ensuring correct application from the start.
  2. Humidity Control: Implementing strategies to manage indoor moisture levels.
  3. Regular Maintenance: Periodic checks and quick fixes to prevent issues.

Read too: How To Dry Wet Ceiling

Conclusion: Achieving a Seamless and Durable Ceiling Finish

In conclusion, addressing the challenge of drywall tape separating from the ceiling involves a combination of understanding, diagnosis, and effective solutions. This guide equips readers with the knowledge needed to tackle the issue head-on, ensuring a lasting and aesthetically pleasing ceiling finish.

Remember, whether you’re dealing with a minor separation or a more significant concern, timely intervention and adherence to proper installation practices are key to maintaining a flawless ceiling appearance. Armed with the insights from this guide, readers can confidently navigate the process of addressing and preventing drywall tape separation from their ceilings.

How To Fix Condensation on Ceiling: A Comprehensive Guide

Waking up to find condensation on your ceiling can be a perplexing and concerning situation for any homeowner. Condensation on the ceiling is often a sign of excess moisture in your home, and if left unaddressed, it can lead to more significant problems such as mold and structural damage. In this comprehensive guide, we will explore the causes of condensation on the ceiling and provide practical steps to fix the issue effectively.

How To Fix Condensation On Ceiling

Understanding Condensation on the Ceiling

Before we delve into the steps to fix condensation on the ceiling, it’s crucial to understand what causes it and why it’s a matter of concern.

Causes of Condensation:

Condensation occurs when warm, moist air comes into contact with a cold surface. In your home, this can happen for several reasons:

  1. Temperature Differences: When the temperature inside your home is significantly higher than the temperature outside, and there is high humidity, condensation can form on cooler surfaces, such as ceilings and walls.
  2. Inadequate Ventilation: Poor ventilation can trap moisture inside your home, increasing the likelihood of condensation.
  3. Lifestyle Factors: Activities such as cooking, bathing, and using humidifiers can introduce moisture into the air, contributing to condensation issues.

Why It’s a Concern:

Condensation on the ceiling can lead to various problems, including:

  • Mold Growth: Excess moisture provides an ideal environment for mold to thrive, posing health risks and requiring costly remediation.
  • Structural Damage: Over time, condensation can damage the structural integrity of your home, particularly if it leads to wood rot.
  • Stains and Paint Damage: Persistent condensation can cause water stains on your ceiling and compromise the integrity of the paint or finish.

Read too: Is R13 Insulation Good For Ceilings

Step 1: Identify the Source of Condensation

The first step in addressing condensation on the ceiling is to identify the source of the excess moisture. Consider the following factors:

  • Check for any plumbing leaks that might be contributing to humidity levels.
  • Assess the effectiveness of your home’s ventilation systems, including exhaust fans in bathrooms and kitchens.
  • Consider your lifestyle habits, such as cooking without proper ventilation or using humidifiers excessively.

Step 2: Improve Ventilation

One of the most effective ways to combat condensation is to improve ventilation in your home. Here’s how:

  • Use exhaust fans in bathrooms and kitchens to remove excess moisture.
  • Ensure that your home’s ventilation systems are functioning correctly.
  • Open windows and doors periodically to allow fresh air to circulate.
  • Consider using a dehumidifier to reduce indoor humidity levels.

Step 3: Proper Insulation

In some cases, inadequate insulation can lead to temperature differences that result in condensation. Ensure your home is properly insulated, particularly in areas where condensation is a recurrent issue.

Step 4: Monitor Humidity Levels

It’s essential to monitor and control the humidity levels in your home. You can do this by:

  • Using a hygrometer to measure indoor humidity levels.
  • Setting your thermostat to maintain consistent indoor temperatures.
  • Using a humidistat to control humidity levels in your home.

Step 5: Address Leaks and Repairs

If you find that condensation is due to leaks or other structural issues, it’s crucial to address these problems promptly. This may involve fixing plumbing leaks, repairing damaged insulation, or resealing windows and doors.

Conclusion

Condensation on the ceiling can be a frustrating issue, but with the right steps and preventative measures, it can be effectively managed. By identifying the source of excess moisture, improving ventilation, properly insulating your home, monitoring humidity levels, and addressing any necessary repairs, you can reduce or eliminate condensation and its associated problems. Remember that persistent condensation can lead to more significant issues, so taking action promptly is key to maintaining a healthy and well-maintained home.