Fire Retardant Fabric for Basement Ceiling Options: Enhance Safety and Style

When it comes to basement renovations, safety and aesthetics are crucial. One way to achieve both is by using fire retardant fabric for basement ceiling. This article explores the benefits, features, and considerations of using fire retardant fabric, ensuring your basement is both stylish and safe.

Fire Retardant Fabric For Basement Ceiling

Exploring Fire Retardant Fabric for Basement Ceiling Options

Fire retardant fabrics are specially treated to resist ignition and slow the spread of fire. These materials are ideal for basement ceilings, providing an additional layer of safety while enhancing the room’s overall appearance.

Features of Fire Retardant Fabric for Basement Ceiling

  • Fire Resistance: These fabrics are designed to withstand high temperatures, reducing the risk of fire spreading through the ceiling.
  • Durability: High-quality fire retardant fabrics are durable, ensuring long-lasting protection and aesthetic appeal.
  • Versatility: Available in various colors and textures, fire retardant fabrics can match any interior design style.

Benefits of Choosing Fire Retardant Fabric for Basement Ceiling

1. Enhanced Safety

The primary benefit of fire retardant fabric is its ability to prevent the spread of fire, providing crucial time for occupants to evacuate and for emergency responders to arrive.

2. Improved Aesthetics

These fabrics come in various designs and colors, allowing homeowners to create a visually appealing basement ceiling that complements the rest of the home.

Read too: Discovering the Charm of Nautical Outdoor Ceiling Fans for Your Coastal Retreat: Sail into Style

3. Sound Insulation

Many fire retardant fabrics also offer sound insulation properties, helping to reduce noise from upper floors and creating a quieter basement environment.

Factors to Consider When Choosing Fire Retardant Fabric for Basement Ceiling

  • Certification: Ensure the fabric meets relevant fire safety standards and certifications, such as NFPA 701 or ASTM E84.
  • Installation: Consider the ease of installation and whether professional assistance is required.
  • Maintenance: Evaluate the cleaning and maintenance requirements of the fabric to ensure it remains effective and attractive over time.

Installation and Maintenance Tips

  • Professional Installation: For optimal safety and performance, consider hiring professionals to install the fire retardant fabric, ensuring it is properly secured and compliant with safety standards.
  • Regular Cleaning: Maintain the fabric by regularly dusting and spot cleaning as needed. Follow manufacturer instructions for cleaning to avoid damaging the fire retardant properties.
  • Inspection: Periodically inspect the fabric for any signs of wear or damage, and replace it if its fire retardant properties are compromised.

Where to Use Fire Retardant Fabric for Basement Ceiling

Fire retardant fabric is suitable for various basement applications, including:

  • Home Theaters: Enhance safety while improving acoustics and aesthetics.
  • Recreation Rooms: Create a stylish and safe environment for family activities and gatherings.
  • Home Offices: Ensure a professional and secure workspace in your basement.

Conclusion

Using fire retardant fabric for basement ceilings is a smart choice for homeowners looking to enhance both safety and aesthetics. These fabrics provide crucial fire resistance, durability, and design versatility, making them an ideal solution for various basement applications. By understanding the features, benefits, and considerations of fire retardant fabric, you can confidently choose the best option for your basement renovation project.
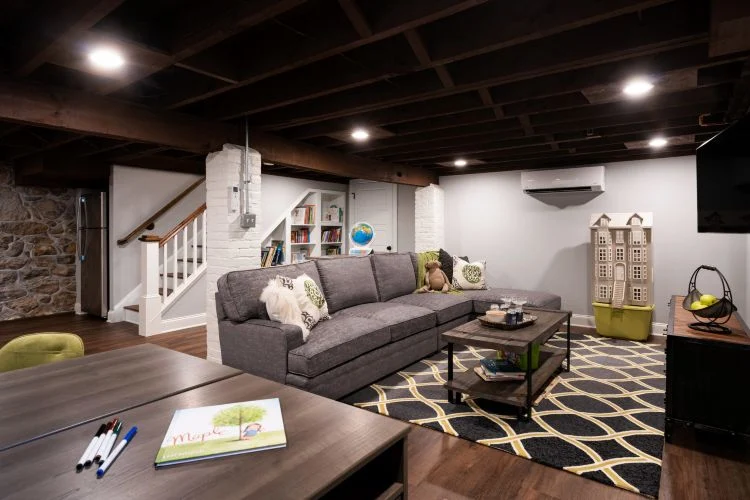
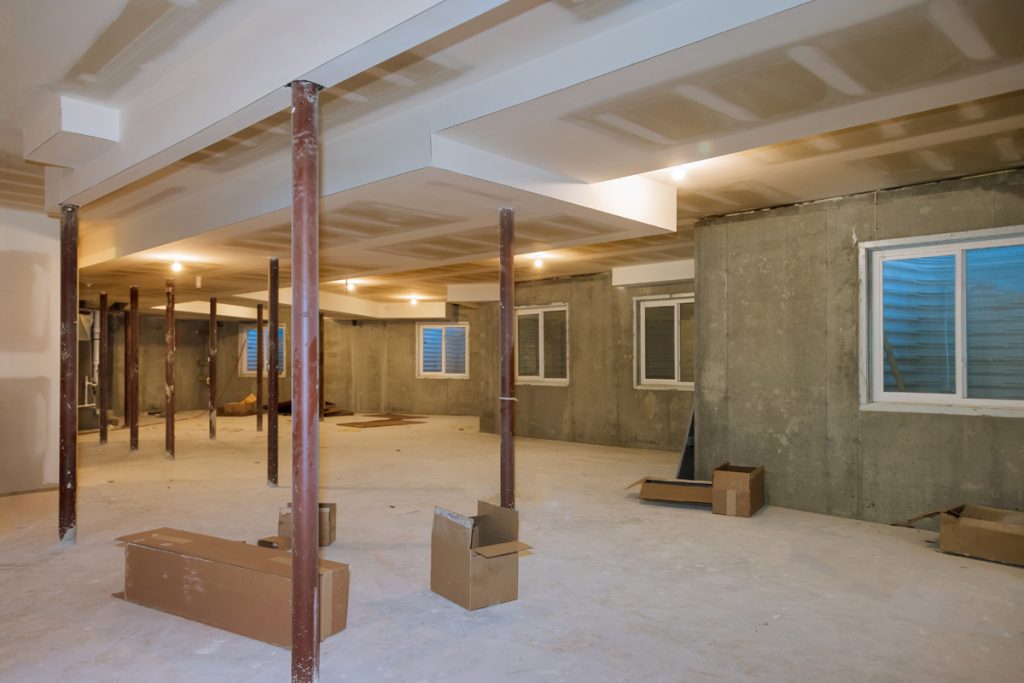
Low Ceiling Finished Basement: Maximizing Space

Finishing a basement with a low ceiling can be challenging, but with the right strategies, it can be transformed into a functional and inviting space. Whether you’re looking to create an extra living area, a home office, or a playroom, there are several design techniques to make the most of the vertical space available. This article will provide you with practical tips and ideas for optimizing your low ceiling finished basement, ensuring it is both stylish and practical.

Low Ceiling Finished Basement

Understanding the Challenges of Low Ceiling Finished Basements

Basements often have lower ceilings than the rest of the house, which can make the space feel cramped and dark. These challenges require creative solutions to enhance the room’s aesthetics and functionality.

1. Limited Vertical Space

The most obvious challenge is the limited vertical space. Standard ceiling heights range from 8 to 9 feet, but basements can often be as low as 7 feet or even lower. This restriction means careful planning is necessary to ensure the space does not feel claustrophobic.

2. Lighting Constraints

Low ceilings can make it difficult to install standard lighting fixtures, which are often designed for higher ceilings. Proper lighting is essential to brighten up the space and make it feel more open and inviting.

3. Structural Elements

Basements frequently have structural elements such as beams, pipes, and ducts that further reduce the available ceiling height. These elements need to be incorporated into the design without compromising the overall aesthetic.

Design Tips for Low Ceiling Finished Basements

1. Opt for Light Colors

Using light colors on the walls, ceiling, and floors can create the illusion of more space. White, light gray, and pastel shades reflect light better, making the basement feel brighter and more spacious.

2. Install Recessed Lighting

Recessed lighting, also known as can lights, is an excellent choice for low ceiling finished basements. These fixtures are installed into the ceiling itself, providing ample light without taking up vertical space. Consider using LED bulbs for energy efficiency and longevity.

3. Choose Low-Profile Furniture

Selecting low-profile furniture can help maintain a sense of openness. Sofas, chairs, and tables that sit lower to the ground will not encroach on the limited vertical space. Additionally, opting for furniture with exposed legs can make the room appear more open and less cluttered.

4. Use Vertical Storage Solutions

Maximize the use of vertical space with tall, narrow storage solutions. Shelving units, bookcases, and cabinets that extend upward draw the eye higher, creating the illusion of a taller ceiling. Avoid overly bulky furniture that can overwhelm the space.

5. Embrace Multi-Functional Furniture

In a low ceiling finished basement, every piece of furniture should serve multiple purposes. Consider using a sofa bed, storage ottoman, or a coffee table with hidden compartments to make the most of the available space.

6. Install Mirrors

Mirrors can significantly enhance the perception of space by reflecting light and creating the illusion of depth. Strategically place mirrors on walls or incorporate mirrored furniture to brighten and open up the room.

7. Keep the Ceiling Simple

A cluttered ceiling can make the space feel more confined. Keep the ceiling design simple and unobtrusive. Avoid heavy molding or intricate designs that can draw attention to the low height. A smooth, painted ceiling can blend seamlessly into the background.

Read too: Discovering the Charm of Nautical Outdoor Ceiling Fans for Your Coastal Retreat: Sail into Style

Creative Ideas for Low Ceiling Finished Basements

1. Cozy Home Theater

Transform your low ceiling finished basement into a cozy home theater. Install a large screen or projector on one wall and use low-profile seating like bean bags or floor cushions. Dark walls and ceiling can enhance the cinematic experience, making the space feel intimate and inviting.

2. Compact Home Office

Create a functional home office in your basement by using space-saving furniture and storage solutions. A wall-mounted desk, floating shelves, and built-in cabinets can help you maintain an organized and efficient workspace without sacrificing comfort.

3. Playroom for Kids

A low ceiling finished basement can be the perfect playroom for children. Use bright, cheerful colors and plenty of storage for toys and games. Install soft flooring like carpet tiles or foam mats to create a safe and comfortable environment for playtime.

4. Guest Bedroom

Provide extra sleeping space for guests by converting your basement into a guest bedroom. Use a Murphy bed or a fold-out sofa to save space when the room is not in use. Add cozy touches like soft lighting, area rugs, and comfortable bedding to make your guests feel at home.

5. Fitness Area

Set up a compact fitness area with low-profile exercise equipment like yoga mats, resistance bands, and free weights. Mirrors can make the space feel larger and allow you to check your form while working out. Ensure there is adequate lighting to create a motivating and energizing environment.

Practical Considerations for Low Ceiling Finished Basements

1. Moisture Control

Basements are prone to moisture issues, which can lead to mold and mildew growth. Ensure proper moisture control by installing a dehumidifier, sealing any cracks in the walls or floor, and using moisture-resistant materials for finishes and furnishings.

2. Insulation and Ventilation

Proper insulation and ventilation are crucial for maintaining a comfortable temperature in your basement. Insulate the walls and ceiling to prevent heat loss and install vents or exhaust fans to promote air circulation and reduce humidity.

3. Flooring Options

Choose flooring materials that are suitable for basement environments. Options like vinyl, laminate, and ceramic tile are moisture-resistant and durable. Area rugs can add warmth and comfort to the space without compromising functionality.

4. Permits and Codes

Before starting any renovation project, check local building codes and obtain any necessary permits. Ensuring your basement meets all safety and construction standards is essential for a successful and legal renovation.

Conclusion

Transforming a low ceiling finished basement into a functional and inviting space requires thoughtful planning and creative design solutions. By using light colors, low-profile furniture, recessed lighting, and vertical storage, you can maximize the available space and create a comfortable and stylish environment. Whether you’re looking to create a home theater, office, playroom, guest bedroom, or fitness area, the tips and ideas provided in this article will help you make the most of your low ceiling finished basement. With the right approach, your basement can become a valuable and enjoyable part of your home.

Effective Ways to Cover Insulation in Basement Ceiling for Improved Aesthetics and Efficiency

Cover Insulation in Basement Ceiling. Covering insulation in your basement ceiling not only enhances the visual appeal of the space but also improves energy efficiency and noise control. This guide explores various methods and considerations for effectively covering insulation in your basement ceiling.

Cover Insulation In Basement Ceiling

Why Cover Insulation in Basement Ceiling?

Covering insulation in the basement ceiling offers several benefits:

  • Aesthetic Improvement: Creates a finished look that enhances the overall appearance of the basement.
  • Energy Efficiency: Helps in maintaining consistent indoor temperatures by reducing heat loss.
  • Noise Reduction: Acts as a sound barrier between floors, minimizing sound transmission.

Methods to Cover Insulation In Basement Ceiling

Installing Drywall or Ceiling Panels

Installing drywall or ceiling panels is a popular method for covering basement insulation:

  • Preparation: Ensure insulation is properly installed and any gaps are sealed.
  • Installation: Secure drywall or panels to ceiling joists using appropriate fasteners.
  • Finishing: Apply joint compound, sand, and paint for a polished finish.

Using Drop Ceiling Tiles

Drop ceiling tiles offer a versatile and accessible option for covering basement insulation:

  • Installation: Install a grid system and insert tiles for easy access to utilities and plumbing.
  • Variety: Choose from different tile materials and designs to suit your basement decor.
  • Maintenance: Easily replace damaged tiles or access utilities above the ceiling.

Spray Foam Insulation

Spray foam insulation can be applied directly to basement ceiling insulation:

  • Sealing Gaps: Helps in sealing gaps and cracks, improving energy efficiency.
  • Application: Professional application ensures even coverage and effectiveness.
  • Cost Consideration: Evaluate upfront costs versus long-term energy savings.

Considerations Before Covering Insulation in Basement Ceiling

Before proceeding, consider these factors:

  • Moisture Control: Ensure basement moisture issues are addressed to prevent mold or mildew.
  • Access Needs: Consider access points for utilities or future repairs when choosing a covering method.
  • Fire Safety: Follow local building codes regarding fire-resistant materials if applicable.

Pros and Cons of Different Covering Methods

Each method has its advantages and considerations:

  • Drywall: Provides a seamless finish but may reduce access to utilities.
  • Drop Ceiling: Offers easy access but may not provide the same aesthetic as drywall.
  • Spray Foam: Excellent for sealing but may require professional application.

Maintaining Covered Basement Ceilings

Maintain your covered basement ceiling to ensure longevity and performance:

  • Regular Inspection: Check for signs of moisture or damage.
  • Cleaning: Dust or vacuum as needed to keep the area clean.
  • Repairs: Promptly address any issues such as water leaks or cracks.

Cost Considerations

Costs vary based on materials, labor, and the complexity of the project:

  • Budget Planning: Estimate costs for materials, labor if hiring professionals, and any additional tools or supplies.

Read too: Striped Schoolhouse Ceiling Light Fixtures: Unveiling the Timeless Charm

Conclusion

Covering insulation in your basement ceiling is a beneficial step toward improving both the aesthetics and efficiency of your home. By understanding different methods, considerations, and maintenance tips, you can choose the best approach to achieve a comfortable and attractive basement environment.

Tips for Finishing a Basement with Low Ceilings to Maximize Comfort and Style: Elevate Your Space

Unleash the hidden potential of your basement by conquering the challenges of low ceilings. In this guide, we’ll explore practical tips and design strategies for finishing a basement with low ceilings, ensuring you transform the space into a welcoming haven.

Finishing A Basement With Low Ceilings

Finishing A Basement With Low Ceilings: A Comprehensive Guide

Finishing a basement with low ceilings requires a thoughtful approach to design and functionality. Learn about the unique challenges posed by limited ceiling height and how to overcome them to create an inviting and comfortable space.

Strategies for Low Ceiling Basements

Explore innovative strategies to make the most of your limited vertical space. From intelligent lighting choices to clever furniture placement, discover ways to create an illusion of height and openness in your low-ceilinged basement.

  • Strategic Lighting: Opt for recessed lighting and wall sconces to avoid protruding fixtures that can make the space feel more cramped. Utilize floor and table lamps to enhance the overall brightness.
  • Vertical Wall Treatments: Extend the appearance of height by incorporating vertical wall treatments, such as vertical stripes or tall wainscoting. These design elements draw the eye upward, creating the illusion of higher ceilings.
  • Space-Efficient Furniture: Choose furniture with low profiles to prevent visual clutter and enhance the perception of spaciousness. Consider multifunctional furniture pieces that serve dual purposes, optimizing functionality.

Design Aesthetics for Low Ceiling Spaces

Balance aesthetics with functionality as you embark on the design journey for your low-ceilinged basement. Explore color schemes, furniture choices, and decor ideas that contribute to a stylish yet comfortable ambiance.

  • Light Color Palettes: Embrace light and neutral color palettes to reflect natural light and create an open, airy feel. Soft hues on walls and furniture contribute to a more expansive visual effect.
  • Mirrors and Reflective Surfaces: Strategically place mirrors and incorporate reflective surfaces to bounce light around the room, amplifying the perceived space and brightness.
  • Vertical Lines and Patterns: Choose decor elements with vertical lines or patterns to draw the eye upward. This visual trickery adds height to the room, making it feel less confined.

Commercial Solutions for Finishing A Basement With Low Ceilings

Discover commercial products and solutions designed specifically for finishing low-ceilinged basements. From specialized lighting fixtures to low-profile building materials, explore options that cater to the unique challenges posed by limited ceiling height.

  • Drop Ceilings and Tiles: Opt for drop ceilings with low-profile tiles that provide easy access to utilities while maintaining a clean and finished appearance.
  • Recessed Ceiling Lights: Invest in recessed ceiling lights designed for low spaces. These fixtures seamlessly blend with the ceiling, providing ample illumination without compromising headroom.
  • Low-Height Furniture Collections: Explore furniture collections tailored for spaces with low ceilings. These curated collections ensure a harmonious and proportionate look for your basement.

Conclusion

In conclusion, finishing a basement with low ceilings requires a strategic blend of design, functionality, and innovative solutions. By implementing these tips, you can transform your basement into a stylish, comfortable, and valuable extension of your home.

Read too: Exploring Craftsman Style Ceiling Fans for Your Home: Embracing Timeless Elegance

Unraveling the Secrets to Ideal Basement Ceiling Height: Maximizing Comfort and Space

When it comes to designing and transforming your basement, the often-overlooked factor of “Basement Ceiling Height” plays a crucial role. In this comprehensive guide, we will delve into the nuances of achieving the perfect balance in your basement space by understanding and optimizing the “Basement Ceiling Height.”

Basement Ceiling Height

Basement Ceiling Height: The Key to Transformative Spaces

Unveiling the Significance: Why Basement Height Matters

Basement height is more than just a numerical measurement; it directly influences the functionality, aesthetics, and overall ambiance of your basement space. Gain insights into why basement height is a critical consideration and how it can impact your renovation or design plans.

Basement Ceiling Height: Understanding the Basics

Measuring Basement Height: A Step-by-Step Guide

Before embarking on any basement project, it’s essential to accurately measure the ceiling height. Explore a step-by-step guide on how to measure basement height correctly, ensuring precise data for planning and decision-making.

Building Codes and Regulations: Navigating Height Requirements

Understanding local building codes and regulations is paramount when working on your basement. Delve into the requirements and restrictions related to basement height, ensuring compliance with safety standards and legal considerations.

Optimizing the Space

Illusions of Height: Design Tricks for Low Ceilings

Not all basements boast generous ceiling heights, but there are design tricks to create the illusion of more space. Explore techniques such as strategic lighting, vertical lines, and color choices that can visually enhance the perceived height of your basement.

Tailoring Your Design Approach

Choosing the Right Design Elements: Fixtures and Furnishings

The choice of fixtures and furnishings plays a pivotal role in optimizing basement height. Discover the ideal options for lighting fixtures, furniture, and decor that complement your basement’s height and contribute to a harmonious design.

Read too: Understanding and Tackling Ceiling Condensation Stains: Unveiling the Mystery

Overcoming Challenges

Dealing with Low Ceilings: Innovative Solutions for Limited Height

Low basement ceilings pose challenges, but innovative solutions exist to make the most of the space. From suspended ceilings to creative storage solutions, explore strategies that transform limitations into opportunities for unique and functional designs.

Professional Guidance and Renovation Tips

Consulting with Experts: Architectural and Design Insights

When faced with challenges related to basement height, seeking professional guidance is invaluable. Learn how architects and designers can provide expert insights, assess structural possibilities, and offer tailored solutions to optimize your basement space.

Renovation Tips for Height Enhancement: Practical Approaches

Embarking on a basement renovation project? Explore practical renovation tips specifically geared toward enhancing basement height. From strategic layout adjustments to incorporating architectural features, discover how to maximize your space effectively.

Conclusion: Elevating Your Basement Experience with Optimal Ceiling Height

In conclusion, the basement ceiling height holds the key to unlocking the full potential of your basement space. By understanding the basics, optimizing design elements, and overcoming challenges with innovative solutions, you can transform your basement into a functional, aesthetically pleasing, and comfortable area.

Whether you’re working with a spacious basement or facing limitations in ceiling height, this guide equips you with the knowledge and strategies needed to make informed decisions for your basement project. Elevate your basement experience by harnessing the power of optimal ceiling height and creating a space that aligns with your vision and lifestyle.

A Comprehensive Guide to Raising Basement Ceiling for Added Comfort and Functionality: Elevate Your Space

Are you looking to transform your basement into a more inviting and spacious area? Explore the possibilities of “Raising Basement Ceiling” and discover the key considerations, benefits, and methods to elevate your basement’s aesthetics and functionality.

Raising Basement Ceiling

Understanding the Vision: Raising Basement Ceiling

Creating a comfortable and welcoming basement involves strategic planning, and one key element to consider is the height of your basement ceiling. In this guide, we will delve into the concept of “Raising Basement Ceiling,” exploring the reasons behind this transformation and providing valuable insights to help you make informed decisions.

Read too: Understanding and Addressing Termite Ceiling Damage: Unveiling the Hidden Threat

Raising Basement Ceiling: Why Consider It?

1. Enhanced Aesthetics:

  • A higher ceiling creates an illusion of more space and openness, making the basement feel less confined.
  • The visual impact of an elevated ceiling can contribute to a more appealing and modern aesthetic.

2. Improved Air Circulation:

  • Higher ceilings facilitate better air circulation, preventing the basement from feeling stuffy or cramped.
  • Adequate ventilation contributes to a healthier and more comfortable living environment.

3. Increased Resale Value:

  • Investing in raising the basement ceiling can add value to your home, making it more attractive to potential buyers.
  • A finished basement with an elevated ceiling is often seen as a desirable feature in real estate.

Key Considerations Before Raising Basement Ceiling

1. Structural Implications:

  • Consult with a structural engineer to assess the feasibility of raising the basement ceiling.
  • Identify any potential challenges or modifications needed to ensure structural integrity.

2. Building Codes and Permits:

  • Check local building codes and regulations to determine if there are any restrictions on raising basement ceilings.
  • Obtain the necessary permits before starting any construction or renovation work.

3. HVAC Adjustments:

  • Evaluate the impact of raising the ceiling on your heating, ventilation, and air conditioning (HVAC) system.
  • Ensure that adjustments are made to maintain optimal temperature and airflow.

Methods for Raising Basement Ceiling

1. Drop Ceilings:

  • Drop ceilings, also known as suspended ceilings, offer a versatile and cost-effective option.
  • They allow easy access to wiring and plumbing, making maintenance more convenient.

2. Drywall Installation:

  • Installing drywall directly to the ceiling joists is a more permanent solution.
  • This method provides a seamless and polished finish for a modern look.

3. Coffered Ceilings:

  • Coffered ceilings add architectural interest to the space while providing the desired height.
  • This decorative option can enhance the overall design of your basement.

Professional Assistance and DIY Considerations

1. Hiring Contractors:

  • Engage experienced contractors who specialize in basement renovations and ceiling modifications.
  • Obtain multiple quotes and references before making a decision.

2. DIY Approach:

  • For those with construction skills, a DIY approach is possible for simpler ceiling-raising projects.
  • However, complex structural modifications may require professional assistance.

Conclusion: Elevate Your Basement Living Experience

In conclusion, “Raising Basement Ceiling” is a transformative endeavor that can elevate your basement from a mere storage space to a functional and inviting area. Careful planning, adherence to building codes, and consideration of structural implications are crucial aspects of this renovation project. Whether you opt for drop ceilings, drywall installations, or coffered ceilings, the decision to raise your basement ceiling is an investment in comfort, aesthetics, and property value.

Remember to consult with professionals, obtain the necessary permits, and prioritize safety throughout the renovation process. With the right approach, your raised basement ceiling can become the highlight of your home, providing a more expansive and enjoyable living space.

Unveiling the Secrets of a Successful Low Ceiling Basement Remodel: Transform Your Space with Style

Transforming a basement with a low ceiling can be a daunting task, but fear not! Dive into our guide on “Low Ceiling Basement Remodel” and discover innovative ideas to elevate your space.

Low Ceiling Basement Remodel

Introduction

A low ceiling in your basement doesn’t have to limit your creativity when it comes to remodeling. In this comprehensive guide, we will explore the intricacies of a successful low ceiling basement remodel, providing you with practical tips and inspiring ideas to turn your space into a stylish and functional area.

Understanding the Challenges of Low Ceiling Basements

The Illusion of Space

Low ceilings can create the illusion of a confined and cramped space. Overcoming this challenge requires strategic planning and design choices that maximize the available height while creating an open and inviting atmosphere.

Lighting Solutions

Insufficient natural light is often a concern in basements, especially those with low ceilings. Incorporating smart lighting solutions can significantly enhance the perceived height of the space and contribute to a brighter, more welcoming environment.

Low Ceiling Basement Remodel: Navigating the Process

Strategic Layout Design

In a low ceiling basement, optimizing the layout is crucial. Strategic placement of furniture, storage, and functional zones can create a sense of spaciousness. Consider multifunctional furniture that serves your needs without overwhelming the limited vertical space.

Vertical Design Elements

Maximize the use of vertical space with floor-to-ceiling shelving, tall cabinets, and wall-mounted storage. This not only adds functionality but also draws the eye upward, making the ceiling appear higher than it actually is.

Innovative Design Ideas for Low Ceiling Basements

Light-colored Palette

Opt for light-colored walls, flooring, and furnishings to create a bright and airy ambiance. Light tones reflect more light, giving the illusion of higher ceilings and a more expansive space.

Strategic Use of Mirrors

Integrating mirrors into your low ceiling basement design can work wonders. Mirrors reflect light and create visual depth, making the space feel larger and more open.

Low Profile Furniture

Choose low-profile furniture that doesn’t overwhelm the room visually. This includes sofas, chairs, and tables with sleek designs that maintain an unobtrusive presence in the limited space.

Low Ceiling Basement Remodel: Where to Begin

Professional Consultation

Consider consulting with a professional designer or contractor experienced in low ceiling basement remodels. Their expertise can provide valuable insights and help you make informed decisions to optimize your space effectively.

Read too: Understanding and Resolving a Ceiling Leak After Rain: Navigating Home Challenges

Conclusion

Embarking on a low ceiling basement remodel requires thoughtful planning and creative solutions. By strategically addressing challenges such as limited height, poor lighting, and the need for smart storage, you can transform your basement into a stylish and functional area.

In conclusion, a successful low ceiling basement remodel is not only achievable but can also result in a space that surpasses expectations. With the right design choices and a focus on maximizing every inch of space, you can turn your basement into a welcoming retreat that defies its low ceiling limitations. Explore the possibilities, embrace innovative ideas, and embark on a journey to revitalize your basement with style and purpose.

Smart Strategies to Increase Basement Ceiling Height and Transform Your Living Area: Elevate Your Space

The ceiling height in a basement plays a crucial role in determining the overall ambiance of the space. If you’re yearning for a more open and airy basement, exploring ways to “Increase Basement Ceiling Height” can be a game-changer. In this comprehensive guide, we’ll uncover practical solutions and expert insights to help you elevate your basement living experience.

Increase Basement Ceiling Height

Increase Basement Ceiling Height: A Strategic Approach

Understanding the Impact of Ceiling Height

Before delving into strategies for increasing basement ceiling height, let’s explore why it matters. This section highlights the impact of ceiling height on aesthetics, functionality, and the overall perception of space.

Read too: How Gutters Causing Ceiling Leak Can Wreak Havoc in Your Home? Unveiling the Hidden Dangers

Assessing Your Basement’s Current Ceiling Height

This H2 heading emphasizes the importance of assessing your basement’s existing ceiling height. From measuring techniques to understanding the standard heights, we’ll guide you through the initial steps of evaluating your space.

Measuring Techniques:

Learn how to accurately measure your basement’s ceiling height, considering variations across different areas. This section provides tips for precise measurements, ensuring a solid foundation for your height-increasing endeavors.

Understanding Standard Heights:

Familiarize yourself with standard basement ceiling heights and how your space compares. This knowledge will aid in setting realistic expectations and determining the feasibility of height enhancement projects.

Strategic Design and Layout Adjustments: Increase Basement Ceiling Height

This heading explores design and layout adjustments to create the illusion of increased ceiling height. From color choices to furniture arrangements, discover practical strategies for optimizing the visual perception of space.

Lighting and Color Selection:

Explore the transformative effects of strategic lighting and color choices on the perceived height of your basement ceiling. This section provides insights into creating a well-lit and visually expansive environment.

Vertical Lines and Optical Illusions:

Utilize vertical lines and optical illusions to draw the eye upward, giving the impression of increased ceiling height. Learn how to incorporate design elements that contribute to the visual expansion of your basement space.

Structural Modifications for Ceiling Height Enhancement

This heading delves into more significant structural modifications for those seeking tangible increases in basement ceiling height. From lowering the floor to raising the ceiling, we’ll explore options that require careful planning and execution.

Raising the Ceiling:

Discover the feasibility of physically raising the basement ceiling and the potential challenges associated with this ambitious project. This section provides a realistic assessment for homeowners considering structural modifications.

Lowering the Floor:

Explore the option of lowering the basement floor to create additional headroom. This strategy involves excavation and careful consideration of factors like plumbing and foundation, and we’ll guide you through the decision-making process.

Conclusion:

In conclusion, increasing basement ceiling height is a multifaceted endeavor that can be achieved through a combination of design, layout adjustments, and, in some cases, structural modifications. By understanding the impact of ceiling height, assessing your space, and implementing strategic changes, you can transform your basement into a more inviting and spacious area.

How To Paint Basement Ceiling for a Stylish and Inviting Atmosphere? Transform Your Space

Discover the art of enhancing your basement’s aesthetic appeal by learning how to paint basement ceiling creatively. Elevate your space with this step-by-step guide for a stylish and inviting atmosphere.

How To Paint Basement Ceiling

Unleashing Creativity – How To Paint Basement Ceiling

Uncover the secrets to transforming your basement into a stylish haven through the art of ceiling painting. Dive into the steps and tips on how to paint a basement ceiling to achieve a visually stunning and welcoming atmosphere.

Preparing Your Basement for Painting:

  1. Clean and Clear the Area:
    • Begin by clearing the basement of any furniture or items that may obstruct your painting efforts. Sweep and clean the area to ensure a dust-free surface.
  2. Inspect for Damage:
    • Conduct a thorough inspection of the ceiling for any signs of damage, leaks, or mold. Address these issues before proceeding with the painting process.
  3. Choose the Right Paint:
    • Select a high-quality paint suitable for ceilings. Consider light colors to brighten the space and make it feel more expansive.

Essential Tools and Materials:

  1. Paint Rollers and Brushes:
    • Invest in quality paint rollers and brushes for efficient and even application. Extension poles can be useful for reaching higher areas.
  2. Drop Cloths or Tarps:
    • Protect the floor and any remaining items in the basement with drop cloths or tarps to prevent paint splatters.
  3. Painter’s Tape:
    • Use painter’s tape to mask off areas you don’t want to paint, such as walls or light fixtures.
  4. Primer:
    • Apply a primer to the ceiling before painting to ensure better adhesion and a more even finish.

Read too: Is Bathroom Ceiling Mold Dangerous to Your Health and Home? Unveiling the Threat

Step-by-Step Guide on How To Paint Basement Ceiling:

  1. Prepare and Prime:
    • Clean the ceiling thoroughly and apply a coat of primer. Allow it to dry completely before proceeding.
  2. Cut In the Edges:
    • Use a brush to cut in around the edges of the ceiling, where the roller might not reach easily. This ensures a clean and precise finish.
  3. Roll the Ceiling:
    • Use a paint roller to cover the larger areas of the ceiling. Work in sections, and be mindful of even paint distribution.
  4. Apply Second Coat (if Necessary):
    • After the first coat has dried, assess the coverage. If needed, apply a second coat for a more vibrant and polished look.

Tips and Tricks for a Successful Basement Ceiling Paint Job:

  1. Use Light Colors:
    • Light-colored paint can help brighten the space and create a more open and airy feel in the basement.
  2. Consider Adding a Pop of Color:
    • If you’re feeling adventurous, consider adding a pop of color to create a focal point in the basement.
  3. Work in Well-Ventilated Spaces:
    • Ensure proper ventilation in the basement while painting. Open windows or use fans to disperse fumes.
  4. Take Breaks:
    • Painting a ceiling can be physically demanding. Take regular breaks to avoid strain and fatigue.

Finishing Touches and Clean-Up:

  1. Remove Painter’s Tape:
    • Once the paint has dried, carefully remove the painter’s tape from edges for a clean finish.
  2. Inspect for Touch-Ups:
    • Inspect the painted ceiling for any areas that may need touch-ups. Address these promptly for a flawless result.
  3. Clean Brushes and Rollers:
    • Clean your brushes and rollers thoroughly with soap and water. Properly store them for future use.

Conclusion: Elevate Your Basement’s Appeal with a Fresh Coat of Paint

In conclusion, mastering how to paint a basement ceiling allows you to transform a neglected space into a stylish and inviting area. With the right tools, materials, and a creative mindset, you can achieve a stunning result that enhances the overall aesthetics of your home.

Take the plunge into basement renovation, and elevate your living space with a fresh coat of paint on the ceiling.

The Ultimate Guide to Understanding the Cost to Paint Basement Ceiling: Unlocking the Aesthetic Potential

Are you considering transforming your basement by giving it a fresh coat of paint? Discover the ins and outs of the “Cost to Paint Basement Ceiling” to make informed decisions and breathe new life into your space.

Cost To Paint Basement Ceiling

Exploring the Basics: Cost to Paint Basement Ceiling

Introduction

Painting the basement ceiling is a fantastic way to enhance the overall aesthetics of your space. Whether you’re turning your basement into a cozy living area, a home gym, or a game room, understanding the costs involved is crucial for effective budgeting.

Factors Influencing the Cost

  1. Ceiling Material: The type of material your basement ceiling is made of can significantly impact the cost of painting. Different materials, such as drywall, wood, or exposed pipes and ductwork, may require specific preparation and paint application techniques.
  2. Ceiling Height and Accessibility: The height of your basement ceiling and its accessibility can affect the overall cost. High ceilings may require specialized equipment, and limited accessibility can make the painting process more time-consuming.
  3. Preparation Work: The condition of the existing ceiling and the amount of preparation needed play a crucial role. If the ceiling requires repairs, cleaning, or priming before painting, these factors will contribute to the overall cost.
  4. Number of Coats: The number of paint coats applied will influence the cost. While a single coat may be sufficient for some surfaces, others may require multiple coats to achieve the desired finish.
  5. Type of Paint Used: The choice of paint, including the quality and brand, can affect costs. Higher-quality paints may come with a higher price tag but offer better durability and a more polished finish.

Calculating the Cost: A Step-by-Step Guide

1. Measure the Ceiling Area

Begin by measuring the total square footage of the basement ceiling. This will serve as the foundation for estimating the amount of paint needed.

2. Determine the Type of Paint

Choose the type of paint based on your preferences and the requirements of the ceiling material. Consider factors like moisture resistance and ease of cleaning for optimal results.

3. Assess the Condition of the Ceiling

Evaluate the condition of the ceiling to determine if any repairs or additional preparation work is necessary. Addressing these issues upfront can prevent complications during the painting process.

4. Obtain Quotes from Painters

If you’re considering hiring professionals, obtain quotes from several painters. Compare their estimates, taking into account the scope of work, materials, and labor costs.

5. Factor in Additional Costs

Consider any additional costs, such as primer, masking materials, and tools. These small expenses can add up, so it’s essential to include them in your overall budget.

Making Informed Decisions: Cost to Paint Basement Ceiling

1. DIY vs. Professional Services

Decide whether to embark on a do-it-yourself (DIY) project or enlist the services of professional painters. While a DIY approach can save money, professionals bring expertise and efficiency to the table.

2. Budget-Friendly Tips

Explore budget-friendly tips to minimize costs, such as selecting cost-effective paint options, doing your own preparation work, and comparing prices from different suppliers.

3. Long-Term Benefits

Consider the long-term benefits of investing in a quality paint job. A well-painted basement ceiling not only enhances the visual appeal but also contributes to the overall durability and cleanliness of the space.

Conclusion

In conclusion, understanding the “Cost to Paint Basement Ceiling” is essential for anyone looking to revitalize their basement space. By considering factors like ceiling material, height, and preparation work, you can make informed decisions that align with your budget and vision for the space.

Whether you choose to take the DIY route or hire professionals, investing in a well-executed paint job can transform your basement into a welcoming and aesthetically pleasing area. Take the time to calculate costs, explore options, and embark on a painting project that adds value and character to your home.

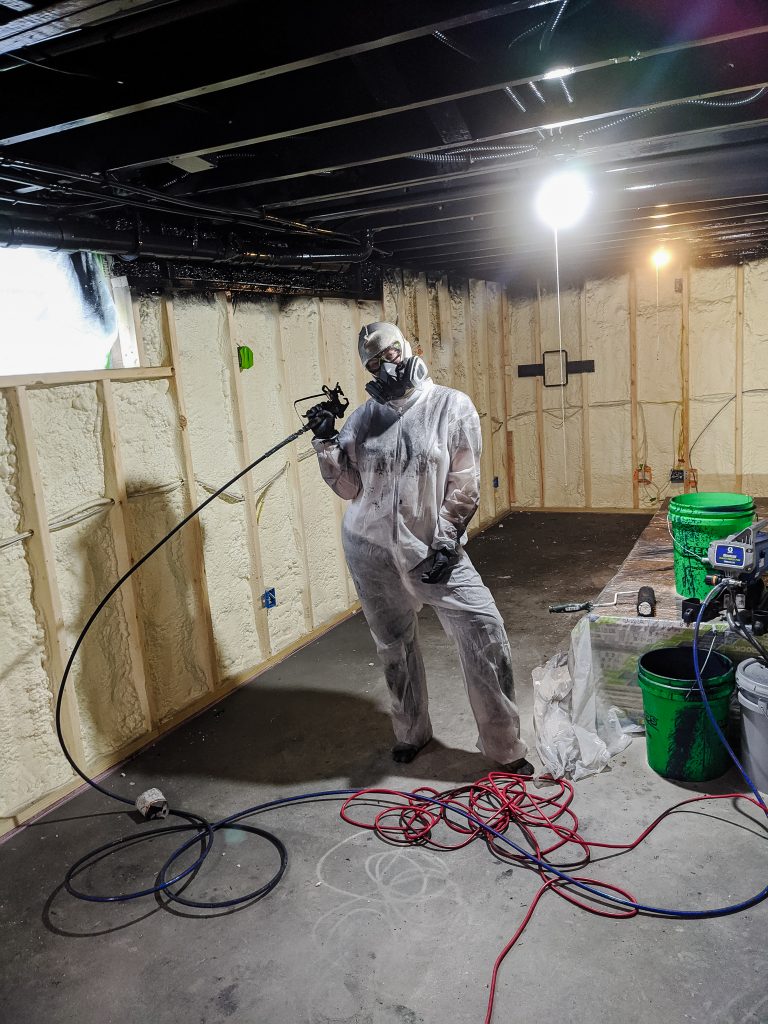
Cost to Spray Basement Ceiling for a Revitalized Space: Understanding the Investment

Explore the factors influencing the “Cost to Spray Basement Ceiling” and discover why this investment can transform your basement into a functional and aesthetically pleasing area.

Cost To Spray Basement Ceiling

Introduction

Investing in your basement’s appearance and functionality can significantly enhance your home’s overall value. One popular method is spray painting the ceiling, providing a clean and modern finish. In this comprehensive guide, we will delve into the key aspects influencing the “Cost to Spray Basement Ceiling.” Gain insights into the benefits of this transformation and make informed decisions about revitalizing your basement space.

Factors Influencing the Cost to Spray Basement Ceiling

*1. Ceiling Material and Condition

The material and current condition of your basement ceiling play a pivotal role in determining the overall cost. Different materials may require specific preparation or primer, impacting the total expense of the spray application.

*2. Ceiling Height and Accessibility

The height of your basement ceiling influences the complexity of the spray application process. Higher ceilings may require specialized equipment, affecting the overall cost. Additionally, accessibility to the basement can impact the ease of the spraying process.

*3. Surface Preparation Requirements

Proper surface preparation is essential for a flawless spray finish. If your basement ceiling requires extensive cleaning, patching, or repairs before spraying, this can contribute to increased costs. Assessing the current state of the ceiling is crucial for accurate budgeting.

Navigating the Investment: Understanding the Cost to Spray Basement Ceiling

Explore the components of the cost associated with spraying your basement ceiling and make informed decisions for a successful transformation.

1. Ceiling Material and Condition: Impact on Cost

  • Material Considerations: Different ceiling materials, such as drywall, wood, or acoustic tiles, may have unique requirements for preparation and spraying. Discuss with professionals to determine the optimal approach for your specific ceiling material.
  • Condition Assessment: If your basement ceiling exhibits water damage, stains, or other imperfections, addressing these issues before spraying is essential. The condition of the ceiling influences the extent of preparation required, impacting the overall cost.

2. Ceiling Height and Accessibility: Cost Implications

  • Height Challenges: Higher ceilings may necessitate the use of specialized equipment, such as scaffolding or extended spray wands. Factor in the additional equipment and labor costs associated with treating tall ceilings.
  • Accessibility Concerns: Limited access to the basement can impact the ease of bringing in equipment and materials. Consider accessibility issues when estimating the cost of spraying the ceiling.

3. Surface Preparation Requirements: Investing in a Flawless Finish

  • Cleaning and Patching: Thoroughly cleaning the ceiling and addressing any patches or repairs are critical for achieving a smooth finish. The time and effort required for preparation contribute to the overall cost.

Making Informed Decisions

*1. Consultation with Professionals

Engage in consultations with experienced professionals to assess your basement ceiling’s specific needs. Professionals can provide accurate cost estimates based on the material, condition, and height of your ceiling.

*2. Material and Labor Costs

Understand the breakdown of material and labor costs. This transparency helps you evaluate the investment required for achieving your desired basement ceiling transformation.

*3. Comparative Quotes

Seek quotes from multiple contractors to compare costs and services. Be wary of unusually low estimates, as they may compromise the quality of materials or workmanship.

Conclusion

Transforming your basement by spraying the ceiling is a rewarding investment that adds both aesthetic value and functionality to your home. By understanding the “Cost to Spray Basement Ceiling” and considering key factors, you can embark on this project with confidence. Make informed decisions, consult professionals, and revitalize your basement space.

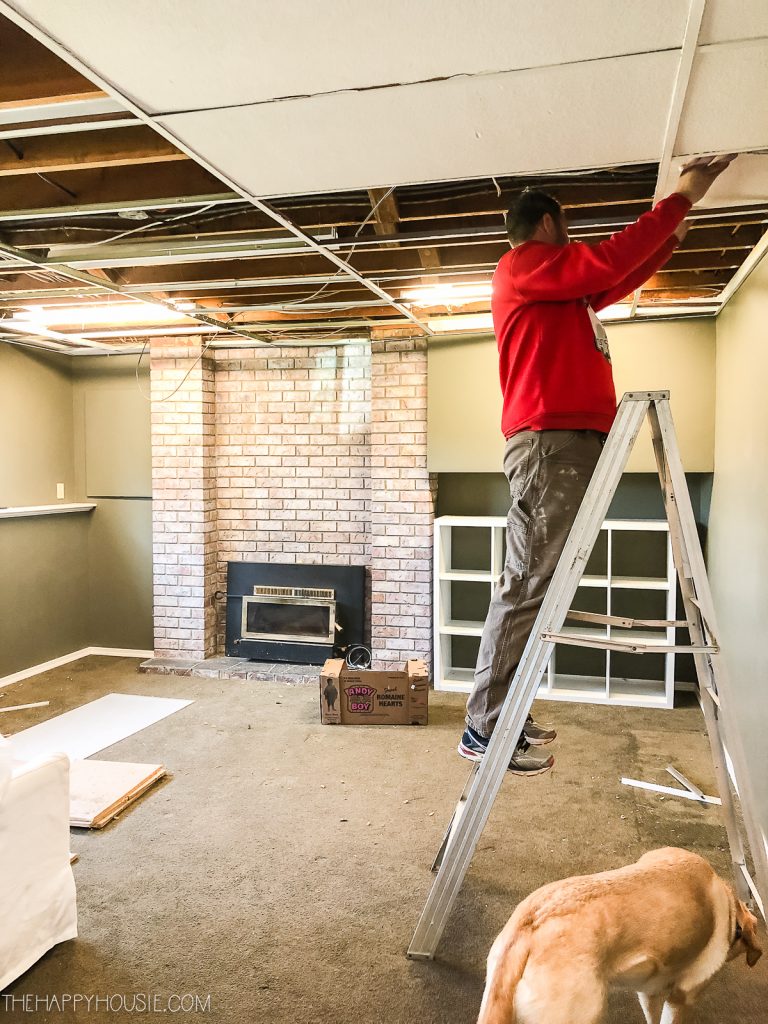
Revitalize Your Space: The Ultimate Guide to Removing Drop Ceiling in Basement for a Stylish Transformation

The basement is often an underutilized space, and removing a drop ceiling can be a game-changer. In this comprehensive guide, we’ll delve into the reasons for removing a drop ceiling in the basement, the step-by-step process, and the transformative benefits of this home improvement project.

Removing Drop Ceiling In Basement

Introduction

Basements, often relegated to storage or forgotten spaces, have immense potential for transformation. One impactful way to enhance the look and feel of your basement is by removing the drop ceiling. Uncover the reasons behind this decision and embark on a journey to revitalize your space.

Reasons for Removing Drop Ceiling in Basement

1. Aesthetic Upgrade

Drop ceilings, while functional, can make a space feel cramped and dated. Removing them opens up the room, creating a more modern and spacious ambiance.

2. Height Enhancement

Basements often suffer from low ceilings, and drop ceilings contribute to this issue. By removing them, you can maximize ceiling height, making the space feel larger and more inviting.

3. Easy Access to Utilities

Drop ceilings can hinder access to pipes, wiring, and other utilities. Removing them simplifies maintenance and allows for easier repairs or upgrades.

4. Improved Lighting Options

Drop ceilings limit lighting choices and may make the space feel dim. Removing them provides the opportunity for more diverse and impactful lighting installations.

The Step-by-Step Guide: Removing Drop Ceiling in Basement

1. Preparation

Before starting the removal process, clear the space of furniture and belongings. Cover the floor with a protective layer to catch debris, and ensure you have the necessary safety equipment, including gloves and safety goggles.

2. Locate and Remove Fixtures*

Identify and remove any light fixtures or fans attached to the drop ceiling. This step ensures their safety and allows for a smoother removal process.

3. Remove Ceiling Tiles*

Carefully remove the ceiling tiles by pushing them upward. Start from one end and work your way across the ceiling. Be cautious not to damage the tiles, as they may be repurposed or reused.

4. Take Down the Grid*

After removing the tiles, dismantle the metal grid that holds the drop ceiling in place. Use pliers to bend and remove the metal tracks carefully.

5. Inspect the Substrate*

Once the grid is removed, inspect the substrate or the actual ceiling. Address any issues, such as water damage or repairs needed, before proceeding with the transformation.

Transformative Benefits of Removing Drop Ceiling in Basement

1. Enhanced Visual Appeal*

Without the confines of a drop ceiling, your basement can take on a more open and inviting appearance. This visual transformation can significantly impact the overall aesthetics of the space.

2. Increased Natural Light*

With the drop ceiling gone, natural light can freely flow, brightening the space and creating a more cheerful atmosphere. Consider adding larger windows or utilizing mirrors to amplify the effect.

3. Versatile Design Opportunities*

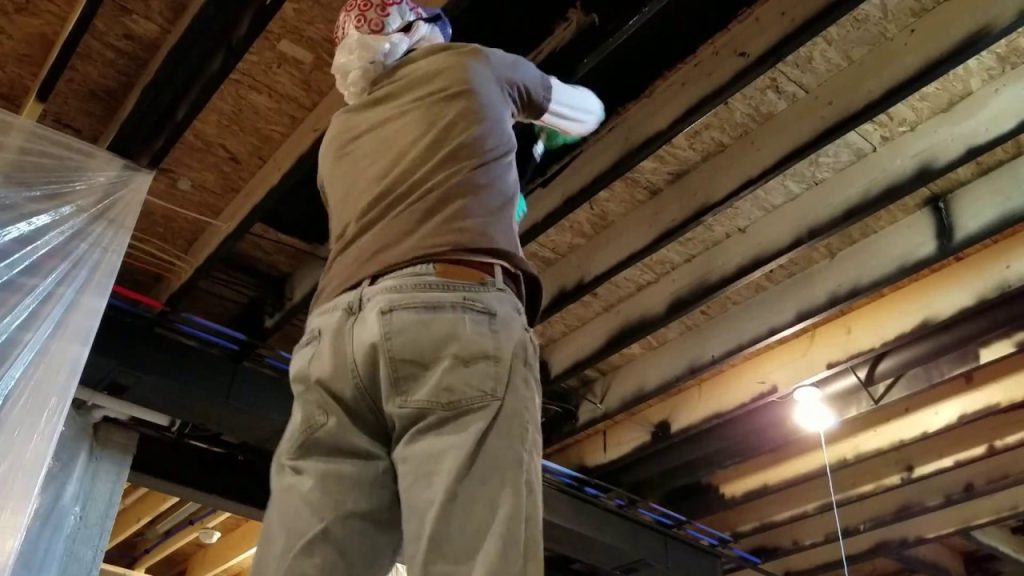
An exposed ceiling opens up a world of design possibilities. Explore creative options like industrial-style exposed beams, painted ductwork, or a sleek and modern finish that suits your taste.

4. Cost-Effective Improvement*

Removing a drop ceiling is a cost-effective way to enhance your basement. It doesn’t require extensive materials, and the visual impact can rival more expensive renovations.

Conclusion

Removing a drop ceiling in the basement is a transformative home improvement project that can breathe new life into an often neglected space. By understanding the reasons behind this decision, following a systematic removal process, and embracing the benefits of the transformation, you can turn your basement into a stylish and functional part of your home. Say goodbye to the confines of a drop ceiling and hello to the limitless possibilities that await your basement renovation journey.

Transforming Your Space: Finishing a Basement With a Low Ceiling

A low ceiling in your basement doesn’t mean you have to sacrifice the opportunity to create a functional and inviting living space. In this comprehensive guide, we’ll explore the process of “Finishing a Basement With a Low Ceiling,” providing you with practical tips and creative solutions to make the most of your limited overhead space.

Finishing Basement With Low Ceiling

Challenges of Finishing a Basement With a Low Ceiling

Before diving into the solutions, let’s understand the challenges you might face when finishing a basement with a low ceiling:

  1. Limited Headroom: A low ceiling can restrict headroom, making it essential to maximize space while maintaining comfort.
  2. Inadequate Lighting: Insufficient natural light in the basement can make the space feel dark and confined.
  3. Air Circulation: Proper air circulation becomes crucial in basements with low ceilings to maintain a comfortable atmosphere.
  4. Design Considerations: Your design choices need to account for the limited vertical space to ensure functionality and aesthetics.

Tips for Finishing a Basement With a Low Ceiling

  1. Plan Carefully: Start with a well-thought-out plan that considers the basement’s purpose, such as a home theater, playroom, or guest bedroom. Tailor the design to your specific needs.
  2. Choose the Right Flooring: Opt for low-profile flooring options like vinyl, laminate, or carpet tiles. These materials add comfort without reducing headroom significantly.
  3. Lighting Strategy: Incorporate a mix of lighting options, including recessed LED lights, wall sconces, and floor lamps. Ensure they’re strategically placed to brighten the space evenly.
  4. Color Palette: Use light and neutral colors for walls and ceilings to create an open and airy feel. A monochromatic color scheme can visually expand the space.
  5. Furniture Selection: Pick low-profile and space-saving furniture to enhance the sense of openness. Modular and multifunctional furniture can be especially useful.
  6. Wall Mirrors: Mirrors can create the illusion of a larger space by reflecting light and adding depth.
  7. Ceiling Treatments: Consider ceiling treatments like beadboard, coffered ceilings, or paintable wallpaper to add interest and draw the eye upward.
  8. Built-Ins: Custom built-ins, like shelving and cabinetry, can maximize storage and provide a tailored look to your basement.
  9. Open Shelving: Open shelves can offer storage while keeping the space visually open. They can be used for decorative displays and organization.
  10. Multi-Purpose Rooms: Create flexible spaces that can serve multiple purposes, such as a combination of a home office and guest bedroom.

Air Circulation and Ventilation

  1. HVAC System: Ensure your heating, ventilation, and air conditioning (HVAC) system is efficient and balanced to maintain a comfortable temperature.
  2. Dehumidification: Consider a dehumidifier to control moisture levels, which is crucial for basement spaces.
  3. Proper Insulation: Adequate insulation can help maintain a comfortable environment and control energy costs.

Rea too: Is Installing A Ceiling Fan Hard

Permitting and Codes

Before embarking on your basement finishing project, check local building codes and permits. Some areas may have specific requirements for basement renovations, especially when adding bedrooms or bathrooms.

Conclusion

Finishing a basement with a low ceiling can be a rewarding project that adds valuable living space to your home. By planning carefully and implementing the right design and space-saving strategies, you can create a functional, comfortable, and visually appealing basement that overcomes the challenges of limited overhead space. Whether you’re aiming to build a cozy home theater, a playroom for the kids, or a versatile guest bedroom, a well-finished basement can enhance your home’s value and provide a comfortable retreat for your family and guests.

Transforming Your Low Ceiling Basement: Before and After

Basements with low ceilings often leave homeowners feeling like they’re in cramped, dim spaces. However, with the right design and renovation, your low ceiling basement can be transformed into a functional and inviting area. In this article, we will explore the remarkable before-and-after journey of renovating a low ceiling basement, unlocking its full potential.

Low Ceiling Basement Before And After

The Challenges of Low Ceiling Basements

Making the Most of Limited Space

Low ceiling basements present several challenges, making them less appealing for everyday use.

1. Limited Headroom:

  • The primary challenge of low ceiling basements is the reduced headroom. This can create a feeling of confinement and limit your options for functional space.

2. Poor Lighting:

  • Low ceilings can make the basement feel darker, requiring additional lighting to compensate for the lack of natural light.

3. Dampness:

  • Many low ceiling basements struggle with moisture issues, which can lead to mold and damage over time.

Read too: How To Fix Condensation On Ceiling

Before: A Dark, Unusable Space

In their “before” state, low ceiling basements are often dark, damp, and underutilized areas. Homeowners may use them for storage, laundry, or simply avoid them altogether due to the lack of appeal.

1. Unfinished Walls:

  • In many cases, the walls in low ceiling basements are left unfinished, exposing concrete or cinder block surfaces.

2. Limited Flooring Options:

  • Flooring choices are often limited to concrete, which can be cold and uninviting.

3. Inadequate Lighting:

  • Inadequate lighting can make the space feel gloomy and unappealing.

After: A Transformed Oasis

The transformation of a low ceiling basement is nothing short of a metamorphosis. With some creative ideas and skilled renovations, the space can become an inviting extension of your home.

1. Clever Ceiling Solutions:

  • Drop ceilings or ceiling tiles can be installed to maximize headroom without compromising on style.

2. Lighting Magic:

  • Proper lighting design can make a low ceiling basement feel bright and spacious. Recessed lighting, wall sconces, and floor lamps can work wonders.

3. Finishing Touches:

  • Finishing the walls with paint or paneling and upgrading the flooring can completely change the atmosphere.

Functional Space:

  • After renovation, a low ceiling basement can be transformed into various functional spaces such as a home office, playroom, entertainment room, or even a cozy guest bedroom.

Creative Storage Solutions:

  • Utilize the available space intelligently for storage, ensuring that your basement remains clutter-free.

Effective Moisture Control:

  • Address moisture issues by waterproofing the basement, ensuring it stays dry and mold-free.

Before and After Inspirations

Real-Life Examples

To provide some inspiration for your low ceiling basement renovation, let’s explore a few real-life “before and after” scenarios:

1. The Cozy Home Theater:

  • The “before” basement had low ceilings and limited lighting, making it feel cramped. However, with a drop ceiling, recessed lighting, and comfortable seating, it became a cozy home theater.

2. The Playful Kids’ Paradise:

  • This basement went from an underused storage area to a vibrant playroom. Bright colors, wall decals, and creative storage solutions made it an ideal space for kids.

3. The Elegant Guest Suite:

  • By finishing the walls, upgrading the flooring, and adding stylish furnishings, a low ceiling basement was transformed into a welcoming guest suite.

Conclusion:

Renovating a low ceiling basement may seem like a daunting task, but the transformation can be nothing short of magical. With clever design choices, effective lighting, and proper moisture control, your basement can become a functional and inviting space. From home theaters to playrooms and guest suites, the possibilities are endless, and your basement’s “before and after” story could be the next inspiring tale of renovation success.

Finishing A Basement With Low Ceilings

Basements often serve as untapped potential in our homes, offering valuable space that can be transformed into functional living areas. However, if you have a basement with low ceilings, it presents a unique set of challenges and opportunities. In this article, we will explore how to effectively finishing a basement with low ceilings, making the most of this area while ensuring it remains comfortable and visually appealing.

Finishing A Basement With Low Ceilings

Understanding the Challenges of Low Ceilings

Low ceilings in a basement can be limiting, but with careful planning and creative design, you can make the space both attractive and functional. Here are some common challenges associated with low ceilings:

  1. Headroom: Low ceilings can restrict headroom, making the space feel cramped and potentially uncomfortable for taller individuals.
  2. Natural Light: Limited ceiling height can affect the placement and size of windows, which impacts the amount of natural light that enters the space.
  3. Ventilation: Adequate ventilation is essential for a basement, and low ceilings may complicate the installation of ventilation systems.
  4. Design Aesthetics: Traditional design elements such as chandeliers or ceiling fans may not be practical or visually appealing in a low-ceilinged space.

Planning Your Basement Finishing Project

  1. Measure Ceiling Height: Start by measuring the exact ceiling height throughout the basement. This will help you understand the scope of the low-ceiling issue and make informed design decisions.
  2. Light Colors: Use light colors for walls and ceilings. Light hues create an illusion of space and brightness, making the room feel less confining.
  3. Recessed Lighting: Recessed lighting fixtures are an excellent choice for low-ceiling basements. They provide ample light without taking up headroom.
  4. Flooring Selection: Opt for low-profile flooring materials like laminate, engineered wood, or vinyl. These options help maximize ceiling height and are easy to maintain.

Creating Illusions of Height

  1. Vertical Lines: Incorporate vertical design elements like tall bookshelves or vertical stripes on the walls. These draw the eye upward and create an illusion of greater height.
  2. Mirrors: Mirrors can make a space feel more expansive. Strategically place mirrors to reflect light and give the impression of a higher ceiling.
  3. Minimalistic Furniture: Choose furniture with sleek lines and low profiles. Bulky or oversized furniture can make a low-ceiling room feel even smaller.

Functional Design for Low Ceilings

  1. Multi-Purpose Furniture: Consider furniture that serves multiple functions, such as a sofa bed or a coffee table with storage. This saves space and makes the most of the room’s functionality.
  2. Built-Ins: Built-in shelves, cabinets, and seating can be tailored to fit the space precisely, maximizing storage while maintaining a clean and uncluttered appearance.
  3. Open Concept Layout: An open floor plan can make the space feel less confined. Minimize the use of interior walls and partitions to create a more open and airy feel.

Ceiling Finishing Options

  1. Drop Ceilings: Drop ceilings, also known as suspended ceilings, can be installed to hide structural elements while providing easy access to utilities. They can also improve acoustics.
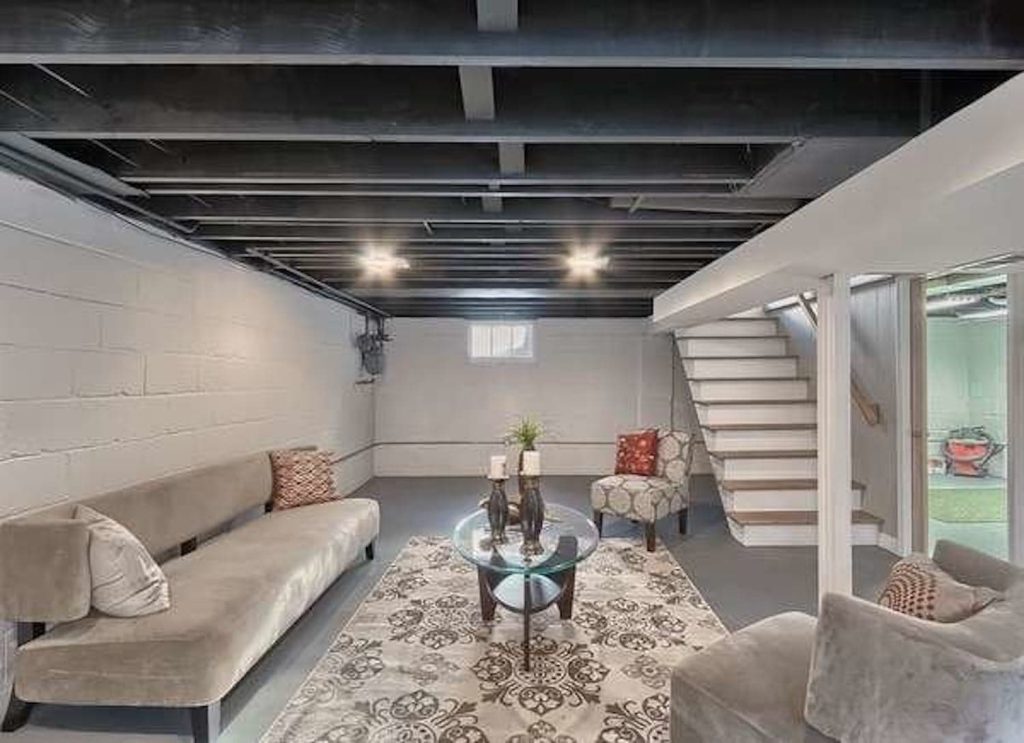
  2. Painted Exposed Ceilings: Sometimes, you can paint exposed ductwork and pipes in the same color as the ceiling to create an industrial or modern look.
  3. Ceiling Tiles: Decorative ceiling tiles are an option for adding texture and style to your low-ceiling space. They come in various patterns and materials.

Maintaining Adequate Ventilation

Proper ventilation is essential for basements. If low ceilings restrict traditional ventilation options, consider installing a ductless mini-split HVAC system or using a combination of small windows and exhaust fans to ensure fresh air circulation.

Read too: How To Dispose Of Ceiling Fans

Conclusion

Finishing a basement with low ceilings may present challenges, but it also offers a unique opportunity to create a cozy and inviting space. With the right design choices, lighting, and functional layout, your low-ceiling basement can become a valuable extension of your home, adding comfort and style to your living environment. By carefully planning your project and considering the specific challenges posed by low ceilings, you can make the most of this valuable space.