When it comes to home or office design, ceilings are often overlooked. However, upgrading this space can have a transformative effect on the aesthetics and functionality of your interiors. Stratford Drop Ceiling Tile are an excellent solution for achieving a modern, clean, and elegant look. Designed with both practicality and style in mind, these tiles are easy to install and perfect for a variety of settings.

In this guide, we’ll delve into the features, benefits, and tips for installing Stratford Drop Ceiling Tiles, as well as explore how they can enhance your living or workspace.
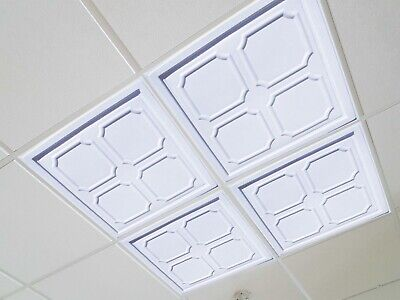
What Are Stratford Drop Ceiling Tiles?
Stratford Drop Ceiling Tiles are lightweight and durable tiles designed to be used in drop ceiling systems. These tiles are constructed from high-quality PVC material, offering a sleek finish that mimics traditional plaster or tin ceilings. They are particularly popular in residential and commercial settings due to their affordability, versatility, and low maintenance requirements.
Why Choose Stratford Drop Ceiling Tiles?
1. Durability
Stratford Drop Ceiling Tiles are resistant to moisture, mold, and mildew, making them an ideal choice for spaces like basements, kitchens, or bathrooms. Unlike traditional ceiling materials, they won’t warp or crack over time.
2. Aesthetic Appeal
These tiles come in a variety of colors and finishes, allowing homeowners and designers to create a custom look. From classic white to metallic finishes, Stratford tiles can complement any interior style.
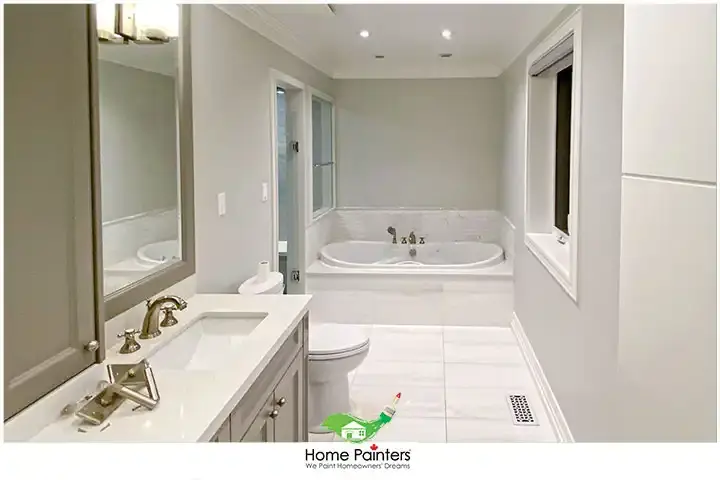
Read too: Bathroom Flooded Through the Ceiling: A Comprehensive Guide
3. Ease of Installation
Stratford tiles are lightweight and designed to fit easily into a standard 2’x2’ drop ceiling grid system. They can also be cut to size with basic tools, making installation a breeze even for DIY enthusiasts.
4. Cost-Effective Solution
Compared to traditional ceiling renovation methods, Stratford Drop Ceiling Tiles are an affordable way to upgrade your space without breaking the bank.
5. Sound Absorption
While primarily designed for aesthetic purposes, these tiles can also contribute to better acoustics in a room by reducing echo and noise.
Applications of Stratford Drop Ceiling Tiles
Stratford Drop Ceiling Tiles are versatile and can be used in various settings. Here are some of the most common applications:
- Residential Spaces: Enhance the look of living rooms, kitchens, or basements with stylish ceiling tiles.
- Offices: Create a professional and polished appearance in conference rooms, lobbies, or workspaces.
- Retail Stores: Upgrade the ambiance of your store while maintaining durability and easy maintenance.
- Hospitals and Clinics: Their resistance to moisture and mold makes them a practical choice for healthcare facilities.
Stratford Drop Ceiling Tiles: Features to Consider
When choosing Stratford Drop Ceiling Tiles, pay attention to the following features to ensure they meet your needs:
1. Material
The tiles are made from rigid PVC, which is lightweight yet sturdy. This material is also fire-retardant, adding an extra layer of safety.
2. Design Options
Stratford tiles are available in numerous styles and finishes, including smooth, textured, and patterned designs. Some models even replicate the look of tin or wood for a more sophisticated appearance.
3. Compatibility
These tiles are designed to fit standard drop ceiling grid systems. Ensure your existing grid is compatible before purchasing.
4. Maintenance
The smooth surface of Stratford Drop Ceiling Tiles makes them easy to clean. A simple wipe with a damp cloth is all it takes to keep them looking new.
How to Install Stratford Drop Ceiling Tiles
Installing Stratford Drop Ceiling Tiles is a straightforward process that can be completed in a few hours. Here’s a step-by-step guide:
1. Prepare the Area
Clear the room and gather all necessary tools, including a utility knife, measuring tape, and a ladder.
2. Inspect the Grid System
Ensure the drop ceiling grid is securely installed and properly aligned. Repair any loose or damaged sections before proceeding.
3. Measure and Cut Tiles
Measure the dimensions of each grid section and cut the tiles to fit if necessary. Stratford tiles can be easily trimmed using a utility knife.
4. Insert the Tiles
Gently place each tile into the grid, ensuring a snug fit. Start at one corner of the room and work your way across.
5. Secure and Adjust
Check that all tiles are properly seated and aligned. Adjust as needed to achieve a polished look.
6. Add Lighting or Vent Fixtures
If your ceiling includes recessed lighting or vents, cut openings in the tiles to accommodate these fixtures.
Top Benefits of Using Stratford Drop Ceiling Tiles
1. Quick and Easy Updates
Stratford Drop Ceiling Tiles are an excellent option for anyone looking to refresh their interiors without undergoing a major renovation.
2. Improved Aesthetics
The variety of styles and finishes available ensures you’ll find a design that suits your space and enhances its overall look.
3. Low Maintenance
Their resistance to moisture and stains means you won’t have to worry about frequent cleaning or repairs.
4. Increased Property Value
A well-designed ceiling can significantly enhance the value of your property, making Stratford tiles a worthwhile investment.
Stratford Drop Ceiling Tiles: Frequently Asked Questions
Q: Are Stratford Drop Ceiling Tiles easy to clean?
A: Yes, they are designed with a smooth, non-porous surface that can be wiped clean with a damp cloth.
Q: Can these tiles be used in high-humidity areas?
A: Absolutely. Stratford Drop Ceiling Tiles are resistant to moisture, making them suitable for kitchens, bathrooms, and basements.
Q: Are they environmentally friendly?
A: Stratford tiles are made from recyclable materials, making them a sustainable choice for eco-conscious homeowners.
Q: Do they provide insulation?
A: While not specifically designed for insulation, these tiles can contribute to better temperature regulation and noise reduction in your space.
Tips for Maintaining Stratford Drop Ceiling Tiles
To keep your Stratford Drop Ceiling Tiles in top condition:
- Dust regularly to prevent the buildup of debris.
- Avoid abrasive cleaners that could scratch the surface.
- Inspect the tiles periodically for any signs of damage or misalignment.
Conclusion
Stratford Drop Ceiling Tile are a versatile, durable, and cost-effective way to transform the look of your ceilings. Whether you’re renovating your home or updating a commercial space, these tiles offer a range of styles and features to meet your needs. Their ease of installation and low maintenance make them a practical choice for any setting.
By incorporating Stratford Drop Ceiling Tiles into your design, you can create a polished and professional look that enhances the beauty and functionality of your interiors.