Ceiling Hung Electric Heaters: Exploring the Efficiency and Comfort

When it comes to keeping your home cozy and comfortable during the colder months, ceiling hung electric heaters offer an efficient and space-saving solution. In this article, we’ll delve into the world of ceiling hung electric heaters, exploring their benefits, installation process, and considerations for selecting the ideal heating solution for your space.

Ceiling Hung Electric Heaters

Understanding Ceiling Hung Electric Heaters

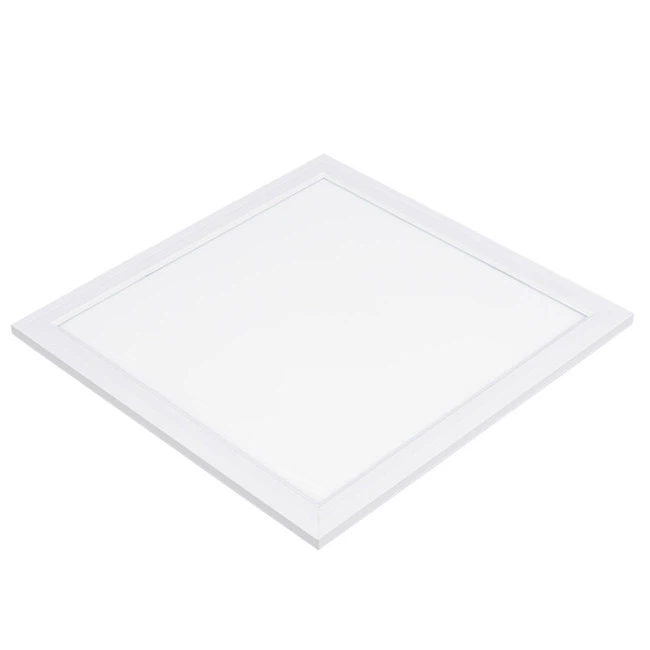
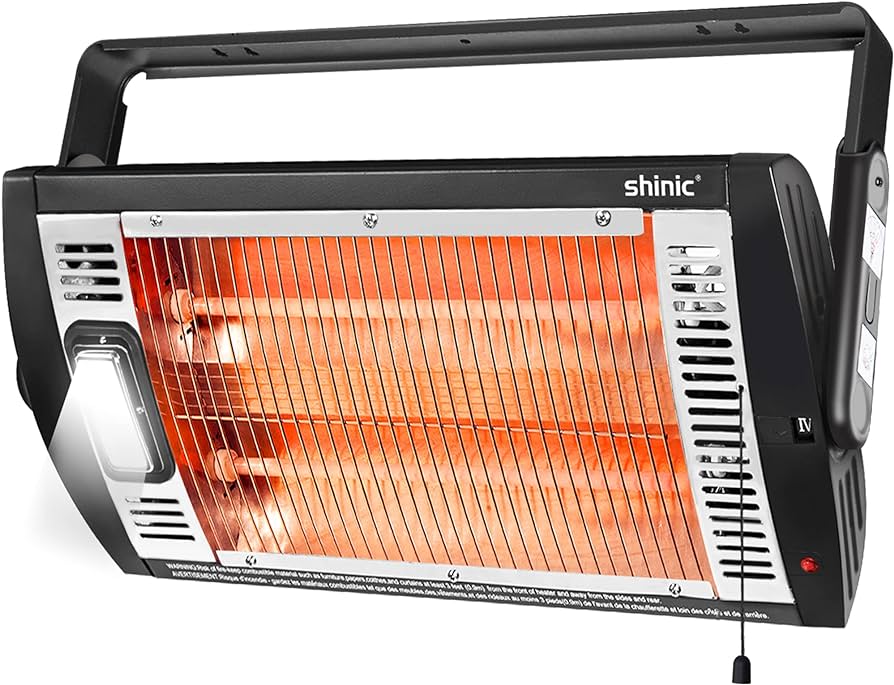
Ceiling Hung Electric Heaters: A Space-Saving Heating Solution

Ceiling hung electric heaters are designed to provide warmth and comfort while maximizing floor space. Installed directly onto the ceiling, these heaters offer uniform heat distribution throughout the room, making them ideal for areas where traditional heating systems may not be feasible or practical.

Benefits of Ceiling Hung Electric Heaters

  1. Space-Saving Design: By mounting directly onto the ceiling, these heaters free up valuable floor space, allowing for greater flexibility in room layout and furniture placement.
  2. Efficient Heating: Ceiling hung electric heaters deliver heat directly downward, minimizing heat loss and ensuring efficient warming of the space below.
  3. Versatility: Available in a range of sizes and wattages, these heaters can accommodate various room sizes and heating requirements, providing customizable comfort.
  4. Quiet Operation: Many ceiling hung electric heater operate quietly, without the noise associated with traditional heating systems, ensuring a peaceful environment.
  5. Energy Efficiency: With features such as programmable thermostats and adjustable heat settings, these heaters offer energy-efficient heating solutions, helping to reduce energy consumption and utility costs.

Read too: Exploring the Benefits and How-Tos of DIY Ceiling Cassette Mini Split Installation: Revolutionizing Comfort

Installation Process

Installing ceiling hung electric heater typically involves the following steps:

  1. Selecting the Right Heater: Choose a heater model and size that is suitable for the intended space and heating requirements.
  2. Locating Ceiling Joists: Identify the ceiling joists or support structures where the heater will be mounted.
  3. Mounting the Heater: Securely attach the heater to the ceiling using appropriate mounting hardware and follow the manufacturer’s instructions for installation.
  4. Electrical Wiring: Connect the heater to a dedicated electrical circuit, ensuring compliance with local building codes and safety standards.
  5. Testing and Adjustment: Once installed, test the heater to ensure proper operation and make any necessary adjustments to heat settings or thermostat controls.

Considerations for Choosing Ceiling Hung Electric Heater

Before selecting a ceiling hung electric heater for your space, consider the following factors:

  • Room Size: Choose a heater with sufficient heating capacity to effectively warm the intended area.
  • Ceiling Height: Ensure adequate clearance between the heater and the floor to optimize heat distribution.
  • Safety Features: Look for heaters with built-in safety features such as overheat protection and tip-over shut-off to prevent accidents.
  • Energy Efficiency: Select heaters with programmable thermostats and energy-saving modes to maximize efficiency and reduce operating costs.

Conclusion

Ceiling hung electric heater offer a practical and efficient heating solution for a variety of spaces, from residential homes to commercial establishments. With their space-saving design, customizable heating options, and energy-efficient operation, these heaters provide comfort and warmth while minimizing energy consumption. Whether you’re looking to supplement existing heating systems or create a cozy atmosphere in a specific area, consider the benefits of ceiling hung electric heater for your heating needs.

Ceiling Fans With Wood Blades: Exploring the Beauty and Benefits

In the realm of home decor and comfort, few fixtures strike the perfect balance between functionality and aesthetics like ceiling fans with wood blades. These elegant and versatile additions to any room offer not only effective air circulation but also a touch of natural beauty. Let’s delve into the world of ceiling fans with wood blades, exploring their design options, benefits, and considerations for choosing the right one for your space.

Ceiling Fans With Wood Blades

Embracing Nature Indoors: Ceiling Fans With Wood Blades

Ceiling Fans With Wood Blades: Enhancing Aesthetics and Airflow

Ceiling fans with wood blades are prized for their ability to blend seamlessly with various interior design styles while providing efficient airflow. The incorporation of wooden blades adds warmth, texture, and a rustic charm to any room, making them a popular choice among homeowners and interior designers alike.

Advantages of Ceiling Fans With Wood Blades

  1. Natural Aesthetics: The organic appeal of wood blades brings a sense of warmth and tranquility to living spaces, creating a cozy ambiance.
  2. Versatility: Wood blades come in a wide range of finishes and colors, allowing homeowners to customize their ceiling fan to complement existing decor.
  3. Quiet Operation: High-quality wood blades contribute to the silent operation of ceiling fans, ensuring peaceful and uninterrupted airflow.
  4. Durability: Well-crafted wood blades are known for their durability and resistance to warping or sagging over time, ensuring long-lasting performance.
  5. Energy Efficiency: By promoting air circulation and assisting in maintaining a comfortable temperature, ceiling fans with wood blades can help reduce reliance on air conditioning systems, leading to energy savings.

Read too: Exploring the Benefits and How-Tos of DIY Ceiling Cassette Mini Split Installation: Revolutionizing Comfort

Design Options and Considerations

When selecting a ceiling fan with wood blades for your home, consider the following design options and factors:

  • Blade Finish: Choose from a variety of wood finishes, including light oak, dark walnut, cherry, and maple, to complement your decor scheme.
  • Blade Size: Select an appropriate blade size based on the dimensions of the room to ensure optimal airflow and circulation.
  • Motor Performance: Invest in a ceiling fan with a high-quality motor for efficient operation and longevity.
  • Additional Features: Explore options such as remote control operation, integrated lighting, and reversible blade rotation for added convenience and functionality.

Incorporating Ceiling Fan With Wood Blades Into Your Home

Whether you’re revamping your living room, bedroom, or outdoor patio, ceiling fan with wood blades can elevate the style and comfort of any space. Consider installing them in the following areas:

  • Living Room: Enhance the cozy atmosphere of your living room with a stylish ceiling fan featuring wooden blades that complement your furniture and decor.
  • Bedroom: Create a tranquil retreat by installing a ceiling fan with wood blades above your bed, providing gentle airflow for restful sleep.
  • Outdoor Spaces: Extend your living area outdoors with weather-resistant ceiling fans featuring wooden blades, perfect for patios, porches, and pergolas.

Conclusion

Ceiling fan with wood blades offer a harmonious blend of functionality and design, making them a versatile and appealing choice for any home. From their natural aesthetics to their practical benefits, these fixtures enhance comfort and style while promoting energy efficiency. Whether you’re seeking to cool a room or elevate its ambiance, consider incorporating a ceiling fan with wood blades into your home decor for an effortless blend of beauty and functionality.

What to Do in Case of a Ceiling Collapse: Who to Call and How to Stay Safe

Ceiling collapses can be sudden and alarming events, posing significant risks to occupants and property. Whether caused by structural damage, water leaks, or other factors, a ceiling collapse requires immediate attention to ensure safety and prevent further damage. In this guide, we’ll explore what to do in the event of a ceiling collapse, who to call for assistance, and essential safety measures to take.

Ceiling Collapse Who To Call

Understanding Ceiling Collapse

A ceiling collapse occurs when the structural integrity of a ceiling is compromised, leading to its sudden failure and collapse. Common causes of ceiling collapses include:

  • Water Damage: Leaking pipes, roof leaks, or flooding can weaken ceiling materials over time, leading to structural failure.
  • Structural Defects: Poor construction, age-related deterioration, or inadequate support can contribute to ceiling collapses.
  • Natural Disasters: Severe weather events such as earthquakes, hurricanes, or heavy snowfall can cause ceilings to collapse.

Read too: Exploring the Benefits and How-Tos of DIY Ceiling Cassette Mini Split Installation: Revolutionizing Comfort

Signs of a Potential Ceiling Collapse

It’s essential to be vigilant for warning signs that may indicate a ceiling is at risk of collapsing. Signs of potential ceiling collapse include:

  • Cracks or Sagging: Visible cracks, bulges, or sagging areas in the ceiling may indicate structural damage.
  • Water Stains: Water stains or discoloration on the ceiling could be a sign of water damage and weakening of materials.
  • Strange Sounds: Unusual noises such as creaking, popping, or shifting sounds coming from the ceiling should be investigated promptly.

What to Do in Case of a Ceiling Collapse

In the event of a ceiling collapse, follow these steps to ensure safety and mitigate risks:

  1. Evacuate Immediately: If a ceiling collapse occurs, evacuate the area immediately to a safe location outside the building.
  2. Assess the Situation: Once outside, assess the extent of the damage and ensure that everyone is accounted for.
  3. Contact Emergency Services: Call emergency services (such as 911) to report the incident and request assistance from firefighters and paramedics if needed.
  4. Document the Damage: Take photos or videos of the collapsed ceiling and any associated damage for insurance purposes.
  5. Secure the Area: Block off the affected area to prevent access and potential injuries from falling debris.
  6. Contact a Professional: After ensuring everyone’s safety, contact a licensed contractor or structural engineer to assess the damage and recommend repairs.

Who to Call for Assistance

In the event of a ceiling collapse, it’s essential to contact the following parties for assistance:

  1. Emergency Services: Call 911 or your local emergency number to report the incident and request immediate assistance.
  2. Building Management: If the ceiling collapse occurs in a commercial or residential building, notify the building management or landlord.
  3. Insurance Provider: Contact your insurance provider to report the incident and initiate the claims process for property damage.

Safety Tips for Ceiling Collapse Prevention

To reduce the risk of a ceiling collapse, consider the following safety tips:

  • Regular Inspections: Schedule regular inspections of your property’s ceilings to identify and address any signs of damage or deterioration.
  • Address Water Damage: Promptly repair any water leaks or damage to prevent moisture buildup and structural damage.
  • Avoid Overloading Ceilings: Avoid hanging heavy objects or equipment from ceilings, as this can strain the structural integrity.
  • Monitor Weather Conditions: Stay informed about severe weather warnings and take precautions to protect your property from potential damage.

Conclusion

A ceiling collapse can be a frightening and dangerous situation, but knowing what to do and who to call can help mitigate risks and ensure a prompt response. By following the steps outlined in this guide and prioritizing safety, you can protect yourself, your loved ones, and your property in the event of a ceiling collapse emergency.

Armstrong Prelude Ceilings Grid Systems: Exploring the Versatility

When it comes to creating stylish and functional ceilings, Armstrong Prelude Ceiling Grid systems stand out as a versatile solution. Whether you’re renovating an office space, commercial building, or residential property, Armstrong Prelude Ceiling Grid offers a wide range of benefits and customization options. In this comprehensive guide, we’ll delve into the features, installation process, and applications of Armstrong Prelude Ceilings Grid, providing you with valuable insights to enhance your next ceiling project.

Armstrong Prelude Ceiling Grid

Introducing Armstrong Prelude Ceiling Grid

Armstrong Prelude Ceiling Grid is a popular choice among architects, contractors, and homeowners due to its durability, flexibility, and ease of installation. Designed to support various ceiling panel types, including acoustical panels, wood planks, and metal tiles, Prelude Ceiling Grid provides a stable foundation for creating visually stunning ceilings in any environment.

Features and Benefits

  • Durable Construction: Made from high-quality galvanized steel, Armstrong Prelude Ceiling Grid offers exceptional strength and longevity, ensuring long-lasting performance.
  • Versatile Design: With a wide range of profiles, colors, and finishes available, Prelude Ceiling Grid allows for endless design possibilities, from traditional to contemporary styles.
  • Easy Installation: The innovative clip-and-hook system of Armstrong Prelude Ceiling Grid simplifies the installation process, reducing labor time and costs.
  • Seismic Performance: Armstrong Prelude Ceiling Grid systems are engineered to withstand seismic movements, making them suitable for use in earthquake-prone regions.
  • Integrated Solutions: Prelude Ceiling Grid is compatible with Armstrong’s extensive range of ceiling panels and accessories, providing a complete ceiling solution for any project.

Applications

Armstrong Prelude Ceiling Grid systems are suitable for various applications, including:

  1. Commercial Spaces: Offices, retail stores, restaurants, and healthcare facilities benefit from the aesthetic appeal and functionality of Armstrong Prelude Ceiling Grid.
  2. Educational Institutions: Schools, colleges, and universities can create conducive learning environments with the acoustic performance of Prelude Ceiling Grid.
  3. Residential Properties: Homeowners appreciate the versatility and customizable options of Armstrong Prelude Ceiling Grid for enhancing living spaces.

Installation Process

Installing Armstrong Prelude Ceiling Grid is a straightforward process that can be completed in a few simple steps:

  1. Planning and Measurement: Determine the layout of the ceiling grid and measure the space accurately.
  2. Assembly: Connect the main runners and cross tees to form the grid framework, ensuring proper alignment and spacing.
  3. Panel Installation: Install ceiling panels within the grid framework, securing them in place according to manufacturer guidelines.
  4. Finishing Touches: Add trim components, lighting fixtures, and other accessories to complete the ceiling design.

Conclusion

Armstrong Prelude Ceilings Grid offers a versatile, durable, and visually appealing solution for a wide range of ceiling applications. Whether you’re renovating a commercial space or upgrading your home, Prelude Ceiling Grid provides the flexibility and performance you need to achieve stunning results.

Read too: Exploring the Benefits and How-Tos of DIY Ceiling Cassette Mini Split Installation: Revolutionizing Comfort

Wood for Outdoor Ceiling Projects: Exploring the Best Types

Are you considering adding a touch of warmth and natural beauty to your outdoor space with a wooden ceiling? Choosing the right type of wood is essential for ensuring durability, weather resistance, and aesthetic appeal. In this guide, we’ll explore the best types of wood for outdoor ceiling projects to help you make an informed decision.

Wood For Outdoor Ceiling

Understanding the Importance of Wood Selection for Outdoor Ceilings

When it comes to outdoor ceilings, selecting the appropriate wood is crucial due to exposure to elements such as sunlight, moisture, and temperature fluctuations. The right type of wood can withstand these environmental factors and maintain its structural integrity and appearance over time. Factors to consider when choosing wood for outdoor ceilings include:

  • Durability: Choose a wood species that is naturally resistant to decay, rot, and insect damage to ensure longevity.
  • Weather Resistance: Opt for wood that can withstand exposure to sunlight, rain, snow, and humidity without warping, splitting, or fading.
  • Aesthetic Appeal: Consider the color, grain pattern, and texture of the wood to achieve the desired look for your outdoor space.

Best Types of Wood for Outdoor Ceiling Projects

  1. Cedar: Cedar is a popular choice for outdoor ceilings due to its natural resistance to decay, rot, and insect infestation. It has a beautiful reddish-brown hue and a distinct aroma that adds character to outdoor spaces.
  2. Redwood: Redwood is another excellent option known for its durability and rich, reddish-brown color. It contains natural oils that protect it from moisture and decay, making it an ideal choice for outdoor applications.
  3. Pressure-Treated Pine: Pressure-treated pine is a cost-effective option for outdoor ceilings. It undergoes a treatment process that enhances its resistance to decay, rot, and insect damage, making it suitable for outdoor use.
  4. Mahogany: Mahogany is prized for its rich, dark color and elegant grain pattern. It is naturally resistant to rot and decay, making it a durable choice for outdoor ceilings. However, it may require periodic sealing or staining to maintain its appearance.
  5. Ipe: Ipe, also known as Brazilian walnut, is an extremely durable and weather-resistant hardwood. It has a rich, dark brown color and a dense grain pattern that adds sophistication to outdoor spaces. While more expensive than other options, ipe requires minimal maintenance and can last for decades.

Read too: Discovering the Charm of Nautical Outdoor Ceiling Fans for Your Coastal Retreat: Sail into Style

Factors to Consider When Installing Wood Outdoor Ceilings

  • Proper Ventilation: Ensure adequate ventilation to prevent moisture buildup and reduce the risk of mold and mildew growth.
  • Sealing or Staining: Apply a protective sealant or stain to the wood to enhance its durability and weather resistance.
  • Regular Maintenance: Perform routine inspections and maintenance tasks, such as cleaning and resealing, to prolong the life of your outdoor ceiling.

Conclusion

Choosing the right type of wood for your outdoor ceiling is essential for creating a durable, weather-resistant, and visually appealing outdoor space. By considering factors such as durability, weather resistance, and aesthetic appeal, you can select the perfect wood for your outdoor ceiling project and enjoy years of beauty and functionality.

Enhance Your Garage with a Vapor Barrier Garage Ceiling: Everything You Need to Know

Are you looking to safeguard your garage against moisture and humidity? Consider installing a vapor barrier garage ceiling. In this comprehensive guide, we’ll explore the benefits, installation process, and maintenance tips for maintaining a dry and protected garage environment.

Vapor Barrier Garage Ceiling

Understanding the Importance of a Vapor Barrier Garage Ceiling

A vapor barrier garage ceiling serves as a protective layer that prevents moisture from infiltrating the space below. Garages are susceptible to moisture intrusion due to factors such as fluctuating temperatures, condensation, and exposure to the elements. Without proper protection, moisture can lead to a host of problems, including mold growth, wood rot, and corrosion of metal surfaces.

The Role of a Vapor Barrier in Moisture Control

A vapor barrier is designed to control the movement of moisture vapor through building materials, such as drywall and insulation. By installing a vapor barrier garage ceiling, you create a barrier that prevents moisture from penetrating the ceiling and entering the garage space. This helps maintain a stable indoor environment and protects valuable belongings stored in the garage from moisture-related damage.

Read too: Discovering the Charm of Nautical Outdoor Ceiling Fans for Your Coastal Retreat: Sail into Style

Benefits of Installing a Vapor Barrier Garage Ceiling

There are several benefits to installing a vapor barrier garage ceilings, including:

  1. Moisture Prevention: By effectively blocking moisture vapor from entering the garage space, a vapor barrier helps prevent mold growth, wood decay, and corrosion of metal surfaces.
  2. Improved Air Quality: By reducing moisture levels in the garage, a vapor barrier can help improve indoor air quality and create a healthier living environment.
  3. Enhanced Energy Efficiency: A vapor barrier garage ceiling can also improve energy efficiency by reducing the workload on HVAC systems and helping to maintain consistent indoor temperatures.
  4. Protects Belongings: By keeping the garage dry and free from moisture-related damage, a vapor barrier protects valuable belongings such as tools, equipment, and vehicles stored in the garage.

Installation Process for a Vapor Barrier Garage Ceiling

Installing a vapor barrier garage ceilings is a relatively straightforward process that can be completed with basic tools and materials. Here’s a general overview of the installation process:

  1. Preparation: Begin by clearing out the garage and removing any existing insulation or ceiling materials.
  2. Measurements: Measure the dimensions of the garage ceiling to determine the amount of vapor barrier material needed.
  3. Installation: Install the vapor barrier material by stapling or adhering it directly to the ceiling joists, ensuring a tight seal around the edges and seams.
  4. Sealing: Use tape or caulk to seal any gaps or seams in the vapor barrier to prevent moisture from seeping through.
  5. Finishing: Once the vapor barrier is installed, you can proceed to add insulation and finish the ceiling with drywall or other ceiling materials as desired.

Maintaining Your Vapor Barrier Garage Ceiling

To ensure optimal performance and longevity of your vapor barrier garage ceilings, it’s essential to perform regular maintenance tasks, such as:

  • Inspection: Periodically inspect the vapor barrier for any signs of damage or deterioration, such as tears, punctures, or water stains.
  • Repair: Promptly repair any damage to the vapor barrier to prevent moisture infiltration and maintain its effectiveness.
  • Ventilation: Ensure proper ventilation in the garage to help reduce humidity levels and prevent moisture buildup.
  • Cleanliness: Keep the garage clean and free from clutter to allow for proper airflow and ventilation around the vapor barrier.

Conclusion

A vapor barrier garage ceilings is an essential component of a moisture control strategy for your garage. By preventing moisture infiltration and protecting against mold, rot, and corrosion, a vapor barrier helps maintain a dry, comfortable, and functional garage space. With proper installation and maintenance, you can enjoy the benefits of a well-protected garage for years to come.

Star Flush Mount Ceiling Light: Discover the Beauty

Are you searching for a lighting solution that combines functionality with celestial elegance? Look no further than star flush mount ceiling light. In this comprehensive guide, we’ll delve into everything you need to know about these stunning lighting fixtures, from their design versatility to installation tips and design inspiration.

Star Flush Mount Ceiling Light

Introducing Star Flush Mount Ceiling Lights

Star flush mount ceiling lights are more than just lighting fixtures—they’re works of art that add a touch of celestial beauty to any space. Featuring a sleek, low-profile design, these lights are mounted flush against the ceiling, making them ideal for rooms with low ceilings or limited space. With their intricate star-shaped patterns and soft, diffused glow, star flush mount ceiling lights create a captivating ambiance that’s sure to impress.

The Versatility of Star Flush Mount Ceiling Lights

One of the key advantages of star flush mount ceiling lights is their versatility. Available in a variety of sizes, styles, and finishes, these lights can complement a wide range of interior design aesthetics, from contemporary and minimalist to rustic and eclectic. Whether you’re illuminating a bedroom, living room, hallway, or foyer, star flush mount ceiling lights make a statement while seamlessly blending into your existing décor.

Read too: Discovering the Charm of Nautical Outdoor Ceiling Fans for Your Coastal Retreat: Sail into Style

Design Considerations for Star Flush Mount Ceiling Lights

When choosing star flush mount ceiling lights for your space, there are several factors to consider to ensure you find the perfect fixture:

  • Size: Consider the size of the room and the height of the ceiling when selecting the appropriate size for your star flush mount ceiling light. Opt for larger fixtures in spacious rooms to make a bold statement, while smaller lights are ideal for more intimate spaces.
  • Style: From modern and contemporary to traditional and vintage-inspired designs, there’s a wide range of styles to choose from when it comes to star flush mount ceiling lights. Select a style that complements your existing décor and enhances the overall aesthetic of the room.
  • Finish: Choose a finish that coordinates with other fixtures and hardware in the space, such as brushed nickel, oil-rubbed bronze, or matte black, for a cohesive look.

Installing Star Flush Mount Ceiling Lights

Installing star flush mount ceiling lights is a relatively simple process that can be completed in just a few steps. Here’s a basic overview of how to install these fixtures:

  1. Turn Off Power: Before beginning the installation process, turn off the power to the existing light fixture at the circuit breaker to prevent electrical accidents.
  2. Remove Old Fixture: If replacing an existing light fixture, carefully remove the old fixture from the ceiling, taking care not to damage the electrical wiring.
  3. Install Mounting Bracket: Attach the included mounting bracket to the electrical box in the ceiling using the provided screws, ensuring it is securely fastened.
  4. Connect Wiring: Connect the electrical wires from the ceiling to the corresponding wires on the star flush mount ceiling light fixture, following the manufacturer’s instructions and using wire nuts to secure the connections.
  5. Attach Fixture: After connecting the wiring, carefully position the fixture over the mounting bracket and secure it in place using the included screws.
  6. Test Light: Turn the power back on at the circuit breaker and test the light to ensure it is functioning properly before completing the installation process.

Design Inspiration

Need some inspiration to help you incorporate star flush mount ceiling lights into your home décor? Here are a few design ideas to spark your creativity:

  • Starry Night Bedroom: Create a dreamy bedroom retreat by installing star flush mount ceiling lights above the bed for a celestial-inspired ambiance.
  • Cosmic Café Dining Room: Illuminate your dining area with a cluster of star flush mount ceiling lights suspended at different heights for a striking centerpiece.
  • Galactic Gallery Hallway: Line the hallway with star flush mount ceiling lights to guide the way and create a captivating gallery-like atmosphere.

Conclusion

Star flush mount ceiling lights are more than just lighting fixtures—they’re expressions of style and sophistication that elevate the ambiance of any room. With their versatile designs, easy installation, and celestial charm, these lights are the perfect choice for adding a touch of elegance to your home décor.

Rustic Drop Ceiling Tile: A Guide to Rustic Home Décor

Are you looking to infuse your home with the cozy charm of rustic décor? One way to achieve this aesthetic is by incorporating rustic drop ceiling tile into your interior design. In this guide, we’ll explore everything you need to know about rustic drop ceiling tiles, from their features and benefits to installation tips and design inspiration.

Rustic Drop Ceiling Tiles

Why Choose Rustic Drop Ceiling Tiles?

Rustic drop ceiling tiles offer a unique blend of functionality and style, making them an excellent choice for homeowners seeking to enhance the visual appeal of their living spaces. Here are some reasons to consider incorporating rustic drop ceiling tiles into your home décor:

  • Authentic Aesthetic: Rustic drop ceiling tiles are designed to mimic the look of natural materials such as wood, tin, or reclaimed metal, adding authenticity and character to any room.
  • Versatility: Whether you’re aiming for a farmhouse-inspired kitchen, a cozy cabin retreat, or a rustic industrial loft, there’s a wide range of rustic drop ceiling tile designs to suit your preferred style.
  • Durability: Made from high-quality materials, rustic drop ceiling tiles are durable and long-lasting, providing both aesthetic appeal and practical functionality.
  • Easy Installation: With their lightweight construction and simple installation process, rustic drop ceiling tiles are an accessible option for DIY enthusiasts and professional contractors alike.

Choosing the Right Rustic Drop Ceiling Tiles

When selecting rustic drop ceiling tiles for your home, consider factors such as material, color, and pattern to ensure they complement your existing décor and design preferences. Here are some popular options to explore:

  1. Wood-look Tiles: Embrace the warmth and texture of natural wood with rustic drop ceiling tiles that feature realistic wood grain patterns and finishes.
  2. Tin Tiles: Add a touch of vintage charm to your space with tin drop ceiling tiles, which evoke the look of traditional pressed tin ceilings found in historic homes and buildings.
  3. Metallic Tiles: For an industrial-inspired aesthetic, opt for rustic drop ceiling tiles with metallic finishes such as copper, bronze, or aged metal.

Read too: Discovering the Charm of Nautical Outdoor Ceiling Fans for Your Coastal Retreat: Sail into Style

Installation Tips

Installing rustic drop ceiling tiles is a straightforward process that can be completed in just a few simple steps. Here’s a basic overview of how to install these stylish tiles:

  1. Prepare the Ceiling: Ensure the ceiling surface is clean, dry, and free of any debris or obstructions before beginning the installation process.
  2. Measure and Cut Tiles: Measure the dimensions of the ceiling and use a utility knife or tin snips to cut the rustic drop ceiling tiles to fit accordingly.
  3. Apply Adhesive: Apply a suitable adhesive to the back of each tile and carefully press it into place on the ceiling, starting from one corner and working your way across.
  4. Secure Edges: Use nails or screws to secure the edges of the tiles to the ceiling, ensuring they are firmly in place and evenly spaced.
  5. Finishing Touches: Once all tiles are installed, add finishing touches such as trim pieces or molding to complete the look and enhance the overall aesthetic.

Design Inspiration for Rustic Drop Ceiling Tiles

Need some inspiration to kickstart your rustic ceiling tile project? Here are a few design ideas to spark your creativity:

  • Rustic Farmhouse Kitchen: Install weathered wood-look ceiling tiles in a farmhouse kitchen for a cozy and inviting ambiance.
  • Rustic Cabin Retreat: Create a rustic retreat in your home with tin ceiling tiles that evoke the charm of a mountain cabin or lakeside lodge.
  • Rustic Industrial Loft: Incorporate metallic drop ceiling tiles into an industrial loft space for an edgy and modern twist on rustic design.

Conclusion

Rustic drop ceiling tile are a versatile and stylish option for enhancing the aesthetic appeal of any room in your home. Whether you’re aiming for a cozy farmhouse vibe or an urban industrial look, these tiles offer endless design possibilities to suit your unique style and preferences.

Popcorn Ceiling Removal in Tucson: Transform Your Home Today!

Are you tired of the outdated popcorn ceilings in your Tucson home? Popcorn ceilings, also known as acoustic ceilings or textured ceilings, were once popular but are now considered unattractive and outdated. If you’re ready to give your home a fresh, modern look, popcorn ceiling removal is the way to go. In this comprehensive guide, we’ll provide expert tips and advice for popcorn ceiling removal in Tucson.

Popcorn Ceiling Removal Tucson

Popcorn Ceiling Removal Tucson: A Step-by-Step Guide

1. Assessment and Preparation

Before starting the popcorn ceiling removal process, assess the condition of the ceiling and prepare the room accordingly. Cover floors and furniture with plastic sheeting to protect them from dust and debris. Additionally, ensure proper ventilation by opening windows and using fans to minimize dust buildup.

2. Moistening the Ceiling

To make the popcorn texture easier to remove, moisten the ceiling with water before scraping. Use a garden sprayer or spray bottle to apply water evenly across the surface, allowing it to soak in for several minutes. This helps soften the texture and reduces the risk of releasing harmful particles into the air.

3. Scraping the Texture

Once the ceiling is adequately moistened, use a wide putty knife or specialized popcorn ceiling scraper to gently remove the texture. Work in small sections, taking care not to damage the underlying surface. If stubborn areas remain, apply additional water and allow it to soak before scraping again.

Read too: Discovering the Charm of Nautical Outdoor Ceiling Fans for Your Coastal Retreat: Sail into Style

4. Finishing Touches

After removing the popcorn texture, inspect the ceiling for any imperfections or rough patches. Use a drywall compound or joint compound to fill in gaps or holes, then sand the surface smooth once the compound has dried. Finally, prime the ceiling with a quality primer before applying your desired finish, such as paint or a new texture.

Benefits of Popcorn Ceiling Removal

  • Enhanced Aesthetic: Removing popcorn ceilings instantly modernizes the look of your home, creating a cleaner and more contemporary space.
  • Improved Lighting: Smooth ceilings reflect light more effectively than textured ceilings, brightening up the room and making it feel more spacious.
  • Healthier Indoor Environment: Popcorn ceilings can trap dust, allergens, and other pollutants, contributing to poor indoor air quality. Removing them can help create a healthier living environment for you and your family.

Cost Considerations

The cost of popcorn ceiling removal in Tucson can vary depending on factors such as the size of the room, the condition of the ceiling, and the extent of preparation and finishing work required. On average, homeowners can expect to pay between $1 and $3 per square foot for professional popcorn ceiling removal services.

Conclusion

Popcorn ceiling removal is a worthwhile investment that can significantly improve the look and feel of your Tucson home. By following our expert tips and best practices, you can tackle this renovation project with confidence and achieve stunning results that you’ll enjoy for years to come.

Popcorn Ceiling Removal in Dallas: Expert Tips

Are you considering removing the popcorn ceiling in your Dallas home? Popcorn ceilings, also known as acoustic ceilings or textured ceilings, were popular in the past but have fallen out of favor in recent years due to their outdated appearance and potential health hazards. If you’re ready to update your space and enhance its aesthetic appeal, popcorn ceiling removal is a great place to start. In this comprehensive guide, we’ll provide expert tips and advice for popcorn ceiling removal in Dallas.

Popcorn Ceiling Removal Dallas

Popcorn Ceiling Removal Dallas: Understanding the Process

1. Assessment and Preparation

Before beginning the popcorn ceiling removal process, it’s essential to assess the condition of the ceiling and prepare the area accordingly. This involves covering floors and furniture with plastic sheeting to protect them from dust and debris. Additionally, ensure that the room is well-ventilated by opening windows and using fans to minimize dust accumulation.

2. Moistening the Ceiling

To make the popcorn texture easier to remove, it’s recommended to moisten the ceiling with water before scraping. Use a garden sprayer or a spray bottle to apply water evenly to the surface, allowing it to soak in for several minutes. This helps soften the texture and reduces the risk of releasing asbestos fibers into the air.

Read too: Discovering the Charm of Nautical Outdoor Ceiling Fans for Your Coastal Retreat: Sail into Style

3. Scraping the Texture

Once the ceiling is adequately moistened, use a wide putty knife or a specialized popcorn ceiling scraper to gently scrape away the texture. Work in small sections, being careful not to damage the underlying drywall or plaster. If you encounter stubborn areas, apply additional water and let it soak in before attempting to scrape again.

4. Finishing Touches

After removing the popcorn texture, inspect the ceiling for any remaining imperfections or rough patches. Use a drywall compound or joint compound to fill in any gaps or holes, then sand the surface smooth once the compound has dried. Finally, prime the ceiling with a quality primer before applying your desired finish, such as paint or a new texture.

Benefits of Popcorn Ceiling Removal

  • Modernization: Removing popcorn ceilings can instantly modernize the look of your home, giving it a cleaner and more updated appearance.
  • Increased Property Value: Homes with smooth ceilings are more attractive to buyers and may command a higher resale value than those with popcorn ceilings.
  • Improved Air Quality: Popcorn ceilings can trap dust, allergens, and other pollutants, contributing to poor indoor air quality. Removing them can help create a healthier living environment for you and your family.

Cost Considerations

The cost of popcorn ceiling removal in Dallas can vary depending on factors such as the size of the room, the condition of the ceiling, and the extent of preparation and finishing work required. On average, homeowners can expect to pay between $1 and $3 per square foot for professional popcorn ceiling removal services.

Conclusion

Popcorn ceiling removal is a worthwhile investment that can enhance the beauty, value, and overall livability of your Dallas home. By following expert tips and best practices, you can tackle this home improvement project with confidence and achieve stunning results that you’ll enjoy for years to come.

Insulate Your Garage Ceiling Without Drywall: Creative Ways

Are you looking to enhance the comfort and energy efficiency of your garage without the hassle of drywall installation? Insulating your garage ceiling without drywall can be a practical and effective solution. In this guide, we’ll explore creative methods to insulate your garage ceiling, keeping it comfortable and functional in any season.

Insulate Garage Ceiling Without Drywall

Insulate Garage Ceiling Without Drywall: Exploring Your Options

1. Foam Board Insulation

Foam board insulation is a popular choice for insulating garage ceilings without drywall. Available in various thicknesses and R-values, foam board insulation provides excellent thermal resistance and can help reduce heat transfer between the garage and living space above. To install foam board insulation, simply cut the panels to size and secure them to the ceiling joists using adhesive or mechanical fasteners.

2. Spray Foam Insulation

Spray foam insulation offers superior coverage and can effectively seal gaps and cracks in the garage ceiling. This type of insulation expands upon application, filling cavities and creating a seamless thermal barrier. Spray foam insulation is typically installed by professionals, but DIY kits are also available for smaller projects. Be sure to follow proper safety precautions when working with spray foam insulation.

3. Reflective Insulation

Reflective insulation, also known as radiant barrier insulation, is designed to reflect radiant heat away from the garage ceiling. This type of insulation typically consists of a layer of reflective foil laminated to a substrate material such as foam or bubble wrap. Reflective insulation is easy to install and can be stapled or taped directly to the underside of the garage ceiling joists.

Read too: Discovering the Charm of Nautical Outdoor Ceiling Fans for Your Coastal Retreat: Sail into Style

Benefits of Insulating Your Garage Ceiling Without Drywall

  • Improved Comfort: Proper insulation helps regulate the temperature in your garage, making it more comfortable to work in year-round.
  • Energy Savings: By reducing heat transfer, insulation can lower your energy bills by minimizing the need for heating and cooling.
  • Moisture Control: Insulation can help prevent condensation and moisture buildup in the garage, reducing the risk of mold and mildew growth.
  • Noise Reduction: Insulation can dampen sound transmission, making your garage quieter and more peaceful.

DIY Tips for Insulating Your Garage Ceiling

  • Measure Twice, Cut Once: Take accurate measurements of your garage ceiling before purchasing insulation materials to ensure proper coverage and fit.
  • Seal Air Leaks: Before installing insulation, seal any gaps or cracks in the garage ceiling with caulk or spray foam to maximize energy efficiency.
  • Safety First: Wear appropriate safety gear, such as gloves, goggles, and a respirator, when handling insulation materials to protect yourself from irritation and airborne particles.

Conclusion

Insulating your garage ceiling without drywall can provide numerous benefits, from improved comfort and energy savings to moisture control and noise reduction. By exploring innovative insulation methods and following DIY tips, you can create a more comfortable and functional garage space that enhances your home’s overall efficiency and value.

Drop Ceiling Lighting 2X2: Exploring the World

Are you looking to brighten up your space with stylish and functional lighting? Dive into the world of drop ceiling lighting 2×2 and discover how this versatile lighting solution can transform any room. From homes to offices, drop ceiling lighting 2×2 offers an array of benefits and design possibilities that can elevate your space to new heights.

Drop Ceiling Lighting 2X2

Understanding Drop Ceiling Lighting 2X2

What is Drop Ceiling Lighting 2X2?

Drop ceiling lighting 2×2 refers to lighting fixtures specifically designed to fit into standard 2×2 ceiling grids commonly found in residential and commercial spaces. These fixtures are typically recessed into the ceiling, providing a seamless and integrated lighting solution.

Types of Drop Ceiling Lighting 2X2

  1. LED Panel Lights: LED panel lights are popular choices for drop ceiling lighting 2×2 due to their energy efficiency, long lifespan, and uniform light distribution. These fixtures offer bright, glare-free illumination, making them ideal for various applications, including offices, classrooms, and healthcare facilities.
  2. Fluorescent Troffer Lights: Fluorescent troffer lights are another common option for drop ceilings lighting 2×2. Available in various lamp configurations, including T8 and T5 fluorescent tubes, these fixtures provide ample illumination and are often used in commercial settings such as retail stores, warehouses, and industrial facilities.
  3. Recessed LED Downlights: Recessed LED downlights offer a sleek and modern lighting solution for drop ceilings. These fixtures are installed flush with the ceiling surface, creating a clean and minimalist look. With adjustable beam angles and color temperatures, recessed LED downlights allow for customizable lighting effects to suit different environments.

Read too: Discovering the Charm of Nautical Outdoor Ceiling Fans for Your Coastal Retreat: Sail into Style

Installation and Design Tips

Installation Methods

  • Surface Mounting: Surface mounting involves attaching the lighting fixture directly to the surface of the drop ceiling grid. This method is straightforward and requires minimal modifications to the ceiling structure.
  • Recessed Installation: Recessed installation involves cutting an opening in the ceiling panel to accommodate the lighting fixture. Recessed fixtures sit flush with the ceiling surface, creating a seamless and integrated look.

Design Considerations

  • Lighting Layout: Plan the layout of your drop ceilings lighting 2×2 to ensure even illumination throughout the space. Consider factors such as the room’s dimensions, function, and desired ambiance when determining the placement of lighting fixtures.
  • Color Temperature: Choose the appropriate color temperature for your lighting fixtures to create the desired atmosphere. Warmer color temperatures (e.g., 2700K-3000K) are ideal for creating a cozy and inviting ambiance, while cooler temperatures (e.g., 4000K-5000K) are suitable for task-oriented spaces.

Conclusion

Elevate your space with the versatility and functionality of drop ceilings lighting 2×2. Whether you’re illuminating a home office, commercial workspace, or retail environment, these lighting fixtures offer a seamless blend of style and performance. With a range of options to choose from and easy installation methods, you can create the perfect lighting solution for any room.

Delta Ceiling Mount Shower Head: Unveiling the Beauty

Are you ready to elevate your shower experience to new heights? Discover the luxurious and innovative Delta Ceiling Mount Shower Head. In this comprehensive guide, we’ll delve into everything you need to know about this exquisite bathroom fixture, from its cutting-edge features to installation tips and more.

Delta Ceiling Mount Shower Head

Introducing the Delta Ceiling Mount Shower Head

What is a Delta Ceiling Mount Shower Head?

A Delta Ceiling Mount Shower Head is a premium-quality shower fixture designed to be mounted directly onto the ceiling of your shower enclosure. This unique installation method creates a sleek and modern aesthetic while providing an immersive shower experience from above.

Read too: Discovering the Charm of Nautical Outdoor Ceiling Fans for Your Coastal Retreat: Sail into Style

Features and Benefits

  1. 360-Degree Rotation: Enjoy full flexibility and control over your shower experience with a Delta Ceiling Mount Shower Head’s 360-degree rotation feature. Easily adjust the angle and direction of the water flow to suit your preferences.
  2. Wide Coverage: Experience luxurious full-body coverage with the wide spray pattern of a Delta Ceiling Mount Shower Head. The strategically designed nozzles ensure even distribution of water for a refreshing and invigorating shower experience.
  3. Multiple Spray Settings: Customize your shower experience with multiple spray settings, including rain shower, massage, and mist. Whether you prefer a gentle rainfall or a powerful massage, there’s a setting to suit every mood and preference.
  4. Easy-to-Clean Design: Designed with convenience in mind, Delta Ceiling Mount Shower Heads feature easy-to-clean surfaces and anti-clog nozzles, ensuring hassle-free maintenance and long-lasting performance.
  5. Sleek and Modern Design: Add a touch of elegance to your bathroom decor with the sleek and modern design of a Delta Ceiling Mount Shower Head. Available in a variety of finishes and styles, you can choose the perfect option to complement your bathroom aesthetic.

Installation Tips

Pre-Installation Preparation

Before installing your Delta Ceilings Mount Shower Head, consider the following:

  • Ensure that your shower ceiling is structurally sound and capable of supporting the weight of the fixture.
  • Measure the dimensions of your shower enclosure to determine the optimal placement of the shower head.
  • Consult the manufacturer’s instructions and recommendations for installation guidelines and best practices.

Installation Process

  1. Prepare the Mounting Surface: Clean the ceiling surface thoroughly and ensure it is free from any debris or moisture.
  2. Mark the Installation Location: Use a pencil to mark the desired location for the shower head on the ceiling, taking into account factors such as shower size and user height preferences.
  3. Drill Pilot Holes: Use a drill to create pilot holes at the marked installation location to facilitate the installation process.
  4. Install Mounting Bracket: Secure the mounting bracket to the ceiling using the provided hardware, ensuring it is level and securely attached.
  5. Attach Shower Head: Connect the Delta Ceilings Mount Shower Head to the mounting bracket according to the manufacturer’s instructions, ensuring a secure and watertight seal.

Conclusion

Transform your daily shower routine into a luxurious and rejuvenating experience with a Delta Ceilings Mount Shower Head. With its innovative design, advanced features, and customizable settings, it’s the perfect addition to any modern bathroom. Elevate your space and indulge in the ultimate shower experience with Delta.

Ceilume Drop Ceiling Tiles for Your Interior Design: Exploring the Versatility

Are you looking to transform the look and feel of your space with an innovative ceiling solution? Ceilume drop ceiling tiles offer a versatile and stylish option for enhancing the aesthetics of any room. In this comprehensive guide, we’ll delve into the world of Ceilume drop ceiling tiles, exploring their features, benefits, and how they can elevate your interior design.

Ceilume Drop Ceiling Tiles

Introducing Ceilume Drop Ceiling Tiles

What are Ceilume Drop Ceiling Tiles?

Ceilume drop ceiling tiles are high-quality, lightweight tiles designed to be suspended from the ceiling grid to create a sleek and polished look. Made from durable materials such as vinyl or PVC, these tiles are known for their versatility, ease of installation, and ability to mimic the appearance of various materials like metal, wood, or plaster.

Benefits of Ceilume Drop Ceiling Tiles

  1. Aesthetic Appeal: Ceilume tiles come in a wide range of styles, patterns, and finishes, allowing you to achieve the desired look for your space. Whether you prefer a classic, modern, or industrial aesthetic, there’s a Ceilume tile to suit your taste.
  2. Durability: Constructed from robust materials, Ceilume drop ceiling tiles are resistant to moisture, mold, mildew, and sagging, ensuring long-lasting performance and durability.
  3. Easy Installation: With their lightweight design and interlocking edges, Ceilume tiles are easy to install, making them suitable for both DIY enthusiasts and professional contractors. They can be quickly and securely fitted into the ceiling grid without the need for specialized tools or equipment.
  4. Acoustic Benefits: Ceilume drop ceiling tiles can help improve the acoustics of a room by absorbing sound and reducing echo, creating a more pleasant and comfortable environment.
  5. Low Maintenance: Once installed, Ceilume tiles require minimal maintenance. They can be easily cleaned with a damp cloth or sponge to remove dust and dirt, helping to keep your space looking fresh and inviting.

Exploring Ceilume Drop Ceiling Tile Options

Styles and Designs

Ceilume offers a diverse selection of drop ceiling tile to suit various design preferences and architectural styles. From traditional to contemporary, you can choose from an array of patterns, textures, and colors to enhance the visual appeal of your space.

Installation Process

To install Ceilume drop ceiling tile, follow a few simple steps:

  1. Prepare the Ceiling Grid: Ensure that the ceiling grid is clean, level, and free from any obstructions.
  2. Measure and Cut Tiles: Measure the dimensions of the ceiling space and cut the tiles to fit using a utility knife or scissors.
  3. Install Edge Trim: Secure edge trim pieces along the perimeter of the ceiling to create a clean and finished look.
  4. Insert Tiles: Place the tiles into the ceiling grid, starting from one corner and working your way across the room.
  5. Secure Tiles: Make sure to securely seat each tile in the grid and align it properly with adjacent tiles.

Maintenance Tips

To keep your Ceilume drop ceiling tile looking their best, follow these maintenance tips:

  • Regularly dust or vacuum the tiles to remove surface dirt and debris.
  • Clean stains or marks promptly with a mild soap solution and water.
  • Avoid using abrasive cleaners or harsh chemicals, as they may damage the surface of the tiles.
  • Inspect the tiles periodically for any signs of damage or wear, and replace any damaged tiles as needed.

Read too: Discovering the Charm of Nautical Outdoor Ceiling Fans for Your Coastal Retreat: Sail into Style

Conclusion

Ceilume drop ceiling tiles offer a stylish, practical, and cost-effective solution for enhancing the look and feel of any interior space. With their wide range of styles, easy installation, and low maintenance requirements, they are an excellent choice for residential, commercial, and industrial applications. Consider incorporating Ceilume drop ceiling tile into your next interior design project to create a visually stunning and functional environment.

Ceiling Mounted Accordion Room Divider Solution: Enhance Your Space with a Versatile

Ceiling mounted accordion room dividers offer a versatile and space-saving solution for dividing large areas into separate zones while maintaining an open and airy feel. Whether you’re looking to create privacy in a shared living space, divide a large room into functional areas, or add flexibility to your workspace, a ceiling mounted accordion room divider provides a stylish and practical solution. In this comprehensive guide, we’ll delve into the features, benefits, installation process, and design considerations of ceiling mounted accordion room dividers, empowering you to optimize your space with ease and style.

Ceiling Mounted Accordion Room Divider

Understanding Ceiling Mounted Accordion Room Dividers

Ceiling mounted accordion room dividers consist of a series of interconnected panels that fold neatly together when not in use and expand accordion-style to create a partition when needed. These dividers are mounted from the ceiling, allowing them to be easily retracted and extended as needed, making them ideal for both residential and commercial applications.

Read too: How To Extend Kitchen Cabinets To The Ceiling: A Complete Guide for Maximizing Space and Style

Benefits of Ceiling Mounted Accordion Room Dividers

  1. Space-saving Design: Ceiling mounted accordion room dividers eliminate the need for floor tracks or support structures, maximizing floor space and maintaining a clean and uncluttered look.
  2. Flexibility: With their accordion-style design, these room dividers can be easily adjusted to create custom configurations, allowing you to adapt your space to suit your changing needs.
  3. Privacy and Division: Accordion room dividers provide privacy and separation between different areas of a room, making them ideal for creating separate living, dining, or work areas in open-concept spaces.
  4. Aesthetic Appeal: Available in a variety of materials, colors, and finishes, ceiling mounted accordion room dividers can enhance the aesthetic appeal of any space, adding visual interest and architectural detail.

Installation Process

Installing a ceiling mounted accordion room divider requires careful planning and precise execution to ensure optimal functionality and appearance:

  1. Determine Placement: Identify the desired location for the room divider and measure the width and height of the space to determine the size of the divider needed.
  2. Mounting: Securely mount the track or rail system to the ceiling using appropriate hardware and anchors, ensuring that it is level and securely anchored to support the weight of the divider.
  3. Hang Panels: Hang the accordion-style panels from the track or rail system, ensuring that they are evenly spaced and aligned for smooth operation.
  4. Test and Adjust: Test the operation of the room divider to ensure that it opens and closes smoothly and adjust as needed for optimal performance.

Design Considerations

When choosing a ceiling mounted accordion room divider, consider the following design factors:

  • Material: Select a material that complements your existing décor and architectural style, such as wood, glass, or fabric.
  • Color and Finish: Choose a color and finish that coordinate with your space, whether you prefer a sleek modern look or a more traditional aesthetic.
  • Soundproofing: For added privacy and noise reduction, consider selecting a room divider with soundproofing features to minimize sound transmission between divided areas.

Maintenance and Care

To keep your ceiling mounted accordion room divider looking and functioning its best, follow these maintenance tips:

  • Regular Cleaning: Wipe down the panels and tracks regularly with a soft cloth or mild detergent to remove dust and debris.
  • Lubrication: Periodically lubricate the moving parts of the room divider to ensure smooth operation and prevent sticking or binding.
  • Inspect for Damage: Regularly inspect the room divider for any signs of damage or wear and tear, such as loose hardware or damaged panels, and address any issues promptly to prevent further damage.

Conclusion

Ceiling mounted accordion room dividers offer a versatile and stylish solution for dividing and organizing interior spaces. Whether you’re looking to create privacy, maximize space, or enhance the aesthetic appeal of your home or workspace, a ceiling mounted accordion room divider provides the flexibility and functionality you need. By understanding the features, benefits, installation process, and design considerations of ceiling mounted accordion room dividers, you can make informed decisions about incorporating this innovative solution into your space and enjoy the benefits of a more versatile and organized environment.

Batt Insulation for Ceilings: Enhance Your Home’s Energy Efficiency

Batt insulation for the ceilings is a crucial component of any home’s energy efficiency and comfort. Whether you’re building a new home or renovating an existing one, properly insulating your ceiling with batt insulation can help reduce energy costs, regulate indoor temperatures, and enhance overall comfort. In this comprehensive guide, we’ll explore everything you need to know about batt insulation for the ceiling, including its benefits, installation methods, materials, and tips for maximizing effectiveness.

Batt Insulation For Ceiling

Understanding Batt Insulation for Ceiling

Batt insulation for the ceiling is a type of insulation material that comes in pre-cut panels or rolls. Made from materials such as fiberglass, mineral wool, or natural fibers, batt insulation is designed to fit snugly between ceiling joists or rafters, providing thermal resistance and preventing heat transfer between the interior and exterior of your home.

Benefits of Batt Insulation for Ceiling

  1. Improved Energy Efficiency: Batt insulation helps prevent heat loss in the winter and heat gain in the summer, reducing the workload on your heating and cooling systems and lowering energy bills.
  2. Enhanced Comfort: By maintaining consistent indoor temperatures, batt insulation creates a more comfortable living environment year-round, eliminating hot and cold spots and minimizing drafts.
  3. Sound Absorption: In addition to thermal resistance, batt insulation also provides sound absorption properties, reducing noise transmission between floors and rooms for a quieter home environment.
  4. Moisture Control: Some types of batt insulation are treated with moisture-resistant materials, helping to prevent mold and mildew growth in the ceiling cavity and improving indoor air quality.

Types of Batt Insulation Materials

Batt insulation for the ceiling is available in various materials, each with its own unique properties and benefits:

  • Fiberglass: Made from spun glass fibers, fiberglass batt insulation is lightweight, non-combustible, and resistant to moisture, making it a popular choice for ceiling insulation.
  • Mineral Wool: Recycled slag and basalt rock make mineral wool batts, providing excellent fire resistance, sound absorption, and thermal performance.
  • Natural Fibers: Insulation materials such as cotton, wool, and cellulose are derived from renewable resources and offer environmentally friendly alternatives to traditional insulation materials.

Read too: How To Extend Kitchen Cabinets To The Ceiling: A Complete Guide for Maximizing Space and Style

Installation Methods

Installing batt insulation for the ceiling requires careful planning and attention to detail to ensure optimal performance:

  1. Measurements: Measure the distance between ceiling joists or rafters to determine the width and thickness of batt insulation needed for your space.
  2. Cutting: Use a utility knife or insulation cutter to trim batt insulation panels to the appropriate size, taking care to avoid compressing the insulation, which can reduce its effectiveness.
  3. Placement: Place batt insulation between ceiling joists or rafters, ensuring a snug fit and full coverage without gaps or voids.
  4. Vapor Barrier: In regions with high humidity or moisture levels, consider installing a vapor barrier over the insulation to prevent condensation and moisture infiltration.

Tips for Maximizing Effectiveness

To maximize the effectiveness of batt insulation for the ceiling, consider the following tips:

  • Seal Air Leaks: Before installing batt insulation, seal any air leaks or gaps in the ceiling structure to prevent drafts and ensure a tight thermal envelope.
  • Proper Ventilation: Ensure adequate attic ventilation to prevent moisture buildup and maintain proper airflow, which can help extend the life of your insulation and prevent mold growth.
  • Professional Installation: If you’re unsure about installing batt insulation yourself, consider hiring a professional contractor with experience in ceiling insulation to ensure proper installation and optimal performance.

Conclusion

Batt insulation for the ceilings is a cost-effective and efficient way to improve your home’s energy efficiency, comfort, and indoor air quality. By understanding the benefits, materials, installation methods, and tips for maximizing effectiveness of batt insulation, you can make informed decisions about insulating your home and enjoy year-round comfort and savings on energy bills.

Armstrong Sahara Ceiling Tile: Transform Your Space

Armstrong Sahara ceiling tile offers a stylish and practical solution for enhancing the look and feel of any interior space. Whether you’re renovating a commercial office, a retail store, or a residential home, Armstrong Sahara ceiling tile can elevate your décor with its timeless design and superior performance. In this comprehensive guide, we’ll explore the features, benefits, and installation considerations of Armstrong Sahara ceiling tile, empowering you to transform your space with confidence and ease.

Armstrong Sahara Ceiling Tile

Understanding Armstrong Sahara Ceiling Tile

Armstrong Sahara ceiling tile is a premium ceiling product known for its high-quality construction, durability, and aesthetic appeal. Featuring a smooth, finely textured surface and a classic square edge design, Sahara ceiling tile adds a touch of sophistication to any room. Available in a variety of sizes, colors, and finishes, Sahara ceiling tile offers versatility and flexibility to suit a wide range of design preferences and project requirements.

Read too: How To Extend Kitchen Cabinets To The Ceiling: A Complete Guide for Maximizing Space and Style

Benefits of Armstrong Sahara Ceiling Tile

  1. Timeless Design: Sahara ceiling tile’s classic square edge design and smooth surface create a timeless look that complements any interior décor style, from traditional to contemporary.
  2. Durability: Constructed from durable materials, Sahara ceiling tile is built to withstand the rigors of daily use, making it ideal for high-traffic areas such as offices, retail spaces, and healthcare facilities.
  3. Acoustic Performance: Sahara ceiling tile is engineered to provide excellent sound absorption, helping to improve acoustics and reduce noise levels in interior spaces for enhanced comfort and productivity.
  4. Easy Installation: With its lightweight construction and compatibility with standard grid systems, Sahara ceiling tile is easy to install, saving time and labor costs during the renovation process.

Design Options

Armstrong Sahara ceiling tile offers a variety of design options to suit your project needs:

  • Size: Choose from standard sizes such as 2’x2′ or 2’x4′ to fit your ceiling grid system and room dimensions.
  • Color: Select from a range of colors, including classic white and various shades of gray, beige, and taupe, to complement your design scheme.
  • Finish: Opt for a smooth or textured finish, depending on your preference for a sleek or more tactile surface.

Installation Considerations

When installing Armstrong Sahara ceiling tile, consider the following factors:

  • Ceiling Grid Compatibility: Ensure that Sahara ceiling tile is compatible with your existing ceiling grid system or select a grid system that is compatible with Sahara tile.
  • Room Layout: Plan the layout of the ceiling tiles to ensure a balanced and visually appealing installation, taking into account lighting fixtures, air vents, and other ceiling elements.
  • Professional Installation: For optimal results, consider hiring a professional contractor with experience installing ceiling tile to ensure proper alignment, spacing, and installation techniques.

Maintenance and Care

To maintain the beauty and performance of Armstrong Sahara ceiling tiles, follow these maintenance tips:

  • Regular Cleaning: Clean the ceiling tiles periodically with a soft brush or vacuum attachment to remove dust and debris.
  • Avoid Harsh Chemicals: Use mild cleaning solutions and avoid abrasive or acidic cleaners that may damage the surface of the tiles.
  • Inspect for Damage: Periodically inspect the ceiling tiles for signs of damage, such as cracks, stains, or water damage, and address any issues promptly to prevent further damage.

Conclusion

Armstrong Sahara ceiling tiles offers a versatile and elegant solution for enhancing the look and feel of any interior space. With its timeless design, durability, and superior performance, Sahara ceiling tile is the perfect choice for commercial and residential projects alike. By understanding the features, benefits, and installation considerations of Armstrong Sahara ceiling tiles, you can transform your space with confidence and create a stylish and functional environment that stands the test of time.

Suspended Ceiling Recessed Light: Enhance Your Décor

Suspended ceiling recessed light offer a sleek and modern lighting solution that seamlessly integrates into suspended ceilings, providing both illumination and aesthetic appeal. Whether you’re looking to enhance the ambiance of your home or office space, suspended ceiling recessed lights can elevate your décor with their clean lines and versatile design. In this comprehensive guide, we’ll explore the benefits, installation process, and design considerations of suspended ceiling recessed lights, empowering you to illuminate your space with style and sophistication.

Suspended Ceiling Recessed Lights

Understanding Suspended Ceiling Recessed Lights

Suspended ceiling recessed lights, also known as can lights or downlights, are lighting fixtures that are installed flush with the surface of a suspended ceiling. These lights are designed to be unobtrusive, blending seamlessly into the ceiling for a clean and streamlined appearance. Suspended ceiling recessed lights are available in various sizes, shapes, and finishes, allowing for customization to suit any décor style or aesthetic preference.

Benefits of Suspended Ceiling Recessed Lights

  1. Space-Saving Design: Suspended ceiling recessed lights take up minimal space and do not protrude from the ceiling, making them ideal for rooms with low ceilings or limited overhead clearance.
  2. Enhanced Ambiance: Recessed lights create a soft and diffused light that enhances the ambiance of any space, whether it’s a cozy living room, a sleek office, or a stylish dining area.
  3. Versatility: With adjustable beam angles and dimming capabilities, suspended ceiling recessed lights offer versatility in lighting design, allowing you to create the perfect atmosphere for any occasion.
  4. Clean Aesthetic: The flush-mount design of suspended ceiling recessed lights creates a clean and uncluttered look, adding a touch of modern elegance to your space without detracting from other design elements.

Read too: How To Extend Kitchen Cabinets To The Ceiling: A Complete Guide for Maximizing Space and Style

Installation Process

The installation of suspended ceiling recessed lights involves the following steps:

  1. Planning: Determine the layout and placement of the recessed lights, taking into account factors such as room size, ceiling height, and desired lighting effects.
  2. Cutting Holes: Using a hole saw or cutting template, cut holes in the suspended ceiling tiles or panels to accommodate the recessed lights.
  3. Wiring: Run electrical wiring from the power source to each recessed light location, ensuring that all connections are secure and in compliance with local building codes.
  4. Mounting: Install the recessed light fixtures into the cut holes in the ceiling, securing them in place according to the manufacturer’s instructions.
  5. Finishing Touches: Attach trim rings or baffles to the recessed lights to create a finished look and adjust the positioning of the lights as needed for optimal illumination.

Design Considerations

When selecting suspended ceiling recessed lights for your space, consider the following design factors:

  • Size and Shape: Choose recessed lights that complement the scale and proportions of your room, taking into account the size and shape of the fixtures relative to the ceiling.
  • Trim Style: Select trim styles that match your décor aesthetic, whether it’s modern and minimalist or traditional and ornate.
  • Lighting Effects: Consider the desired lighting effects for your space, such as task lighting, accent lighting, or ambient lighting, and choose recessed lights with the appropriate beam angle and lumen output.

Conclusion

Suspended ceiling recessed light offer a sophisticated and practical lighting solution for modern interiors. With their space-saving design, versatile illumination capabilities, and clean aesthetic, these fixtures can enhance the ambiance and functionality of any space with ease. By understanding the benefits, installation process, and design considerations of suspended ceiling recessed lights, you can illuminate your space with style and sophistication, creating a welcoming and visually stunning environment for all to enjoy.

Popcorn Ceiling Removal in Seattle: Say Goodbye to Popcorn Ceilings

Popcorn ceilings, also known as textured or acoustic ceilings, were once a popular choice in home construction due to their affordability and ability to hide imperfections. However, many homeowners in Seattle are now opting to remove popcorn ceilings to update their homes and create a more modern and streamlined look. If you’re considering popcorn ceiling removal in Seattle, you’re in the right place. In this guide, we’ll explore the process of popcorn ceiling removal, its benefits, and why hiring professionals in Seattle is the best choice for achieving a flawless finish.

Popcorn Ceiling Removal Seattle

Understanding

Popcorn ceiling removal involves eliminating the textured coating to reveal a smooth finish. While some homeowners may try it themselves, it’s often challenging and messy, yielding unsatisfactory results. Hiring professionals in Seattle who specialize in popcorn ceiling removal ensures a smooth and efficient process from start to finish.

Read too: How To Extend Kitchen Cabinets To The Ceiling: A Complete Guide for Maximizing Space and Style

The Process of Popcorn Ceiling Removal Seattle

  1. Preparation: Before popcorn ceiling removal begins, the room must be properly prepared to minimize mess and damage to surrounding surfaces. Furniture should be covered or removed, and floors should be protected with drop cloths or plastic sheeting.
  2. Moistening the Ceiling: In Seattle, where popcorn ceilings may have been painted over, professionals use a water-based solution to moisten the ceiling, softening the texture and making it easier to scrape off.
  3. Scraping: Once the texture has been moistened, professionals use specialized scraping tools to gently remove the popcorn coating from the ceiling surface. Care must be taken to avoid damaging the underlying drywall or plaster.
  4. Smoothing: After removing the popcorn texture, any imperfections on the ceiling surface are smoothed out using joint compound or plaster. This ensures a seamless finish once the ceiling is painted or refinished.
  5. Cleanup: Once the popcorn ceiling removal process is complete, professionals thoroughly clean up the work area, removing debris and dust to leave the space clean and tidy.

Benefits of Professional Popcorn Ceiling Removal in Seattle

  1. Quality Results: Professionals in Seattle have the knowledge, skills, and experience to ensure that popcorn ceiling removal is performed correctly, resulting in a smooth and flawless finish.
  2. Time Savings: Attempting to remove popcorn ceilings yourself can be a time-consuming and labor-intensive task. Hiring professionals allows you to save time and effort while achieving superior results.
  3. Minimized Mess: Popcorn ceiling removal can create a significant amount of dust and debris. Professionals use specialized equipment and techniques to minimize mess and ensure a clean and tidy work area.
  4. Enhanced Property Value: Removing popcorn ceilings and updating to a smooth finish can enhance the aesthetic appeal and market value of your home, making it more attractive to potential buyers.

Why Choose Popcorn Ceiling Removal in Seattle

Seattle homeowners choose popcorn ceiling removal for several reasons:

  • Modernization: Popcorn ceilings are outdated and can make a home feel dated. Removing them and opting for a smooth finish can modernize the space and increase its appeal.
  • Health Concerns: Popcorn ceilings installed before the 1980s may contain asbestos, a known carcinogen. Removing these ceilings eliminates the risk of asbestos exposure and improves indoor air quality.
  • Personal Preference: Many homeowners simply prefer the look of a smooth ceiling over a textured one. Removing popcorn ceilings allows them to customize their home to suit their personal taste and style.

Conclusion

In Seattle, removing popcorn ceilings allows homeowners to modernize their homes, improve indoor air quality, and boost property value. Hiring professionals specializing in this service ensures quality results, saves time, and provides peace of mind. Say farewell to popcorn ceilings and welcome a fresh, modern appearance to your Seattle home.

Colored Drop Ceiling Tile: Elevate Your Space with Vibrant

Colored drop ceiling tiles offer a creative and versatile solution for enhancing the aesthetic appeal of any space. Whether you’re looking to add a pop of color to a room or create a unique design statement, colored drop ceiling tiles can elevate the look and feel of your interior. In this comprehensive guide, we’ll explore the benefits, design options, and installation considerations of colored drop ceiling tile, empowering you to unleash your creativity and transform your space with vibrant hues and patterns.

Colored Drop Ceiling Tiles

Understanding Colored Drop Ceiling Tiles

Colored drop ceiling tiles, also known as suspended ceiling panels, are decorative panels that are suspended from the ceiling structure using a grid system. These tiles are available in a wide range of colors, patterns, and finishes, allowing for endless design possibilities. Whether you prefer bold and vibrant hues or subtle and understated tones, there’s a colored drop ceiling tile to suit your aesthetic preferences.

Benefits of Colored Drop Ceiling Tiles

  1. Enhanced Aesthetic Appeal: Colored drop ceiling tiles can add visual interest and dimension to any room, transforming dull and uninspired spaces into vibrant and inviting environments.
  2. Versatility: With a vast array of colors and patterns to choose from, colored drop ceiling tiles offer endless design possibilities. Whether you’re aiming for a modern, traditional, or eclectic look, there’s a colored tile to match your vision.
  3. Acoustic Control: Many colored drop ceiling tiles are designed with acoustic properties that help absorb sound and reduce noise levels, creating a more comfortable and peaceful environment.
  4. Concealment of Imperfections: Colored drop ceiling tiles can help conceal imperfections in the ceiling surface, such as cracks, stains, or uneven textures, providing a clean and polished appearance.

Design Options for Colored Drop Ceiling Tiles

When selecting colored drop ceiling tiles for your space, consider the following design options:

  • Solid Colors: Choose from a wide range of solid colors to add a bold or subtle accent to your room’s decor.
  • Patterns and Textures: Opt for tiles with intricate patterns or textured finishes to add visual interest and depth to your ceiling design.
  • Custom Printing: Explore the option of custom printing to create personalized ceiling tiles featuring artwork, graphics, or logos that reflect your unique style and personality.

Read too: How To Extend Kitchen Cabinets To The Ceiling: A Complete Guide for Maximizing Space and Style

Installation Considerations

Before installing colored drop ceiling tiles, consider the following factors:

  • Ceiling Height: Ensure that the height of your ceiling allows for the installation of drop ceiling tiles without encroaching on the space below.
  • Grid System Compatibility: Verify that your existing ceiling grid system is compatible with drop ceiling tiles, or invest in a new grid system if necessary.
  • Lighting Integration: Plan for the integration of lighting fixtures, air vents, and other ceiling accessories to ensure a seamless and cohesive look.

Maintenance and Care

To maintain the beauty and functionality of your colored drop ceiling tiles, follow these maintenance tips:

  • Regular Cleaning: Clean the tiles regularly using a soft brush or vacuum attachment to remove dust, dirt, and debris.
  • Avoid Harsh Chemicals: Use gentle cleaning solutions and avoid harsh chemicals that may damage or discolor the tiles.
  • Inspect for Damage: Periodically inspect the tiles for signs of damage, such as cracks or water stains, and address any issues promptly to prevent further damage.

Conclusion

Colored drop ceiling tile offer a versatile and visually striking solution for enhancing the aesthetic appeal of any space. Whether you’re renovating a residential, commercial, or institutional setting, colored drop ceiling tiles can help you achieve your desired look with ease. By understanding the benefits, design options, and installation considerations of colored drop ceiling tiles, you can unleash your creativity and transform your space into a vibrant and inviting environment that reflects your unique style and personality.