Wood Fiber Ceiling Tile: A Sustainable and Stylish Choice for Your Home

Ceiling tiles play a crucial role in both the aesthetic and functional aspects of a room. Among the various options available, wood fiber ceiling tile stand out for their sustainability, durability, and versatility. This comprehensive guide will explore everything you need to know about wood fiber ceiling tiles, from their benefits and applications to installation tips and maintenance.

Wood Fiber Ceiling Tiles

What are Wood Fiber Ceiling Tiles?

Wood fiber ceiling tiles are made from a combination of wood fibers, binders, and other natural materials. These tiles are designed to be eco-friendly, offering a sustainable alternative to traditional ceiling materials. They come in various designs, textures, and finishes, making them suitable for a wide range of interior design styles.

Read too: A Comprehensive Mr Cool Ceiling Cassette Review: Unveiling Excellence

Benefits of Wood Fiber Ceiling Tiles

Wood fiber ceiling tiles offer numerous advantages, making them an excellent choice for both residential and commercial spaces. Here are some of the key benefits:

1. Sustainability

One of the most significant advantages of wood fiber ceiling tiles is their sustainability. They are made from renewable resources and often include recycled materials. This makes them an eco-friendly choice for environmentally conscious homeowners and businesses.

2. Aesthetic Appeal

Wood fiber ceiling tiles are available in various designs, textures, and finishes, allowing you to create a unique and stylish look for any room. Whether you prefer a rustic, modern, or classic style, there’s a wood fiber ceiling tile to match your taste.

3. Durability

These tiles are known for their durability and resistance to moisture, mold, and mildew. This makes them ideal for use in areas with high humidity, such as kitchens, bathrooms, and basements.

4. Acoustic Properties

Wood fiber ceiling tiles have excellent sound-absorbing properties, making them a great choice for spaces where noise reduction is important. They can help improve the acoustics in rooms like offices, classrooms, and home theaters.

5. Easy Installation

Wood fiber ceiling tiles are relatively easy to install, whether you’re doing it yourself or hiring a professional. They can be mounted directly to the ceiling or installed as part of a suspended ceiling system.

Applications of Wood Fiber Ceiling Tiles

Wood fiber ceiling tiles are versatile and can be used in various settings. Here are some common applications:

1. Residential Spaces

In homes, wood fiber ceiling tiles can enhance the look of living rooms, bedrooms, kitchens, and bathrooms. Their moisture-resistant properties make them particularly suitable for kitchens and bathrooms, where humidity levels are often high.

2. Commercial Spaces

Businesses can benefit from the aesthetic appeal and acoustic properties of wood fiber ceiling tiles. They are commonly used in offices, retail stores, restaurants, and hotels to create a pleasant and professional environment.

3. Educational Institutions

Schools and universities can use wood fiber ceiling tiles in classrooms, lecture halls, and libraries to improve acoustics and create a comfortable learning environment.

4. Healthcare Facilities

Hospitals and clinics can take advantage of the hygienic properties of wood fiber ceiling tiles. These tiles are resistant to mold and mildew, making them suitable for use in patient rooms, waiting areas, and examination rooms.

Installing Wood Fiber Ceiling Tiles

Installing wood fiber ceiling tiles can be a straightforward process if you follow the right steps. Here are some general guidelines to help you get started:

1. Measure and Plan

Before you begin, measure the dimensions of your ceiling to determine the number of tiles you need. Plan the layout to ensure a symmetrical and balanced appearance.

2. Prepare the Ceiling

Ensure the ceiling surface is clean, dry, and free of any debris. If you’re installing the tiles as part of a suspended ceiling system, set up the grid according to the manufacturer’s instructions.

3. Cut the Tiles

Use a utility knife or a saw to cut the tiles to the required size. Make sure to wear protective gear, such as gloves and safety glasses, while cutting.

4. Install the Tiles

If you’re mounting the tiles directly to the ceiling, apply adhesive to the back of each tile and press it firmly into place. For a suspended ceiling system, simply lay the tiles into the grid.

5. Finishing Touches

Once all the tiles are installed, check for any gaps or uneven areas. Make any necessary adjustments to ensure a smooth and professional finish.

Maintaining Wood Fiber Ceiling Tiles

Proper maintenance can help extend the life of your wood fiber ceiling tiles and keep them looking their best. Here are some tips for maintaining your tiles:

1. Regular Cleaning

Dust and dirt can accumulate on the surface of the tiles over time. Use a soft cloth or a vacuum with a brush attachment to gently clean the tiles regularly.

2. Moisture Control

While wood fiber ceiling tiles are moisture-resistant, it’s still important to control humidity levels in your home. Use dehumidifiers or exhaust fans in areas with high humidity to prevent mold and mildew growth.

3. Repair and Replacement

If a tile becomes damaged, it’s usually easy to replace. Simply remove the damaged tile and install a new one in its place. Keep a few extra tiles on hand for quick repairs.

Wood Fiber Ceiling Tiles: A Smart Investment

Choosing wood fiber ceiling tiles is a smart investment for any homeowner or business. Their combination of sustainability, durability, and aesthetic appeal makes them an excellent choice for a wide range of applications. By following the installation and maintenance tips provided in this guide, you can enjoy the benefits of wood fiber ceiling tiles for years to come.

Conclusion

Wood fiber ceiling tile offer a blend of sustainability, aesthetic appeal, and practicality that makes them an ideal choice for a variety of settings. Whether you’re looking to enhance the look of your home or improve the acoustics in a commercial space, these tiles provide a versatile and eco-friendly solution. By understanding their benefits, applications, and maintenance requirements, you can make an informed decision and enjoy the many advantages that wood fiber ceiling tiles have to offer.

Modern Chandeliers For High Ceilings: Elevate Your Space

When it comes to interior design, choosing the right lighting fixture can make a world of difference, especially in rooms with high ceilings. Modern chandeliers for high ceilings not only illuminate the space effectively but also serve as stunning focal points that enhance the overall aesthetics. In this comprehensive guide, we explore everything you need to know about selecting, installing, and maintaining modern chandeliers for rooms with lofty heights.

Modern Chandeliers For High Ceilings

Why Choose Modern Chandeliers For High Ceilings?

Modern chandeliers are renowned for their sleek designs, innovative materials, and versatile styles that complement contemporary and traditional interiors alike. When paired with high ceilings, these fixtures have the potential to transform the ambiance of a room by adding drama, elegance, and ample illumination. Here are some compelling reasons to opt for modern chandeliers in rooms with high ceilings:

1. Visual Impact

Modern chandeliers are designed to make a statement. Their unique shapes, sizes, and finishes draw attention upward, emphasizing the vertical space of high ceilings and creating a sense of grandeur.

2. Effective Illumination

High ceilings can sometimes make a room feel cavernous or dim. Modern chandeliers are equipped with multiple bulbs and often feature reflective surfaces or crystals that maximize light dispersion, ensuring even illumination throughout the space.

3. Versatility in Design

From minimalist geometric shapes to elaborate crystal designs, modern chandeliers offer a wide range of styles to suit different interior themes. Whether your decor leans towards industrial chic, mid-century modern, or contemporary elegance, there’s a modern chandelier that can complement it beautifully.

4. Functional Artistry

Beyond their practical function of providing light, modern chandeliers are celebrated as pieces of functional art. They add a layer of sophistication and character to any room, becoming conversation starters and focal points of interior design.

Choosing the Right Modern Chandeliers For High Ceilings

Selecting the perfect modern chandelier for a room with high ceilings involves considering several key factors, including size, style, and installation requirements. Here’s what you need to keep in mind:

Size and Scale

The size of the chandelier should be proportional to the room and ceiling height. For high ceilings, opt for larger chandeliers that can fill the vertical space without overwhelming it. Consider the diameter and height of the fixture to ensure it complements the room’s dimensions.

Style and Aesthetic

Consider the overall style of your home and the specific room where the chandelier will be installed. Modern chandeliers come in a variety of styles, from minimalist and streamlined designs to intricate and ornate pieces. Choose a style that harmonizes with your existing decor while making a bold statement.

Material and Finish

Modern chandeliers are crafted from a range of materials, including metals like brushed nickel, bronze, or brass, as well as glass, crystal, and even innovative materials like acrylic or wood. Select a material and finish that aligns with your aesthetic preferences and complements other elements in the room.

Light Bulb Type and Brightness

Consider the type of bulbs the chandelier requires and their brightness levels. LED bulbs are energy-efficient and long-lasting, making them an ideal choice for modern chandeliers. Ensure the chandelier provides adequate illumination for the size of the room and its intended use.

Installation Tips for Modern Chandeliers For High Ceilings

Installing a modern chandelier in a room with high ceilings requires careful planning and possibly professional assistance. Here are essential installation tips to follow:

Assess Ceiling Strength

Before installation, verify that your ceiling can support the weight of the chandelier. High ceilings may require additional structural support or a reinforced mounting bracket to ensure safety.

Choose the Right Height

For rooms with high ceilings, the chandelier should typically be hung lower to create a balanced visual effect and maximize light distribution. Aim for a height that allows the chandelier to be noticed without obstructing views or traffic flow.

Consider Remote Control Options

Some modern chandeliers offer remote control capabilities for adjusting brightness levels or activating different lighting modes. Consider these options for added convenience, especially in rooms with tall ceilings where manual adjustment may be challenging.

Secure Installation

Follow the manufacturer’s instructions carefully when installing the chandelier. Ensure all electrical connections are secure, and the fixture is properly anchored to the ceiling to prevent swaying or instability.

Maintaining Modern Chandeliers For High Ceilings

Regular maintenance ensures your modern chandelier remains in pristine condition and continues to enhance your space effectively. Here are maintenance tips to keep in mind:

Dust Regularly

Dust the chandelier and its components regularly using a soft cloth or duster. For intricate designs or crystal accents, use a gentle cleaning solution and avoid harsh chemicals that could damage the finish.

Check and Tighten Fixtures

Periodically inspect the chandelier for loose screws or fixtures and tighten them as needed to prevent vibrations or instability.

Clean Crystals or Glass Accents

If your chandelier features crystal or glass elements, clean them occasionally with a glass cleaner to maintain their clarity and sparkle.

Schedule Professional Inspection

Consider scheduling an annual inspection by a qualified electrician or lighting professional to ensure the chandelier’s electrical components are in good working order and meet safety standards.

Read too: A Comprehensive Mr Cool Ceiling Cassette Review: Unveiling Excellence

Conclusion

Modern chandeliers for high ceilings are more than just lighting fixtures; they are statements of style and sophistication that can elevate any space. By choosing the right chandelier based on size, style, and installation considerations, you can transform your room into a stunning showcase of modern design. Whether you prefer sleek metallic finishes, dazzling crystal accents, or minimalist elegance, there’s a modern chandelier that can enhance your home’s ambiance and visual appeal.

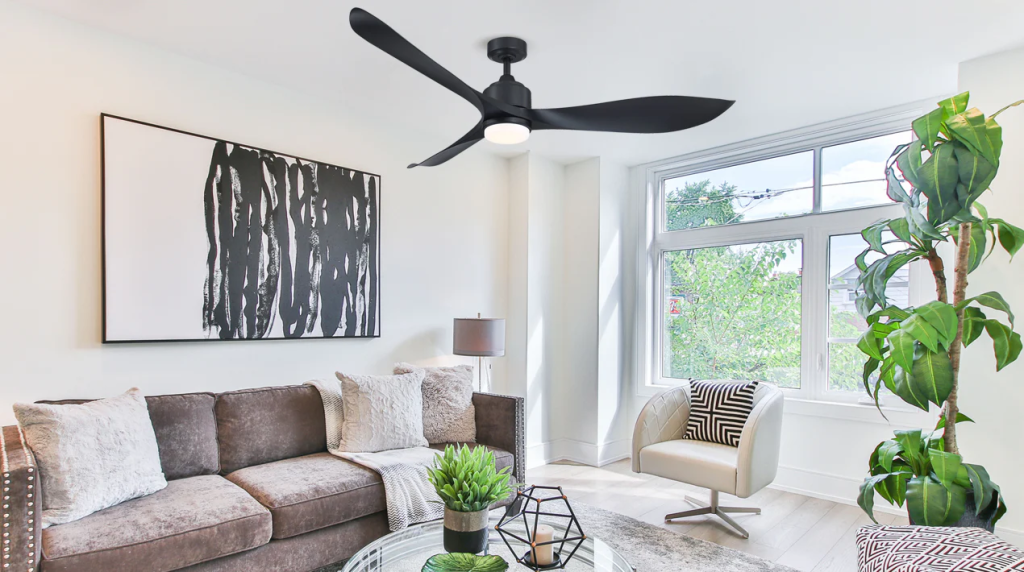
Black Flush Mount Ceiling Fan: Enhance Your Home with a Stylish

A black flush mount ceiling fan can be more than just a functional addition to your home; it can also serve as a stylish statement piece that complements your interior decor. In this comprehensive guide, we delve into everything you need to know about black flush mount ceiling fans. From their design and benefits to installation tips and maintenance, discover how these fans can elevate the comfort and aesthetics of any room.

Black Flush Mount Ceiling Fan

Understanding Black Flush Mount Ceiling Fans

Black flush mount ceiling fans are designed to be mounted close to the ceiling, without the use of a downrod. This installation style makes them ideal for rooms with low ceilings or for those who prefer a sleek, seamless look. The black finish adds a touch of sophistication and versatility, blending well with various interior styles from modern to industrial.

Benefits of Black Flush Mount Ceiling Fans

Black flush mount ceiling fans offer several advantages that make them a popular choice among homeowners. Here are some key benefits:

1. Space-Saving Design

The flush mount design allows the fan to be installed closer to the ceiling, maximizing space in the room. This is particularly beneficial in rooms with low ceilings where a traditional fan with a downrod may not be practical.

2. Stylish Appearance

Black finish adds a contemporary and elegant touch to any room. It complements a wide range of color schemes and decor styles, making it easy to integrate into your existing interior design.

3. Improved Air Circulation

Ceiling fans are effective in improving air circulation and maintaining a comfortable temperature in any season. The black flush mount design ensures efficient airflow without compromising on style.

Read too: A Comprehensive Mr Cool Ceiling Cassette Review: Unveiling Excellence

4. Quiet Operation

Modern black flush mount ceiling fans are engineered for quiet operation, ensuring that they do not disrupt the ambiance of the room while providing comfort.

5. Energy Efficiency

Many black flush mount ceiling fans are equipped with energy-efficient motors and blades. They can help reduce energy consumption and utility costs compared to using air conditioning alone.

Applications of Black Flush Mount Ceiling Fans

Black flush mount ceiling fans are versatile and suitable for various rooms and settings. Here are some common applications:

1. Bedrooms

In bedrooms, black flush mount ceiling fans provide gentle airflow without taking up valuable space. They can enhance comfort during both warm and cool nights, promoting better sleep.

2. Living Rooms

Black flush mount ceiling fans make a stylish addition to living rooms, offering both functionality and aesthetic appeal. They can serve as a focal point or blend seamlessly into the room’s decor.

3. Dining Areas

Dining areas benefit from the gentle breeze provided by a black flush mount ceiling fan, creating a comfortable atmosphere for meals and gatherings.

4. Home Offices

In home offices, where temperature control is essential for productivity, a black flush mount ceiling fan can help maintain a comfortable working environment.

Installing a Black Flush Mount Ceiling Fan

Installing a black flush mount ceiling fan is generally straightforward, but it requires careful planning and attention to detail. Here are the steps to guide you through the installation process:

Step 1: Choose the Right Fan

Select a black flush mount ceiling fan that suits the size and style of your room. Consider factors such as blade span, motor size, and additional features like remote control or light kit compatibility.

Step 2: Turn Off Power

Before you begin installation, turn off the power to the existing ceiling light fixture at the circuit breaker box. Use a voltage tester to ensure that the power is off before proceeding.

Step 3: Remove Existing Fixture

Remove the existing ceiling light fixture and disconnect it from the electrical wiring. Save any mounting hardware that may be reused for installing the new fan.

Step 4: Install Mounting Bracket

Follow the manufacturer’s instructions to install the mounting bracket provided with the fan. Secure the bracket to the ceiling junction box using screws and ensure it is stable and level.

Step 5: Wire the Fan

Carefully wire the fan according to the manufacturer’s instructions. Connect the wires from the fan to the corresponding wires in the ceiling junction box, ensuring a secure connection with wire nuts.

Step 6: Attach Fan Blades and Canopy

Attach the fan blades to the motor housing using the screws provided. Install the canopy to cover the ceiling bracket and wiring, securing it with screws.

Step 7: Test and Adjust

Turn the power back on and test the fan to ensure it operates correctly. Adjust the fan settings and direction as needed for optimal airflow and comfort.

Maintaining Your Black Flush Mount Ceiling Fan

Proper maintenance helps ensure your black flush mount ceiling fan operates efficiently and lasts longer. Here are some maintenance tips:

1. Regular Cleaning

Dust the fan blades and motor housing regularly using a soft cloth or duster. Avoid using abrasive cleaners or water directly on the fan.

2. Check for Loose Parts

Periodically check for any loose screws or bolts and tighten them as needed to prevent noise or wobbling.

3. Lubricate Moving Parts

Apply a small amount of lubricating oil to the motor bearings annually to keep the fan running smoothly.

4. Inspect Wiring and Connections

Inspect the electrical wiring and connections annually to ensure they are secure and in good condition.

Conclusion

A black flush mount ceiling fan is not just a practical addition to your home; it’s a stylish and functional investment that enhances comfort and aesthetics. Whether you’re looking to cool down your bedroom, improve airflow in your living room, or add a contemporary touch to any space, a black flush mount ceiling fan offers the perfect blend of form and function. By choosing the right fan, following proper installation procedures, and maintaining it regularly, you can enjoy the benefits of a black flush mount ceiling fan for years to come.

Ceiling Mount Curtain Track: Enhance Your Home Decor

When it comes to interior design, the details can make a significant difference. One such detail is how you hang your curtains. Using a ceiling mount curtain track offers both aesthetic and functional benefits, making it a popular choice for many homeowners. In this comprehensive guide, we will explore everything you need to know about ceiling mount curtain tracks, from their benefits and applications to installation and maintenance tips.

Ceiling Mount Curtain Track

The Benefits of a Ceiling Mount Curtain Track

Ceiling mount curtain tracks offer a range of advantages that make them an excellent choice for both residential and commercial spaces. Here are some of the key benefits:

1. Clean and Modern Aesthetic

A ceiling mount curtain track provides a sleek and minimalist look. Unlike traditional curtain rods, ceiling tracks are less obtrusive and blend seamlessly with the ceiling, creating a clean and modern aesthetic. This makes them ideal for contemporary and minimalist interior designs.

2. Maximizes Space

Ceiling-mounted tracks allow curtains to be hung closer to the ceiling, which can make rooms appear taller and more spacious. This is particularly beneficial in rooms with low ceilings or in small spaces where maximizing vertical space is crucial.

3. Versatility

Ceiling mount curtain tracks are incredibly versatile and can be used in a variety of settings. They are suitable for both straight and curved installations, making them perfect for bay windows, room dividers, and even hospital cubicles.

4. Improved Functionality

Ceiling tracks offer smooth and easy operation, allowing curtains to glide effortlessly. This is especially useful for heavy or large curtains that can be cumbersome to move on traditional rods. Additionally, ceiling tracks can support motorized systems for even greater convenience.

5. Enhanced Privacy and Light Control

By mounting curtains closer to the ceiling, you can achieve better light control and privacy. Ceiling tracks enable the curtains to cover the entire window area, blocking out more light and providing greater privacy.

Applications of Ceiling Mount Curtain Tracks

Ceiling mount curtain tracks are suitable for a wide range of applications, both in residential and commercial settings. Here are some common uses:

1. Living Rooms and Bedrooms

In living rooms and bedrooms, ceiling mount curtain tracks create a streamlined and elegant look. They are ideal for hanging floor-to-ceiling curtains that add a touch of luxury and sophistication to the space.

2. Home Theaters

Ceiling mount tracks are perfect for home theaters, where blackout curtains are often used to block out light and enhance the viewing experience. The tracks allow for easy operation of heavy blackout curtains.

3. Offices and Workspaces

In office settings, ceiling mount curtain tracks can be used to create flexible partitions or to cover large windows. They offer a professional and clean look, suitable for modern office interiors.

4. Hospitals and Clinics

Ceiling mount curtain tracks are commonly used in hospitals and clinics to create privacy partitions around patient beds. Their smooth operation and ease of cleaning make them ideal for healthcare environments.

5. Hotels and Hospitality

In hotels, ceiling mount curtain tracks are used to create luxurious window treatments and room dividers. They offer a high-end look and feel, enhancing the overall guest experience.

Installing a Ceiling Mount Curtain Track

Installing a ceiling mount curtain track may seem daunting, but with the right tools and instructions, it can be a straightforward process. Here are the steps to follow:

Step 1: Measure and Plan

Before you start, measure the area where you want to install the curtain track. Determine the length of the track and the height at which it will be mounted. Consider the type of curtains you will be using and ensure the track can support their weight.

Step 2: Gather Materials

You will need the following materials:

  • Ceiling mount curtain track kit (includes track, brackets, gliders, and end caps)
  • Drill
  • Screws and anchors
  • Measuring tape
  • Pencil
  • Level
  • Ladder

Step 3: Mark the Mounting Points

Using a measuring tape and pencil, mark the points on the ceiling where the brackets will be mounted. Ensure that the marks are evenly spaced and level. Use a level to double-check that the marks are aligned correctly.

Step 4: Drill Holes and Install Anchors

Drill holes at the marked points and insert the appropriate anchors. This step is crucial, especially if you are mounting the track into drywall or plaster, to ensure a secure installation.

Step 5: Attach the Brackets

Attach the brackets to the ceiling using screws. Make sure you securely fasten and align the brackets with the marked points.

Step 6: Install the Curtain Track

Attach the curtain track to the brackets. Depending on the type of track, this may involve snapping the track into place or securing it with additional screws. Ensure the track is firmly attached and level.

Step 7: Hang the Curtains

Slide the gliders onto the track and attach the curtains. Make sure the curtains move smoothly along the track. If necessary, adjust the track or brackets to ensure proper operation.

Maintaining Your Ceiling Mount Curtain Track

Proper maintenance of your ceiling mount curtain track will ensure its longevity and smooth operation. Here are some maintenance tips:

1. Regular Cleaning

Dust and debris can accumulate on the track and affect the smooth movement of the curtains. Clean the track regularly using a soft cloth or a vacuum with a brush attachment. For stubborn dirt, use a mild detergent solution and a damp cloth.

2. Lubrication

To keep the gliders moving smoothly, apply a silicone-based lubricant to the track occasionally. Avoid using oil-based lubricants, as they can attract dust and cause buildup.

3. Inspect for Wear and Tear

Periodically inspect the track, brackets, and gliders for signs of wear and tear. Tighten any loose screws and replace any damaged components to ensure the track remains secure and functional.

4. Adjustments

If you notice the curtains are not moving smoothly or the track has become misaligned, make the necessary adjustments. This may involve tightening the brackets or realigning the track.

Read too: A Comprehensive Mr Cool Ceiling Cassette Review: Unveiling Excellence

Conclusion

A ceiling mount curtain track is a versatile and stylish solution for hanging curtains in both residential and commercial settings. It offers numerous benefits, including a clean and modern aesthetic, space maximization, and improved functionality. Whether you’re looking to enhance your living room, create flexible office partitions, or add a touch of luxury to a hotel room, a ceiling mount curtain track is an excellent choice. By following the installation and maintenance tips provided in this guide, you can enjoy the many advantages of ceiling mount curtain tracks for years to come.

Wholesale Drop Ceiling Tiles: Affordable Solutions for Your Renovation Projects

Wholesale drop ceiling tiles offer cost-effective options for renovating residential and commercial spaces. Explore how these versatile tiles can enhance your interior while fitting within your budget. This guide delves into the benefits, types, installation methods, and design considerations for incorporating wholesale drop ceiling tiles into your next remodeling project.

Wholesale Drop Ceiling Tiles

Understanding Wholesale Drop Ceiling Tiles

Wholesale drop ceiling tiles, also known as suspended ceiling tiles, are modular panels designed to fit into a grid system suspended below the main ceiling structure. These tiles not only improve aesthetics but also provide acoustic insulation and conceal wiring and plumbing. Available in various materials, sizes, and designs, wholesale drop ceiling tiles cater to different functional and decorative needs.

Benefits of Wholesale Drop Ceiling Tiles

Discover the advantages of choosing wholesale drop ceiling tiles for your renovation projects:

  • Cost Efficiency: Purchasing tiles in bulk from wholesalers reduces overall project costs compared to buying individual tiles.
  • Versatility: Available in materials such as acoustic panels, PVC, metal, and fiberglass, catering to specific project requirements.
  • Ease of Installation: Modular design allows for straightforward installation, even for DIY enthusiasts, saving on labor costs.
  • Sound Absorption: Enhances acoustic comfort by reducing noise levels within rooms, ideal for offices, classrooms, and residential spaces.
  • Aesthetic Appeal: Diverse designs, including textured, smooth, and decorative patterns, add visual interest to any interior.

Types of Wholesale Drop Ceiling Tiles

Explore popular types of wholesale drop ceiling tile available:

  1. Acoustic Ceiling Tiles: Designed to absorb sound and improve acoustics in spaces where noise reduction is essential.
  2. PVC Ceiling Tiles: Lightweight and durable, resistant to moisture and humidity, suitable for kitchens, bathrooms, and basements.
  3. Metal Ceiling Tiles: Offer a sleek, modern look with options like aluminum, steel, or tin, enhancing contemporary interiors.
  4. Fiberglass Ceiling Tiles: Provide thermal insulation and fire resistance, making them suitable for commercial and industrial settings.

Design Considerations

Enhance your space with wholesale drop ceiling tile by considering these design factors:

  • Room Size and Function: Choose tile sizes and materials that complement the room’s dimensions and intended use.
  • Lighting Integration: Opt for tiles that accommodate recessed lighting fixtures or surface-mounted lights for enhanced illumination.
  • Maintenance Requirements: Select tiles that are easy to clean and maintain to preserve their appearance and performance over time.
  • Color and Texture: Coordinate tile colors and textures with existing decor elements for a cohesive and appealing interior design.

Installation of Wholesale Drop Ceiling Tiles

Follow these steps for installing wholesale drop ceiling tile:

  1. Prepare the Space: Measure and prepare the ceiling area, ensuring the grid system is level and properly aligned.
  2. Install Grid System: Securely install the suspension grid system according to manufacturer guidelines, ensuring stability and support.
  3. Cut and Place Tiles: Cut tiles to fit around obstacles like vents and lights, then place them into the grid system, starting from one corner.
  4. Secure Edges and Corners: Ensure tiles are securely positioned within the grid, adjusting as necessary to maintain alignment.
  5. Finishing Touches: Install trim pieces or moldings around the perimeter of the ceiling to achieve a polished look.

Maintenance and Care

Maintain the longevity and performance of wholesale drop ceiling tile with these upkeep tips:

  • Regularly vacuum or dust tiles to prevent debris buildup and maintain a clean appearance.
  • Address water leaks or stains promptly to prevent damage and ensure tiles remain in good condition.
  • Replace damaged tiles as needed to preserve the overall integrity and aesthetic of the ceiling.

Conclusion

Wholesale drop ceiling tile offer a practical and cost-efficient solution for enhancing interior spaces while improving acoustic comfort and aesthetics. By understanding their benefits, types, installation methods, and design considerations outlined in this guide, you can confidently choose and install wholesale drop ceiling tile that meet your project requirements. Invest in wholesale drop ceiling tile today to transform your space into a functional and visually appealing environment.

Read too: Striped Schoolhouse Ceiling Light Fixtures: Unveiling the Timeless Charm

Vintage White Ceiling Fan: Timeless Elegance for Your Home Decor

A vintage white ceiling fan brings a touch of timeless elegance and functionality to any room. Discover how this classic fixture can enhance your home decor while providing efficient air circulation and cooling. This comprehensive guide explores the features, benefits, installation tips, and design inspirations for incorporating a vintage white ceiling fan into your living space.

Vintage White Ceiling Fan

Understanding Vintage White Ceiling Fans

Vintage white ceiling fans combine nostalgic charm with modern technology, featuring a classic white finish that complements various interior styles. These fans typically feature intricate detailing, curved blades, and optional light fixtures, making them a versatile choice for both traditional and contemporary homes. Whether installed in bedrooms, living rooms, or outdoor patios, vintage white ceiling fans add a stylish focal point while improving airflow and comfort.

Benefits of Vintage White Ceiling Fans

Explore the advantages of choosing a vintage white ceiling fan for your home:

  • Timeless Appeal: The vintage white finish evokes a sense of classic beauty and blends seamlessly with different decor themes.
  • Efficient Air Circulation: Ceiling fans improve air circulation and help maintain consistent room temperatures, reducing reliance on air conditioning.
  • Energy Efficiency: Many models come with energy-efficient motors and optional LED light kits, offering cost savings on utility bills.
  • Quiet Operation: High-quality motors ensure quiet and smooth operation, enhancing comfort without disruptive noise.
  • Versatile Design Options: Available in various sizes, blade configurations, and styles to suit different room dimensions and aesthetic preferences.

Features of Vintage White Ceiling Fans

Key features to consider when selecting a vintage white ceiling fan include:

  1. Blade Span and Size: Choose a fan size appropriate for the room size to ensure optimal air circulation and comfort.
  2. Motor Quality: Opt for fans with durable motors that provide reliable performance and long-lasting operation.
  3. Lighting Options: Select models with integrated light fixtures or compatibility for adding light kits, enhancing both functionality and ambiance.
  4. Remote Control or Wall Switch: Convenient control options for adjusting fan speed and lighting settings without leaving your seat.

Design Considerations

Enhance your home decor with a vintage white ceiling fan by considering these design tips:

  • Ceiling Height: Ensure adequate clearance between the fan blades and ceiling or any obstructions for safe and efficient operation.
  • Room Placement: Install fans strategically to maximize airflow and cooling effectiveness throughout the room.
  • Complementary Decor: Coordinate the fan’s design and finish with existing furniture, fixtures, and room colors for a cohesive look.
  • Outdoor Use: Choose weather-resistant models for outdoor spaces such as covered patios or porches to withstand varying weather conditions.

Installation Tips

Follow these steps for installing a vintage white ceiling fan:

  1. Preparation: Turn off power at the circuit breaker and assemble all necessary tools and components.
  2. Mounting Bracket: Secure the mounting bracket to the ceiling junction box, ensuring it can support the weight of the fan.
  3. Fan Assembly: Follow manufacturer instructions to assemble the fan components, including attaching blades and installing light fixtures if applicable.
  4. Electrical Connections: Connect wiring from the fan to the ceiling junction box, ensuring all connections are secure and insulated.
  5. Testing: Restore power and test the fan and lights to ensure proper operation before finalizing installation.

Maintenance and Care

Maintain the performance and appearance of your vintage white ceiling fan with these maintenance tips:

  • Dust fan blades regularly to prevent buildup and maintain optimal airflow.
  • Check and tighten any loose screws or connections to prevent noise or wobbling.
  • Clean or replace light bulbs as needed, following manufacturer recommendations for bulb types and wattage.

Read too: Striped Schoolhouse Ceiling Light Fixtures: Unveiling the Timeless Charm

Conclusion

A vintage white ceiling fans offers a perfect blend of aesthetic appeal and practical functionality for enhancing your home decor. By understanding its features, benefits, design considerations, and installation procedures outlined in this guide, you can confidently select and install a vintage white ceiling fan that complements your lifestyle and interior style. Invest in a vintage white ceiling fan today and enjoy timeless elegance coupled with efficient air circulation throughout your living spaces.

Twin Ceiling Fans With Lights: Enhance Your Home’s Comfort and Style

Twin ceiling fans with lights offer a unique blend of functionality and aesthetics, providing efficient air circulation and illumination in any space. This comprehensive guide explores the benefits, features, installation considerations, and design options for twin ceiling fans with lights, helping you choose the perfect addition to your home.

Twin Ceiling Fans With Lights

Understanding Twin Ceiling Fans With Lights

Twin ceiling fans with lights are dual-motor fans designed to provide enhanced airflow and lighting coverage compared to traditional single-motor ceiling fans. These fans typically feature two fan heads mounted on a single fixture, each equipped with its own set of blades and integrated light fixtures. They are ideal for larger rooms, outdoor areas, or any space where increased air circulation and lighting are desired.

Benefits of Twin Ceiling Fans With Lights

Discover the advantages of installing twin ceiling fans with lights in your home:

  • Enhanced Airflow: Dual motors provide superior air circulation, effectively cooling larger areas more efficiently than single-motor fans.
  • Increased Illumination: Integrated lights illuminate the room while the fans are in operation, offering both functionality and style.
  • Space-Saving Design: Combining fans and lights into a single fixture saves space on the ceiling, making them suitable for rooms with lower ceilings.
  • Versatility: Available in various styles, sizes, and finishes to complement different interior decor themes and outdoor spaces.
  • Energy Efficiency: Many models come with energy-efficient LED lighting options, reducing energy consumption compared to traditional lighting fixtures.

Features to Look For

When choosing twin ceiling fans with lights, consider the following features:

  1. Fan Size and Blade Span: Select a size that matches the room dimensions for optimal air circulation. Blade spans typically range from 42 inches to over 60 inches.
  2. Lighting Options: Choose between integrated LED lights, which offer energy efficiency and longevity, or models that allow you to use standard light bulbs for flexibility.
  3. Motor Quality: Look for fans with high-quality motors that provide quiet operation and long-lasting performance.
  4. Remote Control or Wall Mount: Opt for models with convenient remote controls or wall-mounted switches for ease of operation.

Design Considerations

Enhance your home’s decor with twin ceiling fans with lights by considering these design factors:

  • Finish and Style: Match the fan’s finish (e.g., brushed nickel, matte black, antique bronze) to existing hardware and decor elements in the room.
  • Ceiling Height: Ensure proper clearance between the fan blades and the ceiling or any obstructions to avoid airflow restrictions.
  • Outdoor Use: Choose weather-resistant models for outdoor spaces such as patios or covered decks to withstand the elements.
  • Lighting Control: Opt for dimmable lights or adjustable light settings to create different ambiance levels according to your preferences.

Installation Tips

Follow these steps for installing twin ceiling fans with light:

  1. Prepare the Ceiling: Turn off power to the existing ceiling fixture and remove it carefully. Ensure the ceiling junction box can support the weight of the new fan.
  2. Mounting Bracket Installation: Install the mounting bracket provided with the fan onto the ceiling junction box securely.
  3. Assemble the Fan: Follow the manufacturer’s instructions to assemble the fan components, including attaching fan blades and securing the light fixtures.
  4. Wiring Connections: Connect the fan’s wiring to the corresponding wires in the ceiling junction box, ensuring all connections are secure and insulated.
  5. Secure and Test: Secure the fan to the mounting bracket and test both the fan and lights to ensure they operate correctly.

Maintenance and Care

Keep your twin ceiling fans with light in optimal condition with these maintenance tips:

  • Clean fan blades and light fixtures regularly to remove dust and debris.
  • Check and tighten any loose screws or connections periodically to prevent noise or wobbling.
  • Replace light bulbs as needed, following manufacturer recommendations for bulb types and wattage.

Read too: Striped Schoolhouse Ceiling Light Fixtures: Unveiling the Timeless Charm

Conclusion

Twin ceiling fans with light offer a practical and stylish solution to enhance comfort and ambiance in your home or outdoor space. By understanding their features, benefits, installation process, and design considerations outlined in this guide, you can confidently choose the perfect twin ceiling fans with lights to complement your lifestyle and decor preferences. Invest in twin ceiling fans with lights today and enjoy improved air circulation and illumination throughout your living spaces.

T Bar Ceilings Lighting: Enhancing Your Space with Modern Illumination Solutions

T Bar ceilings lighting offers versatile and stylish illumination options for various spaces, from offices to residential areas. Understanding how to optimize T Bar ceiling lighting can transform your environment into a well-lit and visually appealing space. This guide explores the benefits, installation methods, and design considerations for T Bar ceiling lighting, ensuring you make informed decisions to illuminate your space effectively.

T Bar Ceiling Lighting

Understanding T Bar Ceiling Lighting

T Bar ceiling lighting refers to lighting fixtures that are specifically designed to integrate with T Bar suspended ceiling systems. These systems feature a grid of metal channels that support ceiling tiles or panels, providing a convenient space for recessed or surface-mounted lighting installations. T Bar ceiling lighting is popular for its seamless integration and ability to enhance the overall ambiance of a room.

Benefits of T Bar Ceiling Lighting

Choosing T Bar ceiling lighting offers several advantages:

  • Aesthetic Appeal: The sleek and modern design of T Bar lighting fixtures complements contemporary interiors, enhancing the overall aesthetic appeal of the space.
  • Space-Saving: T Bar lighting fixtures can be recessed into the ceiling, saving valuable floor and wall space compared to traditional lighting options.
  • Versatility: These lighting systems support various types of light fixtures, including LED panels, troffer lights, and recessed downlights, allowing for customizable lighting solutions.
  • Energy Efficiency: LED options are energy-efficient, consuming less power while providing bright and consistent illumination.
  • Easy Maintenance: T Bar ceiling systems allow easy access to lighting fixtures for maintenance or upgrades, reducing downtime and costs associated with repairs.

Types of T Bar Ceiling Lighting Fixtures

Explore the different types of T Bar ceiling lighting fixtures available:

  1. LED Panel Lights: These slim and efficient lights provide uniform illumination across the ceiling surface, ideal for offices and commercial spaces.
  2. Troffer Lights: Troffers are rectangular or square-shaped light fixtures that fit into T Bar ceiling grids, offering both direct and indirect lighting options.
  3. Recessed Downlights: Recessed downlights are installed flush with the ceiling, providing focused illumination without protruding into the room space.
  4. Surface-Mounted Fixtures: These fixtures are mounted directly onto the T Bar ceiling grid, offering flexibility in positioning and design.

Design Considerations for T Bar Ceiling Lighting

When planning T Bar ceiling lighting installation, consider the following design factors:

  • Lighting Layout: Determine the optimal placement of fixtures to ensure even distribution of light and minimize shadows.
  • Light Color Temperature: Choose between warm, neutral, or cool light tones based on the room’s function and ambiance preferences.
  • Dimming Options: Incorporate dimmable fixtures for adjustable lighting levels, enhancing energy savings and creating different atmospheres.
  • Lighting Controls: Integrate lighting controls such as sensors or timers to automate lighting based on occupancy or daylight levels, improving efficiency.

Installation of T Bar Ceiling Lighting

Follow these steps for installing T Bar ceiling lighting fixtures:

  1. Plan and Layout: Create a lighting layout plan, indicating the placement of fixtures and ensuring compatibility with the T Bar ceiling grid.
  2. Prepare the Grid: Verify the integrity of the T Bar ceiling grid and ensure it can support the weight and dimensions of the chosen lighting fixtures.
  3. Install Fixtures: Depending on the type of fixture, follow manufacturer instructions for recessed or surface-mounted installation into the T Bar grid.
  4. Connect Wiring: Safely connect electrical wiring to each fixture, adhering to local building codes and safety standards.
  5. Test and Adjust: Once installed, test each fixture to ensure proper functionality and adjust as needed for optimal lighting performance.

Maintenance and Upkeep

Regular maintenance ensures longevity and performance of T Bar ceiling lighting:

  • Clean fixtures and diffusers periodically to remove dust and maintain light output.
  • Inspect wiring and connections for signs of wear or damage, addressing any issues promptly.
  • Upgrade to energy-efficient LED bulbs or fixtures to reduce energy consumption and operating costs.

Conclusion

T Bar ceilings lighting offers versatile and efficient lighting solutions for various indoor environments. By understanding the benefits, types, design considerations, and installation methods outlined in this guide, you can make informed decisions to enhance your space with modern and effective lighting solutions. Invest in T Bar ceiling lighting to transform your environment into a well-lit and visually appealing space that meets your functional and aesthetic needs.

T Bar Ceiling Contractors: Choosing the Best Professionals for Your Project

Choosing reliable T Bar Ceiling Contractors ensures a smooth and successful ceiling installation. Discover how to select the right experts for your project needs.

T Bar Ceiling Contractors

Introduction

When it comes to installing suspended ceilings, hiring competent T Bar Ceiling Contractors is crucial. These professionals specialize in the installation and maintenance of T Bar ceiling systems, which are popular for their versatility and aesthetic appeal. Whether you’re renovating an office space, commercial establishment, or residential area, finding experienced contractors ensures your project is completed efficiently and to high standards. This guide provides valuable insights into selecting and working with T Bar Ceiling Contractors to achieve the best results for your ceiling installation project.

Understanding T Bar Ceiling Systems

T Bar ceilings, also known as suspended ceilings or drop ceilings, consist of a grid framework suspended from the main ceiling structure. This grid system supports ceiling tiles or panels, allowing easy access to utilities and enhancing the overall appearance of the space. T Bar Ceiling Contractors specialize in assembling and installing these systems, ensuring proper alignment, stability, and functionality.

Why Hire T Bar Ceiling Contractors?

Hiring professional T Bar Ceiling Contractors offers numerous advantages:

  • Expertise: Contractors have specialized knowledge and experience in handling T Bar ceiling installations, ensuring precision and quality workmanship.
  • Efficiency: Professionals can complete installations efficiently, minimizing disruptions to your daily activities or business operations.
  • Safety: Contractors adhere to safety protocols and regulations during installation, reducing the risk of accidents or structural issues.
  • Customization: Experienced contractors can advise on design options and customize the ceiling layout to meet your aesthetic preferences and functional requirements.

Qualities of Reliable T Bar Ceiling Contractors

When selecting T Bar Ceiling Contractors for your project, consider the following criteria:

  1. Experience: Look for contractors with a proven track record in installing T Bar ceilings across various projects.
  2. Certifications and Licensing: Ensure contractors are licensed and certified to perform ceiling installations in your area. This demonstrates their adherence to industry standards and regulations.
  3. Portfolio and References: Review their portfolio of past projects and request references from previous clients. This allows you to assess their work quality and customer satisfaction levels.
  4. Insurance Coverage: Verify that contractors carry adequate insurance coverage, including liability insurance and worker’s compensation. This protects you from liability in case of accidents or damages during the project.
  5. Transparent Pricing: Obtain detailed cost estimates and clarify payment terms upfront to avoid misunderstandings or unexpected expenses.

Hiring Process for T Bar Ceiling Contractor

Follow these steps when hiring T Bar Ceiling Contractor:

  • Research and Shortlist: Conduct online research, seek referrals, and obtain recommendations from industry professionals to compile a list of potential contractors.
  • Initial Consultation: Schedule consultations with shortlisted contractors to discuss your project requirements, timeline, and budget constraints.
  • Ask Questions: Inquire about their experience, previous projects, installation techniques, and warranties offered for their work.
  • Request Written Proposals: Obtain detailed proposals from each contractor, including project timelines, materials to be used, labor costs, and any additional services.
  • Check References: Contact references provided by the contractors to gather feedback on their performance, reliability, and overall satisfaction.
  • Review Contracts: Before signing any agreements, carefully review contracts to ensure all terms, conditions, and project details are clearly outlined and understood.

Working with T Bar Ceiling Contractors

Once you’ve selected a contractor, maintain open communication throughout the project:

  • Project Oversight: Regularly inspect the work progress and address any concerns promptly.
  • Adhere to Timelines: Ensure contractors adhere to agreed-upon timelines and milestones to avoid delays.
  • Quality Assurance: Monitor the quality of workmanship and materials used to uphold standards.
  • Final Inspection: Conduct a final inspection with the contractor to verify that all aspects of the ceiling installation meet your expectations.

Conclusion

Choosing the right T Bar Ceiling Contractor is essential for achieving a successful ceiling installation project. By considering their expertise, qualifications, and reputation, you can ensure a smooth and satisfactory experience from start to finish. Invest in professional T Bar Ceiling Contractor for your next renovation or construction project and enjoy the benefits of a well-installed suspended ceiling system.

Read too: Striped Schoolhouse Ceiling Light Fixtures: Unveiling the Timeless Charm

Square In Ceiling Speakers: Transform Your Home Audio Experience

When it comes to creating an immersive audio experience at home, the type of speakers you choose plays a crucial role. Square in ceiling speakers are a popular choice for homeowners seeking a sleek, unobtrusive audio solution that delivers high-quality sound. This article will delve into the benefits, features, installation, and maintenance of square in ceiling speakers, helping you decide if they are the right fit for your home audio needs.

Square In Ceiling Speakers

What are Square In Ceiling Speakers?

Square in ceiling speakers are designed to be installed flush with your ceiling, providing a discreet audio solution that doesn’t compromise on sound quality. Unlike traditional speakers that take up space on shelves or floors, these speakers blend seamlessly into your ceiling, making them an excellent choice for modern, minimalist home designs.

Key Features

Square in ceiling speakers come with various features that enhance their performance and usability:

  • Discreet Design: Their flush-mount design allows them to blend seamlessly into your ceiling, providing a clean and uncluttered look.
  • High-Quality Sound: Despite their unobtrusive appearance, these speakers are capable of delivering powerful, clear audio.
  • Wide Coverage: The ceiling placement allows for a more even distribution of sound throughout the room.
  • Customizable Grilles: Many models come with paintable grilles, allowing you to match the speakers with your ceiling color.
  • Easy Installation: Designed for easy installation, these speakers can be mounted without extensive modifications to your ceiling structure.

Benefits of Square In Ceiling Speakers

Choosing square in ceiling speakers offers numerous advantages, from their aesthetic appeal to their superior audio performance.

Aesthetic Appeal

One of the main reasons homeowners opt for square in ceiling speakers is their aesthetic appeal. These speakers are virtually invisible once installed, maintaining the clean lines and uncluttered look of modern interiors. This makes them an excellent choice for living rooms, home theaters, kitchens, and even bathrooms.

Superior Sound Quality

Square in ceiling speakers are designed to deliver high-quality audio that rivals traditional speakers. Many models feature advanced technologies such as tweeters for crisp highs and woofers for deep bass, ensuring a full, rich sound experience. Their placement in the ceiling also helps distribute sound more evenly throughout the room, creating an immersive audio environment.

Space-Saving Design

By installing speakers in the ceiling, you free up valuable floor and shelf space. This is particularly beneficial in smaller rooms where space is at a premium. The flush-mount design also reduces the risk of tripping over cables or knocking over speakers, making your home safer and more organized.

Versatility

Square in ceiling speakers are incredibly versatile and can be used in various settings. They are perfect for creating a multi-room audio system, allowing you to enjoy your favorite music or podcasts throughout your home. They can also be integrated with home theater systems, providing a seamless audio experience for movies and TV shows.

How to Choose the Right Square In Ceiling Speakers

With so many options available, selecting the right square in ceiling speakers can be a daunting task. Here are some factors to consider to ensure you make the best choice for your needs:

Room Size and Layout

The size and layout of your room will influence the type of speakers you need. Larger rooms may require more powerful speakers or multiple units to achieve the desired sound coverage. Consider the placement of furniture and other obstacles that could affect sound distribution.

Audio Quality

Pay attention to the audio quality of the speakers. Look for models with high-frequency tweeters and low-frequency woofers for a balanced sound. Some speakers also feature adjustable tweeters, allowing you to direct the sound to specific areas of the room.

Power Handling

The power handling capability of a speaker is measured in watts and indicates how much power it can handle without distortion. Make sure the speakers you choose can handle the output of your amplifier or receiver.

Installation Requirements

Consider the installation process and whether you have the necessary skills and tools to install the speakers yourself. Some models are designed for easy DIY installation, while others may require professional installation.

Budget

Square in ceiling speakers come in a wide range of prices, so it’s important to set a budget before you start shopping. While higher-end models may offer better sound quality and additional features, there are plenty of affordable options that still deliver excellent performance.

Installing Square In Ceiling Speakers

Installing square in ceiling speakers can be a straightforward process if you follow the right steps. Here is a step-by-step guide to help you with the installation:

Tools and Materials Needed

  • Square in ceiling speakers
  • Speaker wire
  • Stud finder
  • Drywall saw
  • Wire stripper
  • Screwdriver
  • Speaker template (usually provided with the speakers)
  • Amplifier or receiver

Step-by-Step Installation Guide

  1. Choose the Location: Use a stud finder to locate the ceiling joists and choose a spot between them for your speakers. Mark the location with a pencil.
  2. Cut the Hole: Use the speaker template to outline the cutout area on the ceiling. Carefully cut the hole with a drywall saw, ensuring it is the right size for the speaker.
  3. Run the Wires: Run speaker wire from your amplifier or receiver to the cutout hole. If you are installing multiple speakers, run wire to each location. Make sure to leave enough slack for connecting the speakers.
  4. Connect the Speakers: Strip the ends of the speaker wire and connect them to the terminals on the back of the speakers. Ensure the polarity (+ and -) is correct to avoid phase issues.
  5. Install the Speakers: Insert the speakers into the cutout hole and secure them in place with the provided screws. Make sure they are flush with the ceiling.
  6. Test the System: Once all the speakers are installed, test the system by playing audio through your amplifier or receiver. Adjust the sound settings as needed to achieve the best performance.

Tips for a Successful Installation

  • Use Quality Speaker Wire: Invest in high-quality speaker wire to ensure the best sound quality and reliability.
  • Plan Your Layout: Plan the layout of your speakers before you start cutting holes to ensure optimal sound distribution.
  • Follow the Manufacturer’s Instructions: Always follow the manufacturer’s instructions for installation to avoid damaging the speakers or your ceiling.

Maintaining Your Square In Ceiling Speakers

Proper maintenance is essential to keep your square in ceiling speakers performing at their best. Here are some tips to help you maintain your speakers:

Regular Cleaning

Dust the speaker grilles regularly to prevent dirt and dust buildup. Use a soft, dry cloth to wipe the grilles, being careful not to push dirt into the speaker components.

Inspect for Damage

Periodically inspect your speakers for any signs of damage or wear. Check the connections and wiring to ensure they are secure and in good condition. Address any issues promptly to prevent further damage.

Avoid Excessive Volume

Playing audio at excessively high volumes can damage the speakers and reduce their lifespan. Keep the volume at a reasonable level to avoid distortion and potential damage.

Update Your System

As technology advances, consider updating your amplifier or receiver to take advantage of new features and improvements in audio quality. This can help you get the most out of your square in ceiling speakers.

Conclusion

Square in ceiling speakers offer a stylish and effective solution for enhancing your home audio experience. Their discreet design, high-quality sound, and versatility make them an excellent choice for various applications, from living rooms and home theaters to kitchens and bathrooms. By considering factors such as room size, audio quality, and installation requirements, you can choose the right speakers to meet your needs.

Read too: Striped Schoolhouse Ceiling Light Fixtures: Unveiling the Timeless Charm

With proper installation and maintenance, square in ceiling speakers can provide years of enjoyment, transforming your home into a space where you can fully immerse yourself in your favorite music, movies, and more. Whether you are a casual listener or an audiophile, these speakers offer a perfect blend of form and function, elevating your home audio to the next level.

Soundbreak XP Ceilings Board: Enhance Your Acoustic Comfort

In modern construction, soundproofing has become an essential aspect of creating comfortable and quiet living and working environments. One of the most effective solutions for controlling sound transmission through ceilings is the Soundbreak XP Ceilings Board. This article explores the benefits, features, and applications of Soundbreak XP Ceiling Board, providing valuable information to help you decide if this product is right for your project.

Soundbreak Xp Ceiling Board

What is Soundbreak XP Ceiling Board?

Soundbreak XP Ceiling Board is a high-performance gypsum board designed specifically for soundproofing. It combines the characteristics of traditional drywall with enhanced sound-damping capabilities, making it an ideal choice for reducing noise transmission in both residential and commercial buildings.

Key Features

Soundbreak XP Ceiling Board is engineered to provide superior acoustic performance. Its key features include:

  • Enhanced Sound Damping: The board incorporates a viscoelastic polymer between two dense gypsum layers, significantly reducing sound transmission.
  • Moisture and Mold Resistance: The XP (eXtreme Protection) technology ensures the board is resistant to moisture and mold, making it suitable for various environments.
  • Fire Resistance: Soundbreak XP Ceiling Board meets fire resistance standards, providing an added layer of safety.
  • Easy Installation: The board can be installed using standard drywall techniques, making it convenient for contractors and DIY enthusiasts alike.

Applications

Soundbreak XP Ceiling Board is versatile and can be used in a variety of settings, including:

  • Residential Homes: Bedrooms, home theaters, living rooms, and nurseries benefit from the reduced noise transmission.
  • Commercial Buildings: Offices, conference rooms, and healthcare facilities gain improved acoustic privacy.
  • Multifamily Dwellings: Apartments and condos require effective soundproofing to enhance tenant satisfaction.
  • Hospitality Industry: Hotels and resorts use sound-damping materials to ensure a quiet and restful environment for guests.

Benefits of Soundbreak XP Ceiling Board

Choosing Soundbreak XP Ceiling Board for your construction or renovation project offers numerous advantages, from improved acoustic comfort to enhanced safety and durability.

Superior Acoustic Performance

The primary benefit of Soundbreak XP Ceiling Board is its ability to reduce noise transmission between rooms and floors. The board’s advanced design effectively dampens sound vibrations, making it ideal for environments where noise control is crucial.

Moisture and Mold Resistance

In addition to its soundproofing capabilities, Soundbreak XP Ceiling Board is resistant to moisture and mold. This makes it suitable for areas with high humidity, such as bathrooms and kitchens, ensuring long-lasting performance and durability.

Fire Resistance

Safety is a critical consideration in any building project. Soundbreak XP Ceiling Board meets fire resistance standards, providing an added layer of protection in the event of a fire. This feature makes it an excellent choice for both residential and commercial applications.

Easy to Work With

Despite its advanced performance characteristics, Soundbreak XP Ceiling Board is easy to install. It can be cut, screwed, and finished using standard drywall techniques, making it a convenient option for contractors and DIY enthusiasts.

Cost-Effective Solution

While Soundbreak XP Ceiling Board may have a higher upfront cost compared to standard drywall, its benefits in terms of acoustic comfort, moisture resistance, and fire safety make it a cost-effective solution in the long run. The enhanced durability and performance can lead to fewer maintenance issues and improved occupant satisfaction.

How to Install Soundbreak XP Ceiling Board

Proper installation is crucial to maximize the benefits of Soundbreak XP Ceiling Board. Here is a step-by-step guide to help you through the installation process:

Tools and Materials Needed

  • Soundbreak XP Ceiling Board
  • Drywall screws
  • Screw gun or drill
  • Utility knife
  • T-square or straight edge
  • Joint tape and compound
  • Sanding block
  • Measuring tape

Step-by-Step Installation Guide

  1. Measure and Cut: Measure the dimensions of your ceiling and cut the Soundbreak XP Ceiling Board to fit. Use a T-square or straight edge to ensure clean, straight cuts.
  2. Position the Board: Position the first panel against the ceiling joists, ensuring a snug fit. It’s helpful to have an assistant to hold the board in place while you secure it.
  3. Secure the Board: Using a screw gun or drill, secure the Soundbreak XP Ceiling Board to the ceiling joists with drywall screws. Place screws every 12 inches along the edges and every 16 inches in the field of the board.
  4. Repeat the Process: Continue to measure, cut, and secure additional panels until the entire ceiling is covered. Ensure that the seams between panels are tight to prevent sound leakage.
  5. Tape and Mud: Apply joint tape over the seams between the panels. Then, apply a layer of joint compound over the tape, feathering the edges to blend with the board surface. Allow the compound to dry completely.
  6. Sand and Finish: Once the joint compound is dry, sand the seams smooth. Apply additional layers of compound as needed, sanding between each layer until the seams are seamless and smooth.
  7. Prime and Paint: After the final sanding, prime and paint the ceiling to your desired finish. This step not only improves the aesthetic appearance but also adds an additional layer of protection.

Tips for Successful Installation

  • Use Quality Tools and Materials: Investing in high-quality tools and materials can make the installation process smoother and result in a better-finished product.
  • Work with a Partner: Installing ceiling boards can be challenging alone. Working with a partner can make the process easier and safer.
  • Follow Manufacturer Guidelines: Always follow the manufacturer’s guidelines for installation to ensure optimal performance and safety.

Maintenance and Care for Soundbreak XP Ceiling Board

To keep your Soundbreak XP Ceiling Board in top condition, follow these maintenance and care tips:

Regular Cleaning

Dust the ceiling regularly to prevent dirt and dust buildup. Use a soft cloth or duster to avoid scratching the surface.

Addressing Moisture Issues

Although Soundbreak XP Ceiling Board is moisture-resistant, it’s essential to address any water leaks or humidity issues promptly to prevent potential damage.

Inspect for Damage

Periodically inspect the ceiling for any signs of damage or wear. Address any issues immediately to maintain the board’s integrity and performance.

Conclusion

Soundbreak XP Ceilings Board offers a superior solution for soundproofing ceilings in both residential and commercial settings. Its advanced design provides excellent acoustic performance, moisture and mold resistance, fire safety, and ease of installation. By choosing Soundbreak XP Ceiling Board, you can enhance the comfort and functionality of your spaces, creating quieter, safer, and more enjoyable environments.

Read too: Striped Schoolhouse Ceiling Light Fixtures: Unveiling the Timeless Charm

Whether you are constructing a new building or renovating an existing space, Soundbreak XP Ceiling Board is a cost-effective and reliable choice for achieving your soundproofing goals. With proper installation and maintenance, this innovative product will provide lasting benefits, making it a valuable addition to your project.

Semi Flush Tiffany Ceiling Lights: Transform Your Home

Lighting is an essential component of home design, contributing significantly to the ambiance and aesthetic of a space. Semi flush Tiffany ceiling lights stand out as a stylish and functional choice for homeowners seeking a blend of elegance and practicality. This article delves into the world of semi flush Tiffany ceiling lights, exploring their design, benefits, and tips for choosing and incorporating them into your home decor.

Semi Flush Tiffany Ceiling Lights

Understanding Semi Flush Tiffany Ceiling Lights

Semi flush Tiffany ceiling lights are lighting fixtures that hang just below the ceiling, providing a middle ground between flush mount and pendant lights. These lights are characterized by their intricate stained glass designs, inspired by the iconic Tiffany lamps created by Louis Comfort Tiffany in the late 19th century.

Design and Aesthetics

Tiffany-style lights are renowned for their vibrant colors and intricate patterns, often depicting floral, geometric, or nature-inspired motifs. The stained glass shades are handcrafted, making each piece unique. The semi flush design allows the light to hang slightly away from the ceiling, creating a soft, ambient glow that enhances the room’s atmosphere.

Versatility and Functionality

Semi flush Tiffany ceiling lights are versatile and can be used in various settings, including living rooms, bedrooms, dining areas, and hallways. They offer a perfect blend of decorative appeal and practical illumination, making them suitable for both ambient and task lighting.

Benefits of Semi Flush Tiffany Ceiling Lights

Choosing semi flush Tiffany ceiling lights offers numerous advantages, from their aesthetic appeal to their functional benefits.

Timeless Elegance

The classic design of Tiffany-style lights brings a touch of timeless elegance to any room. Their intricate stained glass shades add a layer of sophistication and artistic flair that can enhance both traditional and contemporary decor.

Warm and Inviting Atmosphere

The stained glass diffuses light beautifully, casting a warm and inviting glow. This makes semi flush Tiffany ceiling lights ideal for creating a cozy and welcoming atmosphere in any space.

Unique and Handcrafted

Each Tiffany light is a work of art, with handcrafted glass pieces assembled into stunning designs. This uniqueness ensures that your light fixture will be one-of-a-kind, adding a personalized touch to your home decor.

Space-Saving Design

The semi flush design is perfect for rooms with low to medium ceiling heights. These fixtures provide ample illumination without occupying too much visual space, making the room feel more open and airy.

Choosing the Perfect Semi Flush Tiffany Ceiling Light

When selecting a semi flush Tiffany ceiling light, consider various factors to ensure it complements your space and meets your lighting needs.

Room Size and Ceiling Height

Consider the dimensions of your room and the height of the ceiling. Semi flush ceiling lights are ideal for spaces with lower ceilings, typically between 8 to 10 feet high. Measure your space to determine the appropriate size of the light fixture.

Lighting Needs

Think about the primary function of the room and the type of lighting required. For instance, a living room may benefit from ambient lighting provided by a semi flush ceiling light, while a dining room might require brighter task lighting.

Style and Decor

Ensure the design of the semi flush Tiffany ceiling light complements your existing decor. Tiffany lights come in various styles and patterns, so choose one that enhances the overall aesthetic of the room, whether it’s traditional, modern, or eclectic.

Quality and Durability

Invest in a high-quality light fixture that is built to last. Look for reputable brands and materials that offer durability and longevity, ensuring your ceiling light remains a beautiful and functional part of your home for years to come.

Installing Semi Flush Tiffany Ceiling Lights

Proper installation is crucial to ensure your light fixture functions correctly and safely. While some homeowners may choose to install their ceiling light themselves, hiring a professional electrician is often recommended, especially if you’re not experienced with electrical work.

Step-by-Step Installation Guide

  1. Turn Off the Power: Before beginning any electrical work, ensure the power to the room is turned off at the circuit breaker.
  2. Remove the Old Fixture: If you’re replacing an existing light fixture, carefully remove it and disconnect the wiring.
  3. Prepare the New Fixture: Assemble your semi flush Tiffany ceiling light according to the manufacturer’s instructions.
  4. Connect the Wiring: Match the wires from the light fixture to the corresponding wires in the ceiling. Typically, this involves connecting the black (hot) wires, white (neutral) wires, and green or bare (ground) wires.
  5. Mount the Fixture: Attach the fixture to the ceiling bracket, securing it in place with screws.
  6. Install the Bulbs: Insert the recommended bulbs into the fixture.
  7. Restore Power: Turn the power back on at the circuit breaker and test your new light fixture.

Safety Tips

  • Always turn off the power at the circuit breaker before working with electrical components.
  • Use a voltage tester to ensure the power is off before touching any wires.
  • Follow the manufacturer’s instructions carefully.
  • If in doubt, hire a professional electrician to complete the installation.

Incorporating Semi Flush Tiffany Ceiling Lights into Your Decor

Once your semi flush Tiffany ceiling light is installed, it’s time to think about how to integrate it into your overall decor. Here are some tips to help you make the most of this beautiful lighting fixture:

Create a Focal Point

Use the ceiling light as a focal point in the room. Its unique design and warm glow can draw attention and add a touch of elegance to the space. Position it in a central location where it can be admired from all angles.

Complement with Other Lighting

Layer your lighting by incorporating other light sources, such as table lamps, floor lamps, and wall sconces. This creates a balanced and well-lit environment, enhancing the overall ambiance of the room.

Coordinate with Accessories

Choose accessories and decor items that complement the semi flush Tiffany ceiling light. Consider using warm tones, natural materials, and elegant finishes to create a cohesive look.

Reflect Your Personal Style

Your lighting fixtures should reflect your personal style and taste. Don’t be afraid to mix and match different design elements to create a space that feels uniquely yours.

Maintenance Tips for Semi Flush Tiffany Ceiling Lights

To keep your semi flush Tiffany ceiling light looking its best, regular maintenance is essential. Here are some tips to help you maintain your light fixture:

Regular Cleaning

Dust and clean the fixture regularly to prevent dirt and grime buildup. Use a soft, lint-free cloth and a gentle cleaning solution suitable for glass and metal.

Check for Wear and Tear

Periodically inspect the fixture for any signs of wear and tear. Ensure the screws are tight and the wiring is secure. If you notice any damage, address it promptly to maintain the safety and functionality of the light.

Replace Bulbs as Needed

Keep spare bulbs on hand and replace them as soon as they burn out. This ensures your room remains well-lit and your fixture continues to look its best.

Read too: Striped Schoolhouse Ceiling Light Fixtures: Unveiling the Timeless Charm

Conclusion

Semi flush Tiffany ceiling lights are a stylish and functional addition to any home. Their timeless elegance, warm glow, and unique handcrafted designs make them a popular choice for various rooms and decor styles. By considering factors such as room size, lighting needs, and personal style, you can choose the perfect fixture to enhance your space. Proper installation and maintenance will ensure your light fixture remains a beautiful and functional part of your home for years to come.

Scalloped Amber Glass Semi-Flush Ceiling Light: Transform Your Space

Lighting plays a crucial role in interior design, impacting both the ambiance and functionality of a room. One lighting fixture that has gained popularity for its unique aesthetic and practical benefits is the scalloped amber glass semi-flush ceiling light. This article will explore everything you need to know about this stylish lighting option, helping you decide if it’s the right choice for your home.

Scalloped Amber Glass Semi-Flush Ceiling Light

What is a Scalloped Amber Glass Semi-Flush Ceiling Light?

A scalloped amber glass semi-flush ceiling light is a type of light fixture that is mounted close to the ceiling but has a slight gap, creating a semi-flush effect. The design often features a scalloped edge on the amber glass shade, which adds a decorative element and diffuses light beautifully.

Design and Aesthetics

The scalloped amber glass semi-flush ceiling light combines classic elegance with a touch of modern flair. The amber glass shade provides a warm, inviting glow, perfect for creating a cozy atmosphere in any room. The scalloped edges add an extra layer of sophistication, making this light fixture a standout piece.

Versatility and Functionality

This type of ceiling light is highly versatile and can be used in various settings, from living rooms and bedrooms to hallways and kitchens. Its semi-flush design is ideal for rooms with low to medium ceiling heights, offering ample illumination without overpowering the space.

Benefits of Choosing a Scalloped Amber Glass Semi-Flush Ceiling Light

Selecting the right lighting fixture involves considering both aesthetics and functionality. Here are some of the key benefits of choosing a scalloped amber glass semi-flush ceiling light:

Warm and Inviting Ambiance

The amber glass shade of this light fixture casts a warm, soft light that creates a welcoming and cozy atmosphere. This makes it an excellent choice for spaces where you want to relax and unwind.

Stylish Design

The scalloped edge of the glass shade adds a touch of elegance and sophistication to your decor. This design element can complement a variety of interior styles, from traditional to contemporary.

Space-Saving Solution

The semi-flush design is perfect for rooms with limited ceiling height. It provides sufficient lighting without taking up too much visual space, making the room feel more open and airy.

Easy Installation

Compared to chandeliers or pendant lights, semi-flush ceiling lights are generally easier to install. They require less wiring and can be mounted closer to the ceiling, making them a convenient option for many homeowners.

How to Choose the Perfect Scalloped Amber Glass Semi-Flush Ceiling Light

When selecting a scalloped amber glass semi-flush ceiling light, there are several factors to consider to ensure it fits your space and meets your lighting needs.

Room Size and Ceiling Height

Consider the size of the room and the height of the ceiling. Semi-flush ceiling lights are ideal for rooms with low to medium ceilings, as they provide ample lighting without hanging too low. Measure your space to determine the appropriate size of the light fixture.

Lighting Needs

Think about the primary function of the room and the type of lighting required. For instance, a living room may benefit from ambient lighting provided by a semi-flush ceiling light, while a kitchen might require brighter task lighting.

Style and Decor

Ensure the design of the scalloped amber glass semi-flush ceiling light complements your existing decor. The fixture should enhance the overall aesthetic of the room, whether it’s traditional, modern, or eclectic.

Quality and Durability

Invest in a high-quality light fixture that is built to last. Look for reputable brands and materials that offer durability and longevity, ensuring your ceiling light remains a beautiful and functional part of your home for years to come.

Installing Your Scalloped Amber Glass Semi-Flush Ceiling Lights

Proper installation is crucial to ensure your light fixture functions correctly and safely. While some homeowners may choose to install their ceiling light themselves, hiring a professional electrician is often recommended, especially if you’re not experienced with electrical work.

Step-by-Step Installation Guide

  1. Turn Off the Power: Before beginning any electrical work, ensure the power to the room is turned off at the circuit breaker.
  2. Remove the Old Fixture: If you’re replacing an existing light fixture, carefully remove it and disconnect the wiring.
  3. Prepare the New Fixture: Assemble your scalloped amber glass semi-flush ceiling lights according to the manufacturer’s instructions.
  4. Connect the Wiring: Match the wires from the light fixture to the corresponding wires in the ceiling. Typically, this involves connecting the black (hot) wires, white (neutral) wires, and green or bare (ground) wires.
  5. Mount the Fixture: Attach the fixture to the ceiling bracket, securing it in place with screws.
  6. Install the Bulbs: Insert the recommended bulbs into the fixture.
  7. Restore Power: Turn the power back on at the circuit breaker and test your new light fixture.

Safety Tips

  • Always turn off the power at the circuit breaker before working with electrical components.
  • Use a voltage tester to ensure the power is off before touching any wires.
  • Follow the manufacturer’s instructions carefully.
  • If in doubt, hire a professional electrician to complete the installation.

Incorporating a Scalloped Amber Glass Semi-Flush Ceiling Light into Your Decor

Once your scalloped amber glass semi-flush ceiling light is installed, it’s time to think about how to integrate it into your overall decor. Here are some tips to help you make the most of this beautiful lighting fixture:

Create a Focal Point

Use the ceiling light as a focal point in the room. Its unique design and warm glow can draw attention and add a touch of elegance to the space. Position it in a central location where it can be admired from all angles.

Complement with Other Lighting

Layer your lighting by incorporating other light sources, such as table lamps, floor lamps, and wall sconces. This creates a balanced and well-lit environment, enhancing the overall ambiance of the room.

Coordinate with Accessories

Choose accessories and decor items that complement the scalloped amber glass semi-flush ceiling light. Consider using warm tones, natural materials, and elegant finishes to create a cohesive look.

Reflect Your Personal Style

Your lighting fixtures should reflect your personal style and taste. Don’t be afraid to mix and match different design elements to create a space that feels uniquely yours.

Maintenance Tips for Scalloped Amber Glass Semi-Flush Ceiling Lights

To keep your scalloped amber glass semi-flush ceiling lights looking its best, regular maintenance is essential. Here are some tips to help you maintain your light fixture:

Regular Cleaning

Dust and clean the fixture regularly to prevent dirt and grime buildup. Use a soft, lint-free cloth and a gentle cleaning solution suitable for glass and metal.

Check for Wear and Tear

Periodically inspect the fixture for any signs of wear and tear. Ensure the screws are tight and the wiring is secure. If you notice any damage, address it promptly to maintain the safety and functionality of the light.

Replace Bulbs as Needed

Keep spare bulbs on hand and replace them as soon as they burn out. This ensures your room remains well-lit and your fixture continues to look its best.

Read too: Striped Schoolhouse Ceiling Light Fixtures: Unveiling the Timeless Charm

Conclusion

A scalloped amber glass semi-flush ceiling lights is a stylish and functional addition to any home. Its warm glow, elegant design, and versatile application make it a popular choice for various rooms and decor styles. By considering factors such as room size, lighting needs, and personal style, you can choose the perfect fixture to enhance your space. Proper installation and maintenance will ensure your light fixture remains a beautiful and functional part of your home for years to come.

Rustic Bedroom Ceiling Lights for a Cozy Retreat: The Ultimate Guide to Choosing

Transforming your bedroom into a cozy, rustic retreat involves careful selection of various design elements, and one of the most important aspects is lighting. Rustic bedroom ceiling lights can dramatically influence the ambiance and overall aesthetic of your space. Whether you’re renovating an entire room or simply updating your lighting fixtures, this guide will provide you with everything you need to know about choosing the perfect rustic bedroom ceiling lights.

Rustic Bedroom Ceiling Lights

Why Choose Rustic Bedroom Ceiling Lights?

Rustic bedroom ceiling lights are more than just a source of illumination; they are a design statement that can bring warmth, charm, and character to your bedroom. These lights often feature natural materials such as wood, metal, and glass, and they come in a variety of designs that can complement various rustic styles, from farmhouse to cabin chic.

The Appeal of Rustic Design

Rustic design emphasizes natural beauty and simplicity. It often incorporates elements that bring the outdoors inside, creating a space that feels both comforting and grounded. Rustic bedroom ceiling lights play a crucial role in achieving this look by providing a focal point that ties the room together.

Creating a Cozy Atmosphere

The right lighting can make a bedroom feel warm and inviting. Rustic ceiling lights often feature warm tones and soft lighting, which can enhance the cozy feel of your bedroom. Whether you prefer a chandelier made of reclaimed wood or a metal fixture with an antique finish, these lights can add a touch of rustic charm to any bedroom.

Types of Rustic Bedroom Ceiling Lights

There are various types of rustic bedroom ceiling lights to choose from, each offering a unique aesthetic and functionality. Here are some popular options to consider:

Chandeliers

Chandeliers are a classic choice for rustic bedroom ceiling lights. They often feature intricate designs and can serve as a stunning centerpiece in your room. Look for chandeliers made from natural materials like wood or wrought iron to enhance the rustic feel.

Pendant Lights

Pendant lights are versatile and can be used in a variety of ways in a rustic bedroom. They can hang over bedside tables, in reading nooks, or as a central fixture. Choose pendant lights with earthy tones and natural textures to complement your rustic decor.

Flush Mount Ceiling Lights

For a more subtle look, flush mount ceiling lights are an excellent option. These lights sit close to the ceiling and provide a clean, streamlined look. Opt for designs that incorporate rustic elements, such as distressed wood or vintage-inspired metal.

Recessed Lighting

Recessed lighting is ideal for adding ambient light to a rustic bedroom. These lights are installed directly into the ceiling, providing a seamless look. Pair recessed lighting with other rustic fixtures to create a layered lighting scheme.

Choosing the Right Rustic Bedroom Ceiling Lights

When selecting rustic bedroom ceiling lights, there are several factors to consider to ensure you choose the perfect fixture for your space.

Consider the Size of Your Room

The size of your bedroom will influence the type of ceiling light you should choose. For larger bedrooms, a grand chandelier or a series of pendant lights can make a bold statement. In smaller bedrooms, opt for a single flush mount or a couple of recessed lights to avoid overwhelming the space.

Match with Existing Decor

Your ceiling lights should complement the existing decor in your bedroom. If your room features a lot of wood and natural textures, choose lights that incorporate similar materials. For a more industrial rustic look, consider metal fixtures with a vintage finish.

Lighting Needs

Think about the lighting needs in your bedroom. Do you need bright, task lighting for reading or softer, ambient lighting for relaxation? Rustic ceiling lights come in various brightness levels, so choose fixtures that meet your functional requirements.

Installation and Maintenance

Consider the installation process and maintenance needs of your ceiling lights. Some rustic fixtures can be heavy and require professional installation. Additionally, consider how easy it will be to clean and maintain your lights, especially if they feature intricate designs.

Incorporating Rustic Bedroom Ceiling Lights into Your Design

Once you’ve chosen the perfect rustic ceiling lights for your bedroom, it’s time to think about how to incorporate them into your overall design. Here are some tips to help you integrate your new fixtures seamlessly:

Layer Your Lighting

Layered lighting is essential in creating a well-lit, inviting space. Combine your rustic ceiling lights with other types of lighting, such as bedside lamps and wall sconces, to create a balanced and functional lighting scheme.

Use Dimmers

Installing dimmer switches allows you to adjust the brightness of your lights to suit different moods and activities. This is especially useful in a bedroom, where you may want bright light for reading and soft light for relaxing.

Highlight Architectural Features

Use your rustic ceiling lights to highlight architectural features in your bedroom. For example, a chandelier can draw attention to a vaulted ceiling or exposed beams, adding to the rustic charm of the space.

Complement with Accessories

Complete the look by accessorizing with rustic elements such as wooden furniture, cozy textiles, and natural decor pieces. This will create a cohesive design that feels warm and inviting.

Maintenance Tips for Rustic Bedroom Ceiling Lights

To keep your rustic bedroom ceiling light looking their best, follow these maintenance tips:

Regular Cleaning

Dust and clean your lights regularly to prevent dirt buildup. Use a soft cloth and gentle cleaning solution to avoid damaging the fixtures.

Check for Wear and Tear

Periodically inspect your ceiling lights for any signs of wear and tear. Replace any damaged parts promptly to ensure the lights remain safe and functional.

Replace Bulbs as Needed

Keep spare bulbs on hand and replace them as soon as they burn out. This will ensure your room is always well-lit and your fixtures are always looking their best.

Read too: Striped Schoolhouse Ceiling Light Fixtures: Unveiling the Timeless Charm

Conclusion

Rustic bedroom ceiling light are an essential element in creating a cozy and inviting retreat. With so many styles and designs to choose from, you can find the perfect fixture to complement your rustic decor. By considering factors such as room size, existing decor, and lighting needs, you can select the ideal ceiling lights for your space. Remember to layer your lighting, use dimmers, and highlight architectural features to enhance the rustic charm of your bedroom. With proper maintenance, your rustic ceiling lights will continue to add warmth and character to your space for years to come.

Range Hood on a Sloped Ceiling: Optimizing Your Kitchen

When it comes to kitchen design, functionality and aesthetics go hand in hand. A range hood is an essential appliance for maintaining a clean and odor-free kitchen, but what happens when your kitchen has a sloped ceiling? Installing a range hood on a sloped ceiling can be a challenging yet rewarding task. This comprehensive guide will explore the intricacies of fitting a range hood in such a space, offering tips, design ideas, and solutions to common challenges. Whether you’re remodeling or building a new kitchen, this article will help you achieve a seamless integration of a range hood on a sloped ceiling.

Range Hood Sloped Ceiling

Why Choose a Range Hood for Your Sloped Ceiling?

A range hood serves multiple purposes in a kitchen, making it a vital addition, especially in spaces with unique architectural features like sloped ceilings. Here are some reasons why you should consider installing a range hood on a sloped ceiling:

Improved Air Quality

A range hood helps in ventilating your kitchen by removing smoke, steam, and cooking odors. This is particularly important in kitchens with sloped ceilings, as the unique structure can sometimes trap air, leading to poor ventilation.

Enhanced Aesthetics

A well-designed range hood can add to the visual appeal of your kitchen. With various styles and finishes available, you can choose a hood that complements your kitchen’s design, making it a focal point.

Increased Home Value

Modern, functional kitchens are a significant selling point for potential buyers. Installing a range hood that accommodates a sloped ceiling can enhance your kitchen’s functionality and aesthetic appeal, thereby increasing your home’s value.

Understanding the Challenges of Installing a Range Hood on a Sloped Ceiling

Before diving into the installation process, it’s essential to understand the unique challenges posed by a sloped ceiling. These challenges can affect both the placement and the functionality of the range hood.

Angle of the Ceiling

The slope of the ceiling will impact how the range hood is mounted. You’ll need to measure the angle accurately to ensure that the hood is installed at the correct height and position.

Ventilation Path

Ensuring a clear and efficient path for venting is crucial. A sloped ceiling might require additional ductwork or creative routing to ensure that the air is properly expelled from your kitchen.

Aesthetic Integration

Blending the range hood seamlessly with the existing kitchen design can be more complex with a sloped ceiling. You might need to consider custom or adjustable range hoods to match the unique angles and lines of your kitchen.

Types of Range Hoods Suitable for Sloped Ceilings

There are several types of range hoods that can be adapted for use in kitchens with sloped ceilings. Understanding the options available will help you choose the best fit for your space.

Wall-Mounted Range Hoods

Wall-mounted range hoods are installed directly on the wall above the cooktop. For sloped ceilings, you may need to install the hood at a lower height and use a chimney extension to accommodate the slope.

Island Range Hoods

Island range hoods are designed for cooktops located on kitchen islands. These hoods are suspended from the ceiling and can be adapted for sloped ceilings with adjustable mounting brackets and custom ductwork.

Downdraft Range Hoods

Downdraft range hoods are installed directly into the cooktop or countertop and pull air downward. This type can be an excellent solution for kitchens with severe slopes, as they don’t require ceiling mounting.

Custom Range Hoods

Custom range hoods can be tailored to fit the exact specifications of your kitchen. This option provides the most flexibility in terms of design and functionality, allowing you to create a solution that perfectly fits your sloped ceiling.

Installation Tips for a Range Hood on a Sloped Ceiling

Installing a range hood on a sloped ceiling requires careful planning and execution. Here are some steps and tips to guide you through the process:

Step 1: Measure and Plan

Accurate measurements are crucial. Measure the height and angle of the slope, as well as the distance from the cooktop to the ceiling. Ensure that the range hood will be installed at a height that provides optimal ventilation without interfering with your cooking space.

Step 2: Choose the Right Range Hood

Select a range hood that suits your kitchen’s design and functional needs. Consider the type of cooking you do, the size of your cooktop, and the overall aesthetic of your kitchen.

Step 3: Prepare the Installation Area

Ensure that the area where the range hood will be installed is clear and ready for installation. You may need to reinforce the mounting area, especially if you’re installing a heavy or custom hood.

Step 4: Install the Mounting Bracket

For wall-mounted and island hoods, install the mounting bracket securely on the wall or ceiling. Make sure it is level and properly aligned with the cooktop.

Step 5: Adjust for the Slope

Use adjustable brackets or custom mounts to ensure that the range hood is level, despite the sloped ceiling. This may involve cutting or adjusting the chimney or ductwork to fit the angle of the ceiling.

Step 6: Connect the Ductwork

Install the ductwork, ensuring a clear path for ventilation. You may need to use flexible ducts or custom routing to accommodate the sloped ceiling. Seal all connections properly to prevent leaks.

Step 7: Test the Range Hood

Once installed, test the range hood to ensure it is functioning correctly. Check for proper airflow and ensure that the hood is securely mounted.

Design Ideas for Integrating a Range Hood on a Sloped Ceiling

A range hood can enhance the look of your kitchen while providing essential functionality. Here are some design ideas to inspire your installation:

Rustic Charm

For a rustic kitchen, consider a range hood with a wooden or copper finish. Pair it with exposed beams and natural materials to create a cozy, inviting space.

Modern Minimalism

In a modern kitchen, opt for a sleek, stainless steel range hood. The clean lines and simple design will complement a minimalist aesthetic and make the hood a focal point.

Industrial Style

An industrial-style range hood, with its robust, functional design, can add character to your kitchen. Pair it with exposed brick, metal accents, and open shelving for a bold, urban look.

Traditional Elegance

For a traditional kitchen, choose a range hood with classic detailing and a timeless finish. A hood with decorative molding or a custom paint job can blend seamlessly with your cabinetry and overall design.

Maintenance Tips for Your Range Hood on a Sloped Ceiling

Regular maintenance is essential to keep your range hood operating efficiently and looking great. Here are some tips to ensure your hood remains in top condition:

Clean the Filters

Clean or replace the filters regularly to ensure optimal airflow. Grease and debris can accumulate over time, reducing the efficiency of the hood.

Wipe Down Surfaces

Clean the exterior surfaces of the range hood regularly to remove grease and dust. Use a mild detergent and a soft cloth to avoid scratching the finish.

Check the Ductwork

Periodically inspect the ductwork for any blockages or leaks. Ensure that the ducts are securely connected and free from obstructions.

Test the Fan and Lights

Test the fan and lights regularly to ensure they are functioning correctly. Replace any burned-out bulbs or malfunctioning components promptly.

Read too: Understanding and Dealing with Ants in the Ceiling Spaces: Navigating the Intrusion

Conclusion

Installing a range hood on a sloped ceiling can be a complex yet rewarding project. With the right planning, materials, and design, you can create a functional and stylish kitchen that meets your needs. The Progress Lighting Airpro Ceiling Fan offers a versatile solution that can be adapted to fit your unique space. Whether you’re aiming for a rustic retreat, a modern minimalist haven, or a traditional sanctuary, a range hood can transform your kitchen into a more comfortable and visually appealing space. Follow the installation and maintenance tips provided in this guide to ensure that your range hood performs optimally and enhances your kitchen’s overall aesthetic.

Progress Lighting Airpro Ceiling Fan: Enhance Your Home

Choosing the right ceiling fan can significantly impact your home’s comfort, style, and energy efficiency. One standout option on the market is the Progress Lighting Airpro Ceiling Fan. This guide will delve into everything you need to know about the Progress Lighting Airpro Ceiling Fan, including its benefits, features, installation tips, and design ideas. Whether you’re updating your existing fans or installing new ones, this fan offers a blend of performance and aesthetics that can enhance any room in your home.

Progress Lighting Airpro Ceiling Fan

Why Choose the Progress Lighting Airpro Ceiling Fan?

The Progress Lighting Airpro Ceiling Fan is renowned for its combination of style, functionality, and efficiency. Here are several compelling reasons to consider this fan for your home:

Superior Airflow and Energy Efficiency

One of the primary benefits of the Progress Lighting Airpro Ceiling Fan is its superior airflow capabilities. Designed to circulate air efficiently, this fan helps maintain a comfortable temperature in your home, reducing the need for air conditioning and lowering your energy bills.

Stylish Design

The Airpro Ceiling Fan comes in various styles and finishes, making it easy to find a model that complements your home decor. Whether you prefer a modern, sleek look or a more traditional aesthetic, there’s an Airpro Ceiling Fan to match your taste.

Durable and Reliable

Built with high-quality materials, the Progress Lighting Airpro Ceiling Fan is designed to last. Its robust construction ensures that it will provide reliable performance for years to come, making it a worthwhile investment.

Versatile Options

The Airpro Ceiling Fan offers a range of features to suit different needs and preferences. With options like integrated lighting, multiple speed settings, and remote control functionality, you can customize your fan to fit your lifestyle.

Key Features of the Progress Lighting Airpro Ceiling Fan

To fully appreciate the value of the Progress Lighting Airpro Ceiling Fan, it’s essential to understand its key features. Here are some of the standout characteristics of this fan:

Efficient Motor

The Airpro Ceiling Fan is equipped with a powerful and efficient motor that ensures optimal air circulation. This motor is designed to operate quietly, making it perfect for bedrooms, living rooms, and other spaces where noise can be a concern.

Customizable Speeds

With multiple speed settings, the Airpro Ceiling Fan allows you to adjust the airflow to your liking. Whether you need a gentle breeze or more intense circulation, this fan can meet your needs.

Reversible Blades

The fan’s reversible blades provide year-round comfort by allowing you to change the direction of airflow. In the summer, set the blades to rotate counterclockwise for a cooling effect. In the winter, switch to a clockwise rotation to help distribute warm air throughout the room.

Integrated Lighting

Many models of the Progress Lighting Airpro Ceiling Fan come with integrated lighting options. These lights not only illuminate your space but also enhance the fan’s functionality. You can choose from various light fixtures, including LED and incandescent options, to match your lighting needs and preferences.

Remote Control

For added convenience, some Airpro Ceiling Fans come with remote control functionality. This feature allows you to adjust the fan’s speed and lighting settings from anywhere in the room, providing easy and effortless control.

Installing Your Progress Lighting Airpro Ceiling Fan

Proper installation is crucial to ensure that your ceiling fan operates safely and efficiently. Here’s a step-by-step guide to help you install your Progress Lighting Airpro Ceiling Fan:

Step 1: Gather Your Tools

Before you begin, make sure you have all the necessary tools and materials:

  • Screwdrivers (both flathead and Phillips)
  • Pliers
  • Wire strippers
  • Electrical tape
  • Ladder
  • Stud finder
  • Ceiling fan mounting kit (if not included)

Step 2: Turn Off the Power

For safety, turn off the power to the existing light fixture at the circuit breaker. Use a voltage tester to confirm that the power is off before proceeding.

Step 3: Remove the Existing Fixture

Carefully remove the existing light fixture or fan, if applicable. Follow the manufacturer’s instructions to disconnect the wiring and remove any mounting hardware.

Step 4: Install the Mounting Bracket

Attach the mounting bracket to the ceiling electrical box using the provided screws. Ensure that the bracket is securely fastened and can support the weight of the fan.

Step 5: Assemble the Fan

Follow the manufacturer’s instructions to assemble the fan’s motor housing, blades, and light kit (if included). This may involve attaching the blades to the motor and connecting any wiring for the light kit.

Step 6: Connect the Wiring

Connect the fan’s wiring to the electrical box, matching the wires by color (typically black to black, white to white, and green/bare to ground). Use wire nuts and electrical tape to secure the connections.

Step 7: Attach the Fan to the Mounting Bracket

Carefully lift the fan and attach it to the mounting bracket. This may require an extra set of hands to hold the fan in place while you secure it with the provided screws.

Step 8: Install the Light Bulbs and Test

If your fan includes a light kit, install the bulbs and any glass shades or covers. Once everything is in place, turn the power back on at the circuit breaker and test the fan and light to ensure they are functioning correctly.

Design Ideas with the Progress Lighting Airpro Ceiling Fan

The Progress Lighting Airpro Ceiling Fan can enhance the look and feel of any room. Here are some design ideas to inspire you:

Living Room

Install an Airpro Ceiling Fan in your living room to create a comfortable and inviting space. Choose a fan with a stylish finish that complements your furniture and decor. Pair the fan with other light sources, such as floor lamps and table lamps, to create a layered lighting effect.

Bedroom

Add an Airpro Ceiling Fan to your bedroom for a touch of elegance and improved air circulation. Opt for a fan with a quiet motor and dimmable lighting to create a relaxing ambiance. Consider coordinating the fan’s finish with your bedroom furniture for a cohesive look.

Kitchen

Enhance your kitchen with an Airpro Ceiling Fan to keep the space cool and well-ventilated. Choose a fan with a simple, clean design that blends seamlessly with your kitchen’s style. Ensure the fan’s lighting provides adequate illumination for cooking and food preparation.

Outdoor Spaces

Many models of the Progress Lighting Airpro Ceiling Fan are suitable for outdoor use. Install a fan on your patio, porch, or outdoor living area to create a comfortable environment for entertaining and relaxation. Choose a weather-resistant model to ensure durability and longevity.

Maintenance Tips for Your Progress Lighting Airpro Ceiling Fan

Regular maintenance is essential to keep your Progress Lighting Airpro Ceiling Fan running smoothly and looking its best. Here are some tips to help you maintain your fan:

Regular Cleaning

Dust and dirt can accumulate on the fan blades and motor housing over time. Clean the fan regularly using a soft cloth or duster. For more thorough cleaning, use a damp cloth with mild soap and water, and avoid harsh chemicals that could damage the finish.

Tighten Screws and Bolts

Periodically check and tighten any screws and bolts on the fan to ensure they remain secure. This helps prevent wobbling and ensures safe operation.

Balance the Blades

If your fan wobbles or makes noise, the blades may be out of balance. Use a balancing kit (often included with the fan) to adjust the blades and ensure smooth operation.

Lubricate the Motor

Some ceiling fans require periodic lubrication to keep the motor running smoothly. Check the manufacturer’s instructions to determine if your fan needs lubrication and follow the recommended procedures.

Check Electrical Connections

Regularly inspect the electrical connections to ensure they are secure and free from corrosion. If you notice any issues, turn off the power and make the necessary repairs.

Read too: Understanding and Dealing with Ants in the Ceiling Spaces: Navigating the Intrusion

Conclusion

The Progress Lighting Airpro Ceiling Fans is an excellent choice for enhancing the comfort, style, and energy efficiency of your home. With its superior airflow, stylish design, and versatile features, this fan offers a perfect blend of form and function. By following the installation and maintenance tips provided in this guide, you can enjoy the benefits of your Airpro Ceiling Fan for years to come. Whether you’re updating your living room, bedroom, kitchen, or outdoor space, the Progress Lighting Airpro Ceiling Fan is a reliable and attractive option that will elevate your home’s ambiance and comfort.

Plank Ceiling in the Bathroom: Transform Your Space

If you’re looking to elevate the aesthetic of your bathroom, consider installing a plank ceiling. This versatile design choice can bring warmth, texture, and a touch of luxury to your space. In this comprehensive guide, we’ll explore the benefits of a plank ceiling in the bathroom, the types of materials you can use, installation tips, and design inspiration to help you create a stunning bathroom transformation.

Plank Ceiling In Bathroom

Why Choose a Plank Ceiling in the Bathroom?

A plank ceiling in the bathroom can significantly enhance the overall look and feel of the space. Here are some compelling reasons to consider this design option:

Aesthetic Appeal

Plank ceilings add a natural, rustic charm to bathrooms, creating a cozy and inviting atmosphere. The wood texture contrasts beautifully with smooth bathroom surfaces like tile and glass, adding visual interest and depth.

Versatility

Plank ceilings can be tailored to fit any bathroom style, from modern and minimalist to traditional and rustic. You can choose from a variety of wood types, finishes, and stains to match your desired look.

Durability

When properly sealed and maintained, wood planks can withstand the humid environment of a bathroom. Using moisture-resistant materials ensures that your ceiling remains beautiful and functional for years to come.

Value Addition

A well-designed plank ceiling can increase the value of your home. It adds a unique and desirable feature that potential buyers may find appealing, setting your home apart from others.

Types of Materials for a Plank Ceiling in the Bathroom

Selecting the right materials is crucial for the success of your plank ceiling project. Here are some popular options:

Wood

Wood is the most traditional and popular choice for plank ceilings. Different wood types offer various looks and characteristics:

  • Cedar: Naturally resistant to moisture and insects, cedar is a durable option for bathrooms. It has a pleasant aroma and a rich, warm color.
  • Pine: A more affordable option, pine can be stained or painted to match your decor. It’s versatile and widely available.
  • Teak: Known for its high oil content, teak is highly resistant to water and decay. It’s an excellent choice for a luxurious, long-lasting ceiling.

PVC

PVC planks are a practical alternative to wood. They are lightweight, easy to install, and resistant to moisture, making them ideal for bathrooms. PVC planks come in various finishes, including wood-like textures that mimic the appearance of real wood.

Composite Materials

Composite planks, made from a mixture of wood fibers and plastic, combine the best features of both materials. They are highly durable, moisture-resistant, and available in a range of styles and colors.

Installation Tips for a Plank Ceiling in the Bathroom

Installing a plank ceiling in your bathroom requires careful planning and execution. Here’s a step-by-step guide to help you through the process:

Step 1: Measure and Plan

Start by measuring the dimensions of your bathroom ceiling. This will help you determine how much material you need. Consider the direction you want the planks to run and the layout of any lighting fixtures or vents.

Step 2: Choose Your Materials

Select the type of planks you want to use and purchase enough to cover your ceiling area. Don’t forget to buy any additional materials needed for installation, such as nails, adhesive, and a vapor barrier.

Step 3: Prepare the Ceiling

Before installing the planks, ensure your ceiling is clean and free of any debris. If you’re installing over an existing ceiling, check for any damage or mold that needs to be addressed.

Step 4: Install a Vapor Barrier

Since bathrooms are prone to moisture, installing a vapor barrier is essential to protect your ceiling and the underlying structure. Attach the vapor barrier to the ceiling joists with staples or adhesive.

Step 5: Attach the Planks

Start installing the planks along one edge of the ceiling, making sure they are aligned and straight. Use nails or adhesive to secure each plank to the ceiling joists. If using nails, ensure they are countersunk to create a smooth surface. Continue this process until the entire ceiling is covered.

Step 6: Cut Around Fixtures

Carefully measure and cut planks to fit around any ceiling fixtures, such as lights or vents. Use a jigsaw or hole saw for precise cuts.

Step 7: Finish and Seal

Once all the planks are installed, apply a sealant to protect the wood from moisture. Choose a sealant that is suitable for bathrooms and follow the manufacturer’s instructions for application.

Design Inspiration for Your Bathroom Plank Ceiling

A plank ceiling can dramatically transform your bathroom’s look and feel. Here are some design ideas to inspire your project:

Coastal Retreat

Create a serene, beach-inspired bathroom by using light-colored wood planks, such as white-washed pine or bleached cedar. Pair the ceiling with soft blue or seafoam green walls, and add nautical accents like shells, starfish, and wicker baskets.

Rustic Charm

For a warm, rustic bathroom, choose rich, dark wood planks like walnut or teak. Complement the ceiling with stone or brick accents, wrought iron fixtures, and cozy textiles in earthy tones.

Modern Minimalism

Achieve a sleek, modern look by using smooth, evenly finished planks in a light or neutral color. Pair the ceiling with minimalist fixtures, clean lines, and a monochromatic color scheme to create a sophisticated, contemporary space.

Traditional Elegance

For a classic, elegant bathroom, opt for medium-toned wood planks with a refined finish. Complement the ceiling with traditional fixtures, such as brass or gold accents, marble countertops, and vintage-inspired accessories.

Maintenance Tips for Your Plank Ceiling in the Bathroom

Proper maintenance is crucial to keep your plank ceiling looking beautiful and functioning well. Here are some tips to help you maintain your ceiling:

Regular Cleaning

Dust and clean the ceiling regularly to prevent dirt and grime buildup. Use a soft cloth or duster to gently remove dust. For more thorough cleaning, use a damp cloth with mild soap and water. Avoid harsh chemicals that could damage the wood or finish.

Monitor for Moisture

Keep an eye on the humidity levels in your bathroom. Use a vent fan or dehumidifier to reduce moisture and prevent mold and mildew growth. Check the ceiling periodically for any signs of water damage, such as discoloration or warping.

Reseal as Needed

Over time, the sealant on your wood planks may wear off. Reseal the ceiling as needed to maintain its moisture resistance. Follow the manufacturer’s recommendations for reapplication and ensure the bathroom is well-ventilated during the process.

Address Damage Promptly

If you notice any damage, such as cracks or chips, address it promptly to prevent further deterioration. Small repairs can often be done with wood filler and touch-up stain or paint. For more significant damage, you may need to replace individual planks.

Conclusion

Installing a plank ceiling in the bathroom is a stylish and practical way to enhance your space. With various materials and design options, you can create a bathroom that reflects your personal style and adds value to your home. By following the installation and maintenance tips provided in this guide, you can enjoy a beautiful and functional plank ceiling for years to come. Whether you’re aiming for a rustic retreat, a modern oasis, or a traditional sanctuary, a plank ceiling can transform your bathroom into a truly special space.

Read too: Understanding and Dealing with Ants in the Ceiling Spaces: Navigating the Intrusion

Overstock Ceiling Light Fixtures: Illuminate Your Home

Finding the perfect lighting for your home can transform your living spaces, adding warmth, style, and functionality. If you’re looking for high-quality, affordable options, Overstock Ceiling Light Fixtures are an excellent choice. This comprehensive guide will explore everything you need to know about Overstock Ceiling Light Fixtures, from their benefits and types to installation tips and design inspiration.

Overstock Ceiling Light Fixtures

Why Choose Overstock Ceiling Light Fixtures?

Overstock Ceiling Light Fixtures offer a variety of advantages that make them a popular choice among homeowners. Here are some compelling reasons to consider Overstock for your lighting needs:

Affordable Prices

One of the biggest advantages of shopping for ceiling light fixtures on Overstock is the affordability. Overstock frequently offers significant discounts on high-quality lighting fixtures, allowing you to find stylish and functional options within your budget.

Wide Selection

Overstock boasts a vast selection of ceiling light fixtures, including chandeliers, flush mounts, semi-flush mounts, pendant lights, and more. Whether you’re looking for modern, traditional, or eclectic designs, Overstock has something to suit every taste and home decor style.

High Quality

Despite the lower prices, Overstock does not compromise on quality. Many of their ceiling light fixtures are crafted from durable materials and come from reputable brands, ensuring that you get a reliable product that will last for years.

Convenient Shopping Experience

Shopping on Overstock is convenient and user-friendly. With detailed product descriptions, customer reviews, and easy navigation, finding the perfect ceiling light fixture for your home is a breeze.

Types of Overstock Ceiling Light Fixtures

Overstock offers a wide variety of ceiling light fixtures to meet different lighting needs and aesthetic preferences. Here are some of the most popular types:

Chandeliers

Chandeliers are statement pieces that add elegance and sophistication to any room. Overstock offers chandeliers in various styles, including crystal, modern, rustic, and traditional designs. They are perfect for dining rooms, living rooms, and entryways.

Flush Mounts

Flush mount ceiling lights are ideal for rooms with low ceilings. They sit close to the ceiling, providing ample lighting without taking up much space. Overstock offers a range of flush mounts, from simple and understated designs to more decorative options.

Semi-Flush Mounts

Semi-flush mount ceiling lights hang slightly below the ceiling, providing a stylish and functional lighting solution. These fixtures are perfect for rooms with slightly higher ceilings and can be found in a variety of designs on Overstock.

Pendant Lights

Pendant lights are versatile and can be used in various spaces, including kitchens, dining areas, and foyers. Overstock offers pendant lights in many styles, sizes, and finishes, allowing you to find the perfect match for your decor.

Recessed Lighting

Recessed lighting fixtures are installed into the ceiling, providing a sleek and modern look. They are ideal for creating a clean and unobtrusive lighting design. Overstock offers a range of recessed lighting options suitable for different room sizes and purposes.

Benefits of Overstock Ceiling Light Fixtures

Choosing Overstock Ceiling Light Fixtures comes with numerous benefits that can enhance your home’s lighting and overall aesthetic. Here are some key benefits:

Cost-Effective

Overstock’s discounted prices mean you can achieve a high-end look without breaking the bank. This makes it easier to upgrade multiple rooms or invest in higher-quality fixtures than you might otherwise be able to afford.

Diverse Options

The vast selection available on Overstock ensures that you can find ceiling light fixtures that match your specific taste and decor needs. From minimalist and modern to ornate and traditional, the options are nearly endless.

Easy Installation

Many Overstock ceiling light fixtures are designed with ease of installation in mind. They come with clear instructions and all the necessary mounting hardware, making it simple for homeowners to install them without professional help.

Customer Reviews

Overstock’s customer review system allows you to read feedback from other buyers, providing valuable insights into the quality and functionality of the light fixtures. This can help you make more informed purchasing decisions.

Installing Overstock Ceiling Light Fixtures

Proper installation is crucial to ensure your ceiling light fixtures are safe and functional. Here’s a step-by-step guide to help you install your Overstock Ceiling Light Fixtures:

Step 1: Gather Your Tools

Before you begin, make sure you have all the necessary tools:

  • Screwdrivers (Phillips and flathead)
  • Pliers
  • Wire strippers
  • Electrical tape
  • Ladder
  • Mounting hardware (usually included with the fixture)

Step 2: Turn Off the Power

Ensure the power is turned off at the circuit breaker to avoid electrical shock. Double-check with a voltage tester to confirm that the wires are not live.

Step 3: Remove the Existing Fixture

If replacing an existing fixture, carefully remove it by unscrewing the mounting hardware and disconnecting the wires. Keep the area clean and clear of debris.

Step 4: Install the Mounting Bracket

Attach the mounting bracket to the ceiling box using screws and washers. Make sure it is firmly attached and can support the weight of the light fixture.

Step 5: Connect the Wires

Connect the fixture’s wires to the ceiling wires. Typically, you’ll match the colors (black to black, white to white, and green/bare to ground). Use wire nuts and electrical tape to secure the connections.

Step 6: Attach the Fixture

Secure the light fixture to the mounting bracket. Ensure it is securely fastened and that all screws are tightened. Be careful not to overtighten, which could damage the fixture or ceiling.

Step 7: Install the Bulbs and Test

Insert the appropriate bulbs into the fixture and turn the power back on at the circuit breaker. Test the light to ensure it is working correctly and that all connections are secure.

Design Ideas with Overstock Ceiling Light Fixtures

Overstock Ceiling Light Fixtures can enhance the aesthetic appeal of any room. Here are some design ideas to inspire you:

Living Room

Create a focal point in your living room with a stunning chandelier or semi-flush mount light. Choose a design that complements your furniture and decor. For a modern look, opt for clean lines and minimalist designs. For a more traditional feel, choose fixtures with intricate details and warm finishes.

Kitchen

Illuminate your kitchen with pendant lights over the island or dining area. Choose fixtures that provide adequate task lighting and complement your kitchen’s style. Industrial-style pendant lights can add a contemporary edge, while glass or metal designs can offer a sleek, modern touch.

Bedroom

Add a touch of elegance to your bedroom with a stylish chandelier or flush mount light. Choose soft, warm lighting to create a cozy and relaxing atmosphere. Pair the fixture with complementary bedside lamps or wall sconces to enhance the overall look.

Bathroom

Update your bathroom with flush mount or semi-flush mount ceiling lights. Choose fixtures that are resistant to moisture and humidity. Opt for bright, clean lighting to ensure your bathroom is well-lit for daily grooming tasks.

Dining Room

Make a statement in your dining room with a grand chandelier. Choose a fixture that complements your dining table and adds a touch of sophistication to the space. Consider adjustable lighting options to create the perfect ambiance for both casual meals and formal dinners.

Maintenance Tips for Overstock Ceiling Light Fixtures

To keep your Overstock Ceiling Light Fixtures looking beautiful and functioning properly, regular maintenance is essential. Here are some tips to help you maintain your fixtures:

Regular Cleaning

Dust and dirt can accumulate on light fixtures over time. Clean the fixtures regularly with a soft, dry cloth. For stubborn dirt, use a slightly damp cloth, but avoid using harsh chemicals that could damage the finish.

Check Electrical Connections

Periodically inspect the electrical connections to ensure they remain secure and free of corrosion. If you notice any issues, turn off the power and make the necessary repairs.

Tighten Screws

Over time, screws can become loose due to the fixture’s operation. Periodically check and tighten all screws to ensure the light remains securely attached to the ceiling.

Replace Bulbs

If your light fixture uses traditional bulbs, replace them as needed to maintain optimal illumination. Consider switching to LED bulbs for better energy efficiency and longer lifespan.

Read too: Understanding and Dealing with Ants in the Ceiling Spaces: Navigating the Intrusion

Conclusion

Overstock Ceiling Light Fixtures offer an affordable and stylish solution for all your lighting needs. With a wide selection of high-quality fixtures, you can find the perfect lighting to enhance every room in your home. By following the installation and maintenance tips provided in this guide, you can enjoy the beauty and functionality of your Overstock Ceiling Light Fixtures for years to come. Whether you’re looking to create a cozy bedroom retreat, an inviting living room, or a stylish kitchen, Overstock has the perfect lighting options to illuminate your space with elegance and charm.

Rozzen 52 Ceiling Fan for Your Home: Discovering the Benefits

A ceiling fan is more than just a functional appliance; it’s a statement piece that can enhance the comfort and aesthetics of any room. When it comes to choosing the right ceiling fan for your space, the Rozzen 52 Ceiling Fan stands out with its blend of style, efficiency, and innovative features. Whether you’re looking to upgrade your current fan or install one for the first time, understanding the advantages and considerations of the Rozzen 52 Ceiling Fan is essential.

Rozzen 52 Ceiling Fan

Introducing

The Rozzen 52 Ceiling Fans combines sleek design with powerful performance, making it a popular choice among homeowners. Designed to circulate air effectively while complementing various interior styles, this fan is crafted with quality materials and built to withstand everyday use. From its silent operation to energy-efficient features, the Rozzen 52 Ceiling Fans is designed to enhance your living spaces.

Why Choose the Rozzen 52 Ceiling Fan?

Stylish Design

The Rozzen 52 Ceiling Fans features a modern and minimalist design that seamlessly integrates into any room. With its clean lines and contemporary finishes, such as brushed nickel or matte black, this fan adds a touch of sophistication to your home decor.

Efficient Air Circulation

Equipped with a high-performance motor and well-balanced blades, the Rozzen 52 Ceiling Fan delivers optimal airflow throughout the room. Whether you’re cooling a bedroom, living room, or kitchen, this fan ensures consistent air circulation to maintain comfort.

Quiet Operation

Noisy fans can disrupt the tranquility of your home. The Rozzen 52 Ceiling Fans operates silently, allowing you to enjoy a peaceful environment without the distraction of buzzing or humming sounds.

Energy Savings

Energy efficiency is a key feature of the Rozzen 52 Ceiling Fans. By reducing your reliance on air conditioning during moderate weather, this fan helps lower energy costs while maintaining a comfortable indoor climate.

Installing the Rozzen 52 Ceiling Fan

Installing a ceiling fan like the Rozzen 52 requires careful consideration and adherence to safety guidelines. Whether you’re replacing an existing fan or installing one for the first time, following these steps can ensure a successful installation:

Step 1: Preparation

Gather all necessary tools and materials, including a ladder, screwdriver, and wire cutters. Turn off the power to the existing ceiling fixture at the circuit breaker to prevent electrical accidents.

Step 2: Mounting the Fan

Follow the manufacturer’s instructions for mounting the fan bracket to the ceiling junction box. Ensure that the bracket is securely anchored and able to support the weight of the fan.

Step 3: Wiring

Carefully wire the fan according to the provided instructions and local electrical codes. Connect the fan’s motor wires to the corresponding wires in the ceiling junction box, using wire nuts to secure the connections.

Step 4: Attaching Blades and Light Kit (if applicable)

Attach the fan blades to the motor housing using the included screws. If your Rozzen 52 Ceiling Fan includes a light kit, follow the instructions to assemble and attach it to the fan.

Step 5: Testing and Balancing

Once everything is securely installed, restore power at the circuit breaker and test the fan and light functions. Use a balancing kit, if provided, to ensure that the fan blades are balanced and do not wobble during operation.

Maintenance Tips for Your Rozzen 52 Ceiling Fan

To prolong the life and efficiency of your Rozzen 52 Ceiling Fan, regular maintenance is essential. Here are some tips to keep your fan running smoothly:

Clean Regularly

Dust and debris can accumulate on fan blades and affect performance. Use a soft cloth or duster to clean the blades regularly.

Check and Tighten Connections

Periodically inspect the fan’s mounting bracket, blades, and light kit (if applicable) to ensure that all screws and connections are tight and secure.

Lubricate Moving Parts

Apply a small amount of lubricating oil to the fan motor’s bearings annually to reduce friction and noise.

Adjust Fan Direction Seasonally

In warmer months, set the fan to rotate counterclockwise to create a cooling breeze. In colder months, reverse the direction to clockwise to circulate warm air trapped near the ceiling.

Read too: Understanding and Dealing with Ants in the Ceiling Spaces: Navigating the Intrusion

Conclusion

The Rozzen 52 Ceiling Fan offers a perfect blend of style, efficiency, and functionality for any home. Whether you’re looking to upgrade your living space or enhance the comfort of a new room, this fan provides reliable performance and modern aesthetics. By understanding its features, installation process, and maintenance tips, you can confidently choose the Rozzen 52 Ceiling Fan as a valuable addition to your home.

Olive Leaf Semi-Flush Ceiling Light: Transform Your Space

Lighting is one of the most important elements in home decor, impacting both functionality and ambiance. Among the myriad lighting options available, the Olive Leaf Semi-Flush Ceiling Light stands out for its unique design, combining elegance and practicality. This comprehensive guide will explore everything you need to know about the Olive Leaf Semi-Flush Ceiling Light, from its features and benefits to installation tips and design inspiration.

Olive Leaf Semi-Flush Ceiling Light

Why Choose an Olive Leaf Semi-Flush Ceiling Light?

The Olive Leaf Semi-Flush Ceiling Light offers a perfect blend of style and function, making it a popular choice for various spaces within a home. Here are some compelling reasons to consider this lighting option:

Aesthetic Appeal

The Olive Leaf design brings a touch of nature indoors, creating a visually appealing focal point in any room. The intricate leaf patterns add a sophisticated and organic feel, suitable for both modern and traditional decor styles.

Versatile Design

Semi-flush ceiling lights are versatile and can be installed in rooms with both high and low ceilings. The Olive Leaf Semi-Flush Ceiling Light provides ample illumination without overwhelming the space, making it ideal for living rooms, bedrooms, kitchens, and hallways.

Enhanced Lighting

This type of ceiling light offers effective ambient lighting, illuminating the entire room evenly. The semi-flush design allows light to diffuse through the room while also casting beautiful shadows from the leaf patterns, enhancing the overall ambiance.

Easy Installation

Compared to chandeliers or recessed lighting, semi-flush ceiling lights are relatively easy to install. They provide a stylish upgrade without the need for extensive electrical work or ceiling modifications.

Features of the Olive Leaf Semi-Flush Ceiling Light

Understanding the features of the Olive Leaf Semi-Flush Ceiling Light can help you make an informed decision. Here are some key features to look out for:

High-Quality Materials

These ceiling lights are typically made from high-quality materials such as metal and glass, ensuring durability and a premium finish. The leaves are often crafted from metal with a hand-painted finish to enhance their realistic look.

Various Finishes

The Olive Leaf Semi-Flush Ceiling Light is available in various finishes, including bronze, silver, gold, and antique. This variety allows you to choose a finish that complements your existing decor.

Multiple Bulb Options

Many Olive Leaf Semi-Flush Ceiling Lights are compatible with different types of bulbs, including incandescent, LED, and CFL. This flexibility allows you to choose the bulb type that best suits your lighting needs and energy efficiency preferences.

Dimmable Functionality

For added versatility, many models come with dimmable functionality, allowing you to adjust the light intensity to create the perfect ambiance for any occasion.

Installing Your Olive Leaf Semi-Flush Ceiling Light

Proper installation is crucial to ensure your ceiling light operates safely and looks its best. Here’s a step-by-step guide to help you install your Olive Leaf Semi-Flush Ceiling Lights:

Step 1: Gather Your Tools

Before you begin, make sure you have all the necessary tools:

  • Screwdrivers (Phillips and flathead)
  • Pliers
  • Wire strippers
  • Electrical tape
  • Ladder
  • Mounting hardware (usually included with the light fixture)

Step 2: Turn Off the Power

Ensure the power is turned off at the circuit breaker to avoid electrical shock. Double-check with a voltage tester to confirm that the wires are not live.

Step 3: Remove the Existing Fixture

If replacing an existing fixture, carefully remove it by unscrewing the mounting hardware and disconnecting the wires. Keep the area clean and clear of debris.

Step 4: Install the Mounting Bracket

Attach the mounting bracket to the ceiling box using screws and washers. Make sure it is firmly attached and can support the weight of the light fixture.

Step 5: Connect the Wires

Connect the light fixture’s wires to the ceiling wires. Typically, you’ll match the colors (black to black, white to white, and green/bare to ground). Use wire nuts and electrical tape to secure the connections.

Step 6: Attach the Fixture

Secure the light fixture to the mounting bracket. Ensure it is securely fastened and that all screws are tightened. Be careful not to overtighten, which could damage the fixture or ceiling.

Step 7: Install the Bulbs and Test

Insert the appropriate bulbs into the fixture and turn the power back on at the circuit breaker. Test the light to ensure it is working correctly and that all connections are secure.

Decorating with the Olive Leaf Semi-Flush Ceiling Light

The Olive Leaf Semi-Flush Ceiling Light is more than just a functional piece; it’s a decor statement that can enhance the aesthetic of any room. Here are some ideas for incorporating this elegant light fixture into your home decor:

Living Room

In the living room, the Olive Leaf Semi-Flush Ceiling Lights can serve as a stunning focal point. Pair it with neutral or earth-toned furniture to create a harmonious and inviting space. Add some indoor plants to complement the nature-inspired design.

Bedroom

Install the Olive Leaf Semi-Flush Ceiling Lights in the bedroom for a touch of elegance and tranquility. Choose soft, warm lighting to create a cozy and relaxing atmosphere. Complement the light with botanical prints and soft fabrics to enhance the natural theme.

Kitchen

In the kitchen, this ceiling light can provide ample illumination for cooking and dining. Choose a finish that matches your kitchen hardware and appliances. Consider using dimmable bulbs to adjust the lighting for different times of the day and activities.

Hallway

Illuminate your hallway with the Olive Leaf Semi-Flush Ceiling Lights to make a lasting impression on guests. The intricate design will add character to this often-overlooked space. Use it to highlight artwork or photographs along the hallway walls.

Maintenance Tips for Your Olive Leaf Semi-Flush Ceiling Light

To keep your ceiling light looking beautiful and functioning properly, regular maintenance is essential. Here are some tips to help you maintain your Olive Leaf Semi-Flush Ceiling Light:

Regular Cleaning

Dust and dirt can accumulate on the light fixture over time. Clean the light regularly with a soft, dry cloth. For stubborn dirt, use a slightly damp cloth, but avoid using harsh chemicals that could damage the finish.

Check Electrical Connections

Periodically inspect the electrical connections to ensure they remain secure and free of corrosion. If you notice any issues, turn off the power and make the necessary repairs.

Tighten Screws

Over time, screws can become loose due to the fixture’s operation. Periodically check and tighten all screws to ensure the light remains securely attached to the ceiling.

Replace Bulbs

If your light fixture uses traditional bulbs, replace them as needed to maintain optimal illumination. Consider switching to LED bulbs for better energy efficiency and longer lifespan.

Read too: Understanding and Dealing with Ants in the Ceiling Spaces: Navigating the Intrusion

Conclusion

The Olive Leaf Semi-Flush Ceiling Lights is a versatile and elegant lighting option that can enhance any room in your home. With its beautiful design and functional features, it offers both aesthetic appeal and practical benefits. By following the installation and maintenance tips provided in this guide, you can enjoy the beauty and functionality of your Olive Leaf Semi-Flush Ceiling Lights for years to come. Whether you’re looking to create a cozy bedroom retreat, an inviting living room, or a stylish kitchen, this ceiling light is sure to add a touch of elegance and charm to your space.