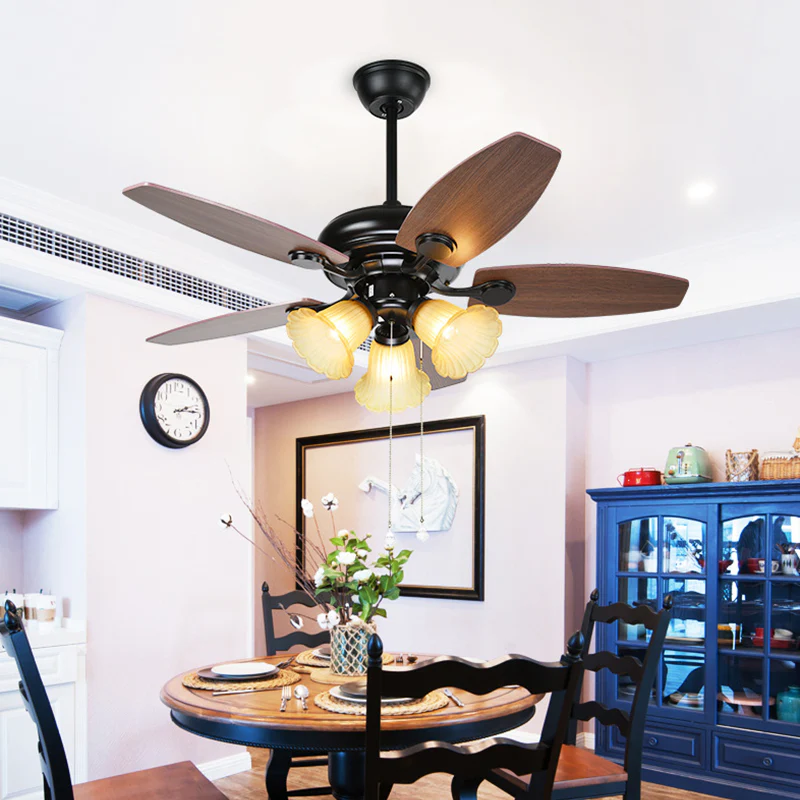
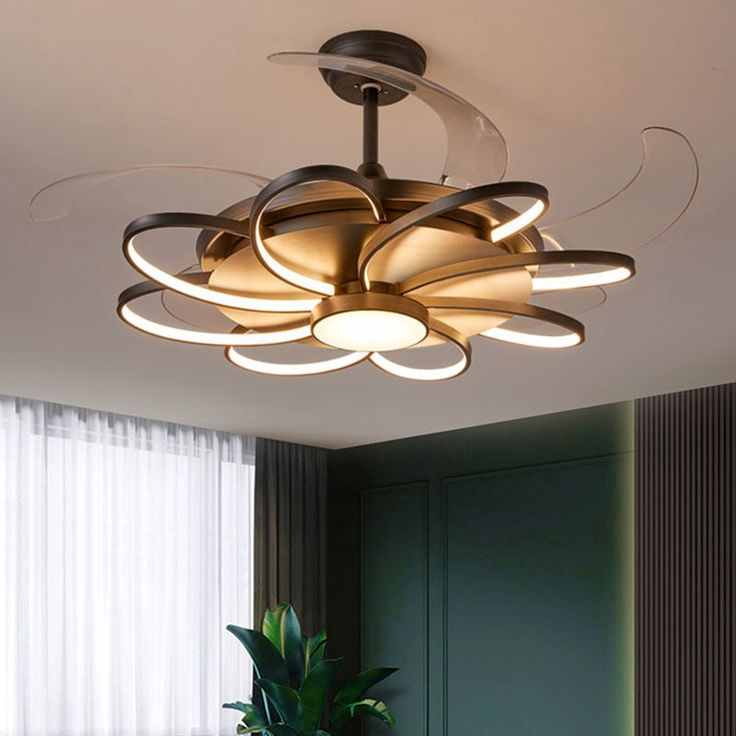
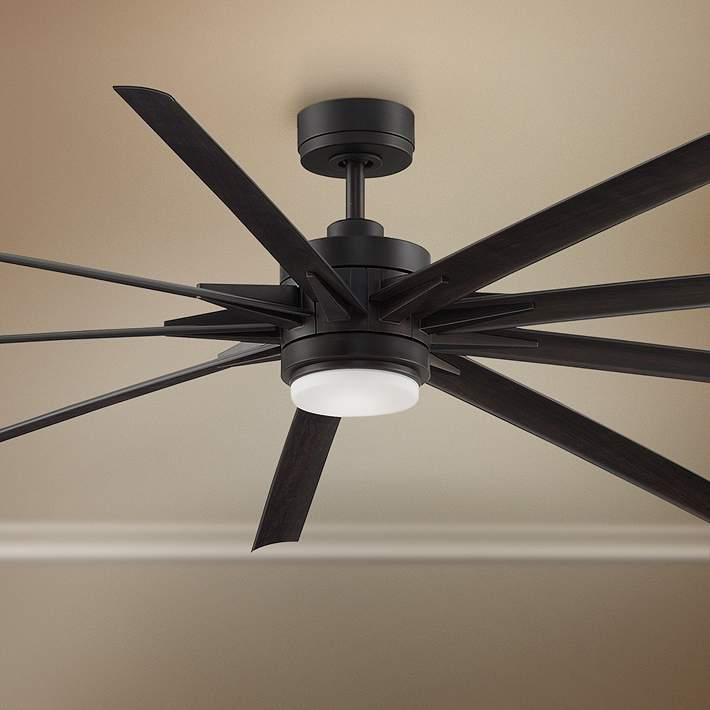
Living Room Chandelier for High Ceiling: Illuminating Elegance

When it comes to home decor, the living room serves as a central hub for relaxation, entertainment, and family gatherings. One of the most striking elements you can incorporate into this space is a living room chandelier for high ceiling. This article will explore the various aspects of choosing and installing a chandelier in a living room with high ceilings, ensuring that your space is not only well-lit but also beautifully adorned.

Living Room Chandelier High Ceiling

Understanding High Ceilings

High ceilings are a defining architectural feature in many modern and traditional homes. They create an open and airy atmosphere, adding a sense of grandeur to any room. However, the height of these ceilings can present specific challenges and opportunities when it comes to lighting design.

Benefits of High Ceilings

  1. Aesthetic Appeal: High ceilings add visual interest and drama to a space, making it feel larger and more inviting.
  2. Increased Natural Light: Taller ceilings allow for larger windows, which can enhance natural light flow and improve overall ambiance.
  3. Design Versatility: The height offers the opportunity to use larger and more elaborate fixtures, such as chandeliers, which can become stunning focal points.

Read too: Kitchen Lighting For A Vaulted Ceiling: Illuminating Your Space with Style and Functionality

Challenges of High Ceilings

  1. Difficult Installation: Installing fixtures can be challenging and may require professional help due to the height.
  2. Lighting Distribution: Ensuring that light is evenly distributed throughout the room can be tricky.
  3. Maintenance: Changing light bulbs or cleaning fixtures can be more cumbersome with elevated heights.

Choosing the Right Living Room Chandelier for High Ceilings

When selecting a chandelier for your high ceiling living room, consider the following factors:

1. Scale and Size

Choosing the right size chandelier is crucial. A small chandelier can get lost in a room with high ceilings, while an overly large fixture can overwhelm the space. A good rule of thumb is to measure the height of the ceiling in feet and convert that measurement into inches for the diameter of the chandelier. For example, if your ceiling is 10 feet high, your chandelier should be approximately 30 inches in diameter.

2. Style and Design

Chandeliers come in various styles, from modern and contemporary to traditional and rustic. When selecting a chandelier, consider the overall decor of your living room:

  • Modern Chandeliers: Often characterized by clean lines, geometric shapes, and minimalist designs. These fixtures work well in contemporary homes.
  • Traditional Chandeliers: These often feature ornate details, such as crystal accents and intricate metalwork. They are suitable for classic and traditional interiors.
  • Rustic Chandeliers: Typically made from wood or wrought iron, these fixtures add warmth and charm to farmhouse or cottage-style homes.

3. Type of Lighting

The type of bulbs used in your chandelier can significantly affect the overall ambiance of your living room:

  • LED Bulbs: Energy-efficient and long-lasting, LED bulbs come in various color temperatures, allowing you to choose between warm or cool light.
  • Incandescent Bulbs: These provide a warm glow and are ideal for creating a cozy atmosphere, although they consume more energy and have a shorter lifespan than LEDs.
  • Halogen Bulbs: A type of incandescent bulb that provides bright, white light, ideal for showcasing artwork and decor.

4. Height Considerations

The placement of your chandelier is critical in maximizing its impact:

  • Dining Areas: If your living room includes a dining space, hang the chandelier about 30-36 inches above the table for optimal lighting.
  • Living Room Areas: For general living areas, the chandelier should be hung at a height that provides ample light without being too low to cause obstruction. Generally, it should be at least 7 feet from the floor.

Installing a Living Room Chandelier for High Ceilings

Once you’ve selected the perfect chandelier for your high ceiling living room, the next step is installation. Here are some tips:

1. Gather the Right Tools

Before installation, ensure you have all necessary tools, including:

  • A ladder or scaffolding
  • A drill
  • Wire strippers
  • A screwdriver
  • A voltage tester

2. Turn Off the Power

Safety first! Always turn off the power at the circuit breaker before beginning any electrical work. Use a voltage tester to ensure that the wires are not live.

3. Prepare the Mounting Bracket

Most chandeliers come with a mounting bracket. Secure this bracket to the ceiling, ensuring that it is anchored properly to support the weight of the fixture.

4. Wire the Chandelier

Carefully connect the chandelier wires to the corresponding wires in your ceiling. Typically, this involves matching the colors: black to black (hot), white to white (neutral), and green or copper to the grounding wire.

5. Hang the Chandelier

Once the wiring is complete, lift the chandelier into place and secure it to the mounting bracket. Ensure that it hangs evenly and at the desired height.

6. Turn the Power Back On

After installation is complete, turn the power back on and test the chandelier to ensure it is working correctly.

7. Final Adjustments

Make any necessary adjustments to the height or angle of the chandelier, and clean any dust or fingerprints from the fixture.

Decorating Around Your Chandelier

Once your chandelier is installed, consider how to decorate the rest of your living room to complement this stunning fixture.

1. Arrange Furniture Thoughtfully

Position your furniture to create a conversation area around the chandelier. This not only draws the eye to the fixture but also promotes a cozy, inviting atmosphere.

2. Use Accent Lighting

In addition to your chandelier, consider adding other lighting sources, such as floor lamps, table lamps, or wall sconces, to create layered lighting. This adds depth and interest to the space.

3. Hang Artwork Strategically

Consider hanging artwork that draws the eye upward towards the chandelier. Use the chandelier’s height to your advantage by displaying pieces that are proportionate and balanced with the fixture.

4. Choose Complementary Colors

Select paint colors and decor that harmonize with the chandelier. If your chandelier is bold, consider neutral walls and furnishings to balance the space.

5. Add Decorative Elements

Incorporate decorative elements, such as plants, vases, or bookshelves, that enhance the ambiance of the living room without cluttering the space.

Maintenance for Living Room Chandeliers

To ensure your chandelier remains a stunning focal point, regular maintenance is essential.

1. Cleaning

Dust can accumulate on chandeliers, dulling their shine. Clean your chandelier regularly using a microfiber cloth or a feather duster. For more intricate fixtures, consider using a damp cloth and a gentle cleaning solution.

2. Bulb Replacement

Regularly check your bulbs and replace any that are burnt out. This will not only keep your chandelier looking its best but will also maintain adequate lighting in the room.

3. Inspect Wiring

Periodically inspect the wiring and connections to ensure everything is secure and functioning properly. If you notice any signs of wear or damage, contact a professional electrician for repairs.

Conclusion

A living room chandelier for high ceiling is more than just a lighting fixture; it’s an elegant statement piece that enhances the beauty and functionality of your space. With careful consideration of style, size, and placement, you can create a warm and inviting atmosphere that reflects your personal taste. By following the tips outlined in this article, you can choose, install, and maintain a chandelier that not only brightens your living room but also adds a touch of sophistication and charm.

Lighting Vaulted Ceilings in Living Room: Perfecting Your Space

When it comes to home design, vaulted ceilings are a stunning architectural feature that can elevate the aesthetic appeal of any living room. These ceilings, which rise high above the room, create an open and airy atmosphere that enhances natural light and provides a sense of spaciousness. However, while they are beautiful, vaulted ceilings present unique challenges, particularly when it comes to lighting. This guide will delve into the best lighting for vaulted ceilings in living room, offering valuable insights on types of fixtures, placement, and design tips.

Lighting For Vaulted Ceilings In Living Room

Understanding Vaulted Ceilings

Vaulted ceilings are defined by their upward-sloping angles, often culminating in a peak at the center. This design element differs from traditional flat ceilings, providing a sense of drama and openness. Commonly found in contemporary, rustic, and traditional homes, vaulted ceilings can greatly influence the overall ambiance of a living room.

Benefits of Vaulted Ceilings

  1. Increased Light Flow: The height and angle of vaulted ceilings often allow for larger windows, increasing the flow of natural light into the room.
  2. Enhanced Space Perception: The upward movement of the ceiling can make a room feel larger and more expansive.
  3. Aesthetic Appeal: The unique architecture of vaulted ceilings can create a striking visual impact, serving as a focal point in the living room.

Read too: Kitchen Lighting For A Vaulted Ceiling: Illuminating Your Space with Style and Functionality

Challenges of Vaulted Ceilings

While vaulted ceilings offer many advantages, they also pose specific challenges regarding lighting:

  1. Height Considerations: Lighting fixtures need to be appropriately scaled and installed at heights that provide adequate illumination without overwhelming the space.
  2. Maintenance: High ceilings can make it difficult to change light bulbs or clean fixtures.
  3. Even Lighting: Ensuring uniform lighting across the room can be challenging due to the ceiling’s height and slope.

Types of Lighting for Vaulted Ceilings in Living Room

Selecting the right lighting fixtures is essential for maximizing the beauty and functionality of vaulted ceilings. Here are some popular lighting options:

1. Chandeliers

Chandeliers are often the centerpiece of any room, and they work exceptionally well with vaulted ceilings.

  • Dramatic Impact: A well-chosen chandelier can enhance the architectural beauty of your vaulted ceiling and become a stunning focal point.
  • Design Options: From rustic wooden designs to elegant crystal options, chandeliers come in a variety of styles to match your decor.

Best For: Dining areas, entryways, and living rooms.

2. Pendant Lights

Pendant lights are versatile and can add both style and function to your living room.

  • Variety of Styles: Available in countless designs, pendant lights can complement any decor.
  • Cluster Arrangement: Hanging multiple pendants at varying heights can create visual interest and illuminate different areas of the room.

Best For: Kitchen islands, seating areas, and accent lighting.

3. Recessed Lighting

Recessed lighting is a sleek option that can provide general illumination without detracting from the beauty of vaulted ceilings.

  • Flexible Placement: Strategically placing recessed lights can help highlight architectural features and provide ambient lighting.
  • Directional Trims: Use adjustable trims to direct light to specific areas of the room.

Best For: General lighting in living rooms, hallways, and areas where a clean look is desired.

4. Wall Sconces

Wall sconces are a great way to add depth and warmth to your living room while complementing vaulted ceilings.

  • Height Placement: Mounting sconces higher on the wall can draw the eye upward, accentuating the height of the ceiling.
  • Style Variety: Wall sconces come in various styles, from modern to vintage, allowing you to choose fixtures that fit your design aesthetic.

Best For: Hallways, staircases, and accent lighting around artwork.

5. Ceiling Fans with Lights

Ceiling fans with integrated lights provide both illumination and air circulation, making them ideal for living rooms with vaulted ceilings.

  • Functional and Stylish: They keep the space comfortable while also serving as a design element.
  • Variety of Designs: Available in numerous styles, they can suit various interior designs.

Best For: Living rooms, bedrooms, and areas needing additional airflow.

Design Considerations for Lighting in Vaulted Ceilings

When selecting lighting for vaulted ceilings, consider the following design elements to ensure a harmonious look:

1. Scale and Proportion

The height of the ceilings means that lighting fixtures must be appropriately sized to prevent them from feeling lost in the space. Here are some tips:

  • Chandeliers and Pendants: Ensure these fixtures are large enough to make a statement without overwhelming the room.
  • Recessed Lights: Space them out evenly to provide sufficient light coverage without creating dark spots.

2. Color Temperature

The color temperature of your lighting can affect the overall mood of the living room. Choose between:

  • Warm White (2700K-3000K): Creates a cozy, inviting atmosphere, perfect for living spaces.
  • Cool White (3500K-4100K): Offers a brighter, more energetic feel, suitable for task-oriented areas.

3. Layered Lighting

To achieve a well-balanced illumination scheme, use layered lighting techniques that incorporate ambient, task, and accent lighting:

  • Ambient Lighting: Use chandeliers, recessed lights, or ceiling fixtures to provide general illumination.
  • Task Lighting: Incorporate lamps or focused lighting for specific tasks, such as reading or working.
  • Accent Lighting: Use wall sconces or track lighting to highlight artwork or architectural features.

4. Fixture Placement

Careful placement of your lighting fixtures can significantly impact the effectiveness of the illumination:

  • Height Adjustments: Position chandeliers lower in dining areas for ambiance, while keeping living room fixtures higher to allow for more light distribution.
  • Directional Lighting: Utilize adjustable fixtures or recessed lighting to direct light to areas where it is most needed.

Installation Tips for Vaulted Ceiling Lighting

Installing lighting fixtures in a room with vaulted ceilings can be tricky. Here are some tips for a successful installation:

1. Hire a Professional

Due to the height of vaulted ceilings, consider hiring a licensed electrician for installation. They can ensure that the fixtures are installed safely and securely.

2. Use Adjustable Hardware

Adjustable mounting hardware allows you to position fixtures at the desired height and angle, ensuring optimal lighting distribution.

3. Ensure Proper Weight Support

Make sure that your ceiling can support the weight of larger fixtures, especially if you are installing heavy chandeliers or large pendant lights.

4. Pre-Planning

Before installing, take the time to plan your lighting layout. Sketch the room and indicate where you want to position your fixtures for maximum effect.

Maintenance and Care for Vaulted Ceiling Lighting

To keep your lighting fixtures looking their best and functioning effectively, regular maintenance is essential:

1. Dusting

Dust and dirt can accumulate on fixtures, affecting both their appearance and performance. Use a microfiber cloth or duster to clean them regularly.

2. Change Bulbs Promptly

Replace burnt-out bulbs as soon as possible to maintain a consistent lighting experience.

3. Inspect for Damage

Regularly check for any signs of wear or damage, such as frayed wires or loose fixtures, and address these issues immediately for safety.

4. Professional Cleaning

Consider hiring professionals for cleaning larger fixtures, such as chandeliers, especially if they have intricate designs that are difficult to clean yourself.

Final Thoughts

Lighting for vaulted ceilings in living room can be both an art and a science. With the right fixtures, thoughtful placement, and attention to detail, you can enhance the beauty of your living space while ensuring it is well-lit and inviting. Whether you choose to go with dramatic chandeliers, sleek recessed lighting, or versatile pendant lights, the key is to create a balanced lighting scheme that accentuates the unique architectural features of your vaulted ceiling.

Embrace the opportunity to transform your living room into a bright, welcoming space that showcases the elegance of vaulted ceilings. With these tips and considerations, you’ll be well on your way to achieving the perfect lighting for your home.

Lighting for Cathedral Ceilings: Illuminating Spaces

When it comes to home design, one architectural feature that stands out is the cathedral ceiling. This striking design element can transform a room, adding an impressive sense of space and airiness. However, it also presents unique challenges, particularly when it comes to lighting for cathedral ceilings. The right lighting can enhance the beauty of these ceilings, create a welcoming atmosphere, and ensure that the room is functional. In this comprehensive guide, we will explore various aspects of lighting for cathedral ceilings, including the best types of fixtures, installation tips, and design considerations.

Lighting For Cathedral Ceilings

Understanding Cathedral Ceilings

Before diving into lighting options, it’s important to understand what a cathedral ceiling is. Unlike flat ceilings, cathedral ceilings are characterized by their sloping sides that rise to meet at a central point. This architectural design creates a dramatic effect and allows for greater natural light when combined with large windows.

Advantages of Cathedral Ceilings

  1. Increased Natural Light: The angle of a cathedral ceiling often allows for larger windows, making rooms feel bright and spacious.
  2. Enhanced Airflow: High ceilings can improve airflow, making spaces feel cooler and more comfortable.
  3. Aesthetic Appeal: Cathedral ceilings add character and charm, creating a stunning focal point in your home.

Read too: Kitchen Lighting For A Vaulted Ceiling: Illuminating Your Space with Style and Functionality

Challenges of Cathedral Ceilings

  1. Lighting Difficulties: The height of these ceilings can make it challenging to find the right lighting solutions that effectively illuminate the space.
  2. Heat Loss: High ceilings can lead to heat loss, making it essential to consider energy-efficient lighting options.
  3. Maintenance: Cleaning and changing light bulbs in high fixtures can be cumbersome.

Lighting Options for Cathedral Ceilings

Choosing the right lighting for cathedral ceilings involves understanding the various fixture options available. Here are some popular types of lighting fixtures that work well:

1. Chandeliers

Chandeliers are a classic choice for cathedral ceilings. They serve as a focal point and can add elegance to any room.

  • Types of Chandeliers: From traditional crystal chandeliers to modern geometric designs, the variety is vast.
  • Height Considerations: Hang chandeliers approximately 30-34 inches above dining tables. In entryways, ensure the bottom of the chandelier is at least 7 feet off the ground.

Ideal For: Dining rooms, entryways, and living rooms.

2. Pendant Lights

Pendant lights can be hung at various heights, making them versatile for different spaces.

  • Clustered Pendants: Using a cluster of pendants at varying heights can create a dramatic effect, especially over kitchen islands or dining tables.
  • Single Large Pendants: A large, single pendant can serve as a statement piece.

Ideal For: Kitchens, dining areas, and living spaces.

3. Recessed Lighting

Recessed lighting is an excellent option for creating ambient light without distracting from the beauty of the cathedral ceiling.

  • Placement: Install recessed lights along the slopes of the ceiling to highlight architectural features and provide overall illumination.
  • Adjustable Trims: Opt for adjustable trims to direct light where it is needed most.

Ideal For: Living rooms, hallways, and areas where a clean aesthetic is desired.

4. Wall Sconces

Wall sconces can add warmth and depth to cathedral ceilings while providing additional lighting.

  • Height Installation: Install sconces higher on the wall to draw the eye upward and emphasize the ceiling’s height.
  • Design Variety: Choose from a variety of styles, including modern, traditional, or rustic designs.

Ideal For: Hallways, staircases, and rooms where additional wall lighting is beneficial.

5. Ceiling Fans with Lights

Ceiling fans that incorporate lights can be both functional and stylish, making them a practical choice for rooms with cathedral ceilings.

  • Efficiency: Ceiling fans help circulate air, making spaces more comfortable.
  • Design Options: Many ceiling fans come in modern designs with integrated LED lighting.

Ideal For: Bedrooms, family rooms, and areas where cooling is essential.

Design Considerations for Lighting

When selecting lighting for cathedral ceilings, consider the following design elements to create a harmonious look:

1. Style Coordination

Ensure your lighting fixtures align with your overall design style. For example:

  • Modern Spaces: Opt for sleek, geometric fixtures with clean lines.
  • Traditional Spaces: Choose ornate chandeliers or vintage-style pendants.

2. Color Temperature

The color temperature of the bulbs can dramatically affect the mood of a room:

  • Warm White (2700K-3000K): Creates a cozy and inviting atmosphere.
  • Cool White (3500K-4100K): Offers a more energetic and bright feel, suitable for task-oriented areas.

3. Layered Lighting

To achieve a well-lit space, incorporate layered lighting:

  • Ambient Lighting: General lighting from chandeliers, recessed lights, or ceiling fans.
  • Task Lighting: Specific lighting for areas where activities occur, like reading or cooking.
  • Accent Lighting: Use sconces or spotlights to highlight artwork or architectural features.

4. Height Adjustments

Adjust the height of your fixtures based on the room’s use. For example, a chandelier in a dining area should hang lower for ambiance, while fixtures in a hallway should be higher for safety.

Installation Tips for Lighting Fixtures

When installing lighting for cathedral ceilings, consider these important tips:

1. Hire a Professional

Given the height and complexity of cathedral ceilings, hiring a licensed electrician for installation is often the safest option. They can ensure proper wiring and secure installation.

2. Use Adjustable Hardware

Using adjustable mounting hardware can help you achieve the desired height and angle for your fixtures, ensuring optimal lighting distribution.

3. Check Weight Limits

Make sure your ceiling can support the weight of your chosen fixtures, especially when dealing with heavy chandeliers or pendant lights.

4. Positioning Fixtures

Plan the placement of fixtures strategically to avoid dark corners and create a balanced lighting effect throughout the room.

Maintenance and Care

To keep your lighting fixtures in top condition, regular maintenance is essential:

1. Dust Regularly

Dust can accumulate on light fixtures, affecting both their appearance and performance. Use a microfiber cloth or duster to clean them regularly.

2. Change Bulbs Promptly

Burned-out bulbs should be replaced as soon as possible to maintain consistent lighting.

3. Inspect for Damage

Periodically check for any signs of wear, such as frayed wires or loose components, and address these issues quickly to ensure safety.

4. Professional Cleaning

For larger fixtures like chandeliers, consider hiring professionals for deep cleaning, especially if they have intricate designs that are difficult to clean yourself.

Final Thoughts

Lighting for cathedral ceilings can be both a functional necessity and a design opportunity. By choosing the right fixtures, considering the height and style of your ceilings, and implementing layered lighting techniques, you can create an inviting and beautifully illuminated space.

Whether you opt for stunning chandeliers, sleek pendant lights, or practical recessed lighting, the key is to select fixtures that enhance the architectural beauty of your cathedral ceilings while providing adequate illumination. Embrace the challenge of lighting these lofty spaces, and enjoy the elegant transformation it brings to your home.

Large Light Fixtures for High Ceilings: Elevate Your Space

When it comes to designing your living spaces, lighting plays a crucial role in both functionality and aesthetics. If you have high ceilings, you may find that standard light fixtures simply don’t make the impact you desire. This is where large light fixtures for high ceilings come into play. Not only do they provide adequate illumination, but they also serve as stunning focal points that can transform a room. In this comprehensive guide, we’ll explore the benefits of using large light fixtures, different styles available, installation tips, and maintenance advice.

Large Light Fixtures For High Ceilings

Understanding the Importance of Large Light Fixtures

Why Size Matters

In rooms with high ceilings, lighting fixtures should be proportional to the space. Large light fixtures not only fill vertical space but also draw the eye upward, creating an illusion of greater height and openness. Here are some reasons why investing in large light fixtures for high ceilings is a smart choice:

  1. Improved Illumination: Large fixtures can produce more light, making your space feel brighter and more welcoming. They often accommodate multiple bulbs, which can increase overall brightness.
  2. Aesthetic Appeal: Large light fixtures serve as artwork for your ceilings. They can add a dramatic flair and complement your interior design theme.
  3. Versatile Styles: From modern to traditional, large fixtures come in various styles that can suit any décor, allowing for personalized expression.
  4. Enhanced Room Functionality: Proper lighting can improve the functionality of a room, making tasks easier and more enjoyable.

Read too: Kitchen Lighting For A Vaulted Ceiling: Illuminating Your Space with Style and Functionality

Types of Large Light Fixtures for High Ceilings

When selecting large light fixtures for high ceilings, it’s essential to consider your space, decor style, and functionality. Here are some popular types to consider:

1. Chandeliers

Chandeliers are classic choices for high ceilings and can range from ornate to minimalist designs.

  • Traditional Chandeliers: Often made of crystal or glass, these fixtures add elegance and sophistication.
  • Modern Chandeliers: Featuring sleek lines and unique materials, modern chandeliers provide a contemporary touch.

Ideal For: Dining rooms, entryways, and living rooms where you want to make a statement.

2. Pendant Lights

Large pendant lights can also serve as eye-catching focal points while providing functional lighting.

  • Single Large Pendants: A single, oversized pendant can hang directly above a dining table or kitchen island, drawing attention.
  • Clustered Pendants: Multiple pendants hung at different heights can create an artistic arrangement.

Ideal For: Kitchens, dining areas, and living spaces where adjustable lighting is required.

3. Ceiling Fans with Lights

Combining functionality with aesthetics, ceiling fans with integrated lighting can be both stylish and practical.

  • Contemporary Designs: Many ceiling fans now come with sleek designs and energy-efficient LED lights.

Ideal For: Bedrooms and family rooms where both cooling and lighting are necessary.

4. Large Flush Mounts

Flush mount fixtures are mounted directly to the ceiling and are ideal for spaces where a chandelier may be too low.

  • Statement Flush Mounts: Large, decorative flush mounts can serve as a bold statement piece without overwhelming the room.

Ideal For: Hallways, bathrooms, and spaces with extremely high ceilings where hanging fixtures may not be practical.

5. Wall Sconces

Although typically smaller, wall sconces can complement larger fixtures by providing additional lighting and creating layers.

  • High Wall Sconces: Placing sconces higher on the wall can enhance the vertical space.

Ideal For: Hallways, staircases, and rooms with large wall space.

Choosing the Right Size

When selecting large light fixtures for high ceilings, size is a critical factor. Here are some guidelines to help you determine the right size for your space:

Measuring Your Ceiling Height

  1. Standard Formula: For rooms with high ceilings, a good rule of thumb is to add an additional inch of height for every foot of ceiling height. For instance, if your ceiling is 10 feet high, aim for a fixture that is at least 10 inches in height.
  2. Consider Scale: Ensure the fixture doesn’t overpower the space. A common mistake is selecting a fixture that is too large or too small for the room.

Visual Balance

  1. Consider Room Size: Large fixtures can look disproportionate in smaller rooms. Balance the scale of your fixture with the room’s dimensions.
  2. Visual Harmony: Make sure the light fixture complements other elements in the room, such as furniture, wall art, and architectural features.

Installation Tips for Large Light Fixtures

Installing large light fixtures requires careful planning and sometimes professional help. Here are some tips to consider:

1. Use a Qualified Electrician

For heavy fixtures, especially chandeliers, it’s advisable to hire a licensed electrician for installation. They can ensure proper electrical wiring and secure installation.

2. Check Weight Limits

Ensure that your ceiling can support the weight of your chosen fixture. Heavy fixtures may require additional support beams or hardware.

3. Determine the Right Height

  • General Guidelines: Hang fixtures about 30-34 inches above a dining table. For entryways, ensure that the bottom of the fixture is at least 7 feet above the ground.

4. Ensure Proper Lighting

Consider the type of bulbs used in your fixture. Opt for LED bulbs for energy efficiency and longevity, ensuring they provide the brightness you need.

Maintenance of Large Light Fixtures

To keep your large light fixtures for high ceilings looking their best, regular maintenance is essential. Here’s how to care for them:

1. Dust Regularly

Dust can accumulate on light fixtures, affecting their brightness and appearance. Use a microfiber cloth or duster to gently clean surfaces.

2. Check Bulbs

Regularly check bulbs to ensure they are functioning correctly. Replace any burned-out bulbs promptly to maintain consistent lighting.

3. Inspect for Damage

Periodically inspect the fixture for any signs of wear, such as frayed wires or loose components. Addressing these issues quickly can prevent accidents.

4. Deep Clean

For fixtures with intricate designs, consider a deep clean every few months. Use a gentle cleaner and avoid harsh chemicals that can damage finishes.

Final Thoughts

Large light fixtures for high ceilings are more than just functional; they add personality, elegance, and warmth to your living spaces. From dramatic chandeliers to sleek pendant lights, the options are plentiful. When choosing the right fixture, consider the size of your room, the style of your decor, and how the fixture will complement your space.

With proper installation and maintenance, your large light fixtures can enhance the beauty of your home for years to come. So go ahead—let your light shine brightly!

Mid Century Style Ceiling Fan: Embrace Elegance

The Mid Century Style Ceiling Fan is a timeless addition to any home, reflecting a design era that emphasizes clean lines, functionality, and organic shapes. This article delves into the significance of Mid-Century design, how these ceiling fans can enhance your space, and tips on choosing the perfect one for your home.

Mid Century Style Ceiling Fan

Understanding Mid-Century Design

Mid-Century design emerged in the mid-20th century, roughly between the 1940s and 1960s. It is characterized by a focus on simplicity, minimalism, and integration with nature. This style emphasizes functionality without sacrificing aesthetics, resulting in a look that is both stylish and practical. Here are some defining features of Mid-Century design:

1. Clean Lines

One of the hallmarks of Mid-Century design is its clean, uncluttered lines. Furniture and decor from this era often feature geometric shapes and smooth curves, creating a harmonious flow throughout the space.

Read too: Kitchen Lighting For A Vaulted Ceiling: Illuminating Your Space with Style and Functionality

2. Natural Materials

Mid-Century designers frequently used natural materials such as wood, leather, and metal. This choice not only adds warmth to a space but also complements the organic forms typical of the style.

3. Bold Colors

While Mid-Century design often embraces a neutral palette, it is also known for pops of bold color. Bright hues like teal, mustard yellow, and burnt orange can enhance the overall aesthetic, bringing vibrancy to a room.

4. Functionality

Every piece in a Mid-Century space serves a purpose. This focus on functionality extends to the Mid Century Style Ceiling Fan, which is designed to not only cool but also enhance the overall decor.

Why Choose a Mid Century Style Ceiling Fan?

Incorporating a Mid Century Style Ceiling Fan into your home offers several benefits:

1. Aesthetic Appeal

A Mid Century ceiling fan serves as both a functional appliance and a statement piece. Its unique design adds character to your space, making it a focal point in the room.

2. Versatility

These fans are incredibly versatile, fitting seamlessly into various decor styles beyond just Mid-Century. Whether your home leans towards modern, rustic, or eclectic, a Mid Century ceiling fan can complement the aesthetic.

3. Energy Efficiency

Many Mid Century ceiling fans are designed with energy efficiency in mind. By circulating air effectively, they can help reduce your reliance on air conditioning, saving you money on energy bills.

4. Improved Airflow

Proper airflow is essential for comfort, especially during warmer months. A well-placed ceiling fan can create a cooling breeze that enhances the overall comfort of your living space.

Choosing the Right Mid Century Style Ceiling Fan

Selecting the perfect Mid Century Style Ceiling Fan involves several considerations:

1. Size Matters

The size of your ceiling fan is crucial for optimal airflow. Here’s a quick guide based on room size:

  • Small Rooms (up to 75 sq. ft.): Choose a fan with a blade span of 29 to 36 inches.
  • Medium Rooms (75 to 144 sq. ft.): Opt for a fan with a blade span of 36 to 42 inches.
  • Large Rooms (144 to 225 sq. ft.): Select a fan with a blade span of 44 to 54 inches.
  • Great Rooms (over 225 sq. ft.): Consider a fan with a blade span of 54 inches or larger.

2. Blade Material

Mid Century ceiling fans often feature wooden blades, which enhance the natural aesthetic of the design. Consider the finish of the blades—walnut, oak, or teak are popular options that contribute to the warm, organic look of Mid-Century decor.

3. Color and Finish

Choose a color and finish that complements your existing decor. Mid-Century fans often come in wood finishes, matte black, or metallic options like brass and chrome. Ensure that the fan aligns with the overall color palette of your room.

4. Lighting Options

Many Mid Century Style Ceiling Fans come with integrated lighting, providing additional illumination for your space. Consider whether you need a fan with light fixtures and what type of bulbs you prefer—LED, incandescent, or CFL.

5. Control Mechanisms

Consider how you want to control your fan. Some models come with pull chains, while others offer wall switches or remote controls for added convenience. Smart ceiling fans are also available, allowing you to control your fan through an app on your smartphone.

Top Mid Century Style Ceiling Fans

Here are some popular Mid Century Style Ceiling Fans that embody the charm of this design era:

1. Emerson Midway Eco Ceiling Fan

The Emerson Midway Eco combines energy efficiency with a classic design. It features a sleek motor and blades crafted from solid wood, making it an excellent addition to any Mid Century-inspired room.

2. Hunter 52-Inch Dempsey Ceiling Fan

With its contemporary design and integrated light kit, the Hunter Dempsey ceiling fan is perfect for those who appreciate a modern twist on Mid Century style. It offers a variety of finishes, allowing for customization to match your decor.

3. Minka Aire Light Wave Ceiling Fan

The Minka Aire Light Wave ceiling fan features a unique design that stands out in any space. With its sweeping blades and integrated LED light, this fan captures the essence of Mid-Century design while offering modern functionality.

4. Harbor Breeze Armitage Ceiling Fan

The Harbor Breeze Armitage ceiling fan offers a rustic charm with its wood finish and vintage style. It provides excellent airflow and can be used in a variety of settings, from modern to rustic Mid-Century homes.

Installation Tips for Mid Century Style Ceiling Fans

Installing a ceiling fan can be a straightforward process, but it requires careful attention to ensure safety and functionality. Here are some essential tips:

1. Gather Necessary Tools

Before starting, gather the following tools:

  • Screwdriver
  • Pliers
  • Wire strippers
  • Ladder
  • Voltage tester
  • Drill

2. Turn Off Power

Safety is paramount. Before you begin installation, ensure that the power is turned off at the circuit breaker. Use a voltage tester to confirm that no electricity is flowing to the wiring you will be working on.

3. Follow Manufacturer Instructions

Every fan comes with a specific set of instructions for installation. Follow these carefully to ensure that the fan is mounted correctly and safely.

4. Mount the Ceiling Fan

Secure the mounting bracket to the ceiling, ensuring it is firmly attached to a ceiling joist for stability. Hang the fan according to the manufacturer’s instructions, making sure all connections are secure.

5. Test the Fan

Once the installation is complete, restore power at the circuit breaker and test the fan to ensure it operates correctly. Check for any wobbling or unusual noises, which may indicate improper installation.

Maintenance for Mid Century Style Ceiling Fans

Proper maintenance can extend the life of your Mid Century Style Ceiling Fan and ensure optimal performance. Here are some tips:

1. Regular Cleaning

Dust and debris can accumulate on the blades and motor, affecting performance. Use a microfiber cloth or duster to wipe down the blades regularly. For tougher grime, a damp cloth with mild soap can be used—just ensure the fan is off and the power is disconnected during cleaning.

2. Check Connections

Periodically check the electrical connections to ensure they remain secure. Loose connections can lead to operational issues or safety hazards.

3. Lubricate Moving Parts

Some ceiling fans have moving parts that require lubrication. Consult the manufacturer’s instructions to determine if and when lubrication is necessary.

4. Replace Bulbs as Needed

If your fan includes a light fixture, regularly check the bulbs and replace any that are burnt out. Consider using energy-efficient LED bulbs for longevity and cost savings.

Conclusion

A Mid Century Style Ceiling Fan is more than just a cooling appliance; it’s a design statement that can elevate your living space. By choosing a fan that reflects the essence of Mid-Century design—emphasizing clean lines, natural materials, and functional beauty—you can enhance your home’s ambiance while enjoying the comfort and efficiency these fans provide. With proper installation and maintenance, your ceiling fan will not only look stunning but also provide lasting comfort for years to come.

How To Soundproof A Ceiling From Noisy Neighbours: The Ultimate Guide

How To Soundproof A Ceiling From Noisy Neighbours? Living in an apartment or shared building can often lead to dealing with noise from neighbors above. Whether it’s footsteps, loud music, or even conversations, noise seeping through the ceiling can disrupt your peace and quiet. Fortunately, soundproofing your ceiling is an effective solution to minimize these disturbances. In this comprehensive guide, we’ll explore how to soundproof a ceiling from noisy neighbors, covering various methods, materials, and tips to help you regain your calm environment.

How To Soundproof A Ceiling From Noisy Neighbours

Why Soundproofing A Ceiling Is Important

Noise pollution is one of the most common issues in shared living spaces, especially in apartment buildings. Ceiling noise can range from light impact sounds like footsteps to airborne sounds such as loud music or TV. Without proper soundproofing, these sounds can travel directly through your ceiling and into your living space, causing a lack of privacy, stress, and sleepless nights.

Read too: Exploring the Efficiency of Radiant Ceiling Heater Electric: A Comprehensive Guide

Soundproofing a ceiling provides several benefits:

  1. Increased Privacy: Reduce unwanted noise and enhance personal privacy within your space.
  2. Better Sleep: A quieter environment is essential for restful sleep, especially in urban or multi-family buildings.
  3. Increased Property Value: A well-soundproofed home or apartment can appeal to buyers and renters who prioritize peace and quiet.

Now, let’s dive into how to soundproof a ceiling from noisy neighbors with detailed strategies and tips.

Understanding How To Soundproof A Ceiling From Noisy Neighbours

Soundproofing a ceiling involves blocking or absorbing sound waves that travel through it. There are two primary types of sounds you’ll need to address:

  1. Airborne Noise: This includes sounds such as voices, music, or TV noise. Airborne noise travels through the air and enters your living space via openings, cracks, and the ceiling structure.
  2. Impact Noise: Impact noise results from physical interactions with the ceiling, like footsteps, dropping objects, or moving furniture. This noise travels through the building’s structure and can be harder to block.

To effectively soundproof your ceiling, you’ll need to focus on solutions that tackle both airborne and impact noise. Here are several effective strategies.

1. Decouple the Ceiling

One of the most effective ways to reduce noise transmission is by decoupling the ceiling from the structure above. Decoupling involves creating a gap or separation between the ceiling and the floor above, which reduces the transfer of vibrations and sound waves.

Methods for Decoupling:

  • Resilient Channels: Resilient channels are thin metal strips that are installed between the ceiling joists and the drywall. They work by creating a small gap that absorbs sound vibrations before they can pass through the ceiling. This method is particularly effective for impact noise.
  • Sound Isolation Clips: These clips function similarly to resilient channels, but they provide more separation between the ceiling and the structure. They are highly effective for both impact and airborne noise.

How It Works:

When resilient channels or sound isolation clips are used, sound waves encounter the gap between the ceiling and the structure, preventing the waves from easily traveling through. This helps to significantly reduce the amount of noise that makes its way into your home.

2. Add Mass to the Ceiling

Sound travels easily through light and thin materials, so increasing the mass of your ceiling can help block sound waves from passing through. The more dense and heavy a material is, the better it will absorb and block sound.

Methods for Adding Mass:

  • Mass-Loaded Vinyl (MLV): MLV is a flexible and dense material that is highly effective at blocking sound. You can install MLV sheets directly onto your ceiling joists before adding drywall. MLV is relatively thin, so it won’t add much bulk, but it offers excellent soundproofing properties.
  • Double Layer of Drywall: Installing a second layer of drywall can also increase the mass of your ceiling, making it harder for sound to penetrate. For even better results, use Green Glue (a soundproofing compound) between the two drywall layers to dampen sound vibrations.
  • Soundproof Drywall: This type of drywall is denser and thicker than standard drywall and is specifically designed to reduce sound transmission. It is more expensive but can be highly effective when combined with other soundproofing methods.

3. Use Acoustic Panels or Tiles

Acoustic panels or ceiling tiles are designed to absorb sound, reducing echoes and preventing noise from bouncing around a room. While they are often used for wall soundproofing, they can also be effective when applied to ceilings.

Types of Acoustic Panels:

  • Foam Panels: These are lightweight and affordable soundproofing options that can be installed on the ceiling. They work best for absorbing mid- to high-frequency noise, such as voices or music.
  • Fiberglass Panels: Fiberglass panels are thicker and denser than foam panels, making them more effective at absorbing low-frequency sounds like footsteps or bass-heavy music.
  • Acoustic Ceiling Tiles: These tiles are often used in commercial buildings, but they can be installed in residential settings as well. They not only absorb sound but can also improve the aesthetic appearance of your ceiling.

4. Seal Gaps and Cracks

Even small gaps or cracks in your ceiling can allow sound to enter. Airborne noise in particular can easily pass through these small openings. Sealing any gaps or cracks is an inexpensive yet highly effective way to improve your ceiling’s soundproofing performance.

How to Seal Gaps:

  • Acoustic Caulk: This flexible and soundproofing caulk is perfect for sealing gaps around the edges of the ceiling or in any cracks that may be present. Unlike regular caulk, acoustic caulk won’t harden over time, allowing it to remain effective as the building naturally shifts.
  • Foam Insulation: Spray foam insulation can be used to fill any larger gaps or holes in the ceiling, providing an added barrier to sound. Foam insulation also offers the added benefit of thermal insulation, improving your home’s energy efficiency.

5. Install a Drop Ceiling

A drop ceiling, also known as a suspended ceiling, consists of a metal grid and ceiling tiles that are installed below the original ceiling. This method is particularly effective at reducing noise because it adds an additional layer of material between you and the noise source.

Benefits of a Drop Ceiling for Soundproofing:

  • Added Air Gap: The drop ceiling creates an air gap between the original ceiling and the suspended tiles. This gap helps absorb sound vibrations, reducing noise transmission.
  • Acoustic Ceiling Tiles: You can choose specialized acoustic tiles that are designed to absorb sound, further enhancing the noise reduction properties of a drop ceiling.

Installation Considerations:

  • Ensure the drop ceiling is installed with soundproofing in mind. Use acoustic ceiling tiles or panels that are specifically rated for soundproofing. You may also want to add insulation above the tiles for even more noise reduction.

6. Install Soundproof Insulation

Insulation plays a critical role in reducing sound transmission between floors. By filling the cavities between the ceiling joists with soundproof insulation, you can effectively dampen sound waves before they reach your living space.

Types of Insulation for Soundproofing:

  • Fiberglass Insulation: Fiberglass is a popular and affordable insulation option that can help reduce sound. It works by absorbing sound waves and preventing them from traveling through the ceiling.
  • Mineral Wool Insulation: Mineral wool, or rock wool, is denser than fiberglass and offers better soundproofing performance. It’s particularly effective at blocking both airborne and impact noise.
  • Blown-in Insulation: This type of insulation is ideal for filling hard-to-reach areas and gaps in your ceiling. It works similarly to fiberglass or mineral wool, absorbing sound and reducing noise transmission.

7. Use Soundproofing Curtains or Drapes

While not as effective as some of the other methods mentioned, heavy soundproofing curtains or drapes can help reduce noise in your space. These thick, dense materials can be hung around the edges of the ceiling or over windows to absorb airborne noise.

Although soundproof curtains won’t block impact noise, they can be helpful in reducing reverberation and softening echoes within the room.

Conclusion: Finding the Right Approach to Soundproofing Your Ceiling

Dealing with noise from neighbors can be incredibly frustrating, but by implementing the right soundproofing techniques, you can significantly reduce or eliminate the disturbances. Whether you’re decoupling the ceiling, adding mass, using acoustic panels, or installing a drop ceiling, there are numerous methods to suit your needs and budget.

When deciding how to soundproof a ceiling from noisy neighbors, it’s essential to evaluate the type of noise you’re dealing with and choose the appropriate method for your situation. With the right approach, you can create a peaceful, quiet environment and enjoy your living space without constant disruptions.

High Ceiling Foyer Chandelier: Elevate Your Space with the Perfect

Choosing the right lighting for your foyer can be a game-changer for your home’s overall aesthetic. The foyer is the first space guests see when they walk into your home, making it essential for setting the tone of the interior design. For homes with high ceilings, finding the right lighting solution becomes both an aesthetic and functional priority. One of the most luxurious options available is the High Ceiling Foyer Chandelier, a stunning lighting fixture that not only illuminates the space but also makes a grand visual statement.

High Ceiling Foyer Chandelier

In this article, we’ll explore everything you need to know about selecting the perfect High Ceiling Foyer Chandelier. From determining the right size and style to installation tips and how to maintain its elegance, this comprehensive guide will help you make an informed decision.

Why Choose a High Ceiling Foyer Chandelier?

When you have a high ceiling in your foyer, the space can feel grand and open, but without the right lighting, it may lack warmth and appeal. A High Ceiling Foyer Chandelier fills this void by acting as both a functional light source and an artistic centerpiece that enhances the architecture of the space.

Read too: Exploring the Efficiency of Radiant Ceiling Heater Electric: A Comprehensive Guide

Key Benefits of a High Ceiling Foyer Chandelier

  1. Visual Impact: A chandelier serves as a focal point, drawing attention upwards and enhancing the scale of your foyer. With high ceilings, a chandelier naturally fits into the space, creating an awe-inspiring effect that captivates guests.
  2. Proper Illumination: A well-lit foyer ensures safety and enhances the ambiance of your home. A chandelier can offer substantial light coverage for large, open spaces while adding warmth and elegance to your entryway.
  3. Customization: Chandeliers come in a wide range of styles, materials, and sizes, allowing you to choose one that complements your home’s overall design scheme.
  4. Added Value: A beautiful chandelier can increase your home’s perceived value and make a lasting impression on potential buyers. It elevates the overall look and creates a sense of luxury.

How to Choose the Right High Ceiling Foyer Chandelier

Choosing the right High Ceiling Foyer Chandelier can feel daunting, especially given the variety of sizes, styles, and designs available. However, there are key factors to consider that will help guide you through the selection process.

1. Determine the Right Size

The first thing to consider is the size of the chandelier in relation to the space. With a high ceiling, you have the opportunity to go big, but it’s important not to overwhelm the foyer. A chandelier that is too large can dominate the space, while one that is too small may get lost in the vastness of the ceiling height.

General Size Guidelines:

  • Ceiling Height: As a rule of thumb, chandeliers in high-ceiling foyers should hang about 7 to 9 feet above the floor. For every foot of ceiling height beyond 9 feet, the chandelier should be about 2 to 3 inches in height.
  • Foyer Size: To determine the chandelier’s diameter, add the dimensions of your foyer together (length + width). For example, if your foyer is 12 feet by 12 feet, aim for a chandelier around 24 inches in diameter.

2. Consider the Style

The chandelier should complement the overall design aesthetic of your home. Whether your home has a modern, traditional, or eclectic design, there is a chandelier style that can match.

  • Modern Chandeliers: Typically feature sleek lines, minimalist designs, and may use contemporary materials such as glass, steel, or even LED lights.
  • Traditional Chandeliers: These often feature ornate details like crystals, brass, or bronze finishes and intricate designs.
  • Transitional Chandeliers: This style blends the best of modern and traditional elements, making it versatile and suitable for most home designs.

3. Lighting Needs

High ceilings may require additional lighting beyond just the chandelier. Consider chandeliers that come with multiple bulbs or layers of lighting to ensure ample brightness throughout the space.

  • Dimmable Features: For flexibility, look for chandeliers with dimmable settings so you can adjust the brightness depending on the time of day or occasion.
  • Layered Lighting: You may also consider adding sconces, recessed lighting, or pendants in the foyer for more dynamic light coverage.

4. Material and Finish

The material and finish of the chandelier can affect both the design and functionality of the fixture. Some common materials include:

  • Crystal: Crystal chandeliers offer a luxurious and classic appeal. They reflect light beautifully and add a timeless sparkle to the space.
  • Metal: Metal chandeliers, especially in finishes like brass, bronze, chrome, or nickel, provide a more modern or industrial look.
  • Glass: Chandeliers made of glass, often frosted or clear, are popular in modern and contemporary homes for their sleek appearance.

5. Installation Considerations

Installing a chandelier in a high-ceiling foyer requires proper planning. In many cases, professional installation is necessary, especially if the chandelier is large and heavy.

  • Weight and Support: Make sure your ceiling can support the weight of the chandelier. You may need additional bracing or support for heavier fixtures.
  • Wiring and Accessibility: With high ceilings, ensure that you have proper wiring and accessibility for maintenance, such as changing bulbs or cleaning.

High Ceiling Foyer Chandelier Styles

When choosing the perfect chandelier for your high-ceiling foyer, it helps to explore different styles to find one that complements your home’s unique design aesthetic. Here are some popular styles to consider:

1. Crystal Chandeliers

Crystal chandeliers are a timeless choice for foyers with high ceilings. The sparkling, multi-faceted crystals reflect light beautifully, creating an opulent and elegant atmosphere. This style is perfect for traditional or formal homes and adds a touch of grandeur to any entryway.

2. Caged Chandeliers

For a modern twist on traditional chandeliers, caged designs feature exposed bulbs encased in a decorative metal framework. These chandeliers are often industrial or rustic in style, making them a great option for lofts or homes with an urban design aesthetic. The open framework allows light to spread more evenly, making them functional and stylish.

3. Sputnik Chandeliers

For those with mid-century modern or contemporary homes, a Sputnik chandelier can be a statement piece. Characterized by its multiple arms radiating from a central point, it gives the appearance of a starburst. The retro-futuristic design is ideal for high ceilings and adds visual interest without being too overpowering.

4. Drum Chandeliers

Drum chandeliers are a perfect option for transitional or modern homes. The fixture consists of a fabric or metal drum-shaped shade that surrounds the light. It creates a soft, diffused glow, making it ideal for foyers where you want a more relaxed and ambient light.

5. Tiered Chandeliers

Tiered chandeliers are perfect for large, grand foyers with extra-high ceilings. These fixtures consist of multiple layers or “tiers” of lights, making them the best choice for expansive spaces. They often feature a combination of crystals, metal, or glass elements, and offer a more dramatic presence.

Installation Tips for High Ceiling Foyer Chandeliers

When installing a chandelier in a high-ceiling foyer, there are several key considerations to ensure safety, functionality, and aesthetic appeal:

1. Hire a Professional

Due to the height and complexity of installation, it’s advisable to hire a professional electrician or installer. A chandelier for a high ceiling can be heavy, and installation requires proper bracing, wiring, and precision.

2. Use a Ladder or Scaffolding

A sturdy ladder or scaffolding will be necessary to reach the high ceilings safely. For very tall foyers, scaffolding may be the best option to ensure stable access to the installation site.

3. Positioning and Alignment

Ensure that the chandelier is centered in the foyer, especially if it’s meant to be a focal point. Depending on the layout of the entryway, you may need to align it with windows, staircases, or doorways for the best visual impact.

4. Lighting Control

Consider installing a dimmer switch to give you more control over the light intensity. Since chandeliers can provide bright lighting, a dimmer will allow you to adjust the ambiance as needed.

Maintenance and Cleaning

To maintain the beauty and functionality of your High Ceiling Foyer Chandelier, regular cleaning is essential. Here are some tips for keeping your chandelier looking its best:

1. Dusting

High ceilings can make it difficult to clean a chandelier regularly, but dust and dirt will accumulate over time. Use a long-handled duster to remove surface dust every few weeks.

2. Deep Cleaning

For deeper cleaning, you’ll need to lower the chandelier (if it’s on a motorized lift) or carefully reach it using a ladder. Use a soft cloth and a gentle cleaning solution to clean the glass or crystal elements. For crystal chandeliers, you may also want to use a specialized crystal cleaner.

3. Bulb Replacement

Ensure that you replace burnt-out bulbs promptly to maintain the fixture’s functionality. Consider energy-efficient LED bulbs, which last longer and reduce the frequency of replacement.

Conclusion

A High Ceiling Foyer Chandelier is more than just a lighting fixture; it’s a statement piece that sets the tone for your entire home. Whether you choose a luxurious crystal chandelier or a sleek modern design, the right chandelier can enhance the grandeur of your high-ceiling foyer, offering both style and function. By considering factors like size, style, and installation, you can select a chandelier that complements your space and creates a welcoming ambiance for years to come.

Glass Semi Flush Ceiling Light: The Perfect Blend of Style and Functionality

Lighting plays an essential role in home design, both in terms of functionality and aesthetics. Whether you’re looking to brighten up a room or add an elegant finishing touch, selecting the right light fixture can make all the difference. One popular option is the Glass Semi Flush Ceiling Light. Known for its sleek and modern design, this type of lighting fixture combines the best of both flush mount and pendant lighting, providing a beautiful and functional solution for many different spaces in the home.

Glass Semi Flush Ceiling Light

In this article, we’ll explore everything you need to know about Glass Semi Flush Ceiling Lights. From understanding what they are and where they work best, to exploring their benefits, styles, and installation tips—by the end, you’ll have all the information you need to make the right lighting choice for your home.

Read too: Exploring the Efficiency of Radiant Ceiling Heater Electric: A Comprehensive Guide

What Is a Glass Semi Flush Ceiling Light?

A Glass Semi Flush Ceiling Light is a type of ceiling light fixture that hangs slightly away from the ceiling, unlike flush mount fixtures that sit directly against it. The “semi-flush” aspect refers to the fixture being mounted a few inches away from the ceiling, usually with a short stem, allowing for better light diffusion and a more dynamic look.

The glass part of the design typically refers to the lampshade or enclosure being made of glass, which not only allows for a more sophisticated appearance but also helps in diffusing light evenly throughout the room. These lights are ideal for homeowners looking to maintain a low-profile lighting fixture while adding a touch of style and class.

Why Choose a Glass Semi Flush Ceiling Light?

There are several reasons why a Glass Semi Flush Ceiling Light might be the perfect lighting solution for your space:

  • Versatility: This fixture works well in various settings, from kitchens and living rooms to bedrooms and hallways.
  • Height Considerations: Since these lights don’t hang as low as pendant lights, they are suitable for spaces with standard or lower ceiling heights where a pendant light might feel too overwhelming.
  • Aesthetic Appeal: The glass elements add a modern, elegant touch that elevates the décor of any room.
  • Light Diffusion: Glass helps spread light more evenly, brightening up the room without harsh shadows.

The Advantages of Glass Semi Flush Ceiling Lights

Before diving into specific styles and designs, let’s first consider some of the main benefits of using Glass Semi Flush Ceiling Lights in your home.

1. Stylish Yet Practical Design

Glass semi-flush ceiling lights are a stylish upgrade from traditional flush mounts. While flush mounts are practical and space-saving, they tend to lack the visual appeal that many homeowners desire. Semi-flush designs bring an elegant and sophisticated look while still maintaining their practical function. The small gap between the fixture and the ceiling creates a subtle depth, making it a more dynamic design element.

2. Ideal for Rooms with Standard Ceiling Heights

Ceiling height can be a concern when selecting lighting fixtures. Homes with lower or standard-height ceilings may not be able to accommodate larger, hanging fixtures like chandeliers or pendants. A Glass Semi Flush Ceiling Light offers the perfect balance by providing style without overwhelming the space. It is also ideal for rooms that need overhead lighting but can’t fit larger fixtures due to limited height.

3. Even Light Distribution

One of the standout features of using a glass fixture is its ability to diffuse light. Unlike metal or opaque fixtures, glass spreads light more evenly across the room. This creates a warm, inviting glow that reduces harsh shadows. It’s particularly effective in creating ambient lighting, making semi-flush glass ceiling lights a great option for living rooms, dining areas, and hallways.

4. Easy to Clean and Maintain

Another benefit of choosing a Glass Semi Flush Ceiling Light is how easy it is to clean. The glass can be quickly wiped down with a damp cloth to remove dust or fingerprints. Unlike fabric shades that may require more extensive cleaning, glass is a low-maintenance option that looks great for years to come with minimal effort.

Different Styles of Glass Semi Flush Ceiling Lights

When it comes to choosing the right Glass Semi Flush Ceiling Light for your home, there are several styles to consider, depending on your décor and the atmosphere you’re trying to create.

1. Modern and Minimalist

For those with modern or minimalist home designs, a sleek glass semi-flush fixture with clean lines and a simple, understated design is a great choice. Look for fixtures that have a frosted or clear glass shade combined with metal finishes such as chrome, nickel, or matte black. These fixtures blend seamlessly into contemporary interiors and add a touch of sophistication.

2. Vintage and Industrial

If your home has a more industrial or vintage feel, you might opt for a Glass Semi Flush Ceiling Light with an Edison bulb and exposed hardware. The glass could be slightly tinted or textured to give it an antique look, adding warmth and character to your space. Copper or brass finishes pair particularly well with this style, bringing an old-world charm into modern homes.

3. Art Deco and Glamorous

For those who love a more glamorous aesthetic, there are plenty of glass semi-flush ceiling lights that feature ornate designs, crystal accents, or intricate metalwork. These fixtures often have frosted or etched glass to diffuse the light softly, creating a luxurious atmosphere. Gold or polished chrome finishes add to the opulence of these fixtures, making them a perfect addition to dining rooms or formal living areas.

4. Classic and Transitional

If you prefer a more classic or transitional look, consider a semi-flush ceiling light with a clear or frosted glass shade and a bronze or brushed nickel base. This type of fixture works well in a variety of rooms, offering a timeless design that complements both traditional and modern interiors.

Where to Install a Glass Semi Flush Ceiling Light

Glass Semi Flush Ceiling Lights are versatile fixtures that work in many areas of the home. Here are some of the most popular spots to install them:

1. Entryway or Foyer

The entryway is the first space your guests see when they enter your home, and a glass semi-flush light can create a welcoming and stylish first impression. These lights provide ample illumination for smaller entryways while adding a decorative touch.

2. Kitchen or Dining Area

Semi-flush lights work particularly well in kitchens, where pendant lighting may hang too low or get in the way of cabinets. Use them over an island or breakfast nook for functional lighting that complements the design of your kitchen.

3. Bedroom

In bedrooms with lower ceilings, a semi-flush fixture can offer enough light for the entire room without taking up valuable headspace. Opt for a frosted glass shade for a softer, diffused light that creates a cozy and relaxing environment.

4. Living Room

In living rooms, a Glass Semi Flush Ceiling Light can act as the central light source, providing ambient lighting while allowing other accent lights, such as floor lamps or wall sconces, to fill in the rest of the room. The glass design helps brighten the room without being too harsh or overpowering.

5. Hallways or Corridors

Hallways are often overlooked when it comes to lighting, but they are essential in connecting spaces and guiding people through your home. A semi-flush light fixture ensures that these areas are well-lit without disrupting the flow of the space.

Installation and Maintenance Tips

Installing a Glass Semi Flush Ceiling Light can be a simple DIY project for those familiar with electrical work. Here are a few tips to ensure a smooth installation process:

  • Turn Off the Power: Always turn off the power at the circuit breaker before starting the installation process.
  • Use a Ladder: Since these fixtures are installed close to the ceiling, a sturdy ladder is essential for safety.
  • Follow Instructions: Each light fixture comes with its own set of installation instructions, so be sure to follow them carefully.
  • Choose the Right Bulb: Consider the type of bulb you want to use. LED bulbs are a great energy-efficient option, while Edison bulbs can add a vintage touch.
  • Clean Regularly: To keep your glass semi-flush ceiling light looking its best, wipe down the glass regularly with a soft, damp cloth to remove any dust or grime.

Conclusion

A Glass Semi Flush Ceiling Light is a versatile and stylish lighting option that can work in a variety of spaces. Whether you’re looking for a modern, minimalist look or a more vintage and decorative design, there’s a glass semi-flush light out there to suit your needs. By considering factors such as room size, ceiling height, and personal style, you can find the perfect light fixture to enhance both the functionality and aesthetic of your home.

Floor to Ceiling Window Treatments: A Complete Guide

Floor-to-ceiling windows have long been associated with luxury, modern design, and expansive views. These tall windows can completely transform a room by flooding it with natural light and creating a connection to the outdoors. However, they also pose unique challenges when it comes to finding the perfect window treatments. Whether you’re looking to control the amount of light entering your room, increase privacy, or enhance the aesthetic appeal, choosing the right floor to ceiling window treatments is key.

Floor To Ceiling Window Treatments

In this comprehensive guide, we’ll explore different types of window treatments, how to choose the right style for your space, and tips for installation and maintenance. We’ll also cover considerations such as energy efficiency, materials, and trends to help you make an informed decision.

Why Choose Floor to Ceiling Window Treatments?

Floor-to-ceiling windows offer an open and elegant look, but they come with their challenges. Here’s why investing in floor to ceiling window treatments can make all the difference:

  • Light Control: Without proper window treatments, large windows can let in excessive sunlight, which can cause glare and heat up the room. The right treatments allow you to adjust the amount of light entering your space.
  • Privacy: These windows often cover large areas of walls, so maintaining privacy can be a concern, especially in urban environments or ground-level rooms.
  • Aesthetic Appeal: Window treatments can frame your windows beautifully, adding texture, color, and depth to your room design.
  • Energy Efficiency: Large windows can cause heat loss during the winter and heat gain during the summer. Quality treatments can provide insulation and contribute to energy savings.
  • UV Protection: Direct sunlight can damage furniture, flooring, and artwork over time. Window treatments can help block harmful UV rays and extend the life of your interior furnishings.

Read too: Exploring the Efficiency of Radiant Ceiling Heater Electric: A Comprehensive Guide

Types of Floor to Ceiling Window Treatments

There are various options available for floor to ceiling window treatments, and each brings its own set of advantages. Here are some of the most popular choices:

1. Drapes and Curtains

Drapes are one of the most versatile and stylish options for covering large windows. They offer several customization options in terms of fabric, length, color, and pattern. You can select heavy blackout drapes for complete light control or choose sheer fabrics that allow filtered light while maintaining some privacy.

Pros:

  • Customization: Available in a wide range of fabrics, colors, and patterns.
  • Light Control: Choose between blackout, semi-sheer, or sheer options.
  • Insulation: Heavier fabrics can add insulation, making your room more energy-efficient.

Cons:

  • Maintenance: Depending on the fabric, drapes may require regular cleaning to avoid dust buildup.
  • Space: They require enough wall space for installation and can look bulky in small rooms.

2. Blinds

Blinds are an effective option for those looking for precise control over light and privacy. Vertical blinds, in particular, are well-suited for tall windows. These can be made from materials like wood, faux wood, aluminum, or vinyl, depending on your aesthetic and budget.

Pros:

  • Light Control: Easy to adjust for varying levels of light.
  • Durability: Blinds tend to be sturdy and long-lasting.
  • Sleek Look: A minimalist, streamlined appearance that complements modern interiors.

Cons:

  • Limited Insulation: Blinds don’t provide as much insulation as drapes.
  • Noise: Blinds can be noisy when adjusted or during windy conditions.

3. Shades

Shades are another popular option for large windows. Roller shades, Roman shades, and cellular shades are the most common types. Shades come in various opacity levels, allowing you to control the amount of light and privacy.

Roller Shades:

These are a sleek and modern choice for floor to ceiling window treatments. Available in materials ranging from blackout to light-filtering, roller shades can be motorized for easy operation.

Cellular Shades:

Known for their honeycomb design, cellular shades provide excellent insulation, helping to regulate room temperature while still offering a stylish look.

Pros:

  • Energy Efficient: Cellular shades, in particular, help with insulation.
  • Customizable: Available in different levels of opacity and material choices.
  • Minimalist Design: A clean and modern option that works well in contemporary spaces.

Cons:

  • Limited Design Options: Shades are often less decorative compared to drapes.
  • Manual Operation: Unless motorized, some shades may be hard to reach or operate in tall windows.

4. Shutters

For a timeless and classic look, shutters are a great option. They offer a tailored look and provide excellent control over light and airflow. Plantation shutters are especially popular for floor to ceiling window treatments because they add a touch of elegance while maintaining functionality.

Pros:

  • Durability: Shutters are made of solid materials like wood or vinyl, which are long-lasting.
  • Aesthetic: They add value to your home and create a polished look.
  • Low Maintenance: Shutters are easy to clean and maintain.

Cons:

  • Cost: Shutters can be more expensive upfront compared to other window treatments.
  • Permanent: Once installed, shutters are difficult to remove or adjust.

5. Motorized Window Treatments

For the ultimate in convenience and luxury, consider motorized window treatments. Whether you choose drapes, blinds, or shades, motorization allows you to open and close your treatments with the push of a button or via a smart home system. Motorized treatments are particularly useful for hard-to-reach windows.

Pros:

  • Convenience: Control with a remote, app, or smart home integration.
  • Precision: Easily adjust for exact light levels and privacy needs.
  • Safety: No cords, making them child and pet-friendly.

Cons:

  • Cost: Motorized treatments tend to be more expensive than manual options.
  • Installation: Requires electrical wiring or batteries, which may add complexity to the installation.

Choosing the Right Window Treatments for Your Space

When deciding on floor to ceiling window treatments, consider the following factors:

1. Functionality

What is the primary function of your window treatments? If you need privacy and light control, drapes or blinds may be the best option. If you’re focusing on energy efficiency, cellular shades or shutters could be the ideal choice. Motorized options are great for convenience, especially in homes with smart home systems.

2. Style and Aesthetic

The window treatments you choose should complement your room’s design. For example, if you have a modern or minimalist interior, sleek roller shades or vertical blinds might work best. For a more traditional or luxurious space, heavy drapes or plantation shutters can enhance the decor.

3. Energy Efficiency

Floor-to-ceiling windows can let in a significant amount of heat during the summer and cold air during the winter. Consider energy-efficient window treatments like cellular shades or lined drapes that provide insulation and help maintain a comfortable room temperature.

4. Budget

Window treatments for large windows can be expensive, so it’s essential to plan your budget carefully. While motorized systems and high-end fabrics offer premium experiences, more affordable options like standard blinds or shades can still provide functionality and style without breaking the bank.

5. Privacy and Light Control

In bedrooms or spaces requiring more privacy, blackout shades or lined drapes are effective. In living areas where natural light is welcome, sheer curtains or light-filtering shades can provide soft lighting without sacrificing privacy.

Installation Tips for Floor to Ceiling Window Treatments

When installing floor to ceiling window treatments, it’s essential to take accurate measurements and ensure proper placement for the best visual and functional results.

1. Measure Accurately

  • Measure the height from the floor to the ceiling to determine the appropriate length for drapes or curtains.
  • For blinds and shades, measure the width of the window as well as the height from the top of the window to the floor.

2. Install High for Maximum Effect

When installing drapes, hang them close to the ceiling rather than directly above the window to create the illusion of taller windows and a more dramatic effect.

3. Consider Professional Installation

Floor-to-ceiling window treatments, especially motorized ones or heavy drapes, can be challenging to install. If you’re unsure, hiring a professional ensures that your window treatments are hung correctly and securely.

Conclusion

Choosing the right floor to ceiling window treatments can significantly enhance the look, feel, and functionality of your space. Whether you prefer the elegance of drapes, the sleek look of blinds, or the convenience of motorized options, there are plenty of choices to suit every style and need. By considering factors such as light control, energy efficiency, and budget, you can make an informed decision that will elevate your home’s design and comfort.

Exhaust Fan for Drop Ceiling: A Comprehensive Guide

In modern construction and renovations, exhaust fans for drop ceilings are gaining popularity, especially in commercial and residential settings. A drop ceiling not only offers a sleek aesthetic but also allows for the easy installation of various systems, including lighting and HVAC components. This article will delve into the significance of exhaust fans in drop ceilings, the types available, installation tips, and maintenance considerations, helping you make an informed decision for your space.

Exhaust Fan For Drop Ceiling

Understanding Drop Ceilings

Before discussing exhaust fans, it’s crucial to understand what a drop ceiling is. A drop ceiling, also known as a suspended ceiling, consists of a grid system that supports lightweight panels. This ceiling style is commonly used in basements, offices, and commercial spaces for several reasons:

  • Aesthetic Appeal: Drop ceilings can hide unsightly ductwork, plumbing, and electrical systems while providing a clean and finished look.
  • Sound Absorption: Many drop ceiling tiles are designed to absorb sound, making them ideal for offices and meeting rooms where noise reduction is desired.
  • Flexibility: The space above a drop ceiling can be easily accessed, allowing for modifications and maintenance without significant disruption.

Read too: Exploring the Efficiency of Radiant Ceiling Heater Electric: A Comprehensive Guide

Why Install an Exhaust Fan?

Installing an exhaust fan for drop ceiling is essential for several reasons:

  • Improved Air Quality: Exhaust fans help remove stale air, odors, and pollutants from a space, improving overall indoor air quality.
  • Moisture Control: In areas prone to humidity, such as kitchens or bathrooms, exhaust fans can help prevent moisture buildup, reducing the risk of mold and mildew.
  • Temperature Regulation: Exhaust fans can aid in regulating temperature by removing hot air, particularly in commercial kitchens or industrial settings where heat accumulates quickly.

Types of Exhaust Fans for Drop Ceilings

When selecting an exhaust fan for a drop ceiling, it’s essential to consider the different types available:

1. Inline Exhaust Fans

Inline exhaust fans are installed within the ductwork rather than directly in the ceiling. This design allows for quiet operation and can effectively ventilate larger areas. Inline fans are ideal for spaces with extensive duct systems, providing better airflow efficiency.

2. Ceiling-Mounted Exhaust Fans

As the name suggests, these fans are mounted directly on the drop ceiling tiles. They are easy to install and are commonly used in residential bathrooms and kitchens. Ceiling-mounted fans can vary in power and design, so it’s essential to choose one that suits your specific needs.

3. Wall-Mounted Exhaust Fans

While not specifically for drop ceilings, wall-mounted exhaust fans can be an alternative if the ceiling structure doesn’t accommodate a ceiling-mounted fan. These fans draw air out through an external wall, providing effective ventilation for various spaces.

4. Bathroom Exhaust Fans

Bathroom exhaust fans are specifically designed to remove moisture and odors from bathrooms. These fans often come with additional features like humidity sensors and timers, making them suitable for residential applications.

Choosing the Right Exhaust Fan for Your Space

Selecting the right exhaust fan for your drop ceiling involves several considerations:

1. Calculate CFM Requirements

CFM, or cubic feet per minute, measures the airflow of the exhaust fan. The required CFM depends on the size of the space and its intended use. As a general guideline:

  • Kitchens: A kitchen exhaust fan should typically provide between 100-400 CFM, depending on the size of the kitchen and cooking habits.
  • Bathrooms: For bathrooms, aim for at least 1 CFM per square foot of floor space. For example, a 100-square-foot bathroom would need a fan with at least 100 CFM.

2. Noise Level

Consider the noise level of the exhaust fan. Fans are rated by their sones, with lower sones indicating quieter operation. If noise is a concern, look for fans with a rating of 1-2 sones, as they operate quietly without sacrificing performance.

3. Energy Efficiency

Energy-efficient exhaust fans can save on energy costs over time. Look for models with the ENERGY STAR label, indicating they meet strict energy efficiency guidelines. Energy-efficient fans often use less power while providing the same or better airflow than standard models.

4. Installation Requirements

Ensure you understand the installation requirements for your chosen exhaust fan. Some fans may require professional installation, while others can be installed as DIY projects. If you’re not comfortable with electrical work or ducting, hiring a professional is advisable.

Installing Exhaust Fans for Drop Ceilings

Installing an exhaust fan for drop ceiling is a task that can often be handled by homeowners with some DIY experience. However, if you’re unsure, it’s always best to consult with a professional. Here’s a step-by-step guide to installing a ceiling-mounted exhaust fan:

Step 1: Gather Materials and Tools

You will need:

  • Exhaust fan unit
  • Ceiling tiles
  • Ductwork (if applicable)
  • Electrical wiring
  • Switch
  • Screwdriver
  • Drill
  • Utility knife
  • Level
  • Safety goggles

Step 2: Turn Off Power

Before starting the installation, turn off the power to the circuit that will supply the fan. This ensures safety during installation.

Step 3: Choose the Location

Select a suitable location for the exhaust fan in your drop ceiling. Ideally, it should be positioned where air will be most effectively removed. For bathrooms, place it near the shower or bathtub; for kitchens, position it above the stove or cooking area.

Step 4: Cut the Ceiling Tile

Use a utility knife to cut the ceiling tile to fit the exhaust fan. Make sure the opening is slightly smaller than the fan’s housing to ensure a snug fit.

Step 5: Install the Fan

Insert the exhaust fan into the opening, ensuring it is secure and level. Depending on the model, you may need to use screws to attach it to the grid system.

Step 6: Connect the Ductwork

If your fan requires ducting, connect the appropriate ductwork to the fan. Make sure the duct is sealed properly to avoid air leaks. If the exhaust fan is vented outside, ensure the duct runs are as short and straight as possible for optimal airflow.

Step 7: Wire the Fan

Follow the manufacturer’s wiring instructions to connect the exhaust fan to your home’s electrical system. This typically involves connecting the fan’s wires to the corresponding wires from the power source.

Step 8: Install the Switch

If your fan has a separate switch, install it in a convenient location, ensuring it is easily accessible.

Step 9: Test the Fan

Once everything is connected, turn the power back on and test the exhaust fan to ensure it operates correctly.

Maintaining Your Exhaust Fan

To keep your exhaust fan for drop ceiling functioning efficiently, regular maintenance is essential:

1. Clean the Fan

Dust and debris can accumulate on the fan blades, reducing performance. Clean the fan at least once a year by removing the cover and wiping down the blades with a damp cloth.

2. Check for Obstructions

Ensure that the ductwork is free from obstructions. This will maintain optimal airflow and efficiency.

3. Test the Fan

Periodically test the fan to ensure it is running properly. Listen for unusual noises, which may indicate a need for repair.

4. Replace Filters

If your exhaust fan has a filter, replace it regularly to maintain air quality and performance.

Conclusion

Installing an exhaust fan for drop ceiling is a practical solution for improving indoor air quality, moisture control, and overall comfort. By understanding the different types of exhaust fans available, the factors to consider when choosing one, and the installation process, you can make informed decisions to enhance your living or working environment. Regular maintenance will ensure that your exhaust fan continues to function effectively, providing the benefits of fresh air and improved ventilation for years to come.

Drop Down Ceiling Lighting: A Stylish and Functional Solution for Modern Spaces

When it comes to interior design, lighting plays a crucial role in setting the tone, mood, and overall atmosphere of a room. One of the most popular and functional lighting solutions in both residential and commercial spaces is Drop Down Ceiling Lighting. This versatile lighting system not only enhances the aesthetics of your space but also provides practical illumination where it’s needed most.

Drop Down Ceiling Lighting

In this article, we will explore the benefits of Drop Down Ceiling Lighting, the different styles available, tips for choosing the right fixture, and how to install and maintain these lighting systems to achieve the perfect balance of style and function in your space.

What is Drop Down Ceiling Lighting?

Drop Down Ceiling Lighting, also known as suspended or pendant lighting, refers to fixtures that are hung from the ceiling by a rod, cord, or chain. These lights are designed to “drop down” from the ceiling, providing focused light to specific areas such as kitchen islands, dining tables, or workspaces. The suspended nature of these lights creates a stylish, modern look that can enhance the design of any room.

Benefits of Drop Down Ceiling Lighting

  1. Focused Lighting: Drop down ceiling lights are perfect for task-oriented spaces. Whether you’re preparing meals in the kitchen or working on a project at your desk, these lights provide focused illumination where you need it most.
  2. Versatility: Available in a wide range of designs, materials, and finishes, drop down ceiling lights can complement any decor style, from industrial to modern to traditional.
  3. Space-Saving: Unlike floor lamps or table lamps that take up valuable space, drop down ceiling lights free up surfaces and floor space, making them ideal for smaller rooms.
  4. Aesthetic Appeal: The suspended nature of drop down lights adds visual interest to your room. These lights can create a focal point, add drama, or enhance the overall aesthetic of the space.

Types of Drop Down Ceiling Lighting

When choosing the right Drop Down Ceiling Lighting for your home or office, it’s important to consider the different styles available. Here are some of the most popular types:

1. Pendant Lights

Pendant lights are one of the most common types of drop down lighting fixtures. They are typically small, single light fixtures that hang from the ceiling, often used in multiples to create a striking visual effect. Pendant lights are versatile and can be used in a variety of settings, including kitchens, dining rooms, and entryways. They come in various shapes, such as globe, drum, and cone, and materials like glass, metal, or fabric.

Read too: Bathroom Flooded Through the Ceiling: A Comprehensive Guide

2. Chandeliers

Chandeliers are more elaborate than pendant lights and are often associated with formal dining rooms or grand entryways. They typically feature multiple arms or branches, each holding a light source. Modern chandeliers have evolved beyond their traditional, ornate designs, with many contemporary options that blend seamlessly into minimalist and modern decor styles.

3. Linear Suspension Lights

Linear suspension lights are long, horizontal light fixtures that drop down from the ceiling. These are ideal for illuminating large surfaces, such as kitchen islands, conference tables, or dining tables. The elongated design provides even lighting across a wide area, making them functional as well as stylish.

4. Track Lighting

Track lighting consists of multiple adjustable lights attached to a track that can be hung from the ceiling. This type of lighting is often used in galleries or retail spaces where flexible and focused lighting is needed. Each light can be directed to highlight specific areas or objects, offering a versatile solution for spaces with changing needs.

5. Multi-Light Pendants

Similar to pendant lights, multi-light pendants feature multiple lights hanging from a single canopy. These fixtures are great for making a bold statement in larger spaces or for creating symmetry above kitchen islands, dining tables, or bathroom vanities.

How to Choose the Right Drop Down Ceiling Lighting

Selecting the right Drop Down Ceiling Lighting for your space involves more than just choosing a fixture you find visually appealing. You need to consider several factors to ensure the lighting solution is both functional and aesthetically pleasing.

1. Room Size and Ceiling Height

The size of the room and the height of the ceiling play a significant role in determining the size and type of drop down lighting you should choose. In rooms with high ceilings, you can opt for larger, more dramatic fixtures that hang lower. Conversely, in rooms with lower ceilings, you’ll want to select fixtures that are more compact and hang closer to the ceiling.

  • Ceiling Height Rule of Thumb: For rooms with an 8-foot ceiling, the bottom of the light fixture should hang about 12-20 inches below the ceiling. Add about 3 inches for each additional foot of ceiling height. For example, if your room has a 10-foot ceiling, the fixture should hang about 18-24 inches from the ceiling.

2. Lighting Needs

Consider the primary function of the room and how much light it requires. In task-oriented spaces like kitchens, offices, or reading areas, you’ll need brighter, more focused lighting. For ambient lighting in living rooms or bedrooms, softer, diffused light might be more appropriate. Some drop down lights come with adjustable brightness, allowing you to customize the light output based on your needs.

3. Style and Design

Your lighting fixture should complement the overall design aesthetic of your room. For example, a sleek metal pendant light might be ideal for a modern kitchen, while a rustic, wood-finished chandelier could suit a farmhouse-style dining room. Matching the finish of your lighting fixture to other hardware in the room, such as door handles or faucets, can create a cohesive look.

4. Fixture Size and Scale

The size of the drop down light should be proportional to the size of the space. A tiny pendant light may get lost in a large room, while an oversized fixture can overwhelm a smaller space. When hanging multiple pendant lights, consider their spacing to ensure the lighting is balanced and functional.

Installing Drop Down Ceiling Lighting: Tips for Success

Once you’ve selected the perfect drop down ceiling light, installation is the next step. Here are a few tips to help ensure your installation goes smoothly.

1. Turn Off Power

Before beginning any electrical work, always turn off the power at the circuit breaker. This will ensure your safety while installing the light fixture.

2. Mounting the Fixture

Most drop down ceiling lights come with a mounting kit that includes all the hardware needed to hang the fixture. Follow the manufacturer’s instructions carefully to ensure the light is securely mounted. You may need to install a junction box if one is not already in place.

3. Determine the Hanging Height

As mentioned earlier, the height at which the fixture hangs is critical. If the fixture is hanging above a table or counter, leave at least 30-36 inches of clearance between the surface and the bottom of the light. This allows enough space for activities while still providing effective lighting.

4. Hire a Professional

While many homeowners may feel comfortable installing smaller light fixtures themselves, it’s always a good idea to hire a licensed electrician, especially if you’re dealing with larger or more complex fixtures. An electrician can ensure the light is properly wired, secure, and safe for long-term use.

Maintaining Drop Down Ceiling Lighting

Maintaining Drop Down Ceiling Lighting is essential to ensure the fixture looks its best and functions properly for years to come.

1. Regular Cleaning

Dust and debris can accumulate on light fixtures, especially in kitchens or rooms with a lot of foot traffic. Use a soft, damp cloth to wipe down the fixture periodically. For glass or crystal fixtures, consider using a specialized glass cleaner to maintain their shine.

2. Check for Loose Parts

Over time, the chains, cords, or rods that suspend your drop down lights may become loose or worn. Periodically check the fixture for any signs of wear and tear, and tighten any loose parts to ensure the fixture remains securely mounted.

3. Replace Bulbs as Needed

Depending on the type of bulb used, you may need to replace them every few months or years. If you’re using LED bulbs, they can last much longer than traditional incandescent or halogen bulbs, reducing the need for frequent replacements. Be sure to follow the manufacturer’s recommendations for the type of bulb to use with your fixture.

Conclusion

Drop Down Ceiling Lighting offers a stylish and functional lighting solution for any space, whether it’s a kitchen, dining room, or office. With various designs, sizes, and finishes available, you can find the perfect fixture to match your decor and meet your lighting needs. By considering factors like room size, ceiling height, and lighting requirements, you can select a fixture that not only looks great but also enhances the functionality of your space.

Whether you’re installing a minimalist pendant light in a modern kitchen or an ornate chandelier in a formal dining room, Drop Down Ceiling Lighting is a versatile option that can transform your home’s interior.

Chandeliers for High Ceiling Foyer: Illuminate Your Space with Elegance and Grandeur

When you walk into a home with a high ceiling foyer, one of the first things that catches your eye is the lighting fixture that crowns the space. Chandeliers for High Ceiling Foyer serve as both a functional light source and a stunning design element that sets the tone for the rest of your home. A well-chosen chandelier not only brightens the room but also enhances the architectural grandeur of a high ceiling foyer, creating an inviting and dramatic first impression.

Chandeliers For High Ceiling Foyer

In this guide, we will explore the different types of chandeliers perfect for high ceiling foyers, factors to consider when selecting the ideal chandelier, and tips on how to hang and maintain your chandelier to create a lasting impact.

Read too: Bathroom Flooded Through the Ceiling: A Comprehensive Guide

Why Choose Chandeliers for High Ceiling Foyers?

A high ceiling foyer offers a unique opportunity to showcase a grand chandelier that not only illuminates but also elevates the overall aesthetic of your home. Unlike smaller spaces, high ceiling foyers allow you to install large, intricate chandeliers that would otherwise overpower lower ceilings. Chandeliers help fill vertical space, create balance, and draw attention to the architectural height of your foyer.

Key Benefits of Chandeliers for High Ceiling Foyers

  1. Visual Drama: A chandelier in a high ceiling foyer adds instant drama and flair, becoming a natural focal point that captures attention.
  2. Enhanced Lighting: High ceilings require more powerful lighting to ensure the space is properly illuminated. Chandeliers provide adequate light while maintaining style.
  3. Ambience and Warmth: The right chandelier can soften the openness of a large foyer, adding warmth and creating a welcoming atmosphere.
  4. Design Versatility: Whether your home decor is traditional, modern, or somewhere in between, there are chandeliers available in a wide range of styles and finishes that can complement any aesthetic.

Types of Chandeliers for High Ceiling Foyers

When choosing Chandeliers for High Ceiling Foyer, it’s essential to consider the style and scale that will work best in your space. Below are several types of chandeliers that are particularly well-suited for foyers with high ceilings.

1. Crystal Chandeliers

Crystal chandeliers are often the go-to choice for creating an opulent and elegant look. The sparkling crystals reflect light beautifully, creating a sense of grandeur. These chandeliers are timeless and work especially well in traditional and luxurious home settings. If you want to make a bold statement, a cascading crystal chandelier is an excellent choice for a high ceiling foyer.

2. Modern Minimalist Chandeliers

For homeowners with a more contemporary or minimalist aesthetic, modern chandeliers offer sleek designs that emphasize clean lines and simplicity. Materials such as metal, glass, and even wood can be incorporated into modern chandelier designs. These fixtures often have geometric shapes and understated elegance that can complement any minimalist high ceiling foyer.

3. Candle-Style Chandeliers

Candle-style chandeliers mimic the look of old-world candelabras, providing a rustic or vintage feel. These types of chandeliers often feature multiple arms with candle-like light bulbs, adding a touch of classic charm. They’re perfect for creating a traditional or French-inspired foyer that feels cozy yet sophisticated.

4. Orb Chandeliers

Orb chandeliers have a unique, spherical shape that can make a bold design statement in a high ceiling foyer. These chandeliers often combine various materials, such as metal and wood, and are ideal for modern and transitional spaces. The circular design of orb chandeliers draws the eye upwards, highlighting the height of the room while adding an artistic touch.

5. Drum Chandeliers

For a more subtle but equally stylish look, drum chandeliers feature a large, drum-shaped shade that surrounds the light. These fixtures are versatile and can suit various decor styles, from traditional to contemporary. Drum chandeliers provide a warm, diffused light, which makes them great for creating a welcoming entrance to your home.

Factors to Consider When Choosing Chandeliers for High Ceiling Foyers

Selecting the right Chandeliers for High Ceiling Foyer is more than just picking a fixture you like. Several factors come into play when determining the best chandelier for your space.

1. Foyer Dimensions

The size of your foyer plays a significant role in determining the type and size of chandelier you should choose. A small chandelier in a large foyer with high ceilings may look out of place, while a large chandelier in a more compact space can feel overwhelming. As a general rule of thumb, your chandelier should be proportional to both the height and width of the foyer.

  • Width: To determine the ideal width of your chandelier, add the length and width of the room in feet, and convert that total into inches. For example, if your foyer is 12 feet by 16 feet, your chandelier should be about 28 inches wide.
  • Height: The height of the chandelier should also match the scale of the room. In spaces with very high ceilings (over 20 feet), consider chandeliers that have multiple tiers to fill the vertical space.

2. Ceiling Height

Since you’re dealing with a high ceiling, ensure that the chandelier hangs at an appropriate height. It’s generally recommended that a chandelier be suspended at least 7-8 feet above the floor. For particularly tall ceilings, a multi-tiered chandelier will help fill the height and provide better illumination.

3. Lighting Needs

Foyers require adequate lighting, especially in homes where this space serves as the first point of entry. Consider the lumen output of the chandelier and whether additional lighting sources are needed. Depending on the size of the foyer, you might want to supplement the chandelier with recessed lights, wall sconces, or floor lamps to create a balanced lighting design.

4. Style and Aesthetic

The style of your chandelier should complement the overall decor of your home. If your home features a modern aesthetic, go for clean-lined and sleek chandeliers with metallic finishes. For more traditional homes, opt for ornate, classic designs that add elegance and detail.

How to Hang a Chandelier in a High Ceiling Foyer

Hanging a chandelier in a high ceiling foyer can be a challenging task, but with the right approach, it can be done beautifully. Here are some tips to ensure your chandelier is installed correctly.

1. Positioning the Chandelier

The placement of your chandelier is key to creating a harmonious look. For symmetry, the chandelier should be centered in the foyer. If the foyer leads directly to a staircase or other focal point, ensure the chandelier aligns visually with the flow of the room.

2. Determine the Right Hanging Height

A general guideline for chandeliers is that the bottom of the fixture should hang about 7 feet from the floor. If your foyer has an extremely high ceiling (over 20 feet), you can hang the chandelier a bit lower to create a more intimate feel while still maintaining balance.

3. Use a Professional for Installation

Due to the height and potential complexity of hanging a chandelier in a high ceiling foyer, it’s usually best to hire a professional for the installation. Not only will they ensure that the chandelier is securely mounted, but they will also handle any electrical work needed to support the fixture.

Maintaining Your Foyer Chandelier

Once your chandelier is installed, it’s important to maintain its beauty and functionality. Dust and dirt can accumulate quickly on chandeliers, especially in foyers where doors frequently open and close.

  • Cleaning: For crystal chandeliers, a regular cleaning regimen using a chandelier cleaner or a mixture of vinegar and water will keep the crystals sparkling. Metal fixtures should be wiped down with a dry or slightly damp cloth to remove dust.
  • Bulb Replacement: Given the height of your chandelier, replacing bulbs can be challenging. Consider investing in long-lasting LED bulbs that will reduce the need for frequent replacements. Additionally, some chandeliers are equipped with motorized lift systems that allow the fixture to be lowered for easier maintenance.

Conclusion

Chandeliers for High Ceiling Foyer are more than just lighting fixtures—they are statement pieces that enhance the grandeur of your home. Whether you prefer the traditional elegance of a crystal chandelier, the sleekness of modern designs, or the rustic charm of candle-style lighting, there is a perfect chandelier out there for your high ceiling foyer. By considering the dimensions, lighting needs, and aesthetic of your space, you can choose a chandelier that transforms your entryway into a stunning, well-lit focal point.

Ceiling to Floor Windows in Apartments: A Comprehensive Guide

When it comes to modern apartment living, Ceiling To Floor Windows Apartments are a game-changer. These expansive windows create a seamless connection between the indoor and outdoor environments, flood rooms with natural light, and enhance the overall aesthetic of any space. Whether you live in a compact urban studio or a luxurious high-rise penthouse, ceiling-to-floor windows can transform the way you experience your apartment.

Ceiling To Floor Windows Apartments

In this article, we’ll explore the benefits of ceiling-to-floor windows, how to optimize your living space with them, and considerations you should keep in mind when choosing this feature for your apartment.

What Are Ceiling To Floor Windows?

As the name suggests, Ceiling To Floor Windows Apartments are spaces designed with large windows that stretch from the ceiling down to the floor. These types of windows offer panoramic views, invite more light into your home, and can make a space appear larger and more open. Whether you prefer a minimalist look or a more ornate decor, these windows can fit effortlessly into any design style.

Read too: Bathroom Flooded Through the Ceiling: A Comprehensive Guide

The Benefits of Ceiling To Floor Windows in Apartments

1. Natural Light for a Brighter Home

One of the most appealing aspects of Ceiling To Floor Windows Apartments is the amount of natural light they let in. This influx of sunlight can enhance your mood, make the space feel more welcoming, and reduce the need for artificial lighting during the day. For those living in cities or apartments that don’t receive a lot of natural light, these windows can be an excellent solution.

The benefits of natural light extend beyond aesthetics. Exposure to sunlight boosts vitamin D levels, enhances productivity, and can improve overall well-being. With floor-to-ceiling windows, your apartment is bathed in natural light from sunrise to sunset, transforming the atmosphere entirely.

2. Maximized Views

Whether you’re gazing out over a stunning city skyline, lush green parks, or the tranquil waters of a nearby river, Ceiling To Floor Windows Apartments offer unrivaled views. They make you feel as though you’re part of the landscape, creating a feeling of openness and connectedness with your surroundings.

For urban dwellers, having unobstructed views of the city can be a major selling point. These windows allow you to enjoy your environment without stepping outside, offering privacy while still making the most of your apartment’s location.

3. A Sense of Spaciousness

Floor-to-ceiling windows can make even the smallest apartment feel larger. The visual expansion created by these windows draws the eye outward, making the space feel more open. For those living in more compact or crowded areas, this feature can be transformative, adding a sense of airiness and depth to your apartment.

By eliminating barriers between you and the outside, Ceiling To Floor Windows Apartments offer the illusion of more space. This is especially beneficial for those living in smaller apartments, as the natural light and panoramic views can make a room appear much larger than it actually is.

4. Increased Property Value

If you’re thinking long-term, investing in an apartment with ceiling-to-floor windows can significantly increase its value. This architectural feature is highly sought after, especially in luxury markets. Apartments with such windows are considered premium, which can lead to a higher resale value or rental price. Whether you’re a homeowner looking to boost property value or a renter wanting to attract future tenants, floor-to-ceiling windows can be a smart investment.

5. Modern and Stylish Design

The sleek, modern look of Ceiling To Floor Windows Apartments is a popular choice for contemporary interior design. They create clean lines, highlight your decor, and blend in with virtually any color scheme or style. Whether you prefer minimalist, industrial, or mid-century modern aesthetics, floor-to-ceiling windows offer versatility in design.

In addition, these windows allow you to showcase statement pieces such as large artwork, luxurious furniture, or unique architectural details. The light that floods in highlights your personal style and ensures that your apartment feels open and airy rather than cluttered or cramped.

How to Design Around Ceiling To Floor Windows in Apartments

1. Choosing the Right Window Treatments

While natural light and unobstructed views are huge advantages of Ceiling To Floor Windows Apartments, there will be times when you need privacy or wish to control the amount of light entering your home. Choosing the right window treatments can help you balance aesthetics with functionality.

  • Sheer curtains: These allow you to filter light while still maintaining the sense of openness and connection to the outdoors.
  • Motorized blinds or shades: For ease of use and a sleek, modern look, motorized window treatments can be an ideal choice. You can easily adjust the amount of light coming in with the push of a button.
  • Blackout curtains: If your apartment is in a bright area or you prefer a darker space for sleeping, blackout curtains can provide the privacy and darkness you need without compromising style.

2. Maximizing Space with Furniture Placement

The presence of large windows can limit where you place furniture in your apartment, but with some strategic thinking, you can make the most of both the windows and the rest of your space.

  • Low-profile furniture: To keep the windows as the focal point of the room, choose furniture with a low profile that won’t block your view. Sofas, coffee tables, and media consoles should sit below the window line, allowing the light to flow freely.
  • Floating furniture arrangement: Instead of pushing your furniture against the walls, try arranging seating in the center of the room. This creates an intimate, conversational area without obstructing your windows.
  • Multi-functional furniture: In smaller apartments, look for furniture that serves multiple purposes, such as a sofa that doubles as a guest bed or a storage ottoman. This will allow you to maximize your space without cluttering the room or obstructing the windows.

3. Emphasizing the View

When you have breathtaking views outside your Ceiling To Floor Windows Apartments, it’s essential to make the most of them. Here are a few ways to draw attention to the outside scenery:

  • Mirrors: Placing mirrors opposite the windows can reflect light and expand the visual space in your apartment. This is particularly useful in smaller rooms where you want to enhance the sense of openness.
  • Minimalist decor: By keeping your decor simple and uncluttered, you allow the view to take center stage. Choose clean, understated furnishings and avoid overwhelming the space with too many accessories or decorative elements.

Considerations for Ceiling To Floor Windows Apartments

While Ceiling To Floor Windows Apartments offer many benefits, there are also some considerations to keep in mind.

1. Energy Efficiency

Large windows can sometimes lead to energy inefficiencies, especially if they are not properly insulated. During the summer, the sunlight streaming through these windows can heat up your apartment, causing your air conditioner to work harder. Conversely, in the winter, heat can escape through the windows, leading to higher energy bills.

To mitigate these issues, consider installing energy-efficient windows with double or triple panes. Additionally, window treatments like insulated curtains or shades can help regulate indoor temperatures.

2. Privacy Concerns

While ceiling-to-floor windows offer beautiful views and natural light, they can also compromise your privacy. If your apartment is located in a densely populated area or faces other buildings, it’s essential to think about how much visibility you’re comfortable with. Consider using sheer curtains or smart glass options that allow you to control privacy without sacrificing light.

3. Maintenance and Cleaning

The larger the windows, the more maintenance they require. Cleaning ceiling-to-floor windows can be a challenge, especially in high-rise apartments. Depending on the window’s accessibility, you may need to hire professional window cleaners to keep them spotless. Regular cleaning will ensure your windows look their best and continue to offer crystal-clear views.

Conclusion

Ceiling to floor windows in apartments offer a modern, elegant, and practical way to enhance your living space. From maximizing natural light to creating the illusion of more space, Ceiling To Floor Windows Apartments are perfect for anyone looking to elevate their home’s aesthetic. With careful design and planning, you can make the most of these stunning architectural features, enjoying both style and comfort in your apartment.

Ceiling Fan With Wood Blades: Style, Function, and Tips for Your Home

When it comes to choosing a ceiling fan, the combination of function and aesthetics is crucial. A Ceiling Fan With Wood Blades offers not only practical air circulation but also a timeless and natural appeal. Whether you’re looking to enhance the interior design of your living room, bedroom, or outdoor patio, a ceiling fan with wood blades can seamlessly blend into various decor styles while providing much-needed comfort.

Ceiling Fan With Wood Blades

In this article, we’ll explore the benefits of ceiling fans with wood blades, how to choose the right one for your space, and tips for installation and maintenance.

Read too: Bathroom Flooded Through the Ceiling: A Comprehensive Guide

The Appeal of a Ceiling Fan With Wood Blades

1. Natural Aesthetic

One of the key reasons homeowners opt for a Ceiling Fan With Wood Blades is the natural and rustic charm that wood brings to any space. The warmth of wood complements a variety of interior design themes, from modern minimalism to traditional farmhouse style. Wood-bladed fans create a cozy, organic feel in your room, making it more inviting.

2. Durability and Longevity

When properly cared for, wood blades are incredibly durable. High-quality ceiling fans with wooden blades often come with finishes that protect the wood from warping or cracking over time. Moreover, the density and strength of wood ensure that these fans can withstand regular use, particularly if you choose a model designed for outdoor spaces.

3. Variety of Finishes

A Ceiling Fan With Wood Blades comes in a wide range of finishes and textures. From light, natural woods like maple and oak to darker, richer tones like walnut or mahogany, you can choose a style that perfectly matches your room’s decor. Some fans also feature distressed or reclaimed wood for a more rustic, vintage vibe. The choice of wood grain and finish allows for endless customization to suit both modern and traditional interiors.

4. Energy Efficiency

Ceiling fans are known for their energy efficiency, and those with wooden blades are no exception. These fans consume far less electricity than air conditioning units, helping you reduce energy costs while still keeping your space cool. Many modern wood-blade fans also come equipped with energy-efficient motors, LED lighting options, and smart home integration to further enhance their efficiency.

5. Quiet Operation

Fans with wooden blades tend to operate more quietly than metal-bladed fans. Wood is a natural material that absorbs vibrations and reduces noise, creating a more peaceful environment. This makes a Ceiling Fan With Wood Blades an excellent choice for bedrooms, reading rooms, or any other space where quiet comfort is essential.

Choosing the Right Ceiling Fan With Wood Blades

When selecting the perfect ceiling fan for your home, there are several factors to consider. The size of the room, the height of the ceiling, and the style of the decor all play crucial roles in making the right choice.

1. Room Size and Blade Span

The size of the ceiling fan’s blade span is one of the most important factors in choosing the right fan for your space. A fan that is too small may not circulate enough air, while a fan that is too large could overwhelm the room.

  • For small rooms (up to 100 square feet), a fan with a blade span of 36 to 44 inches is ideal.
  • For medium-sized rooms (100-200 square feet), a blade span of 44 to 54 inches is recommended.
  • For large rooms (over 200 square feet), look for a fan with a blade span of 52 to 60 inches or more.

2. Ceiling Height

The height of your ceiling will also determine the appropriate type of ceiling fan. If your ceiling is lower than 8 feet, a flush mount or low-profile ceiling fan will work best. For taller ceilings, consider using a downrod to extend the fan to an appropriate height for optimal airflow. Ideally, ceiling fans should hang 8-9 feet from the floor.

3. Blade Pitch

The blade pitch refers to the angle of the fan blades. Fans with a steeper pitch (between 12 to 15 degrees) are more effective at moving air compared to those with a flatter pitch. However, for homes with low ceilings, you may want to opt for a fan with a smaller blade pitch to avoid overpowering airflow.

4. Indoor vs. Outdoor Use

While most wood-bladed fans are designed for indoor use, many models are available for outdoor spaces like patios, porches, or sunrooms. Outdoor ceiling fans are specially treated to resist moisture, humidity, and other environmental factors. Be sure to check whether the fan is rated for “damp” or “wet” conditions if you plan to install it outside.

5. Lighting Options

Some ceiling fans come equipped with built-in light kits, which are convenient for adding both air circulation and illumination to your space. If you choose a Ceiling Fan With Wood Blades that has lighting, ensure it fits your needs—whether it’s for task lighting, ambient lighting, or decorative purposes.

Installation Tips for Ceiling Fans With Wood Blades

Installing a Ceiling Fan With Wood Blades can be a straightforward process if you follow the manufacturer’s guidelines and prepare adequately. If you’re comfortable with basic electrical work, you can likely install the fan yourself. However, for more complex installations or heavier fans, hiring a professional electrician may be necessary.

1. Turn Off Power

Before beginning any installation, make sure to turn off the power to the room where you’ll be working. Use a voltage tester to confirm that the power is off.

2. Assemble the Fan

Many fans require partial assembly before they are installed on the ceiling. Follow the manufacturer’s instructions to assemble the motor housing, blades, and light kit if applicable.

3. Mount the Bracket

Next, mount the ceiling bracket to the electrical box. The bracket will support the weight of the fan, so ensure it is securely fastened. You may also need a fan-rated electrical box if your current box is not strong enough to hold the fan.

4. Attach the Fan

Once the bracket is securely in place, attach the fan’s motor housing to the bracket. Some fans will snap into place, while others may require screws or bolts.

5. Wire the Fan

Carefully connect the fan’s wires to the corresponding wires in your ceiling. Match the black and blue wires for the fan and light to the black wire in the ceiling, and the white wires to the white wires. Connect the green wire to the ground. If your fan has a remote control, follow the instructions for wiring the remote receiver.

6. Attach the Blades

Finally, attach the wooden blades to the motor housing, ensuring they are securely fastened. Some fans may also have decorative blade holders that require additional installation steps.

7. Test the Fan

After everything is installed and the power is turned back on, test your fan to ensure it runs smoothly and the lighting (if applicable) works correctly.

Maintenance and Care for Ceiling Fans With Wood Blades

A Ceiling Fan With Wood Blades requires minimal maintenance, but regular cleaning and care can extend the life of the fan and keep it looking new.

1. Regular Cleaning

Dust and dirt can accumulate on the blades over time, which can affect the fan’s performance. Use a microfiber cloth or a soft duster to gently clean the blades every few months. For more stubborn grime, use a mild wood cleaner that is safe for the finish of the blades.

2. Balance the Blades

If your fan wobbles or makes noise during operation, the blades may be out of balance. Most fans come with a balancing kit that includes small weights. Attach these weights to the blades to balance the fan and reduce noise.

3. Check the Motor

Occasionally, check the motor housing for dust buildup or any signs of wear. If the fan makes unusual noises or runs slower than usual, it may require professional maintenance or a replacement part.

Conclusion

A Ceiling Fan With Wood Blades is an excellent addition to any home, offering both functional and aesthetic benefits. Its natural elegance, quiet operation, and variety of design options make it a versatile choice for any space. By considering factors like room size, blade pitch, and installation requirements, you can find the perfect ceiling fan to meet your needs. With proper installation and regular maintenance, your ceiling fan will provide years of reliable use and timeless style.

Black Tin Ceiling Tiles: A Comprehensive Guide

When it comes to home decor, the ceiling is often an overlooked canvas, yet it holds immense potential to transform any room. One of the most striking options available today is Black Tin Ceiling Tiles. These stylish tiles not only add a touch of elegance but also provide a unique aesthetic appeal that can elevate the overall ambiance of a space. In this article, we’ll explore the various aspects of black tin ceiling tiles, from their history and benefits to installation tips and maintenance.

Black Tin Ceiling Tiles

What Are Black Tin Ceiling Tiles?

Black Tin Ceiling Tile are decorative panels made from tin or metal that are designed to be installed on ceilings. Historically, tin tiles were popular in the late 19th and early 20th centuries, often found in Victorian-era buildings and commercial spaces. Today, they are experiencing a revival, particularly in modern homes and stylish restaurants, where their classic charm meets contemporary design.

The “black” aspect of these tiles refers to their finish, which can range from matte to glossy. The black color adds sophistication and depth to a room, making it an ideal choice for those looking to create a bold statement.

Benefits of Black Tin Ceiling Tiles

1. Aesthetic Appeal

One of the main attractions of Black Tin Ceiling Tile is their stunning visual appeal. The contrast of black against other colors in the room can create a dramatic effect, making any space feel more upscale. These tiles are available in various patterns and designs, allowing homeowners to customize their ceilings according to their style preferences.

2. Durability

Tin ceiling tiles are incredibly durable and resistant to wear and tear. Unlike traditional ceiling materials that may warp, crack, or discolor over time, tin is designed to last. This durability ensures that your investment in black tin ceiling tile will pay off in the long run, maintaining their beauty for years to come.

Read too: Bathroom Flooded Through the Ceiling: A Comprehensive Guide

3. Easy Maintenance

Maintaining Black Tin Ceiling Tile is relatively straightforward. They can be easily wiped down with a damp cloth to remove dust and grime. Unlike painted ceilings that may require regular repainting, tin tiles do not need frequent upkeep, making them a practical choice for busy homeowners.

4. Acoustic Benefits

One often-overlooked advantage of tin ceiling tiles is their ability to improve acoustics in a room. The tiles can help absorb sound and reduce echoes, making them an excellent choice for spaces like restaurants, offices, or home theaters where sound quality is essential.

5. Installation Versatility

Black Tin Ceiling Tile can be installed in various settings, including residential and commercial spaces. They can be used in kitchens, dining areas, living rooms, and even in commercial settings like cafes and retail stores. Their versatility allows for creative installations, including full ceilings or accent areas.

The History of Tin Ceiling Tiles

Tin ceiling tiles have a rich history that dates back to the mid-19th century. During this time, advancements in metalworking made it possible to create lightweight, affordable ceiling panels that mimicked the look of more expensive materials like plaster and carved wood.

These tiles became particularly popular in North America, where they were often used in the construction of Victorian homes and commercial buildings. However, as architectural styles changed in the early 20th century, tin tiles fell out of favor.

In recent years, there has been a resurgence of interest in vintage decor, leading to a revival of tin ceiling tiles in contemporary design. Black Tin Ceiling Tiles, in particular, have gained popularity for their modern aesthetic and timeless charm.

How to Choose the Right Black Tin Ceiling Tiles

Selecting the right Black Tin Ceiling Tiles involves several considerations to ensure that they align with your vision and the overall style of your space.

1. Design and Pattern

Tin ceiling tiles come in various designs, from intricate Victorian patterns to simple geometric shapes. When choosing a design, consider the overall aesthetic of the room. For a more traditional look, opt for ornate patterns; for a modern vibe, choose sleek, minimalist designs.

2. Size and Scale

The size of the tiles can significantly impact the visual effect they create. Smaller tiles can be used for more intricate designs, while larger tiles can create a bolder statement. Consider the proportions of the room when selecting tile sizes to ensure a harmonious look.

3. Finish Options

Black tin ceiling tiles are available in different finishes, including matte, gloss, and textured. The finish you choose can affect the overall ambiance of the room. A glossy finish may reflect light and add brightness, while a matte finish can create a more subdued, sophisticated feel.

4. Installation Method

Consider whether you want to install the tiles yourself or hire a professional. Some tiles are designed for easy DIY installation, while others may require professional expertise, particularly if intricate patterns are involved.

5. Budget

While Black Tin Ceiling Tiles can be a bit more expensive than traditional ceiling materials, they can also add significant value to your home. Set a budget before shopping to ensure you find tiles that fit within your financial constraints.

Installation Tips for Black Tin Ceiling Tiles

Installing Black Tin Ceiling Tiles can be a rewarding DIY project if you follow these steps:

Step 1: Gather Your Materials

You will need the following materials:

  • Black tin ceiling tiles
  • Adhesive (or nails, depending on the installation method)
  • Measuring tape
  • Level
  • Utility knife
  • Caulk or trim (for finishing touches)

Step 2: Prepare the Ceiling

Before installation, ensure that your ceiling is clean and free of any debris. If you’re working with an existing ceiling, consider removing any old tiles or finishes that may affect adhesion.

Step 3: Measure and Mark

Using a measuring tape, mark the center of the ceiling. This point will serve as the starting point for your tile installation. From this center point, measure and mark lines to help guide the placement of your tiles.

Step 4: Start Installing

Begin installing the tiles at the center and work your way outward. Use adhesive or nails to secure the tiles, ensuring they are level and flush against each other. For a seamless look, carefully align the edges of each tile.

Step 5: Finish the Edges

Once all tiles are installed, use caulk or trim to cover any exposed edges or gaps. This finishing touch will create a polished and professional look.

Step 6: Enjoy Your New Ceiling

After installation, take a step back and admire your new Black Tin Ceiling Tiles. The transformation can significantly enhance the overall atmosphere of your space.

Maintenance of Black Tin Ceiling Tiles

To keep your Black Tin Ceiling Tiles looking their best, consider the following maintenance tips:

1. Regular Cleaning

Dust and grime can accumulate on your tiles over time. Use a soft cloth or duster to wipe down the tiles regularly. For more stubborn stains, use a damp cloth with mild soap.

2. Check for Damage

Periodically inspect your tiles for any signs of damage, such as dents or scratches. Address any issues promptly to maintain the integrity of your ceiling.

3. Avoid Harsh Chemicals

When cleaning your black tin ceiling tiles, avoid using harsh chemicals or abrasive cleaners, as they can damage the finish. Stick to mild soap and water for safe cleaning.

4. Touch Up as Needed

If you notice any scratches or scuffs, consider using touch-up paint designed for metal surfaces to maintain a uniform look.

Conclusion

Black Tin Ceiling Tiles offer a unique and sophisticated way to elevate your home decor. Their rich history, coupled with modern aesthetics, makes them a versatile choice for any space. By understanding their benefits, choosing the right tiles, and following proper installation and maintenance techniques, you can transform your ceiling into a stunning focal point. Whether you’re looking to enhance your home’s interior or add character to a commercial space, black tin ceiling tiles are an excellent choice that will stand the test of time.

Basement Ceiling Insulation Code: Everything You Need to Know for Proper Insulation

Insulating your basement ceiling is essential for maintaining energy efficiency, improving comfort, and adhering to building regulations. However, it’s crucial to be aware of the basement ceiling insulation code requirements to ensure that your home stays compliant with local building standards. These codes are in place to ensure the safety, performance, and energy efficiency of your home’s insulation system, especially in colder climates where heat loss can be a significant issue.

Basement Ceiling Insulation Code

In this article, we’ll provide a comprehensive guide to the basement ceiling insulation code, including its importance, relevant standards, and factors to consider when insulating your basement ceiling. Whether you’re a homeowner, contractor, or DIY enthusiast, understanding these codes is critical for achieving the best results in terms of comfort, energy savings, and safety.

Read too: Exploring the Innovation and Efficiency of Ceiling Mounted Surgical Light Solutions: Illuminating Precision

Why Basement Ceiling Insulation Matters

Before diving into specific code requirements, it’s important to understand why basement ceiling insulation is essential. Basements often suffer from poor insulation, leading to several issues:

  1. Heat Loss: Without adequate insulation, basements can become cold during winter, causing the rooms above them to lose heat. This increases energy consumption as heating systems have to work harder.
  2. Moisture Control: Insulation also helps in controlling moisture, which is crucial in basements that are prone to dampness and condensation. Proper insulation prevents mold growth and protects the structural integrity of your home.
  3. Soundproofing: Insulating the basement ceiling can reduce noise transfer between floors, making the home more comfortable, particularly in houses with entertainment or utility rooms in the basement.
  4. Energy Efficiency: Proper insulation ensures energy efficiency, lowering heating and cooling costs throughout the year.

Given these benefits, many building codes outline strict insulation requirements to help homeowners protect their investment and ensure a safe living environment.

Understanding Basement Ceiling Insulation Code

The basement ceiling insulation code is a set of standards and regulations provided by local building authorities, as well as national codes like the International Residential Code (IRC) and the International Energy Conservation Code (IECC). These codes establish the minimum R-value (thermal resistance) needed for different parts of a home, including basements.

What Is an R-Value?

The R-value of insulation refers to its ability to resist heat flow. The higher the R-value, the better the insulation’s performance. Different areas of the home, such as walls, attics, and basements, have specific R-value requirements based on the local climate zone.

For basements, the R-value for ceiling insulation can vary, but it typically ranges between R-19 and R-30. This ensures that the basement stays insulated against temperature fluctuations, especially in colder regions.

The Basement Ceiling Insulation Code Requirements

In many regions, basement insulation requirements are detailed by both local and national building codes. Here’s a breakdown of what you need to know about basement ceiling insulation code standards:

1. International Residential Code (IRC)

The IRC is one of the most widely used building codes in the United States and provides guidance on insulation for various parts of a home, including basements. According to IRC, basement ceilings that are adjacent to conditioned spaces should have insulation that meets the minimum R-value specified for the climate zone.

  • Climate Zone 1-2: R-13 to R-15
  • Climate Zone 3-4: R-19
  • Climate Zone 5-8: R-30

These climate zones represent different geographical regions, where higher numbers indicate colder climates that require better insulation.

2. International Energy Conservation Code (IECC)

The IECC also sets insulation standards for energy efficiency, helping to reduce energy consumption in homes. Like the IRC, the IECC’s insulation requirements are broken down by climate zone. The specific R-value requirements for basement ceilings depend on whether the space above the basement is conditioned or unconditioned.

For instance:

  • If the basement is unconditioned and the ceiling separates it from a conditioned living space, the R-value needs to comply with the standard requirements for floor insulation based on the climate zone.
  • For conditioned basements, the walls should meet the code-specified R-value.

3. Local Building Codes

In addition to national codes, local municipalities may have their own specific insulation requirements. It is important to check with your local building authority before beginning any insulation project to ensure compliance with any additional regulations.

Some local codes may also specify whether a vapor barrier is required in basement insulation to prevent moisture issues. This can be particularly important in areas with high humidity or prone to water leaks.

4. Fire Safety Codes

In many regions, fire safety regulations play a role in how insulation is installed in basements. For example, building codes may require certain types of insulation, such as those with fire-resistant properties, or the installation of fire-blocking materials in specific areas.

Insulation in basement ceilings should comply with fire safety codes, especially if there are electrical wires or pipes running through the ceiling. Fiberglass and mineral wool are often recommended for their fire-retardant qualities.

Factors to Consider When Insulating a Basement Ceiling

To successfully meet the basement ceiling insulation code and achieve the best results, several key factors must be considered during the insulation process. These factors will help determine the right type of insulation and installation techniques for your home.

1. Climate Zone

As mentioned, your local climate zone will heavily influence the required R-value for basement ceiling insulation. Homes in colder climates will need insulation with a higher R-value to ensure the basement remains warm during winter months, while homes in warmer areas can use lower R-value insulation.

2. Unconditioned vs. Conditioned Basements

The type of basement you’re insulating also impacts your choice of insulation and how much you need. In an unconditioned basement (where the basement itself is not heated or cooled), it’s crucial to insulate the ceiling to maintain the energy efficiency of the home. For conditioned basements, the walls might require insulation more than the ceiling, depending on local codes.

3. Moisture Control

Since basements are prone to moisture issues, especially in regions with high humidity or heavy rainfall, moisture control is vital during insulation. If moisture builds up in the insulation, it can lead to mold growth, structural damage, and reduced insulation effectiveness.

Installing a vapor barrier can help prevent moisture from penetrating the insulation. This is especially important if you’re using materials like fiberglass, which can absorb water and lose effectiveness.

4. Soundproofing

In addition to thermal insulation, basement ceiling insulation can also be used to reduce noise transmission between floors. Insulation materials like cellulose or mineral wool can offer soundproofing benefits, making them a good choice if you’re using the basement as a living area, home office, or entertainment space.

5. Cost and Materials

The type of insulation material you choose will affect the cost and performance of the insulation. Common insulation materials for basement ceilings include:

  • Fiberglass Batts: A cost-effective option with good thermal performance. Fiberglass is easy to install and widely used in basement insulation projects.
  • Spray Foam Insulation: This option provides excellent thermal resistance and acts as both insulation and a vapor barrier. However, it can be more expensive than other materials.
  • Mineral Wool: This material offers both thermal and soundproofing benefits, as well as fire resistance, making it an excellent choice for basements.

Installation Tips for Meeting Basement Ceiling Insulation Code

Once you’ve selected the right insulation material and determined the required R-value based on your climate zone and local code, it’s time to install the insulation. Here are some tips to ensure your installation meets code and provides the desired benefits:

1. Seal Gaps and Cracks

Before installing insulation, make sure to seal any gaps, cracks, or holes in the ceiling or walls. This will prevent air leakage and moisture infiltration, ensuring your insulation performs at its best.

2. Install Vapor Barriers

In basements with high humidity levels, a vapor barrier should be installed to prevent moisture from damaging the insulation. This is especially important when using materials like fiberglass, which can lose effectiveness when wet.

3. Use the Right Tools

Proper insulation installation requires specific tools, such as insulation knives, staplers, and protective gear. Make sure to follow the manufacturer’s instructions for both the insulation material and any vapor barrier.

4. Follow Local Code Guidelines

Always refer to your local building codes before starting your insulation project. Codes may differ depending on your location, and it’s essential to stay compliant with these regulations to avoid potential fines or complications during future home inspections.

Conclusion

Meeting the basement ceiling insulation code is crucial for maintaining energy efficiency, improving comfort, and protecting your home from potential moisture issues. By understanding the specific insulation requirements for your climate zone and local codes, you can make informed decisions about the type of insulation to use and how to install it properly.

When properly insulated, a basement can become a more comfortable and usable space, whether for storage, living, or entertainment. Investing in the right insulation materials and techniques will pay off in the form of lower energy bills, better soundproofing, and a more comfortable home.

White Wood Panel Ceiling: A Timeless Touch of Elegance for Your Home

A well-designed ceiling can enhance the overall ambiance of a room, transforming it from ordinary to extraordinary. One of the most popular and stylish ceiling options in interior design today is the white wood panel ceiling. This classic yet versatile feature not only adds a sense of sophistication and warmth but also offers numerous practical benefits. Whether you’re remodeling your home or designing a new space, a white wood panel ceiling can elevate the look and feel of your interiors.

White Wood Panel Ceiling

In this article, we will dive deep into everything you need to know about white wood panel ceilings, including their benefits, different styles, installation tips, and maintenance. We will explore why this timeless ceiling option is gaining popularity in homes across the country and how it can suit various design aesthetics, from modern to rustic.

Read too: Exploring the Innovation and Efficiency of Ceiling Mounted Surgical Light Solutions: Illuminating Precision

Why Choose a White Wood Panel Ceiling?

Before we discuss the technical aspects of installing a white wood panel ceiling, it’s essential to understand why so many homeowners and designers opt for this feature. Here are a few compelling reasons to consider a white wood panel ceiling for your home:

1. Timeless Aesthetic Appeal

The clean, neutral look of a white wood panel ceiling provides an understated elegance that never goes out of style. White wood adds warmth, while its natural grain and texture lend a sense of character and depth to any room. This ceiling style seamlessly blends with various interior designs, from coastal and farmhouse to minimalist and Scandinavian.

2. Brightening the Space

White is a reflective color, making it an excellent choice for brightening up darker rooms or spaces with limited natural light. A white wood panel ceiling can create the illusion of a taller, airier space, making even small rooms feel more expansive. This makes it an ideal choice for living rooms, kitchens, or bedrooms where you want to maximize the perception of space.

3. Versatility Across Design Styles

One of the key benefits of choosing white wood panel ceilings is their versatility. Whether you’re aiming for a contemporary, rustic, or vintage look, white wood panels can adapt to any style. They work beautifully in modern loft apartments, classic country homes, coastal retreats, or even industrial settings where their natural charm softens sharper edges.

4. Acoustic Benefits

Wood is a natural sound absorber, and white wood panel ceilings can help improve the acoustics of a room. This is especially useful in homes with high ceilings or open floor plans, where sound tends to echo. The wood panels absorb and dampen sound, creating a quieter and more comfortable environment.

5. Durability and Longevity

When properly maintained, wood panel ceilings can last for decades. White wood panels are often treated to resist warping, cracking, or staining, making them a durable choice for areas with fluctuating temperatures or humidity levels, such as bathrooms and kitchens. They are also relatively easy to clean, further enhancing their long-lasting appeal.

Styles of White Wood Panel Ceilings

There are several different styles and designs of white wood panel ceilings to choose from. Each style has its own unique characteristics, allowing you to create a custom look that reflects your personal taste and the overall design of your home.

1. Shiplap Ceilings

Shiplap is one of the most popular styles for white wood panel ceilings. This design features long, horizontal planks that fit tightly together with a slight gap between them, creating a visually appealing, clean-lined look. Shiplap ceilings are perfect for coastal, farmhouse, or modern rustic homes, as they evoke a sense of simplicity and charm.

2. Tongue and Groove Ceilings

Tongue and groove ceilings consist of interlocking wood panels, creating a seamless and smooth surface. This style is known for its sturdiness and clean finish. White tongue and groove ceilings are ideal for traditional and transitional interiors where a more refined and polished aesthetic is desired.

3. Beadboard Ceilings

Beadboard is another classic style that works well in cottages, country homes, and vintage-inspired interiors. Beadboard panels feature narrow grooves (called “beads”) and offer a more intricate, detailed texture compared to flat wood panels. A white beadboard ceiling can add a cozy and nostalgic charm to spaces like kitchens, sunrooms, and bathrooms.

4. Board and Batten Ceilings

For those seeking a bolder, more architectural look, a white board and batten ceiling is an excellent option. This design features wider wood planks with vertical battens (narrow strips) placed between the panels. Board and batten ceilings are often used to create visual interest in large rooms, giving the ceiling a more dynamic and striking appearance.

How to Install a White Wood Panel Ceiling

Installing a white wood panel ceiling can be a DIY-friendly project for those with some carpentry experience, but it can also be done by professionals for a flawless finish. Here’s a general guide to help you understand the installation process:

Step 1: Measure the Area

Before beginning the installation, measure the ceiling area where you plan to install the white wood panels. Ensure that you have the correct amount of paneling and supplies based on your measurements. It’s always a good idea to purchase a little extra material in case of mistakes or miscalculations.

Step 2: Prepare the Ceiling Surface

If you’re installing the panels over an existing ceiling, make sure the surface is clean and level. If necessary, install furring strips (thin strips of wood) over the existing ceiling to create a flat, even surface for the panels.

Step 3: Acclimate the Wood

Wood naturally expands and contracts with changes in temperature and humidity. To prevent warping or gaps after installation, allow the wood panels to acclimate to the room’s conditions for at least 48 hours before installation. Simply store the panels in the room where they will be installed.

Step 4: Install the Panels

Depending on the style of white wood panel ceiling you’re installing, the process may vary slightly. For tongue and groove or shiplap panels, fit each plank together, securing them with nails or screws into the furring strips or ceiling joists. If you’re installing beadboard or board and batten, make sure to align each panel evenly before securing it.

Step 5: Finishing Touches

After the panels are installed, fill any nail holes with wood filler and lightly sand the surface for a smooth finish. You may also choose to apply a coat of paint or sealer to enhance the durability of the wood panels. Finally, install trim or molding around the edges of the ceiling to create a polished and professional appearance.

Maintaining Your White Wood Panel Ceiling

Maintaining your white wood panel ceiling is relatively straightforward, but regular care is essential to keep it looking its best for years to come. Here are a few maintenance tips:

1. Dust Regularly

White wood panel ceilings can accumulate dust and cobwebs, especially in rooms with high ceilings. Regular dusting with a soft cloth or vacuum with a brush attachment will help keep the ceiling looking clean and fresh.

2. Clean Stains Promptly

If your ceiling becomes stained, it’s important to clean it as soon as possible. Use a gentle cleaner and a soft cloth to wipe away stains without damaging the wood. Avoid harsh chemicals that could strip the paint or finish.

3. Inspect for Damage

Periodically inspect your white wood panel ceiling for signs of damage, such as cracks, warping, or discoloration. Promptly addressing any issues can prevent further damage and extend the lifespan of your ceiling.

4. Repaint or Refinish as Needed

Over time, the white paint or finish on your ceiling may begin to fade or wear. When this happens, you can refresh the look of your ceiling by applying a new coat of paint or sealer. Be sure to use high-quality paint or finish designed for wood to ensure long-lasting results.

Conclusion

A white wood panel ceiling is a timeless, elegant addition to any home that combines functionality with aesthetic appeal. Whether you’re looking to brighten up a dark space, improve the acoustics of a room, or add a touch of classic charm, white wood panels offer endless possibilities for customization. With proper installation and maintenance, your white wood panel ceiling can be a durable and beautiful feature for years to come.

By exploring different styles such as shiplap, beadboard, tongue and groove, or board and batten, you can find the perfect white wood panel design that suits your home’s interior style. Whether you’re a DIY enthusiast or prefer professional installation, the benefits of adding a white wood panel ceiling to your space are hard to beat.

White Drop Ceiling Tiles: Enhancing Your Space with Style and Functionality

Drop ceiling tiles, also known as suspended ceilings, have been a popular choice for commercial and residential spaces for decades. They offer a simple way to cover unsightly wires, pipes, and ductwork while providing easy access for repairs. Among the many options available, white drop ceiling tiles stand out as one of the most versatile and aesthetically pleasing choices for modern interiors.

White Drop Ceiling Tiles

In this article, we will explore everything you need to know about white drop ceiling tiles, including their benefits, different styles, installation process, and maintenance tips. Whether you’re renovating your home, office, or any other space, this guide will help you understand why white drop ceiling tiles might be the perfect solution for you.

What Are White Drop Ceiling Tiles?

White drop ceiling tiles are lightweight panels typically made of materials such as mineral fiber, gypsum, metal, or vinyl. These tiles are suspended from the actual ceiling using a metal grid system. The tiles rest inside the grid, creating a false ceiling that hides utilities like electrical wiring or air ducts while maintaining a clean and organized appearance.

Read too: Exploring the Innovation and Efficiency of Ceiling Mounted Surgical Light Solutions: Illuminating Precision

White is the most common color for drop ceiling tiles, as it reflects light well, making spaces appear brighter and more open. Whether used in an office, retail store, basement, or kitchen, white drop ceiling tiles provide a neutral, minimalist look that complements virtually any décor.

Benefits of White Drop Ceiling Tiles

There are several reasons why white drop ceiling tiles have remained a popular choice for both commercial and residential properties. Below are some key benefits that make them a preferred option for many people:

1. Enhanced Aesthetic Appeal

White drop ceiling tiles offer a clean, streamlined appearance that enhances the overall look of any room. Their smooth, bright surface can make a room feel more spacious, which is especially important in areas with lower ceilings. In addition, the neutral color of white tiles can easily blend with a wide range of design schemes, from modern to traditional.

2. Light Reflection

One of the main advantages of using white tiles in a ceiling is their ability to reflect light. This can help reduce the need for additional lighting fixtures, making spaces appear brighter without consuming more energy. White drop ceiling tiles are ideal for offices, retail stores, and basements where natural light might be limited.

3. Sound Absorption

Many white drop ceiling tiles are designed to absorb sound, which is especially beneficial in noisy environments like open-plan offices or large conference rooms. These tiles help reduce echo and background noise, creating a more comfortable environment for conversations and work.

4. Easy Access for Maintenance

One of the greatest advantages of using drop ceiling tiles is the easy access they provide to important building systems. By simply lifting the tiles, you can access pipes, electrical wiring, and HVAC ducts for repairs or maintenance. This makes them an excellent choice for commercial buildings, where regular access to these systems is often required.

5. Concealment of Utilities

White drop ceiling tiles offer an elegant solution for hiding unsightly utilities like exposed wires, pipes, and ductwork. Instead of dealing with the messy appearance of these elements, drop ceiling tiles create a smooth and seamless surface, improving the room’s overall appearance.

6. Cost-Effective

Compared to other ceiling options, drop ceilings are relatively affordable. The installation process is quick and simple, reducing labor costs. Additionally, white drop ceiling tiles are available in a variety of price points, allowing you to find a solution that fits your budget without sacrificing quality.

Types of White Drop Ceiling Tiles

When choosing white drop ceiling tiles, it’s essential to understand that they come in various materials, designs, and finishes. Each type of tile offers unique features, so selecting the right one for your specific needs can make all the difference.

1. Mineral Fiber Tiles

Mineral fiber tiles are one of the most common types of drop ceiling tiles. Made from natural and synthetic materials, they are lightweight, affordable, and offer excellent sound absorption properties. These tiles are ideal for offices, classrooms, and other spaces where controlling noise levels is essential.

2. Gypsum Ceiling Tiles

Gypsum tiles are another popular option for white drop ceilings. Known for their durability and fire-resistant properties, they are a great choice for both commercial and residential spaces. Gypsum tiles tend to have a more solid and smoother surface compared to mineral fiber tiles, offering a polished look that works well in modern interiors.

3. Vinyl or PVC Tiles

Vinyl tiles are often used in areas with high moisture levels, such as basements, kitchens, or bathrooms. These tiles are water-resistant and easy to clean, making them a practical solution for spaces that require frequent maintenance. They come in a wide range of textures and patterns, adding more design flexibility.

4. Metal Ceiling Tiles

For a more industrial or contemporary look, metal ceiling tiles are an excellent choice. Metal tiles are incredibly durable, resistant to moisture and damage, and provide a sleek, modern appearance. While metal tiles can be more expensive than other materials, they offer a distinct aesthetic that works well in trendy commercial spaces or loft-style homes.

5. Acoustic Ceiling Tiles

Acoustic tiles are specifically designed to reduce noise levels in a room. They are often made from mineral fibers and feature perforations or patterns that enhance their sound-absorbing capabilities. These tiles are commonly used in theaters, offices, and music studios to improve acoustics.

How to Install White Drop Ceiling Tiles

Installing white drop ceiling tile is a relatively straightforward process, especially for DIY enthusiasts. Below is a step-by-step guide to help you install drop ceiling tiles in your home or office:

Step 1: Measure the Room

Begin by measuring the dimensions of the room to determine how many tiles and how much grid material you will need. It’s essential to account for any fixtures or obstacles in the ceiling, such as lights or vents, which may require adjustments to the grid layout.

Step 2: Install the Wall Angles

The next step is to install wall angles around the perimeter of the room. These angles serve as the support for the edges of the ceiling grid. Use a level to ensure the angles are straight, and secure them to the wall with screws or nails.

Step 3: Assemble the Grid

Once the wall angles are in place, assemble the metal grid that will hold the tiles. The grid consists of main runners, cross tees, and connectors. Follow the manufacturer’s instructions for assembling the grid, ensuring that it is level and properly aligned.

Step 4: Cut and Install the Tiles

If needed, cut the white drop ceiling tiles to fit around obstacles or along the edges of the room. Use a sharp utility knife to make clean cuts. Once the tiles are cut to size, simply drop them into place within the grid. Be careful not to damage the edges of the tiles during installation.

Step 5: Add Lighting or Fixtures

If you’re installing lights, fans, or other fixtures, ensure they are properly supported by the ceiling grid. You may need to reinforce certain sections of the grid to accommodate heavier fixtures.

Maintenance Tips for White Drop Ceiling Tiles

Maintaining your white drop ceiling tiles is essential to keep them looking clean and fresh for years to come. Here are some tips to ensure their longevity:

1. Regular Dusting

Over time, ceiling tiles can accumulate dust and dirt, especially in commercial spaces. Regularly dust your tiles using a soft cloth or vacuum with a brush attachment to keep them looking bright.

2. Clean Stains Immediately

If your white drop ceiling tiles become stained, it’s important to clean them as soon as possible. Use a mild detergent mixed with water to gently scrub the stained area. Avoid using harsh chemicals that could damage the surface of the tiles.

3. Replace Damaged Tiles

If a tile becomes cracked or discolored beyond repair, it’s best to replace it with a new one. Fortunately, drop ceiling tiles are easy to remove and replace without disturbing the rest of the ceiling.

4. Inspect for Moisture Issues

If you notice discoloration or sagging in your ceiling tiles, it could indicate a moisture problem above the ceiling. Inspect the area for leaks, and address any plumbing or roof issues promptly to prevent further damage.

Conclusion

White drop ceiling tile offer a practical and stylish solution for covering unsightly ceilings while providing easy access to utilities. Their ability to brighten up a space, combined with their sound-absorbing properties, makes them an excellent choice for both residential and commercial applications. With a wide range of materials, textures, and styles available, you can find the perfect white drop ceiling tile to suit your needs.

Whether you’re looking to improve the acoustics in your office, create a clean look in your basement, or hide imperfections in your ceiling, white drop ceiling tile provide a cost-effective and versatile option. By following proper installation and maintenance practices, you can enjoy a beautiful and functional ceiling for years to come.

Termite Tubes Hanging From Ceiling: What It Means and How to Handle It

Termites are notorious for causing extensive damage to homes and buildings, often going unnoticed until the problem becomes severe. One of the most alarming signs that termites may be present in your home is the discovery of termite tubes hanging from the ceiling. These mud tubes can indicate an infestation that has reached critical levels, requiring immediate action.

Termite Tubes Hanging From Ceiling

In this article, we’ll delve into what termite tubes are, why they form on ceilings, how to identify them, and most importantly, how to treat and prevent termite infestations. By understanding the behavior of termites and recognizing the signs early, you can protect your home from costly damage.

Read too: Exploring the Innovation and Efficiency of Ceiling Mounted Surgical Light Solutions: Illuminating Precision

What Are Termite Tubes?

Termite tubes, also known as mud tubes or shelter tubes, are tunnels constructed by termites to protect themselves from predators and maintain moisture as they travel between their food source and the soil. These tubes are typically made from a mixture of soil, wood fibers, and saliva. Termites build them to shield their soft, pale bodies from the outside environment, as they are highly sensitive to light and air.

Termite tubes can appear on walls, foundations, and ceilings, and are one of the most obvious signs of termite activity. These tubes act as passageways for termites, allowing them to move from the ground into your home, where they can feed on wooden structures.

Why Are There Termite Tubes Hanging From the Ceiling?

While termite tubes are most commonly found on walls and near the foundation of a home, termite tubes hanging from the ceiling can be a particularly worrisome sign. This typically happens when termites have infested the structural wood in the upper parts of your home, including the ceiling joists, rafters, or attic space. Here’s why termite tubes might appear on your ceiling:

1. Extensive Infestation

If termite tubes are visible on the ceiling, it usually means the infestation is advanced. Termites have likely been feeding on the wood in your home for an extended period, weakening the structure. The tubes on the ceiling indicate that the termites are seeking new food sources or trying to expand their colony.

2. Drywood Termites

While subterranean termites are the most common species responsible for mud tubes, drywood termites can also create infestations in upper areas of the home, such as ceilings. Unlike subterranean termites, drywood termites don’t need contact with the soil and can live entirely within the wooden structures of your home. The appearance of tubes in the ceiling may indicate that drywood termites are present, feeding on the wood framing in your attic or upper floors.

3. Moisture Problems

Termites thrive in moist environments. If there’s a leak in your roof or ceiling that has gone unnoticed, it could create the perfect conditions for termites to build their colonies. Moist wood is easier for termites to chew through, and if the problem persists, the termites will continue to expand their presence, leading to visible tubes on the ceiling.

4. Looking for New Food Sources

Termites may create tubes hanging from the ceiling if they are searching for new sources of cellulose (the primary component of wood). The tubes allow them to explore different areas of the home while staying protected. The presence of these tubes means that termites are already well-established in the walls and ceiling of your home.

How to Identify Termite Tubes Hanging From Ceiling

Spotting termite tubes hanging from the ceiling is a clear indication of an infestation, but how do you know for sure that what you’re seeing is caused by termites? Here are some tips for identifying termite mud tubes:

1. Shape and Size

Termite tubes are typically thin and cylindrical, about the width of a pencil. They can extend several feet in length, running from the floor to the ceiling, across walls, or hanging down from the ceiling itself. If you see any tube-like structures hanging from your ceiling, it’s worth investigating further.

2. Texture

Termite mud tubes are usually rough and made from a combination of dirt, wood particles, and termite saliva. If you touch the tube, it will feel gritty or sandy. The surface of the tube may look cracked or uneven, as termites are constantly building and expanding their tunnels.

3. Location

Termite tubes on ceilings are more common in areas where moisture is present, such as near plumbing fixtures, bathrooms, kitchens, and areas of the roof where water may be pooling. However, they can also appear in attics and other parts of the home where termites have access to wood.

4. Break Open the Tube

If you’re unsure whether the tube is active, carefully break it open. If the infestation is current, you may see live termites inside the tube, which can be a clear sign that immediate treatment is needed. Even if no termites are present, a fresh tube that hasn’t crumbled or dried out may still indicate an active colony nearby.

What to Do If You Find Termite Tubes Hanging From Your Ceiling

Discovering termite tubes hanging from the ceiling is certainly alarming, but it’s important to act quickly to minimize damage. Here’s what you should do if you encounter this sign of infestation:

1. Contact a Professional Pest Control Company

The first step is to contact a professional pest control company that specializes in termite infestations. Termites can cause significant structural damage, and handling the problem yourself may not be enough to fully eradicate the infestation. A licensed pest control expert can inspect your home, assess the severity of the infestation, and develop a treatment plan.

2. Treat the Infestation

Once a professional has confirmed the presence of termites, they will likely recommend a treatment option. Some common methods for treating termites include:

  • Liquid Termiticides: These are chemicals that are applied to the soil around your home or directly to infested areas. They create a barrier that prevents termites from entering your home and kills any termites that come into contact with it.
  • Bait Stations: Termite bait stations are placed around the perimeter of your home. The bait attracts termites, which then carry the toxic substance back to their colony, ultimately killing the entire colony.
  • Fumigation: In severe cases, fumigation may be required. This involves sealing off the entire home and filling it with a gas that kills termites. While highly effective, fumigation can be disruptive, and you’ll need to vacate your home during the process.

3. Address Moisture Issues

Since termites are attracted to moisture, it’s crucial to address any leaks or water damage in your home. Fixing roof leaks, ensuring proper drainage, and repairing any broken pipes can make your home less hospitable to termites.

4. Inspect Your Home Regularly

After treatment, regular inspections can help ensure that termites don’t return. Even after an infestation has been treated, termites can re-enter your home if preventive measures aren’t taken. A professional can provide ongoing monitoring to detect any new termite activity before it becomes a problem again.

Preventing Termite Infestations

While termite infestations can be costly and damaging, there are steps you can take to prevent them from occurring in the first place. By following these preventive measures, you can reduce the risk of seeing termite tubes hanging from your ceiling.

1. Maintain Proper Ventilation

Moisture attracts termites, so it’s essential to maintain good ventilation in your home. Use dehumidifiers in damp areas like basements or crawl spaces, and ensure that attics and other spaces are well-ventilated to prevent moisture buildup.

2. Remove Wood Debris

If there are piles of wood, mulch, or other organic materials near your home, they can serve as a food source for termites. Keep your yard clear of wood debris and ensure that firewood is stored away from your home’s foundation.

3. Use Termite-Resistant Materials

When building or renovating, consider using termite-resistant building materials such as treated wood or metal. These materials can help reduce the risk of termite infestations in the future.

4. Regular Inspections

Annual termite inspections by a licensed pest control professional are one of the best ways to catch a termite problem early. They can identify signs of termites before they cause significant damage and recommend preventive treatments to protect your home.

Conclusion

Finding termite tubes hanging from the ceiling is a serious warning sign of a termite infestation that requires immediate attention. These tubes indicate that termites have infiltrated your home’s structure, possibly causing significant damage. By identifying the signs of termites early and taking swift action, you can prevent further destruction and safeguard your property.

Contacting a pest control professional, addressing moisture issues, and taking preventive measures can all help in managing termite infestations. Don’t wait until the damage becomes too severe—regular inspections and early detection are key to protecting your home from these destructive pests.

Modern Drop Ceiling Lighting: Elevating Your Space with Style and Functionality

Modern interior design is all about blending aesthetics with functionality, and one of the key elements in achieving this is the lighting you choose for your home or office. Modern Drop Ceiling Lighting has become increasingly popular in recent years due to its sleek design and ability to enhance the ambiance of a space. Whether you’re remodeling a room, designing a new office, or simply upgrading your home lighting, drop ceiling lighting offers versatile and stylish options that suit various design preferences.

Modern Drop Ceiling Lighting

In this comprehensive guide, we’ll explore the different types of modern drop ceilings lighting, their benefits, installation considerations, and how they can transform the look and feel of any room. Whether you’re a homeowner looking to refresh your living space or a business owner hoping to improve the atmosphere of your office, modern drop ceiling lighting can offer the perfect solution.

What Is Modern Drop Ceiling Lighting?

Modern drop ceiling lighting refers to lighting fixtures that are installed in or alongside a suspended (or drop) ceiling, which is a secondary ceiling hung below the main structural ceiling. Drop ceilings, also known as suspended ceilings, are common in commercial spaces but are increasingly being used in residential settings due to their practicality and design potential.

Drop ceilings are composed of a grid system that holds individual tiles, allowing for easy installation of lighting, HVAC systems, and other utilities. Modern drop ceiling lighting takes advantage of this setup, offering a range of fixtures that fit seamlessly into the ceiling grid while providing both functionality and a modern aesthetic.

Read too: Exploring the Innovation and Efficiency of Ceiling Mounted Surgical Light Solutions: Illuminating Precision

Benefits of Modern Drop Ceiling Lighting

1. Sleek and Minimalist Design

One of the main appeals of Modern Drop Ceiling Lighting is its ability to create a sleek, minimalist look. In modern design, simplicity and clean lines are highly valued, and drop ceiling lighting delivers just that. The lights are often recessed or flush with the ceiling, reducing visual clutter and making the room feel more open and airy.

2. Improved Lighting Control

With modern drop ceiling lighting, you have greater control over the lighting distribution in your space. Depending on the type of fixture you choose, you can direct light precisely where it’s needed, whether that’s over a workspace, a dining table, or an entertainment area. This helps create a more functional and comfortable environment, especially in rooms where proper lighting is essential.

3. Energy Efficiency

Many modern drop ceiling lighting solutions use LED technology, which is significantly more energy-efficient than traditional incandescent or fluorescent lights. LED lights not only consume less power but also have a longer lifespan, meaning fewer replacements and lower energy bills over time. Given the emphasis on sustainability in modern design, energy-efficient lighting is a perfect match.

4. Versatility

Modern drop ceiling lighting comes in a wide variety of styles, sizes, and configurations, making it versatile enough to fit any room or design theme. Whether you’re looking for soft ambient lighting or bright task lighting, there’s a drop ceiling fixture to suit your needs. It’s also a great option for multi-purpose spaces, such as home offices that double as guest rooms.

5. Easy Maintenance

Since drop ceiling lighting fixtures are often modular, they are easy to replace or maintain. If a light fixture or tile needs to be changed, it can be done quickly without disrupting the entire ceiling structure. This is particularly beneficial in commercial or office spaces, where time and convenience are important factors.

Types of Modern Drop Ceiling Lighting

There are several different types of modern drop ceiling lighting to choose from, each with its own benefits and ideal applications. Let’s take a closer look at some of the most popular options.

1. Recessed Lighting

Recessed lighting, also known as can lights or downlights, is one of the most popular options for Modern Drop Ceiling Lighting. These lights are installed into the ceiling itself, creating a flush and streamlined appearance. Recessed lights work well for general lighting, task lighting, and even accent lighting, depending on their placement and brightness level.

The minimalistic look of recessed lighting makes it perfect for modern, minimalist interiors. It provides uniform illumination without taking up visual space, which can make rooms feel larger and less cluttered.

2. LED Panel Lights

LED panel lights are another excellent choice for drop ceilings, especially in offices or commercial environments. These large, flat fixtures fit directly into the ceiling grid and provide bright, even illumination across a wide area. Modern Drop Ceiling Lighting with LED panels is highly energy-efficient and offers a sleek, modern look that works well in spaces that require a lot of light, such as conference rooms or retail stores.

3. Track Lighting

Track lighting is a more flexible option that can be used with drop ceilings. This type of lighting involves a series of light fixtures attached to a track, which can be mounted on the ceiling grid. The direction of the lights can be adjusted, making track lighting ideal for areas where you want to highlight specific features, such as artwork or architectural elements.

Track lighting also adds a contemporary feel to any room, making it a favorite choice for modern homes and galleries.

4. Pendant Lighting

Pendant lights are a stylish option that can add a touch of elegance to any room. While pendant lights are often associated with traditional ceilings, they can be installed in a drop ceiling with the right adjustments. Pendants hang from the ceiling, making them great for creating a focal point above a kitchen island, dining table, or seating area.

For a modern twist, choose sleek pendant lights with minimalist designs or geometric shapes. These can enhance the overall look of the room while providing targeted lighting.

5. Cove Lighting

Cove lighting is an indirect lighting option that creates a soft, ambient glow by hiding light fixtures along the perimeter of a drop ceiling. This type of lighting is often used in living rooms, bedrooms, and other spaces where a relaxed and cozy atmosphere is desired.

Modern cove lighting typically uses LED strips, which are energy-efficient and can change color to suit different moods or times of day. It’s an excellent way to add a modern touch without overwhelming the space with bright, direct lighting.

Installing Modern Drop Ceiling Lighting

The installation process for modern drop ceiling lighting is relatively straightforward, but it does require careful planning and execution. Here are some key steps to keep in mind when installing drop ceiling lights.

1. Plan the Layout

Before installing any lighting fixtures, it’s essential to plan out the layout. Consider where you need the most light and how the fixtures will be spaced throughout the room. If you’re working with recessed lights, for example, you may want to position them in a grid to ensure even illumination across the entire space.

2. Choose the Right Fixtures

Once you have a layout in mind, select the appropriate fixtures for your needs. For task lighting, such as in a kitchen or office, brighter lights like LED panels or recessed lighting might be ideal. For accent lighting or to create a more relaxed ambiance, consider cove lighting or pendants.

3. Hire a Professional

While some homeowners may be comfortable with basic lighting installation, modern drop ceiling lighting is best handled by a professional. Electricians with experience in ceiling lighting can ensure that everything is installed correctly and safely, especially when working with recessed lighting or wiring in a suspended ceiling.

4. Test the Lighting

Once the fixtures are installed, test them out to ensure everything is working properly and providing the desired amount of light. Adjust the direction or brightness as needed, especially if you’re using adjustable fixtures like track lighting.

How Modern Drop Ceiling Lighting Can Enhance Different Spaces

Modern Drop Ceiling Lighting is highly adaptable, making it suitable for various spaces throughout your home or office. Here are some common areas where drop ceiling lighting can make a big impact.

Living Room

In the living room, modern drop ceiling lighting can create a warm, inviting atmosphere. Recessed lights paired with cove lighting can provide general illumination, while pendant lights can be used to highlight key areas, such as above a coffee table or seating arrangement.

Kitchen

Kitchens benefit from bright, functional lighting, and drop ceiling fixtures like LED panels or recessed lighting work perfectly in this space. These options provide ample light for cooking, cleaning, and other tasks. Adding pendant lights over an island or breakfast bar can also create an appealing focal point.

Office Spaces

In both home offices and commercial workspaces, drop ceiling lighting is essential for productivity. LED panels and track lighting are ideal choices, offering bright, energy-efficient illumination that reduces eye strain and enhances focus.

Bedroom

For bedrooms, softer lighting is often preferred. Cove lighting, combined with recessed lights, can create a calming ambiance that’s perfect for winding down at the end of the day. You can even incorporate dimmers to adjust the brightness based on your needs.

Conclusion

In conclusion, Modern Drop Ceiling Lighting offers a versatile, stylish, and functional solution for enhancing any space. Whether you’re looking to brighten up your kitchen, living room, or office, the wide range of lighting options available ensures you’ll find the perfect fit for your design needs. With energy-efficient LED technology, customizable layouts, and sleek, modern fixtures, drop ceiling lighting is the ideal choice for any contemporary interior.

By planning the layout carefully and selecting the right fixtures, you can create a well-lit space that’s both practical and visually appealing. Don’t hesitate to hire a professional for the installation process to ensure the best results and a seamless integration with your existing ceiling.