Ceiling Mounted Cord Reel: Maximizing Space and Efficiency

In any workspace, whether it’s a garage, workshop, or office, managing cords and cables can be a challenge. Tangled cords not only look messy but also pose safety hazards and reduce productivity. That’s where a ceiling mounted cord reel comes in. In this guide, we’ll explore the benefits of using a ceiling mounted cord reel, how it works, and why it’s a must-have accessory for any organized and efficient workspace.

Ceiling Mounted Cord Reel

Understanding

A ceiling mounted cord reel is a device designed to store and manage electrical cords and cables overhead. It typically consists of a retractable reel mechanism mounted on the ceiling, along with a length of cord or cable wound around it. The user can easily pull down the desired length of cord when needed and retract it back into the reel when not in use, keeping the workspace tidy and clutter-free.

How Ceiling Mounted Cord Reels Work

Ceiling mounted cord reels operate using a spring-loaded mechanism that allows the cord to retract automatically when released. Typically, you would mount the reel on the ceiling using screws or brackets, and then feed the cord through a guide or pulley system to ensure smooth operation. Some cord reels may also feature a locking mechanism to secure the cord at the desired length and prevent it from retracting unintentionally.

Benefits of Ceiling Mounted Cord Reels

  1. Maximized Space: By storing cords and cables overhead, ceiling mounted cord reels help free up valuable floor and countertop space, allowing for better organization and efficiency in the workspace.
  2. Improved Safety: Tangled cords and cables present tripping hazards and increase the risk of accidents in the workplace. With a ceiling mounted cord reels, cords are neatly stored out of the way, reducing the risk of slips, trips, and falls.
  3. Enhanced Productivity: With cords and cables easily accessible and neatly stored, workers can quickly locate and use the tools and equipment they need, leading to increased productivity and efficiency on the job.
  4. Extended Cord Life: Constant bending, twisting, and tangling can cause cords to wear out prematurely. By keeping cords neatly wound on a reel, ceiling mounted cord reels help extend the life of the cord, saving time and money on replacements.

Choosing the Right Ceiling Mounted Cord Reel

When selecting a ceiling mounted cord reel for your workspace, consider the following factors:

  1. Cord Length and Gauge: Choose a cord reel with a length and gauge appropriate for your specific needs. Consider the types of tools and equipment you’ll be using and the distance from the power source to determine the ideal cord length and gauge.
  2. Mounting Options: Evaluate the mounting options available for ceiling mounted cord reels, including ceiling joist mounting, wall mounting, and hanging mounting, to find the best fit for your workspace.
  3. Retraction Mechanism: Look for cord reels with a reliable and smooth retraction mechanism to ensure hassle-free operation and longevity.
  4. Additional Features: Consider any additional features or accessories you may need, such as built-in power outlets, surge protection, or cord locks, to customize your cord reel to suit your specific requirements.

Conclusion

A ceiling mounted cord reels is a simple yet effective solution for managing cords and cables in any workspace. By keeping cords neatly stored overhead, these versatile devices help maximize space, improve safety, and enhance productivity. Invest in a ceiling mounted cord reels today and experience the benefits of a clutter-free and organized workspace.

Read too: Exploring the Efficiency of Radiant Ceiling Heater Electric: A Comprehensive Guide

Exploring the Benefits of Installing a Ceiling Mount Smoke Eater in Your Home or Business

In today’s world, indoor air quality is more important than ever. Whether you’re at home, in the office, or in a public space, the air you breathe can have a significant impact on your health and well-being. One effective solution for improving indoor air quality is to install a ceiling mount smoke eater. In this comprehensive guide, we’ll explore the benefits of ceiling mount smoke eaters, how they work, and why they’re an essential addition to any indoor environment.

Ceiling Mount Smoke Eater

Understanding

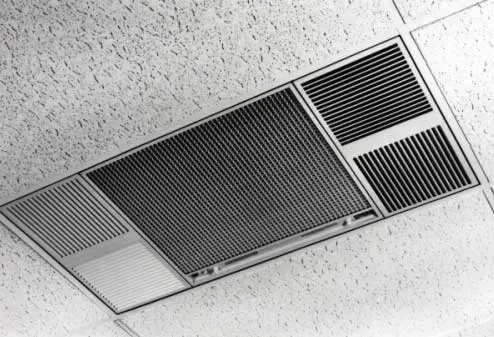
A ceiling mount smoke eater, also known as a ceiling-mounted air purifier or smoke extractor, is a device designed to remove airborne contaminants such as smoke, dust, pollen, pet dander, and other pollutants from the air. These units are typically installed directly onto the ceiling, where they can effectively capture and filter out harmful particles, leaving behind clean, fresh air.

How Ceiling Mount Smoke Eaters Work

Ceiling mount smoke eaters operate using a combination of filtration technologies to remove airborne contaminants from the air. These technologies may include:

  1. HEPA Filtration: High-efficiency particulate air (HEPA) filters are capable of capturing particles as small as 0.3 microns in size, including smoke, dust, and pollen. HEPA filters are highly effective at removing a wide range of airborne pollutants, making them an essential component of any smoke eater system.
  2. Activated Carbon Filtration: Activated carbon filters actively adsorb and neutralize odors, gases, and volatile organic compounds (VOCs) present in the air. By trapping these contaminants within the porous structure of the carbon filter, activated carbon filtration helps eliminate unpleasant odors and improve indoor air quality.
  3. UV-C Light Sterilization: Some ceiling mount smoke eaters incorporate ultraviolet (UV) germicidal irradiation technology to disinfect and sterilize the air. UV-C light is capable of destroying bacteria, viruses, and other microorganisms, reducing the spread of airborne pathogens and promoting a healthier indoor environment.

Benefits of Ceiling Mount Smoke Eaters

  1. Improved Air Quality: By effectively removing smoke, dust, allergens, and other pollutants from the air, ceiling mount smoke eaters help create a cleaner and healthier indoor environment for occupants.
  2. Odor Elimination: Smoke eaters equipped with activated carbon filtration are highly effective at neutralizing odors from tobacco smoke, cooking fumes, pet odors, and more, leaving behind fresh, odor-free air.
  3. Reduced Health Risks: Poor indoor air quality can contribute to a variety of health problems, including respiratory issues, allergies, and asthma. By removing harmful airborne contaminants, ceiling mount smoke eaters can help reduce the risk of respiratory problems and other health issues associated with indoor air pollution.
  4. Enhanced Comfort: Clean, fresh air is essential for maintaining comfort and productivity in indoor environments. Ceiling mount smoke eaters help create a more comfortable and enjoyable space for occupants by ensuring optimal air quality at all times.

Choosing the Right Ceiling Mount Smoke Eater

When selecting a ceiling mount smoke eater for your home or business, consider the following factors:

  1. Airflow Capacity: Choose a smoke eater with sufficient airflow capacity to effectively clean the air in your space. Consider factors such as room size, ceiling height, and the number of occupants when determining the appropriate airflow capacity for your needs.
  2. Filtration Efficiency: Look for smoke eaters equipped with HEPA filtration and activated carbon filtration for maximum effectiveness in removing smoke, odors, and other airborne pollutants.
  3. Noise Level: Consider the noise level of the smoke eater, especially if it will be installed in a residential or commercial space where quiet operation is desired.
  4. Installation Options: Evaluate the installation requirements and options for ceiling mount smoke eaters to ensure compatibility with your space and existing HVAC system.

Conclusion

Ceiling mount smoke eaters offer an effective solution for improving indoor air quality and creating a healthier, more comfortable indoor environment. By removing smoke, odors, and other airborne contaminants, these devices help ensure clean, fresh air for occupants to breathe. Invest in a ceiling mount smoke eater today and enjoy the benefits of cleaner air in your home or business.

Read too: Exploring the Efficiency of Radiant Ceiling Heater Electric: A Comprehensive Guide

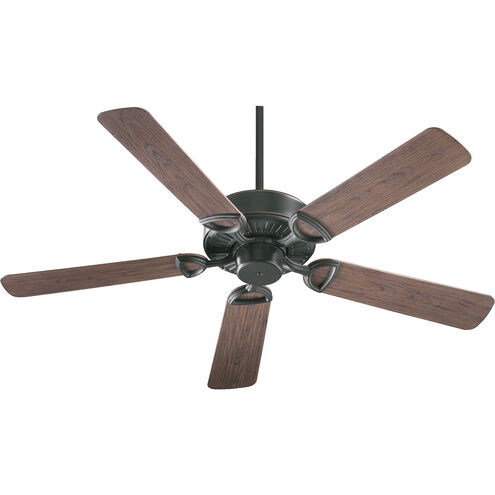
Exploring the Best Ceiling Fans in Naples, FL: Enhance Your Home Comfort

When it comes to staying comfortable in the warm climate of Naples, FL, ceiling fans are a must-have addition to any home. In this comprehensive guide, we’ll explore the benefits of installing ceiling fans in Naples, FL, and highlight some of the best options available to help you beat the heat and enhance your home decor.

Ceiling Fans Naples Fl

Why Choose Ceiling Fans in Naples, FL

Naples, FL, is known for its tropical climate, with hot and humid weather prevalent throughout much of the year. Ceiling fans offer a cost-effective and energy-efficient way to stay cool and comfortable, providing a gentle breeze and helping to circulate air in your home. Whether you’re relaxing in the living room, cooking in the kitchen, or unwinding in the bedroom, ceiling fans can make a significant difference in your overall comfort level.

Benefits

  1. Energy Efficiency: Ceiling fans use significantly less energy than air conditioning systems, helping you reduce your energy consumption and lower your utility bills. By using ceiling fans to supplement your AC, you can maintain a comfortable temperature in your home while saving money on cooling costs.
  2. Improved Air Circulation: In addition to providing cooling benefits, ceiling fans help improve air circulation throughout your home. This can help alleviate stuffiness and reduce the risk of indoor air pollutants building up, promoting a healthier living environment for you and your family.
  3. Year-Round Comfort: While ceiling fans are often associated with cooling, many models are equipped with a reverse function that allows them to operate in reverse during the winter months. By running your ceiling fan in reverse at a low speed, you can help distribute warm air evenly throughout the room, improving overall comfort and reducing heating costs.
  4. Enhanced Home Decor: Ceiling fans come in a wide range of styles, sizes, and finishes, allowing you to find the perfect option to complement your home decor. Whether you prefer a sleek and modern look or a more traditional design, there’s a ceiling fan to suit your taste and aesthetic preferences.

Choosing the Right Ceiling Fan in Naples, FL

When selecting a ceiling fan for your home in Naples, FL, consider the following factors:

  1. Size: Choose a ceiling fan with an appropriate blade span for the size of your room. Larger rooms may require fans with longer blades to provide adequate air circulation, while smaller rooms can be effectively cooled with smaller fans.
  2. Style: Select a fan style that complements your home decor and personal taste. Options range from classic and traditional to contemporary and tropical, allowing you to find the perfect match for your interior design aesthetic.
  3. Features: Look for ceiling fans with desirable features such as adjustable speeds, reversible motor functions, integrated lighting, and remote control operation. These features can enhance convenience and functionality while ensuring optimal performance.
  4. Quality: Invest in a high-quality ceiling fan from a reputable manufacturer to ensure durability, reliability, and long-lasting performance. Quality construction and materials will help your fan withstand the rigors of daily use and maintain its appearance and functionality for years to come.

Top Ceiling Fans in Naples, FL

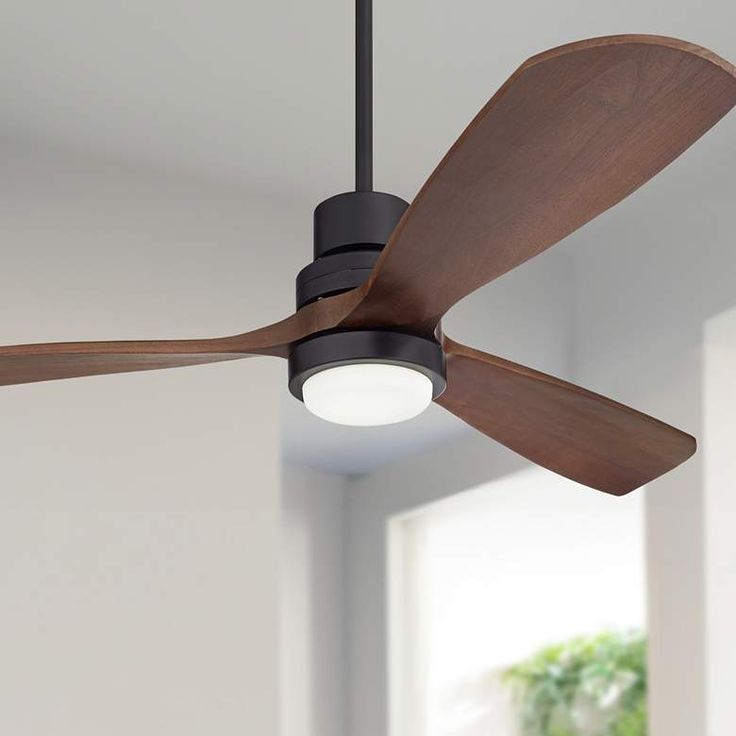
  1. Hunter Key Biscayne Ceiling Fan: This stylish ceiling fan features a tropical design with palm leaf blades, perfect for adding a touch of coastal charm to your Naples home.
  2. Emerson Carrera Grande Eco Ceiling Fan: With its energy-efficient DC motor and sleek contemporary design, this ceiling fan offers both style and performance for modern living spaces.
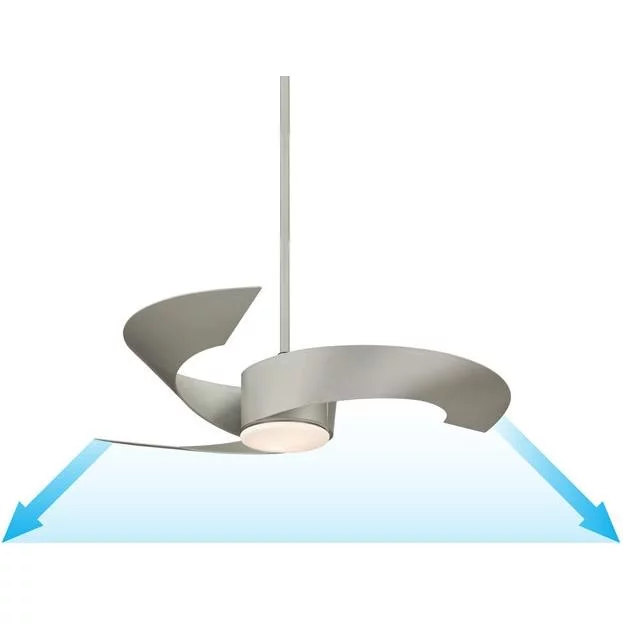
  3. Minka-Aire Artemis Ceiling Fan: The unique design of this ceiling fan, featuring aerodynamic blades and integrated LED lighting, makes it a stunning focal point in any room.

Conclusion

Ceiling fans are an essential addition to any home in Naples, FL, offering energy-efficient cooling, improved air circulation, and enhanced comfort year-round. With a wide range of styles and features to choose from, finding the perfect ceiling fan to complement your home decor and lifestyle is easier than ever. Invest in a quality ceiling fan today and enjoy the benefits of a cooler, more comfortable home in Naples, FL.

Read too: Exploring the Efficiency of Radiant Ceiling Heater Electric: A Comprehensive Guide

Stylish Canopy Kit for Ceiling Light: Enhance Your Lighting Fixture

A canopy kit for ceiling light is a simple yet effective accessory that can elevate the appearance of your lighting fixture while providing added functionality. In this comprehensive guide, we’ll explore the benefits of using a canopy kit, discuss its components and installation process, and offer creative ideas for incorporating it into your home décor.

Canopy Kit For Ceiling Light

Understanding Canopy Kits for Ceiling Lights

A canopy kit for ceiling light is a decorative cover that conceals the electrical box and wiring used to mount a light fixture to the ceiling. It typically consists of a metal or plastic canopy, mounting hardware, and decorative elements such as finials or medallions. Canopy kits come in a variety of sizes, shapes, and finishes to complement different types of light fixtures and interior styles.

Benefits of Using a Canopy Kit for Ceiling Light

  1. Enhanced Aesthetics: A canopy kit adds a polished finishing touch to your ceiling light, covering unsightly electrical components and creating a seamless transition between the fixture and the ceiling. With various designs and finishes available, you can choose a canopy kit that complements your décor and enhances the overall aesthetic appeal of the room.
  2. Improved Safety: By concealing the electrical box and wiring, a canopy kit helps protect against accidental contact and reduces the risk of electrical hazards. This is especially important in homes with high ceilings or exposed wiring, where safety is a top priority.
  3. Easy Installation: Canopy kits are designed for easy installation, typically requiring just a few basic tools and minimal electrical knowledge. Most kits come with detailed instructions, making it simple for homeowners to upgrade their lighting fixtures without professional assistance.
  4. Versatile Design Options: Whether you prefer a sleek and minimalist look or a more ornate and decorative style, there’s a canopy kit available to suit your taste. From classic metal finishes like brushed nickel and oil-rubbed bronze to modern options like matte black and polished chrome, the possibilities are endless.

Components of a Canopy Kit for Ceiling Light

A typical canopy kit for ceiling light consists of the following components:

  1. Canopy: The main component of the kit, the canopy is a cover that attaches to the ceiling and conceals the electrical box and wiring. It may have a flat or domed shape, depending on the design preference.
  2. Mounting Hardware: The kit includes screws, bolts, or other mounting hardware to secure the canopy to the ceiling and attach it to the electrical box.
  3. Decorative Elements: Some canopy kits come with decorative elements such as finials, medallions, or decorative nuts to add visual interest and enhance the overall appearance of the fixture.

Installation Process

Installing a canopy kit for ceiling light is a straightforward process that can be completed in a few simple steps:

  1. Turn Off Power: Before beginning any electrical work, turn off the power to the existing light fixture at the circuit breaker or fuse box.
  2. Remove Existing Fixture: Unscrew the existing light fixture from the ceiling and disconnect the wiring. Remove any mounting hardware or decorative elements attached to the fixture.
  3. Attach Canopy: Position the canopy over the electrical box, ensuring that it covers the wiring and fits securely against the ceiling. Use the provided mounting hardware to secure the canopy in place.
  4. Connect Wiring: Connect the wiring from the electrical box to the corresponding wires on the new light fixture according to the manufacturer’s instructions. Use wire nuts to secure the connections and tuck any excess wiring into the electrical box.
  5. Install Fixture: Attach the light fixture to the canopy using the provided hardware, making sure it is level and securely fastened. Install any decorative elements included with the canopy kit.
  6. Test the Fixture: Turn the power back on and test the new light fixture to ensure it is functioning properly. Make any necessary adjustments or repairs as needed.

Creative Ideas for Using Canopy Kits for Ceiling Lights

  1. Kitchen Lighting: Upgrade your kitchen lighting with a stylish canopy kit for ceiling light. Choose a sleek, modern design to complement contemporary kitchen décor or opt for a more traditional style to add warmth and character to the space.
  2. Entryway Lighting: Make a bold statement in your entryway with a decorative canopy kit for ceiling light. Select a design that reflects your personal style and sets the tone for the rest of your home’s interior.
  3. Bedroom Lighting: Create a cozy and inviting atmosphere in your bedroom with a canopy kit for ceiling light. Choose a soft, diffused light fixture for a calming effect or opt for adjustable brightness to suit your needs.

Conclusion

A canopy kit for ceiling light is a versatile and functional accessory that can enhance the appearance and performance of your lighting fixtures. Whether you’re updating an existing fixture or installing a new one, a canopy kit offers numerous benefits, including improved aesthetics, enhanced safety, and easy installation. With a wide range of design options available, you can easily find the perfect canopy kit to complement your décor and illuminate your space with style.

Read too: Exploring the Efficiency of Radiant Ceiling Heater Electric: A Comprehensive Guide

Ceiling Fan with Bamboo Blades: Enhance Your Home Decor

A ceiling fan with bamboo blades is not only a functional cooling solution but also a stylish addition to any home decor. In this comprehensive guide, we’ll explore the features, benefits, and installation tips for ceiling fans with bamboo blades, helping you make an informed decision when choosing the perfect fan for your space.

Ceiling Fan With Bamboo Blades

Understanding Ceiling Fans with Bamboo Blades

Ceiling fans with bamboo blades are designed to provide efficient air circulation while adding a touch of natural elegance to any room. The bamboo blades offer a unique aesthetic appeal, bringing warmth and texture to your ceiling fan while complementing various interior design styles, from tropical and coastal to modern and eco-friendly.

Benefits of Using a Ceiling Fan with Bamboo Blades

  1. Natural Beauty: The bamboo blades of these ceiling fans lend a natural, organic charm to your space, creating a visually pleasing focal point in any room. The unique texture and color variations of bamboo add depth and character to the fan, enhancing the overall aesthetic appeal of your home decor.
  2. Durability: Bamboo is known for its strength and durability, making it an excellent choice for ceiling fan blades. Unlike traditional materials like metal or plastic, bamboo is resistant to warping, cracking, and fading, ensuring that your fan will maintain its beauty and functionality for years to come.
  3. Energy Efficiency: Ceiling fans with bamboo blades are not only stylish but also energy-efficient. By circulating air more effectively, these fans help create a cooling breeze that can reduce the need for air conditioning, ultimately lowering your energy bills and environmental impact.
  4. Quiet Operation: Many ceiling fans with bamboo blades feature high-quality motor systems that operate quietly and efficiently, ensuring a peaceful and comfortable environment in your home. Whether you’re relaxing in the living room or sleeping in the bedroom, you can enjoy the gentle breeze without the distraction of loud fan noise.

Features to Look for in a Ceiling Fan with Bamboo Blades

When shopping for a ceiling fan with bamboo blades, consider the following features to ensure you choose the best option for your needs:

  1. Blade Size and Pitch: Look for a fan with appropriately sized blades and a steep enough pitch to provide effective airflow and cooling performance. The size of the room will dictate the ideal blade span and pitch for optimal air circulation.
  2. Motor Quality: Invest in a fan with a high-quality motor that is powerful, efficient, and reliable. A well-built motor will ensure smooth operation and consistent performance, even after years of use.
  3. Remote Control or Wall Control: Choose a fan with convenient control options, such as a remote control or wall-mounted control panel. This allows you to adjust the fan speed and direction easily, without having to get up from your seat.
  4. Lighting Options: Some ceiling fans come with integrated light fixtures, providing both illumination and air circulation in one convenient package. Consider whether you need a fan with built-in lights or prefer to use separate light fixtures in your space.

Installation Tips for Ceiling Fans with Bamboo Blades

Installing a ceiling fan with bamboo blades is a relatively straightforward process, but it’s essential to follow manufacturer instructions carefully for safety and optimal performance. Here are some installation tips to keep in mind:

  1. Turn Off Power: Before beginning the installation process, turn off the power to the existing ceiling light fixture at the circuit breaker or fuse box.
  2. Gather Tools and Materials: Make sure you have all the necessary tools and materials on hand, including a ladder, screwdriver, wire stripper, and electrical tape.
  3. Follow Instructions: Carefully read the manufacturer’s instructions included with your ceiling fan to ensure proper installation. Pay close attention to wiring diagrams, blade assembly, and safety precautions.
  4. Secure Mounting Bracket: Attach the mounting bracket to the ceiling junction box securely, using the provided screws and hardware. Make sure the bracket is level and stable before proceeding.
  5. Attach Fan Blades: Install the fan blades onto the motor housing according to the manufacturer’s instructions, making sure they are evenly spaced and securely fastened.
  6. Wire Connections: Connect the wiring from the fan motor to the corresponding wires in the ceiling junction box, following the wiring diagram provided. Use wire nuts to secure the connections and electrical tape to cover any exposed wires.
  7. Test Operation: Once the fan is securely mounted and wired, turn the power back on and test the fan’s operation. Make sure it runs smoothly and without any unusual noises or vibrations.

Creative Ideas for Using Ceiling Fans with Bamboo Blades

  1. Tropical Oasis: Create a relaxing tropical oasis in your living room or outdoor patio with a ceiling fan featuring bamboo blades. Pair it with rattan furniture, lush greenery, and earthy accents for a serene and inviting space.
  2. Coastal Retreat: Bring the beach vibes indoors with a coastal-themed bedroom or sunroom adorned with a bamboo-bladed ceiling fan. Incorporate nautical colors, driftwood accents, and seashell decor for a breezy, laid-back atmosphere.
  3. Modern Elegance: Contrary to popular belief, bamboo blades can also complement modern and minimalist interiors. Choose a sleek and streamlined fan design with bamboo blades for a contemporary touch that blends seamlessly with clean lines and neutral color palettes.

Conclusion

A ceiling fan with bamboo blades offers the perfect combination of functionality, style, and sustainability for any home. Whether you’re looking to cool down a room, enhance your home decor, or reduce your energy consumption, these fans are an excellent choice. With their natural beauty, durability, and energy-efficient performance, ceiling fans with bamboo blades are sure to become a stylish and eco-friendly addition to your living space.

Read too: Exploring the Efficiency of Radiant Ceiling Heater Electric: A Comprehensive Guide

Discover the Beauty of 4 Flush Mount Ceiling Light Fixtures: Illuminate Your Space with Style

Are you searching for a lighting solution that combines functionality with elegance? Look no further than 4 Flush Mount Ceiling Light fixtures. In this comprehensive guide, we’ll explore the versatility, features, and installation tips for these sleek and stylish lighting options, perfect for any room in your home or office.

4 Flush Mount Ceiling Light

Exploring 4 Flush Mount Ceiling Light Fixtures: A Perfect Blend of Form and Function

4 Flush Mount Ceiling Light fixtures offer a modern and minimalist lighting solution that seamlessly integrates into any interior decor. With their low-profile design and diffused light output, these fixtures provide ample illumination while adding a touch of sophistication to your space.

Understanding the Features

  • Sleek Design: The flush mount design of these fixtures sits close to the ceiling, creating a clean and streamlined look that complements any room style. Whether you prefer contemporary or traditional decor, 4 Flush Mount Ceiling Light fixtures blend seamlessly into your space.
  • Multiple Light Sources: With four bulbs or LED panels, these fixtures offer ample illumination to brighten up larger rooms or spaces with higher ceilings. The multiple light sources ensure even distribution of light, eliminating dark spots and shadows for a well-lit environment.
  • Energy Efficiency: Many 4 Flush Mount Ceiling Light fixtures come equipped with energy-efficient LED bulbs or panels, helping you save on energy costs while reducing your carbon footprint. Enjoy bright and beautiful lighting without compromising on sustainability.
  • Versatile Applications: From living rooms and bedrooms to kitchens, hallways, and offices, 4 Flush Mount Ceiling Light fixtures are suitable for a wide range of applications. Use them as the primary source of light in a room or as supplemental lighting to enhance ambiance and visual appeal.

Installing 4 Flush Mount Ceiling Light Fixtures: A Step-by-Step Guide

Installing 4 Flush Mount Ceiling Light fixtures is a straightforward process that can be completed in just a few simple steps. Here’s how to do it:

  1. Prepare the Mounting Area: Turn off the power to the existing light fixture at the circuit breaker. Remove the old fixture and disconnect the wiring from the ceiling junction box. Ensure that the mounting surface is clean and free from any debris.
  2. Attach the Mounting Bracket: Secure the mounting bracket included with the fixture to the ceiling junction box using the provided screws. Make sure the bracket is level and flush with the ceiling surface.
  3. Connect the Wiring: Connect the wires from the ceiling junction box to the corresponding wires on the fixture, following the manufacturer’s instructions. Use wire nuts to secure the connections and ensure proper insulation.
  4. Install the Fixture: Carefully position the fixture over the mounting bracket and align the screw holes. Secure the fixture in place by tightening the mounting screws.
  5. Test the Light: Restore power to the circuit at the breaker and test the light fixture to ensure proper installation and functionality. Make any necessary adjustments to the positioning or wiring as needed.

Benefits of 4 Flush Mount Ceiling Lights Fixtures

  • Space-Saving Design: The flush mount design of these fixtures is ideal for rooms with lower ceilings or limited overhead space, allowing you to maximize vertical space without sacrificing style or functionality.
  • Enhanced Aesthetics: 4 Flush Mount Ceiling Lights fixtures add a touch of modern elegance to any room, serving as both functional lighting and decorative accents that elevate the overall look and feel of your space.
  • Uniform Illumination: With multiple light sources and diffused light output, these fixtures provide uniform illumination across the entire room, minimizing glare and creating a comfortable and inviting atmosphere.
  • Easy Maintenance: LED bulbs or panels used in many 4 Flush Mount Ceiling Lights fixtures have a long lifespan and require minimal maintenance, reducing the need for frequent bulb replacements and saving you time and money in the long run.

Conclusion

In conclusion, 4 Flush Mount Ceiling Lights fixtures offer a stylish, practical, and energy-efficient lighting solution for any room in your home or office. With their sleek design, versatile applications, and easy installation, these fixtures are sure to brighten up your space while adding a touch of contemporary flair.

Read too: Enhance Your Space with Acoustic Ceiling Tiles Paint: A Comprehensive Guide

2 X 2 Black Ceiling Tiles: A Comprehensive Guide

Are you looking to upgrade the look and feel of your interior space? Discover the versatility and elegance of 2 X 2 Black Ceiling Tiles. In this comprehensive guide, we’ll explore everything you need to know about these sleek and modern ceiling tiles, from their features and benefits to installation tips and more.

2 X 2 Black Ceiling Tiles

Introducing

2 X 2 Black Ceiling Tiles are a popular choice for homeowners, interior designers, and business owners alike. Their timeless black finish adds a touch of sophistication to any room, while their practical design offers numerous benefits for both residential and commercial applications.

Key Features of 2 X 2 Black Ceiling Tiles

  • Sleek Appearance: The black finish of these ceiling tiles creates a bold and modern aesthetic that complements a wide range of interior styles and color schemes. Whether used in a residential living space or a commercial office environment, these tiles make a striking visual statement.
  • Durable Construction: Constructed from high-quality materials such as PVC, vinyl, or mineral fiber, 2 X 2 Black Ceiling Tiles are designed to withstand the rigors of daily use while maintaining their appearance over time. Their durable construction ensures long-lasting performance and durability.
  • Easy Installation: With their standard 2 X 2 size and lightweight construction, these ceiling tiles are easy to install using standard ceiling grid systems. Whether you’re a DIY enthusiast or a professional contractor, you’ll appreciate the simplicity and convenience of installing these tiles.
  • Acoustic Benefits: In addition to their visual appeal, 2 X 2 Black Ceiling Tiles offer acoustic benefits by helping to absorb sound and reduce noise levels within a room. This makes them an excellent choice for spaces where noise control is a priority, such as offices, conference rooms, or home theaters.

Installing 2 X 2 Black Ceiling Tiles

Installing 2 X 2 Black Ceiling Tiles is a straightforward process that can be completed in just a few simple steps. Here’s an overview of the installation process:

  1. Prepare the Ceiling Grid: Ensure that the existing ceiling grid is clean, level, and free from any obstructions. Remove any old ceiling tiles or debris from the grid to create a smooth surface for the new tiles.
  2. Measure and Cut Tiles: Measure the dimensions of the ceiling grid openings and use a utility knife or scissors to cut the ceiling tiles to the appropriate size. Be sure to wear protective eyewear and gloves when cutting the tiles.
  3. Install Tiles: Carefully insert the cut tiles into the ceiling grid openings, making sure they fit snugly and securely. Use gentle pressure to press the tiles into place, ensuring a flush and uniform appearance.
  4. Repeat the Process: Continue installing tiles until the entire ceiling grid is covered. Double-check the alignment and spacing of the tiles to ensure a professional-looking finish.
  5. Final Touches: After installing all the tiles, actively inspect the ceiling for any gaps or irregularities. Make any necessary adjustments to ensure a seamless and uniform appearance.

Benefits of 2 X 2 Black Ceiling Tile

  • Enhanced Aesthetics: The sleek black finish of these ceiling tiles adds a touch of elegance and sophistication to any room, making them a versatile choice for a variety of interior design styles.
  • Improved Acoustics: By helping to absorb sound and reduce noise levels, 2 X 2 Black Ceiling Tile create a more comfortable and pleasant environment for occupants, whether at home or in the workplace.
  • Easy Maintenance: These tiles are easy to clean and maintain, requiring only periodic dusting or wiping with a damp cloth to keep them looking their best.
  • Cost-Effective Solution: Compared to more expensive ceiling materials such as wood or metal, 2 X 2 Black Ceiling Tile offer an affordable alternative without compromising on quality or style.

Conclusion

In conclusion, 2 X 2 Black Ceiling Tile offer a stylish, durable, and cost-effective solution for enhancing the look and feel of any interior space. Whether you’re renovating your home, updating a commercial property, or simply looking to add a touch of elegance to your surroundings, these versatile ceiling tiles are sure to impress.

Read too: Enhance Your Space with Acoustic Ceiling Tiles Paint: A Comprehensive Guide

2 Post Lift for a 10 Foot Ceiling: Maximize Your Garage Space

Are you looking to optimize your garage space for vehicle storage or maintenance? Discover how a 2 Post Lift designed for a 10-foot ceiling can revolutionize your garage setup. In this comprehensive guide, we’ll delve into everything you need to know about these innovative automotive lifts, from their features and benefits to installation tips and more.

2 Post Lift 10 Foot Ceiling

Exploring the Versatility of 2 Post Lifts for 10 Foot Ceilings

2 Post Lifts designed for 10-foot ceilings offer a practical solution for maximizing vertical space in your garage or automotive workshop. These lifts provide the necessary clearance for lifting vehicles while still accommodating lower ceiling heights, making them ideal for residential garages or commercial facilities with limited overhead space.

Key Features

  • Compact Design: Engineered to fit within the confines of a 10-foot ceiling, these lifts feature a compact design that maximizes usable floor space in your garage. This allows you to park vehicles beneath the raised lift without sacrificing overhead clearance.
  • Heavy-Duty Construction: Despite their space-saving design, 2 Post Lifts for 10-foot ceilings are built to withstand the weight of vehicles safely and securely. Robust steel construction and reinforced components ensure durability and stability during operation.
  • Versatile Lifting Capacity: Whether you’re working on compact cars, trucks, SUVs, or recreational vehicles, these lifts offer versatile lifting capacities to accommodate a wide range of vehicle sizes and weights. Adjustable arms and lifting pads allow for precise positioning and support.
  • Easy Installation: With their straightforward installation process and minimal space requirements, 2 Post Lifts for 10-foot ceilings can be quickly set up in your garage with basic tools and DIY skills. Many models feature bolt-on installation options for added convenience.

Installing a 2 Post Lift for a 10 Foot Ceiling

Installing a 2 Post Lift for a 10-foot ceiling requires careful planning and attention to detail to ensure safe and proper operation. Here’s a step-by-step guide to help you navigate the installation process:

  1. Assessing Ceiling Height: Measure the height of your garage ceiling to confirm that it has a minimum clearance of 10 feet to accommodate the lift and raised vehicles comfortably.
  2. Selecting the Right Lift: Choose a 2 Post Lift model that is specifically designed for use with a 10-foot ceiling. Consider factors such as lifting capacity, overall dimensions, and compatibility with your vehicles.
  3. Preparing the Garage: Remove any obstructions or clutter from the area where you will install the lift. Ensure that the floor is level and capable of supporting the weight of the lift and vehicles.
  4. Anchoring the Lift: Follow the manufacturer’s instructions to anchor the lift securely to the garage floor. Use concrete anchors or bolts to secure the lift in place, taking care to position it correctly for optimal stability.
  5. Testing and Calibration: After installing the lift, conduct a thorough inspection to actively check for any signs of damage or defects. Test the lift’s operation and safety features, and calibrate as necessary to ensure smooth and reliable performance.

Benefits of Using a 2 Post Lift for a 10 Foot Ceiling

  • Space Optimization: By utilizing vertical space, 2 Post Lifts for 10-foot ceilings enable you to maximize the storage or workspace in your garage without the need for extensive renovations or expansion.
  • Convenience: With vehicles elevated off the ground, accessing the undercarriage for maintenance or repairs becomes much easier and more ergonomic, saving time and effort.
  • Safety: Built-in safety features such as automatic locking mechanisms and overload protection systems help prevent accidents and ensure operator safety during use.
  • Versatility: Whether you’re performing routine maintenance, repairs, or vehicle storage, a 2 Post Lift for a 10-foot ceiling offers versatile functionality to meet your automotive needs.

Read too: Enhance Your Space with Acoustic Ceiling Tiles Paint: A Comprehensive Guide

Conclusion

In conclusion, investing in a 2 Post Lift designed for a 10-foot ceiling can significantly enhance the functionality and efficiency of your garage space. With their compact design, robust construction, and versatile capabilities, these lifts offer a practical solution for vehicle maintenance, storage, and more.

18000 Btu Mini Split Ceiling Cassette: Maximize Comfort and Efficiency

Upgrade your home or office HVAC system with the advanced technology and superior performance of the 18000 Btu Mini Split Ceiling Cassette. In this comprehensive guide, we’ll explore everything you need to know about this innovative cooling solution, from its features and benefits to installation tips and more.

18000 Btu Mini Split Ceiling Cassette

Introducing

The 18000 Btu Mini Split Ceiling Cassette is a cutting-edge HVAC system designed to deliver efficient and uniform cooling to any space. With its sleek design, powerful performance, and versatile installation options, this ceiling cassette unit offers unmatched comfort and convenience for residential and commercial applications alike.

Key Features of the 18000 Btu Mini Split Ceiling Cassette

  • Powerful Cooling Capacity: With a cooling capacity of 18000 British Thermal Units (Btu) per hour, this mini-split system is capable of quickly and effectively cooling large rooms or open-plan areas with ease.
  • Ceiling Cassette Design: The ceiling cassette design of this unit allows for discreet installation in drop ceilings or suspended grids, minimizing visual clutter and maximizing floor space. The compact cassette sits flush with the ceiling, providing a sleek and streamlined appearance.
  • Energy Efficiency: Equipped with advanced inverter technology and energy-efficient components, the 18000 Btu Mini Split Ceiling Cassette helps reduce energy consumption and utility costs while maintaining optimal comfort levels.
  • Multi-Zone Capability: This mini-split system offers multi-zone capability, allowing for customizable cooling in different areas of the home or building. Multiple indoor units can be connected to a single outdoor condenser, providing flexibility and efficiency.

Installing the 18000 Btu Mini Split Ceiling Cassette

Installing the 18000 Btu Mini Split Ceiling Cassette is a straightforward process that can be completed by a professional HVAC technician. Here’s an overview of the installation steps:

  1. Selecting the Location: Choose the optimal location for the ceiling cassette unit, taking into account factors such as airflow, accessibility, and aesthetics. Ensure that the ceiling can support the weight of the unit and that there are no obstructions blocking the airflow.
  2. Cutting the Ceiling Opening: Use the template provided with the unit to mark and cut the opening in the ceiling for the cassette unit. Take care to follow the manufacturer’s guidelines and recommendations for sizing and placement.
  3. Mounting the Unit: Install the mounting bracket or frame in the ceiling opening, securing it in place according to the manufacturer’s instructions. Carefully lift the cassette unit into position and attach it to the mounting bracket, ensuring a secure fit.
  4. Connecting the Refrigerant Lines: Connect the refrigerant lines and electrical wiring to the cassette unit, following the wiring diagram and installation manual provided by the manufacturer. Test the connections to ensure proper functionality.
  5. Testing and Commissioning: Once the installation is complete, test the unit to ensure that it is operating correctly. Check for any leaks, unusual noises, or performance issues, and make any necessary adjustments or repairs as needed.

Benefits of the 18000 Btu Mini Split Ceiling Cassette

The 18000 Btu Mini Split Ceilings Cassette offers numerous benefits, including:

  • Space-Saving Design: The ceiling cassette unit mounts flush with the ceiling, saving valuable floor space and maintaining a clean and uncluttered appearance.
  • Quiet Operation: Advanced compressor technology and sound-dampening features ensure whisper-quiet operation, making this unit ideal for bedrooms, offices, and other quiet spaces.
  • Customizable Comfort: With adjustable airflow patterns and programmable settings, users can customize their comfort preferences for maximum satisfaction.
  • Enhanced Air Quality: Built-in filters remove dust, allergens, and other airborne particles, improving indoor air quality and creating a healthier living or working environment.

Conclusion

In conclusion, the 18000 Btu Mini Split Ceilings Cassette offers unmatched cooling performance, energy efficiency, and versatility for residential and commercial applications. Whether you’re looking to upgrade your existing HVAC system or install a new cooling solution, this innovative unit is sure to exceed your expectations.

Read too: Enhance Your Space with Acoustic Ceiling Tiles Paint: A Comprehensive Guide

Vinyl Covered Gypsum Ceiling Tile: Enhance Your Space with Stylish

Looking to revamp your interior decor? Consider the versatile and visually appealing option of Vinyl Covered Gypsum Ceiling Tile. In this detailed guide, we’ll delve into everything you need to know about these innovative ceiling tiles, from their features and installation process to their benefits and design possibilities.

Vinyl Covered Gypsum Ceiling Tiles

Understanding

Vinyl Covered Gypsum Ceiling Tiles offer a practical and aesthetic solution for transforming any space. These tiles combine the durability and versatility of gypsum with the stylish appearance and easy maintenance of vinyl, making them an ideal choice for both residential and commercial applications.

Key Features of Vinyl Covered Gypsum Ceiling Tiles

  • Durable Construction: Constructed from high-quality gypsum core material and covered with a vinyl surface, these ceiling tiles are built to withstand daily wear and tear while maintaining their appearance for years to come.
  • Easy Installation: Vinyl Covered Gypsum Ceiling Tiles are designed for easy installation, with options for direct mounting to the ceiling grid or using adhesive for a seamless finish. Their lightweight construction also makes them easy to handle and maneuver during installation.
  • Versatile Design Options: Available in a wide range of sizes, shapes, colors, and patterns, Vinyl Covered Gypsum Ceiling Tiles offer endless design possibilities to suit any aesthetic preference or interior style. Whether you prefer a classic white finish or a bold, contemporary design, there’s a tile to match your vision.
  • Excellent Acoustic Properties: Gypsum is known for its excellent acoustic properties, and Vinyl Covered Gypsum Ceiling Tiles are no exception. These tiles help to reduce noise levels within a space, creating a more comfortable and peaceful environment for occupants.

Installing Vinyl Covered Gypsum Ceiling Tiles

Installing Vinyl Covered Gypsum Ceiling Tiles is a straightforward process that can be completed with basic tools and DIY skills. Here’s a step-by-step guide to help you get started:

  1. Preparation: Begin by preparing the ceiling surface, ensuring that it is clean, dry, and free from any debris or obstructions. If necessary, install a suitable ceiling grid system to support the tiles.
  2. Measurement: Measure the dimensions of the ceiling area and calculate the number of tiles needed for complete coverage. Allow for any necessary adjustments around light fixtures, vents, or other obstacles.
  3. Cutting Tiles: Use a sharp utility knife or tile cutter to cut the Vinyl Covered Gypsum Ceiling Tiles to the appropriate size and shape, taking care to make accurate cuts for a precise fit.
  4. Installation: Starting from one corner of the room, begin installing the tiles by either placing them directly into the ceiling grid or applying adhesive to the back of each tile and pressing it firmly into place. Continue this process until the entire ceiling area is covered.
  5. Finishing Touches: Once all the tiles are installed, double-check for any gaps or uneven edges and make any necessary adjustments. Install trim pieces or moldings along the perimeter of the ceiling to create a finished look.

Enhancing Your Space with Vinyl Covered Gypsum Ceiling Tiles

Vinyl Covered Gypsum Ceiling Tiles offer numerous benefits beyond their aesthetic appeal. From improving acoustics to enhancing durability and ease of maintenance, these tiles are a practical and stylish choice for any interior space.

Conclusion

In conclusion, Vinyl Covered Gypsum Ceiling Tile provide a versatile, durable, and visually appealing solution for upgrading your interior decor. Whether renovating a home, office, or hospitality venue, these tiles offer endless possibilities for creating functional, beautiful spaces.

Read too: Enhance Your Space with Acoustic Ceiling Tiles Paint: A Comprehensive Guide

Stylish Drop Ceiling Pendant Lights: Illuminate Your Space

Enhance the ambiance of your home or office with the exquisite charm of Drop Ceiling Pendant Lights. In this comprehensive guide, we’ll delve into the versatility, installation process, and aesthetic appeal of these stunning lighting fixtures.

Drop Ceiling Pendant Lights

Exploring the Elegance of Drop Ceiling Pendant Lights

Versatile Lighting Options

Drop ceiling pendant lights offer a wide range of lighting options to suit various interior design styles and preferences. Whether you’re looking to create a warm and inviting atmosphere in your living room, add a touch of sophistication to your dining area, or illuminate your workspace with task lighting, there’s a pendant light to match your needs. From sleek and modern designs to vintage-inspired fixtures, the versatility of drop ceiling pendant lights makes them an ideal choice for any space.

Customizable Designs

One of the key benefits of drop ceiling pendant lights is their customizable design options. These fixtures come in a variety of shapes, sizes, colors, and materials, allowing you to tailor the lighting to complement your decor and personal style. Choose from classic glass pendants for a timeless look, industrial-inspired metal fixtures for a modern edge, or artisan-crafted designs for a touch of artisanal elegance. With endless possibilities for customization, you can create a truly unique lighting scheme that reflects your individual taste and personality.

Efficient Use of Space

Drop ceiling pendant lights are an excellent choice for rooms with limited floor space or low ceilings. By suspending the lights from the ceiling, you can free up valuable floor space and create a more open and airy feel in the room. Additionally, pendant lights can be clustered together to create a focal point or arranged in a linear pattern to illuminate a specific area, making them a versatile and space-saving lighting solution for any environment.

Installation and Considerations

Mounting Options

When installing drop ceiling pendant lights, it’s essential to consider the mounting options available. These fixtures can be mounted directly to the ceiling or suspended from a track or rod, depending on your preference and the layout of the space. Ceiling-mounted pendants offer a sleek and seamless look, while suspended fixtures provide added flexibility for adjusting the height and position of the lights to suit your needs.

Electrical Wiring and Safety

Proper electrical wiring is crucial when installing drop ceiling pendant light to ensure safe and reliable operation. If you’re not experienced with electrical work, it’s best to hire a qualified electrician to handle the installation process. They will ensure that the wiring is correctly connected and grounded to prevent any electrical hazards or malfunctions. Additionally, be sure to choose pendant lights that are UL-listed for safety and quality assurance.

Bulb Compatibility and Light Output

Before purchasing drop ceiling pendant light, consider the type of bulbs they require and their compatibility with your existing lighting setup. LED bulbs are a popular choice for pendant lights due to their energy efficiency and long lifespan, but be sure to check the fixture’s specifications to ensure compatibility. Additionally, consider the desired light output and color temperature to create the perfect ambiance in your space.

Luxurious Ceiling Waterfall Shower Heads: Elevate Your Shower Experience

Upgrade your daily shower routine with the ultimate indulgence of Ceiling Waterfall Shower Heads. In this comprehensive guide, we’ll explore the luxurious features, installation process, and benefits of incorporating these stunning fixtures into your bathroom design.

Ceiling Waterfall Shower Heads

Unveiling the Elegance of Ceiling Waterfall Shower Heads

Aesthetic Appeal

Imagine stepping into your shower and being enveloped by a gentle cascade of water from above. Ceiling waterfall shower heads offer a visually stunning focal point for any bathroom, creating a spa-like ambiance that elevates the overall aesthetic appeal of the space. With their sleek and modern design, these fixtures blend seamlessly into contemporary bathrooms, adding a touch of luxury and sophistication.

Versatile Installation Options

Ceiling waterfall shower heads come in a variety of sizes and shapes to suit different preferences and bathroom layouts. Whether you prefer a square or round design, or you’re looking for a larger rainfall shower head to provide full-body coverage, there’s a ceiling-mounted option to fit your needs. Additionally, these fixtures can be installed flush with the ceiling for a seamless appearance or suspended from a drop-down arm for added flexibility.

Luxurious Shower Experience

The primary allure of ceiling waterfall shower heads lies in the unparalleled shower experience they provide. Unlike traditional wall-mounted shower heads, which deliver water from a single source, ceiling-mounted fixtures disperse water over a wider area, simulating the sensation of standing beneath a natural waterfall. This gentle cascade of water not only feels incredibly soothing but also helps to relieve stress and tension, making each shower feel like a rejuvenating escape.

Installation and Considerations

Professional Installation

While ceiling waterfall shower heads offer a luxurious showering experience, proper installation is essential to ensure optimal performance and safety. It’s recommended to hire a professional plumber or contractor familiar with ceiling-mounted fixtures to handle the installation process. They will securely mount the shower head to the ceiling and properly connect it to the water supply lines, minimizing the risk of leaks or structural damage.

Water Pressure and Flow Rate

Before purchasing a ceiling waterfall shower head, consider your home’s water pressure and flow rate to ensure compatibility with the fixture. While these shower heads typically require higher water pressure to operate effectively, some models come with built-in pressure regulators or flow restrictors to optimize performance and conserve water. Be sure to consult with a plumbing expert to determine the best option for your specific needs.

Maintenance and Care

To keep your ceiling waterfall shower head looking and performing its best, regular maintenance is essential. Clean the shower head regularly to remove mineral deposits and debris that can accumulate over time, causing clogs and affecting water flow. Use a mild cleaning solution and a soft brush or cloth to gently scrub the surface, being careful not to damage any delicate components. Additionally, check for any signs of leaks or corrosion and address any issues promptly to prevent damage to your bathroom ceiling or surrounding walls.

Conclusion

Incorporating a Ceiling Waterfall Shower Head into your bathroom design is an excellent way to create a luxurious and spa-like shower experience right at home. From their stunning aesthetic appeal to their soothing cascade of water, these fixtures offer unparalleled comfort and relaxation with every use. By understanding the installation process, maintenance requirements, and considerations involved, you can enjoy the ultimate showering experience for years to come.

Read too: Exploring the Efficiency of Radiant Ceiling Heater Electric: A Comprehensive Guide

Ceiling Mounted Door Track for Efficient Space Utilization: Exploring the Advantages

Are you looking to maximize space utilization and enhance the aesthetic appeal of your interiors? Consider incorporating Ceiling Mounted Door Track into your design. In this comprehensive guide, we’ll delve into the benefits and applications of ceiling-mounted door tracks, from residential to commercial settings.

Ceiling Mounted Door Track

Understanding Ceiling Mounted Door Tracks

Space-Saving Design

Ceiling-mounted door tracks offer a space-saving solution by eliminating the need for floor-mounted tracks or traditional swinging doors. By attaching the door directly to the ceiling track, you free up valuable floor space, making it ideal for rooms with limited square footage or awkward layouts.

Smooth and Effortless Operation

One of the key advantages of ceiling-mounted door tracks is their smooth and effortless operation. With minimal friction and noise, these tracks allow doors to glide open and closed with ease, providing a seamless user experience. This makes them particularly well-suited for areas where quiet operation is essential, such as offices, conference rooms, and healthcare facilities.

Aesthetic Appeal

Ceiling-mounted door tracks contribute to a sleek and modern aesthetic, adding a touch of sophistication to any space. Whether you prefer a minimalist design or a more industrial look, ceiling-mounted tracks can be customized to complement your decor and architectural style. Additionally, the absence of visible floor tracks creates a cleaner and more streamlined appearance.

Applications of Ceiling Mounted Door Tracks

Residential Use

In residential settings, ceiling-mounted door tracks are commonly used to partition large rooms or create flexible living spaces. From sliding doors for closets and bathrooms to room dividers in open-plan layouts, ceiling-mounted tracks offer versatility and functionality without compromising on style.

Commercial and Hospitality Settings

In commercial and hospitality settings, ceiling-mounted door tracks are valued for their space-saving benefits and elegant design. Hotels, restaurants, and retail stores use them to create movable partitions, private dining areas, and storefront entrances, allowing for seamless transitions between spaces while maximizing usable floor area.

Healthcare Facilities

Ceiling-mounted door tracks are also widely used in healthcare facilities, where hygiene, accessibility, and patient privacy are paramount. These tracks enable the installation of sliding doors in patient rooms, treatment areas, and operating theaters, providing smooth and quiet operation without the risk of floor obstruction or tripping hazards.

Considerations for Installation

Structural Support

Proper installation of ceiling-mounted door tracks requires adequate structural support to bear the weight of the doors and track system. It’s essential to consult with a qualified contractor or engineer to ensure that your ceiling can support the load and that the installation meets building code requirements.

Door Material and Hardware

When selecting doors for ceiling-mounted tracks, consider factors such as material, size, and hardware compatibility. Choose lightweight yet durable materials such as aluminum or glass to minimize strain on the track system. Additionally, opt for high-quality hardware, including rollers, guides, and handles, to ensure smooth and reliable operation.

Maintenance and Care

Regular maintenance is essential to keep ceiling-mounted door tracks operating smoothly and prolong their lifespan. Inspect the track system periodically for signs of wear or damage, such as loose fasteners or worn rollers, and address any issues promptly. Clean the tracks regularly to remove dust, debris, and lubricate moving parts as needed to prevent friction and ensure optimal performance.

Read too: Exploring the Efficiency of Radiant Ceiling Heater Electric: A Comprehensive Guide

Conclusion

Ceiling-mounted door track offer a versatile and space-saving solution for a wide range of residential and commercial applications. From maximizing floor space to enhancing the aesthetic appeal of interiors, these innovative track systems provide seamless operation and flexibility without compromising on style. By understanding the benefits and considerations of ceiling-mounted door tracks, you can create functional and visually striking spaces that meet the needs of modern living and working environments.

Exploring the Benefits of Ceiling Mounted Basketball Goals: Elevate Your Game

Are you looking to take your basketball game to new heights? Consider investing in Ceiling Mounted Basketball Goals for your home or facility. In this comprehensive guide, we’ll delve into the advantages of ceiling-mounted basketball goals, from maximizing playing space to enhancing safety and convenience.

Ceiling Mounted Basketball Goals

Understanding Ceiling Mounted Basketball Goals

Space-Saving Design

One of the primary benefits of ceiling-mounted basketball goals is their space-saving design. By mounting the hoop directly to the ceiling, you free up valuable floor space that would otherwise be occupied by traditional basketball systems. This makes ceiling-mounted goals ideal for indoor facilities with limited space, such as gyms, recreation centers, and home courts.

Uninterrupted Gameplay

Unlike portable or in-ground basketball hoops, ceiling-mounted goals provide uninterrupted gameplay without the risk of players colliding with the base or support structure. This ensures a safer playing environment, especially in high-traffic areas where collisions are more likely to occur.

Adjustable Height and Versatility

Many ceiling-mounted basketball goals feature adjustable height mechanisms, allowing players of all ages and skill levels to enjoy the game. Whether you’re hosting a youth basketball camp or a competitive adult league, the ability to adjust the hoop height ensures that everyone can participate and compete at their preferred level.

Factors to Consider When Choosing Ceiling Mounted Basketball Goals

Ceiling Height and Structural Integrity

Before installing a ceiling-mounted basketball goal, it’s essential to consider the height of your ceiling and the structural integrity of the mounting surface. Ensure that your ceiling is high enough to accommodate the desired playing height and that the mounting surface can support the weight of the goal and withstand the force of gameplay.

Backboard Material and Size

Select a ceiling-mounted basketball goal with a durable backboard material, such as tempered glass or acrylic, to withstand repeated use and weather conditions. The size of the backboard should also be proportional to the playing area, with larger backboards providing a more authentic playing experience.

Installation and Assembly

Proper installation is crucial for the safety and performance of your ceiling-mounted basketball goal. Follow manufacturer instructions carefully and consider hiring a professional installer if you’re not comfortable with DIY assembly. Additionally, ensure that the goal is securely anchored to the ceiling to prevent accidents or injuries during gameplay.

Enhancing Your Basketball Experience

Customization Options

Many ceiling-mounted basketball goals offer customization options, allowing you to personalize your playing experience. From team colors and logos to padding and accessories, you can customize your goal to match your facility’s aesthetic and create a professional-grade playing environment.

Integrated Features

Some ceiling-mounted basketball goal come equipped with integrated features such as scoreboards, shot clocks, and remote-controlled height adjustment systems. These additional features enhance gameplay and add a level of sophistication to your basketball facility, making it more attractive to players and spectators alike.

Read too: Exploring the Efficiency of Radiant Ceiling Heater Electric: A Comprehensive Guide

Conclusion

Ceiling-mounted basketball goal offer numerous benefits for players, coaches, and facility owners alike. From maximizing playing space to enhancing safety and convenience, these innovative hoops elevate the basketball experience to new heights. By choosing the right ceiling-mounted goal and following proper installation guidelines, you can create a top-tier basketball facility that fosters skill development, competition, and camaraderie.

The Benefits of a Ceiling Mount Shop Fan: Maximizing Air Circulation

Looking to enhance airflow and ventilation in your workshop or garage? Consider investing in a high-quality Ceiling Mount Shop Fan. In this comprehensive guide, we’ll explore the benefits of using a ceiling-mounted fan in your workspace and provide valuable insights into selecting and installing the right fan for your needs.

Ceiling Mount Shop Fan

Understanding the Advantages of Ceiling Mount Shop Fans

Enhanced Air Circulation

A Ceiling Mount Shop Fan is designed to provide optimal air circulation in large, open spaces such as workshops, garages, warehouses, and industrial facilities. By mounting the fan on the ceiling, you can maximize floor space while effectively distributing air throughout the room.

Improved Ventilation

Proper ventilation is essential for maintaining a comfortable and safe working environment. A ceiling-mounted shop fan helps exhaust stale air, fumes, and odors, promoting better indoor air quality and reducing the risk of respiratory issues and heat-related discomfort.

Energy Efficiency

Ceiling mount shop fans are energy-efficient alternatives to traditional HVAC systems. By strategically positioning the fan to circulate air where it’s needed most, you can reduce the need for constant air conditioning or heating, leading to significant energy savings and lower utility bills.

Key Features to Consider When Choosing a Ceiling Mount Shop Fan

Fan Size and Airflow

Select a fan size and airflow capacity that aligns with the dimensions and ventilation requirements of your workspace. Larger fans with higher CFM (cubic feet per minute) ratings are suitable for larger areas, while smaller fans are ideal for compact spaces.

Motor Power and Durability

Look for a shop fan with a powerful motor and durable construction to withstand the demands of industrial and commercial environments. High-quality materials and precision engineering ensure reliable performance and longevity, even under heavy use.

Adjustable Settings and Control Options

Choose a ceiling mount shop fan with adjustable speed settings and convenient control options, such as remote controls or wall-mounted switches. Variable speed settings allow you to customize airflow according to your specific needs and preferences.

Read too: Exploring the Efficiency of Radiant Ceiling Heater Electric: A Comprehensive Guide

Installing Your Ceiling Mount Shop Fan

Safety Precautions

Before installing your ceiling mount shop fan, ensure that the mounting location is structurally sound and can support the weight of the fan. Follow manufacturer instructions and local building codes to ensure safe and proper installation.

Professional Assistance

If you’re unsure about installing the fan yourself or if electrical wiring is involved, it’s best to seek professional assistance from a licensed electrician or HVAC technician. Professional installation ensures compliance with safety standards and prevents potential hazards.

Conclusion

A Ceiling Mount Shop Fan is a versatile and efficient solution for improving air circulation and ventilation in workshops, garages, and industrial settings. By selecting the right fan for your space and following proper installation guidelines, you can enjoy enhanced comfort, productivity, and safety in your work environment.

Exploring the Benefits of a 52-Inch White Ceiling Fan: Choosing the Perfect Ceiling Fan

Are you looking to enhance the comfort and aesthetics of your home while also keeping it cool and stylish? Consider installing a 52-inch white ceiling fan. In this guide, we’ll delve into the features and benefits of this versatile home appliance, helping you make an informed decision for your space.

Ceiling Fan 52 Inch White

Understanding the Appeal of a 52-Inch White Ceiling Fan

What Makes a 52-Inch White Ceiling Fan Unique?

A 52-inch white ceiling fan combines functionality with elegance, making it a popular choice for homeowners and interior designers alike. With its generous size and sleek white finish, this type of ceiling fan offers several advantages:

  • Optimal Air Circulation: The larger blade span of a 52-inch ceiling fan ensures efficient air circulation, effectively cooling large rooms or open living spaces.
  • Versatile Design: The neutral white color complements a wide range of interior styles, from modern and minimalist to traditional and coastal.
  • Enhanced Illumination: Many 52-inch white ceiling fans come with built-in light fixtures, providing both cooling and illumination in one stylish package.

Choosing the Right 52-Inch White Ceiling Fan

Factors to Consider When Selecting a 52-Inch White Ceiling Fans

When shopping for a 52-inch white ceiling fans, keep the following factors in mind to ensure you choose the perfect option for your home:

  1. Blade Material: Opt for blades made from high-quality materials such as wood or composite for durability and longevity.
  2. Motor Performance: Look for a fan with a powerful motor that operates quietly and efficiently, ensuring optimal performance without disturbing noise.
  3. Remote Control Compatibility: Consider whether you prefer a ceiling fan with remote control capabilities for convenient operation from anywhere in the room.
  4. Energy Efficiency: Choose an ENERGY STAR certified ceiling fan to maximize energy savings and reduce utility costs while staying cool and comfortable.

Installing and Maintaining Your Ceiling Fan

Tips for Proper Installation and Maintenance

Follow these guidelines to ensure a hassle-free installation and long-lasting performance of your 52-inch white ceiling fans:

  • Professional Installation: For safety and optimal performance, consider hiring a licensed electrician to install your ceiling fan correctly.
  • Regular Cleaning: Clean the fan blades and motor housing regularly to remove dust and debris, keeping the fan running smoothly and efficiently.
  • Seasonal Reversal: Take advantage of the fan’s reversible motor feature to promote air circulation and energy savings year-round.

Conclusion

A 52-inch white ceiling fans offers an ideal combination of style, functionality, and versatility for any home. By considering important factors such as blade material, motor performance, and energy efficiency, you can select the perfect ceiling fan to complement your space. With proper installation and maintenance, your ceiling fan will provide years of cooling comfort and aesthetic appeal.

Read too: Exploring the Efficiency of Radiant Ceiling Heater Electric: A Comprehensive Guide

Best Ceiling Mounted Infrared Heaters: Exploring the Top Picks

Are you considering installing a ceiling-mounted infrared heater to add warmth and comfort to your space? With so many options available on the market, choosing the right one can be overwhelming. In this guide, we’ll explore some of the top picks for the best ceiling-mounted infrared heaters, helping you make an informed decision for your heating needs.

Best Ceiling Mounted Infrared Heaters

Understanding Ceiling Mounted Infrared Heaters

What Are Ceiling Mounted Infrared Heaters?

Ceiling-mounted infrared heaters are an excellent heating solution for spaces where floor space is limited or where a discreet heating option is preferred. These heaters emit infrared radiation, which heats objects and people directly without heating the air in between. This results in efficient and comfortable heating with minimal energy consumption.

Best Ceiling Mounted Infrared Heaters: Our Top Picks

1. Brand A Ceiling Mounted Infrared Heater

  • Key Features: This heater offers a sleek and modern design, making it an attractive addition to any space. With adjustable heat settings and a remote control option, you can easily customize your heating experience.

2. Brand B Infrared Heater for Ceiling Mounting

  • Key Features: Known for its reliability and performance, this infrared heater boasts durable construction and efficient heating capabilities. It comes with built-in safety features and a user-friendly interface for hassle-free operation.

3. Brand C Energy-Efficient Ceiling Mounted Heater

  • Key Features: Ideal for eco-conscious consumers, this energy-efficient heater delivers powerful heating while consuming minimal electricity. Its low-profile design makes it suitable for rooms with limited ceiling height.

Factors to Consider When Choosing

How to Choose the Best Ceiling Mounted Infrared Heater

When selecting a ceiling-mounted infrared heater, consider the following factors:

  1. Heating Capacity: Determine the size of the space you need to heat and choose a heater with adequate heating capacity to ensure optimal comfort.
  2. Installation Requirements: Consider the installation process and ensure that the heater is compatible with your ceiling structure and electrical system.
  3. Energy Efficiency: Look for heaters with energy-saving features such as programmable timers and thermostats to help reduce energy consumption and save on utility bills.
  4. Safety Features: Prioritize heaters with built-in safety features such as overheat protection and tip-over shut-off to prevent accidents and ensure peace of mind.

Installation and Maintenance Tips

Ensuring Proper Installation and Maintenance

Follow these tips for installing and maintaining your ceiling-mounted infrared heater:

  1. Professional Installation: For optimal performance and safety, consider hiring a professional electrician to install the heater.
  2. Regular Cleaning: Keep the heater clean and free of dust and debris to maintain its efficiency and prolong its lifespan.
  3. Annual Inspections: Schedule annual inspections to check for any signs of wear and tear and ensure that the heater is functioning correctly.

Read too: Exploring the Efficiency of Radiant Ceiling Heater Electric: A Comprehensive Guide

Conclusion

Ceiling-mounted infrared heaters offer an efficient and space-saving heating solution for various indoor spaces. By considering key factors such as heating capacity, energy efficiency, and safety features, you can select the best heater to meet your heating needs. With proper installation and maintenance, your ceiling-mounted infrared heater can provide reliable warmth and comfort for years to come.

Choosing the Right Bathroom Exhaust Fan for Your Suspended Ceiling: A Comprehensive Guide

Are you planning to install a bathroom exhaust fan in a room with a suspended ceiling? Selecting the right fan for this type of ceiling is crucial for proper ventilation and optimal performance. In this guide, we’ll explore everything you need to know about choosing a bathroom exhaust fan for a suspended ceiling, from key features to installation tips.

Bathroom Exhaust Fan For Suspended Ceiling

Understanding Bathroom Exhaust Fans for Suspended Ceilings

Exploring the Benefits of a Bathroom Exhaust Fan for Suspended Ceilings

A bathroom exhaust fan plays a vital role in maintaining indoor air quality and preventing moisture-related issues in bathrooms. When it comes to suspended ceilings, there are specific considerations to keep in mind:

  1. Improved Ventilation: Suspended ceilings can sometimes restrict airflow, making proper ventilation even more essential. A well-chosen exhaust fan can help circulate air effectively, reducing the risk of mold, mildew, and odors.
  2. Space-Saving Design: Many bathroom exhaust fans designed for suspended ceilings feature a compact and low-profile design, making them ideal for rooms with limited space above the ceiling.
  3. Noise Reduction: Look for exhaust fans with quiet operation to ensure minimal disruption, especially in residential settings where noise levels can be a concern.

Key Features to Consider

Choosing the Right Bathroom Exhaust Fan for Your Suspended Ceiling

When selecting a bathroom exhaust fan for a suspended ceiling, consider the following key features:

  1. Airflow Capacity: Determine the size of the room and choose a fan with adequate airflow capacity to effectively remove moisture and odors.
  2. Installation Method: Look for a fan that is specifically designed for suspended ceilings and compatible with your ceiling grid system.
  3. Energy Efficiency: Opt for an energy-efficient model with features such as low-power consumption and automatic shut-off timers to save on energy costs.
  4. Noise Level: Consider the noise level of the fan, especially if the bathroom is located near bedrooms or other quiet areas.

Installation Tips Bathroom Exhaust Fan for Your Suspended Ceiling

Ensuring Proper Installation of Your Bathroom Exhaust Fan

Follow these tips for installing a bathroom exhaust fans in a suspended ceiling:

  1. Locate the Joists: Determine the location of the ceiling joists to ensure proper support for the fan.
  2. Cut an Opening: Carefully cut an opening in the ceiling tiles to accommodate the exhaust fan housing.
  3. Secure the Fan: Install the fan housing securely to the ceiling grid using appropriate hardware and brackets.
  4. Connect Ductwork: Connect the ductwork to the fan housing, ensuring a tight seal to prevent air leaks.

Conclusion

Choosing the right bathroom exhaust fans for a suspended ceiling is essential for maintaining proper ventilation and preventing moisture-related issues. By considering key features and following proper installation guidelines, you can ensure optimal performance and long-lasting durability for your bathroom exhaust fan.

Read too: Exploring the Efficiency of Radiant Ceiling Heater Electric: A Comprehensive Guide

Enhance Your Space with Armstrong 1912A Ceiling Tiles: A Comprehensive Guide

Are you considering upgrading your ceiling with a timeless and elegant look? Look no further than the Armstrong 1912A Ceiling Tiles. In this guide, we’ll delve into everything you need to know about this premium ceiling tile option, from its features and benefits to installation tips and design ideas.

Armstrong 1912A Ceiling Tile

Discovering Armstrong 1912A Ceiling Tile: An Overview

Armstrong 1912A Ceiling Tile: Elevating Spaces with Style and Sophistication

Armstrong 1912A Ceiling Tile is a classic choice for residential and commercial spaces alike. With its distinctive design and superior quality, it adds a touch of sophistication to any room. Let’s explore its key features:

  1. Timeless Design: The Armstrong 1912A Ceiling Tile features a timeless design characterized by its finely textured surface and beveled edges, creating a subtle yet refined aesthetic.
  2. Durable Construction: Crafted from high-quality materials, this ceiling tile offers durability and longevity, making it suitable for various environments, including offices, retail spaces, and healthcare facilities.
  3. Acoustic Performance: In addition to its visual appeal, Armstrong 1912A Ceiling Tile provides excellent acoustic performance, helping to reduce noise levels and create a more comfortable and productive environment.
  4. Easy Installation: Designed for hassle-free installation, this ceiling tile can be easily installed using standard ceiling grid systems, allowing for quick and efficient upgrades to your space.

Exploring the Versatility of Armstrong 1912A Ceiling Tile

Transform Your Space with Armstrong 1912A Ceiling Tile

Whether you’re renovating a residential kitchen or updating a commercial lobby, Armstrong 1912A Ceiling Tile offers endless possibilities for enhancing your space. Here are some creative ways to incorporate this versatile ceiling tile into your design:

  1. Office Spaces: Create a professional and inviting atmosphere in your office with Armstrong 1912A Ceiling Tile. Its clean lines and understated elegance complement a wide range of office decor styles.
  2. Retail Environments: Make a lasting impression on customers with a visually striking ceiling design. Armstrong 1912A Ceiling Tile adds visual interest and sophistication to retail spaces, helping to elevate the overall shopping experience.
  3. Healthcare Facilities: Enhance patient comfort and well-being in healthcare facilities with Armstrong 1912A Ceiling Tile. Its acoustic properties contribute to a quieter and more peaceful environment, promoting healing and relaxation.

Installation Tips and Maintenance Guidelines

Achieving Optimal Results with Armstrong 1912A Ceiling Tile

When installing Armstrong 1912A Ceiling Tile, follow these tips to ensure a seamless and professional-looking finish:

  1. Prepare the Surface: Ensure that the ceiling surface is clean, smooth, and free from any dust or debris before installation.
  2. Use Proper Tools: Use appropriate tools and equipment for cutting and handling the ceiling tiles to prevent damage and ensure accurate installation.
  3. Follow Manufacturer Instructions: Refer to the manufacturer’s installation guidelines and recommendations for best results.
  4. Regular Maintenance: Maintain the beauty and functionality of your Armstrong 1912A Ceiling Tile by regularly cleaning it with a mild detergent and water solution.

Conclusion

Armstrong 1912A Ceiling Tiles offers a perfect blend of style, durability, and performance, making it an ideal choice for a wide range of applications. Whether you’re updating a residential space or renovating a commercial property, this versatile ceiling tile is sure to enhance the look and feel of any room.

Read too: Exploring the Efficiency of Radiant Ceiling Heater Electric: A Comprehensive Guide

Outdoor 36 Inch Ceiling Fans: Discover the Beauty and Functionality

Transform your outdoor living space into a comfortable oasis with the addition of stylish and functional Outdoor 36 Inch Ceiling Fans. In this comprehensive guide, we’ll explore everything you need to know about these versatile fans, from their features and benefits to installation tips and more.

Outdoor 36 Inch Ceiling Fans

Exploring Outdoor 36 Inch Ceiling Fans: The Perfect Addition to Your Outdoor Space

Outdoor 36 Inch Ceiling Fans are designed to provide both style and comfort to outdoor areas such as patios, porches, and gazebos. With their compact size and powerful performance, these fans are ideal for smaller outdoor spaces where airflow and circulation are essential.

Key Features

  • Weather-Resistant Construction: Outdoor 36 Inch Ceiling Fans are specifically designed to withstand the elements, with durable materials and finishes that resist rust, corrosion, and fading due to exposure to sunlight and moisture.
  • Compact Size: Measuring just 36 inches in diameter, these fans are perfect for smaller outdoor areas where space is limited. Despite their compact size, they deliver impressive airflow and cooling performance.
  • Multiple Speed Options: Most Outdoor 36 Inch Ceiling Fans come with multiple speed settings, allowing you to customize the airflow to suit your comfort preferences. Whether you need a gentle breeze or powerful cooling, these fans have you covered.
  • Integrated Light Kit: Many models of Outdoor 36 Inch Ceiling Fans feature an integrated light kit, providing both illumination and airflow in one convenient fixture. This makes them perfect for illuminating outdoor entertaining areas during evening gatherings.

Installing Your Outdoor 36 Inch Ceiling Fan

Installing an Outdoor 36 Inch Ceiling Fan is a relatively simple process that can be completed with basic tools and DIY skills. Here’s a step-by-step guide to help you get started:

  1. Choose the Right Location: Select a suitable location for your Outdoor 36 Inch Ceiling Fan, ensuring that there is proper clearance from any obstacles such as walls or beams.
  2. Prepare the Mounting Area: Install a mounting bracket or ceiling fan box in the chosen location, following the manufacturer’s instructions and ensuring that it is securely anchored to the ceiling structure.
  3. Assemble the Fan: Assemble the fan components according to the manufacturer’s instructions, making sure to secure the blades to the motor housing and attach any additional accessories such as light kits.
  4. Mount the Fan: Lift the assembled fan onto the mounting bracket or ceiling fan box, ensuring that it is properly aligned and secured in place with the provided screws or hardware.
  5. Connect the Wiring: Follow the wiring instructions provided with the fan, connecting the wires from the fan motor to the corresponding wires in the ceiling junction box. Use wire nuts and electrical tape to secure the connections.
  6. Test the Fan: Once the installation is complete, turn on the power and test the operation of the fan to ensure that it is functioning properly. Adjust the speed settings and check for any unusual noises or vibrations.

Enhancing Your Outdoor Living Experience with Outdoor 36 Inch Ceiling Fan

Outdoor 36 Inch Ceiling Fans are not only functional but also add a touch of style and sophistication to any outdoor space. Whether you’re relaxing on the patio, hosting a barbecue, or enjoying a quiet evening under the stars, these fans create a comfortable and inviting atmosphere for you and your guests to enjoy.

Conclusion:

In conclusion, Outdoor 36 Inch Ceiling Fan are the perfect solution for adding comfort, style, and functionality to your outdoor living space. With their compact size, weather-resistant construction, and versatile features, these fans provide year-round comfort and enjoyment for you and your family.

Read too: Enhance Your Space with Acoustic Ceiling Tiles Paint: A Comprehensive Guide