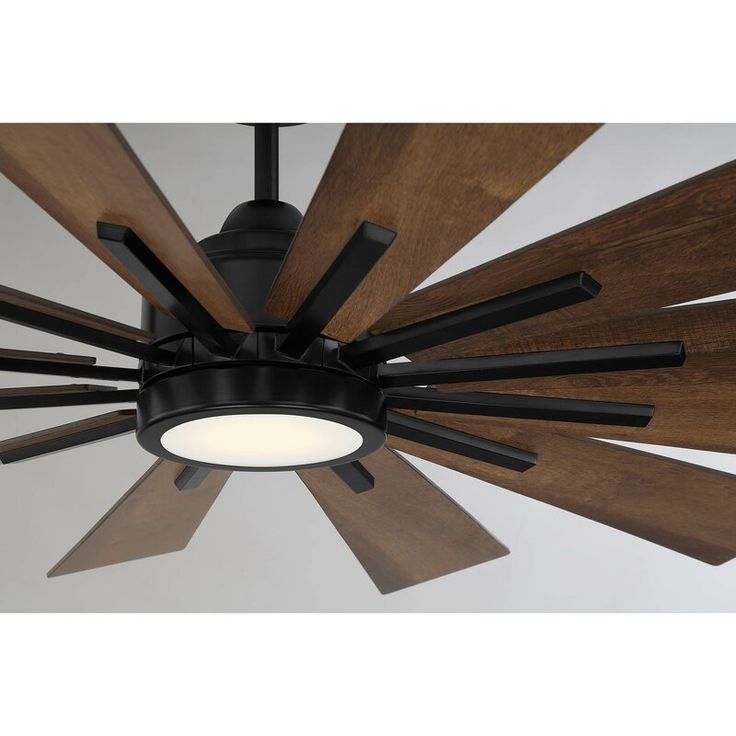
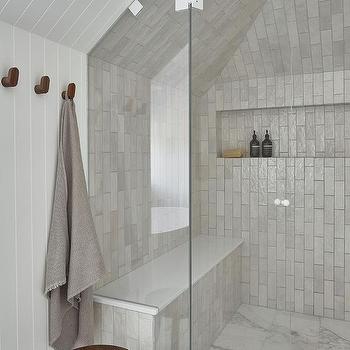
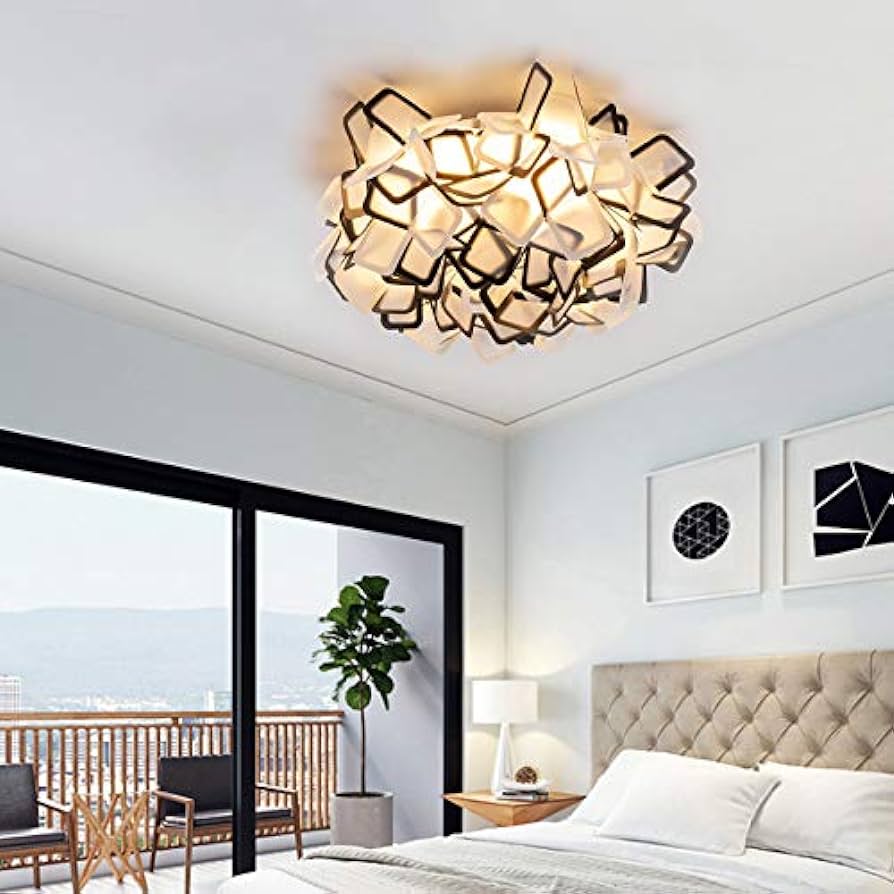
Exploring the Benefits of Ceiling Mounted Basketball Hoop for Home Courts: Elevate Your Game

In recent years, the trend of installing home basketball courts has gained popularity among sports enthusiasts and families alike. With the advancement of technology and design, one innovative solution that stands out is the ceiling mounted basketball hoop. In this comprehensive guide, we’ll delve into the benefits, installation process, and considerations of ceiling mounted basketball hoops, helping you elevate your game to new heights.

Ceiling Mounted Basketball Hoop

Understanding Ceiling Mounted Basketball Hoops

What Are Ceiling Mounted Basketball Hoops?

Ceiling mounted basketball hoops are a space-saving alternative to traditional, ground-mounted hoops. As the name suggests, these hoops securely mount to the ceiling of a room or indoor space, allowing gameplay without requiring a dedicated ground-level basketball court.

Components of Ceiling Mounted Basketball Hoops

A typical ceiling mounted basketball hoop consists of several key components, including the backboard, rim, support structure, and mounting hardware. These hoops are designed to withstand rigorous play while providing a realistic basketball experience.

Read too: Discovering the Charm of Nautical Outdoor Ceiling Fans for Your Coastal Retreat: Sail into Style

Benefits of Ceiling Mounted Basketball Hoops

Space Optimization

One of the primary advantages of ceiling mounted basketball hoops is their ability to maximize space utilization. By eliminating the need for a ground-level court, homeowners can utilize existing indoor spaces such as garages, basements, or recreational rooms for basketball gameplay.

Safety and Durability

Ceiling mounted basketball hoops are engineered for durability and safety. With sturdy construction and high-quality materials, these hoops offer reliable performance and can withstand aggressive play without the risk of tipping over or causing damage to the surrounding area.

Installation Process

Professional Installation

While some DIY enthusiasts may attempt to install ceiling mounted basketball hoops themselves, it’s recommended to hire a professional for installation. A qualified installer will ensure proper mounting and alignment, minimizing the risk of accidents and ensuring optimal performance.

Structural Considerations

Before installing a ceiling mounted basketball hoop, it’s essential to assess the structural integrity of the mounting surface. The ceiling should be able to support the weight of the hoop, backboard, and players during gameplay. Consultation with a structural engineer may be necessary for certain installations.

Conclusion

Ceiling mounted basketball hoops offer a practical and space-saving solution for home basketball courts. With their innovative design, durability, and safety features, these hoops provide an excellent option for basketball enthusiasts looking to enjoy the game without the need for a dedicated outdoor court. Consider installing a ceiling mounted basketball hoop to elevate your playing experience and make the most of your available space.

Innovative Ideas for Shower With Slanted Ceiling: Making the Most of Your Space

Are you struggling to design a shower in a bathroom with a slanted ceiling? Don’t let the challenge of limited space dampen your creativity. In this comprehensive guide, we’ll explore innovative ideas and practical tips for creating a stunning shower area under a slanted ceiling that maximizes both functionality and aesthetics.

Shower With Slanted Ceiling

Understanding Showers With Slanted Ceiling

What Are Showers With Slanted Ceilings?

Showers with slanted ceilings, also known as attic showers or sloped ceiling showers, are common in bathrooms located in attic spaces or rooms with angled ceilings. While they present unique design challenges, they also offer an opportunity to create a cozy and intimate showering experience.

Considerations for Shower With Slanted Ceilings

When designing a shower with a slanted ceiling, several factors need to be taken into account, including the angle and height of the ceiling, water drainage, ventilation, and waterproofing. By addressing these considerations early in the design process, you can ensure a successful and functional shower space.

Design Ideas for Shower With Slanted Ceiling

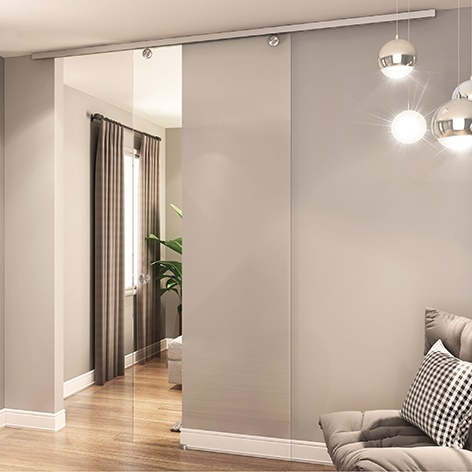
Glass Enclosures

Opt for a glass enclosure for your shower to maintain an open and spacious feel, despite the constraints of a slanted ceiling. Frameless glass doors and walls can create a seamless transition between the shower area and the rest of the bathroom, allowing natural light to penetrate and visually expand the space.

Built-In Storage Solutions

Maximize the use of vertical space by incorporating built-in storage solutions into the design of your shower. Recessed shelves or niches can be installed directly into the slanted walls, providing convenient storage for toiletries, bath essentials, and decorative accents without encroaching on the showering area.

Read too: Discovering the Charm of Nautical Outdoor Ceiling Fans for Your Coastal Retreat: Sail into Style

Waterproofing and Drainage Considerations

Waterproof Membrane Installation

Ensure proper waterproofing of the shower area to prevent water damage and mold growth in the sloped ceiling. Install a waterproof membrane on the walls and ceiling of the shower enclosure, extending it beyond the shower area to create a seamless barrier against moisture infiltration.

Sloped Shower Pan

Choose a sloped shower pan that matches the angle of the ceiling to facilitate proper drainage and minimize standing water. This ensures that water flows efficiently toward the drain, reducing the risk of leaks or water pooling on the shower floor.

Conclusion

Designing a shower with a slanted ceiling may pose unique challenges, but with careful planning and creative solutions, you can transform this space into a functional and stylish oasis. By considering factors such as layout, waterproofing, and storage, you can optimize your shower area to make the most of your bathroom’s architectural features.

Art Deco Flush Mount Ceiling Light Fixtures: Elevate Your Space

Are you searching for a lighting solution that combines elegance, sophistication, and timeless style? Look no further than Art Deco Flush Mount Ceiling Light fixtures. In this comprehensive guide, we’ll delve into the allure of Art Deco design, explore the characteristics of flush mount ceiling lights, and provide inspiration for incorporating these stunning fixtures into your space.

Art Deco Flush Mount Ceiling Light

Exploring Art Deco Flush Mount Ceiling Light Fixtures

Understanding Art Deco Style

Art Deco emerged in the early 20th century as a luxurious and glamorous design movement characterized by geometric shapes, bold colors, and lavish ornamentation. Inspired by the modern advancements of the time, Art Deco celebrates innovation, elegance, and opulence.

Characteristics of Flush Mount Ceiling Lights

Flush mount ceiling lights are fixtures that are mounted directly against the ceiling, providing a seamless and streamlined appearance. These fixtures are ideal for rooms with low ceilings or where a minimalist aesthetic is desired. Art Deco Flush Mount Ceiling Lights often feature geometric patterns, sleek metallic finishes, and frosted glass diffusers, reflecting the iconic style of the era.

Advantages of Art Deco Flush Mount Ceiling Lights

Timeless Elegance

Art Deco Flush Mount Ceiling Lights exude timeless elegance and sophistication, making them a perfect choice for both traditional and contemporary spaces. Their sleek lines and geometric motifs add a touch of glamour to any room, creating a focal point that commands attention.

Versatility

Flush mount ceiling lights are highly versatile and can be used in a variety of settings, from entryways and hallways to bedrooms, living rooms, and dining areas. Their low-profile design makes them suitable for rooms with limited ceiling height, while their stylish appearance complements a range of interior styles.

Design Ideas for Incorporating Art Deco Flush Mount Ceiling Lights

Entryway Elegance

Make a grand entrance with an Art Deco Flush Mount Ceiling Light fixture in your entryway. Choose a statement-making design with intricate metalwork and frosted glass panels to create a dramatic first impression.

Chic Dining Room Illumination

Add a touch of glamour to your dining room with a series of Art Deco Flush Mount Ceiling Lights positioned above the table. Opt for fixtures with geometric shapes and metallic finishes to enhance the sophistication of the space.

Stylish Bedroom Ambiance

Create a relaxing and stylish ambiance in your bedroom with an Art Deco Flush Mount Ceiling Light fixture. Choose a design with soft, diffused lighting to promote relaxation and complement your bedroom decor.

Installation Tips

Proper Placement

When installing Art Deco Flush Mount Ceiling Lights, consider the size and layout of the room to determine the optimal placement. Position the fixtures evenly to ensure balanced illumination throughout the space.

Read too: Discovering the Charm of Nautical Outdoor Ceiling Fans for Your Coastal Retreat: Sail into Style

Secure Mounting

Ensure securely mounting the fixtures to the ceiling to prevent accidents and ensure long-term durability. Follow the manufacturer’s instructions carefully and use appropriate mounting hardware for a safe and secure installation.

Conclusion

Art Deco Flush Mount Ceiling Lights are more than just lighting fixtures—they’re timeless works of art that elevate the ambiance and style of any space. Whether you’re drawn to the geometric motifs, sleek finishes, or soft diffused lighting, these iconic fixtures are sure to make a statement in your home or business. Explore the possibilities of Art Deco design and transform your space with the elegance and sophistication of Art Deco Flush Mount Ceiling Lights.

Enhance Your Space with Stylish Black Ceiling Tiles 2X4: A Complete Guide

Are you looking to add a touch of sophistication and modernity to your space? Consider installing black ceiling tiles 2X4 to elevate the aesthetic appeal of any room. In this comprehensive guide, we’ll explore the versatility, installation process, benefits, and design ideas for black ceiling tiles 2X4, helping you create a stylish and inviting atmosphere.

Black Ceiling Tiles 2X4

Exploring Black Ceiling Tiles 2X4

Versatility and Style

Black ceiling tiles 2X4 offer a sleek and contemporary look that complements a variety of interior design styles. Whether you prefer a minimalist, industrial, or luxurious aesthetic, black ceiling tiles can enhance the visual appeal of any space.

Material and Construction

Black ceiling tiles are typically made from durable materials such as PVC, fiberglass, or metal. These materials are lightweight, easy to install, and resistant to moisture and humidity, making them suitable for use in kitchens, bathrooms, and other high-moisture areas.

Benefits of Black Ceiling Tiles 2X4

Enhanced Aesthetic Appeal

The deep, rich color of black ceiling tiles adds depth and drama to any room, creating a striking focal point that draws the eye upward. Black ceilings can make a space feel more intimate and cozy or create a sense of sophistication and luxury, depending on the overall design aesthetic.

Concealment of Imperfections

Black ceiling tiles are excellent for concealing imperfections such as cracks, stains, or uneven surfaces. The dark color helps to mask flaws and creates a seamless, uniform appearance, giving your ceiling a polished and professional look.

Installation Process

Preparation

Before installing black ceiling tiles, ensure that the ceiling surface is clean, dry, and free of any debris or obstructions. Measure the dimensions of the room and calculate the number of tiles needed for complete coverage.

Installation

Begin by locating the center of the room and marking it as a reference point. Install the first row of tiles along the centerline, working outward toward the walls. Use adhesive or nails to secure the tiles in place, ensuring that they are aligned and evenly spaced.

Design Ideas for Black Ceiling Tiles 2X4

Modern Minimalism

Achieve a sleek and minimalist look by pairing black ceiling tiles with clean lines, neutral colors, and minimalist furnishings. Opt for simple, geometric patterns or solid black tiles for a contemporary aesthetic.

Industrial Chic

Embrace the industrial trend by incorporating black ceiling tiles into a loft-style space. Pair the tiles with exposed brick walls, metal accents, and vintage-inspired furniture for an edgy and urban vibe.

Luxurious Sophistication

Create a sense of luxury and opulence with black ceiling tiles in a formal dining room or living area. Pair the tiles with plush furnishings, crystal chandeliers, and metallic accents for a glamorous and sophisticated look.

Read too: Discovering the Charm of Nautical Outdoor Ceiling Fans for Your Coastal Retreat: Sail into Style

Conclusion

Black ceiling tiles 2X4 offer a stylish and versatile solution for enhancing any space. Whether you’re aiming for a modern, industrial, or luxurious aesthetic, black ceiling tiles can help you achieve your design goals with ease. From installation tips to design inspiration, this guide has everything you need to know to incorporate black ceiling tiles into your home or commercial space.

White Flush Mount Ceiling Fan Options: Enhance Your Space with Style

Are you looking to add a touch of elegance and functionality to your space? Explore the allure of white flush mount ceiling fan and how they can transform your room into a stylish and comfortable retreat. Discover installation insights, design inspirations, and top-rated options to elevate your home décor.

White Flush Mount Ceiling Fan

Elevate Your Space with a White Flush Mount Ceiling Fan

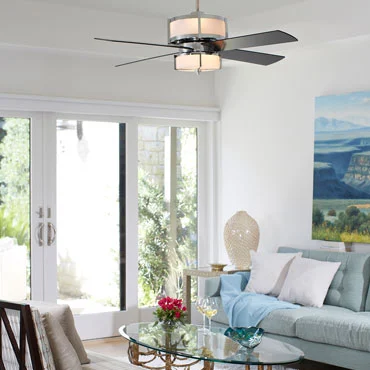
A white flush mount ceiling fan offers a sleek and understated design that complements any interior style. Whether you prefer modern minimalism or classic elegance, these versatile fixtures blend seamlessly into your space while providing optimal air circulation and comfort.

Read too: Discovering the Charm of Nautical Outdoor Ceiling Fans for Your Coastal Retreat: Sail into Style

Why Choose a White Flush Mount Ceiling Fan?

  1. Space-Saving Design: Flush mount ceiling fans are ideal for rooms with low ceilings or limited space. Their streamlined profile hugs the ceiling, creating a clean and unobtrusive look that maximizes headroom and visual appeal.
  2. Versatile Aesthetic: White finish adds a timeless and versatile touch to any room, enhancing its brightness and creating a sense of openness. Whether you’re aiming for a coastal-inspired retreat or a contemporary vibe, a white flush mount ceiling fan effortlessly complements your dĂ©cor scheme.
  3. Efficient Air Circulation: Despite their compact design, white flush mount ceiling fans deliver powerful airflow, keeping your room cool and comfortable year-round. With advanced motor technology and blade designs, these fans provide efficient performance without compromising on style.

Installation Tips

Installing a white flush mount ceiling fan is a relatively straightforward process, but it requires careful attention to detail to ensure optimal performance and safety. Follow these installation tips to achieve professional results:

  1. Prepare the Mounting Location: Choose a suitable location for the ceiling fan, ensuring that there is sufficient clearance and support for the fixture. Remove any existing light fixtures or ceiling fans and patch up any holes or imperfections in the ceiling.
  2. Secure the Mounting Bracket: Attach the mounting bracket securely to the ceiling joist or support structure using appropriate screws and hardware. Ensure that the bracket is level and stable to prevent wobbling or imbalance during operation.
  3. Assemble the Fan Components: Follow the manufacturer’s instructions to assemble the fan components, including the motor housing, blades, and light kit (if applicable). Pay attention to the wiring connections and blade alignment to ensure smooth and quiet operation.
  4. Connect the Wiring: Carefully connect the fan’s wiring to the corresponding wires in the ceiling, following standard electrical procedures and safety precautions. Use wire nuts to secure the connections and cover them with the provided wire housing for added safety.
  5. Test and Balance the Fan: Once the installation is complete, turn on the power and test the fan to ensure that it operates smoothly and quietly. Use a balancing kit to adjust the blade alignment if necessary, ensuring optimal airflow and performance.

Design Inspiration: White Flush Mount Ceiling Fan Ideas

Coastal Retreat

Create a serene coastal oasis with a white flush mount ceiling fan paired with natural materials, soft blue accents, and beach-inspired décor. The clean lines and crisp finish of the fan evoke the tranquility of seaside living, while the gentle breeze enhances the laid-back ambiance.

Modern Elegance

Achieve a contemporary look with a white flush mount ceiling fan featuring sleek blades and minimalist design. Pair it with sleek furniture, metallic accents, and monochromatic tones for a sophisticated and polished aesthetic that exudes modern elegance.

Classic Charm

Capture the timeless appeal of traditional design with a white flush mount ceiling fan adorned with ornate details and vintage-inspired elements. Pair it with rich wood finishes, floral patterns, and antique accents for a cozy and inviting atmosphere reminiscent of old-world charm.

Top-Rated White Flush Mount Ceiling Fans Options

  1. Hunter Dempsey Low Profile Ceiling Fan: This stylish fan features a clean white finish, reversible blades, and a dimmable LED light kit, making it a versatile choice for any room.
  2. Emerson Curva Sky Ceiling Fan: With its sleek and modern design, this fan adds a contemporary flair to your space while providing efficient airflow and energy-saving performance.
  3. Minka-Aire Concept II Flush Mount Ceiling Fan: Ideal for low ceilings, this fan boasts a seamless flush mount design, quiet operation, and customizable speed and light settings for personalized comfort.
  4. Casablanca Isotope Ceiling Fan: Combining form and function, this fan features a low-profile design, integrated LED light, and advanced motor technology for optimal performance and style.

Conclusion

In conclusion, a white flush mount ceiling fans offers a versatile and stylish solution for enhancing your home’s comfort and aesthetics. Whether you prefer a modern, coastal, or traditional look, there’s a white flush mount ceiling fans to suit your design preferences and elevate your space with a refreshing breeze and chic ambiance.

Elevate Your Bathroom Design with a Stunning Wood Plank Ceiling

Transform your bathroom into a spa-like retreat with the natural elegance of a wood plank ceiling. Explore the possibilities of adding warmth, texture, and style to your bathroom design.

Wood Plank Ceiling Bathroom

Enhancing Your Bathroom with a Wood Plank Ceiling

A wood plank ceiling adds a touch of rustic charm and warmth to any bathroom, creating a cozy and inviting atmosphere reminiscent of a luxury spa. Whether you’re renovating your existing bathroom or building a new one, incorporating a wood plank ceiling can elevate the overall design and ambiance of the space. Let’s delve into the features, benefits, and design options for wood plank ceilings in bathrooms:

Features of Wood Plank Ceiling Bathroom

  • Natural Beauty: Wood plank ceilings showcase the natural beauty and grain patterns of the wood, adding warmth and character to your bathroom dĂ©cor.
  • Variety of Wood Species: From classic oak and pine to exotic teak and cedar, there are various wood species to choose from, allowing you to achieve the desired aesthetic for your bathroom.
  • Moisture-Resistant Finishes: To withstand the humid environment of a bathroom, wood plank ceilings can be treated with moisture-resistant finishes or sealants, ensuring long-lasting durability and performance.
  • Customizable Design: Wood plank ceilings offer endless design possibilities, from traditional tongue-and-groove panels to rustic reclaimed wood planks, allowing you to create a unique and personalized look for your bathroom.

Read too: Discovering the Charm of Nautical Outdoor Ceiling Fans for Your Coastal Retreat: Sail into Style

Benefits of Wood Plank Ceiling Bathroom

  • Warm and Inviting Atmosphere: The natural warmth and texture of wood create a cozy and inviting atmosphere in your bathroom, making it the perfect place to relax and unwind after a long day.
  • Enhanced Aesthetics: A wood plank ceiling adds visual interest and architectural detail to your bathroom, enhancing the overall aesthetics and value of your home.
  • Improved Acoustics: Wood plank ceilings can help improve the acoustics of your bathroom by reducing echoes and sound reverberation, creating a quieter and more comfortable environment.

Installation Process for Wood Plank Ceiling Bathroom

Installing a wood plank ceiling in your bathroom requires careful planning and attention to detail. Follow these steps for a successful installation:

1. Measure and Prepare

  • Measure the dimensions of your bathroom ceiling and calculate the square footage needed for the wood planks. Prepare the ceiling surface by removing any existing materials and ensuring it is clean, dry, and level.

2. Choose the Right Materials

  • Select high-quality wood planks that are suitable for use in bathrooms and resistant to moisture and humidity. Consider factors such as wood species, plank width, and finish options to achieve the desired look for your bathroom.

3. Installation Techniques

  • Depending on the chosen design, wood planks can be installed using tongue-and-groove, nail-down, or adhesive methods. Follow manufacturer guidelines and best practices for proper installation to ensure a secure and stable ceiling.

4. Finish and Seal

  • Once the wood planks are installed, apply a protective finish or sealant to enhance durability and resistance to moisture. Allow the finish to dry completely before using the bathroom.

Design Ideas for Wood Plank Ceilings Bathroom

  • Rustic Retreat: Create a cozy cabin-like ambiance with knotty pine or reclaimed wood planks, accented with wrought iron fixtures and natural stone accents.
  • Modern Elegance: Achieve a sleek and contemporary look with smooth hardwood planks in a rich walnut or cherry finish, paired with minimalist fixtures and clean lines.
  • Coastal Charm: Embrace a coastal-inspired theme with whitewashed or weathered wood planks, complemented by nautical accents and beachy dĂ©cor elements.

Conclusion

In conclusion, a wood plank ceilings adds warmth, texture, and character to your bathroom, creating a cozy and inviting space that reflects your personal style and taste. With a variety of wood species, finishes, and design options available, you can easily customize your wood plank ceilings to suit your preferences and enhance the overall aesthetics of your bathroom.

White Faux Ceiling Beam: Elevate Your Home DĂ©cor

Transform your home’s interior with the timeless elegance of white faux ceiling beam. Explore the versatility, beauty, and practicality of these stunning architectural elements.

White Faux Ceiling Beams

Unveiling the Beauty of White Faux Ceiling Beams

White faux ceiling beams are a stylish and versatile addition to any home, providing the charm and character of real wood without the maintenance or cost. These decorative beams can enhance the aesthetic appeal of any room while adding warmth and texture to the ceiling. Let’s delve into the features, benefits, and design ideas for incorporating white faux ceiling beams into your home:

Features of White Faux Ceiling Beams

  • Authentic Appearance: White faux ceiling beams mimic the look and texture of real wood, providing a realistic and natural aesthetic for your home.
  • Lightweight Construction: Made from high-quality polyurethane or composite materials, white faux ceiling beams are lightweight and easy to install, making them suitable for both DIY and professional projects.
  • Versatile Design: Available in a variety of sizes, styles, and finishes, white faux ceiling beams can complement any dĂ©cor style, from traditional to contemporary, adding character and depth to your space.
  • Low Maintenance: Unlike real wood beams, white faux ceiling beams require minimal maintenance and upkeep. They are resistant to moisture, rot, and insect damage, ensuring long-lasting beauty and durability.

Read too: Discovering the Charm of Nautical Outdoor Ceiling Fans for Your Coastal Retreat: Sail into Style

Benefits of White Faux Ceiling Beams

  • Cost-Effective: White faux ceiling beams are more affordable than real wood beams, allowing you to achieve the look of luxury without breaking the bank.
  • Easy Installation: With their lightweight design and simple installation process, white faux ceiling beams can be installed quickly and easily, saving time and labor costs.
  • Design Versatility: Whether you’re looking to add rustic charm to a farmhouse kitchen or contemporary elegance to a modern living room, white faux ceiling beams offer endless design possibilities to suit your style and preferences.

Installation Process for White Faux Ceiling Beams

Follow these steps to install white faux ceiling beams in your home:

1. Measure and Plan

  • Measure the length and width of the ceiling where you plan to install the beams. Use these measurements to determine the number and size of beams needed for your project.

2. Prepare the Ceiling

  • Clean the ceiling surface and remove any existing fixtures or obstacles that may interfere with the installation of the beams. Mark the locations where the beams will be installed using a pencil or chalk.

3. Install the Beams

  • Cut the white faux ceiling beams to the desired length using a saw, if necessary. Apply construction adhesive to the back of each beam and press firmly against the ceiling, following the marked guidelines.

4. Secure the Beams

  • Use screws or nails to secure the beams to the ceiling, ensuring a tight and secure fit. Fill any gaps or seams with wood filler or caulk to create a seamless finish.

Design Ideas for White Faux Ceiling Beams

  • Rustic Charm: Install white faux ceiling beams in a farmhouse-style kitchen or dining room to add rustic charm and warmth to the space.
  • Coastal Elegance: Create a coastal-inspired vibe in a living room or bedroom by pairing white faux ceiling beams with light, airy dĂ©cor and beach-inspired accents.
  • Modern Sophistication: For a contemporary look, install white faux ceiling beams in a minimalist or industrial-style space, adding architectural interest and visual appeal.

Conclusion

In conclusion, white faux ceiling beam are a versatile and cost-effective way to add style, charm, and architectural interest to any room in your home. With their authentic appearance, easy installation, and endless design possibilities, these decorative beams offer a timeless and elegant solution for enhancing your living space.

Three Blade Outdoor Ceiling Fan: Enhance Your Outdoor Space

Transform your outdoor space into a comfortable and stylish oasis with the addition of a sleek three blade outdoor ceiling fan. Learn about the features, benefits, and installation tips to make the most of your outdoor living experience.

Three Blade Outdoor Ceiling Fan

Exploring Three Blade Outdoor Ceiling Fans

A three blade outdoor ceiling fan is a versatile and functional addition to any outdoor space, providing both style and comfort. These fans are designed to withstand the elements while delivering efficient airflow and cooling breeze. Let’s delve into the features and benefits of these outdoor fans:

Features of Three Blade Outdoor Ceiling Fans

  • Durable Construction: Three blade outdoor ceiling fans are constructed with weather-resistant materials such as stainless steel or ABS plastic to withstand exposure to moisture, UV rays, and rust.
  • Efficient Motor: These fans are equipped with high-performance motors that deliver powerful airflow while operating quietly and efficiently.
  • Sleek Design: With their minimalist design and sleek blades, three blade outdoor ceiling fans add a modern touch to any outdoor space, enhancing its aesthetic appeal.
  • Remote Control Options: Many three blade outdoor ceiling fans come with remote control options, allowing you to adjust speed settings and lighting from the comfort of your seat.

Benefits of Three Blade Outdoor Ceiling Fans

  • Improved Comfort: By circulating air and creating a cooling breeze, outdoor ceiling fans help to reduce the perceived temperature and make outdoor spaces more comfortable, even on hot summer days.
  • Energy Efficiency: Using a ceiling fan in conjunction with air conditioning allows you to raise the thermostat setting by a few degrees, reducing energy consumption and lowering utility bills.
  • Enhanced DĂ©cor: Three blade outdoor ceiling fans serve as functional dĂ©cor elements, adding style and sophistication to patios, porches, gazebos, and other outdoor areas.

Read too: Discovering the Charm of Nautical Outdoor Ceiling Fans for Your Coastal Retreat: Sail into Style

Installation Tips for Three Blade Outdoor Ceiling Fans

Follow these tips to ensure a successful installation of your three blade outdoor ceiling fan:

1. Choose the Right Size

  • Select a fan size that is appropriate for the size of your outdoor space. Measure the area and choose a fan with an appropriate blade span to provide adequate airflow and coverage.

2. Install on a Stable Surface

  • Ensure that the mounting surface for the ceiling fan is stable and secure. Use a mounting bracket designed for outdoor use and follow the manufacturer’s instructions for proper installation.

3. Consider Outdoor Conditions

  • Select a location for the ceiling fan sheltered from direct exposure to rain and moisture. Install the fan under a covered patio or porch to protect it from the elements.

4. Hire a Professional Installer

  • If you’re not confident in your ability to install the ceiling fan yourself, consider hiring a professional electrician or handyman to ensure safe and proper installation.

Conclusion

In conclusion, a three blade outdoor ceiling fan is a stylish and functional addition to any outdoor space, providing comfort, energy efficiency, and enhanced décor. By choosing the right fan size, installing it properly, and considering outdoor conditions, you can maximize the benefits of your outdoor ceiling fan and enjoy a more enjoyable outdoor living experience.

Installing a Paddle Board Ceiling Rack in Your Home: Maximize Space and Style

Are you tired of tripping over your paddle board every time you step into your garage or storage area? Say goodbye to clutter and hello to organization with a paddle board ceiling rack. In this guide, we’ll explore the benefits of installing a paddle board ceiling rack, how to do it yourself, and why it’s a game-changer for paddle board enthusiasts.

Paddle Board Ceiling Rack

Discovering the Paddle Board Ceiling Rack

The Need for Organization

Paddle boards are large, bulky items that can take up valuable floor space if not properly stored. A paddle board ceiling rack provides a solution by allowing you to safely and securely store your board overhead, freeing up floor space for other items or activities.

Benefits of a Paddle Board Ceiling Rack

  1. Space Optimization: By utilizing the ceiling space in your garage or storage area, a ceiling rack allows you to maximize floor space and keep your paddle board out of the way when not in use.
  2. Protection: Storing your paddle board on a ceilings rack helps protect it from damage caused by being leaned against walls or stacked with other items. It also prevents scratches and dents that can occur when boards are stored haphazardly.
  3. Easy Access: Despite being overhead, a paddle board ceilings rack provides convenient access to your board whenever you’re ready to hit the water. No more struggling to maneuver around obstacles or dig through clutter to find your board.

Installing a Paddle Board Ceiling Rack

Step-by-Step Guide

  1. Locate Ceiling Joists: Use a stud finder to locate the ceiling joists where you plan to install the rack. Ceiling joists provide the necessary support to hold the weight of your paddle board.
  2. Mark Mounting Points: Once you’ve located the joists, mark the mounting points for the ceiling rack brackets. Ensure you space the brackets appropriately to support the length of your paddle board.
  3. Install Brackets: Secure the brackets to the ceiling joists using heavy-duty screws or bolts. Make sure the brackets are level and securely anchored to the joists to prevent accidents or damage.
  4. Attach Rack Arms: Once the brackets are in place, attach the rack arms to the brackets according to the manufacturer’s instructions. Test the rack for stability and adjust as needed.

Maintenance and Safety Tips

Regular Inspections

Periodically inspect the ceiling rack and mounting hardware for signs of wear or damage. Tighten any loose bolts or screws, and replace any worn components to ensure the safety and security of your paddle board.

Weight Capacity

Be mindful of the weight capacity of your paddle board ceilings rack and avoid exceeding it. Overloading the rack can lead to structural damage or failure, risking damage to your paddle board and other property.

Read too: Discovering the Charm of Nautical Outdoor Ceiling Fans for Your Coastal Retreat: Sail into Style

Conclusion

A paddle board ceilings rack is a practical and space-saving solution for storing your paddle board safely and securely. By following the installation and maintenance tips outlined in this guide, you can enjoy the convenience of easy access to your paddle board while keeping your space organized and clutter-free.

Stylish Outdoor Patio Ceiling Lighting Ideas: Elevate Your Outdoor Space

Transforming your outdoor patio into a welcoming and inviting space involves careful attention to lighting. Among the various lighting options available, outdoor patio ceiling lighting stands out for its ability to illuminate the area while adding a touch of elegance and functionality. In this guide, we’ll explore the world of outdoor patio ceiling lighting, from design inspirations to installation tips, to help you create the perfect ambiance for your outdoor gatherings.

Outdoor Patio Ceiling Lighting

Exploring Outdoor Patio Ceiling Lighting

Why Outdoor Patio Ceiling Lighting Matters

Outdoor patio ceiling lighting serves multiple purposes, including:

  1. Enhanced Visibility: Proper lighting allows you to enjoy your outdoor space even after sunset, providing visibility for various activities such as dining, entertaining, or relaxation.
  2. Ambiance Creation: Well-designed lighting fixtures can set the mood and ambiance of your outdoor patio, whether you’re aiming for a cozy atmosphere or a vibrant gathering space.
  3. Aesthetic Appeal: Outdoor ceiling lights come in a variety of styles and designs, allowing you to enhance the visual appeal of your patio while complementing its overall décor.

Types of Outdoor Patio Ceiling Lighting

1. Flush Mount Lights

Flush mount lights sit close to the ceiling, providing a sleek and unobtrusive lighting option. They are ideal for low ceilings or areas where space is limited.

2. Pendant Lights

Pendant lights hang from the ceiling on a chain or rod, adding a decorative element to your outdoor space. They come in various shapes, sizes, and materials to suit different design preferences.

3. Chandeliers

For a touch of sophistication and grandeur, consider installing a chandelier on your outdoor patio ceiling. Chandeliers create a focal point and can elevate the overall aesthetic of your outdoor décor.

Design Tips for Outdoor Patio Ceiling Lighting

1. Consider the Size and Scale

Choose lighting fixtures that are proportionate to the size of your patio space. Oversized fixtures may overwhelm small patios, while undersized ones may look out of place in larger areas.

2. Coordinate with Existing DĂ©cor

Select lighting fixtures that complement the style and theme of your outdoor furniture and décor. Whether your patio has a modern, rustic, or traditional aesthetic, there are lighting options available to match.

3. Illuminate Key Areas

Strategically place lighting fixtures to illuminate key areas of your patio, such as seating areas, dining spaces, pathways, and architectural features. This ensures even lighting distribution and enhances the functionality of the space.

Installation and Maintenance

1. Hire a Professional

For complex installations or wiring requirements, it’s advisable to hire a licensed electrician to ensure safety and compliance with building codes.

2. Regular Cleaning and Inspection

Periodically clean outdoor lighting fixtures to remove dirt, debris, and insects that may accumulate over time. Inspect wiring and connections for any signs of damage or wear and tear, and address any issues promptly to maintain optimal performance.

Read too: Discovering the Charm of Nautical Outdoor Ceiling Fans for Your Coastal Retreat: Sail into Style

Conclusion

Outdoor patio ceilings lighting is a versatile and stylish addition to any outdoor space, offering both practical illumination and aesthetic enhancement. By exploring different types of lighting fixtures, considering design tips, and ensuring proper installation and maintenance, you can create an outdoor oasis that is both functional and visually appealing.

LED Exterior Ceiling Light: Illuminate Your Outdoor Space

Enhance the beauty and safety of your outdoor area with state-of-the-art LED exterior ceiling light. Discover the benefits, installation tips, and design options to brighten up your outdoor space in style.

Led Exterior Ceiling Lights

Introduction

LED exterior ceiling lights are revolutionizing outdoor lighting, offering energy-efficient solutions that enhance the ambiance and functionality of any outdoor space. From illuminating a patio or deck to providing security lighting for pathways and entryways, LED exterior ceiling lights offer versatility, durability, and unmatched performance. In this comprehensive guide, we’ll delve into the world of LED exterior ceiling lights, exploring their features, advantages, installation techniques, and design considerations.

Exploring LED Exterior Ceiling Lights

LED exterior ceiling light are fixtures designed to be mounted on outdoor ceilings, such as those found on porches, covered patios, gazebos, and carports. These lights provide both functional and aesthetic benefits, offering illumination for outdoor activities while also enhancing the visual appeal of the surrounding area. LED technology has transformed the outdoor lighting industry, providing brighter, more energy-efficient lighting solutions that require minimal maintenance and offer extended longevity.

Benefits of LED Exterior Ceiling Lights

  1. Energy Efficiency: LED lights consume significantly less energy than traditional incandescent or fluorescent bulbs, helping you reduce your energy bills while minimizing your carbon footprint.
  2. Longevity: LED bulbs have a much longer lifespan compared to conventional lighting options, lasting up to 25 times longer. This means fewer replacements and reduced maintenance costs over time.
  3. Durability: LED exterior ceiling lights are built to withstand harsh outdoor conditions, including rain, wind, and extreme temperatures. They are resistant to corrosion, rust, and fading, ensuring long-lasting performance in any climate.
  4. Instant On: Unlike traditional bulbs that may take a few moments to reach full brightness, LED lights illuminate instantly, providing immediate light when you need it.
  5. Versatility: LED exterior ceiling lights come in a variety of styles, sizes, and designs to suit any outdoor aesthetic. Whether you prefer sleek and modern fixtures or classic and traditional designs, there’s an LED option to match your preferences.

Installation Tips for LED Exterior Ceiling Lights

  1. Choose the Right Location: Before installing LED exterior ceiling lights, carefully consider the placement to ensure optimal illumination and aesthetic appeal. Position the lights strategically to cover key areas while minimizing glare and shadows.
  2. Ensure Proper Wiring: If you’re installing new LED exterior ceiling lights or replacing existing fixtures, ensure that the wiring is compatible with LED technology and meets local building codes and safety standards.
  3. Use Waterproof Fixtures: Since LED exterior ceiling lights will be exposed to the elements, it’s essential to choose waterproof fixtures rated for outdoor use. Look for lights with an IP65 or higher rating to ensure protection against moisture and dust.
  4. Secure Mounting: Ensure you properly secure the mounting hardware to firmly attach the LED lights to the ceiling, enabling them to withstand wind, vibration, and other environmental factors.

Design Considerations for LED Exterior Ceiling Lights

  1. Style and Finish: LED exterior ceiling lights come in a variety of styles, including flush mounts, semi-flush mounts, lanterns, and more. Choose a style and finish that complements your outdoor décor and architectural features.
  2. Brightness and Color Temperature: Consider the desired brightness level and color temperature for your outdoor space. Opt for warmer temperatures (2700-3000K) for a cozy ambiance or cooler temperatures (4000-5000K) for enhanced visibility and security.
  3. Smart Features: Explore LED exterior ceiling lights with smart features such as motion sensors, dusk-to-dawn sensors, and dimmable options for added convenience and energy savings.

Conclusion

LED exterior ceiling lights offer a versatile, energy-efficient, and stylish lighting solution for outdoor spaces of all sizes and styles. Whether you’re illuminating a cozy patio, a sprawling backyard, or a commercial outdoor area, LED lights provide unmatched performance, durability, and visual appeal.

Read too: Exploring the Efficiency of Radiant Ceiling Heater Electric: A Comprehensive Guide

Floor-to-Ceiling Wine Cabinet: A Complete Guide

Transform your home into a wine lover’s paradise with a breathtaking floor-to-ceiling wine cabinet. Discover the elegance, functionality, and versatility of this stunning storage solution.

Floor To Ceiling Wine Cabinet

Introduction

A floor-to-ceiling wine cabinet is more than just a storage space; it’s a statement piece that adds sophistication and luxury to any room. Whether you’re a wine connoisseur or simply enjoy entertaining guests, a floor-to-ceiling wine cabinet offers both practicality and style. In this comprehensive guide, we’ll delve into the world of floor-to-ceiling wine cabinets, exploring their design options, installation process, and benefits for wine enthusiasts and interior design enthusiasts alike.

Exploring the Floor-to-Ceiling Wine Cabinet

A floor-to-ceiling wine cabinet is a tall, slender storage unit that extends from the floor to the ceiling, maximizing vertical space and creating a striking visual impact. These cabinets are typically designed to accommodate a large number of wine bottles while also incorporating features such as adjustable shelving, glass doors, and built-in lighting to showcase your collection in style.

Design Options and Customization

One of the key benefits of a floor-to-ceiling wine cabinet is its versatility in design and customization. From sleek and modern to rustic and traditional, there are endless design options to choose from to suit your personal taste and complement your existing decor. Some popular design features and customization options include:

  • Materials: Choose from a variety of high-quality materials, including wood, metal, glass, and acrylic, to create a wine cabinet that matches your aesthetic preferences and fits seamlessly into your space.
  • Finishes: Select from an array of finishes, such as stained wood, painted surfaces, or brushed metal, to achieve the perfect look for your wine cabinet.
  • Storage Capacity: Customize the size and configuration of your wine cabinet to accommodate your collection, whether you have a small selection of bottles or an extensive wine cellar.
  • Additional Features: Enhance the functionality and visual appeal of your wine cabinet with features like integrated wine racks, temperature control systems, and display lighting.

Installation and Considerations

Installing a floor-to-ceiling wine cabinet requires careful planning and consideration to ensure optimal functionality and aesthetic appeal. Here are some key factors to keep in mind during the installation process:

  • Location: Choose a suitable location for your wine cabinet, taking into account factors such as lighting, temperature control, and accessibility.
  • Structural Support: Ensure that the chosen location can support the weight of the wine cabinet, especially if it will be installed on an upper floor or in a space with limited structural support.
  • Ventilation: Proper ventilation is essential to maintain the quality of your wine collection and prevent mold or mildew growth. Consider installing ventilation systems or ensuring adequate airflow around the wine cabinet.
  • Professional Installation: For larger or more complex wine cabinet designs, consider hiring a professional contractor or installer to ensure proper installation and functionality.

Benefits of a Floor-to-Ceiling Wine Cabinet

Investing in a floor-to-ceilings wine cabinet offers numerous benefits for wine enthusiasts and homeowners alike, including:

  • Maximized Storage: Utilize vertical space more efficiently to store a larger wine collection without sacrificing valuable floor space.
  • Enhanced Aesthetics: Add a touch of elegance and sophistication to any room with a stylish and visually striking floor-to-ceiling wine cabinet.
  • Convenient Accessibility: Keep your wine collection organized and easily accessible, allowing you to quickly select the perfect bottle for any occasion.
  • Temperature Control: Maintain optimal storage conditions for your wine collection with temperature-controlled features and insulation options.

Conclusion

A floor-to-ceilings wine cabinet is a functional and stylish addition to any home or commercial space, offering both practical storage solutions and aesthetic appeal. Whether you’re a wine enthusiast looking to showcase your collection or a homeowner seeking to elevate your interior design, a floor-to-ceilings wine cabinet is sure to impress.

Read too: Exploring the Efficiency of Radiant Ceiling Heater Electric: A Comprehensive Guide

Ceiling Fan with Bamboo Blades: Enhance Your Home Decor

A ceiling fan with bamboo blades is not only a functional cooling solution but also a stylish addition to any home decor. In this comprehensive guide, we’ll explore the features, benefits, and installation tips for ceiling fans with bamboo blades, helping you make an informed decision when choosing the perfect fan for your space.

Ceiling Fan With Bamboo Blades

Understanding Ceiling Fans with Bamboo Blades

Ceiling fans with bamboo blades are designed to provide efficient air circulation while adding a touch of natural elegance to any room. The bamboo blades offer a unique aesthetic appeal, bringing warmth and texture to your ceiling fan while complementing various interior design styles, from tropical and coastal to modern and eco-friendly.

Benefits of Using a Ceiling Fan with Bamboo Blades

  1. Natural Beauty: The bamboo blades of these ceiling fans lend a natural, organic charm to your space, creating a visually pleasing focal point in any room. The unique texture and color variations of bamboo add depth and character to the fan, enhancing the overall aesthetic appeal of your home decor.
  2. Durability: Bamboo is known for its strength and durability, making it an excellent choice for ceiling fan blades. Unlike traditional materials like metal or plastic, bamboo is resistant to warping, cracking, and fading, ensuring that your fan will maintain its beauty and functionality for years to come.
  3. Energy Efficiency: Ceiling fans with bamboo blades are not only stylish but also energy-efficient. By circulating air more effectively, these fans help create a cooling breeze that can reduce the need for air conditioning, ultimately lowering your energy bills and environmental impact.
  4. Quiet Operation: Many ceiling fans with bamboo blades feature high-quality motor systems that operate quietly and efficiently, ensuring a peaceful and comfortable environment in your home. Whether you’re relaxing in the living room or sleeping in the bedroom, you can enjoy the gentle breeze without the distraction of loud fan noise.

Features to Look for in a Ceiling Fan with Bamboo Blades

When shopping for a ceiling fan with bamboo blades, consider the following features to ensure you choose the best option for your needs:

  1. Blade Size and Pitch: Look for a fan with appropriately sized blades and a steep enough pitch to provide effective airflow and cooling performance. The size of the room will dictate the ideal blade span and pitch for optimal air circulation.
  2. Motor Quality: Invest in a fan with a high-quality motor that is powerful, efficient, and reliable. A well-built motor will ensure smooth operation and consistent performance, even after years of use.
  3. Remote Control or Wall Control: Choose a fan with convenient control options, such as a remote control or wall-mounted control panel. This allows you to adjust the fan speed and direction easily, without having to get up from your seat.
  4. Lighting Options: Some ceiling fans come with integrated light fixtures, providing both illumination and air circulation in one convenient package. Consider whether you need a fan with built-in lights or prefer to use separate light fixtures in your space.

Installation Tips for Ceiling Fans with Bamboo Blades

Installing a ceiling fan with bamboo blades is a relatively straightforward process, but it’s essential to follow manufacturer instructions carefully for safety and optimal performance. Here are some installation tips to keep in mind:

  1. Turn Off Power: Before beginning the installation process, turn off the power to the existing ceiling light fixture at the circuit breaker or fuse box.
  2. Gather Tools and Materials: Make sure you have all the necessary tools and materials on hand, including a ladder, screwdriver, wire stripper, and electrical tape.
  3. Follow Instructions: Carefully read the manufacturer’s instructions included with your ceiling fan to ensure proper installation. Pay close attention to wiring diagrams, blade assembly, and safety precautions.
  4. Secure Mounting Bracket: Attach the mounting bracket to the ceiling junction box securely, using the provided screws and hardware. Make sure the bracket is level and stable before proceeding.
  5. Attach Fan Blades: Install the fan blades onto the motor housing according to the manufacturer’s instructions, making sure they are evenly spaced and securely fastened.
  6. Wire Connections: Connect the wiring from the fan motor to the corresponding wires in the ceiling junction box, following the wiring diagram provided. Use wire nuts to secure the connections and electrical tape to cover any exposed wires.
  7. Test Operation: Once the fan is securely mounted and wired, turn the power back on and test the fan’s operation. Make sure it runs smoothly and without any unusual noises or vibrations.

Creative Ideas for Using Ceiling Fans with Bamboo Blades

  1. Tropical Oasis: Create a relaxing tropical oasis in your living room or outdoor patio with a ceiling fan featuring bamboo blades. Pair it with rattan furniture, lush greenery, and earthy accents for a serene and inviting space.
  2. Coastal Retreat: Bring the beach vibes indoors with a coastal-themed bedroom or sunroom adorned with a bamboo-bladed ceiling fan. Incorporate nautical colors, driftwood accents, and seashell decor for a breezy, laid-back atmosphere.
  3. Modern Elegance: Contrary to popular belief, bamboo blades can also complement modern and minimalist interiors. Choose a sleek and streamlined fan design with bamboo blades for a contemporary touch that blends seamlessly with clean lines and neutral color palettes.

Conclusion

A ceiling fan with bamboo blades offers the perfect combination of functionality, style, and sustainability for any home. Whether you’re looking to cool down a room, enhance your home decor, or reduce your energy consumption, these fans are an excellent choice. With their natural beauty, durability, and energy-efficient performance, ceiling fans with bamboo blades are sure to become a stylish and eco-friendly addition to your living space.

Read too: Exploring the Efficiency of Radiant Ceiling Heater Electric: A Comprehensive Guide

Minka Roto Ceiling Fans: Experience Unmatched Performance and Style

Elevate the comfort and elegance of your living space with the exceptional Minka Roto Ceiling Fans. In this detailed review, we’ll explore the features, benefits, and installation process of the Minka Roto Ceiling Fan, providing you with all the information you need to enhance your home decor with this stylish and functional fixture.

Minka Roto Ceiling Fan

Introducing

The Minka Roto Ceiling Fan is not just an ordinary cooling solution; it’s a design statement that brings both functionality and style to any room. With its sleek design and powerful performance, this ceiling fan is sure to become the focal point of your living space.

Key Features of the Minka Roto Ceiling Fan

  • Minimalist Design: The Minka Roto Ceiling Fan features a minimalist design with clean lines and a sleek profile, making it suitable for a wide range of interior styles, from modern to transitional.
  • High-Performance Motor: Equipped with a powerful motor, the Minka Roto Ceiling Fan delivers exceptional airflow, keeping your room cool and comfortable even on the hottest days.
  • Versatile Blade Options: Choose from a variety of blade finishes and sizes to customize the look of your Minka Roto Ceiling Fan and complement your existing decor.
  • Integrated Light Kit: Many models of the Minka Roto Ceiling Fan come with an integrated light kit, providing both illumination and cooling in one stylish package.

Installing Your Minka Roto Ceiling Fan

Installing the Minka Roto Ceiling Fan is a straightforward process that can be completed in just a few simple steps. Follow these guidelines for a hassle-free installation experience:

  1. Preparation: Begin by turning off the power to the existing ceiling fan or light fixture at the circuit breaker. Remove the old fixture and prepare the ceiling junction box for installation.
  2. Mounting: Attach the mounting bracket to the ceiling junction box using the provided hardware. Ensure that the bracket is securely fastened and level.
  3. Wiring: Connect the wires from the ceiling junction box to the corresponding wires on the ceiling fan motor, following the manufacturer’s instructions carefully. Secure the wire connections with wire nuts and electrical tape.
  4. Blade Installation: Attach the fan blades to the motor housing using the included screws, making sure to align them properly and tighten the screws securely.
  5. Light Kit Installation: If your Minka Roto Ceiling Fan includes an integrated light kit, install it according to the provided instructions, ensuring that all connections are secure.
  6. Testing: Once the installation is complete, turn the power back on at the circuit breaker and test the operation of the ceiling fan and light kit to ensure everything is functioning properly.

Enhancing Your Home Decor with the Minka Roto Ceiling Fan

The Minka Roto Ceiling Fan not only provides superior comfort and functionality but also adds a touch of sophistication to any room. Whether you’re looking to update your living room, bedroom, or office space, this ceiling fan is sure to make a stylish statement.

Read too: Enhance Your Space with Acoustic Ceiling Tiles Paint: A Comprehensive Guide

Conclusion:

In conclusion, the Minka Roto Ceiling Fans offers unmatched performance, style, and versatility, making it the perfect addition to any home decor. With its sleek design, powerful motor, and customizable options, this ceiling fan is sure to enhance the comfort and elegance of your living space for years to come.

Minka Delano Ceiling Fans: A Comprehensive Review

Upgrade the aesthetic appeal and functionality of your living space with the exquisite Minka Delano Ceiling Fans. In this detailed review, we’ll explore the features, benefits, and installation process of the Minka Delano Ceiling Fan, providing you with all the information you need to make an informed decision for your home decor.

Minka Delano Ceiling Fan

Introducing

The Minka Delano Ceiling Fans is more than just a cooling solution; it’s a design statement that elevates any room’s ambiance. Combining sleek aesthetics with powerful functionality, this ceiling fan offers the perfect balance of form and function.

Key Features of the Minka Delano Ceiling Fan

  • Modern Design: With its contemporary design and clean lines, the Minka Delano Ceiling Fan adds a touch of sophistication to any space, from modern lofts to traditional homes.
  • High-Quality Construction: Crafted from premium materials and precision-engineered for durability, the Minka Delano Ceiling Fan is built to last and withstand the test of time.
  • Integrated Light Kit: Many models of the Minka Delano Ceiling Fan come equipped with an integrated light kit, providing both illumination and cooling in one convenient fixture.
  • Remote Control Operation: Enjoy effortless control of your ceiling fan with the included remote control, allowing you to adjust fan speed, lighting, and more from the comfort of your seat.

Installing Your Minka Delano Ceiling Fan

Installing the Minka Delano Ceiling Fan is a straightforward process that can be completed in just a few simple steps. Follow these guidelines for a hassle-free installation experience:

  1. Preparation: Begin by turning off the power to the existing ceiling fan or light fixture at the circuit breaker. Remove the old fixture and prepare the ceiling junction box for installation.
  2. Mounting: Attach the mounting bracket to the ceiling junction box using the provided hardware. Make sure to actively secure the bracket and ensure it is level.
  3. Wiring: Connect the wires from the ceiling junction box to the corresponding wires on the ceiling fan motor, following the manufacturer’s instructions carefully. Secure the wire connections with wire nuts and electrical tape.
  4. Blade Installation: Attach the fan blades to the motor housing using the included screws, making sure to align them properly and tighten the screws securely.
  5. Light Kit Installation: If your Minka Delano Ceiling Fan includes an integrated light kit, install it according to the provided instructions, ensuring that all connections are secure.
  6. Testing: Once the installation is complete, turn the power back on at the circuit breaker and test the operation of the ceiling fan and light kit to ensure everything is functioning properly.

Elevating Your Home Decor with the Minka Delano Ceiling Fan

The Minka Delano Ceiling Fan serves as more than just a functional fixture; it’s a design element that enhances the overall look and feel of your living space. Whether you’re looking to add a touch of elegance to your living room, bedroom, or dining area, this ceiling fan is sure to make a stylish statement.

Conclusion: Elevate Your Living Space with the Minka Delano Ceiling Fan

In conclusion, the Minka Delano Ceiling Fan offers a winning combination of style, performance, and convenience, making it the perfect addition to any home decor. With its sleek design, high-quality construction, and advanced features, this ceiling fan is sure to enhance the comfort and ambiance of your living space for years to come.

Read too: Enhance Your Space with Acoustic Ceiling Tiles Paint: A Comprehensive Guide

Minka Aire Napoli Ceiling Fans: Exploring the Beauty and Functionality

Transforming the ambiance of your living space while ensuring optimal comfort has never been easier, thanks to the exquisite Minka Aire Napoli Ceiling Fans. In this comprehensive guide, we’ll delve into the features, benefits, and installation process of this stunning ceiling fan, allowing you to make an informed decision when enhancing your home decor.

Minka Aire Napoli Ceiling Fan

Discovering the Elegance of the Minka Aire Napoli Ceiling Fan

The Minka Aire Napoli Ceiling Fan is more than just a functional fixture; it’s a statement piece that exudes sophistication and style. Designed with meticulous attention to detail and crafted from high-quality materials, this ceiling fan is the epitome of luxury and performance.

Key Features

  • Exquisite Design: The Minka Aire Napoli Ceiling Fan boasts a timeless design with intricately carved blades and a beautifully crafted housing, adding a touch of elegance to any room.
  • Powerful Performance: Equipped with a high-performance motor and precision-balanced blades, this ceiling fan delivers powerful airflow to effectively circulate air and maintain a comfortable environment.
  • Integrated Light Kit: Many models of the Minka Aire Napoli Ceiling Fan come with an integrated light kit, providing both illumination and functionality in one stylish package.
  • Remote Control Operation: Enjoy convenient control of your ceiling fan from anywhere in the room with the included remote control, allowing you to adjust the fan speed and lighting settings with ease.

Installing Your Minka Aire Napoli Ceiling Fan

Installing the Minka Aire Napoli Ceiling Fan is a straightforward process that can be completed in just a few simple steps. Follow these guidelines for a seamless installation experience:

  1. Preparation: Begin by turning off the power to the existing ceiling fan or light fixture at the circuit breaker. Remove the old fixture and prepare the ceiling junction box for installation.
  2. Mounting: Attach the mounting bracket to the ceiling junction box using the provided hardware. Ensure that the bracket is securely fastened and level.
  3. Wiring: Connect the wires from the ceiling junction box to the corresponding wires on the ceiling fan motor, following the manufacturer’s instructions carefully. Secure the wire connections with wire nuts and electrical tape.
  4. Blade Installation: Attach the fan blades to the motor housing using the included screws, making sure to align them properly and tighten the screws securely.
  5. Light Kit Installation: If your Minka Aire Napoli Ceiling Fan includes an integrated light kit, install it according to the provided instructions, ensuring that all connections are secure.
  6. Testing: Once the installation is complete, turn the power back on at the circuit breaker and test the operation of the ceiling fan and light kit to ensure everything is functioning properly.

Enhancing Your Living Space with the Minka Aire Napoli Ceiling Fan

The Minka Aire Napoli Ceiling Fan is not only a functional addition to your home; it’s also a stunning centerpiece that enhances the aesthetic appeal of any room. Whether you’re looking to add a touch of elegance to your living room, bedroom, or dining area, this ceiling fan is sure to make a statement.

Read too: Enhance Your Space with Acoustic Ceiling Tiles Paint: A Comprehensive Guide

Conclusion:

In conclusion, the Minka Aire Napoli Ceiling Fans combines exquisite design, powerful performance, and convenient functionality to create a truly exceptional addition to any home. With its timeless elegance and superior craftsmanship, this ceiling fan is sure to elevate your living space to new heights of style and comfort.

Ideas for a Stunning Shower With Sloped Ceiling: Transform Your Bathroom

Are you faced with the challenge of designing a shower in a bathroom with a sloped ceiling? While sloped ceilings can pose design obstacles, they also offer unique opportunities to create a visually stunning and functional shower space. In this guide, we’ll explore creative ideas and practical solutions for designing a shower with a sloped ceiling that combines style and functionality seamlessly.

Shower With Sloped Ceiling

Understanding the Challenges and Opportunities

Designing a shower under a sloped ceiling presents both challenges and opportunities for homeowners and designers alike. While limited headroom and awkward angles may seem daunting, they can be leveraged to create a cozy and intimate shower experience. With thoughtful planning and innovative design solutions, you can transform your shower into a focal point of your bathroom.

Design Considerations for Shower With Sloped Ceiling

When planning a shower with a sloped ceiling, several key factors should be taken into account to ensure a successful design:

  1. Maximize Vertical Space: Since sloped ceilings limit vertical space, it’s essential to make the most of the available height. Consider installing taller shower doors or opting for a frameless glass enclosure to create a sense of openness and maximize natural light.
  2. Choose the Right Showerhead: Selecting the appropriate showerhead is crucial when working with a sloped ceiling. Opt for a wall-mounted or ceiling-mounted showerhead with adjustable height and spray settings to accommodate varying ceiling heights and ensure optimal water flow and coverage.
  3. Incorporate Built-In Storage: To optimize space and minimize clutter, consider integrating built-in storage solutions into your shower design. Recessed shelves or niches can be installed directly into the sloped walls to provide convenient storage for toiletries and bath essentials.
  4. Embrace Creative Lighting: Lighting plays a significant role in enhancing the ambiance of a shower with a sloped ceiling. Incorporate recessed lighting, LED strips, or waterproof sconces to illuminate the space effectively and create a spa-like atmosphere. Additionally, installing a skylight or a strategically placed window can introduce natural light and visually expand the shower area.
  5. Choose Durable and Waterproof Materials: Since showers are exposed to moisture and humidity, it’s essential to select durable and waterproof materials for the walls, floors, and ceiling. Opt for waterproof tile, stone, or glass surfaces that are easy to clean and maintain, ensuring longevity and performance in wet environments.

Inspirational Ideas for Shower With Sloped Ceiling

Now that we’ve covered the essential design considerations, let’s explore some inspirational ideas for creating a stunning shower with a sloped ceiling:

  1. Spa-Inspired Retreat: Transform your shower into a luxurious spa retreat by incorporating calming elements such as natural stone tile, rainfall showerhead, and built-in bench seating. Add a touch of elegance with a freestanding soaking tub and lush greenery for a serene and relaxing ambiance.
  2. Contemporary Elegance: Achieve a sleek and modern look with a monochromatic color scheme, minimalist fixtures, and geometric tile patterns. Install a linear drain along the shower floor for a seamless and stylish finish, complemented by recessed lighting and sleek glass partitions.
  3. Rustic Charm: Embrace the warmth and character of rustic design by incorporating reclaimed wood accents, exposed beams, and earthy textures. Opt for a walk-in shower with a stone or brick accent wall, paired with antique-inspired fixtures and vintage-style lighting for a cozy and inviting atmosphere.

Conclusion

Designing a shower with a sloped ceiling requires careful planning and attention to detail, but the results can be truly spectacular. By maximizing vertical space, incorporating built-in storage, embracing creative lighting, and choosing durable materials, you can create a shower that not only functions beautifully but also elevates the overall aesthetic of your bathroom.

Read too: Exploring the Efficiency of Radiant Ceiling Heater Electric: A Comprehensive Guide

Modern High Ceiling Lighting Ideas: Illuminate Your Space in Style

Elevating the aesthetic appeal of your home’s interior involves careful consideration of lighting solutions, particularly when dealing with high ceilings. Modern high ceiling lighting ideas offer innovative ways to illuminate and enhance the grandeur of lofty spaces. In this guide, we’ll explore a variety of contemporary lighting concepts and designs tailored specifically for high ceilings, providing you with inspiration to transform your living space into a well-lit haven of style and sophistication.

Modern High Ceiling Lighting Ideas

Exploring Modern High Ceiling Lighting Ideas

High ceilings present both unique opportunities and challenges when it comes to lighting design. While they offer a sense of spaciousness and grandeur, they also require lighting fixtures that can effectively illuminate the entire space without overwhelming it. Let’s delve into some modern lighting ideas that are perfectly suited for high ceilings:

1. Statement Chandeliers:

Make a bold statement with an eye-catching chandelier that commands attention and serves as a focal point in the room. Opt for contemporary designs featuring sleek lines, geometric shapes, or intricate patterns to complement the modern aesthetic of your space. Hang the chandelier at an appropriate height to maximize its impact without obstructing sightlines.

2. Recessed Lighting:

Recessed lighting fixtures are a versatile and practical option for high ceilings, providing ample illumination while maintaining a clean and streamlined look. Install recessed lights strategically throughout the space to evenly distribute light and minimize shadows. Consider incorporating dimmer switches to adjust the lighting intensity according to your preferences and needs.

3. Pendant Lights:

Pendant lights offer a stylish and customizable lighting solution for high ceilings, allowing you to create visual interest and define different zones within the room. Choose pendant lights with adjustable heights to accommodate varying ceiling heights and create a sense of balance in the space. Experiment with different shapes, sizes, and materials to achieve the desired aesthetic effect.

4. Track Lighting Systems:

For flexibility and versatility, consider installing a track lighting system that can be easily adjusted to illuminate specific areas or highlight architectural features. Modern track lighting fixtures come in a variety of styles and configurations, allowing you to customize the layout according to your lighting requirements and design preferences.

5. Floor Lamps and Uplights:

Supplement overhead lighting with strategically placed floor lamps and uplights to add warmth and ambiance to your high-ceilinged space. Choose sleek and contemporary designs that complement the overall décor scheme and provide targeted illumination where needed. Position floor lamps near seating areas or in dark corners to create cozy reading nooks or accentuate artwork and décor elements.

Conclusion

With the right lighting choices, you can transform your high-ceilinged space into a stunning showcase of modern design and sophistication. From statement chandeliers to recessed lighting and everything in between, the possibilities are endless when it comes to illuminating your home in style. Explore these modern high ceiling lighting ideas to create a luminous environment that reflects your unique taste and enhances the beauty of your living space.

Read too: Exploring the Efficiency of Radiant Ceiling Heater Electric: A Comprehensive Guide

Exploring Milk Glass Flush Mount Ceiling Light: Illuminate Your Space with Elegance

Enhancing the ambiance of your living space often involves finding the perfect lighting solution. Milk glass flush mount ceiling light offer a blend of elegance and functionality, providing both ample illumination and stylish aesthetics. In this comprehensive guide, we’ll delve into the world of milk glass flush mount ceiling lights, exploring their design, functionality, installation, and how they can elevate the look of any room.

Milk Glass Flush Mount Ceiling Light

Unveiling Milk Glass Flush Mount Ceiling Lights

Milk glass flush mount ceiling lights are fixtures that combine the timeless appeal of milk glass with the practicality of flush mount installation. These lights are designed to be mounted directly to the ceiling, making them ideal for rooms with low ceilings or spaces where a sleek, unobtrusive lighting solution is desired. The milky white appearance of the glass diffuses light evenly, creating a soft, inviting glow that enhances the atmosphere of any room.

Exploring the Features of Milk Glass Flush Mount Ceiling Lights

  1. Design Versatility: Milk glass flush mount ceiling lights come in a variety of styles and designs, allowing you to find the perfect fixture to complement your home dĂ©cor. From vintage-inspired designs with intricate detailing to modern minimalist styles, there’s a milk glass flush mount ceiling light to suit every taste and aesthetic preference.
  2. Enhanced Illumination: The opaque nature of milk glass diffuses light evenly, reducing glare and harsh shadows. This creates a warm, inviting ambiance that is ideal for living rooms, bedrooms, kitchens, and hallways. Whether you’re reading a book, preparing a meal, or entertaining guests, milk glass flush mount ceiling lights provide the perfect level of illumination for any occasion.
  3. Easy Installation: Flush mount ceiling lights are designed to be installed directly onto the ceiling surface, making them a practical choice for homeowners and DIY enthusiasts. With a few simple tools and basic electrical knowledge, you can quickly and easily install milk glass flush mount ceiling lights in any room of your home.

Choosing the Right Milk Glass Flush Mount Ceiling Light

When selecting a milk glass flush mount ceiling light for your space, consider factors such as the size and layout of the room, the overall design aesthetic, and the level of illumination required. Additionally, pay attention to the quality of materials and craftsmanship to ensure durability and longevity.

Read too: Exploring the Efficiency of Radiant Ceiling Heater Electric: A Comprehensive Guide

Conclusion

Milk glass flush mount ceiling lights offer a winning combination of style, functionality, and versatility, making them an ideal lighting solution for any home. Whether you’re looking to update your existing lighting fixtures or enhance the ambiance of a new space, consider incorporating milk glass flush mount ceiling lights into your dĂ©cor. With their timeless appeal and practical design, these fixtures are sure to illuminate your home with elegance and charm for years to come.

Enhance Your Log Cabin Retreat with a Rustic Log Cabin Ceiling Fan

Are you looking to elevate the ambiance of your log cabin retreat while improving air circulation and comfort? Consider installing a log cabin ceiling fan. In this guide, we’ll explore everything you need to know about log cabin ceiling fans, from their rustic design to their practical functionality, to help you choose the perfect fixture for your cozy getaway.

Log Cabin Ceiling Fan

Embracing Rustic Elegance: Log Cabin Ceiling Fan Designs

Log cabin ceiling fans are designed to complement the natural beauty and rustic charm of log cabin interiors. These fans often feature rugged materials like wood and wrought iron, along with finishes that mimic the look of weathered wood or aged metal. Whether you prefer a traditional, lodge-style fan or a more modern rustic design, there are plenty of options to suit your taste.

Choosing the Right Size and Style: Log Cabin Ceiling Fan

When selecting a log cabin ceiling fan, consider the size and style of your space. For smaller rooms or low ceilings, opt for a compact fan with a flush-mount design to maximize headroom. In larger rooms or spaces with high ceilings, choose a larger fan with longer blades to ensure adequate air circulation and cooling.

Read too: Exploring Craftsman Style Ceiling Fans for Your Home: Embracing Timeless Elegance

Features to Consider

Beyond aesthetics, there are several features to consider when choosing a log cabin ceiling fan:

  1. Blade Material: Look for blades made from natural wood or reclaimed lumber for an authentic rustic look. These blades can be stained or finished to complement your cabin’s decor.
  2. Lighting Options: Many log cabin ceiling fans come with integrated lights or light kits, providing both illumination and airflow in one fixture. Choose between traditional light fixtures or rustic-inspired designs like antler chandeliers or lanterns.
  3. Remote Control: Consider a fan with remote control capabilities for added convenience. Remote-controlled fans allow you to adjust the fan speed, direction, and lighting settings from anywhere in the room.
  4. Reversible Motor: Look for a fan with a reversible motor that allows you to switch between downdraft mode for cooling in the summer and updraft mode for circulating warm air in the winter, helping to improve energy efficiency year-round.

Installation and Maintenance Tips

Installing a log cabin ceiling fan is relatively straightforward, but it’s essential to follow the manufacturer’s instructions carefully. Make sure to balance the fan blades during installation to prevent wobbling and ensure smooth, quiet operation. Additionally, regular maintenance, such as dusting the blades and tightening screws, will help keep your fan running smoothly for years to come.

Conclusion

A log cabin ceiling fans is the perfect addition to any log cabin retreat, combining rustic charm with practical functionality. Whether you’re looking to improve air circulation, add lighting, or enhance the ambiance of your space, there’s a log cabin ceiling fan to suit your needs. Explore our selection of rustic log cabin ceiling fans and take your cabin to new heights of comfort and style.