In any building, ensuring that safety measures are in place is crucial. One of the key components in emergency preparedness is the ceiling mount emergency light. This essential device plays a vital role in illuminating escape routes and ensuring visibility during power outages or emergencies. This guide will explore the features, benefits, and installation tips for ceiling mount emergency lights to help you make informed decisions about this important safety feature.
What is a Ceiling Mount Emergency Light?
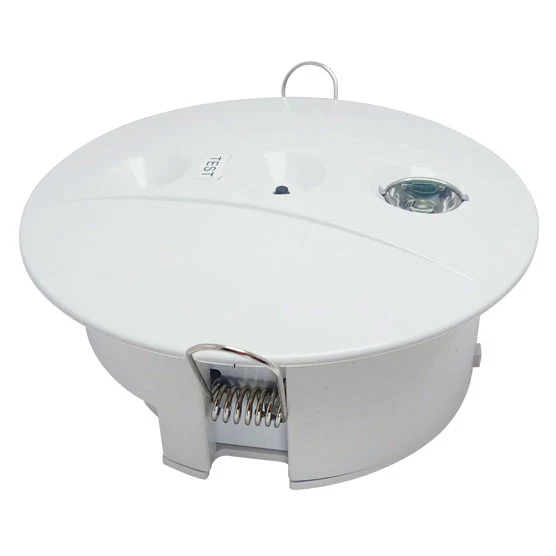
A ceiling mount emergency light is a type of emergency lighting designed to be installed on the ceiling of a building. Unlike standard lights, which provide illumination during normal conditions, emergency lights are specifically designed to activate during power outages or other emergencies, ensuring that key areas remain visible.
Read too: Flush Mount Rustic Ceiling Lights: Illuminate Your Space with Stunning
These lights are equipped with a battery backup system that allows them to function even when the main power supply is interrupted. This makes them essential for ensuring safe evacuation and maintaining visibility in critical situations.
Features of Ceiling Mount Emergency Lights
When choosing a ceiling mount emergency light, it’s important to consider several key features:
1. Battery Backup
A reliable battery backup system is crucial for any emergency light. This feature ensures that the light will continue to function even during a power outage. The battery should be capable of providing sufficient illumination for a reasonable duration, typically between 90 minutes to several hours.
2. Brightness and Illumination
The brightness of the emergency light is an important factor. It should provide adequate illumination to light up escape routes and key areas. Look for lights with adjustable brightness settings or high lumen output to ensure maximum visibility.
3. Durability and Build Quality
Emergency lights should be built to withstand various conditions, including extreme temperatures, humidity, and physical impacts. A durable casing made from materials like high-impact plastic or metal ensures that the light remains functional in diverse environments.
4. Installation and Maintenance
Ease of installation and maintenance are also important considerations. Many ceiling mount emergency lights are designed for simple installation and require minimal maintenance. Some models come with mounting brackets and easy-to-follow instructions to facilitate the installation process.
5. Compliance with Standards
Ensure that the emergency light complies with local building codes and safety standards. This includes certifications such as UL (Underwriters Laboratories) or ETL (Intertek Testing Services), which indicate that the light has been tested for safety and performance.
Benefits of Installing Ceiling Mount Emergency Lights
Installing ceiling mount emergency lights offers several benefits, including:
1. Enhanced Safety
The primary benefit of emergency lights is enhanced safety. In the event of a power outage or emergency, these lights provide illumination that helps people navigate safely, reducing the risk of accidents and injuries.
2. Improved Visibility
Emergency lights ensure that critical areas, such as exit routes, stairwells, and hallways, remain visible. This is crucial for guiding occupants to safety during an evacuation and preventing confusion in low-light conditions.
3. Compliance with Regulations
Many building codes and safety regulations require the installation of emergency lighting systems. By installing ceiling mount emergency lights, you ensure compliance with these regulations and avoid potential penalties.
4. Peace of Mind
Knowing that your building is equipped with reliable emergency lighting provides peace of mind. In the event of an unexpected power failure or emergency situation, you can be confident that occupants will have the visibility they need to respond effectively.
How to Choose the Right Ceiling Mount Emergency Light
Selecting the right ceiling mount emergency light involves considering several factors:
1. Determine Your Needs
Assess the specific needs of your building or space. Consider the size of the area, the number of exit routes, and the typical usage conditions. This will help you determine the appropriate brightness, battery backup duration, and number of lights required.
2. Evaluate Features
Compare the features of different emergency lights, such as battery life, brightness levels, and durability. Choose a model that offers the best combination of these features based on your needs and budget.
3. Check Compliance
Verify that the emergency light meets local building codes and safety standards. This ensures that the light is safe, reliable, and suitable for use in your building.
4. Consider Installation Requirements
Choose a light that is easy to install and maintain. Look for models with clear installation instructions and minimal maintenance needs to simplify the process.
Installation Tips for Ceiling Mount Emergency Lights
Proper installation is essential for ensuring that your ceiling mount emergency light functions correctly. Here are some tips for a successful installation:
1. Read the Instructions
Before starting the installation, thoroughly read the manufacturer’s instructions. This will provide important information about the installation process, wiring requirements, and safety precautions.
2. Choose the Right Location
Select a location for the light that provides optimal visibility. Typically, this will be near exit routes, stairwells, and high-traffic areas. Ensure that the light is mounted securely on the ceiling and is not obstructed by other objects.
3. Ensure Proper Wiring
Follow the wiring instructions carefully to ensure that the light is connected correctly to the power supply and battery backup. Improper wiring can lead to malfunction or failure of the emergency light.
4. Test the Light
After installation, test the light to ensure that it operates correctly. Check the battery backup function and verify that the light provides adequate illumination. Perform regular tests to ensure continued functionality.
5. Perform Regular Maintenance
Regular maintenance is essential for keeping your emergency lights in working order. Check the battery and replace it as needed, clean the light fixtures, and ensure that the light is free from obstructions.
Conclusion
A ceiling mount emergency light is a critical component of any building’s safety system. By providing reliable illumination during power outages or emergencies, these lights help ensure safe evacuation and compliance with safety regulations. When selecting and installing a ceiling mount emergency light, consider factors such as battery backup, brightness, durability, and compliance with standards. With proper installation and regular maintenance, you can enhance the safety and preparedness of your building, providing peace of mind for occupants and property owners alike.