Lighting For Vaulted Ceilings: Transform Your Space With These Brilliant Ideas

Vaulted ceilings are a hallmark of spaciousness and architectural beauty. They elevate your room’s aesthetic, making it feel open and grand. However, finding the right lighting for vaulted ceilings can be challenging due to their height and unique angles. Whether you’re aiming for cozy warmth, modern brightness, or dramatic ambiance, this guide will illuminate your path to perfect lighting.

Lighting For Vaulted Ceilings

Why Is Lighting For Vaulted Ceilings Important?

Vaulted ceilings create a striking visual impact but also present specific lighting challenges. Their height often means standard light fixtures fail to provide adequate illumination. Moreover, improper lighting can leave the upper space looking dull and lifeless. To maintain a harmonious look, selecting the appropriate lighting is key.


Key Factors to Consider for Lighting Vaulted Ceilings

Before diving into specific lighting options, consider the following factors to ensure optimal results:

1. Ceiling Height and Angle

Vaulted ceilings vary significantly in height and slope. Understanding the dimensions helps you determine the most effective fixture placement.

Read too: Shiplap Ceiling in Kitchen: A Timeless Trend for a Stylish and Cozy Space

2. Room Functionality

The purpose of the room influences the lighting style. For example, living rooms may benefit from a combination of ambient and accent lighting, while kitchens require task-focused options.

3. Natural Light Availability

Leverage natural light by pairing it with fixtures that enhance the room’s ambiance during the evening.

4. Control Systems

Install dimmers or smart controls to customize brightness and mood, providing flexibility for various occasions.


Best Lighting Options For Vaulted Ceilings

1. Chandeliers

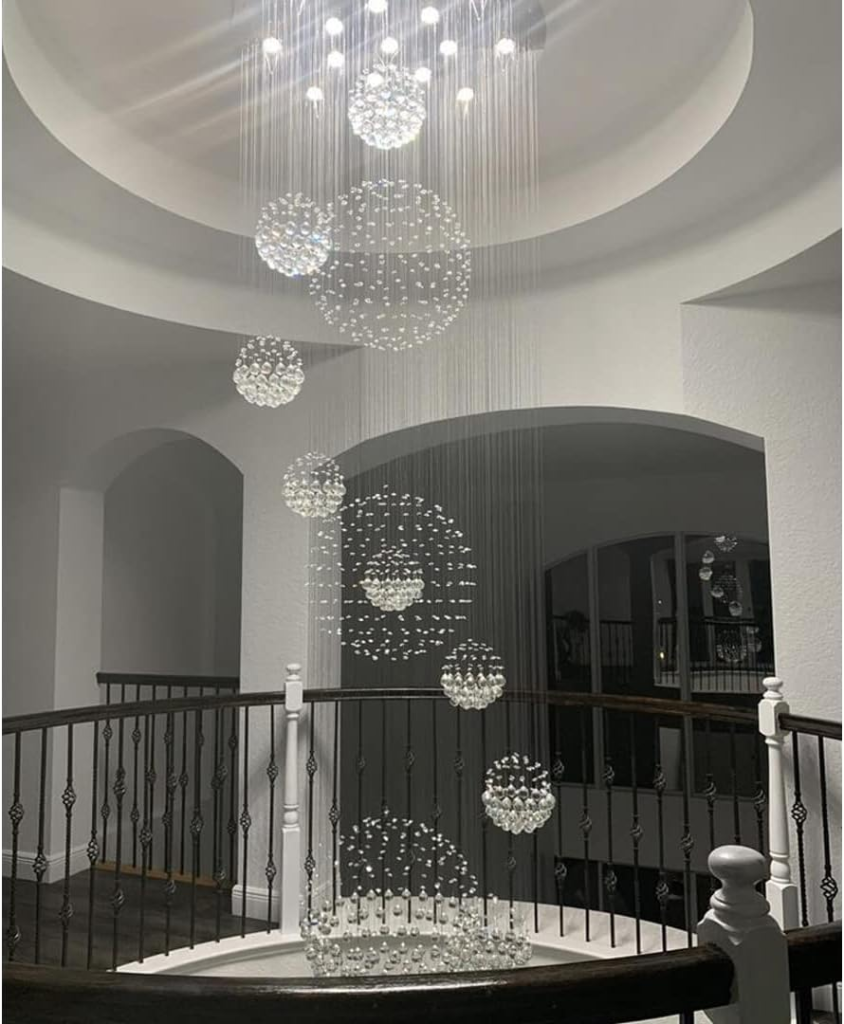
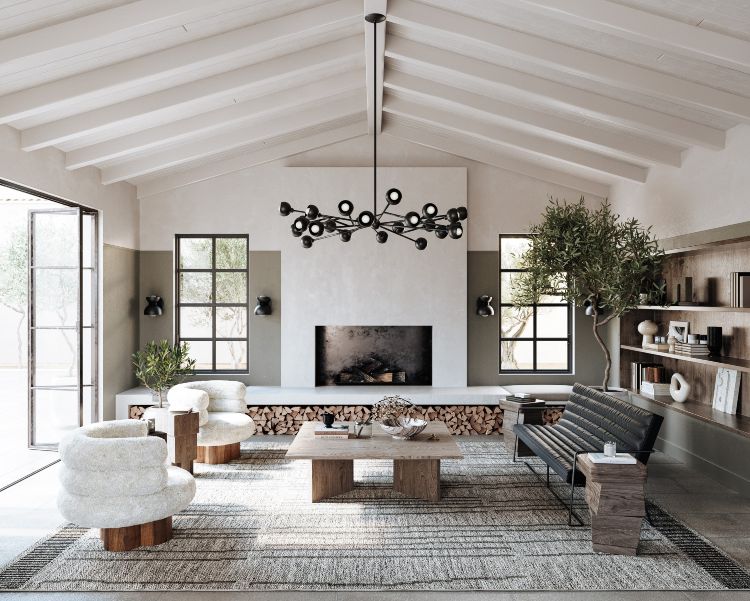
Chandeliers are a classic choice for lighting vaulted ceilings. Their grandeur complements the spaciousness of high ceilings, creating a focal point in any room. Modern chandeliers come in various designs, from minimalist to elaborate, ensuring they suit any interior style.

  • Best For: Dining rooms, living rooms, and entryways.
  • Tips: Hang the chandelier at the appropriate height to avoid overwhelming the space. Consider adjustable chains for added flexibility.

2. Pendant Lights

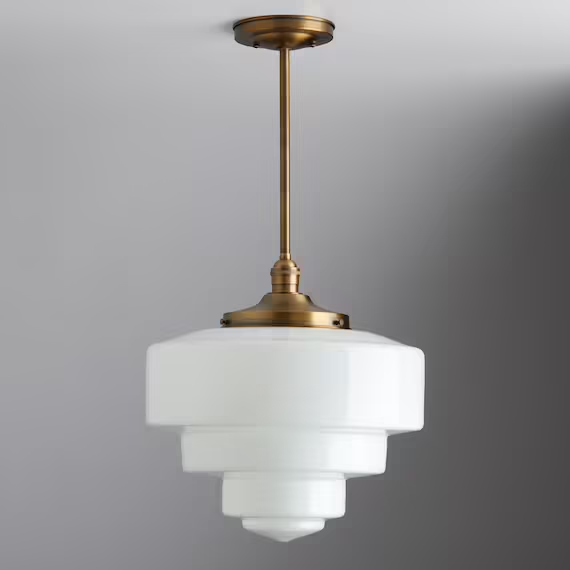
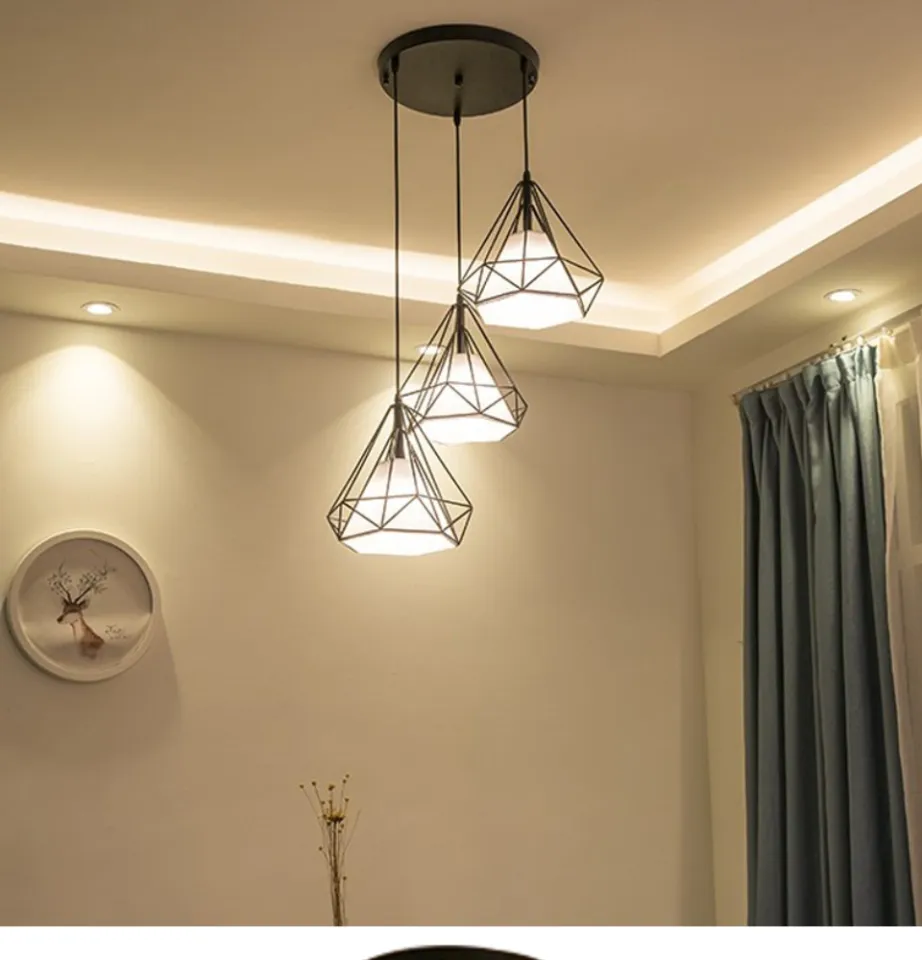
Pendant lights offer a sleek and versatile solution. They can be hung at various lengths, making them perfect for sloped ceilings. Grouping multiple pendants can create a striking visual impact.

  • Best For: Kitchen islands, dining tables, or as reading lights in a living room.
  • Tips: Use pendants with dimmable options to adjust the light according to your needs.

3. Recessed Lighting

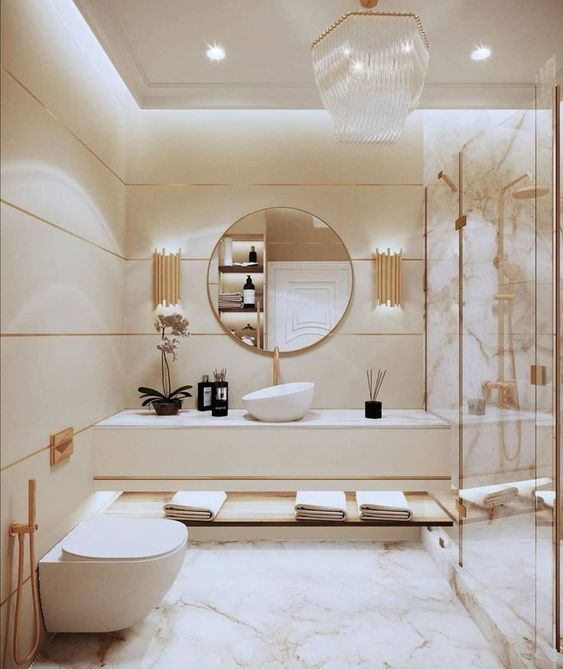
Recessed lights, also known as can lights, are an excellent choice for providing even illumination. They blend seamlessly into the ceiling, ensuring a clean and modern appearance.

  • Best For: General illumination in living rooms, bedrooms, or bathrooms.
  • Tips: Angle the lights to accentuate architectural features or artwork.

4. Track Lighting

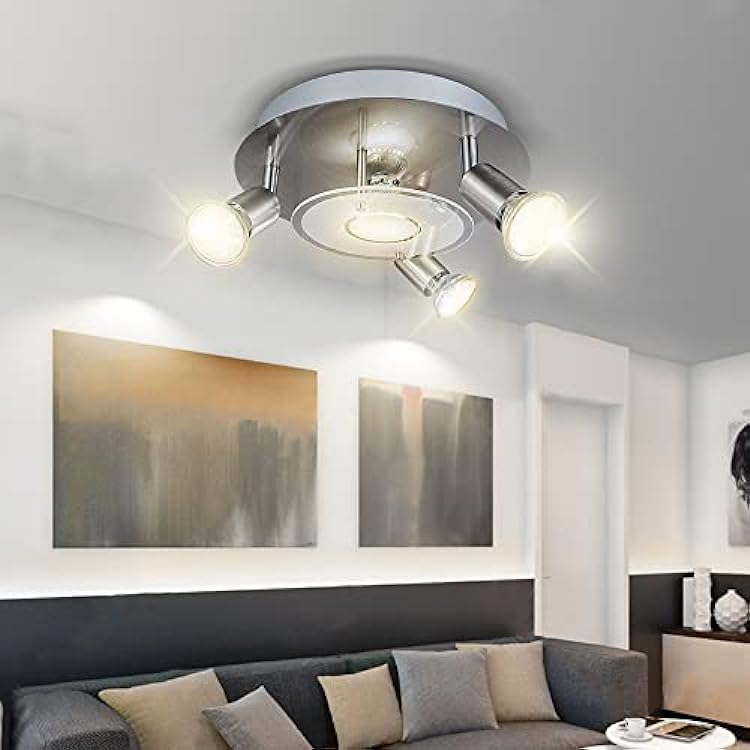
Track lighting allows for flexible placement of multiple light heads along a track. This option works wonderfully for accent lighting or highlighting specific areas.

  • Best For: Art studios, galleries, or modern-style living rooms.
  • Tips: Choose adjustable heads to direct light precisely where needed.

5. Skylights and Solar Tubes

Though not traditional fixtures, skylights and solar tubes are natural lighting solutions for vaulted ceilings. They bring daylight into your home, reducing reliance on artificial lights during the day.

  • Best For: Sunrooms, kitchens, or bathrooms.
  • Tips: Pair with blackout shades for control over natural light during nighttime.

Enhancing Ambiance With Layered Lighting

Using a combination of lighting types can elevate your design. Layered lighting involves three main elements:

  1. Ambient Lighting: General illumination from recessed lights or chandeliers.
  2. Task Lighting: Focused light sources like pendant lights or desk lamps.
  3. Accent Lighting: Highlighting architectural features using track lights or wall sconces.

For vaulted ceilings, layering ensures even coverage while adding depth and character to the space. For example, recessed lights can handle general brightness, while a chandelier adds elegance and accent lights highlight the ceiling’s structure.


Practical Tips for Installing Lighting For Vaulted Ceilings

Use LED Bulbs

LEDs are energy-efficient, long-lasting, and come in various color temperatures. Their brightness ensures that even tall ceilings receive adequate illumination.

Consider Wall Washers

Wall washers are fixtures that direct light upwards or across a wall, creating a soft glow. They work well in rooms with vaulted ceilings to reduce shadows and brighten the entire space.

Install Smart Lighting

Smart lighting systems allow you to control brightness and color temperature remotely, making it easy to adjust your lighting to match the mood or time of day.

Add Ceiling Fans With Lights

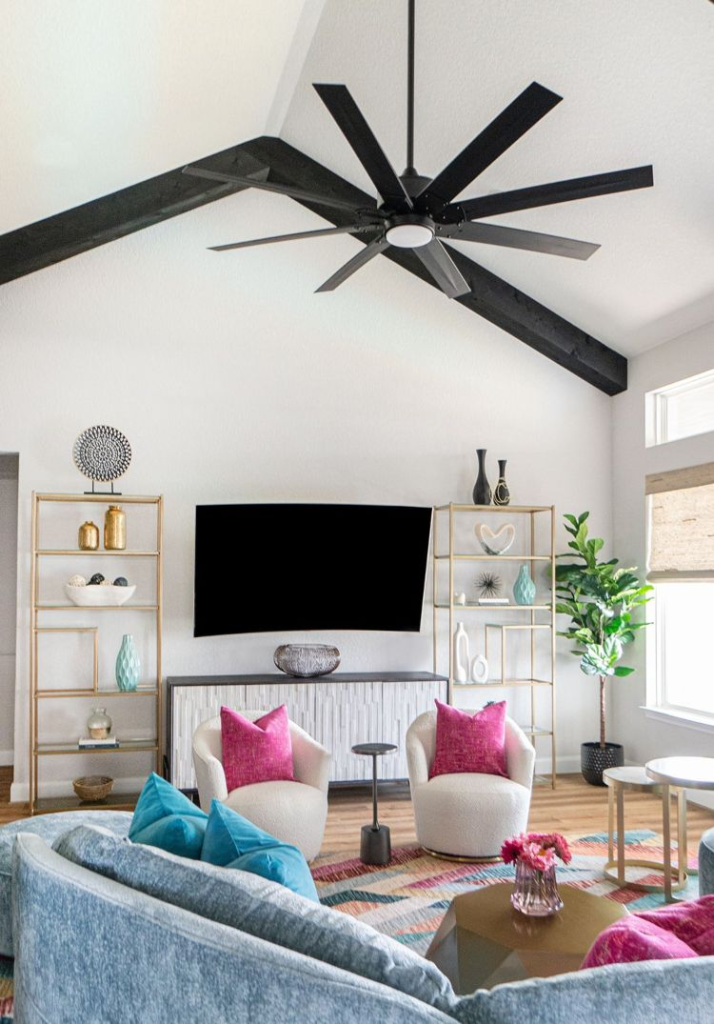
For multipurpose functionality, consider ceiling fans with built-in lights. These fixtures provide airflow and illumination, perfect for larger rooms with vaulted ceilings.


Common Mistakes to Avoid

  1. Using Inadequate Fixtures: Avoid fixtures designed for standard ceilings, as they may not provide sufficient light.
  2. Neglecting Dimmers: Without dimmers, lighting can feel harsh or overly bright.
  3. Ignoring Room Proportion: Ensure the size of the fixture complements the scale of the ceiling.

Conclusion: Illuminate Your Vaulted Ceilings with Style

Finding the perfect lighting for vaulted ceilings involves balancing functionality and aesthetics. From grand chandeliers to modern recessed lighting, the right choice can transform your space into a well-lit haven. Consider your room’s style, functionality, and natural light to create a lighting scheme that truly shines.

Glass Globe Ceiling Light: A Complete Guide to Choosing and Installing

Lighting is one of the most crucial elements in home design. It not only illuminates a space but also adds to its style and ambiance. One lighting fixture that has been gaining popularity in recent years for its sleek design and functionality is the glass globe ceiling light. These fixtures provide a contemporary and minimalist look, making them suitable for a variety of interior styles. In this guide, we will explore what makes a glass globe ceiling light a standout choice, how to choose the right one for your space, and tips for installation and maintenance.

Glass Globe Ceiling Light

What is a Glass Globe Ceiling Light?

A glass globe ceiling light is a type of ceiling fixture that features a spherical or globe-shaped glass shade. These lights come in a variety of designs, from clear and frosted glass to colored or patterned versions. The globe shade helps diffuse light evenly across a room, creating a soft, inviting ambiance. Glass globe ceiling lights are typically used in modern or minimalist interior designs, but they can also complement more traditional or eclectic décor depending on the style of the fixture.

One of the reasons these lights have become so popular is their simplicity and versatility. They can be used in virtually any room of the house, from kitchens and dining rooms to bathrooms and hallways, and can easily be incorporated into a variety of design schemes.

Read too: Kitchen Lighting For A Vaulted Ceiling: Illuminating Your Space with Style and Functionality

Benefits of Using a Glass Globe Ceiling Light

1. Aesthetic Appeal

The sleek, modern design of a glass globe ceiling light brings a refined and timeless look to any room. Whether you choose clear, frosted, or colored glass, the round shape offers a soft, elegant visual appeal that works in both contemporary and traditional settings. This lighting fixture can act as a focal point in a room, drawing the eye upward and adding sophistication to your décor.

2. Even Lighting Distribution

One of the main advantages of a glass globe ceiling light is its ability to distribute light evenly. Unlike traditional ceiling lights with directional bulbs, the globe design helps to spread light across the room in all directions. This feature is particularly beneficial in spaces where uniform lighting is required, such as kitchens or living rooms.

3. Energy-Efficiency

Many modern glass globe ceiling light fixtures are designed to be energy-efficient. When paired with LED bulbs, these lights can provide ample illumination while using far less energy than traditional incandescent bulbs. This can help reduce your electricity bill and is an eco-friendly choice for those looking to make sustainable design decisions.

4. Versatility

A glass globe ceiling light can be used in a variety of spaces, from high-traffic areas like living rooms and dining rooms to more intimate settings like bedrooms and bathrooms. These fixtures come in different sizes, styles, and colors, allowing you to select the perfect fit for your space. Whether you’re looking for a single pendant light or a chandelier-style fixture with multiple globes, there’s a design to match your aesthetic and functional needs.

5. Low Maintenance

Unlike other types of ceiling lighting that may require frequent cleaning or bulb replacements, glass globe ceiling light fixtures are relatively low maintenance. The glass is easy to wipe clean, and with LED technology, you won’t need to worry about changing the bulbs as often.

How to Choose the Right Glass Globe Ceiling Light

Selecting the right glass globe ceiling light for your home involves considering factors such as the size of the room, your lighting needs, and your overall design aesthetic. Here are some tips for making the best choice:

1. Consider the Size of the Room

The size of the room is an important factor when selecting a glass globe ceiling light. In larger spaces, such as a dining room or living room, you may need a larger fixture or even a chandelier-style light with multiple globes to provide adequate illumination. For smaller rooms like a hallway or bathroom, a single globe pendant light might be the ideal option.

When choosing a ceiling light, make sure it is proportionate to the size of the room. A fixture that is too large may overwhelm the space, while one that is too small may not provide enough light. Many lighting manufacturers provide size guides to help you make the right choice.

2. Choose the Right Style

There are a variety of styles of glass globe ceiling light fixtures to suit different tastes. Some of the most popular styles include:

  • Modern Minimalist: These lights feature clean lines, clear glass, and simple shapes. They work well in contemporary or industrial-style interiors.
  • Vintage or Retro: Globe lights with antique finishes or brass and gold accents add a vintage touch to your home. These lights can complement traditional or retro-inspired interiors.
  • Scandi or Bohemian: A frosted or smoked glass globe with natural wooden elements or woven designs can add a boho or Scandinavian flair to your room.
  • Industrial: A glass globe with metal accents, such as black or matte finishes, can fit perfectly into an industrial-style space, offering a more raw and edgy look.

Consider the style of your room and how the glass globe ceiling light will fit into your overall design scheme.

3. Lighting Functionality

Think about the type of lighting you need. Do you want a statement light for ambiance, or do you need bright, functional light for tasks like cooking or reading? Some glass globe ceiling light fixtures come with dimmable options, allowing you to adjust the brightness depending on the time of day or your needs.

If you’re installing the light in a kitchen or workspace, you may need a fixture that provides more focused lighting. Pendant-style globes or multiple globes in a chandelier format can offer excellent task lighting while still adding a decorative touch.

4. Material and Finish

The material and finish of the glass globe ceiling light can also influence its overall look and durability. Choose glass that complements your room’s color scheme, whether it’s clear, frosted, or tinted glass. The finish of the light fixture itself—such as chrome, matte black, gold, or brass—should harmonize with other elements in your room, such as furniture, window treatments, and wall colors.

5. Installation Height

When installing a glass globe ceiling light, the height of the ceiling plays an important role in the overall design. If you have high ceilings, a hanging pendant with a long downrod will provide a dramatic effect, allowing the globe to hang low and become a focal point in the room. For standard or low ceilings, consider flush-mount designs that keep the light close to the ceiling without overwhelming the space.

How to Install a Glass Globe Ceiling Light

While installing a glass globe ceiling light is typically a straightforward process, it’s important to follow the manufacturer’s instructions and safety guidelines. Here’s a basic overview of how to install a glass globe ceiling light:

1. Turn Off the Power

Before starting the installation process, ensure that the power to the existing light fixture is turned off at the breaker box. This will prevent any risk of electric shock during installation.

2. Remove the Old Fixture

Carefully remove the existing light fixture from the ceiling. If you’re replacing an old fixture, you may need to disconnect the wires and unscrew any mounting hardware that holds the fixture in place.

3. Install the Mounting Bracket

Most glass globe ceiling light fixtures will come with a mounting bracket that attaches to the ceiling. Secure this bracket to the ceiling box using screws. Make sure it is firmly attached and aligned.

4. Connect the Wires

Next, connect the wiring from the ceiling to the wires on the light fixture. Typically, this will involve connecting the black (live) wire to the black wire on the fixture, the white (neutral) wire to the white wire, and the green or copper wire (ground) to the ground screw.

5. Attach the Globe and Fixture

Once the wiring is secured, you can attach the globe shade to the fixture. Some glass globe lights have a simple screw-in mechanism, while others may require a decorative ring or other hardware. Carefully install the globe and ensure it is stable and securely attached.

6. Test the Light

Turn the power back on and test the light. If everything is connected correctly, your new glass globe ceiling lights should be up and running, providing beautiful illumination and style to your room.

Conclusion

A glass globe ceiling lights is a versatile and stylish lighting fixture that can enhance the look and feel of any room. Whether you’re aiming for a modern, minimalist design or a vintage-inspired touch, these lights offer a variety of options to suit your aesthetic and functional needs. By considering the size of your space, the style of your room, and your specific lighting needs, you can choose the perfect glass globe ceiling lights to illuminate your home with beauty and elegance.

Drop Ceiling Can Lights: Illuminate Your Space

In the world of interior design and lighting, drop ceiling can lights have gained significant popularity for their sleek appearance and versatility. These recessed lights, often referred to as “pot lights” or “downlights,” are designed to be installed within the ceiling structure, offering a clean and modern look while maximizing the use of space. This article explores the features, benefits, installation processes, and maintenance of drop ceiling can lights, ensuring you have all the information you need to make an informed decision for your lighting needs.

Drop Ceiling Can Lights

What Are Drop Ceiling Can Lights?

Definition and Design

Drop ceiling can lights are recessed lighting fixtures installed in ceilings, typically used in spaces where a traditional light fixture would be cumbersome or visually unappealing. These fixtures are designed to sit flush with the ceiling surface, making them a discreet yet effective lighting solution. They are commonly used in both residential and commercial settings, including homes, offices, and retail spaces.

Types of Drop Ceiling Can Lights

  1. New Construction Can Lights: These are designed for installation in new builds where the ceiling structure is still being constructed. They require framing and are usually more substantial than retrofit options.
  2. Retrofit Can Lights: Ideal for existing ceilings, retrofit can lights are designed to fit into pre-existing holes or fixtures. They are perfect for upgrading older lighting systems without extensive remodeling.
  3. Adjustable Can Lights: These fixtures allow you to direct the light beam where it’s needed most, providing versatility in lighting options.
  4. LED Can Lights: Energy-efficient and long-lasting, LED options are increasingly popular. They reduce energy consumption and have a longer lifespan compared to traditional incandescent bulbs.

Read too: Kitchen Lighting For A Vaulted Ceiling: Illuminating Your Space with Style and Functionality


Advantages of Using Drop Ceiling Can Lights

1. Aesthetically Pleasing

One of the primary benefits of drop ceiling can lights is their ability to create a clean and uncluttered ceiling line. By being recessed, these fixtures maintain a streamlined look, making them ideal for modern interiors where minimalism is key. They can also provide a more spacious feel to a room since they do not protrude into the living space.

2. Versatile Lighting Options

Drop ceiling can lights offer flexibility in lighting design. They can be used for ambient lighting, task lighting, or accent lighting. Depending on the bulb type and installation, they can create a warm and inviting atmosphere or a bright, focused light for workspaces.

3. Space-Saving Design

In spaces with low ceilings, traditional light fixtures can feel overwhelming. Drop ceiling can lights are installed flush with the ceiling, making them an excellent option for smaller rooms where every inch counts. Their compact design allows for more headroom and a less crowded appearance.

4. Energy Efficiency

With the rise of LED technology, many drop ceiling can lights now come with LED options that consume significantly less energy than traditional incandescent bulbs. This can lead to lower energy bills and a reduced carbon footprint, making them an environmentally friendly choice.

5. Easy Installation and Maintenance

While installation requires some basic electrical knowledge, drop ceiling can lights are generally easier to install than other lighting fixtures. Many options also allow for easy bulb replacement, making maintenance straightforward and hassle-free.


Choosing the Right Drop Ceiling Can Lights

When selecting drop ceiling can lights for your home or office, consider the following factors:

1. Size and Dimensions

The size of the can lights you choose should complement the scale of the room. Common diameters for recessed can lights range from 4 to 6 inches, but larger options (up to 8 inches) are also available for more extensive lighting needs. Always ensure the light size fits well within the drop ceiling grid.

2. Light Bulb Type

Deciding on the type of bulb is crucial. LED bulbs are preferred for their longevity and energy efficiency, while halogen and incandescent options can offer warmer lighting but may require more frequent replacements. Consider the color temperature as well—warm white (2700K) is often preferred for cozy living spaces, while cooler whites (5000K) are better for work areas.

3. Trim Style

The trim of the can light plays a significant role in its overall aesthetic. Options range from open trims that allow light to spill in all directions to baffle trims that reduce glare and direct light downward. Choose a trim that complements your interior design.

4. Dimming Capability

For versatility in lighting design, consider fixtures that are dimmable. This allows you to adjust the brightness based on your mood or activity, enhancing the functionality of your space.

5. Energy Efficiency Ratings

Look for ENERGY STAR-rated fixtures, which signify energy-efficient products that meet specific energy-saving criteria. This will ensure that you are choosing lights that will help reduce your energy costs over time.


Installation Process for Drop Ceiling Can Lights

Installing drop ceiling can lights can be a rewarding DIY project if you follow these steps carefully. However, if you’re not comfortable working with electricity, it’s always best to hire a professional.

Step 1: Gather Your Tools and Materials

Before you begin, ensure you have the following tools:

Step 2: Plan Your Layout

Determine where you want the lights to be installed. Consider the size of the room, the existing layout, and the purpose of the lighting. Mark the positions on the ceiling grid with a pencil.

Step 3: Cut Holes for the Fixtures

Using a hole saw attachment, carefully cut holes in the ceiling tiles where you’ve marked your light locations. Ensure the holes are the correct size for the fixtures you are installing.

Step 4: Run Electrical Wiring

If you’re replacing existing fixtures, turn off the power to the circuit at the breaker box. Use wire cutters to prepare the wiring. If you’re adding new fixtures, run electrical wiring through the ceiling grid to the designated holes, ensuring you comply with local building codes.

Step 5: Connect the Wiring

Carefully connect the wires from the ceiling to the can light fixture. Typically, you’ll connect black to black (or red), white to white, and green or bare wire to the ground. Secure connections with wire nuts and electrical tape.

Step 6: Install the Fixtures

Insert the can light into the holes and secure them according to the manufacturer’s instructions. Ensure that they fit snugly and that the trim is flush against the ceiling.

Step 7: Test Your Installation

Once everything is connected, restore power at the breaker box and test the lights. Ensure that all fixtures are working correctly and that there are no flickers or other issues.

Step 8: Final Adjustments

Adjust the angle of any adjustable lights to direct the beam where needed. Clean the area of any debris from installation.


Maintenance Tips for Drop Ceiling Can Lights

To ensure your drop ceiling can lights remain functional and attractive over time, consider the following maintenance tips:

1. Regular Cleaning

Dust and dirt can accumulate on the light fixtures and bulbs, reducing their brightness. Regularly wipe down the fixtures with a damp cloth and dust the bulbs gently to maintain their appearance and functionality.

2. Inspect Wiring and Connections

Periodically check the wiring and connections to ensure there are no loose connections or signs of wear. If you notice any issues, contact a qualified electrician for repairs.

3. Replace Bulbs as Needed

Monitor the performance of the bulbs and replace them as needed. Ensure you are using the correct type and wattage specified for your fixtures to avoid damage.

4. Trim Replacement

If the trim becomes damaged or outdated, consider replacing it to maintain the aesthetic appeal of your lighting. Trims can often be swapped out without replacing the entire fixture.


Conclusion

Drop ceiling can lights are an excellent choice for anyone looking to enhance the functionality and aesthetics of their space. With their sleek design, versatility in lighting, and energy efficiency, they provide a modern solution to interior lighting needs. Whether you’re renovating your home, upgrading your office, or simply seeking better lighting options, understanding the features, benefits, and installation of drop ceiling can lights will help you make an informed decision.

Serge Mouille Three-Arm Ceiling Lamp: Illuminate Your Space with Style

When it comes to combining artistry with functionality, the Serge Mouille Three-Arm Ceiling Lamp stands out as a timeless piece that transforms any space into a stylish haven. Known for its sleek design and artistic flair, this lamp is more than just a source of light; it’s a statement of sophistication and creativity. This article delves into the origins, design elements, installation tips, and care instructions for this iconic lighting fixture, showcasing why it should be a staple in your home.

Serge Mouille Three-Arm Ceiling Lamp

The Legacy of Serge Mouille

Before we explore the intricacies of the Serge Mouille Three-Arm Ceiling Lamp, it’s essential to understand the man behind the design. Serge Mouille was a French industrial designer and artist, renowned for his innovative lighting solutions during the mid-20th century. Born in 1922 in Paris, Mouille’s work is characterized by its modernist style, which emphasizes clean lines, functional forms, and an artistic aesthetic.

Read too: Bathroom Flooded Through the Ceiling: A Comprehensive Guide

Mouille’s designs were influenced by the burgeoning movement of modernism in France, where he experimented with metal and minimalist shapes. His work gained significant acclaim, and today, the Serge Mouille Three-Arm Ceiling Lamp is considered one of his masterpieces. It reflects the perfect blend of utility and artistry, embodying the principles of modern design while adding a touch of elegance to any room.


Features of the Serge Mouille Three-Arm Ceiling Lamp

1. Unique Design Elements

The Serge Mouille Three-Arm Ceiling Lamp features a distinctive design that sets it apart from other lighting fixtures. The lamp comprises three adjustable arms that extend from a central hub, allowing for versatile positioning of the light sources. Each arm can be directed to illuminate different areas, making it an ideal choice for living rooms, dining areas, or even office spaces.

  • Material: Crafted primarily from metal, the lamp showcases a matte black finish, which adds a touch of sophistication. The contrasting white interior of the lamp shades reflects light beautifully, creating a warm and inviting glow.
  • Shape: The lamp’s geometric shapes—triangular shades and linear arms—contribute to its modernist aesthetic. This unique form allows it to function as both a lighting source and a work of art.

2. Versatile Functionality

One of the standout features of the Serge Mouille Three-Arm Ceiling Lamp is its adaptability. The adjustable arms provide flexibility in lighting design, allowing you to customize the brightness and direction of the light based on your needs. Whether you’re looking to create a cozy atmosphere for a dinner party or need focused light for reading, this lamp can easily transition between functions.

3. Timeless Aesthetic

The minimalist design and neutral color palette of the Serge Mouille Three-Arm Ceiling Lamp make it a versatile choice that complements various interior styles. Whether your home is modern, industrial, or even mid-century, this lamp fits seamlessly into the decor. Its timeless appeal ensures that it remains a relevant design choice for years to come.


How to Style the Serge Mouille Three-Arm Ceiling Lamp

1. Living Room Elegance

In the living room, the Serge Mouille Three-Arm Ceiling Lamp can serve as a stunning focal point. Position it above a coffee table or sectional sofa to create a warm and inviting ambiance. Pair it with modern furniture and neutral tones to enhance its artistic presence. Additionally, consider using it in conjunction with other light sources, such as floor lamps or wall sconces, to create layered lighting that adds depth to the space.

2. Dining Area Drama

For dining rooms, this lamp offers both functionality and flair. Hang it above the dining table to provide focused lighting for meals. The adjustable arms allow you to direct light onto the table, making it perfect for family gatherings or dinner parties. Combine the lamp with an elegant table setting and complementary decor to create an unforgettable dining experience.

3. Home Office Inspiration

In a home office, the Serge Mouille Three-Arm Ceiling Lamp can help foster creativity and productivity. Position it centrally to illuminate your workspace effectively. The stylish design will not only brighten the area but also inspire innovative thinking and style. Pair it with minimalist desk accessories and shelving to maintain a clean and organized aesthetic.

4. Bedroom Serenity

In the bedroom, this lamp can add a touch of luxury and sophistication. Hang it above the bedside tables for an elegant reading light that enhances the overall decor. The soft, diffused light creates a calming atmosphere, perfect for relaxation. Style it with plush bedding and muted color palettes to create a serene retreat.


Installation Tips for the Serge Mouille Three-Arm Ceiling Lamp

Installing the Serge Mouille Three-Arm Ceiling Lamp is a relatively straightforward process, especially if you follow these steps:

1. Gather Your Tools

Before starting, ensure you have all necessary tools, including a screwdriver, wire cutters, and a voltage tester. Make sure to have a partner if the lamp is heavy, as this will make installation easier and safer.

2. Turn Off Power

Safety should always come first. Before you begin installation, turn off the power at the circuit breaker to avoid any electrical hazards. Use a voltage tester to confirm that the power is off.

3. Prepare the Ceiling Mount

Follow the manufacturer’s instructions to secure the ceiling mount. Typically, this involves drilling holes into the ceiling and using anchors if necessary. Ensure that the mount is level and securely fastened to support the weight of the lamp.

4. Wire the Fixture

Connect the wiring according to the instructions provided. Generally, this will involve connecting the corresponding wires (black to black, white to white, and green or bare wire to the ground). Use wire nuts to secure connections and cover any exposed wires.

5. Attach the Lamp

Once the wiring is complete, attach the Serge Mouille Three-Arm Ceiling Lamps to the ceiling mount. Follow the manufacturer’s guidance to ensure it’s securely fastened. Adjust the arms as needed to achieve your desired lighting effect.

6. Restore Power and Enjoy

After installation, turn the power back on at the circuit breaker. Test the lamp to ensure it’s functioning correctly. Take a moment to adjust the arms and angles for the perfect lighting setup in your space.


Caring for Your Serge Mouille Three-Arm Ceiling Lamp

To maintain the beauty and functionality of your Serge Mouille Three-Arm Ceiling Lamp, follow these care tips:

1. Regular Dusting

Over time, dust can accumulate on the lamp’s surfaces, diminishing its shine and performance. Use a microfiber cloth to gently dust the lamp regularly. For hard-to-reach areas, consider using a soft-bristle brush.

2. Avoid Harsh Cleaners

When cleaning the lamp, avoid using harsh chemicals or abrasive materials, as these can damage the finish. Instead, opt for a mild soap solution or a gentle glass cleaner if the lamp has glass components.

3. Check Wiring Annually

It’s a good practice to check the wiring and connections annually to ensure everything is secure and functioning properly. If you notice any signs of wear or fraying, consult a professional electrician for repairs.

4. Replace Bulbs as Needed

The Serge Mouille Three-Arm Ceiling Lamps typically uses standard bulbs. Keep an eye on the light output, and replace bulbs as needed to maintain brightness. If you’re using LED bulbs, enjoy their long lifespan, but remember to replace them when they start to flicker or dim.


Conclusion

The Serge Mouille Three-Arm Ceiling Lamps is more than just a lighting fixture; it’s a piece of art that brings elegance and sophistication to any space. With its unique design, versatile functionality, and timeless aesthetic, it serves as a perfect addition to modern interiors. Whether you’re illuminating a living room, dining area, home office, or bedroom, this lamp offers endless styling possibilities.

By understanding its design heritage, installation methods, and maintenance requirements, you can enjoy the beauty of the Serge Mouille Three-Arm Ceiling Lamps for years to come. Illuminate your home with this iconic piece, and let it inspire creativity and conversation in every room.

Chrome Flush Ceiling Light: Brighten Your Space with Style

When it comes to lighting your home or office, the choices can be overwhelming. One standout option is the Chrome Flush Ceiling Light. These elegant fixtures not only provide essential illumination but also add a touch of sophistication to any room. In this comprehensive guide, we will delve into everything you need to know about chrome flush ceiling lights, including their features, benefits, installation tips, and design considerations.

Chrome Flush Ceiling Light

What Is a Chrome Flush Ceiling Light?

A Chrome Flush Ceiling Light is a type of ceiling-mounted light fixture that sits close to the ceiling. Its chrome finish gives it a modern and sleek appearance, making it a popular choice for contemporary and minimalist decor styles. Unlike pendant lights or chandeliers that hang lower, flush lights provide unobtrusive lighting, making them suitable for various applications, from residential to commercial spaces.

Read too: Shiplap Ceiling in Kitchen: A Timeless Trend for a Stylish and Cozy Space

Key Features of Chrome Flush Ceiling Lights

  1. Sleek Design: The chrome finish provides a shiny, reflective surface that can enhance the aesthetics of any room. This type of lighting fixture often features clean lines and simple shapes, contributing to a modern look.
  2. Space-Saving: Since they are mounted directly against the ceiling, flush lights do not take up any additional space. This makes them ideal for rooms with low ceilings or smaller areas where you want to maximize headroom.
  3. Variety of Styles: Chrome flush ceiling lights come in a wide range of designs, including minimalist styles, ornate patterns, and even geometric shapes. This versatility makes it easy to find a fixture that complements your existing decor.
  4. Energy Efficiency: Many modern flush ceiling lights use LED technology, which not only provides bright illumination but also consumes significantly less energy compared to traditional incandescent bulbs.
  5. Versatile Placement: These fixtures are suitable for various settings, including living rooms, bedrooms, hallways, and even bathrooms. Their adaptability makes them a go-to choice for many homeowners.

Benefits of Using Chrome Flush Ceiling Lights

1. Enhanced Aesthetic Appeal

The shiny chrome finish of these fixtures can instantly elevate the look of a room. They can act as statement pieces or blend seamlessly into the background, depending on your decor style. Whether you are going for a luxurious look or a simple modern vibe, a chrome flush ceiling light can help you achieve your desired aesthetic.

2. Effective Lighting

With their ability to provide bright, direct lighting, chrome flush ceiling lights are perfect for spaces that require ample illumination. They can illuminate large areas without creating harsh shadows, ensuring that your home is bright and welcoming.

3. Low Maintenance

Flush ceiling lights are typically easy to clean and maintain. The smooth surface of chrome is resistant to dust and grime, making it simple to wipe down and keep looking new. Additionally, many LED models last for years, reducing the frequency of bulb changes.

4. Budget-Friendly Options

There are chrome flush ceiling lights available at various price points, making it easy to find one that fits your budget. Whether you’re looking for an affordable option for a rental property or a high-end fixture for your dream home, there are plenty of choices available.

5. Safety and Practicality

Because they are mounted flush to the ceiling, these lights are less likely to be knocked or bumped, making them a safer option for households with children or pets. They also provide consistent lighting without the risk of hanging cords or fixtures.

Choosing the Right Chrome Flush Ceiling Light

Selecting the ideal Chrome Flush Ceiling Light involves considering several factors to ensure it meets your needs and complements your space.

1. Size and Scale

The size of the fixture should be proportional to the room it will illuminate. A small light may look lost in a large space, while an oversized fixture can overwhelm a small room. Measure the dimensions of your ceiling and consider the scale of your furniture when choosing a light.

2. Style and Design

Consider the overall style of your room. If your decor leans toward traditional, you might opt for a more ornate chrome flush light. For modern spaces, sleek, minimalist designs work best. You can also find fixtures with unique shapes or artistic elements for a contemporary touch.

3. Light Output and Type

Think about the amount of light you need in the room. Check the lumen output of the fixture, as this will determine how bright the light will be. Also, consider whether you want a warm or cool light, as this can affect the ambiance of the space.

4. Installation Requirements

Ensure that you are comfortable with the installation process. Some fixtures may require professional installation, especially if they come with complex wiring or additional features like remote control or dimming options.

5. Energy Efficiency

Look for energy-efficient options, such as LED bulbs. These not only save on energy costs but also have a longer lifespan, which means less frequent replacements.

Installation Tips for Chrome Flush Ceiling Lights

Installing a Chrome Flush Ceiling Light can be a straightforward DIY project if you follow these steps:

Tools and Materials Needed

  • Screwdriver
  • Voltage tester
  • Ladder
  • Wire connectors
  • Electrical tape
  • Chrome flush ceiling light fixture

Step-by-Step Installation Process

  1. Turn Off Power: Before starting, turn off the electricity at the circuit breaker to avoid any accidents.
  2. Remove Existing Fixture: If you are replacing an old light, carefully remove it. Take note of how it is wired so you can replicate the connections with your new fixture.
  3. Test the Wires: Use a voltage tester to ensure the wires are not live before touching them.
  4. Connect Wires: Attach the new fixture’s wires to the existing ceiling wires. Typically, you will connect the black (live) wire to the black wire from the fixture, the white (neutral) wire to the white wire, and the green or bare (ground) wire to the grounding wire. Use wire connectors to secure these connections and wrap them with electrical tape for added safety.
  5. Attach the Fixture: Secure the fixture to the mounting bracket or directly to the ceiling according to the manufacturer’s instructions.
  6. Install Bulbs: If required, install the light bulbs before fixing the cover or shade onto the fixture.
  7. Restore Power: Turn the power back on at the circuit breaker and test the light to ensure it’s working correctly.

Safety Considerations

  • Always follow the manufacturer’s instructions for installation.
  • If you’re unsure about working with electrical components, consult a licensed electrician.

Maintaining Your Chrome Flush Ceiling Light

To keep your Chrome Flush Ceiling Light looking its best and functioning efficiently, regular maintenance is essential.

1. Clean Regularly

Dust and fingerprints can accumulate on the chrome surface, dulling its shine. Use a soft, damp cloth to wipe down the fixture, and avoid abrasive cleaners that could scratch the surface. For tougher grime, a mild soap solution can be used.

2. Check Bulbs

If you notice dimming or flickering, check the bulbs and replace them as necessary. Ensure you’re using the correct wattage for your fixture to avoid damage.

3. Inspect Wiring

Periodically check the wiring for any signs of wear or damage. If you notice any issues, contact a professional to address them.

4. Avoid Harsh Conditions

If your chrome flush ceiling light is installed in a humid area like a bathroom, consider using a fixture designed for wet or damp locations to prevent corrosion.

Popular Styles of Chrome Flush Ceiling Lights

1. Minimalist Designs

Minimalist chrome flush ceiling lights are characterized by their simple, clean lines and understated elegance. These fixtures often feature geometric shapes and are perfect for modern and contemporary spaces.

2. Decorative Options

For those who love a little flair, decorative chrome flush lights may feature intricate patterns or embellishments. These are ideal for adding a touch of glamour to dining rooms, living areas, or entryways.

3. Industrial Styles

Industrial-style chrome flush lights often have a more rugged look, with exposed bulbs and utilitarian designs. They work well in lofts, kitchens, and other spaces that embrace a modern industrial aesthetic.

4. LED Flush Lights

Many manufacturers now offer Chrome Flush Ceiling Lights equipped with LED technology. These fixtures provide bright light while using significantly less energy, making them a sustainable choice for eco-conscious consumers.

Conclusion

Chrome Flush Ceiling Lights are an excellent choice for anyone looking to enhance their lighting options while adding a stylish touch to their home or office. With their versatility, energy efficiency, and modern appeal, these fixtures can transform any space into a well-lit haven. Whether you opt for a minimalist design or a decorative option, there is a chrome flush ceiling light to suit every taste and need.

By understanding the features, benefits, installation, and maintenance of these fixtures, you can make informed choices that will brighten your space while complementing your decor. Illuminate your surroundings with the sophistication and functionality of chrome flush ceiling lights today!

Best Lighting for High Ceilings: The Ultimate Guide

When it comes to designing spaces with high ceilings, choosing the right lighting is essential for both functionality and aesthetics. Proper lighting can enhance the architectural beauty of a room while creating a welcoming and comfortable atmosphere. In this article, we will explore the best lighting for high ceilings, including different types of fixtures, design tips, and how to create an inviting ambiance.

Best Lighting For High Ceilings

Why Lighting Matters in High Ceilings

1. Enhances Architectural Features

High ceilings can make a room feel grand and spacious, but without the right lighting, they can also appear empty and uninviting. Proper lighting highlights the architectural features, such as beams, moldings, and unique design elements.

2. Creates a Cozy Atmosphere

Lighting plays a critical role in setting the mood of a space. In rooms with high ceilings, warm, inviting lighting can make the area feel more intimate, balancing the expansive feel of the room.

3. Functional Illumination

In addition to aesthetics, lighting must serve its primary purpose: providing adequate illumination for activities. High ceilings often require more powerful fixtures or strategically placed lights to ensure the space is well-lit.

Read too: Shiplap Ceiling in Kitchen: A Timeless Trend for a Stylish and Cozy Space

Types of Lighting for High Ceilings

When it comes to selecting the best lighting for high ceilings, consider these different types of fixtures and techniques:

1. Chandeliers

Chandeliers are often the go-to choice for high-ceiling spaces. They not only provide ample light but also serve as a stunning focal point in a room. Here are a few tips for choosing chandeliers:

  • Scale: Choose a chandelier that is proportionate to the size of the room. A large chandelier can make a statement, while smaller ones may get lost in the space.
  • Height: Hang the chandelier at least 7 feet above the floor to ensure clearance, especially in areas with high traffic.

2. Pendant Lights

Pendant lights are versatile and can be used in various configurations. They work well in high-ceiling spaces, especially when installed in clusters or at varying heights. Consider the following:

  • Grouping: Group multiple pendant lights together to create a layered lighting effect. This approach can provide more light and a visually appealing design.
  • Height Variation: Varying the height of the pendants can add dimension and interest to the space.

3. Wall Sconces

Wall sconces are excellent for providing ambient lighting and can accentuate architectural features in a high-ceiling room. Here are some tips:

  • Placement: Install sconces at eye level, usually 60-66 inches from the floor, to ensure they are functional and visually pleasing.
  • Style: Choose sconces that complement the overall decor style of the room, whether modern, traditional, or eclectic.

4. Recessed Lighting

Recessed lighting is a great option for high ceilings as it can provide even illumination without overwhelming the space. Consider the following:

  • Spacing: When installing recessed lights, ensure they are evenly spaced to avoid shadows. A general rule is to space them about 4-6 feet apart, depending on the fixture’s brightness.
  • Dimming Options: Installing dimmers allows you to adjust the brightness according to the time of day or occasion, creating a more versatile lighting solution.

5. Track Lighting

Track lighting is highly adaptable and can be adjusted to focus on specific areas or features within a room. Here are some advantages:

  • Flexibility: With track lighting, you can easily reposition the fixtures to highlight artwork, furniture, or other design elements.
  • Design: Modern track lighting systems come in various styles and finishes, allowing you to select options that fit your decor.

Design Tips for High Ceiling Lighting

To maximize the impact of your lighting in high-ceiling spaces, consider these design tips:

1. Layer Your Lighting

Use a combination of ambient, task, and accent lighting to create a well-lit and inviting atmosphere. This layering technique ensures that every part of the room is adequately illuminated and adds depth to the overall design.

2. Use Dimmer Switches

Incorporating dimmer switches allows for better control over the lighting intensity, making it easier to create the desired mood. This is especially useful in multi-functional spaces where lighting needs may vary throughout the day.

3. Consider Color Temperature

The color temperature of your light bulbs can significantly affect the ambiance of a room. For high ceilings, consider using warm white bulbs (2700K to 3000K) to create a cozy and inviting atmosphere.

4. Highlight Architectural Features

Use lighting to draw attention to architectural elements like beams, moldings, or fireplaces. This can be achieved with spotlights, recessed lights, or even strategically placed wall sconces.

5. Think About Ceiling Height

When selecting lighting fixtures, consider the height of your ceilings. For extremely high ceilings, consider fixtures that extend down, such as long pendants or multiple chandeliers, to bring the light closer to eye level.

Popular Lighting Fixtures for High Ceilings

Here are some popular lighting fixtures that work exceptionally well in high-ceiling spaces:

1. Kichler Tanglewood 52-Inch Ceiling Fan with Light

This ceiling fan not only provides excellent air circulation but also features integrated lighting. The unique design adds character to any room while ensuring optimal lighting.

2. Westinghouse Lighting 63510 Sorrento 3-Light Pendant

This stunning pendant light offers a modern twist with its sleek design. Ideal for over dining tables or kitchen islands, it adds sophistication while providing ample light.

3. Savoy House 1-Light Mini Pendant

Mini pendants like this one can be grouped together to create a dramatic effect. Their compact size makes them perfect for high ceilings when hung at varying lengths.

4. Quoizel NY8603VB Newbury 3-Light Pendant

This beautiful pendant light features a vintage design that works well in traditional and modern spaces. The three lights provide ample illumination for larger areas.

5. Cyan Design 06238 Spiral 3-Light Pendant

With a modern twist on the traditional chandelier, this spiral pendant light makes a bold statement in high-ceiling spaces while offering adjustable heights.

Conclusion

Finding the best lighting for high ceilings involves understanding the unique challenges and opportunities these spaces present. By selecting the right fixtures, employing effective design strategies, and considering the functionality of the lighting, you can create a beautiful and inviting atmosphere that showcases the grandeur of your high ceilings. Whether you opt for a statement chandelier, sleek pendants, or recessed lighting, the right choices can transform your space into a well-lit haven.

High Ceiling Lights for Living Room: Elevate Your Space with Style and Functionality

High ceilings in a living room provide an air of grandeur and spaciousness, but they also present a unique challenge when it comes to lighting. Proper lighting is essential not only to illuminate the space but also to enhance the room’s ambiance, style, and functionality. Choosing the right high ceiling lights for your living room can transform your space, creating a warm and inviting atmosphere while complementing your interior design.

High Ceiling Lights For Living Room

In this article, we’ll explore different types of lighting options for living rooms with high ceilings, how to install them properly, and tips for making your space feel cozier and well-lit. Whether you’re looking to make a bold statement or simply want to improve the functionality of your room, there are various lighting solutions to suit your needs.

Read too: Shiplap Ceiling in Kitchen: A Timeless Trend for a Stylish and Cozy Space

The Importance of High Ceiling Lights for Living Room

When you have a living room with high ceilings, it’s crucial to choose lighting that balances the space while highlighting its architectural features. High ceilings can make a room feel vast, but without proper lighting, the room may appear dim, cold, or cavernous. This is why high ceiling lights for living rooms are essential to:

  • Illuminate the Space: Adequate lighting ensures that every part of the room is well-lit, creating a welcoming environment.
  • Enhance Architectural Features: Lighting can draw attention to architectural details such as beams, moldings, or vaulted ceilings.
  • Add Warmth and Coziness: Proper lighting makes large spaces feel more intimate and comfortable.
  • Improve Functionality: Task lighting is necessary for activities such as reading, socializing, and watching television.

Choosing the right lighting fixtures involves considering both form and function. It’s not just about how the lights look but also how they serve the space.

Types of High Ceiling Lights for Living Room

There are several lighting options to consider when designing your living room with high ceilings. The key is to layer the lighting, combining different types to create balance and depth. Here are some of the most popular and effective lighting choices for living rooms with high ceilings:

1. Chandeliers

Chandeliers are the classic choice for high ceiling lighting and add elegance and drama to any living room. They act as a focal point and bring light down from the ceiling to the main living space. When selecting a chandelier for a living room with high ceilings, consider the following:

  • Size: Ensure the chandelier is large enough to fill the space proportionally. A small chandelier can get lost in a room with high ceilings, while an oversized one can overwhelm the room.
  • Height: The chandelier should hang at the right height—ideally 8 to 10 feet above the floor, depending on the ceiling height. This ensures the light is effectively dispersed while still leaving enough clearance for people walking below.
  • Style: From traditional crystal chandeliers to modern, minimalist designs, you can find a chandelier to match your décor and enhance the room’s style.

2. Pendant Lights

Pendant lights are versatile and offer a sleek, modern option for high ceiling living rooms. They can be used individually or grouped together at varying heights for a more dramatic effect. Pendant lights work particularly well over seating areas or coffee tables, where they can provide both ambient and task lighting.

  • Adjustability: Many pendant lights are adjustable, allowing you to customize the height for your specific ceiling.
  • Grouping: Grouping multiple pendant lights can create an artistic focal point and provide more even lighting across the room.
  • Design: Choose designs that complement your living room’s aesthetic. Glass pendants provide a clean, contemporary look, while metallic or fabric shades offer warmth and texture.

3. Recessed Lighting

Recessed lighting is a great option for high ceilings because it provides a clean, unobtrusive look. These lights are installed directly into the ceiling, offering a modern, streamlined appearance that doesn’t compete with other design elements in the room.

  • Spacing: Ensure the recessed lights are evenly spaced across the ceiling to provide even illumination throughout the room. Too few lights can make the room appear dim, while too many can make it feel overly bright.
  • Dimming Features: Installing dimmable recessed lights allows you to adjust the lighting intensity depending on the time of day or the activity in the room. This flexibility can help create a cozy atmosphere in the evening while still offering bright lighting for daytime activities.

4. Track Lighting

Track lighting provides flexibility and is ideal for high ceiling spaces that require directional lighting. This type of lighting system involves a series of adjustable fixtures mounted along a track. It allows you to direct light to specific areas, such as artwork, furniture, or architectural features.

  • Versatility: The adjustable nature of track lighting makes it a great option for illuminating different parts of the living room. You can highlight focal points or provide accent lighting where needed.
  • Modern Aesthetic: Track lighting has a sleek, contemporary design that works well in modern and industrial-style living rooms.
  • Placement: Track lighting works well in areas where you need focused lighting, such as along walls or over specific furniture arrangements.

5. Wall Sconces

Wall sconces add an extra layer of lighting to your living room with high ceilings. They’re perfect for creating ambient lighting, particularly when positioned higher on the walls to complement ceiling lights.

  • Symmetry: Installing sconces in pairs or along the perimeter of the room creates a balanced and elegant look.
  • Ambient Lighting: Sconces provide soft, indirect light that can make a large living room feel more intimate and cozy.
  • Design Options: From modern minimalist designs to more ornate options, wall sconces come in a variety of styles that can enhance the overall look of your space.

6. Floor and Table Lamps

While ceiling lighting is essential, floor and table lamps offer task lighting and add warmth to the room. These lamps can be strategically placed in seating areas or corners to provide additional light and ambiance.

  • Portability: Floor and table lamps can be easily moved, giving you flexibility in how you light different parts of the room.
  • Layering: Combine ceiling lights with lamps to create a layered lighting effect that adds depth and dimension to the room.

How to Choose the Right High Ceiling Lights for Living Room

Choosing the right lighting for a living room with high ceilings requires careful consideration of both the space and the purpose of the lights. Here are some key factors to keep in mind:

1. Room Size and Ceiling Height

The size of your living room and the height of the ceiling will play a significant role in determining the type and number of lights you need. For particularly tall ceilings (over 12 feet), you may need larger or more lights to adequately illuminate the space. Consider the scale of the room when selecting fixtures to ensure that they fit proportionally.

2. Functionality

Think about how you use the living room. If it’s primarily a space for entertaining guests, you may want more ambient lighting, such as chandeliers or pendant lights. If it’s a space for reading or watching television, task lighting like floor lamps or adjustable sconces may be necessary.

3. Style and Aesthetic

Lighting fixtures should complement the overall décor of your living room. A modern living room may benefit from minimalist pendant lights, while a more traditional space could be enhanced by an ornate chandelier. The finish of the lighting fixtures—whether brass, chrome, or matte black—should also coordinate with other design elements in the room.

4. Layered Lighting

In living rooms with high ceilings, it’s essential to use multiple types of lighting to create layers. Ambient lighting, accent lighting, and task lighting all serve different purposes, and combining them ensures that the room is well-lit and functional. For example, you can pair a chandelier with recessed lighting and wall sconces for a balanced lighting design.

5. Energy Efficiency

Consider energy-efficient lighting options such as LED bulbs. These not only last longer but also consume less electricity, which is especially important if you’re lighting a large room with high ceilings. Many modern lighting fixtures are designed to be compatible with LED bulbs, making them a smart, eco-friendly choice.

Tips for Installing High Ceiling Lights

  • Hire a Professional: Installing lights in high ceilings often requires specialized equipment such as scaffolding or tall ladders. Hiring a professional ensures that the installation is done safely and correctly.
  • Consider Smart Lighting: Smart lighting systems allow you to control the brightness, color, and even scheduling of your lights from your phone or through voice commands. This can be particularly useful in a room with high ceilings where light switches may be less accessible.
  • Use Dimmers: Installing dimmer switches allows you to adjust the light levels to suit different moods and occasions. This is particularly useful in living rooms where you may want to create a more relaxed atmosphere in the evening.

Conclusion

Choosing the right high ceiling lights for your living room can make a significant difference in both the aesthetics and functionality of the space. From chandeliers and pendant lights to recessed and track lighting, there are various options to suit different styles and needs. By layering your lighting and considering the size, height, and purpose of your living room, you can create a beautifully illuminated space that feels both inviting and functional.

Investing in the right lighting not only improves the visual appeal of your living room but also enhances your comfort and overall enjoyment of the space. Whether you’re entertaining guests or relaxing with your family, the right high ceiling lights can make all the difference.

Lighting for Cathedral Ceilings: Illuminating Spaces

When it comes to home design, one architectural feature that stands out is the cathedral ceiling. This striking design element can transform a room, adding an impressive sense of space and airiness. However, it also presents unique challenges, particularly when it comes to lighting for cathedral ceilings. The right lighting can enhance the beauty of these ceilings, create a welcoming atmosphere, and ensure that the room is functional. In this comprehensive guide, we will explore various aspects of lighting for cathedral ceilings, including the best types of fixtures, installation tips, and design considerations.

Lighting For Cathedral Ceilings

Understanding Cathedral Ceilings

Before diving into lighting options, it’s important to understand what a cathedral ceiling is. Unlike flat ceilings, cathedral ceilings are characterized by their sloping sides that rise to meet at a central point. This architectural design creates a dramatic effect and allows for greater natural light when combined with large windows.

Advantages of Cathedral Ceilings

  1. Increased Natural Light: The angle of a cathedral ceiling often allows for larger windows, making rooms feel bright and spacious.
  2. Enhanced Airflow: High ceilings can improve airflow, making spaces feel cooler and more comfortable.
  3. Aesthetic Appeal: Cathedral ceilings add character and charm, creating a stunning focal point in your home.

Read too: Kitchen Lighting For A Vaulted Ceiling: Illuminating Your Space with Style and Functionality

Challenges of Cathedral Ceilings

  1. Lighting Difficulties: The height of these ceilings can make it challenging to find the right lighting solutions that effectively illuminate the space.
  2. Heat Loss: High ceilings can lead to heat loss, making it essential to consider energy-efficient lighting options.
  3. Maintenance: Cleaning and changing light bulbs in high fixtures can be cumbersome.

Lighting Options for Cathedral Ceilings

Choosing the right lighting for cathedral ceilings involves understanding the various fixture options available. Here are some popular types of lighting fixtures that work well:

1. Chandeliers

Chandeliers are a classic choice for cathedral ceilings. They serve as a focal point and can add elegance to any room.

  • Types of Chandeliers: From traditional crystal chandeliers to modern geometric designs, the variety is vast.
  • Height Considerations: Hang chandeliers approximately 30-34 inches above dining tables. In entryways, ensure the bottom of the chandelier is at least 7 feet off the ground.

Ideal For: Dining rooms, entryways, and living rooms.

2. Pendant Lights

Pendant lights can be hung at various heights, making them versatile for different spaces.

  • Clustered Pendants: Using a cluster of pendants at varying heights can create a dramatic effect, especially over kitchen islands or dining tables.
  • Single Large Pendants: A large, single pendant can serve as a statement piece.

Ideal For: Kitchens, dining areas, and living spaces.

3. Recessed Lighting

Recessed lighting is an excellent option for creating ambient light without distracting from the beauty of the cathedral ceiling.

  • Placement: Install recessed lights along the slopes of the ceiling to highlight architectural features and provide overall illumination.
  • Adjustable Trims: Opt for adjustable trims to direct light where it is needed most.

Ideal For: Living rooms, hallways, and areas where a clean aesthetic is desired.

4. Wall Sconces

Wall sconces can add warmth and depth to cathedral ceilings while providing additional lighting.

  • Height Installation: Install sconces higher on the wall to draw the eye upward and emphasize the ceiling’s height.
  • Design Variety: Choose from a variety of styles, including modern, traditional, or rustic designs.

Ideal For: Hallways, staircases, and rooms where additional wall lighting is beneficial.

5. Ceiling Fans with Lights

Ceiling fans that incorporate lights can be both functional and stylish, making them a practical choice for rooms with cathedral ceilings.

  • Efficiency: Ceiling fans help circulate air, making spaces more comfortable.
  • Design Options: Many ceiling fans come in modern designs with integrated LED lighting.

Ideal For: Bedrooms, family rooms, and areas where cooling is essential.

Design Considerations for Lighting

When selecting lighting for cathedral ceilings, consider the following design elements to create a harmonious look:

1. Style Coordination

Ensure your lighting fixtures align with your overall design style. For example:

  • Modern Spaces: Opt for sleek, geometric fixtures with clean lines.
  • Traditional Spaces: Choose ornate chandeliers or vintage-style pendants.

2. Color Temperature

The color temperature of the bulbs can dramatically affect the mood of a room:

  • Warm White (2700K-3000K): Creates a cozy and inviting atmosphere.
  • Cool White (3500K-4100K): Offers a more energetic and bright feel, suitable for task-oriented areas.

3. Layered Lighting

To achieve a well-lit space, incorporate layered lighting:

  • Ambient Lighting: General lighting from chandeliers, recessed lights, or ceiling fans.
  • Task Lighting: Specific lighting for areas where activities occur, like reading or cooking.
  • Accent Lighting: Use sconces or spotlights to highlight artwork or architectural features.

4. Height Adjustments

Adjust the height of your fixtures based on the room’s use. For example, a chandelier in a dining area should hang lower for ambiance, while fixtures in a hallway should be higher for safety.

Installation Tips for Lighting Fixtures

When installing lighting for cathedral ceilings, consider these important tips:

1. Hire a Professional

Given the height and complexity of cathedral ceilings, hiring a licensed electrician for installation is often the safest option. They can ensure proper wiring and secure installation.

2. Use Adjustable Hardware

Using adjustable mounting hardware can help you achieve the desired height and angle for your fixtures, ensuring optimal lighting distribution.

3. Check Weight Limits

Make sure your ceiling can support the weight of your chosen fixtures, especially when dealing with heavy chandeliers or pendant lights.

4. Positioning Fixtures

Plan the placement of fixtures strategically to avoid dark corners and create a balanced lighting effect throughout the room.

Maintenance and Care

To keep your lighting fixtures in top condition, regular maintenance is essential:

1. Dust Regularly

Dust can accumulate on light fixtures, affecting both their appearance and performance. Use a microfiber cloth or duster to clean them regularly.

2. Change Bulbs Promptly

Burned-out bulbs should be replaced as soon as possible to maintain consistent lighting.

3. Inspect for Damage

Periodically check for any signs of wear, such as frayed wires or loose components, and address these issues quickly to ensure safety.

4. Professional Cleaning

For larger fixtures like chandeliers, consider hiring professionals for deep cleaning, especially if they have intricate designs that are difficult to clean yourself.

Final Thoughts

Lighting for cathedral ceilings can be both a functional necessity and a design opportunity. By choosing the right fixtures, considering the height and style of your ceilings, and implementing layered lighting techniques, you can create an inviting and beautifully illuminated space.

Whether you opt for stunning chandeliers, sleek pendant lights, or practical recessed lighting, the key is to select fixtures that enhance the architectural beauty of your cathedral ceilings while providing adequate illumination. Embrace the challenge of lighting these lofty spaces, and enjoy the elegant transformation it brings to your home.

Light Fixtures For Tall Ceilings: Illuminating Spaces

When it comes to designing a home with tall ceilings, the right lighting can make all the difference. Light fixtures for tall ceilings not only serve the practical purpose of illuminating your space but also enhance its aesthetic appeal. Choosing the right fixtures can highlight architectural features, create a cozy atmosphere, and even act as a statement piece in your room. In this comprehensive guide, we will explore the various types of light fixtures suitable for tall ceilings, their benefits, design tips, and considerations to ensure you make the best choice for your home.

Light Fixtures For Tall Ceilings

Understanding the Need for Proper Lighting in Tall Ceilings

1. Aesthetic Enhancement

High ceilings can often make a space feel empty or uninviting. Using the right light fixtures can fill that vertical space, creating a sense of balance and proportion in your room. Whether you prefer contemporary designs or classic elegance, the right fixture can elevate your room’s aesthetic.

Read too: Discovering the Charm of Nautical Outdoor Ceiling Fans for Your Coastal Retreat: Sail into Style

2. Functional Lighting

Tall ceilings often require more powerful light sources to effectively illuminate the room. Standard fixtures may not provide adequate light in these spaces, making it essential to select fixtures designed for higher placements.

3. Creating Ambiance

Lighting plays a crucial role in setting the mood of a room. Different fixtures can create various atmospheres, from bright and energizing to warm and cozy. With tall ceilings, you have the opportunity to experiment with layers of light to achieve your desired ambiance.

Types of Light Fixtures For Tall Ceilings

When selecting light fixtures for tall ceilings, it’s essential to consider the different styles and types available. Here are some popular options:

1. Chandeliers

Chandeliers are one of the most popular choices for tall ceilings. These fixtures add a touch of luxury and grandeur to any room. Here are some points to consider:

  • Size and Scale: Choose a chandelier that is proportionate to your room’s size. A large chandelier can become a stunning focal point in a spacious room.
  • Height Consideration: Hang the chandelier at an appropriate height—generally, at least 7 feet above the floor to allow for safe clearance.
  • Styles: From modern to traditional, chandeliers come in various designs, including crystal, metal, and glass, allowing you to match the fixture to your room’s décor.

2. Pendant Lights

Pendant lights are versatile fixtures that can work beautifully in rooms with tall ceilings. They can be used alone or in clusters to create a unique design.

  • Multiple Pendants: Group several pendants at varying heights for a dramatic effect, especially in dining areas or kitchens.
  • Variety of Designs: Available in various shapes, sizes, and colors, pendant lights can be selected to complement your existing décor.
  • Adjustable Heights: Many pendant fixtures come with adjustable cables, allowing you to customize their height based on your space.

3. Wall Sconces

Wall sconces can be an excellent addition to rooms with tall ceilings, especially when paired with other fixtures. They provide additional lighting while enhancing the room’s overall design.

  • Height Placement: Install sconces at eye level or higher to create a balanced look. This can draw the eye upward and emphasize the height of the ceiling.
  • Accent Lighting: Use sconces to highlight artwork, architectural features, or even as part of a layered lighting scheme.
  • Variety of Styles: Wall sconces come in many styles, from minimalist to ornate, allowing you to find options that align with your design vision.

4. Recessed Lighting

Recessed lighting can provide a clean and modern look for tall ceilings. These fixtures are embedded into the ceiling, offering unobtrusive illumination.

  • Layered Lighting: Combine recessed lights with other fixtures for a well-rounded lighting design. This approach allows you to control brightness and ambiance effectively.
  • Directional Lighting: Many recessed lights can be angled to highlight specific areas or features in the room, enhancing its overall appearance.
  • Energy Efficiency: LED recessed lights are energy-efficient and long-lasting, making them a practical choice for larger spaces.

5. Track Lighting

Track lighting is another great option for tall ceilings, offering flexibility and versatility in illuminating your space.

  • Adjustable Positioning: Track lights can be adjusted to highlight different areas of the room or specific features, allowing you to customize your lighting.
  • Contemporary Aesthetic: This style works well in modern or industrial settings and can add an artistic touch to your decor.
  • Variety of Bulbs: You can use different types of bulbs in track lighting, including LED and halogen, depending on your brightness preferences.

Tips for Choosing Light Fixtures For Tall Ceilings

When selecting light fixtures for tall ceilings, there are several key factors to keep in mind:

1. Room Dimensions

Consider the size of your room when choosing light fixtures. Larger rooms may require multiple fixtures or larger-scale designs to adequately light the space. Measure the height of your ceilings to determine the appropriate length for hanging fixtures.

2. Style and Theme

Select light fixtures that complement the overall style of your room. Whether you prefer a modern, rustic, or traditional aesthetic, there are light fixtures available in various designs and finishes to match your vision.

3. Lighting Needs

Assess your lighting needs based on how you use the space. Do you need bright, task-oriented lighting, or do you prefer softer, ambient lighting? This will guide you in choosing the right fixtures and bulbs.

4. Dimmers and Controls

Installing dimmer switches allows you to adjust the brightness of your fixtures, providing flexibility for different activities and moods. Consider smart lighting options that can be controlled via mobile apps or voice commands for added convenience.

5. Safety and Maintenance

Ensure that your light fixtures are installed safely, especially when dealing with high ceilings. Regular maintenance, such as cleaning and bulb replacement, will keep your fixtures looking great and functioning effectively.

Maintenance Tips for Light Fixtures For Tall Ceilings

Proper maintenance is essential to keep your light fixtures for tall ceilings in good condition. Here are some maintenance tips:

1. Regular Dusting

Dust can accumulate on light fixtures, especially those installed at height. Use a microfiber cloth or a feather duster to wipe down your fixtures regularly to keep them looking clean.

2. Bulb Replacement

Check your bulbs regularly and replace any that are burnt out. For hard-to-reach fixtures, consider using a long-handled bulb changer or enlisting the help of a professional.

3. Inspect Electrical Components

Periodically inspect the electrical components of your fixtures for any signs of wear or damage. If you notice any issues, consult an electrician to address them.

4. Professional Cleaning

For larger or more complex fixtures, consider hiring a professional cleaning service to ensure that they are cleaned safely and thoroughly.

Conclusion

Choosing the right light fixtures for tall ceilings can dramatically transform the look and feel of your space. From elegant chandeliers to modern pendant lights, the options are endless. By considering the type of fixture, room size, and your personal style preferences, you can find lighting solutions that enhance both the functionality and aesthetics of your home. Remember to keep safety and maintenance in mind to ensure that your fixtures remain beautiful and effective for years to come.

Glass Flush Mount Ceiling Fixture: Illuminate Your Space

When it comes to lighting solutions for your home, few options are as versatile and stylish as the Glass Flush Mount Ceiling Fixture. These fixtures not only provide essential illumination but also serve as beautiful decorative elements that can enhance any room’s aesthetic. Whether you’re redesigning your home or simply updating your lighting, understanding the various aspects of glass flush mount ceiling fixtures can help you make informed decisions.

Glass Flush Mount Ceiling Fixture

In this article, we will explore the benefits, design options, installation tips, and maintenance of glass flush mount ceiling fixtures, ensuring you have all the information you need to illuminate your space effectively.


Understanding Glass Flush Mount Ceiling Fixtures

What Are Glass Flush Mount Ceiling Fixtures?

Glass flush mount ceiling fixtures are lighting installations that are attached directly to the ceiling without any space between the fixture and the ceiling itself. These fixtures often feature a glass shade that diffuses light, creating a soft, ambient glow. The design typically includes a base that connects the fixture to the ceiling and may have decorative elements to enhance its visual appeal.

Benefits of Glass Flush Mount Ceiling Fixtures

  1. Space-Saving Design: One of the most significant advantages of flush mount fixtures is their space-saving design. They are ideal for rooms with low ceilings, as they don’t protrude downwards, reducing the risk of bumping your head.
  2. Versatility: Glass flush mount fixtures come in various styles, sizes, and finishes, making them suitable for any room, from kitchens and hallways to bedrooms and living areas. They can complement both modern and traditional decor.
  3. Easy to Clean: Unlike hanging fixtures that may collect dust in hard-to-reach areas, flush mount fixtures are easier to clean and maintain, making them a practical choice for any home.
  4. Ambient Lighting: These fixtures provide a broad, even distribution of light, making them perfect for general illumination. They can also enhance the ambiance of a room by creating a warm and inviting atmosphere.

Read too: Kitchen Lighting For A Vaulted Ceiling: Illuminating Your Space with Style and Functionality


Choosing the Right Glass Flush Mount Ceiling Fixture

When selecting a glass flush mount ceiling fixture, consider the following factors to ensure it fits your needs and style:

1. Size

The size of the fixture is crucial for achieving a balanced look in your space. A fixture that is too small may look out of place, while one that is too large can overwhelm the room. Here are some tips to help you choose the right size:

  • Room Dimensions: Measure the dimensions of your room. A general rule of thumb is to add the room’s length and width in feet and use that number as the diameter of the fixture in inches. For example, if your room is 12 feet by 10 feet, look for a fixture around 22 inches in diameter.
  • Ceiling Height: For rooms with higher ceilings, you may want a larger fixture to maintain proportion. In contrast, lower ceilings may require a more compact design.

2. Style

The style of the fixture should complement the overall decor of your room. Here are some popular styles to consider:

  • Modern: Sleek lines and minimalist designs characterize modern fixtures, often using materials like metal and glass in unique shapes.
  • Traditional: These fixtures may feature ornate designs, warm finishes, and frosted glass shades, providing a classic look.
  • Industrial: Industrial-style fixtures often incorporate raw materials like metal and glass, offering a rustic and edgy feel.
  • Transitional: A blend of modern and traditional, transitional fixtures can seamlessly fit into various decor styles.

3. Finish

The finish of the fixture can impact the overall look of your space. Popular finishes for glass flush mount ceiling fixtures include:

  • Brushed Nickel: This modern finish works well in contemporary spaces and adds a touch of elegance.
  • Antique Bronze: Ideal for traditional or rustic designs, antique bronze adds warmth and character.
  • Chrome: A shiny chrome finish offers a sleek and modern look, perfect for minimalistic designs.
  • Matte Black: This finish has become increasingly popular for its modern and sophisticated appearance.

Installation Tips for Glass Flush Mount Ceiling Fixtures

Installing a glass flush mount ceiling fixture can be a straightforward process if you follow these steps:

1. Gather Tools and Materials

Before you begin, gather the necessary tools and materials, including:

  • Screwdriver
  • Wire cutters
  • Electrical tape
  • Voltage tester
  • Ladder

2. Turn Off Power

Safety first! Always turn off the power at the circuit breaker before working with electrical fixtures. Use a voltage tester to ensure that the wires are not live.

3. Remove the Old Fixture

If you are replacing an existing fixture, carefully remove it by unscrewing the mounting plate and disconnecting the wires. Make sure to note how the wires are connected for easier installation of the new fixture.

4. Connect the Wires

Follow the manufacturer’s instructions for connecting the wires of the new fixture. Typically, this involves connecting the black (or red) wires together, the white wires together, and grounding the fixture. Use electrical tape to secure the connections.

5. Secure the Fixture

Attach the mounting bracket to the ceiling, ensuring that it is securely fastened. Then, carefully attach the fixture to the mounting bracket and secure it in place.

6. Install the Glass Shade

Once the fixture is securely mounted, install the glass shade according to the manufacturer’s instructions. Be gentle to avoid breaking the glass.

7. Turn On Power and Test

After everything is securely in place, turn the power back on at the circuit breaker and test the fixture to ensure it is working properly.


Maintenance of Glass Flush Mount Ceiling Fixtures

To keep your glass flush mount ceiling fixture looking its best and functioning efficiently, regular maintenance is essential. Here are some maintenance tips:

1. Regular Cleaning

Dust and grime can accumulate on your fixture over time, dulling its appearance. To clean:

  • Turn Off Power: Always turn off the power before cleaning to avoid electrical accidents.
  • Remove the Glass Shade: If your fixture allows for it, remove the glass shade for easier cleaning.
  • Use Gentle Cleaners: Use a soft cloth and a mild glass cleaner or a mixture of vinegar and water to clean the glass. Avoid abrasive cleaners that can scratch the surface.
  • Wipe Down the Base: Use a damp cloth to wipe the base and any other parts of the fixture, removing dust and dirt.

2. Check for Loose Parts

Periodically check your fixture for any loose screws or components. Tightening any loose parts can prevent rattling noises and ensure that the fixture remains secure.

3. Replace Bulbs as Needed

If your fixture uses traditional light bulbs, be sure to replace any burned-out bulbs promptly to maintain proper lighting. Consider switching to LED bulbs for better energy efficiency and longevity.


Design Ideas with Glass Flush Mount Ceiling Fixtures

Incorporating a glass flush mount ceiling fixture into your home can enhance both functionality and style. Here are some design ideas to inspire you:

1. Layered Lighting

Use glass flush mount fixtures as part of a layered lighting scheme. Combine them with wall sconces and table lamps to create a well-lit and inviting atmosphere.

2. Color Coordination

Choose fixtures that coordinate with the color palette of your room. Whether it’s a pop of color or a neutral tone, matching your fixtures with your decor can create a cohesive look.

3. Statement Fixtures

Consider using a larger or uniquely designed glass flush mount fixture as a statement piece in your room. A bold design can serve as a focal point that draws the eye.

4. Grouping Fixtures

In larger spaces, consider grouping multiple glass flush mount fixtures for an even distribution of light and a dramatic visual impact. This works particularly well in open-concept areas.


Conclusion: The Timeless Appeal of Glass Flush Mount Ceiling Fixtures

Glass flush mount ceiling fixtures offer a blend of style, functionality, and practicality that can enhance any room in your home. With their ability to provide ample lighting while serving as beautiful decorative elements, these fixtures are a popular choice for homeowners and designers alike.

By understanding the benefits, choosing the right fixture, following proper installation techniques, and maintaining your lighting, you can ensure that your glass flush mount ceiling fixtures remain a stunning feature of your home for years to come.

Serge Mouille Ceiling Light: A Design Icon

When it comes to timeless lighting design, few pieces resonate as deeply as the Serge Mouille Ceiling Light. This exquisite fixture combines form and function, embodying the principles of mid-century modernism while remaining versatile enough to enhance a variety of interior styles. In this article, we will explore the history, design elements, and installation tips for the Serge Mouille Ceiling Light, helping you understand why it remains a favorite among designers and homeowners alike.

Serge Mouille Ceiling Light

A Brief History of Serge Mouille

Serge Mouille was a French designer born in 1922, renowned for his innovative lighting solutions. He began his career as a blacksmith, which provided him with a unique skill set to create functional art. Mouille’s work is often characterized by simple lines, geometric shapes, and a playful approach to form.

Mouille designed a series of iconic lighting fixtures in the 1950s, including the Serge Mouille Ceiling Light. His designs were influenced by the aesthetic movement of the time, which emphasized minimalism and the beauty of industrial materials. Though initially, his work was not widely recognized, today, it is celebrated for its artistic merit and functional elegance.

Read too: Discovering the Charm of Nautical Outdoor Ceiling Fans for Your Coastal Retreat: Sail into Style

The Allure of the Serge Mouille Ceiling Light

Design Elements of the Serge Mouille Ceiling Light

The Serge Mouille Ceiling Lights is a true representation of mid-century modern design. Here are some of its distinctive features:

  1. Sleek Lines and Minimalist Design: The fixture is characterized by clean, geometric lines that create a sense of balance and harmony in any space. Its minimalist design ensures it does not overwhelm a room, making it suitable for various interior styles.
  2. Material and Finish: Typically crafted from metal, the Serge Mouille Ceiling Light is often finished in black, white, or brass. The choice of materials not only adds durability but also contributes to the fixture’s elegant appearance.
  3. Adjustable Arms: One of the standout features of this ceiling light is its adjustable arms. This functionality allows users to direct light precisely where needed, making it both practical and aesthetically pleasing.
  4. Variety of Configurations: The Serge Mouille Ceiling Light is available in various configurations, including single and multi-arm designs. This versatility makes it an ideal choice for different room sizes and layouts.
  5. Artistic Appeal: Beyond its function, the light serves as a piece of art. The sculptural quality of the design can enhance the visual interest of any room, making it a conversation starter.

Choosing the Right Serge Mouille Ceiling Light

When selecting a Serge Mouille Ceiling Light for your home, consider the following factors:

  1. Room Size: Assess the size of the room where you intend to install the light. Larger rooms may benefit from multi-arm configurations, while smaller spaces may only require a single fixture.
  2. Ceiling Height: The height of your ceiling can influence the type of fixture you choose. For rooms with high ceilings, a multi-arm light can create a stunning focal point, while a low ceiling may require a flush mount design.
  3. Existing Decor: Ensure the style of the light complements your existing decor. The versatility of the Serge Mouille design means it can work well with various styles, from contemporary to traditional.
  4. Functionality: Consider how you will use the space. If you need task lighting for a work area, look for designs that allow for focused light direction.

Installation Tips for the Serge Mouille Ceiling Light

Once you’ve selected your Serge Mouille Ceiling Lights, it’s time for installation. Here are some tips to ensure a smooth process:

  1. Gather Necessary Tools: Before starting, make sure you have all the necessary tools, including a screwdriver, wire connectors, and a voltage tester.
  2. Turn Off Power: Safety is paramount. Always turn off the power at the circuit breaker before beginning any electrical work.
  3. Read Instructions: Carefully read the manufacturer’s installation instructions. Each fixture may have specific requirements that need to be followed.
  4. Mounting the Fixture: Secure the mounting bracket to the ceiling. Ensure it is level and firmly attached to prevent the fixture from hanging unevenly.
  5. Wiring Connections: Connect the wires according to the instructions, typically involving connecting the black (hot) wire, white (neutral) wire, and ground wire. Ensure all connections are tight and secure.
  6. Final Assembly: Once the wiring is complete, attach the fixture to the mounting bracket and ensure it is securely fastened.
  7. Turn Power On: After installation, turn the power back on and test the light to ensure it functions correctly.

Styling Tips with Serge Mouille Ceiling Light

The Serge Mouille Ceiling Lights can elevate the aesthetic of any room. Here are some styling tips to maximize its impact:

  1. Pair with Complementary Decor: Consider pairing the light with other mid-century modern pieces, such as furniture or artwork, to create a cohesive look.
  2. Highlight Architectural Features: Use the light to draw attention to architectural features in your home, such as high ceilings or interesting wall textures.
  3. Layer Your Lighting: Combine the Serge Mouille Ceiling Light with other light sources, such as floor lamps and table lamps, to create a well-lit, inviting atmosphere.
  4. Use as a Focal Point: In a room with minimal decor, the Serge Mouille Ceiling Light can serve as a striking focal point, providing both light and artistic flair.
  5. Experiment with Colors: While black and white are classic finishes, don’t be afraid to explore brass or colored versions to match your interior palette.

Conclusion

The Serge Mouille Ceiling Light is more than just a lighting fixture; it’s a design statement that embodies the elegance of mid-century modernism. With its sleek lines, adjustable features, and artistic appeal, it’s no wonder that this ceiling light has remained a favorite among homeowners and designers alike.

Whether you are renovating a space or simply looking to refresh your home’s decor, consider the timeless elegance of the Serge Mouille Ceiling Lights. Its ability to blend function and art makes it a valuable addition to any room.

Lights In A Vaulted Ceiling: Transforming Your Space with Style and Elegance

Vaulted ceilings are a stunning architectural feature that adds a sense of grandeur and openness to any space. Whether found in a modern home, a classic cathedral, or a rustic cabin, these high, sloped ceilings have the power to make a room feel more expansive and dramatic. However, one of the challenges homeowners face when dealing with vaulted ceilings is figuring out how to properly illuminate them. Choosing the right lights in a vaulted ceiling can transform a room from dark and cavernous to warm and inviting.

Lights In A Vaulted Ceiling

In this article, we’ll explore different lighting options for vaulted ceilings, factors to consider when planning your lighting design, and the various styles available to create an ambient and functional space. Whether you’re looking to highlight architectural details or create a cozy atmosphere, the right lighting can make all the difference.

Why Lighting in a Vaulted Ceiling Matters

Vaulted ceilings, with their unique height and shape, require a different approach to lighting than flat ceilings. Without proper lighting, a room with a vaulted ceiling can feel cold and unwelcoming, as shadows can accumulate in the corners and the ceiling itself may disappear into darkness. Thoughtfully placed lights in a vaulted ceiling not only illuminate the space but can also enhance the room’s overall aesthetic, highlight architectural details, and create a balanced atmosphere.

Lighting can also impact how the room is used. For example, a large living room with a vaulted ceiling might need both task lighting for specific activities (such as reading or cooking) and ambient lighting to create a comfortable and cozy vibe in the evening. Understanding how light interacts with your vaulted ceiling can help you make the most of your space.

Types of Lights for Vaulted Ceilings

There are several types of lighting options to consider for your vaulted ceiling. Each type of light serves a specific purpose and contributes to the overall feel and function of the room.

1. Chandeliers

Chandeliers are a classic choice for rooms with high ceilings, and they work especially well in vaulted spaces. A well-placed chandelier can become the focal point of a room, drawing attention upward and emphasizing the ceiling’s height. Depending on the style of the chandelier, it can add a touch of elegance, sophistication, or even modernity to your space.

Read too: Discovering the Charm of Nautical Outdoor Ceiling Fans for Your Coastal Retreat: Sail into Style

For vaulted ceilings, it’s essential to choose a chandelier that is appropriately sized. A fixture that is too small will get lost in the height, while one that is too large can overwhelm the room. Ensure that the chandelier hangs at the right height to provide enough light without being too close to eye level.

2. Pendant Lights

Pendant lights are another popular option for vaulted ceilings, especially in kitchens, dining rooms, or entryways. Like chandeliers, pendant lights hang from the ceiling and can help draw attention to the height and shape of the room. They come in a variety of styles and sizes, from industrial-inspired fixtures to sleek, modern designs.

One advantage of pendant lights is their versatility. You can hang a series of smaller pendants to create a sense of rhythm and continuity in a long hallway, or opt for a single statement piece to serve as the focal point of a room. When hanging pendant lights in a vaulted ceiling, be mindful of the height and ensure they don’t obstruct views or movement.

3. Recessed Lighting

For a more subtle and modern approach, recessed lighting is an excellent choice for vaulted ceilings. Recessed lights, also known as can lights or downlights, are installed directly into the ceiling and provide a clean, streamlined look. Because the fixtures are flush with the ceiling, they don’t interfere with the room’s overall design and can create an even distribution of light.

Recessed lighting is ideal for creating ambient lighting in a vaulted space, especially when paired with dimmers to adjust the brightness based on the time of day or mood. It’s also an excellent option for highlighting specific architectural details, such as wooden beams or an exposed brick wall.

4. Track Lighting

Track lighting offers flexibility in terms of direction and positioning. Unlike chandeliers or pendants, which hang from a fixed point, track lighting allows you to adjust the position of individual lights along a track. This makes it easier to highlight specific areas of a vaulted room, such as artwork, furniture, or architectural features.

Track lighting is also a practical solution for rooms with angled ceilings, as the lights can be adjusted to point directly downward or at a specific angle. It’s a versatile option that works well in both modern and traditional spaces.

5. Skylights with Natural Light

One of the most beautiful ways to illuminate a vaulted ceiling is by incorporating natural light. Skylights can flood a room with daylight, making the space feel open, airy, and connected to the outdoors. While not a traditional “light fixture,” skylights are an excellent way to complement artificial lighting, especially during the day.

By combining skylights with artificial lights, you can create a dynamic lighting design that changes throughout the day. In the evening, the artificial lights take over to create a warm, inviting ambiance.

Factors to Consider When Choosing Lights for a Vaulted Ceiling

Choosing the right lighting for a vaulted ceiling involves more than just picking out a fixture you like. There are several factors you need to consider to ensure the lights in your vaulted ceiling are both functional and stylish.

1. Room Size and Ceiling Height

Vaulted ceilings come in various shapes and sizes, so it’s important to consider the dimensions of the room before selecting a light fixture. In larger rooms, a small fixture may not provide enough light, while in smaller spaces, an oversized chandelier or pendant may feel overwhelming.

Additionally, the height of the ceiling will impact the type of fixture you choose. For extremely high ceilings, longer hanging fixtures like chandeliers or large pendant lights may be necessary to bring the light down to a usable level. On the other hand, recessed lighting can be a good solution for rooms with slightly lower vaulted ceilings, as it doesn’t take up any visual space.

2. Lighting Needs

Different rooms serve different purposes, and your lighting choices should reflect the way the space is used. In living rooms and bedrooms, where creating a cozy, ambient atmosphere is key, soft, diffused lighting is ideal. You can achieve this with a combination of chandeliers, pendants, or recessed lights on dimmers.

In functional spaces like kitchens and home offices, task lighting is essential. Pendants over a kitchen island or track lighting above a work area can provide focused light for cooking, reading, or working.

3. Style and Aesthetic

The style of your lighting fixtures should complement the overall aesthetic of the room. If your home has a modern, minimalist design, sleek, understated fixtures like recessed lights or simple pendants may be the best option. For more traditional or rustic spaces, ornate chandeliers or industrial-style fixtures can enhance the room’s character.

The finish of the fixtures also plays a role in the overall design. For example, black or matte-finish fixtures can add a contemporary touch, while brass or copper finishes offer a more classic, vintage feel.

Installing Lights in a Vaulted Ceiling

Installing lights in a vaulted ceiling can be more complex than installing them in a standard flat ceiling, particularly because of the added height and potential angles. It’s often a good idea to work with a professional electrician to ensure the fixtures are installed safely and securely.

When installing hanging fixtures like chandeliers or pendant lights, you’ll need to make sure they are hung at the proper height for the room. As a general rule of thumb, chandeliers should hang approximately 7-8 feet above the floor in a room with a standard-height ceiling. For vaulted ceilings, the fixture should hang lower to provide adequate light while still maintaining the sense of openness.

Benefits of Proper Lighting in Vaulted Ceilings

In addition to enhancing the overall appearance of your home, the right lighting in a vaulted ceiling can offer several practical benefits:

  1. Improved Ambiance: Well-placed lighting can create a warm, inviting atmosphere, making your home feel cozier and more welcoming.
  2. Enhanced Architectural Features: Lighting can highlight unique features of your vaulted ceiling, such as exposed beams, intricate woodwork, or beautiful skylights.
  3. Functional Lighting: In addition to aesthetic benefits, properly positioned lights in a vaulted ceiling ensure that your space is well-lit and functional for everyday tasks.

Conclusion

Lighting plays a critical role in the overall design and function of a room with a vaulted ceiling. From elegant chandeliers to versatile track lighting, the right lighting fixtures can transform your space into one that feels both inviting and visually stunning. By carefully considering the size, style, and lighting needs of your room, you can create a balanced and beautiful lighting plan that enhances the unique architectural features of your vaulted ceiling.

Whether you’re remodeling your home or simply updating your lighting, the options for illuminating a vaulted ceiling are as varied as they are beautiful. With the right lighting, you can highlight the architectural beauty of your vaulted ceiling and create a space that feels both spacious and intimate.

Lighting For Kitchen With Vaulted Ceiling: Enhance Your Home’s Ambiance

Lighting plays a crucial role in any kitchen, especially one with a vaulted ceiling. Discover how to effectively illuminate your space with Lighting For Kitchen With Vaulted Ceiling to create a functional and inviting environment.

Lighting For Kitchen With Vaulted Ceiling

Understanding the Importance of Lighting For Kitchen With Vaulted Ceiling

In kitchens with vaulted ceilings, proper lighting is essential for several reasons:

  • Enhanced Visibility: Evenly distributed light reduces shadows and enhances visibility while cooking or preparing meals.
  • Aesthetic Appeal: Well-chosen lighting fixtures can accentuate architectural features of vaulted ceilings.
  • Ambiance: Lighting sets the mood and ambiance of the kitchen, making it a comfortable space for daily activities.

Types of Lighting Fixtures Suitable for Kitchens With Vaulted Ceiling

Explore various lighting options that complement vaulted ceilings:

  • Pendant Lights: Hang at different heights to highlight the ceiling’s height and provide focused task lighting over kitchen islands or dining areas.
  • Recessed Lighting: Install in rows along the ceiling to evenly distribute light without obstructing the ceiling’s visual appeal.
  • Track Lighting: Adjustable fixtures can be directed towards different areas of the kitchen for flexibility in lighting up workspaces or decorative elements.
  • Chandeliers: Add elegance and style while providing ambient lighting suitable for larger kitchens with vaulted ceilings.

Read too: Kitchen Lighting For A Vaulted Ceiling: Illuminating Your Space with Style and Functionality

Considerations When Choosing Lighting For Kitchen With Vaulted Ceiling

Factors to keep in mind for optimal lighting solutions:

  • Ceiling Height: Vaulted ceilings vary in slope and height, influencing the placement and type of lighting fixtures.
  • Functionality: Determine the kitchen areas that require task lighting versus ambient or accent lighting.
  • Energy Efficiency: Opt for LED or energy-efficient fixtures to reduce electricity consumption and long-term maintenance costs.

Design Tips for Lighting a Kitchen With Vaulted Ceiling

Achieve balance and functionality with these design strategies:

  • Layered Lighting: Combine overhead, task, and accent lighting to create a cohesive and versatile lighting scheme.
  • Highlight Architectural Details: Use lighting to draw attention to exposed beams, arches, or other unique features of vaulted ceilings.
  • Scale and Proportion: Ensure lighting fixtures complement the scale of the kitchen and ceiling height without overwhelming the space.

Installation and Placement Guidelines

Ensure proper installation for optimal performance:

  • Professional Consultation: Seek advice from lighting experts or interior designers familiar with vaulted ceiling configurations.
  • Even Distribution: Place fixtures strategically to avoid glare and shadows while maximizing light coverage.
  • Safety and Regulations: Adhere to electrical codes and safety guidelines when installing lighting fixtures in kitchens.

Maintenance and Upkeep

Maintaining your kitchen lighting ensures longevity and efficiency:

  • Regular Cleaning: Dust fixtures and bulbs to maintain brightness and prevent buildup that can diminish light output.
  • Replace Bulbs: Replace bulbs promptly to maintain consistent lighting levels and prevent flickering or dimming.
  • Fixture Inspection: Periodically check wiring and connections to ensure safety and functionality.

Conclusion

Choosing the right Lighting For Kitchen With Vaulted Ceiling transforms your kitchen into a functional and visually appealing space. By understanding the various types of lighting fixtures, design considerations, and installation guidelines, you can create a kitchen that meets both aesthetic and practical needs.

Flush Mount Ceiling Light Low Profile: Illuminate Your Space with Style

Lighting is an essential aspect of home design, influencing both the functionality and aesthetics of a space. One of the most versatile and stylish options available is the flush mount ceiling light low profile. This type of lighting fixture is perfect for rooms with low ceilings or for those who prefer a sleek, unobtrusive design. In this comprehensive guide, we’ll explore the benefits, design tips, and installation considerations for flush mount ceiling light with a low profile.

Flush Mount Ceiling Light Low Profile

Why Choose a Flush Mount Ceiling Light Low Profile?

Space-Saving Design

Flush mount ceiling lights are designed to sit close to the ceiling, making them an excellent choice for rooms with limited headroom. Their low profile ensures that they do not take up valuable space, allowing for more open and airy environments. This is particularly beneficial in smaller rooms, hallways, or areas with low ceilings.

Versatile Aesthetic

Flush mount ceiling lights come in a wide variety of styles, finishes, and designs, making it easy to find a fixture that complements your existing decor. Whether you prefer modern, minimalist, traditional, or industrial designs, there is a flush mount ceiling light that will suit your taste. Their understated elegance can enhance any room without overwhelming the overall design.

Read too: Discovering the Charm of Nautical Outdoor Ceiling Fans for Your Coastal Retreat: Sail into Style

Efficient Lighting

These fixtures provide efficient and even lighting, making them ideal for general illumination in any room. Many flush mount ceiling lights are compatible with energy-efficient LED bulbs, helping you reduce energy consumption and lower your electricity bills. Additionally, the low profile design ensures that light is distributed evenly across the room, minimizing shadows and dark spots.

Easy Maintenance

Flush mount ceiling lights are relatively easy to clean and maintain. Their simple design means fewer nooks and crannies where dust can accumulate. Most fixtures can be easily wiped down with a damp cloth, and changing bulbs is typically straightforward. This makes them a practical choice for busy households or commercial spaces.

Designing Your Space with Flush Mount Ceiling Light Low Profile

When incorporating flush mount ceiling lights into your home, there are several design considerations to keep in mind. Here are some tips to help you make the most of these versatile lighting fixtures:

Choose the Right Size

The size of your flush mount ceiling light should be proportionate to the size of the room. In larger rooms, a bigger fixture can provide ample illumination and make a bold design statement. In smaller spaces, opt for a more compact light to maintain balance and prevent the fixture from overwhelming the room. Measure your space and consider the height of your ceilings to choose the appropriate size.

Consider the Style

Flush mount ceiling lights are available in a wide range of styles, from sleek and modern to ornate and traditional. Choose a style that complements the overall decor of your room. For a cohesive look, consider matching the finish of the light fixture with other hardware and accents in the room, such as door handles, cabinet knobs, or picture frames.

Think About Light Distribution

Consider the type of light distribution you need for each room. Some flush mount ceiling lights provide diffused light, which is ideal for creating a soft, ambient glow. Others offer more focused illumination, which is better for task lighting. Think about how you use each room and choose a fixture that provides the appropriate level of brightness and coverage.

Add Dimmer Switches

Installing dimmer switches with your flush mount ceiling lights allows you to adjust the brightness according to your needs and preferences. This is particularly useful in multi-functional spaces where different lighting levels are required for various activities. Dimming capabilities also enhance the ambiance of a room and can help save energy.

Installing Flush Mount Ceiling Light Low Profile

Gather Your Tools and Materials

Before you begin the installation process, gather all the necessary tools and materials. You will need a ladder, screwdriver, wire strippers, voltage tester, wire nuts, and the light fixture. Make sure to read the manufacturer’s instructions carefully and ensure you have all the components required for installation.

Turn Off the Power

Safety is paramount when working with electrical fixtures. Turn off the power to the circuit where you will be installing the light. Use a voltage tester to ensure that the power is completely off before you begin working. This will help prevent electrical shocks and ensure a safe installation process.

Remove the Old Fixture

If you are replacing an existing light fixture, start by removing it. Carefully unscrew and detach the old fixture from the ceiling, being mindful of the wiring. Once the fixture is removed, inspect the wiring and the ceiling box to ensure they are in good condition and suitable for the new fixture.

Install the Mounting Bracket

Most flush mount ceiling lights come with a mounting bracket that needs to be installed first. Attach the bracket to the ceiling box using the provided screws. Make sure the bracket is securely fastened and level. This will provide a stable base for your new light fixture.

Connect the Wires

Next, connect the wires from the light fixture to the wires in the ceiling box. Match the colors of the wires: typically, black to black (hot), white to white (neutral), and green or bare copper to the ground wire. Use wire nuts to secure the connections and ensure they are tight. Carefully tuck the wires into the ceiling box.

Attach the Light Fixture

Once the wiring is connected, attach the light fixture to the mounting bracket. Align the fixture with the bracket and use the provided screws to secure it in place. Make sure the fixture is flush against the ceiling and properly aligned. Double-check that all screws are tight and the fixture is securely mounted.

Install the Bulbs and Cover

Install the appropriate light bulbs as specified by the manufacturer. Once the bulbs are in place, attach the fixture’s cover or shade. This may involve screwing in a glass cover, snapping on a plastic diffuser, or securing a metal grate. Ensure the cover is securely attached and fits snugly.

Turn the Power Back On

After the fixture is installed, turn the power back on at the circuit breaker. Test the light to make sure it is working properly. If you have installed a dimmer switch, check that it functions correctly and adjusts the brightness as intended.

Maintaining Your Flush Mount Ceiling Light Low Profile

Regular Cleaning

To keep your flush mount ceiling light looking its best, regular cleaning is essential. Dust and dirt can accumulate on the surface and reduce the brightness of the light. Use a soft, damp cloth to wipe down the fixture, paying special attention to any intricate details or crevices. Avoid using harsh chemicals or abrasive cleaners, as they can damage the finish.

Inspect for Wear and Tear

Periodically inspect your light fixture for signs of wear and tear. Check for loose screws, damaged wires, or other issues that may need attention. Address any problems promptly to ensure the fixture remains safe and functional. Regular maintenance will help extend the lifespan of your light fixture and keep it looking and working its best.

Replace Bulbs as Needed

Over time, the light bulbs in your fixture may need to be replaced. Follow the manufacturer’s recommendations for the type and wattage of bulbs to use. When replacing bulbs, make sure the power is turned off and the fixture is cool to the touch. Properly dispose of old bulbs and install new ones according to the manufacturer’s instructions.

Update Your Decor

If you decide to update your room’s decor, consider how your flush mount ceiling light fits into the new design. You may want to change the fixture to match a new color scheme or style. Many flush mount ceiling lights are designed to be easily replaced, allowing you to update your lighting as your tastes and needs evolve.

Conclusion

Flush mount ceiling lights with a low profile offer a perfect blend of style, functionality, and space-saving design. They are an ideal solution for rooms with low ceilings or for those who prefer a sleek, modern look. By carefully selecting the right size, style, and light distribution, you can create a well-lit and visually appealing space. Proper installation and regular maintenance will ensure your light fixture remains a valuable addition to your home for years to come.

Fiber Optic Panels Ceilings Solutions: Enhance Your Space with Innovative

Discover the transformative potential of fiber optic panels ceiling installations for modern interior design. Fiber optic panels offer a unique way to illuminate spaces while adding a touch of sophistication and versatility to any room. In this comprehensive guide, we will explore everything you need to know about fiber optic panels ceilings, including their benefits, applications, installation considerations, and why they are becoming increasingly popular in residential and commercial settings.

Fiber Optic Panels Ceiling

Understanding Fiber Optic Panels Ceiling

Fiber optic panels ceiling refers to ceiling-mounted panels that use optical fibers to transmit light. These panels are typically made of acrylic or glass and are embedded with numerous tiny optical fibers that carry light from a remote light source. The result is a soft, ambient illumination that can be customized in color, intensity, and pattern, creating visually stunning effects.

Benefits of Fiber Optic Panels Ceiling

Versatility in Design

One of the key advantages of fiber optic panels ceiling is their versatility in design. These panels can be customized to fit virtually any ceiling size or shape, making them suitable for a variety of architectural and interior design applications. Whether installed in residential homes, corporate offices, or hospitality venues, fiber optic panels offer limitless design possibilities.

Read too: Exploring the Benefits and How-Tos of DIY Ceiling Cassette Mini Split Installation: Revolutionizing Comfort

Energy Efficiency

Fiber optic lighting is highly energy-efficient compared to traditional lighting sources. Because the light source is located remotely from the panels, there is minimal heat emission and energy loss, resulting in lower electricity consumption and reduced cooling costs. This makes fiber optic panels a sustainable choice for environmentally conscious building projects.

Minimal Maintenance

Unlike conventional lighting fixtures that may require frequent bulb replacements or cleaning, fiber optic panels ceiling are low-maintenance. The optical fibers are durable and do not degrade over time, ensuring long-lasting performance without the need for extensive upkeep. Routine dusting or occasional cleaning is typically sufficient to maintain their appearance.

Enhanced Safety

Fiber optic lighting is inherently safer than traditional lighting options, especially in environments where moisture or electrical hazards are a concern. Because the light source is located remotely and the panels themselves do not emit heat, there is reduced risk of fire or electrical shock. This makes fiber optic panels ideal for use in bathrooms, spas, and other high-moisture areas.

Applications of Fiber Optic Panels Ceiling

Residential Spaces

In residential settings, fiber optic panels ceiling can create captivating lighting effects in living rooms, bedrooms, or home theaters. They can be used to simulate starry skies, accentuate architectural features, or provide gentle ambient lighting that enhances the overall ambiance of the space.

Commercial Buildings

Commercial buildings benefit from the versatility of fiber optic panels ceiling in various ways. They can be used in lobbies to create a welcoming atmosphere, in conference rooms to enhance presentations, or in retail environments to highlight merchandise displays. Their ability to create unique lighting effects makes them a favorite choice among architects and interior designers.

Hospitality Industry

Hotels, restaurants, and resorts utilize fiber optic panels ceiling to create memorable guest experiences. These panels can be integrated into ceilings, walls, or even floors to provide subtle lighting that enhances the aesthetics of dining areas, lounges, or spa facilities. The customizable nature of fiber optic lighting allows hospitality venues to differentiate themselves and create a unique ambiance for guests.

Installation Considerations for Fiber Optic Panels Ceiling

Planning and Design

Before installing fiber optic panels ceiling, careful planning and design considerations are essential. Determine the desired lighting effects, panel sizes, and placement to achieve the intended design objectives. Work closely with lighting designers or consultants to ensure optimal results.

Light Source Selection

Choose the appropriate light source for fiber optic panels based on the desired brightness, color options, and control capabilities. Common light sources include LED illuminators or metal halide lamps, each offering different features that can impact the final lighting effects.

Installation Process

The installation of fiber optic panels ceiling typically involves mounting the panels securely to the ceiling structure and connecting them to the light source via optical fibers. Depending on the complexity of the design, professional installation may be recommended to ensure proper alignment, wiring, and functionality.

Maintaining Fiber Optic Panels Ceiling

Cleaning and Care

Maintaining fiber optic panels ceiling is relatively straightforward. Use a soft, lint-free cloth to gently dust the panels and remove any surface debris. Avoid using abrasive cleaners or solvents that could damage the optical fibers or panel surfaces.

Periodic Inspections

Periodically inspect fiber optic panels for signs of wear, loose connections, or dimming lights. Address any issues promptly to maintain consistent lighting performance and prevent potential disruptions.

Light Source Maintenance

Regularly check and maintain the light source powering the fiber optic panels. Replace bulbs or components as recommended by the manufacturer to ensure reliable operation and optimal light quality.

Why Choose Fiber Optic Panels Ceiling?

Aesthetic Appeal

Fiber optic panels ceiling offer unmatched aesthetic appeal, creating mesmerizing lighting effects that captivate and inspire. Whether used as a focal point or as subtle accent lighting, these panels enhance the visual appeal of any space.

Customization Options

With fiber optic lighting, customization options are virtually limitless. From adjusting color hues to creating dynamic patterns or effects, users have the flexibility to tailor lighting solutions to suit specific preferences and design requirements.

Long-Term Investment

Investing in fiber optic panels ceiling represents a long-term investment in quality lighting and energy efficiency. Their durability, low maintenance requirements, and energy-saving benefits contribute to cost savings over time while enhancing the value of the space.

Popular Brands and Models

When considering fiber optic panels ceiling for your project, explore reputable brands known for their innovation and quality craftsmanship:

  • Star Ceiling Panels: Specializes in customizable fiber optic panels for residential and commercial applications.
  • Optic Arts: Offers a range of fiber optic lighting solutions, including ceiling panels, starry sky effects, and decorative installations.
  • Fiber Creations: Provides bespoke fiber optic lighting designs tailored to architectural and interior design projects.

Conclusion

Fiber optic panels ceilings represent a cutting-edge approach to lighting design, offering versatility, energy efficiency, and aesthetic appeal for a wide range of applications. Whether used in residential homes, commercial buildings, or hospitality venues, these panels have the ability to transform ordinary spaces into extraordinary environments that delight and inspire.

By understanding the benefits, applications, installation considerations, and maintenance practices outlined in this guide, you can make informed decisions when incorporating fiber optic panels ceiling into your next architectural or interior design project. Embrace the innovative possibilities of fiber optic lighting and create spaces that illuminate, captivate, and elevate the human experience.

Art Deco Ceiling Light Fixture Designs for Your Home: Discovering Elegance

Art Deco style brings a touch of glamour and sophistication to interior design, and one of the key elements that embody this aesthetic is the Art Deco Ceiling Light Fixture. Learn more about these exquisite fixtures and how they can enhance your home decor.

Art Deco Ceiling Light Fixture

Exploring Art Deco Ceiling Light Fixture Designs

Art Deco design is characterized by geometric shapes, bold colors, and luxurious materials. When it comes to ceiling light fixtures, here are some typical features:

  • Geometric Shapes: Look for fixtures with angular or symmetrical designs, reflecting the Art Deco emphasis on geometry.
  • Materials: Art Deco often incorporates materials like chrome, glass, brass, and sometimes even Bakelite or colorful plastics.
  • Patterns: Some fixtures may feature intricate patterns or motifs, adding to their decorative appeal.

Choosing the Right Art Deco Ceiling Light Fixture

When selecting an Art Deco ceiling light fixture for your space, consider the following factors:

  • Room Size and Ceiling Height: Choose a fixture that complements the size of your room and the height of your ceiling.
  • Color Scheme: Opt for colors that harmonize with your existing decor or create a bold contrast as a focal point.
  • Functionality: Ensure the fixture provides adequate lighting for the room’s purpose while also serving as a statement piece.

Installing Your Art Deco Ceiling Light Fixture

Installing a ceiling light fixture requires careful consideration of electrical wiring and safety. If you’re not experienced with electrical work, it’s best to hire a professional to ensure proper installation and safety compliance.

Maintaining Your Art Deco Ceiling Light Fixture

To keep your Art Deco ceiling light fixtures in top condition:

  • Dust Regularly: Use a soft cloth or duster to remove dust and debris.
  • Avoid Harsh Cleaners: Use gentle cleaners suitable for the fixture’s materials to avoid damage.
  • Check for Loose Parts: Periodically check for loose screws or connections and tighten them as needed.

Where to Find Art Deco Ceiling Light Fixtures

Art Deco ceiling light fixtures can be found at antique stores, specialty lighting shops, and online retailers. Consider browsing through catalogs and websites that specialize in vintage or Art Deco-inspired lighting.

Read too: Discovering the Charm of Nautical Outdoor Ceiling Fans for Your Coastal Retreat: Sail into Style

Enhancing Your Home with Art Deco Style

Incorporating an Art Deco ceiling light fixtures into your home decor can transform the ambiance of any room, from a foyer to a dining area or bedroom. It adds a touch of elegance and nostalgia while remaining timeless in its appeal.

Conclusion

An Art Deco Ceiling Light Fixtures is more than just a source of illumination; it’s a statement piece that defines the Art Deco style’s essence. Whether you’re renovating a historic home or adding flair to a modern space, these fixtures offer both form and function. Explore the variety of designs available and find the perfect fixture to complement your home’s aesthetic.

High Ceiling Living Room Lighting Ideas for a Stunning Ambiance: Elevate Your Space

In the realm of interior design, lighting serves as both a practical necessity and a powerful tool for creating ambiance and mood. When it comes to high-ceilinged living rooms, finding the right lighting solutions can be a transformative experience. Let’s explore a variety of High Ceiling Living Room Lighting Ideas to help you elevate your space and make a statement.

High Ceiling Living Room Lighting Ideas

Understanding: High Ceiling Living Room Lighting Ideas

High ceilings offer a sense of grandeur and spaciousness, but they also present unique challenges when it comes to lighting. Properly illuminating a high-ceilinged living room requires strategic placement of fixtures and thoughtful consideration of design elements.

Read too: Flush Mount Rustic Ceiling Lights: Illuminate Your Space with Stunning

1. Statement Chandeliers:

One of the most iconic lighting fixtures for high-ceilinged spaces is the statement chandelier. Opt for a chandelier with a bold design and ample size to make a striking focal point in your living room. Whether you prefer a modern crystal chandelier or a classic wrought iron fixture, choose a style that complements your decor aesthetic.

2. Floor-to-Ceiling Lighting:

Embrace the verticality of your space by incorporating floor-to-ceiling lighting elements. Install wall sconces or recessed lighting fixtures along the perimeter of the room to create a wash of ambient light that highlights the height of the ceiling. This technique not only enhances the sense of spaciousness but also adds visual interest to the walls.

3. Layered Lighting Scheme:

Create depth and dimension in your high-ceilinged living room with a layered lighting scheme. Combine overhead fixtures with task lighting, such as floor lamps or table lamps, to provide functional illumination at different levels. Incorporate dimmer switches to adjust the intensity of light according to the time of day and mood.

4. Pendant Lights:

Pendant lights are versatile fixtures that can be used to add style and functionality to your living room. Hang multiple pendant lights at varying heights to create visual interest and draw the eye upward. Choose pendant designs that complement the overall decor scheme and provide adequate task lighting for specific areas, such as seating areas or dining spaces.

5. Natural Light Enhancement:

Take advantage of natural light sources, such as large windows or skylights, to enhance the ambiance of your high-ceilinged living room. Use sheer curtains or blinds to control the amount of incoming light and minimize glare. Consider positioning furniture to maximize natural light exposure and create a bright and airy atmosphere.

Conclusion

High Ceiling Living Room Lighting presents a unique opportunity to showcase your design prowess and create a truly unforgettable space. Whether you opt for a statement chandelier, floor-to-ceiling lighting, or a layered lighting scheme, the key is to balance functionality with aesthetics to achieve a stunning ambiance. By incorporating these High Ceiling Living Room Lighting Ideas into your design repertoire, you can elevate your space to new heights and enjoy a living room that is both practical and visually captivating.

Exploring Directional Ceiling Light Fixtures: Illuminate Your Space with Style

Discover the versatility and functionality of directional ceiling light fixtures and how they can enhance the ambiance and aesthetics of any room in your home.

Directional Ceiling Light Fixtures

Understanding Directional Ceiling Light Fixtures

Directional ceiling light fixtures are versatile lighting solutions that allow you to adjust the direction of the light beam to suit your specific lighting needs. These fixtures typically feature adjustable heads or arms that can be rotated or angled to direct the light where it’s needed most. Whether you’re highlighting artwork, illuminating a workspace, or creating ambiance in a room, directional ceiling lights offer flexibility and control over your lighting design.

Benefits of Directional Ceiling Light Fixtures

  1. Versatility: Directional ceiling light fixture can be adjusted to focus light on specific areas or objects, making them ideal for accent lighting, task lighting, or general illumination.
  2. Customization: With adjustable heads or arms, directional ceiling lights offer customizable lighting solutions that can adapt to changes in room layout or decor.
  3. Energy Efficiency: By directing light precisely where it’s needed, directional fixtures help minimize wasted light and energy, resulting in lower energy bills and reduced environmental impact.

Types of Directional Ceiling Light Fixtures

  1. Track Lighting: Track lighting systems feature multiple adjustable heads mounted on a single track, allowing for flexible positioning and customization of light direction.
  2. Spotlights: Spotlights are directional fixtures with a focused beam of light, ideal for highlighting artwork, architectural features, or specific areas in a room.
  3. Recessed Lighting: Recessed directional lights sit flush with the ceiling upon installation and offer the flexibility to tilt or swivel, enabling precise direction of light to desired areas.

Applications of Directional Ceiling Light Fixtures

Directional ceiling light fixture are suitable for a variety of applications, including:

  • Artwork Illumination: Use directional lights to showcase artwork, sculptures, or decorative objects on display shelves.
  • Task Lighting: Position directional fixtures over work areas, countertops, or desks to provide focused illumination for tasks such as reading, cooking, or crafting.
  • Ambient Lighting: Use directional lights to create ambiance and mood lighting in living rooms, dining areas, or bedrooms by directing light towards walls or ceilings.

Installing Directional Ceiling Light Fixtures

Follow these steps for a successful installation:

  1. Select Fixture: Choose a directional ceiling light fixture that suits your aesthetic preferences and lighting needs.
  2. Locate Power Source: Identify the power source and turn off the electricity to the area where you’ll be installing the fixture.
  3. Mounting: Follow the manufacturer’s instructions to mount the fixture securely to the ceiling or wall.
  4. Wiring: Connect the wiring according to local electrical codes and regulations, ensuring proper insulation and grounding.
  5. Adjustment: Once installed, adjust the direction of the light heads or arms to achieve the desired lighting effect.

Maintenance and Care

Regular maintenance of directional ceiling light fixture ensures optimal performance and longevity. Dust the fixtures regularly to prevent buildup and clean the bulbs as needed. Check for loose connections or damaged parts and replace any worn components promptly.

Conclusion

Directional ceiling light fixture offer a versatile and customizable lighting solution for any space. Whether you’re illuminating artwork, creating ambiance, or providing task lighting, these fixtures provide flexibility and control over your lighting design. Invest in directional ceiling lights to enhance the functionality and aesthetics of your home lighting system.

Read too: Flush Mount Rustic Ceiling Lights: Illuminate Your Space with Stunning

Choosing the Right Ceiling Lighting for a Small Bathroom: Illuminating Ideas

In a small bathroom, every design decision matters. From the layout to the fixtures, every element plays a crucial role in maximizing space and functionality. One often overlooked aspect of bathroom design is ceiling lighting. Properly chosen ceiling lighting can not only brighten up a small space but also enhance its visual appeal. In this guide, we’ll explore various options and considerations for selecting the perfect ceiling lighting for your small bathroom.

Ceiling Lighting For Small Bathroom

Understanding the Importance of Ceiling Lighting for Small Bathrooms

Brightening Up Limited Space

In a small bathroom, adequate lighting is essential for creating a sense of openness and brightness. Ceiling lighting serves as the primary source of illumination in the room, helping to illuminate every corner and make the space feel larger and more inviting.

Enhancing Visibility and Functionality

Effective lighting is crucial for performing daily tasks in the bathroom, such as grooming, applying makeup, or shaving. Properly placed ceiling lighting ensures adequate visibility and functionality, making it easier to navigate and use the space comfortably.

Read too: Striped Schoolhouse Ceiling Light Fixtures: Unveiling the Timeless Charm

Adding Visual Interest and Style

Ceiling lighting fixtures can also serve as decorative elements that enhance the overall aesthetic of the bathroom. From sleek and modern designs to vintage-inspired fixtures, the right ceiling lighting can add personality and style to your small bathroom.


Choosing the Right Ceiling Lighting for Your Small Bathroom

Flush Mount Fixtures

Flush mount fixtures are an excellent choice for small bathrooms with low ceilings. These fixtures sit flush against the ceiling, providing ample illumination without taking up valuable headspace. Look for sleek and compact designs that complement your bathroom’s style.

Recessed Lighting

Recessed lighting is another space-saving option for small bathrooms. These fixtures are installed directly into the ceiling, creating a clean and streamlined look. Place recessed lights strategically to ensure even illumination throughout the space, focusing on key areas such as the vanity and shower.

Pendant Lights

Pendant lights can add a touch of elegance and sophistication to a small bathroom. Opt for slim and minimalist designs that won’t overwhelm the space. Hang pendant lights above the vanity or bathtub to create a focal point and enhance the room’s ambiance.

LED Strip Lighting

LED strip lighting is a versatile option for adding both ambient and task lighting to your small bathroom. These flexible strips can be installed along the perimeter of the ceiling or vanity mirror, providing gentle illumination and enhancing the room’s visual appeal.

Wall Sconces

Wall sconces are a stylish and space-saving alternative to ceiling lighting in small bathrooms. Install sconces on either side of the vanity mirror to eliminate shadows and provide flattering lighting for grooming tasks. Choose fixtures with adjustable arms or dimmable options for added flexibility.


Conclusion

Choosing the right ceiling lighting for your small bathroom is essential for creating a functional and stylish space. Whether you opt for flush mount fixtures, recessed lighting, pendant lights, LED strip lighting, or wall sconces, consider the unique layout and design of your bathroom to ensure optimal illumination and visual appeal. With the right ceiling lighting, you can transform your small bathroom into a bright, welcoming, and functional oasis.

Hanging Lights From Drop Ceiling: Creative Ideas

Discover innovative ways to brighten up your space with Hanging Lights From Drop Ceiling. Explore design tips, installation techniques, and creative inspiration for incorporating suspended lighting into your home or commercial environment!

Hanging Lights From Drop Ceiling

Introduction

Hanging lights from a drop ceiling can add a touch of elegance, warmth, and ambiance to any room. Whether you’re looking to illuminate a kitchen island, dining area, or office space, suspended lighting fixtures offer versatility and style. In this guide, we’ll explore creative ideas for hanging lights from drop ceilings, providing you with inspiration and practical tips for transforming your space into a well-lit and inviting environment.

Understanding Hanging Lights From Drop Ceiling

Hanging lights from a drop ceiling involves suspending lighting fixtures from the ceiling grid, creating a striking visual effect and providing ample illumination to the space below. These fixtures come in a variety of styles, shapes, and sizes, allowing for endless design possibilities to suit any aesthetic preference or functional requirement.

Hanging Lights From Drop Ceiling: Design Ideas

  1. Pendant Lights: Pendant lights are versatile fixtures that can be hung individually or in clusters to create a focal point in any room. Choose from a wide range of shapes, materials, and finishes to complement your decor style.
  2. Chandeliers: Chandeliers add a touch of sophistication and glamour to any space, making them ideal for dining rooms, entryways, or living areas. Opt for a statement chandelier with cascading crystals or a sleek, modern design for a contemporary look.
  3. Track Lighting: Track lighting systems allow for adjustable and directional lighting, making them perfect for highlighting artwork, architectural features, or task areas in kitchens and offices.
  4. Linear Suspended Lights: Linear suspended lights provide even illumination across a space, making them suitable for long countertops, conference tables, or office workstations.

Installation Techniques for Hanging Lights From Drop Ceiling

  1. Anchor Points: Identify suitable anchor points in the ceiling grid to support the weight of the lighting fixtures. Use sturdy hooks, cables, or mounting brackets to secure the fixtures in place.
  2. Electrical Wiring: Ensure that the electrical wiring is safely routed through the ceiling grid and connected to a suitable power source. Consult a licensed electrician for professional installation.
  3. Adjustable Heights: Consider installing adjustable suspension systems to customize the height of the lighting fixtures according to your preferences and the specific requirements of the space.
  4. Safety Measures: Follow manufacturer instructions and safety guidelines when installing hanging lights from drop ceilings to prevent accidents or damage to the fixtures and the ceiling grid.

Read too: Striped Schoolhouse Ceiling Light Fixtures: Unveiling the Timeless Charm

Creative Inspiration for Hanging Lights From Drop Ceiling

  1. Industrial Chic: Embrace an industrial aesthetic with exposed bulbs, metal shades, and raw materials for a contemporary look.
  2. Bohemian Vibes: Create a cozy and eclectic atmosphere with Moroccan-inspired lanterns, colorful glass pendants, and woven rattan shades.
  3. Minimalist Elegance: Opt for sleek and streamlined designs in neutral tones for a minimalist aesthetic that complements modern interiors.
  4. Vintage Glamour: Add a touch of vintage charm with ornate brass chandeliers, crystal accents, and frosted glass shades reminiscent of old-world glamour.

Conclusion

Hanging light from a drop ceiling offers a versatile and stylish lighting solution for any space. By exploring design ideas, installation techniques, and creative inspiration, you can enhance the ambiance and functionality of your home or commercial environment with suspended lighting fixtures that illuminate and elevate your surroundings.