Paneling for Ceilings and Walls: A Stylish Solution for Home Interiors

When it comes to home improvement and interior design, paneling for ceilings and walls has become an increasingly popular choice. Whether you’re looking to enhance the aesthetic appeal of a room, improve sound insulation, or add an element of texture, paneling offers a versatile and timeless solution. In this article, we’ll explore the various benefits of using paneling for ceilings and walls, the types of paneling materials available, installation tips, and much more to help you make an informed decision for your next home renovation project.

What is Paneling for Ceilings and Walls?

Paneling for ceilings and walls refers to the application of panels, often made from wood or other materials, to cover the surface of walls or ceilings. This design technique dates back centuries but has recently enjoyed a resurgence in modern home décor due to its ability to add character, warmth, and a touch of elegance to a room. Whether you opt for traditional wooden panels, sleek metal panels, or eco-friendly options like vinyl, paneling can create a lasting visual impact while providing practical benefits.

Why Choose Paneling for Ceilings and Walls?

Paneling for ceilings and walls isn’t just about aesthetics—it also offers a range of practical advantages. Below are some reasons why you might want to consider paneling for your home:

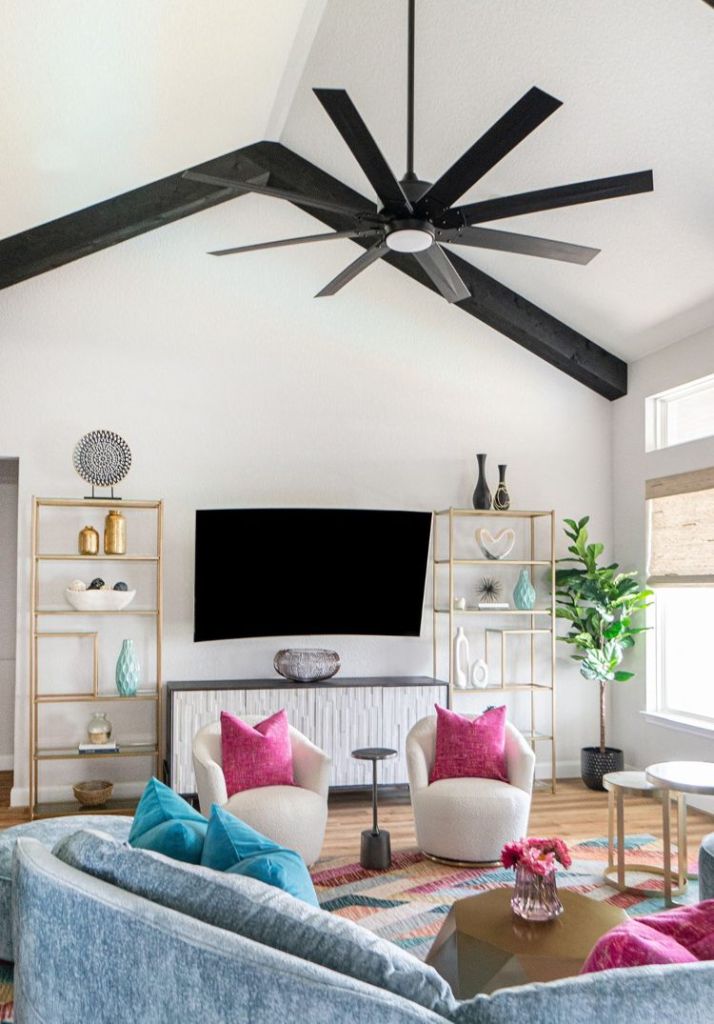
  1. Improved Aesthetic Appeal: Paneling creates a clean, polished look that can transform the ambiance of any room. With various textures and finishes available, you can choose the one that complements your home’s existing style.
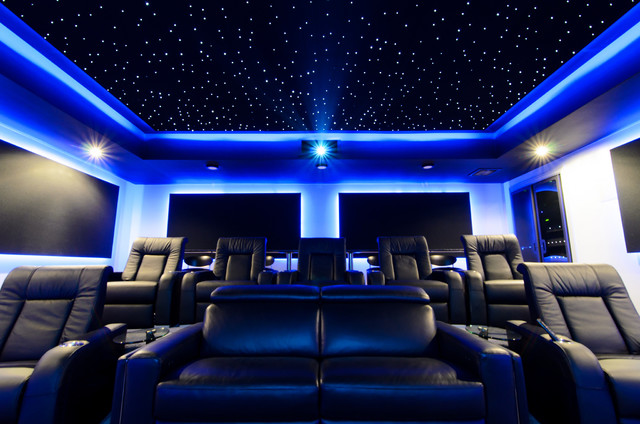
  2. Sound Insulation: Depending on the material, paneling for ceilings and walls can enhance the acoustics of a room. This is particularly useful for areas like home theaters or music rooms where sound control is important.
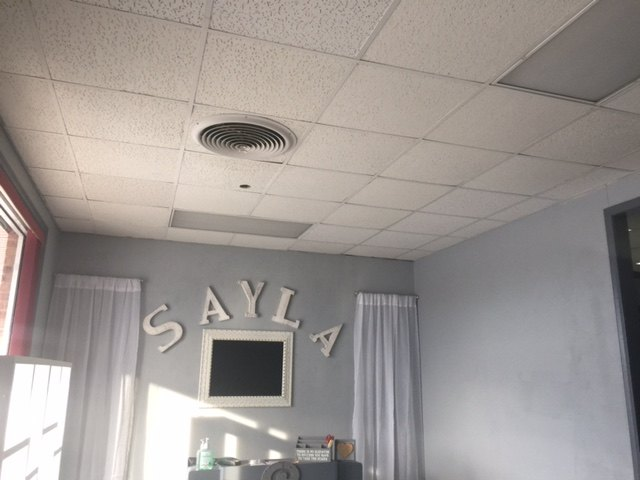
  3. Conceals Imperfections: If your walls or ceilings are damaged or have imperfections, paneling for ceilings and walls is an excellent solution to cover up flaws while adding a sophisticated touch.
  4. Easy Maintenance: Many types of paneling are easy to clean and maintain. Materials like vinyl or metal are durable and resistant to moisture, which is particularly important for kitchens, bathrooms, and basements.
  5. Energy Efficiency: Paneling can also help improve the insulation of your home. Certain types of panels provide an extra layer of insulation, making it easier to regulate temperature and reduce energy bills.

Read too: Discovering the Charm of Nautical Outdoor Ceiling Fans for Your Coastal Retreat: Sail into Style

Types of Paneling for Ceilings and Walls

There are various types of paneling for ceilings and walls, each offering unique advantages and contributing to different interior styles. Below are some of the most common materials used for paneling:
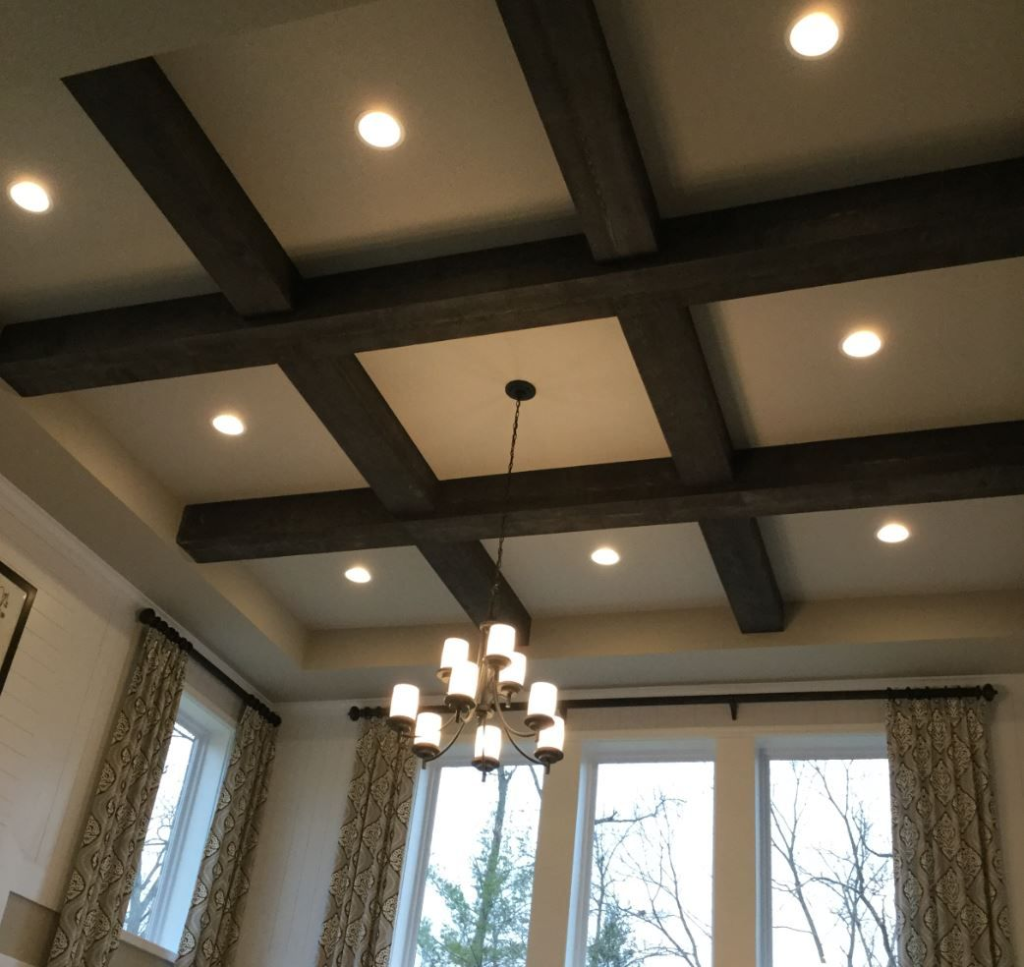
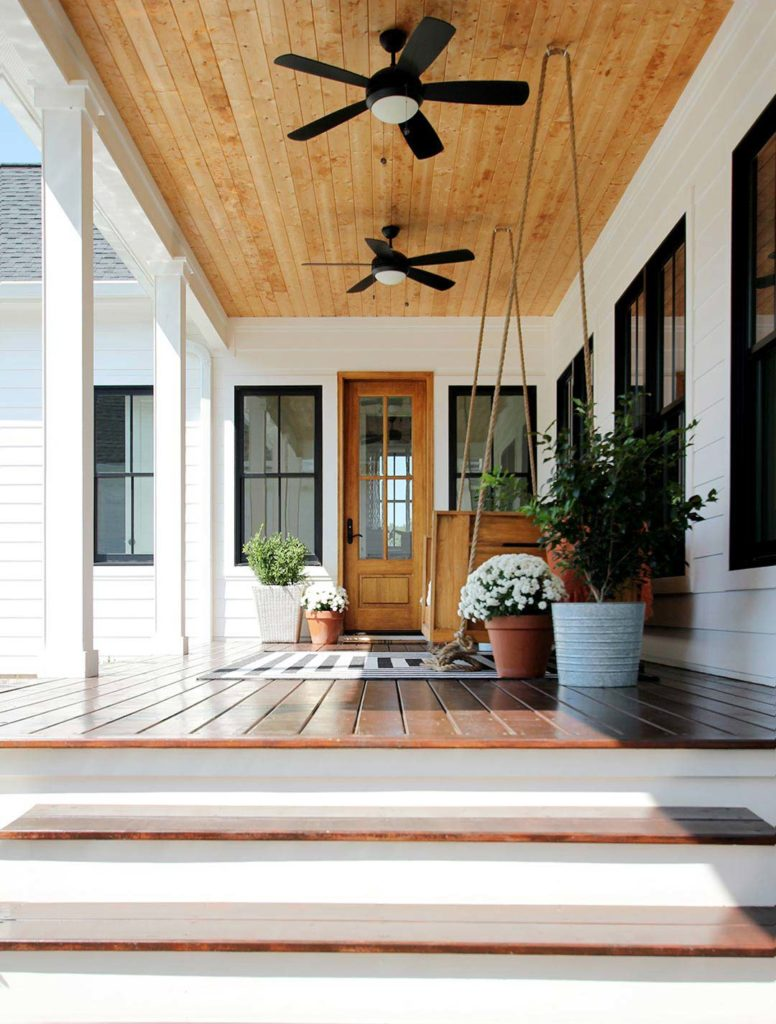
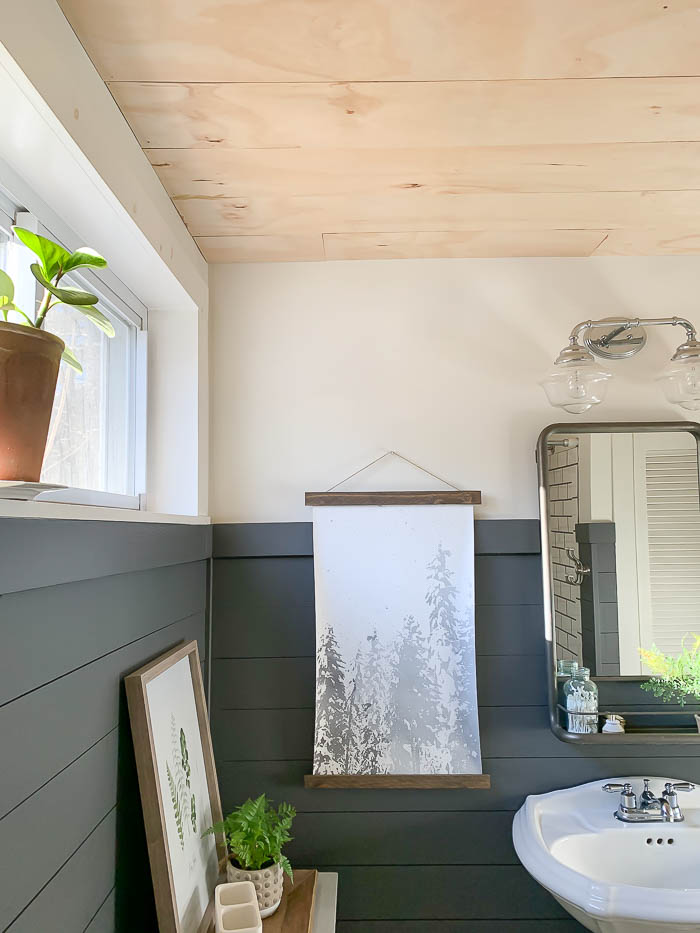
1. Wood Paneling

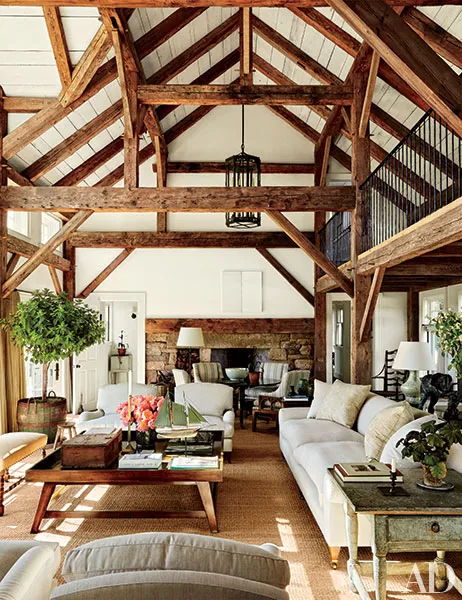
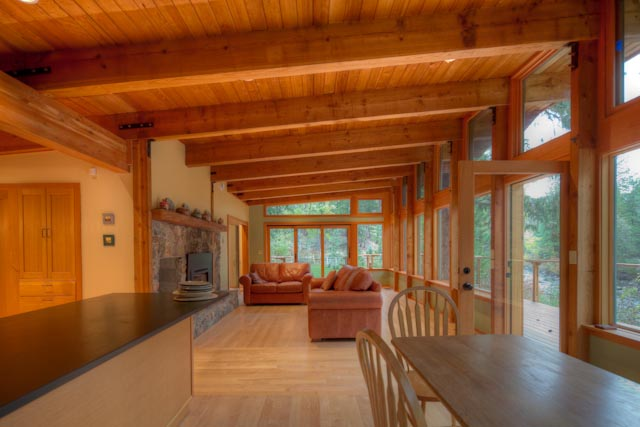
Wood is the most traditional and timeless choice for paneling for ceilings and walls. It brings warmth, texture, and a natural aesthetic to any room. Wood paneling can be stained or painted in different colors to match your home’s design. Popular types of wood for paneling include oak, pine, maple, and cedar.

Wood paneling is highly versatile and can suit various interior styles, from rustic cabins to modern minimalist designs. Additionally, wood paneling is a sustainable option if you opt for responsibly sourced materials or reclaimed wood.

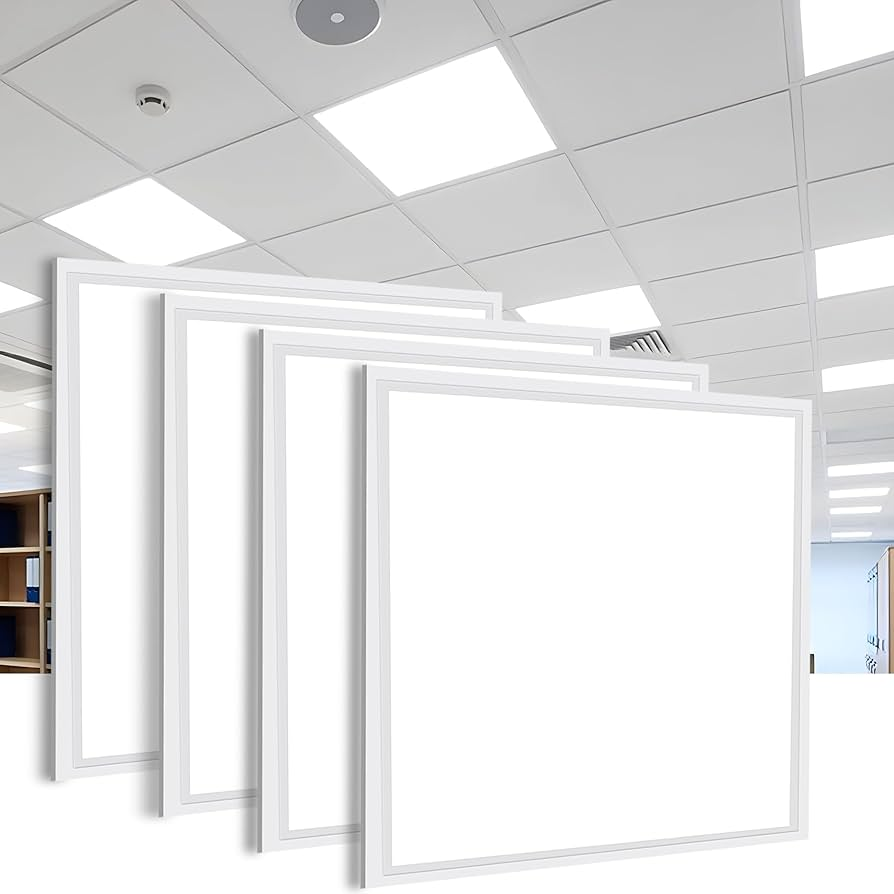
2. MDF (Medium Density Fiberboard) Paneling

For a more affordable alternative to solid wood, MDF paneling is a great option. Made from compressed wood fibers, MDF is smooth, durable, and easy to paint. It is a popular choice for paneling for ceilings and walls because of its budget-friendly price and clean finish. MDF can be molded into intricate designs, allowing for both traditional and contemporary looks.

While MDF may not have the same natural appeal as wood, it is incredibly versatile and ideal for homeowners who want a polished and modern look without breaking the bank.
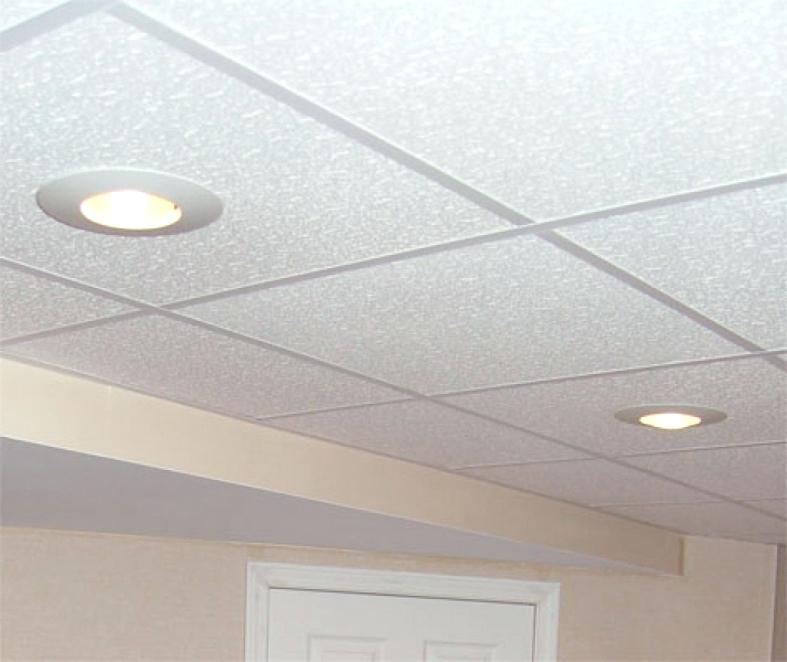
3. Vinyl Paneling

Vinyl paneling is another popular choice for paneling for ceilings and walls, especially in areas like kitchens and bathrooms where moisture resistance is crucial. And vinyl is lightweight, easy to clean, and can mimic the look of wood or stone without the associated maintenance. It’s also a great option for homeowners seeking an eco-friendly, low-maintenance solution.

Vinyl panels are available in a variety of finishes, including matte, glossy, and textured, so you can choose the perfect style for your space.
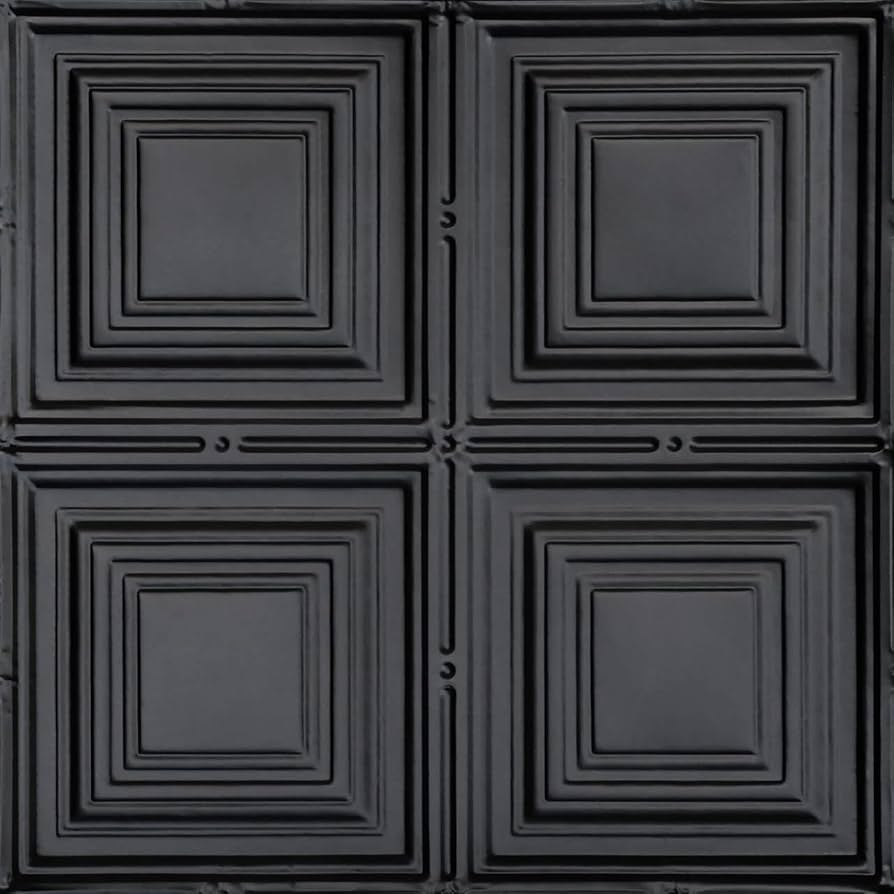
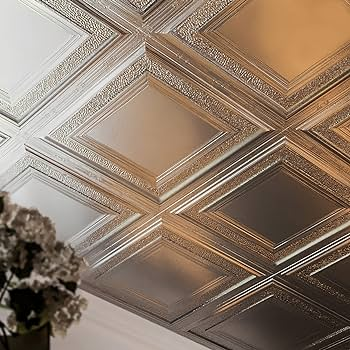
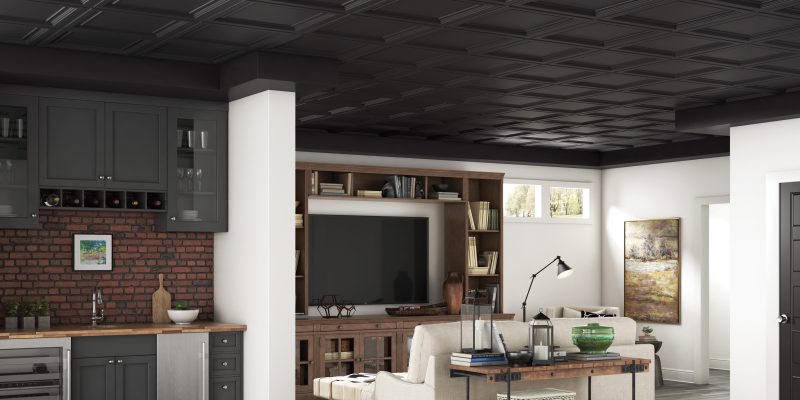
4. Metal Paneling

For a more industrial or modern look, metal paneling is an excellent choice. Stainless steel, aluminum, or copper panels can bring an edgy, sleek design to walls and ceilings. Metal paneling is incredibly durable and often used in commercial spaces, but it can also add a bold touch to residential interiors.

Metal panels are ideal for creating a contemporary, sophisticated look. They are also easy to maintain and are resistant to damage such as dents or stains.

5. Fabric Paneling

Fabric paneling is a softer alternative to traditional materials like wood or metal. It is commonly used for acoustic purposes, as it can reduce sound reverberation in a room. Fabric panels can be customized with various textures, colors, and patterns to suit the design of your home.

This type of paneling is ideal for spaces where comfort and acoustics are a priority, such as home theaters, recording studios, or bedrooms.

6. Stone or Brick Paneling

If you’re looking for a rustic or industrial vibe, stone or brick paneling can create a dramatic effect. Manufactured stone or brick panels are available in a variety of textures and colors, making them suitable for both modern and traditional designs.

This type of paneling for ceilings and walls is perfect for creating a feature wall or for adding a touch of old-world charm to any space. It’s also incredibly durable and can stand up to the wear and tear of everyday life.

Installing Paneling for Ceilings and Walls

Installing paneling for ceilings and walls is a relatively straightforward process, but it’s important to follow a few key steps to ensure a successful installation. Here’s a basic guide to help you get started:

1. Preparation

Before installing panels, it’s essential to prepare the area. Remove any existing wall coverings or ceilings that may interfere with the installation. Make sure the surface is clean, smooth, and dry.

2. Measure and Cut Panels

Accurate measurements are crucial when installing paneling for ceilings and walls. Use a measuring tape to determine the height and width of the area to be covered. When cutting panels, ensure they are cut to fit snugly within the space.

3. Apply Adhesive or Nail Panels

Depending on the material and type of paneling, you’ll either apply adhesive to the back of the panels or use nails/screws to secure them to the wall or ceiling. Make sure each panel is level as you install it, ensuring a neat and polished finish.

4. Finish Edges

Once the panels are installed, use trim pieces to cover the edges and create a clean transition between the paneling and surrounding walls or ceiling. If necessary, touch up the panels with paint or stain.

5. Maintenance

Most types of paneling for ceilings and walls require little maintenance. However, it’s essential to clean the panels regularly and address any damage or wear and tear promptly.

Benefits of Paneling for Ceilings and Walls

Paneling for ceilings and walls offers numerous benefits beyond its decorative qualities. Here are just a few reasons why paneling is a great choice for your home:

  • Increased Property Value: Adding paneling to your walls and ceilings can increase the value of your home by enhancing its appeal and functionality.
  • Customization: With so many materials and finishes available, you can customize your space to match your personal style and preferences.
  • Durability: Paneling is generally durable and long-lasting, with many materials providing added protection from moisture, wear, and impact.

Conclusion

Paneling for ceilings and walls is a versatile, stylish, and functional solution for homeowners looking to enhance their interiors. Whether you opt for traditional wood paneling, sleek vinyl, or modern metal options, paneling can transform any space into something extraordinary. With its wide range of materials, styles, and benefits, paneling for ceilings and walls can suit any home, from rustic cottages to contemporary apartments.

By choosing the right paneling for your ceilings and walls, you can create a welcoming and visually striking environment that adds both beauty and practicality to your home.

Oak Tongue And Groove Ceiling: A Timeless Addition to Your Home Design

The design of your home can say a lot about your personality and style. If you’re looking to elevate the aesthetics of a room while adding character and warmth, an Oak Tongue and Groove Ceiling is a fantastic option. This classic ceiling treatment not only brings a touch of natural beauty but also improves the overall feel of your living space. Whether you’re renovating a cozy cabin, a modern home, or even a commercial property, an Oak Tongue and Groove Ceiling adds timeless elegance and charm.

Oak Tongue And Groove Ceiling

In this article, we will explore what an Oak Tongue and Groove Ceiling is, why it’s a popular choice among homeowners, its benefits, how to install it, and how it can fit into different design styles. We’ll also cover tips for maintaining your oak ceiling and how it can transform various spaces in your home.

Read too: Bathroom Flooded Through the Ceiling: A Comprehensive Guide


What is an Oak Tongue and Groove Ceiling?

An Oak Tongue and Groove Ceiling refers to a ceiling installation method that uses oak wood panels that interlock at the edges via a “tongue and groove” design. This type of ceiling treatment features a smooth, uniform look, with the oak panels fitting snugly together to create a seamless and strong surface. The tongue is a protruding edge that fits into the groove of the next panel, ensuring that the pieces stay in place and form a tight, stable structure.

The use of oak, known for its durability, stunning grain patterns, and timeless appeal, makes this ceiling option one of the most popular choices for both traditional and contemporary homes. It’s a perfect way to introduce natural wood textures into your space while benefiting from oak’s strength and longevity.


Why Choose Oak Tongue and Groove Ceiling?

1. Aesthetic Appeal

One of the primary reasons people choose Oak Tongue and Groove Ceilings is for their aesthetic value. Oak has a rich, warm color and a distinct grain pattern that adds sophistication and beauty to any room. Whether you prefer a light or dark oak finish, the wood’s natural appearance brings warmth, texture, and depth to the space.

The interlocking tongue and groove design also ensures a smooth, seamless look that can complement a variety of interior design styles. This makes oak ceilings a versatile option, able to fit into both rustic, traditional spaces as well as modern or minimalist homes.

2. Durability and Longevity

Oak wood is incredibly durable and resistant to wear and tear, making it an ideal material for ceiling applications. An Oak Tongue and Groove Ceiling can last for decades with proper care, offering excellent value for your investment. Its sturdy structure and ability to withstand environmental changes like humidity make it a great choice for areas like kitchens, bathrooms, and even basements.

Unlike other materials that may warp or crack over time, oak is strong and stable, ensuring that your ceiling will remain in excellent condition for years. Oak is also naturally resistant to insects, adding another layer of protection to your home.

3. Versatility in Design

An Oak Tongue and Groove Ceiling can be incorporated into almost any design style. Whether you’re going for a classic, country, rustic, or contemporary feel, the richness of oak adapts easily. The natural wood color can be left unfinished for a rustic, organic look or stained in a variety of tones to complement your room’s color palette.

The texture and design also allow oak ceilings to be paired with different wall finishes, flooring, and furniture styles, ensuring that they always enhance the overall aesthetic of the room. It can be used in spaces like living rooms, kitchens, bathrooms, bedrooms, and even in outdoor areas like patios or covered porches.


Benefits of an Oak Tongue and Groove Ceiling

1. Enhanced Acoustic Properties

An often-overlooked benefit of installing an Oak Tongue and Groove Ceiling is its ability to improve sound quality in a room. The oak panels help absorb sound and reduce noise, creating a quieter, more peaceful environment. This can be especially beneficial in spaces such as home theaters, living rooms, or bedrooms where you want to enhance the sound experience or create a calm atmosphere.

2. Easy to Maintain

Oak is known for being low-maintenance when compared to other ceiling materials. With a regular dusting or cleaning, your Oak Tongue and Groove Ceiling will retain its beauty over time. In areas where moisture might be a concern, such as kitchens or bathrooms, a protective finish can be applied to guard against water damage. Routine inspections and occasional polishing or oiling will keep the oak looking fresh and vibrant for years.

3. Eco-Friendly Option

Wood, especially oak, is a renewable resource when sourced responsibly. Using Oak Tongue and Groove Ceilings is an eco-friendly choice, especially when the wood is harvested sustainably. Oak is a durable material, meaning you’ll likely only need one installation that will last for many years, reducing the need for frequent replacements.


How to Install an Oak Tongue and Groove Ceiling

Installing an Oak Tongue and Groove Ceiling may seem like a challenging task, but with the right tools and a bit of patience, it can be a manageable DIY project. Here’s a basic overview of how to install it:

Step 1: Prepare the Ceiling

Before beginning installation, you’ll need to ensure the ceiling surface is clean and level. If there’s any existing ceiling material, it may need to be removed. Once you have a smooth, even surface, you can begin installing your oak panels.

Step 2: Cut Panels to Size

Measure your ceiling and cut the oak panels to fit the length of the space. Depending on your ceiling’s shape, you might need to make some adjustments to the panels to ensure they fit properly. A saw with a fine-tooth blade is best for cutting oak without splintering the wood.

Step 3: Install the Panels

Start installing the oak panels from one corner of the room, making sure that the tongue side is facing the wall. Use nails, screws, or a pneumatic nailer to secure the panels in place. Be sure to stagger the seams to create a more visually appealing, natural look. The tongue will easily slot into the groove of the next panel, ensuring a tight fit.

Step 4: Finish and Seal

Once all panels are in place, you can finish the ceiling by applying a protective finish. Whether you prefer a natural matte finish or a glossy sheen, this will help protect the oak from damage over time. Apply a wood sealant if you’re working in a high-moisture area to prevent water absorption.


How to Incorporate Oak Tongue and Groove Ceiling in Different Spaces

1. Living Rooms

A Oak Tongue and Groove Ceiling in the living room instantly makes the space feel more inviting and cozy. The natural wood adds texture and richness, while the seamless design enhances the room’s overall aesthetic. Complement the oak ceiling with plush furniture, soft lighting, and neutral tones to create a relaxed, welcoming atmosphere.

2. Kitchens and Dining Rooms

In kitchens or dining rooms, oak ceilings add warmth and a natural, earthy vibe. It works particularly well with rustic, country, or farmhouse designs. Oak can also pair nicely with stainless steel appliances, giving the space a balanced, timeless look. For an extra touch, you can even add exposed beams alongside the oak panels for an added sense of grandeur.

3. Bedrooms and Bathrooms

In bedrooms, an Oak Tongue and Groove Ceiling creates a tranquil, serene space perfect for relaxation. Oak’s natural beauty complements softer tones in bedding and furniture, promoting a restful ambiance. In bathrooms, a protective finish can help guard against moisture, and the oak ceiling will add a rustic yet refined touch.


Maintenance Tips for Your Oak Tongue and Groove Ceiling

To keep your Oak Tongue and Groove Ceiling looking beautiful over time, consider these maintenance tips:

  • Dust Regularly: Oak tends to attract dust, so regular cleaning with a soft cloth or duster will help maintain its appearance.
  • Use a Damp Cloth: For tougher stains, use a damp cloth with mild soap. Be sure not to use excessive water, as moisture can damage the wood over time.
  • Polish or Oil: Apply wood polish or oil occasionally to restore the wood’s natural luster and protect it from wear.
  • Check for Damage: Periodically inspect your ceiling for signs of damage, such as cracks or warping. Address any issues immediately to prevent further damage.

Conclusion

An Oak Tongue and Groove Ceiling offers the perfect combination of style, durability, and warmth, making it an excellent choice for a variety of interior spaces. Whether you’re looking to add natural elegance to your living room, kitchen, or bedroom, oak ceilings provide a timeless and versatile option. With its exceptional durability, ease of maintenance, and stunning visual appeal, an Oak Tongue and Groove Ceiling is sure to elevate the beauty and comfort of any room in your home.

Composite Tongue And Groove Ceiling: The Perfect Blend of Style and Durability

When designing or renovating a home, ceiling choices are often overlooked. However, a well-crafted ceiling can significantly enhance the aesthetics and functionality of any space. One of the best options available today is the Composite Tongue And Groove Ceiling. This modern ceiling solution offers a combination of beauty, strength, and ease of installation, making it a top choice for homeowners and designers alike.

Composite Tongue And Groove Ceiling

Whether you’re aiming for a rustic, contemporary, or elegant look, a Composite Tongue And Groove Ceiling can transform your interior and exterior spaces. In this article, we will explore everything you need to know about this ceiling type, including its benefits, installation process, design options, and maintenance tips.


What is a Composite Tongue And Groove Ceiling?

A Composite Tongue And Groove Ceiling is a ceiling system made from composite materials, typically a mix of wood fibers and plastic resins. These materials are engineered to mimic the appearance of natural wood while offering superior durability and resistance to environmental factors.

Read too: Bathroom Flooded Through the Ceiling: A Comprehensive Guide

The “tongue and groove” design refers to the interlocking system used in the panels. Each panel has a “tongue” on one side and a “groove” on the other, allowing them to fit seamlessly together. This creates a smooth, continuous surface with a clean and polished look.

Composite tongue and groove ceilings are used in both interior and exterior applications, making them a versatile choice for homes, commercial spaces, and outdoor areas like patios and porches.


Advantages of a Composite Tongue And Groove Ceiling

1. Durability and Longevity

One of the biggest advantages of composite materials is their ability to withstand wear and tear. Unlike traditional wood ceilings, composite tongue and groove panels do not warp, crack, or rot over time. They are highly resistant to moisture, making them perfect for humid environments such as bathrooms and kitchens.

2. Low Maintenance

Traditional wood ceilings require regular sealing, staining, or painting to maintain their appearance. In contrast, composite tongue and groove ceilings need minimal upkeep. A simple wipe-down with a damp cloth is usually enough to keep them looking new.

3. Aesthetic Appeal

Composite ceilings offer the warmth and charm of wood without the associated drawbacks. Available in a variety of colors and finishes, they can complement any design style, from rustic farmhouse to sleek modern interiors.

4. Easy Installation

The tongue and groove system allows for quick and straightforward installation. The interlocking panels eliminate the need for complex mounting systems, making it an ideal DIY project or a quick job for professionals.

5. Pest and Mold Resistance

Since composite materials do not attract termites or other pests, they are an excellent alternative to wood. Additionally, they are resistant to mold and mildew, making them perfect for outdoor applications and high-humidity areas.

6. Eco-Friendly Option

Many composite ceiling products are made from recycled materials, making them an environmentally friendly choice. By opting for a composite tongue and groove ceiling, you’re contributing to sustainability without sacrificing style or quality.


Installation Process of a Composite Tongue And Groove Ceiling

Installing a Composite Tongue And Groove Ceiling is a relatively simple process. Here’s a step-by-step guide:

Step 1: Gather Materials and Tools

Before starting, ensure you have the following:

  • Composite tongue and groove panels
  • Measuring tape
  • Saw (for cutting panels to size)
  • Screws or nails
  • Drill or nail gun
  • Level
  • Adhesive (optional for added security)

Step 2: Prepare the Surface

Ensure that the ceiling surface is clean and dry. If installing over an existing ceiling, make sure it is structurally sound.

Step 3: Measure and Cut the Panels

Measure the ceiling area and cut the composite panels accordingly. Leave a small expansion gap along the edges to accommodate temperature changes.

Step 4: Install the First Panel

Start at one end of the ceiling. Attach the first panel securely using screws or nails along the edges. If using adhesive, apply it to the back of the panel before securing it in place.

Step 5: Connect the Panels

Slide the next panel’s tongue into the groove of the installed panel, ensuring a tight fit. Secure it in place and continue the process across the entire ceiling.

Step 6: Finishing Touches

Once all panels are installed, add trim or molding around the edges to create a polished look. Wipe down the ceiling to remove any dust or debris.


Design Ideas for Composite Tongue And Groove Ceilings

A Composite Tongue And Groove Ceiling can be used in a variety of settings. Here are some design ideas to inspire you:

1. Rustic Charm

Opt for wood-grain composite panels in natural tones to create a cozy, cabin-like atmosphere in living rooms or bedrooms. Pair with exposed beams for added character.

2. Modern Minimalism

For a sleek and modern look, choose smooth, light-colored composite panels. Pair them with recessed lighting to enhance the contemporary aesthetic.

3. Outdoor Elegance

Use composite panels on a covered porch or patio ceiling to create a stylish outdoor space. Weather-resistant composite materials ensure long-lasting beauty.

4. Coastal Vibes

Soft white or gray composite panels can create a breezy, beach-inspired look, perfect for vacation homes or sunrooms.


Maintenance Tips for Composite Tongue And Groove Ceilings

To keep your Composite Tongue And Groove Ceiling looking great for years, follow these simple maintenance tips:

  • Regular Cleaning: Dust or wipe the panels with a damp cloth to remove dirt and debris.
  • Avoid Harsh Chemicals: Use mild soap and water instead of abrasive cleaners to prevent damage.
  • Inspect for Damage: Check periodically for any loose panels or screws and secure them if needed.
  • Protect from Excess Moisture: While composite ceilings are moisture-resistant, prolonged exposure to water can affect their longevity. Ensure proper ventilation in humid areas.

Conclusion

A Composite Tongue And Groove Ceiling is an excellent choice for homeowners and designers looking for a stylish, durable, and low-maintenance ceiling solution. Whether used indoors or outdoors, its versatility and aesthetic appeal make it a standout feature in any space.

With a range of colors, finishes, and installation ease, this ceiling type provides an elegant yet practical alternative to traditional wood ceilings. If you’re planning to upgrade your home’s ceiling, a Composite Tongue And Groove Ceiling is definitely worth considering.

Lighting Vaulted Ceiling Living Room: A Complete Guide to Brightening Your Space with Style

When designing a living room with a vaulted ceiling, lighting plays a pivotal role in bringing out the space’s architectural beauty while ensuring it’s functional. Lighting vaulted ceiling living room can be both challenging and rewarding, offering the opportunity to create dramatic effects, highlight key features, and set the perfect ambiance.

In this comprehensive guide, we’ll explore the different lighting options, tips for illuminating vaulted ceilings, and how to balance aesthetics with practical needs. Whether you’re redesigning your space or moving into a new home, understanding how to properly light your vaulted ceiling living room will enhance your overall living experience.

Read too: Shiplap Ceiling in Kitchen: A Timeless Trend for a Stylish and Cozy Space


Why Lighting Matters for a Vaulted Ceiling Living Room

Vaulted ceilings bring a sense of grandeur and openness to any room, but they can also pose lighting challenges. Without the right light sources, large spaces with high ceilings may appear dark, cold, or uninviting. Proper lighting is essential to highlight the architectural elements of the room, make the space feel cozy, and provide sufficient illumination for everyday activities.

Key Benefits of Proper Lighting for Vaulted Ceilings:

  • Creates a Warm and Inviting Atmosphere: Bright, ambient light can make the room feel cozy and welcoming.
  • Enhances the Room’s Architectural Features: Vaulted ceilings are a focal point of the room, and lighting can emphasize their height and elegance.
  • Provides Adequate Illumination: Ensures the space is practical for reading, relaxing, or hosting gatherings.
  • Accentuates Design Elements: Lighting can highlight art, furniture, or structural elements like beams or windows.

How to Choose the Best Lighting for a Vaulted Ceiling Living Room

Selecting the right lighting for your vaulted ceiling living room involves considering both the functionality and aesthetics of the space. Here are some key factors to help you make the right choices:

1. Consider Layered Lighting

To create a balanced lighting scheme, it’s important to use a combination of different types of lighting. Layering light involves using various light sources at different levels, such as ambient, task, and accent lighting.

  • Ambient Lighting: This is the general illumination that brightens the entire room. Use overhead fixtures like chandeliers, pendant lights, or ceiling-mounted LED lights.
  • Task Lighting: For specific areas like reading corners or workspaces, use table lamps or adjustable floor lamps.
  • Accent Lighting: Use accent lighting to highlight certain features, like artwork, architectural details, or plant arrangements. Wall sconces, track lights, or spotlights work well for this purpose.

2. High Ceilings Call for Powerful Light Fixtures

When lighting a room with a vaulted ceiling, the fixtures should be powerful enough to fill the space. Chandeliers with multiple tiers or large pendant lights can help illuminate the room evenly. For even distribution of light, you can consider using multiple smaller fixtures instead of one large central chandelier.

3. Use Dimmer Switches for Versatility

Vaulted ceilings often require powerful lighting, but the ability to control the brightness of that light is just as important. Installing dimmer switches will allow you to adjust the light intensity depending on the time of day, activity, or mood you wish to set. Dim lighting is perfect for creating a relaxed ambiance, while brighter settings are ideal for reading, entertaining, or other tasks.

4. Consider the Room’s Size and Shape

Vaulted ceilings are often found in larger living rooms, which require lighting fixtures capable of providing sufficient illumination. The larger the room, the more light fixtures you may need to evenly distribute light across the space. Ceiling fans with integrated lighting are also a great option for larger spaces to help circulate air while providing additional light.


Popular Lighting Ideas for a Vaulted Ceiling Living Room

There are several creative and functional lighting ideas you can implement to maximize the effect of your vaulted ceiling:

1. Chandeliers and Pendant Lights

A chandelier or a series of pendant lights can be the perfect centerpiece for a vaulted ceiling living room. These fixtures not only provide ample light but also serve as a dramatic focal point. When choosing a chandelier or pendant light, make sure it is appropriately sized for the room. A fixture that’s too small can feel out of place, while one that’s too large can overwhelm the space.

2. Track and Recessed Lighting

For a modern look, consider installing track or recessed lighting. Track lights allow for flexibility as they can be adjusted to illuminate specific areas, such as art pieces or seating areas. Recessed lighting is perfect for providing uniform, unobtrusive light and is ideal for high ceilings, as it helps avoid fixtures hanging too low.

3. Wall Sconces

Wall sconces are a fantastic way to add light while saving space in a living room with a vaulted ceiling. They can be used to accentuate the height of the ceiling, highlighting walls or architectural features. You can place sconces along the walls or near windows to enhance the natural light.

4. Floor Lamps

For task lighting, consider using floor lamps with adjustable heads. These can be moved around the room to provide light where it’s needed most, such as by a reading chair or next to a couch.

5. Up-Lighting for Added Drama

Up-lighting can be used to emphasize the height of the ceiling and create dramatic effects. Install LED floor lights in the corners of the room or use a tall lamp with a wide base that directs light upwards to illuminate the vaulted ceiling. This technique highlights the volume of the space and gives the room a sense of openness.


Tips for Installing Lighting in a Vaulted Ceiling Living Room

Lighting a vaulted ceiling can be tricky, especially when dealing with the height of the room. Below are some tips to ensure that your lighting installation is efficient and safe:

1. Hire a Professional Electrician

Installing lighting fixtures in high ceilings often requires professional help. A licensed electrician can ensure that fixtures are securely mounted, wiring is done safely, and lighting is distributed effectively throughout the room.

2. Measure the Space Properly

Before purchasing fixtures, measure the dimensions of your living room and the height of the vaulted ceiling. This will help you choose the right size and number of light fixtures for optimal lighting coverage.

3. Install Proper Ceiling Mounts

Ensure that all ceiling-mounted fixtures are securely installed using proper mounts that can support the weight of the fixture. Vaulted ceilings require specialized mounts to safely hang heavy lighting fixtures like chandeliers.

4. Use Smart Lighting

Consider using smart LED lights that can be controlled via voice or smartphone. These lights offer the convenience of adjusting the brightness, color, and even setting schedules for when the lights turn on and off. Smart lights are especially useful for hard-to-reach light fixtures on vaulted ceilings.


Common Mistakes to Avoid When Lighting Vaulted Ceilings

Lighting a vaulted ceiling comes with its own set of challenges, and making the wrong choices can detract from the room’s overall design. Here are some common mistakes to avoid:

1. Choosing Fixtures That Are Too Small

A fixture that is too small won’t be able to provide enough light to fill the room, and it will look out of place in a large, open space. Always choose fixtures that are proportionate to the size of the room and ceiling.

2. Ignoring Natural Light

Vaulted ceiling rooms often have large windows that allow for an abundance of natural light. Make sure your lighting choices complement the natural light sources in the room, rather than overpowering them.

3. Overcrowding the Ceiling with Fixtures

While it’s tempting to fill a vaulted ceiling with numerous fixtures, it’s important not to overdo it. Too many lights can make the space feel cluttered and visually overwhelming. Focus on a few key fixtures that provide ample light while leaving enough room for the architectural features to shine.


Conclusion

Lighting a vaulted ceiling living room is all about balancing style with functionality. Whether you choose chandeliers, recessed lighting, wall sconces, or floor lamps, the right lighting can highlight the beauty of your vaulted ceiling while ensuring your space is well-lit and inviting.

By layering different lighting sources, considering the size of your room, and ensuring proper installation, you can create a warm, welcoming atmosphere that showcases the architectural splendor of your vaulted ceilings.

Home Theater Star Ceiling: Transform Your Entertainment Experience

Imagine watching your favorite movie or TV show while looking up at a sky full of stars—only you’re inside the comfort of your home. A Home Theater Star Ceiling transforms your viewing experience into something magical and immersive. This design feature uses fiber optic or LED lights to create a stunning starry effect on your ceiling, simulating the night sky in a dark room. It brings a sense of awe and wonder to your home theater, making it a perfect spot for relaxation, movie marathons, or even stargazing from the comfort of your couch.

Home Theater Star Ceiling

Not only does a Home Theater Star Ceiling enhance the ambiance of your space, but it can also add value to your home. The intricate design and unique lighting effect elevate your home theater’s aesthetic, offering a high-end touch to your entertainment space. Whether you want to recreate a cinematic feel, boost your relaxation experience, or impress guests, a star ceiling is a feature that never goes unnoticed.

In this guide, we will explore everything you need to know about Home Theater Star Ceilings—from how they work and the benefits they offer, to installation tips and design ideas. Let’s dive into the world of starry skies and discover how this innovative ceiling design can transform your home theater into a stunning, multi-sensory experience.


Benefits of a Home Theater Star Ceiling

A Home Theater Star Ceiling offers several benefits that go beyond its captivating aesthetic. It’s not just about creating a beautiful ambiance—it’s about enhancing your entire entertainment experience. Here are some of the top reasons to consider installing a star ceiling in your home theater:

1. Immersive Movie Experience

One of the main reasons to install a Home Theater Star Ceiling is to create an immersive movie-watching experience. By simulating a starry sky, you can transport yourself into the movie or show you’re watching, making you feel like you’re part of the story. The soft, twinkling lights help set the mood, adding to the cinematic magic. Whether you’re watching a space-themed movie or enjoying a relaxing evening with a romantic film, the star ceiling sets the perfect atmosphere.

Read too: Discovering the Charm of Nautical Outdoor Ceiling Fans for Your Coastal Retreat: Sail into Style

2. Unique Aesthetic Appeal

A star ceiling is undoubtedly a conversation starter. Its unique design adds an element of sophistication and charm to your home theater. It’s the perfect way to create a focal point in the room, turning the ceiling into a stunning feature. The combination of dark walls and a glowing starry sky provides a stark contrast, drawing attention to the beautiful lighting above.

3. Improved Acoustics and Lighting

While the Home Theater Star Ceiling is primarily known for its aesthetic impact, it can also contribute to improving the overall acoustics of the room. The lights can help diffuse sound waves, reducing harsh echoes and creating a more pleasant sound environment. Additionally, some star ceiling systems are equipped with dimmable features, giving you full control over the brightness and creating a more customized lighting experience.

4. Versatile Design Options

Whether you prefer a subtle, elegant glow or a dazzling, full-blown galaxy, Home Theater Star Ceilings offer a variety of design options to fit your personal style. You can choose from fiber optic lights, LED strips, or a combination of both, each offering different levels of brightness and effects. You can also adjust the design to fit the shape and size of your room, ensuring the ceiling complements the overall interior design.

5. Relaxation and Ambiance

A starry ceiling doesn’t only improve your entertainment experience; it also creates an atmosphere of relaxation. The soft glow from the stars can calm your mind, making it an excellent feature for winding down at the end of a long day. It can even serve as a nightlight, providing a gentle, soothing ambiance as you fall asleep.


How a Home Theater Star Ceiling Works

To better understand how to install and maintain a Home Theater Star Ceiling, it’s important to know how these systems work. Star ceilings can be created using two primary types of lighting technology: fiber optics and LEDs. Let’s take a closer look at both.

1. Fiber Optic Lighting

Fiber optic lighting is a popular choice for creating a Home Theater Star Ceiling. The system consists of tiny, flexible fiber optic strands that are connected to a light source (usually an LED or halogen bulb). The light travels through the fibers and emerges from the tiny ends, creating the illusion of stars in the sky.

The key advantage of fiber optic lighting is that it can be tailored to create a range of effects. You can use dimmers or controllers to change the brightness and color of the lights. This flexibility allows you to customize your star ceiling to fit your desired atmosphere.

Fiber optic lighting is also energy-efficient and produces very little heat, making it safe to use in home theaters.

2. LED Lighting

LED lighting is another popular option for creating a Home Theater Star Ceiling. While it doesn’t offer the same “starry” effect as fiber optics, LED lights are still effective in creating a glowing ceiling. LED lights can be installed in strips along the edges of the ceiling or used in small, discrete points to create a twinkling effect.

The benefit of LED lights is that they are incredibly energy-efficient and long-lasting, making them a cost-effective solution for home theater lighting. They are also available in a wide range of colors and can be paired with dimmable features to achieve your desired look.

Both fiber optic and LED lighting can be used together for a more dramatic effect, or they can be used independently to suit your preferences.


Designing Your Home Theater Star Ceiling

When designing your Home Theater Star Ceiling, there are a few key elements to consider. These include the size of your room, the type of lighting system you want to use, and how you want the stars to appear. Here are some tips to help you create the perfect design for your home theater:

1. Room Size and Shape

The size and shape of your room will impact how you install your Home Theater Star Ceiling. Larger rooms may require more lights or a combination of fiber optics and LEDs to create an evenly distributed glow. For smaller rooms, you may want to opt for a more subtle design with fewer lights.

Consider the height and layout of your ceiling as well. A higher ceiling may allow for a more expansive starry sky, while a lower ceiling may require more focused lighting.

2. Choosing the Right Lighting System

As mentioned earlier, fiber optic lighting and LED lights are the most common options for star ceilings. Each system has its own set of benefits, so choose the one that best suits your needs. Fiber optics tend to create a more realistic, “twinkling” star effect, while LED lights can be brighter and more customizable.

Some Home Theater Star Ceiling kits come with built-in dimmers and color-changing features, allowing you to change the mood of your room with the touch of a button. Choose a system that offers flexibility and customization.

3. Star Patterns and Effects

When designing your star ceiling, think about how you want the stars to appear. Do you want a full galaxy with thousands of tiny stars, or do you prefer a more minimalistic approach with just a few twinkling points of light? You can also customize the patterns of the stars, arranging them to resemble constellations, the Milky Way, or a completely unique design.

Some systems allow you to create motion effects, like shooting stars or slow-fading lights, adding an extra layer of magic to your home theater.


Installation Tips for Your Home Theater Star Ceiling

While installing a Home Theater Star Ceiling can be a DIY project, it’s important to have the right tools and knowledge to ensure a successful installation. Here are some tips to help guide you through the process:

1. Planning the Layout

Before starting, plan the layout of your star ceiling carefully. Consider the placement of the lights and how they will be distributed across the ceiling. If you’re using fiber optics, measure the distance between the light source and the fiber optic strands to ensure they’ll reach the desired areas.

2. Installation Process

For fiber optic systems, start by drilling small holes in the ceiling to insert the fiber optic strands. The light source is usually installed in the attic or a nearby room, with fiber optic cables running through the ceiling to the star points. For LED systems, install the strips along the edges or in points where you want the light to appear.

It’s important to follow the manufacturer’s instructions to ensure safe and effective installation. You may also want to consider hiring a professional if you’re unsure about handling electrical work.

3. Maintenance

After installation, regular maintenance is essential to keep your Home Theater Star Ceiling in good working condition. Check for any loose connections, and clean the lights periodically to prevent dust buildup. With proper care, your star ceiling can last for years.


Conclusion

A Home Theater Star Ceiling is the perfect way to enhance your entertainment space, offering both aesthetic appeal and functionality. Whether you’re watching a film, listening to music, or simply relaxing, the mesmerizing glow of a starry ceiling can elevate your experience.

By choosing the right lighting system, designing a layout that suits your space, and following proper installation tips, you can transform your home theater into a truly magical destination. Get ready to immerse yourself in an unforgettable cinematic experience under a sky full of stars.

Rustic Wood Ceiling Beams: Tips and Ideas for a Cozy Aesthetic

Rustic wood ceiling beams can dramatically elevate the look and feel of a space, infusing it with warmth, charm, and a touch of nostalgia. Whether you’re designing a cozy farmhouse living room or adding character to a modern loft, rustic wood ceiling beams bring a natural, organic element that enhances almost any decor style. This article will guide you through everything you need to know about incorporating rustic ceiling beams into your home, including design ideas, benefits, installation tips, and maintenance advice.

Rustic Wood Ceiling Beams

Why Choose Rustic Wood Ceiling Beams?

Rustic wood ceiling beams aren’t just structural; they’re a stylistic choice that makes a statement. Here’s why many homeowners and interior designers love them:

  1. Natural Aesthetic: Wood beams bring a natural texture that adds warmth and visual interest to ceilings.
  2. Timeless Appeal: Rustic ceiling beams never go out of style, fitting seamlessly into various decor themes, from modern farmhouse to industrial.
  3. Versatility: They can work with many types of architecture and decor, enhancing both traditional and contemporary designs.
  4. Enhanced Property Value: Adding high-quality, rustic elements like ceiling beams can boost the value of your property by creating a unique, desirable aesthetic.

Read too: Kitchen Lighting For A Vaulted Ceiling: Illuminating Your Space with Style and Functionality


Types of Rustic Wood Ceiling Beams

When it comes to selecting rustic wood ceiling beams, there are several options to consider based on material, style, and installation method.

1. Solid Wood Beams

Solid wood beams are the traditional choice for creating a rustic look. Made from high-quality hardwoods such as oak, cedar, or pine, they offer durability and an authentic appearance. However, solid wood beams can be heavy and often require professional installation, making them a more permanent but higher-cost investment.

2. Faux Wood Beams

Faux wood beams are an excellent alternative for those who want the look of wood without the weight. Typically made from high-density polyurethane, these beams are lightweight, affordable, and easy to install. Faux wood beams come in a variety of textures and finishes that mimic the look of real wood and are ideal for DIY enthusiasts.

3. Reclaimed Wood Beams

For an eco-friendly option, reclaimed wood beams are an excellent choice. These beams are sourced from old barns, factories, or other structures, giving them unique character and history. Each piece of reclaimed wood has its own natural variations, adding to the rustic charm. Reclaimed wood beams are perfect for homeowners looking to reduce waste while achieving a vintage aesthetic.

4. Box Beams

Box beams are hollow beams constructed from wood planks and are lighter than solid wood beams. They offer the same visual appeal without adding much weight, making them suitable for both new builds and renovations. Box beams are also customizable, allowing you to create the exact look you desire.


How to Incorporate Rustic Wood Ceiling Beams into Different Rooms

Whether you’re aiming for a grand, traditional style or a cozy, intimate atmosphere, rustic wood ceiling beams can be tailored to fit various spaces in your home.

Living Room

The living room is an ideal space to showcase rustic ceiling beams, as they can become the focal point of the room. Consider installing multiple beams across the ceiling to create a structured, eye-catching design. You could also add a central beam to highlight a high ceiling or a vaulted layout.

Kitchen

Rustic beams can add warmth to your kitchen, balancing the often utilitarian feel of stainless steel appliances and modern cabinetry. In open-concept kitchens, ceiling beams can help define the space while adding depth. Position beams over a kitchen island or dining area to make the space feel more inviting.

Bedroom

In a bedroom, wood ceiling beams contribute to a relaxing, tranquil environment. A pair of beams over the bed creates symmetry, while a single, central beam can add height to the room. Consider pairing rustic beams with soft lighting to further enhance the cozy feel.

Dining Room

For formal or informal dining areas, rustic beams create an ambiance that’s both welcoming and elegant. In rooms with low ceilings, box beams are an excellent option, as they add visual appeal without making the ceiling feel lower. For dining rooms with high or vaulted ceilings, solid wood beams add grandeur and create a unique focal point.


Installation Tips for Rustic Wood Ceiling Beams

Installing rustic wood ceiling beams requires careful planning and, in many cases, professional help. Here are some steps to guide you through the process:

Step 1: Choose the Right Type of Beam

Decide whether you want solid wood, faux wood, reclaimed wood, or box beams based on your budget, ceiling height, and personal preference.

Step 2: Measure and Plan

Measure your ceiling and mark where you want the beams to go. If you’re installing multiple beams, spacing them evenly creates a balanced look. Planning the placement is essential, especially if you’re incorporating beams into a room with lighting fixtures, as you may need to adjust the layout accordingly.

Step 3: Prepare the Ceiling

Ensure your ceiling is ready for installation by checking for structural support. Solid wood beams require sturdy support structures, especially in high-load areas.

Step 4: Install Mounting Brackets or Frames

Attach mounting brackets or frames to support the beams, particularly if you’re using heavier, solid wood beams. Faux or box beams may not need as robust a support system, but they should still be securely attached.

Step 5: Secure the Beams

Once the mounting brackets are in place, secure each beam to the ceiling. Take your time to ensure that each beam is level and securely fastened.

Step 6: Finish and Stain

After installation, you can finish the beams with a stain or sealant to protect the wood and enhance its appearance. Opt for finishes that match or contrast with your room’s decor for added visual impact.


Maintenance Tips for Rustic Wood Ceiling Beams

Keeping your rustic wood beams looking their best doesn’t require extensive upkeep, but regular maintenance helps preserve their natural beauty.

  1. Dust Regularly: Use a microfiber cloth to remove dust from the surface of the beams. Dusting prevents buildup that can dull the wood’s appearance.
  2. Apply Wood Polish: Every few months, apply a wood polish or conditioning oil to keep the wood hydrated and shiny.
  3. Inspect for Cracks or Damage: Check your beams periodically for cracks or signs of damage. Reclaimed wood beams may have natural imperfections, but it’s a good idea to address any structural issues as they arise.
  4. Avoid Excessive Moisture: Wood beams can warp if exposed to excessive moisture, so avoid using them in overly humid areas unless they are properly sealed.

Popular Design Ideas with Rustic Wood Ceiling Beams

1. Farmhouse Chic

For a classic farmhouse look, combine white walls with natural wood ceiling beams. Adding simple, rustic furniture and decor items completes this timeless style.

2. Industrial Loft

In an industrial-themed space, pair dark-stained wood beams with exposed brick walls and metal fixtures. This look works well in loft apartments or homes with high, open ceilings.

3. Scandinavian Minimalism

Use light-colored wood beams with a natural finish to bring a touch of warmth to a minimalist, Scandinavian-inspired space. Keep the decor simple, with neutral colors and uncluttered furnishings.

4. Modern Rustic

Blend rustic wood beams with sleek, modern furniture and fixtures for a balanced aesthetic. This combination works beautifully in open-concept spaces, where the beams add texture without overwhelming the room.


Conclusion

Adding rustic wood ceiling beams to your home can dramatically transform the atmosphere, bringing a touch of nature and an element of charm that few other design elements can match. Whether you choose reclaimed wood for a vintage feel, faux beams for a budget-friendly option, or solid wood for a lasting investment, rustic ceiling beams make a stylish and functional addition to any room.

With proper planning, installation, and maintenance, you can enjoy the timeless beauty and warmth that rustic wood ceiling beams bring to your home for years to come.

Drop Ceiling LED Panel: A Comprehensive Guide

In recent years, drop ceiling LED panel have gained significant popularity in both residential and commercial spaces. These innovative lighting solutions provide a sleek, modern look while also enhancing energy efficiency and functionality. If you’re considering upgrading your lighting system, this comprehensive guide will explore everything you need to know about drop ceiling LED panels, including their benefits, installation process, design options, and maintenance tips.

Drop Ceiling Led Panels

What Are Drop Ceiling LED Panels?

Drop ceiling LED panels are flat, rectangular light fixtures designed to fit seamlessly into a drop ceiling grid. Unlike traditional ceiling lights, these panels are thin and lightweight, making them an excellent choice for spaces with limited ceiling height. Available in various sizes, shapes, and color temperatures, drop ceiling LED panels are versatile and can easily be integrated into any design aesthetic.

These panels often replace fluorescent tube lights, providing a more modern and efficient lighting solution. The result is an even distribution of light that enhances visibility and comfort while reducing glare.

Read too: Shiplap Ceiling in Kitchen: A Timeless Trend for a Stylish and Cozy Space

Benefits of Using Drop Ceiling LED Panels

1. Energy Efficiency

One of the most significant advantages of drop ceiling LED panels is their energy efficiency. LED lights consume significantly less electricity than traditional fluorescent bulbs, leading to lower energy bills. Additionally, LEDs have a longer lifespan, which means fewer replacements and reduced waste.

2. Improved Lighting Quality

Drop ceiling LED panels provide bright, consistent lighting that enhances visibility. Unlike fluorescent lights, which can flicker and create uneven lighting, LED panels offer a smooth light output, reducing eye strain and improving overall comfort in the space.

3. Sleek and Modern Design

With their slim profile and clean lines, drop ceiling LED panels can enhance the aesthetics of any room. Available in various styles and finishes, these panels can complement a wide range of interior designs, from contemporary to industrial.

4. Easy Installation

Installing drop ceiling LED panels is a straightforward process that typically requires minimal tools. Most panels are designed to fit directly into existing drop ceiling grids, allowing for quick and hassle-free installation.

5. Versatile Applications

Drop ceiling LED panels are suitable for various applications, including offices, retail spaces, schools, hospitals, and even residential homes. Their versatility makes them an ideal choice for anyone looking to upgrade their lighting.

Choosing the Right Drop Ceiling LED Panels

When selecting drop ceiling LED panels, consider the following factors:

1. Size and Shape

Drop ceiling LED panels come in various sizes, typically ranging from 1×1 feet to 2×4 feet. Choose a size that fits your existing ceiling grid and complements the dimensions of your space. Additionally, consider the shape of the panel; rectangular panels are the most common, but square options are also available.

2. Color Temperature

The color temperature of LED lights is measured in Kelvin (K) and affects the ambiance of the space. Common color temperatures for drop ceiling LED panels include:

  • Warm White (2700K-3000K): Creates a cozy, inviting atmosphere, ideal for residential spaces.
  • Neutral White (3500K-4100K): Provides a balanced, natural light suitable for various environments.
  • Cool White (5000K-6500K): Offers bright, clear light that enhances visibility, making it perfect for offices and commercial spaces.

3. Lumens Output

Lumens measure the brightness of a light source. When selecting drop ceiling LED panels, consider the lumens output to ensure you achieve the desired brightness in your space. Higher lumens mean brighter light, but also take into account the size of the room and the amount of natural light it receives.

4. Energy Efficiency Rating

Look for LED panels with high energy efficiency ratings, such as ENERGY STAR certification. These products meet strict energy efficiency guidelines set by the U.S. Environmental Protection Agency, ensuring optimal performance and reduced energy consumption.

5. Dimming Capability

If you want to control the brightness of your lights, consider choosing dimmable drop ceiling LED panels. This feature allows you to adjust the light output based on the time of day or the specific activities in the space, providing greater flexibility and comfort.

Installation Process for Drop Ceiling LED Panels

Installing drop ceiling LED panels is a relatively simple process. Here’s a step-by-step guide to help you through the installation:

1: Gather Your Materials

Before you begin the installation, ensure you have all the necessary materials, including:

  • Drop ceiling LED panels
  • Ceiling grid clips (if not included)
  • Electrical tools (screwdriver, wire stripper, etc.)
  • Safety goggles and gloves

2: Turn Off Power

Safety first! Before starting the installation, turn off the power to the existing lighting fixture at the circuit breaker. This precaution will prevent any electrical hazards during the installation.

3: Remove Existing Lights

If you’re replacing existing lighting fixtures, carefully remove them from the ceiling. Disconnect the wiring and ensure the area is clear for the installation of the new LED panels.

4: Prepare the Ceiling Grid

If necessary, adjust the existing ceiling grid to ensure a proper fit for the new drop ceiling LED panels. Ensure that the grid is clean and free of any debris.

5: Install the Panels

  1. If your LED panels come with clips, attach them to the panels according to the manufacturer’s instructions.
  2. Align the panels with the ceiling grid and carefully place them into the grid. Ensure they are level and securely fit into the frame.

6: Connect the Wiring

  1. Follow the manufacturer’s instructions to connect the wiring. This may involve connecting the LED panel wires to the existing electrical wires in the ceiling.
  2. Use wire connectors to secure the connections and ensure that there are no exposed wires.

7: Restore Power and Test

Once everything is securely connected, turn the power back on at the circuit breaker. Test the drop ceiling LED panels to ensure they are functioning correctly.

Maintenance Tips for Drop Ceiling LED Panels

To keep your drop ceiling LED panels in optimal condition, follow these maintenance tips:

1. Regular Cleaning

Dust and dirt can accumulate on the surface of LED panels, reducing their brightness. Use a soft cloth or duster to clean the panels regularly. For stubborn stains, a damp cloth with mild soap can be used, but ensure the panels are turned off and cooled down before cleaning.

2. Check for Flickering Lights

If you notice flickering lights, it could be a sign of a loose connection or an issue with the electrical supply. Inspect the wiring connections and ensure they are secure. If the problem persists, consult a professional electrician for assistance.

3. Monitor Energy Usage

Keep an eye on your energy bills to track the efficiency of your LED panels. If you notice a significant increase, it may indicate an issue with the panels or the electrical system.

4. Replace Faulty Panels

Although LED panels have a long lifespan, they can occasionally fail. If you notice any panels that are not functioning, replace them promptly to maintain even lighting throughout your space.

Conclusion

Drop ceiling LED panel offer a modern and efficient lighting solution for various applications. With their sleek design, energy efficiency, and ease of installation, they can transform any space while enhancing its overall aesthetics. By understanding the benefits, selection criteria, installation process, and maintenance tips, you can confidently upgrade your lighting system and enjoy the many advantages these panels provide.

Whether you’re renovating your home or designing a new commercial space, drop ceiling LED panels are an excellent choice to illuminate your environment with style and efficiency.

American Tin Ceilings Installation: Transform Your Space with Timeless Elegance

American tin ceilings have made a remarkable comeback in modern interior design, offering a blend of vintage charm and contemporary aesthetics. The intricate patterns, reflective surfaces, and variety of finishes make tin ceilings a popular choice for homeowners looking to add character and elegance to their spaces. This article will provide you with a detailed guide to American tin ceilings installation, covering everything from the materials needed to the installation process itself.

American Tin Ceilings Installation

Understanding American Tin Ceilings

What Are Tin Ceilings?

Tin ceilings are decorative ceiling panels made from thin sheets of metal, traditionally tin. They became popular in the 19th century in the United States, often used in commercial spaces, restaurants, and homes. These ceilings were originally designed to mimic the look of more expensive materials like plaster or wood, but they offered a more affordable and durable alternative.

Today, American tin ceilings are available in a variety of designs, including floral patterns, geometric shapes, and intricate motifs. They can be painted, left in their natural metallic finish, or treated to achieve a vintage look. This versatility allows homeowners to customize their ceilings to fit their design vision perfectly.

Benefits of Tin Ceilings

  1. Aesthetic Appeal: Tin ceilings add an element of sophistication and elegance to any room. Their reflective surfaces can also help to brighten a space by bouncing light around the room.
  2. Durability: Made from metal, tin ceilings are resistant to moisture, mold, and mildew. This makes them an excellent choice for areas prone to humidity, such as kitchens and bathrooms.
  3. Easy Maintenance: Tin ceilings require minimal upkeep. Regular dusting and the occasional wipe with a damp cloth are usually all that’s needed to keep them looking their best.
  4. Sound Absorption: Tin ceilings can help absorb sound, making them a great option for reducing noise in busy households or commercial settings.
  5. Eco-Friendly Option: Many manufacturers now produce tin ceiling tiles from recycled materials, making them an environmentally friendly choice for eco-conscious homeowners.

Read too: Shiplap Ceiling in Kitchen: A Timeless Trend for a Stylish and Cozy Space

Preparing for American Tin Ceilings Installation

Step 1: Gather Materials and Tools

Before beginning your installation, it’s essential to gather all necessary materials and tools. Here’s a list to get you started:

  • Tin ceiling tiles: Measure your ceiling space to determine how many tiles you’ll need.
  • Adhesive: Use construction adhesive or a specific adhesive for tin ceilings.
  • Measuring tape: Accurate measurements are crucial for a successful installation.
  • Level: To ensure your tiles are straight and even.
  • Utility knife: For cutting tiles to fit around edges or obstacles.
  • Caulk: For sealing gaps and providing a clean finish.
  • Safety goggles: Protect your eyes during installation.

Step 2: Prepare the Ceiling

Before installing your tin ceiling tiles, make sure the surface is clean, dry, and free of any debris. If your ceiling is uneven or has bumps, consider using drywall to create a smoother surface. If you’re covering an existing ceiling, ensure that it’s structurally sound and suitable for installation.

Step 3: Measure and Plan

Accurate measurements are crucial for a successful installation. Use a measuring tape to determine the length and width of your ceiling. Divide these measurements by the dimensions of your tin tiles to calculate how many tiles you will need.

Plan the layout of your tiles to ensure that any cut tiles will be placed around the edges, creating a balanced look. It’s often best to start in the center of the room and work your way out to avoid odd-shaped pieces at the edges.

American Tin Ceilings Installation Process

Step 1: Mark the Center

Use a chalk line or a straight edge to mark the center of your ceiling. This will be your starting point for installation.

Step 2: Apply Adhesive

Following the manufacturer’s instructions, apply adhesive to the back of the first tile. Be generous, but avoid excessive amounts that could ooze out during installation.

Step 3: Position the First Tile

Carefully position the tile against the ceiling, aligning it with your center mark. Use a level to ensure it’s straight. Press firmly to adhere the tile to the ceiling.

Step 4: Continue Installing Tiles

Repeat the adhesive application and installation process for the remaining tiles. Work your way outwards from the center, checking for alignment and levelness as you go. If necessary, cut tiles to fit around light fixtures, vents, or edges using a utility knife.

Step 5: Fill in Gaps

Once all tiles are installed, inspect the edges for any gaps. Use caulk to fill these spaces for a polished look. This will also help create a seamless appearance.

Step 6: Final Touches

After the installation, allow the adhesive to cure as per the manufacturer’s guidelines. Once cured, you can paint your tin tiles if desired or leave them in their natural finish.


Maintenance of American Tin Ceilings

Maintaining your tin ceiling is straightforward. Here are some tips to keep your ceiling looking beautiful for years to come:

  1. Regular Dusting: Use a soft cloth or microfiber duster to remove dust and cobwebs regularly.
  2. Cleaning: For deeper cleaning, use a damp cloth with mild soap. Avoid abrasive cleaners that could scratch the surface.
  3. Inspection: Periodically check for any signs of rust or damage, especially if you live in a humid climate. If rust appears, treat it immediately with a rust-inhibiting primer.
  4. Repainting: If you’ve painted your tiles and they begin to look dull, you can repaint them. Make sure to use a paint that is suitable for metal surfaces.

Conclusion

Installing American tin ceilings can transform your home, adding elegance and character while providing practical benefits. With the right preparation and installation techniques, you can achieve a stunning result that enhances your living space. Whether you’re undertaking a DIY project or hiring a professional, understanding the installation process will help ensure your success.

With their timeless beauty, durability, and low maintenance, tin ceilings are an excellent investment for any home. Embrace the charm of yesteryear while enjoying the benefits of modern design with American tin ceilings installation.

Decorative Drop Ceiling Tiles 2X2: A Comprehensive Guide

When it comes to enhancing the aesthetic appeal and functionality of a room, decorative drop ceiling tiles 2×2 provide an excellent solution. These tiles not only elevate the interior design but also offer practical benefits like sound absorption, insulation, and ease of installation. This article will explore the various aspects of decorative drop ceiling tiles, including their benefits, types, installation tips, and maintenance. Whether you’re a homeowner looking to remodel or a contractor seeking new materials, this guide will provide valuable insights into choosing the right decorative drop ceiling tiles for your project.

Decorative Drop Ceiling Tiles 2X2

What Are Decorative Drop Ceiling Tiles 2X2?

Decorative drop ceiling tiles 2×2 are square tiles that are typically made from various materials, such as mineral fiber, metal, or PVC. They are designed to fit into a grid system suspended from the ceiling. The “2×2” designation refers to the tile’s dimensions, which are 2 feet by 2 feet. This standard size is popular in both residential and commercial spaces, providing a uniform look and allowing for easy installation.

Read too: How To Extend Kitchen Cabinets To The Ceiling: A Complete Guide for Maximizing Space and Style

Key Features of Decorative Drop Ceiling Tiles 2X2

  1. Aesthetic Variety: Decorative drop ceiling tiles come in a wide range of designs, colors, and textures. From classic patterns to modern styles, there’s something to suit every taste and interior design.
  2. Easy Installation: The tiles are designed to fit into a grid framework, making them easy to install or replace without professional help.
  3. Sound Absorption: Many decorative drop ceiling tiles are designed with sound-absorbing properties, which can help reduce noise levels in busy environments.
  4. Lightweight and Versatile: These tiles are typically lightweight, making them easier to handle and install. They can be used in various settings, including offices, homes, schools, and retail spaces.
  5. Durability: Made from sturdy materials, decorative drop ceiling tiles are built to last. They resist wear and tear, making them a practical choice for high-traffic areas.

Benefits of Decorative Drop Ceiling Tiles 2X2

Investing in decorative drop ceiling tiles 2×2 offers numerous benefits that enhance both aesthetics and functionality. Here are some key advantages:

1. Improved Aesthetics

One of the primary reasons for choosing decorative drop ceiling tiles is their ability to transform a plain ceiling into an eye-catching focal point. With an array of styles available, these tiles can enhance the overall look of a room and complement existing decor.

2. Cost-Effective Renovation

If you’re looking to update your space without a full remodel, installing decorative drop ceiling tiles is a cost-effective solution. They can be an affordable way to refresh the appearance of a room, making it look modern and stylish.

3. Easy Access to Utilities

Drop ceiling systems allow for easy access to electrical wiring, plumbing, and HVAC systems. If repairs or maintenance are needed, you can simply lift a tile to access these utilities without disrupting the entire ceiling.

4. Enhanced Acoustic Performance

Decorative drop ceiling tiles often incorporate sound-absorbing materials that help reduce noise levels in a space. This is particularly beneficial in commercial settings like offices, where a quieter environment can improve productivity.

5. Energy Efficiency

Some decorative drop ceiling tiles have insulation properties that can help maintain the temperature in a room, reducing energy costs. By improving thermal efficiency, these tiles can contribute to a more comfortable living or working environment.

Types of Decorative Drop Ceiling Tiles 2X2

When selecting decorative drop ceiling tiles, it’s essential to consider the various types available. Each type has its unique features, benefits, and aesthetic appeal. Here are some popular options:

1. Mineral Fiber Tiles

Mineral fiber tiles are one of the most common types of drop ceiling tiles. They are lightweight and provide excellent sound absorption. These tiles are available in various textures and patterns, making them a versatile choice for many design styles.

2. PVC Tiles

PVC tiles are known for their durability and water resistance, making them an ideal choice for areas prone to moisture, such as bathrooms or kitchens. They are available in numerous colors and styles, often featuring glossy finishes that can brighten a space.

3. Metal Tiles

For a modern, industrial look, metal drop ceiling tiles are an excellent option. They are typically made from aluminum or steel and can come in various finishes, such as brushed nickel or copper. Metal tiles are durable and can add a sophisticated touch to any room.

4. Wood Tiles

Wood drop ceiling tiles offer a warm, natural look that can enhance the comfort of a space. They are available in different wood species and finishes, providing a unique and stylish option for residential or commercial interiors.

5. Acoustic Tiles

These tiles are specifically designed to absorb sound and reduce noise levels. They are often made from specialized materials that enhance their acoustic properties, making them perfect for settings where noise reduction is a priority.

How to Install Decorative Drop Ceiling Tiles 2X2

Installing decorative drop ceiling tiles 2×2 is a straightforward process that many homeowners can tackle themselves. Here’s a step-by-step guide to help you through the installation:

Tools and Materials Needed

  • Tools:
    • Measuring tape
    • Level
    • Utility knife
    • Straight edge
    • Screwdriver
    • Drill
  • Materials:
    • Ceiling grid system
    • 2×2 decorative drop ceiling tiles
    • Wall angle trim
    • Hanging wires

Step-by-Step Installation Process

1. Measure the Space

Begin by measuring the room to determine how many tiles you will need. Measure the length and width of the room, then calculate the total square footage.

2. Install the Wall Angle Trim

Using a level, install wall angle trim around the perimeter of the room at the desired height. This trim will support the grid system.

3. Install the Ceiling Grid System

  • Main Runners: Install the main runners (longer grid pieces) perpendicular to the ceiling joists. Use a drill to secure them in place.
  • Cross Tees: Install cross tees between the main runners to create a grid that will support the tiles. The spacing between the cross tees should be 2 feet apart.

4. Hang the Grid System

Attach hanging wires to the ceiling joists and connect them to the grid system. This will secure the grid in place and ensure it is level.

5. Cut Tiles to Fit

Measure and cut tiles as necessary to fit around the edges and fixtures. Use a utility knife and straight edge for clean cuts.

6. Insert the Tiles

Carefully place each tile into the grid, ensuring they fit snugly and are level with one another. Make adjustments as needed to achieve a uniform appearance.

7. Finishing Touches

Inspect the installation and make any necessary adjustments. Ensure all tiles are securely in place and that the grid system is properly supported.

Maintenance of Decorative Drop Ceiling Tiles 2X2

To ensure your decorative drop ceiling tiles 2×2 remain in excellent condition, regular maintenance is necessary. Here are some maintenance tips:

1. Regular Cleaning

Dust and debris can accumulate on the surface of the tiles. Use a soft cloth or duster to regularly clean the tiles. For more stubborn stains, a mild soap solution can be used. Avoid abrasive cleaners that could damage the surface.

2. Inspect for Damage

Periodically check for any signs of damage, such as cracks, water stains, or warping. If any tiles are damaged, replace them promptly to maintain the overall appearance of your ceiling.

3. Check the Grid System

Inspect the grid system for any loose connections or sagging areas. Ensure that the grid remains level and securely fastened to the ceiling.

4. Replace Filters if Needed

If your ceiling tiles are part of a ventilation system, be sure to check and replace filters as necessary to maintain good air quality.

Conclusion

Decorative drop ceiling tiles 2×2 offer an excellent opportunity to transform your space while providing practical benefits. With a variety of styles and materials to choose from, you can create a beautiful and functional ceiling that enhances the overall look and feel of your home or business. From installation to maintenance, this guide provides the information you need to make informed decisions about your ceiling design.

By understanding the benefits and features of decorative drop ceiling tiles, you can take the next step in enhancing your space with confidence.

Black Tin Ceiling Tiles: A Comprehensive Guide

When it comes to home decor, the ceiling is often an overlooked canvas, yet it holds immense potential to transform any room. One of the most striking options available today is Black Tin Ceiling Tiles. These stylish tiles not only add a touch of elegance but also provide a unique aesthetic appeal that can elevate the overall ambiance of a space. In this article, we’ll explore the various aspects of black tin ceiling tiles, from their history and benefits to installation tips and maintenance.

Black Tin Ceiling Tiles

What Are Black Tin Ceiling Tiles?

Black Tin Ceiling Tile are decorative panels made from tin or metal that are designed to be installed on ceilings. Historically, tin tiles were popular in the late 19th and early 20th centuries, often found in Victorian-era buildings and commercial spaces. Today, they are experiencing a revival, particularly in modern homes and stylish restaurants, where their classic charm meets contemporary design.

The “black” aspect of these tiles refers to their finish, which can range from matte to glossy. The black color adds sophistication and depth to a room, making it an ideal choice for those looking to create a bold statement.

Benefits of Black Tin Ceiling Tiles

1. Aesthetic Appeal

One of the main attractions of Black Tin Ceiling Tile is their stunning visual appeal. The contrast of black against other colors in the room can create a dramatic effect, making any space feel more upscale. These tiles are available in various patterns and designs, allowing homeowners to customize their ceilings according to their style preferences.

2. Durability

Tin ceiling tiles are incredibly durable and resistant to wear and tear. Unlike traditional ceiling materials that may warp, crack, or discolor over time, tin is designed to last. This durability ensures that your investment in black tin ceiling tile will pay off in the long run, maintaining their beauty for years to come.

Read too: Bathroom Flooded Through the Ceiling: A Comprehensive Guide

3. Easy Maintenance

Maintaining Black Tin Ceiling Tile is relatively straightforward. They can be easily wiped down with a damp cloth to remove dust and grime. Unlike painted ceilings that may require regular repainting, tin tiles do not need frequent upkeep, making them a practical choice for busy homeowners.

4. Acoustic Benefits

One often-overlooked advantage of tin ceiling tiles is their ability to improve acoustics in a room. The tiles can help absorb sound and reduce echoes, making them an excellent choice for spaces like restaurants, offices, or home theaters where sound quality is essential.

5. Installation Versatility

Black Tin Ceiling Tile can be installed in various settings, including residential and commercial spaces. They can be used in kitchens, dining areas, living rooms, and even in commercial settings like cafes and retail stores. Their versatility allows for creative installations, including full ceilings or accent areas.

The History of Tin Ceiling Tiles

Tin ceiling tiles have a rich history that dates back to the mid-19th century. During this time, advancements in metalworking made it possible to create lightweight, affordable ceiling panels that mimicked the look of more expensive materials like plaster and carved wood.

These tiles became particularly popular in North America, where they were often used in the construction of Victorian homes and commercial buildings. However, as architectural styles changed in the early 20th century, tin tiles fell out of favor.

In recent years, there has been a resurgence of interest in vintage decor, leading to a revival of tin ceiling tiles in contemporary design. Black Tin Ceiling Tiles, in particular, have gained popularity for their modern aesthetic and timeless charm.

How to Choose the Right Black Tin Ceiling Tiles

Selecting the right Black Tin Ceiling Tiles involves several considerations to ensure that they align with your vision and the overall style of your space.

1. Design and Pattern

Tin ceiling tiles come in various designs, from intricate Victorian patterns to simple geometric shapes. When choosing a design, consider the overall aesthetic of the room. For a more traditional look, opt for ornate patterns; for a modern vibe, choose sleek, minimalist designs.

2. Size and Scale

The size of the tiles can significantly impact the visual effect they create. Smaller tiles can be used for more intricate designs, while larger tiles can create a bolder statement. Consider the proportions of the room when selecting tile sizes to ensure a harmonious look.

3. Finish Options

Black tin ceiling tiles are available in different finishes, including matte, gloss, and textured. The finish you choose can affect the overall ambiance of the room. A glossy finish may reflect light and add brightness, while a matte finish can create a more subdued, sophisticated feel.

4. Installation Method

Consider whether you want to install the tiles yourself or hire a professional. Some tiles are designed for easy DIY installation, while others may require professional expertise, particularly if intricate patterns are involved.

5. Budget

While Black Tin Ceiling Tiles can be a bit more expensive than traditional ceiling materials, they can also add significant value to your home. Set a budget before shopping to ensure you find tiles that fit within your financial constraints.

Installation Tips for Black Tin Ceiling Tiles

Installing Black Tin Ceiling Tiles can be a rewarding DIY project if you follow these steps:

Step 1: Gather Your Materials

You will need the following materials:

  • Black tin ceiling tiles
  • Adhesive (or nails, depending on the installation method)
  • Measuring tape
  • Level
  • Utility knife
  • Caulk or trim (for finishing touches)

Step 2: Prepare the Ceiling

Before installation, ensure that your ceiling is clean and free of any debris. If you’re working with an existing ceiling, consider removing any old tiles or finishes that may affect adhesion.

Step 3: Measure and Mark

Using a measuring tape, mark the center of the ceiling. This point will serve as the starting point for your tile installation. From this center point, measure and mark lines to help guide the placement of your tiles.

Step 4: Start Installing

Begin installing the tiles at the center and work your way outward. Use adhesive or nails to secure the tiles, ensuring they are level and flush against each other. For a seamless look, carefully align the edges of each tile.

Step 5: Finish the Edges

Once all tiles are installed, use caulk or trim to cover any exposed edges or gaps. This finishing touch will create a polished and professional look.

Step 6: Enjoy Your New Ceiling

After installation, take a step back and admire your new Black Tin Ceiling Tiles. The transformation can significantly enhance the overall atmosphere of your space.

Maintenance of Black Tin Ceiling Tiles

To keep your Black Tin Ceiling Tiles looking their best, consider the following maintenance tips:

1. Regular Cleaning

Dust and grime can accumulate on your tiles over time. Use a soft cloth or duster to wipe down the tiles regularly. For more stubborn stains, use a damp cloth with mild soap.

2. Check for Damage

Periodically inspect your tiles for any signs of damage, such as dents or scratches. Address any issues promptly to maintain the integrity of your ceiling.

3. Avoid Harsh Chemicals

When cleaning your black tin ceiling tiles, avoid using harsh chemicals or abrasive cleaners, as they can damage the finish. Stick to mild soap and water for safe cleaning.

4. Touch Up as Needed

If you notice any scratches or scuffs, consider using touch-up paint designed for metal surfaces to maintain a uniform look.

Conclusion

Black Tin Ceiling Tiles offer a unique and sophisticated way to elevate your home decor. Their rich history, coupled with modern aesthetics, makes them a versatile choice for any space. By understanding their benefits, choosing the right tiles, and following proper installation and maintenance techniques, you can transform your ceiling into a stunning focal point. Whether you’re looking to enhance your home’s interior or add character to a commercial space, black tin ceiling tiles are an excellent choice that will stand the test of time.

USG Eclipse Ceiling Tile: A Comprehensive Guide to Enhanced Acoustic Performance and Design

Ceiling tiles play a vital role in the aesthetics and functionality of both commercial and residential spaces. Among the numerous options available on the market, USG Eclipse Ceiling Tile stand out for their superior acoustic performance, durability, and design versatility. Whether you’re renovating an office, hospital, school, or any other large building, these ceiling tiles offer a balance of style and function that enhances any environment.

Usg Eclipse Ceiling Tile

In this comprehensive guide, we’ll explore what USG Eclipse Ceiling Tiles are, their benefits, various applications, and how they can transform your space.


What Are USG Eclipse Ceiling Tiles?

USG Eclipse Ceiling Tiles are high-performance acoustic tiles designed for commercial and institutional spaces. Manufactured by USG Corporation, a leading provider of building materials, these tiles are engineered to control sound, enhance aesthetics, and offer easy maintenance. Available in various sizes, textures, and edge designs, these ceiling tiles cater to a wide range of architectural and interior design needs.

One of the standout features of the USG Eclipse Ceiling Tile is its ability to provide excellent sound absorption, making it perfect for environments where noise control is critical. These tiles also boast a sleek, clean design, ensuring that they complement any modern or traditional interior without overwhelming the overall look of the space.

Read too: Kitchen Lighting For A Vaulted Ceiling: Illuminating Your Space with Style and Functionality


Benefits of USG Eclipse Ceiling Tiles

1. Superior Acoustic Performance

The primary benefit of using USG Eclipse Ceiling Tiles is their acoustic performance. These tiles are designed to absorb sound, reducing noise levels in busy environments such as offices, schools, and hospitals. By controlling noise, they help create a more comfortable and productive atmosphere. Whether you’re looking to improve speech clarity in a conference room or minimize distractions in a classroom, these tiles can dramatically enhance the auditory experience of any room.

2. Aesthetic Versatility

While functionality is important, aesthetics also matter. USG Eclipse Ceiling Tiles are available in a variety of finishes and textures, allowing for customization to suit different design needs. From sleek, modern surfaces to textured designs that add depth, these tiles can blend seamlessly into any space. They can also be paired with different grid systems to create a polished and cohesive look.

3. Durability and Longevity

These ceiling tiles are designed to withstand the test of time. Made from high-quality materials, USG Eclipse Ceiling Tiles resist sagging, discoloration, and wear, making them a durable choice for spaces with heavy use. They are also easy to clean, which helps to maintain their appearance and performance over time.

4. Light Reflectance

An often-overlooked feature of ceiling tiles is their ability to reflect light. USG Eclipse Ceiling Tiles are designed to reflect natural and artificial light, helping to brighten up a room and reduce the need for additional lighting. This not only enhances the ambiance but can also lead to energy savings by minimizing the need for excessive lighting fixtures.

5. Sustainability

Sustainability is becoming increasingly important in construction and interior design. USG Eclipse Ceiling Tiles are manufactured with environmental responsibility in mind. Many of these tiles contain recycled content and are designed for easy disposal, aligning with LEED certification goals and other green building standards. For businesses or institutions looking to create an eco-friendly space, choosing USG Eclipse Ceiling Tiles can contribute to sustainability efforts.


Applications of USG Eclipse Ceiling Tiles

1. Office Spaces

One of the most common places you’ll find USG Eclipse Ceiling Tiles is in office buildings. In open-plan offices where noise can be a distraction, these tiles help reduce ambient noise levels, making the workspace quieter and more conducive to productivity. Additionally, the clean and professional appearance of these ceiling tiles enhances the overall aesthetic of the office, giving it a polished and modern feel.

2. Educational Facilities

Schools and universities are another prime setting for USG Eclipse Ceiling Tiles. Classrooms, lecture halls, and libraries require good acoustics to support learning and concentration. The sound-absorbing properties of these ceiling tiles help to reduce noise, ensuring that students and teachers can communicate effectively without distractions from outside the room or adjacent areas.

3. Healthcare Environments

In healthcare settings, such as hospitals and clinics, noise control is critical for patient comfort and privacy. USG Eclipse Ceiling Tiles not only help to absorb sound in busy corridors and waiting rooms but also enhance privacy in patient rooms and consultation areas. Furthermore, their easy-to-clean surface makes them a hygienic choice for healthcare environments where cleanliness is paramount.

4. Retail and Commercial Spaces

Retail stores and commercial buildings often have high ceilings and large open spaces, which can lead to echoes and poor acoustics. USG Eclipse Ceiling Tiles offer an excellent solution for improving the acoustic environment while maintaining a stylish look. In retail environments, where customer experience is key, these tiles help create a more pleasant atmosphere by reducing noise and creating a bright, welcoming space.


H2: USG Eclipse Ceiling Tile: Technical Specifications

When considering USG Eclipse Ceiling Tiles, it’s important to understand their technical specifications to ensure they meet the specific needs of your project. Here are some of the key technical aspects of these tiles:

1. Noise Reduction Coefficient (NRC)

The Noise Reduction Coefficient (NRC) is a key factor in determining how well a ceiling tile absorbs sound. USG Eclipse Ceiling Tiles typically have an NRC rating between 0.70 and 0.80, meaning they absorb 70-80% of sound that strikes them. This makes them highly effective at reducing echo and controlling ambient noise levels in a room.

2. Ceiling Attenuation Class (CAC)

The Ceiling Attenuation Class (CAC) measures a ceiling tile’s ability to block sound between rooms. USG Eclipse Ceiling Tiles often have a CAC rating of around 35, which is ideal for reducing sound transmission between spaces, such as between offices or classrooms.

3. Light Reflectance (LR)

The Light Reflectance (LR) rating for USG Eclipse Ceiling Tiles is typically around 0.85, meaning they reflect 85% of the light that hits them. This high reflectance makes them a great choice for spaces where maximizing natural light is important, contributing to energy efficiency by reducing the need for artificial lighting.

4. Fire Resistance

Safety is always a top priority in any building project. USG Eclipse Ceiling Tiles are rated for fire resistance, meeting or exceeding industry standards. This makes them suitable for installation in environments where fire safety is a concern, such as schools, hospitals, and office buildings.


Installation and Maintenance Tips for USG Eclipse Ceiling Tiles

1. Professional Installation

While USG Eclipse Ceiling Tiles are relatively easy to install, it’s always recommended to hire a professional contractor for larger projects to ensure the installation is done correctly. Proper installation not only ensures optimal acoustic performance but also extends the lifespan of the tiles.

2. Grid Systems Compatibility

These ceiling tiles are compatible with a variety of grid systems, including standard 9/16-inch and 15/16-inch grids. Ensure you choose the right grid system for your space to complement the tile’s design and performance.

3. Cleaning and Maintenance

One of the benefits of USG Eclipse Ceiling Tiles is their easy-to-clean surface. To maintain their appearance and performance, regular dusting or light vacuuming with a soft brush attachment is recommended. For deeper cleaning, a damp cloth can be used to remove any stains or marks.

4. Replacement and Repairs

If a tile becomes damaged or stained beyond cleaning, it’s relatively easy to replace individual tiles without disrupting the entire ceiling system. Keeping a few extra tiles on hand can ensure quick repairs if necessary.


Why Choose USG Eclipse Ceiling Tiles for Your Next Project?

When it comes to selecting ceiling tiles for your next project, USG Eclipse Ceiling Tiles offer a compelling combination of acoustic performance, durability, and aesthetic appeal. Whether you’re designing an office space, a school, a hospital, or a retail store, these tiles provide the functionality and design flexibility needed to meet the demands of modern construction and interior design.

Here’s a quick recap of why you should consider USG Eclipse Ceiling Tile:

  • Superior sound absorption for noise control in busy environments.
  • Aesthetic versatility with a range of finishes and textures to suit any design scheme.
  • Durability and longevity that resist sagging, discoloration, and wear.
  • Energy efficiency through high light reflectance.
  • Sustainability through eco-friendly materials and manufacturing processes.

Conclusion

In conclusion, USG Eclipse Ceiling Tile are an excellent choice for anyone looking to improve both the acoustic performance and aesthetics of a space. Whether you’re outfitting a corporate office, a healthcare facility, a school, or a commercial building, these tiles offer unmatched versatility and performance. Their ease of maintenance, coupled with their high durability and eco-friendly credentials, makes them a sound investment for any long-term project.

Coffered Ceiling With Wood Beams: A Complete Guide

When it comes to enhancing the aesthetic appeal and architectural elegance of a room, a Coffered Ceiling With Wood Beams stands out as a sophisticated choice. This design feature not only adds character and depth to a space but also provides a timeless look that can elevate both modern and traditional interiors. In this comprehensive guide, we’ll explore what a coffered ceiling with wood beams is, its benefits, how to design and install it, and tips for maintenance to keep it looking its best.

Coffered Ceiling With Wood Beams

What is a Coffered Ceiling With Wood Beams?

A coffered ceiling with wood beams is a type of ceiling design characterized by a grid of recessed panels or coffers, often accented with wooden beams. This style of ceiling adds visual interest and architectural detail to a room by creating a sense of depth and dimension. The coffered sections are typically framed with wood beams, which can be stained, painted, or left in their natural state, depending on the desired aesthetic.

Read too: Exploring the Innovation and Efficiency of Ceiling Mounted Surgical Light Solutions: Illuminating Precision

Benefits of a Coffered Ceiling With Wood Beams

Incorporating a coffered ceiling with wood beams into your home offers several benefits that go beyond mere aesthetics:

  1. Enhanced Architectural Detail: A coffered ceiling introduces a level of sophistication and detail that can transform an ordinary room into an extraordinary space. The interplay of light and shadow created by the recessed panels adds depth and visual interest.
  2. Timeless Elegance: Wood beams bring a classic, timeless quality to the design. Whether you choose a rustic or contemporary finish, wood beams can complement a wide range of interior styles.
  3. Increased Room Perception: By adding dimension to the ceiling, a coffered ceiling with wood beams can make a room feel larger and more open. The vertical lines created by the beams draw the eye upward, enhancing the perception of height.
  4. Customizable Design: Coffered ceilings are highly customizable. You can choose from various patterns, beam sizes, and finishes to create a design that suits your taste and complements your home’s décor.
  5. Acoustic Benefits: The design of a coffered ceiling can help improve the acoustics in a room. The panels and beams can absorb sound and reduce echoes, making it a practical choice for home theaters or music rooms.

Designing a Coffered Ceiling With Wood Beams

Designing a coffered ceiling with wood beams involves several considerations to ensure that the final result meets your aesthetic preferences and functional needs. Here’s a step-by-step guide to help you design the perfect ceiling for your space:

1. Determine the Room’s Purpose

Consider the purpose of the room where you plan to install the coffered ceiling. The design should align with the room’s function and overall style. For example, a coffered ceiling in a dining room may feature elegant, intricate patterns, while a more relaxed design might be suitable for a family room.

2. Select a Design Pattern

Choose a design pattern that complements the architecture of your home. Common coffered ceiling patterns include:

  • Square Panels: Traditional and classic, square panels create a grid-like effect that is symmetrical and balanced.
  • Rectangular Panels: Ideal for longer rooms, rectangular panels can emphasize the room’s length and create a streamlined look.
  • Custom Patterns: For a unique touch, you can create custom patterns that reflect your personal style or architectural preferences.

3. Choose the Wood Beams

Select the type of wood and finish for the beams. Popular choices include:

  • Oak: Durable and versatile, oak beams can be stained or painted to match your décor.
  • Pine: A softer wood with a lighter color, pine is often used for a more casual, rustic look.
  • Maple: Known for its smooth grain and strength, maple beams add a refined, polished touch to the ceiling.

Decide whether you want the beams to be stained, painted, or left natural. The finish should complement the room’s color scheme and other design elements.

4. Measure and Plan

Accurate measurements are crucial for a successful installation. Measure the dimensions of the room and determine the size and spacing of the coffers and beams. Create a detailed plan or blueprint to guide the installation process.

5. Consult with Professionals

While some DIY enthusiasts may choose to tackle the installation themselves, consulting with a professional contractor or carpenter can ensure that the project is completed to a high standard. Professionals can provide valuable insights into design options, materials, and installation techniques.

Installing a Coffered Ceiling With Wood Beams

The installation of a coffered ceiling with wood beams is a multi-step process that requires precision and attention to detail. Here’s an overview of the installation process:

1. Preparation

Begin by preparing the room for installation. Remove any existing ceiling fixtures or obstructions. Cover the floor and furniture to protect them from dust and debris.

2. Install the Framework

Install the framework for the coffered ceiling. This typically involves attaching wooden or metal supports to the ceiling to create the grid pattern. Ensure that the framework is level and securely fastened.

3. Attach the Beams

Once the framework is in place, attach the wood beams to the ceiling. Beams should be securely fastened to the framework and aligned according to the design plan. If you’re using pre-finished beams, ensure that they are installed with the finished side facing outward.

4. Install the Panels

Install the panels or coffers within the grid created by the beams. Panels can be made from wood, drywall, or other materials, depending on the desired look. Secure the panels in place and ensure that they are flush with the beams.

5. Finishing Touches

Complete the installation by adding any finishing touches. This may include painting or staining the beams and panels, applying trim or molding, and installing lighting fixtures if desired. Make sure all components are securely fastened and properly aligned.

Maintaining a Coffered Ceiling With Wood Beams

Regular maintenance is essential to keep your coffered ceiling with wood beams looking its best. Here are some tips for maintaining and caring for your ceiling:

1. Dust Regularly

Dust the ceiling and beams regularly to prevent the accumulation of dirt and debris. Use a soft, dry cloth or a vacuum with a brush attachment to gently clean the surface.

2. Check for Damage

Periodically inspect the ceiling for any signs of damage, such as cracks, dents, or water stains. Address any issues promptly to prevent further damage and maintain the ceiling’s appearance.

3. Protect the Wood

If your wood beams are stained or painted, protect the finish by avoiding harsh cleaning agents. Use a mild wood cleaner and a soft cloth to clean the beams and maintain their appearance.

4. Maintain Proper Humidity

Wood can be sensitive to changes in humidity. Ensure that the room has proper ventilation and maintain a consistent humidity level to prevent warping or cracking of the wood beams.

Conclusion

A Coffered Ceiling With Wood Beams is a stunning design feature that can transform any room into a sophisticated and elegant space. By carefully considering design options, selecting the right materials, and following proper installation and maintenance procedures, you can enjoy the beauty and functionality of this timeless ceiling design. Whether you’re looking to enhance your home’s architectural detail or create a luxurious focal point, a coffered ceiling with wood beams is a choice that will add lasting value and appeal to your home.

Painted Drop Ceiling Tiles: A Comprehensive Guide to Enhancing Your Ceiling’s Aesthetics

When it comes to transforming a room, the ceiling often gets overlooked. However, with “Painted Drop Ceiling Tiles,” you can significantly enhance both the aesthetics and functionality of your space. Painted drop ceiling tiles not only offer a fresh look but also provide a creative way to address various issues like discoloration or damage. This guide will explore the benefits, application techniques, maintenance, and design ideas for painted drop ceiling tiles.

Painted Drop Ceiling Tiles

Why Choose Painted Drop Ceiling Tiles?

Painted drop ceiling tiles are a popular choice for many homeowners and businesses looking to revamp their interiors. Here’s why they might be the perfect solution for your space:

Benefits of Painted Drop Ceiling Tiles

  1. Aesthetic Enhancement: Painting drop ceiling tiles allows you to customize the look of your ceiling, giving it a fresh and updated appearance. Whether you prefer a classic white or a bold color, painting provides a versatile way to match your ceiling to your décor.
  2. Cost-Effective Solution: Replacing drop ceiling tiles can be costly. Painting is a budget-friendly alternative that can revitalize your ceiling without the need for a complete overhaul.
  3. Conceals Imperfections: Over time, drop ceiling tiles may become stained or discolored. Painting can cover these imperfections, giving your ceiling a cleaner, more uniform look.
  4. Improves Lighting: A fresh coat of paint, especially in lighter colors, can improve the reflectivity of your ceiling tiles, making your space brighter and more welcoming.
  5. Customizable Options: With a wide range of paint colors and finishes available, you can achieve the exact look you want. From matte to glossy finishes, the options are extensive.

Read too: Bathroom Flooded Through the Ceiling: A Comprehensive Guide

How to Prepare for Painting Drop Ceiling Tiles

Before diving into painting your drop ceiling tiles, proper preparation is crucial for achieving the best results. Here’s a step-by-step guide to preparing your tiles for painting:

1. Remove Dust and Debris

  • Begin by cleaning the tiles to remove any dust, dirt, or debris. Use a vacuum with a brush attachment or a soft cloth to ensure the surface is clean.

2. Check for Damage

  • Inspect the tiles for any signs of damage, such as cracks or water stains. Replace any tiles that are severely damaged to ensure a smooth painting surface.

3. Protect the Area

  • Cover the floor and any furniture with drop cloths or plastic sheeting to protect them from paint splatters. Tape off any areas that you don’t want to paint, such as walls and trim.

4. Choose the Right Paint

  • Select a paint that is suitable for ceiling tiles. Opt for a water-based acrylic or latex paint designed for use on drop ceiling tiles. These paints are durable and provide a smooth finish.

Painting Techniques for Drop Ceiling Tiles

Once you’ve prepared the area and chosen your paint, follow these techniques for painting your drop ceiling tiles:

1. Apply a Primer

  • Applying a primer is essential for ensuring the paint adheres well to the tiles. Use a primer designed for ceiling tiles and apply it evenly with a roller or brush. Allow the primer to dry completely before moving on to the paint.

2. Use the Right Tools

  • For painting, use a high-quality roller or brush. A roller is typically more efficient for covering large areas, while a brush can be useful for edges and corners.

3. Apply Paint Evenly

  • Apply the paint in even, overlapping strokes to avoid streaks and ensure full coverage. Start from one corner and work your way across the ceiling.

4. Allow Proper Drying Time

  • Let the first coat of paint dry completely before applying a second coat if needed. Follow the paint manufacturer’s instructions for drying times to ensure the best results.

5. Reinstall and Touch Up

  • Once the paint is dry, reinstall the tiles if you removed them for painting. Touch up any areas that may need additional paint or corrections.

Maintenance Tips for Painted Drop Ceiling Tiles

To keep your painted drop ceiling tiles looking their best, follow these maintenance tips:

1. Regular Dusting

  • Dust your ceiling tiles regularly to prevent dirt and debris buildup. Use a soft brush or a vacuum with a brush attachment to gently clean the tiles.

2. Address Stains Promptly

  • If you notice any stains or spots on the tiles, clean them promptly to prevent permanent damage. Use a mild cleaning solution and a soft cloth to gently wipe the affected areas.

3. Avoid Excessive Moisture

  • Avoid exposing the painted tiles to excessive moisture, as this can cause the paint to peel or discolor. Ensure proper ventilation in areas prone to high humidity.

4. Touch Up as Needed

  • Over time, touch up any areas that may have become damaged or worn. This helps maintain a uniform appearance and prolongs the life of the paint job.

Design Ideas for Painted Drop Ceiling Tiles

Painting drop ceiling tiles opens up numerous design possibilities. Here are some creative ideas to consider:

1. Classic White

  • A timeless choice, classic white paint brightens up a room and provides a clean, fresh look. It’s perfect for modern, minimalist, or traditional interiors.

2. Bold Colors

  • For a dramatic effect, consider using bold colors. Shades like navy blue, deep green, or rich burgundy can add a touch of sophistication and create a focal point in the room.

3. Patterns and Textures

  • Experiment with patterns or textures by using stencils or specialized paint techniques. This can add visual interest and make your ceiling a unique feature of the room.

4. Metallic Finishes

  • Metallic paints can give your ceiling a glamorous, upscale look. Consider silver, gold, or bronze finishes for a touch of elegance.

5. Accent Ceilings

  • Use painted tiles to create an accent ceiling. Paint the tiles in a contrasting color or pattern to draw attention and add character to the space.

When to Seek Professional Help

While painting drop ceiling tiles is a manageable DIY project, there are instances when professional help might be necessary:

  • Extensive Damage: If the tiles are severely damaged or require significant repair, a professional can assess and address the issues more effectively.
  • Large Areas: For large-scale projects or commercial spaces, hiring professionals ensures a quicker, more efficient job with high-quality results.
  • Complex Designs: If you’re interested in intricate patterns or special finishes, professional painters can achieve a level of detail and precision that may be challenging to achieve on your own.

Conclusion

Painted drop ceiling tiles offer an excellent opportunity to enhance the look of your space affordably and creatively. Whether you’re refreshing an old ceiling or adding a new dimension to your décor, painting can transform your ceiling into a stylish focal point. By following proper preparation techniques, applying paint carefully, and maintaining your tiles, you can enjoy a beautiful and functional ceiling for years to come.

Cedar Wood for Ceilings: Enhancing Your Space with Timeless Elegance

Cedar wood for ceilings has become a popular choice among homeowners and designers looking to add warmth, character, and a touch of nature to their interiors. Its natural beauty and versatility make it an excellent option for creating stunning ceiling designs that enhance any space. This comprehensive guide will delve into the benefits of using cedar wood for ceilings, explore different applications, and provide tips for installation and maintenance.

Cedar Wood For Ceilings

What Makes Cedar Wood Ideal for Ceilings?

Cedar wood is renowned for its aesthetic appeal, durability, and unique properties that make it a standout choice for ceiling applications. Here’s why cedar wood is an excellent option:

1. Aesthetic Appeal

  • Natural Beauty: Cedar wood features rich, warm tones and distinct grain patterns that add elegance and character to any room.
  • Versatility: It complements a wide range of interior styles, from rustic and traditional to modern and contemporary.

Read too: Understanding and Dealing with Ants in the Ceiling Spaces: Navigating the Intrusion

2. Durability and Strength

  • Longevity: Cedar wood is known for its longevity, making it a durable option for ceiling installations.
  • Resistance to Decay: It has natural resistance to decay, insects, and moisture, which enhances its lifespan.

3. Acoustic Properties

  • Sound Absorption: Cedar wood can help improve the acoustics of a room by absorbing sound, reducing echo, and creating a more pleasant auditory environment.

4. Environmentally Friendly

  • Sustainable Source: Cedar is a renewable resource, making it an eco-friendly choice for environmentally conscious homeowners.

Types of Cedar Wood for Ceilings

Several types of cedar wood can be used for ceilings, each offering unique characteristics and finishes. Here are some popular options:

1. Western Red Cedar

Overview

Western Red Cedar is a highly sought-after type of cedar known for its deep, rich color and aromatic properties. It is commonly used in both interior and exterior applications.

Features

  • Color and Grain: Features a beautiful reddish-brown hue with a straight grain pattern.
  • Aroma: Known for its pleasant, natural aroma.
  • Durability: Highly resistant to decay and insects.

Pros and Cons

  • Pros: Rich color, durable, aromatic.
  • Cons: Can be more expensive than other types of cedar.

2. Eastern White Cedar

Overview

Eastern White Cedar is another popular choice for ceilings, valued for its light color and fine grain.

Features

  • Color and Grain: Exhibits a pale, creamy color with a fine, even grain.
  • Weight: Lighter and softer compared to other cedar types.
  • Cost: Generally more affordable than Western Red Cedar.

Pros and Cons

  • Pros: Light color, affordable, easy to work with.
  • Cons: Softer, may be less durable compared to Western Red Cedar.

3. Alaskan Yellow Cedar

Overview

Alaskan Yellow Cedar is known for its durability and distinctive yellow hue. It is often used in high-end interior applications.

Features

  • Color and Grain: Displays a yellowish color with a fine, straight grain.
  • Durability: Highly resistant to decay and insects.
  • Workability: Easy to machine and finish.

Pros and Cons

  • Pros: Durable, unique color, easy to work with.
  • Cons: Can be pricier and less commonly available.

Benefits of Using Cedar Wood for Ceilings

Incorporating cedar wood into your ceiling design offers several benefits:

1. Enhanced Aesthetic

  • Warmth and Elegance: Cedar wood adds warmth and sophistication, creating a cozy and inviting atmosphere.
  • Customizable: Available in various finishes and styles to match your design preferences.

2. Improved Acoustics

  • Sound Control: Cedar wood can help manage sound levels, making spaces more comfortable and acoustically pleasing.

3. Easy Maintenance

  • Low Maintenance: Cedar wood is relatively easy to maintain, requiring periodic cleaning and occasional treatment to preserve its appearance.

4. Longevity

  • Durable Material: Cedar’s natural properties ensure a long-lasting ceiling that withstands wear and tear.

Applications of Cedar Wood Ceilings

Cedar wood can be used in a variety of ceiling applications, each offering unique benefits:

1. Residential Interiors

Living Rooms and Bedrooms

  • Design Impact: Adds a natural, sophisticated touch to living rooms and bedrooms, enhancing the overall ambiance.
  • Color Options: Choose from various finishes to match your decor.

Kitchens and Dining Areas

  • Durability: Ideal for areas with high traffic and potential moisture exposure.
  • Aesthetic Appeal: Complements modern and traditional kitchen designs.

2. Commercial Spaces

Offices and Conference Rooms

  • Acoustic Benefits: Helps manage sound and create a more comfortable working environment.
  • Professional Look: Adds a touch of elegance to commercial interiors.

Retail and Hospitality

  • Visual Appeal: Enhances the ambiance of retail spaces and hotels, creating a welcoming atmosphere for clients and guests.

3. Outdoor Applications

Porches and Patios

  • Weather Resistance: Suitable for covered outdoor areas where cedar’s natural properties can withstand varying weather conditions.
  • Visual Continuity: Provides a cohesive look with other natural materials used in outdoor spaces.

How to Install Cedar Wood Ceilings

Proper installation is crucial for achieving the best results with cedar wood ceilings. Follow these steps for a successful installation:

1. Prepare the Space

  • Measure and Plan: Accurately measure the ceiling area and plan the layout.
  • Surface Preparation: Ensure the ceiling surface is clean, dry, and level.

2. Choose the Right Cedar Wood

  • Select Type: Choose the type of cedar wood that best suits your design and budget.
  • Acclimate Wood: Allow the cedar wood to acclimate to the room’s humidity before installation to prevent warping.

3. Installation Process

  • Install Furring Strips: Attach furring strips to the ceiling to create a secure base for the cedar panels.
  • Lay Cedar Panels: Begin installing the cedar panels, starting from one side and working your way across. Use nails or screws to secure the panels.
  • Finishing Touches: Sand and finish the panels as needed to achieve the desired look.

4. Maintenance

  • Regular Cleaning: Dust and clean the cedar ceiling regularly to maintain its appearance.
  • Treatments: Apply wood treatments as necessary to protect against moisture and pests.

Conclusion

Cedar wood for ceilings offers a timeless and elegant solution for enhancing your interior spaces. With its natural beauty, durability, and versatility, cedar wood can transform any room into a sophisticated and inviting environment. By understanding the different types of cedar wood, benefits, and installation techniques, you can make an informed decision and enjoy the lasting appeal of cedar wood ceilings in your home or commercial space.

American Tin Ceiling Tiles: Elevate Your Space with Timeless Elegance

American tin ceiling tiles are a classic architectural feature that brings a touch of vintage charm to modern interiors. Known for their durability and aesthetic appeal, these tiles have become a popular choice for both historical restorations and contemporary designs. This article explores the rich history of American tin ceiling tiles, their benefits, installation tips, and design options, providing a comprehensive guide to help you make the most of this timeless design element.

American Tin Ceiling Tiles

What Are American Tin Ceiling Tiles?

American tin ceiling tiles are decorative panels made from metal, traditionally tin, used to cover ceilings. They were popular from the late 19th century to the early 20th century, valued for their durability, ease of maintenance, and aesthetic versatility. These tiles come in various designs and patterns, ranging from intricate Victorian motifs to sleek modern styles.

Historical Background

Tin ceiling tiles became popular in the United States during the industrial revolution, offering an affordable alternative to more expensive materials like plaster. They were widely used in public buildings, commercial spaces, and homes, contributing to the architectural elegance of the era. Today, they are celebrated for their historic charm and are often featured in restoration projects and new builds alike.

Benefits of American Tin Ceiling Tiles

American tin ceiling tiles offer a variety of benefits that make them a preferred choice for many interior design projects:

1. Durability

Tin ceiling tiles are known for their robustness. They can withstand wear and tear, making them suitable for high-traffic areas and spaces exposed to varying environmental conditions. Their resistance to moisture and pests also contributes to their long-lasting performance.

2. Aesthetic Appeal

The ornate patterns and textures of tin ceiling tiles can transform a plain ceiling into a stunning focal point. Available in various designs, including geometric patterns, floral motifs, and classic scrollwork, these tiles add character and sophistication to any room.

Read too: Kitchen Lighting For A Vaulted Ceiling: Illuminating Your Space with Style and Functionality

3. Ease of Maintenance

Tin ceiling tiles are relatively easy to clean and maintain. Regular dusting and occasional wiping with a damp cloth are usually sufficient to keep them looking their best. For more stubborn stains, a mild soap solution can be used.

4. Versatility

American tin ceiling tiles can be painted, patinated, or left in their natural metallic finish, offering flexibility in design. They can complement a wide range of interior styles, from rustic farmhouse to contemporary chic.

5. Sound Insulation

The metal construction of tin ceiling tiles provides a certain level of sound insulation, which can help in reducing noise transmission between rooms.

Types of American Tin Ceiling Tiles

When choosing American tin ceiling tiles, you’ll find a variety of styles and finishes. Here are some common types:

1. Embossed Patterns

  • Characteristics: These tiles feature raised designs, creating a three-dimensional effect. Patterns can range from intricate Victorian designs to simple geometric shapes.
  • Pros: Adds texture and visual interest to ceilings.
  • Cons: May require more frequent cleaning to maintain the detailed design.

2. Flat Tiles

  • Characteristics: Flat tin ceiling tiles have a smooth, even surface without embossed patterns. They offer a sleek and modern look.
  • Pros: Easier to clean and maintain, versatile in design.
  • Cons: Less visual texture compared to embossed tiles.

3. Vintage Finish

  • Characteristics: These tiles are designed to mimic the appearance of aged tin. They often have a patina or distressed finish that adds historical charm.
  • Pros: Ideal for restoration projects or creating a vintage look.
  • Cons: May not suit modern or minimalist interiors.

4. Paintable Tiles

  • Characteristics: These tiles come in a base metal finish that can be painted to match any color scheme.
  • Pros: Customizable to fit any interior design.
  • Cons: Painting may require more maintenance over time.

Installation Tips for American Tin Ceiling Tiles

Proper installation is crucial to achieving a flawless look with American tin ceiling tiles. Here are some tips to help ensure a successful installation:

1. Prepare the Surface

Before installing tin ceiling tiles, ensure the surface is clean, dry, and level. Remove any old ceiling coverings or debris to create a smooth base for the new tiles.

2. Measure and Plan

Accurate measurements are essential for a proper fit. Measure the dimensions of your ceiling and plan the layout of the tiles. This will help you determine how many tiles you need and ensure a symmetrical design.

3. Choose the Right Adhesive

Depending on your installation method, choose an appropriate adhesive. For drop-in tiles, a grid system may be used, while glue or nail-on methods are common for direct applications.

4. Install Tiles Carefully

Begin by installing the tiles at the center of the ceiling and work outward. This approach ensures that any cut tiles are placed at the edges, where they are less noticeable. Use spacers if necessary to maintain consistent gaps between tiles.

5. Finish Edges and Seams

Once the tiles are installed, address any visible seams or edges. You can use trim or molding to create a polished look and cover any gaps or imperfections.

Design Ideas with American Tin Ceiling Tiles

Incorporating American tin ceiling tiles into your interior design offers numerous creative possibilities:

1. Classic Elegance

Use tin ceiling tiles with intricate patterns in a traditional setting, such as a Victorian-style home or a period-inspired room. Their historical charm complements period furnishings and décor.

2. Modern Contrast

Combine tin ceiling tiles with modern design elements for a striking contrast. The metallic finish of the tiles can add a touch of sophistication to contemporary interiors, especially when paired with minimalist furniture and clean lines.

3. Industrial Chic

In industrial-style spaces, tin ceiling tiles can enhance the raw, rugged aesthetic. Choose tiles with a distressed or vintage finish to blend seamlessly with exposed brick and metal fixtures.

4. Artistic Statements

Create a focal point by using tin ceiling tiles in unique patterns or colors. Consider painting or patinating the tiles to match your room’s color scheme and make a bold design statement.

Maintenance and Care

To keep your American tin ceiling tiles looking their best, follow these maintenance tips:

  • Regular Dusting: Dust the tiles regularly to prevent dirt buildup. Use a soft cloth or a duster to remove surface dust.
  • Cleaning Spills: Wipe up any spills or stains promptly using a damp cloth. For more stubborn stains, use a mild soap solution.
  • Avoid Harsh Chemicals: Refrain from using harsh chemicals or abrasive cleaners, as they can damage the finish of the tiles.
  • Inspect for Damage: Periodically check for any signs of damage or corrosion. Address any issues promptly to prevent further deterioration.

Conclusion

American tin ceiling tiles offer a timeless and elegant solution for enhancing the aesthetic appeal of any room. With their rich history, durability, and versatility, they provide both functional and decorative benefits. By understanding the different types of tiles, installation tips, and design ideas, you can successfully incorporate these classic elements into your home or commercial space. Whether you’re restoring a historic building or updating a modern interior, American tin ceiling tiles are a valuable choice for adding sophistication and charm.

Spruce Tongue And Groove Ceiling: Transform Your Space

When it comes to home improvement and interior design, a Spruce Tongue And Groove Ceiling offers a timeless and elegant option. This ceiling style not only enhances the aesthetic appeal of your space but also adds value to your home. In this article, we will explore everything you need to know about Spruce Tongue and Groove ceilings, including their benefits, installation process, design ideas, and maintenance tips.

Spruce Tongue And Groove Ceiling

The Beauty of a Spruce Tongue And Groove Ceiling

Spruce wood is known for its attractive appearance, durability, and versatility. Tongue and groove (T&G) ceilings are constructed using wooden planks that fit together seamlessly, creating a smooth and cohesive surface. The tongue of one plank fits into the groove of the next, ensuring a snug fit without the need for visible nails or screws.

Read too: Kitchen Lighting For A Vaulted Ceiling: Illuminating Your Space with Style and Functionality

Benefits of Spruce Tongue And Groove Ceilings

  1. Aesthetic Appeal: Spruce wood has a beautiful, natural grain pattern that adds warmth and character to any room. The T&G design creates a clean and polished look that complements various interior styles, from rustic to contemporary.
  2. Durability: Spruce is a durable wood species, making it an excellent choice for ceilings. It can withstand changes in temperature and humidity, ensuring a long-lasting installation.
  3. Easy Installation: The tongue and groove system simplifies the installation process. The planks interlock easily, allowing for a quick and efficient installation, whether you are a DIY enthusiast or hiring a professional.
  4. Versatility: Spruce T&G ceilings can be used in various rooms, including living areas, bedrooms, kitchens, and bathrooms. They can also be installed on both flat and vaulted ceilings.
  5. Insulation and Acoustics: Wood ceilings provide natural insulation, helping to regulate the temperature in your home. Additionally, they can improve the acoustics of a room by reducing echo and noise levels.

Installing a Spruce Tongue And Groove Ceiling

Preparation and Planning

Before starting the installation, it’s essential to plan and prepare adequately. Here are the steps to follow:

  1. Measure the Space: Measure the length and width of the ceiling to determine the number of spruce T&G planks needed. Consider purchasing extra planks to account for any mistakes or future repairs.
  2. Acclimate the Wood: Allow the spruce planks to acclimate to the room’s temperature and humidity for at least 48 hours before installation. This prevents the wood from expanding or contracting after installation.
  3. Gather Tools and Materials: Ensure you have all the necessary tools and materials, including a tape measure, saw, hammer, nails, adhesive, level, and safety gear.

Installation Steps

  1. Prepare the Ceiling Surface: Ensure the ceiling surface is clean, dry, and level. Remove any old ceiling materials and make any necessary repairs.
  2. Install Furring Strips (Optional): If the ceiling is uneven, consider installing furring strips perpendicular to the direction of the T&G planks. This creates a level surface for the planks to attach to.
  3. Start Installation: Begin at one end of the room and install the first plank with the groove side facing the wall. Use nails or adhesive to secure the plank in place.
  4. Interlock the Planks: Fit the tongue of the next plank into the groove of the previous plank. Tap the planks gently with a hammer and a tapping block to ensure a tight fit.
  5. Continue Across the Ceiling: Continue interlocking and securing the planks across the ceiling. Stagger the joints for a more natural look and added stability.
  6. Finish the Edges: Once you reach the opposite wall, measure and cut the final plank to fit. Use trim or molding to cover any gaps around the edges for a polished finish.

Design Ideas for Spruce Tongue And Groove Ceilings

Rustic Charm

A Spruce Tongue And Groove Ceiling is perfect for creating a rustic, cabin-like atmosphere. Pair it with exposed wooden beams, stone accents, and earthy color schemes to enhance the rustic charm. This design is ideal for living rooms, bedrooms, and kitchens.

Modern Elegance

For a modern twist, paint the spruce T&G ceiling in a light, neutral color such as white or gray. This brightens the space and adds a contemporary touch. Combine it with minimalist furniture and sleek lighting fixtures for a sophisticated look.

Coastal Retreat

Embrace a coastal theme by using whitewashed spruce T&G planks. This design evokes a breezy, beach-house vibe, perfect for bedrooms and bathrooms. Add nautical decor, such as seashells, rope accents, and ocean-inspired artwork, to complete the look.

Farmhouse Style

Create a cozy farmhouse feel with a natural spruce T&G ceiling. Pair it with shiplap walls, vintage furniture, and warm, inviting textiles. This style is ideal for kitchens and dining areas, offering a welcoming and homely atmosphere.

Maintenance Tips for Spruce Tongue And Groove Ceilings

Regular Cleaning

Dust the ceiling regularly using a soft cloth or a duster to prevent the buildup of dirt and cobwebs. For a deeper clean, use a damp cloth with mild soap and water. Avoid using harsh chemicals that can damage the wood.

Inspect for Damage

Periodically inspect the ceiling for any signs of damage, such as cracks, warping, or water stains. Address any issues promptly to prevent further damage and maintain the integrity of the ceiling.

Refinish as Needed

Over time, the finish on the spruce wood may wear down. Consider refinishing the ceiling every few years to restore its original beauty. Sand the surface lightly and apply a fresh coat of wood finish or sealant.

Control Humidity Levels

Maintain a consistent indoor humidity level to prevent the wood from expanding or contracting excessively. Use a dehumidifier in humid climates and a humidifier in dry climates to protect the ceiling.

Conclusion: Elevate Your Space with a Spruce Tongue And Groove Ceiling

A Spruce Tongue And Groove Ceiling is a versatile and elegant choice for any home. Its natural beauty, durability, and ease of installation make it a popular option for various interior styles. Whether you prefer a rustic, modern, coastal, or farmhouse design, a spruce T&G ceiling can enhance the aesthetic appeal and value of your space. By following proper installation and maintenance practices, you can enjoy the timeless charm of a spruce tongue and groove ceiling for years to come.

Black Suspended Ceiling Grid: Transform Your Space

A black suspended ceiling grid is more than just a functional element of interior design; it’s a statement piece that can transform the look and feel of any space. Whether you are remodeling an office, retail store, or residential area, the sleek, modern aesthetic of a black suspended ceiling grid can add a touch of sophistication and elegance. This article will provide a comprehensive guide on everything you need to know about black suspended ceiling grids, from their benefits and installation to maintenance and design tips.

Black Suspended Ceiling Grid

Why Choose a Black Suspended Ceiling Grid?

When considering ceiling options, a black suspended ceiling grid stands out for several reasons. Here are some of the key benefits:

Aesthetic Appeal

A black suspended ceiling grid offers a sleek and modern look that can complement various design styles. The dark color can create a dramatic contrast with lighter walls and furnishings, adding depth and character to a room.

Versatility

Black ceiling grids are incredibly versatile and can be used in a variety of settings, including offices, retail spaces, restaurants, and homes. They work well with different types of ceiling tiles, from acoustic tiles to metal panels.

Concealment

Suspended ceiling grids are excellent for concealing unsightly elements such as ductwork, pipes, and wiring. The black color can further enhance this concealment by blending seamlessly with shadows, making these elements less noticeable.

Acoustic Benefits

In spaces where sound control is important, a black suspended ceiling grid paired with acoustic tiles can help reduce noise levels. This makes it an ideal choice for offices, meeting rooms, and other areas where acoustics are a priority.

Selecting the Right Black Suspended Ceiling Grid

Choosing the right black suspended ceiling grid involves considering several factors, including material, size, and style. Here’s a breakdown to help you make an informed decision.

Material Options

Black suspended ceiling grids are available in various materials, each with its own set of advantages:

  • Metal: Metal grids are durable and offer a modern, industrial look. They are also resistant to moisture and fire, making them suitable for a variety of environments.
  • PVC: PVC grids are lightweight, easy to install, and resistant to moisture and mildew. They are a cost-effective option for areas where humidity is a concern.
  • Wood: While less common, wood grids can add a warm and natural touch to a space. They are best suited for residential or high-end commercial applications.

Grid Size

The size of the grid you choose will depend on the size of the ceiling tiles and the overall design you want to achieve. Standard grid sizes include:

  • 2×2 Feet: Ideal for smaller tiles, providing a more traditional look.
  • 2×4 Feet: Suitable for larger tiles, offering a more open and contemporary feel.

Design Styles

Black suspended ceiling grids come in various design styles to match different aesthetics:

  • Flat Lay-In: This style features a flat surface where tiles lay into the grid, creating a clean and modern appearance.
  • Recessed: Tiles sit slightly below the grid, adding depth and dimension to the ceiling.
  • Reveal Edge: This style has a beveled edge that creates a shadow effect, enhancing the visual interest of the ceiling.

Installation of a Black Suspended Ceiling Grid

Installing a black suspended ceiling grid can be a straightforward process if you follow the right steps. Here’s a step-by-step guide to help you with the installation.

Preparation

  1. Measure the Space: Start by measuring the dimensions of the room to determine the amount of material you will need.
  2. Plan the Layout: Sketch out the ceiling layout, marking where the grid lines will be placed. Ensure that the grid is square and evenly spaced.
  3. Gather Materials: Ensure you have all the necessary materials, including the grid system, ceiling tiles, wire hangers, and any tools required for installation.

Installation Steps

  1. Install Perimeter Trim: Begin by attaching the perimeter trim around the room’s edges. This trim will support the grid and provide a finished look.
  2. Hang Main Runners: Install the main runners across the length of the room. These will form the backbone of the grid system.
  3. Add Cross Tees: Connect the cross tees to the main runners, creating the grid pattern. Ensure that the tees are evenly spaced and securely fastened.
  4. Install Hangers: Attach wire hangers to the ceiling joists or other structural elements. These hangers will support the weight of the grid and tiles.
  5. Insert Ceiling Tiles: Once the grid is securely in place, insert the ceiling tiles into the grid openings. Adjust as necessary to ensure a snug fit.

Safety Tips

  • Use a Ladder: Always use a sturdy ladder when installing the grid to ensure safety and stability.
  • Wear Safety Gear: Protect yourself by wearing gloves and safety glasses during the installation process.
  • Double-Check Measurements: Ensure that all measurements are accurate to avoid any misalignment or gaps in the grid.

Maintaining Your Black Suspended Ceiling Grid

Proper maintenance is essential to keep your black suspended ceiling grid looking its best and functioning effectively. Here are some tips for maintaining your ceiling grid.

Regular Cleaning

Dust and dirt can accumulate on ceiling grids and tiles over time. Regular cleaning with a soft cloth or duster can help maintain their appearance. For more thorough cleaning, use a mild detergent and water solution, but avoid using harsh chemicals that could damage the finish.

Inspecting for Damage

Periodically inspect the grid and tiles for any signs of damage, such as warping, discoloration, or sagging. Replace any damaged components promptly to maintain the integrity of the ceiling.

Adjusting and Tightening

Over time, the grid may shift or become loose. Check the connections and tighten any loose fittings to ensure that the grid remains secure and stable.

Design Ideas and Tips for Using a Black Suspended Ceiling Grid

A black suspended ceiling grid can be a versatile design element. Here are some ideas and tips to help you make the most of this stylish ceiling option.

Contrast with Light Walls

One effective design strategy is to contrast the black ceiling grid with light-colored walls and furnishings. This creates a striking visual effect and highlights the ceiling as a focal point in the room.

Incorporate Lighting

Integrate lighting fixtures into the ceiling grid to enhance the overall design. Recessed lights, pendant lights, or LED strips can be installed within the grid to provide functional illumination and add a modern touch.

Mix and Match Materials

Combine the black ceiling grid with different types of ceiling tiles to create a unique look. For example, using metal tiles with a black grid can add an industrial vibe, while acoustic tiles can offer a softer, more traditional feel.

Read too: Kitchen Lighting For A Vaulted Ceiling: Illuminating Your Space with Style and Functionality

Use in Different Spaces

Don’t limit the use of a black suspended ceiling grid to just one area. Consider installing it in various spaces such as the kitchen, living room, or even the bathroom to maintain a cohesive design throughout your home or commercial space.

Conclusion

A black suspended ceiling grid is a stylish and practical choice for any space. Its aesthetic appeal, versatility, and functional benefits make it an excellent option for both residential and commercial settings. By understanding the different materials, sizes, and design styles available, and following proper installation and maintenance procedures, you can create a stunning ceiling that enhances your overall interior design. Whether you are looking to conceal unsightly elements or add a touch of sophistication, a black suspended ceiling grid can transform your space and make a lasting impression.

Plank Ceiling in the Bathroom: Transform Your Space

If you’re looking to elevate the aesthetic of your bathroom, consider installing a plank ceiling. This versatile design choice can bring warmth, texture, and a touch of luxury to your space. In this comprehensive guide, we’ll explore the benefits of a plank ceiling in the bathroom, the types of materials you can use, installation tips, and design inspiration to help you create a stunning bathroom transformation.

Plank Ceiling In Bathroom

Why Choose a Plank Ceiling in the Bathroom?

A plank ceiling in the bathroom can significantly enhance the overall look and feel of the space. Here are some compelling reasons to consider this design option:

Aesthetic Appeal

Plank ceilings add a natural, rustic charm to bathrooms, creating a cozy and inviting atmosphere. The wood texture contrasts beautifully with smooth bathroom surfaces like tile and glass, adding visual interest and depth.

Versatility

Plank ceilings can be tailored to fit any bathroom style, from modern and minimalist to traditional and rustic. You can choose from a variety of wood types, finishes, and stains to match your desired look.

Durability

When properly sealed and maintained, wood planks can withstand the humid environment of a bathroom. Using moisture-resistant materials ensures that your ceiling remains beautiful and functional for years to come.

Value Addition

A well-designed plank ceiling can increase the value of your home. It adds a unique and desirable feature that potential buyers may find appealing, setting your home apart from others.

Types of Materials for a Plank Ceiling in the Bathroom

Selecting the right materials is crucial for the success of your plank ceiling project. Here are some popular options:

Wood

Wood is the most traditional and popular choice for plank ceilings. Different wood types offer various looks and characteristics:

  • Cedar: Naturally resistant to moisture and insects, cedar is a durable option for bathrooms. It has a pleasant aroma and a rich, warm color.
  • Pine: A more affordable option, pine can be stained or painted to match your decor. It’s versatile and widely available.
  • Teak: Known for its high oil content, teak is highly resistant to water and decay. It’s an excellent choice for a luxurious, long-lasting ceiling.

PVC

PVC planks are a practical alternative to wood. They are lightweight, easy to install, and resistant to moisture, making them ideal for bathrooms. PVC planks come in various finishes, including wood-like textures that mimic the appearance of real wood.

Composite Materials

Composite planks, made from a mixture of wood fibers and plastic, combine the best features of both materials. They are highly durable, moisture-resistant, and available in a range of styles and colors.

Installation Tips for a Plank Ceiling in the Bathroom

Installing a plank ceiling in your bathroom requires careful planning and execution. Here’s a step-by-step guide to help you through the process:

Step 1: Measure and Plan

Start by measuring the dimensions of your bathroom ceiling. This will help you determine how much material you need. Consider the direction you want the planks to run and the layout of any lighting fixtures or vents.

Step 2: Choose Your Materials

Select the type of planks you want to use and purchase enough to cover your ceiling area. Don’t forget to buy any additional materials needed for installation, such as nails, adhesive, and a vapor barrier.

Step 3: Prepare the Ceiling

Before installing the planks, ensure your ceiling is clean and free of any debris. If you’re installing over an existing ceiling, check for any damage or mold that needs to be addressed.

Step 4: Install a Vapor Barrier

Since bathrooms are prone to moisture, installing a vapor barrier is essential to protect your ceiling and the underlying structure. Attach the vapor barrier to the ceiling joists with staples or adhesive.

Step 5: Attach the Planks

Start installing the planks along one edge of the ceiling, making sure they are aligned and straight. Use nails or adhesive to secure each plank to the ceiling joists. If using nails, ensure they are countersunk to create a smooth surface. Continue this process until the entire ceiling is covered.

Step 6: Cut Around Fixtures

Carefully measure and cut planks to fit around any ceiling fixtures, such as lights or vents. Use a jigsaw or hole saw for precise cuts.

Step 7: Finish and Seal

Once all the planks are installed, apply a sealant to protect the wood from moisture. Choose a sealant that is suitable for bathrooms and follow the manufacturer’s instructions for application.

Design Inspiration for Your Bathroom Plank Ceiling

A plank ceiling can dramatically transform your bathroom’s look and feel. Here are some design ideas to inspire your project:

Coastal Retreat

Create a serene, beach-inspired bathroom by using light-colored wood planks, such as white-washed pine or bleached cedar. Pair the ceiling with soft blue or seafoam green walls, and add nautical accents like shells, starfish, and wicker baskets.

Rustic Charm

For a warm, rustic bathroom, choose rich, dark wood planks like walnut or teak. Complement the ceiling with stone or brick accents, wrought iron fixtures, and cozy textiles in earthy tones.

Modern Minimalism

Achieve a sleek, modern look by using smooth, evenly finished planks in a light or neutral color. Pair the ceiling with minimalist fixtures, clean lines, and a monochromatic color scheme to create a sophisticated, contemporary space.

Traditional Elegance

For a classic, elegant bathroom, opt for medium-toned wood planks with a refined finish. Complement the ceiling with traditional fixtures, such as brass or gold accents, marble countertops, and vintage-inspired accessories.

Maintenance Tips for Your Plank Ceiling in the Bathroom

Proper maintenance is crucial to keep your plank ceiling looking beautiful and functioning well. Here are some tips to help you maintain your ceiling:

Regular Cleaning

Dust and clean the ceiling regularly to prevent dirt and grime buildup. Use a soft cloth or duster to gently remove dust. For more thorough cleaning, use a damp cloth with mild soap and water. Avoid harsh chemicals that could damage the wood or finish.

Monitor for Moisture

Keep an eye on the humidity levels in your bathroom. Use a vent fan or dehumidifier to reduce moisture and prevent mold and mildew growth. Check the ceiling periodically for any signs of water damage, such as discoloration or warping.

Reseal as Needed

Over time, the sealant on your wood planks may wear off. Reseal the ceiling as needed to maintain its moisture resistance. Follow the manufacturer’s recommendations for reapplication and ensure the bathroom is well-ventilated during the process.

Address Damage Promptly

If you notice any damage, such as cracks or chips, address it promptly to prevent further deterioration. Small repairs can often be done with wood filler and touch-up stain or paint. For more significant damage, you may need to replace individual planks.

Conclusion

Installing a plank ceiling in the bathroom is a stylish and practical way to enhance your space. With various materials and design options, you can create a bathroom that reflects your personal style and adds value to your home. By following the installation and maintenance tips provided in this guide, you can enjoy a beautiful and functional plank ceiling for years to come. Whether you’re aiming for a rustic retreat, a modern oasis, or a traditional sanctuary, a plank ceiling can transform your bathroom into a truly special space.

Read too: Understanding and Dealing with Ants in the Ceiling Spaces: Navigating the Intrusion

Recessed Light for Drop Ceiling: Choosing the Perfect

When it comes to illuminating a room with a drop ceiling, choosing the right lighting fixture is essential for achieving both functionality and aesthetics. Recessed lights are a popular choice for drop ceilings due to their sleek design and ability to provide ample illumination without intruding on the visual space. In this comprehensive guide, we’ll explore everything you need to know about recessed lights for drop ceilings, from installation tips to design options and more.

Recessed Light For Drop Ceiling

Understanding Recessed Lights for Drop Ceilings

What are Recessed Lights?

Recessed lights, also known as downlights or can lights, install into the ceiling, creating a seamless and streamlined look. Unlike traditional light fixtures hanging from the ceiling, recessed lights are flush with the ceiling surface, making them ideal for rooms with low ceilings or limited space.

Read too: Exploring Craftsman Style Ceiling Fans for Your Home: Embracing Timeless Elegance

Benefits of Recessed Lights for Drop Ceilings

  • Space-Saving: Recessed lights are installed directly into the ceiling, allowing them to save space and create a clean, uncluttered look in rooms with drop ceilings.
  • Versatility: Recessed lights come in a variety of sizes, shapes, and styles, making them suitable for a wide range of design aesthetics and ceiling types.
  • Customizable Illumination: With adjustable trims and dimmable options, recessed lights allow you to customize the level of illumination in your space to suit your needs and preferences.

Choosing the Right Recessed Light for Your Drop Ceiling

Consider Ceiling Height and Layout

Before selecting a recessed light for your drop ceiling, consider the height and layout of the room. For rooms with low ceilings, choose a slim-profile recessed light that won’t protrude too far into the space. Additionally, take into account the spacing and arrangement of the lights to ensure even illumination throughout the room.

Opt for LED Technology

LED recessed lights are an energy-efficient and long-lasting option for drop ceilings. Not only do LED lights consume less energy than traditional incandescent bulbs, but they also have a significantly longer lifespan, reducing the need for frequent bulb replacements.

Installation Tips for Recessed Lights in Drop Ceilings

Measure and Mark Placement

Before installing recessed lights in your drop ceiling, carefully measure and mark the placement of each fixture to ensure proper spacing and alignment. Use a pencil and tape measure to mark the locations where the lights will be installed, taking into account any obstacles or obstructions in the ceiling.

Follow Manufacturer Instructions

When installing recessed lights in a drop ceiling, always follow the manufacturer’s instructions and guidelines for proper installation. This may include using specific mounting hardware, ensuring proper electrical wiring, and adhering to safety precautions to prevent accidents or damage during the installation process.

Conclusion

Recessed lights offer a stylish and practical lighting solution for drop ceilings, allowing you to brighten up your space without sacrificing aesthetics or functionality. By choosing the right recessed light for your needs and following proper installation techniques, you can enhance the ambiance and illumination of any room with a drop ceiling.

Exploring Drop Ceiling Outside Corner Solutions: Enhancing Aesthetics and Functionality

Upgrade the look and feel of your space with innovative solutions for Drop Ceiling Outside Corner. Discover the benefits and options available for adding style and functionality to your drop ceiling corners.

Drop Ceiling Outside Corner

Introduction

Drop ceilings, also known as suspended ceilings, are a popular choice for commercial and residential spaces due to their versatility and ease of installation. However, when it comes to outside corners, traditional solutions may not provide the desired aesthetic or functionality. In this article, we’ll explore innovative solutions for Drop Ceiling Outside Corners and how they can enhance the look and performance of your space.

Understanding Drop Ceiling Outside Corners

Drop ceiling outside corners refer to the areas where two ceiling panels meet at an external angle, such as around the perimeter of a room or at architectural features. These corners play a crucial role in the overall appearance and structural integrity of the ceiling system.

Drop Ceiling Outside Corner Solutions

  1. Prefabricated Corner Molding: Prefabricated corner molding is specifically designed to fit over outside corners, providing a seamless transition between ceiling panels. Available in various materials and finishes, such as vinyl, metal, or wood, prefabricated corner molding offers durability and aesthetic appeal.
  2. Flexible Vinyl Trim: Flexible vinyl trim is a versatile option for creating smooth transitions around outside corners. Its pliable nature allows for easy installation and ensures a snug fit against irregular surfaces. Vinyl trim is available in a range of colors and profiles to complement any design aesthetic.
  3. Corner Caps: Corner caps are designed to cover and protect outside corners while providing a decorative accent. Available in various styles, including sleek modern designs and traditional motifs, corner caps add visual interest to drop ceiling corners and can help conceal imperfections.
  4. Integrated Lighting Solutions: Some drop ceiling outside corner solutions feature integrated lighting options, such as LED strips or recessed fixtures. These lighting elements not only enhance the aesthetics of the space but also provide functional illumination for task or ambient lighting needs.

Benefits of Innovative Drop Ceiling Outside Corner Solutions

  • Enhanced Aesthetics: Innovative outside corner solutions add a polished and professional look to drop ceilings, enhancing the overall aesthetics of the space.
  • Improved Durability: Prefabricated molding, flexible trim, and corner caps provide added protection to outside corners, reducing the risk of damage and wear over time.
  • Ease of Installation: Many innovative outside corner solutions are designed for easy installation, allowing for quick and hassle-free upgrades to drop ceilings.
  • Customization Options: With a wide range of materials, finishes, and profiles available, it’s easy to find outside corner solutions that match your design preferences and project requirements.

Installing Drop Ceiling Outside Corner Solutions

  • Measure Carefully: Take accurate measurements of your outside corners to ensure a precise fit for the chosen solution.
  • Prepare the Surface: Clean and prepare the surface of the outside corners before installation to ensure proper adhesion and a smooth finish.
  • Follow Manufacturer Instructions: Follow the manufacturer’s instructions carefully when installing prefabricated molding, flexible trim, or corner caps to achieve the best results.

Conclusion

Upgrade your drop ceiling with innovative solutions for outside corners to create a more polished, functional, and aesthetically pleasing space. Whether you prefer prefabricated molding, flexible trim, or decorative corner caps, there are plenty of options available to suit your needs and style preferences. Invest in innovative drop ceiling outside corner solutions to enhance the look and performance of your space today.

Read too: Striped Schoolhouse Ceiling Light Fixtures: Unveiling the Timeless Charm