Dealing with Bathroom Ceiling Water Damage and Effective Solutions: Unveiling the Culprit

Discover the ins and outs of managing and preventing the consequences of “Bathroom Ceiling Water Damage.” Learn how to safeguard your home from potential issues and restore your bathroom to its former glory.

Bathroom Ceiling Water Damage

Understanding the Impact of Bathroom Ceiling Water Damage

Identifying the Signs

Spotting early signs of bathroom ceiling damage is crucial for prompt intervention. Stains, discoloration, sagging, or peeling paint on your bathroom ceiling are indicators that water damage may be present. Investigate the source promptly to prevent further deterioration.

The Causes Behind Bathroom Ceiling Water Damage

Leaky Fixtures

Leaky faucets, showerheads, or pipes within the walls can lead to water accumulation in the ceiling. Regularly inspect and repair any leaks to mitigate the risk of water damage.

Poor Ventilation

Inadequate ventilation in the bathroom can result in moisture buildup, contributing to water damage. Ensure proper ventilation through exhaust fans or windows to promote air circulation and prevent condensation.

Dealing with the Consequences

Immediate Action

When faced with bathroom ceiling damage swift action is essential. Begin by identifying and fixing the source of the leak. Then, address the damaged area promptly to prevent the spread of mold and further structural issues.

Repairing Water-Damaged Ceilings

For minor damage, you can use a joint compound or patching plaster to repair water-damaged areas. However, extensive damage may require the expertise of a professional contractor to ensure a thorough and lasting repair.

Preventive Measures for a Water-Resistant Bathroom

Regular Maintenance

Stay proactive by routinely checking for leaks, inspecting caulking, and ensuring proper ventilation. Timely maintenance reduces the likelihood of bathroom ceiling damage and prolongs the life of your bathroom.

Waterproofing

Consider waterproofing your bathroom surfaces, including the ceiling. Waterproof paints, sealants, and membranes can create a protective barrier against moisture, preventing water damage.

Adequate Insulation

Proper insulation in your bathroom helps regulate temperature and reduce condensation, minimizing the risk of water damage. Insulate walls, ceilings, and pipes to create a more resilient and water-resistant environment.

Repairing and Restoring Your Bathroom Ceiling After Water Damage

Professional Restoration

In cases of severe water damage, seeking professional restoration services is advisable. Professionals have the expertise and equipment to assess the extent of the damage, conduct thorough repairs, and restore your bathroom to its pre-damaged condition.

Read too: Understanding and Addressing a Crack in the Basement Ceiling: Unveiling the Dilemma

Conclusion: Safeguarding Your Bathroom Against Water Damage

In conclusion, understanding the causes and consequences of “Bathroom Ceiling Water Damage” empowers homeowners to take proactive measures. Regular maintenance, immediate action in the face of damage, and preventive strategies are key elements in safeguarding your bathroom and home from the potentially costly and hazardous effects of water damage.

Understanding and Preventing Ceiling Cracks in Winter: Navigating the Chill

As winter sets in, homeowners often encounter the unwelcome surprise of “Ceiling Cracks In Winter.” Learn why this phenomenon occurs and discover effective strategies to protect your home from the challenges brought by the cold season.

Ceiling Cracks In Winter

The Intricacies of Ceiling Cracks in Winter

Understanding Temperature Fluctuations

“Cold and Cracked: Ceiling Cracks In Winter” often stem from the natural expansion and contraction of building materials in response to temperature changes. As outdoor temperatures drop, building materials contract, potentially leading to the formation of cracks in ceilings.

Factors Contributing to Ceiling Cracks In Winter

Age of the Building

Older homes are more susceptible to “Ceiling Cracks In Winter.” Over time, the structure may have experienced wear and tear, making it prone to cracks. Regular inspections become essential for identifying and addressing potential vulnerabilities.

Insufficient Insulation

Inadequate insulation allows cold air to infiltrate your home, leading to temperature variations that contribute to ceiling cracks. Addressing insulation issues is a proactive step toward minimizing the impact of winter weather on your home’s structural integrity.

Identifying and Repairing Ceiling Cracks

Visual Inspection

Perform a thorough visual inspection of your ceilings to identify any existing cracks. Hairline cracks may seem minor, but they can develop into more significant issues over time. Prompt identification allows for timely repairs.

DIY Repairs

For minor cracks, DIY repairs may suffice. Use high-quality caulk or joint compound to fill the cracks, ensuring a smooth and seamless finish. However, it’s crucial to monitor the repaired areas and address any recurring issues promptly.

Professional Intervention

Extensive or recurring ceiling cracks may necessitate professional intervention. A qualified contractor can assess the structural integrity of your home, identify underlying issues, and implement effective solutions to prevent further damage.

Preventive Measures for a Crack-Free Winter

Humidity Control

Maintaining optimal indoor humidity levels helps minimize the impact of temperature fluctuations on building materials. Use humidifiers or dehumidifiers as needed to create a stable environment within your home.

Proper Ventilation

Adequate ventilation is key to preventing “Ceiling Cracks In Winter.” Ensure that your home is well-ventilated to regulate moisture levels and reduce the likelihood of temperature-related structural issues.

Regular Maintenance

Consistent home maintenance, especially before the onset of winter, is essential. Address any existing cracks, inspect insulation, and seal gaps to fortify your home against the challenges of the colder months.

Read too: Understanding and Addressing a Crack in the Basement Ceiling: Unveiling the Dilemma

Conclusion: Embracing a Crack-Free Winter

In conclusion, understanding the dynamics of “Ceiling Cracks In Winter” empowers homeowners to take proactive measures. From identifying vulnerabilities to implementing preventive strategies, a well-maintained home can withstand the challenges posed by temperature fluctuations. By embracing a crack-free winter approach, you ensure the longevity and structural integrity of your living space.

Understanding Asbestos in Ceiling Plaster and Ensuring a Safe Home: Unveiling the Dangers

Asbestos, once a popular building material due to its fire-resistant properties, is now recognized as a serious health hazard. In this comprehensive guide, we delve into the potential risks associated with “Asbestos In Ceiling Plaster” and explore the necessary steps to ensure a safe living environment for you and your loved ones.

Asbestos In Ceiling Plaster

The Silent Threat: Asbestos in Ceiling Plaster

Asbestos was widely used in construction materials, including ceiling plaster, until its dangers became apparent. Asbestos in ceiling poses a particular concern as it can release tiny fibers into the air, which, when inhaled, may lead to severe health issues. Understanding the presence of asbestos in your home is crucial for proactive safety measures.

Knowing the signs of asbestos in ceiling is the first step in safeguarding your home. Older homes, typically constructed before the 1980s, are more likely to contain asbestos. If your ceiling plaster has a textured, stippled appearance, there’s a possibility it contains asbestos. Professional inspection is recommended for accurate identification.

Read too: Understanding and Addressing a Crack in the Basement Ceiling: Unveiling the Dilemma

The Health Risks of Asbestos Exposure: Asbestos in Ceiling Plaster

Respiratory Issues

Asbestos in ceiling can become hazardous when disturbed, releasing microscopic fibers into the air. Inhalation of these fibers can lead to respiratory issues, including shortness of breath, persistent coughing, and in severe cases, conditions such as asbestosis.

Mesothelioma

Exposure to asbestos is strongly linked to the development of mesothelioma, a rare but aggressive form of cancer. This disease primarily affects the lining of the lungs, abdomen, or heart and has a long latency period, often manifesting decades after initial exposure.

Safeguarding Your Home: Asbestos in Ceiling Plaster

Professional Inspection and Removal

If your home was built before the 1980s, it’s advisable to seek professional inspection for asbestos. Certified asbestos removal specialists can assess the situation and, if necessary, safely remove asbestos-containing materials like ceiling plaster. DIY removal is strongly discouraged due to the associated health risks.

Encapsulation

In some cases, encapsulation may be a viable option. This involves applying a sealant to asbestos-containing materials, preventing the release of fibers. However, encapsulation is not a permanent solution and may require periodic monitoring.

Safe Renovation Practices

If you plan to renovate a home with potential asbestos-containing materials, take precautions. Ensure proper containment measures, use protective equipment, and consider professional assistance to minimize the risk of asbestos exposure during the renovation process.

Conclusion: Prioritizing Health and Safety

In conclusion, awareness of the presence of “Asbestos In Ceiling Plaster” is crucial for maintaining a healthy living space. Whether you’re buying an older home or considering renovations, understanding the risks associated with asbestos exposure is paramount. Prioritize professional inspection, safe removal practices, and vigilant monitoring to ensure a home that is free from the dangers of asbestos.

Unveiling a New Look After Removing Popcorn Ceiling: Transform Your Space

Popcorn ceilings were once a popular choice for homeowners, adding texture and hiding imperfections. However, trends evolve, and many now find themselves wanting a more modern and sleek look for their living spaces. If you’ve decided to join the ranks of those bidding farewell to popcorn ceilings, you’re in for a transformative journey. In this guide, we’ll explore the process and the stunning results you can achieve “After Removing Popcorn Ceiling.”

After Removing Popcorn Ceiling

The Decision to Say Goodbye: After Removing Popcorn Ceiling

The decision to remove popcorn ceilings is often prompted by a desire for a cleaner, updated aesthetic. Whether you’re preparing to sell your home or simply want to enhance your living space, this decision opens the door to a range of design possibilities. “After Removing Popcorn Ceiling,” you gain a blank canvas to experiment with various styles and decor themes.

The Removal Process

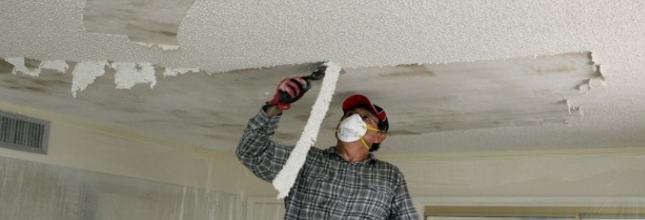
Removing popcorn ceilings can be a messy undertaking, but the results are well worth it. To start, cover your floors and furniture to protect them from the impending dust. Then, using a combination of water and a scraper, carefully remove the popcorn texture. This process requires patience, as thorough removal ensures a smooth surface for your next design steps.

After Removing Popcorn Ceiling: The Transformation

Embracing Minimalism

One of the immediate benefits “After Removing Popcorn Ceiling” is the ability to embrace minimalism. Smooth ceilings offer a clean and contemporary look that complements a wide range of design styles. Whether you prefer a Scandinavian-inspired aesthetic or a more traditional vibe, the absence of popcorn texture allows your chosen decor to shine.

Painting Possibilities

Once the popcorn texture is gone, you have the freedom to explore various painting options. Lighter colors can make a room feel more spacious, while darker hues create a cozy and intimate atmosphere. Consider your overall design goals and experiment with different color palettes.

Lighting Enhancements

Smooth ceilings also provide an opportunity to enhance your lighting fixtures. Pendant lights, chandeliers, or recessed lighting can now take center stage without competing with the textured backdrop. “After Removing Popcorn Ceiling,” your lighting choices become integral to the overall ambiance of the room.

Tips for a Seamless Transition

Repair and Smooth

After popcorn removal, it’s crucial to repair any imperfections in the ceiling. Smooth out any uneven areas and address any dings or dents. A flawless surface sets the stage for a polished and sophisticated look “After Removing Popcorn Ceiling.”

Professional Assistance

While some homeowners embark on popcorn ceiling removal as a DIY project, it’s worth considering professional assistance. Experienced contractors can streamline the process, ensuring efficient removal and a high-quality finish. Their expertise can be especially valuable if your home has asbestos-containing popcorn ceilings, as proper removal is crucial for safety.

Read too: Understanding and Addressing a Crack in the Basement Ceiling: Unveiling the Dilemma

Conclusion: Revel in Your New Space “After Removing Popcorn Ceiling”

In conclusion, the decision to bid farewell to popcorn ceilings opens the door to a world of design possibilities. “After Removing Popcorn Ceiling,” your space becomes a canvas for your creative vision. Embrace the clean lines, experiment with colors, and let your lighting choices shine. Whether you choose to tackle the removal yourself or enlist professional help, the end result is a transformed space that reflects your style and enhances the overall aesthetic of your home.

Understanding and Addressing Ice Dam Ceiling Leak Issues: Defending Your Home

Uncover the complexities surrounding an “Ice Dam Ceiling Leak” and explore proactive measures to safeguard your home. Learn about the causes, consequences, and effective solutions to prevent and address ice dam-related ceiling leaks.

Ice Dam Ceiling Leak

Ice Dam Ceiling Leak: An Unwelcome Intruder

Ice Dam Ceiling Leak: Navigating the Winter Menace

Delve into the challenge of an ice dam ceiling leak and understand why it becomes a winter menace for homeowners. Gain insights into the potential causes and consequences, setting the stage for effective prevention and resolution.

Decoding the Signs: Recognizing an Ice Dam Ceiling Leak

Learn to recognize the signs of an ice dam ceiling leak. From visible water stains to dripping water, understand the indicators that signal potential damage and the need for immediate attention during the winter months.

Understanding the Causes of an Ice Dam Ceiling Leak

1. Formation of Ice Dams

Explore the role of ice dams in causing ceiling leaks. Understand how ice dams form on roofs, creating barriers that trap melting snow and lead to water infiltration into your home.

2. Roofing Material and Insulation Issues

Delve into the consequences of roofing material and insulation issues contributing to ice dam-related leaks. Learn how inadequate insulation and roofing materials can exacerbate the formation of ice dams and compromise your ceiling’s integrity.

3. Temperature Fluctuations

Understand the impact of temperature fluctuations on ice dam formation. Explore how the freeze-thaw cycle can contribute to the creation of ice dams, leading to potential leaks and water damage to your ceiling.

The Consequences of Neglected Ice Dam Ceiling Leaks

1. Structural Compromises

Uncover the potential structural compromises resulting from prolonged ice dam-related leaks. Learn how untreated issues can weaken the integrity of your ceiling and the overall structure of your home.

2. Mold and Mildew Growth

Explore the risk of mold and mildew growth associated with ice dam ceiling leaks. Understand the health hazards and the importance of addressing water leaks promptly to prevent these issues.

3. Aesthetic Deterioration

Beyond structural concerns, ice dam-related leaks affect the aesthetics of your home. Learn about the impact on the appearance of your ceiling, including discoloration, peeling paint, and potential damage to decorative elements.

Dealing with Ice Dam Ceiling Leaks: Effective Solutions

1. Immediate Action: Emergency Measures

In the event of an ice dam ceiling leak, take immediate action to contain the issue. Explore emergency measures, including identifying and addressing the source of water infiltration, drying the affected area, and preventing further damage.

2. Professional Assessment: Seeking Expert Advice

Consult with professionals for a thorough assessment of the damage. Learn about the importance of seeking expert advice to identify the extent of the ice dam-related leaks and determine the most effective resolution methods.

3. Roof and Insulation Upgrades: Long-term Solutions

Explore roof and insulation upgrades as long-term solutions to prevent ice dam-related leaks. Learn about the benefits of enhancing your roof’s insulation, improving ventilation, and upgrading roofing materials to minimize the risk of ice dams.

Preventive Measures: Safeguarding Your Home

1. Adequate Insulation and Ventilation

Implement adequate insulation and ventilation to prevent ice dam formation. Explore the significance of maintaining proper attic temperatures and air circulation to reduce the risk of ice dams on your roof.

2. Snow Removal Strategies

Consider effective snow removal strategies to mitigate ice dam formation. Explore safe methods for removing snow from your roof, preventing the buildup that contributes to the creation of ice dams.

3. Professional Roof Inspection

Prioritize professional roof inspections to identify vulnerabilities. Learn about the importance of regular inspections to detect potential issues and address them before they lead to ice dam-related ceiling leaks.

Read too: Exploring Hunter Douglas Architectural Ceilings for Modern Design: Elevate Your Space with Elegance

Conclusion: Defending Against Winter’s Wrath

In conclusion, dealing with an “Ice Dam Ceiling Leak” requires a combination of vigilance, immediate action, and professional expertise. By understanding the causes, consequences, and effective resolution methods, you can safeguard your home from the challenges of ice dam-related leaks. Remember, early intervention is key to minimizing damage and ensuring the longevity and safety of your home during the winter months.

Why Is Your Ceiling Wet After Rain? Understanding Causes and Solutions: Troubleshooting Guide

Embark on a journey of discovery as we unravel the mystery behind a “Ceiling Wet After Rain.” Explore the potential causes, consequences, and effective solutions to ensure a dry and secure home environment.

Ceiling Wet After Rain

Ceiling Wet After Rain: The Unsettling Dilemma

Ceiling Wet After Rain: A Cause for Concern

Delve into the unexpected issue of finding your ceiling wet after rain and understand why it’s a cause for concern. Uncover the potential reasons behind this dilemma and the steps you can take to address it.

Decoding the Signs: Recognizing a Wet Ceiling After Rain

Learn to recognize the signs of a wet ceiling after rain. From visible water stains to dampness and discoloration, understand the indicators that suggest water infiltration and potential damage to your ceiling.

Understanding the Causes of a Wet Ceiling After Rain

1. Roof Leaks: The Primary Culprit

Explore the role of roof leaks in causing a wet ceiling. Understand how compromised roofing materials, damaged shingles, or improper installation can lead to water intrusion and affect your ceiling.

2. Poorly Sealed Windows and Doors

Delve into the consequences of poorly sealed windows and doors contributing to a wet ceiling. Learn how gaps or deteriorating seals can allow rainwater to enter, posing a threat to the integrity of your ceiling.

3. Faulty Gutters and Downspouts

Understand the impact of faulty gutters and downspouts on your ceiling’s condition. Explore how clogged or misaligned gutters can lead to water overflow, resulting in rainwater finding its way into your home.

The Consequences of a Neglected Wet Ceiling

1. Structural Compromises

Uncover the potential structural compromises resulting from a persistently wet ceiling. Learn how untreated issues can weaken the integrity of your ceiling and the overall structure of your home.

2. Mold and Mildew Growth

Explore the risk of mold and mildew growth associated with a consistently wet ceiling. Understand the health hazards and the importance of addressing water leaks promptly to prevent these issues.

3. Aesthetic Deterioration

Beyond structural concerns, a wet ceiling can affect the aesthetics of your home. Learn about the impact on the appearance of your ceiling, including discoloration, peeling paint, and potential damage to decorative elements.

Read too: Exploring Hunter Douglas Architectural Ceilings for Modern Design: Elevate Your Space with Elegance

Dealing with a Wet Ceiling After Rain: Effective Solutions

1. Immediate Action: Emergency Measures

In the event of a wet ceiling after rain, take immediate action to contain the issue. Explore emergency measures, including identifying and addressing the source of water infiltration, drying the affected area, and preventing further damage.

2. Professional Assessment: Seeking Expert Advice

Consult with professionals for a thorough assessment of the damage. Learn about the importance of seeking expert advice to identify the extent of the water damage and determine the most effective resolution methods.

3. Repair Techniques: Preserving Your Ceiling

Explore repair techniques to preserve the integrity of your ceiling. From fixing roof leaks to addressing window and door seals, discover the steps involved in restoring a ceiling affected by water after rain.

Preventive Measures: Safeguarding Your Ceiling

1. Regular Roof Inspections

Implement regular roof inspections to prevent water infiltration. Explore the significance of proactive measures in identifying and addressing potential issues before they lead to a wet ceiling after rain.

2. Properly Sealed Openings

Consider the importance of properly sealed windows and doors. Explore the role of effective seals and weather stripping in preventing rainwater from entering your home and causing damage to your ceiling.

3. Gutter Maintenance

Prioritize gutter maintenance for a functional drainage system. Learn about the importance of keeping gutters and downspouts clear of debris to prevent water overflow and protect your ceiling.

Conclusion: Ensuring a Dry and Secure Home Environment

In conclusion, dealing with a “Ceiling Wet After Rain” requires a combination of vigilance, immediate action, and professional expertise. By understanding the causes, consequences, and effective resolution methods, you can safeguard your home from the challenges of a wet ceiling. Remember, early intervention is key to minimizing damage and ensuring the longevity and safety of your home environment.

What to Do When Your Bathroom Ceiling is Dripping Water? Troubleshooting Woes

Embark on a journey of understanding and resolving the perplexing issue of a “Bathroom Ceiling Dripping Water.” Uncover the reasons behind this concern and explore effective solutions for a dry and secure bathroom space.

Bathroom Ceiling Dripping Water

Bathroom Ceiling Dripping Water: A Dilemma Explored

Bathroom Ceiling Dripping Water: Unveiling the Mystery

Discover the unsettling sight of water dripping from your bathroom ceiling and its potential causes. Delve into the complexities of identifying and addressing this issue to ensure a safe and dry environment.

Decoding the Signs: Recognizing Bathroom Ceiling Water Drips

Learn to recognize the signs of water dripping from your bathroom ceiling. From visible water stains to the sound of dripping water, understand the indicators that signal potential leaks and the need for immediate attention.

Understanding the Causes of Bathroom Ceiling Water Drips

1. Plumbing Issues: Leaks and Bursts

Explore the role of plumbing issues in causing water drips from the bathroom ceiling. Understand how leaks, burst pipes, or faulty plumbing connections can lead to water infiltration and subsequent ceiling damage.

2. Roof Leaks and Seepage

Delve into the consequences of roof leaks and seepage affecting your bathroom ceiling. Learn about the potential sources of water intrusion from the roof and how it can manifest as dripping water in your bathroom.

3. Condensation and Humidity

Understand the impact of condensation and high humidity levels on your bathroom ceiling. Explore how these environmental factors can contribute to water accumulation and dripping, leading to potential structural damage.

Read too: Exploring Hunter Douglas Architectural Ceilings for Modern Design: Elevate Your Space with Elegance

The Consequences of Neglected Bathroom Ceiling Water Drips

1. Structural Compromises

Uncover the potential structural compromises resulting from prolonged water drips. Learn how untreated issues can weaken the integrity of your bathroom ceiling and the overall structure of your home.

2. Mold and Mildew Growth

Explore the risk of mold and mildew growth associated with persistent water drips. Understand the health hazards and the importance of addressing water leaks promptly to prevent these issues.

3. Aesthetic Deterioration

Beyond structural concerns, water drips affect the aesthetics of your bathroom. Learn about the impact on the appearance of your ceiling, including discoloration, peeling paint, and potential damage to decorative elements.

Dealing with Bathroom Ceiling Water Drips: Effective Solutions

1. Immediate Action: Emergency Measures

In the event of water drips, take immediate action to contain the issue. Explore emergency measures, including identifying and addressing the source of water infiltration, drying the affected area, and preventing further damage.

2. Professional Assessment: Seeking Expert Advice

Consult with professionals for a thorough assessment of the damage. Learn about the importance of seeking expert advice to identify the extent of the water drips and determine the most effective resolution methods.

3. Repair Techniques: Preserving Your Bathroom Space

Explore repair techniques to preserve the integrity of your bathroom ceiling. From fixing plumbing issues to repairing roof leaks, discover the steps involved in restoring a bathroom with water drips.

Preventive Measures: Safeguarding Your Bathroom

1. Regular Maintenance and Inspections

Implement regular maintenance and inspections to prevent water drips. Explore the significance of inspecting plumbing, checking the roof for leaks, and ensuring proper ventilation to protect your bathroom from potential issues.

2. Waterproofing Solutions

Consider waterproofing solutions for vulnerable areas prone to water infiltration. Explore options such as sealants, coatings, and other preventive measures to create a protective barrier against water drips.

3. Prompt Repairs

Address any signs of potential issues promptly. Learn about the importance of prompt repairs to plumbing problems, roof leaks, or other sources of water infiltration to prevent water drips in your bathroom.

Conclusion: Ensuring a Dry and Secure Bathroom Environment

In conclusion, dealing with “Bathroom Ceiling Dripping Water” requires a combination of vigilance, immediate action, and professional expertise. By understanding the causes, consequences, and effective resolution methods, you can safeguard your bathroom from the challenges of water drips. Remember, early intervention is key to minimizing damage and ensuring the longevity and safety of your bathroom space.

Understanding and Addressing Stress Cracks in Ceiling: A Comprehensive Guide to Home Care

Discover the nuances of dealing with “Stress Cracks in Ceiling” as we unravel the causes, consequences, and effective solutions for maintaining a structurally sound and visually appealing home.

Stress Cracks In Ceiling

Stress Cracks in Ceiling: An Unwelcome Sight

Stress Cracks in Ceiling: Navigating the Visual Disarray

Explore the visual impact of stress cracks in your ceiling and understand the potential underlying issues causing these unwelcome fissures. Delve into the complexities of identifying and addressing stress cracks for a resilient home.

Recognizing the Signs: Unveiling Stress Cracks in Ceiling

Learn to recognize the signs of stress cracks in your ceiling. From subtle hairline fractures to more prominent openings, understanding these indicators is crucial for early intervention and effective resolution.

Understanding the Causes of Stress Cracks

1. Structural Settling and Movement

Explore how structural settling and movement contribute to stress cracks in the ceiling. Understand the impact of the natural shifting of a building over time and its influence on the integrity of your ceiling.

2. Temperature and Humidity Fluctuations

Delve into the consequences of temperature and humidity fluctuations on your ceiling. Learn how these environmental factors can lead to stress cracks and impact the overall stability of your home.

3. Poor Construction Practices

Uncover the role of poor construction practices in the formation of stress cracks. Explore how inadequate materials, subpar workmanship, and insufficient support structures can contribute to ceiling fissures.

The Consequences of Neglected Stress Cracks

1. Compromised Structural Integrity

Understand the potential compromise to the structural integrity of your home when stress cracks are left unaddressed. Explore the risks associated with neglecting these fissures and their impact on overall stability.

2. Aesthetic Deterioration

Beyond structural concerns, stress cracks affect the aesthetics of your home. Learn about the impact on the appearance of your ceiling, including discoloration, peeling paint, and potential damage to decorative elements.

3. Risk of Water Infiltration

Explore the risk of water infiltration associated with stress cracks. Understand how these openings can become pathways for water to enter, leading to additional issues such as mold growth and water damage.

Dealing with Stress Cracks in Ceiling: Effective Solutions

1. Immediate Action: Emergency Measures

In the event of stress cracks, take immediate action to contain the issue. Explore emergency measures, including identifying and addressing the source of structural stress, stabilizing the affected area, and preventing further damage.

2. Professional Assessment: Seeking Expert Advice

Consult with professionals for a thorough assessment of the damage. Learn about the importance of seeking expert advice to identify the extent of the stress cracks and determine the most effective resolution methods.

3. Repair Techniques: Preserving Your Home

Explore repair techniques to preserve the integrity of your ceiling. From filling and sealing cracks to reinforcing structural components, discover the steps involved in restoring a ceiling with stress cracks.

Read too: Exploring Hunter Douglas Architectural Ceilings for Modern Design: Elevate Your Space with Elegance

Preventive Measures: Safeguarding Your Ceiling

1. Regular Structural Inspections

Implement regular structural inspections to identify potential stress points. Explore the significance of proactive measures in identifying and addressing structural issues before they lead to stress cracks.

2. Temperature and Humidity Control

Consider temperature and humidity control measures to minimize environmental stress on your ceiling. Explore solutions such as proper ventilation, insulation, and climate control systems to maintain stable conditions.

3. Quality Construction Practices

Prioritize quality construction practices for new projects or renovations. Explore the importance of using reliable materials, adhering to construction standards, and employing skilled craftsmen to minimize the risk of stress cracks.

Conclusion: Ensuring a Stable and Appealing Home Environment

In conclusion, addressing “Stress Cracks in Ceiling” requires a holistic approach that combines vigilance, immediate action, and professional expertise. By understanding the causes, consequences, and effective resolution methods, you can safeguard your home from the challenges of stress crack formation. Remember, early intervention is key to minimizing damage and ensuring the longevity and stability of your ceiling.

Understanding the Cost to Paint Ceilings Professionally: Unveiling the Aesthetic Transformation

Embarking on a home improvement journey? Explore the intricacies of enhancing your living space by discovering the “Cost to Paint Ceilings” and the transformative impact it can have on your home’s aesthetics.

Cost To Paint Ceilings

Cost to Paint Ceilings: The Gateway to a Revitalized Space

Cost to Paint Ceilings: Aesthetic Upgrade for Your Living Space

Uncover the transformative potential of painting ceilings. Delve into the factors influencing the cost and the impact a professionally painted ceiling can have on the overall look and feel of your home.

Navigating the Decision: Is It Time to Paint Your Ceilings?

Before diving into costs, assess the signs indicating your ceilings are due for a fresh coat of paint. Explore the visual cues, such as discoloration, peeling, or stains, that suggest it’s time to revitalize your ceilings.

Cost Factors: What Influences the Cost to Paint Ceilings

1. Ceiling Size and Height

Understand how the size and height of your ceilings contribute to the overall cost. Explore the intricacies of calculating paint quantities for standard and vaulted ceilings, considering the added complexities that height can introduce.

2. Ceiling Condition and Repairs

Assess the condition of your ceilings and the need for repairs before painting. Learn how addressing issues like cracks, water damage, or surface imperfections can impact the overall cost and longevity of the paint job.

3. Ceiling Type and Texture

Explore the nuances associated with different ceiling types and textures. From smooth surfaces to textured finishes, understand how these factors influence the complexity of the painting process and subsequently affect the overall cost.

Hiring Professionals vs. DIY: Cost to Paint Ceilings

1. Professional Painters: What Justifies the Cost?

Delve into the benefits of hiring professional painters. Explore the expertise, efficiency, and quality assurance they bring to the table, justifying the cost and ensuring a seamless and visually appealing result.

2. DIY Painting: Considerations and Challenges

For the budget-conscious homeowner, consider the challenges and considerations of the DIY approach. From equipment costs to the time and effort required, weigh the pros and cons before deciding to paint your ceilings yourself.

Cost Breakdown: Estimating the Investment

1. Paint and Materials

Explore the cost breakdown, starting with paint and materials. Understand the types of paints available, their quality, and how factors like primer, brushes, and drop cloths contribute to the overall cost.

2. Labor Costs

Break down the labor costs involved in painting ceilings. Consider factors such as prep work, repairs, and the intricacies of applying paint to ceilings, recognizing the value professional painters bring to the process.

3. Additional Costs and Contingencies

Anticipate additional costs and contingencies that may arise during the painting process. From unexpected repairs to color changes, be prepared for potential variations that can influence the final cost.

Read too: Exploring Hunter Douglas Architectural Ceilings for Modern Design: Elevate Your Space with Elegance

The Return on Investment: Enhancing Your Home’s Value

1. Aesthetic Appeal and Atmosphere

Explore how a freshly painted ceiling enhances the overall aesthetic appeal and atmosphere of your home. Learn about the visual impact and the positive impressions it can create for both residents and visitors.

2. Longevity and Maintenance Savings

Consider the longevity of a professionally painted ceiling and the potential savings on maintenance costs in the long run. Understand how a quality paint job can withstand wear and tear, providing value over time.

3. Market Value and Resale Potential

Explore the impact of a well-painted ceiling on your home’s market value and resale potential. Understand the market appeal and buyer perceptions, recognizing the role a refreshed ceiling plays in the overall property value.

Making Informed Decisions: Your Guide to Painting Ceilings

1. Getting Accurate Quotes

Navigate the process of obtaining accurate quotes for your ceiling painting project. Understand the importance of detailed assessments, clear communication, and transparency in the quoting process.

2. Budgeting Tips and Considerations

Receive practical budgeting tips for your ceiling painting project. Explore considerations such as allocating contingency funds, prioritizing essential repairs, and balancing cost-effectiveness with quality.

3. Selecting Colors and Finishes

Discover the impact of color and finish choices on the overall cost and aesthetic outcome. Learn how to make informed decisions that align with your preferences, style, and the ambiance you wish to create in your home.

Conclusion: Elevating Your Living Space with a Fresh Ceiling Palette

In conclusion, understanding the “Cost to Paint Ceilings” involves a thoughtful evaluation of factors, considerations, and the desired outcomes for your living space. Whether opting for professional services or taking the DIY route, the investment in a beautifully painted ceiling can have a lasting impact on your home’s aesthetics and value. Remember, it’s not just about the cost; it’s about the transformation and the enhanced quality of living that a fresh ceiling palette brings.

Understanding and Resolving Wet Stains on Ceiling: Decoding the Damp Dilemma

Discovering “Wet Stains on Ceiling” can be a homeowner’s concern. Uncover the causes, consequences, and effective solutions to address this issue and safeguard your home.

Wet Stains On Ceiling

Wet Stains on Ceiling: A Troublesome Scenario

Wet Stains on Ceiling: A Clue to Potential Problems

Witnessing wet stains on your ceiling can be alarming, signifying potential water damage and structural issues. Explore the intricacies of this issue, understanding the causes and potential consequences that can affect the aesthetics and integrity of your home.

Identifying the Signs: Recognizing Wet Stains on Ceiling

Learn to identify the signs of wet stains on your ceiling. From subtle discoloration and watermarks to more apparent bulges and sagging, understanding these indicators is crucial for early intervention and effective resolution.

Understanding the Causes of Wet Stains

1. Roof Leaks and Seepage

Explore the impact of roof leaks and seepage on the formation of wet stains. Understand how water infiltration from the roof can lead to structural damage, compromising the integrity of your ceiling.

2. Plumbing Issues

Delve into the consequences of plumbing issues, such as leaks or burst pipes, contributing to the formation of wet stains. Recognize the importance of promptly addressing plumbing problems to prevent extensive water damage.

3. Condensation and Humidity

Understand the role of condensation and humidity in creating wet stains on ceilings. Explore preventive measures to control indoor humidity levels and protect your ceilings from moisture-related issues.

The Consequences of Neglected Wet Stains

1. Structural Compromises

Uncover the potential structural compromises resulting from prolonged wet stains. Learn how untreated issues can weaken the integrity of your ceiling and the overall structure of your home.

2. Mold and Mildew Growth

Explore the risk of mold and mildew growth associated with wet stains. Understand the health hazards and the importance of addressing wet stains promptly to prevent these issues.

3. Aesthetic Deterioration

Beyond structural concerns, wet stains affect the aesthetics of your home. Learn about the impact on the appearance of your ceiling, including discoloration, peeling paint, and potential damage to decorative elements.

Read too: Exploring Hunter Douglas Architectural Ceilings for Modern Design: Elevate Your Space with Elegance

Dealing with Wet Stains on Ceiling: Effective Solutions

1. Immediate Action: Emergency Measures

In the event of wet stains, take immediate action to contain the issue. Explore emergency measures, including identifying and addressing the source of water infiltration, drying the affected area, and preventing further damage.

2. Professional Assessment: Seeking Expert Advice

Consult with professionals for a thorough assessment of the damage. Learn about the importance of seeking expert advice to identify the extent of the wet stains and determine the most effective resolution methods.

3. Resolution Techniques: Preserving Your Home

Explore resolution techniques to preserve the integrity of your ceiling. From repairing damaged sections to repainting and addressing the root cause, discover the steps involved in restoring a ceiling with wet stains.

Preventive Measures: Safeguarding Your Ceiling

1. Regular Maintenance

Implement a routine maintenance schedule to prevent wet stains. Explore the significance of inspecting your roof, plumbing, and ensuring proper ventilation to protect your ceiling from potential issues.

2. Waterproofing Solutions

Consider waterproofing solutions for vulnerable areas prone to water infiltration. Explore options such as sealants, coatings, and other preventive measures to create a protective barrier against wet stains.

3. Prompt Repairs

Address any signs of potential issues promptly. Learn about the importance of prompt repairs to roof leaks, plumbing problems, or other sources of water infiltration to prevent the formation of wet stains on your ceiling.

Conclusion: Safeguarding Your Home from Wet Stain Challenges

In conclusion, dealing with “Wet Stains on Ceiling” requires a combination of vigilance, immediate action, and professional expertise. By understanding the causes, consequences, and effective resolution methods, you can safeguard your home from the challenges of wet stain formation. Remember, early intervention is key to minimizing damage and ensuring the longevity and safety of your ceiling.

Understanding and Addressing a Troublesome Water Pocket in Ceiling: Navigating the Dangers

Discovering a “Water Pocket in Ceiling” can be alarming, signifying potential water damage and structural issues. In this comprehensive guide, we’ll delve into the causes, consequences, and effective solutions to safeguard your home from the challenges of a water pocket in the ceiling.

Water Pocket In Ceiling

Water Pocket in Ceiling: A Silent Menace

Water Pocket in Ceiling: Unveiling the Hidden Threat

Witnessing the formation of a water pocket in your ceiling can be disconcerting. Explore the intricacies of this issue, understanding the causes and potential consequences that can affect the structural integrity and aesthetics of your home.

Identifying the Signs: Recognizing a Water Pocket in Ceiling

Learn to recognize the signs of a water pocket in your ceiling. From subtle discoloration and sagging to more apparent bulges, understanding these indicators is crucial for early intervention and effective resolution.

Understanding the Causes of Water Pockets

1. Roof Leaks and Seepage

Explore the impact of roof leaks and seepage on the formation of water pockets. Understand how water infiltration from the roof can lead to structural damage, compromising the integrity of your ceiling.

2. Plumbing Issues

Delve into the consequences of plumbing issues, such as leaks or burst pipes, contributing to the formation of water pockets. Recognize the importance of promptly addressing plumbing problems to prevent extensive water damage.

3. Condensation and Humidity

Understand the role of condensation and humidity in creating water pockets in ceilings. Explore preventive measures to control indoor humidity levels and protect your ceilings from moisture-related issues.

The Consequences of Neglected Water Pockets

1. Structural Compromises

Uncover the potential structural compromises resulting from prolonged water pocket formation. Learn how untreated issues can weaken the integrity of your ceiling and the overall structure of your home.

2. Mold and Mildew Growth

Explore the risk of mold and mildew growth associated with water pockets. Understand the health hazards and the importance of addressing water pockets promptly to prevent these issues.

3. Aesthetic Deterioration

Beyond structural concerns, water pockets affect the aesthetics of your home. Learn about the impact on the appearance of your ceiling, including discoloration, peeling paint, and potential damage to decorative elements.

Dealing with a Water Pocket in Ceiling: Effective Solutions

1. Immediate Action: Emergency Measures

In the event of a water pocket, take immediate action to contain the issue. Explore emergency measures, including identifying and addressing the source of water infiltration, draining the pocket, and preventing further damage.

2. Professional Assessment: Seeking Expert Advice

Consult with professionals for a thorough assessment of the damage. Learn about the importance of seeking expert advice to identify the extent of the water pocket and determine the most effective resolution methods.

3. Resolution Techniques: Preserving Your Home

Explore resolution techniques to preserve the integrity of your ceiling. From draining the water pocket to repairing damaged sections and addressing the root cause, discover the steps involved in restoring a water pocket in the ceiling.

Read too: Exploring Hunter Douglas Architectural Ceilings for Modern Design: Elevate Your Space with Elegance

Preventive Measures: Safeguarding Your Ceiling

1. Regular Maintenance

Implement a routine maintenance schedule to prevent water pockets. Explore the significance of inspecting your roof, plumbing, and ensuring proper ventilation to protect your ceiling from potential issues.

2. Waterproofing Solutions

Consider waterproofing solutions for vulnerable areas prone to water infiltration. Explore options such as sealants, coatings, and other preventive measures to create a protective barrier against water pocket formation.

3. Prompt Repairs

Address any signs of potential issues promptly. Learn about the importance of prompt repairs to roof leaks, plumbing problems, or other sources of water infiltration to prevent the formation of water pockets in your ceiling.

Conclusion: Safeguarding Your Home from Water Pocket Challenges

In conclusion, dealing with a “Water Pocket in Ceiling” requires a combination of vigilance, immediate action, and professional expertise. By understanding the causes, consequences, and effective resolution methods, you can embark on a journey to safeguard your home from the challenges of water pocket formation. Remember, early intervention is key to minimizing damage and ensuring the longevity and safety of your ceiling.

How to Handle and Restore a Water Damaged Plaster Ceiling with Care? Rescuing Elegance

A Water Damaged Plaster Ceiling can be a homeowner’s distress. Discover the causes, consequences, and meticulous restoration methods to preserve the elegance of your living space.

Water Damaged Plaster Ceiling

Water Damaged Plaster Ceiling: Unraveling the Dilemma

Water Damaged Plaster Ceiling: A Silent Menace to Home Elegance

Witnessing the beauty of your plaster ceiling marred by water damage is disheartening. Dive into the intricacies of this issue, understanding the causes and the potential consequences that can affect the aesthetics and structure of your home.

Identifying the Signs: How to Spot Water Damage on Plaster Ceilings

Learn to recognize the subtle signs of water damage on your plaster ceiling. From discoloration and sagging to the appearance of cracks, understanding these indicators is crucial for early intervention and effective restoration.

Understanding the Causes of Water Damage

1. Roof Leaks and Seepage

Explore the impact of roof leaks and seepage on your plaster ceiling. Understand how water infiltration from the roof can lead to structural damage and aesthetic deterioration.

2. Plumbing Issues

Delve into the consequences of plumbing issues, such as leaks or burst pipes, on your plaster ceiling. Recognize the importance of promptly addressing plumbing problems to prevent extensive water damage.

3. Condensation and Humidity

Understand the role of condensation and humidity in causing water damage to plaster ceilings. Explore preventive measures to control indoor humidity levels and protect your ceilings from moisture-related issues.

The Consequences of Neglected Water Damage

1. Structural Compromises

Uncover the potential structural compromises resulting from prolonged water damage. Learn how untreated issues can weaken the integrity of your plaster ceiling and the overall structure of your home.

2. Mold and Mildew Growth

Explore the risk of mold and mildew growth associated with water damage. Understand the health hazards and the importance of addressing water damage promptly to prevent these issues.

3. Aesthetic Deterioration

Beyond structural concerns, water damage affects the aesthetics of your home. Learn about the impact on the appearance of your plaster ceiling, including discoloration, peeling paint, and the potential for ornamental details to be compromised.

Read too: Exploring Hunter Douglas Architectural Ceilings for Modern Design: Elevate Your Space with Elegance

Dealing with Water Damaged Plaster Ceiling: Effective Solutions

1. Immediate Action: Emergency Measures

In the event of water damage, take immediate action to contain the issue. Explore emergency measures such as identifying and addressing the source of water infiltration, drying the affected area, and preventing further damage.

2. Professional Assessment: Seeking Expert Advice

Consult with professionals for a thorough assessment of the damage. Learn about the importance of seeking expert advice to identify the extent of the water damage and determine the most effective restoration methods.

3. Restoration Techniques: Preserving Elegance

Explore meticulous restoration techniques to preserve the elegance of your plaster ceiling. From repairing damaged sections to repainting and recreating ornamental details, discover the steps involved in restoring water-damaged plaster.

Preventive Measures: Safeguarding Your Plaster Ceiling

1. Regular Maintenance

Implement a routine maintenance schedule to prevent water damage. Explore the significance of inspecting your roof, plumbing, and ensuring proper ventilation to protect your plaster ceiling from potential issues.

2. Waterproofing Solutions

Consider waterproofing solutions for vulnerable areas prone to water infiltration. Explore options such as sealants, coatings, and other preventive measures to create a protective barrier against water damage.

3. Prompt Repairs

Address any signs of potential issues promptly. Learn about the importance of prompt repairs to roof leaks, plumbing problems, or other sources of water infiltration to prevent extensive damage to your plaster ceiling.

Conclusion: Preserving the Grandeur of Your Home

In conclusion, handling a Water Damaged Plaster Ceiling requires a combination of vigilance, immediate action, and professional expertise. By understanding the causes, consequences, and effective restoration methods, you can embark on a journey to preserve the grandeur of your home. Remember, early intervention is the key to minimizing damage and ensuring the longevity and elegance of your plaster ceilings.

Understanding and Addressing Roof Leak Ceiling Stain Issues: Unveiling the Silent Threat

Discovering a “Roof Leak Ceiling Stain” can be a homeowner’s nightmare, signifying potential water damage and structural issues. In this comprehensive guide, we’ll delve into the causes, consequences, and effective solutions to safeguard your home from the silent threat of ceiling stains caused by roof leaks.

Roof Leak Ceiling Stain

Roof Leak Ceiling Stain: A Closer Look at the Problem

Roof Leak Ceiling Stain: The Telltale Signs of Water Intrusion

When unsightly stains appear on your ceiling, it’s often an indication of a more significant issue – a roof leak. Explore the subtle but impactful signs that your ceiling stain is linked to water infiltration from your roof.

Identifying the Culprits: Causes of Roof Leaks

1. Damaged Roofing Materials

Examine the impact of damaged shingles, flashing, or roofing materials on your home’s vulnerability to leaks. Understand how wear and tear, weather, and aging contribute to the deterioration of these crucial components.

2. Clogged Gutters and Downspouts

Explore the role of gutters in diverting rainwater away from your roof. Learn how clogged gutters and downspouts can lead to water overflow, causing leaks and ceiling stains.

3. Improper Roof Installation

Investigate the consequences of improper roof installation, including issues with flashing, underlayment, and other critical elements. Understand how inadequate installation practices can compromise the integrity of your roof.

The Implications of Roof Leak Ceiling Stains

1. Structural Damage

Discover how untreated roof leaks can result in severe structural damage to your home. Explore the potential consequences of compromised roof integrity and the importance of addressing leaks promptly.

2. Mold and Mildew Growth

Understand the risk of mold and mildew growth associated with water intrusion. Explore the health hazards linked to ceiling stains, emphasizing the importance of prompt intervention to prevent these issues.

3. Aesthetic Concerns

Beyond structural implications, ceiling stains affect the aesthetics of your home. Learn about the impact on paint, drywall, and overall visual appeal, highlighting the importance of addressing the issue for both structural and cosmetic reasons.

Effective Solutions

1. Emergency Measures: Immediate Action

In the event of a ceiling stain, take swift action to contain the damage. Explore emergency measures, including identifying and addressing the source of the leak, to prevent further water infiltration.

2. Professional Roof Inspection

Consult with roofing professionals to conduct a comprehensive roof inspection. Learn about the importance of identifying the root cause of the leak, allowing for targeted and effective repairs.

3. Repairs and Restoration

Once the cause of the roof leak is identified, explore the various repair options available. From patching up damaged areas to replacing roofing materials, discover the steps necessary to restore the integrity of your roof.

Preventive Measures: Safeguarding Your Roof

1. Regular Roof Maintenance

Implement a routine roof maintenance schedule to prevent roof leaks. Explore the significance of inspecting your roof regularly, addressing minor issues promptly, and ensuring proper drainage.

2. Gutter Maintenance

Understand the crucial role of well-maintained gutters in preventing water damage. Learn about the importance of regular gutter cleaning, repairs, and the installation of gutter guards to avoid clogs.

3. Professional Roof Installation and Upgrades

Explore the benefits of professional roof installation and consider upgrades that enhance your roof’s resilience against leaks. From high-quality materials to advanced installation techniques, invest in the longevity of your roof.

Read too: Exploring Hunter Douglas Architectural Ceilings for Modern Design: Elevate Your Space with Elegance

Conclusion: Preserving Your Home from Roof Leak Ceiling Stains

In conclusion, understanding and addressing “Roof Leak Ceiling Stain” issues require a proactive approach. By identifying the causes, recognizing the implications, and implementing effective solutions and preventive measures, you can preserve the integrity of your home and safeguard it from the silent threat of roof leaks. Remember, early intervention is key to mitigating potential damages and ensuring a safe and resilient living space.

Dealing with the Challenges of Rain Coming Through Ceiling in Your Home: Unexpected Woes

As homeowners, we often face unexpected challenges, and one of the most disconcerting experiences is discovering “Rain Coming Through Ceiling.” In this comprehensive guide, we’ll explore the causes, potential damages, and effective solutions to address this alarming issue and safeguard your home.

Rain Coming Through Ceiling

Understanding the Phenomenon: Rain Coming Through Ceiling

Rain Coming Through Ceiling: A Troubling Intrusion into Your Home

Discovering rainwater infiltrating your home through the ceiling can be a distressing sight. Let’s delve into the potential causes and consequences of this phenomenon, ensuring you have the knowledge to address the issue promptly and effectively.

Identifying the Causes: Why Is Rain Coming Through My Ceiling?

1. Damaged Roofing Materials

Examine the impact of damaged roofing materials on your home’s structural integrity. Learn how wear and tear, severe weather, or aging can compromise the protective barrier of your roof, allowing rainwater to seep through.

2. Missing or Damaged Shingles

Explore the role of shingles in safeguarding your roof. Discover how missing or damaged shingles can create vulnerable spots, leading to leaks and ultimately resulting in rainwater making its way into your home.

3. Clogged or Damaged Gutters

Understand the importance of well-maintained gutters in diverting rainwater away from your home. Explore the consequences of clogged or damaged gutters, which can contribute to water pooling on your roof and finding its way through the ceiling.

Dealing with Rain Coming Through Ceiling: Effective Solutions

1. Emergency Measures: Containing the Damage

In the immediate aftermath of discovering rain coming through your ceiling, take swift action to contain the damage. Learn how to identify and safely address the affected areas, minimizing the impact on your home’s interior.

2. Identifying the Source: Roof Inspection

To effectively address the issue, conduct a thorough inspection of your roof. Explore steps to identify the source of the leak, whether it’s damaged flashing, missing shingles, or compromised roofing materials.

3. Temporary Fixes: Tarping and Sealants

In emergency situations, temporary fixes can be implemented to prevent further water intrusion. Understand the use of tarps and sealants as effective measures to provide immediate relief while awaiting permanent repairs.

4. Professional Repairs: Roofing Experts to the Rescue

Consulting with roofing professionals is crucial for a long-term solution. Explore the benefits of hiring experts to assess the extent of the damage, recommend necessary repairs, and restore the integrity of your roof.

The Cost of Ignoring the Issue

1. Structural Damage

Learn about the potential structural damage caused by prolonged exposure to rainwater. Understand how untreated leaks can compromise the stability of your home, leading to costly repairs.

2. Mold and Mildew Growth

Explore the risk of mold and mildew growth resulting from moisture intrusion. Understand the health hazards associated with mold and the importance of addressing leaks promptly to prevent these issues.

3. Compromised Insulation and Energy Efficiency

Discover how rain coming through the ceiling can compromise your home’s insulation. Explore the implications for energy efficiency and the potential increase in utility costs if the issue is not addressed promptly.

Read too: Exploring Hunter Douglas Architectural Ceilings for Modern Design: Elevate Your Space with Elegance

Preventive Measures: Safeguarding Your Home

Regular Roof Maintenance

Implementing a routine roof maintenance schedule is essential for preventing rainwater leaks. Explore the importance of inspecting your roof regularly, addressing minor issues before they escalate into major problems.

Gutter Maintenance

Understand the role of gutters in preventing rainwater damage. Learn about the significance of regular gutter maintenance, including cleaning and repairs, to ensure proper water drainage.

Conclusion: Taking Control of Rain Coming Through Ceiling

In conclusion, discovering rain coming through your ceiling is a homeowner’s nightmare, but with proactive measures and prompt action, you can take control of the situation. From identifying the causes to implementing effective solutions and preventive measures, this guide empowers you to safeguard your home from the challenges of rainwater intrusion. Remember, early intervention is key to preventing extensive damage and maintaining the comfort and integrity of your living space.

Transform Your Space with a Stylish Low Ceiling Basement Renovation: Unlocking the Potential

Are you grappling with the challenge of a low ceiling basement? Fear not, as a Low Ceiling Basement Renovation can be the key to transforming this often overlooked space into a stylish and functional area. In this comprehensive guide, we’ll explore creative ideas, practical tips, and expert advice on how to navigate the unique challenges of renovating a basement with a low ceiling.

Low Ceiling Basement Renovation

Introduction

A basement with a low ceiling can present a design puzzle, but with the right approach, you can turn it into a hidden gem in your home. A Low Ceiling Basement Renovation is not just about aesthetics; it’s about maximizing the available space while creating a comfortable and inviting atmosphere.

Understanding the Challenges

Low ceilings can make a space feel cramped and confined. However, a successful Low Ceiling Basement Renovation involves understanding these challenges and working with them rather than against them. By embracing innovative design solutions, you can create a basement that not only looks great but also feels open and inviting.

Creative Design Ideas for Low Ceiling Basements

1. Optimal Lighting Solutions

In a low ceiling basement, lighting plays a crucial role in creating the illusion of height. Choose recessed lighting or flush-mount fixtures to maximize headroom without sacrificing illumination. Wall sconces and floor lamps can also contribute to a well-lit and inviting space.

2. Neutral Color Palettes

Lighter colors on walls and ceilings can visually expand a space. Consider neutral tones like whites, light grays, or pastels to create an open and airy feel. This simple yet effective trick is a cornerstone of Low Ceiling Basement Renovation.

3. Multi-Functional Furniture

Selecting furniture that serves multiple purposes is essential in a low ceiling basement. Look for pieces with built-in storage to keep clutter at bay, and consider modular furniture that can be rearranged to accommodate different activities.

Expert Tips for a Successful Low Ceiling Basement Renovation

1. Strategic Layout Planning

Careful planning is paramount when dealing with limited vertical space. Prioritize essential areas and arrange them strategically. For example, place seating areas and entertainment centers in parts of the basement with higher ceilings, leaving lower areas for less-frequented spaces.

2. Clever Ceiling Design

While you might not be able to raise the ceiling, you can draw the eye upward with creative ceiling designs. Consider decorative beams, interesting textures, or even a subtle mural to divert attention from the height limitation.

3. Use Vertical Space

Maximize storage and display opportunities by utilizing vertical space. Tall bookshelves, wall-mounted cabinets, and floor-to-ceiling curtains can draw the eye upward, creating the illusion of a higher ceiling.

Low Ceiling Basement Renovation: A Step-by-Step Guide

1. Assessing the Space

Before diving into the renovation process, thoroughly assess your basement’s current condition. Take note of any structural issues, water damage, or potential hazards. Addressing these concerns upfront is crucial for a successful Low Ceiling Basement Renovation.

2. Waterproofing and Insulation

Basements are prone to moisture, so waterproofing is essential. Invest in quality waterproofing solutions to prevent issues like mold and mildew. Additionally, proper insulation can improve energy efficiency and create a more comfortable living environment.

3. Flooring Options

Choose flooring materials that complement the overall design and address potential moisture issues. Consider options like vinyl, laminate, or moisture-resistant carpeting. These choices not only enhance the aesthetic appeal but also contribute to the longevity of your Low Ceiling Basement Renovation.

Read too: Understanding and Addressing a Leaky Ceiling in Your Apartment: Navigating the Drips

Conclusion: Elevate Your Space with a Low Ceiling Basement Renovation

In conclusion, a low ceiling should not be a deterrent to transforming your basement into a stylish and functional part of your home. A thoughtfully planned Low Ceiling Basement Renovation can unlock the hidden potential of this space, providing you with a comfortable and inviting area for various activities. By implementing the creative ideas and expert tips outlined in this guide, you’ll be well on your way to creating a basement that defies expectations and becomes a favorite spot in your home.

Unlock the Secrets to Successful Framing of a Basement Ceiling: A Comprehensive Guide

Basement renovations can be both exciting and challenging, and one crucial aspect that often requires careful consideration is framing the ceiling. In this comprehensive guide, we will delve into the intricacies of “Framing A Basement Ceiling,” providing you with invaluable insights and tips to ensure a successful and well-executed project.

Framing A Basement Ceiling

Understanding the Importance of Proper Basement Ceiling Framing

When it comes to basement renovations, framing the ceiling is a critical step that sets the foundation for the entire space. Proper framing not only enhances the structural integrity of the basement but also plays a pivotal role in creating a comfortable and aesthetically pleasing environment.

Key Components of Framing A Basement Ceiling

1. Planning and Preparation

Before diving into the framing process, meticulous planning is essential. Assess the structural elements of your basement and identify any potential challenges. Consider factors such as electrical wiring, plumbing, and ventilation systems. A well-thought-out plan will streamline the framing process and minimize unforeseen issues.

2. Materials Needed for Framing

Choosing the right materials is crucial for the success of your basement ceiling project. Opt for sturdy and moisture-resistant materials to prevent issues such as mold growth. Common materials include pressure-treated lumber, steel studs, and moisture-resistant drywall. Ensure that your chosen materials comply with local building codes.

3. Creating a Level Framework

Achieving a level framework is paramount for a professional-looking finish. Use a laser level to ensure accuracy throughout the framing process. This step is crucial for the installation of ceiling tiles or drywall, as any inconsistencies can result in an uneven appearance.

Step-by-Step Guide

1. Measure and Mark

Accurate measurements are the foundation of successful framing. Measure the dimensions of your basement ceiling and mark key reference points. This will guide you in determining the placement of framing elements and ensure a precise fit.

2. Install the Top and Bottom Plates

Begin by installing the top and bottom plates along the perimeter of the basement ceiling. These plates serve as the framework for the vertical studs. Use appropriate anchors to secure the plates to the existing structure, ensuring stability.

3. Space and Install Vertical Studs

Determine the spacing for the vertical studs based on your design and local building codes. Install the studs securely between the top and bottom plates, creating a sturdy framework. This step is crucial for supporting the weight of the ceiling materials.

Enhancing Aesthetics with Creative Ceiling Framing Designs

While the primary purpose of framing a basement ceiling is structural, there’s no reason why you can’t add a touch of creativity to enhance the overall aesthetics. Consider incorporating recessed lighting, coffered designs, or unique patterns to transform your basement into a stylish and inviting space.

Common Challenges and How to Overcome Them

Even with careful planning, basement ceiling framing may present challenges. Addressing issues such as uneven surfaces, obstructions, or irregularities in the existing structure requires adaptability. Be prepared to make adjustments and consult with a professional if needed.

Read too: Understanding and Addressing a Leaky Ceiling in Your Apartment: Navigating the Drips

Conclusion: Elevate Your Basement Renovation with Expert Ceiling Framing

In conclusion, “Framing A Basement Ceiling” is a pivotal step in any basement renovation project. By following a systematic approach, utilizing quality materials, and incorporating creative design elements, you can transform your basement into a functional and visually appealing space. Whether you are a seasoned DIY enthusiast or enlisting professional help, the key lies in understanding the nuances of basement ceiling framing to achieve a successful outcome.

Understanding and Tackling Ceiling Brown Water Stains for a Pristine Home Environment: Unveiling the Mystery

Brown water stains on the ceiling can be an alarming sight, hinting at potential water damage and underlying issues. In this comprehensive guide, we delve into the intricacies of “Ceiling Brown Water Stains,” exploring their causes, implications, and effective strategies for prevention and remediation. Arm yourself with knowledge to restore your ceiling and maintain a healthy living space.

Ceiling Brown Water Stains

Introduction: Decoding the Signs of Trouble – Ceiling Brown Water Stains

Brown water stains are not just unsightly; they often indicate a more significant issue within your home. This article aims to demystify the presence of these stains, offering insights into the various factors that contribute to their appearance and the steps homeowners can take to address the root causes.

Understanding

Brown water stains are often the result of water infiltrating the structure of your home. Identifying the source of the water intrusion is crucial in effectively addressing and preventing these stains. From roof leaks to plumbing issues, understanding the potential causes is the first step towards a stain-free ceiling.

Common Causes

To combat the issue of brown water stains, it’s essential to identify the underlying causes. Roof leaks, burst pipes, condensation, and even faulty plumbing can contribute to the formation of these stains. We explore each potential cause in detail, empowering homeowners to troubleshoot and take preventative measures.

Implications of Neglecting Ceiling Brown Water Stains

Ignoring brown water stains can lead to more significant problems, including structural damage, mold growth, and compromised indoor air quality. This section emphasizes the importance of addressing the issue promptly to avoid escalating damages and costly repairs.

Effective Strategies for Removing Ceiling Brown Water Stains

Remediation is a crucial aspect of dealing with brown water stains. From assessing the extent of the damage to choosing the right cleaning solutions, this section provides practical steps for homeowners to undertake the stain removal process. Additionally, we discuss when it might be necessary to seek professional help for more complex cases.

Preventive Measures for a Stain-Free Ceiling

Prevention is key in maintaining a stain-free ceiling. Simple maintenance practices, regular inspections, and prompt repairs can significantly reduce the risk of water stains. This section offers practical tips to help homeowners safeguard their ceilings and prevent water-related issues.

DIY vs. Professional Assistance: Making Informed Choices

While some cases of brown water stains may be manageable through do-it-yourself methods, others require professional intervention. This section helps homeowners assess the severity of the issue and make informed decisions on whether to tackle the problem independently or seek the expertise of professionals.

Read too: Understanding and Addressing a Leaky Ceiling in Your Apartment: Navigating the Drips

Conclusion: Restoring Your Ceiling to Pristine Condition

In conclusion, understanding and addressing ceiling brown water stains are crucial for maintaining a healthy and aesthetically pleasing home environment. By recognizing the signs, identifying causes, and implementing effective remediation and prevention strategies, homeowners can ensure their ceilings remain free from unsightly brown water stains.

Understanding and Addressing a Crack in the Bathroom Ceiling for a Safer Home: Troubleshooting the Issue

A crack in the bathroom ceiling can be more than just a cosmetic concern; it may signal underlying structural issues. In this comprehensive guide, we explore the intricacies of dealing with a “Crack in Bathroom Ceiling,” shedding light on potential causes, implications, and effective solutions to ensure the safety and integrity of your home.

Crack In Bathroom Ceiling

Introduction: Decoding the Signs

Living with a crack in the bathroom ceiling can be unsettling, but it’s crucial to understand that identifying and addressing the issue early on is key to preventing further damage. This article aims to provide homeowners with the knowledge needed to assess, troubleshoot, and resolve the problem, ensuring a secure and well-maintained home environment.

Understanding

A crack in the ceiling can result from various factors, ranging from water damage and structural issues to poor construction. In this section, we delve into the common causes of a crack in the bathroom ceiling, empowering homeowners to identify the root problem and take appropriate action.

Common Causes of a Crack in Bathroom Ceiling

Identifying the causes of a crack in the ceiling is crucial for effective resolution. We explore potential culprits such as water leaks, humidity, structural settling, and inadequate ventilation. Understanding these causes allows homeowners to address the issue at its source and prevent recurrence.

Implications of Ignoring a Crack in Bathroom Ceiling

Ignoring a crack in the ceiling can lead to more severe consequences, including structural damage, mold growth, and compromised safety. This section emphasizes the importance of prompt action to mitigate risks and protect both the integrity of the home and the well-being of its occupants.

Read too: Understanding and Addressing a Leaky Ceiling in Your Apartment: Navigating the Drips

Assessment and DIY Inspection Techniques

Homeowners can conduct preliminary assessments and inspections to gauge the severity of a crack in the ceiling. We provide practical DIY inspection techniques to help determine whether the issue is superficial or indicative of more extensive problems, guiding readers in making informed decisions on the next steps.

Professional Inspection and Remediation Options

For complex cases or when the crack in the ceiling is a cause for significant concern, seeking professional inspection and remediation is recommended. We discuss the role of professionals, the inspection process, and potential remediation options to assist homeowners in navigating more challenging scenarios.

Preventive Measures and Maintenance Practices

Preventing a crack in the ceiling involves adopting proactive measures and regular maintenance practices. We provide practical tips on how to maintain optimal bathroom conditions, minimize the risk of cracks, and ensure the longevity of the ceiling structure.

Conclusion: Safeguarding Your Home – Resolving a Crack in Bathroom Ceiling

In conclusion, addressing a crack in the bathroom ceiling is crucial for maintaining a safe and secure home environment. By understanding the causes, implications, and potential solutions, homeowners can take proactive steps to ensure the longevity of their bathroom ceilings and the overall structural integrity of their homes.

Understanding and Dealing with Mold in Popcorn Ceiling – A Comprehensive Guide: Unveiling the Silent Menace

The charm of popcorn ceilings is undeniable, adding a touch of nostalgia to many homes. However, lurking behind the textured allure might be an unseen threat – “Mold in Popcorn Ceiling.” In this informative guide, we delve into the nuances of mold growth in popcorn ceilings, exploring its causes, signs, and effective remediation methods. Stay informed to protect your home and loved ones from this stealthy invader.

Mold In Popcorn Ceiling

Introduction: The Hidden Dangers of Mold in Popcorn Ceiling

Popcorn ceilings, once a popular design choice, are now raising concerns due to the potential presence of mold. “Mold in Ceiling” is not just an aesthetic issue; it poses health risks and can compromise the structural integrity of your home. Let’s uncover the mysteries surrounding this silent menace and empower homeowners with knowledge to address the issue head-on.

Understanding Mold Growth in Popcorn Ceilings

“Mold in Popcorn Ceiling” is a result of moisture infiltration, creating a breeding ground for mold spores. Popcorn ceilings, with their irregular texture, can trap moisture more easily than smooth surfaces, leading to the ideal conditions for mold to thrive. Understanding the factors contributing to mold growth is the first step in effective prevention and remediation.

Causes of Mold in Popcorn Ceiling

Several factors contribute to the development of mold in popcorn ceilings. Leaky roofs, plumbing issues, high humidity levels, or inadequate ventilation can create an environment where mold spores find a welcoming home. Identifying and addressing these root causes are crucial in preventing mold growth in the first place.

Signs of Mold in Popcorn Ceiling

Recognizing the signs of mold in popcorn ceilings is vital for early intervention. Discoloration, a musty odor, or visible spots on the ceiling are common indicators. Homeowners should regularly inspect their popcorn ceilings, especially in areas prone to moisture, to catch mold growth in its early stages.

Health Implications of Mold Exposure

“Mold in Popcorn Ceiling” doesn’t just affect the aesthetics of your home; it can also impact your health. Mold spores can trigger respiratory issues, allergies, and other health problems, especially in individuals with compromised immune systems. Prompt action is necessary to mitigate health risks associated with mold exposure.

Remediation Strategies for Mold in Popcorn Ceiling

Effectively dealing with mold in popcorn ceilings requires a systematic approach. From identifying and fixing the source of moisture to removing and replacing affected materials, homeowners can take several steps to remediate mold growth. Professional assistance may be necessary for extensive or severe cases of mold infestation.

Preventive Measures and Maintenance Tips

Prevention is key when it comes to “Mold in Popcorn Ceiling.” Regular maintenance, prompt repairs of leaks, and ensuring proper ventilation can significantly reduce the risk of mold growth. Homeowners should also consider alternatives to popcorn ceilings that are less prone to trapping moisture.

Read too: Understanding and Addressing a Leaky Ceiling in Your Apartment: Navigating the Drips

DIY vs. Professional Remediation: Making Informed Choices

While some cases of mold in popcorn ceilings may be manageable through do-it-yourself methods, others require professional intervention. Knowing the extent of the infestation and understanding the limitations of DIY approaches are essential for making informed decisions in dealing with “Mold in Popcorn Ceiling.”

Conclusion: Safeguarding Your Home from Mold in Popcorn Ceiling

In conclusion, the presence of mold in popcorn ceilings is a serious concern that demands attention. By arming yourself with knowledge about the causes, signs, and remediation strategies, you can take proactive steps to protect your home and loved ones. Regular inspections and maintenance are key in ensuring a healthy living environment and preserving the integrity of your home.

Understanding and Addressing a Crack in the Basement Ceiling: Unveiling the Dilemma

Discovering a Crack in the Basement Ceiling can be a cause for concern for homeowners. In this comprehensive guide, we’ll delve into the intricacies of this issue, exploring the potential causes, implications, and effective solutions to ensure the structural integrity of your home. Arm yourself with knowledge to navigate this common challenge and make informed decisions about repairs and maintenance.

Crack In Basement Ceiling

The Unseen Challenge: Acknowledging the Presence of a Crack in the Basement Ceiling

Deciphering the Signs: How to Recognize a Crack in the Basement Ceiling

Identifying a crack in the basement ceiling is the first step in addressing the issue. Look for visual cues such as:

  • Visible Lines or Gaps: Inspect the ceiling for visible cracks, lines, or gaps.
  • Changes in Paint or Texture: Noticeable changes in paint or texture may indicate the presence of underlying cracks.
  • Water Stains: Water stains near the crack could suggest potential water intrusion issues.

The Anatomy of a Crack: Understanding the Causes

1. Foundation Settlement

One common cause of cracks in the basement ceiling is foundation settlement. As the soil beneath the foundation shifts or compresses, it can lead to structural movement, resulting in cracks in the basement and throughout the home.

2. Hydrostatic Pressure

Hydrostatic pressure, caused by water buildup in the soil surrounding the foundation, can exert force on the basement walls and ceiling. This pressure can lead to cracks as the structure tries to accommodate the external forces.

3. Structural Overload

Excessive loads on the basement walls or ceiling, whether from internal factors like renovations or external factors like soil pressure, can contribute to the development of cracks. Understanding load-bearing capacities is crucial for preventing structural damage.

The Implications: Potential Risks of Ignoring a Crack in the Basement Ceiling

1. Water Intrusion and Mold Growth

A crack in the basement ceiling can serve as a gateway for water intrusion. This water, if left unaddressed, can lead to mold growth, compromising indoor air quality and posing health risks for occupants.

2. Structural Instability

Ignoring a crack may result in the progressive deterioration of the basement’s structural integrity. Over time, this can lead to more severe issues, such as sagging ceilings or even structural failure.

The Solution: Addressing and Repairing a Crack in the Basement Ceiling

1. Professional Inspection

If you discover a crack in your basement ceiling, seeking a professional inspection is crucial. Structural engineers or qualified contractors can assess the severity of the issue, identify the underlying cause, and recommend appropriate solutions.

2. Epoxy Injection

For minor cracks, epoxy injection is a common repair method. Epoxy is injected into the crack to fill and seal it, restoring the structural integrity of the affected area.

3. Waterproofing Measures

Addressing the underlying cause of the crack, such as hydrostatic pressure or water intrusion, may involve implementing waterproofing measures. This can include proper drainage systems, exterior waterproofing coatings, and the installation of a sump pump.

Preventive Measures: Safeguarding Your Basement

1. Proper Grading and Drainage

Ensuring proper grading around your home directs water away from the foundation, minimizing the risk of water-related issues.

2. Routine Maintenance

Regularly inspect your basement for signs of cracks, water stains, or changes in the structure. Promptly addressing minor issues can prevent them from escalating into major problems.

3. Professional Consultation for Renovations

If you’re planning basement renovations or structural modifications, consult with a professional to ensure that the changes won’t compromise the integrity of the basement ceiling or walls.

Read too: Exploring What Causes Ceiling Cracks and How to Address Them: Unveiling the Mysteries

Conclusion: Navigating the Challenges of a Crack in the Basement Ceiling

In conclusion, discovering a Crack in the Basement Ceiling warrants prompt attention and action. Understanding the potential causes, implications, and repair options empowers homeowners to make informed decisions for the well-being of their homes.

Whether through professional inspections, targeted repairs, or preventive measures, addressing basement ceiling cracks is essential for maintaining a safe, dry, and structurally sound living space.