Armstrong Cascade Ceiling Tile: A Stylish and Functional Ceiling Solution for Every Space

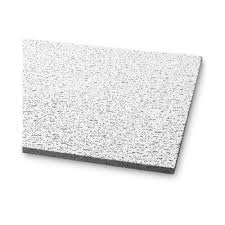
When it comes to upgrading the look and feel of a room, the ceiling is often overlooked. However, with the right ceiling tiles, you can enhance the aesthetic appeal and functionality of any space. One such solution is the Armstrong Cascade Ceiling Tile, a popular choice for both residential and commercial environments due to its sleek design, acoustic properties, and ease of installation. In this article, we will dive deep into what makes Armstrong Cascade Ceiling Tile an excellent option for your ceiling projects, exploring its features, benefits, and installation process.

Armstrong Cascade Ceiling Tile

Why Choose Armstrong Cascade Ceiling Tile for Your Next Project?

Selecting the right ceiling tile is crucial for achieving both functional and design goals in any room. Here’s why Armstrong Cascade Ceiling Tile stands out among other ceiling tile options:

1. Elegant Design with a Modern Aesthetic

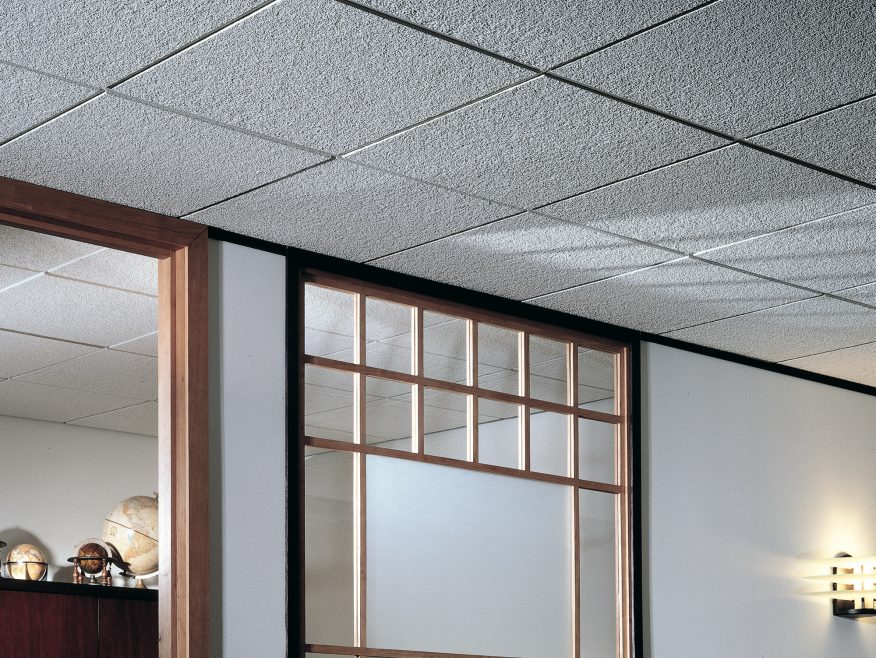
The Armstrong Cascade Ceiling Tile is known for its clean, contemporary look. These tiles feature a subtle geometric design that adds depth and dimension to the ceiling without overwhelming the space. Available in various colors and finishes, Armstrong Cascade tiles can be easily integrated into a wide range of design themes, whether you are aiming for a modern minimalist look or a more traditional style.

Read too: Bathroom Flooded Through the Ceiling: A Comprehensive Guide

2. Exceptional Acoustic Properties

In both homes and offices, controlling noise is a key factor in creating a comfortable environment. Armstrong Cascade Ceiling Tiles are designed with acoustic performance in mind, helping to absorb sound and reduce noise levels in a room. This makes them an ideal choice for offices, classrooms, auditoriums, or even living rooms where sound control is important. With these tiles, you can improve the overall acoustics of a room, making it quieter and more pleasant for occupants.

3. Durability and Longevity

Durability is a significant factor when selecting ceiling tiles, and Armstrong Cascade Ceiling Tile excels in this area. These tiles are made from high-quality materials that are resistant to sagging, warping, and cracking, ensuring that your ceiling maintains its appearance for years. In environments where moisture is a concern, such as kitchens or bathrooms, Armstrong Cascade tiles are particularly beneficial, as they are designed to resist moisture and prevent mildew or mold growth.

4. Ease of Installation

One of the main advantages of Armstrong Cascade Ceiling Tiles is their ease of installation. Whether you’re a professional contractor or a DIY enthusiast, these tiles are straightforward to install with minimal tools required. They can be easily placed into a suspended ceiling grid or mounted directly onto a ceiling surface, making them a versatile choice for different types of installations. Armstrong also provides detailed installation guides, ensuring a smooth and efficient process.

5. Sustainability and Eco-Friendly Materials

For those concerned about the environmental impact of building materials, Armstrong Cascade Ceiling Tiles are an eco-conscious choice. These tiles are made from recycled materials and are designed with sustainability in mind. Armstrong is committed to reducing its carbon footprint, and by choosing Cascade ceiling tiles, you contribute to an environmentally friendly building solution.

Key Features of Armstrong Cascade Ceiling Tile

Now that we’ve covered why Armstrong Cascade Ceiling Tile is a top choice, let’s take a closer look at its specific features that make it stand out in the market.

1. Acoustic Performance

One of the key selling points of Armstrong Cascade Ceiling Tiles is their superior acoustic performance. These tiles are designed with Noise Reduction Coefficient (NRC) ratings, which measure how well a material absorbs sound. Armstrong Cascade tiles typically offer a high NRC rating, meaning they are effective at reducing noise levels in a room. This is particularly important in open-plan offices or classrooms where sound can easily travel and become distracting.

2. Moisture and Sag Resistance

Ceiling tiles in areas prone to humidity or temperature fluctuations can easily become warped or saggy over time. The Armstrong Cascade Ceiling Tile combats this problem with its moisture-resistant properties. These tiles are engineered to prevent sagging even in humid environments, such as kitchens, bathrooms, or basements. This makes them a practical choice for both residential and commercial spaces where moisture is a concern.

3. Fire Resistance

Safety is a top priority when selecting building materials, and Armstrong Cascade Ceiling Tile doesn’t fall short in this regard. These tiles are manufactured with fire-resistant properties, offering added protection in case of fire. With Armstrong tiles, you can ensure that your ceiling not only looks good but also provides an extra layer of safety for your home or business.

4. Wide Range of Designs and Textures

Armstrong Cascade Ceiling Tiles come in a variety of textures, patterns, and finishes, allowing you to choose a design that complements your space. Whether you’re looking for a smooth, white tile that blends into a modern office environment or a more textured tile with intricate details for a traditional setting, Armstrong offers plenty of options. The versatility of these tiles means that they can enhance the aesthetic of any room, no matter your design preferences.

5. Easy Maintenance

Maintaining your ceiling tiles shouldn’t be a hassle, and with Armstrong Cascade Ceiling Tiles, it isn’t. These tiles are designed to be low maintenance, requiring only occasional dusting or light cleaning to keep them looking their best. The durability of the tiles ensures they remain intact and aesthetically pleasing for years without the need for constant upkeep or replacement.

How to Install Armstrong Cascade Ceiling Tile

Installing Armstrong Cascade Ceiling Tile is a relatively straightforward process that can be done either by a professional or a handy homeowner. Below is a step-by-step guide to installing these ceiling tiles in your home or office:

1. Prepare the Area

Before starting the installation, ensure that the area is ready. This involves measuring the ceiling to determine how many tiles you will need and preparing any tools or materials required for the job. It’s also a good idea to remove any old tiles or debris from the ceiling to create a clean surface for installation.

2. Select Your Installation Method

There are two common ways to install Armstrong Cascade Ceiling Tiles: drop ceiling installation and direct mount installation. For drop ceiling installations, you’ll need a ceiling grid system that the tiles can be placed into. For direct mount installations, the tiles are attached directly to the ceiling using adhesive or nails.

3. Install the Ceiling Grid (If Necessary)

If you’re installing a drop ceiling, the first step is to set up the ceiling grid. This involves measuring and cutting the grid pieces to fit your space, then attaching them to the ceiling using anchors and screws. Ensure that the grid is level to avoid any issues when placing the tiles.

4. Place the Tiles

Once the grid is in place (or if you’re doing a direct mount installation), it’s time to install the tiles. For drop ceilings, simply lift each tile into the grid and let it rest in place. For direct mount installations, apply adhesive or nails to the back of each tile and press it firmly onto the ceiling. Make sure each tile is aligned properly to create a seamless look.

5. Finishing Touches

After all the tiles are installed, inspect the ceiling for any gaps or misaligned tiles. If necessary, make adjustments to ensure a uniform appearance. Once everything looks good, you can add any additional finishing touches, such as trim or lighting fixtures.

Maintenance Tips for Armstrong Cascade Ceiling Tile

To ensure the longevity of your Armstrong Cascade Ceiling Tile, it’s important to follow a few simple maintenance steps. Here are some tips for keeping your tiles in top condition:

1. Regular Dusting

Over time, dust and debris can accumulate on your ceiling tiles, diminishing their appearance. To keep your tiles looking fresh, use a soft cloth or duster to remove dust regularly. For hard-to-reach areas, a vacuum with a brush attachment can be helpful.

2. Spot Cleaning

If your tiles become stained or dirty, use a mild cleaning solution and a soft cloth to gently wipe the affected area. Avoid using harsh chemicals, as they can damage the finish of the tiles.

3. Inspect for Damage

While Armstrong Cascade Ceiling Tiles are durable, it’s still a good idea to inspect them periodically for any signs of damage, such as cracks or warping. If you notice any issues, address them promptly to prevent further damage and ensure the integrity of your ceiling.

Conclusion: Why Armstrong Cascade Ceiling Tile is the Right Choice for Your Ceiling

The Armstrong Cascade Ceiling Tile offers an ideal combination of style, functionality, and durability. With its modern design, acoustic properties, moisture resistance, and ease of installation, it’s no surprise that these tiles are a popular choice for both residential and commercial projects. Whether you’re looking to enhance the look of a living room, improve the acoustics in an office, or create a moisture-resistant ceiling in a bathroom, Armstrong Cascade Ceiling Tile delivers.

By choosing Armstrong Cascade Ceiling Tile, you’re investing in a high-quality product that will not only improve the aesthetics of your space but also provide long-term performance and low maintenance requirements. Whether you’re a professional contractor or a DIY enthusiast, Armstrong tiles make the installation process simple and the results stunning.

Armstrong 1270 Ceiling Tile: A Comprehensive Guide to Performance, Installation, and Benefits

When it comes to designing or upgrading ceilings in commercial spaces, schools, or homes, one name that consistently stands out is Armstrong. Known for their range of high-quality ceiling tiles, the Armstrong 1270 Ceiling Tile is a top choice for those seeking durability, aesthetics, and functionality in one package. Whether you’re an architect, contractor, or a homeowner, this ceiling tile offers the perfect blend of design and performance to meet a wide range of needs.

Armstrong 1270 Ceiling Tile

In this article, we will explore everything you need to know about the Armstrong 1270 Ceiling Tile—from its unique features and benefits to how it’s installed and maintained. We will also discuss why this particular ceiling tile stands out in the market and why it might be the right choice for your next ceiling project.


What Is the Armstrong 1270 Ceiling Tile?

The Armstrong 1270 Ceiling Tile is part of Armstrong’s line of premium ceiling solutions, designed to cater to both commercial and residential settings. Its fine-textured surface and acoustic properties make it suitable for spaces where sound control is critical, such as offices, schools, retail environments, and even high-end residential projects. This tile is designed to be used in suspended or drop ceiling systems, which provide easy access to utilities such as wiring, plumbing, and HVAC systems.

Read too: Bathroom Flooded Through the Ceiling: A Comprehensive Guide


Key Features of Armstrong 1270 Ceiling Tile

1. Superior Acoustic Performance

One of the main reasons people opt for the Armstrong 1270 Ceiling Tile is its excellent acoustic performance. With a high Noise Reduction Coefficient (NRC) rating, this ceiling tile absorbs sound effectively, reducing noise levels in rooms that are prone to echo or excessive background noise. This makes it ideal for open-plan offices, classrooms, and other busy environments where noise can be distracting.

2. Fine Textured Finish

Aesthetics play a significant role in ceiling design, and the Armstrong 1270 Ceiling Tile doesn’t disappoint. Its fine-textured, non-directional finish provides a clean and smooth appearance, which complements both modern and traditional spaces. This type of finish is especially valuable in areas where you want the ceiling to blend seamlessly into the overall design, enhancing the space’s professional look.

3. Durability and Longevity

The Armstrong 1270 Ceiling Tile is built to last, with high resistance to sagging and wear over time. This makes it a low-maintenance option, especially in environments with fluctuating humidity and temperature levels, such as basements or commercial kitchens. Thanks to its durable materials, you can trust that your ceiling will maintain its aesthetic and functional qualities for years to come.

4. Easy Installation

Installing the Armstrong 1270 Ceiling Tile is straightforward, even for those with limited experience. The tiles are lightweight and easy to handle, allowing for quick installation in most suspended ceiling systems. The compatibility of these tiles with standard grids also means that retrofitting or upgrading an existing ceiling system is a breeze.

5. Environmental Friendliness

Armstrong is committed to sustainability, and the 1270 Ceiling Tile is made from materials that are both recycled and recyclable. Choosing this tile can help reduce your carbon footprint, contributing to a greener building project. Additionally, these tiles meet several environmental certifications, making them an excellent choice for eco-conscious buyers or those aiming to meet green building standards.


Why Choose Armstrong 1270 Ceiling Tile for Your Space?

If you’re considering a ceiling upgrade, the Armstrong 1270 Ceiling Tile offers several advantages that make it a standout choice in the market. Below are a few reasons why this ceiling tile is worth your investment.

1. Ideal for Noise Control

In today’s open-office environments or high-traffic areas like classrooms and waiting rooms, controlling noise is essential for productivity and comfort. The Armstrong 1270 Ceiling Tile excels in sound absorption, making it perfect for spaces where minimizing background noise is a priority. Its NRC rating ensures that noise reverberation is kept to a minimum, allowing conversations, meetings, and lectures to take place without distractions.

2. Seamless Aesthetic Appeal

The clean, fine-textured finish of the Armstrong 1270 Ceiling Tile allows it to fit into a wide variety of design schemes. Whether you’re aiming for a modern, minimalist look or something more traditional, this tile’s non-directional surface adds a subtle, elegant touch to any ceiling. Its neutral finish makes it a versatile choice for a wide range of interior design styles, helping to enhance the overall aesthetic of the room.

3. Cost-Effective Solution

While ceiling tiles can vary in price, the Armstrong 1270 Ceiling Tile offers excellent value for money. Its combination of durability, acoustic performance, and aesthetic appeal makes it a smart investment for long-term ceiling solutions. With minimal maintenance required and a long lifespan, this tile reduces the need for frequent replacements, helping to lower overall costs.

4. Sustainable Choice

In a world where sustainability is increasingly important, the Armstrong 1270 Ceiling Tile is a responsible choice. The tile is made from recycled materials, and at the end of its life, it can be recycled again. This not only reduces waste but also helps conserve natural resources. Moreover, Armstrong’s commitment to environmentally friendly manufacturing processes means that this tile aligns with modern green building practices.


How to Install Armstrong 1270 Ceiling Tile

Installing the Armstrong 1270 Ceiling Tile is a relatively simple process, especially if you’re familiar with drop ceiling systems. Here is a step-by-step guide to help you complete your ceiling project efficiently.

1. Preparation

Start by measuring the dimensions of your room to determine how many ceiling tiles you will need. Make sure you have all the necessary tools, including a ladder, tape measure, and a level. If you’re working with an existing ceiling grid, check that it’s in good condition and properly aligned.

2. Install the Grid System

If you don’t already have a ceiling grid system installed, you’ll need to set it up first. Use your measurements to install the grid at the correct height and ensure that it’s level. For larger rooms, consider marking where each tile will go to make installation easier.

3. Cut the Tiles to Fit

For rooms with irregular dimensions or obstacles like light fixtures or air vents, you may need to cut the ceiling tiles. Use a sharp utility knife or tile cutter to trim the tiles to size. Be sure to measure carefully to avoid gaps or uneven edges.

4. Place the Tiles

Once the grid is installed and the tiles are cut to size, simply place the Armstrong 1270 Ceiling Tiles into the grid. Start from one corner and work your way across the room, making sure each tile is aligned and level.

5. Inspect and Adjust

After the tiles are in place, take a moment to inspect the ceiling for any gaps, misaligned tiles, or other issues. Adjust as needed to ensure a professional, seamless finish.


Maintenance Tips for Armstrong 1270 Ceiling Tile

To keep your Armstrong 1270 Ceiling Tile looking its best, regular maintenance is key. Here are some tips for maintaining your ceiling tiles:

1. Dusting and Cleaning

Over time, ceiling tiles can collect dust and debris. Use a soft cloth or a vacuum cleaner with a brush attachment to gently clean the tiles. For stubborn spots or stains, a mild detergent and water solution can be used, but avoid harsh chemicals that could damage the tile’s finish.

2. Checking for Damage

Periodically inspect the tiles for signs of sagging, discoloration, or wear. If you notice any damaged tiles, it’s best to replace them as soon as possible to maintain the overall appearance of the ceiling.

3. Monitoring Moisture Levels

Although the Armstrong 1270 Ceiling Tile is durable, it’s important to keep an eye on moisture levels in areas like bathrooms or basements, where humidity could cause the tiles to warp or discolor. Use dehumidifiers or proper ventilation to control moisture and extend the life of your ceiling tiles.


Conclusion

The Armstrong 1270 Ceiling Tile is an excellent choice for anyone looking to improve both the aesthetics and functionality of their space. Its superior acoustic properties, fine-textured finish, and long-lasting durability make it a valuable investment for a wide variety of settings, from commercial offices to residential homes. With easy installation and minimal maintenance, these ceiling tiles offer a seamless and cost-effective solution to elevate any interior environment.

755B Armstrong Ceiling Tile: The Ideal Choice for Modern Ceiling Solutions

When it comes to creating a space that’s functional, aesthetically pleasing, and designed for longevity, ceiling tiles are often overlooked. However, they play a crucial role in the acoustics, aesthetics, and energy efficiency of a room. One of the leading products in the ceiling tile industry is the 755B Armstrong Ceiling Tile, known for its durability, acoustic performance, and sleek appearance. Whether you’re remodeling a commercial space or upgrading your home, this ceiling tile offers a versatile solution that meets a wide range of needs.

755B Armstrong Ceiling Tile

In this article, we will explore the features, benefits, and installation process of the 755B Armstrong Ceiling Tile. We will also offer some maintenance tips and discuss why it stands out in the crowded market of ceiling solutions. Whether you’re an architect, contractor, or homeowner, this guide will help you understand why the 755B tile could be the perfect fit for your project.


What Is the 755B Armstrong Ceiling Tile?

The 755B Armstrong Ceiling Tile is part of Armstrong’s renowned line of ceiling solutions, specifically designed to offer high performance in both residential and commercial spaces. Known for its fine-textured finish and clean, modern aesthetic, this tile is engineered to meet the acoustic and durability needs of various environments. Its primary application is in drop ceilings or suspended ceiling systems, which are commonly used in offices, retail spaces, and large commercial areas. However, it is also suitable for homeowners looking to improve the look and functionality of their ceilings.


Key Features of 755B Armstrong Ceiling Tile

1. Acoustic Performance

One of the standout features of the 755B Armstrong Ceiling Tile is its excellent sound absorption properties. This makes it ideal for environments where noise control is crucial, such as offices, schools, or conference rooms. With its Noise Reduction Coefficient (NRC) rating, it efficiently reduces sound reverberation, creating a quieter and more comfortable atmosphere. This feature is particularly important in open office layouts or busy environments where multiple conversations and background noise can become distracting.

2. Durability

The 755B Armstrong Ceiling Tile is known for its long-lasting durability. Made from high-quality materials, these tiles resist sagging and maintain their structural integrity over time. This is especially useful in environments with fluctuating temperatures or humidity levels, such as basements or kitchens. The tiles are also impact-resistant, making them a reliable option for areas with high foot traffic or potential ceiling disturbances.

Read too: Bathroom Flooded Through the Ceiling: A Comprehensive Guide

3. Fine Textured Finish

Aesthetics play a significant role in ceiling design, and the 755B Armstrong Ceiling Tile does not disappoint. Its fine-textured, non-directional surface provides a smooth and seamless look. This design allows the tiles to blend well with various architectural styles, from modern office spaces to more traditional interiors. Whether you’re creating a professional atmosphere or a cozy home setting, these tiles can enhance the visual appeal of any room.

4. Easy Installation

The 755B Armstrong Ceiling Tile is designed for easy installation, especially in drop ceilings or suspended ceiling systems. Their lightweight construction makes handling them manageable, even for those new to DIY home projects. Whether you’re a professional contractor or a homeowner, these tiles can be installed quickly with minimal tools and expertise. They are compatible with most standard suspension systems, making them a flexible solution for both new installations and retrofitting existing ceilings.

5. Energy Efficiency

Ceiling tiles, especially in commercial settings, contribute to energy efficiency by providing additional insulation. The 755B Armstrong Ceiling Tile helps to maintain consistent temperatures in a room by reducing the need for excessive heating or cooling. This not only lowers energy costs but also improves comfort for occupants, making it a smart investment for long-term savings.


Why Choose the 755B Armstrong Ceiling Tile?

If you’re still considering whether the 755B Armstrong Ceiling Tile is the right choice for your project, here are several compelling reasons why this tile is a top contender in the market.

1. Versatility for Multiple Applications

The 755B Armstrong Ceiling Tile is versatile enough to be used in a variety of settings. Whether it’s an office space, a retail environment, or a residential area, these tiles offer the right blend of performance and appearance. Their fine texture and non-directional pattern make them suitable for various design styles, while their acoustic performance is essential in noisy environments like classrooms or open-plan offices.

2. Cost-Effective Solution

While ceiling tiles can range in price, the 755B Armstrong Ceiling Tile strikes a balance between affordability and high performance. It offers great value, especially for large commercial projects where budgets can be tight. The durability and long lifespan of the tiles also contribute to their cost-effectiveness, as they won’t need to be replaced frequently.

3. Environmental Sustainability

Armstrong places a strong emphasis on sustainability, and the 755B Armstrong Ceiling Tile is no exception. These tiles are made from recycled materials and are fully recyclable at the end of their lifespan. This makes them an eco-friendly choice for those who are looking to minimize their environmental impact. Armstrong’s commitment to sustainability extends to their manufacturing processes as well, ensuring that their products meet industry standards for environmental responsibility.

4. Improved Indoor Air Quality

Another important factor to consider is the role of ceiling tiles in maintaining indoor air quality. The 755B Armstrong Ceiling Tile is designed to resist mold, mildew, and bacterial growth, making it a healthy choice for indoor environments. This is particularly beneficial in areas such as healthcare facilities, schools, and homes where air quality is of utmost importance. By choosing this tile, you’re not only enhancing the look of your ceiling but also contributing to a healthier indoor space.


Installation Guide for the 755B Armstrong Ceiling Tile

Installing the 755B Armstrong Ceiling Tile is a straightforward process, especially if you’re familiar with suspended ceiling systems. Here’s a step-by-step guide to help you install these tiles efficiently:

1. Preparation

Before you start the installation, make sure you have all the necessary tools and materials. This includes a tape measure, level, ladder, suspension system, and, of course, the ceiling tiles. If you’re installing the tiles in an existing ceiling grid, check that the system is in good condition and properly aligned.

2. Measure and Mark

Measure the dimensions of the room to ensure that your grid system is accurately aligned. Use a level to mark where the ceiling grid will be installed. For larger rooms, consider creating a layout plan to ensure that the tiles will fit evenly across the ceiling.

3. Install the Suspension System

Install the ceiling grid or suspension system according to the manufacturer’s instructions. Ensure that it is securely fastened to the ceiling joists or beams. This is a crucial step as the grid will support the weight of the tiles.

4. Cut Tiles to Fit

If your room has irregular dimensions, you may need to cut some of the tiles to fit around the edges. Use a utility knife or tile cutter for precise cuts, ensuring that the edges remain clean for a professional finish.

5. Install the Tiles

Once the grid is in place, carefully place the 755B Armstrong Ceiling Tiles into the grid. Start from one corner of the room and work your way across, making sure that each tile fits snugly into place. Double-check that the tiles are level and evenly spaced.


Maintenance Tips for 755B Armstrong Ceiling Tile

Maintaining your 755B Armstrong Ceiling Tile is essential for ensuring its long-lasting performance. Here are some tips to keep your ceiling looking its best:

1. Regular Dusting

Dust and debris can accumulate on the surface of ceiling tiles over time. Use a soft, dry cloth or a vacuum with a brush attachment to remove dust from the tiles. Regular cleaning will help maintain their appearance and prevent the buildup of allergens.

2. Spot Cleaning

For stains or smudges, gently wipe the tiles with a damp cloth. Avoid using harsh chemicals or abrasive cleaners, as they can damage the tile’s finish. If a tile becomes heavily soiled or stained, consider replacing it to maintain the overall appearance of the ceiling.

3. Check for Damage

Periodically inspect your ceiling tiles for any signs of damage, such as sagging or discoloration. If you notice any issues, it’s best to address them promptly to avoid further damage. Sagging tiles can indicate issues with the suspension system or moisture problems, both of which should be resolved as soon as possible.


Conclusion

The 755B Armstrong Ceiling Tile offers a comprehensive solution for both residential and commercial spaces, combining aesthetics with functionality. Its acoustic properties, durability, and fine-textured finish make it an excellent choice for those seeking to enhance the appearance and performance of their ceiling. Whether you’re looking to improve acoustics in a noisy office or add a touch of elegance to your home, the 755B Armstrong Ceiling Tile is a cost-effective, durable, and visually appealing option.

Wine Rack Ceiling Mount: The Stylish and Space-Saving Solution for Wine Lovers

For those who appreciate the art of wine collection, finding the perfect storage solution can be a challenge. Traditional wine racks often take up valuable floor or counter space, which can be problematic in homes or kitchens with limited room. That’s where a Wine Rack Ceiling Mount comes into play. This innovative and stylish solution allows you to store your favorite bottles of wine overhead, providing easy access while saving space.

Wine Rack Ceiling Mount

In this article, we will explore the benefits of ceiling-mounted wine racks, how to choose the right one for your home, and offer tips on installation and maintenance. Whether you’re a casual wine enthusiast or a seasoned connoisseur, a Wine Rack Ceiling Mount could be the perfect addition to your home.


Why Choose a Wine Rack Ceiling Mount?

A Wine Rack Ceiling Mount offers several advantages over traditional floor or countertop wine storage solutions. Here’s why more and more wine lovers are opting for ceiling-mounted wine racks:

1. Space Efficiency

One of the primary reasons people choose ceiling-mounted wine racks is the ability to save floor and counter space. Whether you have a small kitchen, limited storage in your home bar, or a compact apartment, a ceiling-mounted rack allows you to store wine without taking up valuable real estate.

By utilizing vertical space, you keep your wine collection accessible without cluttering your countertops or cupboards.

2. Aesthetic Appeal

A Wine Rack Ceiling Mount can act as a beautiful display piece in your home. Hanging wine racks come in various styles and materials, from sleek metal designs to rustic wooden finishes. This allows you to match the aesthetic of your kitchen, dining room, or bar area.

Not only do ceiling-mounted racks look elegant, but they also draw attention to your collection, transforming your bottles into part of your home’s décor.

3. Improved Wine Organization

Many ceiling-mounted wine racks allow for easy labeling and sorting of wine bottles, which helps keep your collection organized. You can arrange your wines by vintage, region, or type (red, white, sparkling), making it easy to find the perfect bottle for any occasion.

Additionally, some models allow you to store wine glasses alongside your bottles, which can further enhance your wine-serving experience.

4. Optimal Wine Storage Conditions

Ceiling-mounted wine racks can contribute to maintaining proper wine storage conditions. Keeping wine bottles horizontally ensures the cork remains moist, which is essential for preserving the wine’s flavor and preventing oxidation. By elevating your wine collection, the bottles are also less likely to be exposed to temperature fluctuations from the floor or counter surfaces.

Read too: Bathroom Flooded Through the Ceiling: A Comprehensive Guide


Types of Wine Rack Ceiling Mounts

When selecting a Wine Rack Ceiling Mount, it’s important to consider your storage needs, design preferences, and available space. Here are the most common types of ceiling-mounted wine racks:

1. Suspended Cable Wine Racks

Suspended cable wine racks are sleek and modern, using thin but strong cables to hold the wine bottles in place. These racks often create a floating effect, which can be a stunning focal point in your home. They are perfect for contemporary or minimalist spaces and can hold a significant number of bottles while taking up minimal space.

2. Wooden Wine Racks

If you prefer a more traditional or rustic look, wooden wine racks are an excellent choice. These racks are often made from materials like oak, pine, or walnut and are designed to complement homes with classic or country-style decor. Ceiling-mounted wooden wine racks typically feature individual slots for each bottle, providing a secure and organized storage solution.

3. Metal Wine Racks

Metal wine racks are known for their durability and sleek appearance. These racks come in various designs, ranging from industrial to modern. Stainless steel and wrought iron are common materials for ceiling-mounted wine racks, offering both style and stability. Metal wine racks are ideal for homes with a modern or urban aesthetic.

4. Glass and Acrylic Wine Racks

For those who prefer a more contemporary or luxury look, glass or acrylic wine racks offer a high-end aesthetic. These racks are often paired with LED lighting to create an eye-catching display. Glass and acrylic racks may hold fewer bottles than metal or wooden racks but are perfect for showcasing your finest wines.


Installation Tips for a Wine Rack Ceiling Mount

Installing a Wine Rack Ceiling Mount may seem daunting, but with the right tools and preparation, it can be a straightforward process. Here are some steps to guide you through the installation:

1. Measure Your Space

Before purchasing a ceiling-mounted wine rack, measure the available ceiling space in your desired location. Ensure that there is enough clearance between the rack and the nearest surface (such as countertops or cabinets) to avoid obstructing your work area or walking paths.

2. Select a Sturdy Location

It’s crucial to install your wine rack in a location that can support the weight of the rack and the wine bottles. Most ceiling-mounted racks need to be secured into ceiling joists or beams. Avoid installing your rack into drywall alone, as it won’t provide adequate support.

3. Use Proper Anchors and Hardware

Make sure to use appropriate anchors, screws, and brackets designed to hold heavy loads. Many wine rack manufacturers include the necessary hardware, but it’s always good to double-check that everything is strong enough to support your collection.

4. Follow Manufacturer Instructions

Each wine rack model may have specific installation requirements, so it’s important to follow the manufacturer’s instructions closely. If you’re unsure about the process, consider hiring a professional to ensure your rack is securely installed.

5. Check for Balance and Stability

Once installed, test the wine rack’s balance and stability before placing any bottles in it. Make sure it is level and securely fastened. An unbalanced rack can pose a risk to your wine collection and anyone underneath it.


Maintenance Tips for Ceiling-Mounted Wine Racks

Proper maintenance of your Wine Rack Ceiling Mount ensures that it remains functional and visually appealing for years to come. Here are some maintenance tips to keep in mind:

1. Regular Cleaning

Dust and dirt can accumulate on your wine rack over time. Wipe down the surface with a soft, damp cloth every few months to keep it clean. For metal racks, you can use a gentle cleaner to remove smudges or fingerprints.

2. Inspect for Loose Screws or Brackets

Periodically check that all screws and brackets are still secure. Ceiling-mounted wine racks can loosen over time due to the weight of the wine bottles, so it’s essential to ensure everything remains tight and secure.

3. Avoid Overloading the Rack

While your Wine Rack Ceiling Mount may be designed to hold several bottles, avoid overloading it beyond its recommended capacity. Exceeding the weight limit can cause the rack to become unstable and increase the risk of damage.

4. Rotate Your Wine Collection

For wine that is meant to age, ensure that bottles are rotated every few months to keep the cork moist and prevent spoilage. If you’re storing wine that you plan to drink soon, make sure it’s easily accessible in your rack.


Choosing the Right Wine Rack Ceiling Mount for Your Home

Selecting the best Wine Rack Ceiling Mount for your home depends on several factors, including your available space, style preferences, and the size of your wine collection. Here are a few things to consider when choosing the right rack:

1. Capacity

How many bottles do you want to store? Some ceiling-mounted racks are designed to hold just a few bottles, while others can store a dozen or more. Consider the size of your collection and how frequently you plan to add to it.

2. Aesthetic

The style of your wine rack should complement your existing décor. Whether you prefer a rustic wooden design or a sleek, modern metal rack, choose one that enhances the look of your space.

3. Functionality

Think about the ease of access when selecting your wine rack. If you plan to use your wine frequently, choose a rack that allows easy access to your bottles. Some racks also include storage for wine glasses, which can be a convenient feature.

4. Price and Quality

While it’s tempting to choose the most affordable option, make sure the rack is built to last. Look for high-quality materials and reviews that attest to the rack’s durability and performance.


Conclusion

A Wine Rack Ceiling Mount is not only a space-saving solution but also a stylish way to display your wine collection. Whether you’re short on storage space or simply looking to elevate the aesthetic of your home, a ceiling-mounted rack can be an excellent investment. By choosing the right style, properly installing your rack, and maintaining it regularly, you’ll enjoy both the beauty and functionality it brings to your home for years to come.


West Elm Flush Mount Ceiling Light: A Comprehensive Guide

Lighting plays a critical role in shaping the ambiance and functionality of any space. If you’re looking for a blend of elegance, modernity, and efficiency, a West Elm Flush Mount Ceiling Light is an excellent option to consider. Known for its contemporary design and practical functionality, West Elm’s collection of flush mount lights offers something for every taste and room design. In this article, we’ll dive deep into why the West Elm Flush Mount Ceiling Light should be at the top of your list for home lighting solutions, how to choose the right style, and tips for installation and maintenance.

West Elm Flush Mount Ceiling Light

Why Choose West Elm Flush Mount Ceiling Lights?

West Elm Flush Mount Ceiling Lights are not just functional pieces; they are statement-makers that can transform any room. Here’s why West Elm’s flush mount ceiling lights stand out among the competition:

1. Stylish and Contemporary Design

West Elm is synonymous with modern, chic designs, and their flush mount lights are no exception. Whether you’re aiming for a minimalist, mid-century modern, or industrial look, their wide array of designs can fit any aesthetic. Some of the most popular designs feature brass finishes, matte black fixtures, and elegant glass globes. The simplicity of these designs allows the lights to seamlessly blend into the décor of various rooms, making them an excellent choice for living rooms, bedrooms, kitchens, and even entryways.

2. Space-Saving Solution

One of the primary advantages of a West Elm Flush Mount Ceiling Light is its compact nature. Flush mount lights are perfect for spaces with lower ceilings where hanging fixtures might not be practical. Because they are mounted close to the ceiling, they provide ample lighting without taking up too much vertical space. This makes them ideal for rooms where space is at a premium, such as hallways, small kitchens, and closets.

3. Versatility

These flush mount ceiling lights are incredibly versatile. They can be used in virtually any room, thanks to their sleek and unobtrusive design. Whether you’re looking to illuminate a large space or add a soft glow to a smaller room, West Elm’s collection has a flush mount option that will meet your needs. Furthermore, the lights come in various materials, finishes, and sizes, allowing you to tailor the lighting to match your personal style and your room’s décor.

Read too: Bathroom Flooded Through the Ceiling: A Comprehensive Guide

4. Energy Efficiency

Many West Elm lighting options, including the West Elm Flush Mount Ceiling Light, are compatible with energy-efficient LED bulbs. LED lights consume significantly less energy than traditional incandescent bulbs, saving you money on your energy bill and reducing your environmental footprint. Additionally, LED bulbs last much longer, reducing the need for frequent replacements.

5. Easy Installation

The installation process for a West Elm Flush Mount Ceiling Light is relatively straightforward. You won’t need to worry about complicated wiring or hiring a professional unless you’re uncomfortable with electrical work. These lights come with detailed instructions, and with the right tools, most homeowners can complete the installation within a couple of hours. However, always ensure you turn off the electricity at the breaker before beginning any electrical work.

Choosing the Right West Elm Flush Mount Ceiling Light for Your Home

Selecting the perfect West Elm Flush Mount Ceiling Light involves more than just picking the one that looks nice. You’ll need to consider several factors, such as room size, ceiling height, and existing décor. Here’s a guide to help you make the best choice:

1. Room Size

The size of the room should be a primary consideration when choosing a flush mount light. A light fixture that is too small may not provide enough illumination for a large room, while one that is too large can overwhelm a smaller space. For instance, a West Elm Flush Mount Ceiling Light with a larger, more intricate design would work beautifully in a living room or master bedroom, while a more compact option is ideal for a hallway or bathroom.

2. Ceiling Height

Flush mount ceiling lights are perfect for rooms with lower ceilings, typically between 8 to 10 feet high. However, if your ceiling is particularly low, ensure the light fixture doesn’t protrude too far down, which could create a cramped feeling. On the other hand, if your ceiling is slightly higher, you might want to consider a semi-flush mount light that drops slightly below the ceiling, providing a little more dimension to the room.

3. Room Functionality

Consider how the room will be used when selecting your West Elm Flush Mount Ceiling Light. For instance, in a kitchen or workspace, you’ll need brighter, more focused lighting, while in a bedroom or living room, a softer, more ambient light may be more appropriate. West Elm offers several dimmable options, which allow you to adjust the brightness based on the room’s needs.

4. Style and Finish

West Elm is known for its modern designs, but they offer a variety of styles to fit different aesthetics. For a minimalist or Scandinavian-style room, a simple brass or matte black flush mount fixture can add a touch of sophistication. If you’re going for a mid-century modern look, consider one of West Elm’s flush mount lights with globe-shaped shades and brass accents. Additionally, the finish of the light should complement the existing hardware in the room, such as door handles, faucets, and drawer pulls.

Top West Elm Flush Mount Ceiling Light Designs to Consider

Here are some standout designs from West Elm that you might want to consider when shopping for your next flush mount ceiling light:

1. Mobile Chandelier Flush Mount

This flush mount combines a chandelier-style design with the compactness of a ceiling-mounted fixture. Its brass arms and globe lights offer a modern twist on a classic design, making it an ideal option for a living room or dining room that requires a bit more sophistication.

2. Glass Orb Flush Mount

This sleek and simple design is perfect for minimalists. The clear glass orb paired with a brass or nickel base makes it a versatile piece that can fit into various room styles. It’s a great choice for hallways, bedrooms, or even a kitchen.

3. Sputnik Semi-Flush Mount

For those looking to make a bold statement, the Sputnik Semi-Flush Mount is a mid-century modern marvel. Its multiple arms and exposed bulbs create a dramatic effect, making it a fantastic centerpiece for any room.

4. Capiz Flush Mount

For a more natural, organic look, the Capiz Flush Mount offers a touch of coastal elegance. Its layered capiz shells diffuse light beautifully, creating a soft, ambient glow perfect for a bedroom or bathroom.

Installation Tips for Your West Elm Flush Mount Ceiling Light

Once you’ve chosen your ideal West Elm Flush Mount Ceiling Light, it’s time for installation. Here’s a brief guide to help ensure a smooth process:

1. Gather Your Tools

You’ll need a few basic tools before you begin, including a screwdriver, wire stripper, voltage tester, and a ladder. It’s also a good idea to have a friend or family member on hand to help hold the light in place during installation.

2. Turn Off the Power

Before doing any electrical work, always turn off the power to the room at the breaker box. Use a voltage tester to ensure no power is running to the light fixture.

3. Remove the Old Fixture

If you’re replacing an old light, carefully remove it by unscrewing the fixture and disconnecting the wires. Keep the wires organized so you can easily connect the new fixture.

4. Connect the Wires

Follow the manufacturer’s instructions to connect the wires from the ceiling to your new West Elm light fixture. Usually, you’ll connect the black wires (hot), white wires (neutral), and the ground wire. Use wire nuts to secure the connections.

5. Secure the Fixture

Once the wires are connected, carefully mount the fixture to the ceiling using the provided screws. Double-check that everything is secure before turning the power back on.

6. Test the Light

After the fixture is installed, restore power to the room and test the light to ensure it’s working properly. If the light doesn’t turn on, check your connections and make sure the bulbs are correctly installed.

How to Maintain Your West Elm Flush Mount Ceiling Light

To keep your West Elm Flush Mount Ceiling Light looking its best, regular maintenance is essential. Here are a few tips to ensure your light fixture remains in pristine condition:

1. Regular Dusting

Dust can accumulate on the surface of the light, particularly on glass or metallic elements. Use a soft, microfiber cloth to gently wipe down the fixture on a regular basis.

2. Clean Light Bulbs

Dust on light bulbs can reduce their brightness. Make sure to clean your light bulbs every few months to ensure maximum illumination.

3. Avoid Harsh Chemicals

When cleaning metal or glass elements, avoid using harsh chemicals that can damage the finish. Stick to mild soap and water, followed by a dry cloth to remove any residue.

Conclusion: Enhance Your Home with West Elm Flush Mount Ceiling Light

Incorporating a West Elm Flush Mount Ceiling Light into your home is a fantastic way to elevate both the functionality and aesthetic of your space. Whether you’re looking for a minimalist touch, a statement piece, or an elegant solution for a small space, West Elm’s range of flush mount lights offers something for every style and need. With easy installation, energy-efficient options, and a variety of designs to choose from, these lights are a smart and stylish investment for your home’s lighting needs.

Vintage Copper Ceiling Tiles for Your Home: Discover the Timeless Elegance

When it comes to creating a truly unique and sophisticated interior space, nothing quite compares to the timeless charm of Vintage Copper Ceiling Tiles. These stunning pieces not only add a touch of old-world elegance to any room but also serve as a conversation starter, bringing both beauty and history into your home. Whether you’re aiming for a luxurious, rustic, or eclectic aesthetic, copper ceiling tiles can transform your space in ways you might never have imagined. In this article, we’ll explore everything you need to know about Vintage Copper Ceiling Tiles, including their history, benefits, installation process, and how they can elevate the design of any space.

Vintage Copper Ceiling Tiles

The History and Appeal of Vintage Copper Ceiling Tiles

Vintage Copper Ceiling Tiles have been used in homes and commercial buildings for centuries, with their popularity peaking in the late 19th and early 20th centuries. Originally, these tiles were seen as a sign of wealth and status. Wealthy homeowners and businesses would use intricate ceiling tiles made from copper, tin, or other metals to create grand spaces that exuded luxury.

One of the reasons copper became a popular choice is due to its unique properties. Copper is durable, resistant to corrosion, and relatively easy to work with, which allowed artisans to create elaborate and detailed designs. The warm, reddish-brown hue of copper adds a natural richness to interiors, making it a perfect material for creating a vintage look.

Today, Vintage Copper Ceiling Tiles have made a comeback as homeowners and designers seek to incorporate classic design elements with modern functionality. These tiles offer a unique aesthetic that can’t be replicated by more common materials like wood or plaster. Plus, they’re a fantastic way to add texture and depth to any room, making them a favorite among interior designers.

Read too: Bathroom Flooded Through the Ceiling: A Comprehensive Guide

Why Choose Vintage Copper Ceiling Tiles?

If you’re considering a renovation or looking to update the look of a room, there are several reasons why Vintage Copper Ceiling Tiles are an excellent choice. Here are a few key benefits:

1. Aesthetic Appeal

The warm tones of copper can instantly create a cozy and inviting atmosphere. When patinated, copper takes on a beautiful green or bluish hue, giving your ceiling an antique, weathered look. This natural aging process, combined with the intricate patterns often found in vintage tiles, makes each piece unique. Whether you want to recreate the grandeur of a Victorian-era room or add a rustic charm to a modern home, Vintage Copper Ceiling Tiles provide an unmatched aesthetic.

2. Durability

Copper is known for its strength and longevity. Unlike wood, which can warp or rot, or plaster, which can crack over time, copper remains intact for decades, if not centuries. Its resistance to moisture and corrosion makes it particularly suitable for humid environments like kitchens and bathrooms. With Vintage Copper Ceiling Tiles, you won’t have to worry about frequent repairs or replacements.

3. Versatility in Design

Another reason to choose copper tiles is their versatility. Vintage Copper Ceiling Tiles come in a wide range of designs, from simple, understated patterns to highly ornate motifs. This allows you to choose tiles that complement the existing decor of your home, whether it’s modern, industrial, rustic, or traditional. Additionally, copper can be used in a variety of spaces, not just on ceilings but also as backsplash tiles, accent walls, or even as part of furniture design.

4. Eco-Friendly Option

Copper is 100% recyclable, making it an environmentally friendly choice for your home. Many Vintage Copper Ceiling Tiles available today are made from reclaimed or recycled copper, which reduces the need for new mining and minimizes environmental impact. Plus, because copper lasts so long, it’s a sustainable option that reduces waste in the long run.

How to Incorporate Vintage Copper Ceiling Tiles into Your Home

If you’ve decided that Vintage Copper Ceiling Tiles are the perfect addition to your space, you might be wondering how to incorporate them effectively. Here are a few ideas for using these tiles to enhance the look of your home:

1. Create a Focal Point in the Living Room

One of the easiest ways to use copper tiles is to install them in the living room as a stunning focal point. Whether you cover the entire ceiling or just a section, copper tiles will add warmth and character to the room. Pair the tiles with vintage-inspired furniture and lighting for a cohesive, elegant look.

2. Enhance Your Kitchen with a Copper Backsplash

In addition to ceilings, copper tiles work beautifully as a backsplash in the kitchen. The natural sheen of copper reflects light, making the room feel larger and more open. Plus, the metal is heat and moisture-resistant, which makes it ideal for kitchen environments. You can even combine Vintage Copper Ceiling Tiles with copper accents throughout the kitchen, such as light fixtures, handles, and countertops, for a harmonious design.

3. Add Rustic Charm to Your Bathroom

Bathrooms are another great space to incorporate Vintage Copper Ceiling Tiles. Whether you use them on the ceiling, as a decorative wall panel, or as part of the vanity area, copper tiles bring a rustic yet refined touch. Since copper is naturally resistant to moisture, it’s a smart choice for a bathroom where humidity levels tend to be higher.

4. Revamp Your Bedroom with an Accent Ceiling

Tired of plain white ceilings? Adding Vintage Copper Ceiling Tiles to your bedroom can completely transform the space. Opt for tiles with intricate detailing to bring a sense of luxury and comfort to the room. The rich hues of copper create a warm, inviting ambiance, perfect for a restful retreat.

Tips for Installing Vintage Copper Ceiling Tiles

Once you’ve decided on the perfect placement for your Vintage Copper Ceiling Tiles, the next step is installation. Here are a few tips to ensure a smooth installation process:

1. Measure the Space Carefully

Before purchasing your tiles, measure the area you plan to cover. Copper tiles are typically sold in square pieces, so knowing the exact dimensions of your ceiling or wall will help you determine how many tiles you’ll need. It’s always a good idea to buy a few extra tiles in case of mistakes during installation.

2. Prepare the Surface

Ensure that the surface where you’ll be installing the tiles is clean, dry, and smooth. If you’re installing them on a ceiling, you may need to remove any old tiles or materials first. For best results, you’ll want to work with a flat, even surface to avoid gaps or uneven tile placement.

3. Use the Right Adhesive

Copper tiles can be heavy, so it’s essential to use a strong adhesive designed for metal. Follow the manufacturer’s instructions on the adhesive packaging, and be sure to apply it evenly to avoid any tiles slipping or falling after installation.

4. Patience is Key

Installing Vintage Copper Ceiling Tiles can be time-consuming, especially if you’re working with a large area or intricate patterns. Take your time to align each tile correctly and ensure that the edges meet evenly. Rushing through the process can lead to mistakes, which can be costly to fix later on.

Caring for Your Vintage Copper Ceiling Tiles

One of the great things about Vintage Copper Ceiling Tiles is that they require very little maintenance. However, to keep them looking their best, it’s important to follow a few basic care guidelines:

1. Regular Dusting

Dust can accumulate on ceiling tiles over time, so it’s a good idea to dust them regularly. You can use a soft cloth or a feather duster to gently remove any dirt or debris.

2. Avoid Harsh Cleaners

Copper is a sensitive metal that can be damaged by abrasive or harsh chemical cleaners. Instead, use a mild soap and water solution to clean the tiles. After cleaning, dry the tiles thoroughly to prevent water spots or streaks.

3. Preserve the Patina

Many homeowners love the natural patina that develops on copper over time. If you want to preserve this look, avoid polishing the tiles. However, if you prefer the shiny, new appearance of copper, you can polish the tiles periodically with a specialized copper cleaner.

Conclusion: Elevate Your Home with Vintage Copper Ceiling Tiles

Incorporating Vintage Copper Ceiling Tiles into your home is a surefire way to add elegance, charm, and a touch of history to any space. Whether you’re renovating a single room or looking to update your entire home, copper ceiling tiles offer a versatile and durable option that can enhance the overall aesthetic. From their rich color to their intricate designs, these tiles are the perfect choice for anyone looking to create a space that is both beautiful and unique.

If you’re ready to embrace the beauty of Vintage Copper Ceiling Tiles, there’s no better time to start planning your next home improvement project. With their timeless appeal and practical benefits, these tiles are an investment in your home’s style and functionality.

USG Eclipse Ceiling Tile: A Comprehensive Guide to Enhanced Acoustic Performance and Design

Ceiling tiles play a vital role in the aesthetics and functionality of both commercial and residential spaces. Among the numerous options available on the market, USG Eclipse Ceiling Tile stand out for their superior acoustic performance, durability, and design versatility. Whether you’re renovating an office, hospital, school, or any other large building, these ceiling tiles offer a balance of style and function that enhances any environment.

Usg Eclipse Ceiling Tile

In this comprehensive guide, we’ll explore what USG Eclipse Ceiling Tiles are, their benefits, various applications, and how they can transform your space.


What Are USG Eclipse Ceiling Tiles?

USG Eclipse Ceiling Tiles are high-performance acoustic tiles designed for commercial and institutional spaces. Manufactured by USG Corporation, a leading provider of building materials, these tiles are engineered to control sound, enhance aesthetics, and offer easy maintenance. Available in various sizes, textures, and edge designs, these ceiling tiles cater to a wide range of architectural and interior design needs.

One of the standout features of the USG Eclipse Ceiling Tile is its ability to provide excellent sound absorption, making it perfect for environments where noise control is critical. These tiles also boast a sleek, clean design, ensuring that they complement any modern or traditional interior without overwhelming the overall look of the space.

Read too: Kitchen Lighting For A Vaulted Ceiling: Illuminating Your Space with Style and Functionality


Benefits of USG Eclipse Ceiling Tiles

1. Superior Acoustic Performance

The primary benefit of using USG Eclipse Ceiling Tiles is their acoustic performance. These tiles are designed to absorb sound, reducing noise levels in busy environments such as offices, schools, and hospitals. By controlling noise, they help create a more comfortable and productive atmosphere. Whether you’re looking to improve speech clarity in a conference room or minimize distractions in a classroom, these tiles can dramatically enhance the auditory experience of any room.

2. Aesthetic Versatility

While functionality is important, aesthetics also matter. USG Eclipse Ceiling Tiles are available in a variety of finishes and textures, allowing for customization to suit different design needs. From sleek, modern surfaces to textured designs that add depth, these tiles can blend seamlessly into any space. They can also be paired with different grid systems to create a polished and cohesive look.

3. Durability and Longevity

These ceiling tiles are designed to withstand the test of time. Made from high-quality materials, USG Eclipse Ceiling Tiles resist sagging, discoloration, and wear, making them a durable choice for spaces with heavy use. They are also easy to clean, which helps to maintain their appearance and performance over time.

4. Light Reflectance

An often-overlooked feature of ceiling tiles is their ability to reflect light. USG Eclipse Ceiling Tiles are designed to reflect natural and artificial light, helping to brighten up a room and reduce the need for additional lighting. This not only enhances the ambiance but can also lead to energy savings by minimizing the need for excessive lighting fixtures.

5. Sustainability

Sustainability is becoming increasingly important in construction and interior design. USG Eclipse Ceiling Tiles are manufactured with environmental responsibility in mind. Many of these tiles contain recycled content and are designed for easy disposal, aligning with LEED certification goals and other green building standards. For businesses or institutions looking to create an eco-friendly space, choosing USG Eclipse Ceiling Tiles can contribute to sustainability efforts.


Applications of USG Eclipse Ceiling Tiles

1. Office Spaces

One of the most common places you’ll find USG Eclipse Ceiling Tiles is in office buildings. In open-plan offices where noise can be a distraction, these tiles help reduce ambient noise levels, making the workspace quieter and more conducive to productivity. Additionally, the clean and professional appearance of these ceiling tiles enhances the overall aesthetic of the office, giving it a polished and modern feel.

2. Educational Facilities

Schools and universities are another prime setting for USG Eclipse Ceiling Tiles. Classrooms, lecture halls, and libraries require good acoustics to support learning and concentration. The sound-absorbing properties of these ceiling tiles help to reduce noise, ensuring that students and teachers can communicate effectively without distractions from outside the room or adjacent areas.

3. Healthcare Environments

In healthcare settings, such as hospitals and clinics, noise control is critical for patient comfort and privacy. USG Eclipse Ceiling Tiles not only help to absorb sound in busy corridors and waiting rooms but also enhance privacy in patient rooms and consultation areas. Furthermore, their easy-to-clean surface makes them a hygienic choice for healthcare environments where cleanliness is paramount.

4. Retail and Commercial Spaces

Retail stores and commercial buildings often have high ceilings and large open spaces, which can lead to echoes and poor acoustics. USG Eclipse Ceiling Tiles offer an excellent solution for improving the acoustic environment while maintaining a stylish look. In retail environments, where customer experience is key, these tiles help create a more pleasant atmosphere by reducing noise and creating a bright, welcoming space.


H2: USG Eclipse Ceiling Tile: Technical Specifications

When considering USG Eclipse Ceiling Tiles, it’s important to understand their technical specifications to ensure they meet the specific needs of your project. Here are some of the key technical aspects of these tiles:

1. Noise Reduction Coefficient (NRC)

The Noise Reduction Coefficient (NRC) is a key factor in determining how well a ceiling tile absorbs sound. USG Eclipse Ceiling Tiles typically have an NRC rating between 0.70 and 0.80, meaning they absorb 70-80% of sound that strikes them. This makes them highly effective at reducing echo and controlling ambient noise levels in a room.

2. Ceiling Attenuation Class (CAC)

The Ceiling Attenuation Class (CAC) measures a ceiling tile’s ability to block sound between rooms. USG Eclipse Ceiling Tiles often have a CAC rating of around 35, which is ideal for reducing sound transmission between spaces, such as between offices or classrooms.

3. Light Reflectance (LR)

The Light Reflectance (LR) rating for USG Eclipse Ceiling Tiles is typically around 0.85, meaning they reflect 85% of the light that hits them. This high reflectance makes them a great choice for spaces where maximizing natural light is important, contributing to energy efficiency by reducing the need for artificial lighting.

4. Fire Resistance

Safety is always a top priority in any building project. USG Eclipse Ceiling Tiles are rated for fire resistance, meeting or exceeding industry standards. This makes them suitable for installation in environments where fire safety is a concern, such as schools, hospitals, and office buildings.


Installation and Maintenance Tips for USG Eclipse Ceiling Tiles

1. Professional Installation

While USG Eclipse Ceiling Tiles are relatively easy to install, it’s always recommended to hire a professional contractor for larger projects to ensure the installation is done correctly. Proper installation not only ensures optimal acoustic performance but also extends the lifespan of the tiles.

2. Grid Systems Compatibility

These ceiling tiles are compatible with a variety of grid systems, including standard 9/16-inch and 15/16-inch grids. Ensure you choose the right grid system for your space to complement the tile’s design and performance.

3. Cleaning and Maintenance

One of the benefits of USG Eclipse Ceiling Tiles is their easy-to-clean surface. To maintain their appearance and performance, regular dusting or light vacuuming with a soft brush attachment is recommended. For deeper cleaning, a damp cloth can be used to remove any stains or marks.

4. Replacement and Repairs

If a tile becomes damaged or stained beyond cleaning, it’s relatively easy to replace individual tiles without disrupting the entire ceiling system. Keeping a few extra tiles on hand can ensure quick repairs if necessary.


Why Choose USG Eclipse Ceiling Tiles for Your Next Project?

When it comes to selecting ceiling tiles for your next project, USG Eclipse Ceiling Tiles offer a compelling combination of acoustic performance, durability, and aesthetic appeal. Whether you’re designing an office space, a school, a hospital, or a retail store, these tiles provide the functionality and design flexibility needed to meet the demands of modern construction and interior design.

Here’s a quick recap of why you should consider USG Eclipse Ceiling Tile:

  • Superior sound absorption for noise control in busy environments.
  • Aesthetic versatility with a range of finishes and textures to suit any design scheme.
  • Durability and longevity that resist sagging, discoloration, and wear.
  • Energy efficiency through high light reflectance.
  • Sustainability through eco-friendly materials and manufacturing processes.

Conclusion

In conclusion, USG Eclipse Ceiling Tile are an excellent choice for anyone looking to improve both the acoustic performance and aesthetics of a space. Whether you’re outfitting a corporate office, a healthcare facility, a school, or a commercial building, these tiles offer unmatched versatility and performance. Their ease of maintenance, coupled with their high durability and eco-friendly credentials, makes them a sound investment for any long-term project.

Triple Fan Ceiling Fans: The Ultimate Cooling Solution for Larger Spaces

When it comes to cooling down large spaces, traditional ceiling fans can sometimes fall short. That’s where the Triple Fan Ceiling Fans comes into play. This innovative ceiling fan design is quickly gaining popularity for its ability to provide superior airflow and style to larger areas like warehouses, outdoor patios, or even modern living rooms. Unlike conventional ceiling fans with a single motor and set of blades, the Triple Fan Ceiling Fan features three smaller fans mounted on a single fixture, which maximizes the efficiency and distribution of airflow.

Triple Fan Ceiling Fan

In this article, we’ll explore everything you need to know about Triple Fan Ceiling Fans—from their unique design and benefits to choosing the right fan for your home or commercial space. Whether you’re seeking to improve air circulation in a large room or looking to enhance the aesthetic appeal of your space, the Triple Fan Ceiling Fan is an option worth considering.


What Is a Triple Fan Ceiling Fan?

Understanding the Design

A Triple Fan Ceiling Fan is a ceiling fixture that consists of three separate fan units mounted onto a central support or base. Each fan operates independently, allowing for a more comprehensive distribution of air across a larger area. These fans are often designed to rotate and pivot, which gives you more control over where the airflow is directed. Some models even come with remote controls or smart home compatibility, giving users greater flexibility in adjusting fan speed and direction.

Where Are Triple Fan Ceiling Fans Used?

This type of ceiling fan is commonly used in spaces that require extra air circulation due to their size or layout. Some examples of where you might find a Triple Fan Ceiling Fan include:

  • Outdoor patios and decks: Perfect for cooling down larger outdoor spaces.
  • Warehouses: Where efficient air circulation is crucial for comfort and safety.
  • High-ceilinged rooms: Such as living rooms or great rooms where traditional fans may not provide adequate coverage.
  • Commercial spaces: Restaurants, cafes, and open-concept retail stores often benefit from the style and functionality of a Triple Fan Ceiling Fan.

Read too: Kitchen Lighting For A Vaulted Ceiling: Illuminating Your Space with Style and Functionality


Benefits of a Triple Fan Ceiling Fan

1. Enhanced Airflow Coverage

One of the most significant advantages of the Triple Fan Ceiling Fan is its ability to provide enhanced airflow in larger spaces. With three individual fans working in tandem, the unit can circulate air more effectively than a single-fan ceiling fixture. This makes it ideal for rooms with high ceilings, open layouts, or outdoor areas where air can often feel stagnant.

2. Aesthetic Appeal

In addition to their practical benefits, Triple Fan Ceiling Fans offer a sleek and modern aesthetic. The unique design can serve as a focal point in the room, adding a touch of industrial or contemporary style. Many models feature metal finishes, wood accents, or even vintage designs, making them a versatile option for different decor themes.

3. Versatile Installation Options

Due to their versatile design, Triple Fan Ceiling Fans can be installed in a wide range of spaces, both indoors and outdoors. Most models are rated for damp locations, making them suitable for covered patios or sunrooms. For indoor installations, they’re perfect for larger rooms like open-plan living areas, dining rooms, or lofts.

4. Remote and Smart Controls

Many Triple Fan Ceiling Fans come equipped with remote control options, allowing you to adjust fan speed, direction, and sometimes even lighting from the comfort of your seat. Some newer models are also compatible with smart home systems like Google Home or Amazon Alexa, which means you can control your fan with voice commands or integrate it into your automated home setup.

5. Energy Efficiency

Despite having three fan units, Triple Fan Ceiling Fans are typically designed to be energy-efficient. Most models feature DC motors, which use less electricity than traditional AC motors, reducing your energy consumption and lowering your utility bills. The improved airflow distribution can also help cool your space more effectively, meaning you might rely less on air conditioning during warmer months.


Choosing the Right Triple Fan Ceiling Fan for Your Space

Selecting the right Triple Fan Ceiling Fan for your home or commercial space involves several key considerations. Here are a few factors to keep in mind:

1. Size of the Room

When choosing a ceiling fan, it’s essential to consider the size of the room. Triple Fan Ceiling Fans are designed to cool larger areas, but even within this category, there are varying sizes. If you’re looking to install a fan in a large open-concept living room or a spacious outdoor patio, choose a fan that is proportionate to the room’s dimensions. Some fans have longer downrods to accommodate high ceilings, while others are designed for tighter spaces.

2. Fan Blade Material

The material of the fan blades plays a role in both the fan’s performance and its appearance. Many Triple Fan Ceiling Fans come with blades made from metal, wood, or a combination of both. Metal blades are typically more durable and provide a more industrial look, making them ideal for commercial settings or outdoor spaces. Wooden or wood-like blades, on the other hand, add a touch of warmth and elegance, perfect for residential interiors.

3. Installation Type

Depending on the location and structure of your ceiling, you may need to select a specific type of installation. Triple Fan Ceiling Fans can be mounted on a standard ceiling or on an angled ceiling with the help of a downrod. For outdoor areas, make sure that the fan is rated for wet or damp environments to avoid any potential issues with moisture.

4. Control Features

As mentioned earlier, many Triple Fan Ceiling Fans come with advanced control options. If convenience is a top priority, opt for a model with remote control capabilities or smart home integration. Having the ability to control the fan speed and direction with ease can significantly improve your comfort, especially in larger rooms where manually adjusting the fan is impractical.

5. Lighting Options

Some Triple Fan Ceiling Fans come equipped with integrated lighting, making them a multifunctional fixture. If your space requires additional light, this can be an excellent solution to brighten up the room while improving airflow. Look for LED lighting options, which are energy-efficient and offer a range of brightness levels to suit your needs.


Triple Fan Ceiling Fan: Installation Tips

While Triple Fan Ceiling Fans offer incredible benefits, they do require careful installation to ensure proper performance and safety. Here are some installation tips to keep in mind:

1. Hire a Professional

Unless you’re highly skilled with electrical work, it’s always a good idea to hire a licensed electrician for the installation of your Triple Fan Ceiling Fan. These fans are often heavier and more complex to install than traditional ceiling fans due to their multi-fan design.

2. Ensure Proper Mounting

Because Triple Fan Ceiling Fans are typically larger and heavier, they need to be securely mounted to a ceiling joist or other solid support. The fan should not be installed in a manner where it could potentially fall or cause damage to the ceiling structure.

3. Check Ceiling Height

To maximize the fan’s effectiveness, it’s important to install it at the appropriate height. Most ceiling fans should be at least 8-9 feet above the floor to ensure optimal airflow. In rooms with especially high ceilings, you may need to use a longer downrod to lower the fan to an appropriate height.

4. Test the Fan Before Final Installation

Before completing the installation, test the fan to ensure all components are working correctly. Check that each fan spins freely, that the controls work properly, and that the fan remains securely in place when operating.


Why You Should Consider a Triple Fan Ceiling Fan

If you’re looking for a ceiling fan that combines functionality, energy efficiency, and style, the Triple Fan Ceiling Fan is a standout option. It not only provides enhanced cooling for larger spaces but also elevates the design of any room or outdoor area.

1. Perfect for Large Rooms

Unlike single-blade ceiling fans, Triple Fan Ceiling Fans are designed to cover more ground, making them perfect for large living rooms, outdoor patios, or even industrial spaces. Their three-fan design ensures that air is circulated evenly throughout the room, keeping every corner cool and comfortable.

2. Stylish and Modern

These fans are not only practical but also stylish. They come in a variety of finishes and designs that can complement various interior styles, whether you’re going for a modern, industrial, or even rustic look. The multi-fan design makes them a bold and unique centerpiece in any space.

3. Energy-Efficient Cooling

With the ability to cool larger areas more efficiently, Triple Fan Ceiling Fans can help reduce your reliance on air conditioning. This not only helps lower your energy bills but also reduces your environmental footprint.


Conclusion: The Future of Ceiling Fans

In conclusion, the Triple Fan Ceiling Fans is an ideal choice for those who need superior air circulation and want to make a design statement. With a variety of styles, sizes, and features to choose from, these fans are suitable for both residential and commercial applications. Whether you’re looking to cool down a spacious living room, outdoor patio, or warehouse, the Triple Fan Ceiling Fan provides a powerful, energy-efficient solution that enhances comfort and adds aesthetic value to any space.

T Bar Ceiling Light: A Complete Guide to Modern Lighting Solutions

When it comes to office spaces, commercial buildings, or even residential areas, lighting plays a crucial role not only in functionality but also in aesthetics. One of the most popular choices for overhead lighting in these environments is T Bar ceiling light. Known for their sleek design, efficiency, and versatility, T Bar ceiling lights are often used in drop or suspended ceilings, offering both practicality and a clean, modern look.

T Bar Ceiling Lights

In this guide, we will explore everything you need to know about T Bar ceiling lights—from their features and benefits to installation tips and choosing the right type for your needs. Whether you’re an architect designing a large office building or a homeowner looking to upgrade your lighting, understanding the benefits of T Bar ceiling lights can help you make an informed decision.


What Are T Bar Ceiling Lights?

Definition and Overview

T Bar ceiling lights are lighting fixtures designed specifically for use with T-bar grid ceilings, also known as drop ceilings or suspended ceilings. These ceilings are common in offices, schools, hospitals, and retail stores, where ease of access to wiring, plumbing, or HVAC systems is essential. The T Bar structure consists of a grid of metal strips (the “T-bars”) that hold the ceiling tiles in place. The T Bar ceiling lights are typically integrated into this grid, making them flush with the surrounding ceiling tiles.

T Bar lights often come in LED panel formats, making them highly energy-efficient and providing consistent, bright lighting across large spaces. They are usually available in standard sizes like 2×2 or 2×4 feet, designed to fit perfectly within the ceiling grid system.


Benefits of T Bar Ceiling Lights

1. Energy Efficiency

One of the most significant advantages of T Bar ceiling lights is their energy efficiency. Most modern T Bar lights utilize LED technology, which consumes significantly less electricity compared to traditional fluorescent or incandescent bulbs. LED T Bar lights can last up to 50,000 hours or more, reducing the need for frequent replacements and lowering overall energy consumption in large commercial spaces.

Read too: Kitchen Lighting For A Vaulted Ceiling: Illuminating Your Space with Style and Functionality

2. Uniform Illumination

T Bar ceiling lights offer uniform light distribution, which is particularly important in settings like offices or classrooms where even lighting is crucial for reducing eye strain and enhancing productivity. Unlike traditional lighting options, these lights eliminate dark spots and shadows, ensuring that every corner of the room is well-lit.

3. Space-Saving Design

Since T Bar ceiling lights are installed directly into the ceiling grid, they do not take up any extra room, making them an excellent choice for spaces where a clean, uncluttered look is desired. This is especially useful in commercial spaces where hanging lights or chandeliers might interfere with ceiling height or workspace functionality.

4. Cost-Effective

Thanks to their energy efficiency and long lifespan, T Bar ceiling lights provide a cost-effective lighting solution. While the initial installation might be higher compared to traditional lighting, the reduced energy bills and minimal maintenance over time make them a smart investment.

5. Customizable Lighting Options

Many T Bar ceiling lights offer features such as dimmability, tunable white lighting, or even RGB color options for creative spaces. This allows you to customize the lighting based on the needs of the room, whether it’s for productivity, relaxation, or showcasing products.

6. Eco-Friendly

LED T Bar lights are also environmentally friendly, as they contain no harmful substances like mercury found in fluorescent lighting. Additionally, their lower energy consumption means fewer carbon emissions, aligning with sustainability initiatives.


Types of T Bar Ceiling Lights

1. LED Panel T Bar Lights

The most common type of T Bar ceiling lights are LED panels. These fixtures offer a thin, flat design that provides even lighting across a large surface area. They are available in different sizes, including 2×2 feet and 2×4 feet, and can be installed directly into the T-bar ceiling grid.

2. Fluorescent T Bar Lights

Before LED technology became the norm, fluorescent T Bar lights were widely used. While some spaces may still use these, they are gradually being replaced by LEDs due to their superior energy efficiency and longevity.

3. Dimmable T Bar Lights

Dimmable T Bar ceiling lights allow users to adjust the brightness based on the time of day or the task at hand. This is ideal for offices or classrooms where varying light levels may be required for different activities.

4. Tunable White LED T Bar Lights

These lights allow users to adjust the color temperature of the light, ranging from warm white to cool white. Tunable white lighting is particularly beneficial in environments where different activities occur throughout the day. For instance, a warmer color might be used in the evening to create a relaxing atmosphere, while cooler, brighter light could be ideal during working hours.

5. RGB T Bar Lights

For more creative spaces, such as retail stores or entertainment venues, RGB T Bar lights can add vibrant color options to your lighting design. These lights can be programmed to change colors based on the mood or theme of the room, providing a dynamic and engaging environment.


How to Choose the Right T Bar Ceiling Lights

When selecting T Bar ceiling lights for your space, it’s important to consider several key factors to ensure that you choose the right product for your needs.

1. Size and Fit

T Bar ceiling lights typically come in standard sizes like 2×2 feet or 2×4 feet. Make sure to measure your ceiling grid accurately to choose the right size. It’s essential that the light fixture fits snugly into the ceiling grid to avoid any gaps or misalignments.

2. Lighting Needs

Consider the purpose of the room where the lights will be installed. In an office setting, for example, you may want bright, cool white lighting to enhance focus and productivity. In a restaurant or lounge, you might opt for dimmable lights that can create a more intimate, relaxed atmosphere in the evening. Determine the lighting requirements based on the room’s function before making a decision.

3. Energy Efficiency

Look for T Bar ceiling lights with high energy efficiency ratings. LED lights are generally the best option, offering reduced energy consumption and longer lifespans compared to traditional lighting options.

4. Dimmability and Tunability

If your space requires flexible lighting options, such as varying brightness or color temperature, look for dimmable or tunable T Bar lights. These features allow you to control the ambiance of the room, making the lighting adaptable to different situations.

5. Aesthetic and Design

Although T Bar ceiling lights are often chosen for their functionality, aesthetics shouldn’t be overlooked. Opt for a design that complements the overall style of the room. For example, sleek and modern LED panels might be perfect for a contemporary office, while a more decorative option could enhance the ambiance of a retail store.


Installation Tips for T Bar Ceiling Lights

Installing T Bar ceiling lights can be straightforward if you follow these steps:

1. Turn Off Power

Before beginning any installation, always ensure that the power to the area is turned off to prevent electrical accidents.

2. Remove the Ceiling Tile

Carefully remove the ceiling tile where you want to install the light. This will create the space needed for the new light fixture.

3. Mount the Fixture

Place the T Bar ceiling light into the grid where the ceiling tile was. Most fixtures are designed to fit snugly into the grid without additional supports, but check the manufacturer’s instructions for any specific mounting requirements.

4. Connect the Wiring

Follow the manufacturer’s instructions to connect the light to the building’s electrical system. If you’re not experienced with electrical work, it’s recommended to hire a licensed electrician to handle this part of the installation.

5. Secure the Light

Once the light is connected, secure it in place according to the installation guide. Replace any adjacent ceiling tiles if necessary.

6. Test the Light

Turn the power back on and test the light to ensure it’s working correctly. If the light is dimmable, check that the dimming feature operates smoothly.


Where to Use T Bar Ceiling Lights

T Bar ceiling lights are incredibly versatile and can be used in a variety of settings. Here are some of the most common places where you might see these lights in action:

1. Offices

In corporate environments, T Bar ceiling lights provide bright, even illumination that fosters productivity. Their energy efficiency and long lifespan make them ideal for office buildings that require large amounts of light for extended periods.

2. Schools

Classrooms, libraries, and hallways in educational settings can benefit from the uniform lighting provided by T Bar fixtures. Dimmable options may also be used in lecture halls or auditoriums for more flexibility.

3. Retail Spaces

Retail stores often use T Bar ceiling lights to ensure products are well-lit and appealing to customers. Tunable lights can also be used to create a specific ambiance based on the time of day or promotional events.

4. Healthcare Facilities

In hospitals and clinics, bright, clean lighting is essential for both staff and patients. T Bar ceiling lights offer the even, bright lighting necessary for medical environments while also being easy to clean and maintain.

5. Home Basements

While commonly used in commercial settings, T Bar ceiling lights are also an excellent option for home basements with drop ceilings. They provide ample lighting and fit seamlessly into the grid system, making them both practical and aesthetically pleasing.


Conclusion: The Ideal Lighting Solution for Any Space

T Bar ceiling light offer a versatile, energy-efficient, and cost-effective lighting solution for a wide range of spaces. From corporate offices and retail stores to schools and even residential areas, these lights provide the perfect balance of functionality and style. Whether you need consistent, bright lighting for productivity or customizable lighting options for a more dynamic environment, T Bar ceiling lights can meet your needs. With their easy installation, long lifespan, and modern aesthetic, it’s easy to see why these fixtures are becoming the go-to choice for many lighting projects.


Semi Flush Crystal Ceiling Lights: Elevate Your Space with Elegant Illumination

When it comes to interior lighting, ceiling lights play a crucial role not only in illuminating a space but also in enhancing its overall aesthetic appeal. One of the most sophisticated and versatile lighting options is the semi flush crystal ceiling light. These fixtures offer a perfect blend of luxury, functionality, and space-saving design, making them ideal for a wide variety of rooms in your home. Whether you’re looking to add a touch of glamour to your living room, bedroom, or hallway, semi flush crystal ceiling lights can transform the look and feel of your space.

Semi Flush Crystal Ceiling Lights

In this article, we’ll explore everything you need to know about semi flush crystal ceiling lights—from their benefits to how to choose the right fixture for your home. We’ll also look at some popular designs and tips on incorporating these lights into different spaces for a striking and elegant effect.


What Are Semi Flush Crystal Ceiling Lights?

Before diving into the benefits and styles of these lighting fixtures, it’s important to understand what semi flush crystal ceiling lights are.

Definition of Semi Flush Lighting

Semi flush lighting fixtures are mounted close to the ceiling but hang slightly down, usually by a few inches. They are different from flush mount lights, which sit directly against the ceiling, and from chandeliers or pendant lights, which hang much lower. The semi flush style offers a middle ground, providing enough clearance for lower ceilings while still creating a focal point in the room.

Why Crystal?

The addition of crystal elements elevates the elegance of these lights. Crystal lighting fixtures are known for their luxurious and glamorous appeal. The reflective nature of crystal allows the light to refract and scatter in a dazzling display, creating a visually stunning effect in any room. Semi flush crystal ceiling lights often feature clear, cut glass or crystal droplets that dangle from the fixture, adding a layer of sparkle and sophistication to the design.

Read too: Kitchen Lighting For A Vaulted Ceiling: Illuminating Your Space with Style and Functionality


Benefits of Choosing Semi Flush Crystal Ceiling Lights

1. Perfect for Low to Medium Ceilings

Unlike pendant lights or chandeliers, which require high ceilings, semi flush crystal ceiling lights are ideal for homes with low to medium ceiling heights. They hang just a few inches below the ceiling, allowing for sufficient headroom while still providing a decorative element. This makes them a practical choice for spaces like hallways, bedrooms, and smaller living rooms where height might be limited.

2. Elegant and Timeless Design

The beauty of crystal is timeless. Whether your home is decorated in a traditional, contemporary, or transitional style, semi flush crystal ceiling lights can blend seamlessly with the decor. Crystal fixtures add a touch of luxury to any room, and the semi flush design ensures they don’t overwhelm smaller spaces.

3. Versatile Lighting Option

Semi flush fixtures are known for providing ambient or general lighting, making them a versatile option for many rooms in the home. They distribute light evenly throughout the space, ensuring that the room is well-lit without the need for multiple fixtures. Additionally, the crystal elements in the light can help diffuse and amplify the light, adding a warm and inviting glow to the space.

4. Space-Saving Design

Since semi flush crystal ceiling lights are mounted close to the ceiling, they are an excellent space-saving solution. This is particularly beneficial for smaller rooms or areas where floor space is at a premium. These lights allow you to maintain an open, uncluttered look while still incorporating a statement piece.

5. Enhances Room’s Focal Point

Lighting can act as the centerpiece of a room. With the dazzling sparkle of crystal, a semi flush ceiling light can serve as a focal point that draws attention and enhances the overall aesthetic of the room. The reflective properties of crystal add dimension to the space, creating a sense of luxury and drama without overpowering the room’s other design elements.


How to Choose the Perfect Semi Flush Crystal Ceiling Lights

When shopping for semi flush crystal ceiling lights, there are several factors to consider to ensure you find the perfect fixture for your space.

1. Size and Scale

The size of the fixture should be proportional to the size of the room. A fixture that’s too small might not provide enough light or visual impact, while one that’s too large could overpower the space. Measure your room and consider how the light will look when installed. For larger rooms, you may want to choose a wider fixture with multiple tiers of crystals, while smaller rooms might benefit from a more compact design.

2. Material and Finish

While the crystals are the focal point of the light, the base material and finish are also important. Semi flush crystal lights come in a variety of finishes, including chrome, brushed nickel, brass, and bronze. Choose a finish that complements your room’s decor. For example, chrome and nickel finishes tend to work well in modern or contemporary spaces, while bronze or brass finishes might be more suited for traditional or rustic rooms.

3. Lighting Needs

Think about the type of light you want the fixture to emit. Some semi flush crystal lights are equipped with dimmable features, allowing you to adjust the brightness depending on the time of day or the mood you want to create. Additionally, check the wattage of the bulbs and the overall brightness to ensure that the fixture will provide enough light for your room’s needs.

4. Crystal Style and Quality

Not all crystal is created equal. The quality of the crystal can vary significantly, with higher-quality crystal offering more sparkle and brilliance. Look for semi flush crystal ceiling lights that use leaded crystal or opt for cut glass crystals that mimic the look of real crystal but at a more affordable price point. The shape and cut of the crystals can also affect how the light refracts, so choose a style that best fits your aesthetic.


Popular Designs of Semi Flush Crystal Ceiling Lights

There are countless designs available when it comes to semi flush crystal ceiling lights, but here are a few popular styles that can add a touch of elegance to your home:

1. Classic Tiered Crystal Light

This style features multiple tiers of hanging crystals that create a waterfall effect. The classic design exudes opulence and is perfect for rooms that need a dramatic centerpiece, such as dining rooms or master bedrooms.

2. Modern Geometric Crystal Light

For a more contemporary take on crystal lighting, opt for a semi flush light that features geometric shapes or minimalistic designs. These fixtures often combine sleek metal frames with crystal accents, offering a chic and modern vibe without sacrificing elegance.

3. Drum Shade with Crystal Accents

If you prefer a softer, more diffused light, consider a semi flush fixture with a fabric drum shade and crystal accents. The shade helps to soften the brightness while the crystals underneath add sparkle and sophistication.

4. Vintage-Inspired Crystal Chandelier

For those who love a bit of old-world charm, vintage-inspired crystal fixtures can bring a sense of history and glamour to your space. These lights often feature ornate metalwork and intricate crystal arrangements that hark back to antique designs.


Where to Use Semi Flush Crystal Ceiling Lights in Your Home

Semi flush crystal ceiling lights are versatile and can be used in various rooms throughout your home. Here are a few ideas on where to place them for maximum impact:

1. Living Room

In the living room, a semi flush crystal ceiling light can serve as a focal point, drawing attention to the center of the room. It’s perfect for adding elegance and brightness to this central gathering space without taking up valuable floor or table space.

2. Bedroom

Add a romantic and luxurious touch to your bedroom with a semi flush crystal light. The soft, diffused light created by the crystals can help create a relaxing and intimate atmosphere, perfect for winding down at the end of the day.

3. Hallway or Entryway

Hallways and entryways are often overlooked when it comes to decor, but they are the perfect place to make a statement with a crystal ceiling light. Semi flush fixtures are ideal for these areas as they don’t hang too low, ensuring you have enough clearance while still providing a stylish and welcoming touch.

4. Dining Room

For dining rooms with lower ceilings, a semi flush crystal light offers the perfect balance of glamour and practicality. It creates an elegant ambiance for dinners and gatherings without hanging too low over the dining table.


Conclusion: The Elegance of Semi Flush Crystal Ceiling Lights

Adding semi flush crystal ceiling lights to your home is an easy way to elevate your space with a touch of luxury and elegance. Whether you’re looking to add ambient lighting to a hallway, make a statement in your living room, or create a cozy, intimate bedroom environment, these lights provide both style and function. With countless designs and styles available, you’re sure to find the perfect fixture to complement your decor and enhance your home’s aesthetic.

Rustic Ceiling Fans for Cabins: The Perfect Blend of Style and Functionality

When designing or decorating a cabin, creating a warm, inviting, and cozy atmosphere is key. One of the best ways to enhance the rustic charm of your space while ensuring optimal comfort is by installing a ceiling fan that complements the aesthetic. Rustic ceiling fans for cabins offer not only practical airflow solutions but also a design element that can bring the entire room together. Whether you’re furnishing a log cabin, a woodland retreat, or simply want to give your space a natural, rustic touch, selecting the right ceiling fan can make all the difference.

Rustic Ceiling Fans For Cabins

In this article, we’ll guide you through everything you need to know about rustic ceiling fans for cabins, including their unique features, how to choose the perfect fan for your space, and the benefits of integrating a ceiling fan into your cabin’s design.


Why Choose Rustic Ceiling Fans for Cabins?

A ceiling fan isn’t just a functional tool for circulating air—it’s an essential component of your room’s decor, especially in cabins. Rustic ceiling fans are designed with natural materials, earthy tones, and rugged finishes that complement the cozy, homey feel that many cabin owners seek.

Here’s why rustic ceiling fans are a must-have for your cabin:

1. Functional Comfort

Cabins, particularly those in remote areas or without air conditioning, can become quite warm in the summer and chilly in the winter. Ceiling fans help to regulate temperature by improving air circulation. In the summer, fans create a cooling breeze, while in the winter, they can be set to reverse mode to push warm air downward, reducing the need for excessive heating.

2. Enhances Rustic Aesthetic

Rustic ceiling fans come in designs that perfectly match the natural look of wood, stone, and other rugged materials found in cabin interiors. These fans often feature blades made of wood or wood-like materials, distressed finishes, and earthy color palettes that blend seamlessly with the environment.

Read too: Kitchen Lighting For A Vaulted Ceiling: Illuminating Your Space with Style and Functionality

3. Energy Efficiency

Ceiling fans are an eco-friendly way to manage temperature. They use less energy than air conditioning units and can significantly reduce your energy consumption. With a rustic ceiling fan, you can stay cool in the summer and warm in the winter while keeping energy costs down.


Key Features to Look for in Rustic Ceiling Fans for Cabins

When shopping for rustic ceiling fans for cabins, there are several key features to consider to ensure you get the most out of both the style and functionality of the fan. Here’s a breakdown of what to look for:

1. Blade Material and Design

The blades are one of the most prominent design elements of a ceiling fan. Rustic ceiling fans often feature blades that are made from or designed to look like wood. Look for blades with distressed, weathered finishes or natural wood grain patterns that fit the overall aesthetic of your cabin.

Some popular wood types used for rustic fans include:

  • Pine
  • Oak
  • Walnut
  • Cherry

2. Lighting Integration

Many rustic ceiling fans come with integrated lighting fixtures, which are particularly useful in cabins that may have limited natural light. Rustic ceiling fan lights often feature antique or vintage designs, with amber or frosted glass shades, metal accents, and warm lighting tones that enhance the cozy feel of the cabin.

3. Control Options

For convenience, many modern rustic ceiling fans come with remote controls, allowing you to easily adjust fan speed and lighting settings. Some also offer smart technology integration, where you can control the fan using a smartphone app or voice commands via smart home systems.

4. Reversible Motor

A reversible motor is a crucial feature for year-round comfort. During the summer months, the fan should spin counterclockwise to create a cooling breeze. In winter, switching the direction to clockwise helps to push warm air that has risen to the ceiling back down into the room, improving heating efficiency.

5. Size and Mounting Options

The size of your ceiling fan should be appropriate for the size of your cabin room. For larger spaces, such as great rooms or open-plan living areas, a fan with a large blade span (52 inches or more) is recommended. In smaller, more intimate spaces like bedrooms, a smaller fan will suffice. Additionally, cabins with high ceilings may require a fan with a downrod mount to ensure proper air circulation, while low-ceiling spaces might benefit from a flush mount fan.


Rustic Ceiling Fans for Cabins: Top Designs and Styles

Rustic ceiling fans come in a wide variety of styles, each offering a unique blend of functionality and aesthetics. Below are some of the top designs and styles to consider for your cabin:

1. Log Cabin Ceiling Fans

Fans designed for log cabins often feature dark wood finishes, weathered metal accents, and blades shaped to resemble tree branches or rough-cut logs. These fans evoke a sense of the wilderness and seamlessly blend into the rustic decor of a log cabin.

2. Antler-Inspired Fans

For those looking to bring a touch of the outdoors inside, antler ceiling fans are a popular choice. These fans often feature faux antler accents on the light fixture or as part of the fan’s central design. They’re perfect for hunting lodges or cabins that embrace a wilderness-inspired theme.

3. Industrial Rustic Fans

Industrial rustic fans combine raw, rugged materials like metal and wood with exposed hardware, creating a look that is both functional and stylish. These fans work well in modern rustic cabins or those with a mix of traditional and contemporary design elements.

4. Vintage Farmhouse Fans

Farmhouse-style fans are a great option for cabins that lean toward a more traditional or country-style decor. These fans often feature light, weathered wood blades and simple, elegant light fixtures that add a touch of nostalgia to the space.

5. Tropical Rustic Fans

For cabins near lakes or rivers, tropical rustic fans add an airy, breezy feel to the space. These fans typically feature wide, leaf-shaped blades made of materials like rattan or bamboo, paired with light wood or bronze finishes.


How to Choose the Right Rustic Ceiling Fan for Your Cabin

Selecting the perfect rustic ceiling fan for cabins involves more than just picking a fan that looks good. Here are some practical tips to help you make the right decision:

1. Match the Fan to the Cabin’s Decor

The fan should complement the overall design of the cabin. Consider the wood finishes, colors, and textures present in your space and choose a fan that enhances these elements. For instance, if your cabin has a lot of dark wood, opt for a fan with dark wood blades. If your space is lighter, a fan with a weathered or whitewashed finish may be more suitable.

2. Consider the Room Size

As mentioned earlier, the size of the room is an important factor in determining the right fan. A fan that’s too small will struggle to circulate air effectively in a large room, while a fan that’s too large may overpower a smaller space. Measure your room’s square footage and choose a fan with the appropriate blade span to ensure optimal airflow.

3. Think About Functionality

While style is important, don’t overlook the fan’s functionality. Does it have enough speed settings? Is it equipped with lighting? Does it come with a remote control for easy adjustments? Be sure to choose a fan that offers the features you need for both comfort and convenience.

4. Energy Efficiency

If you’re looking to reduce energy costs, choose a fan with an Energy Star rating. These fans are designed to be more energy-efficient, saving you money while keeping your cabin comfortable year-round.

5. Installation Requirements

Consider the ceiling height and the complexity of installation. If your ceiling is vaulted or particularly high, you may need a downrod extension for proper installation. Make sure to check the fan’s specifications to ensure it will fit properly in your space.


Conclusion: The Perfect Addition to Your Cabin

A rustic ceiling fan for cabins is the perfect way to combine function and style, keeping your space comfortable while enhancing its natural, cozy aesthetic. Whether you’re outfitting a log cabin, a lakeside retreat, or simply adding a rustic touch to your home, a well-chosen ceiling fan will become an integral part of the ambiance.

By considering factors such as design, size, and functionality, you can select the ideal fan that meets your needs and adds a finishing touch to your cabin decor. With proper maintenance and care, your rustic ceiling fan will keep your space feeling comfortable for years to come.

Rustic Retreat: A Guide to Choosing the Perfect Rustic Cabin Ceiling Fan

When creating a cozy and charming environment in your rustic cabin, the right ceiling fan can be both a functional and aesthetic choice. Rustic Cabin Ceiling Fan blend seamlessly with the natural, rugged charm of cabin interiors, enhancing both comfort and style. This comprehensive guide will explore the benefits of rustic cabin ceiling fans, factors to consider when choosing one, and maintenance tips to keep them in top condition.

Rustic Cabin Ceiling Fan

Understanding Rustic Cabin Ceiling Fans

Rustic Cabin Ceiling Fans are designed to complement the natural and earthy aesthetics of cabin interiors. These fans often feature materials and designs that echo the rugged beauty of nature, such as wood finishes, metal accents, and traditional motifs. They not only provide essential airflow but also contribute to the overall ambiance of your cabin.

Key Features of Rustic Cabin Ceiling Fans

  1. Natural Materials: Many rustic ceiling fans incorporate materials like wood, wrought iron, and antique finishes. These materials help to create a warm, inviting atmosphere that aligns with the natural beauty of a cabin setting.
  2. Traditional Designs: Rustic ceiling fans often feature traditional or vintage designs. Look for fans with details such as ornate metalwork, distressed wood finishes, and classic blade shapes.
  3. Durability: Given the often harsh conditions of cabin environments, rustic ceiling fans are built to be durable and long-lasting. They are designed to withstand varying temperatures and humidity levels.

Benefits of Rustic Cabin Ceiling Fans

1. Enhancing Aesthetic Appeal

One of the main benefits of Rustic Cabin Ceiling Fans is their ability to enhance the aesthetic appeal of your cabin. They blend effortlessly with the natural, rugged decor of a cabin, adding a touch of sophistication while maintaining a casual, comfortable look.

Read too: Bathroom Flooded Through the Ceiling: A Comprehensive Guide

2. Improving Air Circulation

Ceiling fans are essential for improving air circulation. They help to distribute air evenly throughout the room, creating a comfortable environment by reducing hot and cold spots. This is especially useful in a cabin, where heating and cooling can be uneven.

3. Energy Efficiency

Using ceiling fans can help reduce energy costs. By improving air circulation, you can reduce the reliance on heating and cooling systems, which can lower your energy bills. In the summer, a ceiling fan helps to create a wind-chill effect, making the room feel cooler without lowering the thermostat.

4. Versatility

Rustic Cabin Ceiling Fans are versatile and can be used in various settings within a cabin. Whether you’re outfitting a living room, bedroom, or even a covered porch, a rustic ceiling fan can provide both style and function.

Choosing the Right Rustic Cabin Ceiling Fan

1. Consider the Size of the Room

The size of your room will influence the size of the ceiling fan you choose. Larger rooms benefit from fans with longer blade spans, while smaller rooms require more compact models. Measure your room and consult the manufacturer’s guidelines to select the appropriate size.

2. Evaluate the Design and Finish

The design and finish of your ceiling fan should complement your cabin’s decor. Rustic cabin fans come in various styles, including those with wood blades, antique finishes, and metal accents. Choose a design that enhances the overall theme of your cabin while providing the functionality you need.

3. Look for Adjustable Speeds and Reversible Motor

A fan with adjustable speeds allows you to control the airflow according to your needs. A reversible motor feature is also beneficial, as it enables the fan to run in both directions. In the winter, running the fan in reverse helps to circulate warm air that collects near the ceiling.

4. Check for Additional Features

Modern Rustic Cabin Ceiling Fans may come with additional features such as integrated lighting, remote controls, and energy-efficient LED bulbs. Consider these extras based on your preferences and needs.

Installation and Maintenance Tips

1. Professional Installation

For best results, it’s recommended to have your ceiling fan installed by a professional. Proper installation ensures that the fan operates efficiently and safely. A professional can also help with any electrical work needed.

2. Regular Cleaning

To maintain the appearance and performance of your Rustic Cabin Ceiling Fan, regular cleaning is essential. Dust the blades and other components regularly to prevent buildup. Use a soft cloth and a gentle cleaner to avoid damaging the finish.

3. Inspect for Wear and Tear

Periodically check your ceiling fan for any signs of wear and tear, such as loose blades or squeaking noises. Address any issues promptly to prevent further damage and ensure the fan continues to operate smoothly.

4. Lubrication

Some ceiling fans require occasional lubrication of the motor and moving parts. Consult the manufacturer’s instructions for specific maintenance recommendations for your model.

Comparing Rustic Cabin Ceiling Fans with Other Styles

1. Modern Ceiling Fans

Modern ceiling fans often feature sleek, minimalistic designs and advanced technology. While they offer contemporary style and efficiency, they may not blend as seamlessly with the traditional charm of a rustic cabin.

2. Industrial Ceiling Fans

Industrial ceiling fans are designed for durability and functionality in industrial settings. They often feature robust materials and utilitarian designs. While durable, they may lack the aesthetic appeal of a rustic cabin fan.

3. Traditional Ceiling Fans

Traditional ceiling fans include classic designs with ornate details. They share some similarities with rustic fans but may not always feature the same natural materials or rugged finishes.

Conclusion

Rustic Cabin Ceiling Fans are more than just a practical addition to your cabin; they are a stylish and functional element that enhances your living space. By choosing the right fan, considering installation and maintenance tips, and comparing with other styles, you can create a comfortable and charming environment that reflects the natural beauty of your rustic retreat.

Radiant Ceiling Panels Hydronic: Benefits, Installation, and Efficiency

When it comes to effective and energy-efficient heating solutions, Radiant Ceiling Panels Hydronic offer an innovative and comfortable alternative. This article will delve into what radiant ceiling panels hydronic are, their benefits, installation processes, and maintenance tips to help you make an informed decision for your home or business.

Radiant Ceiling Panels Hydronic

What Are Radiant Ceiling Panels Hydronic?

Radiant Ceiling Panels Hydronic are a type of heating system designed to provide comfortable and efficient heat by utilizing water-filled panels mounted on the ceiling. The system works by circulating hot water through pipes embedded in or attached to the ceiling panels. As the water heats up, it warms the panels, which then radiate heat downward into the living space.

This system contrasts with traditional heating methods like forced air, which relies on blowing heated air through ducts. Radiant ceiling panels offer a more direct and even heat distribution, contributing to a more comfortable indoor environment.

Benefits of Radiant Ceiling Panels Hydronic

1. Even Heat Distribution

One of the primary benefits of Radiant Ceiling Panels Hydronic is their ability to provide even heat distribution. Since the panels are mounted on the ceiling, heat is radiated directly downward, reducing cold spots and creating a consistent temperature throughout the room.

2. Energy Efficiency

Hydronic systems are known for their energy efficiency. By using water as the heat transfer medium, radiant ceiling panels can operate at lower temperatures compared to traditional heating systems. This efficiency translates into reduced energy consumption and lower utility bills.

Read too: Bathroom Flooded Through the Ceiling: A Comprehensive Guide

3. Improved Air Quality

Unlike forced air systems that can stir up dust and allergens, radiant ceiling panels do not affect indoor air quality. The absence of air movement means fewer particles are disturbed, creating a cleaner and healthier living environment.

4. Quiet Operation

Radiant Ceiling Panels Hydronic operate silently since there are no moving parts like fans or blowers. This quiet operation contributes to a more peaceful and serene indoor atmosphere.

5. Design Flexibility

The panels can be integrated seamlessly into various architectural designs. They are typically installed flush with the ceiling, allowing for a clean and unobtrusive appearance that can be easily incorporated into any interior design.

Installation of Radiant Ceiling Panels Hydronic

1. Planning and Design

Before installing Radiant Ceiling Panels Hydronic, a detailed planning and design phase is crucial. This involves determining the heating needs of the space, selecting the appropriate panel size and placement, and designing the layout of the piping system.

2. Professional Installation

While DIY installations are possible, it’s often recommended to hire a professional for the installation of radiant ceiling panels. Professionals have the expertise to ensure proper placement, alignment, and connection of the panels and piping. They can also handle the integration with your existing heating system if necessary.

3. Ceiling Preparation

The ceiling must be prepared to accommodate the panels and piping. This may involve removing existing ceiling materials, ensuring structural integrity, and installing support brackets or mounts for the panels.

4. Panel and Pipe Installation

Once the ceiling is prepared, the panels and pipes are installed. The panels are mounted to the ceiling, and the pipes are connected to the panels and the central heating system. The system is then filled with water, and the heating process is tested.

5. System Testing

After installation, the system must be tested to ensure it operates correctly. This includes checking for leaks, verifying temperature control, and ensuring that the heat distribution is even throughout the room.

Maintenance of Radiant Ceiling Panels Hydronic

1. Regular Inspections

Regular inspections are important to maintain the efficiency and longevity of your Radiant Ceiling Panels Hydronic system. Inspect the panels and pipes for any signs of leaks or damage. Ensure that the system is operating correctly and efficiently.

2. System Flush

Over time, sediment can build up in the system, affecting performance. A periodic system flush helps remove any buildup and ensures smooth operation. Consult with a professional for guidance on how often to perform this maintenance task.

3. Check for Leaks

Leaks in the piping system can lead to reduced efficiency and potential damage. Regularly check for any signs of leaks and address them promptly to prevent further issues.

4. Professional Servicing

Annual servicing by a professional can help identify and resolve any potential issues before they become major problems. Professionals can also perform more in-depth maintenance tasks, such as checking the integrity of the piping system and ensuring optimal performance.

Comparing Radiant Ceiling Panels Hydronic with Other Heating Systems

1. Radiant Floor Heating

Both radiant ceiling panels and radiant floor heating provide efficient and comfortable heat. However, ceiling panels are less intrusive and do not require floor space. Radiant floor heating, on the other hand, can be more effective in spaces with high ceilings where heat distribution from the ceiling may be less efficient.

2. Forced Air Heating

Forced air heating systems use ducts to distribute warm air throughout the space. While effective, they can create uneven temperatures and stir up dust. Radiant Ceiling Panels Hydronic offer a more even heat distribution and improved air quality by eliminating air movement.

3. Baseboard Heating

Baseboard heating systems are installed along the baseboards of a room and can be less aesthetically pleasing compared to ceiling-mounted panels. Radiant ceiling panels offer a more discreet installation and even heat distribution without taking up wall space.

Conclusion

Radiant Ceiling Panels Hydronic offer an innovative and efficient solution for heating residential and commercial spaces. With their even heat distribution, energy efficiency, and quiet operation, they provide a comfortable and effective heating option. By understanding the benefits, installation process, and maintenance requirements, you can make an informed decision about incorporating radiant ceiling panels into your heating system.

Outdoor Ceiling Fan 3 Blade: A Comprehensive Guide for Your Outdoor Space

When it comes to enhancing comfort and style in your outdoor living areas, an Outdoor Ceiling Fan 3 Blade can be a perfect choice. Not only does it provide a refreshing breeze, but its streamlined design also adds a touch of modern elegance to your patio, deck, or porch. In this guide, we will explore everything you need to know about Outdoor Ceiling Fans with 3 Blades, including their benefits, design considerations, top models, and maintenance tips.

Outdoor Ceiling Fan 3 Blade

Why Choose an Outdoor Ceiling Fan 3 Blade?

Outdoor ceiling fans are designed to withstand the elements while providing comfort and style to outdoor spaces. The three-blade design is popular for several reasons:

1. Sleek and Modern Appearance

The Outdoor Ceiling Fan 3 Blade design often features a sleek and contemporary look. The minimalist style complements modern and transitional outdoor decor, making it a versatile choice for various settings.

Read too: Bathroom Flooded Through the Ceiling: A Comprehensive Guide

2. Improved Airflow Efficiency

Three-blade fans are designed to move air efficiently while using less power. The aerodynamic blade design allows for optimal airflow, which is particularly beneficial in larger outdoor spaces where good air circulation is essential.

3. Less Noise

With fewer blades, these fans generally produce less noise compared to models with more blades. This makes them ideal for creating a tranquil outdoor environment where noise is kept to a minimum.

4. Easy Maintenance

Fans with three blades are typically easier to clean and maintain. The simpler design means fewer parts and less buildup of dust and debris, ensuring that the fan operates smoothly over time.

Key Considerations When Choosing an Outdoor Ceiling Fan 3 Blade

When selecting the perfect Outdoor Ceiling Fan 3 Blade, there are several factors to consider to ensure you make the best choice for your space:

1. Weather Resistance

Outdoor ceiling fans must be designed to withstand various weather conditions. Look for fans with weather-resistant materials such as stainless steel or marine-grade aluminum. Additionally, ensure that the fan is rated for outdoor use and can handle exposure to moisture and UV rays.

2. Size and Blade Span

The size of the fan and the blade span are crucial for effective airflow. For larger outdoor spaces, such as patios or decks, choose a fan with a larger blade span to ensure adequate circulation. Conversely, for smaller areas, a fan with a shorter blade span will suffice.

3. Motor Quality

The quality of the motor is essential for both performance and durability. Opt for fans with high-quality motors that provide quiet and efficient operation. DC motors are generally more energy-efficient and quieter than traditional AC motors.

4. Style and Finish

The aesthetic appeal of the fan is important to match your outdoor decor. Outdoor ceiling fans come in various styles and finishes, including brushed nickel, matte black, and oil-rubbed bronze. Choose a finish that complements your outdoor furniture and overall design.

5. Lighting Options

Some outdoor ceiling fans come with integrated lighting options, providing both illumination and cooling in one unit. If you need extra lighting for your outdoor space, consider fans with built-in light fixtures or options for adding a light kit.

Top Outdoor Ceiling Fan 3 Blade Models

Here are some of the best Outdoor Ceiling Fans with 3 Blades currently available, known for their performance, style, and durability:

1. Hunter Fan Company 59244 Coastal

The Hunter Coastal ceiling fan features a three-blade design with a coastal-inspired finish. Its weather-resistant construction makes it ideal for outdoor use, and the included remote control allows for easy operation. The fan is designed to be quiet and efficient, providing excellent airflow for your patio or deck.

2. Minka-Aire Xtreme H2O

The Minka-Aire Xtreme H2O is a high-performance fan designed for outdoor use. Its three-blade configuration ensures optimal airflow, while the sleek, modern design adds a touch of elegance to any outdoor space. The fan is made with weather-resistant materials and features a DC motor for quiet operation.

3. Emerson CF712W

The Emerson CF712W is a durable and stylish ceiling fan designed specifically for outdoor environments. Its three-blade design provides efficient airflow, and the fan is constructed with high-quality materials to withstand the elements. The fan also features a remote control for convenient operation.

4. Casablanca Caneel Bay

The Casablanca Caneel Bay ceiling fan combines classic style with modern functionality. The three-blade design is perfect for outdoor use, and the fan features a weather-resistant finish. With its powerful motor and sleek design, the Caneel Bay is an excellent choice for enhancing your outdoor living area.

Installation Tips for Outdoor Ceiling Fans

Proper installation is crucial for the optimal performance of your Outdoor Ceiling Fan 3 Blade. Here are some tips to ensure a successful installation:

1. Choose the Right Location

Install the fan in a location where it can effectively circulate air without obstructions. Ensure that the fan is mounted at least 7-8 feet above the floor to allow for adequate airflow and safety.

2. Use a Weatherproof Mounting Kit

For outdoor installations, use a weatherproof mounting kit to ensure the fan is securely attached and can withstand exposure to moisture. The kit should include corrosion-resistant hardware and a canopy designed for outdoor use.

3. Hire a Professional Installer

While some homeowners may choose to install the fan themselves, hiring a professional ensures that the installation is done correctly and safely. A professional installer can handle electrical connections and ensure that the fan is mounted securely.

Maintenance and Care for Outdoor Ceiling Fans

To keep your Outdoor Ceiling Fan 3 Blade functioning smoothly and looking great, regular maintenance is essential:

1. Clean the Blades

Dust and debris can accumulate on the blades over time. Use a soft cloth or duster to gently clean the blades and remove any buildup. For stubborn dirt, use a mild soap solution and a soft brush.

2. Check for Loose Parts

Periodically inspect the fan for any loose screws or parts. Tighten any loose connections to prevent rattling or wobbling during operation.

3. Inspect the Motor

Ensure that the motor is functioning properly and that there are no signs of wear or damage. If you notice any issues, contact a professional for repairs or maintenance.

4. Protect from the Elements

Although outdoor ceiling fans are designed to withstand the elements, using a fan cover or shield during harsh weather conditions can help extend the lifespan of the fan.

Conclusion

An Outdoor Ceiling Fan 3 Blade can be a stylish and functional addition to your outdoor living space. With its sleek design, efficient airflow, and quiet operation, it’s an excellent choice for enhancing comfort and aesthetics in your patio, deck, or porch. By considering factors such as weather resistance, motor quality, and installation tips, you can select the perfect fan for your needs and ensure its long-lasting performance.

Most Silent Ceiling Fan: Enhance Your Comfort Without the Noise

Ceiling fans are essential for maintaining comfort in your home, particularly during the warmer months. However, not all ceiling fans are created equal. One of the key features many homeowners look for is a quiet operation. If you’re seeking a fan that delivers a cooling breeze without the accompanying noise, you’ll want to find the most silent ceiling fan available. In this article, we’ll explore what makes a ceiling fan silent, highlight some top models, and provide tips for choosing the quietest fan for your space.

Most Silent Ceiling Fan

What Makes a Ceiling Fan Silent?

Before diving into specific models, it’s important to understand what factors contribute to a ceiling fan’s quiet operation. Here are some key elements that can impact a fan’s noise level:

1. Motor Type

The type of motor in a ceiling fan plays a significant role in its noise level. There are two main types of motors used in ceiling fans:

  • AC Motors: Traditional ceiling fans use AC motors, which can be noisier due to the mechanical components and the way they operate. These motors have more moving parts, which can lead to additional noise.
  • DC Motors: DC motors are a newer technology and are generally much quieter than AC motors. They have fewer moving parts and run more smoothly, which reduces noise levels. Fans with DC motors are typically the quietest options available.

Read too: Bathroom Flooded Through the Ceiling: A Comprehensive Guide

2. Blade Design

The design and material of the blades can also affect how much noise a ceiling fan makes. Blades that are well-balanced and aerodynamically designed help minimize noise. Additionally, materials such as plywood or plastic tend to be quieter than metal blades.

3. Installation

Proper installation is crucial for a quiet ceiling fan. An improperly installed fan can produce vibrations and rattling noises. Ensuring that the fan is securely mounted and that all components are tightened can help reduce operational noise.

4. Fan Size and Speed

Larger fans generally operate more quietly than smaller ones because they can move air more efficiently at lower speeds. Additionally, running the fan at lower speeds can also reduce noise.

Top Models of the Most Silent Ceiling Fans

When searching for the most silent ceiling fan, it’s helpful to look at specific models known for their quiet performance. Here are some top-rated options:

1. Haiku L Series by Big Ass Fans

The Haiku L Series is renowned for its silent operation. This fan features a DC motor and blades designed for maximum efficiency and minimal noise. It comes with a sleek design and offers a range of smart features, including a remote control and adjustable settings. The Haiku L Series is an excellent choice if you’re looking for a high-quality, quiet ceiling fan.

2. Minka-Aire Raptor Ceiling Fan

The Minka-Aire Raptor Ceiling Fan is another great option known for its quiet performance. It features a powerful yet silent motor and is designed with aerodynamic blades that help reduce noise. This fan is available in various finishes, making it a versatile choice for different interior styles.

3. Casablanca Isotope Ceiling Fan

The Casablanca Isotope Ceiling Fan combines modern design with silent operation. It uses a DC motor and has a sleek, minimalistic design that complements various room styles. The fan’s quiet performance and energy efficiency make it a popular choice among homeowners.

4. Emerson Urbanjet Ceiling Fan

The Emerson Urbanjet Ceiling Fan is designed for quiet operation and energy efficiency. It features a DC motor and aerodynamic blades that minimize noise. This fan also comes with a modern design, making it suitable for contemporary interiors.

How to Choose the Most Silent Ceiling Fan

Selecting the most silent ceiling fan for your home involves considering several factors. Here are some tips to help you make the best choice:

1. Look for a DC Motor

As mentioned earlier, DC motors are quieter than AC motors. When shopping for a ceiling fan, prioritize models with DC motors to ensure minimal noise.

2. Check for Noise Ratings

Some manufacturers provide noise ratings for their fans. Look for information on decibel levels (dB) to compare the noise levels of different models. Lower decibel levels indicate quieter operation.

3. Read Customer Reviews

Customer reviews can provide valuable insights into the performance and noise levels of different ceiling fans. Look for reviews specifically mentioning quiet operation to find models that meet your needs.

4. Consider the Fan Size

Larger fans generally operate more quietly than smaller ones. Ensure that the fan you choose is appropriately sized for the room where it will be installed.

5. Professional Installation

Ensure that your ceiling fan is installed by a professional to avoid issues with noise caused by improper installation. A properly installed fan will operate more smoothly and quietly.

Benefits of Choosing a Silent Ceiling Fan

1. Enhanced Comfort

A quiet ceiling fan contributes to a more comfortable living environment by providing cooling without disruptive noise. This is especially important for spaces where relaxation or concentration is needed, such as bedrooms or home offices.

2. Improved Sleep Quality

Noise can disrupt sleep, so having a ceiling fan that operates quietly can help create a more restful sleeping environment. The gentle breeze from a silent fan can enhance sleep quality without disturbing your rest.

3. Reduced Distractions

In home offices or study areas, a silent ceiling fan helps maintain focus and concentration by eliminating background noise. This can improve productivity and create a more conducive work environment.

4. Increased Property Value

A high-quality, silent ceiling fan can enhance the overall appeal of your home, potentially increasing its value. Buyers often appreciate the comfort and efficiency provided by a well-designed ceiling fan.

Conclusion

Finding the most silent ceiling fan involves looking for features such as a DC motor, aerodynamic blade design, and proper installation. Models like the Haiku L Series, Minka-Aire Raptor, Casablanca Isotope, and Emerson Urbanjet offer exceptional quiet performance, making them excellent choices for any home.

By considering factors such as motor type, blade design, and customer reviews, you can select a ceiling fan that enhances your comfort without the distraction of noise. Investing in a silent ceiling fan not only improves your living environment but also adds value to your home.

Maverick 70 Ceiling Fan: Enhance Your Home with the Stylish and Efficient

Ceiling fans are more than just practical additions to your home—they offer a blend of functionality, style, and comfort. One of the best options available in the market today is the Maverick 70 Ceiling Fan. This large, efficient ceiling fan is perfect for spacious areas and can enhance the ambiance of your home with its sleek design. In this article, we’ll explore the features, benefits, and installation of the Maverick 70 Ceiling Fan, providing a comprehensive guide for homeowners considering this fan for their space.

Maverick 70 Ceiling Fan

Why Choose the Maverick 70 Ceiling Fan?

The Maverick 70 Ceiling Fan has become a popular choice among homeowners looking for an efficient and stylish solution to cool large rooms. With its 70-inch blade span, this fan is perfect for wide open spaces, making it ideal for living rooms, great rooms, and even outdoor patios.

1. Energy Efficiency

One of the standout features of the Maverick 70 Ceiling Fan is its energy efficiency. Equipped with a DC motor, the fan consumes significantly less energy compared to traditional AC motor fans. This results in lower electricity bills while still providing optimal airflow. Additionally, the fan is compatible with Energy Star ratings, meaning it meets stringent guidelines for energy efficiency.

2. Stunning Design

Design plays a critical role when choosing a ceiling fan, and the Maverick 70 Ceiling Fan delivers on aesthetics. Its three elegantly curved blades offer a minimalist yet modern look that can complement a variety of interior styles. The fan comes in a range of finishes, including brushed steel, matte black, and matte white, allowing homeowners to pick a model that best suits their decor. Whether your home style is modern, rustic, or coastal, the Maverick 70 Ceiling Fan fits right in.

Read too: Bathroom Flooded Through the Ceiling: A Comprehensive Guide

3. Powerful Performance

A ceiling fan’s primary function is to circulate air and cool down spaces, and the Maverick 70 Ceiling Fan excels in this regard. The large 70-inch blade span allows the fan to move air efficiently in even the largest rooms. With six speed settings, you can adjust the airflow to meet your cooling needs, whether you’re looking for a gentle breeze or a more intense flow during the hot summer months.

The fan operates quietly, making it perfect for bedrooms, living rooms, or any space where you want to relax without background noise. The whisper-quiet motor and smooth operation provide cooling comfort without disrupting conversations or sleep.

Features of the Maverick 70 Ceiling Fan

Now that we’ve established why the Maverick 70 Ceiling Fan is such a popular choice, let’s dive into the specific features that make it stand out from the competition.

1. Large Blade Span

The Maverick 70 Ceiling Fan is named after its 70-inch blade span, which is larger than average ceiling fans. This wide blade reach is perfect for larger rooms where a regular fan might struggle to circulate air effectively. With its large span and precision-engineered blades, the Maverick 70 ensures that every corner of the room is cooled evenly.

2. Reversible Motor for Year-Round Use

Ceiling fans aren’t just for the summer. The Maverick 70 Ceiling Fan comes with a reversible motor that allows you to change the direction of the blades depending on the season. In the summer, the fan rotates in a counter-clockwise direction to create a cool breeze. In the winter, you can switch it to clockwise, which helps push warm air down from the ceiling, improving the efficiency of your heating system.

3. Remote Control for Easy Operation

Gone are the days of pulling cords to change the fan’s speed or turn it on and off. The Maverick 70 Ceiling Fan comes with a remote control that allows you to easily adjust the fan’s settings from anywhere in the room. With the remote, you can control the fan’s speed, turn the fan on or off, and even set it to reverse mode—all at the touch of a button.

4. Indoor and Outdoor Use

Another great feature of the Maverick 70 Ceiling Fan is its versatility. It is designed to be used both indoors and outdoors, making it a great option for covered patios or verandas. Its damp rating ensures that the fan can handle outdoor conditions like humidity and mild exposure to moisture without rusting or deteriorating. This means you can enjoy the sleek design and efficient airflow in both your indoor and outdoor living spaces.

5. Energy Star Rated

The Maverick 70 Ceiling Fan is Energy Star rated, meaning it meets or exceeds the stringent energy efficiency guidelines set by the U.S. Environmental Protection Agency. This makes the fan not only a cost-effective option in the long run but also an eco-friendly choice for environmentally-conscious homeowners.

How to Install the Maverick 70 Ceiling Fan

One of the benefits of the Maverick 70 Ceiling Fan is its relatively simple installation process. However, if you’re not experienced with electrical work, you may want to consider hiring a professional to ensure everything is installed correctly and safely.

1. Gather the Necessary Tools

Before beginning the installation, you’ll need a few basic tools:

  • A ladder
  • Screwdriver
  • Wire strippers
  • A voltage tester
  • The mounting hardware that comes with the fan

2. Turn Off the Power

For safety reasons, always turn off the power at the breaker box before working on any electrical projects. Use a voltage tester to ensure the power is completely off before you begin wiring the fan.

3. Assemble the Fan

Follow the manufacturer’s instructions to assemble the fan. Attach the blades to the motor and ensure all screws are securely tightened. The Maverick 70 Ceiling Fans comes with detailed instructions that will guide you through this process.

4. Mount the Fan

Using the mounting hardware included with the fan, secure the mounting bracket to the ceiling. Depending on whether your ceiling is sloped or flat, you may need additional accessories to properly install the fan.

5. Wire the Fan

Carefully connect the wires from the fan to the corresponding wires in your ceiling. Typically, you’ll connect the black or red wire (fan power) to the black wire in the ceiling, the white wire (neutral) to the white wire, and the green or bare wire (ground) to the green or bare wire in your ceiling. Again, refer to the manufacturer’s instructions for specific wiring details.

6. Test the Fan

Once everything is connected and securely mounted, restore power to the fan and test its operation. Use the remote to turn the fan on, adjust the speed, and check the directional settings to ensure everything is working properly.

Benefits of the Maverick 70 Ceiling Fan for Your Home

1. Increased Comfort

With its powerful motor and large blade span, the Maverick 70 Ceiling Fans ensures that your home stays cool and comfortable, even during the hottest months of the year.

2. Lower Energy Costs

By using the Maverick 70 Ceiling Fans to circulate air, you can reduce your reliance on air conditioning, leading to lower energy bills. Additionally, the fan’s energy-efficient motor consumes less electricity, making it a cost-effective choice over time.

3. Stylish Design

The Maverick 70 Ceiling Fans is not just functional; it’s also a stylish addition to any room. Its sleek, modern design can enhance the look of your living space while providing practical benefits.

4. Versatility

Whether you need a ceiling fan for your living room, bedroom, or outdoor patio, the Maverick 70 Ceiling Fan is versatile enough to meet all your needs. Its large size and damp rating make it suitable for a wide range of spaces.

Conclusion

The Maverick 70 Ceiling Fans is an excellent choice for homeowners seeking a combination of style, performance, and energy efficiency. Its large blade span, quiet operation, and sleek design make it a standout in the world of ceiling fans. Whether you’re cooling a large living space or adding comfort to your outdoor area, this fan delivers the features and benefits you’re looking for.

Lighting Direct Ceiling Fans: Elevate Your Space with Style and Functionality

Ceiling fans are a quintessential part of home comfort, seamlessly blending function and aesthetics. When it comes to enhancing your living space, Lighting Direct Ceiling Fans stand out as a top choice. These fans are not only designed to keep your space cool but also to add a touch of elegance to your home decor. In this comprehensive guide, we’ll explore the benefits, styles, and features of Lighting Direct Ceiling Fans to help you make an informed decision.

Lighting Direct Ceiling Fans

Understanding Lighting Direct Ceiling Fans

Lighting Direct Ceiling Fans are designed to integrate both lighting and ventilation into one elegant fixture. This fusion of functionality ensures that you get the best of both worlds—a cool breeze and a well-lit room. These fans are particularly popular because they reduce the need for multiple light sources and fans, simplifying your home’s design while enhancing its efficiency.

Benefits of Lighting Direct Ceiling Fans

1. Enhanced Energy Efficiency

Lighting Direct Ceiling Fans are designed with energy efficiency in mind. By combining lighting and cooling in a single unit, you can reduce your overall energy consumption. Modern ceiling fans use advanced motor technology that consumes less electricity compared to traditional fans. Additionally, LED lighting integrated into these fans is more energy-efficient than conventional incandescent bulbs.

Read too: Bathroom Flooded Through the Ceiling: A Comprehensive Guide

2. Improved Air Circulation

One of the primary functions of ceiling fans is to improve air circulation. Lighting Direct Ceiling Fans are engineered to distribute air evenly throughout the room, ensuring a comfortable environment. Proper air circulation can help regulate temperature, making your home feel cooler in the summer and warmer in the winter.

3. Stylish Design Options

Lighting Direct Ceiling Fans come in a wide range of styles and finishes, making it easy to find one that complements your home decor. Whether you prefer a sleek modern design or a more traditional look, there’s a Lighting Direct Ceiling Fan that will enhance the aesthetic appeal of your space.

4. Space-Saving Solution

By integrating lighting and ventilation into one fixture, Lighting Direct Ceiling Fans help save space. This is especially beneficial in rooms with limited space where a separate fan and light fixture might be impractical. The compact design of these fans ensures that you have more room for other furnishings and decorations.

5. Versatile Lighting Options

Many Lighting Direct Ceiling Fans feature adjustable lighting settings, allowing you to customize the ambiance of your room. Whether you need bright light for tasks or a softer glow for relaxation, you can easily adjust the lighting to suit your needs. Some models even offer remote controls or smart home compatibility for added convenience.

Choosing the Right Lighting Direct Ceiling Fan

When selecting a Lighting Direct Ceiling Fan, there are several factors to consider to ensure you choose the right one for your home:

Room Size

The size of your room will play a significant role in determining the size of the ceiling fan you need. For small rooms, a fan with a blade span of 36 to 42 inches is usually sufficient. Larger rooms may require fans with blade spans of 52 inches or more to provide adequate airflow.

Ceiling Height

Ceiling height is another important consideration. For standard ceilings, a fan with a standard mount will typically work well. However, for rooms with high or vaulted ceilings, you may need a fan with a longer downrod to ensure optimal air circulation.

Style and Finish

The style and finish of your Lighting Direct Ceiling Fan should complement your home’s decor. Choose a finish that matches your existing furnishings and design elements. Common finishes include brushed nickel, oil-rubbed bronze, and antique brass.

Lighting Features

Consider the type of lighting you need. Some Lighting Direct Ceiling Fans come with built-in LED lights, while others may have traditional bulb sockets. Think about the brightness level and color temperature that will best suit your space.

Control Options

Modern Lighting Direct Ceiling Fans often come with various control options, including pull chains, wall switches, and remote controls. Some even offer smart home compatibility, allowing you to control the fan and lighting through your smartphone or voice commands.

Installation and Maintenance

Proper installation and maintenance are crucial to ensuring the longevity and performance of your Lighting Direct Ceiling Fan.

Installation Tips

  • Hire a Professional: While some homeowners may choose to install their ceiling fan themselves, it’s often best to hire a professional electrician. Proper installation ensures that the fan operates safely and efficiently.
  • Follow Manufacturer Instructions: Always refer to the manufacturer’s installation instructions to ensure that you install the fan correctly.
  • Check for Balance: After installation, make sure the fan is properly balanced. An unbalanced fan can cause wobbling and noise, reducing its effectiveness and lifespan.

Maintenance Tips

  • Regular Cleaning: Dust and debris can accumulate on the blades and light fixtures, affecting the fan’s performance. Regularly clean the blades and light fixtures to keep your fan in top condition.
  • Check for Loose Parts: Periodically check for any loose screws or components. Tighten them as needed to prevent any potential issues.
  • Replace Bulbs: If your fan has integrated lighting, replace any burnt-out bulbs promptly to maintain optimal lighting performance.

Conclusion

Lighting Direct Ceiling Fans offer a perfect blend of functionality and style. By integrating lighting and ventilation into a single fixture, these fans enhance your home’s comfort and aesthetic appeal. When selecting the right fan for your space, consider factors such as room size, ceiling height, style, and control options. Proper installation and regular maintenance will ensure that your Lighting Direct Ceiling Fan continues to perform efficiently and look great for years to come.

Whether you’re upgrading an existing fan or installing a new one, Lighting Direct Ceiling Fans are a smart choice for any home. Their energy efficiency, stylish designs, and versatile features make them a valuable addition to any room.

Light Fixtures for Vaulted Kitchen Ceilings: Transform Your Space with Stylish and Functional

Vaulted kitchen ceilings offer a dramatic and spacious ambiance, but they also present unique challenges when it comes to lighting. Finding the right light fixtures for vaulted kitchen ceilings can transform the space, providing both functionality and aesthetic appeal. In this article, we will explore various lighting options, tips for choosing the perfect fixtures, and how to make the most of your vaulted kitchen ceiling.

Light Fixtures For Vaulted Kitchen Ceilings

Understanding the Challenges of Vaulted Ceilings

Vaulted ceilings are characterized by their sloping or arched design, which can make lighting installation more complex compared to standard ceilings. The high and angled nature of these ceilings means that traditional light fixtures might not provide the desired illumination or might be difficult to install. Additionally, the lighting needs to balance the visual interest with practical illumination.

Read too: Bathroom Flooded Through the Ceiling: A Comprehensive Guide

Types of Light Fixtures for Vaulted Kitchen Ceilings

When it comes to selecting light fixtures for vaulted kitchen ceilings, consider the following options:

  1. Pendant Lights Pendant lights are a popular choice for vaulted ceilings because they can be adjusted to hang at various heights. This flexibility allows you to direct light where it’s needed most and create a visually appealing focal point in your kitchen.
  2. Chandeliers Chandeliers can add elegance and grandeur to a vaulted kitchen. Opt for a chandelier with a design that complements the architectural style of your kitchen. Multi-tiered chandeliers can also help distribute light more evenly across the space.
  3. Recessed Lighting Recessed lighting is an excellent choice for vaulted ceilings as it provides a clean, modern look. The fixtures are installed into the ceiling, so they don’t hang down, making them ideal for maintaining the open feel of a vaulted space.
  4. Track Lighting Track lighting offers versatility and can be adjusted to focus light on specific areas. This is especially useful in vaulted kitchens where the high ceiling might otherwise lead to uneven illumination.
  5. Ceiling Fans with Lights If you’re looking for a dual-purpose fixture, consider ceiling fans with integrated lights. These can help circulate air and provide illumination, making them a practical choice for large, open kitchens with vaulted ceilings.

Choosing the Right Light Fixtures for Your Vaulted Kitchen Ceiling

1. Consider the Ceiling Height

The height of your vaulted ceiling will influence your choice of light fixtures. For very high ceilings, you might need longer pendant lights or chandeliers with extended chains to bring the light closer to the kitchen work areas. Conversely, for moderately high ceilings, standard fixtures or track lighting might suffice.

2. Focus on Light Distribution

Ensure that your chosen light fixtures provide adequate illumination throughout the kitchen. Combine different types of lighting to cover various needs—ambient lighting for general illumination, task lighting for specific work areas, and accent lighting to highlight architectural features.

3. Match the Style

Select fixtures that complement the overall style of your kitchen. Whether you prefer modern, traditional, rustic, or industrial designs, there are light fixtures available to match your aesthetic. For instance, sleek, minimalist pendant lights might work well in a modern kitchen, while a grand chandelier might be better suited to a traditional space.

4. Think About Installation

Consider the complexity of installing your chosen fixtures. Some lights, like recessed lighting, may require professional installation, especially if they need to be integrated into an existing ceiling structure. Ensure that any fixture you select can be safely and effectively installed in your vaulted ceiling.


Tips for Enhancing Your Vaulted Kitchen Ceiling with Light Fixtures

  1. Layer Your Lighting Use a combination of different lighting types to create a well-balanced environment. Layering your lighting helps to achieve both functionality and ambiance. For instance, combine overhead lights with under-cabinet lighting and wall sconces.
  2. Highlight Architectural Features Take advantage of the unique features of your vaulted ceiling by using accent lighting. Highlighting beams, trusses, or other architectural details can enhance the visual interest of your space.
  3. Use Dimmers Installing dimmer switches allows you to adjust the light intensity according to your needs and mood. This flexibility is especially useful in a kitchen where lighting needs can vary from cooking to entertaining.
  4. Consider Energy Efficiency Choose energy-efficient light fixtures and bulbs to save on electricity bills and reduce your environmental impact. LED lights are a great option as they offer long-lasting performance and lower energy consumption.

Conclusion

Selecting the right light fixtures for vaulted kitchen ceilings involves balancing style, functionality, and practicality. By considering the unique aspects of your space and exploring various lighting options, you can create a beautifully illuminated kitchen that enhances both its aesthetic and usability. Whether you opt for pendant lights, chandeliers, recessed lighting, or a combination of fixtures, the right lighting can transform your vaulted kitchen ceiling into a stunning feature of your home.

Leather Luxe Ceiling Fans: Discover the Elegance and Functionality

When it comes to home décor, every detail counts, and the choice of ceiling fans can greatly impact both aesthetics and functionality. Among the myriad of options available, the Leather Luxe Ceiling Fans stands out for its unique combination of style and performance. In this guide, we will explore why the Leather Luxe Ceiling Fan is a top choice for those seeking sophistication and practicality in their living spaces.

Leather Luxe Ceiling Fan

The Charm of the Leather Luxe Ceiling Fan

The Leather Luxe Ceiling Fan is designed to enhance your home’s interior with its luxurious appearance and high-quality materials. Its name suggests opulence, and indeed, the fan lives up to its reputation. Crafted with meticulous attention to detail, it features a distinctive leather finish that adds a touch of elegance to any room. This ceiling fan is not just a functional piece but a statement of style.

1. Aesthetic Appeal

One of the main attractions of the Leather Luxe Ceiling Fan is its aesthetic appeal. The fan’s leather finish gives it a rich, textured look that sets it apart from conventional ceiling fans. The leather-like material used in the fan’s design mimics the appearance of genuine leather, providing a sophisticated and upscale feel. This design choice allows the fan to blend seamlessly with a variety of interior styles, from modern and contemporary to classic and traditional.

2. High-Quality Materials

The Leather Luxe Ceiling Fan is constructed using high-quality materials to ensure durability and longevity. The leather finish not only looks good but is also resistant to wear and tear, making it a practical choice for any home. The fan’s blades are made from robust materials that provide efficient airflow while maintaining the fan’s stylish appearance. Whether you’re using it in a living room, bedroom, or office, the fan’s construction ensures it will stand the test of time.

Read too: Bathroom Flooded Through the Ceiling: A Comprehensive Guide


Benefits of the Leather Luxe Ceiling Fan

1. Enhanced Airflow and Comfort

One of the key benefits of the Leather Luxe Ceiling Fan is its ability to enhance airflow and comfort in your living space. The fan is designed to circulate air effectively, helping to maintain a comfortable temperature throughout the year. By improving air circulation, the fan can also help reduce energy costs by allowing you to rely less on air conditioning or heating.

2. Versatile Design

The versatile design of the Leather Luxe Ceiling Fan makes it suitable for various rooms and décor styles. Its luxurious appearance can complement both traditional and contemporary interiors, adding a touch of elegance wherever it is installed. Whether you have a modern loft or a classic home, the Leather Luxe Ceiling Fan can enhance the overall ambiance of your space.

3. Quiet Operation

Another advantage of the Leather Luxe Ceiling Fan is its quiet operation. Thanks to its advanced motor technology, the fan operates quietly, ensuring that it does not disrupt your daily activities or sleep. The fan’s silent performance makes it an ideal choice for bedrooms, study areas, and other spaces where noise reduction is important.

4. Easy Maintenance

Maintaining the Leather Luxe Ceiling Fan is straightforward. The fan’s smooth leather finish is easy to clean, requiring only a simple wipe-down to remove dust and dirt. Additionally, the fan’s blades and motor are designed to be low-maintenance, ensuring that you can enjoy its benefits without the hassle of frequent upkeep.


How to Choose the Right Leather Luxe Ceiling Fan

1. Size and Scale

When selecting a Leather Luxe Ceiling Fan, it’s important to consider the size and scale of the fan in relation to your room. The fan should be proportionate to the space to ensure optimal airflow and visual balance. For larger rooms, you may need a fan with a larger blade span, while smaller rooms can be complemented by a more compact design.

2. Style and Finish

The Leather Luxe Ceiling Fan comes in various styles and finishes to suit different preferences. While the leather finish is a defining feature, the fan may also be available in different colors and patterns. Choose a style that complements your existing décor and enhances the overall aesthetic of your room.

3. Features and Functionality

Consider the features and functionality of the Leather Luxe Ceiling Fan when making your selection. Some models come with additional features such as remote controls, integrated lighting, and adjustable speeds. Determine which features are important to you and choose a fan that meets your needs.

4. Installation and Placement

Proper installation is crucial for the performance of your Leather Luxe Ceiling Fan. Ensure that the fan is installed at the appropriate height and location to maximize its effectiveness. If you’re unsure about the installation process, consider hiring a professional to ensure that the fan is installed correctly.


Care and Maintenance Tips

1. Regular Cleaning

To keep your Leather Luxe Ceiling Fans looking its best, regular cleaning is essential. Dust the fan blades and the leather finish periodically to prevent the buildup of dirt and grime. Use a soft, dry cloth to avoid damaging the fan’s surface.

2. Inspect and Tighten Components

Periodically inspect the fan’s components to ensure that they are secure and in good condition. Check the blades, motor, and mounting hardware for any signs of wear or loosening. Tighten any loose components to maintain the fan’s performance and safety.

3. Professional Maintenance

For more thorough maintenance, consider scheduling a professional service. A technician can perform a detailed inspection of the fan’s motor and other internal components, ensuring that everything is functioning properly. Professional maintenance can also help extend the lifespan of your Leather Luxe Ceiling Fan.


Conclusion

The Leather Luxe Ceiling Fans is more than just a cooling device; it’s a statement piece that adds elegance and sophistication to any room. With its luxurious leather finish, high-quality materials, and quiet operation, it offers both style and functionality. By considering factors such as size, style, and features, you can find the perfect Leather Luxe Ceiling Fan to enhance your home’s décor and comfort.

Embrace the charm of the Leather Luxe Ceiling Fan and experience the perfect blend of luxury and performance in your living space.

Kichler Hatteras Bay Ceiling Fans: A Perfect Blend of Style and Functionality

When it comes to combining modern design with classic elegance, few ceiling fans can compete with the Kichler Hatteras Bay Ceiling Fans. Known for its exceptional craftsmanship and attention to detail, this fan not only enhances the aesthetic appeal of any room but also offers excellent functionality. Whether you’re looking to improve air circulation in your home or add a stylish accent to your living space, the Kichler Hatteras Bay Ceiling Fans is a great option to consider.

Kichler Hatteras Bay Ceiling Fan

In this article, we’ll dive into everything you need to know about the Kichler Hatteras Bay Ceiling Fan—from its design and features to how it compares to other ceiling fans on the market. You’ll also learn about installation tips, maintenance, and why this fan is an excellent addition to both indoor and outdoor spaces.

Read too: Bathroom Flooded Through the Ceiling: A Comprehensive Guide

Why Choose the Kichler Hatteras Bay Ceiling Fan?

Choosing the right ceiling fan for your space goes beyond simply picking a fan that looks good. Performance, durability, and energy efficiency are all key factors to consider. Here’s why the Kichler Hatteras Bay Ceiling Fan stands out:

1. Timeless Design

One of the primary reasons homeowners love the Kichler Hatteras Bay Ceiling Fan is its timeless nautical-inspired design. This fan draws inspiration from coastal and industrial styles, making it a perfect fit for a variety of settings, including beach houses, cabins, or even modern lofts.

The fan comes in multiple finishes, including weathered copper, polished nickel, and oiled bronze, allowing you to match it with the decor of any room. Its sleek, classic design makes it a standout feature in any room, whether installed indoors or on a covered outdoor patio.

2. Impressive Airflow

Design isn’t everything when it comes to ceiling fans—performance is just as important. The Kichler Hatteras Bay Ceiling Fan is designed to deliver powerful airflow, ensuring that your space stays cool and comfortable even during the hottest months. With its 52-inch blade span and high CFM (Cubic Feet per Minute) rating, this fan moves air efficiently across large areas, making it ideal for rooms up to 400 square feet.

3. Energy Efficiency

The Kichler Hatteras Bay Ceiling Fan is also energy efficient, which means you can enjoy its cooling effects without worrying about a significant increase in your energy bill. It’s compatible with LED light kits, which are more energy-efficient and longer-lasting than traditional bulbs. In the long run, this helps reduce electricity costs while also being eco-friendly.

4. Indoor and Outdoor Versatility

One of the standout features of the Kichler Hatteras Bay Ceiling Fan is its versatility. This fan is rated for both indoor and outdoor use, meaning you can install it in living rooms, bedrooms, covered patios, and even kitchens. Its weather-resistant construction ensures that it can withstand the elements when used outdoors.

5. Quiet Operation

Nobody wants a noisy ceiling fan, and that’s another area where the Kichler Hatteras Bay Ceiling Fan excels. Thanks to its high-quality motor, the fan operates quietly, providing a gentle breeze without disturbing the peace of your space. This makes it ideal for bedrooms or living areas where noise levels are a concern.

Key Features of the Kichler Hatteras Bay Ceiling Fan

Let’s take a closer look at some of the key features that make the Kichler Hatteras Bay Ceiling Fan a popular choice among homeowners:

1. Durable Construction

The Kichler Hatteras Bay Ceiling Fan is built to last. With a sturdy metal frame and weather-resistant materials, this fan is durable enough to handle both indoor and outdoor environments. The blades are crafted from high-quality materials that are resistant to warping, ensuring smooth and reliable operation year after year.

2. Reversible Motor

This fan features a reversible motor, which means it can be adjusted to operate in both directions. During the summer, you can set the fan to rotate counterclockwise, creating a cooling breeze that pushes air downwards. In the winter, switch the direction to clockwise to circulate warm air from the ceiling, helping to maintain a comfortable temperature throughout the year.

3. Light Kit Compatibility

If you want to add lighting to your room, the Kichler Hatteras Bay Ceiling Fan offers compatibility with light kits. Whether you choose to install an integrated LED light kit or a more traditional setup, you can customize your fan to fit the lighting needs of your space.

4. Multiple Control Options

Controlling the Kichler Hatteras Bay Ceiling Fan is a breeze, thanks to the variety of control options available. Many models come with wall controls, and some even feature remote control options. These features make it easy to adjust the fan speed and lighting without leaving your seat.

5. Energy Star Rated

Energy efficiency is becoming more important than ever, and the Kichler Hatteras Bay Ceiling Fan is designed with this in mind. Many models are Energy Star rated, meaning they meet strict guidelines for energy efficiency set by the U.S. Environmental Protection Agency. This not only reduces your energy consumption but also helps protect the environment.

How to Install the Kichler Hatteras Bay Ceiling Fan

Installing a ceiling fan can seem daunting, but with the right tools and instructions, it’s a project that many homeowners can tackle on their own. Here are the basic steps for installing the Kichler Hatteras Bay Ceiling Fan:

1. Prepare Your Space

Before installation, ensure that you have a stable, properly sized junction box in the ceiling that is rated to hold the weight of the ceiling fan. Turn off the power to the circuit you’ll be working on for safety.

2. Assemble the Fan

The Kichler Hatteras Bay Ceiling Fan comes with all the parts you need, including the motor, blades, and mounting hardware. Begin by assembling the fan according to the manufacturer’s instructions. Be sure to secure all screws tightly to prevent any wobbling during operation.

3. Mount the Fan

Next, mount the fan’s bracket to the ceiling using screws and bolts. Once the bracket is securely in place, attach the fan’s motor and housing. Double-check that everything is level and firmly attached to prevent future issues.

4. Wire the Fan

Follow the manufacturer’s instructions for wiring the fan. Typically, you’ll need to connect the black (or blue) wire to the fan’s power source, the white wire to neutral, and the green or copper wire to ground. If your fan has a light kit, make sure to connect the additional wiring for the lights.

5. Attach the Blades

Once the fan is mounted and wired, attach the blades to the motor. Ensure that the screws are tightened securely to prevent any wobbling or rattling when the fan is in use.

6. Test the Fan

After installation, turn the power back on and test the fan. Check for smooth operation and ensure that the fan is balanced and not wobbling. If you encounter any issues, consult the user manual for troubleshooting tips or contact a professional for assistance.

Maintaining Your Kichler Hatteras Bay Ceiling Fan

Like any appliance, your Kichler Hatteras Bay Ceiling Fan will require occasional maintenance to ensure it continues to function properly. Here are some maintenance tips to keep your fan in top shape:

1. Regular Cleaning

Dust and dirt can accumulate on the fan blades, reducing performance and causing the motor to work harder than necessary. Clean the blades and housing regularly using a soft cloth or duster to prevent buildup. For outdoor installations, you may need to clean the fan more frequently due to exposure to the elements.

2. Lubrication

If your fan begins to make unusual noises or operates less smoothly than usual, it may require lubrication. Check the manufacturer’s guidelines for information on which parts of the fan need lubrication and how often it should be applied.

3. Tighten Screws and Bolts

Over time, the screws and bolts that hold your fan together may loosen, leading to wobbling or noise. Periodically check and tighten all screws and bolts to keep the fan operating smoothly.

4. Check the Balance

If your fan wobbles during operation, it may be unbalanced. To fix this, you can purchase a fan-balancing kit or adjust the placement of the blades to ensure they are evenly spaced and aligned.

Kichler Hatteras Bay Ceiling Fan: The Perfect Choice for Your Home

Whether you’re looking for a ceiling fan that adds style to your indoor space or one that can withstand outdoor conditions, the Kichler Hatteras Bay Ceiling Fan offers the perfect blend of form and function. With its elegant design, powerful performance, and durable construction, this fan is a reliable choice for any home. Its versatility makes it suitable for various spaces, from large living rooms to cozy covered patios.

With easy installation and low-maintenance requirements, the Kichler Hatteras Bay Ceiling Fan is a long-lasting investment that will keep your home comfortable year-round. Plus, its energy efficiency helps save on electricity costs, making it an eco-friendly choice.

Conclusion

When it comes to choosing a ceiling fan that combines style, durability, and performance, the Kichler Hatteras Bay Ceiling Fans is an excellent option. Its timeless design and high-quality features make it stand out among other ceiling fans on the market. Whether you’re installing it indoors or outdoors, this fan is sure to enhance the comfort and aesthetics of your space.