Vaulted Ceiling Fireplace Ideas: Elevate Your Space

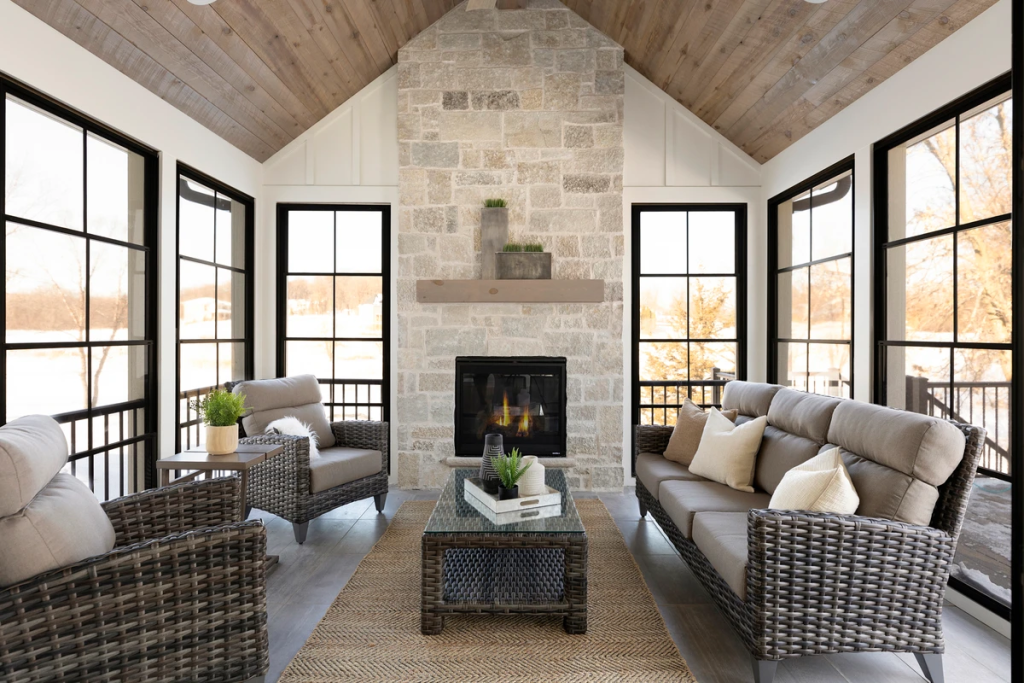
When it comes to creating a stunning focal point in your home, few features can compare to a beautifully designed fireplace, especially when set against a vaulted ceiling. The combination of a vaulted ceiling and a fireplace can create a dramatic effect, enhancing both the aesthetic appeal and the ambiance of your living space. In this article, we will explore various vaulted ceiling fireplace ideas that not only showcase the elegance of your home but also provide warmth and comfort.

Vaulted Ceiling Fireplace Ideas

Understanding Vaulted Ceilings and Their Benefits

Before diving into specific vaulted ceiling fireplace ideas, it’s essential to understand what vaulted ceilings are and why they have become a popular choice in modern home design.

What is a Vaulted Ceiling?

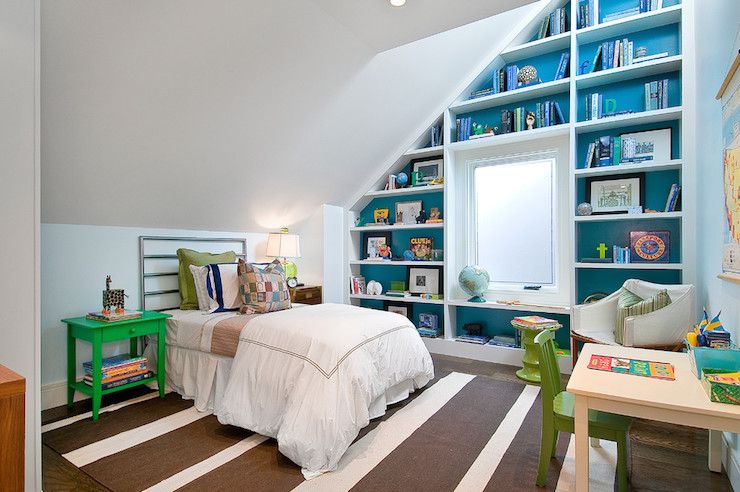
A vaulted ceiling is characterized by its upwardly arching design, which can create the illusion of a larger space. This architectural feature often includes angles that lead to a peak or a dome shape, giving rooms an airy and open feel.

Benefits of Vaulted Ceilings

  1. Enhanced Space: Vaulted ceilings make a room feel larger and more expansive, drawing the eye upward and providing a sense of openness.
  2. Natural Light: The height and angles of vaulted ceilings allow for larger windows or skylights, flooding the space with natural light.
  3. Aesthetic Appeal: The unique design adds character and charm to any room, making it more inviting and visually interesting.
  4. Improved Airflow: The elevation can help with air circulation, keeping the space cooler in the summer and warmer in the winter.

Vaulted Ceiling Fireplace Ideas: Creating a Focal Point

When you have a vaulted ceiling, incorporating a fireplace can create a stunning focal point that draws attention and enhances the overall design of the room. Here are some creative ideas for your fireplace in a space with a vaulted ceiling.

Read too: Kitchen Lighting For A Vaulted Ceiling: Illuminating Your Space with Style and Functionality

1. Floor-to-Ceiling Stone or Brick Fireplace

One of the most impactful vaulted ceiling fireplace ideas is to extend the fireplace from the floor to the ceiling. This design creates a dramatic statement and adds texture to the room. A stone or brick fireplace provides a rustic yet elegant touch and complements the height of the ceiling beautifully.

Key Features:

  • Use natural materials like stone or reclaimed brick.
  • Incorporate a wooden mantel at eye level for added warmth.
  • Choose a modern or traditional style depending on your decor.

2. Contemporary Linear Fireplace

For a sleek, modern look, consider a linear fireplace that stretches horizontally across the wall. This minimalist design works exceptionally well with vaulted ceilings, allowing the architecture to shine without overwhelming the space.

Key Features:

  • Opt for a fireplace with a glass front for a clean appearance.
  • Use bold colors or finishes to make a statement.
  • Incorporate built-in shelving on either side for added storage and decor.

3. Classic Wood-Burning Fireplace with a Dramatic Mantel

A classic wood-burning fireplace can bring warmth and a sense of nostalgia to your space. Pair it with a dramatic mantel that reaches up to the peak of the vaulted ceiling for a timeless look.

Key Features:

  • Choose a richly stained wood for the mantel to add contrast.
  • Incorporate decorative elements on the mantel, such as art, candles, or family photos.
  • Ensure the fireplace is functional and meets local safety codes.

4. Suspended Fireplace

A suspended fireplace is a unique and eye-catching option for a room with a vaulted ceiling. This type of fireplace hangs from the ceiling, creating a sense of drama and intrigue.

Key Features:

  • Look for a design that complements the angles of the ceiling.
  • Choose a modern, metallic finish for a contemporary feel.
  • Ensure proper ventilation and safety measures are in place.

5. Fireplace with Built-in Seating

Incorporate a cozy seating area around your fireplace to create an inviting atmosphere. This design can be especially effective in a room with a vaulted ceiling, making the space feel warm and welcoming.

Key Features:

  • Design built-in benches or seating that follows the lines of the fireplace.
  • Use cushions and throws to enhance comfort and style.
  • Consider adding a small coffee table for functionality.

Decorating Around Your Vaulted Ceiling Fireplace

Once you’ve selected your ideal fireplace design, it’s time to consider how to decorate the surrounding area to complement the vaulted ceiling fireplace.

1. Artwork Above the Fireplace

Utilizing the vertical space above the fireplace can draw the eye upward and highlight the height of the vaulted ceiling. Choose large-scale artwork or a series of smaller pieces arranged in an eye-catching gallery wall.
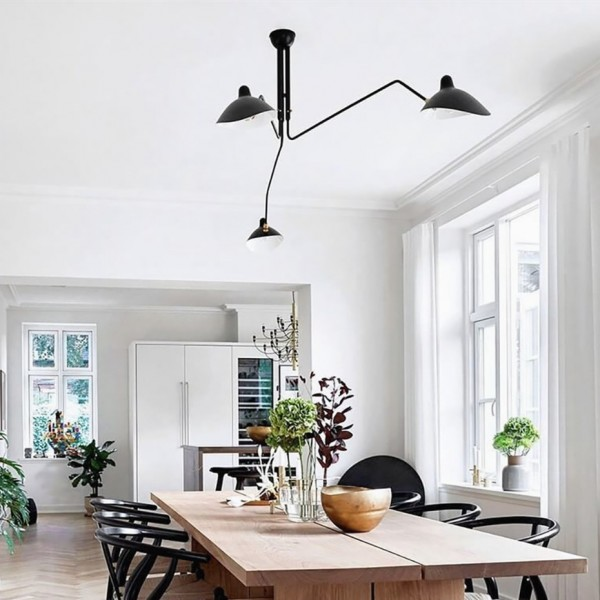
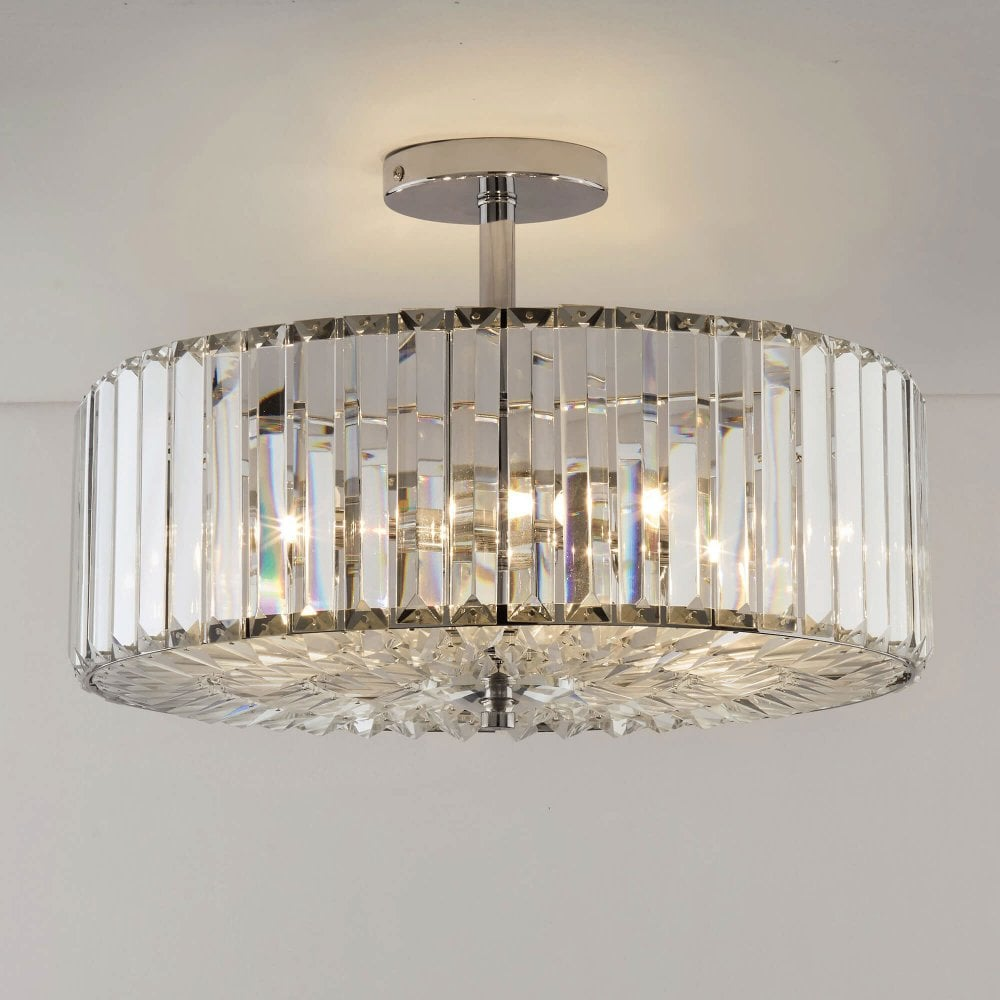
2. Layered Lighting

Incorporate layered lighting to enhance the ambiance around your fireplace. Consider pendant lights that hang down from the vaulted ceiling, wall sconces flanking the fireplace, and table lamps on side tables.

3. Textured Rugs and Throws

Add warmth and comfort to the space with textured rugs and throws. A plush area rug can define the seating area, while throws can enhance the coziness of the space.

4. Natural Elements

Incorporate natural elements such as plants, wood, and stone to bring the outdoors inside. Consider placing potted plants on the mantel or using natural wood furniture that complements the design of the fireplace.


Functional Considerations for Your Vaulted Ceiling Fireplace

When designing your vaulted ceiling fireplace, it’s essential to keep functionality in mind. Here are some important aspects to consider:

1. Ventilation and Safety

Ensure that your fireplace meets local safety codes and is properly ventilated. This is especially important for wood-burning fireplaces to prevent smoke buildup and ensure proper air quality.

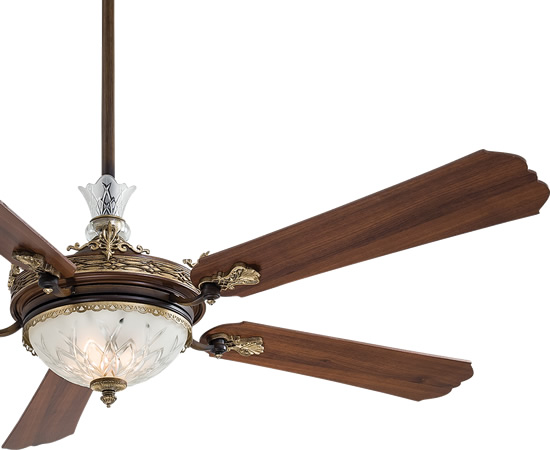
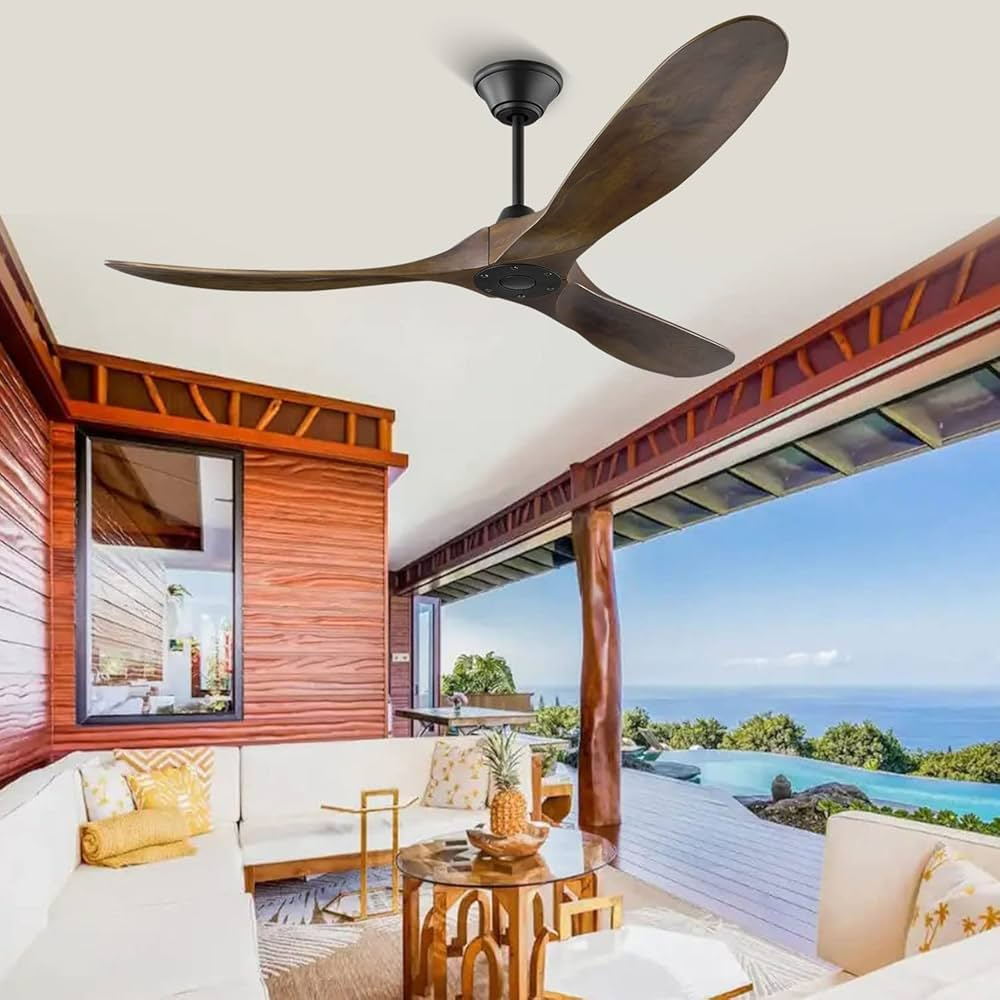
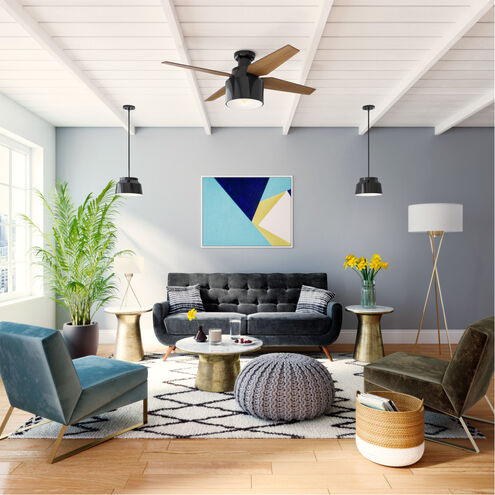
2. Heat Distribution

Vaulted ceilings can sometimes lead to uneven heat distribution. Consider installing ceiling fans to help circulate warm air, or choose a fireplace design that effectively radiates heat throughout the room.

3. Maintenance

Regular maintenance is essential for keeping your fireplace in good working order. Schedule annual inspections for wood-burning fireplaces and clean the chimney to prevent soot buildup.

4. Accessibility

Make sure that the fireplace is easily accessible for both use and maintenance. Consider the layout of the room to ensure that there is enough space for furniture and movement around the fireplace.


Conclusion: Transforming Your Space with Vaulted Ceiling Fireplace Ideas

Incorporating a fireplace into a room with a vaulted ceiling can transform the space into a warm, inviting retreat. With a variety of vaulted ceiling fireplace ideas to choose from, you can create a stunning focal point that enhances both the functionality and aesthetics of your home. Whether you opt for a floor-to-ceiling stone design, a modern linear fireplace, or a cozy wood-burning option, the right fireplace can elevate your living space.

As you explore different designs and decorating ideas, remember to consider the overall style of your home, your functional needs, and the unique characteristics of your vaulted ceiling. With careful planning and creativity, you can create a beautiful and inviting atmosphere that showcases the elegance of your home while providing warmth and comfort.

Shelves for Slanted Ceiling: Maximizing Space

Living in a home with slanted ceilings can present unique challenges, especially when it comes to maximizing space and storage. However, with the right design ideas and the right shelves for slanted ceiling, you can turn those awkward angles into stunning design features that enhance both functionality and aesthetics. In this article, we will explore various options, styles, and creative solutions for installing shelves in spaces with slanted ceilings.

Shelves For Slanted Ceiling

Understanding Slanted Ceilings

Slanted ceilings, often found in attics or rooms with architectural features like vaulted ceilings, can limit your options for furniture and storage. The angle of the ceiling can make it difficult to find suitable shelving units or cabinets that fit properly. However, by utilizing creative shelving solutions, you can make the most of these unconventional spaces.

Why Shelves for Slanted Ceiling are Important

  1. Maximize Storage: Slanted ceilings often result in wasted space. Properly designed shelves can utilize this area for storage, reducing clutter and making the room feel more organized.
  2. Enhance Aesthetics: Stylish shelves can add character and visual interest to a room. When designed thoughtfully, they can complement the overall decor.
  3. Increase Usability: By installing shelves in slanted areas, you can transform underutilized spaces into functional storage solutions.

Creative Ideas for Shelves for Slanted Ceiling

1. Built-In Shelves

One of the best options for shelves for slanted ceiling is to have built-in shelving units. These can be custom-designed to fit the exact angle and dimensions of your ceiling, ensuring a perfect fit. Built-in shelves can also blend seamlessly with the walls, creating a cohesive look.

Read too: Kitchen Lighting For A Vaulted Ceiling: Illuminating Your Space with Style and Functionality

Benefits of Built-In Shelves

  • Customizable: You can tailor the size, shape, and number of shelves to your specific needs.
  • Streamlined Appearance: Built-in shelves can make a room look more polished and organized.
  • Space Saving: They can utilize corner spaces and other awkward areas effectively.

2. Floating Shelves

Floating shelves are another excellent choice for slanted ceilings. These shelves appear to “float” on the wall, providing a modern aesthetic while maximizing space.

Advantages of Floating Shelves

  • Minimalist Design: They can give your room a sleek, modern look without bulky furniture.
  • Flexible Placement: You can install them at varying heights, allowing you to work with the angles of your ceiling.
  • Easy Installation: Floating shelves are relatively easy to install, making them a DIY-friendly option.

3. Corner Shelves

If your slanted ceiling creates an awkward corner, consider using corner shelves. These shelves can fit snugly into the corner space, allowing you to utilize every inch of the room.

Features of Corner Shelves

  • Unique Design: Corner shelves can create a unique visual element in your space.
  • Versatile Usage: They can be used for books, plants, or decorative items.
  • Space Efficiency: Corner shelves help to maximize space that would otherwise be wasted.

Tips for Designing Shelves for Slanted Ceiling

When designing shelves for slanted ceiling, consider the following tips to ensure that they are both functional and visually appealing:

1. Measure Carefully

Before you begin designing or installing shelves, take accurate measurements of the space. Measure the height and angle of the ceiling to determine the best dimensions for your shelves.

2. Consider Functionality

Think about how you plan to use the shelves. Will they hold books, decorative items, or storage bins? Understanding the purpose of the shelves will help guide your design decisions.

3. Choose the Right Materials

Selecting the right materials for your shelves is crucial. Consider the weight of the items you plan to store and choose materials that can support them. Solid wood, plywood, and high-quality particle board are excellent choices.

4. Keep it Light

When installing shelves in a slanted ceiling space, it’s essential to keep the design light and airy. Avoid heavy or dark materials that may make the space feel cramped. Opt for lighter colors and transparent materials to enhance the openness of the room.

5. Personalize Your Design

Incorporate your personal style into the shelves. Whether you prefer a rustic, modern, or eclectic look, customizing your shelves with your favorite colors, finishes, or decorative accents will make the space uniquely yours.


Types of Shelves for Slanted Ceiling

1. Adjustable Shelving Units

Adjustable shelving units are versatile and can be customized as per your changing storage needs. These can be adjusted to different heights, accommodating items of various sizes.

2. Ladder Shelves

Ladder shelves lean against the wall and provide a stylish option for displaying items. They can fit snugly against slanted ceilings and add an interesting architectural element to the room.

3. Bookcases with Angled Tops

Bookcases that feature angled tops can fit neatly under slanted ceilings while providing ample storage for books and decor. This design ensures that no vertical space is wasted.

4. Wall-Mounted Baskets

For a more casual look, consider wall-mounted baskets. These can provide storage for smaller items and can be easily rearranged or replaced as needed.


Incorporating Color and Decor with Shelves for Slanted Ceiling

When designing your shelves for slanted ceiling spaces, consider the overall color scheme and decor of the room. Here are a few ideas:

1. Paint the Shelves

Adding a pop of color to your shelves can make them stand out. Consider painting them a bold color or using a contrasting hue to make them a focal point in the room.

2. Use Decorative Bins

Utilize decorative bins and boxes on your shelves to add texture and color while providing storage. This approach can keep the space organized and visually appealing.

3. Mix and Match Materials

Incorporating various materials, such as wood, metal, and glass, can add depth and interest to your shelves. For example, wooden shelves paired with metal brackets can create a contemporary yet warm look.


Maintenance Tips for Shelves for Slanted Ceiling

To ensure that your shelves remain in good condition and continue to enhance your space, consider the following maintenance tips:

1. Regular Cleaning

Dust and clean your shelves regularly to keep them looking their best. Use a microfiber cloth to remove dust, and avoid harsh chemicals that could damage the finish.

2. Check for Stability

Periodically check the stability of your shelves, especially if they are installed in an angle. Ensure that brackets and mounting hardware are secure to prevent accidents.

3. Avoid Overloading

Be mindful of the weight capacity of your shelves. Avoid overloading them, as this can lead to sagging or even structural failure.


Conclusion: Transforming Your Space with Shelves for Slanted Ceiling

Incorporating shelves for slanted ceiling can transform otherwise wasted spaces into functional and aesthetically pleasing areas of your home. With various options available, including built-in shelves, floating shelves, and corner shelves, you can create a personalized storage solution that enhances your home’s design. By following the tips and ideas outlined in this article, you can maximize your space while maintaining a stylish appearance.

Embrace the unique architecture of your home and let your creativity shine through with the right shelving solutions. Whether you are looking to display your favorite books, store seasonal decorations, or simply organize your space, the perfect shelves for slanted ceiling are waiting for you to discover.

Ceiling Mounted Curtain Tracks: Enhance Your Space with Style and Functionality

When it comes to home decor, choosing the right window treatments can dramatically transform a space. One increasingly popular option is ceiling mounted curtain tracks. These versatile systems offer a sleek and modern look while providing excellent functionality. In this article, we will delve into the various aspects of ceiling mounted curtain tracks, including their benefits, installation, styles, and maintenance tips, ensuring you have all the information needed to make an informed decision.

Ceiling Mounted Curtain Tracks

What Are Ceiling Mounted Curtain Tracks?

Ceiling mounted curtain tracks are systems designed to hold curtains, drapes, or other types of fabric treatments directly from the ceiling rather than from the wall. This design choice can create the illusion of higher ceilings and allows for more versatile styling options. The tracks are typically made from durable materials such as aluminum or plastic and can accommodate various curtain styles, from sheer drapes to heavy blackout curtains.

Benefits of Ceiling Mounted Curtain Tracks

  1. Space Optimization: By mounting curtains directly to the ceiling, you can maximize wall space and create a more open feel in the room.
  2. Height Illusion: This setup helps make ceilings appear taller, which can be particularly beneficial in smaller rooms.
  3. Flexible Styling Options: With a range of track systems available, you can choose the best design to suit your decor, from minimalist styles to more decorative options.
  4. Smooth Operation: Most ceiling mounted tracks feature gliders or rollers, allowing for smooth opening and closing of curtains without the hassle of traditional rods.
  5. Customizable Lengths: These tracks can be cut to fit any window size, ensuring a perfect fit for your space.

Read too: Bathroom Flooded Through the Ceiling: A Comprehensive Guide

Choosing the Right Ceiling Mounted Curtain Track

When selecting the perfect ceiling mounted curtain tracks, there are several factors to consider:

Track Type

  1. Single Track: Ideal for hanging a single layer of curtains, this is the most common type of track.
  2. Double Track: This type allows you to hang two layers of curtains, such as sheer curtains underneath blackout curtains for added versatility.
  3. Curved Tracks: If you have a bay window or an unconventional window shape, curved tracks can be customized to fit these spaces seamlessly.

Material

  • Aluminum: Lightweight yet durable, aluminum tracks are resistant to bending and can support heavier curtains.
  • Plastic: While generally less expensive, plastic tracks may not support heavy fabrics as well as aluminum.

Style and Finish

Choose a track finish that complements your room’s decor. Options range from sleek and modern metallic finishes to more traditional painted styles.

Installation of Ceiling Mounted Curtain Tracks

Installing ceiling mounted curtain tracks may seem daunting, but with the right tools and guidance, it can be a straightforward DIY project. Here’s a step-by-step guide to help you through the process.

Tools You Will Need

  • Measuring tape
  • Pencil
  • Level
  • Drill
  • Screwdriver
  • Brackets (usually included with the track system)
  • Curtains

Steps for Installation

  1. Measure the Area: Determine the length of the track needed by measuring the window width. If you want the curtains to extend beyond the window frame, add a few extra inches.
  2. Mark the Placement: Use a pencil to mark where the brackets will be installed. Ensure the marks are level.
  3. Install the Brackets: Drill holes at the marked points, insert wall anchors if necessary, and secure the brackets with screws.
  4. Attach the Track: Once the brackets are in place, slide the curtain track onto the brackets. Make sure it is secure.
  5. Add the Curtains: Depending on your track system, either thread the curtains through the track or attach them using hooks or clips provided.
  6. Test the System: Open and close the curtains to ensure smooth operation. Make any necessary adjustments to the track placement if required.

Maintenance Tips for Ceiling Mounted Curtain Tracks

To ensure the longevity and functionality of your ceiling mounted curtain tracks, follow these maintenance tips:

Regular Cleaning

Dust and debris can accumulate on the tracks and the curtains themselves. Wipe down the tracks with a damp cloth regularly and wash the curtains according to the manufacturer’s instructions.

Check for Obstructions

Ensure that nothing is obstructing the track system. Remove any debris or objects that may hinder the smooth operation of the curtains.

Lubrication

If you notice any sticking or difficulty in moving the curtains, consider applying a silicone-based lubricant to the track to facilitate smoother movement.

Inspect for Damage

Regularly inspect the tracks and brackets for any signs of wear or damage. If you notice bending or cracking, replace the affected parts promptly to maintain safety and functionality.

Enhancing Your Decor with Ceiling Mounted Curtain Tracks

Ceiling mounted curtain tracks offer a modern, stylish solution for window treatments. By opting for this installation, you can easily elevate the aesthetic of your space. Here are some decor tips to enhance the overall look:

Layering Curtains

Using double tracks allows you to layer different curtain types. For example, sheer curtains can provide privacy while allowing light in, and heavier drapes can be drawn for complete darkness.

Coordinating Colors

Choose curtain colors that complement your room’s palette. Neutral tones can create a calming effect, while bold colors can make a statement.

Accessories

Consider adding decorative curtain weights or tiebacks to enhance the overall look. These accessories can help maintain the shape and flow of your curtains.

Conclusion

Ceiling mounted curtain tracks are an excellent addition to any home, providing both functionality and style. By understanding their benefits, installation process, and maintenance needs, you can enjoy a beautifully styled space that reflects your personal taste. Whether you are looking to create a cozy bedroom retreat or a modern living area, these tracks can significantly enhance your window treatments.

Vintage Style Ceiling Fans: A Timeless Addition to Your Home

Vintage style ceiling fans have made a significant comeback in home decor, combining functionality with a nostalgic aesthetic that adds character to any room. These fans not only provide comfort and airflow but also serve as statement pieces that reflect your personal style. In this comprehensive guide, we’ll explore the allure of vintage style ceiling fans, their benefits, types, installation tips, and maintenance advice to help you choose the perfect fan for your space.

Vintage Style Ceiling Fans

Why Choose Vintage Style Ceiling Fans?

The Aesthetic Appeal

Vintage style ceiling fans evoke a sense of nostalgia and charm, reminiscent of bygone eras. Their intricate designs, often featuring ornate details, brass finishes, and wooden blades, can enhance the decor of traditional, rustic, or eclectic interiors. These fans serve as more than just functional pieces; they are also artful additions that can elevate the entire atmosphere of a room.

Versatility in Design

One of the primary advantages of vintage style ceiling fans is their versatility. They can complement a wide range of interior styles, from farmhouse chic to mid-century modern. Whether you’re looking to add a classic touch to your living room or enhance the cozy ambiance of a bedroom, there’s a vintage fan that can fit seamlessly into your decor.

Improved Air Circulation

In addition to their aesthetic benefits, vintage style ceiling fans offer practical advantages. They help improve air circulation, making your home feel cooler during warm months and distributing heat more evenly in winter. This can lead to reduced reliance on air conditioning and heating, ultimately saving you money on energy bills.

Read too: Bathroom Flooded Through the Ceiling: A Comprehensive Guide

Types of Vintage Style Ceiling Fans

Exploring Different Vintage Style Ceiling Fans

When it comes to vintage style ceiling fans, there are several types to consider:

1. Traditional Fans

Traditional vintage ceiling fans typically feature ornate designs with wood or metal finishes. These fans often have multiple blades, usually made from wood, and come in various colors. Their classic look makes them suitable for both modern and vintage-themed interiors.

2. Industrial Style Fans

Industrial vintage ceiling fans embrace a more rugged aesthetic, often incorporating materials like wrought iron and exposed light bulbs. These fans are perfect for lofts or spaces that feature industrial design elements, blending functionality with a bold, utilitarian look.

3. Retro Mid-Century Fans

Mid-century modern vintage fans capture the essence of the 1950s and 60s with sleek lines and vibrant colors. These fans often feature a minimalist design with a focus on form and function, making them ideal for contemporary spaces that still want to evoke a retro vibe.

4. Outdoor Vintage Fans

For those looking to add a touch of vintage style to outdoor spaces, outdoor-rated vintage ceiling fans are available. These fans are designed to withstand the elements while providing the same charm and style as indoor options.

Choosing the Right Vintage Style Ceiling Fan

Consider Your Space

Before purchasing a vintage style ceiling fan, consider the size of the room. Larger rooms may require a fan with a bigger blade span, while smaller rooms can benefit from compact designs. Measure your space to determine the appropriate fan size for optimal airflow and aesthetics.

Style and Color

Choose a fan that complements your existing decor. Vintage style ceiling fans come in various colors and finishes, from distressed wood to polished brass. Ensure that the style you select harmonizes with your interior design theme.

Features

Modern vintage style ceiling fans often come equipped with features like remote controls, integrated lighting, and energy-efficient motors. Consider which features are important to you and how they can enhance your comfort and convenience.

Installation Tips for Vintage Style Ceiling Fans

1. Safety First

Before installation, ensure that you turn off the power to the ceiling fixture where you plan to install the fan. Safety should always be your top priority.

2. Gather Necessary Tools

Prepare the necessary tools, which may include a screwdriver, ladder, wire connectors, and a voltage tester. Having everything ready will make the installation process smoother.

3. Follow the Instructions

Most vintage style ceiling fan come with detailed installation instructions. Follow these guidelines carefully to ensure that the fan is installed correctly and securely. If you’re unsure or uncomfortable with electrical work, it’s best to hire a licensed electrician.

4. Check the Balance

After installation, check the fan for balance. An unbalanced fan can create noise and wobbling. Many fans come with balancing kits to help you achieve a smooth, stable operation.

Maintenance of Vintage Style Ceiling Fans

1. Regular Cleaning

Dust and debris can accumulate on the blades and motor of your vintage ceiling fan, affecting its performance and appearance. Clean the blades regularly with a soft cloth or a microfiber duster to keep them looking pristine.

2. Inspect the Wiring

Periodically check the wiring and connections to ensure everything is secure and in good condition. If you notice any frayed wires or loose connections, consult a professional for repairs.

3. Lubricate Moving Parts

To maintain optimal performance, periodically lubricate the fan’s moving parts according to the manufacturer’s recommendations. This will help prevent wear and tear, ensuring that your fan operates smoothly for years to come.

4. Replace Bulbs as Needed

If your vintage fan includes integrated lighting, replace bulbs as needed to maintain proper illumination. Consider using energy-efficient LED bulbs for longer-lasting performance.

Conclusion

Vintage style ceiling fan are a perfect blend of charm, functionality, and nostalgia. With various designs available, you can find the ideal fan to complement your home’s decor while providing effective air circulation. By considering the type, size, and features of your fan, you can make a well-informed choice that enhances both comfort and aesthetic appeal in your living space.

Recessed Drop Ceiling Lights: A Comprehensive Guide

Recessed drop ceiling lights are an excellent choice for modern interiors, providing both functionality and style. These lights, installed into the ceiling, create a sleek and unobtrusive lighting solution that can enhance the aesthetics of any room. In this article, we will delve into the benefits, types, installation tips, and maintenance of recessed drop ceiling lights to help you make an informed decision for your lighting needs.

Recessed Drop Ceiling Lights

Understanding Recessed Drop Ceiling Lights

What Are Recessed Drop Ceiling Lights?

Recessed drop ceiling lights, often referred to as can lights or pot lights, are fixtures that are mounted above the ceiling tiles, creating a streamlined appearance. They provide ambient, task, or accent lighting depending on their placement and design. This type of lighting is particularly popular in commercial spaces, offices, and contemporary homes due to its versatility and clean look.

Read too: Bathroom Flooded Through the Ceiling: A Comprehensive Guide

Benefits of Recessed Drop Ceiling Lights

1. Space Optimization

One of the main advantages of recessed drop ceiling lights is their ability to save space. Since they are embedded into the ceiling, they don’t take up any physical space, making them ideal for rooms with low ceilings or limited space. This feature allows for greater design flexibility in smaller areas.

2. Aesthetic Appeal

Recessed lights offer a sleek and modern look, seamlessly blending into the ceiling. They can enhance the overall decor of a room without the bulkiness of traditional fixtures. Whether you prefer a minimalist aesthetic or a more intricate design, recessed lighting can complement your style.

3. Versatility

These lights are incredibly versatile. They can be used in various settings, from kitchens and living rooms to commercial spaces like offices and retail stores. You can also choose different types of bulbs, such as LED, incandescent, or fluorescent, to suit your lighting needs.

4. Improved Lighting Quality

Recessed drop ceiling lights provide even illumination, reducing shadows and enhancing visibility. This quality makes them suitable for areas where task lighting is essential, such as kitchens or workspaces.

5. Energy Efficiency

With the rise of LED technology, recessed lights can now be more energy-efficient than traditional lighting options. LED bulbs consume less electricity and have a longer lifespan, making them a cost-effective choice in the long run.

Types of Recessed Drop Ceiling Lights

H2: Exploring Different Styles of Recessed Drop Ceiling Lights

When selecting recessed drop ceiling lights, you’ll find various styles and designs to choose from, including:

1. Standard Recessed Lights

These are the most common type, designed to fit into standard ceiling heights. They come in various sizes and shapes, typically ranging from 3 to 6 inches in diameter.

2. Adjustable Recessed Lights

Also known as gimbal lights, adjustable recessed lights allow you to direct the light where it is needed most. This flexibility makes them perfect for accent lighting or highlighting artwork and architectural features.

3. Baffle Recessed Lights

Baffle lights feature a ribbed design that helps to reduce glare and provide soft lighting. They are often used in living areas or theaters for a cozy ambiance.

4. New Construction vs. Remodel Recessed Lights

New construction recessed lights are designed for homes that are being built or undergoing significant renovations, while remodel recessed lights are ideal for existing ceilings. The installation method varies based on your specific project needs.

Installation Tips for Recessed Drop Ceiling Lights

1. Planning Your Layout

Before installation, plan the layout of your recessed lights. Consider the size of the room, the height of the ceiling, and the purpose of the lighting. A common rule of thumb is to space the lights 4 to 6 feet apart for even illumination.

2. Measure and Mark

Once you’ve determined the layout, measure and mark the positions of the lights on the ceiling. Use a stud finder to avoid wiring and beams during installation.

3. Cut the Ceiling Tiles

Using a hole saw, carefully cut holes in the ceiling tiles according to your marks. Ensure that the holes are the correct size for the fixtures you’ve selected.

4. Install the Housing

For new construction lights, secure the housing in place using the provided brackets. For remodel fixtures, insert the clips into the hole and push the housing into the ceiling.

5. Wiring

Follow the manufacturer’s instructions to wire the lights correctly. It’s advisable to consult with a licensed electrician if you are not experienced in electrical work.

6. Attach the Trim

After wiring, attach the trim to the housing, ensuring it is securely in place. Choose a trim style that complements your decor.

Maintenance of Recessed Drop Ceiling Lights

1. Regular Cleaning

Dust and dirt can accumulate on recessed lights over time, reducing their brightness. Regularly clean the trim and bulbs with a soft cloth to maintain optimal lighting conditions.

2. Check for Burnt Out Bulbs

Periodically check your lights to ensure all bulbs are functioning properly. Replace any burnt-out bulbs promptly to maintain even illumination.

3. Inspect Wiring and Fixtures

Ensure that all wiring is secure and in good condition. If you notice any flickering lights or electrical issues, consult a professional electrician.

Conclusion

Recessed drop ceiling light offer an elegant and functional lighting solution for various settings. Their versatility, aesthetic appeal, and energy efficiency make them a popular choice for homeowners and business owners alike. By understanding the benefits, types, installation tips, and maintenance practices, you can make informed decisions to enhance your space with recessed lighting.

Hunter Stratford Ceiling Fans: A Comprehensive Guide

When it comes to home decor and comfort, ceiling fans play a crucial role in maintaining a pleasant indoor environment. Among the various options available, the Hunter Stratford Ceiling Fans stands out for its exceptional design, functionality, and performance. This article explores the features, benefits, installation process, and maintenance tips for the Hunter Stratford Ceiling Fan, making it an essential guide for potential buyers.

Hunter Stratford Ceiling Fan

What is the Hunter Stratford Ceiling Fan?

The Hunter Stratford Ceiling Fan is a stylish and functional ceiling fan that combines modern technology with classic aesthetics. Known for its high-quality materials and innovative design, this fan is designed to provide optimal air circulation while adding a touch of elegance to any room. Whether you are looking to cool down a living space or enhance your home’s decor, the Hunter Stratford ceiling fan is an excellent choice.

Key Features of the Hunter Stratford Ceiling Fan

1. Stylish Design

One of the standout features of the Hunter Stratford Ceiling Fan is its sleek and sophisticated design. Available in various finishes, including brushed nickel, matte black, and white, this fan can complement a range of interior styles, from modern to traditional. The fan blades are crafted to ensure both aesthetic appeal and efficient airflow.

2. Whisper-Quiet Operation

Equipped with a powerful yet quiet motor, the Hunter Stratford Ceiling Fan operates silently, making it ideal for bedrooms, nurseries, and other quiet spaces. This feature allows you to enjoy a comfortable environment without the distracting noise that some fans produce.

Read too: Kitchen Lighting For A Vaulted Ceiling: Illuminating Your Space with Style and Functionality

3. Energy Efficiency

The Hunter Stratford Ceiling Fan is designed with energy efficiency in mind. It uses less energy than traditional fans, helping you reduce your electricity bills while keeping your home cool and comfortable. Many models are also compatible with energy-efficient light bulbs, further enhancing their eco-friendliness.

4. Versatile Mounting Options

This ceiling fan offers versatile mounting options, including standard, flush, and angled mounting. This flexibility makes it suitable for various ceiling heights and room configurations. Whether you have a high ceiling in your living room or a low ceiling in your kitchen, the Hunter Stratford Ceiling Fan can be adapted to fit your needs.

5. Integrated Lighting

Many models of the Hunter Stratford Ceiling Fan come with integrated lighting options, allowing you to illuminate your space while providing airflow. The light fixtures are designed to complement the fan’s aesthetic, creating a cohesive look in your room.

Benefits of Choosing the Hunter Stratford Ceiling Fan

1. Improved Air Circulation

The primary benefit of any ceiling fan is improved air circulation. The Hunter Stratford Ceiling Fan effectively circulates air, making your living space feel cooler in the summer and warmer in the winter. This feature can significantly enhance your comfort level year-round.

2. Aesthetic Appeal

The elegant design of the Hunter Stratford Ceiling Fan adds a stylish element to any room. It can serve as a focal point in your decor, making it an attractive addition to your home.

3. Cost Savings

By using a ceiling fan in conjunction with your air conditioning system, you can reduce energy consumption and save on your utility bills. The Hunter Stratford Ceiling Fan allows you to set your thermostat a few degrees higher, as the fan helps circulate cool air throughout the space.

4. Easy Installation

The installation process for the Hunter Stratford Ceiling Fan is straightforward, making it accessible for DIY enthusiasts. Most models come with detailed instructions and all the necessary hardware, allowing you to install it quickly and efficiently.

Installation Process for the Hunter Stratford Ceiling Fan

Step 1: Gather Your Tools

Before beginning the installation, gather all necessary tools, including a screwdriver, ladder, and wire strippers. Having everything ready will streamline the process.

Step 2: Turn Off Power

Safety first! Before starting the installation, turn off the power at the circuit breaker to avoid any electrical hazards.

Step 3: Assemble the Fan

Follow the manufacturer’s instructions to assemble the fan. This typically involves attaching the blades to the motor and securing any light fixtures.

Step 4: Install the Mounting Bracket

Attach the mounting bracket to the ceiling. Ensure it is securely fastened and can support the weight of the fan.

Step 5: Connect the Wires

Connect the fan wires to the ceiling wires according to the color-coded instructions. Typically, this involves connecting black to black (or red), white to white, and green or bare copper to the ground wire.

Step 6: Attach the Fan

Once the wiring is connected, lift the fan and secure it to the mounting bracket. Ensure that it is securely fastened.

Step 7: Install Light Fixtures

If your model includes integrated lighting, attach the light fixtures according to the instructions. Ensure that all connections are secure.

Step 8: Restore Power

Turn the power back on at the circuit breaker and test the fan and lights to ensure everything is functioning correctly.

Maintenance Tips for the Hunter Stratford Ceiling Fan

1. Regular Cleaning

Dust and debris can accumulate on the fan blades and motor over time. Use a damp cloth or a microfiber duster to clean the blades regularly. Avoid using harsh chemicals, as they can damage the finish.

2. Check for Wobbling

If your ceiling fan begins to wobble, it could indicate loose screws or unbalanced blades. Check all screws to ensure they are tight, and adjust the blade alignment if necessary.

3. Lubricate the Motor

To keep the motor running smoothly, consider lubricating it annually with a few drops of oil. This can help prevent wear and tear and extend the fan’s lifespan.

4. Replace Light Bulbs

If your Hunter Stratford Ceiling Fan includes integrated lighting, regularly check the bulbs for burnout. Replace them with compatible LED bulbs to maintain energy efficiency.

5. Seasonal Adjustments

Many ceiling fans, including the Hunter Stratford, have a reverse switch that allows you to change the direction of the blades. In the summer, set the fan to rotate counterclockwise to create a cooling breeze. In the winter, reverse the direction to push warm air down.

Conclusion

The Hunter Stratford Ceiling Fans is more than just a functional appliance; it is an integral part of your home’s decor and comfort. With its stylish design, quiet operation, and energy efficiency, it serves as an excellent investment for any homeowner. Whether you are looking to enhance the comfort of your living space or add a touch of elegance, the Hunter Stratford Ceiling Fan is an ideal choice.


Hidden Ceiling Curtain Track: A Complete Guide

When it comes to interior design, curtains are not just a functional element; they can also enhance the aesthetic appeal of a room. One innovative solution gaining popularity is the Hidden Ceiling Curtain Track. This discreet option allows for a sleek, modern look while providing the flexibility to hang various types of curtains. In this article, we will explore the benefits, installation process, design ideas, and maintenance tips for hidden ceiling curtain tracks.

Hidden Ceiling Curtain Track

What is a Hidden Ceiling Curtain Track?

A Hidden Ceiling Curtain Track is a mounting system that allows curtains to be suspended from the ceiling, completely concealing the track from view. This design creates a clean, unobtrusive appearance that can elevate the overall look of a room. Whether you’re using sheer curtains to filter light or blackout curtains for privacy, a hidden track system enables smooth operation without the visual clutter of traditional curtain rods.

Benefits of Using a Hidden Ceiling Curtain Track

1. Aesthetic Appeal

The primary advantage of a hidden ceiling curtain track is its aesthetic appeal. By hiding the track, you create a seamless look that complements modern and minimalist interiors. This system can make windows appear larger and more expansive, enhancing the overall ambiance of the room.

2. Versatility

Hidden tracks can be used with various types of curtains, including drapes, sheers, and even heavier materials. This versatility allows homeowners to change the style of their curtains without needing to replace the track system.

3. Easy Operation

Most hidden ceiling curtain tracks come with smooth gliding mechanisms, making it easy to open and close your curtains. This is especially beneficial for larger windows or high ceilings where traditional rods may be cumbersome to operate.

Read too: Kitchen Lighting For A Vaulted Ceiling: Illuminating Your Space with Style and Functionality

4. Space-Saving Design

With no visible hardware protruding from the wall, hidden ceiling tracks save valuable space. This is particularly useful in small rooms where every inch counts, allowing for a more open and airy feel.

5. Enhanced Privacy and Light Control

Hidden tracks enable homeowners to install curtains that provide maximum privacy and light control. By choosing the right fabric and opacity, you can create the perfect environment for any space.

Design Ideas for Hidden Ceiling Curtain Tracks

1. Modern Minimalism

For a sleek, modern look, opt for simple, unadorned curtains made from light, flowing fabrics. A hidden track system allows the curtains to blend seamlessly into the ceiling, creating a minimalist aesthetic.

2. Layered Curtains

Consider using a combination of sheer and blackout curtains for added versatility. The sheer curtains can filter natural light during the day, while the blackout curtains provide complete privacy at night. A hidden track makes it easy to layer these fabrics without visible hardware.

3. Statement Drapes

If you want to make a bold statement, choose vibrant or patterned drapes that can be drawn back to reveal a stunning view. The hidden track allows the drapes to be the focal point of the room without distracting from other design elements.

4. Biophilic Design

Incorporate natural elements by using curtains made from organic materials or earthy tones. A hidden ceiling curtain track can enhance the connection between indoor and outdoor spaces, making your home feel more connected to nature.

5. Custom Solutions

For uniquely shaped windows or specialized spaces, consider a custom hidden curtain track. This option allows you to tailor the system to fit your specific needs, ensuring a perfect fit and function.

Installation Process for Hidden Ceiling Curtain Tracks

Installing a Hidden Ceiling Curtain Track can be a DIY project, but it requires careful planning and execution. Here are the steps to guide you through the installation process:

1. Measure Your Space

Start by measuring the length of the area where you plan to install the curtain track. Consider the height of the ceiling and the desired drop of the curtains. Accurate measurements will ensure that your track fits perfectly.

2. Select the Right Track

Choose a hidden ceiling curtain track that suits your needs. Look for a system that can support the weight of your chosen curtains and includes smooth gliding mechanisms. Many retailers offer pre-cut lengths, or you can purchase a customizable option.

3. Gather Your Tools

You will need several tools for installation, including a drill, level, measuring tape, and a stud finder. Having the right tools on hand will make the process smoother and more efficient.

4. Mark the Mounting Points

Using your measurements, mark the points where the track will be mounted on the ceiling. Ensure that the track is level to avoid any uneven hanging of the curtains.

5. Install the Track

Drill the necessary holes for the track brackets, then secure the track in place according to the manufacturer’s instructions. Ensure that the track is firmly attached to the ceiling and can support the weight of the curtains.

6. Hang Your Curtains

Once the track is installed, hang your curtains according to the provided instructions. Make sure they glide smoothly along the track and adjust as necessary.

7. Final Touches

After installation, step back and assess the overall look. Make any necessary adjustments to ensure that the curtains hang evenly and operate smoothly.

Maintenance Tips for Hidden Ceiling Curtain Tracks

To ensure the longevity of your Hidden Ceiling Curtain Track, regular maintenance is essential. Here are some tips to keep your track and curtains in optimal condition:

1. Regular Cleaning

Dust and debris can accumulate on the track over time. Periodically clean the track using a soft cloth or a vacuum with a brush attachment to remove any buildup. Ensure that the curtains are also cleaned according to the manufacturer’s instructions.

2. Check for Damage

Inspect the track and curtains regularly for any signs of wear or damage. Look for frayed fabric, bent tracks, or malfunctioning gliders. Address any issues promptly to avoid further complications.

3. Lubricate the Track

To maintain smooth operation, consider applying a lubricant specifically designed for curtain tracks. This will ensure that the gliders move freely and prevent any sticking or jamming.

4. Adjust as Needed

If you notice that the curtains are not hanging evenly, you may need to adjust the gliders or the track itself. Follow the manufacturer’s guidelines for making adjustments to ensure proper functionality.

Conclusion

The Hidden Ceiling Curtain Track is a versatile and stylish solution for enhancing your interior space. With its many benefits, including aesthetic appeal, easy operation, and space-saving design, it’s a worthy investment for any home. Whether you choose to go the DIY route or hire a professional, the result will be a beautifully curated environment that showcases your personal style.

Floor to Ceiling Kitchen Cabinets: A Comprehensive Guide

When it comes to kitchen design, one of the most impactful choices you can make is the selection of cabinets. Among the various options available, Floor to Ceiling Kitchen Cabinets stand out for their ability to enhance both functionality and aesthetics. This guide will delve into the advantages, design considerations, installation tips, and maintenance of floor to ceiling kitchen cabinets, providing you with the insights needed to transform your kitchen into a stylish and organized space.

Floor To Ceiling Kitchen Cabinet

What Are Floor to Ceiling Kitchen Cabinets?

Floor to Ceiling Kitchen Cabinets are cabinetry solutions that extend from the floor all the way to the ceiling, maximizing vertical storage space. Unlike standard cabinets that may leave empty wall space above, these cabinets utilize the entire height of the kitchen, offering more storage and a streamlined appearance. They can be designed in various styles, materials, and finishes to complement any kitchen decor.

Read too: Kitchen Lighting For A Vaulted Ceiling: Illuminating Your Space with Style and Functionality

Advantages of Floor to Ceiling Kitchen Cabinets

1. Maximized Storage Space

One of the most significant benefits of floor to ceiling cabinets is the extensive storage capacity they provide. By utilizing the vertical space in your kitchen, you can store a wide range of items, from cookware and pantry essentials to small appliances. This organization can help reduce clutter on countertops, making your kitchen feel more spacious.

2. Enhanced Aesthetic Appeal

Floor to ceiling cabinets create a seamless and cohesive look in your kitchen. They can make the space feel more elegant and polished, particularly when designed with modern finishes or stylish hardware. Whether you prefer a contemporary, traditional, or farmhouse style, these cabinets can enhance your kitchen’s overall design.

3. Improved Functionality

Having cabinets that reach the ceiling makes it easier to access everything you need while cooking and entertaining. You can customize the interior layout to suit your needs, with options for pull-out shelves, lazy Susans, and more. This functionality is particularly beneficial in busy kitchens where efficiency is key.

4. Increased Home Value

Investing in high-quality Floor to Ceiling Kitchen Cabinets can increase the value of your home. Potential buyers often appreciate well-organized and aesthetically pleasing kitchens, making your home more attractive on the market.

5. Variety of Design Options

Floor to ceiling cabinets come in a wide array of designs, materials, and finishes. Whether you prefer wood, laminate, or metal, you can find the perfect style to suit your taste. Additionally, you can choose between open shelving, glass-front doors, or solid cabinet doors for added customization.

Design Considerations for Floor to Ceiling Kitchen Cabinets

When planning for Floor to Ceiling Kitchen Cabinets, consider the following design elements to ensure a perfect fit for your space:

1. Cabinet Style

Decide on the cabinet style that best fits your kitchen’s overall theme. Popular styles include:

  • Shaker Style: Known for its clean lines and simple design, perfect for modern and traditional kitchens.
  • Flat Panel: Offers a sleek and minimalist look, ideal for contemporary spaces.
  • Glass Front: Adds an open feel, allowing you to showcase beautiful dishware or decorative items.

2. Material Selection

Choose materials that will not only look good but also withstand the rigors of kitchen use. Common materials include:

  • Solid Wood: Durable and offers a classic look.
  • Laminate: Budget-friendly and available in various colors and finishes.
  • Metal: Provides a modern industrial feel and is highly durable.

3. Color and Finish

The color and finish of your cabinets will significantly impact your kitchen’s ambiance. Lighter colors can make a small kitchen feel larger, while darker shades can add warmth and richness. Consider finishes like matte, glossy, or textured to add depth and interest.

4. Hardware Choices

Select hardware that complements your cabinet style. Whether you prefer knobs, pulls, or handles, the right hardware can enhance the overall look of your cabinets. Consider finishes like brushed nickel, bronze, or gold to align with your design theme.

5. Lighting Considerations

Incorporating lighting into your floor to ceiling cabinets can enhance functionality and aesthetics. Consider under-cabinet lighting to illuminate countertops and inside-cabinet lighting to showcase your glassware.

Installation Tips for Floor to Ceiling Kitchen Cabinets

Installing Floor to Ceiling Kitchen Cabinets can be a complex project, but with the right preparation, you can achieve professional-looking results. Here are some tips for a successful installation:

1. Measure Accurately

Before purchasing cabinets, measure your kitchen space carefully. Take into account the height, width, and depth of the area where you will install the cabinets. This will ensure a proper fit and prevent costly mistakes.

2. Plan the Layout

Create a layout plan that includes the placement of appliances, sink, and other fixtures. This will help you determine where to position your cabinets for optimal functionality.

3. Choose the Right Tools

Ensure you have the necessary tools for the installation, including a level, drill, screwdriver, and measuring tape. Having the right tools will make the process smoother and more efficient.

4. Follow Manufacturer Instructions

Each cabinet brand may have specific installation instructions. Follow these carefully to ensure proper assembly and mounting. If needed, consult with a professional installer for more complex installations.

5. Secure Properly

Ensure the cabinets are securely fastened to the wall to prevent any tipping or instability. Use brackets and screws designed for heavy cabinetry to provide additional support.

Maintenance of Floor to Ceiling Kitchen Cabinets

To keep your Floor to Ceiling Kitchen Cabinets looking their best, regular maintenance is essential. Here are some tips to help you care for your cabinets:

1. Regular Cleaning

Wipe down your cabinets regularly with a damp cloth to remove dust and grease. Avoid using harsh chemicals that could damage the finish. For deeper cleaning, use a gentle soap solution.

2. Avoid Moisture

Excess moisture can damage wood cabinets over time. Ensure proper ventilation in your kitchen, especially around the sink and cooking areas.

3. Check for Damage

Periodically inspect your cabinets for any signs of damage, such as scratches, dents, or loose hardware. Address any issues promptly to prevent further damage.

4. Refinish as Needed

If your cabinets begin to show wear, consider refinishing them. This can involve sanding and repainting or applying a new stain to refresh their appearance.

Conclusion

Floor to Ceiling Kitchen Cabinets are an excellent choice for maximizing storage, enhancing aesthetics, and improving the functionality of your kitchen. With a variety of styles, materials, and design options available, you can create a beautiful and organized space tailored to your needs. By following the tips provided in this guide, you can confidently choose, install, and maintain these cabinets, ensuring they remain a stunning feature in your home for years to come.

Copper Flush Mount Ceiling Light: A Stylish Guide

When it comes to home lighting, choosing the right fixtures can significantly enhance your interior design. One standout option is the Copper Flush Mount Ceiling Light. This stylish fixture combines elegance and functionality, making it a popular choice for various settings. In this article, we will explore the benefits, design options, installation tips, and care instructions for copper flush mount ceiling lights, ensuring you have all the information needed to elevate your space.

Copper Flush Mount Ceiling Light

What is a Copper Flush Mount Ceiling Light?

A Copper Flush Mount Ceiling Light is a lighting fixture that is installed directly against the ceiling, providing a sleek and modern look. Made from durable copper, these lights often feature a variety of designs, from vintage styles to contemporary aesthetics. They are ideal for spaces with low ceilings, offering ample light without taking up visual space.

Read too: Kitchen Lighting For A Vaulted Ceiling: Illuminating Your Space with Style and Functionality

Benefits of Copper Flush Mount Ceiling Lights

1. Aesthetic Appeal

Copper has a warm, inviting hue that adds a touch of sophistication to any room. The metallic finish reflects light beautifully, creating a cozy atmosphere. Whether in a modern, industrial, or traditional setting, these fixtures can enhance your decor.

2. Versatility

The versatility of copper flush mount lights makes them suitable for various spaces. They can be used in living rooms, dining areas, kitchens, hallways, and even bathrooms. Their understated design allows them to complement any interior style.

3. Space-Saving Design

Since these fixtures are mounted flush against the ceiling, they are perfect for rooms with low ceilings or limited vertical space. This design helps create an open feel without sacrificing lighting.

4. Energy Efficiency

Many copper flush mount ceiling lights use LED bulbs, which are more energy-efficient than traditional incandescent bulbs. This not only saves on energy bills but also reduces the frequency of bulb replacements.

5. Easy Maintenance

Copper is known for its durability and resistance to rust. With minimal upkeep, a copper flush mount light can maintain its luster and functionality for years.

Design Options for Copper Flush Mount Ceiling Lights

1. Traditional Designs

Traditional copper flush mount lights often feature ornate details and intricate designs. These fixtures can add a vintage charm to any space, making them ideal for classic interiors.

2. Modern Minimalism

For those who prefer a more contemporary look, modern copper flush mount lights offer sleek lines and simple shapes. These designs focus on functionality while still showcasing the beauty of copper.

3. Industrial Style

Industrial-style copper flush mount lights typically incorporate raw materials and exposed bulbs. This rugged aesthetic works well in lofts, offices, or any space that embraces an urban feel.

4. Vintage-Inspired

Vintage-inspired designs combine retro elements with modern functionality. These fixtures often feature Edison bulbs, which provide a warm glow reminiscent of the past.

How to Choose the Right Copper Flush Mount Ceiling Light

When selecting a Copper Flush Mount Ceiling Light, consider the following factors to ensure it fits perfectly in your space:

1. Size and Scale

Measure the area where you plan to install the light. A larger room may require multiple fixtures or a larger single light, while smaller spaces may only need a compact option. Aim for a proportional balance between the light fixture and the room size.

2. Style

Consider your overall decor style. Whether you prefer traditional, modern, or industrial designs, there’s a copper flush mount light to match your aesthetic.

3. Wattage and Lumens

Choose a fixture that provides adequate brightness for the space. Look for the wattage and lumens of the light source. For general lighting, aim for around 100-150 lumens per square foot.

4. Installation Height

Ensure the height at which the light will be installed is appropriate for the space. Flush mount lights are designed for low ceilings, but consider the overall look when deciding on placement.

Installation Tips for Copper Flush Mount Ceiling Lights

Installing a Copper Flush Mount Ceiling Light can be a straightforward DIY project. Here are some steps to guide you:

1. Gather Necessary Tools

Before starting, ensure you have all the necessary tools, including a screwdriver, wire stripper, and electrical tape. Safety goggles and a ladder will also be helpful.

2. Turn Off the Power

Always turn off the power to the existing light fixture at the circuit breaker to avoid any electrical hazards.

3. Remove the Old Fixture

Carefully detach the existing light fixture by unscrewing it from the ceiling. Disconnect the wires, noting how they are connected for reference.

4. Connect the New Fixture

Connect the wires from the new copper flush mount light to the existing wiring. Typically, the black wire connects to black, white to white, and the ground wire to the green or copper grounding wire.

5. Secure the Fixture

Once the wires are connected, secure the fixture to the ceiling according to the manufacturer’s instructions. Ensure it is mounted firmly and safely.

6. Turn the Power Back On

After installation, turn the power back on at the circuit breaker and test the light to ensure it functions correctly.

Care and Maintenance of Copper Flush Mount Ceiling Lights

To keep your Copper Flush Mount Ceiling Light looking its best, regular maintenance is essential. Here are some care tips:

1. Dust Regularly

Use a soft, dry cloth to wipe down the fixture and remove dust and debris. This prevents buildup and keeps the light shining bright.

2. Clean with Care

If the copper begins to tarnish, use a gentle copper cleaner and a soft cloth to restore its shine. Avoid abrasive cleaners that could scratch the surface.

3. Check for Loose Connections

Periodically inspect the fixture for any loose screws or wiring connections. Tighten as necessary to ensure safe operation.

4. Replace Bulbs as Needed

When a bulb burns out, replace it promptly. Ensure you use the recommended wattage for your fixture to avoid damage.

Conclusion

The Copper Flush Mount Ceiling Light is more than just a lighting solution; it’s a stylish statement that enhances the aesthetics of any room. With various design options, energy efficiency, and easy maintenance, these fixtures are ideal for modern living. Whether you’re updating your home decor or designing a new space, consider incorporating a copper flush mount light for a touch of elegance and sophistication. With the right selection and care, your lighting fixture will be a lasting feature in your home.

Ceiling Mounted Occupancy Sensor: A Comprehensive Guide

In today’s fast-paced world, energy efficiency is more important than ever. One innovative solution that has gained popularity in both residential and commercial spaces is the Ceiling Mounted Occupancy Sensor. These devices not only enhance convenience but also significantly reduce energy costs by ensuring that lights and devices are only active when needed. In this article, we will explore what ceiling-mounted occupancy sensors are, how they work, their benefits, installation tips, and their applications in various settings.

Ceiling Mounted Occupancy Sensor

Understanding Ceiling Mounted Occupancy Sensors

What is a Ceiling Mounted Occupancy Sensor?

A Ceiling Mounted Occupancy Sensor is a device designed to detect the presence of individuals in a room and automatically control lighting and other electrical devices. Mounted on the ceiling, these sensors utilize various technologies—such as passive infrared (PIR), ultrasonic, or dual technology—to sense motion within their range.

How Do They Work?

Occupancy sensors detect movement based on changes in infrared radiation or sound waves. Here’s a brief overview of how different types work:

  1. Passive Infrared (PIR) Sensors: These sensors measure changes in infrared energy, which is emitted by warm bodies. When a person enters the sensor’s field of view, the change in infrared levels triggers the device to activate the lights.
  2. Ultrasonic Sensors: These sensors emit high-frequency sound waves and measure the reflection of these waves. If there is movement in the room, the reflected sound waves will change, triggering the sensor.
  3. Dual Technology Sensors: Combining both PIR and ultrasonic technologies, these sensors offer a higher level of reliability by requiring confirmation from both detection methods before activating the lights.

Read too: Kitchen Lighting For A Vaulted Ceiling: Illuminating Your Space with Style and Functionality

Benefits of Ceiling Mounted Occupancy Sensors

1. Energy Efficiency

One of the most significant advantages of using a Ceiling Mounted Occupancy Sensor is the reduction in energy consumption. By ensuring that lights are only on when needed, these sensors can lead to substantial savings on electricity bills.

2. Convenience

Occupancy sensors provide convenience, particularly in high-traffic areas. Users no longer have to fumble for switches in the dark, as lights automatically turn on when someone enters the room.

3. Extended Equipment Life

Frequent switching on and off can wear out bulbs and fixtures. By using occupancy sensors, you can extend the lifespan of your lighting equipment by reducing unnecessary on/off cycles.

4. Enhanced Security

Occupancy sensors can be integrated into security systems. They can be programmed to activate lights in response to movement, deterring potential intruders when the premises are unoccupied.

5. Versatile Applications

These sensors are versatile and can be used in various settings, from homes and offices to schools and hospitals, making them suitable for nearly any environment.

Key Considerations When Choosing a Ceiling Mounted Occupancy Sensor

When selecting a Ceiling Mounted Occupancy Sensor, consider the following factors to ensure optimal performance:

1. Coverage Area

Different sensors have varying coverage ranges. Assess the size of the space where you intend to install the sensor and choose one that effectively covers the entire area.

2. Mounting Height

The height at which the sensor is mounted affects its detection capabilities. Most sensors are effective when mounted between 8 to 12 feet from the ground.

3. Sensitivity Settings

Some sensors come with adjustable sensitivity settings, allowing you to customize how responsive the sensor is to movement. This can be particularly useful in environments with pets or constant movement.

4. Delay Settings

Most occupancy sensors feature delay settings, determining how long lights remain on after motion is no longer detected. Select a delay time that aligns with the typical usage patterns of the space.

5. Compatibility

Ensure that the sensor you choose is compatible with your existing lighting systems. Some sensors may require specific types of fixtures or controls.

Installation Tips for Ceiling Mounted Occupancy Sensors

Installing a Ceiling Mounted Occupancy Sensor can be straightforward, but proper installation is crucial for effective operation. Here are some tips to help you through the process:

1. Choose the Right Location

Select a location that provides an unobstructed view of the area you wish to monitor. Avoid placing the sensor near obstacles such as furniture or walls, as these can interfere with its ability to detect movement.

2. Mounting the Sensor

Most sensors come with mounting brackets. Use screws or anchors to securely attach the sensor to the ceiling. Ensure that it is level and facing the intended direction.

3. Wiring

If you’re replacing an existing switch, turn off the power before proceeding. Follow the manufacturer’s wiring instructions carefully. If you’re unsure, consider hiring a licensed electrician to ensure proper installation.

4. Test the Sensor

After installation, test the sensor’s functionality. Walk through the area to ensure the sensor detects your movement and the lights respond accordingly.

5. Adjust Settings

After testing, adjust the sensitivity and delay settings based on your observations. This may require a few iterations to find the optimal configuration.

Applications of Ceiling Mounted Occupancy Sensors

1. Residential Spaces

In homes, ceiling-mounted occupancy sensors can be installed in bedrooms, hallways, and living areas. They provide convenience and energy savings by ensuring that lights are only on when the space is occupied.

2. Commercial Buildings

Offices and retail spaces benefit significantly from these sensors. They can help reduce energy costs by ensuring lights in unoccupied areas are turned off, leading to substantial savings.

3. Educational Institutions

Schools and universities often use ceiling-mounted occupancy sensors in classrooms, restrooms, and hallways. This not only saves energy but also enhances safety by ensuring adequate lighting when students are present.

4. Healthcare Facilities

In hospitals and clinics, these sensors can enhance patient care by ensuring that lights are activated when medical personnel enter rooms. This is particularly important in areas where patient mobility is limited.

Conclusion

Ceiling Mounted Occupancy Sensors are a smart investment for anyone looking to enhance energy efficiency, convenience, and security in their space. With various types and applications, these sensors can adapt to the unique needs of any environment. Whether you’re looking to install them in your home, office, or public space, understanding their benefits and installation requirements will help you make the most informed decision. By embracing this technology, you not only contribute to energy conservation but also create a more comfortable and efficient living or working space.


Milk Glass Ceiling Light: Illuminate Your Space

When it comes to lighting design, few fixtures can match the timeless elegance of a Milk Glass Ceiling Light. This style not only serves a functional purpose but also enhances the aesthetic appeal of any room. In this comprehensive guide, we will explore the history, design options, benefits, and installation tips related to milk glass ceiling lights. Whether you are renovating your home or simply looking to refresh your lighting scheme, this article has you covered.

Milk Glass Ceiling Light

Understanding Milk Glass

What is Milk Glass?

Milk glass, often characterized by its opaque white appearance, has a rich history that dates back to the 16th century. Initially used in decorative items, its versatility and beauty eventually made it a popular choice for lighting fixtures. The soft, diffused light produced by milk glass creates a warm and inviting atmosphere, making it ideal for various spaces in your home.

The Historical Significance

Milk glass has been utilized in home décor since the Victorian era. Its unique properties allowed for intricate designs that could be mass-produced, making it accessible to the average consumer. In the mid-20th century, milk glass ceiling lights became particularly fashionable, often found in homes and public buildings. Today, this retro style is experiencing a resurgence, appealing to both vintage enthusiasts and modern homeowners alike.

Read too: Discovering the Charm of Nautical Outdoor Ceiling Fans for Your Coastal Retreat: Sail into Style

The Allure of Milk Glass Ceiling Lights

Aesthetic Appeal

One of the primary reasons homeowners choose Milk Glass Ceiling Light fixtures is their aesthetic versatility. They can complement a wide range of interior styles, from traditional to contemporary. The soft glow emitted by milk glass helps to create a serene environment, making it suitable for living rooms, bedrooms, and kitchens.

Variety of Designs

Milk glass ceiling lights come in numerous designs, allowing homeowners to select a fixture that best fits their decor. Here are some popular styles:

  1. Flush Mounts: These fixtures are mounted directly against the ceiling, making them ideal for rooms with low ceilings. They provide ample light without sacrificing space.
  2. Pendant Lights: Hanging pendant fixtures can serve as a statement piece in any room. With various shapes and sizes, they can be used individually or grouped for a more dramatic effect.
  3. Chandeliers: For a touch of elegance, milk glass chandeliers add a sophisticated flair. They work well in dining rooms and entryways, drawing the eye upward.
  4. Sconces: Wall-mounted milk glass sconces can enhance the lighting in hallways or beside mirrors, providing both style and functionality.

Soft Lighting Effect

The opaque nature of milk glass diffuses light, creating a soft, even glow that reduces harsh shadows and glare. This quality makes it an excellent choice for spaces where you want to create a warm, inviting ambiance. For example, using milk glass ceiling lights in a dining area can foster a cozy atmosphere during family meals.

Benefits of Milk Glass Ceiling Lights

Durability

Milk glass is a sturdy material that can withstand daily use. Unlike plastic fixtures that may yellow or become brittle over time, quality milk glass maintains its appearance with minimal maintenance. This durability makes milk glass ceiling lights a long-lasting choice for your home.

Easy to Clean

Maintaining the beauty of milk glass fixtures is relatively simple. Most can be wiped clean with a damp cloth to remove dust and grime, ensuring they remain looking fresh and new. Regular cleaning helps to maximize light output and enhance the overall aesthetic of your space.

Versatile Compatibility

Milk glass ceiling lights can be paired with various bulb types, including LED, incandescent, and CFL. This versatility allows homeowners to select the brightness and color temperature that best suits their needs, whether they want warm, inviting light or cooler, brighter illumination.

Installation Tips for Milk Glass Ceiling Lights

Tools Required

Before starting the installation process, gather the necessary tools. You will typically need:

  • Screwdriver
  • Wire cutters
  • Electrical tape
  • Voltage tester
  • Ladder

Safety First

Always turn off the power at the circuit breaker before beginning any electrical work. This precaution helps prevent accidents and ensures a safe installation process.

Step-by-Step Installation

  1. Remove the Old Fixture: If you are replacing an existing light, carefully remove it by unscrewing the mounting bracket and disconnecting the wires.
  2. Prepare the New Fixture: Follow the manufacturer’s instructions for assembling your new milk glass ceiling light. This may include attaching the glass shade to the base.
  3. Connect the Wires: Connect the fixture’s wires to the ceiling wiring. Typically, the black wire connects to the black (hot) wire, and the white wire connects to the white (neutral) wire. Secure the connections with wire nuts and wrap with electrical tape for added safety.
  4. Mount the Fixture: Secure the fixture to the ceiling using the provided mounting bracket. Ensure it is flush against the ceiling for a professional appearance.
  5. Install the Bulb: Insert the appropriate bulb, ensuring it is securely fitted.
  6. Test the Light: Once everything is connected and secured, turn the power back on and test your new milk glass ceiling light.

Creative Ways to Use Milk Glass Ceiling Lights

In the Kitchen

Milk glass ceiling lights can enhance the look of your kitchen while providing excellent task lighting. Consider pendant lights above an island or a flush mount fixture for general illumination. The soft glow can create a warm atmosphere, making cooking and entertaining more enjoyable.

In the Living Room

In the living room, a stylish milk glass chandelier or a series of pendant lights can serve as focal points, adding charm and character. Pair these fixtures with warm-toned bulbs to create a cozy ambiance perfect for relaxation.

In the Bedroom

For bedrooms, milk glass ceiling lights can be used in various forms, including flush mounts or pendant fixtures. The soft, diffused light is ideal for creating a serene environment conducive to rest and relaxation.

In the Bathroom

Using milk glass sconces or a ceiling light in the bathroom can soften the overall look while providing adequate illumination for grooming and other activities. The moisture-resistant properties of milk glass make it a practical choice for this space.

Conclusion

Milk Glass Ceiling Light fixtures offer a blend of functionality, style, and historical charm. Their versatility makes them suitable for various rooms and design schemes, while their soft lighting enhances the ambiance of any space. Whether you choose a dramatic chandelier or simple flush mounts, incorporating milk glass lighting into your home will elevate its aesthetic and create inviting atmospheres.

Lighting in Vaulted Ceiling Kitchens: Illuminating Your Space

When it comes to kitchen design, few elements are as impactful as the Lighting in Vaulted Ceiling Kitchen. A vaulted ceiling not only adds an architectural interest to your home but also creates unique challenges and opportunities for lighting. In this guide, we’ll explore various aspects of lighting in vaulted ceiling kitchens, including the types of fixtures to consider, installation tips, design ideas, and much more.

Lighting In Vaulted Ceiling Kitchen

Understanding Vaulted Ceilings

What is a Vaulted Ceiling?

A vaulted ceiling is a ceiling that rises sharply, creating an open, airy atmosphere. It often features exposed beams and can make a room feel significantly larger. Vaulted ceilings are common in modern homes and can be a beautiful focal point in kitchens.

Benefits of Vaulted Ceilings

  1. Increased Space: Vaulted ceilings can make a room feel more spacious and open, enhancing the overall aesthetic.
  2. Natural Light: With the right design, vaulted ceilings can allow for more windows, bringing in natural light and reducing the need for artificial lighting during the day.
  3. Architectural Interest: A vaulted ceiling can serve as a statement feature, adding character and elegance to your kitchen.

Lighting in Vaulted Ceiling Kitchen: Essential Considerations

When planning your kitchen lighting, there are several factors to consider, especially with a vaulted ceiling.

Read too: Discovering the Charm of Nautical Outdoor Ceiling Fans for Your Coastal Retreat: Sail into Style

1. Layered Lighting

Creating a well-lit kitchen involves using multiple layers of lighting. Consider combining ambient, task, and accent lighting:

  • Ambient Lighting: This is the primary source of light, usually provided by overhead fixtures. For vaulted ceilings, you might consider using chandeliers or large pendant lights that draw the eye upward.
  • Task Lighting: This type of lighting focuses on specific areas where tasks are performed, such as countertops or cooking spaces. Under-cabinet lights and recessed lighting are great options for providing task illumination.
  • Accent Lighting: Accent lighting adds visual interest and can highlight specific features, such as artwork or architectural details. Wall sconces or spotlights can serve this purpose.

2. Choosing the Right Fixtures

The type of fixtures you choose can significantly impact the overall look and functionality of your kitchen. Here are some popular options:

  • Chandeliers: A bold chandelier can become the centerpiece of your vaulted ceiling kitchen. Opt for a design that complements your kitchen’s style, whether it’s modern, rustic, or traditional.
  • Pendant Lights: Hanging pendant lights can be used above islands or dining areas. Consider multiple pendants at varying heights for a dynamic look.
  • Recessed Lighting: Recessed lights can be strategically placed throughout the kitchen to provide even illumination without taking up visual space.
  • Track Lighting: Track lighting allows for flexibility and directionality, which can be particularly useful in vaulted spaces.

3. Brightness and Color Temperature

When selecting light bulbs, consider both brightness and color temperature:

  • Brightness: Measured in lumens, ensure you have adequate lighting for various tasks in the kitchen. Generally, aim for around 300-400 lumens per square meter.
  • Color Temperature: The color temperature of your lighting affects the ambiance. Warmer tones (2700K-3000K) create a cozy atmosphere, while cooler tones (4000K-5000K) provide a more energetic feel. A mix of both can offer versatility.

Design Ideas for Lighting in Vaulted Ceiling Kitchens

1. Statement Chandeliers

If your kitchen has a particularly high ceiling, consider a large statement chandelier. This can serve as a focal point that not only illuminates but also enhances the overall design aesthetic of the space.

2. Layering with Beams

If your vaulted ceiling includes exposed beams, consider integrating lighting into the beams themselves. This creates a warm, inviting atmosphere and highlights the architectural details of your kitchen.

3. Incorporating Natural Light

Take advantage of natural light by incorporating large windows or skylights. This not only reduces the need for artificial lighting during the day but also adds a beautiful, natural element to your kitchen.

4. Under-Cabinet Lighting

Adding under-cabinet lighting can significantly improve task lighting in your kitchen. This provides additional light for meal prep and cooking while enhancing the overall design.

5. Dimming Options

Incorporate dimmer switches for your lighting fixtures. This allows you to adjust the brightness based on the time of day or the mood you wish to create, making your kitchen more versatile.

Installation Tips for Lighting in Vaulted Ceiling Kitchens

1. Hire a Professional

Installing lighting in a vaulted ceiling can be more complex than standard ceilings. Hiring a professional electrician can ensure that everything is installed safely and correctly.

2. Consider Wiring Needs

Ensure that you plan for adequate wiring, especially if you’re adding new fixtures. A vaulted ceiling may require different wiring techniques to ensure everything is functional and meets safety codes.

3. Measure Heights Carefully

When installing fixtures, take into account the height of the ceiling. Ensure that hanging fixtures are installed at a safe height to avoid obstruction and provide adequate illumination.

4. Test Before Finalizing

Before finalizing the installation, test the placement of your lights. Use temporary fixtures to visualize how the light will distribute in the space, allowing for adjustments if necessary.

Maintenance of Lighting Fixtures

Proper maintenance of your lighting fixtures will keep your kitchen looking great and ensure optimal functionality.

1. Regular Cleaning

Dust and debris can accumulate on light fixtures, especially in high ceilings. Regular cleaning will help maintain brightness and overall appearance.

2. Check for Bulb Lifespan

LED bulbs are known for their longevity, but it’s essential to monitor their performance. Replace any bulbs that begin to dim or flicker to ensure consistent lighting.

3. Inspect for Damage

Periodically inspect your fixtures for any signs of damage or wear. Address any issues promptly to prevent safety hazards.

Conclusion

Lighting in Vaulted Ceiling Kitchen is a crucial aspect of kitchen design that can enhance both functionality and aesthetics. By considering layered lighting, choosing the right fixtures, and maintaining your lighting, you can create a well-lit, inviting kitchen that serves as the heart of your home. Embrace the unique opportunities that vaulted ceilings present and let your kitchen shine.

Drop Ceiling LED Lighting: A Complete Guide

When it comes to modernizing your home or office, Drop Ceiling LED Lighting is an excellent choice that combines functionality, aesthetics, and energy efficiency. Whether you are upgrading an existing ceiling or designing a new space, understanding the benefits and applications of drop ceiling LED lighting can help you make informed decisions. In this article, we will explore everything you need to know about drop ceiling LED lighting, including its advantages, installation tips, design ideas, and maintenance.

Drop Ceiling Led Lighting

What is Drop Ceiling LED Lighting?

Drop Ceiling LED Lighting refers to lighting fixtures installed in a drop ceiling system, which consists of a framework that suspends a ceiling grid. This type of ceiling is commonly found in commercial buildings, schools, and modern residential spaces. The fixtures can be recessed, surface-mounted, or used in conjunction with panel lights, providing versatility and a sleek appearance.

Read too: Discovering the Charm of Nautical Outdoor Ceiling Fans for Your Coastal Retreat: Sail into Style

Advantages of Drop Ceiling LED Lighting

  1. Energy Efficiency: LED lights consume significantly less energy than traditional incandescent or fluorescent bulbs. They convert a higher percentage of energy into light, which results in lower electricity bills.
  2. Longevity: LED lights have a lifespan of 25,000 hours or more, making them a long-lasting option. This reduces the frequency of replacements and maintenance costs.
  3. Low Heat Emission: Unlike incandescent bulbs, LEDs emit very little heat, contributing to a cooler environment. This is particularly beneficial in commercial spaces where numerous lights are used.
  4. Design Flexibility: Drop ceiling LED lighting can be customized to fit various aesthetic needs. With a range of styles, colors, and brightness levels available, it can enhance the overall look of any room.
  5. Easy Installation: Installing drop ceiling LED lights is generally straightforward. Many fixtures are designed to fit seamlessly into existing drop ceiling grids, making them an ideal option for renovations.

Types of Drop Ceiling LED Lighting

1. LED Troffers

LED troffers are rectangular fixtures that fit into the grid of a drop ceiling. They provide even illumination and are perfect for large areas such as offices, classrooms, and retail spaces. Available in various sizes and lumen outputs, they can easily replace traditional fluorescent troffers.

2. LED Panels

LED panels offer a sleek, modern look and are often used in settings that require a minimalist aesthetic. These thin, flat panels provide a uniform light distribution and can be installed flush with the ceiling or in a recessed manner. They are ideal for conference rooms, lobbies, and open-plan offices.

3. Recessed LED Lights

Recessed LED lights are installed above the ceiling line, creating a clean look. They are versatile and can be used for general lighting or accent lighting, depending on the design and placement. These lights work well in residential settings, particularly in kitchens and living areas.

4. Surface-Mounted LED Fixtures

Surface-mounted fixtures are attached directly to the ceiling grid, making them a good option for spaces with a higher ceiling. They provide a stylish way to illuminate areas that might not suit recessed or panel lighting.

5. LED Strip Lighting

For a more creative approach, LED strip lights can be installed along the edges of a drop ceiling or in coves. They can create ambient lighting and highlight architectural features, adding a unique touch to any room.

Installation Tips for Drop Ceiling LED Lighting

Installing drop ceiling LED lighting can be a DIY project or handled by a professional electrician. Here are some tips to guide you through the installation process:

  1. Plan Your Layout: Before installation, map out where you want the lights to be placed. Consider the size of the room, the type of lighting needed, and how the fixtures will fit into the existing grid.
  2. Gather Necessary Tools: You’ll typically need a screwdriver, wire cutters, wire nuts, and a voltage tester. If you’re working with recessed lights, you may also require a hole saw for cutting the ceiling material.
  3. Turn Off Power: Ensure the power is turned off at the circuit breaker before starting any electrical work to avoid accidents.
  4. Install the Fixtures: For troffers and panels, simply lift them into the grid and secure them in place. For recessed fixtures, cut appropriate holes in the ceiling, run electrical wiring, and connect the fixture according to the manufacturer’s instructions.
  5. Make Electrical Connections: Connect the wires from the fixtures to the existing wiring in your ceiling. Typically, you’ll connect black to black (hot), white to white (neutral), and green or bare to ground.
  6. Test the Lights: Once everything is connected, restore power and test the lights to ensure they function correctly.

Design Ideas for Drop Ceiling LED Lighting

Incorporating Drop Ceiling LED Lighting into your design can create stunning visual effects and enhance the functionality of a space. Here are some design ideas to consider:

  1. Layered Lighting: Combine different types of LED fixtures to create layers of light. Use recessed lights for general illumination, LED strips for accent lighting, and pendant fixtures for task lighting.
  2. Color Temperature: Select LED lights with varying color temperatures to create different atmospheres. Cooler temperatures (5000K) are great for workspaces, while warmer temperatures (2700K) create a cozy feel for residential areas.
  3. Dimmer Switches: Installing dimmer switches allows you to adjust the brightness of your drop ceiling lights according to the time of day and activity, adding versatility to the lighting scheme.
  4. Highlight Features: Use drop ceiling LED lighting to highlight architectural elements like beams, columns, or artwork. Strategically placed lighting can draw attention to focal points in a room.
  5. Integrate with Smart Technology: Consider incorporating smart LED lights that can be controlled via smartphone apps. This allows you to adjust brightness, color, and even set schedules for your lights.

Maintenance of Drop Ceiling LED Lighting

One of the benefits of using LED lighting is the low maintenance required. However, it’s still essential to ensure your fixtures remain in good condition. Here are some maintenance tips:

  1. Regular Cleaning: Dust and debris can accumulate on light fixtures, reducing their brightness. Periodically clean your LED lights with a soft cloth to maintain optimal performance.
  2. Check for Flickering: If your LED lights start to flicker, it may indicate a problem with the fixture or wiring. Addressing this issue promptly can prevent more significant electrical problems.
  3. Replace Bulbs as Needed: While LED bulbs have long lifespans, they may still require replacement over time. Keep an eye on any that have dimmed significantly and replace them to maintain consistent lighting.
  4. Inspect Wiring: Regularly inspect the wiring and connections to ensure they are secure and free from damage. This is particularly important if you notice any flickering or inconsistent lighting.

Conclusion

Drop Ceiling LED Lighting is an efficient, stylish, and versatile solution for both residential and commercial spaces. With various types of fixtures available, installation ease, and low maintenance requirements, it’s an excellent choice for anyone looking to enhance their lighting design. By understanding the different types of drop ceiling LED lights, installation tips, and design ideas, you can transform your space into a well-lit, inviting environment that meets all your needs.

Serge Mouille Ceiling Light: A Design Icon

When it comes to timeless lighting design, few pieces resonate as deeply as the Serge Mouille Ceiling Light. This exquisite fixture combines form and function, embodying the principles of mid-century modernism while remaining versatile enough to enhance a variety of interior styles. In this article, we will explore the history, design elements, and installation tips for the Serge Mouille Ceiling Light, helping you understand why it remains a favorite among designers and homeowners alike.

Serge Mouille Ceiling Light

A Brief History of Serge Mouille

Serge Mouille was a French designer born in 1922, renowned for his innovative lighting solutions. He began his career as a blacksmith, which provided him with a unique skill set to create functional art. Mouille’s work is often characterized by simple lines, geometric shapes, and a playful approach to form.

Mouille designed a series of iconic lighting fixtures in the 1950s, including the Serge Mouille Ceiling Light. His designs were influenced by the aesthetic movement of the time, which emphasized minimalism and the beauty of industrial materials. Though initially, his work was not widely recognized, today, it is celebrated for its artistic merit and functional elegance.

Read too: Discovering the Charm of Nautical Outdoor Ceiling Fans for Your Coastal Retreat: Sail into Style

The Allure of the Serge Mouille Ceiling Light

Design Elements of the Serge Mouille Ceiling Light

The Serge Mouille Ceiling Lights is a true representation of mid-century modern design. Here are some of its distinctive features:

  1. Sleek Lines and Minimalist Design: The fixture is characterized by clean, geometric lines that create a sense of balance and harmony in any space. Its minimalist design ensures it does not overwhelm a room, making it suitable for various interior styles.
  2. Material and Finish: Typically crafted from metal, the Serge Mouille Ceiling Light is often finished in black, white, or brass. The choice of materials not only adds durability but also contributes to the fixture’s elegant appearance.
  3. Adjustable Arms: One of the standout features of this ceiling light is its adjustable arms. This functionality allows users to direct light precisely where needed, making it both practical and aesthetically pleasing.
  4. Variety of Configurations: The Serge Mouille Ceiling Light is available in various configurations, including single and multi-arm designs. This versatility makes it an ideal choice for different room sizes and layouts.
  5. Artistic Appeal: Beyond its function, the light serves as a piece of art. The sculptural quality of the design can enhance the visual interest of any room, making it a conversation starter.

Choosing the Right Serge Mouille Ceiling Light

When selecting a Serge Mouille Ceiling Light for your home, consider the following factors:

  1. Room Size: Assess the size of the room where you intend to install the light. Larger rooms may benefit from multi-arm configurations, while smaller spaces may only require a single fixture.
  2. Ceiling Height: The height of your ceiling can influence the type of fixture you choose. For rooms with high ceilings, a multi-arm light can create a stunning focal point, while a low ceiling may require a flush mount design.
  3. Existing Decor: Ensure the style of the light complements your existing decor. The versatility of the Serge Mouille design means it can work well with various styles, from contemporary to traditional.
  4. Functionality: Consider how you will use the space. If you need task lighting for a work area, look for designs that allow for focused light direction.

Installation Tips for the Serge Mouille Ceiling Light

Once you’ve selected your Serge Mouille Ceiling Lights, it’s time for installation. Here are some tips to ensure a smooth process:

  1. Gather Necessary Tools: Before starting, make sure you have all the necessary tools, including a screwdriver, wire connectors, and a voltage tester.
  2. Turn Off Power: Safety is paramount. Always turn off the power at the circuit breaker before beginning any electrical work.
  3. Read Instructions: Carefully read the manufacturer’s installation instructions. Each fixture may have specific requirements that need to be followed.
  4. Mounting the Fixture: Secure the mounting bracket to the ceiling. Ensure it is level and firmly attached to prevent the fixture from hanging unevenly.
  5. Wiring Connections: Connect the wires according to the instructions, typically involving connecting the black (hot) wire, white (neutral) wire, and ground wire. Ensure all connections are tight and secure.
  6. Final Assembly: Once the wiring is complete, attach the fixture to the mounting bracket and ensure it is securely fastened.
  7. Turn Power On: After installation, turn the power back on and test the light to ensure it functions correctly.

Styling Tips with Serge Mouille Ceiling Light

The Serge Mouille Ceiling Lights can elevate the aesthetic of any room. Here are some styling tips to maximize its impact:

  1. Pair with Complementary Decor: Consider pairing the light with other mid-century modern pieces, such as furniture or artwork, to create a cohesive look.
  2. Highlight Architectural Features: Use the light to draw attention to architectural features in your home, such as high ceilings or interesting wall textures.
  3. Layer Your Lighting: Combine the Serge Mouille Ceiling Light with other light sources, such as floor lamps and table lamps, to create a well-lit, inviting atmosphere.
  4. Use as a Focal Point: In a room with minimal decor, the Serge Mouille Ceiling Light can serve as a striking focal point, providing both light and artistic flair.
  5. Experiment with Colors: While black and white are classic finishes, don’t be afraid to explore brass or colored versions to match your interior palette.

Conclusion

The Serge Mouille Ceiling Light is more than just a lighting fixture; it’s a design statement that embodies the elegance of mid-century modernism. With its sleek lines, adjustable features, and artistic appeal, it’s no wonder that this ceiling light has remained a favorite among homeowners and designers alike.

Whether you are renovating a space or simply looking to refresh your home’s decor, consider the timeless elegance of the Serge Mouille Ceiling Lights. Its ability to blend function and art makes it a valuable addition to any room.

60 Outdoor Ceiling Fan for Your Outdoor Spaces: Discover the Benefits

When it comes to enhancing comfort and style in your outdoor spaces, a 60 Outdoor Ceiling Fan is an excellent choice. Designed to efficiently circulate air, these fans provide a cool breeze on hot days, allowing you to enjoy your patio, deck, or porch to the fullest. In this article, we’ll explore the advantages of a 60 outdoor ceiling fan, key features to consider when making your selection, and maintenance tips to ensure its longevity.

60 Outdoor Ceiling Fan

What Is a 60 Outdoor Ceiling Fan?

A 60 Outdoor Ceiling Fan refers to a ceiling fan with a blade span of 60 inches, specifically designed for outdoor use. These fans are ideal for larger outdoor areas, such as spacious patios, large decks, or covered outdoor living spaces. With their robust construction and powerful motor, 60 outdoor ceiling fans can efficiently move air, keeping your outdoor area comfortable and inviting.

Benefits of a 60 Outdoor Ceiling Fan

  1. Effective Air Circulation: A 60-inch fan is capable of moving a significant volume of air, making it perfect for larger outdoor spaces. This increased airflow helps reduce the perceived temperature, providing relief on hot days.
  2. Versatile Design: Outdoor ceiling fans come in various styles, finishes, and designs, allowing you to find one that complements your outdoor decor. From rustic to modern, there’s a fan to fit every aesthetic.
  3. Energy Efficiency: By providing natural cooling, a 60 outdoor ceiling fan can reduce the reliance on air conditioning in adjacent indoor areas, leading to lower energy bills. This eco-friendly option helps maintain comfort while being mindful of energy consumption.
  4. Enhanced Outdoor Experience: With a fan circulating the air, you can enjoy your outdoor space more, whether it’s for entertaining guests, dining al fresco, or simply relaxing with a book.
  5. Weather Resistant: Designed for outdoor use, 60 outdoor ceiling fans are typically built with weather-resistant materials, making them durable against the elements. This durability ensures they last for years with minimal maintenance.

Read too: Kitchen Lighting For A Vaulted Ceiling: Illuminating Your Space with Style and Functionality


Key Features to Look For in a 60 Outdoor Ceiling Fan

When selecting a 60 outdoor ceiling fan, consider the following features to ensure you choose the best fan for your needs:

1. Blade Material and Design

The material and design of the fan blades can impact performance and aesthetics. Common materials include wood, plastic, and metal. Plastic and metal blades are often more durable and resistant to moisture, while wood blades can provide a more classic look.

2. Motor Type

The motor type plays a crucial role in the fan’s performance. Look for fans with high-quality motors that offer multiple speed settings. DC motors are typically more energy-efficient and quieter than traditional AC motors.

3. Wet or Damp Rating

Ensure that the fan is rated for outdoor use, with a “wet” or “damp” rating. Wet-rated fans can withstand direct exposure to water, making them suitable for uncovered areas, while damp-rated fans are designed for areas with humidity or indirect moisture.

4. Size and Ceiling Height Compatibility

A 60 outdoor ceiling fan is ideal for larger outdoor spaces, but ensure it’s compatible with your ceiling height. Generally, fans should be installed at least 7 to 9 feet above the floor for optimal performance and safety.

5. Lighting Options

Many outdoor ceiling fans come with integrated lighting, which can enhance the functionality of your outdoor space. If you plan to use the area in the evening, consider a fan with built-in lights to create a cozy atmosphere.


Installing Your 60 Outdoor Ceiling Fan

Proper installation is essential to ensure your fan operates effectively and safely. Here are some tips for installing your 60 outdoor ceiling fan:

1. Choose the Right Location

Select a location that allows for adequate airflow and is free from obstructions. The fan should be positioned away from furniture and other structures to maximize air circulation.

2. Use a Ceiling Fan Mounting Bracket

Most outdoor ceiling fans come with a mounting bracket. Securely attach the bracket to a ceiling joist to ensure stability. If you’re unsure about the location of the joist, use a stud finder to locate it accurately.

3. Follow Electrical Safety Guidelines

Always turn off the power at the circuit breaker before starting any electrical work. If you’re not comfortable with electrical installations, consider hiring a licensed electrician to do the job.

4. Check Clearances

Ensure that the fan blades are at least 7 feet above the ground and that there is at least 18 inches of clearance between the fan and any walls or obstructions.

5. Test the Fan After Installation

Once the fan is installed, turn the power back on and test the fan for proper operation. Check all speed settings and lighting options to ensure everything is working correctly.


Maintenance Tips for Your 60 Outdoor Ceiling Fan

To keep your 60 Outdoor Ceiling Fan running smoothly and efficiently, regular maintenance is essential. Here are some easy maintenance tips:

1. Regular Cleaning

Dust and debris can accumulate on the fan blades, affecting performance. Use a soft cloth or feather duster to wipe down the blades regularly. For a more thorough cleaning, use a damp cloth with a mild detergent.

2. Check the Blades and Motor

Inspect the fan blades for any signs of damage or warping. If you notice any issues, it may be time to replace the blades. Additionally, check the motor for unusual noises, which could indicate a need for lubrication or servicing.

3. Tighten Loose Parts

Over time, parts of the fan can become loose. Periodically check the screws and fasteners on the fan and tighten them as needed to ensure safe and efficient operation.

4. Inspect Electrical Connections

Occasionally check the electrical connections to ensure they are secure. Loose connections can lead to operational issues and pose safety risks.

5. Seasonal Checks

Before and after the outdoor season, inspect your fan for any weather-related wear and tear. Perform any necessary maintenance to keep it in optimal condition.


Why Choose a 60 Outdoor Ceiling Fan?

When selecting a ceiling fan for your outdoor space, a 60 Outdoor Ceiling Fan stands out for its ability to provide ample airflow in larger areas. The combination of efficiency, style, and durability makes it a wise investment for any homeowner looking to enhance their outdoor experience.

Enhancing Your Outdoor Space

With the right fan, you can transform your outdoor space into a comfortable oasis. Whether you’re hosting a barbecue, enjoying a family gathering, or simply relaxing with a drink, a 60 outdoor ceiling fan creates a pleasant environment that encourages you to spend more time outdoors.

Versatility in Design

A 60 outdoor ceiling fan can complement various outdoor styles, from contemporary to traditional. You can find fans with various finishes, blade designs, and light fixtures to match your personal taste and outdoor decor.

Investment in Comfort

Investing in a quality outdoor ceiling fan not only enhances your comfort but also increases the value of your home. Buyers often appreciate features that improve outdoor living, making your property more appealing should you decide to sell in the future.


Conclusion

A 60 Outdoor Ceiling Fans is an excellent addition to any outdoor space, providing comfort, style, and energy efficiency. By understanding the benefits and features to look for, you can make an informed decision that enhances your outdoor experience. With proper installation and maintenance, your outdoor ceiling fan will keep your patio, deck, or porch comfortable for years to come.

Explore the variety of options available for 60 outdoor ceiling fans and choose one that suits your style and needs. Create the perfect outdoor sanctuary that you and your family can enjoy all year round!

Rustic Flush Mount Ceiling Light: Elevate Your Home with Timeless Charm

When it comes to home decor, lighting plays a crucial role in setting the mood and enhancing the aesthetic appeal of your space. Among the many options available, a rustic flush mount ceiling light stands out for its ability to blend functionality with style. This lighting fixture is not only practical for illuminating your home but also serves as a decorative element that can enhance the rustic charm of any room.

Rustic Flush Mount Ceiling Light

In this article, we’ll explore the characteristics, benefits, and various styles of rustic flush mount ceiling lights. We’ll also discuss how to choose the right fixture for your space, installation tips, and ideas for integrating these lights into your home decor. Whether you’re renovating your home or simply looking for ways to refresh your space, a rustic flush mount ceiling light can be the perfect addition.

What Is a Rustic Flush Mount Ceiling Light?

A rustic flush mount ceiling light is a type of ceiling fixture that is mounted directly to the ceiling without any hanging components. This design allows the light to sit snugly against the ceiling, providing an unobtrusive lighting solution that works well in spaces with low ceilings or where you want to avoid visual clutter.

Rustic designs typically incorporate natural materials, earthy tones, and a rugged aesthetic that evokes a sense of warmth and coziness. Flush mount ceiling lights in this style often feature elements such as wood, metal, glass, or even wrought iron, combining these materials to create a unique look that enhances the rustic charm of your home.

Read too: Discovering the Charm of Nautical Outdoor Ceiling Fans for Your Coastal Retreat: Sail into Style

Key Features of Rustic Flush Mount Ceiling Lights

  1. Material Variety: Rustic flush mount ceiling lights can be made from various materials. Common choices include reclaimed wood, distressed metal, and textured glass, all of which contribute to a warm, inviting atmosphere.
  2. Design Styles: These fixtures come in a range of designs, from simple and understated to ornate and intricate. Whether you prefer a minimalist look or something more elaborate, you can find a rustic flush mount that suits your taste.
  3. Versatility: Rustic flush mount ceiling lights are versatile and can complement various interior styles, including farmhouse, country, industrial, and even modern designs. This adaptability makes them an excellent choice for almost any room in your home.
  4. Energy Efficiency: Many modern rustic flush mount ceiling lights use LED bulbs, which provide bright illumination while consuming less energy than traditional incandescent bulbs. This can lead to lower electricity bills and a reduced environmental footprint.

Benefits of Using Rustic Flush Mount Ceiling Lights

Incorporating rustic flush mount ceiling lights into your home decor offers several advantages. Here are some key benefits:

1. Space-Saving Design

Flush mount lights are ideal for rooms with low ceilings or limited vertical space. Unlike pendant lights or chandeliers, which can feel overwhelming in compact areas, flush mounts provide ample light without taking up additional space. This makes them perfect for hallways, small bedrooms, and bathrooms.

2. Enhanced Aesthetic Appeal

A rustic flush mount ceiling light can serve as a focal point in any room. With their unique designs and natural materials, these fixtures can enhance the overall aesthetic of your space, adding character and warmth. They work particularly well in entryways, dining areas, and living rooms, where they can draw attention and create an inviting atmosphere.

3. Easy Installation

Installing a flush mount ceiling light is generally a straightforward process that requires minimal tools and expertise. This makes it an excellent choice for DIY enthusiasts looking to update their home lighting without the need for professional help. Most flush mounts come with clear installation instructions, allowing you to have your new fixture up and running in no time.

4. Cost-Effective Lighting Solution

Rustic flush mount ceiling lights are available at various price points, making it easy to find an option that fits your budget. Whether you’re looking for a high-end designer fixture or a more affordable model, there are plenty of options available. Additionally, the energy efficiency of LED bulbs can lead to long-term savings on your electricity bills.

Choosing the Right Rustic Flush Mount Ceiling Light

When selecting a rustic flush mount ceiling light for your home, there are several factors to consider to ensure you choose the perfect fixture for your space.

1. Room Size and Ceiling Height

The size of the room and the height of the ceiling will play a significant role in your choice of flush mount light. In larger spaces, you may want a more substantial fixture that can provide ample illumination. Conversely, in smaller rooms, a compact design can help maintain a sense of openness.

2. Style and Aesthetic

Consider the overall decor of the room where you plan to install the light. Rustic flush mount ceiling lights come in various styles, including industrial, vintage, and contemporary. Choose a design that complements your existing decor and enhances the room’s overall aesthetic.

3. Color and Finish

The color and finish of the fixture can greatly influence the look and feel of your space. Look for finishes that match or complement other elements in the room, such as furniture, cabinetry, or hardware. Common finishes for rustic lights include distressed wood, bronze, black, and antique brass.

4. Light Bulb Type

Many rustic flush mount ceiling lights use standard light bulbs, but some may require specific types, such as Edison-style bulbs for a vintage look. Consider the type of lighting you prefer—whether warm, cool, or daylight—and choose bulbs that will create the desired ambiance.

5. Installation Requirements

Before purchasing a fixture, check the installation requirements. Some models may require more complex wiring or a larger junction box, which can affect your choice. If you’re unsure about installation, consulting with a professional electrician may be beneficial.

Popular Styles of Rustic Flush Mount Ceiling Lights

There are several popular styles of rustic flush mount ceiling lights, each offering a unique look and feel. Here are a few options to consider:

1. Farmhouse Style

Farmhouse-style flush mounts typically feature natural wood, distressed finishes, and simple lines. These fixtures often incorporate elements such as barn-inspired designs, which can add a charming, country-like feel to your home.

2. Industrial Style

Industrial flush mount lights often combine metal and glass elements, featuring exposed bulbs and rugged designs. This style works particularly well in lofts, urban apartments, or modern homes looking to add a touch of vintage charm.

3. Vintage Style

Vintage-inspired flush mounts often feature ornate details, such as decorative scrollwork or glass shades. These fixtures can evoke a sense of nostalgia and work beautifully in traditional or eclectic spaces.

4. Contemporary Rustic

For those who prefer a more modern take on rustic design, contemporary flush mounts often incorporate sleek lines and minimalistic designs while still featuring rustic materials. This style is perfect for modern homes looking to blend rustic elements with contemporary aesthetics.

Installation Tips for Rustic Flush Mount Ceiling Lights

Once you’ve selected the perfect rustic flush mount ceiling light, it’s time to consider installation. Here are some tips to help ensure a successful installation:

1. Gather the Necessary Tools

Before you begin, gather the necessary tools, which may include a screwdriver, wire stripper, voltage tester, and ladder. Having everything on hand will make the installation process smoother.

2. Turn Off the Power

Always turn off the power to the circuit you’ll be working on at the breaker box. Use a voltage tester to ensure the wires are not live before proceeding.

3. Remove the Old Fixture

If you’re replacing an existing light, carefully remove the old fixture by unscrewing it from the ceiling and disconnecting the wires. Take note of how the old fixture is wired, as this will help you during the installation of the new light.

4. Connect the Wires

Follow the manufacturer’s instructions to connect the wires of the new rustic flush mount ceiling light. Generally, you will connect the black (or red) wire to the black wire in the ceiling, the white wire to the white wire, and the green or copper wire (ground) to the grounding wire in the ceiling. Ensure the connections are secure.

5. Mount the Fixture

Once the wiring is complete, attach the fixture to the ceiling according to the manufacturer’s instructions. Make sure it is securely fastened and properly aligned.

6. Test the Light

After the fixture is installed, turn the power back on at the breaker and test the light to ensure it is working properly. If it does not light up, double-check your wiring connections.

Creative Ways to Incorporate Rustic Flush Mount Ceiling Lights in Your Home

Rustic flush mount ceiling lights can be used creatively in various spaces throughout your home. Here are some ideas to inspire you:

1. Entryway Lighting

A rustic flush mount light can create a warm and welcoming atmosphere in your entryway. Choose a fixture that complements your decor and provides adequate lighting for guests as they enter your home.

2. Dining Room Ambiance

Enhance the dining experience by installing a rustic flush mount ceiling light above your dining table. The soft glow from the fixture can create an intimate atmosphere, perfect for family dinners or entertaining guests.

3. Bathroom Lighting

Rustic flush mount lights are an excellent choice for bathrooms, where they can provide ample light without taking up valuable space. Consider pairing them with wall sconces for a layered lighting effect.

4. Bedroom Comfort

Install a rustic flush mount ceiling light in your bedroom to create a cozy and relaxing environment. Choose a fixture with a dimmable option for adjustable brightness, allowing you to set the mood for different times of day.

5. Hallway Illumination

Brighten up dark hallways with a series of rustic flush mount lights. Spacing them evenly can create a beautiful visual effect while providing essential lighting for safety and navigation.

Conclusion

A rustic flush mount ceiling light is more than just a practical lighting solution; it is a design statement that can enhance the charm and character of your home. With various styles, materials, and designs available, you can find the perfect fixture to match your decor and elevate your space.

Whether you’re looking to brighten up a small room or make a bold statement in your entryway, a rustic flush mount ceiling light can provide the warmth and ambiance you desire. By considering the factors discussed in this article, you can confidently choose and install a fixture that will serve you well for years to come.

Lights In A Vaulted Ceiling: Transforming Your Space with Style and Elegance

Vaulted ceilings are a stunning architectural feature that adds a sense of grandeur and openness to any space. Whether found in a modern home, a classic cathedral, or a rustic cabin, these high, sloped ceilings have the power to make a room feel more expansive and dramatic. However, one of the challenges homeowners face when dealing with vaulted ceilings is figuring out how to properly illuminate them. Choosing the right lights in a vaulted ceiling can transform a room from dark and cavernous to warm and inviting.

Lights In A Vaulted Ceiling

In this article, we’ll explore different lighting options for vaulted ceilings, factors to consider when planning your lighting design, and the various styles available to create an ambient and functional space. Whether you’re looking to highlight architectural details or create a cozy atmosphere, the right lighting can make all the difference.

Why Lighting in a Vaulted Ceiling Matters

Vaulted ceilings, with their unique height and shape, require a different approach to lighting than flat ceilings. Without proper lighting, a room with a vaulted ceiling can feel cold and unwelcoming, as shadows can accumulate in the corners and the ceiling itself may disappear into darkness. Thoughtfully placed lights in a vaulted ceiling not only illuminate the space but can also enhance the room’s overall aesthetic, highlight architectural details, and create a balanced atmosphere.

Lighting can also impact how the room is used. For example, a large living room with a vaulted ceiling might need both task lighting for specific activities (such as reading or cooking) and ambient lighting to create a comfortable and cozy vibe in the evening. Understanding how light interacts with your vaulted ceiling can help you make the most of your space.

Types of Lights for Vaulted Ceilings

There are several types of lighting options to consider for your vaulted ceiling. Each type of light serves a specific purpose and contributes to the overall feel and function of the room.

1. Chandeliers

Chandeliers are a classic choice for rooms with high ceilings, and they work especially well in vaulted spaces. A well-placed chandelier can become the focal point of a room, drawing attention upward and emphasizing the ceiling’s height. Depending on the style of the chandelier, it can add a touch of elegance, sophistication, or even modernity to your space.

Read too: Discovering the Charm of Nautical Outdoor Ceiling Fans for Your Coastal Retreat: Sail into Style

For vaulted ceilings, it’s essential to choose a chandelier that is appropriately sized. A fixture that is too small will get lost in the height, while one that is too large can overwhelm the room. Ensure that the chandelier hangs at the right height to provide enough light without being too close to eye level.

2. Pendant Lights

Pendant lights are another popular option for vaulted ceilings, especially in kitchens, dining rooms, or entryways. Like chandeliers, pendant lights hang from the ceiling and can help draw attention to the height and shape of the room. They come in a variety of styles and sizes, from industrial-inspired fixtures to sleek, modern designs.

One advantage of pendant lights is their versatility. You can hang a series of smaller pendants to create a sense of rhythm and continuity in a long hallway, or opt for a single statement piece to serve as the focal point of a room. When hanging pendant lights in a vaulted ceiling, be mindful of the height and ensure they don’t obstruct views or movement.

3. Recessed Lighting

For a more subtle and modern approach, recessed lighting is an excellent choice for vaulted ceilings. Recessed lights, also known as can lights or downlights, are installed directly into the ceiling and provide a clean, streamlined look. Because the fixtures are flush with the ceiling, they don’t interfere with the room’s overall design and can create an even distribution of light.

Recessed lighting is ideal for creating ambient lighting in a vaulted space, especially when paired with dimmers to adjust the brightness based on the time of day or mood. It’s also an excellent option for highlighting specific architectural details, such as wooden beams or an exposed brick wall.

4. Track Lighting

Track lighting offers flexibility in terms of direction and positioning. Unlike chandeliers or pendants, which hang from a fixed point, track lighting allows you to adjust the position of individual lights along a track. This makes it easier to highlight specific areas of a vaulted room, such as artwork, furniture, or architectural features.

Track lighting is also a practical solution for rooms with angled ceilings, as the lights can be adjusted to point directly downward or at a specific angle. It’s a versatile option that works well in both modern and traditional spaces.

5. Skylights with Natural Light

One of the most beautiful ways to illuminate a vaulted ceiling is by incorporating natural light. Skylights can flood a room with daylight, making the space feel open, airy, and connected to the outdoors. While not a traditional “light fixture,” skylights are an excellent way to complement artificial lighting, especially during the day.

By combining skylights with artificial lights, you can create a dynamic lighting design that changes throughout the day. In the evening, the artificial lights take over to create a warm, inviting ambiance.

Factors to Consider When Choosing Lights for a Vaulted Ceiling

Choosing the right lighting for a vaulted ceiling involves more than just picking out a fixture you like. There are several factors you need to consider to ensure the lights in your vaulted ceiling are both functional and stylish.

1. Room Size and Ceiling Height

Vaulted ceilings come in various shapes and sizes, so it’s important to consider the dimensions of the room before selecting a light fixture. In larger rooms, a small fixture may not provide enough light, while in smaller spaces, an oversized chandelier or pendant may feel overwhelming.

Additionally, the height of the ceiling will impact the type of fixture you choose. For extremely high ceilings, longer hanging fixtures like chandeliers or large pendant lights may be necessary to bring the light down to a usable level. On the other hand, recessed lighting can be a good solution for rooms with slightly lower vaulted ceilings, as it doesn’t take up any visual space.

2. Lighting Needs

Different rooms serve different purposes, and your lighting choices should reflect the way the space is used. In living rooms and bedrooms, where creating a cozy, ambient atmosphere is key, soft, diffused lighting is ideal. You can achieve this with a combination of chandeliers, pendants, or recessed lights on dimmers.

In functional spaces like kitchens and home offices, task lighting is essential. Pendants over a kitchen island or track lighting above a work area can provide focused light for cooking, reading, or working.

3. Style and Aesthetic

The style of your lighting fixtures should complement the overall aesthetic of the room. If your home has a modern, minimalist design, sleek, understated fixtures like recessed lights or simple pendants may be the best option. For more traditional or rustic spaces, ornate chandeliers or industrial-style fixtures can enhance the room’s character.

The finish of the fixtures also plays a role in the overall design. For example, black or matte-finish fixtures can add a contemporary touch, while brass or copper finishes offer a more classic, vintage feel.

Installing Lights in a Vaulted Ceiling

Installing lights in a vaulted ceiling can be more complex than installing them in a standard flat ceiling, particularly because of the added height and potential angles. It’s often a good idea to work with a professional electrician to ensure the fixtures are installed safely and securely.

When installing hanging fixtures like chandeliers or pendant lights, you’ll need to make sure they are hung at the proper height for the room. As a general rule of thumb, chandeliers should hang approximately 7-8 feet above the floor in a room with a standard-height ceiling. For vaulted ceilings, the fixture should hang lower to provide adequate light while still maintaining the sense of openness.

Benefits of Proper Lighting in Vaulted Ceilings

In addition to enhancing the overall appearance of your home, the right lighting in a vaulted ceiling can offer several practical benefits:

  1. Improved Ambiance: Well-placed lighting can create a warm, inviting atmosphere, making your home feel cozier and more welcoming.
  2. Enhanced Architectural Features: Lighting can highlight unique features of your vaulted ceiling, such as exposed beams, intricate woodwork, or beautiful skylights.
  3. Functional Lighting: In addition to aesthetic benefits, properly positioned lights in a vaulted ceiling ensure that your space is well-lit and functional for everyday tasks.

Conclusion

Lighting plays a critical role in the overall design and function of a room with a vaulted ceiling. From elegant chandeliers to versatile track lighting, the right lighting fixtures can transform your space into one that feels both inviting and visually stunning. By carefully considering the size, style, and lighting needs of your room, you can create a balanced and beautiful lighting plan that enhances the unique architectural features of your vaulted ceiling.

Whether you’re remodeling your home or simply updating your lighting, the options for illuminating a vaulted ceiling are as varied as they are beautiful. With the right lighting, you can highlight the architectural beauty of your vaulted ceiling and create a space that feels both spacious and intimate.

Mid Century Ceiling Fan: Bringing Retro Style and Functionality to Your Home

The Mid Century ceiling fan is more than just a functional fixture. It’s a design statement that combines sleek lines, minimalist aesthetics, and the functionality of modern engineering. As we see a resurgence of mid-century modern design in homes across the globe, many homeowners are opting for this style to add a touch of retro elegance to their living spaces.

Mid Century Ceiling Fan

This article will explore the key features of a Mid Century ceiling fan, how it can enhance your home’s decor, and how to choose the perfect fan for your space. By the end, you’ll have a comprehensive understanding of why mid-century modern fans are gaining popularity and how you can incorporate this timeless piece into your home.

Why Choose a Mid Century Ceiling Fan?

The Mid Century ceiling fan is inspired by the design trends of the 1940s to 1960s, an era known for its clean lines, organic curves, and emphasis on functionality. This period focused on the “less is more” approach, prioritizing practical design without sacrificing style. Here are some key reasons why a Mid Century ceiling fan might be the perfect addition to your home:

1. Timeless Aesthetic Appeal

Mid-century modern design has a timeless quality. Whether you’re styling a modern living room or a cozy bedroom, a mid-century ceiling fan adds a dash of elegance without feeling outdated. The clean lines and geometric shapes make these fans versatile, easily blending with both modern and vintage home decor.

2. Versatile Designs

While mid-century fans are known for their simplicity, they come in a variety of designs, colors, and finishes. You can find models with wooden blades, sleek metallic finishes, or fans featuring bold, eye-catching colors like mustard yellow, burnt orange, or teal, which were iconic during the mid-century era.

Read too: Discovering the Charm of Nautical Outdoor Ceiling Fans for Your Coastal Retreat: Sail into Style

3. Functional and Energy-Efficient

Today’s Mid Century ceiling fans combine the best of both worlds: retro style with modern technology. These fans often feature energy-efficient motors, LED lighting, and remote control capabilities, offering both functionality and eco-friendliness.

4. Adds a Retro Charm

A Mid Century ceiling fan can become a central decorative piece that complements other mid-century modern furniture and accessories, like teak wood furniture, leather sofas, and minimalist coffee tables. Its retro charm brings warmth and character to a space, evoking nostalgia for the golden age of design.

Choosing the Perfect Mid Century Ceiling Fan

Choosing the right Mid Century ceiling fan can make a significant impact on the overall look and feel of your room. Here’s a detailed guide to help you make the best choice based on factors like size, material, finish, and functionality.

1. Size Matters

The size of your ceiling fan plays an important role in both its functionality and aesthetic appeal. When choosing a Mid Century ceiling fan, measure the size of the room to ensure that the fan you select provides adequate airflow. Here’s a general guideline for fan size:

  • Small rooms (up to 100 square feet): Choose a fan with a blade span of 29 to 36 inches.
  • Medium rooms (100 to 300 square feet): Opt for a fan with a blade span of 42 to 48 inches.
  • Large rooms (over 300 square feet): Consider a fan with a blade span of 52 to 56 inches.

Additionally, rooms with higher ceilings may require a downrod to lower the fan to an appropriate height for maximum efficiency.

2. Material and Finishes

Mid-century modern fans often incorporate natural materials like wood, combined with sleek metals. Wooden blades add warmth and a natural touch, while metals like brushed nickel or brass offer a modern, industrial vibe. Look for fans that have a contrast between the materials, such as wooden blades paired with a metallic motor housing, for that perfect mid-century look.

Popular finishes for Mid Century ceiling fans include:

  • Matte black: For a bold, sophisticated look.
  • Brushed nickel: For a sleek, modern appearance.
  • Polished brass: To add a touch of vintage luxury.
  • Wood grain: For a natural and earthy feel.

3. Lighting Options

Many ceiling fans come equipped with lighting, and you can choose from a variety of lighting styles that complement the mid-century modern aesthetic. Look for fans with integrated LED lights, which are energy-efficient and offer a soft, warm glow. Additionally, globes or dome-shaped light fixtures, typical of mid-century design, can further enhance the retro look of your fan.

4. Control Features

Modern Mid Century ceiling fans often include advanced control features like remote control, smart home integration, and multiple speed settings. These features make it easier to operate your fan without sacrificing the classic aesthetic. For example, some fans can be connected to a smartphone app or integrated into smart home systems like Google Home or Amazon Alexa.

The Best Rooms for a Mid Century Ceiling Fan

A Mid Century ceiling fan can be installed in virtually any room, adding both style and functionality. However, certain spaces lend themselves particularly well to this retro design. Here are some suggestions on where to install a mid-century fan in your home:

1. Living Room

The living room is the heart of your home, making it the perfect place for a statement piece like a Mid Century ceiling fan. In a living room with high ceilings, a fan with long, sleek blades and a wooden or metallic finish can anchor the space. Pair the fan with mid-century modern furniture, such as a low-profile sofa and a minimalist coffee table, to complete the look.

2. Dining Room

Ceiling fans in dining rooms not only provide airflow but also add a touch of sophistication. Opt for a fan with a unique light fixture to provide both functionality and style. Ensure that the fan is properly scaled to the size of your dining table for a balanced appearance.

3. Bedroom

For bedrooms, a Mid Century ceiling fan can create a calming atmosphere while keeping the room cool. Fans with wooden blades or warm finishes are ideal for bedrooms, adding a natural, cozy feel. Select a fan with a dimmable light to create the perfect ambiance for relaxation.

4. Home Office

In a home office, a sleek and minimalist mid-century fan can provide comfort without distracting from your work. Choose a design with clean lines and neutral finishes to maintain a focused and serene workspace.

How to Install a Mid Century Ceiling Fan

Installing a Mid Century ceiling fan can be done with relative ease, but for optimal results, professional installation is recommended, especially if you have high ceilings or need additional wiring. Here’s a general overview of the installation process:

1. Turn Off Power

Before starting, turn off the power to the ceiling fixture at the circuit breaker. This ensures safety while working with the electrical wiring.

2. Assemble the Fan

Follow the manufacturer’s instructions to assemble the fan, attaching the blades and the downrod if needed. Many fans come partially assembled, but ensure that all parts are securely fastened before installation.

3. Mount the Bracket

Attach the mounting bracket to the ceiling junction box, ensuring that it’s securely fastened. The bracket holds the weight of the fan, so it needs to be strong enough to support the fixture.

4. Connect the Wires

Carefully connect the fan’s wires to the corresponding wires in the ceiling junction box. Typically, you’ll need to connect the black or blue wire (fan power), white wire (neutral), and green wire (ground) to their corresponding wires. If the fan includes lighting, additional wiring may be required.

5. Secure the Fan

Once the wiring is complete, attach the fan to the mounting bracket and secure it in place. Double-check that the fan is level and securely fastened to prevent wobbling.

6. Turn on the Power and Test

After the fan is installed, restore power at the circuit breaker and test the fan and light to ensure everything is functioning correctly.

Mid Century Ceiling Fan Maintenance

To ensure your Mid Century ceiling fan stays in top condition and functions efficiently, regular maintenance is essential. Here are some maintenance tips:

  • Clean the blades regularly to prevent dust buildup. Dust can cause the fan to become unbalanced, resulting in noise or wobbling.
  • Tighten screws on the blades and mounting hardware every few months to ensure the fan operates smoothly.
  • Check the motor for unusual sounds or vibrations, which could indicate the need for professional maintenance.
  • Lubricate moving parts (if applicable) to prevent wear and tear, especially on older models with more mechanical components.

Final Thoughts on Mid Century Ceiling Fans

A Mid Century ceiling fan is the perfect blend of form and function. Whether you’re looking to cool down your living space, add a stylish focal point, or elevate your home decor with a touch of retro charm, these fans deliver on all fronts. With a wide range of designs, materials, and features to choose from, there’s a Mid Century ceiling fan for every room and aesthetic.

Semi Flush Crystal Ceiling Lights: Elevate Your Space with Elegant Illumination

When it comes to interior lighting, ceiling lights play a crucial role not only in illuminating a space but also in enhancing its overall aesthetic appeal. One of the most sophisticated and versatile lighting options is the semi flush crystal ceiling light. These fixtures offer a perfect blend of luxury, functionality, and space-saving design, making them ideal for a wide variety of rooms in your home. Whether you’re looking to add a touch of glamour to your living room, bedroom, or hallway, semi flush crystal ceiling lights can transform the look and feel of your space.

Semi Flush Crystal Ceiling Lights

In this article, we’ll explore everything you need to know about semi flush crystal ceiling lights—from their benefits to how to choose the right fixture for your home. We’ll also look at some popular designs and tips on incorporating these lights into different spaces for a striking and elegant effect.


What Are Semi Flush Crystal Ceiling Lights?

Before diving into the benefits and styles of these lighting fixtures, it’s important to understand what semi flush crystal ceiling lights are.

Definition of Semi Flush Lighting

Semi flush lighting fixtures are mounted close to the ceiling but hang slightly down, usually by a few inches. They are different from flush mount lights, which sit directly against the ceiling, and from chandeliers or pendant lights, which hang much lower. The semi flush style offers a middle ground, providing enough clearance for lower ceilings while still creating a focal point in the room.

Why Crystal?

The addition of crystal elements elevates the elegance of these lights. Crystal lighting fixtures are known for their luxurious and glamorous appeal. The reflective nature of crystal allows the light to refract and scatter in a dazzling display, creating a visually stunning effect in any room. Semi flush crystal ceiling lights often feature clear, cut glass or crystal droplets that dangle from the fixture, adding a layer of sparkle and sophistication to the design.

Read too: Kitchen Lighting For A Vaulted Ceiling: Illuminating Your Space with Style and Functionality


Benefits of Choosing Semi Flush Crystal Ceiling Lights

1. Perfect for Low to Medium Ceilings

Unlike pendant lights or chandeliers, which require high ceilings, semi flush crystal ceiling lights are ideal for homes with low to medium ceiling heights. They hang just a few inches below the ceiling, allowing for sufficient headroom while still providing a decorative element. This makes them a practical choice for spaces like hallways, bedrooms, and smaller living rooms where height might be limited.

2. Elegant and Timeless Design

The beauty of crystal is timeless. Whether your home is decorated in a traditional, contemporary, or transitional style, semi flush crystal ceiling lights can blend seamlessly with the decor. Crystal fixtures add a touch of luxury to any room, and the semi flush design ensures they don’t overwhelm smaller spaces.

3. Versatile Lighting Option

Semi flush fixtures are known for providing ambient or general lighting, making them a versatile option for many rooms in the home. They distribute light evenly throughout the space, ensuring that the room is well-lit without the need for multiple fixtures. Additionally, the crystal elements in the light can help diffuse and amplify the light, adding a warm and inviting glow to the space.

4. Space-Saving Design

Since semi flush crystal ceiling lights are mounted close to the ceiling, they are an excellent space-saving solution. This is particularly beneficial for smaller rooms or areas where floor space is at a premium. These lights allow you to maintain an open, uncluttered look while still incorporating a statement piece.

5. Enhances Room’s Focal Point

Lighting can act as the centerpiece of a room. With the dazzling sparkle of crystal, a semi flush ceiling light can serve as a focal point that draws attention and enhances the overall aesthetic of the room. The reflective properties of crystal add dimension to the space, creating a sense of luxury and drama without overpowering the room’s other design elements.


How to Choose the Perfect Semi Flush Crystal Ceiling Lights

When shopping for semi flush crystal ceiling lights, there are several factors to consider to ensure you find the perfect fixture for your space.

1. Size and Scale

The size of the fixture should be proportional to the size of the room. A fixture that’s too small might not provide enough light or visual impact, while one that’s too large could overpower the space. Measure your room and consider how the light will look when installed. For larger rooms, you may want to choose a wider fixture with multiple tiers of crystals, while smaller rooms might benefit from a more compact design.

2. Material and Finish

While the crystals are the focal point of the light, the base material and finish are also important. Semi flush crystal lights come in a variety of finishes, including chrome, brushed nickel, brass, and bronze. Choose a finish that complements your room’s decor. For example, chrome and nickel finishes tend to work well in modern or contemporary spaces, while bronze or brass finishes might be more suited for traditional or rustic rooms.

3. Lighting Needs

Think about the type of light you want the fixture to emit. Some semi flush crystal lights are equipped with dimmable features, allowing you to adjust the brightness depending on the time of day or the mood you want to create. Additionally, check the wattage of the bulbs and the overall brightness to ensure that the fixture will provide enough light for your room’s needs.

4. Crystal Style and Quality

Not all crystal is created equal. The quality of the crystal can vary significantly, with higher-quality crystal offering more sparkle and brilliance. Look for semi flush crystal ceiling lights that use leaded crystal or opt for cut glass crystals that mimic the look of real crystal but at a more affordable price point. The shape and cut of the crystals can also affect how the light refracts, so choose a style that best fits your aesthetic.


Popular Designs of Semi Flush Crystal Ceiling Lights

There are countless designs available when it comes to semi flush crystal ceiling lights, but here are a few popular styles that can add a touch of elegance to your home:

1. Classic Tiered Crystal Light

This style features multiple tiers of hanging crystals that create a waterfall effect. The classic design exudes opulence and is perfect for rooms that need a dramatic centerpiece, such as dining rooms or master bedrooms.

2. Modern Geometric Crystal Light

For a more contemporary take on crystal lighting, opt for a semi flush light that features geometric shapes or minimalistic designs. These fixtures often combine sleek metal frames with crystal accents, offering a chic and modern vibe without sacrificing elegance.

3. Drum Shade with Crystal Accents

If you prefer a softer, more diffused light, consider a semi flush fixture with a fabric drum shade and crystal accents. The shade helps to soften the brightness while the crystals underneath add sparkle and sophistication.

4. Vintage-Inspired Crystal Chandelier

For those who love a bit of old-world charm, vintage-inspired crystal fixtures can bring a sense of history and glamour to your space. These lights often feature ornate metalwork and intricate crystal arrangements that hark back to antique designs.


Where to Use Semi Flush Crystal Ceiling Lights in Your Home

Semi flush crystal ceiling lights are versatile and can be used in various rooms throughout your home. Here are a few ideas on where to place them for maximum impact:

1. Living Room

In the living room, a semi flush crystal ceiling light can serve as a focal point, drawing attention to the center of the room. It’s perfect for adding elegance and brightness to this central gathering space without taking up valuable floor or table space.

2. Bedroom

Add a romantic and luxurious touch to your bedroom with a semi flush crystal light. The soft, diffused light created by the crystals can help create a relaxing and intimate atmosphere, perfect for winding down at the end of the day.

3. Hallway or Entryway

Hallways and entryways are often overlooked when it comes to decor, but they are the perfect place to make a statement with a crystal ceiling light. Semi flush fixtures are ideal for these areas as they don’t hang too low, ensuring you have enough clearance while still providing a stylish and welcoming touch.

4. Dining Room

For dining rooms with lower ceilings, a semi flush crystal light offers the perfect balance of glamour and practicality. It creates an elegant ambiance for dinners and gatherings without hanging too low over the dining table.


Conclusion: The Elegance of Semi Flush Crystal Ceiling Lights

Adding semi flush crystal ceiling lights to your home is an easy way to elevate your space with a touch of luxury and elegance. Whether you’re looking to add ambient lighting to a hallway, make a statement in your living room, or create a cozy, intimate bedroom environment, these lights provide both style and function. With countless designs and styles available, you’re sure to find the perfect fixture to complement your decor and enhance your home’s aesthetic.

Rustic Ceiling Fans for Cabins: The Perfect Blend of Style and Functionality

When designing or decorating a cabin, creating a warm, inviting, and cozy atmosphere is key. One of the best ways to enhance the rustic charm of your space while ensuring optimal comfort is by installing a ceiling fan that complements the aesthetic. Rustic ceiling fans for cabins offer not only practical airflow solutions but also a design element that can bring the entire room together. Whether you’re furnishing a log cabin, a woodland retreat, or simply want to give your space a natural, rustic touch, selecting the right ceiling fan can make all the difference.

Rustic Ceiling Fans For Cabins

In this article, we’ll guide you through everything you need to know about rustic ceiling fans for cabins, including their unique features, how to choose the perfect fan for your space, and the benefits of integrating a ceiling fan into your cabin’s design.


Why Choose Rustic Ceiling Fans for Cabins?

A ceiling fan isn’t just a functional tool for circulating air—it’s an essential component of your room’s decor, especially in cabins. Rustic ceiling fans are designed with natural materials, earthy tones, and rugged finishes that complement the cozy, homey feel that many cabin owners seek.

Here’s why rustic ceiling fans are a must-have for your cabin:

1. Functional Comfort

Cabins, particularly those in remote areas or without air conditioning, can become quite warm in the summer and chilly in the winter. Ceiling fans help to regulate temperature by improving air circulation. In the summer, fans create a cooling breeze, while in the winter, they can be set to reverse mode to push warm air downward, reducing the need for excessive heating.

2. Enhances Rustic Aesthetic

Rustic ceiling fans come in designs that perfectly match the natural look of wood, stone, and other rugged materials found in cabin interiors. These fans often feature blades made of wood or wood-like materials, distressed finishes, and earthy color palettes that blend seamlessly with the environment.

Read too: Kitchen Lighting For A Vaulted Ceiling: Illuminating Your Space with Style and Functionality

3. Energy Efficiency

Ceiling fans are an eco-friendly way to manage temperature. They use less energy than air conditioning units and can significantly reduce your energy consumption. With a rustic ceiling fan, you can stay cool in the summer and warm in the winter while keeping energy costs down.


Key Features to Look for in Rustic Ceiling Fans for Cabins

When shopping for rustic ceiling fans for cabins, there are several key features to consider to ensure you get the most out of both the style and functionality of the fan. Here’s a breakdown of what to look for:

1. Blade Material and Design

The blades are one of the most prominent design elements of a ceiling fan. Rustic ceiling fans often feature blades that are made from or designed to look like wood. Look for blades with distressed, weathered finishes or natural wood grain patterns that fit the overall aesthetic of your cabin.

Some popular wood types used for rustic fans include:

  • Pine
  • Oak
  • Walnut
  • Cherry

2. Lighting Integration

Many rustic ceiling fans come with integrated lighting fixtures, which are particularly useful in cabins that may have limited natural light. Rustic ceiling fan lights often feature antique or vintage designs, with amber or frosted glass shades, metal accents, and warm lighting tones that enhance the cozy feel of the cabin.

3. Control Options

For convenience, many modern rustic ceiling fans come with remote controls, allowing you to easily adjust fan speed and lighting settings. Some also offer smart technology integration, where you can control the fan using a smartphone app or voice commands via smart home systems.

4. Reversible Motor

A reversible motor is a crucial feature for year-round comfort. During the summer months, the fan should spin counterclockwise to create a cooling breeze. In winter, switching the direction to clockwise helps to push warm air that has risen to the ceiling back down into the room, improving heating efficiency.

5. Size and Mounting Options

The size of your ceiling fan should be appropriate for the size of your cabin room. For larger spaces, such as great rooms or open-plan living areas, a fan with a large blade span (52 inches or more) is recommended. In smaller, more intimate spaces like bedrooms, a smaller fan will suffice. Additionally, cabins with high ceilings may require a fan with a downrod mount to ensure proper air circulation, while low-ceiling spaces might benefit from a flush mount fan.


Rustic Ceiling Fans for Cabins: Top Designs and Styles

Rustic ceiling fans come in a wide variety of styles, each offering a unique blend of functionality and aesthetics. Below are some of the top designs and styles to consider for your cabin:

1. Log Cabin Ceiling Fans

Fans designed for log cabins often feature dark wood finishes, weathered metal accents, and blades shaped to resemble tree branches or rough-cut logs. These fans evoke a sense of the wilderness and seamlessly blend into the rustic decor of a log cabin.

2. Antler-Inspired Fans

For those looking to bring a touch of the outdoors inside, antler ceiling fans are a popular choice. These fans often feature faux antler accents on the light fixture or as part of the fan’s central design. They’re perfect for hunting lodges or cabins that embrace a wilderness-inspired theme.

3. Industrial Rustic Fans

Industrial rustic fans combine raw, rugged materials like metal and wood with exposed hardware, creating a look that is both functional and stylish. These fans work well in modern rustic cabins or those with a mix of traditional and contemporary design elements.

4. Vintage Farmhouse Fans

Farmhouse-style fans are a great option for cabins that lean toward a more traditional or country-style decor. These fans often feature light, weathered wood blades and simple, elegant light fixtures that add a touch of nostalgia to the space.

5. Tropical Rustic Fans

For cabins near lakes or rivers, tropical rustic fans add an airy, breezy feel to the space. These fans typically feature wide, leaf-shaped blades made of materials like rattan or bamboo, paired with light wood or bronze finishes.


How to Choose the Right Rustic Ceiling Fan for Your Cabin

Selecting the perfect rustic ceiling fan for cabins involves more than just picking a fan that looks good. Here are some practical tips to help you make the right decision:

1. Match the Fan to the Cabin’s Decor

The fan should complement the overall design of the cabin. Consider the wood finishes, colors, and textures present in your space and choose a fan that enhances these elements. For instance, if your cabin has a lot of dark wood, opt for a fan with dark wood blades. If your space is lighter, a fan with a weathered or whitewashed finish may be more suitable.

2. Consider the Room Size

As mentioned earlier, the size of the room is an important factor in determining the right fan. A fan that’s too small will struggle to circulate air effectively in a large room, while a fan that’s too large may overpower a smaller space. Measure your room’s square footage and choose a fan with the appropriate blade span to ensure optimal airflow.

3. Think About Functionality

While style is important, don’t overlook the fan’s functionality. Does it have enough speed settings? Is it equipped with lighting? Does it come with a remote control for easy adjustments? Be sure to choose a fan that offers the features you need for both comfort and convenience.

4. Energy Efficiency

If you’re looking to reduce energy costs, choose a fan with an Energy Star rating. These fans are designed to be more energy-efficient, saving you money while keeping your cabin comfortable year-round.

5. Installation Requirements

Consider the ceiling height and the complexity of installation. If your ceiling is vaulted or particularly high, you may need a downrod extension for proper installation. Make sure to check the fan’s specifications to ensure it will fit properly in your space.


Conclusion: The Perfect Addition to Your Cabin

A rustic ceiling fan for cabins is the perfect way to combine function and style, keeping your space comfortable while enhancing its natural, cozy aesthetic. Whether you’re outfitting a log cabin, a lakeside retreat, or simply adding a rustic touch to your home, a well-chosen ceiling fan will become an integral part of the ambiance.

By considering factors such as design, size, and functionality, you can select the ideal fan that meets your needs and adds a finishing touch to your cabin decor. With proper maintenance and care, your rustic ceiling fan will keep your space feeling comfortable for years to come.