Unveiling the Secrets of a Successful Low Ceiling Basement Remodel: Transform Your Space with Style

Transforming a basement with a low ceiling can be a daunting task, but fear not! Dive into our guide on “Low Ceiling Basement Remodel” and discover innovative ideas to elevate your space.

Low Ceiling Basement Remodel

Introduction

A low ceiling in your basement doesn’t have to limit your creativity when it comes to remodeling. In this comprehensive guide, we will explore the intricacies of a successful low ceiling basement remodel, providing you with practical tips and inspiring ideas to turn your space into a stylish and functional area.

Understanding the Challenges of Low Ceiling Basements

The Illusion of Space

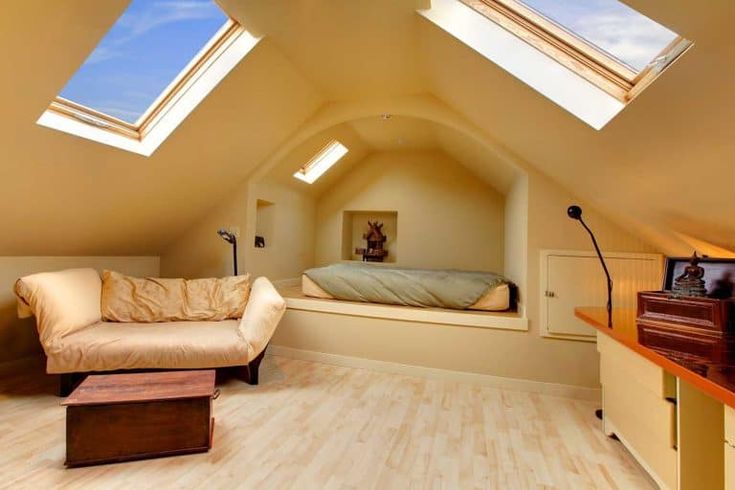
Low ceilings can create the illusion of a confined and cramped space. Overcoming this challenge requires strategic planning and design choices that maximize the available height while creating an open and inviting atmosphere.

Lighting Solutions

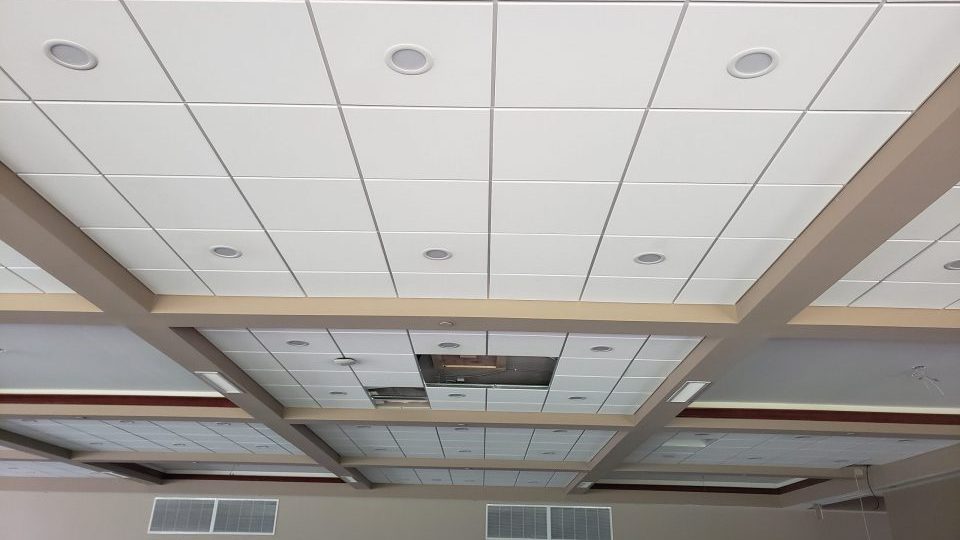
Insufficient natural light is often a concern in basements, especially those with low ceilings. Incorporating smart lighting solutions can significantly enhance the perceived height of the space and contribute to a brighter, more welcoming environment.

Low Ceiling Basement Remodel: Navigating the Process

Strategic Layout Design

In a low ceiling basement, optimizing the layout is crucial. Strategic placement of furniture, storage, and functional zones can create a sense of spaciousness. Consider multifunctional furniture that serves your needs without overwhelming the limited vertical space.

Vertical Design Elements

Maximize the use of vertical space with floor-to-ceiling shelving, tall cabinets, and wall-mounted storage. This not only adds functionality but also draws the eye upward, making the ceiling appear higher than it actually is.

Innovative Design Ideas for Low Ceiling Basements

Light-colored Palette

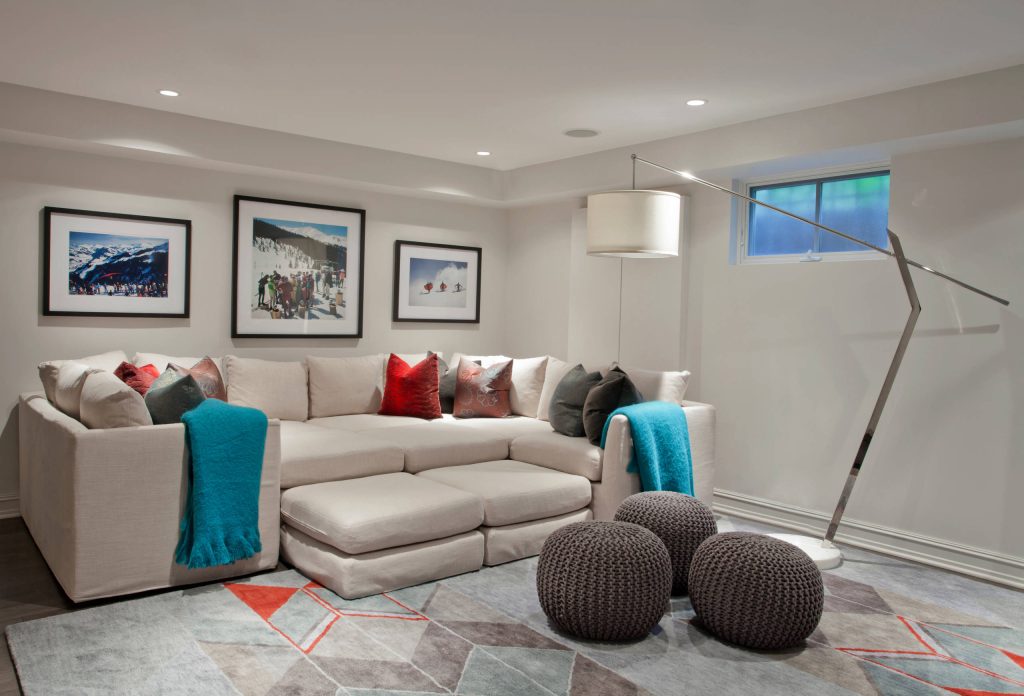
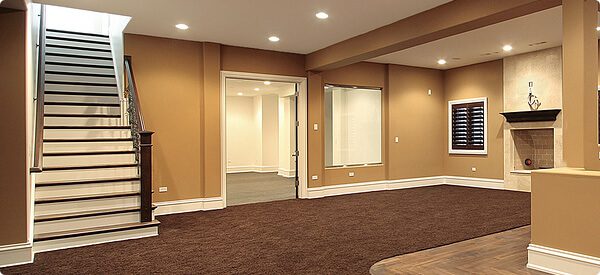
Opt for light-colored walls, flooring, and furnishings to create a bright and airy ambiance. Light tones reflect more light, giving the illusion of higher ceilings and a more expansive space.

Strategic Use of Mirrors

Integrating mirrors into your low ceiling basement design can work wonders. Mirrors reflect light and create visual depth, making the space feel larger and more open.

Low Profile Furniture

Choose low-profile furniture that doesn’t overwhelm the room visually. This includes sofas, chairs, and tables with sleek designs that maintain an unobtrusive presence in the limited space.

Low Ceiling Basement Remodel: Where to Begin

Professional Consultation

Consider consulting with a professional designer or contractor experienced in low ceiling basement remodels. Their expertise can provide valuable insights and help you make informed decisions to optimize your space effectively.

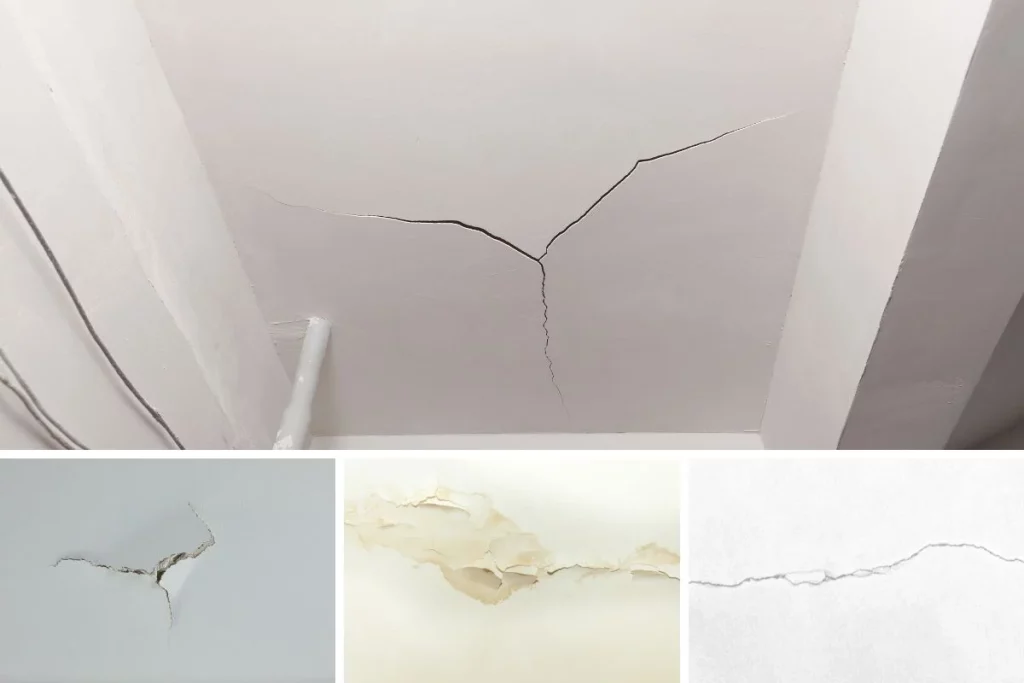
Read too: Understanding and Resolving a Ceiling Leak After Rain: Navigating Home Challenges

Conclusion

Embarking on a low ceiling basement remodel requires thoughtful planning and creative solutions. By strategically addressing challenges such as limited height, poor lighting, and the need for smart storage, you can transform your basement into a stylish and functional area.

In conclusion, a successful low ceiling basement remodel is not only achievable but can also result in a space that surpasses expectations. With the right design choices and a focus on maximizing every inch of space, you can turn your basement into a welcoming retreat that defies its low ceiling limitations. Explore the possibilities, embrace innovative ideas, and embark on a journey to revitalize your basement with style and purpose.

Exploring the Causes of Ceiling Leaks: Unveiling the Culprits Behind Common Water Intrusions

Ceiling leaks can be a homeowner’s nightmare, causing damage to property and requiring costly repairs. Understanding “What Causes Ceiling Leaks” is crucial for preventing and addressing these issues effectively. In this comprehensive guide, we will delve into the various factors contributing to ceiling leaks and provide valuable insights for homeowners.

What Causes Ceiling Leaks

Introduction

Ceiling leaks are a common household problem that can arise from a variety of sources. Identifying the root cause is essential for implementing timely and effective solutions. In this article, we will explore the key factors behind ceiling leaks and shed light on how they can be prevented.

Understanding What Causes Ceiling Leaks

The Role of Roof Damage

One of the primary culprits behind ceiling leaks is roof damage. Whether it’s missing shingles, cracked tiles, or damaged flashing, a compromised roof allows water to infiltrate and seep into the ceiling. Regular roof inspections and prompt repairs are crucial for preventing such leaks.

Faulty Plumbing Systems

Leaky pipes and plumbing issues can contribute significantly to ceiling leaks. Over time, pipes may deteriorate, develop cracks, or burst, leading to water seepage into the ceilings. Regular maintenance and inspections of plumbing systems can help identify and address potential issues before they escalate.

Condensation and Humidity

Excessive condensation and high humidity levels within a property can also result in ceiling leaks. When warm air meets a cold surface, condensation forms, potentially causing water damage. Proper ventilation and insulation are key in mitigating these issues and preventing moisture-related ceiling leaks.

Flashing Failures

Flashing, the material used to seal joints in a building, is crucial for preventing water intrusion. If flashing is improperly installed or deteriorates over time, it can compromise its effectiveness, leading to ceiling leaks. Regular inspections and maintenance of flashing are essential for a leak-free home.

Gutter Problems

Clogged or damaged gutters can contribute significantly to ceiling leaks. When gutters fail to channel water away from the roof, it can accumulate and seep into the ceiling. Regular cleaning and maintenance of gutters are vital for preventing water-related damage to ceilings and roofs.

Read too: Condo Ceiling Leak Responsible and How to Address It: Unveiling the Culprit

What Causes Ceiling Leaks: A Closer Look

Understanding Roof Leaks

Roof leaks are a major contributor to ceiling water damage. They can result from various issues, such as damaged shingles, worn-out roofing materials, or inadequate sealing around vents and chimneys. Regular roof inspections by professionals can help identify potential vulnerabilities and prevent leaks before they occur.

Preventing Ceiling Leaks: Tips for Homeowners

  1. Regular Roof Inspections: Schedule professional roof inspections at least once a year to identify and address potential issues promptly.
  2. Plumbing Maintenance: Regularly inspect and maintain your plumbing system, checking for leaks, and repairing any damaged pipes promptly.
  3. Control Humidity Levels: Invest in proper ventilation and dehumidifiers to control indoor humidity levels, reducing the risk of condensation-related ceiling leaks.
  4. Flashing Checks: Ensure that flashing is correctly installed and regularly inspect it for any signs of wear or damage.
  5. Gutter Maintenance: Clean gutters regularly and inspect them for damage. Ensure that water is properly channeled away from the roof and foundation.

Conclusion

In conclusion, understanding “What Causes Ceiling Leaks” is essential for homeowners seeking to protect their property from water damage. By addressing issues such as roof damage, faulty plumbing, condensation, flashing failures, and gutter problems, individuals can take proactive measures to prevent ceiling leaks. Regular maintenance, inspections, and prompt repairs are key to maintaining a dry and secure home.

By staying informed about the causes of ceiling leaks and implementing preventive measures, homeowners can safeguard their investment and enjoy peace of mind knowing that their ceilings are protected from potential water intrusions.

Understanding and Addressing Wet Marks on Ceiling: Decoding the Damp Dilemma

Discovering wet marks on your ceiling can be a cause for concern, signifying potential issues that need attention. In this comprehensive guide, we will delve into the common reasons behind wet marks on the ceiling and provide practical solutions to address and prevent further damage.

Wet Marks On Ceiling
508587208

Understanding Wet Marks on Ceiling: A Troubling Sign

Detecting the Issue

The first step in addressing wet marks is understanding what they indicate. Whether it’s a subtle discoloration or noticeable water streaks, these signs suggest the presence of moisture, and identifying the source is crucial.

Potential Causes

Several factors can contribute to wet marks on the ceiling. Roof leaks, plumbing issues, condensation, or even poor ventilation can result in the accumulation of moisture, leading to unsightly and potentially damaging marks.

Investigating Wet Marks on Ceiling: Identifying the Culprit

Roof Leaks

Inspect your roof for missing or damaged shingles, as well as cracked flashing around chimneys and vents. Addressing these issues promptly can prevent further water penetration and damage to the ceiling.

Plumbing Issues

Leaks from plumbing fixtures or pipes can lead to wet marks. Check for visible leaks, water stains, or mold growth around pipes and fixtures. Address any plumbing issues promptly to prevent further damage.

Condensation Concerns

Poor ventilation can lead to condensation, especially in areas with high humidity. Check for signs of condensation on windows, walls, and ceilings. Improving ventilation and using dehumidifiers can help mitigate this issue.

Practical Solutions:

Locate and Repair the Source

Once the source of the moisture is identified, take necessary steps to repair it. Whether it’s fixing a roof leak, addressing plumbing issues, or improving ventilation, repairing the source is essential to prevent recurrence.

Remove Mold and Mildew

Wet marks can lead to mold and mildew growth. Clean affected areas with a mixture of water and mild detergent. For persistent mold issues, consider consulting professionals for thorough remediation.

Repaint and Restore

After addressing the root cause and ensuring the affected area is thoroughly dry, consider repainting the ceiling to restore its appearance. Use moisture-resistant paint to prevent future issues.

Preventing Future Wet Marks on Ceiling: Maintenance Tips

Regular Inspections

Schedule regular inspections of your roof, plumbing, and ventilation systems to catch potential issues before they escalate.

Ensure Proper Ventilation

Proper ventilation is crucial in preventing moisture buildup. Use exhaust fans in bathrooms and kitchens, and ensure attic spaces are adequately ventilated.

Read too: Condo Ceiling Leak Responsible and How to Address It: Unveiling the Culprit

Conclusion: A Dry and Secure Home

In conclusion, wet marks on the ceiling can be a red flag indicating potential issues that require prompt attention. By understanding the causes, identifying the source, and implementing practical solutions, you can maintain a dry and secure home, free from the troubles of water damage.

Exploring Different Types of Ceiling Damage and Their Solutions: Unveiling the Culprits

Discover the diverse world of ceiling issues in our guide on “Types of Ceiling Damage.” Explore the causes, signs, and effective solutions to keep your ceilings in top condition.

Types Of Ceiling Damage

Types of Ceiling Damage: An In-Depth Exploration

Introduction to Ceiling Damage

Embark on a comprehensive journey as we delve into the intricate world of “Types of Ceiling Damage.” Learn about the various factors that contribute to the deterioration of your ceilings.

Common Culprits Behind Ceiling Damage

  1. Water Damage: Explore how water intrusion can lead to ceiling discoloration, sagging, and the development of mold and mildew.
  2. Structural Issues: Understand how structural problems can manifest as cracks, uneven surfaces, and other visible signs of wear and tear.

Types of Ceiling Damage: Signs and Characteristics

Water Stains

  1. Causes: Uncover the causes of water stains on ceilings, ranging from leaky roofs to plumbing issues.
  2. Identification: Learn how to identify different types of water stains and their implications for ceiling health.

Cracks and Fractures

  1. Structural Implications: Explore how cracks in ceilings can indicate underlying structural issues and compromise the integrity of the entire structure.
  2. Types of Cracks: Understand the various types of cracks, including hairline cracks, settling cracks, and more.

Sagging Ceilings

  1. Causes: Delve into the causes of sagging ceilings, from water damage to inadequate support structures.
  2. Safety Concerns: Understand the safety implications of sagging ceilings and the urgency of addressing this issue.

Detecting and Assessing Ceiling Damage

Visual Inspection

  1. Identifying Water Stains: Learn how to visually identify water stains and trace their source to address water-related damage.
  2. Crack Analysis: Understand how to analyze the type, size, and location of cracks to determine the severity of structural issues.

Professional Assessment

  1. Consultation with Experts: Explore the benefits of consulting with professionals for a thorough assessment of ceiling damage.
  2. Use of Technology: Understand how technology, such as moisture meters and infrared imaging, aids in accurate damage assessment.

Read too: Condo Ceiling Leak Responsible and How to Address It: Unveiling the Culprit

Solutions for Different Types of Ceiling Damage

Water Damage Repair

  1. Leak Identification: Learn about the importance of identifying and repairing leaks promptly to prevent water damage.
  2. Ceiling Repainting: Explore the role of repainting in restoring the aesthetic appeal of ceilings affected by water stains.

Crack and Structural Repairs

  1. Crack Filling Techniques: Understand different crack filling techniques and materials to restore the smoothness of ceilings.
  2. Reinforcement Strategies: Explore structural reinforcement methods to address underlying issues and prevent further damage.

Sagging Ceiling Remediation

  1. Support Reinforcement: Learn about reinforcing support structures to correct sagging ceilings and ensure long-term stability.
  2. Ceiling Replacement: Understand when and how to replace sections of ceilings that are beyond repair.

Preventive Measures for Ceiling Health

Regular Maintenance

  1. Roof Inspections: Explore the importance of regular roof inspections to prevent water damage and maintain a watertight structure.
  2. Ceiling Checks: Learn how routine ceiling inspections can help detect and address issues before they escalate.

Moisture Control

  1. Proper Ventilation: Understand the role of proper ventilation in controlling humidity and preventing moisture-related ceiling damage.
  2. Use of Dehumidifiers: Explore how dehumidifiers can be effective tools in maintaining optimal indoor humidity levels.

Conclusion: Preserving the Integrity of Your Ceilings

Empower yourself with knowledge about the different “Types of Ceiling Damage” to proactively address issues and preserve the integrity of your home. By understanding the signs, causes, and solutions, you can ensure your ceilings remain not only visually appealing but structurally sound for years to come.

Understanding and Addressing a Termite Hole in the Ceiling: Unraveling the Threat

Discover the nuances of a potential menace with our comprehensive guide on “Termite Hole in Ceiling.” Explore the causes, detection methods, and effective solutions to safeguard your home.

Termite Hole In Ceiling

Termite Hole in Ceiling: A Silent Intruder

Introduction to the Issue

Dive into the silent intrusion of termites with a focus on “Termite Hole in Ceiling.” Learn how these pests can compromise the structural integrity of your home.

Signs and Symptoms

  1. Visible Damage: Understand how termite holes manifest on ceilings, indicating the presence of these destructive pests.
  2. Wooden Structures at Risk: Explore the vulnerability of wooden structures to termite infestations and the potential consequences.

Termite Hole in Ceiling: Causes and Contributors

Moisture and Humidity

  1. Attractiveness to Termites: Learn about the correlation between moisture-rich environments and the attraction of termites to ceilings.
  2. Preventing Moisture Buildup: Explore strategies to prevent moisture buildup as a proactive measure against termite infestations.

Wood-to-Ground Contact

  1. Ideal Conditions for Termites: Understand how direct contact between wooden structures and the ground creates conducive conditions for termite activity.
  2. Elevating Wooden Structures: Explore methods to elevate and protect wooden elements from ground contact to deter termite infestations.

Detecting and Confirming a Termite Hole in Ceiling

Visual Inspection

  1. Characteristics of Termite Holes: Learn how to visually identify termite holes in ceilings, considering size, shape, and patterns.
  2. Tracing Mud Tubes: Understand the significance of mud tubes as indicators of termite activity and potential entry points.

Tapping and Listening Technique

  1. Utilizing Tapping Sounds: Explore the technique of tapping on wooden surfaces to detect hollow sounds indicative of termite damage.
  2. Professional Acoustic Inspection: Understand how professionals employ acoustic inspection tools to detect termite activity within structures.

Addressing a Termite Hole in Ceiling: Solutions and Strategies

Termiticide Application

  1. Effective Chemical Barriers: Explore the application of termiticides to create protective barriers that deter termite activity in ceilings.
  2. Professional Pest Control Services: Understand the benefits of hiring professional pest control services for precise and comprehensive termite treatment.

Wood Replacement and Repair

  1. Removing Infested Wood: Learn about the importance of removing and replacing termite-infested wood to eliminate the source of the infestation.
  2. Structural Repairs: Explore the need for structural repairs to restore the integrity of the ceiling and prevent further termite damage.

Read too: Condo Ceiling Leak Responsible and How to Address It: Unveiling the Culprit

Preventive Measures for Long-Term Success: Termite Hole in Ceiling

Regular Inspections

  1. Scheduled Pest Inspections: Understand the importance of regular pest inspections, including ceiling areas, to detect and address termite activity promptly.
  2. Early Intervention: Explore the significance of early intervention in preventing widespread termite infestations and damage.

Reducing Moisture Levels

  1. Proper Ventilation: Learn about the role of proper ventilation in reducing moisture levels, creating an inhospitable environment for termites.
  2. Maintenance of Dry Conditions: Explore practical tips for maintaining dry conditions in and around the home to deter termite infestations.

Conclusion: Safeguarding Your Home from Termite Intrusions

By understanding the threat posed by a termite hole in the ceiling and implementing proactive measures, homeowners can safeguard their properties from extensive damage. Stay informed, conduct regular inspections, and take decisive action to ensure the longevity and resilience of your home against these silent invaders.

The Ultimate Guide to Popcorn Ceiling Removal in Jax: Transform Your Space

Unlock the secrets to a refreshed and modern living space with “Popcorn Ceiling Removal Jax.” Explore the process, benefits, and considerations for transforming your home in Jacksonville.

Popcorn Ceiling Removal Jax

Popcorn Ceiling Removal Jax: A Gateway to Modern Living

Introduction to the Renovation Journey

Embark on a renovation journey by exploring the intricacies of “Popcorn Ceiling Removal Jax” and its transformative impact on your home’s aesthetics and value.

Significance of Modernization

  1. Aesthetic Enhancement: Discover how removing popcorn ceilings contributes to a more modern and visually appealing interior.
  2. Property Value Boost: Understand the potential increase in property value associated with updated and contemporary home features.

Popcorn Ceiling Removal Jax: The Process Unveiled

Professional Assessment

  1. Initial Consultation: Learn about the importance of an initial consultation with professionals to assess the scope of the popcorn ceiling removal project.
  2. Testing for Asbestos: Understand the necessity of asbestos testing, especially in older homes, before commencing the removal process.

Preparation and Safety Measures

  1. Securing the Space: Explore the steps involved in securing the work area to minimize disruptions and ensure safety during the removal.
  2. Proper Ventilation: Understand the importance of proper ventilation to minimize dust and maintain indoor air quality during the removal process.

Removal Techniques

  1. Scraping Method: Learn about the scraping method, a common technique used for removing popcorn ceilings, and its effectiveness.
  2. Wet Removal Method: Explore the wet removal method, an alternative technique that involves dampening the popcorn texture for easier removal.

Benefits of Popcorn Ceiling Removal in Jax

Modern Aesthetics

  1. Smooth Ceiling Finish: Discover how removing popcorn ceilings results in a smooth finish that enhances the overall modern aesthetics of your home.
  2. Versatility in Design: Explore the versatility in design choices that a smooth ceiling offers, allowing for various paint colors and decorative options.

Improved Lighting

  1. Enhanced Natural Light: Understand how a smooth ceiling reflects light more effectively, contributing to a brighter and more inviting living space.
  2. Strategic Lighting Placement: Explore how strategic lighting placement becomes more feasible with a smooth ceiling, allowing for enhanced room ambiance.

Read too: Condo Ceiling Leak Responsible and How to Address It: Unveiling the Culprit

Crucial Considerations for Popcorn Ceiling Removal in Jax

Asbestos Abatement

  1. Professional Asbestos Removal: Learn about the importance of hiring professionals for asbestos removal if testing indicates its presence in popcorn ceilings.
  2. Legal Compliance: Understand the legal requirements and regulations related to asbestos abatement in home renovations.

Temporary Relocation

  1. Consideration for Occupants: Explore the option of temporary relocation for occupants during the popcorn ceiling removal process to minimize exposure to dust and potential disturbances.
  2. Timing and Planning: Plan the removal process with consideration for the timing that is least disruptive for occupants.

DIY vs. Professional Removal: Making an Informed Choice

Risks of DIY Removal:

  1. Health Risks: Understand the health risks associated with DIY popcorn ceiling removal, particularly concerning asbestos exposure.
  2. Quality of Work: Recognize the potential challenges in achieving a professional finish through DIY methods.

Professional Expertise and Assurance

  1. Efficiency and Speed: Explore how professionals ensure efficiency and speed in completing the removal process.
  2. Quality Finish: Understand the assurance of a high-quality, smooth finish when relying on experienced professionals.

Conclusion: Elevate Your Living Space with Popcorn Ceiling Removal in Jax

Embrace the modernization journey by opting for “Popcorn Ceiling Removal Jax.” Transform your home, enhance its aesthetics, and elevate your living space to new heights. With the right professionals and considerations, the removal process becomes a stepping stone toward a contemporary and stylish home in Jacksonville.

Understanding and Addressing Bubbles in the Ceiling: Unveiling the Issue

Embark on a journey to decipher the perplexing problem of “Bubbles in the Ceiling.” Learn about the causes, potential risks, and effective solutions to restore the aesthetic appeal and structural integrity of your living space.

Bubbles In The Ceiling

Bubbles in the Ceiling: A Visual Anomaly

Introduction to the Dilemma

Delve into the visual anomaly of bubbles, a puzzling issue that can detract from the beauty of your home and signal underlying concerns.

The Significance of Prompt Attention

  1. Visual Disruption: Explore how bubbles disrupt the smooth and flawless appearance of the ceiling, drawing attention to potential issues.
  2. Structural Implications: Understand how bubbles may indicate underlying structural or moisture-related problems that require prompt attention.

Causes of Bubbles in the Ceiling

Moisture Intrusion

  1. Roof Leaks: Understand how roof leaks can lead to moisture intrusion, causing bubbles.
  2. Condensation Issues: Explore the impact of condensation on the ceiling, contributing to the development of bubbles.

Poor Ventilation

  1. Inadequate Air Circulation: Learn about the role of poor ventilation in creating an environment conducive to moisture buildup and bubble formation.
  2. Bathroom and Kitchen Concerns: Explore how areas with high humidity, such as bathrooms and kitchens, can contribute to ceiling bubbles.

Detecting and Diagnosing Bubbles in the Ceiling

Visual Inspection

  1. Identifying Bubble Characteristics: Learn how to visually identify different types of bubbles and understand their potential causes.
  2. Surveying the Entire Ceiling: Explore the importance of conducting a comprehensive visual inspection to detect the extent of the issue.

Read too: Condo Ceiling Leak Responsible and How to Address It: Unveiling the Culprit

Moisture and Humidity Testing

  1. Using Moisture Meters: Understand the application of moisture meters to identify areas of increased moisture content.
  2. Monitoring Indoor Humidity: Explore the benefits of monitoring indoor humidity levels to preemptively address potential causes of ceiling bubbles.

Addressing Bubbles in the Ceiling: Solutions and Strategies

Repairing Roof Leaks

  1. Identifying and Patching Leaks: Understand the process of identifying and patching roof leaks to prevent further moisture intrusion.
  2. Professional Roof Inspection: Explore the benefits of hiring professionals for a thorough roof inspection and repair.

Improving Ventilation

  1. Installation of Ventilation Systems: Learn about the installation of proper ventilation systems to enhance air circulation and reduce moisture buildup.
  2. Use of Exhaust Fans: Explore how exhaust fans in bathrooms and kitchens can mitigate humidity and prevent ceiling bubbles.

Ceiling Repair Techniques

  1. Popping and Patching Bubbles: Understand the technique of popping and patching bubbles to restore its smooth surface.
  2. Applying Sealants: Explore the use of sealants to reinforce repaired areas and prevent future bubble formation.

Preventive Measures for Long-Term Success

Regular Maintenance

  1. Roof Inspections: Learn about the importance of regular roof inspections as part of home maintenance to identify and address potential issues.
  2. Upkeep of Ventilation Systems: Explore the regular upkeep of ventilation systems to ensure continuous and effective air circulation.

Educating Homeowners

  1. Awareness of Warning Signs: Educate homeowners about the warning signs of moisture intrusion and poor ventilation that may lead to ceiling bubbles.
  2. Promoting Timely Repairs: Encourage a proactive approach to home repairs, emphasizing the importance of addressing issues promptly.

Conclusion: Restoring Beauty and Functionality

Bubbles in the ceiling may seem like a mere aesthetic concern, but they often point to deeper issues that require attention. By understanding the causes, detecting problems early, and implementing effective solutions, homeowners can restore the beauty and functionality of their ceilings while ensuring the long-term integrity of their homes.

A Guide to Asbestos Popcorn Ceiling Encapsulation for a Modern Home: Transforming Spaces Safely

Uncover the secrets to a safe and stylish home renovation with “Asbestos Popcorn Ceiling Encapsulation.” Explore the process, benefits, and essential considerations for transforming your space while ensuring the well-being of your household.

Asbestos Popcorn Ceiling Encapsulation

Understanding Asbestos Popcorn Ceiling Encapsulation: A Vital Renovation Approach

Introduction to Asbestos Popcorn Ceiling

Delve into the history of popcorn ceilings containing asbestos, the associated risks, and the need for a safe and effective renovation approach.

The Role of Encapsulation

  1. Defining Encapsulation: Understand the concept of encapsulation as a method to contain and neutralize asbestos fibers within popcorn ceilings.
  2. Safety Benefits: Explore how encapsulation provides a safer alternative to removal, preventing the release of harmful asbestos particles into the air.

Read too: Condo Ceiling Leak Responsible and How to Address It: Unveiling the Culprit

Asbestos Popcorn Ceiling Encapsulation: The Process Unveiled

Professional Assessment

  1. Asbestos Testing: Learn about the importance of professional asbestos testing to determine the presence of asbestos in your popcorn ceiling.
  2. Consultation with Experts: Understand the significance of consulting asbestos removal professionals for a thorough assessment and encapsulation plan.

Preparation and Safety Measures

  1. Sealing Off the Area: Explore the necessary steps to seal off the work area, preventing the spread of asbestos particles during encapsulation.
  2. Personal Protective Equipment (PPE): Learn about the use of proper PPE to ensure the safety of workers and occupants during the encapsulation process.

Encapsulation Techniques

  1. Application of Sealants: Understand how specialized sealants are applied to encapsulate the popcorn ceiling, creating a protective barrier against asbestos fibers.
  2. Reinforcement Measures: Explore additional reinforcement techniques to enhance the durability and effectiveness of the encapsulation process.

Benefits of Asbestos Popcorn Ceiling Encapsulation

Cost-Effectiveness

  1. Compared to Removal: Explore the cost advantages of encapsulation over complete asbestos removal, making it a more budget-friendly option.
  2. Long-Term Savings: Understand how encapsulation provides long-term cost savings by eliminating the need for extensive renovations.

Preservation of Aesthetics

  1. Maintaining Original Design: Discover how encapsulation allows homeowners to preserve the original aesthetics of their popcorn ceilings, avoiding the need for extensive remodeling.
  2. Customization Options: Explore the possibility of customizing the encapsulated ceiling with various finishes, colors, and textures.

Crucial Considerations for Asbestos Popcorn Ceiling Encapsulation

Regulatory Compliance

  1. Local Regulations: Understand the local regulations and guidelines governing asbestos encapsulation to ensure compliance with safety standards.
  2. Certified Professionals: Ensure that the encapsulation process is carried out by certified professionals in adherence to industry standards.

Occupant Safety Measures

  1. Temporary Relocation: Explore options for temporary relocation during the encapsulation process to minimize exposure to airborne asbestos particles.
  2. Post-Encapsulation Safety: Understand the recommended safety measures for occupants following the encapsulation process.

DIY vs. Professional Asbestos Popcorn Ceiling Encapsulation: Making the Right Choice

Risks of DIY Encapsulation

  1. Inadequate Safety Measures: Recognize the potential risks associated with attempting a DIY encapsulation without proper safety measures.
  2. Effectiveness Concerns: Understand the limitations of DIY encapsulation in comparison to professional services.

Professional Expertise and Assurance

  1. Industry Knowledge: Explore how professional encapsulation services bring industry expertise and knowledge to ensure a safe and effective process.
  2. Guarantees and Warranties: Learn about the guarantees and warranties offered by professional encapsulation services, providing homeowners with peace of mind.

Conclusion: A Safe and Stylish Home Transformation

Asbestos popcorn ceiling encapsulation emerges as a safe and viable solution for homeowners looking to transform their spaces without compromising safety. With proper planning, professional guidance, and adherence to safety standards, this renovation approach ensures a stylish and secure home environment for years to come.

Understanding and Addressing a Condensation Leak in the Ceiling: Decoding the Drip

Unveiling the mystery behind a common household woe, this article explores the causes, consequences, and effective solutions for a “Condensation Leak in the Ceiling.” Dive into the intricacies of this issue to safeguard your home from potential damages and ensure a dry, comfortable living space.

Condensation Leak In Ceiling

Condensation Leak in Ceiling: An Unwelcome Intruder

Introduction to the Dilemma

Discover the signs and symptoms of a condensation leak in the ceiling, a predicament that can lead to not only aesthetic issues but also structural damage if left unaddressed.

The Anatomy of a Condensation Leak

  1. Understanding Condensation: Explore how condensation occurs in homes and the conditions that contribute to its formation.
  2. Identification of Leak Sources: Learn how to identify whether the water infiltrating your ceiling is indeed a result of condensation.

Read too: Understanding and Eliminating Termite Mud Tubes on Your Ceiling: Unveiling the Stealthy Invaders

Condensation Leak in Ceiling: Unraveling the Causes

Poor Ventilation

  1. Inadequate Air Circulation: Understand how a lack of proper ventilation can lead to trapped moisture, causing condensation and subsequent leaks.
  2. Importance of Ventilation Systems: Explore the role of ventilation systems in maintaining a healthy indoor environment and preventing condensation-related issues.

Temperature Fluctuations

  1. Temperature Differential: Learn how significant temperature differences between indoor and outdoor spaces can contribute to condensation and leaks.
  2. Weather-Related Impacts: Understand how seasonal changes and weather patterns can exacerbate condensation-related problems.

Detecting and Confirming a Condensation Leak in Ceiling

Visual Inspection

  1. Water Stains: Recognize the appearance of water stains on your ceiling as a potential indicator of a condensation leak.
  2. Mold and Mildew: Understand how the growth of mold and mildew can signal an underlying moisture issue.

Humidity and Moisture Levels

  1. Monitoring Indoor Humidity: Learn about tools and techniques for monitoring indoor humidity levels to detect potential condensation issues.
  2. Use of Moisture Meters: Explore the use of moisture meters to confirm the presence of excess moisture in affected areas.

Addressing a Condensation Leak in Ceiling: Solutions and Strategies

Improving Ventilation

  1. Installation of Ventilation Fans: Explore the installation of ventilation fans in areas prone to condensation, such as bathrooms and kitchens.
  2. Air Exchange Systems: Consider the benefits of air exchange systems in maintaining optimal indoor air quality.

Insulation Upgrades

  1. Proper Insulation Installation: Understand the role of insulation in preventing temperature differentials that lead to condensation.
  2. Consulting with Insulation Experts: Explore the option of consulting with insulation professionals to ensure proper installation and effectiveness.

Sealing Leaks and Cracks

  1. Identification of Entry Points: Learn how to identify and seal potential entry points for moisture, such as cracks and gaps.
  2. Use of Sealants: Explore the use of appropriate sealants to prevent water infiltration through vulnerable areas.

Preventive Measures for Long-Term Success: Condensation Leak in Ceiling

Regular Maintenance

  1. Gutter and Roof Inspection: Understand the importance of regular inspections of gutters and roofs to prevent water accumulation.
  2. Prompt Repairs: Addressing leaks and issues promptly to avoid long-term damage and minimize the risk of condensation-related leaks.

Educating Homeowners

  1. Awareness of Condensation Triggers: Educate homeowners about the common triggers of condensation and how to mitigate them.
  2. Promoting Regular Checks: Encourage a proactive approach to regular checks and maintenance to prevent recurring issues.

Conclusion: Keeping Your Home Dry and Comfortable

By unraveling the complexities of a condensation leak in the ceiling, homeowners can take informed steps to address the issue promptly and implement preventive measures for long-term success. Embracing proper ventilation, insulation upgrades, and regular maintenance can transform a damp predicament into a dry, comfortable living space, ensuring the integrity of your home for years to come.

Transform Your Space with Dayton Walls And Ceilings: Elevate Your Home or Office Ambiance

When it comes to enhancing the aesthetics and functionality of your living or working space, one crucial aspect often overlooked is the choice of walls and ceilings. In the realm of architectural wonders, Dayton Walls And Ceilings stand out as pioneers in transforming ordinary spaces into extraordinary masterpieces.

Dayton Walls And Ceilings

Introduction

In the ever-evolving world of interior design, Dayton Walls And Ceilings have established themselves as leaders, setting the bar high for innovative and stylish solutions. In this article, we’ll delve into the significance of Dayton Walls And Ceilings, exploring the transformative impact they can have on any environment.

Why Dayton Walls And Ceilings Matter

This craftsmanship are more than just structural elements; they are canvases waiting to be adorned with creativity and style. The right walls and ceilings can redefine the ambiance of a room, offering a blend of functionality and aesthetic appeal that goes beyond the ordinary.

The Artistry of Dayton Walls And Ceilings

Creating a seamless blend between functionality and aesthetics, this craftsmanship bring forth a myriad of design possibilities. From textured finishes that add depth to a room to sleek, modern designs that exude sophistication, the options are limitless. The artistry embedded in these elements is a testament to Dayton’s commitment to elevating spaces.

Exploring the Variety

One of the key strengths of this craftsmanship lies in their diverse range of offerings. Whether you’re looking for classic designs that exude timeless elegance or contemporary options that resonate with modern sensibilities, Dayton has something for everyone. The variety ensures that you can find the perfect fit for your unique style and preferences.

Incorporating Innovation

Innovation is at the core of Dayton’s philosophy, evident in the cutting-edge solutions they provide for walls and ceilings. From acoustic panels that enhance sound quality to eco-friendly materials that contribute to a sustainable future, Dayton continues to push the boundaries of what walls and ceilings can achieve.

Transformative Impact on Home Spaces

A well-designed home is a harmonious blend of functionality and aesthetics. Dayton’s walls and ceilings play a pivotal role in achieving this balance. By carefully selecting and installing the right elements, homeowners can witness a transformation that not only enhances the visual appeal of their living spaces but also contributes to a comfortable and inviting atmosphere.

Read too: Understanding and Addressing a Condensation Leak in the Ceiling: Decoding the Drip

The Dayton Difference in Walls And Ceilings

When it comes to choosing the perfect walls and ceilings for your space, the Dayton Difference cannot be overstated. This section explores what sets Dayton apart in the realm of interior design.

Quality Craftsmanship: This craftsmanship boast unparalleled quality craftsmanship. Each element is meticulously crafted to ensure durability and longevity, standing as a testament to the brand’s commitment to excellence.

Customization Options: One size does not fit all, and Dayton understands this well. With a plethora of customization options, homeowners can tailor their walls and ceilings to suit their unique tastes and preferences.

Sustainability Initiatives: In an era where sustainability is paramount, Dayton Walls And Ceilings take the lead with eco-friendly materials and practices. Choosing Dayton means choosing a greener, more sustainable future for your living spaces.

Creating Timeless Spaces

The mark of exceptional walls and ceilings is their ability to withstand the test of time. Dayton’s commitment to timeless design ensures that your investment in their products is a long-term investment in the beauty and functionality of your home.

Conclusion

In conclusion, Dayton Walls And Ceilings are not just elements of construction; they are gateways to unparalleled design possibilities. From classic to contemporary, Dayton’s offerings cater to a diverse range of tastes and preferences. The transformative impact of these walls and ceilings goes beyond aesthetics, contributing to the overall functionality and ambiance of any space.

Elevate your living or working environment with this craftsmanship and experience the fusion of innovation, artistry, and quality craftsmanship in every corner of your space. Choose Dayton, and let your walls and ceilings tell a story of timeless elegance and modern sophistication.

Understanding and Tackling Orange Mold on Ceiling: Unveiling the Intrigue

Discovering orange mold on the ceiling can be both alarming and puzzling for homeowners. In this comprehensive guide, we will delve into the origins, implications, and effective strategies for addressing the presence of orange mold on your ceiling.

Orange Mold On Ceiling

Exploring the Phenomenon: Orange Mold on Ceiling

Orange mold is a distinctive and potentially hazardous type of mold that can thrive in various environments, including ceilings. Let’s unravel the mystery of why and how this unique mold takes root in our living spaces.

Demystifying the Presence

Understanding the factors contributing to the growth of orange mold on the ceiling is essential for developing a targeted approach to remediation.

  1. Moisture Accumulation: Orange mold thrives in damp environments. Ceiling areas prone to moisture buildup, whether from leaks, condensation, or inadequate ventilation, create ideal conditions for mold growth.
  2. Warmth and Darkness: Ceilings in poorly lit or rarely visited areas can provide the darkness and warmth mold spores need to multiply. Identifying such spaces is crucial in addressing orange mold growth.
  3. Inadequate Ventilation: Ceilings with insufficient airflow are more susceptible to mold problems. Proper ventilation is essential to prevent the stagnation of air and subsequent mold colonization.

Consequences of Ignoring Orange Mold on Ceiling: Beyond Aesthetic Concerns

Neglecting the presence of orange mold on the ceiling can lead to a range of consequences, from structural damage to adverse health effects. It’s crucial to address this issue promptly to mitigate potential risks.

Addressing the Issue: Strategies for Dealing with Orange Mold

  1. Identify and Resolve the Source: Begin by identifying and addressing the source of moisture that promotes mold growth. Fix leaks, improve ventilation, and ensure proper insulation to prevent recurrence.
  2. Mold Removal and Cleaning: Safely remove the mold from the ceiling using appropriate cleaning agents and protective gear. Ensure thorough cleaning to eliminate spores and prevent regrowth.
  3. Enhance Ventilation: Improve ventilation in affected areas to discourage mold from returning. Consider installing exhaust fans, opening windows, or using dehumidifiers to maintain optimal humidity levels.

Preventive Measures: Safeguarding Your Ceiling Against Orange Mold

Implementing preventive measures is key to ensuring the long-term health and cleanliness of your ceiling.

  1. Regular Inspections: Conduct routine inspections of your ceiling, especially in areas prone to moisture. Early detection allows for prompt intervention before mold colonies become established.
  2. Maintain Optimal Humidity: Keep indoor humidity levels between 30% and 50% to create an environment less conducive to mold growth. Use air conditioners and dehumidifiers as needed.
  3. Proper Ventilation Practices: Encourage proper air circulation throughout your home. Ensure that vents are unobstructed, and consider using exhaust fans in high-moisture areas like kitchens and bathrooms.

Read too: Understanding and Addressing a Condensation Leak in the Ceiling: Decoding the Drip

Conclusion: Taking Control of Orange Mold on Ceiling

In conclusion, understanding and addressing orange mold on the ceiling is crucial for maintaining a healthy and aesthetically pleasing living space. By identifying the causes, promptly remedying the issue, and implementing preventive measures, homeowners can take control of their indoor environment.

Don’t let orange mold cast a shadow on the beauty and safety of your home. Take proactive steps, stay vigilant, and enjoy a mold-free and comfortable living space for years to come.

Understanding and Addressing Mud Tubes on Ceiling: Unraveling the Mystery

Discovering mud tubes on the ceiling can be a disconcerting revelation for homeowners. In this comprehensive guide, we’ll delve into the intriguing world of mud tubes, exploring their origins, implications, and effective strategies for dealing with mud tubes on the ceiling.

Mud Tubes On Ceiling

Unveiling Mud Tubes : A Puzzling Phenomenon

Encountering mud tubes is more than just a cosmetic concern—it can be indicative of underlying issues that warrant investigation. Let’s embark on a journey to understand the nature of mud tubes and their presence on the ceiling.

Decoding the Origins of Mud Tubes on Ceiling

Mud tubes, often associated with termites, are intriguing structures built from soil, saliva, and fecal matter. Understanding their origin is crucial for determining the appropriate course of action when they appear on the ceiling.

  1. Termite Activity: Mud tubes are commonly constructed by termites as protective pathways between their nest and a food source. Identifying termite activity is essential when mud tubes are found on the ceiling.
  2. Moisture and Decay: In some cases, mud tubes may result from moisture-related issues or decay within the structure. Leaking roofs or plumbing, for example, can create conditions conducive to the formation of mud tubes.
  3. Wood-Destroying Fungi: Wood-decaying fungi can contribute to the creation of mud tubes. Understanding the presence of fungi is crucial for addressing the root cause and preventing further damage.

Consequences of Ignoring Mud Tubes : Beyond Aesthetic Concerns

Neglecting mud tubes can have far-reaching consequences, extending beyond mere aesthetics. Termite infestations and structural damage are potential outcomes that highlight the importance of addressing this issue promptly.

Addressing the Issue: Strategies for Dealing with Mud Tubes

  1. Professional Inspection: Engage a licensed pest control professional to conduct a thorough inspection of your home. Identifying the type of pest and extent of the infestation is crucial for developing an effective treatment plan.
  2. Termite Treatment: If termites are identified as the culprits behind the mud tubes, professional termite treatment is essential. This may involve the use of termiticides, baits, or other targeted methods.
  3. Addressing Moisture Issues: Resolve any moisture-related concerns contributing to the formation of mud tubes. Repairing leaks, improving ventilation, and addressing drainage issues can help prevent future occurrences.

Read too: Understanding and Addressing a Condensation Leak in the Ceiling: Decoding the Drip

Preventive Measures:

Taking proactive steps to prevent the recurrence of mud tubes on the ceiling is essential for maintaining a termite-free and structurally sound home.

  1. Regular Inspections: Conduct regular inspections of your home for signs of termite activity, water damage, or decay. Early detection is key to preventing extensive damage.
  2. Wood Treatment: Treat wooden structures with termite-resistant products to deter infestations. This is especially important for vulnerable areas such as attics, crawl spaces, and ceilings.
  3. Maintain Proper Ventilation: Ensure adequate ventilation throughout your home to prevent the buildup of moisture. Proper airflow helps create an environment less conducive to termite activity.

Conclusion: Taking Control of Mud Tubes on Ceiling

In conclusion, discovering mud tubes on the ceiling is a call to action for homeowners. By understanding the origins, addressing the issue promptly, and implementing preventive measures, you can protect your home from the damaging effects of termites and related concerns.

Don’t let mud tubes cast a shadow on the integrity of your ceiling. Take control, engage professionals when needed, and enjoy a home that stands resilient against the challenges posed by mud tubes.

Understanding and Resolving a Leak Through Ceiling Light: Shedding Light on the Dilemma

Experiencing a leak through the ceiling light can be a perplexing and concerning situation for homeowners. In this comprehensive guide, we will delve into the causes, consequences, and effective solutions for a leak through the ceiling light, shedding light on this unexpected issue.

Leak Through Ceiling Light

Understanding the Phenomenon: Leak Through Ceiling Light

A leak through the ceiling light is more than just an inconvenience—it’s a potential indicator of underlying problems within your home. Let’s explore the various factors that could contribute to this issue and how to address them.

Investigating the Causes of Leak Through Ceiling Light

Identifying the root cause of a leak is crucial for effective resolution. Below are common culprits behind this phenomenon:

  1. Roof Leaks: Damaged or aging roofing materials can lead to water infiltration, causing leaks that may find their way into the ceiling light fixtures.
  2. Plumbing Issues: Leaky pipes, burst plumbing fixtures, or faulty connections within the home’s plumbing system can result in water seepage, leading to leaks through the ceiling light.
  3. Condensation Concerns: In some instances, condensation may form within the ceiling and light fixtures, mimicking a leak. Poor ventilation and insulation can contribute to this issue.

Consequences of Ignoring Leak: Beyond Aesthetics

Neglecting a leak can have severe consequences, extending beyond the cosmetic impact. Mold growth, electrical hazards, and compromised structural integrity are potential outcomes of overlooking this issue.

Addressing the Issue: Strategies for Resolving Leak

  1. Immediate Action: When you notice a leak, take immediate action to turn off the power in the affected area. This helps prevent electrical hazards and potential damage to the light fixture.
  2. Identifying the Source: Thoroughly inspect the area to determine the source of the leak. Is it stemming from the roof, plumbing, or is it a result of condensation? Identifying the origin is essential for effective resolution.
  3. Roof Repairs: If the leak is traced back to the roof, prompt repairs or roof replacement may be necessary. Addressing damaged shingles, flashing, or other roofing components is crucial.

Preventive Measures to Safeguard Against

Preventing future occurrences of a leak involves implementing strategic preventive measures. Consider the following:

  1. Regular Roof Maintenance: Schedule regular inspections and maintenance for your roof to identify and address potential issues before they lead to leaks.
  2. Plumbing Inspections: Routinely inspect and maintain your home’s plumbing system. Promptly address any leaks or plumbing concerns to prevent water damage and ceiling light leaks.
  3. Enhance Ventilation: Improve ventilation within your home to mitigate condensation-related issues. Proper airflow helps prevent moisture buildup within the ceiling and light fixtures.

Read too: Understanding and Addressing a Condensation Leak in the Ceiling: Decoding the Drip

Conclusion: Illuminating Solutions for a Leak-Free Ceiling Light

In conclusion, a leak is a multifaceted issue that demands prompt attention and strategic resolution. By understanding the causes, consequences, and implementing preventive measures, homeowners can safeguard their homes from the challenges posed by a ceiling light leak.

Don’t let a leak cast a shadow on the safety and comfort of your home. Take proactive steps, address the root causes, and enjoy a well-illuminated, leak-free living space for years to come.

Transforming Your Home with a Thoughtfully Designed Low Ceiling Finished Basement: Elevating Comfort

Unlocking the potential of a low ceiling finished basement is a rewarding endeavor that can enhance both the functionality and aesthetics of your home. In this comprehensive guide, we’ll explore the art of maximizing space and style in a low ceiling finished basement, offering insights, tips, and inspiration for homeowners.

Low Ceiling Finished Basement

Understanding the Appeal of a Low Ceiling Finished Basement

A finished basement is an excellent way to add valuable living space to your home. When dealing with lower ceiling heights, thoughtful design becomes paramount in creating a comfortable and inviting atmosphere.

Embracing Style and Functionality in a Low Ceiling Finished Basement

Designing a low ceiling finished basement requires strategic planning to make the most of the available space. Let’s delve into key considerations and creative solutions for transforming your basement into a stylish and functional retreat.

  1. Strategic Lighting Solutions: Illuminate your low ceiling finished basement with strategic lighting. Recessed lights, wall sconces, and floor lamps can brighten the space without drawing attention to the ceiling height.
  2. Optical Illusions with Vertical Lines: Use vertical lines in your design to draw the eyes upward, creating an illusion of height. Vertical stripes in wallpaper, tall bookshelves, or vertically oriented artwork can all contribute to this effect.
  3. Light Color Palette: Choose light and neutral colors for your low ceiling finished basement to create an open and airy feel. Light colors reflect more light, making the space feel larger and less confined.
  4. Multi-Functional Furniture: Select furniture that serves multiple purposes. Dual-purpose pieces, such as a sofa bed or ottomans with hidden storage, maximize functionality while minimizing clutter in a low ceiling space.
  5. Strategic Furniture Placement: Arrange furniture to create distinct zones within the basement. Strategic placement can help define areas for different activities without making the space feel cramped.
  6. Mirror Magic: Incorporate mirrors into your design to reflect light and create the illusion of more space. Placing mirrors on walls opposite windows or in areas that receive natural light can be particularly effective.

Consequences of Neglecting Design

Failing to consider design elements in a low ceiling finished basement can result in a space that feels cramped and unwelcoming. This oversight may limit the functionality of the area and detract from the overall appeal of your home.

Addressing Design Challenges: Tips and Tricks

  1. Built-In Shelving: Utilize built-in shelving to maximize storage and display areas without sacrificing floor space. Custom shelving can be designed to fit the contours of a low ceiling.
  2. Drop Ceilings with Style: Consider drop ceilings that add character and conceal utility components. Opt for decorative tiles or patterns that enhance the aesthetic appeal of the space.
  3. Utilize Wall-Mounted Features: Wall-mounted features, such as floating shelves, wall-mounted TVs, and hanging plants, draw attention away from the low ceiling and create a visually interesting environment.

Showcasing Success Stories of Low Ceiling Finished Basements

Explore real-life examples of successful low ceiling finished basement transformations. From cozy entertainment areas to functional home offices, these stories showcase the limitless possibilities for optimizing your space.

Read too: Understanding and Addressing a Condensation Leak in the Ceiling: Decoding the Drip

Conclusion: Elevating Your Living Space with a Low Ceiling Finished Basement

In conclusion, a low ceiling should not limit the potential of your finished basement. With thoughtful design, strategic choices, and creative solutions, you can transform your basement into a stylish, functional, and inviting space. Whether it becomes a home theater, a game room, or a cozy retreat, a well-designed low ceiling finished basement can significantly enhance your overall living experience.

Don’t let a low ceiling be a constraint; let it be an opportunity for innovative design and personalized style in your home. Embrace the challenge, unlock the potential, and enjoy the rewards of a thoughtfully designed low ceiling finished basement.

What to Do When Your Dream Ceiling Starts Leaking Water? Navigating Nightmares

Imagine waking up to the unexpected nightmare of finding water dripping from your dream ceiling. In this comprehensive guide, we’ll explore the distressing scenario of a dream ceiling leaking water, shedding light on potential causes, immediate actions, and long-term solutions.

Dream Ceiling Leaking Water

Understanding the Nightmare: Dream Ceiling Leaking Water

Your dream ceiling dripping water can be a shocking and worrisome experience. To effectively address the issue, let’s first explore the possible causes behind this unexpected predicament.

Investigating the Causes of Dream Ceiling Leaking Water

Identifying the root cause is essential for resolving the problem and preventing further damage. Here are common reasons your dream ceiling might start leaking water:

  1. Roof Leaks: Damaged shingles, cracked flashing, or an aging roof can allow rainwater to seep into your dream home, leading to water leaks.
  2. Plumbing Issues: A burst pipe, leaky faucet, or faulty plumbing within your dream abode can contribute to water leaking into the ceiling, creating an unsettling scenario.
  3. Condensation Concerns: In dream homes with poor ventilation, condensation can accumulate, leading to water droplets forming on the ceiling. This may mimic a leak, creating a confusing situation.

Consequences of Ignoring Dream Ceiling Leaks: Beyond the Nightmare

Ignoring water leaks in your dream ceiling can lead to more than just ruined aesthetics. Mold growth, structural damage, and compromised dream interiors are potential consequences of neglecting the issue.

Addressing the Nightmare: Immediate Actions

When faced with a dream ceiling leaking water, taking swift action is crucial to minimize damage. Consider the following immediate steps:

  1. Contain the Leak: Place buckets or containers under the leak to prevent water from spreading and causing further damage to your dream furnishings.
  2. Identify the Source: If safe to do so, try to identify the source of the leak. Is it coming from the roof, plumbing, or is it a result of condensation? Knowing the origin is key to effective resolution.
  3. Contact Professionals: In your dream home emergency, don’t hesitate to contact professionals – roofers, plumbers, or water damage restoration experts – to assess and address the issue promptly.

Read too: Understanding and Addressing a Condensation Leak in the Ceiling: Decoding the Drip

Long-Term Solutions for a Leak-Free Dream Ceiling

Once the immediate crisis is averted, it’s essential to implement long-term solutions to ensure your dream ceiling stays dry and intact.

  1. Roof Repairs: If the leak is stemming from your dream roof, investing in timely repairs or a roof replacement is crucial for maintaining the integrity of your dream home.
  2. Plumbing Overhaul: Conduct a thorough inspection of the dream plumbing system. Repair or replace any faulty pipes, fixtures, or connections to prevent future leaks.
  3. Enhance Ventilation: Improve ventilation in your dream home to reduce condensation. Adequate airflow can prevent water droplets from forming on the ceiling and causing a dream-like illusion of a leak.

Conclusion: Turning Nightmares into Sweet Dreams

In conclusion, a dream ceiling leaking water may seem like a nightmare, but with prompt action and strategic solutions, you can turn the situation around. By understanding the causes and consequences, and implementing both immediate and long-term measures, you can safeguard your dream home from the distress of unexpected water leaks.

Don’t let a dream ceiling leak turn into a recurring nightmare. Take control of the situation, address the root causes, and enjoy a home that remains dry and dream-worthy.

Understanding and Tackling Condensation Stains on Ceiling: Decoding the Dilemma

Condensation stains on the ceiling can be a perplexing issue for homeowners, leaving unsightly marks and raising concerns about potential damage. In this comprehensive guide, we’ll delve into the world of condensation stains, exploring their causes, consequences, and effective strategies to address and prevent them.

Condensation Stains On Ceiling

Understanding Condensation Stains on Ceiling: The Silent Intruders

Condensation stains on the ceiling often manifest as discolored patches or streaks, signaling the presence of excess moisture. While the stains themselves may seem benign, the underlying causes can have far-reaching implications for your home.

Unraveling the Causes of Condensation Stains on Ceiling

Identifying the root causes of condensation stains is crucial for effective mitigation. Let’s explore the common culprits behind this issue.

  1. Poor Ventilation: Inadequate ventilation is a leading cause of condensation stains. When warm, moist air becomes trapped indoors, it can condense on cooler surfaces like ceilings, resulting in unsightly stains over time.
  2. High Humidity Levels: Elevated humidity levels contribute significantly to condensation. Homes with poor humidity control, especially in areas with high outdoor humidity, are prone to developing stains on the ceiling.
  3. Insufficient Insulation: Lack of proper insulation allows temperature differentials between indoor and outdoor environments. This temperature contrast can lead to condensation formation and subsequent staining on the ceiling.

Consequences of Ignoring Condensation Stains: Beyond Aesthetics

While the aesthetic impact of condensation stains is evident, the consequences extend beyond appearance. Ignoring these stains can lead to more significant issues, including mold growth, structural damage, and compromised indoor air quality.

Addressing Condensation Stains on Ceiling: Strategies for Success

  1. Improve Ventilation: Enhancing ventilation is a fundamental step in preventing condensation stains. Install exhaust fans, ensure proper airflow, and consider using a dehumidifier in humid climates.
  2. Control Humidity Levels: Managing indoor humidity is key to preventing condensation. Use air conditioners, dehumidifiers, or open windows to maintain optimal humidity levels.
  3. Enhance Insulation: Upgrading insulation in your home helps regulate temperature differentials, reducing the likelihood of condensation. Addressing insulation issues can be a long-term solution to prevent stains.

Preventive Measures for Long-Term Success Against Condensation Stains on Ceiling

Beyond immediate solutions, implementing preventive measures can ensure long-term success in keeping condensation stains at bay.

  1. Regular Maintenance Checks: Conduct routine inspections to identify and address potential issues before they escalate. Regular maintenance can prevent condensation stains and other related problems.
  2. Weatherization: Seal gaps, cracks, and leaks in your home’s structure to prevent outdoor air infiltration. Weatherization measures contribute to a well-insulated and moisture-resistant environment.
  3. Educating Residents: Raise awareness among household members about the importance of proper ventilation and humidity control. Encourage habits that contribute to a healthy indoor environment.

Read too: Understanding and Addressing a Condensation Leak in the Ceiling: Decoding the Drip

Conclusion: A Clear Path to a Stain-Free Ceiling

In conclusion, condensation stains on the ceiling are not just a cosmetic concern; they can be indicative of underlying issues that demand attention. By understanding the causes and consequences, homeowners can take proactive steps to address the problem and safeguard their homes from further damage.

Remember, a vigilant approach to maintenance, coupled with strategic improvements in ventilation, insulation, and humidity control, can keep condensation stains from tarnishing the beauty and integrity of your home. Don’t let condensation stains linger—take action today for a stain-free and comfortable living space.

Exploring Different Types of Ceiling Cracks and Their Causes: Unveiling the Mystery

Ceiling cracks can be a cause for concern for homeowners, signaling potential structural issues or simply cosmetic inconveniences. In this comprehensive guide, we will delve into the various types of ceiling cracks, unraveling the mysteries behind their appearance, and providing insights into their possible causes and solutions.

Types Of Ceiling Cracks

Understanding Types of Ceiling Cracks: A Closer Look

Ceiling cracks come in various forms, each telling its own story about the underlying conditions of a structure. By identifying the type of crack, homeowners can gain valuable information about the root cause and take appropriate measures.

Hairline Cracks: The Thin Red Line

Among the most common types of ceiling cracks are hairline cracks. These tiny, narrow fissures often appear due to natural settling or changes in temperature and humidity. While usually harmless, they can be aesthetically displeasing.

Settlement Cracks: When the Foundation Shifts

Settlement cracks are a more significant concern, as they indicate movement in the foundation. As a home settles over time, these cracks may appear, demanding attention to prevent further structural damage.

Stress Cracks: Signs of Structural Stress

Stress cracks are usually distinguishable by their diagonal patterns. They emerge when structural components, such as beams or supports, undergo excessive stress. Identifying and addressing the source of stress is crucial to preventing these cracks from worsening.

Spiderweb Cracks: The Intricate Web of Concern

Spiderweb cracks, also known as crazing, create a network of fine lines resembling a spider’s web. Often associated with aging materials or improper paint application, these cracks can be both a cosmetic and structural issue.

Expansion and Contraction Cracks: Weather’s Impact

In regions with extreme temperature variations, expansion and contraction cracks may develop. These cracks occur when materials expand in heat and contract in cold, causing tension that results in visible fissures.

Read too: Understanding and Addressing a Condensation Leak in the Ceiling: Decoding the Drip

Exploring Causes

Understanding the types of ceiling cracks is only part of the puzzle. To truly address the issue, it’s crucial to delve into the potential causes behind their appearance.

Common Causes of Ceiling Cracks: Unraveling the Mystery

  1. Foundation Issues: Settlement cracks often stem from problems with the foundation. Uneven settling or shifting can lead to cracks that may compromise the stability of the entire structure.
  2. Structural Stress: Stress cracks are indicative of excessive loads on structural components. Identifying and rectifying the source of stress, whether it’s inadequate support or structural design flaws, is essential.
  3. Aging Materials: Spiderweb cracks are often a result of aging materials, particularly if the ceiling is made of plaster. Over time, materials can weaken, leading to the development of intricate cracks.
  4. Temperature Fluctuations: Expansion and contraction cracks are prevalent in areas with drastic temperature changes. Proper insulation and material selection can help mitigate the impact of weather-induced cracks.

Conclusion: Addressing Types of Ceiling Cracks Effectively

In conclusion, understanding the types of ceiling cracks is pivotal for homeowners looking to maintain a safe and aesthetically pleasing living space. By identifying the specific cracks and their causes, appropriate measures can be taken to address the issue promptly.

Regular inspections, timely repairs, and proactive maintenance are key elements in preserving the structural integrity of your ceiling. Remember, when it comes to ceiling cracks, early detection and intervention can make a significant difference in preventing further damage.

Don’t let ceiling cracks jeopardize the safety and appeal of your home. Stay informed, take action, and enjoy a well-maintained living space for years to come.

Understanding and Addressing the Wet Spot on Ceiling Dilemma: Unlocking the Mystery

Have you ever noticed an unsightly wet spot on your ceiling that seemed to appear out of nowhere? If so, you’re not alone. The perplexing issue of a wet spot on the ceiling can be a cause for concern for many homeowners. In this comprehensive guide, we’ll delve into the various aspects of this phenomenon, exploring its potential causes, consequences, and effective solutions.

Wet Spot On Ceiling

Read too: Understanding and Addressing a Condensation Leak in the Ceiling: Decoding the Drip

Unveiling the Mystery:

A wet spot on the ceiling can be a disconcerting sight, leaving homeowners puzzled and anxious about potential damage to their property. This phenomenon is often an indicator of an underlying issue that requires prompt attention.

Causes of Wet Spots On Ceiling: Decoding the Culprits

  1. Roof Leaks: One of the primary culprits behind a wet spot on the ceiling is a roof leak. Whether it’s a damaged shingle, compromised flashing, or an aging roof, water infiltration can lead to persistent wet spots.
  2. Plumbing Issues: Faulty plumbing can also contribute to wet spots on the ceiling. Leaking pipes, dripping fixtures, or even a burst pipe within the walls can result in water seepage, manifesting as wet spots overhead.
  3. Condensation Concerns: In some cases, condensation may be the root cause. Poor ventilation and insulation can lead to moisture buildup, forming unsightly wet spots on the ceiling.

Consequences of Ignoring Wet Spots On Ceiling: The Price of Neglect

Ignoring a wet spot on the ceiling can have severe consequences, both structurally and aesthetically. Mold growth, compromised structural integrity, and damage to belongings are among the potential outcomes. Addressing the issue promptly is crucial to preventing further deterioration.

Addressing the Issue: Solutions for Wet Spot On Ceiling

  1. Roof Repairs: If a roof leak is identified as the source, prompt repairs are imperative. This may involve patching up damaged areas, replacing shingles, or even investing in a new roof if necessary.
  2. Plumbing Inspection and Repairs: A thorough inspection of the plumbing system is essential. Any leaks or issues should be repaired promptly to prevent further water damage and the formation of wet spots on the ceiling.
  3. Improving Ventilation: Adequate ventilation is crucial in preventing condensation-related wet spots. Installing vents, exhaust fans, or improving overall ventilation in affected areas can help mitigate the issue.

Conclusion: Taking Action Against Wet Spots On Ceiling

In conclusion, a wet spot on the ceiling is not merely a cosmetic concern; it’s a symptom of underlying issues that demand attention. By understanding the potential causes and consequences, homeowners can take proactive steps to address the problem and safeguard their homes from further damage.

Remember, a vigilant approach to maintenance and timely repairs can save you from the headaches and expenses associated with neglecting the wet spots on your ceiling. If you notice this issue in your home, don’t hesitate to investigate and take corrective action promptly.

Don’t let a wet spot on your ceiling turn into a major headache. By staying informed and addressing the root causes, you can maintain a dry, comfortable, and structurally sound home for years to come.

Troubleshooting and Addressing a Water Bubble in Ceiling: Causes and Solutions Revealed

Discovering a mysterious “Water Bubble in Ceiling” can be alarming for homeowners. Uncover the reasons behind it and explore effective solutions in this comprehensive guide. Learn how to address the issue and prevent potential water damage to your ceiling.

Water Bubble In Ceiling

Understanding the Issue – Water Bubble in Ceiling

Before delving into solutions, understanding why a water bubble forms in the ceiling is crucial. This section will provide insights into the possible causes and signs that indicate the presence of water damage in your ceiling.

Common Causes of Water Bubbles in Ceilings: A Detailed Exploration

Water bubbles can result from various issues, including leaks, plumbing problems, or roof damage. Explore the common causes such as roof leaks, burst pipes, or condensation issues that may lead to the formation of water bubbles in your ceiling.

Identifying the Source – Water Bubble in Ceiling

To effectively address the issue, identifying the source of the water bubble is essential. This part of the guide will guide you through the process of locating the source, whether it’s from the roof, plumbing, or other potential areas.

Potential Signs of Water Damage: Beyond the Visible Bubble

Water damage often extends beyond the visible water bubble. Learn to recognize additional signs such as discoloration, sagging, or peeling paint that may indicate a more extensive problem. Early detection is key to preventing further damage.

Solutions for Addressing a Water Bubble in Ceiling

Now that you’ve identified the issue, let’s explore effective solutions for addressing a water bubble in the ceiling. This section will guide you through step-by-step processes, empowering you to take corrective measures.

Immediate Actions: Mitigating Further Damage

As soon as you notice a water bubble, taking immediate actions is crucial. This part of the guide will provide a checklist of actions to mitigate further damage, including safely draining the water and protecting your belongings.

DIY Repair Strategies for Water Bubbles in Ceilings

For minor water bubbles, DIY repair strategies can be effective. Explore techniques such as puncturing the bubble, drying the affected area, and applying ceiling patches. Follow step-by-step instructions to address the issue on your own.

Professional Assistance: When to Seek Help

In some cases, seeking professional assistance is necessary, especially for extensive water damage. This section will highlight situations where contacting a professional plumber, roofer, or water damage restoration specialist is advisable.

Preventive Measures for Future Protection

After addressing the current issue, implementing preventive measures is crucial to avoid future water bubbles in the ceiling. Learn about routine maintenance, inspections, and proactive measures to protect your home from potential water damage.

Read too: Understanding and Addressing a Condensation Leak in the Ceiling: Decoding the Drip

Conclusion: Safeguarding Your Home from Water Damage

In conclusion, discovering a water bubble in the ceiling can be concerning, but armed with the knowledge from this guide, you can take proactive steps to address the issue. Whether through DIY repairs or professional assistance, safeguarding your home from water damage is essential for its longevity and your peace of mind.

Low Ceiling Attic Remodel Ideas for Your Home: Transforming Challenges into Charm: Low Ceiling Attic Remodel Ideas for Your Hom

Unleash the hidden potential of your space with a captivating journey through the possibilities of a “Low Ceiling Attic Remodel.” Discover ingenious ideas to maximize functionality and style in your home.

Low Ceiling Attic Remodel

Introduction

Often overlooked, an attic with low ceilings presents a unique canvas for creative remodeling. In this guide, we’ll explore the intricacies of a “Low Ceiling Attic Remodel,” providing insights, inspiration, and practical tips to turn constraints into opportunities. Let’s embark on a transformative journey for your home.

Elevating Spaces: Unveiling the Potential of Low Ceiling Attic Remodel

Remodeling an attic with low ceilings requires a thoughtful approach that combines aesthetics with functionality. Let’s delve into key considerations, design ideas, and expert advice to make the most of your low ceiling attic space.

*1. Strategic Lighting Solutions

Overcoming the challenge of low ceilings begins with strategic lighting. Incorporate recessed lighting, wall sconces, and pendant lights to create an illusion of height. Consider skylights or dormer windows to introduce natural light and enhance the overall ambiance.

*2. Optimizing Layout and Furniture

Selecting the right furniture and optimizing the layout is crucial in a low ceiling attic. Choose low-profile furniture with clean lines to maintain an open and airy feel. Explore built-in storage solutions to maximize space while keeping the design cohesive.

*3. Mirrors for Visual Expansion

Mirrors are a powerful tool in transforming the perception of space. Strategically place mirrors to reflect light and create the illusion of a larger, more open area. This simple yet effective trick adds depth and dimension to a low ceiling attic.

*4. Utilizing Vertical Space

Make the most of vertical space by incorporating floor-to-ceiling storage units and shelving. Customized cabinetry and bookshelves not only provide storage but also draw the eyes upward, emphasizing height rather than the limitations of low ceilings.

*5. Opting for Low-Profile Flooring

Flooring choices play a significant role in low ceiling attic remodels. Opt for low-profile flooring options such as hardwood or laminate to create a seamless flow. Light-colored rugs can add warmth without overwhelming the space.

*6. Color Palette and Patterns

Choose a light and neutral color palette to open up the room and create an airy atmosphere. Soft hues on walls and ceilings contribute to an illusion of height. Consider incorporating vertical patterns or stripes in wallpapers or decor elements to draw the eyes upward.

*7. Multi-Functional Furniture

Embrace multi-functional furniture that serves dual purposes. Foldable desks, convertible sofas, and wall-mounted tables are excellent choices for a low ceiling attic, providing versatility without compromising style.

Steps to Execute a Successful Low Ceiling Attic Remodel

  1. Professional Assessment: Seek professional advice to assess the structural integrity and potential of your attic space. Addressing any structural issues upfront ensures a safe and successful remodel.
  2. Detailed Planning: Plan the layout and design meticulously, considering the unique features and challenges of low ceilings. Prioritize functionality and aesthetic cohesion in your design.
  3. Lighting Design: Develop a lighting plan that incorporates a mix of ambient, task, and accent lighting. Experiment with different fixtures to achieve the desired ambiance.
  4. Furniture Selection: Invest time in selecting furniture that complements the scale of your attic. Custom-built or modular furniture can be tailored to fit the specific dimensions of a low ceiling space.
  5. Maximizing Storage: Explore creative storage solutions that capitalize on the available space. Customized built-ins and hidden storage can enhance both functionality and aesthetics.
  6. Ventilation and Insulation: Address ventilation and insulation needs to ensure a comfortable and energy-efficient space. Proper insulation helps regulate temperature, creating a cozy environment in all seasons.

Read too: Understanding and Eliminating Ants on the Ceiling: Unveiling the Intruders

Conclusion: Elevate Your Home with a Low Ceiling Attic Remodel

In conclusion, a “Low Ceiling Attic Remodel” is an opportunity to showcase your creativity and enhance the overall appeal of your home. By embracing strategic design choices, maximizing natural light, and prioritizing functionality, you can transform a seemingly challenging space into a unique and charming retreat.

Whether you envision a cozy reading nook, a stylish home office, or a serene bedroom, the key lies in thoughtful planning and execution. With this guide, embark on your remodeling journey with confidence, turning limitations into distinctive features that define the character of your home.