Mastering the Art of Installing T Bar Ceiling Clip for a Seamless Ceiling Solution

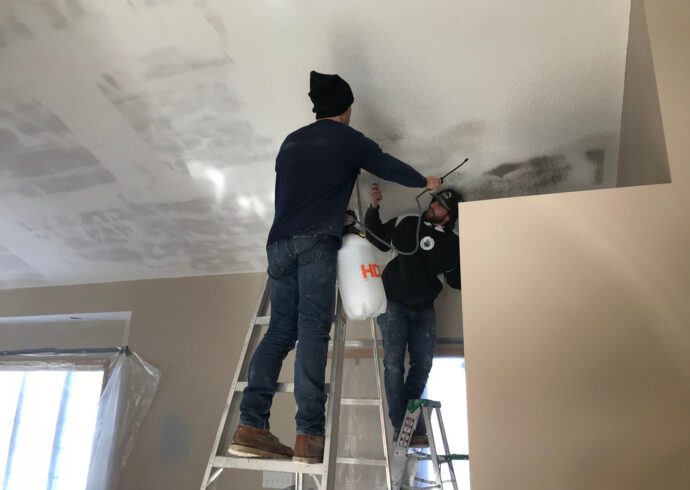
Are you looking for a hassle-free solution to install ceiling panels in your space? Look no further than T bar ceiling clip. These innovative clips offer a simple and effective way to secure ceiling panels to T bar grid systems, providing a seamless and professional finish. In this comprehensive guide, we’ll explore everything you need to know about T bar ceiling clips, from their features and benefits to installation tips and techniques.

T Bar Ceiling Clips

Understanding T Bar Ceiling Clips

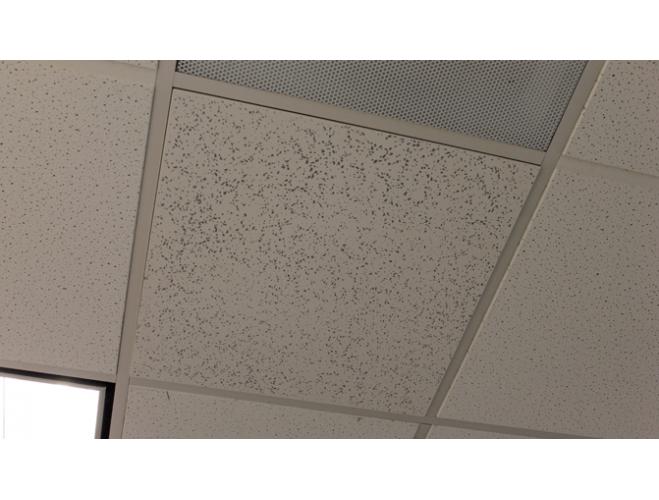
What are T Bar Ceiling Clips?

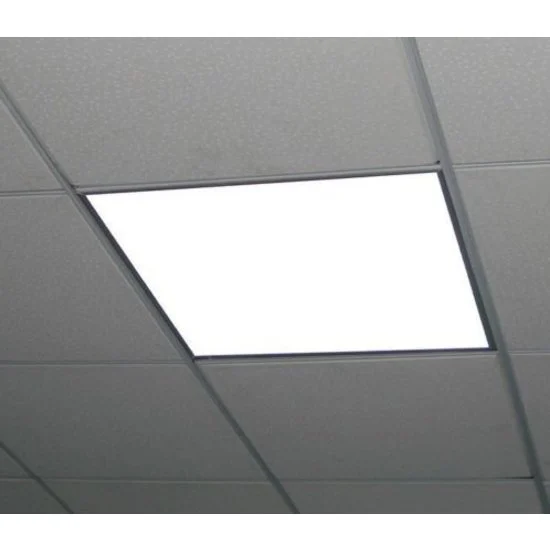
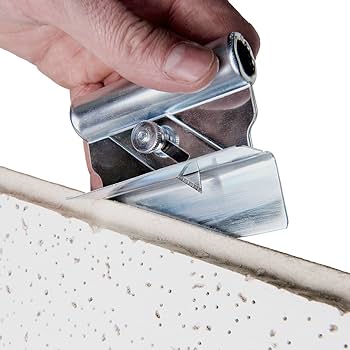
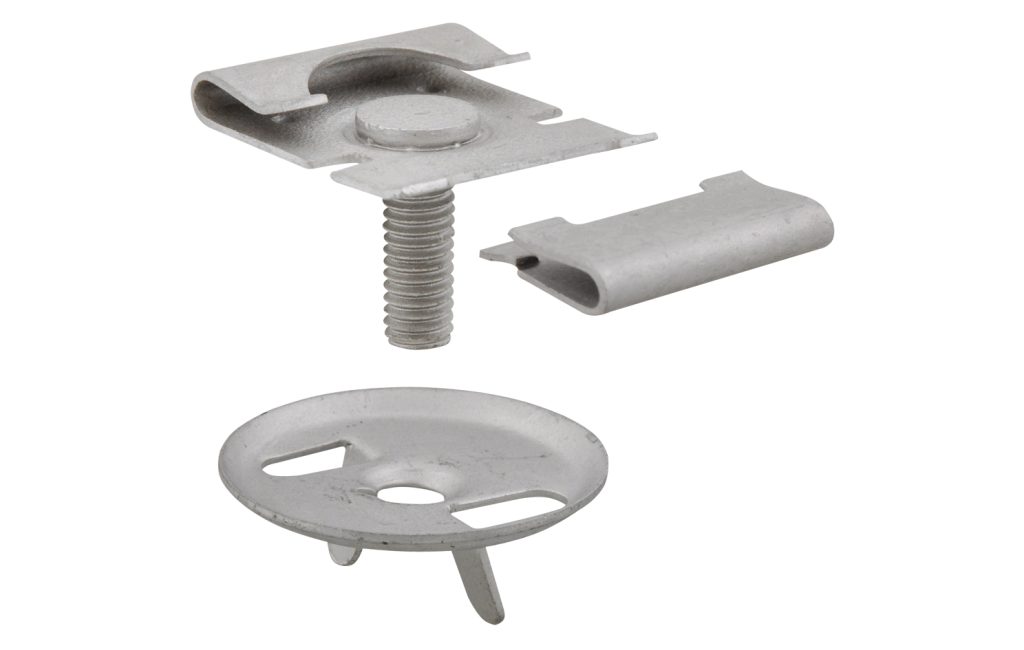
T bar ceiling clips, also known as T grid clips or T bar hangers, are metal fasteners designed to attach ceiling panels to T bar grid systems. These clips are typically made of durable materials such as steel or aluminum and feature a hook or clamp mechanism for securing the panels in place.

Key Features

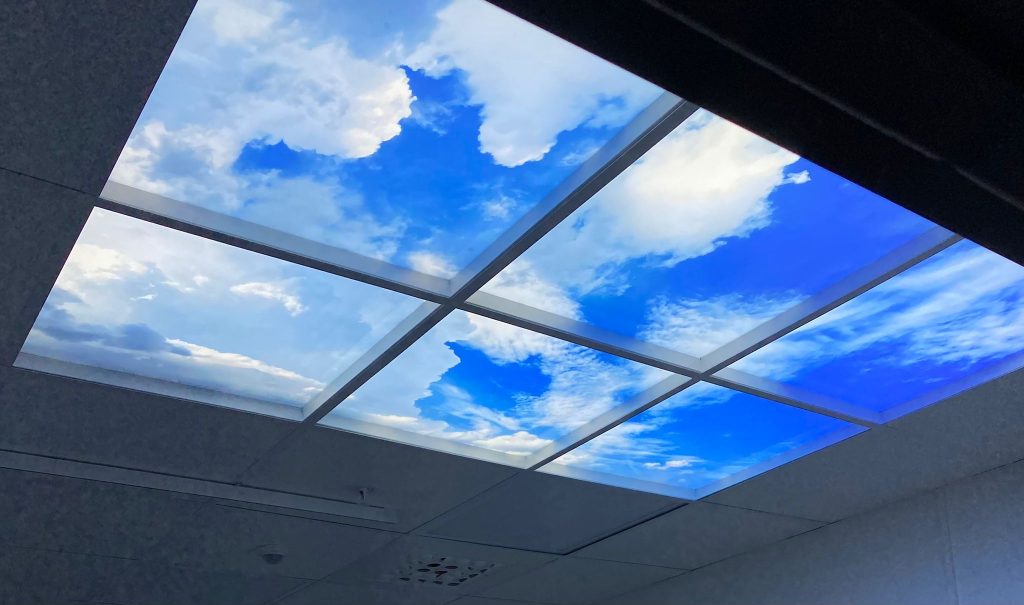
  1. Versatility: T bar ceiling clips are compatible with various types of ceiling panels, including acoustic tiles, drop-in panels, and suspended ceilings.
  2. Ease of Installation: These clips are designed for quick and easy installation, allowing you to effortlessly secure ceiling panels without the need for specialized tools or equipment.
  3. Adjustability: Many T bar ceiling clips feature adjustable settings or mechanisms, allowing for precise positioning and alignment of the ceiling panels.
  4. Durable Construction: Made of high-quality materials, T bar ceiling clips are built to withstand the rigors of installation and provide long-lasting support for ceiling panels.

Benefits of Using T Bar Ceiling Clips

1. Time Savings

T bar ceiling clips streamline the installation process, saving you time and labor compared to traditional installation methods. With their simple and intuitive design, these clips allow for quick and efficient installation of ceiling panels, reducing downtime and minimizing disruption to your space.

2. Secure Attachment

T bar ceiling clips provide a secure and stable attachment method for ceiling panels, ensuring that they remain firmly in place over time. Whether you’re installing lightweight acoustic tiles or heavier drop-in panels, these clips offer reliable support and prevent sagging or shifting.

3. Aesthetic Appeal

By eliminating the need for visible screws or fasteners, T bar ceiling clips create a clean and seamless appearance that enhances the overall aesthetic of your space. With their discreet design, these clips allow ceiling panels to blend seamlessly into the surrounding environment, providing a polished and professional finish.

Read too: Exploring the Efficiency of Radiant Ceiling Heater Electric: A Comprehensive Guide

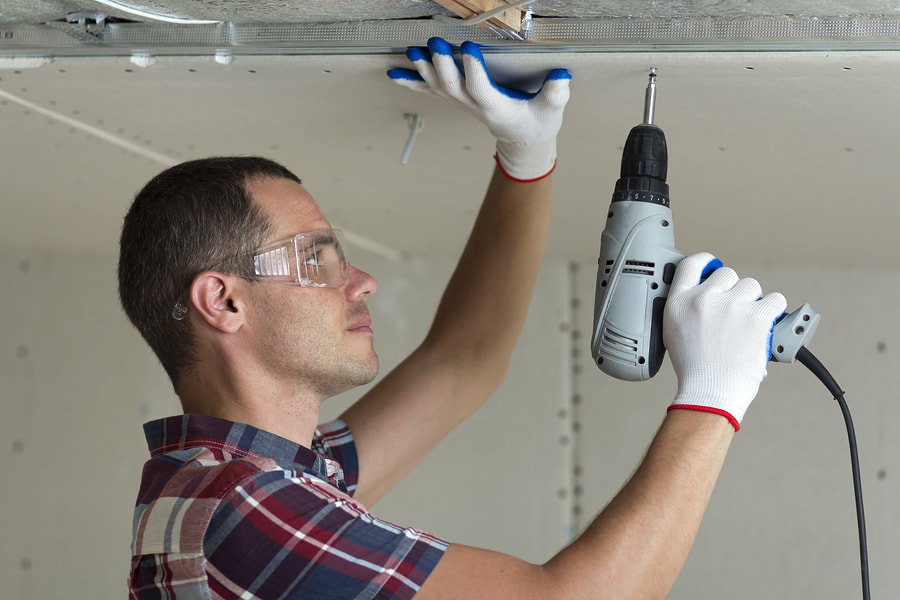
Installation Tips and Techniques

1. Prepare the T Bar Grid

Before installing T bar ceiling clips, ensure you have properly installed and leveled the T bar grid system. Make any necessary adjustments to the grid to ensure that it provides a stable foundation for the ceiling panels.

2. Position the Clips

Determine the spacing and placement of the T bar ceiling clips based on the size and layout of the ceiling panels. Position the clips evenly along the T bar grid to provide adequate support and prevent sagging or unevenness.

3. Attach the Ceiling Panels

Once the clips are in place, carefully lower the ceiling panels onto the T bar grid, ensuring that they align properly with the clips. Press down firmly on the panels to secure them in place, ensuring a snug fit and uniform appearance.

Conclusion

In conclusion, T bar ceiling clip offer a convenient and efficient solution for installing ceiling panels in a variety of spaces. With their versatility, ease of installation, and secure attachment, these clips provide a seamless and professional finish that enhances the aesthetic appeal of any room. Whether you’re renovating a commercial space or updating your home, T bar ceiling clips are a must-have accessory for achieving a polished and professional ceiling installation.

Enhance Your Space with Modern Suspended Ceiling LED Panels

Are you looking to elevate the ambiance of your space while improving its functionality? Consider incorporating suspended ceiling LED panels into your interior design. These modern lighting fixtures offer a sleek and efficient solution for illuminating various indoor environments, from offices and commercial spaces to residential settings. In this article, we’ll delve into the features, benefits, and installation considerations of suspended ceiling LED panels, helping you make an informed decision about integrating them into your space.

Suspended Ceiling Led Panels

Exploring Suspended Ceiling LED Panels

Understanding the Basics

Suspended ceiling LED panels, also known as drop ceiling or recessed ceiling panels, are lighting fixtures that are designed to be installed into a suspended grid ceiling system. These panels are typically thin and lightweight, making them easy to install and providing a seamless integration into the ceiling.

Key Features

  1. Energy Efficiency: LED technology used in suspended ceiling panels is highly energy-efficient, consuming significantly less power than traditional lighting sources while providing bright and uniform illumination.
  2. Slim Profile: Suspended ceiling LED panels have a slim profile, allowing them to be seamlessly integrated into the ceiling without protruding or creating visual clutter.
  3. Uniform Light Distribution: LED panels distribute light evenly across the entire surface, eliminating harsh shadows and glare for a more comfortable and visually appealing environment.
  4. Long Lifespan: LED lights have a longer lifespan compared to traditional lighting sources, reducing the need for frequent bulb replacements and maintenance.

Read too: Exploring the Efficiency of Radiant Ceiling Heater Electric: A Comprehensive Guide

Benefits of Suspended Ceiling LED Panels

1. Enhanced Aesthetics

Suspended ceiling LED panels add a modern and sophisticated touch to any space, enhancing its overall aesthetics and ambiance. Whether used in commercial lobbies, office spaces, or residential kitchens, these panels can elevate the visual appeal of the environment.

2. Energy Savings

LED technology used in suspended ceiling panel consumes less energy than traditional lighting sources, resulting in lower electricity bills and reduced environmental impact. Switching to LED lighting can lead to significant cost savings over time.

3. Improved Productivity

Well-lit environments have been shown to improve productivity and concentration levels. By providing bright and uniform illumination, suspended ceiling LED panel create a conducive environment for work, study, and other activities that require focus and attention to detail.

Installation Considerations

1. Ceiling Height

Before installing suspended ceiling LED panel, consider the height of your ceiling. Panels with a lower profile are ideal for spaces with limited ceiling height, while larger panels may be better suited for rooms with higher ceilings.

2. Electrical Wiring

Ensure that your space has adequate electrical wiring and access points for installing the LED panels. Consult a qualified electrician to assess the wiring requirements and ensure compliance with building codes and safety regulations.

3. Compatibility with Ceiling Grid

Check the compatibility of the LED panels with your existing ceiling grid system. Most panels are designed to fit standard grid sizes, but it’s essential to verify compatibility before making a purchase.

Conclusion

In conclusion, suspended ceiling LED panel offer a versatile and efficient lighting solution for a wide range of indoor environments. With their sleek design, energy efficiency, and uniform light distribution, these panels can enhance the aesthetics, functionality, and comfort of any space. Whether used in commercial settings or residential homes, suspended ceiling LED panel are sure to make a lasting impression.

Elevate Your Décor with the Stylish Sonnet Satin Brass Ceiling Fan With Acrylic Blades

Are you looking to add a touch of sophistication to your home’s interior? Look no further than the stunning Sonnet Satin Brass Ceiling Fan With Acrylic Blades. This stylish and functional ceiling fan combines timeless design with modern features, making it the perfect choice for any contemporary living space. In this article, we’ll explore the features, benefits, and installation tips for the Sonnet Satin Brass Ceiling Fan With Acrylic Blades, helping you elevate your home décor to new heights.

Sonnet Satin Brass Ceiling Fan With Acrylic Blades

Introducing the Sonnet Satin Brass Ceiling Fan With Acrylic Blades

Sophisticated Design

The Sonnet Satin Brass Ceiling Fan boasts a sleek and elegant design that effortlessly enhances any room’s aesthetic. The satin brass finish adds a touch of luxury, while the acrylic blades offer a modern twist, creating a striking focal point in any space.

Powerful Performance

Don’t let its stylish appearance fool you—the Sonnet Ceiling Fan is also a powerhouse when it comes to performance. With its powerful motor and efficient blade design, this fan delivers optimal airflow to keep your home cool and comfortable year-round.

Quiet Operation

Say goodbye to noisy, disruptive ceiling fans. The Sonnet Ceiling Fan operates quietly and smoothly, allowing you to enjoy the gentle breeze without any distracting background noise. Whether you’re relaxing in the living room or getting a good night’s sleep in the bedroom, this fan ensures a peaceful environment.

Read too: Exploring the Efficiency of Radiant Ceiling Heater Electric: A Comprehensive Guide

Key Features of the Sonnet Satin Brass Ceiling Fan With Acrylic Blades

1. Acrylic Blades

The Sonnet Ceiling Fan features acrylic blades that are not only stylish but also durable and easy to clean. The sleek, clear blades complement the satin brass finish, creating a modern look that complements a variety of interior styles.

2. Remote Control Operation

Conveniently control the fan speed and lighting settings with the included remote control. Adjust the fan speed to your desired level or dim the lights to create the perfect ambiance for any occasion—all from the comfort of your couch or bed.

3. Integrated LED Light Kit

Illuminate your space with the integrated LED light kit, which provides energy-efficient lighting and enhances the fan’s overall appeal. The dimmable LED lights allow you to customize the brightness to suit your preferences, whether you’re entertaining guests or enjoying a quiet evening at home.

Installation Tips

1. Choose the Right Location

Select a central location in the room for optimal airflow and aesthetics. Avoid installing the fan too close to walls or obstructions, as this can impede airflow and reduce performance.

2. Follow the Manufacturer’s Instructions

Carefully read and follow the manufacturer’s instructions for installation to ensure proper mounting and wiring. If you’re unsure about any aspect of the installation process, consult a qualified electrician for assistance.

3. Balance the Blades

After installing the fan, use a balancing kit to ensure that the blades are properly aligned and balanced. This will prevent wobbling and ensure smooth, quiet operation.

Conclusion

In conclusion, the Sonnet Satin Brass Ceiling Fan With Acrylic Blades is a stylish and functional addition to any modern home. With its sophisticated design, powerful performance, and convenient features, this fan is sure to enhance your home décor while keeping you cool and comfortable. Invest in the Sonnet Ceiling Fan today and enjoy years of reliable, elegant airflow in your living space.

Everything You Need to Know About Sky Panel Ceiling Light: Illuminating Your Space

Have you ever considered upgrading your home’s lighting with a Sky Panel Ceiling Light? These innovative fixtures offer a unique blend of functionality and aesthetics, transforming any space into a beautifully illuminated environment. In this comprehensive guide, we’ll explore everything you need to know about Sky Panel Ceiling Light fixtures, from their design and installation to their benefits and applications.

Sky Panel Ceiling Light

Exploring the Features of Sky Panel Ceiling Light

What is a Sky Panel Ceiling Light?

A Sky Panel Ceiling Lights is a type of LED lighting fixture designed to mimic the appearance of a skylight or natural daylight. These panels are typically installed flush with the ceiling and feature a slim profile, making them an ideal choice for both residential and commercial applications.

Key Features

  1. Ultra-Thin Design: Sky Panel Ceiling Lights are known for their sleek and slim design, allowing them to blend seamlessly into any ceiling surface without protruding or creating visual clutter.
  2. Customizable Light Temperature: Many Sky Panel Ceiling Lights offer adjustable color temperature settings, allowing users to customize the ambiance of their space from warm, cozy tones to cool, daylight-inspired hues.
  3. Energy Efficiency: LED technology ensures that Sky Panel Ceiling Lights are energy-efficient, consuming significantly less power than traditional lighting sources while providing ample illumination.
  4. Even Light Distribution: Sky Panel Ceiling Lights are designed to provide uniform light distribution across the entire panel surface, eliminating harsh shadows and glare for a more comfortable and visually pleasing environment.

Benefits of Sky Panel Ceiling Light

1. Enhanced Ambiance

Sky Panel Ceiling Lights create a soft, diffused light that mimics natural daylight, promoting a sense of well-being and comfort in any space. Whether used in residential living areas or commercial settings, these fixtures can enhance the ambiance and atmosphere of the room.

2. Energy Efficiency

LED technology used in Sky Panel Ceiling Lights consumes less energy than traditional lighting sources, resulting in lower electricity bills and reduced environmental impact. Additionally, LED lights have a longer lifespan, reducing the need for frequent bulb replacements.

3. Versatility

Sky Panel Ceiling Lights are available in various sizes, shapes, and color temperatures, allowing for versatile applications in different settings. Whether used as primary lighting in a living room or as decorative accent lighting in a hallway, these fixtures can adapt to various design preferences and requirements.

Applications of Sky Panel Ceiling Lights

1. Residential Settings

In homes, people use Sky Panel Ceiling Lights in living rooms, bedrooms, kitchens, and bathrooms to provide general illumination or create focal points. You can also install them in areas with limited natural light to simulate the appearance of a skylight and brighten up the room.

2. Commercial Spaces

In commercial settings such as offices, retail stores, and hospitality venues, Sky Panel Ceiling Lights can enhance the aesthetics of the space while providing efficient and comfortable lighting for employees and customers. These fixtures are also popular choices for conference rooms, lobbies, and reception areas.

Installation and Maintenance

Installation

Installing a Sky Panel Ceiling Light typically requires basic electrical wiring knowledge and tools. Most fixtures come with mounting hardware and instructions for easy installation onto standard ceiling surfaces. However, we recommend consulting a qualified electrician for proper installation and wiring to ensure safety and compliance with building codes.

Read too: Exploring the Efficiency of Radiant Ceiling Heater Electric: A Comprehensive Guide

Maintenance

Sky Panel Ceiling Lights are relatively low-maintenance fixtures, requiring occasional cleaning to remove dust and debris buildup from the panel surface. Regular cleaning with a soft, damp cloth can help maintain optimal light output and prolong the lifespan of the fixture.

Conclusion

In conclusion, Sky Panel Ceiling Lights offer a stylish, energy-efficient lighting solution for homes, offices, and commercial spaces alike. With their sleek design, customizable features, and versatility, these fixtures can elevate the ambiance and functionality of any room while reducing energy consumption and maintenance costs. Whether used as primary lighting or decorative accents, Sky Panel Ceiling Lights are sure to make a lasting impression in any environment.

Discover the Timeless Elegance of Old World Ceiling Fans: Adding Charm and Comfort to Your Home

In the realm of home décor, certain elements possess a timeless appeal that transcends trends and fads. Old World Ceiling Fans are one such feature, exuding charm, elegance, and functionality that have stood the test of time. Let’s delve into the allure of these classic fixtures and explore how they can add character and comfort to your home.

Old World Ceiling Fans

The Timeless Appeal of Old World Ceiling Fans

Old World Ceiling Fans evoke a sense of nostalgia and romance, harkening back to a bygone era of elegance and refinement. With their ornate designs, rich finishes, and intricate details, these ceiling fans serve as both functional fixtures and exquisite works of art, elevating the aesthetic of any room they adorn.

Key Features of Old World Ceiling Fans

  1. Vintage Design: Old World Ceiling Fans are characterized by their vintage-inspired designs, which often feature decorative accents such as intricate scrollwork, filigree detailing, and vintage-inspired finishes like aged bronze or weathered wood.
  2. Quality Craftsmanship: Crafted with attention to detail and quality materials, Old World Ceiling Fans are built to last. From solid wood blades to sturdy metal housings, these fans are designed to withstand the test of time while maintaining their beauty and performance.
  3. Versatility: Despite their vintage-inspired aesthetic, Old World Ceiling Fans come in a variety of styles and sizes to suit different décor preferences and room sizes. Whether you prefer a rustic farmhouse look or a more traditional European vibe, there’s a ceiling fan to complement your design aesthetic.
  4. Comfort and Efficiency: In addition to their aesthetic appeal, Old World Ceiling Fans provide practical benefits such as improved air circulation, enhanced comfort, and energy efficiency. By circulating air throughout the room, these fans help maintain a comfortable temperature year-round while reducing the need for heating and cooling.

Choosing the Right Old World Ceiling Fan

When selecting an Old World Ceiling Fan for your home, consider the following factors:

  • Size: Choose a fan size that is appropriate for the room dimensions. For larger rooms, opt for fans with longer blades and higher airflow capacity, while smaller rooms may require more compact fan designs.
  • Style: Select a fan style that complements your existing décor and design aesthetic. Whether you prefer a classic, ornate look or a more understated design, there’s an Old World Ceiling Fan to suit every taste.
  • Features: Look for features such as adjustable speed settings, reversible blades, and integrated lighting options to customize your fan to meet your specific needs and preferences.

Installation and Maintenance

Installing an Old World Ceiling Fan is a relatively straightforward process that can be completed by DIY enthusiasts or professional electricians. However, it’s essential to follow the manufacturer’s instructions carefully and ensure proper mounting and wiring for safe and efficient operation.

To maintain your Old World Ceiling Fan’s beauty and performance, periodically clean the blades and housing with a soft, damp cloth to remove dust and debris. Lubricate moving parts as needed and replace any worn or damaged components to keep your fan running smoothly for years to come.

Read too: Flush Mount Rustic Ceiling Lights: Illuminate Your Space with Stunning

Conclusion

Old World Ceiling Fans are more than just functional fixtures; they’re timeless design elements that add character, charm, and comfort to any home. With their vintage-inspired aesthetic, quality craftsmanship, and practical benefits, these fans are a stylish and functional addition to any room.

Whether you’re renovating a historic home or simply looking to infuse your space with Old World charm, consider incorporating an Old World Ceiling Fan into your décor for a touch of timeless elegance and comfort that will never go out of style.

Enhance Your Home with Stunning Oak Beams for Ceiling: Timeless Elegance and Durability

When it comes to home renovation and interior design, the ceiling often plays a pivotal role in defining the overall aesthetic and ambiance of a space. One element that can truly transform a ceiling and elevate the style of any room is the use of oak beams. Oak beams for ceiling installations bring a sense of timeless elegance, warmth, and durability that is unmatched by other materials.

Oak Beams For Ceiling

Why Choose Oak Beams for Ceiling?

  1. Natural Beauty: Oak beams exude natural beauty and character with their rich grain patterns, warm tones, and rustic appeal. They add a sense of warmth and coziness to any room, making them particularly popular in traditional and farmhouse-style homes.
  2. Durability: Oak is renowned for its exceptional durability and longevity. Oak beams for ceiling installations are sturdy and resistant to warping, cracking, and rotting, ensuring they stand the test of time and maintain their beauty for generations to come.
  3. Versatility: Whether you’re aiming for a rustic, traditional, or contemporary look, oak beams complement a variety of interior styles and architectural designs. They can be used to create rustic exposed beam ceilings, add architectural interest to vaulted ceilings, or frame focal points such as fireplaces and kitchen islands.
  4. Environmental Sustainability: Oak beams are a sustainable choice for environmentally-conscious homeowners. Oak is a slow-growing hardwood that is harvested from responsibly managed forests, making it a renewable and eco-friendly building material.

Installing Oak Beams for Ceiling

Installing oak beams for ceiling applications requires careful planning and precision to ensure a seamless and visually appealing result. Here are some key considerations:

  • Structural Integrity: Consult with a structural engineer or contractor to assess the load-bearing capacity of your ceiling and determine the appropriate size and spacing for the oak beams.
  • Installation Method: Oak beams can be installed using various methods, including direct mounting to ceiling joists, suspended from ceiling brackets, or integrated into a dropped ceiling grid. The chosen method will depend on the specific design goals and structural requirements of the project.
  • Finishing Touches: Depending on the desired aesthetic, oak beams can be left unfinished for a natural, rustic look, or they can be stained, painted, or sealed to enhance their appearance and protect them from moisture and wear.

Read too: Flush Mount Rustic Ceiling Lights: Illuminate Your Space with Stunning

Maintaining Oak Beams

Proper maintenance is essential to preserve the beauty and integrity of oak beams for ceilings installations. Here are some tips for caring for your oak beams:

  • Regularly dust the beams with a soft, dry cloth to remove surface dirt and debris.
  • Avoid using harsh chemicals or abrasive cleaners, as they can damage the wood finish.
  • Periodically inspect the beams for signs of damage or wear, such as cracks, splits, or insect infestations, and address any issues promptly to prevent further damage.

Conclusion

Oak beams for ceilings installations are a timeless choice that adds charm, character, and sophistication to any home. With their natural beauty, durability, and versatility, oak beams have long been favored by homeowners and designers alike for their ability to enhance the architectural interest and overall aesthetic of a space.

Whether you’re renovating a historic farmhouse, building a modern retreat, or simply looking to add warmth and character to your home, consider incorporating oak beams into your ceiling design for a truly timeless and elegant look that will stand the test of time.

Nordic Flush Mount Ceiling Light: A Stylish Lighting Solution for Modern Homes

In the realm of interior design, lighting serves as the cornerstone of ambiance and functionality. Among the myriad of lighting options available, Nordic Flush Mount Ceiling Light stand out for their sleek design, versatility, and ability to effortlessly elevate any space.

Nordic Flush Mount Ceiling Light

What are Nordic Flush Mount Ceiling Lights?

Nordic Flush Mount Ceiling Lights, also known as Scandinavian flush mount fixtures, are characterized by their minimalist yet elegant design. These fixtures are installed directly onto the ceiling, creating a seamless look that complements various interior styles, from Scandinavian to modern and minimalist designs.

Why Choose Nordic Flush Mount Ceiling Lights?

  1. Minimalist Aesthetics: Nordic Flush Mount Ceiling Lights boast clean lines and simple shapes, adding a touch of sophistication to any room without overwhelming the space.
  2. Space-Saving Design: Unlike pendant or chandelier lights that hang from the ceiling, flush mount fixtures sit close to the ceiling, making them ideal for rooms with low ceilings or limited space.
  3. Versatility: Whether you’re illuminating a bedroom, living room, kitchen, or hallway, Nordic Flush Mount Ceiling Lights blend seamlessly with any décor style, offering both ambient and task lighting where needed.
  4. Energy Efficiency: Many Nordic Flush Mount Ceiling Lights feature LED technology, providing ample illumination while consuming less energy compared to traditional incandescent bulbs, resulting in lower electricity bills and reduced environmental impact.

Choosing the Right Nordic Flush Mount Ceiling Light

When selecting a Nordic Flush Mount Ceiling Light for your space, consider the following factors:

  • Size: Ensure the fixture’s dimensions are proportionate to the room size. Opt for larger fixtures in spacious areas and smaller ones for more intimate spaces.
  • Finish: Choose a finish that complements existing décor elements, such as brushed nickel, matte black, or brass, for a cohesive look.
  • Light Output: Determine the desired level of brightness for the room and select a fixture with appropriate lumens and color temperature.

Read too: Flush Mount Rustic Ceiling Lights: Illuminate Your Space with Stunning

Installation and Maintenance

Installing a Nordic Flush Mount Ceiling Light is relatively straightforward and typically requires basic electrical wiring knowledge. However, if you’re unsure, it’s best to hire a licensed electrician to ensure proper installation and safety.

To maintain the fixture’s pristine appearance, regularly dust the surface with a soft, dry cloth. Avoid using abrasive cleaners or harsh chemicals that may damage the finish.

Conclusion

Nordic Flush Mount Ceiling Lights offer a perfect blend of form and function, adding a touch of contemporary elegance to any space. With their minimalist design, versatility, and energy-efficient features, these fixtures are an excellent choice for modern homes seeking stylish and practical lighting solutions.

Illuminate your home with the timeless beauty of Nordic Flush Mount Ceiling Lights and transform your living spaces into inviting retreats filled with warmth and ambiance.

Exploring Nautical Themed Ceiling Fan for Your Coastal Retreat: Setting Sail in Style

Are you dreaming of bringing the serene beauty of the ocean into your home? Explore the charm and elegance of nautical themed ceiling fans and discover how these stylish fixtures can transform any space into a coastal oasis. From classic designs to modern interpretations, nautical themed ceiling fan offer both functionality and aesthetic appeal for your seaside-inspired décor.

Nautical Themed Ceiling Fans

Anchoring Your Space with Nautical Themed Ceiling Fans

Embracing Coastal Vibes

Nautical themed ceiling fan capture the essence of seaside living, evoking images of sandy shores, crashing waves, and gentle sea breezes. These fans are designed to complement coastal décor themes, bringing a sense of tranquility and relaxation to any room in your home.

Classic and Timeless Designs

One of the defining features of nautical themed ceiling fans is their classic and timeless designs. Inspired by maritime elements such as ship wheels, compasses, and sailboat sails, these fans often feature unique details that pay homage to the seafaring lifestyle. Whether you prefer a vintage-inspired look or a more contemporary design, there’s a nautical themed ceiling fan to suit your taste.

Durable Materials for Coastal Living

Living by the coast comes with its own set of challenges, including exposure to salt air and humidity. Nautical themed ceiling fans are crafted from durable materials such as stainless steel, bronze, and weather-resistant finishes that are designed to withstand the elements. This ensures that your fan will maintain its beauty and functionality for years to come, even in harsh coastal environments.

Versatile Lighting Options

In addition to their cooling capabilities, many nautical themed ceiling fans also feature built-in lighting options. From integrated LED lights to vintage-inspired lanterns, these fixtures offer versatile lighting solutions that enhance both the style and functionality of your space. Whether you’re illuminating a seaside-inspired living room or a coastal-themed bedroom, nautical themed ceiling fans provide the perfect finishing touch.

Exploring the Features

Weatherproof Construction

Nautical themed ceiling fans are designed with weatherproof construction to withstand the rigors of coastal living. Featuring finishes resistant to rust and crafted from durable materials, these fans actively endure in outdoor environments, rendering them ideal for covered porches, patios, and gazebos.

Reversible Blades

Many nautical themed ceiling fans come equipped with reversible blades, allowing you to customize the look of your fan to suit your décor preferences. Choose from weathered wood finishes for a rustic coastal vibe or crisp white blades for a more contemporary look. With reversible blades, you can easily change the appearance of your fan to complement your changing décor.

Remote Control Operation

For added convenience, some nautical themed ceiling fans come with remote control operation, allowing you to adjust the fan speed and lighting settings from anywhere in the room. This makes it easy to create the perfect ambiance for any occasion, whether you’re entertaining guests or relaxing with a good book.

Read too: Flush Mount Rustic Ceiling Lights: Illuminate Your Space with Stunning

Elevate Your Coastal Retreat with Nautical Themed Ceiling Fans

From seaside cottages to beachfront condos, nautical themed ceiling fans add a touch of coastal charm to any space. With their classic designs, durable construction, and versatile features, these fans are the perfect addition to your seaside-inspired décor.

The Beauty of Murano Glass Ceiling Light Fixtures: Unveiling Elegance

Are you ready to elevate the ambiance of your space with exquisite lighting? Dive into the world of Murano glass ceiling light fixtures and experience the unparalleled beauty and craftsmanship of these stunning pieces. From intricate chandeliers to sleek pendant lights, Murano glass fixtures add a touch of luxury to any room.

Murano Glass Ceiling Light Fixtures

Exploring the Timeless Beauty of Murano Glass Ceiling Light Fixtures

The Art of Murano Glassmaking

For centuries, Murano glassmakers have been revered for their mastery of the craft. Each Murano glass ceiling light fixture is a testament to their skill and artistry, handcrafted using traditional techniques that have been passed down through generations. From delicate blown glass to intricate patterns, these fixtures are truly works of art.

Exquisite Designs and Patterns

Murano glass ceiling light fixtures are known for their exquisite designs and intricate patterns. From classic floral motifs to contemporary geometric shapes, each fixture is a unique expression of elegance and sophistication. Whether you prefer a traditional or modern aesthetic, there’s a Murano glass fixture to suit your style.

Luxurious Materials and Finishes

In addition to their exceptional craftsmanship, Murano glass ceiling light fixtures are prized for their use of luxurious materials and finishes. From vibrant colored glass to shimmering gold accents, these fixtures are made from the finest materials available, ensuring both beauty and durability.

Read too: Flush Mount Rustic Ceiling Lights: Illuminate Your Space with Stunning

Versatile Lighting Options

Murano glass ceiling light fixtures offer versatile lighting options to suit any space and style. Whether you’re looking to make a statement with a dazzling chandelier or create a cozy ambiance with a pendant light, there’s a Murano glass fixture that will enhance the beauty of your home.

The Features

Chandelier Elegance

Murano glass chandeliers are the epitome of luxury and sophistication. Featuring cascading tiers of hand-blown glass and sparkling crystal accents, these fixtures create a stunning focal point in any room. Whether you’re illuminating a grand dining room or a chic entryway, a Murano glass chandelier adds instant elegance to your space.

Pendant Perfection

Murano glass pendant lights are perfect for adding a touch of glamour to any space. Available in a variety of shapes and sizes, these fixtures feature hand-blown glass shades that diffuse light beautifully, creating a warm and inviting ambiance. Hang a single pendant over a kitchen island or group several together for a dramatic lighting display.

Flush Mount Sophistication

For spaces with lower ceilings, Murano glass flush mount fixtures offer a sleek and sophisticated lighting solution. These fixtures feature hand-blown glass shades that sit flush against the ceiling, providing ample illumination without taking up valuable space. Perfect for hallways, bedrooms, and bathrooms, flush mount fixtures add a touch of luxury to any room.

Elevate Your Space with Murano Glass Ceiling Light Fixtures

From dazzling chandeliers to sleek pendant lights, Murano glass ceiling lights fixtures add a touch of luxury and sophistication to any space. With their exquisite craftsmanship, versatile designs, and timeless beauty, these fixtures are sure to make a statement in your home.

Elevate Your Outdoor Space with Stylish Quorum Outdoor Ceiling Fans

When it comes to creating a comfortable and inviting outdoor living space, few elements are as essential as a reliable ceiling fan. Not only do outdoor ceiling fans provide much-needed ventilation on warm days, but they also add a touch of style and sophistication to any patio, deck, or porch area. In this article, we’ll explore the world of Quorum outdoor ceiling fans and discover how they can elevate your outdoor experience.

Quorum Outdoor Ceiling Fans

Introducing Quorum Outdoor Ceiling Fans

Quorum International is renowned for its exceptional quality and innovative designs in the ceiling fan industry. Their outdoor ceiling fans are no exception, combining functionality with aesthetic appeal to create the perfect addition to any outdoor setting. Whether you’re looking for a fan to cool down your covered porch or to complement your outdoor dining area, Quorum has a wide range of options to suit your needs.

Why Choose Quorum Outdoor Ceiling Fans?

  1. Durability: Quorum outdoor ceiling fans are built to withstand the elements, with durable materials that can withstand exposure to sunlight, rain, and humidity.
  2. Performance: These fans are equipped with powerful motors and well-designed blades to provide efficient airflow, keeping you cool and comfortable even on the hottest days.
  3. Style Options: From sleek and modern designs to rustic and traditional styles, Quorum offers a diverse selection of outdoor ceiling fans to complement any outdoor decor scheme.
  4. Convenience: Many Quorum outdoor ceiling fans come with convenient features such as remote controls, reversible motor settings, and integrated lighting options for added convenience and versatility.

Installing Your Quorum Outdoor Ceiling Fan

Installing a Quorum outdoor ceiling fan is a straightforward process that can typically be completed in just a few hours with basic tools. Before you begin, be sure to read the manufacturer’s instructions carefully and follow all safety guidelines. Here are some general steps to guide you through the installation process:

  1. Choose the Right Location: Select a suitable location for your outdoor ceiling fan, ensuring that there is sufficient clearance and support for the fan.
  2. Mounting: Depending on the type of ceiling you have (e.g., flat ceiling, sloped ceiling, or angled ceiling), you may need to use a different mounting bracket or adapter to secure the fan in place.
  3. Wiring: Carefully wire the fan according to the manufacturer’s instructions, making sure to connect the wires securely and safely.
  4. Attachment: Attach the fan blades to the motor housing using the provided screws, ensuring that they are evenly spaced and securely fastened.
  5. Testing: Once the installation is complete, test the fan to ensure that it is operating correctly and that all functions are working as intended.

Read too: Elevate Your Home Décor with Exquisite Japanese Style Ceiling Lamp Designs

Conclusion

Quorum outdoor ceiling fans are a stylish and practical addition to any outdoor space, providing comfort, style, and functionality in one convenient package. Whether you’re lounging on your patio, hosting a backyard barbecue, or enjoying a quiet evening under the stars, a Quorum outdoor ceiling fan can help you make the most of your outdoor oasis.

Understanding the Benefits of Qmark Radiant Ceiling Panel for Efficient Heating

In the realm of heating solutions, Qmark Radiant Ceiling Panel have emerged as a top choice for both residential and commercial applications. These innovative panels offer a range of benefits, from energy efficiency to superior comfort. Let’s delve into the world of Qmark Radiant Ceiling Panels to understand how they work and why they’re gaining popularity among property owners.

Qmark Radiant Ceiling Panels

Understanding Qmark Radiant Ceiling Panels

Qmark Radiant Ceiling Panels emit radiant heat from the ceiling downward to provide efficient and uniform heating. Unlike traditional heating systems that rely on forced-air circulation, radiant heating operates by transferring heat directly to objects and occupants in the room, creating a comfortable and consistent temperature.

How Qmark Radiant Ceiling Panels Work

Qmark Radiant Ceiling Panels consist of electric heating elements encased in a high-quality insulation material. When electricity flows through the heating elements, they generate infrared radiation, which heats up the surface of the panels. This heat is then radiated downward, warming the surrounding objects and occupants in the room.

Read too: Elevate Your Home Décor with Exquisite Japanese Style Ceiling Lamp Designs

Benefits

  1. Energy Efficiency: Qmark Radiant Ceiling Panels operate on electricity, eliminating the need for fossil fuels and reducing energy consumption compared to traditional heating systems.
  2. Comfort: Radiant heating provides consistent warmth without the noise, drafts, or fluctuations associated with forced-air systems, creating a comfortable environment for occupants.
  3. Space-saving Design: Qmark Radiant Ceiling Panels are installed flush with the ceiling, freeing up valuable floor space and allowing for flexible room layout and design.
  4. Zoned Heating: With individual control options for each panel, Qmark Radiant Ceiling Panels enable zoned heating, allowing users to adjust the temperature of specific areas according to their preferences.
  5. Quiet Operation: Unlike forced-air systems that rely on blowers and fans, Qmark Radiant Ceiling Panels operate silently, contributing to a peaceful and quiet indoor environment.

Applications of Qmark Radiant Ceiling Panels

  • Residential Spaces: Qmark Radiant Ceiling Panels are ideal for heating bedrooms, living rooms, kitchens, and other areas in residential homes, providing efficient and comfortable warmth.
  • Commercial Buildings: From offices and retail spaces to restaurants and healthcare facilities, Qmark Radiant Ceiling Panels offer a versatile heating solution for various commercial applications.
  • Industrial Settings: Qmark Radiant Ceiling Panels are also suitable for industrial environments such as warehouses, workshops, and manufacturing facilities, providing localized heating where needed.

Conclusion

Qmark Radiant Ceiling Panel offer a modern and efficient heating solution for residential, commercial, and industrial spaces. With their energy efficiency, comfort, and versatility, these panels provide an excellent alternative to traditional heating systems. Consider installing Qmark Radiant Ceiling Panels to enjoy efficient and uniform heating in your space.

Illuminate Your Outdoor Space with Stylish Porch Ceiling Light

Are you looking to elevate the look and feel of your outdoor space? Explore our guide to porch ceiling light outdoor for inspiration and practical advice on creating a welcoming atmosphere for your porch area.

Porch Ceiling Lights Outdoor

Enhancing Your Outdoor Experience with Porch Ceiling Lights Outdoor

Outdoor lighting plays a crucial role in creating a warm and inviting atmosphere for your porch or patio area. Porch ceiling lights outdoor not only provide illumination but also add style and charm to your outdoor décor. Here’s why investing in porch ceiling lights outdoor is a smart choice:

  • Enhanced Safety: Proper lighting helps prevent accidents and provides visibility for navigating outdoor spaces, especially during nighttime.
  • Extended Use: With the right lighting, you can enjoy your outdoor space well into the evening, whether you’re entertaining guests or simply relaxing outdoors.
  • Aesthetic Appeal: Porch ceiling lights outdoor come in a variety of styles, from traditional lanterns to modern fixtures, allowing you to enhance the visual appeal of your home’s exterior.

Choosing the Right Porch Ceiling Lights Outdoor

When selecting porch ceiling lights outdoor for your home, consider the following factors:

1. Style and Design

Choose porch ceiling lights outdoor that complement the architectural style of your home and reflect your personal taste. Options include flush-mount fixtures, pendant lights, and hanging lanterns.

Read too: Elevate Your Home Décor with Exquisite Japanese Style Ceiling Lamp Designs

2. Size and Scale

Ensure that the size and scale of the porch ceiling lights outdoor are proportionate to the size of your porch or patio area. Larger spaces may require multiple fixtures or larger-sized lights for adequate illumination.

3. Lighting Technology

Opt for energy-efficient LED porch ceiling lights outdoor to minimize energy consumption and reduce maintenance costs. LED lights also offer superior brightness and longevity compared to traditional incandescent bulbs.

4. Weather Resistance

Select porch ceiling light outdoor that are designed to withstand outdoor elements, such as rain, wind, and UV exposure. Look for fixtures with durable materials like aluminum or stainless steel and sealed construction to prevent water intrusion.

Installing Porch Ceiling Lights Outdoor

Once you’ve chosen the perfect porch ceiling lights outdoor for your home, follow these steps for proper installation:

1. Turn Off Power

Before beginning the installation process, turn off the power to the existing ceiling light fixture at the circuit breaker.

2. Remove Old Fixture

Carefully remove the old ceiling light fixture, taking note of the wiring connections. Disconnect the wires and remove the mounting bracket.

3. Install New Fixture

Follow the manufacturer’s instructions to install the new porch ceiling lights outdoor. Secure the mounting bracket to the ceiling and connect the wiring, ensuring proper insulation and wire nuts are used.

4. Test and Adjust

Once the installation is complete, restore power to the fixture and test the porch ceiling lights outdoor to ensure they are functioning correctly. Make any necessary adjustments to the positioning or angle of the lights for optimal illumination.

Conclusion

Porch ceiling lights outdoor are an essential addition to any outdoor space, providing both practical illumination and aesthetic appeal. By choosing the right fixtures and following proper installation guidelines, you can create a welcoming and well-lit environment for enjoying your porch or patio area.

Ultimate Guide to Popcorn Ceiling Removal in Tampa, FL: Tips and Techniques

Are you looking to update your home in Tampa, FL, by removing the outdated popcorn ceiling? Dive into our detailed guide for everything you need to know about Popcorn Ceiling Removal Tampa Fl. From preparation to finishing touches, we’ve got you covered.

Popcorn Ceiling Removal Tampa Fl

Exploring Popcorn Ceiling Removal in Tampa, FL

Popcorn ceilings, also known as acoustic or textured ceilings, were once a popular choice for their sound-absorbing properties and ability to hide imperfections. However, many homeowners in Tampa, FL, are now opting to remove them due to their outdated appearance and potential health concerns. Here’s why popcorn ceiling removal in Tampa, FL, is gaining popularity:

  • Enhanced Aesthetic: Removing popcorn ceilings can instantly modernize the look and feel of a room, giving it a more updated appearance.
  • Health Benefits: Popcorn ceilings installed before the 1980s may contain asbestos, a known carcinogen. Removing these ceilings can eliminate the health risks associated with asbestos exposure.
  • Increased Property Value: Homes with updated ceilings are often more attractive to buyers and may command a higher resale value in the Tampa, FL, real estate market.

Popcorn Ceiling Removal Tampa, FL: Key Steps

1. Inspection

Before beginning the removal process, it’s crucial to have the ceiling tested for asbestos, especially in older homes. If asbestos is present, professional abatement may be necessary.

2. Preparation

Clear the room of furniture and cover floors and walls with plastic sheeting to protect them from dust and debris. Wear appropriate protective gear, including goggles, gloves, and a mask, to safeguard against exposure.

3. Wetting the Ceiling

Using a pump sprayer, thoroughly saturate the popcorn texture with water. This helps soften the material and minimize the release of dust particles during removal.

4. Scrape Off the Texture

Once the texture has softened, gently scrape it off using a ceiling texture scraper or putty knife. Work in small sections to avoid damaging the underlying drywall.

5. Repair and Smooth

After removing the popcorn texture, inspect the ceiling for any imperfections or damage. Make necessary repairs, such as filling in holes or cracks, and sand the surface smooth.

6. Paint or Finish

Once the ceiling is smooth and dry, apply a fresh coat of paint or your desired finish to complete the renovation.

Read too: Elevate Your Home Décor with Exquisite Japanese Style Ceiling Lamp Designs

Expert Tips for Success

  • Take breaks as needed to avoid fatigue during the removal process.
  • Use caution when working on ladders or scaffolding, and follow safety guidelines to prevent accidents.
  • Consider hiring a professional contractor for larger or more complex popcorn ceiling removal projects in Tampa, FL.

Conclusion

Removing popcorn ceilings can significantly improve the appearance and value of your home in Tampa, FL. By following the steps outlined in this guide and taking appropriate safety precautions, you can achieve professional-looking results and enjoy a fresh, updated living space.

Expert Guide to Popcorn Ceiling Removal in Spokane: Tips and Techniques

Are you considering removing the outdated popcorn ceiling in your Spokane home? Learn about the essential steps, techniques, and tips for a successful popcorn ceiling removal project in Spokane with our comprehensive guide.

Popcorn Ceiling Removal Spokane

Understanding Popcorn Ceiling Removal Spokane

Popcorn ceilings, also known as acoustic or textured ceilings, were once popular for their sound-absorbing properties and ability to hide imperfections. However, they are now considered outdated and can detract from the overall aesthetic of a space. Here’s why popcorn ceiling removal in Spokane is a popular choice for homeowners:

  • Modernization: Removing popcorn ceilings can instantly modernize the look and feel of a room, giving it a more updated appearance.
  • Health Concerns: Popcorn ceilings installed before the 1980s may contain asbestos, posing health risks if disturbed. Removal is necessary to eliminate this hazard.
  • Increased Property Value: Homes with updated ceilings are often more attractive to buyers and may command a higher resale value.

Popcorn Ceiling Removal Spokane: Key Steps

1. Inspection

Before starting the removal process, it’s essential to have the ceiling tested for asbestos, especially in older homes. If asbestos is present, professional abatement may be necessary.

Read too: Elevate Your Home Décor with Exquisite Japanese Style Ceiling Lamp Designs

2. Preparation

Clear the room of furniture, cover floors and walls with plastic sheeting, and wear appropriate protective gear, including goggles, gloves, and a mask.

3. Wetting the Ceiling

Using a pump sprayer, thoroughly saturate the popcorn texture with water. This helps loosen the material and minimize the release of dust particles.

4. Scrape Off the Texture

Once the texture has softened, gently scrape it off using a ceiling texture scraper or putty knife. Work in small sections to avoid damaging the underlying drywall.

5. Repair and Smooth

After removing the popcorn texture, inspect the ceiling for any imperfections or damage. Make necessary repairs, such as filling in holes or cracks, and sand the surface smooth.

6. Paint or Finish

Once the ceiling is smooth and dry, apply a fresh coat of paint or your desired finish to complete the renovation.

Expert Tips for Success

  • Take breaks as needed to avoid fatigue during the removal process.
  • Use caution when working on ladders or scaffolding, and follow safety guidelines.
  • Consider hiring a professional contractor for larger or more complex popcorn ceiling removal projects.

Conclusion

Removing popcorn ceilings can significantly enhance the appearance and value of your Spokane home. By following the steps outlined in this guide and taking appropriate safety precautions, you can achieve professional-looking results and enjoy a fresh, updated living space.

Exploring the Versatility of Sand Micro Ceiling Tiles: A Comprehensive Guide

Sand Micro Ceiling Tiles is a versatile and stylish option for enhancing the aesthetics of any interior space. In this comprehensive guide, we’ll delve into the features, benefits, and design possibilities of Sand Micro Ceiling Tile, providing you with everything you need to know to incorporate this elegant material into your home or commercial project.

Sand Micro Ceiling Tile

Understanding Sand Micro Ceiling Tile

Sand Micro Ceiling Tile is a type of ceiling tile made from a blend of sand and other materials, resulting in a unique texture and appearance reminiscent of natural sandstone. These tiles are available in various sizes, colors, and finishes, allowing for endless design possibilities.

Features and Benefits

  1. Natural Aesthetic: Sand Micro Ceiling Tile brings the beauty of natural sandstone indoors, adding warmth and texture to any space.
  2. Durable and Long-lasting: These tiles are highly durable and resistant to wear, making them suitable for high-traffic areas and commercial settings.
  3. Sound Absorption: Sand Micro Ceiling Tile offers excellent sound absorption properties, helping to reduce noise levels and create a quieter environment.
  4. Easy Maintenance: With minimal maintenance requirements, Sand Micro Ceiling Tile is easy to clean and maintain, making it ideal for busy households and commercial spaces.

Installation Process

Installing Sand Micro Ceiling Tile is a straightforward process that can be completed by experienced DIYers or professional contractors. Here’s an overview of the installation process:

  1. Preparation: Ensure the ceiling surface is clean, dry, and free from any debris or obstructions.
  2. Adhesive Application: Apply a suitable adhesive to the back of the tiles using a trowel, following the manufacturer’s instructions.
  3. Tile Placement: Carefully place each tile onto the ceiling surface, pressing firmly to ensure proper adhesion.
  4. Grouting (Optional): If desired, apply grout between the tiles to create a seamless and polished finish.
  5. Finishing Touches: Once the adhesive has fully cured, clean the tiles with a damp cloth to remove any excess grout or adhesive residue.

Design Possibilities

Sand Micro Ceiling Tile can be used in a variety of design applications, including:

Maintenance Tips

To keep your Sand Micro Ceiling Tile looking its best, follow these maintenance tips:

  • Regularly dust or vacuum the tiles to remove any dirt or debris.
  • Clean spills or stains promptly with a mild detergent and water solution.
  • Avoid using abrasive cleaners or scrubbing pads, as they may damage the surface of the tiles.

Read too: Discovering the Charm of Nautical Outdoor Ceiling Fans for Your Coastal Retreat: Sail into Style

Conclusion

In conclusion, Sand Micro Ceiling Tiles offers a beautiful and versatile option for enhancing the aesthetic appeal of any interior space. With its natural aesthetic, durability, and easy maintenance, it’s an excellent choice for residential and commercial projects alike.

Mastering the Art of Cutting Ceiling Tiles with a Reveal Edge Ceiling Tile Cutter

When it comes to installing ceiling tiles, achieving precise cuts is essential for a professional-looking finish. With a Reveal Edge Ceiling Tile Cutter, you can streamline the cutting process and ensure accuracy with every tile. In this guide, we’ll explore the features, benefits, and techniques for using a Reveal Edge Ceiling Tile Cutter to elevate your ceiling tile installations.

Reveal Edge Ceiling Tile Cutter

Understanding the Reveal Edge Ceiling Tile Cutter

A Reveal Edge Ceiling Tiles Cutter is made for clean, accurate cuts on reveal edge profile tiles. It has sharp blades and adjustable guides for different tile sizes, ensuring precise cuts with ease.

Key Features and Benefits

  1. Adjustable Cutting Guides: Reveal Edge Ceiling Tile Cutters feature adjustable guides for precise cut lengths and angles, ensuring a perfect fit for every tile.
  2. Sharp Cutting Blades: These tile cutters have razor-sharp blades for clean, smooth cuts without harming the tile’s surface or edge profile.
  3. Ease of Use: Reveal Edge Ceiling Tile Cutters are designed for user convenience, with ergonomic handles and intuitive controls that make the cutting process quick and effortless.
  4. Versatility: These tile cutters are versatile tools that can handle a wide range of ceiling tile materials, including acoustical tiles, fiberglass tiles, and PVC tiles.

Techniques for Using a Reveal Edge Ceiling Tile Cutter

  1. Measure and Mark: Measure the tile’s dimensions, then mark the cutting line with a pencil or marker.
  2. Adjust Cutting Guides: Use the adjustable cutting guides on the tile cutter to set the desired cut length and angle according to your measurements.
  3. Cutting Process: Place the tile securely on the cutter’s base, aligning the cutting line with the blade. Press down firmly on the handle to engage the blade and make the cut in one smooth motion.
  4. Finishing Touches: After cutting the tile, smooth any rough edges or burrs with fine-grit sandpaper for a professional finish.

Tips for Optimal Results

  • Always wear appropriate safety gear, such as gloves and safety glasses, when operating a Reveal Edge Ceiling Tiles Cutter.
  • Take your time to ensure accurate measurements and precise cuts, as mistakes can be costly and time-consuming to rectify.
  • Regularly sharpen the cutting blades and clean the cutting surface of the tile cutter to maintain optimal performance.

Conclusion

In conclusion, a Reveal Edge Ceiling Tile Cutter is a valuable tool for anyone involved in ceiling tile installation projects. By understanding its features, benefits, and proper usage techniques, you can achieve professional-looking results with ease and efficiency.

Read too: Discovering the Charm of Nautical Outdoor Ceiling Fans for Your Coastal Retreat: Sail into Style

Choosing the Perfect Range Hood for 10 Foot Ceiling: A Comprehensive Guide

When it comes to kitchen ventilation, finding the right range hood for a 10 foot ceiling is crucial for maintaining air quality and enhancing the overall aesthetic appeal of your space. In this comprehensive guide, we’ll explore the various options available, installation considerations, and key features to look for when selecting a range hood for your 10 foot ceiling.

Range Hood For 10 Foot Ceiling

Understanding Range Hood for 10 Foot Ceiling

A range hood designed for a 10 foot ceiling is specifically crafted to accommodate higher ceilings while effectively capturing and removing cooking odors, smoke, and grease from the kitchen environment. These range hoods are available in a variety of styles, sizes, and configurations to suit different kitchen layouts and design preferences.

Key Features to Consider

  1. Ventilation Power: Opt for a range hood with sufficient ventilation power to effectively remove cooking odors and grease from your kitchen. Look for models with high CFM (cubic feet per minute) ratings to ensure optimal airflow.
  2. Adjustable Height: Choose a range hood with adjustable chimney height to accommodate the extra ceiling height in your kitchen. This feature allows for customization to ensure proper installation and ventilation performance.
  3. Lighting: Consider range hoods with built-in lighting to illuminate your cooking area. LED lights are energy-efficient and provide bright, even illumination for cooking tasks.
  4. Noise Level: Look for range hoods with quiet operation to minimize noise disruption in your kitchen. Models with advanced sound insulation and low-noise motors are ideal for maintaining a peaceful cooking environment.

Installation Considerations

Proper installation is essential for maximizing the performance and aesthetics of your range hood for a 10 foot ceiling. Here are some installation considerations to keep in mind:

  • Ensure the range hood is installed at the correct height to effectively capture cooking pollutants.
  • Follow manufacturer guidelines and local building codes for ventilation ductwork installation.
  • Hire a professional contractor or HVAC technician to handle installation if you’re not confident in your DIY skills.

Range Hood Styles

Range hoods for 10 foot ceilings are available in various styles to complement different kitchen designs, including:

  • Wall-mounted range hoods
  • Island range hoods
  • Under-cabinet range hoods
  • Downdraft range hoods

Maintenance Tips

To ensure optimal performance and longevity of your range hood for 10 foot ceilings, follow these maintenance tips:

  • Clean the range hood filters regularly to prevent grease buildup and maintain airflow.
  • Wipe down the exterior surfaces of the range hood with a mild detergent and water solution to remove grease and dirt.
  • Schedule professional maintenance and inspection annually to identify and address any potential issues promptly.

Read too: Discovering the Charm of Nautical Outdoor Ceiling Fans for Your Coastal Retreat: Sail into Style

Conclusion

In conclusion, choosing the right range hood for a 10 foot ceilings is essential for effective kitchen ventilation and aesthetic enhancement. By considering key features, installation considerations, and maintenance tips, you can select the perfect range hood to suit your needs and elevate your kitchen space.

Exploring the Efficiency of Radiant Ceiling Heater Electric: A Comprehensive Guide

Radiant ceiling heater electric offer a modern and efficient solution for heating homes, offices, and commercial spaces. In this comprehensive guide, we’ll delve into the workings of radiant ceiling heaters electric, explore their benefits, installation process, and maintenance tips to help you make an informed decision about integrating them into your space.

Radiant Ceiling Heaters Electric

Understanding Radiant Ceiling Heaters Electric

Radiant ceiling heaters electric utilize electric elements installed in the ceiling panels to emit infrared radiation, which heats objects and surfaces in the room directly. This method of heating is highly efficient, as it eliminates the need for ductwork and reduces heat loss commonly associated with forced-air systems.

Benefits of Radiant Ceiling Heaters Electric

  1. Energy Efficiency: Radiant ceiling heaters electric operate without the need for fans or blowers, resulting in lower energy consumption compared to traditional heating systems.
  2. Comfortable Heating: Unlike forced-air systems, which can create drafts and temperature fluctuations, radiant ceiling heaters electric provide consistent and comfortable warmth throughout the room.
  3. Space-Saving Design: Since radiant ceiling heaters electric are installed flush with the ceiling, they do not take up valuable floor space, making them ideal for rooms with limited square footage.
  4. Silent Operation: Radiant ceiling heaters electric operate silently, without the noise associated with forced-air systems, providing a peaceful environment for occupants.

Installation Process

Installing radiant ceiling heaters electric requires careful planning and expertise to ensure optimal performance. Here’s an overview of the installation process:

  1. Assessment: Begin by assessing the space to determine the appropriate placement and number of heaters required for effective heating.
  2. Electrical Wiring: Install electrical wiring to connect the heaters to the power source. It’s essential to follow local building codes and regulations during this step.
  3. Ceiling Panel Installation: Mount the radiant ceiling panels in the desired locations, ensuring they are securely fastened to the ceiling.
  4. Connection and Testing: Connect the heaters to the electrical wiring and test their functionality to ensure they are operating correctly.

Maintenance Tips

To keep your radiant ceiling heaters electric running smoothly, follow these maintenance tips:

  • Regularly clean the surface of the heaters to remove dust and debris, which can impede their performance.
  • Check for any signs of wear or damage to the heating elements and replace them if necessary.
  • Schedule annual inspections by a qualified technician to ensure the heaters are operating efficiently and safely.

Read too: Discovering the Charm of Nautical Outdoor Ceiling Fans for Your Coastal Retreat: Sail into Style

Conclusion

In conclusion, Radiant Ceiling Heater Electric offer a versatile, energy-efficient, and comfortable heating solution for residential and commercial spaces. By understanding their benefits, installation process, and maintenance requirements, you can enjoy reliable warmth and comfort throughout the year.

Mastering Radiant Ceiling Heat Repair: Solutions and Tips for a Warm Home

Radiant ceiling heat systems are a popular choice for homeowners looking for efficient and effective heating solutions. However, like any system, they can encounter issues over time. If you’re experiencing problems with your radiant ceiling heat, don’t worry. In this comprehensive guide, we’ll explore common issues, troubleshooting techniques, and repair strategies to keep your home comfortable and warm.

Radiant Ceiling Heat Repair

Understanding Radiant Ceiling Heat Systems

Before delving into repair techniques, it’s essential to understand how radiant ceiling heat systems work. These systems consist of heating elements installed in the ceiling panels, which radiate heat downward to warm the room below. Unlike forced-air systems, radiant ceiling heat provides even heating without the need for ductwork.

Common Issues with Radiant Ceiling Heat

  1. Uneven Heating: If you notice that certain areas of your home are warmer or cooler than others, it could indicate an issue with your radiant ceiling heat system. This may be caused by damaged heating elements, insulation problems, or airflow restrictions.
  2. No Heat: A lack of heat from your radiant ceiling panels could be due to various factors, including electrical issues, thermostat malfunctions, or damaged heating elements.
  3. Thermostat Problems: A malfunctioning thermostat can lead to temperature fluctuations or an inability to control the heating system effectively.

Radiant Ceiling Heat Repair Techniques

1. Inspect Heating Elements: Begin by visually inspecting the heating elements in your ceiling panels for signs of damage or wear. Look for cracks, breaks, or discoloration, which may indicate a problem. If you notice any issues, contact a professional for repair or replacement.

2. Check Insulation: Proper insulation is crucial for the efficient operation of radiant ceiling heat systems. Inspect the insulation in your ceiling panels to ensure it is intact and not compromised. Replace any damaged insulation to improve heating efficiency.

3. Test Thermostat: Verify that your thermostat is functioning correctly by testing it with a separate heating source, such as a portable heater. If the thermostat is not responding or is displaying inaccurate temperatures, it may need to be recalibrated or replaced.

4. Clear Airflow: Ensure that there are no obstructions blocking airflow around your radiant ceiling panels. Furniture, curtains, or other objects can impede airflow and prevent efficient heating. Rearrange furniture and remove obstacles to improve airflow.

Read too: Discovering the Charm of Nautical Outdoor Ceiling Fans for Your Coastal Retreat: Sail into Style

Hiring a Professional

While some radiant ceiling heat repairs can be performed DIY, complex issues may require the expertise of a professional HVAC technician. If you’re unsure about the cause of your heating problems or if repairs are beyond your skill level, don’t hesitate to seek professional assistance.

Conclusion

In conclusion, Radiant Ceiling Heat Repair requires careful diagnosis and troubleshooting to identify and resolve issues effectively. By understanding how your radiant ceiling heat system works and implementing appropriate repair techniques, you can ensure that your home remains warm and comfortable throughout the colder months.

Expert Popcorn Ceiling Removal in Raleigh: Transform Your Home

Are you tired of the dated popcorn ceilings in your Raleigh home? Bid farewell to the inconvenience and revitalize your space with professional popcorn ceiling removal services. Dive into everything you need to know about Popcorn Ceiling Removal Raleigh in this comprehensive guide.

Popcorn Ceiling Removal Raleigh

Understanding Popcorn Ceiling Removal Raleigh

Popcorn ceilings, also known as textured or acoustic ceilings, were once a popular choice for homes due to their affordability and ability to hide imperfections. However, over time, they have become outdated and may even pose health risks due to the potential presence of asbestos.

Why Remove Popcorn Ceilings?

  • Enhanced Aesthetics: Popcorn ceilings can give your home a dated appearance and may not align with modern interior design trends.
  • Health Concerns: Older popcorn ceilings may contain asbestos, a hazardous material that poses health risks if disturbed.
  • Increased Property Value: Removing popcorn ceilings can increase the value of your home and make it more appealing to potential buyers.
  • Improved Lighting: Smooth ceilings reflect light more effectively, making rooms appear brighter and more spacious.

The Popcorn Ceiling Removal Process

Removing popcorn ceilings is a multi-step process that requires careful planning and execution. Here’s what you can expect from the popcorn ceiling removal process in Raleigh:

1. Inspection and Testing

Before initiating the removal process, it’s crucial to inspect the ceiling for asbestos. A certified contractor will take samples and send them to a lab for testing to ensure safe removal.

2. Preparation

Once the ceiling is confirmed to be asbestos-free, the area is prepared for removal. This may involve covering furniture and floors with plastic sheeting and sealing off the room to contain dust.

Read too: Elevate Your Home Décor with Exquisite Japanese Style Ceiling Lamp Designs

3. Wetting and Scraping

The popcorn texture is softened with water to facilitate removal. Using specialized tools, the contractor carefully scrapes away the texture, taking care to avoid damaging the underlying surface.

4. Smoothing and Repair

After removing the texture, the ceiling is smoothed out to achieve a seamless finish. Any imperfections or damage to the ceiling are addressed to ensure a flawless result.

5. Finishing Touches

Once the ceiling is smooth and free of texture, it can be painted to match the rest of the room’s decor. The result is a clean, modern look that enhances the overall aesthetic of the space.

Why Choose Professional Popcorn Ceiling Removal in Raleigh?

While DIY popcorn ceiling removal may seem tempting, hiring a professional contractor offers numerous advantages:

  • Expertise: Professional contractors have the knowledge and experience to safely and efficiently remove popcorn ceilings.
  • Safety: Certified contractors follow proper safety protocols to minimize health risks associated with asbestos exposure.
  • Efficiency: Professional removal ensures the job is completed quickly and with minimal disruption to your daily life.
  • Quality Results: With professional equipment and techniques, contractors can achieve smooth, flawless ceilings that enhance the beauty of your home.

Transform Your Home Today

Don’t let outdated popcorn ceilings detract from the beauty of your Raleigh home. Invest in professional popcorn ceiling removal services and transform your space into a modern, stylish sanctuary.

Contact a reputable contractor specializing in Popcorn Ceiling Removal Raleigh and bid farewell to popcorn ceilings for good.