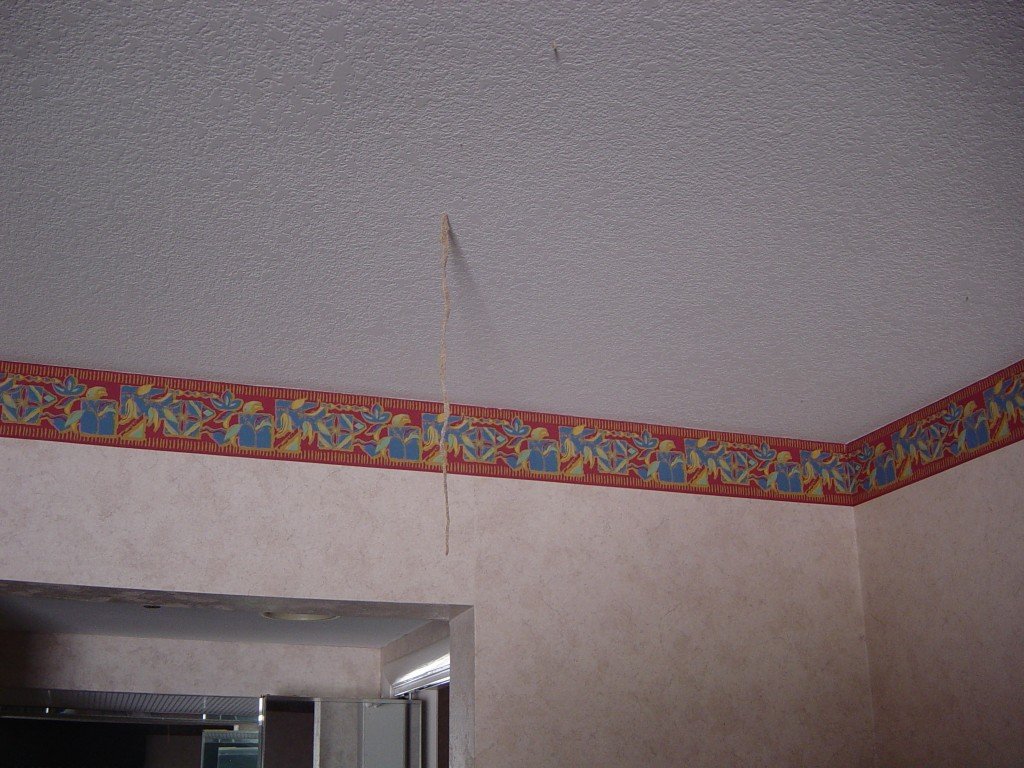
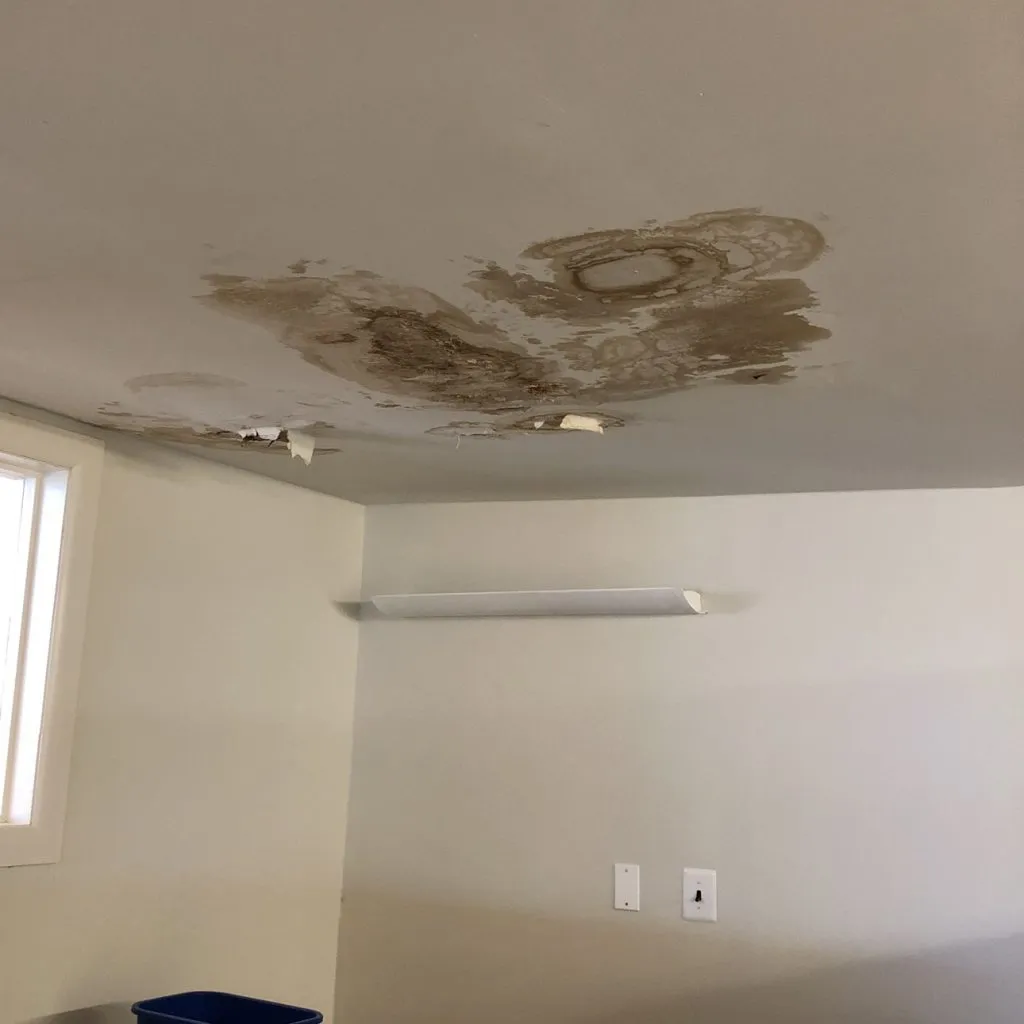
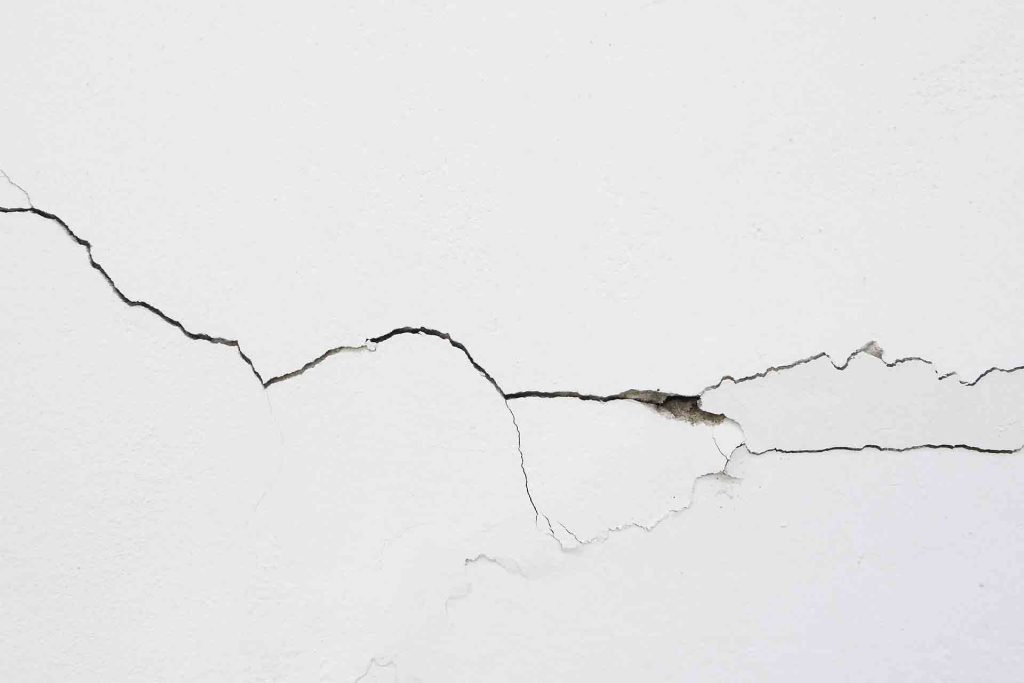
What Causes Water Leaks in Ceiling?

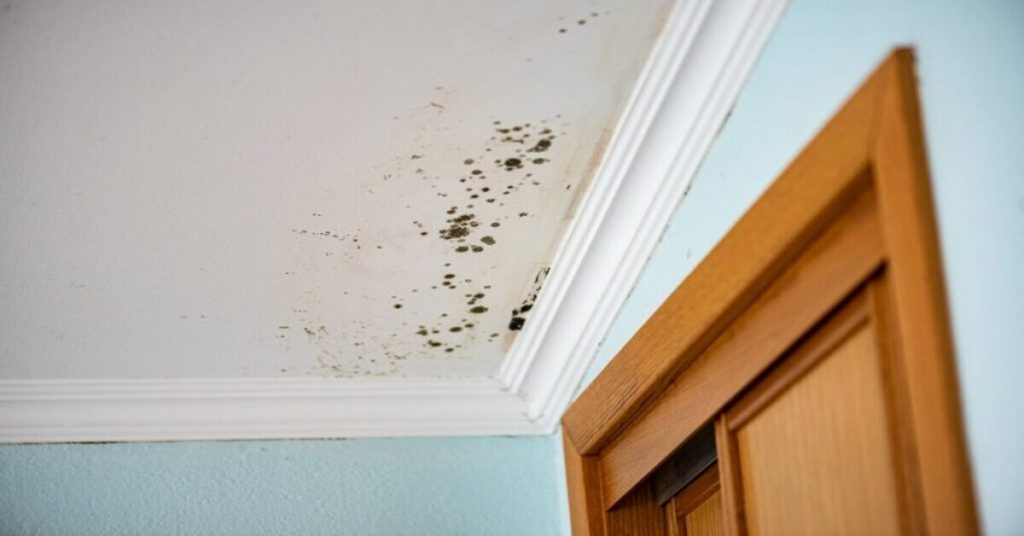
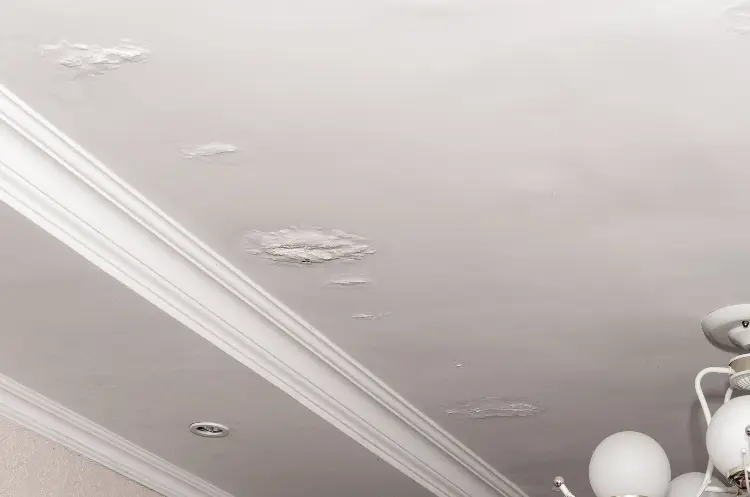
What Causes Water Leaks in Ceiling? Water leaks in ceiling can be a major inconvenience and even a safety hazard. They can cause damage to your home’s structure, mold growth, and even electrical problems. If you’re experiencing a water leak in your ceiling, it’s important to identify the cause of the leak as soon as possible so that you can take steps to repair it.

What Causes Water Leaks In Ceiling

The Problem

There are many things that can cause water leaks in ceilings. Some of the most common causes include:

  • Roof damage: This is the most common cause of water leaks in ceilings. Roof damage can be caused by storms, hail, or even just wear and tear.
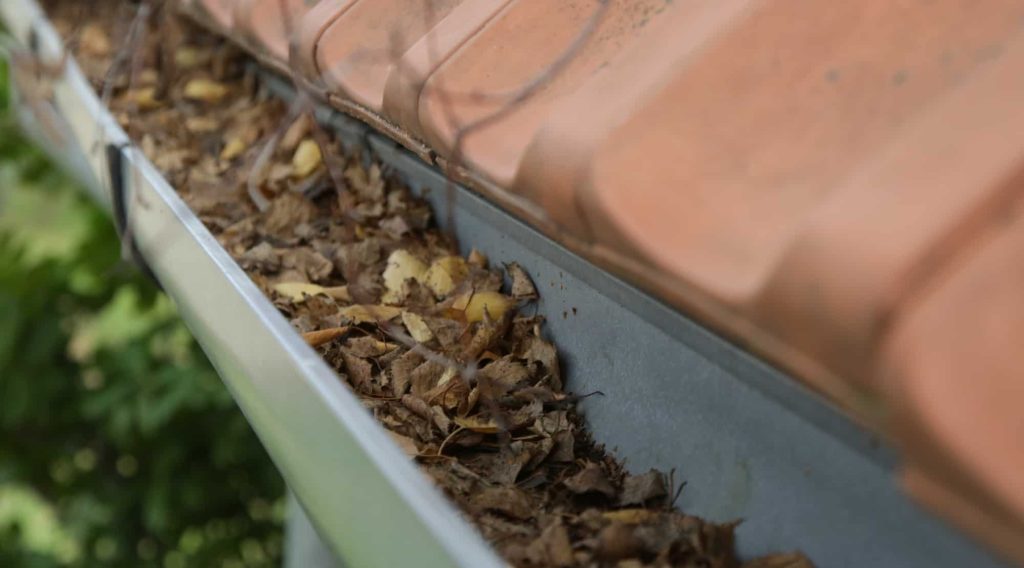
  • Gutters and downspouts: Gutters and downspouts are designed to carry rainwater away from your home. If your gutters or downspouts are damaged or clogged, water can back up and leak into your home.
  • Ice dams: Ice dams form when snow melts on your roof and then refreezes at the edge of your roof. This can cause water to back up and leak into your home.
  • Plumbing leaks: Plumbing leaks can occur in your home’s pipes, fixtures, or appliances. If you have a plumbing leak, it can eventually lead to a water leak in your ceiling.
  • Appliance leaks: Appliances such as dishwashers, washing machines, and refrigerators can leak water if they are not properly installed or maintained.

Roof damage

This damage is the most common cause of water leaks in ceilings. Roof damage can be caused by storms, hail, or even just wear and tear. If your roof is damaged, water can seep through the roof and into your ceiling.

Here are some signs of roof damage:

  • Cracks, holes, or missing shingles
  • Wavy or sagging shingles
  • Loose or damaged flashing
  • Dirt, debris, or mold on your roof

If you see any of these signs, it’s important to have your roof inspected by a professional as soon as possible.

Gutters and downspouts

Properly functioning gutters and downspouts actively direct rainwater away from your home, ensuring it doesn’t collect near your property. If these components sustain damage or become clogged, water may accumulate and infiltrate your home.

Here are some signs of gutter or downspout damage:

  • Damaged or missing gutters or downspouts
  • Clogged gutters or downspouts
  • Debris or leaves in your gutters or downspouts

To prevent gutter and downspout leaks, it’s important to keep your gutters and downspouts clean and free of debris.

Ice dams

Ice dams form when snow melts on your roof and then refreezes at the edge of your roof. This can cause water to back up and leak into your home.

Here are some signs of ice dams:

  • A buildup of ice at the edge of your roof
  • Water dripping from your eaves
  • Wet spots on your ceiling

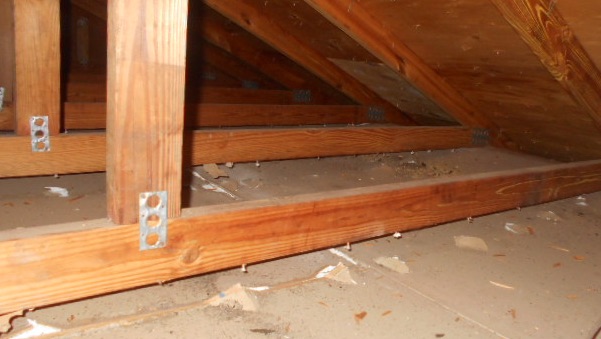
To prevent ice dams, it’s important to install insulation in your attic to prevent the snow from melting.

Read too: Can You Spray Foam Attic Ceiling

Plumbing leaks

Plumbing leaks can occur in your home’s pipes, fixtures, or appliances. If you have a plumbing leak, it can eventually lead to a water leak in your ceiling.

Here are some signs of plumbing leaks:

  • Puddles of water under your sinks, toilets, or appliances
  • Wet spots on your ceiling
  • Leaking faucets or toilets
  • Low water pressure

If you see any of these signs, it’s important to have your plumbing system inspected by a professional as soon as possible.

Appliance leaks

Improper installation or maintenance of appliances like dishwashers, washing machines, and refrigerators can lead to water leakage.

Here are some signs of appliance leaks:

  • Wet spots on your floor
  • Leaking hoses or connections
  • Low water pressure

If you see any of these signs, it’s important to have your appliances inspected by a professional as soon as possible.

Troubleshooting

If you’re experiencing a water leak in your ceiling, the first step is to identify the source of the leak. Once you know where the leak is coming from, you can take steps to repair it.

How Much Does It Cost to Spray Paint a Basement Ceiling?

If you’re looking to update the look of your basement ceiling, spray painting is a great option. It’s a quick and easy way to give your basement a fresh new look, and it’s relatively inexpensive.

In this article, we’ll discuss the cost of spray painting a basement ceiling in detail. We’ll also cover some of the factors that can affect the cost, so you can get an accurate estimate for your project.

Cost To Spray Paint Basement Ceiling

Cost to Spray Paint a Basement Ceiling

The cost to spray paint a basement ceiling varies depending on a number of factors, including the size of the ceiling, the type of paint you use, the cost of labor in your area, and the level of difficulty of the project.

In general, you can expect to pay between $1 and $3 per square foot to have a basement ceiling painted. For a 1,000 square foot ceiling, this would cost between $1,000 and $3,000.

Factors that Affect Cost

The following factors can affect the cost of spray painting a basement ceiling:

  • Size of the ceiling: The larger the ceiling, the more expensive it will be to paint. For example, a 1,000 square foot ceiling will cost twice as much to paint as a 500 square foot ceiling.
  • Type of paint: Paints with higher quality finishes or special features, such as fire retardant paint, will cost more. For example, a paint with a high-gloss finish will cost more than a paint with a matte finish.
  • Cost of labor: Labor costs vary depending on your location and the availability of painters. For example, labor costs in a major metropolitan area will be higher than labor costs in a rural area.
  • Level of difficulty of the project: Some basement ceilings are more difficult to paint than others. For example, a ceiling with a lot of beams or other obstructions will be more difficult to paint than a smooth ceiling.

DIY vs. Professional

You can save money by painting your basement ceiling yourself. However, it’s important to note that spray painting can be a messy process. If you’re not comfortable working with spray paint, it’s best to hire a professional.

Tips for Saving Money

If you’re on a budget, there are a few things you can do to save money on your basement ceiling painting project:

  • Do it yourself: If you’re comfortable working with spray paint, you can save a significant amount of money by painting your basement ceiling yourself.
  • Choose a less expensive paint: There are a number of affordable paints available that will still give you a good finish.
  • Paint during the off-season: Labor rates are typically lower during the off-season.
  • Consider the level of difficulty of the project: If you’re not sure if you can handle the project yourself, it’s best to hire a professional.

Additional Information

  • Spray painting a basement ceiling is a relatively easy project that you can do yourself. However, it’s important to follow safety precautions when working with spray paint.
  • If you’re not comfortable working with spray paint, it’s best to hire a professional. A professional painter will have the experience and expertise to get the job done right.
  • There are a number of different types of paint available for basement ceilings. Choose a paint that is specifically designed for basements.
  • It’s important to prepare the surface before painting. This will help to ensure that the paint adheres properly.
  • Follow the manufacturer’s instructions when applying paint. This will help to ensure that you get the best results.
  • If you’re painting a dark ceiling, you may need to apply two coats of paint.
  • If you’re painting a textured ceiling, you may need to use a special type of paint.
  • Be sure to wear a respirator and goggles when painting.

Additional Tips

Here are a few additional tips for saving money on your basement ceiling painting project:

  • Get multiple estimates from different painters. This will help you to get the best price.
  • Ask about discounts for seniors or military personnel.
  • Consider painting the ceiling yourself if you’re comfortable working with spray paint.

Conclusion

Spray painting a basement ceiling is a great way to update the look of your basement. It’s relatively inexpensive, and it’s a quick and easy project. By considering the factors that affect cost, you can get an accurate estimate for your project and save money.

Can You Spray Foam Attic Ceiling?

If you’re looking for a way to improve the insulation in your attic, spray foam is a great option. Spray foam is a type of insulation that is applied as a liquid and expands to fill all the nooks and crannies in your attic. This can help to seal up air leaks and improve energy efficiency.

One of the most common questions about spray foam is whether it can be applied to attic ceilings. The answer is yes, spray foam can be applied to attic ceilings. In fact, it is one of the most effective ways to insulate an attic ceiling.

Can You Spray Foam Attic Ceiling

Can Spray Foam Be Applied to Attic Ceilings?

Yes, spray foam can be applied to attic ceilings. In fact, it is one of the most effective ways to insulate an attic ceiling. Spray foam is a versatile insulation that can be applied to a variety of surfaces, including ceilings, walls, and floors.

Benefits of Spray Foam Attic Ceilings

There are many benefits to using spray foam for attic ceilings. Some of the benefits include:

  • Improved energy efficiency: Spray foam can help to seal up air leaks and improve energy efficiency. This can save you money on your energy bills.
  • Reduced noise levels: Spray foam can help to reduce noise levels in your home. This can make your home more comfortable and peaceful.
  • Improved comfort: Spray foam can help to keep your home cooler in the summer and warmer in the winter. This can make your home more comfortable to live in.

How to Apply Spray Foam to Attic Ceilings

Applying spray foam to attic ceilings is a job that is best left to a professional. A professional will have the experience and expertise to apply the foam correctly.

The process of applying spray foam to attic ceilings typically involves the following steps:

  1. Preparing the attic: The attic will need to be cleaned and cleared of any debris.
  2. Installing baffles: Baffles are installed to help prevent the foam from blocking the soffit vents.
  3. Applying the foam: The foam is applied using a special sprayer.
  4. Finishing the job: Once the foam has cured, the attic can be cleaned up.

Cost of Spray Foam Attic Ceilings

The cost of spray foam attic ceilings varies depending on the size of the attic and the type of foam that is used. In general, spray foam attic ceilings are more expensive than other types of insulation.

Conclusion

If you’re looking for a way to improve the insulation in your attic, spray foam is a great option. Spray foam can be applied to attic ceilings and offers a number of benefits, including improved energy efficiency, reduced noise levels, and improved comfort.

Additional Information

  • Spray foam is a type of insulation that is applied as a liquid and expands to fill all the nooks and crannies in your attic. This is important because it helps to seal up air leaks, which can account for up to 30% of heat loss in a home.
  • Spray foam can help to reduce noise levels by up to 50%. This is because it creates a solid barrier that blocks sound waves.
  • Spray foam can help to keep your home cooler in the summer and warmer in the winter. This is because it helps to trap heat and cold air inside your home.
  • Applying spray foam to attic ceilings is a job that is best left to a professional. This is because it requires specialized equipment and expertise.

Additional Examples

Here are some examples of how spray foam can be used to improve the insulation in an attic ceiling:

  • In a home with a vented attic, spray foam can be applied to the underside of the roof sheathing. This will help to seal up air leaks and improve energy efficiency.
  • In a home with an unvented attic, spray foam can be applied to the attic floor. This will help to create a solid barrier that blocks heat and cold air from escaping.
  • In a home with a cathedral ceiling, spray foam can be applied to the underside of the rafters. This will help to improve energy efficiency and reduce noise levels.

Read too: Should You Insulate Your Garage Ceiling

Conclusion

Spray foam is a versatile and effective insulation that can be used to improve the insulation in an attic ceiling. It offers a number of benefits, including improved energy efficiency, reduced noise levels, and improved comfort.tunesharemore_vert

Is There Asbestos In Popcorn Ceiling?

Popcorn ceilings constituted a widely utilized ceiling finish in the United States from the 1950s to the 1980s. They are created by spraying a mixture of cellulose fibers, gypsum, and water onto a ceiling. While popcorn ceilings are relatively easy to install and maintain, they have been linked to health concerns, including asbestos exposure.

Is There Asbestos In Popcorn Ceiling

Is There Asbestos In Popcorn Ceiling?

Yes, popcorn ceilings may contain asbestos. Asbestos is a naturally occurring mineral that was once used in a variety of building materials, including popcorn ceilings. Asbestos fibers are small and can be easily inhaled or ingested. When inhaled, asbestos fibers can become trapped in the lungs and have the potential to cause severe health issues, such as mesothelioma, lung cancer, and asbestosis.

How to Tell If Your Popcorn Ceiling Contains Asbestos

Determining whether your popcorn ceiling contains asbestos with certainty requires professional testing; there is no foolproof method to do so otherwise. However, there are a few things you can look for that may indicate the presence of asbestos.

  • Popcorn ceilings that were installed before 1980 are more likely to contain asbestos. The EPA banned the use of asbestos in new construction in 1978.
  • Popcorn ceilings that are textured or have a rough surface are more likely to contain asbestos. Asbestos fibers are often used to create a textured finish.
  • Popcorn ceilings that are damaged or crumbling are more likely to release asbestos fibers into the air.

If you are concerned that your popcorn ceiling may contain asbestos, it is important to have it tested by a qualified professional. Asbestos testing is relatively inexpensive and can be done quickly.

Health Risks of Asbestos Exposure

Asbestos exposure can lead to a number of serious health problems, including:

  • Mesothelioma: A rare cancer that affects the lining of the lungs, chest, or abdomen.
  • Lung cancer: A type of cancer that affects the lungs.
  • Asbestosis: A lung disease that causes scarring and difficulty breathing.

Symptoms of Asbestos Exposure

In most cases, asbestos exposure does not cause any immediate symptoms. However, over time, asbestos exposure can lead to the development of serious health problems.

The symptoms of mesothelioma, lung cancer, and asbestosis can vary depending on the type of cancer or disease. However, some common symptoms include:

  • Shortness of breath
  • Chest pain
  • Cough
  • Fatigue
  • Weight loss

Preventing Asbestos Exposure

The best way to prevent asbestos exposure is to avoid disturbing popcorn ceilings that may contain asbestos. If you must disturb a popcorn ceiling, it is important to take precautions to prevent the release of asbestos fibers into the air.

Precautions for Disturbing Popcorn Ceilings

  • Wear a respirator that filters out asbestos fibers.
  • Wear protective clothing, including gloves, a long-sleeved shirt, and pants.
  • Cover the floor and furniture with plastic sheeting.
  • Wet the popcorn ceiling with a spray bottle to help prevent the release of asbestos fibers.
  • Use a putty knife or scraper to remove the popcorn ceiling.
  • Dispose of the popcorn ceiling in a sealed bag or container.

Conclusion

Popcorn ceilings that were installed before 1980 may contain asbestos. If you are concerned that your popcorn ceiling may contain asbestos, it is important to have it tested by a qualified professional.

Additional Information

  • Asbestos was used in popcorn ceilings because it is a fire-resistant material.
  • Asbestos was banned in new construction in 1978, but it was still used in some renovations until the early 1980s.
  • If you are unsure whether your popcorn ceiling contains asbestos, it is always best to have it tested.

Prevention Tips

  • If you have a popcorn ceiling that was installed before 1980, it is best to leave it alone.
  • If you must disturb a popcorn ceiling, take precautions to prevent asbestos exposure.
  • If you are concerned about asbestos exposure, talk to your doctor.

Conclusion

Asbestos is a serious health hazard, and it is important to take precautions to prevent exposure. If you have a popcorn ceiling that may contain asbestos, it is best to have it tested and removed by a qualified professional.

How to Turn High Ceilings Into Loft and Cost

If you have high ceilings in your home, you may be wondering if you can turn them into lofts. Lofts can be a great way to add extra living space, storage, or even a bedroom to your home.

In this article, we’ll discuss how to turn high ceilings into loft cost, as well as the cost involved.

Turn High Ceilings Into Loft Cost

Turning High Ceilings Into Lofts

The first step in turning high ceilings into lofts is to determine if your home is structurally sound enough to support the weight of a loft. You’ll need to consult with a structural engineer to get a professional opinion.

If your home is structurally sound, you can then begin planning the layout of your loft. You’ll need to consider the following factors:

  • Size and shape of the loft: How much space do you need? Do you want a loft with a specific shape?
  • Purpose of the loft: Will the loft be used for living space, storage, or something else?
  • Access to the loft: How will you get to the loft? Will you need stairs or a ladder?

Once you have a plan, you can then begin construction. The cost of construction will vary depending on the size and complexity of your loft.

Cost of Turning High Ceilings Into Lofts

The cost of turning high ceilings into lofts can range from a few thousand dollars to tens of thousands of dollars. The cost will depend on the following factors:

  • Size and complexity of the loft: The larger and more complex the loft, the more it will cost to build. For example, a loft with a skylight or a loft with a bathroom will be more expensive than a simple loft with a floor and walls.
  • Materials used: The type of materials you use will also affect the cost. For example, wood is more expensive than drywall.
  • Labor costs: The cost of labor will vary depending on your location and the availability of contractors.

Additional Costs

In addition to the cost of construction, you may also need to factor in the following costs:

  • Finishing materials: You’ll need to choose flooring, paint, and other finishing materials for your loft.
  • Furnishings: You’ll need to furnish your loft, if you plan to use it as living space.
  • Building permits: You may need to obtain building permits from your local government.

Conclusion

Turn high ceilings into loft cost can be a great way to add value and functionality to your home. However, it’s important to do your research and factor in all of the costs involved before you begin construction.

Read too: Is There Asbestos In Popcorn Ceiling

Tips for Saving Money

If you’re on a budget, there are a few things you can do to save money on your loft conversion project:

  • Do-it-yourself: If you’re comfortable with DIY projects, you can save a significant amount of money by doing the construction yourself.
  • Choose less expensive materials: There are a number of affordable materials available that will still give you a good finish.
  • Get multiple estimates: Get quotes from several contractors before you make a decision.

Additional Information

  • Lofts can be used for a variety of purposes, including living space, storage, and even a bedroom.
  • The size and shape of your loft will determine the amount of space you have available.
  • You’ll need to choose the right materials for your loft, depending on the purpose of the loft.
  • You’ll need to obtain building permits from your local government before you begin construction.

Conclusion

Turn high ceilings into loft cost can be a rewarding project that can add value and functionality to your home. By doing your research and planning carefully, you can save money and get the most out of your conversion.

Additional Examples

Here are a few examples of how high ceilings can be turned into lofts:

  • A loft can be used as a bedroom for an additional guest or child.
  • A loft can be used as a home office or workspace.
  • A loft can be used as a playroom for children.
  • A loft can be used as a storage area for seasonal items or belongings.

Dreams About Water Leaking From Ceiling: Meanings and Interpretations

Dreams about water leaking from the ceiling can be a common occurrence. These dreams can be interpreted in a variety of ways, depending on the individual’s personal circumstances and experiences.

In this article, we will explore the possible meanings and interpretations of dreams about water leaking from the ceiling. We will also provide some tips on how to deal with these dreams if they are causing you distress.

Dreams About Water Leaking From Ceiling

Possible Meanings

There are a number of possible meanings for dreams about water leaking from the ceiling. Some of these meanings include:

  • Feelings of insecurity or instability: Dreams about water leaking can represent feelings of insecurity or instability in your waking life. You may be feeling overwhelmed or stressed, or you may be unsure of your place in the world.
  • Fear of change: Dreams about water leaking from the ceiling can also represent fear of change. You may be facing a major life change, such as a new job or a move, and you are feeling anxious about the unknown.
  • Unresolved emotions: Dreams about water leaking from the ceiling can also be a sign of unresolved emotions. You may be holding onto anger, sadness, or fear, and these emotions are manifesting themselves in your dreams.
  • Spiritual cleansing: In some cases, dreams about water leaking from the ceiling can be seen as a sign of spiritual cleansing. The water represents the cleansing of your soul, and the ceiling represents the barriers that are holding you back.

Read too: What Causes Black Mold On Ceiling

Tips for Dealing with Dreams About Water Leaking

If you are having recurring dreams about water leaking, there are a few things you can do to deal with them:

  • Consider the possible meanings of your dreams: Take some time to reflect on your own life and experiences. What are you feeling insecure about? What changes are you facing? What unresolved emotions are you holding onto?
  • Talk to someone you trust: Talking to a therapist or counselor can help you to understand the meaning of your dreams and develop healthy coping mechanisms.
  • Practice relaxation techniques: Relaxation techniques, such as deep breathing or meditation, can help you to reduce stress and anxiety.

Conclusion

Dreams about water leaking can be a source of distress for some people. However, by understanding the possible meanings of these dreams, you can begin to deal with them in a healthy way.

Additional Information

In addition to the information provided above, here are a few additional tips for dealing with dreams:

  • If you are having trouble sleeping because of these dreams, you may want to try sleeping with a fan or other noise machine to drown out the sound of water dripping.
  • If you are particularly anxious about the meaning of your dreams, you may want to keep a dream journal to record your dreams and your thoughts and feelings about them.
  • Remember that dreams are just dreams. They are not a reflection of reality, and they do not necessarily mean anything bad.

By following these tips, you can learn to understand and deal with dreams about water leaking from the ceiling in a healthy way.

Black Spots On Ceiling In Bedroom: Causes, Identification, and Removal

Black spots on the ceiling in your bedroom can be a nuisance and a cause for concern. There are a few possible causes for these spots, and depending on the cause, there are a few things you can do to remove them.

Black Spots On Ceiling In Bedroom

Causes

The most common cause of black spots on the ceiling in a bedroom is mold. Mold can grow in damp or humid environments, and it can be caused by a variety of factors, including:

  • A leak in the roof or ceiling
  • Condensation from water vapor in the air
  • Poor ventilation
  • Water damage from flooding or other disasters

Other possible causes of black spots on the ceiling in a bedroom include:

  • Dust and dirt
  • Fire damage
  • Insect droppings
  • Paint or stain stains

Identification

If you’re not sure what is causing the black spots on your ceiling, there are a few things you can do to identify the cause.

  • Mold: Mold will often have a musty smell. You can also look for signs of mold growth, such as discoloration, flaking, or peeling.
  • Dust and dirt: Dust and dirt will often be powdery or gritty. You can wipe them away with a damp cloth.
  • Fire damage: Fire damage will often be charred or burned.
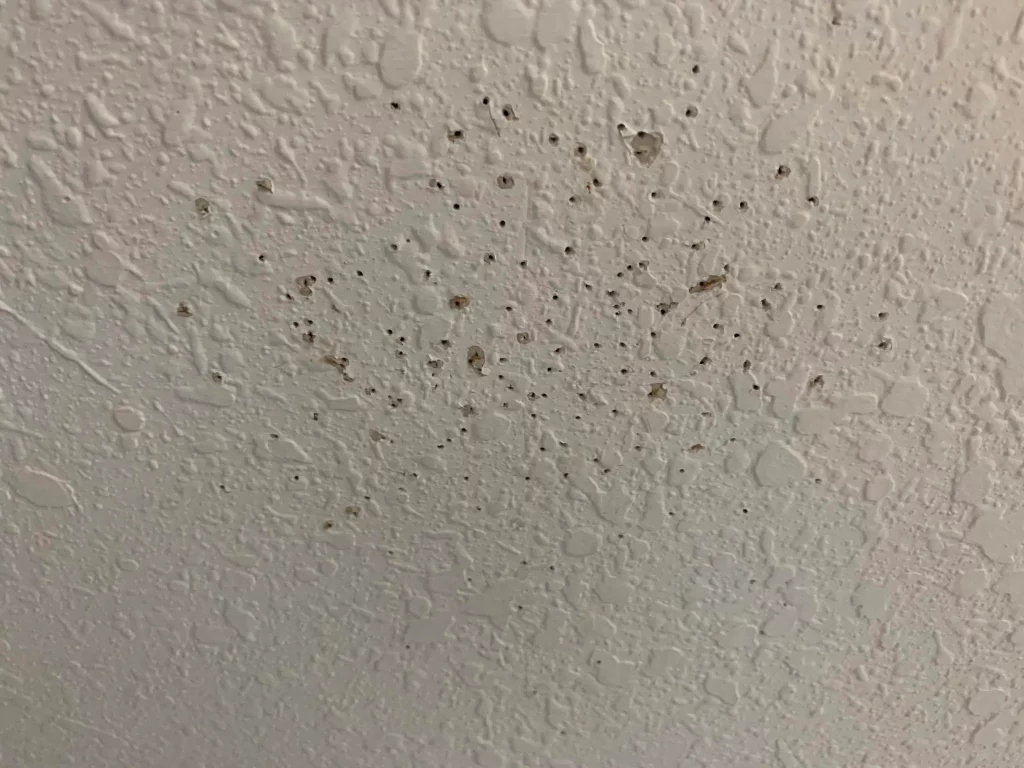
  • Insect droppings: Insect droppings will often be small and round.
  • Paint or stain stains: Paint or stain stains will often be uniform in color.

Removal

Once you’ve identified the cause of the black spots on your ceiling, you can take steps to remove them.

Mold: If the black spots are caused by mold, you’ll need to remove the mold and prevent it from growing back. You can do this by:

  • Cleaning the area with a solution of bleach and water
  • Removing any damaged or wet materials
  • Fixing any leaks or moisture problems
  • Using a mold inhibitor to prevent mold growth

Dust and dirt: Dust and dirt can be removed by wiping them away with a damp cloth. You may also want to vacuum the area to remove any loose dust or dirt.

Fire damage: Fire damage will need to be repaired by a professional.

Insect droppings: You can eliminate insect droppings by vacuuming or wiping them away with a damp cloth.

Paint or stain stains: You can remove paint or stain stains by repainting or restaining the affected area.

Read too: How Much To Insulate Garage Ceiling

Prevention

The best way to prevent black spots on the ceiling in your bedroom is to take steps to prevent mold growth. You can do this by:

  • Keeping your home dry
  • Ventilating your home properly
  • Fixing any leaks or moisture problems
  • Storing food in airtight containers
  • Cleaning up any spills or messes immediately

By following these tips, you can help to keep your bedroom ceiling looking its best.

Additional information:

In addition to the information provided above, here are a few additional tips for removing black spots on the ceiling in your bedroom:

  • If mold is the cause of the black spots, you may need to wear a mask and gloves to shield yourself from mold spores.
  • If fire damage causes the black spots, you may need to hire a professional cleaning service.
  • If insect droppings are responsible for the black spots, you may need to apply a pesticide to exterminate the insects.

By following these tips, you can safely and effectively remove black spots from your bedroom ceiling.

Indian Meal Moth Larvae on Ceiling: How to Get Rid of Them

Indian meal moths are small, brown moths that are common household pests. They are attracted to food, and their larvae can be found feeding on a variety of foods, including flour, cereal, pasta, and dry pet food.

If you see Indian meal moth larvae on your ceiling, it is important to take action to get rid of them. These larvae can cause damage to your food and can also be a nuisance.

Indian Meal Moth Larvae On Ceiling

How to Identify Indian Meal Moth Larvae

Indian meal moth larvae are small, white worms that are about 1/4 inch long. They have a brown head and a dark brown band around their body.

Larvae can be found in food that is infested with Indian meal moths. They are often found in the crevices of food packaging, or they may be crawling on the surface of food.

How to Get Rid of Indian Meal Moth Larvae on Ceiling

There are a few things you can do to get rid of Indian meal moth larvae on your ceiling.

1. Clean up any infested food

The first step is to clean up any infested food. Throw away any food that has been infested with Indian meal moths. This encompasses opened food and food that remains sealed.

2. Vacuum the area

Vacuum the area where you found the larvae. This will help to remove any larvae that are not visible.

3. Apply an insecticide

You can apply an insecticide to the area where you found the larvae. Be sure to follow the directions on the label carefully.

4. Seal up any cracks or crevices

Indian meal moths can enter your home through cracks or crevices. Seal up any cracks or crevices around your home to prevent them from entering.

Prevention

The best way to prevent Indian meal moth larvae from infesting your home is to take steps to prevent them from entering in the first place.

Here are some tips for prevention:

  • Store food in airtight containers.
  • Clean up any spills or crumbs immediately.
  • Vacuum your home regularly.
  • Inspect food for signs of infestation before you buy it.

Conclusion

If you see Indian meal moth larvae on your ceiling, it is important to take action to get rid of them. By following the tips in this article, you can get rid of the larvae and prevent them from infesting your home.

Read too: Do All Popcorn Ceilings Contain Asbestos

Additional Information

Indian meal moth larvae are not harmful to humans, but they can be a nuisance. They can also cause damage to your food.

If you have a large infestation of Indian meal moth larvae, you may need to call a professional pest control company.tunesharemore_vert

Does All Popcorn Ceiling Have Asbestos?

Popcorn ceilings were a popular home improvement trend in the United States from the 1950s to the 1980s. Their reputation stemmed from their sound-absorbing and fire-resistant properties, as well as their cost-effective installation. Nevertheless, popcorn ceilings frequently contained asbestos, a naturally occurring mineral that poses health hazards to humans.

Does All Popcorn Ceiling Have Asbestos

What is asbestos?

Asbestos comprises thin, fibrous crystals that occur naturally. Inhaling or ingesting these fibers can lead to severe health issues, such as lung cancer, mesothelioma, and asbestosis.

Did all popcorn ceilings contain asbestos?

No, not all popcorn ceilings contained asbestos. However, it’s estimated that up to 90% of popcorn ceilings installed before 1980 contained asbestos. This is because asbestos was a common ingredient in many building materials during that time, including popcorn ceilings, drywall, and insulation.

How can you tell if your popcorn ceiling contains asbestos?

The only way to determine if your popcorn ceiling contains asbestos is to have it tested. However, there are some signs that may indicate the presence of asbestos, including:

  • The ceiling was installed before 1980.
  • The ceiling has a rough, textured surface.
  • The ceiling is discolored or damaged.

If you are concerned that your popcorn ceiling may contain asbestos, you should have it tested by a professional.

What are the risks of asbestos exposure?

Asbestos exposure can cause a number of serious health problems, including:

  • Lung cancer
  • Mesothelioma
  • Asbestosis

Lung cancer is the most common type of cancer caused by asbestos exposure. Mesothelioma is a rare cancer of the lining of the lungs, abdomen, or chest. Asbestosis is a chronic lung disease that can cause shortness of breath, coughing, and chest pain.

How can you protect yourself from asbestos exposure?

If you think your popcorn ceiling may contain asbestos, you should take steps to protect yourself from exposure. These steps include:

  • Avoiding disturbing the ceiling.
  • Wearing a respirator when you are in the same room as the ceiling.
  • Having the ceiling removed by a professional.

How to remove popcorn ceilings safely

If you decide to have your popcorn ceiling removed, it is important to do so safely. Only a licensed professional trained in safe asbestos handling should undertake asbestos removal.

Conclusion

Popcorn ceilings were a popular home improvement trend in the past, but they may contain asbestos, a hazardous material. If you think your popcorn ceiling may contain asbestos, you should have it tested by a professional.tunesharemore_vert

Signs of Water Damage on Ceilings

Water damage on ceilings can be a major problem. It can lead to mold growth, structural damage, and other issues. If you notice any signs of water damage on your ceiling, it is important to take action immediately to prevent further damage.

In this article, we will discuss the signs of water damage on ceilings, how to identify them, and what to do if you find them.

Signs Of Water Damage On Ceiling

Signs of Water Damage on Ceilings

There are a number of signs that can indicate water damage on ceilings. Some of the most common signs include:

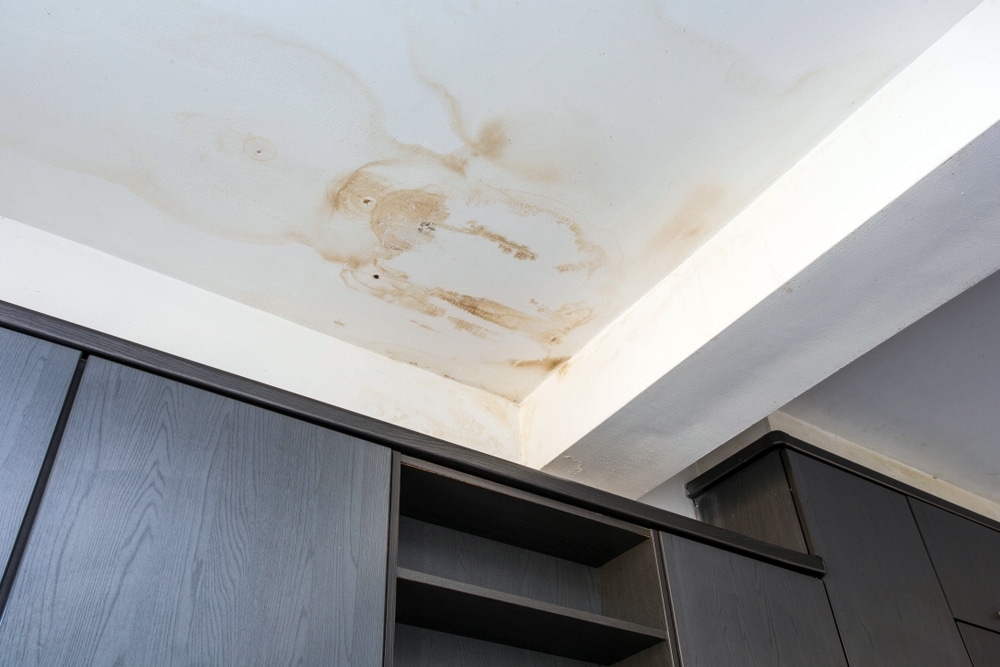
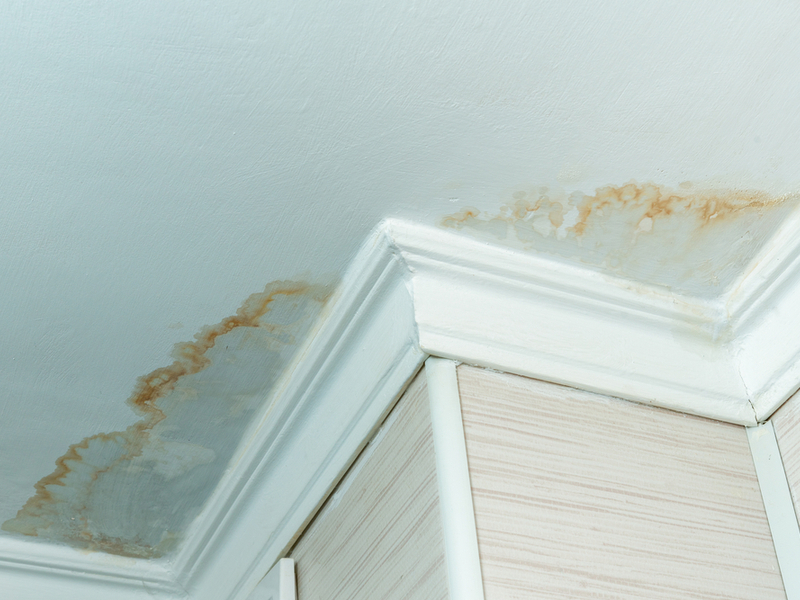
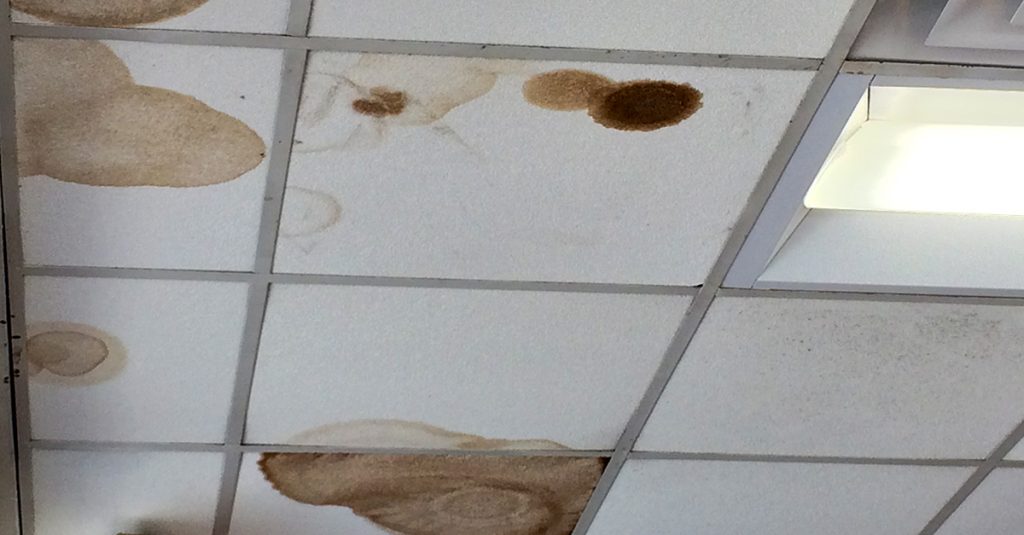
  • Wet spots or stains: Water damage will often appear as wet spots or stains on the ceiling. These stains can be brown, black, or another color.
  • Blisters or bubbles: Water damage can also cause blisters or bubbles to form on the ceiling. These blisters or bubbles are caused by water that has seeped between the layers of drywall.
  • Mold or mildew growth: Mold and mildew can grow on ceilings that have been exposed to water damage. Mold and mildew can cause health problems, so it is important to remove them as soon as possible.
  • Drywall damage: Water damage can also cause drywall to become damaged. This damage can appear as cracks, holes, or other imperfections in the drywall.
  • Sagging or bowing: In severe cases, water damage can cause the ceiling to sag or bow. This is a sign that the damage is significant and that structural repairs may be necessary.
  • Musty odor: Water damage can also cause a musty odor in the home. This odor is caused by mold and mildew growth.

Identifying Water Damage

If you notice any of the signs of water damage on your ceiling, it is important to identify the source of the leak. This will help you to determine the best course of action for repair.

Here are a few tips for identifying the source of a leak:

  • Check for leaks in plumbing fixtures: Leaks in plumbing fixtures, such as faucets, toilets, and showers, are a common cause of water damage on ceilings.
  • Inspect the roof: Leaks in the roof can also cause water damage on ceilings.
  • Check for leaks in the attic: Leaks in the attic can also cause water damage on ceilings.
  • Check for leaks in the walls: Leaks in the walls can also cause water damage on ceilings.

Repairing Water Damage

Once you have identified the source of the leak, you can begin repairing the water damage. The specific steps you will need to take will vary depending on the cause of the leak.

In general, you will need to take the following steps to repair water damage:

  1. Stop the leak: The first step is to stop the leak. This may involve repairing a leaky pipe, replacing damaged caulking or sealant, or clearing a clogged drain.
  • Clean up the damage: Once the leak has been stopped, you will need to clean up any damage that has already occurred. This may involve removing wet drywall, scraping mold, or repairing structural damage.
  • Dry the area: It is important to dry the area completely before you begin repairs. This will help to prevent mold and mildew growth.
  • Make repairs: Once the area is dry, you can begin making repairs. This may involve replacing damaged drywall, repairing structural damage, or applying a sealant to prevent future leaks.

Preventing Water Damage

The best way to prevent water damage on ceilings is to take steps to prevent leaks. Here are a few tips for preventing leaks:

  • Regularly inspect your plumbing fixtures for leaks.
  • Have your roof inspected and repaired by a professional regularly.
  • Check your attic for leaks regularly.
  • Seal any cracks or holes in your walls or ceiling.

Conclusion

Water damage on ceilings can be a major problem. By being aware of the signs of water damage and taking steps to prevent leaks, you can help to protect your home from this damage.

How to Fix Water Spot on Ceiling Under Bathroom

Water spot on ceiling under bathroom can be a serious problem. If left untreated, it can lead to mold growth, structural damage, and other problems. In this article, we will discuss the causes of water damage on ceilings under bathrooms, how to identify the source of the leak, and how to fix the damage.

Water Spot On Ceiling Under Bathroom

Causes of Water Damage on Ceilings Under Bathrooms

There are a number of things that can cause water damage on ceilings under bathrooms. Some of the most common causes include:

  • Leaking pipes: Leaking pipes are one of the most common causes of water damage on ceilings under bathrooms. Leaks can occur in the pipes that supply water to the toilet, sink, or shower. Various factors, including corrosion, wear and tear, or improper installation, can cause leaks.
  • Damaged caulking or sealant: Caulking and sealant seal around bathtubs, showers, and other fixtures in bathrooms. If the caulking or sealant becomes damaged, it can allow water to seep through. Caulking and sealant can be damaged by moisture, chemicals, or physical wear and tear.
  • Clogged drains: Clogged drains can also cause water damage on ceilings under bathrooms. When drains are clogged, water can back up and overflow, causing damage to the ceiling. Clogs can be caused by hair, soap scum, or other debris.
  • Roof leaks: In some cases, water damage on ceilings under bathrooms can be caused by a roof leak. If the roof is damaged, it can allow water to seep into the attic and then drip down onto the ceiling. Roof leaks can be caused by hail, wind, or other weather events.

How to Identify the Source of the Leak

Once you have determined that you have water damage on the ceiling under your bathroom, you need to identify the source of the leak. This can be a difficult task, but there are a few things you can do to help narrow it down.

  • Look for any obvious signs of a leak, such as wet spots on the ceiling, dripping water, or mold growth. If you see any of these signs, you can start your investigation there.
  • Try to trace the path of the water. If you can see where the water is coming from, you will be well on your way to identifying the source of the leak.
  • Turn off the water to the bathroom and see if the leak stops. If the leak stops, you have identified the source of the leak.
  • If you are having trouble identifying the source of the leak, you may need to hire a plumber or other professional to help you.

How to Fix Water Damage on Ceilings Under Bathrooms

Once you have identified the source of the leak, you can start to fix the damage. The specific steps you will need to take will vary depending on the cause of the leak.

Stop the leak: The first step is to stop the leak. This may involve repairing a leaking pipe, replacing damaged caulking or sealant, or clearing a clogged drain.

Clean up the damage: After stopping the leak, you must clean up any existing damage. This may involve removing wet drywall, scraping mold, or repairing structural damage.

Prevent future leaks: After repairing the damage, you should take measures to prevent future leaks. This may require you to replace old or damaged pipes, caulk or seal around fixtures, or repair your roof.

Tips for Fixing Water Damage on Ceilings Under Bathrooms

  • Be patient: Fixing water damage can be a time-consuming process. Do not rush the job, or you may end up making the problem worse.
  • Use the right materials: Make sure you use the right materials to fix the damage. Using the wrong materials can lead to further problems.
  • Get professional help: If you are not comfortable fixing the damage yourself, hire a professional.

Read too: Do All Popcorn Ceilings Contain Asbestos

Additional Information

In addition to the steps listed above, there are a few additional things you can do to help prevent water spot on ceiling under bathroom.

  • Install a moisture sensor: A moisture sensor can help you detect leaks early on, before they cause significant damage.
  • Install a water alarm: A water alarm can sound an alarm if water is detected.
  • Install a sump pump: A sump pump can help to remove water from your basement or crawl space, which can help to prevent leaks from occurring in your bathroom.

Should You Insulate Your Garage Ceiling?

Your garage is an important part of your home, and it can be used for a variety of purposes, from storing your car to working on projects. But if your garage is not insulated, it can be a source of wasted energy and discomfort.

Insulating your garage ceiling is a great way to save money on your energy bills, improve the comfort of your home, and protect your belongings from the elements. In this article, we will discuss the benefits of insulating your garage ceiling in more detail and answer the question, “Should you insulate your garage ceiling?

Should You Insulate Your Garage Ceiling

Benefits of Insulating Your Garage Ceiling

Reduced energy bills: Insulated garage ceilings can help to keep the heat in during the winter and the cool air in during the summer. This can save you money on your energy bills, especially if your garage is attached to your home.

For example, if you live in a cold climate and your garage is attached to your home, insulating your garage ceiling can save you up to 10% on your heating costs. This is because the insulation will help to prevent heat from escaping from your home through the garage ceiling.

Improved comfort: A well-insulated garage will be more comfortable to use, even in cold weather. This is because the insulation will help to trap heat inside the garage, making it warmer and more comfortable to work in.

For example, if you use your garage as a workshop, insulating your garage ceiling will make it more comfortable to work in during the winter. The insulation will help to keep you warm and comfortable, even if the temperature outside is cold.

Protection from the elements: Insulation protects garages from the elements, extending the lifespan of your belongings. This is because the insulation will help to keep out moisture and cold air, which can damage your belongings.

For example, if you store your car in your garage, insulating your garage ceiling will help to protect your car from the elements. The insulation will help to keep your car dry and warm, which can help to extend the life of your car.

Should You Insulate Your Garage Ceiling?

The answer to this question depends on a number of factors, including:

  • The climate in your area: If you live in a cold climate, insulating your garage ceiling is especially important. This will help to keep your home warmer and more comfortable in the winter.

For example, if you live in a cold climate, such as Minnesota or Wisconsin, insulating your garage ceiling is a good investment. The insulation will help to keep your home warmer and more comfortable in the winter, which can save you money on your energy bills.

  • The size of your garage: The larger your garage, the more insulation you will need, and the higher the cost will be.

For example, if you have a two-car garage, you will need about 800 square feet of insulation. The cost of insulation will vary depending on the type of insulation you choose.

  • Your budget: Insulating your garage ceiling can be a significant investment, so it is important to consider your budget before making a decision.

For example, the cost of insulating a two-car garage with fiberglass batts is about $500. The cost of insulating a two-car garage with spray foam insulation is about $2,000.

How to Insulate Your Garage Ceiling

If you decide to insulate your garage ceiling, there are a few things you will need to do:

  1. Remove any existing insulation. If your garage already has insulation, it is important to remove it before installing new insulation.
  2. Inspect the joists. Make sure the joists are in good condition and free of damage. You will need to repair the damaged joists before installing insulation.
  3. Measure the joists. You will need to measure the width and depth of the joists to determine the correct size of insulation.
  4. Cut the insulation to size. Use a sharp knife or saw to cut the insulation to the correct size.
  5. Install the insulation. Staple or screw the insulation to the joists, leaving a small gap between the insulation and the ceiling.
  6. Seal any gaps or cracks. Use insulation tape to seal any gaps or cracks in the insulation.

Conclusion

Insulating your garage ceiling is a wise investment that can save you money, improve your comfort, and protect your belongings. If you are considering insulating your garage ceiling, it is important to do your research and compare prices before making a decision.

How Much Does It Cost to Insulate a Garage Ceiling?

Insulating your garage ceiling is a great way to save money on your energy bills, improve the comfort of your home, and protect your belongings from the elements. But how much does it cost to insulate a garage ceiling?

How Much To Insulate Garage Ceiling

The cost of insulating a garage ceiling can vary depending on a number of factors, including:

  • The size of your garage: The larger your garage, the more insulation you will need, and the higher the cost will be.
  • The type of insulation you choose: Different types of insulation have different costs. Fiberglass batts are the most common type of insulation, and they are relatively inexpensive. Spray foam insulation is more expensive, but it is also more effective at blocking heat transfer.
  • The cost of labor in your area: The cost of labor can vary depending on the location. In general, labor costs are higher in urban areas than in rural areas.

In general, the cost of insulating a garage ceiling ranges from $250 to $3,900.

Here is a breakdown of the costs involved in insulating a garage ceiling:

  • Materials: The cost of insulation materials can range from $1 to $3 per square foot. For a typical 2-car garage, you will need about 800 square feet of insulation. The cost of insulation materials will depend on the type of insulation you choose.
  • Labor: The cost of labor can range from $25 to $50 per hour. The amount of labor required will depend on the size of your garage and the type of insulation you choose.

Here are some tips for reducing the cost of insulating your garage ceiling:

  • Do it yourself: If you are handy, you can insulate your garage ceiling yourself and save money on labor costs. There are many tutorials available online and in home improvement stores.
  • Choose the right insulation: There are a variety of insulation materials available, each with its own advantages and disadvantages. Choose the type of insulation that is best suited for your needs and budget.
  • Get multiple estimates: Get estimates from several contractors before making a decision. This will help you compare prices and find the best deal.

How to Insulate a Garage Ceiling

If you decide to insulate your garage ceiling yourself, you will need the following materials:

  • Insulation: You can choose from a variety of insulation materials, including fiberglass batts, cellulose insulation, and spray foam insulation.
  • Insulation staples or screws: You will need these to secure the insulation to the joists.
  • Insulation tape: You will need this to seal any gaps or cracks in the insulation.
  • Safety gear: You will need safety glasses, gloves, and a dust mask to protect yourself from insulation fibers.

Here are the steps involved in insulating a garage ceiling:

  1. Remove any existing insulation. If your garage already has insulation, it is important to remove it before installing new insulation.
  2. Inspect the joists. Make sure the joists are in good condition and free of damage. If the joists are damaged, you will need to repair them before installing insulation.
  3. Measure the joists. You will need to measure the width and depth of the joists to determine the correct size of insulation.
  4. Cut the insulation to size. Use a sharp knife or saw to cut the insulation to the correct size.
  5. Install the insulation. Staple or screw the insulation to the joists, leaving a small gap between the insulation and the ceiling.
  6. Seal any gaps or cracks. Use insulation tape to seal any gaps or cracks in the insulation.

Benefits of Insulating a Garage Ceiling

Reduced energy bills: Insulating your garage ceiling can help you save money on your energy bills by reducing the amount of heat that escapes from your home. This is especially important if your garage is attached to your home.

  • Improved comfort: A well-insulated garage will be more comfortable to use, even in cold weather. This is because the insulation will help to trap heat inside the garage, making it warmer and more comfortable to work in.
  • Protection from the elements: Insulated garages are better protected from the elements, which can help to extend the life of your belongings. This is because the insulation will help to keep out moisture and cold air, which can damage your belongings.

Conclusion

Insulating your garage ceiling is a wise investment that can save you money, improve your comfort, and protect your belongings. If you are considering insulating your garage ceiling, it is important to do your research and compare prices before making a decision.tunesharemore_vert

How Much Does It Cost to Paint an Exposed Basement Ceiling?

How Much Does It Cost to Paint an Exposed Basement Ceiling? An exposed basement ceiling can be a great way to add character and style to your home. It can also help to improve the appearance of a basement that is in need of a makeover. However, painting an exposed basement ceiling can be a bit of a challenge. The ceiling is often uneven and textured, which can make it difficult to get a smooth finish.

Cost To Paint Exposed Basement Ceiling

Cost Factors

The cost of painting an exposed basement ceiling will vary depending on a number of factors, including:

  • Size of the ceiling: The larger the ceiling, the more paint you will need, and the more time it will take to paint. For example, a 1,000 square foot ceiling will require about 10 gallons of paint if you are using a single coat.
  • Condition of the ceiling: If the ceiling is in poor condition, you may need to repair any cracks or holes before you can paint. This can add to the cost of the project.
  • Type of paint: The type of paint you choose will affect the cost. Latex paint is the most common type of paint used for exposed basement ceilings, and it is relatively inexpensive. Oil-based paint is more expensive and requires more time to dry.
  • Painting supplies: You will need to purchase paint brushes, rollers, and other painting supplies.
  • Labor costs: If you hire a professional painter, you will need to factor in labor costs.

DIY Costs

If you choose to paint your exposed basement ceiling yourself, you can expect to pay about $0.50 to $1 per square foot for materials. This includes the cost of paint, brushes, rollers, and other supplies.

For example, if you have a 1,000 square foot ceiling, you can expect to pay about $500 to $1,000 in materials.

Here are some additional details about the cost of materials for DIY painting:

  • Paint: Latex paint costs about $20 to $30 per gallon. You will need two coats of paint, so you will need about 20 gallons of paint for a 1,000 square foot ceiling.
  • Brushes and rollers: You will need a paint brush for cutting in around the edges of the ceiling and a roller for painting the larger areas. You can purchase a set of brushes and rollers for about $50.
  • Other supplies: You will also need a drop cloth to protect your floors and a ladder to reach the ceiling. You can purchase a drop cloth for about $20 and a ladder for about $50.

Professional Painting Costs

If you hire a professional painter, you can expect to pay about $2 to $3 per square foot for labor. This includes the cost of prep work, painting, and cleanup.

For example, if you have a 1,000 square foot ceiling, you can expect to pay about $2,000 to $3,000 in labor costs.

Here are some additional details about the cost of labor for professional painting:

  • Prep work: The painter will need to prepare the ceiling by cleaning it and repairing any cracks or holes. This can add about $100 to $200 to the cost of the project.
  • Painting: The painter will apply two coats of paint to the ceiling. This will take about two days to complete.
  • Cleanup: The painter will clean up the mess after they are finished painting. This includes removing the drop cloth and ladder.

Read too: Do All Popcorn Ceilings Contain Asbestos

Total Costs

The total cost of painting an exposed basement ceiling will depend on the size of the ceiling, the condition of the ceiling, the type of paint you choose, and whether you choose to do the work yourself or hire a professional painter.

DIY Tips

If you choose to paint your exposed basement ceiling yourself, here are a few tips to help you get a smooth finish:

  • Prepare the ceiling properly. Make sure the ceiling is clean and free of dirt, dust, and cobwebs. You can use a vacuum cleaner or a broom to clean the ceiling. If the ceiling is dirty or dusty, it will be difficult to get a smooth finish.
  • Apply a coat of primer. Primer will help the paint adhere to the ceiling. You can use a latex primer or an oil-based primer.
  • Apply two coats of paint. This will help to create a smooth, even finish. You can use a latex paint or an oil-based paint.

Do All Popcorn Ceilings Contain Asbestos?

Popcorn ceilings were a popular home improvement trend in the United States from the 1950s to the 1980s. They are made by spraying a material onto a ceiling that creates a textured, bumpy surface. Popcorn ceilings can be a good way to hide imperfections in a ceiling, but they can also be a health hazard if they contain asbestos.

Do All Popcorn Ceilings Contain Asbestos

What is Asbestos?

Asbestos is a naturally occurring mineral that is made up of fibers. It has found application in various building materials, including popcorn ceilings, due to its strength and fire resistance properties. However, asbestos is a known carcinogen and can cause a variety of health problems, including lung cancer, mesothelioma, and asbestosis.

Do All Popcorn Ceilings Contain Asbestos?

The short answer is no, not all popcorn ceilings contain asbestos. However, it is estimated that about 50% of popcorn ceilings installed before 1980 contain asbestos. This is because the Environmental Protection Agency (EPA) banned the use of asbestos in popcorn ceiling material in 1978, making it a common ingredient until that time.

How to Tell if Your Popcorn Ceiling Contains Asbestos

If you are concerned that your popcorn ceiling may contain asbestos, there are a few things you can do to check. First, you can look for the following signs:

  • The ceiling was installed before 1980.
  • The ceiling has a crumbly or powdery texture.
  • The ceiling has a gray or brown color.

If you see any of these signs, it is best to have your ceiling tested for asbestos by a qualified professional.

Health Risks of Asbestos Exposure

Asbestos exposure can cause a variety of health problems, including:

  • Lung cancer
  • Mesothelioma
  • Asbestosis

Lung cancer is the most common health problem caused by asbestos exposure. Mesothelioma is a rare cancer that affects the lining of the lungs, heart, or abdomen. Asbestosis is a chronic lung disease that can cause shortness of breath, coughing, and fatigue.

How to Remove Popcorn Ceilings Containing Asbestos

If you have a popcorn ceiling that contains asbestos, it is important to have it removed by a qualified professional. Removing asbestos yourself can be dangerous and can lead to exposure to asbestos fibers.

A professional asbestos removal company will use specialized equipment and procedures to safely remove the popcorn ceiling. They will also take steps to contain the asbestos fibers and prevent them from spreading.

Additional Details

In addition to the signs listed above, there are a few other things you can look for to help determine if your popcorn ceiling contains asbestos. For example, if the ceiling has a strong, musty odor, it may be a sign of asbestos.

If you are concerned that your popcorn ceiling may contain asbestos, it is always best to have it tested by a qualified professional. Asbestos testing is a relatively inexpensive and quick process.

Conclusion

Popcorn ceilings that were installed before 1980 may contain asbestos. If you are concerned that your popcorn ceiling contains asbestos, it is best to have it tested by a qualified professional.

Call to Action

If you are concerned that your popcorn ceiling may contain asbestos, contact a qualified professional to have it tested.

Additional Details

Here are some additional details about the health risks of asbestos exposure:

  • Lung cancer is the most common health problem caused by asbestos exposure. It takes about 20-30 years for lung cancer to develop after asbestos exposure.
  • Mesothelioma is a rare cancer that affects the lining of the lungs, heart, or abdomen. It takes about 30-40 years for mesothelioma to develop after asbestos exposure.
  • Asbestosis is a chronic lung disease that can cause shortness of breath, coughing, and fatigue. It takes about 10-20 years for asbestosis to develop after asbestos exposure.

Read too: What Causes Black Mold On Ceiling

How to Remove Asbestos

Qualified professionals should exclusively undertake the complex and hazardous process of asbestos removal. A professional asbestos removal company will use specialized equipment and procedures to safely remove the asbestos. They will also take steps to contain the asbestos fibers and prevent them from spreading.

How to Test for Asbestos

Asbestos testing is a relatively inexpensive and quick process. A qualified professional will use a variety of methods to test for asbestos, including visual inspection, air sampling, and bulk sampling.

I hope this information is helpful.tunesharemore_vert

Why Is My Bathroom Ceiling Dripping Water After a Shower?

Why Is My Bathroom Ceiling Dripping Water After a Shower? A dripping bathroom ceiling can be a frustrating and even dangerous problem. It can cause water damage to your home, mold growth, and even health problems. If you’re experiencing a dripping bathroom ceiling, it’s important to identify the cause of the leak and take steps to fix it as soon as possible.

Bathroom Ceiling Dripping Water After Shower

What Causes a Dripping Bathroom Ceiling?

There are a number of possible causes of a dripping bathroom ceiling. The most common causes include:

  • Leaking pipes: Leaking pipes are the most common cause of bathroom ceiling leaks. They can be caused by a variety of factors, such as corrosion, wear and tear, or damage from freezing.
  • Damaged tiles or grout: Damaged tiles or grout can allow water to seep through to the ceiling below. This can happen due to impact damage, improper installation, or wear and tear. For example, if you drop a heavy object on your shower tiles, it could crack the tiles and cause a leak.
  • Clogged or damaged drains: Clogged or damaged drains can cause water to back up and leak through the ceiling. This can happen if you don’t regularly clean your shower and bathtub to remove soap scum and other debris that can clog drains.
  • Improper ventilation: Improper ventilation can lead to moisture buildup, which can contribute to mold growth and ceiling leaks. Bathrooms are typically small, enclosed spaces with no windows. This can lead to moisture buildup if there is not enough ventilation.

How to Fix a Dripping Bathroom Ceiling

Once you’ve identified the cause of the leak, you can take steps to fix it. The leak is caused by a leaking pipe, you’ll need to call a plumber to repair the pipe. If the leak is caused by damaged tiles or grout, you’ll need to replace the damaged tiles or grout. If the leak is caused by a clogged or damaged drain, you’ll need to clear the clog or repair the drain. The leak is caused by improper ventilation, you’ll need to improve the ventilation in your bathroom.

Preventing Bathroom Ceiling Leaks

The best way to prevent bathroom ceiling leaks is to take steps to prevent moisture buildup. You can do this by:

  • Fixing any leaks in your pipes or drains. This is the most important step. If you have a leak, it’s only a matter of time before it causes damage.
  • Regularly cleaning your shower and bathtub to remove soap scum and other debris that can clog drains. This will help to prevent clogs that can lead to leaks.
  • Using a dehumidifier to reduce humidity in your bathroom. This is a good option if you have a bathroom that doesn’t have a lot of ventilation.
  • Installing a fan in your bathroom to help ventilate the area. This is the most effective way to reduce moisture buildup in your bathroom.

Conclusion

Bathroom ceiling dripping water after shower can be a serious problem, but it’s one that can be fixed with the right diagnosis and treatment. By identifying the cause of the leak and taking steps to fix it, you can prevent further damage to your home and keep yourself and your family safe.

Call to Action:

If you’re experiencing a dripping bathroom ceiling, it’s important to take action as soon as possible. Contact a plumber or other professional to identify the cause of the leak and fix it.

Additional Information:

Here are some additional tips for preventing and fixing bathroom ceiling leaks:

  • Inspect your bathroom regularly for signs of leaks. This includes looking for water stains on the ceiling, walls, or floors.
  • If you see a leak, take action immediately. The longer you wait to fix a leak, the more damage it can cause.
  • If you’re not comfortable fixing a leak yourself, call a plumber or other professional.
  • When you’re fixing a leak, be sure to use the right tools and materials. This will help to ensure that the leak is fixed properly and that it doesn’t happen again.

By following these tips, you can help to prevent bathroom ceiling leaks and keep your home safe and dry.tunesharemore_vert

What Causes Black Mold On Ceiling: A Comprehensive Guide

Black mold is a type of mold that can grow on ceilings and other surfaces in homes and businesses. It is often caused by moisture and humidity, and can be a health hazard.

In this article, we will discuss the causes of black mold on ceiling, the health risks associated with black mold exposure, and how to prevent and remove black mold.

What Causes Black Mold On Ceiling

What Causes Black Mold On Ceilings?

Black mold is caused by moisture and humidity. When these conditions are present, mold spores can grow and spread.

Moisture

Moisture is the most common cause of black mold. It can come from a variety of sources, including:

  • Leaks: Leaks from roofs, pipes, or other sources can cause moisture to build up in ceilings.
  • Water damage: Water damage from flooding or other events can also lead to moisture and humidity in ceilings.
  • High humidity: High humidity levels can also promote the growth of mold.

Humidity

Humidity is the amount of water vapor in the air. When humidity levels are high, it can be difficult for moisture to escape from ceilings.

Other Factors

Other factors that can contribute to the growth of black mold on ceilings include:

  • Poor ventilation: Poor ventilation can prevent moisture from escaping from ceilings.
  • Debris: Debris, such as leaves or branches, can provide a substrate for mold to grow on.
  • Warm temperatures: Warm temperatures can promote the growth of mold.

Health Risks Associated With Black Mold

Black mold can be a health hazard. It can release toxins that can cause respiratory problems, allergic reactions, and other health problems.

Respiratory problems: Black mold can irritate the respiratory system, causing symptoms such as coughing, wheezing, and shortness of breath.

  • Allergic reactions: Black mold can trigger allergic reactions, such as sneezing, runny nose, and itchy eyes.
  • Sinus infections: Black mold can increase the risk of sinus infections.
  • Eye infections: Black mold can increase the risk of eye infections.
  • Skin infections: Black mold can increase the risk of skin infections.
  • Immune system problems: Black mold can weaken the immune system, making people more susceptible to infections.
  • Neurological problems: Black mold has been linked to neurological problems, such as memory loss and cognitive decline.

Preventing Black Mold

The best way to prevent black mold is to reduce moisture and humidity in your home. You can do this by:

  • Fixing leaks: Fix any leaks in your roof, pipes, or other sources.
  • Improving ventilation: Improve ventilation in your home by installing fans or opening windows.
  • Dehumidifying: Dehumidify your home to reduce humidity levels.
  • Cleaning regularly: Clean surfaces regularly to remove mold spores before they can grow.

Removing Black Mold

If you find black mold in your home, it is important to remove it as soon as possible. You can remove black mold yourself or hire a professional mold remediation company.

Removing black mold yourself:

If you choose to remove black mold yourself, it is important to wear protective gear, such as a respirator, gloves, and goggles. You should also follow the instructions on the mold removal product you are using.

Steps for removing black mold yourself:

  1. Remove any debris or materials that are contaminated with mold.
  2. Clean the affected area with a bleach solution.
  3. Rinse the area thoroughly with water.
  4. Allow the area to dry completely.

Removing black mold with a professional:

If you are not comfortable removing black mold yourself, you should hire a professional mold remediation company. A professional will have the necessary equipment and experience to remove black mold safely and effectively.

Conclusion

Black mold is a serious problem that can cause health problems. It is important to understand the causes of black mold on ceiling, the health risks associated with black mold exposure, and how to prevent and remove black mold.

Read too: Should You Insulate Unfinished Basement Ceiling

Call to Action

If you have found black mold in your home, please contact a qualified mold remediation company to have it removed safely and effectively.

Additional Information

In addition to the information provided in this article, here are some additional tips for preventing and removing black moldtunesharemore_vert

Should You Insulate Your Unfinished Basement Ceiling?

Your basement is a valuable part of your home, but it can be a cold and uncomfortable place if it’s not properly insulated. In fact, up to 25% of heat loss in a home can occur through the basement ceiling.

If you’re considering insulating your unfinished basement ceiling, there are a few things you need to know. In this article, we’ll discuss the pros and cons of insulating your basement ceiling, as well as the different types of insulation available.

Should You Insulate Unfinished Basement Ceiling

Should You Insulate Your Basement Ceiling?

There are several reasons why you might want to insulate your unfinished basement ceiling. Here are a few of the benefits:

  • Increased energy efficiency: Basement insulation can help to keep your home warm in the winter and cool in the summer. This can lead to lower energy bills.

For example, according to the U.S. Department of Energy, insulating your basement ceiling can save you up to 15% on your heating costs. This can add up to hundreds or even thousands of dollars over the lifetime of your home.

  • Improved comfort: A well-insulated basement will be more comfortable to use, whether you’re using it for storage, recreation, or finishing.

For example, if you use your basement for a home office or playroom, you’ll be more comfortable working or playing in a warm and dry environment.

  • Reduced noise levels: Basement insulation can help to reduce noise levels from the outside world. This can be especially important if you live in a noisy area.

For example, if you live near a busy road or train tracks, basement insulation can help to reduce the amount of noise that comes into your home.

Cons of Basement Ceiling Insulation

There are a few potential downsides to basement ceiling insulation. Here are a few things to consider:

The cost of basement ceiling insulation will vary depending on the size of your basement and the type of insulation you choose. However, in general, you can expect to pay between $1 and $2 per square foot.

  • Labor: If you’re not comfortable doing the work yourself, you’ll need to hire a contractor.

Insulating a basement ceiling is a relatively simple project, but it can be time-consuming. If you’re not comfortable doing the work yourself, you can hire a contractor to do it for you.

  • Space: Basement ceiling insulation can reduce the amount of storage space in your basement.

Depending on the type of insulation you choose, you may need to lose a few inches of headroom in your basement. This can reduce the amount of storage space you have available.

Types of Basement Ceiling Insulation

There are two main types of basement ceiling insulation:

  • Fiberglass: Fiberglass insulation is a popular option because it’s relatively inexpensive and easy to install.

Fiberglass insulation is made up of small, glass fibers that are held together by a binder. It comes in rolls or batts that can be cut to fit between the joists in your basement ceiling.

  • Foam insulation: Foam insulation is a more expensive option, but it’s also more effective at preventing heat loss.

Foam insulation comes in a variety of forms, including spray foam, rigid foam, and blown-in foam. Spray foam is the most effective type of foam insulation, but it’s also the most expensive. Rigid foam and blown-in foam are less expensive than spray foam, but they’re also less effective at preventing heat loss.

How to Insulate Your Basement Ceiling

If you’ve decided to insulate your basement ceiling, there are a few things you’ll need to do.

  1. Choose the right insulation: There are a variety of insulation materials and thicknesses available. Choose the type and thickness that’s right for your climate and needs.
  2. Measure and cut the insulation: Use a tape measure and a sharp knife to cut the insulation to the correct length and width.
  3. Install the insulation: There are a variety of ways to install basement ceiling insulation. Follow the instructions on the insulation packaging for specific instructions.

Conclusion

Should you insulate unfinished basement ceiling? Insulating your unfinished basement ceiling is a great way to improve the energy efficiency, comfort, and value of your home. If you’re considering this project, be sure to weigh the pros and cons carefully before making a decision.

Water Leaking Through Ceiling After Bath: Causes, Solutions, and Prevention

Water leaking through the ceiling after a bath can be a frustrating and costly problem. It can cause damage to the ceiling, walls, and floor below, and it can also lead to mold and mildew growth. In some cases, it can even be a sign of a more serious underlying problem, such as a leaking roof or damaged pipes.

Water Leaking Through Ceiling After Bath

Causes of Water Leaks

There are a number of possible causes of water leaks through the ceiling after a bath. Some of the most common causes include:

  • Damaged pipes: Damaged pipes are a common cause of water leaks. This damage can be caused by a number of factors, including corrosion, wear and tear, or even a sudden impact.
  • Loose or damaged seals: Loose or damaged seals can allow water to seep through the pipes and into the ceiling. You can locate these seals at the joints between pipes, fittings, and fixtures.
  • Clogged drains: Clogged drains can cause water to back up and leak into the ceiling. This is often caused by hair, soap scum, or other debris that builds up in the drain.
  • Damaged roof or gutters: Damaged roofs or gutters can allow water to leak into the ceiling. Several factors, such as wind damage, hail, or ice dams, can cause this.

Solutions for Water Leaks

The solution for a water leak will depend on the cause of the leak. In certain instances, fixing the leak can be a straightforward process involving a few simple steps. In other cases, the leak may require professional assistance.

If damaged pipes are the root cause of the leak, you will need to repair or replace the pipes. This can be a difficult and time-consuming task, so it is best to hire a professional plumber.

If loose or damaged seals are the cause of the leak, you will need to replace the seals. Homeowners can easily accomplish this task.

If the leak is caused by clogged drains, the drains will need to be cleared. This can be done with a plunger or a drain snake.

If damage to the roof or gutters is responsible for the leak, you will need to repair the damage. This is a task that is best left to a professional roofer.

Preventing Water Leaks

There are a number of things that can be done to prevent water leaks through the ceiling after a bath. Some of the most important preventive measures include:

  • Regularly inspect the pipes and drains for damage. You can do this by inspecting for any indications of cracks, leaks, or corrosion.
  • Clean the gutters and downspouts regularly. This will help to prevent water from backing up and leaking into the house.
  • Use a plunger or drain snake to clear clogged drains. This will help to prevent water from backing up and leaking into the house.
  • Have the roof inspected regularly for damage. This is especially important if you live in an area with severe weather.

Read too: How To Fix Condensation On Ceiling

Additional Tips

In addition to the preventive measures listed above, there are a few additional tips that can help to prevent water leaking through the ceiling after a bath. These tips include:

  • Install a water leak detector. A water leak detector can alert you to a leak before it causes damage.
  • Use a shower curtain or liner. A shower curtain or liner can help to prevent water from splashing onto the floor and causing damage to the ceiling.
  • Turn off the water when you leave the bathroom. This will help to prevent leaks if a pipe bursts.

By following these tips, homeowners can help to keep their homes dry and safe.

Additional Content

Here are some additional tips for preventing water leaks through the ceiling after a bath:

  • Use a high-quality shower curtain or liner. A cheap shower curtain or liner is more likely to tear or leak.
  • Inspect the shower curtain or liner regularly for damage. If you see any tears or holes, replace the curtain or liner immediately.
  • Keep the shower curtain or liner clean. A dirty shower curtain or liner can harbor mold and mildew, which can damage the ceiling.
  • Clean the shower regularly. A dirty shower can lead to soap scum buildup, which can clog drains and cause leaks.
  • Use a plunger or drain snake regularly to clear clogged drains. A clogged drain can cause water to back up and leak into the ceiling.

By following these tips, homeowners can help to keep their homes dry and safe.

Hearing Crawling in Your Ceiling: What to Do

Hear crawling in your ceiling can be a disturbing and unsettling experience. It can be difficult to sleep or relax knowing that there is something moving around above your head. In some cases, the crawling may be caused by a harmless animal, such as a mouse or a squirrel. However, it is also possible that the crawling is caused by something more serious, such as a structural problem or a pest infestation.

I Hear Crawling In My Ceiling

What to Do

If you are hearing crawling in your ceiling, there are a few things you can do to investigate the cause.

  1. Listen carefully to the noise. Try to determine the location of the noise and the type of sound it is making. Is it a scratching sound, a scurrying sound, or something else?
    • The type of noise you hear can help you to narrow down the possible causes. For example, a scratching sound is more likely to be caused by an animal, while a scurrying sound is more likely to be caused by pests.
  1. Look for signs of pests. Check for droppings, nests, or other signs of animal activity in your attic or crawl space.
    • Pests often leave behind signs of their presence. Look for droppings, nests, or other debris. You may also see the pests themselves, such as mice or ants.
  1. Inspect your ceiling. Look for cracks, holes, or other openings that could allow animals or pests to enter your home.
    • Animals and pests can enter your home through even the smallest openings. Look for cracks, holes, or other gaps in your ceiling. You may also want to inspect your attic or crawl space for any openings that could allow pests to enter your home.

Possible Causes

There are a number of possible causes for hearing crawling in your ceiling. Some of the most common causes include:

  • Animals: Mice, rats, squirrels, and other small animals are common causes of crawling noises in ceilings. These animals may be looking for food, water, or a place to nest.
    • Mice and rats are the most common animals that cause crawling noises in ceilings. These animals are attracted to food and water, and they often look for places to nest in warm, dark areas. Squirrels are less common, but they can also cause crawling noises in ceilings. Squirrels are looking for food and nesting material, and they often enter homes through attics or crawl spaces.
  • Pests: Ants, termites, and other pests can also cause crawling noises in ceilings. These pests may be damaging your home’s structure or eating away at your belongings.
    • Ants are a common pest that can cause crawling noises in ceilings. Ants are looking for food, and they often enter homes through cracks or holes in the foundation. Termites are a more serious pest that can cause significant damage to your home’s structure. Termites often enter homes through cracks or holes in the foundation, and they can spread quickly if not treated.
  • Structural problems: In some cases, crawling noises in ceilings can be caused by a structural problem, such as a loose roof tile or a damaged joist.
    • Loose roof tiles can cause a rattling or scurrying sound when they are hit by rain or wind. Damaged joists can also cause a creaking or groaning sound.

Read too: Should You Insulate Unfinished Basement Ceiling

How to Get Rid of the Crawling

Once you have determined the cause of the crawling, you can take steps to get rid of it.

  • Animals: If animals are the cause of the crawling, you can try to trap them or seal up any openings that allow them to enter your home.
    • There are a number of different ways to trap animals. You can use live traps, snap traps, or glue traps. You can also seal up any openings that could allow animals to enter your home.
  • Pests: If pests are the cause of the crawling, you can use pesticides or other pest control methods to get rid of them.
    • There are a number of different pesticides and pest control methods available. You can choose a method that is appropriate for the type of pest you are dealing with.
  • Structural problems: If a structural problem is the cause of the crawling, you will need to have it repaired by a professional.
    • A structural problem is a serious issue that should be repaired by a qualified professional.

Conclusion

Hear crawling in your ceiling can be a sign of a serious problem. It is important to investigate the cause of the crawling and take steps to get rid of it. By following the tips in this article, you can help to ensure that your home is safe and secure.