Lighting Direct Ceiling Fans: Elevate Your Space with Style and Functionality

Ceiling fans are a quintessential part of home comfort, seamlessly blending function and aesthetics. When it comes to enhancing your living space, Lighting Direct Ceiling Fans stand out as a top choice. These fans are not only designed to keep your space cool but also to add a touch of elegance to your home decor. In this comprehensive guide, we’ll explore the benefits, styles, and features of Lighting Direct Ceiling Fans to help you make an informed decision.

Lighting Direct Ceiling Fans

Understanding Lighting Direct Ceiling Fans

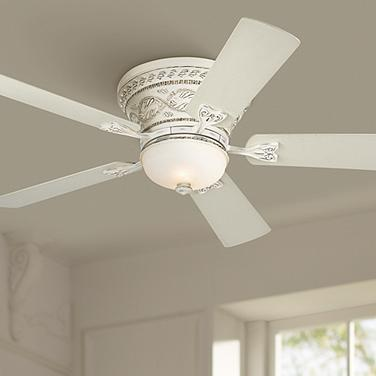
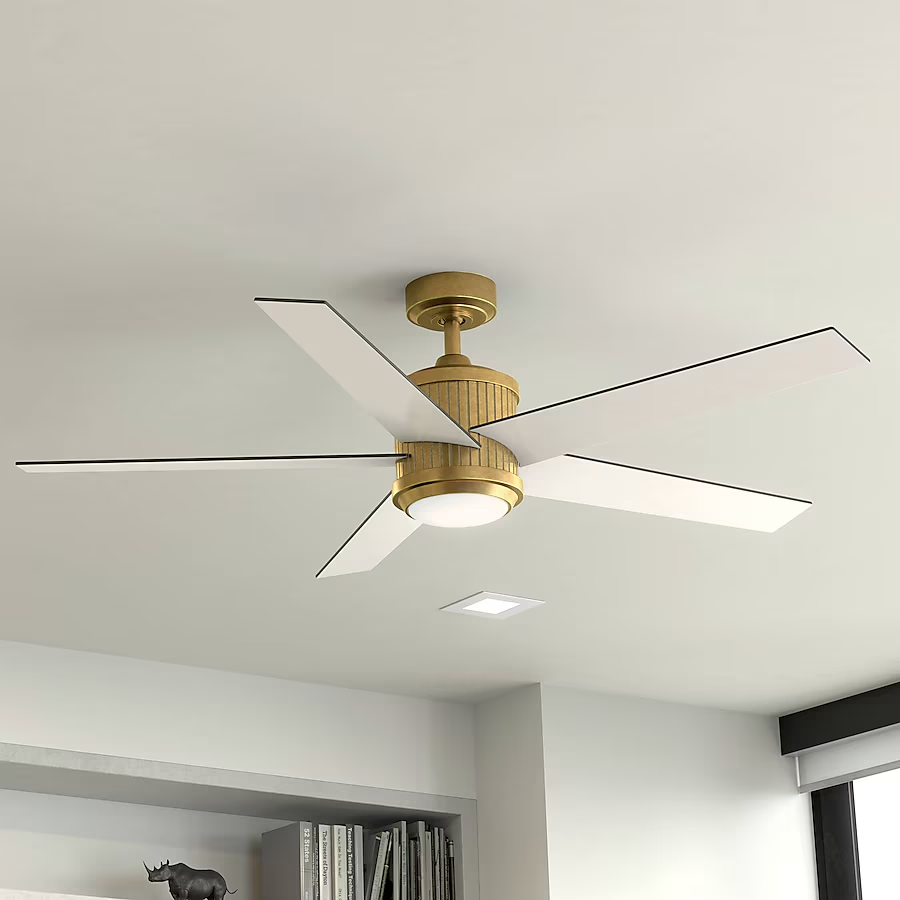
Lighting Direct Ceiling Fans are designed to integrate both lighting and ventilation into one elegant fixture. This fusion of functionality ensures that you get the best of both worlds—a cool breeze and a well-lit room. These fans are particularly popular because they reduce the need for multiple light sources and fans, simplifying your home’s design while enhancing its efficiency.

Benefits of Lighting Direct Ceiling Fans

1. Enhanced Energy Efficiency

Lighting Direct Ceiling Fans are designed with energy efficiency in mind. By combining lighting and cooling in a single unit, you can reduce your overall energy consumption. Modern ceiling fans use advanced motor technology that consumes less electricity compared to traditional fans. Additionally, LED lighting integrated into these fans is more energy-efficient than conventional incandescent bulbs.

Read too: Bathroom Flooded Through the Ceiling: A Comprehensive Guide

2. Improved Air Circulation

One of the primary functions of ceiling fans is to improve air circulation. Lighting Direct Ceiling Fans are engineered to distribute air evenly throughout the room, ensuring a comfortable environment. Proper air circulation can help regulate temperature, making your home feel cooler in the summer and warmer in the winter.

3. Stylish Design Options

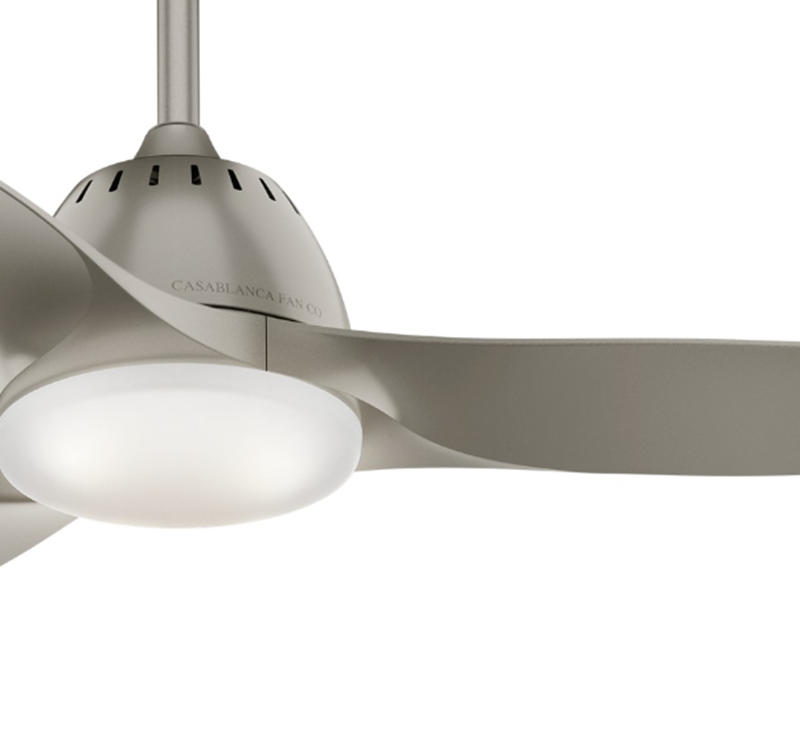
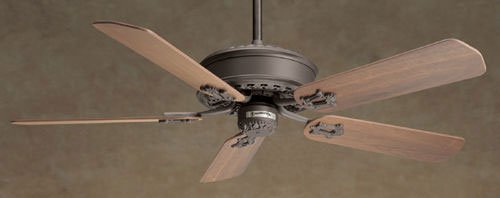
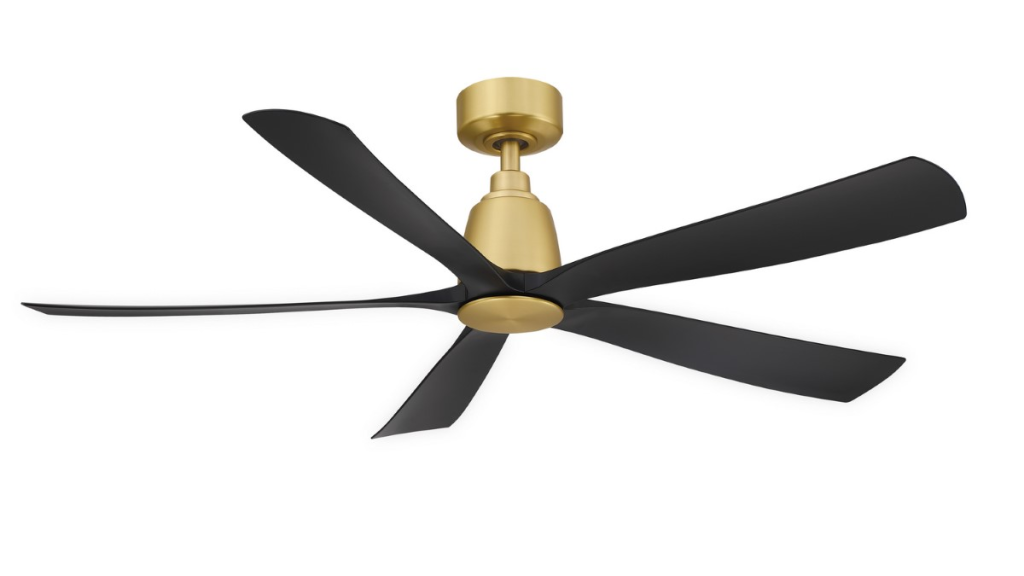
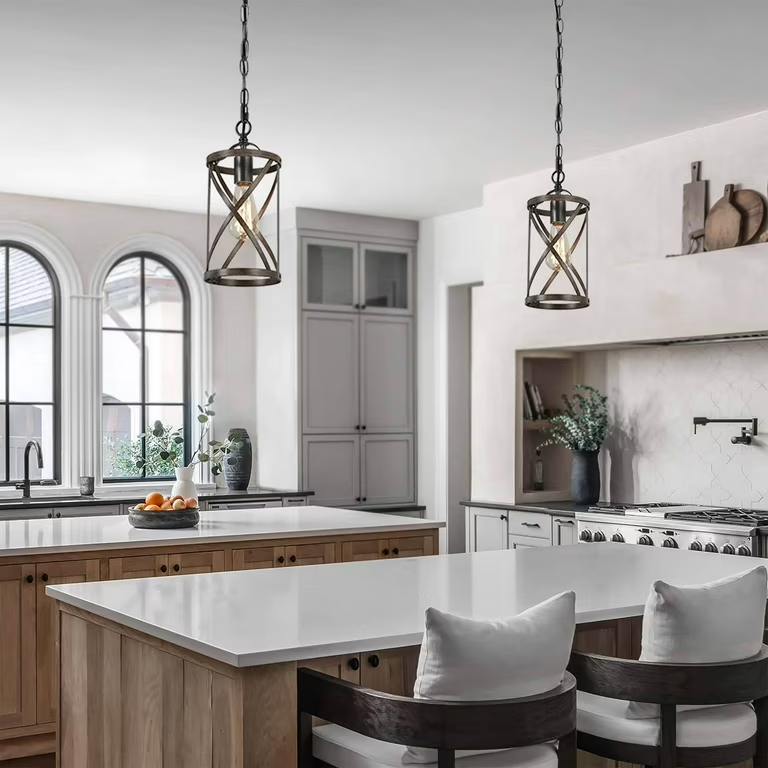
Lighting Direct Ceiling Fans come in a wide range of styles and finishes, making it easy to find one that complements your home decor. Whether you prefer a sleek modern design or a more traditional look, there’s a Lighting Direct Ceiling Fan that will enhance the aesthetic appeal of your space.

4. Space-Saving Solution

By integrating lighting and ventilation into one fixture, Lighting Direct Ceiling Fans help save space. This is especially beneficial in rooms with limited space where a separate fan and light fixture might be impractical. The compact design of these fans ensures that you have more room for other furnishings and decorations.

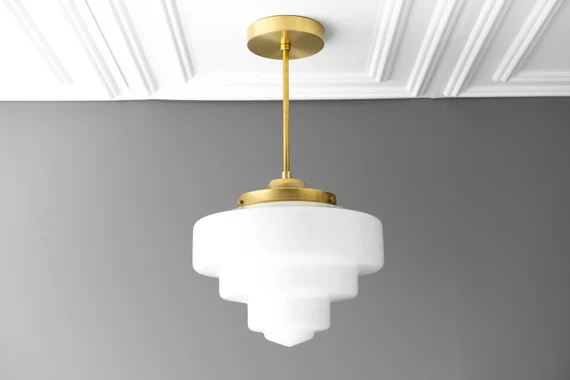
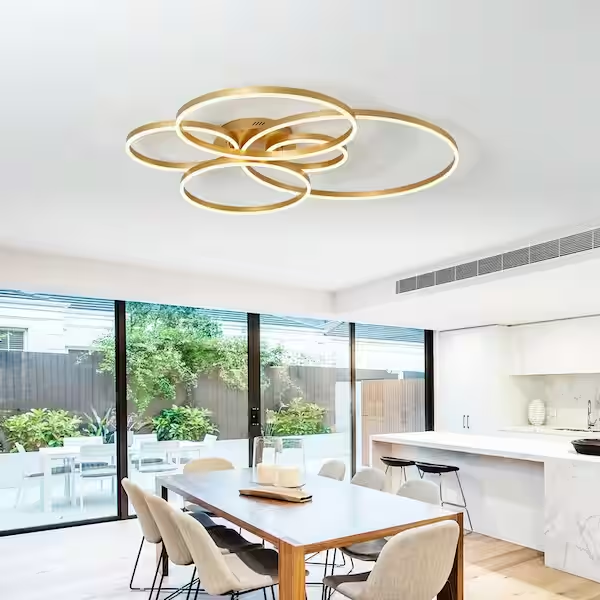
5. Versatile Lighting Options

Many Lighting Direct Ceiling Fans feature adjustable lighting settings, allowing you to customize the ambiance of your room. Whether you need bright light for tasks or a softer glow for relaxation, you can easily adjust the lighting to suit your needs. Some models even offer remote controls or smart home compatibility for added convenience.

Choosing the Right Lighting Direct Ceiling Fan

When selecting a Lighting Direct Ceiling Fan, there are several factors to consider to ensure you choose the right one for your home:

Room Size

The size of your room will play a significant role in determining the size of the ceiling fan you need. For small rooms, a fan with a blade span of 36 to 42 inches is usually sufficient. Larger rooms may require fans with blade spans of 52 inches or more to provide adequate airflow.
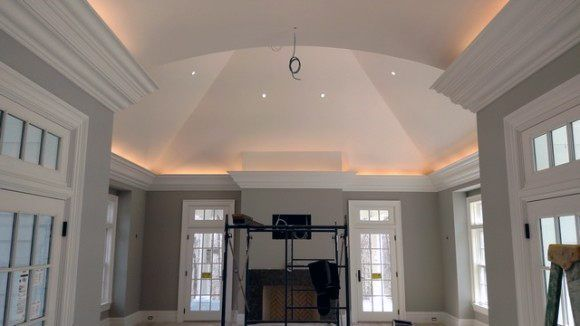
Ceiling Height

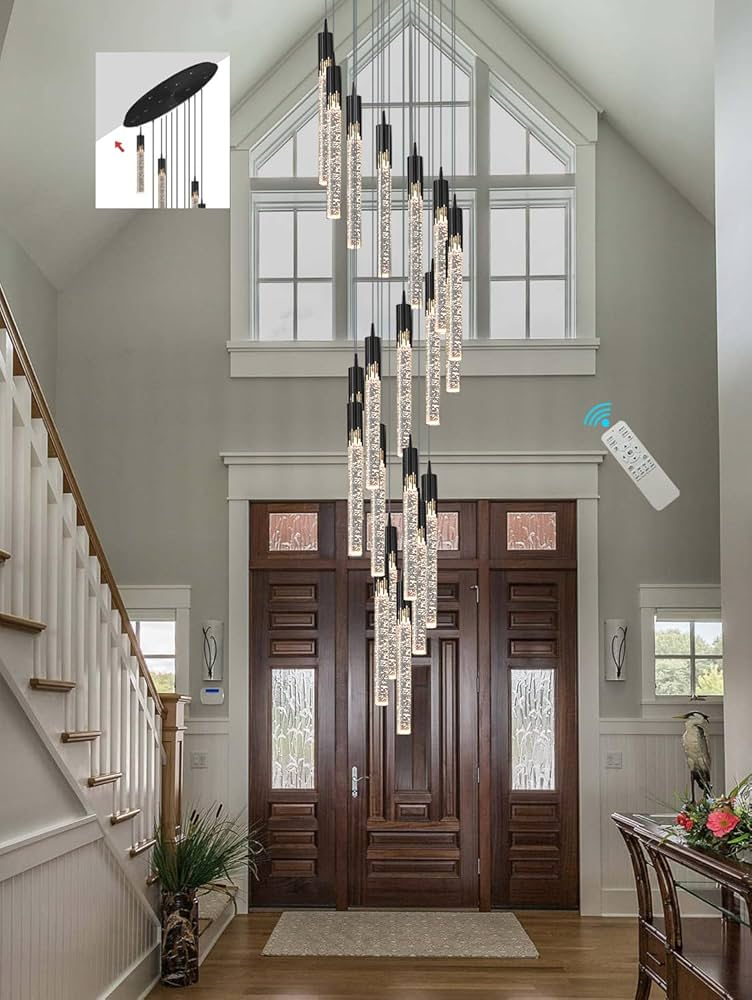
Ceiling height is another important consideration. For standard ceilings, a fan with a standard mount will typically work well. However, for rooms with high or vaulted ceilings, you may need a fan with a longer downrod to ensure optimal air circulation.

Style and Finish

The style and finish of your Lighting Direct Ceiling Fan should complement your home’s decor. Choose a finish that matches your existing furnishings and design elements. Common finishes include brushed nickel, oil-rubbed bronze, and antique brass.
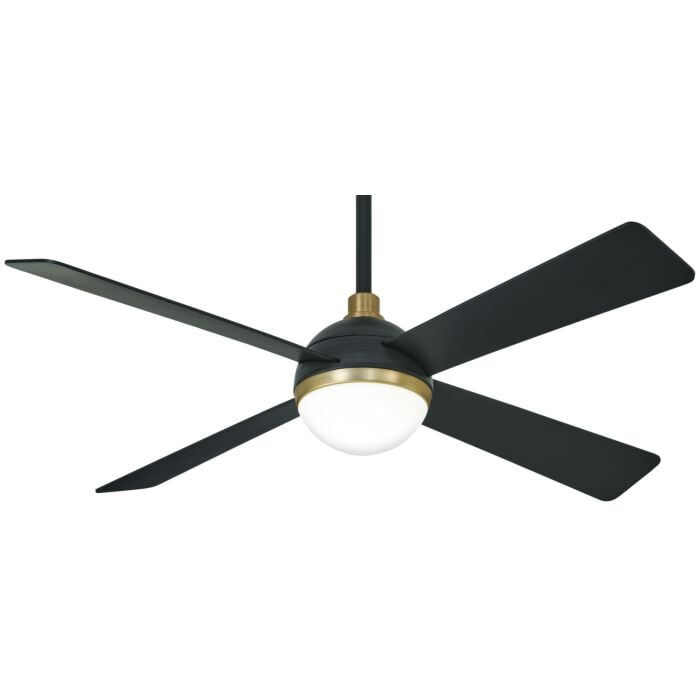
Lighting Features

Consider the type of lighting you need. Some Lighting Direct Ceiling Fans come with built-in LED lights, while others may have traditional bulb sockets. Think about the brightness level and color temperature that will best suit your space.

Control Options

Modern Lighting Direct Ceiling Fans often come with various control options, including pull chains, wall switches, and remote controls. Some even offer smart home compatibility, allowing you to control the fan and lighting through your smartphone or voice commands.

Installation and Maintenance

Proper installation and maintenance are crucial to ensuring the longevity and performance of your Lighting Direct Ceiling Fan.
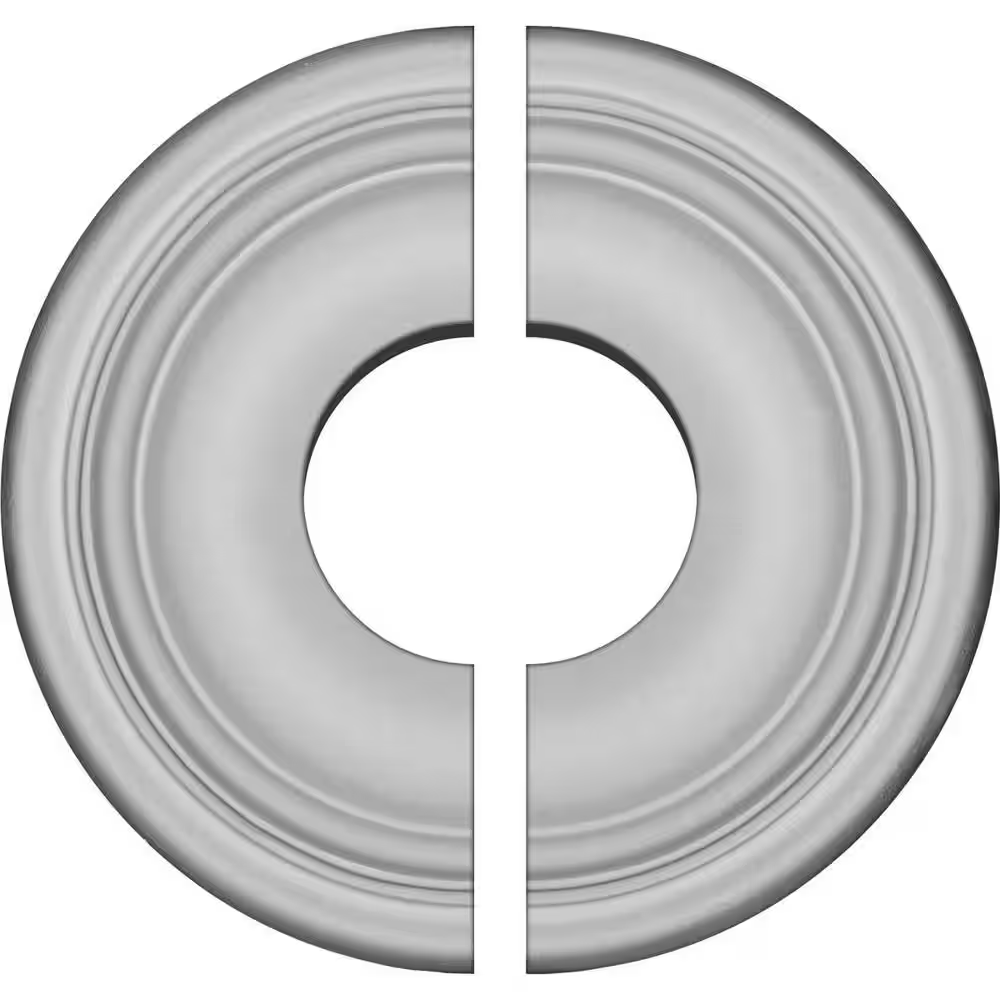
Installation Tips

  • Hire a Professional: While some homeowners may choose to install their ceiling fan themselves, it’s often best to hire a professional electrician. Proper installation ensures that the fan operates safely and efficiently.
  • Follow Manufacturer Instructions: Always refer to the manufacturer’s installation instructions to ensure that you install the fan correctly.
  • Check for Balance: After installation, make sure the fan is properly balanced. An unbalanced fan can cause wobbling and noise, reducing its effectiveness and lifespan.

Maintenance Tips

  • Regular Cleaning: Dust and debris can accumulate on the blades and light fixtures, affecting the fan’s performance. Regularly clean the blades and light fixtures to keep your fan in top condition.
  • Check for Loose Parts: Periodically check for any loose screws or components. Tighten them as needed to prevent any potential issues.
  • Replace Bulbs: If your fan has integrated lighting, replace any burnt-out bulbs promptly to maintain optimal lighting performance.

Conclusion

Lighting Direct Ceiling Fans offer a perfect blend of functionality and style. By integrating lighting and ventilation into a single fixture, these fans enhance your home’s comfort and aesthetic appeal. When selecting the right fan for your space, consider factors such as room size, ceiling height, style, and control options. Proper installation and regular maintenance will ensure that your Lighting Direct Ceiling Fan continues to perform efficiently and look great for years to come.

Whether you’re upgrading an existing fan or installing a new one, Lighting Direct Ceiling Fans are a smart choice for any home. Their energy efficiency, stylish designs, and versatile features make them a valuable addition to any room.

Cottage Style Ceiling Fans: Embrace Charm and Comfort

When it comes to creating a cozy and inviting atmosphere in your home, few things are as effective as a well-chosen ceiling fan. Among the myriad of options available, the cottage style ceiling fan stands out for its charming, rustic appeal and functional design. In this article, we’ll delve into the world of cottage style ceiling fans, exploring their benefits, design elements, and how they can enhance the ambiance of your space.

Cottage Style Ceiling Fan

What is a Cottage Style Ceiling Fan?

A cottage style ceiling fan is a type of ceiling fan that incorporates elements of traditional and rustic design, often associated with cozy, countryside homes. These fans typically feature designs that evoke a sense of warmth and nostalgia, combining functionality with aesthetic charm. They are an excellent choice for spaces that aim to create a relaxed and inviting environment.

Benefits of a Cottage Style Ceiling Fan

1. Enhanced Aesthetic Appeal

One of the most significant advantages of a cottage style ceiling fan is its ability to enhance the visual appeal of a room. These fans often come in designs that include ornate details, wooden blades, and vintage-inspired finishes. They can serve as a focal point in a room, adding character and charm to spaces such as living rooms, bedrooms, and sunrooms.

  • Design Variety: Includes traditional, rustic, and vintage-inspired styles.
  • Visual Appeal: Adds a charming and cozy element to any room.

2. Functionality and Efficiency

Despite their aesthetic appeal, cottage style ceiling fans do not compromise on functionality. Many of these fans are equipped with modern technology to ensure effective air circulation and energy efficiency. Features such as adjustable speeds, reversible motors, and integrated lighting options are commonly found in these fans, making them both practical and stylish.

  • Air Circulation: Provides efficient cooling and airflow.
  • Energy Efficiency: Often includes features that help reduce energy consumption.

Read too: Enhance Your Space with Acoustic Ceiling Tiles Paint: A Comprehensive Guide

3. Versatility

Cottage style ceiling fans are versatile and can complement various interior design themes. Whether your home features a traditional farmhouse look or a more contemporary cottage style, these fans can blend seamlessly with your existing decor. They are available in a range of finishes, materials, and sizes, allowing you to find the perfect match for your space.

  • Interior Compatibility: Fits well with different design themes, including farmhouse and rustic.
  • Variety: Available in multiple finishes and sizes to suit various rooms.

4. Comfort and Atmosphere

A cottage style ceiling fan not only adds visual appeal but also contributes to the overall comfort of a room. By improving air circulation, these fans help maintain a pleasant temperature, especially in warmer months. Additionally, the gentle breeze created by the fan can enhance the comfort level in your home, making it a more enjoyable space to relax and unwind.

  • Comfort: Enhances temperature control and airflow.
  • Atmosphere: Creates a cozy and inviting environment.

Design Elements of a Cottage Style Ceiling Fan

1. Wooden Blades

One of the hallmark features of a cottage style ceiling fan is its use of wooden blades. These blades often have a natural or distressed finish, adding to the fan’s rustic charm. The wood can be stained or painted in various colors to match the room’s decor.

  • Natural Finish: Often features wood grain patterns and earthy tones.
  • Customization: Can be stained or painted to complement room colors.

2. Ornate Details

Cottage style ceiling fans frequently include ornate details such as decorative scrollwork, vintage-inspired light fixtures, and intricate metalwork. These details enhance the fan’s visual appeal and contribute to its overall charm.

  • Decorative Elements: Includes intricate designs and vintage finishes.
  • Visual Interest: Adds character and style to the fan.

3. Vintage Finishes

To achieve a truly cottage-inspired look, many fans come with vintage finishes such as antique brass, oil-rubbed bronze, or brushed nickel. These finishes give the fan a timeless quality, blending well with traditional and rustic decor.

  • Finish Options: Antique brass, oil-rubbed bronze, and brushed nickel.
  • Timeless Quality: Complements traditional and rustic interiors.

4. Integrated Lighting

Many cottage style ceiling fans come with integrated lighting options. These lights can be designed to match the fan’s overall aesthetic, providing both functional illumination and enhancing the room’s ambiance. Options may include traditional chandeliers, glass shades, or pendant lights.

  • Lighting Features: Includes chandeliers, glass shades, and pendant lights.
  • Ambiance: Enhances room lighting and decor.

How to Choose the Right Cottage Style Ceiling Fan

1. Consider Room Size

When selecting a cottage style ceiling fan, it’s essential to consider the size of the room where it will be installed. Larger rooms may require a fan with larger blades or a higher airflow capacity, while smaller rooms can benefit from more compact models.

  • Room Dimensions: Match fan size to room dimensions for optimal performance.
  • Airflow Capacity: Choose a fan with appropriate airflow for the room size.

2. Match the Decor

Ensure that the design of the cottage style ceiling fan complements your existing decor. Consider the fan’s finish, blade material, and overall design to ensure it harmonizes with your room’s aesthetic.

  • Design Harmony: Select a fan that blends with your room’s decor.
  • Finish and Material: Choose finishes and materials that match your design theme.

3. Check for Features

Look for additional features that can enhance the fan’s functionality. Options such as remote controls, variable speed settings, and reversible motors can provide added convenience and versatility.

  • Convenience Features: Remote controls, speed settings, and reversible motors.
  • Functionality: Choose features that suit your needs.

4. Budget Considerations

Finally, consider your budget when selecting a cottage style ceiling fan. While there are many affordable options available, higher-end models with premium finishes and advanced features may come at a higher price. Determine your budget and find a fan that offers the best value for your money.

  • Cost: Consider your budget when choosing a fan.
  • Value: Find a fan that offers the best features within your price range.

Conclusion

A cottage style ceiling fan can be a beautiful addition to your home, combining functionality with aesthetic appeal. Whether you’re looking to enhance the charm of a cozy cottage or add a touch of rustic elegance to your modern space, these fans offer a range of benefits and design options to suit your needs. By considering factors such as room size, decor compatibility, and budget, you can find the perfect cottage style ceiling fan to complement your home’s ambiance and comfort.

Casablanca Wisp 44 Ceiling Fan: Elegance and Efficiency in a Compact Design

The Casablanca Wisp 44 Ceiling Fan excels in style, functionality, and energy efficiency. Whether upgrading or buying new, it offers features that meet both aesthetic and practical needs. This guide covers its features, benefits, and installation to help you decide.

Casablanca Wisp 44 Ceiling Fan

Overview of the Casablanca Wisp 44 Ceiling Fan

The Casablanca Wisp 44 Ceiling Fan is known for its sleek design and compact size, making it an excellent choice for smaller rooms or spaces with low ceilings. With a 44-inch blade span, it provides a balanced airflow without overpowering the space, creating a comfortable environment in any room.

Design and Aesthetics

The Casablanca Wisp 44 boasts a modern, minimalist design that seamlessly fits into various interior styles. Its clean lines and elegant finish make it a versatile addition to any room, from contemporary to traditional decor.

  1. Blade Finish: The fan features beautifully crafted blades that come in a variety of finishes, including wood tones and sleek metals. This range allows you to choose a finish that complements your existing decor.
  2. Motor Housing: The fan’s motor housing is compact and streamlined, contributing to its understated elegance while housing a powerful motor for efficient airflow.
  3. Light Kit: The Casablanca Wisp 44 can be equipped with an integrated light kit, adding both functionality and ambiance to your space. The light kit often includes dimmable options to adjust the lighting according to your needs.

Key Features of the Casablanca Wisp 44 Ceiling Fan

1. Airflow Efficiency

The Casablanca Wisp 44 Ceiling Fan is designed to provide optimal airflow for small to medium-sized rooms. Its 44-inch blade span ensures a balanced distribution of air, enhancing comfort without being overpowering.

  1. Reversible Motor: The fan comes with a reversible motor that allows you to change the direction of the blades. This feature is useful for both cooling in the summer and improving heat distribution in the winter.
  2. Quiet Operation: Thanks to its advanced motor technology, the Casablanca Wisp 44 operates quietly, ensuring that you enjoy a peaceful environment without disruptive noise.

Read too: Bathroom Flooded Through the Ceiling: A Comprehensive Guide

2. Energy Efficiency

In today’s eco-conscious world, energy efficiency is a key consideration for many homeowners. The Casablanca Wisp 44 is designed with energy efficiency in mind, offering several benefits:

  1. Energy Star Rated: Many models of the Casablanca Wisp 44 are Energy Star rated, meaning they meet high standards for energy efficiency and can help lower your electricity bills.
  2. LED Lighting: The integrated light kit often features energy-efficient LED bulbs, which consume less power and have a longer lifespan compared to traditional incandescent bulbs.

3. Customization and Control

The Casablanca Wisp 44 Ceiling Fan offers various customization options to tailor its performance and appearance to your preferences:

  1. Remote Control: Many models come with a remote control that allows you to adjust the fan speed, direction, and lighting from the comfort of your seat.
  2. Wall Control: An optional wall control can also be installed, offering a convenient way to operate the fan without needing a remote.
  3. Finish Options: With a range of blade and motor finishes, you can select a combination that enhances the visual appeal of your room and matches your decor.

Installation of the Casablanca Wisp 44 Ceiling Fan

1. Preparing for Installation

Before installing your Casablanca Wisp 44 Ceiling Fan, it’s essential to ensure that you have the right tools and follow safety guidelines:

  1. Tools Needed: You’ll need a ladder, screwdrivers, pliers, wire cutters, and a drill. Ensure that the fan is installed on a secure and stable ceiling mount.
  2. Electrical Check: Turn off the power to the existing ceiling fixture at the circuit breaker. Verify that the electrical box is rated to support the weight of the fan.

2. Installing the Ceiling Fan

  1. Mounting the Bracket: Install the mounting bracket to the ceiling electrical box, ensuring it is securely fastened and level.
  2. Attaching the Motor: Connect the fan’s motor to the mounting bracket according to the manufacturer’s instructions. Ensure that all connections are tight and secure.
  3. Connecting Wires: Connect the electrical wires from the fan to the wires in the ceiling, following the color-coded wiring instructions provided. Use wire nuts to secure the connections.
  4. Installing Blades and Light Kit: Attach the fan blades to the motor using the provided hardware. If your model includes a light kit, install it according to the instructions and connect the wiring.
  5. Final Adjustments: Check that the fan blades are properly aligned and balanced. Test the fan and light to ensure they operate correctly.

3. Post-Installation Tips

  1. Regular Maintenance: Clean the fan blades regularly to prevent dust buildup and ensure smooth operation. Check for any loose screws or parts and tighten them as needed.
  2. Seasonal Adjustments: Adjust the fan direction according to the season to maximize comfort and efficiency. In summer, set the fan to rotate counterclockwise for a cooling breeze. In winter, set it to rotate clockwise to circulate warm air.

Comparing the Casablanca Wisp 44 Ceiling Fan to Other Models

When choosing a ceiling fan, it’s helpful to compare different models to find the best fit for your needs. Here’s how the Casablanca Wisp 44 stacks up against other ceiling fans:

  1. Size and Design: The 44-inch size is ideal for smaller to medium rooms. For larger spaces, you might consider a fan with a larger blade span.
  2. Features: While the Casablanca Wisp 44 offers excellent features such as energy efficiency and quiet operation, other models may offer additional features like advanced remote controls or smart home compatibility.
  3. Price Range: The Casablanca Wisp 44 is positioned in the mid-range price category, offering a balance of quality and affordability. Higher-end models may offer additional features but at a higher cost.

Conclusion

The Casablanca Wisp 44 Ceiling Fan combines elegance, efficiency, and practicality, making it an excellent choice for a variety of home environments. With its sleek design, energy-efficient operation, and customizable features, it provides both aesthetic appeal and functional benefits. Whether you’re upgrading an existing fan or installing a new one, the Casablanca Wisp 44 offers a reliable and stylish solution for your cooling and lighting needs.

Floor To Ceiling Window Shades: A Complete Guide

Floor-to-ceiling windows are a coveted feature in modern homes, offering expansive views, an abundance of natural light, and an undeniable touch of elegance. However, with great windows comes the need for thoughtful window treatments that enhance both the aesthetics and functionality of your space. Enter floor-to-ceiling window shades—a versatile solution that blends style, privacy, and practicality. In this article, we’ll explore everything you need to know about floor-to-ceiling window shades, from the different types available to tips on choosing, installing, and maintaining them.

Floor To Ceiling Window Shades

Why Floor To Ceiling Window Shades Are the Perfect Choice

Floor-to-ceiling windows can dramatically transform a space, making it feel larger, brighter, and more connected to the outdoors. But without the right window shades, these large windows can also lead to issues like excessive glare, lack of privacy, and increased energy costs. Floor-to-ceiling window shades are designed to address these challenges while enhancing the overall aesthetic of your home. Here’s why they are an excellent choice:

Enhancing Aesthetic Appeal

Floor-to-ceiling window shades add a polished, cohesive look to any room. Whether you prefer a minimalist, modern aesthetic or a more traditional, cozy feel, there’s a style of shade that can seamlessly integrate with your décor. These shades can be tailored to match your interior design, from the material and color to the type of mechanism used to operate them.

Providing Privacy

Large windows can sometimes feel like an invitation for prying eyes, especially in urban environments or when the windows face a neighbor’s property. Floor-to-ceiling window shades provide the privacy you need without sacrificing the beauty of your windows. Whether you choose shades that completely block out the view or those that allow for a gentle diffusion of light, you can enjoy your space in peace.

Read too: Bathroom Flooded Through the Ceiling: A Comprehensive Guide

Controlling Light and Glare

While natural light is one of the biggest advantages of floor-to-ceiling windows, too much of it can lead to glare on screens, faded furniture, and an uncomfortable indoor environment. Floor-to-ceiling window shades give you control over the amount of light entering your room. With options that range from light-filtering to blackout, you can customize your window treatments to meet the specific needs of each room.

Improving Energy Efficiency

Large windows can be a source of heat loss in winter and heat gain in summer, leading to higher energy bills. Floor-to-ceiling window shades can help mitigate these issues by providing an additional layer of insulation. In the winter, they can help retain heat, and in the summer, they can block out the sun’s rays, keeping your home cooler and reducing your reliance on heating and cooling systems.

Types of Floor To Ceiling Window Shades

When it comes to selecting the right floor-to-ceiling window shades, there are several types to choose from, each with its own set of benefits and design features. Here are some of the most popular options:

1. Roller Shades

Roller shades are a popular choice for their sleek, simple design and ease of use. They consist of a single piece of fabric that rolls up into a tube at the top of the window. Roller shades are available in a variety of materials, including blackout fabrics for complete light control and sheer fabrics that allow for a soft diffusion of light. They can be motorized for added convenience, making them a great option for hard-to-reach windows.

2. Roman Shades

Roman shades offer a more traditional, elegant look. They are made from fabric that folds neatly into pleats when raised and lies flat when lowered. Roman shades can be lined for added privacy and insulation or left unlined for a more lightweight, airy effect. They are available in a wide range of fabrics, from luxurious silks to casual cottons, making them a versatile choice for any room.

3. Cellular Shades

Cellular shades, also known as honeycomb shades, are designed with energy efficiency in mind. Their unique structure traps air within the cells, providing an extra layer of insulation against heat and cold. Cellular shades are available in various opacities, from sheer to blackout, and they come in single, double, or triple cells, depending on your insulation needs. These shades are particularly effective for improving energy efficiency in homes with large windows.

4. Sheer Shades

Sheer shades combine the soft look of curtains with the functionality of shades. These shades feature fabric vanes suspended between two layers of sheer fabric, allowing for a soft diffusion of light while still providing some level of privacy. Sheer shades are perfect for rooms where you want to maintain a connection with the outdoors while softening the light and adding a touch of elegance to the space.

5. Solar Shades

Solar shades are designed to reduce glare and block harmful UV rays while still preserving your view of the outdoors. They are made from a special fabric that filters sunlight, making them ideal for rooms with a lot of direct sunlight or for protecting furniture and flooring from fading. Solar shades are available in different levels of openness, which determines how much light is filtered and how much of the view is preserved.

How to Choose the Right Floor To Ceiling Window Shades

Selecting the right floor-to-ceiling window shades involves considering several factors, including the function of the room, your aesthetic preferences, and your budget. Here are some tips to help you make the best choice:

1. Consider the Room’s Purpose

The purpose of the room will heavily influence your choice of window shades. For example, in a bedroom, you might prioritize blackout shades to ensure a good night’s sleep. In a living room, you might prefer light-filtering shades that allow for natural light while still providing privacy. Consider how you use the room and what you need from your window treatments before making a decision.

2. Match the Style of Your Home

Your window shades should complement the overall style of your home. If you have a modern, minimalist interior, sleek roller or solar shades might be the best fit. For a more traditional or eclectic space, consider Roman or sheer shades. The color and material of the shades should also coordinate with your existing decor, including your furniture, wall color, and flooring.

3. Evaluate Light and Privacy Needs

Different rooms have different requirements for light and privacy. In a room where you want to maximize natural light, like a kitchen or home office, sheer or solar shades might be ideal. In contrast, for a bedroom or media room, you might prefer shades that can completely block out light to create a dark, restful environment. Think about how much privacy you need as well, especially if your windows face a busy street or a neighbor’s property.

4. Think About Energy Efficiency

If energy efficiency is a priority, consider cellular shades, which provide excellent insulation and can help reduce your heating and cooling costs. Solar shades are also a good option for reducing heat gain in the summer, especially for south-facing windows that receive a lot of direct sunlight.

Installing Floor To Ceiling Window Shades

Installing floor-to-ceiling window shades can be a DIY project if you’re handy, but it requires careful planning and precision. Here’s a general guide to help you get started:

1. Gather Your Tools and Materials

Before you begin, make sure you have all the necessary tools, including a tape measure, drill, level, screws, and a screwdriver. You’ll also need the shades themselves, along with any brackets or mounting hardware that came with them.

2. Measure and Mark

Measure the width and height of your window or the area where the shades will be installed. Mark the spots where the brackets will be attached, ensuring they are level and evenly spaced.

3. Install the Brackets

Using a drill, attach the brackets to the top of the window frame or ceiling. Make sure the brackets are level and securely fastened, as they will support the weight of the shades.

4. Attach the Shades

Once the brackets are in place, attach the shades according to the manufacturer’s instructions. If you’re installing motorized shades, make sure they are properly connected to the power source and test the operation.

5. Adjust and Secure

After the shades are installed, test them to ensure they open and close smoothly. Make any necessary adjustments to the alignment or tension, and secure the shades in place.

Maintaining Floor To Ceiling Window Shades

To keep your floor-to-ceiling window shades looking their best and functioning properly, regular maintenance is essential. Here are some tips to help you care for your shades:

1. Regular Cleaning

Dust your shades regularly to prevent dirt buildup. Use a soft cloth, duster, or vacuum with a brush attachment to clean both sides of the shades. For fabric shades, consider using a handheld vacuum or a lint roller to remove dust and debris.

2. Spot Cleaning

For stains or spills, spot clean your shades with a mild detergent and a damp cloth. Be sure to test any cleaning solution on a small, inconspicuous area first to ensure it doesn’t damage the material.

3. Inspect for Damage

Periodically inspect your shades for any signs of wear and tear, such as frayed cords, broken mechanisms, or fabric damage. Address any issues promptly to prevent further damage and ensure your shades continue to function properly.

Conclusion

Floor-to-ceiling window shades are a versatile and stylish solution for large windows, offering both aesthetic and functional benefits. Whether you’re looking to control light, enhance privacy, or improve energy efficiency, there’s a type of floor-to-ceiling shade to suit your needs. By choosing the right shades, installing them correctly, and maintaining them with care, you can enjoy the beauty and functionality of your windows for years to come.

Floor To Ceiling Window Blinds: Elevate Your Home Design

Floor-to-ceiling windows are a striking feature in modern architecture, offering expansive views, natural light, and a seamless connection with the outdoors. However, the challenge lies in finding the right window treatments that not only enhance these architectural elements but also provide functional benefits like privacy, light control, and energy efficiency. Floor to ceiling window blinds are the perfect solution, offering a blend of style and practicality that complements any home. In this article, we will explore the various aspects of floor-to-ceiling window blinds, including their benefits, different types, installation tips, and how to maintain them to ensure they last for years.

Floor To Ceiling Window Blinds

Why Choose Floor To Ceiling Window Blinds?

When it comes to covering large windows, floor-to-ceiling window blinds offer several unique advantages. These blinds are designed to make the most of your window space, allowing you to control the amount of light that enters your room while also providing privacy when needed. Here are some compelling reasons to consider floor-to-ceiling blinds for your home:

Maximizing Natural Light

One of the most significant benefits of floor-to-ceiling windows is the abundance of natural light they allow into your space. However, too much sunlight can lead to glare, increased heat, and faded furniture. Floor to ceiling window blinds give you the flexibility to adjust the amount of light entering your home, making it easier to create a comfortable and inviting atmosphere. By simply tilting the slats or raising and lowering the blinds, you can manage the light to suit your needs throughout the day.

Enhancing Aesthetic Appeal

Floor-to-ceiling window blinds are not just functional; they are also a stylish addition to your home decor. These blinds can be customized to match your interior design, with options ranging from sleek, minimalist designs to more traditional styles. Whether you prefer the clean lines of modern roller blinds or the textured warmth of wooden blinds, there’s a style to suit every taste. The vertical orientation of these blinds also draws the eye upwards, creating the illusion of higher ceilings and a more spacious room.

Providing Privacy

While large windows offer stunning views, they can also expose your home to unwanted attention, especially if you live in a densely populated area. Floor to ceiling window blinds provide an effective way to maintain your privacy without sacrificing the beauty of your windows. You can choose blinds that completely block out the view from outside or opt for sheer blinds that allow light to filter through while still providing some level of privacy.

Read too: Bathroom Flooded Through the Ceiling: A Comprehensive Guide

Improving Energy Efficiency

Floor-to-ceiling windows can contribute to heat loss in the winter and excessive heat gain in the summer, leading to higher energy bills. Installing floor-to-ceiling window blinds can help improve the energy efficiency of your home by providing an extra layer of insulation. During the winter, closed blinds help retain heat, while in the summer, they can block out the sun’s rays to keep your home cool. This not only makes your home more comfortable but can also reduce your reliance on heating and cooling systems.

Types of Floor To Ceiling Window Blinds

There are several types of floor-to-ceiling window blinds available, each offering different features and aesthetic appeal. Here are some popular options to consider:

1. Vertical Blinds

Vertical blinds are a classic choice for floor-to-ceiling windows, particularly in larger spaces like living rooms or offices. These blinds consist of vertical slats that can be tilted to control light or drawn completely to one side to open up the view. Vertical blinds are available in a variety of materials, including fabric, vinyl, and wood, making them a versatile option for different interior styles. They are especially effective for covering sliding glass doors or wide windows.

2. Roller Blinds

Roller blinds offer a sleek and modern look, making them an excellent choice for contemporary homes. These blinds are made from a single piece of fabric that can be rolled up or down to control light and privacy. Roller blinds come in a wide range of colors, patterns, and materials, including blackout fabrics for complete light control. Their simple design makes them easy to operate and maintain, and they can be customized to fit any window size.

3. Panel Track Blinds

Panel track blinds are similar to vertical blinds but feature wider panels that slide smoothly along a track. These blinds are ideal for covering large windows or even using as room dividers. Panel track blinds offer a clean, streamlined look and are available in various materials, including woven wood, fabric, and solar screen options. Their large panels make them a striking feature in any room, adding both function and style.

4. Roman Blinds

Roman blinds are a more traditional option, offering a soft, elegant look that can complement both classic and modern interiors. These blinds are made from fabric that folds neatly when raised and lies flat when lowered. Roman blinds can be lined for added privacy and insulation or left unlined for a more lightweight, sheer effect. They are available in a wide range of fabrics, from luxurious silks to casual cottons, making them a versatile choice for any room.

5. Sheer Blinds

Sheer blinds combine the soft look of curtains with the functionality of blinds. These blinds feature fabric vanes that are suspended between two layers of sheer fabric, allowing you to control the light and maintain a view of the outdoors while still providing some privacy. Sheer blinds are perfect for rooms where you want to soften the light and create a gentle, airy atmosphere.

How to Choose the Right Floor To Ceiling Window Blinds

Choosing the right floor-to-ceiling window blinds involves considering several factors, including the style of your home, the function of the room, and your personal preferences. Here are some tips to help you make the best choice:

1. Consider the Room’s Function

The function of the room will play a significant role in determining the type of blinds you choose. For example, in a bedroom, you might prioritize blackout blinds to ensure a good night’s sleep. In a living room or dining area, you may want blinds that allow for more natural light while still providing privacy. Consider how you use the room and what you need from your window treatments before making a decision.

2. Match the Style of Your Home

Your window blinds should complement the overall style of your home. If you have a modern, minimalist interior, sleek roller or panel track blinds might be the best fit. For a more traditional or eclectic space, consider wooden or Roman blinds. The color and material of the blinds should also coordinate with your existing decor, including your furniture, wall color, and flooring.

3. Evaluate Light and Privacy Needs

Different rooms have different requirements for light and privacy. In a room where you want to maximize natural light, like a sunroom or kitchen, sheer or light-filtering blinds might be ideal. In contrast, for a home office or media room, you might prefer blinds that can completely block out light to reduce glare on screens. Think about how much privacy you need as well, especially if your windows face a busy street or a neighbor’s house.

4. Measure Carefully

Accurate measurements are crucial for floor-to-ceiling window blinds, as these large-scale window treatments need to fit perfectly to look their best and function properly. Measure the width and height of your windows carefully, and consider whether you want the blinds to be mounted inside the window frame or outside, as this will affect the measurements. If you’re unsure about measuring or installation, it’s a good idea to consult with a professional.

Installing Floor To Ceiling Window Blinds

Installing floor-to-ceiling window blinds can be a DIY project, but it requires careful planning and precision. Here’s a general guide to help you get started:

1. Gather Your Tools and Materials

Before you begin, make sure you have all the necessary tools, including a tape measure, drill, level, screws, and a screwdriver. You’ll also need the blinds themselves, along with any brackets or mounting hardware that came with them.

2. Measure and Mark

Measure the width and height of your window or the area where the blinds will be installed. Mark the spots where the brackets will be attached, ensuring they are level and evenly spaced.

3. Install the Brackets

Using a drill, attach the brackets to the top of the window frame or ceiling. Make sure the brackets are level and securely fastened, as they will support the weight of the blinds.

4. Attach the Blinds

Once the brackets are in place, attach the blinds according to the manufacturer’s instructions. If you’re installing motorized blinds, make sure they are properly connected to the power source and test the operation.

5. Adjust and Secure

After the blinds are installed, test them to ensure they open and close smoothly. Make any necessary adjustments to the alignment or tension, and secure the blinds in place.

Maintaining Floor To Ceiling Window Blinds

To keep your floor-to-ceiling window blinds looking their best, regular maintenance is essential. Here are some tips to help you care for your blinds:

1. Regular Cleaning

Dust your blinds regularly to prevent dirt buildup. Use a soft cloth, duster, or vacuum with a brush attachment to clean both sides of the slats. For fabric blinds, consider using a handheld vacuum or a lint roller to remove dust and debris.

2. Spot Cleaning

For stains or spills, spot clean your blinds with a mild detergent and a damp cloth. Be sure to test any cleaning solution on a small, inconspicuous area first to ensure it doesn’t damage the material.

3. Inspect for Damage

Periodically inspect your blinds for any signs of wear and tear, such as frayed cords, broken slats, or malfunctioning mechanisms. Address any issues promptly to prevent further damage and ensure your blinds continue to function properly.

Conclusion

Floor-to-ceiling window blinds are a versatile and stylish solution for large windows, offering both aesthetic and functional benefits. Whether you’re looking to control light, enhance privacy, or improve energy efficiency, there’s a type of floor-to-ceiling blind to suit your needs. By choosing the right blinds, installing them correctly, and maintaining them with care, you can enjoy the beauty and functionality of your windows for years to come.

Ceiling Fan White And Brass: A Stylish and Functional Addition to Your Home

When it comes to selecting the perfect ceiling fan, the combination of white and brass finishes has become increasingly popular. This timeless design not only complements a wide range of interiors but also adds a touch of elegance to any space. In this comprehensive guide, we will explore everything you need to know about choosing and installing a ceiling fan in white and brass. From design considerations to installation tips, we’ll cover all aspects to ensure that you make an informed decision.

Ceiling Fan White And Brass

Why Choose a Ceiling Fan White And Brass?

Timeless Appeal and Versatility

One of the key reasons homeowners opt for a ceiling fan in white and brass is its timeless appeal. The clean, crisp look of white paired with the warm, luxurious tone of brass creates a versatile design that can easily blend with various decor styles. Whether you have a modern, traditional, or transitional interior, a white and brass ceiling fan can enhance the aesthetic appeal of your room without overpowering it.

Read too: Kitchen Lighting For A Vaulted Ceiling: Illuminating Your Space with Style and Functionality

Enhances Natural Light

White is a reflective color that can help brighten a room, especially when paired with brass accents that add a warm glow. A ceiling fan in these finishes can help maximize natural light, making your space feel more open and inviting. This is particularly beneficial in rooms with limited natural light or those that need an extra touch of brightness.

Adds a Touch of Luxury

Brass has long been associated with luxury and sophistication. When combined with white, it adds a subtle yet elegant touch to your space. This combination is perfect for those looking to create a refined atmosphere without the need for overly ornate fixtures. A white and brass ceiling fan can act as a statement piece in your room, drawing attention while maintaining a sense of understated elegance.

Key Considerations When Choosing a Ceiling Fan White And Brass

1. Room Size and Blade Span

Before purchasing a ceiling fan, it’s essential to consider the size of the room and the appropriate blade span. The blade span determines how much air the fan can circulate, and it should be proportional to the size of the room for optimal efficiency. Here’s a general guide to help you choose the right blade span:

  • Small Rooms (up to 75 sq. ft.): 29” – 36” blade span
  • Medium Rooms (76 – 144 sq. ft.): 36” – 42” blade span
  • Large Rooms (144 – 225 sq. ft.): 44” – 50” blade span
  • Extra-Large Rooms (225+ sq. ft.): 52” – 60”+ blade span

For rooms with high ceilings, you may also need a longer downrod to ensure the fan is positioned at the optimal height for air circulation.

2. Motor Type

The motor is the heart of any ceiling fan, and choosing the right one is crucial for performance and longevity. There are two main types of motors used in ceiling fans:

  • AC Motors: These are the traditional motors used in ceiling fans. They are reliable, cost-effective, and available in a wide range of designs. AC motor fans are usually controlled via a pull chain or wall switch.
  • DC Motors: These motors are more energy-efficient and quieter than AC motors. They are often found in higher-end models and come with remote controls for added convenience. DC motors are ideal if you are looking for a fan that offers superior performance with lower energy consumption.

3. Design and Style

When selecting a ceiling fan, it’s important to consider the overall design and style of your room. The combination of white and brass can complement various interior themes, from modern and minimalist to traditional and vintage. Here are a few design tips:

  • Modern Interiors: Opt for a sleek, minimalist fan with clean lines and subtle brass accents. A fan with smooth, white blades and a polished brass finish will seamlessly blend with modern decor.
  • Traditional Interiors: Choose a fan with ornate details, such as decorative brass elements or carved wood blades. The white and brass combination will enhance the classic look without overwhelming the space.
  • Transitional Interiors: If your decor is a mix of modern and traditional elements, consider a fan with a balanced design. A fan with simple white blades and a warm brass finish can tie together different styles for a cohesive look.

4. Lighting Options

Many ceiling fans come with integrated lighting, which can be a practical feature, especially in rooms where ceiling space is limited. When choosing a ceiling fan with lights, consider the following:

  • Type of Bulbs: LED bulbs are the most energy-efficient option and offer long-lasting illumination. They are available in various color temperatures, allowing you to customize the lighting to suit your preferences.
  • Dimmability: A dimmable light feature allows you to adjust the brightness according to the time of day or the mood you want to create. This can be particularly useful in living rooms or bedrooms.
  • Lighting Style: The style of the light fixture should complement the fan and the room’s decor. A frosted glass shade can diffuse light softly, while a clear glass shade can provide a brighter, more focused light.

Installing a Ceiling Fan White And Brass: Step-by-Step Guide

Tools and Materials Needed

  • Ceiling fan kit (white and brass finish)
  • Ladder or step stool
  • Screwdrivers (Phillips and flathead)
  • Wire strippers
  • Wire nuts
  • Electrical tape
  • Voltage tester
  • Downrod (if needed)
  • Ceiling fan mounting bracket

Step 1: Turn Off Power

Before beginning any electrical work, turn off the power to the circuit at the breaker box. Use a voltage tester to ensure the power is off.

Step 2: Assemble the Fan

If the fan requires assembly, follow the manufacturer’s instructions to attach the blades to the motor housing. Ensure all screws are tightened securely.

Step 3: Install the Mounting Bracket

Attach the ceiling fan mounting bracket to the electrical box in the ceiling. Make sure the bracket is securely fastened, as it will need to support the weight of the fan.

Step 4: Attach the Downrod (If Needed)

If your ceiling is high, you may need to attach a downrod to the fan motor to lower the fan to the appropriate height. Secure the downrod to the motor housing, ensuring it is tightly fastened.

Step 5: Wire the Fan

Connect the fan’s wiring to the house wiring using wire nuts. Match the wires by color: typically, black to black (fan motor), white to white (neutral), and green or copper to the ground wire. If the fan has a light fixture, there may be additional wires to connect. Secure the connections with electrical tape.

Step 6: Attach the Fan to the Bracket

Carefully lift the fan and attach it to the mounting bracket. Secure all screws and ensure the fan is stable and level.

Step 7: Install the Blades

If the blades are not pre-attached, install them now. Make sure they are evenly spaced and securely fastened to the motor housing.

Step 8: Test the Fan

Turn the power back on and test the fan to ensure it operates smoothly. Check the fan’s speed settings and light function (if applicable). Make sure there is no wobbling or unusual noises.

Maintaining Your Ceiling Fan White And Brass

Regular Cleaning

Dust can accumulate on the fan blades, which can affect performance and cause wobbling. Regularly clean the blades with a microfiber cloth or a vacuum with a soft brush attachment. For the brass components, use a brass cleaner or a mixture of vinegar and water to maintain their shine.

Tighten Screws

Periodically check all screws and connections to ensure they remain tight. Loose screws can lead to wobbling or noise during operation.

Lubricate the Motor

If your ceiling fan has an oil port, add a few drops of motor oil to keep the fan running smoothly. This is particularly important for older fans or those with AC motors.

Balance the Blades

If your fan wobbles, it may be out of balance. Use a blade balancing kit to adjust the blades and ensure smooth operation.

Top Design Trends for Ceiling Fan White And Brass

1. Minimalist Designs

Minimalist ceiling fans in white and brass are popular for their clean lines and simplicity. These fans often feature sleek blades and understated brass accents, making them ideal for modern and contemporary interiors.

2. Vintage Revival

Vintage-inspired ceiling fans with ornate brass detailing and classic white finishes are making a comeback. These fans add a touch of nostalgia to any room, especially when paired with vintage furniture and decor.

3. Smart Ceiling Fans

Smart ceiling fans in white and brass are gaining popularity for their convenience and advanced features. These fans can be controlled via smartphone apps or voice assistants, allowing you to adjust the speed, lighting, and direction with ease.

4. Customizable Options

Many manufacturers offer customizable ceiling fans, allowing you to choose the blade finish, light fixtures, and even the type of brass used. This allows you to create a fan that perfectly matches your decor.

Conclusion

A ceiling fan in white and brass is more than just a functional appliance; it’s a stylish addition that can enhance the overall aesthetic of your room. By considering factors such as room size, motor type, and design style, you can choose a fan that meets both your functional needs and design preferences.

Whether you’re looking to brighten up a modern living room or add a touch of elegance to a traditional bedroom, a white and brass ceiling fan is a versatile choice that offers timeless appeal. With proper installation and maintenance, your ceiling fan will provide comfort and style for years to come.

Casablanca Victorian Ceiling Fans: Elegance and Functionality Combined

When it comes to adding a touch of classic elegance to your home, few fixtures compare to the timeless beauty of Casablanca Victorian ceiling fans. These fans are not just functional appliances but also exquisite pieces of art that bring a sense of grandeur to any room. Whether you’re looking to enhance your living room, bedroom, or a historical home, Casablanca Victorian ceiling fans offer a unique blend of Victorian aesthetics and modern efficiency.

Casablanca Victorian Ceiling Fans

In this comprehensive guide, we’ll explore everything you need to know about Casablanca Victorian ceiling fans, from their history and design elements to the benefits they offer and tips for selecting the perfect fan for your space.

The Timeless Appeal of Casablanca Victorian Ceiling Fans

Casablanca Victorian ceiling fans are inspired by the grandeur and intricate designs of the Victorian era, a period known for its opulent architecture, ornate decor, and attention to detail. These fans capture the essence of that time with their elegant designs, featuring intricate detailing, rich finishes, and a sense of sophistication that can elevate any room’s decor.

A Brief History of Victorian Ceiling Fans

Victorian ceiling fans emerged during a time when ceiling fans were becoming popular for both their practicality and decorative appeal. The Victorian era, spanning from the mid-1800s to the early 1900s, was a time of innovation and luxury in home design. It was during this period that ceiling fans began to incorporate more elaborate designs, including hand-carved wood, intricate metalwork, and elaborate glass shades.

Casablanca, a brand known for its high-quality and stylish ceiling fans, has carried on this tradition with its Victorian line. By combining the ornate detailing of the past with the technological advancements of the present, Casablanca Victorian ceiling fans have become a sought-after choice for those looking to add a touch of historical charm to their homes.

Read too: Kitchen Lighting For A Vaulted Ceiling: Illuminating Your Space with Style and Functionality

Key Features of Casablanca Victorian Ceiling Fans

Casablanca Victorian ceiling fans are not just about aesthetics—they also offer a range of features that make them a practical choice for modern homes. Let’s take a closer look at some of the key features that set these fans apart.

1. Ornate Design and Craftsmanship

One of the standout features of Casablanca Victorian ceiling fans is their intricate design and craftsmanship. These fans often feature hand-carved wood blades, decorative metal elements, and detailed light fixtures that echo the elegance of the Victorian era. The attention to detail in these fans makes them more than just functional appliances; they are statement pieces that add character to any room.

2. High-Quality Materials

Casablanca fans are known for their use of high-quality materials, ensuring durability and longevity. The Victorian models often feature solid wood blades, brass or bronze finishes, and high-quality glass shades. These materials not only enhance the fan’s aesthetic appeal but also contribute to its long-lasting performance.

3. Quiet and Efficient Operation

Despite their vintage appearance, Casablanca Victorian ceiling fans are equipped with modern technology that ensures quiet and efficient operation. Many models feature powerful motors that provide optimal airflow without the noise, making them perfect for bedrooms, living rooms, or any space where tranquility is valued.

4. Versatile Lighting Options

Many Casablanca Victorian ceiling fans come with integrated lighting, offering both functionality and ambiance. The lights are often housed in decorative glass shades that complement the fan’s overall design. Depending on the model, you can choose from different lighting configurations, such as uplights, downlights, or both, to suit your room’s needs.

5. Energy Efficiency

In addition to their aesthetic appeal and quiet operation, Casablanca Victorian ceiling fans are designed with energy efficiency in mind. The use of energy-efficient motors and LED lighting helps reduce energy consumption while maintaining optimal performance. This makes them an eco-friendly choice that can also help lower your electricity bills.

Why Choose Casablanca Victorian Ceiling Fans?

Choosing a Casablanca Victorian ceiling fan is about more than just cooling a room—it’s about enhancing your home’s overall aesthetic while enjoying the benefits of modern technology. Here are some compelling reasons to choose a Casablanca Victorian ceiling fan for your home.

1. Enhance Your Home’s Aesthetic

The intricate design of Casablanca Victorian ceiling fans makes them an ideal choice for adding a touch of elegance to your home. Whether you live in a historical property or simply appreciate vintage-inspired decor, these fans can seamlessly integrate with your interior design, creating a cohesive and stylish look.

2. Functional Art

Unlike modern ceiling fans, which often prioritize function over form, Casablanca Victorian ceiling fans are pieces of functional art. Their detailed craftsmanship and high-quality materials make them more than just practical devices; they are conversation pieces that can elevate the style of any room.

3. Long-Lasting Quality

Investing in a Casablanca Victorian ceiling fan means investing in quality. These fans are built to last, with durable materials and construction that ensure years of reliable performance. Whether it’s the solid wood blades or the powerful motor, every component of these fans is designed with longevity in mind.

4. Versatility in Design

Casablanca Victorian ceiling fans are available in a range of designs, finishes, and sizes, making it easy to find the perfect match for your space. Whether you prefer a fan with ornate brass detailing, a classic bronze finish, or rich mahogany blades, there’s a model to suit your taste.

5. Increased Home Value

Installing high-quality fixtures like Casablanca Victorian ceiling fans can enhance your home’s value. Their timeless design and high-end materials make them an attractive feature for potential buyers, particularly those who appreciate the charm of vintage or historical homes.

How to Choose the Right Casablanca Victorian Ceiling Fan

Selecting the right Casablanca Victorian ceiling fan involves considering several factors to ensure it complements your space and meets your functional needs. Here are some tips to help you make the right choice.

1. Consider Room Size and Ceiling Height

The size of the room and the height of the ceiling are crucial factors when choosing a ceiling fan. For larger rooms, opt for a fan with a wider blade span to ensure adequate airflow. Conversely, for smaller rooms, a fan with a smaller blade span will suffice. Additionally, if your room has high ceilings, consider a fan with a longer downrod to ensure the blades are positioned at the optimal height.

2. Match the Fan to Your Decor

When choosing a Casablanca Victorian ceiling fan, consider how it will fit with your existing decor. Pay attention to the fan’s finish, blade material, and lighting to ensure it complements your room’s color scheme and style. For example, if your room features dark wood furniture, a fan with mahogany blades and a bronze finish would be a cohesive choice.

3. Evaluate Lighting Needs

If you plan to use the fan’s integrated lighting as a primary light source, make sure the fan provides adequate illumination for your space. Consider the type of bulbs the fan uses, the direction of the light (uplight, downlight, or both), and whether the lights are dimmable.

4. Check for Energy Efficiency

Look for fans that are ENERGY STAR® certified or feature energy-efficient motors and lighting. This not only helps reduce your carbon footprint but also saves on energy costs. Casablanca Victorian ceiling fans often come with energy-saving features without compromising on style or performance.

5. Assess Control Options

Consider how you want to control your fan. Casablanca Victorian ceiling fans typically offer multiple control options, including pull chains, wall controls, and remote controls. Some models may also be compatible with smart home systems, allowing you to control the fan through your smartphone or voice commands.

Installation and Maintenance Tips for Casablanca Victorian Ceiling Fans

Once you’ve chosen your ideal Casablanca Victorian ceiling fan, proper installation and maintenance are key to ensuring it performs optimally and lasts for years. Here are some tips to help you get the most out of your fan.

Installation Tips

  • Hire a Professional: While installing a ceiling fan can be a DIY project, hiring a professional electrician ensures it’s done safely and correctly, especially if you’re dealing with complex wiring or high ceilings.
  • Use the Right Mounting Kit: Ensure you use the correct mounting kit for your ceiling type, whether it’s a standard, sloped, or high ceiling. This will help maintain the fan’s stability and performance.
  • Balance the Blades: After installation, check that the fan blades are balanced. Unbalanced blades can cause the fan to wobble, which may lead to noise and decreased efficiency.

Maintenance Tips

  • Regular Cleaning: Dust the fan blades regularly to prevent buildup, which can cause the fan to wobble or operate less efficiently. Use a soft cloth or a duster designed for ceiling fans.
  • Tighten Screws and Bolts: Periodically check that all screws and bolts are tightened to prevent any parts from becoming loose over time.
  • Lubricate the Motor: Some Casablanca Victorian ceiling fans may require motor lubrication. Check the manufacturer’s instructions for guidance on how often this should be done.
  • Inspect the Wiring: If you notice any issues with the fan’s operation, such as flickering lights or unusual noises, inspect the wiring or consult a professional to ensure there are no electrical problems.

Conclusion

Casablanca Victorian ceiling fans are more than just cooling devices—they are elegant, timeless pieces that bring a touch of history and luxury to any space. With their intricate designs, high-quality materials, and modern functionality, these fans are a worthwhile investment for anyone looking to enhance their home’s aesthetic while enjoying the benefits of a reliable, energy-efficient ceiling fan.

Whether you’re renovating a historical property or simply want to add a classic touch to your modern home, Casablanca Victorian ceiling fans offer the perfect blend of style and performance.

Art Deco Lamp Ceiling Fixtures: A Comprehensive Guide

Art Deco, an iconic design movement from the early 20th century, continues to inspire contemporary interiors with its elegant and luxurious style. One standout feature of Art Deco design is the use of Art Deco lamp ceiling fixtures. These lamps are not just functional lighting solutions; they are artistic statements that can transform a room. This guide explores the beauty, history, and application of Art Deco lamp ceiling fixtures to help you elevate your space with timeless sophistication.

Art Deco Lamp Ceiling

What is Art Deco?

Art Deco, short for Arts Décoratifs, emerged in the 1920s and 1930s as a response to the elaborate and ornate styles of the 19th century. Characterized by geometric shapes, streamlined forms, and luxurious materials, Art Deco represents a blend of opulence and modernity. This design style is known for its use of rich materials such as chrome, glass, and exotic woods, and its influence extends to architecture, furniture, and lighting.

Key Characteristics:

  • Geometric Patterns: Sharp angles, chevrons, and zigzags are common motifs.
  • Luxurious Materials: Emphasis on high-quality materials like brass, crystal, and polished wood.
  • Streamlined Forms: Smooth, clean lines that convey a sense of elegance and modernity.

The Appeal of Art Deco Lamp Ceiling Fixtures

Art Deco lamp ceiling fixtures embody the essence of the Art Deco style. These lamps are more than just sources of light; they are focal points that add character and charm to any room. Here’s why Art Deco lamp ceiling fixtures are so appealing:

1. Timeless Elegance

Art Deco lamp ceiling fixtures bring a touch of timeless elegance to any interior. Their sophisticated designs and luxurious materials make them perfect for both classic and contemporary spaces.

Features:

  • Refined Aesthetics: Sleek lines and geometric patterns create a refined look.
  • Luxurious Materials: Often made from high-quality metals and glass.

Read too: Kitchen Lighting For A Vaulted Ceiling: Illuminating Your Space with Style and Functionality

2. Unique Design Elements

Each Art Deco lamp ceiling fixture is a piece of art in itself. The use of unique design elements such as etched glass, chrome finishes, and intricate patterns sets these fixtures apart from other lighting options.

Design Elements:

  • Etched Glass: Provides a soft, diffused light with artistic patterns.
  • Chrome and Brass: Adds a touch of glamour and sophistication.

3. Versatility in Decor

Art Deco lamp ceiling fixtures are versatile and can complement a variety of interior styles. Whether you have a modern, traditional, or eclectic decor, these fixtures can blend seamlessly and enhance the overall look of your space.

Versatility:

  • Modern Spaces: Adds a touch of vintage elegance.
  • Traditional Interiors: Complements classic furnishings and architecture.

Choosing the Right Art Deco Lamp Ceiling Fixture

When selecting an Art Deco lamp ceiling fixture, consider factors such as the size of the room, the existing decor, and the type of light you need. Here are some tips to help you choose the perfect fixture:

1. Size and Scale

The size of the lamp should be proportionate to the size of the room and the height of the ceiling. Larger rooms with high ceilings can accommodate more elaborate fixtures, while smaller rooms benefit from more compact designs.

Sizing Tips:

  • Large Rooms: Opt for chandeliers or large pendant lights.
  • Small Rooms: Choose smaller, more streamlined fixtures.

2. Material and Finish

Art Deco lamp ceiling fixtures come in various materials and finishes. Select materials that complement your existing decor and add a touch of luxury to your space.

Material Options:

  • Glass: Offers a classic Art Deco look with intricate designs.
  • Metal: Brass and chrome finishes add a modern touch.

3. Lighting Needs

Consider the type of lighting you need. Art Deco lamp ceiling fixtures can provide ambient, task, or accent lighting. Choose fixtures that offer the right type of illumination for your space.

Lighting Types:

  • Ambient Lighting: Provides overall illumination.
  • Task Lighting: Focused light for specific areas.
  • Accent Lighting: Highlights architectural features or artwork.

Installing Art Deco Lamp Ceiling Fixtures

Proper installation is crucial for achieving the desired effect with your Art Deco lamp ceiling fixture. Follow these steps for a successful installation:

1. Preparation

Before installation, ensure that you have all the necessary tools and materials. Turn off the power to the existing light fixture and remove it carefully.

Preparation Steps:

  • Gather Tools: Screwdrivers, pliers, wire cutters, and electrical tape.
  • Turn Off Power: Switch off the circuit breaker to avoid electrical hazards.

2. Mounting the Fixture

Install the mounting bracket and secure it to the ceiling. Follow the manufacturer’s instructions for attaching the fixture to the bracket.

Mounting Steps:

  • Attach Bracket: Secure the mounting bracket to the ceiling.
  • Connect Wires: Connect the fixture’s wires to the ceiling wires using wire nuts.
  • Secure Fixture: Attach the fixture to the mounting bracket and secure it with screws.

3. Finishing Touches

Once the fixture is mounted, test the light to ensure it works correctly. Install the light bulbs and make any final adjustments to the fixture.

Finishing Steps:

  • Install Bulbs: Insert the appropriate bulbs into the fixture.
  • Test the Light: Turn on the power and test the fixture.
  • Adjust Position: Make any necessary adjustments to the fixture’s position.

Maintenance and Care

Maintaining your Art Deco lamp ceiling fixture ensures its longevity and keeps it looking its best. Follow these maintenance tips:

1. Regular Cleaning

Dust and clean the fixture regularly to prevent buildup that can affect its appearance and functionality. Use a soft cloth and gentle cleaning solutions.

Cleaning Tips:

  • Dust Regularly: Use a soft cloth or duster to remove dust.
  • Clean Glass: Wipe glass surfaces with a mild glass cleaner.

2. Check for Damage

Periodically inspect the fixture for any signs of damage or wear. Address any issues promptly to prevent further damage.

Inspection Tips:

  • Check Wiring: Ensure that wires are secure and free of damage.
  • Inspect Fixtures: Look for any cracks or imperfections in the fixture.

3. Replace Bulbs

Replace burned-out bulbs promptly to maintain optimal lighting. Use bulbs that are compatible with your fixture.

Bulb Replacement Tips:

  • Use Compatible Bulbs: Check the fixture’s specifications for the correct bulb type.
  • Turn Off Power: Always turn off the power before changing bulbs.

Conclusion

Art Deco lamp ceilings fixtures are a beautiful and functional way to add elegance and style to your space. By understanding the characteristics of Art Deco design, selecting the right fixture, and following proper installation and maintenance procedures, you can enjoy the timeless beauty of Art Deco lighting in your home. Whether you’re updating an existing space or designing a new one, Art Deco lamp ceiling fixtures offer a sophisticated touch that enhances any interior.

2 Piece Ceiling Medallion 5 Inch Center Hole: Enhancing Your Home’s Aesthetic

Ceiling medallions have long been a staple in interior design, adding a touch of elegance and sophistication to any room. Whether you’re renovating an old home or looking to add a unique element to a new space, a 2 Piece Ceiling Medallion with a 5 Inch Center Hole offers both style and functionality. This article will delve into everything you need to know about this decorative feature, from its benefits to installation tips and design ideas.

2 Piece Ceiling Medallion 5 Inch Center Hole

Understanding the 2 Piece Ceiling Medallion with 5 Inch Center Hole

What is a 2 Piece Ceiling Medallion?

A 2 Piece Ceiling Medallion is a decorative element typically installed around the base of a light fixture or ceiling fan. The two-piece design allows for easy installation, especially when retrofitting a medallion around an existing fixture. The medallion is split into two parts, which are fitted together around the fixture without needing to remove it. This design is particularly advantageous when working with larger or more complex installations.

Read too: Kitchen Lighting For A Vaulted Ceiling: Illuminating Your Space with Style and Functionality

The Importance of the 5 Inch Center Hole

The 5 Inch Center Hole in this medallion is crucial for fitting around the canopy of most standard light fixtures or ceiling fans. It ensures that the medallion frames the fixture perfectly, hiding any unsightly gaps and providing a polished, finished look. The size of the center hole must match the fixture to avoid any installation issues or aesthetic mismatches.

Materials and Finishes

2 Piece Ceiling Medallions are typically made from materials like polyurethane, plaster, or wood. Polyurethane is the most common material due to its durability, lightweight nature, and ease of installation. These medallions come in various finishes, including pre-painted options or primed surfaces ready for custom painting to match your décor.

Benefits of Installing a 2 Piece Ceiling Medallion

1. Easy Installation

One of the primary advantages of a 2 Piece Ceiling Medallion is its ease of installation. Unlike traditional one-piece medallions, which may require removing a fixture, the two-piece design can be installed without any major disruptions. This makes it an ideal choice for DIY enthusiasts and professionals alike.

2. Aesthetic Appeal

A ceiling medallion adds an instant touch of elegance to any room. Whether you prefer a minimalist look or something more ornate, these medallions are available in various styles and sizes to suit your taste. The 5 Inch Center Hole ensures that the medallion frames your fixture perfectly, enhancing the overall visual impact.

3. Versatility

The 2 Piece Ceiling Medallion with 5 Inch Center Hole is versatile enough to be used in various settings, from living rooms and dining rooms to bedrooms and hallways. It can complement a wide range of interior styles, from classic and traditional to modern and contemporary.

4. Concealing Imperfections

Ceiling medallions are excellent for hiding imperfections around light fixtures or ceiling fans. They can cover gaps, cracks, or uneven paint, providing a seamless and polished finish.

5. Increased Property Value

Adding decorative elements like ceiling medallions can enhance the perceived value of your home. Potential buyers often appreciate these kinds of details, which can set your property apart in the real estate market.

How to Install a 2 Piece Ceiling Medallion with a 5 Inch Center Hole

Step 1: Gather Your Tools and Materials

Before starting the installation, ensure you have the necessary tools and materials. You will need:

  • The 2 Piece Ceiling Medallion with a 5 Inch Center Hole
  • A ladder
  • Measuring tape
  • Adhesive (such as construction adhesive or caulk)
  • Screws and anchors (if necessary)
  • A drill or screwdriver
  • Painter’s tape (optional)
  • Paint and brushes (if painting the medallion)

Step 2: Measure and Mark

Begin by measuring the area where the medallion will be installed to ensure it is centered around the light fixture or ceiling fan. Mark the position lightly with a pencil to guide your installation. If your medallion is pre-painted or if you plan to paint it, do so before installation to avoid getting paint on the ceiling.

Step 3: Apply Adhesive

Apply a generous amount of adhesive to the back of both pieces of the medallion. Focus on the edges and areas that will contact the ceiling. If your ceiling is uneven, you may also want to apply adhesive to the ceiling itself.

Step 4: Position the Medallion

Carefully position the first piece of the medallion around the fixture, aligning it with your pencil marks. Hold it in place for a few minutes to allow the adhesive to set slightly. Repeat this process with the second piece, ensuring the two halves fit together snugly around the fixture.

Step 5: Secure the Medallion

If necessary, use screws and anchors to secure the medallion to the ceiling. Drill pilot holes through the medallion and into the ceiling, then insert the screws. Be careful not to overtighten, as this could crack or damage the medallion.

Step 6: Finishing Touches

Once the medallion is securely in place, fill any gaps between the two pieces with caulk or a similar filler. If your medallion is primed, apply a final coat of paint to match your ceiling or fixture. Finally, remove any excess adhesive or filler and allow everything to dry completely.

Design Ideas for Using a 2 Piece Ceiling Medallion with a 5 Inch Center Hole

Traditional Elegance

For a traditional or classic look, choose a 2 Piece Ceiling Medallion with ornate details and pair it with a chandelier or a vintage ceiling fan. This combination works well in formal dining rooms or living rooms with high ceilings and crown molding.

Modern Minimalism

If you prefer a more contemporary style, opt for a simpler, clean-lined medallion in a neutral color. Pair it with a sleek, modern light fixture to create a subtle yet sophisticated look that complements minimalist décor.

Rustic Charm

For a rustic or farmhouse-inspired space, consider a wood-finished medallion paired with an industrial-style ceiling fan or light fixture. The natural wood tones add warmth and character to the room, enhancing the overall rustic aesthetic.

Bold Statement

To make a bold design statement, choose a large, intricately designed medallion in a contrasting color to your ceiling. Pair it with an eye-catching light fixture, such as a crystal chandelier, to create a focal point that draws attention and adds drama to the space.

Maintenance and Care for Your Ceiling Medallion

Cleaning

Ceiling medallions are generally low-maintenance, but they can accumulate dust over time. To clean your medallion, use a soft cloth or duster to gently remove dust. For more stubborn dirt, a damp cloth with mild soap can be used, but avoid harsh chemicals that could damage the finish.

Touch-Ups

Over time, your medallion may require touch-ups, especially if it is painted. Keep a small amount of matching paint on hand to cover any chips or scratches that may occur.

Regular Inspections

Periodically inspect your medallion to ensure it remains securely attached to the ceiling. If you notice any loosening or damage, address it promptly to prevent further issues.

Conclusion

A 2 Piece Ceiling Medallion with a 5 Inch Center Hole is a beautiful and functional addition to any room. Its ease of installation, combined with the aesthetic appeal and versatility it offers, makes it an excellent choice for homeowners looking to enhance their interior design. Whether you’re aiming for a traditional, modern, rustic, or bold look, a ceiling medallion can help you achieve your vision with elegance and style.

Brass And Black Ceiling Fan: A Timeless Blend of Elegance and Functionality

When it comes to selecting the perfect ceiling fan for your home, a combination of style and functionality is essential. The Brass and Black Ceiling Fan has become a popular choice for homeowners who want to add a touch of sophistication to their space while ensuring optimal air circulation. This stylish fan not only enhances the aesthetic appeal of any room but also serves as a practical solution for keeping your home cool and comfortable. In this article, we’ll explore the many features, benefits, and design options of the brass and black ceiling fan, helping you understand why it could be the ideal addition to your living space.

Brass And Black Ceiling Fan

Why Choose a Brass and Black Ceiling Fan?

The Aesthetic Appeal of Brass and Black

The Brass and Black Ceiling Fan is a striking combination of classic and modern design elements. The rich, warm tone of brass, paired with the sleek, bold look of black, creates a fan that can complement a wide variety of interior styles. Whether your home features a traditional, industrial, or contemporary design, this fan can seamlessly integrate into the space, adding a touch of luxury and refinement.

Versatility in Interior Design

One of the key reasons why the brass and black ceiling fan is so popular is its versatility. This fan can be used in various settings, from a modern loft to a classic living room, making it a flexible option for homeowners with diverse tastes. The brass finish brings a timeless elegance, while the black accents add a contemporary edge, ensuring that the fan remains stylish and relevant regardless of changing trends.

Durability and Longevity

Brass is known for its durability and resistance to corrosion, making it an excellent material for ceiling fans. The black components, often made from high-quality metals or durable plastics, further enhance the fan’s longevity. By choosing a brass and black ceiling fan, you’re investing in a product that will not only look great for years to come but will also withstand the test of time.

Features of a Brass and Black Ceiling Fan

High-Quality Materials

The Brass and Black Ceiling Fan is typically constructed from high-quality materials that ensure both durability and performance. The brass components are often solid and polished, offering resistance to tarnishing and corrosion. Meanwhile, the black elements, which may include the blades or motor housing, are usually made from sturdy materials that can withstand daily use without losing their finish.

Read too: Kitchen Lighting For A Vaulted Ceiling: Illuminating Your Space with Style and Functionality

Efficient Air Circulation

One of the primary functions of any ceiling fan is to promote air circulation within a room. The brass and black ceiling fan is designed with aerodynamics in mind, featuring blades that are carefully angled to maximize airflow. Whether you need a gentle breeze during the summer or improved air circulation in the winter, this fan can adjust to meet your needs while adding style to your space.

Energy Efficiency

Modern ceiling fans, including those with a brass and black design, are built with energy efficiency in mind. Many models come equipped with energy-saving features, such as reversible motors that allow you to change the direction of the fan’s rotation based on the season. This not only helps maintain a comfortable temperature in your home but also reduces energy consumption, leading to lower utility bills.

Quiet Operation

Another significant feature of the Brass and Black Ceiling Fan is its quiet operation. Advanced motor technology and well-balanced blades ensure that the fan runs smoothly without creating excessive noise. This makes it an excellent choice for bedrooms, home offices, or any other space where a peaceful environment is essential.

Lighting Integration

Many brass and black ceiling fans come with integrated lighting, offering both illumination and cooling in one stylish package. These lights are often adjustable, allowing you to customize the brightness to suit your mood or activity. With various lighting options available, including LED and dimmable bulbs, you can create the perfect ambiance in any room.

Brass and Black Ceiling Fan: A Perfect Fit for Any Room

Living Room Elegance

The living room is often the centerpiece of a home, and a Brass and Black Ceiling Fan can serve as a stunning focal point. Its elegant design can tie together various elements of the room, such as brass light fixtures, black furniture, or other metallic accents. Additionally, the fan provides a comfortable breeze, making your living space more inviting for both family and guests.

Bedroom Comfort

In the bedroom, a brass and black ceiling fan can add a touch of luxury while ensuring a restful night’s sleep. Its quiet operation won’t disturb your slumber, and the gentle airflow can help maintain a comfortable temperature throughout the night. With the option to dim the integrated lights, you can create a relaxing environment that’s perfect for winding down after a long day.

Dining Room Sophistication

For the dining room, the Brass and Black Ceiling Fan offers a sophisticated touch that can elevate the overall dining experience. Whether you’re hosting a formal dinner or enjoying a casual meal, this fan’s stylish appearance and functional lighting will enhance the ambiance. The fan’s adjustable speed settings also ensure that you and your guests remain comfortable, regardless of the season.

Office Efficiency

If you have a home office, a brass and black ceiling fan can help create a productive and comfortable workspace. The fan’s sleek design complements modern office furniture, while its quiet operation allows you to focus on your tasks without distraction. Additionally, the integrated lighting can provide the perfect level of illumination for working, reading, or video conferencing.

Outdoor Spaces

Many homeowners are now choosing to extend their living spaces outdoors, and a Brass and Black Ceiling Fan can be a perfect addition to patios, verandas, or screened-in porches. Designed to withstand the elements, these fans can keep your outdoor area cool and comfortable while adding a touch of elegance to your exterior decor.

Choosing the Right Brass and Black Ceiling Fan

Consider the Size of Your Room

When selecting a brass and black ceiling fans, it’s essential to choose the right size to ensure optimal performance. The size of the fan should be proportionate to the size of the room; a fan that is too small won’t circulate air effectively, while one that is too large may overpower the space. Most manufacturers provide guidelines on the recommended room size for each fan model, helping you make the right choice.

Evaluate the Mounting Options

Ceiling fans come with various mounting options, including flush mounts, downrods, and angled mounts. The right mounting option for your Brass and Black Ceiling Fan depends on the height of your ceiling and the layout of the room. For rooms with low ceilings, a flush mount may be the best option, while a downrod is suitable for higher ceilings.

Check the Control Options

Modern brass and black ceiling fans offer several control options, including pull chains, wall controls, and remote controls. Consider which option best suits your lifestyle and room layout. For example, a remote control can provide convenient operation from anywhere in the room, while a wall control may be preferable for a more permanent solution.

Lighting Preferences

If you’re choosing a fan with integrated lighting, consider your lighting needs. Do you prefer a warm, soft glow or bright, task-oriented lighting? Many brass and black ceiling fans offer customizable lighting options, so you can select the perfect brightness and color temperature for your space.

Maintaining Your Brass and Black Ceiling Fan

Regular Cleaning

To keep your brass and black ceiling fans looking its best, regular cleaning is essential. Dust the blades and motor housing frequently to prevent the buildup of dirt and grime. Use a soft cloth or a microfiber duster to avoid scratching the finish. For the brass components, you may want to use a brass cleaner to maintain their shine.

Inspecting the Blades and Motor

Periodically inspect the fan blades and motor to ensure they are in good condition. Look for signs of wear or damage, and make sure the blades are balanced to prevent wobbling. If you notice any issues, address them promptly to avoid further damage and ensure the fan operates smoothly.

Lubrication and Maintenance

Some ceiling fans may require occasional lubrication to keep the motor running efficiently. Check the manufacturer’s guidelines for maintenance recommendations specific to your Brass and Black Ceiling Fan model. Proper care will extend the life of your fan and ensure it continues to perform well.

Conclusion

A Brass and Black Ceiling Fan is more than just a functional appliance; it’s a statement piece that can enhance the beauty and comfort of any room. With its timeless design, durability, and energy efficiency, this fan offers a perfect blend of style and practicality. Whether you’re updating your living room, bedroom, or outdoor space, the brass and black ceiling fan is a versatile option that will complement a variety of interior designs while providing the cooling power you need.

Ceiling Molding With Lights: Transform Your Home with Stunning

Incorporating Ceiling Molding With Lights into your home’s design is an innovative way to enhance both the aesthetics and ambiance of any room. This dynamic design element merges the elegance of crown molding with the functional and atmospheric benefits of integrated lighting, creating a seamless blend of traditional craftsmanship and modern technology. Whether you’re looking to elevate your living room, bedroom, or dining area, ceiling molding with lights offers a versatile and striking solution that adds value and visual interest to your home.

Ceiling Molding With Lights

In this article, we’ll explore the various styles, benefits, installation tips, and design ideas for ceiling molding with lights. We’ll also discuss how this feature can be a game-changer in home design and provide inspiration for making your living spaces more inviting and stylish.

What Is Ceiling Molding With Lights?

Ceiling Molding With Lights refers to the integration of lighting systems within crown molding or other types of ceiling moldings. This concept involves installing LED strips or other light sources along the top or inside of the molding to create a glowing effect around the room’s perimeter. The result is a soft, indirect lighting that highlights the architecture of the room, enhances the mood, and can be tailored to various aesthetic preferences.

This design trend has grown in popularity due to its ability to combine practical lighting with decorative elements, making it a go-to choice for homeowners and interior designers alike. The versatility of ceiling molding with lights allows it to fit seamlessly into both modern and traditional interior designs, making it suitable for a wide range of spaces and styles.

The Benefits of Ceiling Molding With Lights

1. Enhanced Aesthetic Appeal

One of the primary reasons homeowners opt for Ceiling Molding With Lights is the dramatic enhancement it brings to a room’s visual appeal. The combination of crown molding and ambient lighting can make any space look more sophisticated and polished. The light accentuates the lines and curves of the molding, drawing attention to the architecture and adding depth to the ceiling.

2. Improved Ambiance

Lighting plays a crucial role in setting the mood of a room. Ceiling molding with lights offers a gentle, ambient light source that can create a cozy, inviting atmosphere. This type of lighting is perfect for relaxing environments like bedrooms or living rooms, where harsh overhead lights can be overwhelming. It can also be dimmed or adjusted to suit different occasions, whether you’re hosting a dinner party or enjoying a quiet evening at home.

Read too: Bathroom Flooded Through the Ceiling: A Comprehensive Guide

3. Space Illusion

Ceiling molding with lights can make a room appear larger and more open. The upward-facing lights bounce off the ceiling, creating an illusion of height and space. This effect is particularly beneficial in rooms with lower ceilings, as it draws the eye upward and makes the ceiling feel higher.

4. Energy Efficiency

Most ceiling molding lighting systems utilize LED lights, which are highly energy-efficient compared to traditional lighting options. LEDs consume less power, generate less heat, and have a longer lifespan, making them a cost-effective and environmentally friendly choice. This efficiency means you can enjoy the benefits of illuminated ceiling molding without significantly increasing your energy bills.

5. Versatility in Design

Ceiling molding with lights is highly customizable, allowing you to tailor the design to your specific taste and home décor. You can choose from a variety of molding styles, colors, and lighting temperatures to match the overall theme of your space. Whether you prefer a classic, ornate look or a sleek, modern design, there’s a ceiling molding option that will complement your style.

Installation Tips for Ceiling Molding With Lights

While Ceiling Molding With Lights is a beautiful addition to any home, proper installation is crucial to achieving the desired effect. Here are some essential tips to ensure a successful installation:

1. Plan Your Design

Before beginning the installation, take the time to plan out your design. Decide where you want to place the molding and how you want the lights to be arranged. Consider the size of the room, the height of the ceiling, and the existing décor. Sketch out a rough plan or use design software to visualize the final look.

2. Choose the Right Molding

Selecting the right molding is key to achieving the look you want. Crown molding is the most popular choice for ceiling molding with lights, but other styles like cove molding or panel molding can also be used depending on your design preferences. Make sure the molding you choose is large enough to conceal the lighting fixtures and wiring.

3. Select the Appropriate Lighting

LED strips are the most common lighting option for ceiling molding due to their flexibility, low profile, and energy efficiency. When selecting LED strips, consider the color temperature (warm, cool, or neutral) and brightness level. Warm white LEDs create a cozy atmosphere, while cool white LEDs offer a more modern, crisp look.

4. Measure and Cut Carefully

Accurate measurements are essential for a seamless installation. Measure the length of each wall carefully and cut the molding pieces to fit perfectly. Use a miter saw to make precise cuts, especially for the corners where two pieces of molding meet.

5. Install the Molding and Lighting

Begin by attaching the LED strips to the back of the molding using adhesive backing or clips. Make sure the lights are evenly spaced and secure. Once the lights are in place, install the molding onto the ceiling using nails, screws, or adhesive. Ensure that the molding is level and flush with the ceiling for a clean, professional finish.

6. Test the Lighting

Before completing the installation, test the lighting to ensure it functions correctly. Check for any dark spots, flickering, or uneven lighting. If everything looks good, finish the installation by concealing any visible wires and touching up any paint or caulking.

Design Ideas for Ceiling Molding With Lights

The possibilities for Ceiling Molding With Lights are virtually endless, limited only by your creativity. Here are some design ideas to inspire your next home improvement project:

1. Modern Minimalist

For a modern, minimalist look, opt for sleek, simple molding with cool white LED lights. This design works well in contemporary spaces with clean lines and neutral color palettes. The subtle lighting adds a touch of sophistication without overpowering the room’s décor.

2. Classic Elegance

To create a classic, elegant space, choose ornate crown molding with warm white LED lights. This combination is perfect for traditional living rooms or dining rooms, where the molding can enhance the architectural details of the space. The warm lighting adds a cozy, inviting ambiance that complements the timeless design.

3. Glamorous Glow

For a touch of luxury, consider using gold or silver-finished molding with dimmable LED lights. This glamorous design works beautifully in bedrooms or home theaters, where you can control the lighting to create a dramatic, opulent atmosphere. Pair the lighting with rich fabrics and metallic accents to complete the look.

4. Coastal Retreat

Incorporate ceiling molding with lights into a coastal-themed room by choosing molding in a soft, whitewashed finish. Pair it with cool blue or soft white LED lights to create a relaxing, beachy vibe. This design is ideal for bedrooms or bathrooms, where the gentle lighting can enhance the serene, spa-like atmosphere.

5. Industrial Chic

For an industrial-inspired space, use metal or concrete-look molding with exposed LED strips. This edgy design adds a unique touch to lofts, kitchens, or offices, where the raw materials and exposed lighting create a stylish, urban feel. Pair it with exposed brick, metal accents, and neutral colors for a cohesive look.

Maintenance and Care for Ceiling Molding With Lights

To keep your Ceiling Molding With Lights looking and functioning at its best, regular maintenance is essential. Here are some tips to ensure longevity and performance:

1. Dust Regularly

Dust can accumulate on both the molding and the LED strips, diminishing the lighting effect and making the molding look dull. Regularly dust the molding with a soft cloth or a duster to keep it clean and bright.

2. Check the Lights

Periodically check the LED strips for any signs of wear or malfunction. Replace any burnt-out or flickering lights promptly to maintain a consistent lighting effect. If you notice any issues with the wiring, consult a professional electrician for repairs.

3. Clean Gently

If the molding or lights become dirty, clean them gently with a damp cloth. Avoid using harsh chemicals or abrasive cleaners, as these can damage the finish on the molding or the lights. For tough stains, use a mild soap solution and rinse thoroughly.

4. Repaint or Refinish as Needed

Over time, the molding may need to be repainted or refinished to maintain its appearance. If you notice chips, scratches, or fading, apply a fresh coat of paint or finish to restore the molding’s original beauty.

Conclusion

Ceiling Molding With Lights is a versatile and elegant design feature that can transform the look and feel of any room in your home. Whether you’re aiming for a modern, minimalist style or a classic, timeless look, this innovative combination of molding and lighting offers endless possibilities for customization and creativity. With careful planning, quality materials, and regular maintenance, you can enjoy the beauty and functionality of ceiling molding with lights for years to come.

Whether you’re renovating your home or simply looking for ways to enhance your interior design, ceiling molding with lights is a trend worth considering. It not only adds visual interest and elegance to your space but also provides practical, ambient lighting that enhances the overall ambiance of your home.

Oversized Flush Mount Ceiling Light: A Comprehensive Guide

When it comes to enhancing the aesthetic appeal and functionality of your home, an oversized flush mount ceiling light can make a dramatic impact. This lighting fixture combines style and practicality, offering both abundant illumination and a sleek, modern look. In this comprehensive guide, we’ll explore the features, benefits, and considerations of oversized flush mount ceiling lights, and provide tips for selecting and installing the perfect fixture for your space.

Oversized Flush Mount Ceiling Light

What Is an Oversized Flush Mount Ceiling Light?

An oversized flush mount ceiling light is a type of ceiling fixture that is mounted directly against the ceiling without any gap. It is typically larger than standard flush mount lights and is designed to provide broad and even illumination across a room. Here’s a closer look at its defining characteristics:

Key Features

  • Size: As the name suggests, oversized flush mount ceiling lights are larger in diameter compared to traditional flush mounts. This allows them to illuminate a larger area effectively.
  • Design: These fixtures often feature contemporary designs with clean lines and modern aesthetics, making them a stylish choice for various interior styles.
  • Installation: They are mounted flush to the ceiling, which makes them suitable for rooms with low ceilings or where space is limited.

Benefits

  • Even Illumination: The larger size of these fixtures helps in distributing light more evenly across the room, reducing shadows and dark spots.
  • Aesthetic Appeal: An oversized fixture can act as a statement piece, adding a touch of elegance and sophistication to any space.
  • Space-Saving: Since they are mounted flush to the ceiling, they don’t protrude into the room, making them ideal for rooms with low ceilings or limited headroom.

Read too: Bathroom Flooded Through the Ceiling: A Comprehensive Guide

Choosing the Right Oversized Flush Mount Ceiling Light

Selecting the perfect oversized flush mount ceiling light involves considering several factors to ensure it complements your space and meets your lighting needs. Here’s a guide to help you make an informed decision:

1. Determine the Size and Scale

  • Room Size: Consider the size of the room where the fixture will be installed. A larger light fixture works best in spacious areas such as living rooms or dining rooms.
  • Ceiling Height: Ensure that the fixture is proportionate to the height of your ceiling. Oversized fixtures are generally more suitable for rooms with higher ceilings, but modern designs are also available for lower ceilings.

2. Style and Design

  • Interior Decor: Choose a fixture that matches the overall decor of your room. Oversized flush mount ceiling lights come in various styles, including contemporary, industrial, and traditional.
  • Material and Finish: Consider materials like glass, metal, or acrylic, and finishes such as chrome, brass, or matte black, depending on your aesthetic preferences.

3. Lighting Needs

  • Brightness: Evaluate the amount of light you need for the room. Oversized fixtures can provide ample illumination, but it’s important to choose one with appropriate wattage or lumens for your space.
  • Light Temperature: Decide on the color temperature of the light. Options include warm white, cool white, or daylight, depending on the ambiance you want to create.

4. Energy Efficiency

  • Bulb Type: Look for fixtures that use energy-efficient bulbs, such as LED or CFL, to reduce energy consumption and lower utility bills.
  • Dimmability: Some fixtures offer dimming options, allowing you to adjust the light intensity based on your needs.

Installation Tips for Oversized Flush Mount Ceiling Lights

Proper installation is crucial for ensuring that your oversized flush mount ceiling light functions effectively and safely. Follow these tips to achieve a successful installation:

1. Hire a Professional

  • Electrical Expertise: If you’re not comfortable with electrical work, it’s best to hire a licensed electrician to handle the installation. They will ensure that the fixture is wired correctly and securely.

2. Check the Weight

  • Support Structure: Verify that your ceiling can support the weight of the oversized fixture. Heavier fixtures may require additional support or reinforcement.

3. Prepare the Area

  • Turn Off Power: Before installation, turn off the power at the circuit breaker to prevent electrical hazards.
  • Remove Existing Fixture: If replacing an old fixture, carefully remove it and disconnect the wiring.

4. Follow Manufacturer Instructions

  • Installation Manual: Read and follow the manufacturer’s instructions provided with the fixture. This will guide you through the installation process and ensure proper assembly.

5. Test the Fixture

  • Functionality Check: Once installed, turn the power back on and test the fixture to ensure it operates correctly and provides the desired level of illumination.

Maintaining Your Oversized Flush Mount Ceiling Light

Proper maintenance will keep your oversized flush mount ceiling light looking and functioning like new. Here’s how to care for your fixture:

1. Regular Cleaning

  • Dusting: Dust the fixture regularly to prevent the buildup of dirt and debris. Use a soft cloth or duster to clean the surface.
  • Cleaning Glass: If the fixture has glass components, clean them with a glass cleaner or a mild soap solution to maintain clarity and brightness.

2. Check for Issues

  • Bulb Replacement: Replace burnt-out bulbs promptly to ensure consistent lighting.
  • Inspect Wiring: Periodically check the wiring and connections to ensure they are secure and free from damage.

3. Professional Servicing

  • Electrical Maintenance: If you notice any issues with the fixture, such as flickering lights or unusual noises, contact a professional for servicing or repairs.

Design Ideas for Using Oversized Flush Mount Ceiling Lights

Oversized flush mount ceiling lights can enhance various areas of your home. Here are some design ideas to inspire you:

1. Living Room

  • Statement Piece: Use an oversized flush mount ceiling light as a focal point in your living room. Choose a design that complements your furniture and decor.
  • Layered Lighting: Combine the flush mount light with other lighting sources, such as floor lamps and table lamps, to create a well-lit and inviting space.

2. Dining Room

  • Elegant Dining: An oversized fixture can add elegance to your dining area, making it the perfect centerpiece for meals and gatherings.
  • Ambient Lighting: Opt for a fixture with a dimmable feature to adjust the lighting according to the occasion.

3. Entryway

  • Welcoming Entrance: Install an oversized flush mount ceiling light in your entryway to create a warm and welcoming atmosphere for guests.
  • Bright Illumination: Choose a fixture that provides ample light to illuminate the entire entryway.

4. Bedroom

  • Modern Touch: Incorporate an oversized flush mount ceiling light in the bedroom to add a modern touch and enhance overall lighting.
  • Soft Lighting: Select a fixture with a soft light temperature to create a relaxing and comfortable ambiance.

Conclusion

Oversized flush mount ceiling lights are a stylish and functional addition to any home. With their ability to provide ample illumination and make a statement in any room, they offer both practical and aesthetic benefits. By understanding the features, benefits, and installation tips, you can select and maintain the perfect fixture for your space.

Whether you’re enhancing your living room, dining area, entryway, or bedroom, an oversized flush mount ceiling light can transform your space and provide the perfect lighting solution. Consider your needs, style preferences, and maintenance requirements to make an informed decision and enjoy the benefits of this versatile lighting option.

Minka Aire Orb Ceiling Fan: Discover the Elegance and Functionality

When it comes to blending style and functionality in your home’s cooling solutions, the Minka Aire Orb Ceiling Fan stands out as a top choice. This modern ceiling fan not only enhances your room’s aesthetics but also provides efficient airflow and cooling. In this comprehensive guide, we’ll explore the features, benefits, installation tips, and maintenance of the Minka Aire Orb Ceiling Fan, helping you make an informed decision for your space.

Minka Aire Orb Ceiling Fan

What Makes the Minka Aire Orb Ceiling Fan a Top Choice?

The Minka Aire Orb Ceiling Fan is renowned for its innovative design and advanced functionality. Here’s why it’s an excellent choice for modern homes:

1. Sleek, Modern Design

The Minka Aire Orb Ceiling Fan features a contemporary design that seamlessly integrates with various interior styles. Its sleek, spherical shape and minimalistic design make it a perfect fit for both modern and transitional decor.

  • Unique Aesthetic: The fan’s circular design and clean lines offer a unique aesthetic that stands out in any room.
  • Color Options: Available in several finishes, including matte black, brushed nickel, and oil-rubbed bronze, the Minka Aire Orb can complement a wide range of color schemes and furnishings.

2. Efficient Airflow

Equipped with powerful motor technology, the Minka Aire Orb Ceiling Fan delivers excellent airflow and cooling performance. The fan blades are designed to circulate air efficiently, providing consistent comfort throughout the room.

  • Adjustable Speeds: The fan offers multiple speed settings, allowing you to customize airflow according to your needs.
  • Reversible Motor: The reversible motor feature enables you to switch between cooling and heating modes, enhancing year-round comfort.

3. Quiet Operation

One of the standout features of the Minka Aire Orb Ceiling Fan is its quiet operation. The fan’s motor is designed to minimize noise, ensuring a peaceful environment without the distracting hum often associated with ceiling fans.

  • Whisper-Quiet Performance: Ideal for bedrooms, living rooms, and home offices where noise levels are a concern.
  • Smooth Operation: The fan operates smoothly at all speed settings, providing a serene and relaxing atmosphere.

4. Energy Efficiency

The Minka Aire Orb Ceiling Fan is designed with energy efficiency in mind. By improving airflow and reducing the need for air conditioning, it helps lower energy bills and reduce your home’s carbon footprint.

  • LED Lighting: Some models come with integrated LED lighting, which is energy-efficient and long-lasting.
  • Eco-Friendly Design: The fan’s design promotes better air circulation, reducing the need for additional cooling or heating.

Read too: Bathroom Flooded Through the Ceiling: A Comprehensive Guide

Features of the Minka Aire Orb Ceiling Fan

To fully appreciate the Minka Aire Orb Ceiling Fan, it’s essential to understand its key features:

1. Stylish Design

The Minka Aire Orb Ceiling Fan boasts a minimalist design that adds a touch of elegance to any room. Its spherical shape and sleek finish create a modern look that enhances the overall decor.

  • Finish Options: Choose from finishes like matte black, brushed nickel, and oil-rubbed bronze to match your room’s decor.
  • Blade Design: The fan features clean, streamlined blades that complement its modern aesthetic.

2. Advanced Motor Technology

The fan is equipped with a high-performance motor that ensures efficient operation and reliability. The motor’s advanced technology contributes to the fan’s quiet performance and effective airflow.

  • DC Motor: Many models use a DC motor, which is known for its energy efficiency and quiet operation.
  • Reversible Function: The reversible motor allows for both summer and winter use, providing versatile climate control.

3. Remote Control

The Minka Aire Orb Ceiling Fan often includes a remote control for added convenience. With the remote, you can easily adjust the fan’s speed, lighting, and direction without needing to reach the pull chains.

  • Easy Operation: The remote control simplifies operation and allows for easy adjustments from anywhere in the room.
  • Convenient Features: Some remotes come with additional features like a timer function or dimming options for integrated lighting.

4. Integrated Lighting

Many models of the Minka Aire Orb Ceiling Fan come with integrated LED lighting, adding both functionality and style to your space.

  • Energy-Efficient Lighting: LED lights are long-lasting and consume less energy compared to traditional bulbs.
  • Adjustable Brightness: The lighting can often be dimmed to create the perfect ambiance.

Installation Tips for the Minka Aire Orb Ceiling Fan

Proper installation is crucial for the performance and longevity of your ceiling fan. Here are some tips to ensure a successful installation:

1. Choose the Right Location

Select a location that provides ample space for the fan to operate efficiently. Ensure there are no obstructions above or around the fan that could interfere with its performance.

  • Clearance: The fan should be installed at least 7-8 feet above the floor for optimal airflow and safety.
  • Positioning: Center the fan in the room for balanced airflow and aesthetic appeal.

2. Use the Correct Mounting Hardware

Ensure you use the appropriate mounting hardware and follow the manufacturer’s instructions for installation. The fan should be securely mounted to a ceiling joist or support beam.

  • Support: For heavy or large fans, additional support may be required to ensure stability.
  • Electrical Wiring: Make sure the electrical wiring is properly connected and meets local code requirements.

3. Follow Installation Instructions

Carefully follow the installation instructions provided with the fan. If you’re unsure about any aspect of the installation process, consider hiring a professional electrician.

  • Step-by-Step Guide: The instructions typically include detailed steps for assembling and installing the fan.
  • Safety First: Always turn off the power before beginning installation and double-check all connections.

Maintenance Tips for the Minka Aire Orb Ceiling Fan

Regular maintenance is key to keeping your Minka Aire Orb Ceiling Fan in top condition. Here are some maintenance tips:

1. Clean Regularly

Dust and clean the fan blades and motor regularly to prevent buildup that can affect performance. Use a soft, dry cloth or a duster to remove dust from the blades and other components.

  • Blade Cleaning: Gently wipe the blades with a damp cloth if needed, but avoid using harsh chemicals.
  • Motor Maintenance: Ensure that the motor is free of dust and debris to maintain smooth operation.

2. Check for Loose Parts

Periodically check for any loose screws or components. Tighten any loose parts to ensure the fan operates smoothly and safely.

  • Screw Check: Inspect the fan’s mounting bracket and blade attachments regularly.
  • Balance: If you notice any wobbling or noise, check the fan blades for proper alignment and balance.

3. Replace Bulbs as Needed

If your fan has integrated lighting, replace any burnt-out bulbs promptly to maintain optimal lighting and performance.

  • LED Bulbs: Use the recommended LED bulbs for replacements to ensure compatibility and efficiency.
  • Bulb Lifespan: LED bulbs generally have a long lifespan, but it’s still important to monitor their performance.

4. Schedule Professional Servicing

For any issues that can’t be resolved with basic maintenance, or if you need a thorough inspection, consider scheduling professional servicing.

  • Inspection: A professional can perform a comprehensive checkup and address any underlying issues.
  • Repairs: For complex repairs or adjustments, professional expertise ensures the fan remains in good working order.

Conclusion

The Minka Aire Orb Ceiling Fans combines modern design with efficient performance, making it an excellent choice for enhancing any room with high ceilings or contemporary decor. With its sleek design, advanced motor technology, and integrated lighting options, this fan offers both style and functionality.

By understanding its features, following installation tips, and performing regular maintenance, you can enjoy the benefits of your Minka Aire Orb Ceiling Fans for years to come. Whether you’re looking to upgrade your home’s cooling system or add a touch of elegance to your space, the Minka Aire Orb Ceiling Fans is a stylish and practical solution.

Modern Farmhouse Ceiling Light: A Comprehensive Guide

The modern farmhouse style has taken the interior design world by storm, blending the rustic charm of country living with contemporary design elements. One key aspect of achieving this aesthetic is choosing the right lighting, particularly ceiling lights. Modern farmhouse ceiling light offer a perfect mix of warmth, simplicity, and functionality, making them a great choice for any home looking to combine modern and traditional elements.

Modern Farmhouse Ceiling Light

In this article, we will explore the various types of modern farmhouse ceiling lights, their features, and how to choose the best one for your home. Whether you’re renovating your entire house or simply looking to update your lighting fixtures, this guide will provide you with all the information you need to make an informed decision.

Understanding the Modern Farmhouse Style

Before diving into the details of modern farmhouse ceiling lights, it’s important to understand the overall style. The modern farmhouse look is characterized by its blend of cozy, rustic elements and sleek, contemporary finishes. It draws inspiration from traditional farmhouses, with a focus on natural materials, neutral color palettes, and simple, functional design.

Read too: Bathroom Flooded Through the Ceiling: A Comprehensive Guide

Key Elements of Modern Farmhouse Style:

  • Natural Materials: Wood, metal, and stone are commonly used in modern farmhouse designs. These materials add warmth and texture to a space.
  • Neutral Colors: Whites, creams, grays, and earthy tones are typical of the modern farmhouse palette. These colors create a calm, inviting atmosphere.
  • Clean Lines: While the style incorporates rustic elements, it also emphasizes clean, simple lines to keep the look fresh and uncluttered.
  • Mix of Old and New: Modern farmhouse design often blends vintage or antique pieces with contemporary furniture and decor, creating a unique and personalized look.

Now that we have a clear understanding of the modern farmhouse style, let’s explore how ceiling lights fit into this aesthetic.

Why Choose a Modern Farmhouse Ceiling Light?

Modern farmhouse ceiling lights are an essential component of this design style. They not only provide necessary illumination but also serve as a focal point in a room, enhancing the overall aesthetic. Here are some reasons why you might choose a modern farmhouse ceiling light:

1. Versatility

One of the biggest advantages of modern farmhouse ceiling lights is their versatility. They can be used in various rooms, including the kitchen, living room, dining room, and even bedrooms. Whether you have a large open space or a cozy nook, there’s a modern farmhouse ceiling light that will fit perfectly.

2. Timeless Appeal

The combination of rustic and modern elements gives these lights a timeless appeal. Unlike trendier lighting options that may feel outdated in a few years, modern farmhouse ceiling lights are designed to be classic and enduring, ensuring they remain stylish for years to come.

3. Warmth and Ambiance

Lighting plays a crucial role in setting the mood of a space, and modern farmhouse ceiling lights are particularly effective at creating a warm, inviting ambiance. Whether you choose a fixture with exposed bulbs, wood accents, or a metal finish, these lights add a cozy touch to any room.

4. Functional Design

In addition to their aesthetic appeal, modern farmhouse ceiling lights are also designed with functionality in mind. Many fixtures feature adjustable heights, dimmable settings, and other practical features that make them suitable for everyday use.

Types of Modern Farmhouse Ceiling Lights

When it comes to modern farmhouse ceiling lights, there are several different types to choose from, each offering its own unique style and functionality. Below, we’ll explore some of the most popular options and how they can be used to enhance your home’s interior.

1. Chandeliers

Chandeliers are a popular choice for modern farmhouse interiors, offering a statement piece that draws the eye upward and adds a touch of elegance to any room. In a modern farmhouse setting, chandeliers often feature a combination of wood and metal, with simple, clean lines that align with the style’s aesthetic.

Where to Use:

  • Dining Room: A modern farmhouse chandelier above the dining table creates a stunning focal point and provides ample lighting for meals.
  • Entryway: Welcome guests with a warm, inviting chandelier in the entryway that sets the tone for the rest of your home.
  • Living Room: Hang a chandelier in the center of the living room to tie the space together and add a touch of sophistication.

2. Pendant Lights

Pendant lights are another versatile option, offering both style and functionality. They are often used in kitchens, where they can be hung above islands or countertops to provide focused task lighting. Modern farmhouse pendant lights typically feature industrial elements, such as metal shades or exposed bulbs, paired with rustic materials like wood or rope.

Where to Use:

  • Kitchen: Install pendant lights above the kitchen island for both task lighting and a stylish design element.
  • Bedroom: Use pendant lights as bedside lighting for a modern farmhouse twist on traditional table lamps.
  • Hallway: Line a hallway with a series of pendant lights to create a cohesive and well-lit pathway.

3. Flush Mounts

For spaces with lower ceilings, flush mount ceiling lights are an ideal choice. These fixtures sit close to the ceiling, providing ample illumination without taking up much visual space. In a modern farmhouse setting, flush mounts often feature simple designs with metal or wood accents, making them both practical and stylish.

Where to Use:

  • Bedrooms: Flush mount lights in the bedroom offer soft, ambient lighting while maintaining a clean, uncluttered look.
  • Bathrooms: Install a flush mount light in the bathroom for even, overhead illumination.
  • Closets: Light up a walk-in closet with a flush mount fixture that adds both style and functionality.

4. Semi-Flush Mounts

Semi-flush mount lights hang slightly lower than flush mounts, offering a bit more visual interest while still being suitable for rooms with lower ceilings. These lights are a great option for modern farmhouse interiors, as they often feature a mix of rustic and industrial elements, such as metal frames, wood accents, and exposed bulbs.

Where to Use:

  • Hallways: A semi-flush mount light in a hallway provides both style and function, illuminating the space without overwhelming it.
  • Kitchens: Use semi-flush mounts in smaller kitchens or over dining areas for a balanced mix of form and function.
  • Home Office: Add a semi-flush mount light to your home office for stylish, practical lighting that complements your modern farmhouse decor.

How to Choose the Perfect Modern Farmhouse Ceiling Light

Selecting the right modern farmhouse ceiling light involves more than just picking a style you like. There are several factors to consider to ensure that your chosen fixture will enhance your space both aesthetically and functionally.

1. Room Size and Ceiling Height

Before choosing a light fixture, consider the size of the room and the height of the ceiling. Larger rooms or those with higher ceilings can accommodate more substantial fixtures, such as chandeliers or large pendant lights. Conversely, smaller rooms or those with lower ceilings may require flush mounts or smaller pendants to avoid overwhelming the space.

2. Lighting Needs

Think about the primary purpose of the light fixture in the room. Is it intended to provide ambient lighting, task lighting, or accent lighting? For example, a chandelier in the dining room may serve as the main source of light, while pendant lights in the kitchen might be used for task lighting over an island or countertop.

3. Style and Finish

While modern farmhouse ceiling lights typically feature a mix of rustic and industrial elements, there’s still plenty of room for personalization. Consider the overall style of your home and choose a fixture that complements your existing decor. Additionally, pay attention to the finish of the light fixture—whether it’s brushed nickel, matte black, aged brass, or natural wood—to ensure it aligns with your design vision.

4. Bulb Type and Brightness

The type of bulb you choose can significantly impact the overall look and feel of your light fixture. For a warm, inviting glow, opt for Edison-style bulbs, which are often used in modern farmhouse lighting. Additionally, consider the brightness level needed for the room—dimmable fixtures offer versatility, allowing you to adjust the light to suit different activities.

5. Installation and Maintenance

Finally, think about the installation process and ongoing maintenance of your chosen light fixture. Some ceiling lights may require professional installation, especially if they are heavy or complex. Additionally, consider how easy it will be to clean and maintain the fixture, particularly if it features intricate details or delicate materials.

Incorporating Modern Farmhouse Ceiling Lights into Different Rooms

Modern farmhouse ceiling lights can be used in various rooms throughout your home, each with its own unique requirements and opportunities for creativity. Here are some tips for incorporating these lights into different spaces:

1. Kitchen

In the kitchen, lighting is both functional and decorative. Modern farmhouse pendant lights are a popular choice for kitchen islands, providing focused task lighting while adding a stylish touch. For larger kitchens, consider combining pendant lights with a statement chandelier over the dining area, creating a cohesive look that ties the space together.

2. Living Room

The living room is often the heart of the home, and modern farmhouse ceiling lights can help create a warm, inviting atmosphere. A large chandelier or semi-flush mount light in the center of the room can serve as the main source of light, while additional lamps or wall sconces provide supplementary lighting for reading or relaxing.

3. Bedroom

In the bedroom, lighting should promote relaxation and comfort. Flush mount or semi-flush mount lights are ideal for bedrooms with lower ceilings, offering soft, ambient lighting that creates a cozy atmosphere. For a more dramatic look, consider a modern farmhouse chandelier or pendant lights on either side of the bed.

4. Bathroom

In the bathroom, modern farmhouse ceiling lights should provide even, bright lighting for daily tasks like grooming and applying makeup. Flush mount lights are a practical choice for bathrooms, as they provide ample illumination without taking up too much space. Alternatively, consider a pair of pendant lights on either side of the vanity for a stylish, yet functional touch.

Conclusion: Elevate Your Home with Modern Farmhouse Ceiling Lights

Modern farmhouse ceiling lights are the perfect way to blend rustic charm with contemporary design, creating a warm and inviting atmosphere in any room. Whether you’re looking for a statement chandelier, practical pendant lights, or a sleek flush mount, there’s a modern farmhouse ceiling light to suit every space and style.

By considering factors such as room size, lighting needs, and personal style, you can select the perfect fixture to enhance your home’s interior. With the right lighting, you can transform any space into a cozy, stylish retreat that reflects the best of both modern and farmhouse design.

How to Hang a Mirror From the Ceiling: A Comprehensive Guide

Hanging a mirror from the ceiling can be an eye-catching and functional design choice that adds a unique touch to any space. Whether you’re looking to create a dramatic focal point, enhance natural light, or make a room appear larger, ceiling-mounted mirrors offer both aesthetic and practical benefits. This comprehensive guide will walk you through everything you need to know about how to hang a mirror from the ceiling, from planning and preparation to installation and maintenance.

Hang Mirror From Ceiling

Why Hang a Mirror From the Ceiling?

Hanging a mirror from the ceiling can offer several advantages:

  1. Aesthetic Appeal: Ceiling-mounted mirrors can serve as a striking visual element in a room. They can create a sense of openness and add an elegant touch to your decor.
  2. Enhanced Light Reflection: By positioning a mirror on the ceiling, you can maximize the reflection of natural light, making the room appear brighter and more spacious.
  3. Unique Design: Ceiling-mounted mirrors are less common than wall-mounted ones, making them a standout feature that can give your interior a unique look.
  4. Visual Expansion: Mirrors can visually expand a room, making it seem larger than it actually is. Hanging a mirror from the ceiling can enhance this effect, especially in smaller spaces.

Read too: Kitchen Lighting For A Vaulted Ceiling: Illuminating Your Space with Style and Functionality

How to Hang a Mirror From the Ceiling

Hanging a mirror from the ceiling involves careful planning and execution. Follow these steps to ensure a successful installation.

1. Choose the Right Mirror

Selecting the right mirror is crucial. Consider the following factors:

  • Size and Weight: The size and weight of the mirror will determine the type of hardware and installation method you need. Heavier mirrors require stronger supports and anchoring systems.
  • Shape and Style: Choose a mirror that complements the room’s design. Whether it’s a round, square, or custom-shaped mirror, make sure it aligns with your aesthetic goals.
  • Safety: Ensure the mirror is made of high-quality glass and has rounded edges or is otherwise designed to minimize the risk of injury in case of accidents.

2. Gather Materials and Tools

Before you begin, make sure you have all the necessary materials and tools:

  • Mirror: The mirror you intend to hang.
  • Ceiling Hooks or Mounting Hardware: Heavy-duty hooks or brackets designed for ceiling mounting.
  • Ceiling Anchors: For added support, especially if installing into drywall or other non-stud materials.
  • Measuring Tape: To ensure precise placement.
  • Level: To make sure the mirror hangs evenly.
  • Drill and Drill Bits: For creating holes in the ceiling.
  • Screwdriver: To secure the hardware.
  • Stud Finder: To locate ceiling joists if necessary.

3. Plan the Placement

Careful planning is key to a successful installation:

  • Determine Placement: Decide where you want the mirror to be positioned. Consider the height and the angle at which the mirror will be viewed.
  • Mark the Ceiling: Use a pencil to mark the spot where the hooks or brackets will be installed. Ensure the markings are level and aligned.

4. Install the Ceiling Hooks or Brackets

Follow these steps to install the mounting hardware:

  • Find Joists: Use a stud finder to locate the ceiling joists, as these will provide the strongest support for your mirror.
  • Drill Holes: Drill holes into the ceiling at the marked locations. Make sure the holes are the correct size for the anchors or screws you’ll be using.
  • Install Anchors: If you’re not drilling into a joist, insert ceiling anchors into the drilled holes to provide additional support.
  • Attach Hooks or Brackets: Secure the ceiling hooks or brackets into the holes or anchors using a screwdriver. Ensure they are firmly attached and can support the weight of the mirror.

5. Hang the Mirror

With the hardware in place, you’re ready to hang the mirror:

  • Attach Hanging Hardware: If the mirror doesn’t have built-in hanging hardware, you may need to attach D-rings, wire, or other hanging mechanisms to the back of the mirror.
  • Lift and Position the Mirror: Carefully lift the mirror and position it onto the ceiling hooks or brackets. Make sure it’s level and aligned with your markings.
  • Secure the Mirror: Depending on the type of hardware you used, you may need to secure the mirror further with additional fasteners or supports.

6. Check and Adjust

Once the mirror is in place, take a moment to ensure everything is correct:

  • Level the Mirror: Use a level to verify that the mirror is hanging evenly. Adjust as necessary.
  • Test Stability: Gently test the stability of the mirror by applying light pressure. Ensure it’s securely mounted and doesn’t shift or wobble.
  • Clean the Mirror: Wipe the mirror with a glass cleaner to remove any fingerprints or dust from the installation process.

Maintenance and Safety Tips

To ensure the longevity and safety of your ceiling-mounted mirror, follow these maintenance and safety tips:

1. Regular Inspections

Periodically check the mirror and its mounting hardware for signs of wear or loosening. Tighten any screws or brackets as needed.

2. Clean Properly

Clean the mirror regularly with a non-abrasive glass cleaner and a soft cloth. Avoid using harsh chemicals or abrasive materials that could damage the mirror’s surface.

3. Ensure Adequate Support

If you notice any instability or sagging, address it immediately. Reassess the mounting hardware and make any necessary adjustments or reinforcements.

4. Safety First

Ensure that the mirror is securely mounted and that all hardware is properly installed. If you’re unsure about any aspect of the installation, consult with a professional for assistance.

Conclusion

Hanging a mirror from the ceiling can be a stylish and functional way to enhance your living space. By carefully selecting the right mirror, planning the placement, and following proper installation techniques, you can create a stunning visual impact in any room. Regular maintenance and safety checks will ensure that your ceiling-mounted mirror remains a beautiful and practical addition to your home for years to come.

Modern Chandelier For 20 Foot Ceiling: Elevate Your Space with Style

When it comes to lighting up a high-ceilinged room, a modern chandelier can make a dramatic difference in both functionality and aesthetics. If you have a 20-foot ceiling, selecting the right chandelier becomes crucial for creating a visually striking focal point that complements the scale of your space. In this comprehensive guide, we will explore the best options for a modern chandelier for a 20-foot ceiling, discussing design considerations, style choices, and installation tips to ensure you find the perfect fit for your home.

Modern Chandelier For 20 Foot Ceiling

What Is a Modern Chandelier For a 20 Foot Ceiling?

A modern chandelier for a 20-foot ceiling is designed to enhance spaces with high ceilings while reflecting contemporary design aesthetics. Modern chandeliers combine sleek lines, minimalistic designs, and innovative materials to offer both elegance and functionality. When selecting a chandelier for such a tall space, it’s essential to consider scale, proportion, and the chandelier’s ability to effectively light the room.

Read too: Discovering the Charm of Nautical Outdoor Ceiling Fans for Your Coastal Retreat: Sail into Style

Key Features of Modern Chandeliers for High Ceilings

  • Scale and Proportion: For a 20-foot ceiling, the chandelier should be sizable enough to make an impact without overwhelming the space. Large, dramatic fixtures are ideal for such high ceilings.
  • Design and Materials: Modern chandeliers often feature materials like glass, crystal, metal, and sleek finishes. Designs can range from geometric shapes to abstract forms, each offering a unique touch.
  • Lighting Options: Look for chandeliers with adjustable lighting features. These can include dimmable settings or multi-directional lights to ensure optimal illumination.

Benefits of Installing a Modern Chandelier in High Ceilings

1. Aesthetic Appeal

One of the primary benefits of a modern chandelier for a 20-foot ceiling is its visual impact. A well-chosen chandelier can serve as a striking centerpiece, adding a touch of elegance and sophistication to your room. Its size and design can draw attention upward, enhancing the vertical space and creating a dramatic effect.

2. Enhanced Lighting

High ceilings can present challenges when it comes to lighting. A modern chandelier provides ample illumination while also allowing for more focused lighting options. With the right chandelier, you can achieve both ambient and task lighting, ensuring the entire room is well-lit.

3. Improved Room Dynamics

A chandelier designed for high ceilings can improve the dynamics of a room. It can balance the vertical space, making the room feel more cohesive and connected. Additionally, the chandelier can enhance the architectural features of the room, drawing attention to unique elements such as exposed beams or vaulted ceilings.

4. Customization and Versatility

Modern chandeliers come in a variety of styles, sizes, and finishes, offering plenty of options for customization. Whether you prefer a minimalist design or a more elaborate fixture, you can find a chandelier that suits your taste and complements your home’s decor.

How to Choose the Right Modern Chandelier For a 20 Foot Ceiling

1. Consider the Room’s Style and Design

The style of your room will greatly influence the type of chandelier that works best. For a contemporary space, opt for sleek, geometric designs with clean lines and minimalistic features. In contrast, a more eclectic room might benefit from a chandelier with a bold or abstract design.

2. Measure the Chandelier Size

For a 20-foot ceiling, the chandelier needs to be proportionate to the room’s size. A general guideline is to choose a chandelier that is about 1/2 to 1/3 the width of the room. For very high ceilings, a larger chandelier or a multi-tiered design can be appropriate.

3. Choose the Right Height

The height at which the chandelier is hung is crucial. It should be low enough to provide adequate illumination but high enough to avoid obstructing views or movement. A common recommendation is to hang the chandelier so that its bottom is about 7 to 8 feet above the floor. In a high-ceiling room, this might mean using a long downrod or chain to achieve the right height.

4. Lighting Functionality

Evaluate the lighting needs of the room. A chandelier with adjustable lighting options or multiple light sources can provide flexibility for different activities and moods. Dimmable features are particularly useful for creating varying levels of illumination.

5. Material and Finish

Select materials and finishes that complement the overall design of your space. Modern chandeliers often feature materials like polished metal, crystal, or glass. Choose a finish that matches your existing decor or adds a new element of interest.

6. Installation Considerations

Given the height of a 20-foot ceiling, installation can be complex. It may require special equipment or professional help to ensure the chandelier is installed securely and at the correct height. Ensure that your ceiling can support the weight of the chandelier and that the installation complies with safety standards.

Design Ideas for Modern Chandeliers in High Ceilings

1. Minimalist Elegance

For a minimalist interior, choose a chandelier with clean lines and a simple design. A modern, geometric fixture in a matte metal finish can add sophistication without overwhelming the space.

2. Statement Piece

In a large, open living area, a multi-tiered chandelier or one with an elaborate design can serve as a statement piece. Opt for a fixture with dramatic elements such as cascading crystals or intricate metalwork to draw attention and create a focal point.

3. Modern Farmhouse

For a modern farmhouse aesthetic, consider a chandelier with a blend of rustic and contemporary elements. A fixture with a wooden or metal frame, combined with exposed bulbs or glass shades, can enhance the warm, inviting feel of the space.

4. Contemporary Glam

In a contemporary glam setting, a chandelier with crystal or glass elements can add a touch of luxury. Choose a design with reflective surfaces and sleek finishes to create a dazzling effect that enhances the room’s modern elegance.

Installation Tips for Modern Chandeliers in High Ceilings

1. Professional Installation

For safety and optimal results, hire a professional electrician for installation. They have the expertise to handle the complexities of high-ceiling installations, including ensuring proper support and alignment.

2. Use the Right Tools

If you choose to install the chandelier yourself, use the appropriate tools and equipment. This may include a sturdy ladder, a ceiling mount kit, and a voltage tester. Follow all manufacturer instructions carefully.

3. Adjust for Height

Ensure that the chandelier is adjustable to the desired height. Many modern chandeliers come with adjustable downrods or chains, allowing you to customize the height according to your needs.

4. Ensure Proper Support

Verify that your ceiling can support the weight of the chandelier. Install a ceiling mount that is rated for the chandelier’s weight and ensure that it is securely attached to the ceiling joists.

Conclusion

Selecting the perfect modern chandelier for a 20-foot ceiling requires careful consideration of design, size, and functionality. By choosing a chandelier that complements your space and meets your lighting needs, you can enhance the beauty and ambiance of your high-ceilinged room. Whether you prefer a sleek, minimalist design or a bold statement piece, a modern chandelier can transform your space into a stunning showcase of style and elegance.

Floor Ceiling Stone Fireplace Ideas to Transform Your Home

Floor To Ceiling Stone Fireplace Ideas. When it comes to creating a focal point in a room, few design elements rival the grandeur of a floor to ceiling stone fireplace. This architectural feature not only enhances the aesthetic appeal of your living space but also adds warmth and character. Whether you’re looking to modernize your home or embrace a rustic charm, a floor to ceiling stone fireplace can be tailored to suit any style. In this article, we’ll explore various ideas for incorporating a floor to ceiling stone fireplace into your home, offering inspiration and practical tips to help you achieve a stunning look.

Floor To Ceiling Stone Fireplace Ideas

Why Choose a Floor to Ceiling Stone Fireplace?

A floor to ceiling stone fireplace serves as a dramatic centerpiece that elevates the overall design of a room. Here are some reasons why this design choice is worth considering:

  1. Visual Impact: The towering height of a floor to ceiling stone fireplace immediately draws attention and makes a bold statement.
  2. Increased Warmth: Stone is an excellent conductor of heat, making it a practical choice for maintaining a cozy atmosphere.
  3. Versatile Design: Stone fireplaces can be customized to fit various styles, from modern minimalism to classic rustic charm.
  4. Durability: Stone is a durable material that can withstand the test of time, offering long-lasting beauty and functionality.

Top Floor to Ceiling Stone Fireplace Ideas

1. Modern Minimalist Stone Fireplace

For a sleek, contemporary look, consider a modern minimalist approach. Opt for clean lines, a monochromatic color palette, and large-format stones to create a streamlined appearance. Here’s how you can achieve this look:

  • Material: Use large, uniform stones such as slate or granite for a seamless appearance.
  • Color Scheme: Stick to neutral tones like gray, white, or beige to maintain a minimalist aesthetic.
  • Design: Choose a simple, rectangular fireplace that integrates smoothly into the wall.

2. Rustic Farmhouse Stone Fireplace

If you’re drawn to a more traditional or rustic style, a farmhouse-inspired stone fireplace might be ideal. This design emphasizes warmth and natural charm. To create a rustic farmhouse fireplace:

  • Material: Select natural, uneven stones such as river rock or fieldstone.
  • Finish: Incorporate a rough-hewn finish to enhance the authentic, handcrafted look.
  • Accents: Add a wooden mantle and distressed finishes for an extra touch of rustic elegance.

3. Industrial Chic Stone Fireplace

An industrial chic fireplace combines raw, urban elements with refined design. This style often features exposed materials and a utilitarian feel. To achieve an industrial chic stone fireplace:

  • Material: Use rugged stones like rough-cut limestone or reclaimed stone for an industrial vibe.
  • Design: Pair the stone with metal accents, such as a steel fireplace surround or exposed ductwork.
  • Color Palette: Choose darker tones and matte finishes to reinforce the industrial aesthetic.

4. Classic Elegance Stone Fireplace

For a timeless and sophisticated look, a classic elegance stone fireplace can transform your space into a refined sanctuary. This design often features traditional elements and luxurious details. To create a classic elegance fireplace:

  • Material: Opt for high-end stones like marble or travertine.
  • Design: Incorporate intricate details such as carved stonework or ornate mantles.
  • Color Scheme: Use light, elegant tones like cream or pale gray to enhance the classic appeal.

5. Contemporary Rustic Stone Fireplace

Combining contemporary and rustic elements can create a unique and inviting atmosphere. This design merges the warmth of rustic stone with modern touches. To achieve a contemporary rustic look:

  • Material: Use a mix of smooth and rough stone textures.
  • Design: Incorporate modern elements such as sleek lines and minimalist mantles.
  • Color Palette: Choose earthy tones and natural hues to bridge the gap between rustic and contemporary.

How to Choose the Right Stone for Your Fireplace

Selecting the right stone for your floor to ceiling fireplace is crucial for achieving your desired look and functionality. Here are some factors to consider:

  • Stone Type: Different types of stone offer varying textures and colors. Options include granite, marble, limestone, slate, and fieldstone.
  • Color: Choose a color that complements the overall design of your room. Neutral tones work well for modern designs, while earthy colors are ideal for rustic styles.
  • Finish: The finish of the stone affects its appearance and maintenance. Polished stones offer a sleek look, while rough-hewn finishes add texture and character.

Installation Tips for Floor to Ceiling Stone Fireplaces

Installing a floor to ceiling stone fireplace involves several steps to ensure a successful and safe installation. Here are some essential tips:

  1. Hire a Professional: For complex installations, it’s advisable to hire a professional contractor or stonemason with experience in fireplace construction.
  2. Prepare the Wall: Ensure that the wall is structurally sound and capable of supporting the weight of the stone.
  3. Choose the Right Mortar: Use high-quality mortar designed for stone installation to ensure a secure bond.
  4. Plan the Layout: Arrange the stones in a pattern that complements your design before beginning the installation to avoid errors.
  5. Allow for Proper Ventilation: Ensure that your fireplace installation includes adequate ventilation to prevent issues with smoke or heat.

Maintenance of Floor to Ceiling Stone Fireplaces

Maintaining your floor to ceiling stone fireplace is essential for preserving its beauty and functionality. Here’s how to keep it in top condition:

  1. Regular Cleaning: Dust and clean the stone surface regularly to prevent the buildup of dirt and grime. Use a soft cloth and a mild stone cleaner.
  2. Check for Damage: Inspect the stone and mortar for any signs of damage or wear. Address any issues promptly to prevent further damage.
  3. Seal the Stone: Periodically apply a stone sealer to protect the surface from stains and moisture.
  4. Avoid Harsh Chemicals: Use only products that are safe for stone to avoid damaging the finish.

Read too: Kitchen Lighting For A Vaulted Ceiling: Illuminating Your Space with Style and Functionality

Conclusion

A floor to ceiling stone fireplace can transform your living space with its impressive presence and timeless appeal. Whether you prefer a modern minimalist look or a rustic farmhouse design, there are numerous ideas to suit your style and preferences. By selecting the right stone, planning your installation carefully, and maintaining your fireplace, you can enjoy the beauty and functionality of this stunning feature for years to come.

Crown Molding Cabinets to Ceiling: Elevate Your Space

When it comes to enhancing the aesthetic appeal and functionality of your home, few features are as striking as crown molding cabinets to ceiling. This design element adds a touch of elegance and sophistication, transforming ordinary cabinetry into a stunning focal point. In this comprehensive guide, we’ll explore everything you need to know about incorporating crown molding on cabinets that reach up to the ceiling, including benefits, installation tips, and design ideas.

Crown Molding Cabinets To Ceiling

Why Choose Crown Molding Cabinets to Ceiling?

Crown molding is a traditional design element that has been used in interior decoration for centuries. When applied to cabinets that extend to the ceiling, it creates a seamless and cohesive look that enhances the overall aesthetic of your space. Here’s why you should consider this elegant upgrade:

  1. Visual Appeal: Crown molding adds a luxurious and classic touch to your cabinets. It creates a polished, high-end look that elevates the entire room.
  2. Enhanced Proportions: Cabinets that reach the ceiling can sometimes look imposing or disconnected from the rest of the room. Adding crown molding helps to visually integrate the cabinets with the ceiling and walls, providing a balanced and harmonious appearance.
  3. Increased Storage: Cabinets that go all the way to the ceiling provide additional storage space. Adding crown molding makes these cabinets look intentional and well-designed, rather than just functional.
  4. Hide Imperfections: Crown molding can help conceal any gaps or imperfections where the cabinets meet the ceiling, creating a more refined and seamless look.

Choosing the Right Crown Molding for Your Cabinets

Selecting the perfect crown molding for your cabinets involves considering various factors to ensure that it complements your existing decor and meets your aesthetic goals. Here’s what to keep in mind:

1. Style and Design

Crown molding comes in various styles and designs, from classic and ornate to modern and minimalist. The style you choose should reflect your overall design theme:

  • Traditional: Ornate, detailed crown molding with intricate patterns and flourishes works well in classic or traditional settings.
  • Modern: Sleek, simple crown molding with clean lines and minimal detailing suits contemporary or modern interiors.
  • Transitional: A blend of traditional and modern elements, transitional crown molding features subtle details that work well in various design styles.

Read too: Kitchen Lighting For A Vaulted Ceiling: Illuminating Your Space with Style and Functionality

2. Material

Crown molding is available in several materials, each with its own benefits:

  • Wood: Offers a rich, classic look and can be stained or painted. It’s durable but may require more maintenance.
  • MDF (Medium Density Fiberboard): Affordable and easy to paint, MDF is a popular choice for modern and transitional designs. It’s not as durable as wood but is less prone to warping.
  • Polyurethane: Lightweight and resistant to moisture, polyurethane is ideal for areas with high humidity. It can mimic the look of wood and is easy to install.

3. Size and Proportion

The size of the crown molding should be proportional to the height of the cabinets and the room. Larger, more elaborate moldings work well in rooms with high ceilings, while smaller, simpler designs are better suited for lower ceilings.

Installing Crown Molding Cabinets to Ceiling

Proper installation is key to achieving a polished and professional look. Here’s a step-by-step guide to help you with the process:

1. Preparation

Before installation, gather all necessary tools and materials, including crown molding, a saw, a measuring tape, a miter box, a nail gun, and wood glue. Ensure that the cabinets and ceiling are clean and free of debris.

2. Measure and Cut

Accurate measurements are crucial for a successful installation. Measure the length of each cabinet section where the crown molding will be installed. Use a miter saw to cut the crown molding at the appropriate angles, typically 45 degrees for inside and outside corners.

3. Fit and Secure

Dry-fit the crown molding pieces to ensure they fit properly. Apply wood glue to the back of the molding, then position it against the cabinets and ceiling. Use a nail gun to secure the molding in place, making sure to countersink the nails so they can be filled and painted over later.

4. Fill and Sand

Once the molding is secured, fill any nail holes or gaps with wood filler or caulk. Allow it to dry, then sand the area smooth to ensure a seamless finish.

5. Paint or Stain

If you’re painting the crown molding, apply a primer followed by your chosen paint color. For stained wood moldings, apply a wood stain followed by a clear sealer. Allow the paint or stain to dry completely before touching or using the cabinets.

Design Ideas for Crown Molding Cabinets to Ceiling

Incorporating crown molding into your cabinetry opens up a world of design possibilities. Here are some creative ideas to inspire you:

1. Classic Elegance

For a timeless look, opt for ornate crown molding with intricate details and a traditional finish. This works well in formal dining rooms, living rooms, or grand kitchens.

2. Modern Minimalism

Choose sleek, simple crown molding with clean lines for a modern, understated look. Pair it with minimalist cabinetry and neutral colors to create a contemporary space.

3. Transitional Style

Combine traditional and modern elements with transitional crown molding. This versatile style blends well with various decor themes and provides a balanced look.

4. Two-Tone Finish

Consider a two-tone finish for your crown molding and cabinets. For example, you could paint the crown molding a contrasting color from the cabinets to highlight the design feature.

5. Integrated Lighting

Install LED lighting along the top edge of the crown molding for an elegant touch. This creates a soft glow that enhances the ambiance and highlights the molding.

Maintenance and Care for Crown Molding

Proper maintenance ensures that your crown molding remains beautiful and functional over time. Here are some tips for keeping it in top condition:

  1. Regular Dusting: Dust the crown molding regularly to prevent buildup. Use a soft cloth or duster to gently clean the surface.
  2. Spot Cleaning: Address any stains or marks promptly. Use a mild cleaner and a soft cloth to clean the affected area without damaging the finish.
  3. Inspect for Damage: Periodically check for signs of damage or wear, such as cracks or peeling paint. Address any issues promptly to prevent further damage.
  4. Repaint or Refinish: Over time, the paint or finish on your crown molding may need touching up. Repaint or refinish as needed to maintain its appearance.

Conclusion

Incorporating crown molding cabinets to ceiling is an excellent way to enhance the elegance and functionality of your space. With careful selection of styles, materials, and installation techniques, you can achieve a beautiful and timeless look that elevates your home’s decor. Whether you prefer classic sophistication, modern minimalism, or a transitional design, crown molding offers endless possibilities for creating a stunning focal point in your interior design.

Scandinavian Flush Mount Ceiling Light: Illuminate Your Space

When it comes to home lighting, a Scandinavian flush mount ceiling light offers a perfect blend of style and functionality. Known for their sleek designs and minimalistic appeal, these lights can enhance any room’s aesthetic while providing effective illumination. This comprehensive guide will explore the various aspects of Scandinavian flush mount ceiling lights, including their features, benefits, installation tips, and more. Whether you’re renovating your space or simply looking for a stylish lighting upgrade, this guide will help you understand why a Scandinavian flush mount ceiling light might be the perfect choice for your home.

Scandinavian Flush Mount Ceiling Light

What is a Scandinavian Flush Mount Ceiling Light?

A Scandinavian flush mount ceiling light is a type of light fixture that is mounted directly onto the ceiling without any space in between. The design typically reflects the minimalist and functional aesthetics of Scandinavian interior design, which emphasizes simplicity, clean lines, and practicality.

Read too: Striped Schoolhouse Ceiling Light Fixtures: Unveiling the Timeless Charm

Key Characteristics of Scandinavian Flush Mount Ceiling Lights

  1. Minimalist Design
    • Description: These lights feature a clean and uncluttered design with simple geometric shapes and neutral colors.
    • Benefit: Enhances the overall look of a room without overwhelming the space with excessive ornamentation.
  2. Compact and Space-Efficient
    • Description: Flush mount lights are designed to sit snugly against the ceiling, making them ideal for rooms with low ceilings or limited space.
    • Benefit: Maximizes the usable space in the room and avoids obstruction, making it suitable for areas where pendant lights might be impractical.
  3. Versatile Styles
    • Description: Scandinavian flush mount ceiling lights come in various styles, including sleek metal finishes, frosted glass, and wood accents.
    • Benefit: Offers a range of options to match different interior design styles and preferences.
  4. Functional Lighting
    • Description: Designed to provide ample illumination while maintaining an unobtrusive appearance.
    • Benefit: Ensures that the space is well-lit without creating glare or harsh shadows.

Benefits of Choosing a Scandinavian Flush Mount Ceiling Light

1. Enhances Aesthetic Appeal

  • Explanation: The minimalist design of Scandinavian flush mount ceiling lights aligns with contemporary and modern interior styles, creating a cohesive and stylish look.
  • Advantage: Complements various decor themes, from modern and industrial to Scandinavian and mid-century.

2. Space-Saving Solution

  • Explanation: Unlike pendant lights or chandeliers, flush mount lights do not hang down, making them an ideal choice for rooms with lower ceilings.
  • Advantage: Allows for maximum headroom and reduces the risk of accidents or obstruction in high-traffic areas.

3. Easy Installation and Maintenance

  • Explanation: Flush mount lights are relatively easy to install compared to more complex lighting fixtures. They also require less maintenance due to their simple design.
  • Advantage: Saves time and effort during installation and upkeep, making them a practical choice for both DIY enthusiasts and professionals.

4. Improved Lighting Efficiency

  • Explanation: The design of flush mount lights ensures that light is evenly distributed across the room without creating harsh shadows or dark spots.
  • Advantage: Provides consistent and effective illumination, improving the overall functionality of the space.

Choosing the Right Scandinavian Flush Mount Ceiling Light

Selecting the right flush mount ceiling light involves considering various factors to ensure it meets your needs and complements your interior design. Here’s what to look for:

1. Size and Proportion

  • Consideration: Choose a light fixture that is appropriately sized for the room. Larger rooms may require bigger fixtures or multiple lights, while smaller rooms benefit from compact designs.
  • Recommendation: Measure the dimensions of your space and select a fixture that maintains a good balance between size and scale.

2. Lighting Type and Brightness

  • Consideration: Consider the type of lighting (e.g., LED, incandescent) and the brightness level required for the room.
  • Recommendation: Opt for LED fixtures for energy efficiency and longer lifespan, and choose a brightness level that matches the room’s purpose (e.g., brighter lights for work areas, softer lights for living spaces).

3. Material and Finish

  • Consideration: Scandinavian flush mount ceiling lights come in various materials such as metal, glass, and wood. The finish can range from matte to polished.
  • Recommendation: Select materials and finishes that match your existing decor and personal style. For example, a matte finish complements modern interiors, while a polished finish may suit more traditional settings.

4. Design and Style

  • Consideration: The design of the fixture should align with the overall style of your home. Scandinavian designs are known for their clean lines and functional form.
  • Recommendation: Choose a design that enhances the room’s aesthetic without clashing with other decor elements.

Installation Tips for Scandinavian Flush Mount Ceiling Lights

Proper installation is crucial for ensuring that your flush mount ceiling light functions correctly and enhances your space. Here are some tips to guide you through the installation process:

1. Turn Off Power

  • Tip: Before starting the installation, ensure that the power to the circuit is turned off at the breaker box to prevent electrical accidents.
  • Why: Ensures safety during the installation process.

2. Prepare the Mounting Area

  • Tip: Ensure that the ceiling is clean and free of any debris. Use a stud finder to locate and mark the mounting points.
  • Why: A clean and properly prepared area ensures a secure and stable installation.

3. Assemble the Fixture

  • Tip: Follow the manufacturer’s instructions to assemble the fixture. If the light requires assembly, ensure all parts are correctly fitted before mounting.
  • Why: Proper assembly ensures that the fixture functions correctly and safely.

4. Mount the Fixture

  • Tip: Attach the mounting bracket to the ceiling using the screws provided. Securely connect the wiring according to the instructions, and then mount the light fixture onto the bracket.
  • Why: Proper mounting ensures that the fixture is stable and correctly connected to the electrical system.

5. Test the Light

  • Tip: Once the fixture is installed, restore power to the circuit and test the light to ensure it is functioning correctly.
  • Why: Testing ensures that the light is installed correctly and operates as expected.

Maintenance and Care

To keep your Scandinavian flush mount ceiling light in excellent condition, follow these maintenance tips:

1. Regular Cleaning

  • Tip: Dust the fixture regularly using a soft cloth. For glass components, use a glass cleaner to remove any smudges or fingerprints.
  • Why: Regular cleaning maintains the fixture’s appearance and ensures optimal light output.

2. Check for Damage

  • Tip: Periodically inspect the fixture for any signs of damage, such as cracks or loose parts. Address any issues promptly to prevent further damage.
  • Why: Regular checks help identify potential problems early and ensure the fixture remains in good working condition.

3. Replace Bulbs as Needed

  • Tip: Replace burnt-out bulbs promptly and use the recommended wattage and type specified by the manufacturer.
  • Why: Ensures consistent lighting performance and prevents damage to the fixture.

Conclusion

A Scandinavian flush mount ceiling light is an excellent choice for those seeking a stylish, functional, and space-efficient lighting solution. With their minimalist design, easy installation, and effective illumination, these lights can enhance any room’s aesthetic while providing practical benefits. By understanding the features, benefits, and installation tips outlined in this guide, you can make an informed decision and enjoy the perfect lighting solution for your home.

Brushed Nickel Ceiling Light: Elevate Your Home’s Aesthetic

When it comes to home lighting, the right fixtures can make all the difference in creating a welcoming and stylish environment. Among the many options available, the brushed nickel ceiling light stands out for its sleek design, versatility, and timeless appeal. This comprehensive guide will delve into everything you need to know about brushed nickel ceiling lights, including their benefits, types, installation tips, and design ideas. Whether you’re renovating your home or simply looking to update your lighting, this guide will help you make an informed decision.

Brushed Nickel Ceiling Light

Why Choose a Brushed Nickel Ceiling Light?

Brushed nickel ceiling lights offer several advantages that make them a popular choice for homeowners and designers alike. Here are some key benefits:

Modern and Timeless Aesthetic

Brushed nickel has a subtle, matte finish that gives it a sophisticated, modern look while maintaining a timeless appeal. It blends seamlessly with various decor styles, from contemporary to traditional, making it a versatile choice for any room in your home.

Durability

Brushed nickel is known for its durability and resistance to corrosion, tarnish, and fingerprints. This makes it an ideal material for ceiling lights, as it can withstand the test of time and maintain its appearance with minimal maintenance.

Versatility

Brushed nickel ceiling lights come in a wide range of styles, sizes, and designs, allowing you to find the perfect fixture for any room. Whether you’re looking for a statement piece for your living room or a subtle fixture for your hallway, there’s a brushed nickel ceiling light to suit your needs.

Easy to Clean

The brushed finish of nickel makes it easy to clean and maintain. Unlike polished metals, brushed nickel doesn’t show fingerprints or smudges as easily, ensuring your ceiling light looks pristine with minimal effort.

Complements Other Fixtures

Brushed nickel is a popular finish for other home fixtures, such as faucets, cabinet hardware, and door handles. Choosing a brushed nickel ceiling light can create a cohesive look throughout your home by matching or complementing these other fixtures.

Types of Brushed Nickel Ceiling Lights

There are several types of brushed nickel ceiling lights to choose from, each offering unique features and benefits. Understanding the different options can help you select the best lights for your specific needs.

Flush Mount Ceiling Lights

Flush mount ceiling lights are installed directly against the ceiling, providing a sleek and unobtrusive look. They are ideal for rooms with low ceilings or where a minimalist design is desired. Brushed nickel flush mount lights offer a clean and modern appearance while delivering ample illumination.

Semi-Flush Mount Ceiling Lights

Semi-flush mount ceiling lights hang slightly below the ceiling, creating a more decorative and eye-catching effect. They are suitable for spaces with higher ceilings and can add a touch of elegance to your home. These lights strike a balance between form and function, offering both style and illumination.

Chandeliers

Brushed nickel chandeliers are a statement piece that can elevate the aesthetic of any room. They come in various styles, from modern geometric designs to traditional candle-like fixtures. Chandeliers are perfect for adding a touch of luxury and sophistication to dining rooms, living rooms, or entryways.

Read too: Kitchen Lighting For A Vaulted Ceiling: Illuminating Your Space with Style and Functionality

Pendant Lights

Pendant lights hang down from the ceiling on a rod or chain, making a bold design statement. They are ideal for adding a decorative touch to areas such as kitchen islands, dining tables, or foyers. Brushed nickel pendant lights come in a variety of styles, from contemporary to vintage, allowing you to personalize your decor.

Recessed Lights

Recessed lights, also known as downlights, are installed within the ceiling, providing a streamlined and discreet lighting solution. They are perfect for creating a clean, uncluttered look and are often used to highlight specific areas or features. Brushed nickel recessed lights are versatile and can be arranged in various configurations to achieve the desired lighting effect.

Track Lighting

Track lighting consists of a series of adjustable light heads mounted on a track system. This type of lighting is ideal for highlighting artwork, architectural features, or workspaces. Brushed nickel track lighting adds a contemporary touch and allows for flexibility in directing light where it’s needed most.

Installation Tips for Brushed Nickel Ceiling Lights

Proper installation is crucial for ensuring the optimal performance and longevity of your brushed nickel ceiling lights. Here are some tips to help you achieve a successful installation:

Plan Your Lighting Layout

Before starting the installation, plan your lighting layout to ensure even and effective illumination. Consider the size and shape of the room, as well as any specific areas or features you want to highlight. A well-thought-out lighting plan can enhance the functionality and aesthetics of your space.

Choose the Right Location

Select appropriate locations for your brushed nickel ceiling lights, keeping in mind factors such as ceiling height, proximity to electrical sources, and the room’s purpose. Ensure that the chosen locations provide adequate coverage and complement the overall design of your space.

Follow Electrical Safety Guidelines

Always follow electrical safety guidelines when installing ceiling lights. Turn off the power at the circuit breaker before starting the installation and use proper wiring techniques. If you are not comfortable working with electrical systems, consider hiring a licensed electrician to ensure a safe and professional installation.

Use Proper Mounting Hardware

Ensure that you use the proper mounting hardware for your brushed nickel ceiling lights. This includes appropriate screws, anchors, and mounting brackets that can support the weight of the fixture. Using the right hardware will ensure a secure and stable installation.

Test the Lights

After installing the brushed nickel ceiling lights, test them to ensure they are functioning correctly. Check for any flickering, uneven lighting, or other issues that may need to be addressed. Proper testing can help identify and resolve any problems before they become major concerns.

Design Ideas with Brushed Nickel Ceiling Lights

Brushed nickel ceiling lights can enhance the beauty and functionality of your home in various ways. Here are some design ideas to inspire you:

Modern Living Room Lighting

Install a brushed nickel chandelier or semi-flush mount light in your living room to create a focal point and add a touch of elegance. Pair it with recessed lights for ambient lighting and adjustable track lights to highlight artwork or architectural features.

Kitchen Illumination

Use brushed nickel pendant lights above your kitchen island or dining table to provide task lighting and enhance the overall aesthetic. Combine them with recessed lights for general illumination and under-cabinet lighting for a well-lit and functional kitchen space.

Elegant Dining Room

A brushed nickel chandelier can make a stunning centerpiece in your dining room. Choose a design that complements your dining table and other decor elements. Add wall sconces or recessed lights to create layers of lighting and set the perfect mood for dining.

Cozy Bedroom Ambiance

Create a cozy and inviting ambiance in your bedroom with a brushed nickel ceiling light. Opt for a semi-flush mount light or a chandelier for a touch of sophistication. Use dimmable bulbs to adjust the lighting levels according to your preferences and activities.

Welcoming Entryway

Make a lasting first impression with a brushed nickel pendant light or chandelier in your entryway. This will create a welcoming and stylish atmosphere for guests as they enter your home. Consider adding wall sconces or recessed lights for additional illumination.

Functional Home Office

Ensure your home office is well-lit and conducive to productivity with brushed nickel ceiling lights. Use recessed lights for general illumination and adjustable track lights to focus on specific work areas. A pendant light can add a decorative touch while providing ample lighting for tasks.

Maintenance of Brushed Nickel Ceiling Lights

Proper maintenance is essential for ensuring the longevity and performance of your brushed nickel ceiling lights. Here are some maintenance tips:

Regular Cleaning

Regularly clean your brushed nickel ceiling lights to remove dust, dirt, and fingerprints. Use a soft cloth and a mild detergent to wipe down the fixtures, being careful not to damage the light bulbs or electrical components. Regular cleaning can help maintain the brightness and appearance of the lights.

Inspect for Damage

Periodically inspect your brushed nickel ceiling lights for any signs of damage, such as cracks, rust, or loose connections. Address any issues promptly to prevent further damage and ensure the lights continue to function properly.

Check Electrical Connections

Ensure that all electrical connections are secure and free from corrosion. If you notice any loose or corroded connections, turn off the power and repair or replace the affected components. Proper electrical maintenance can help prevent potential safety hazards.

Replace Worn-Out Bulbs

Although brushed nickel fixtures are durable, the light bulbs will eventually need to be replaced. Monitor the performance of your ceiling lights and replace any bulbs that show signs of dimming or flickering. Using high-quality replacement bulbs can ensure consistent and reliable illumination.

Conclusion

Brushed nickel ceiling lights are an excellent choice for enhancing the functionality, safety, and aesthetics of your home. Their durability, versatility, and timeless design make them suitable for a wide range of applications. By understanding the different types of brushed nickel ceiling lights, following proper installation procedures, and maintaining the fixtures, you can create a beautifully illuminated environment that you can enjoy for years to come.