Wattstopper Ceiling Occupancy Sensor: Enhancing Efficiency and Comfort

In today’s world, energy efficiency and smart technology go hand-in-hand. One of the most innovative and useful devices to emerge in recent years is the Wattstopper Ceiling Occupancy Sensor. These sensors play a critical role in optimizing energy usage, enhancing security, and improving convenience in various settings. This comprehensive guide will dive deep into the features, benefits, and applications of the Wattstopper Ceiling Occupancy Sensor.

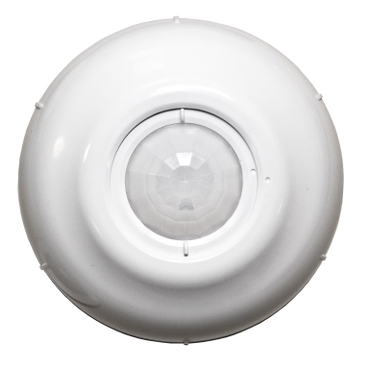
Wattstopper Ceiling Occupancy Sensor

What is a Wattstopper Ceiling Occupancy Sensor?

A Wattstopper Ceiling Occupancy Sensor is a device designed to detect the presence or absence of people within a specified area, typically a room or hallway, and control lighting or other systems accordingly. By automating the process of turning lights on and off, these sensors help save energy and reduce costs. The Wattstopper brand is renowned for its high-quality, reliable occupancy sensors that cater to a variety of commercial, industrial, and residential needs.

How Does a Wattstopper Ceiling Occupancy Sensor Work?

These sensors use passive infrared (PIR) technology, ultrasonic waves, or a combination of both to detect motion and occupancy. Here’s a breakdown of how these technologies work:

  • Passive Infrared (PIR): This technology detects the heat emitted by people. When a person enters the sensor’s field of view, the change in infrared energy triggers the sensor to turn the lights on.
  • Ultrasonic: Ultrasonic sensors emit sound waves and measure the reflection of these waves off objects in the room. Movement causes changes in the frequency of the reflected waves, which the sensor detects to determine occupancy.
  • Dual Technology: Combining PIR and ultrasonic technologies, dual-technology sensors offer enhanced accuracy and reduce the likelihood of false positives.

Benefits of Using a Wattstopper Ceiling Occupancy Sensor

Energy Efficiency

One of the primary advantages of installing a Wattstopper Ceiling Occupancy Sensor is the significant energy savings. By ensuring lights are only on when needed, these sensors help reduce unnecessary energy consumption, leading to lower utility bills and a smaller carbon footprint.

Read too: Kitchen Lighting For A Vaulted Ceiling: Illuminating Your Space with Style and Functionality

Enhanced Security

Occupancy sensors can also enhance security. Automatically turning lights on when motion is detected can deter potential intruders and make it easier for residents or employees to navigate spaces safely.

Increased Convenience

These sensors add a layer of convenience by automating lighting controls. Users no longer need to manually switch lights on and off, which is particularly beneficial in large buildings or areas where occupants frequently come and go.

Compliance with Energy Codes

Many building codes and standards now require the use of occupancy sensors to meet energy efficiency goals. Installing Wattstopper Ceiling Occupancy Sensors ensures compliance with these regulations, which can be crucial for new construction and renovation projects.

Applications of Wattstopper Ceiling Occupancy Sensors

Commercial Buildings

In office spaces, conference rooms, and restrooms, Wattstopper Ceiling Occupancy Sensors are invaluable. They ensure lights are only on when rooms are occupied, significantly cutting down on wasted energy. In addition, sensors can be integrated with HVAC systems to optimize heating and cooling based on occupancy, further enhancing energy efficiency.

Educational Facilities

Classrooms, lecture halls, and common areas in schools and universities can benefit from occupancy sensors. By automating lighting, these sensors help educational institutions manage energy costs while providing a comfortable learning environment.

Residential Settings

In homes, Wattstopper Ceiling Occupancy Sensors can be installed in frequently used areas such as hallways, bathrooms, and basements. They offer the same benefits of energy savings, convenience, and enhanced security, making them a smart addition to any residence.

Industrial Environments

Warehouses, manufacturing plants, and storage facilities can also utilize occupancy sensors to improve safety and efficiency. Ensuring that lighting is only used when necessary can lead to substantial cost savings and a safer working environment.

Key Features of Wattstopper Ceiling Occupancy Sensors

Adjustable Sensitivity

Wattstopper sensors come with adjustable sensitivity settings, allowing users to fine-tune the sensor’s range and responsiveness. This ensures optimal performance in various environments and minimizes false detections.

Time Delay Settings

These sensors often include time delay settings, which determine how long the lights remain on after motion is no longer detected. This feature helps prevent lights from turning off too quickly, providing a balance between energy savings and convenience.

Coverage Area

Wattstopper Ceiling Occupancy Sensors are designed to cover a wide area, making them suitable for large rooms and open spaces. The coverage area can vary depending on the model, so it’s essential to choose a sensor that fits the specific needs of your space.

Easy Installation

Wattstopper sensors are designed for straightforward installation, with clear instructions and the necessary hardware included. Many models are compatible with standard electrical boxes, making retrofitting or new installations hassle-free.

Choosing the Right Wattstopper Ceiling Occupancy Sensor

When selecting a Wattstopper Ceiling Occupancy Sensor, consider the following factors:

Type of Sensor

Determine whether a PIR, ultrasonic, or dual-technology sensor is best suited for your application. PIR sensors are ideal for spaces with a clear line of sight, while ultrasonic sensors are better for areas with obstacles. Dual-technology sensors provide the highest level of accuracy and reliability.

Coverage Area

Choose a sensor with a coverage area that matches the size of the room or space where it will be installed. For large open spaces, look for sensors with a broader detection range.

Mounting Height

Consider the height at which the sensor will be mounted. Wattstopper sensors are available in models suitable for standard ceiling heights as well as high-bay installations.

Integration with Other Systems

Some Wattstopper Ceiling Occupancy Sensors can be integrated with other building systems, such as HVAC and security systems. This integration can enhance overall building automation and efficiency.

Maintenance and Troubleshooting Tips

Regular Cleaning

Dust and debris can affect the performance of occupancy sensors. Regular cleaning with a soft cloth can help maintain sensor accuracy.

Checking Connections

If a sensor is not functioning correctly, check the electrical connections and ensure the sensor is properly installed. Loose or incorrect wiring can cause operational issues.

Sensitivity Adjustments

If the sensor is too sensitive or not sensitive enough, adjust the sensitivity settings. Consult the user manual for guidance on making these adjustments.

Conclusion

The Wattstopper Ceiling Occupancy Sensor is a powerful tool for improving energy efficiency, enhancing security, and increasing convenience in a variety of settings. Whether for commercial, educational, residential, or industrial applications, these sensors provide reliable performance and significant benefits. By understanding their features, benefits, and applications, you can make an informed decision and choose the right occupancy sensor for your needs.

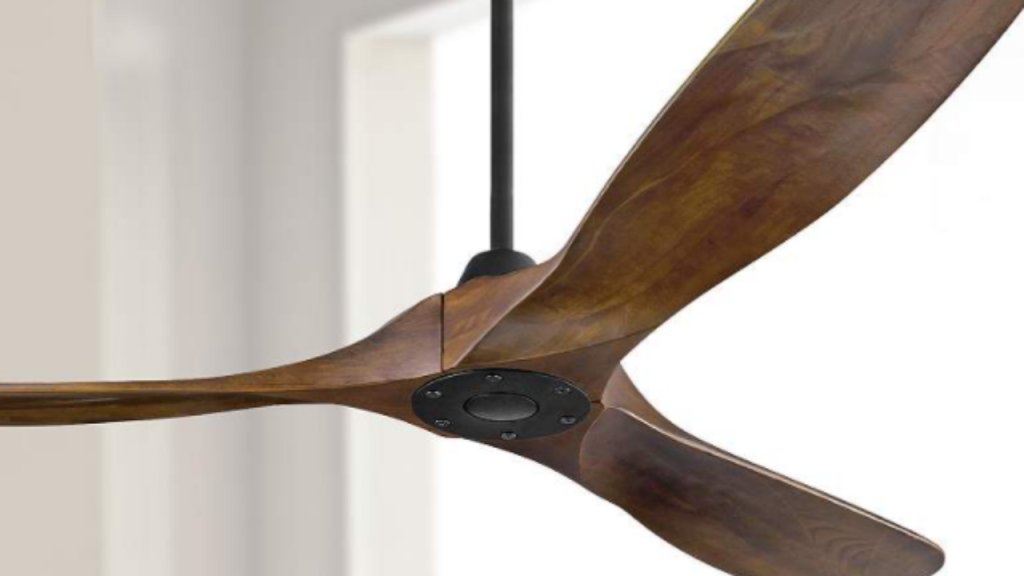
6000 CFM Ceiling Fan Options for Efficient Home Cooling: Explore the Best

In the realm of home cooling solutions, the 6000 CFM ceiling fan stands out as a powerful and efficient choice. Whether you’re looking to enhance comfort or reduce energy costs, understanding the benefits and features of a 6000 CFM ceiling fan can make a significant difference in your living space.

6000 Cfm Ceiling Fan

What is a 6000 CFM Ceiling Fan?

A 6000 CFM ceiling fan refers to its airflow capacity, measured in cubic feet per minute. This metric indicates how much air the fan can move, crucial for effective air circulation in larger rooms or spaces.

Understanding Airflow Efficiency

Efficiency is key when choosing a ceiling fan. A 6000 CFM rating ensures ample airflow without excessive energy consumption, making it a sustainable choice for environmentally conscious homeowners.

Benefits of a 6000 CFM Ceiling Fans

Enhanced Cooling Performance

With a high CFM rating, these fans excel in providing superior cooling performance, ideal for hot climates or rooms with poor ventilation.

Energy Efficiency

Despite their powerful performance, 6000 CFM ceiling fans are designed to operate efficiently, reducing electricity usage compared to traditional air conditioning systems.

Cost Savings

Lower energy consumption translates to reduced utility bills, offering long-term savings while maintaining comfort levels.

Factors to Consider When Choosing a 6000 CFM Ceiling Fan

Room Size and Ceiling Height

Matching the fan’s CFM rating to your room size ensures optimal airflow distribution. Ceiling height also affects performance, with higher ceilings requiring fans designed for greater reach.

Blade Design and Materials

The design and materials of fan blades impact both airflow and noise levels. Choose blades that complement the fan’s CFM rating for optimal performance.

Read too: Bathroom Flooded Through the Ceiling: A Comprehensive Guide

Additional Features

Modern 6000 CFM ceiling fans may include remote controls, reversible motor functions, and energy-efficient LED lighting options, enhancing convenience and functionality.

Installation Tips for 6000 CFM Ceiling Fans

Proper Mounting

Follow manufacturer guidelines for ceiling fan mounting to ensure safety and efficiency. Incorrect installation can compromise performance and safety.

Maintenance

Regular cleaning and inspection of fan blades and motor components prolong the lifespan and efficiency of your ceiling fan.

Choosing the Right 6000 CFM Ceiling Fans for Your Home

Popular Models and Brands

Explore renowned brands known for their quality and performance in the ceiling fan market. Compare features and customer reviews to make an informed decision.

Style and Aesthetics

Ceiling fans contribute to interior decor. Choose a model that complements your home’s style while delivering on performance and functionality.

Conclusion

Investing in a 6000 CFM ceiling fans offers multiple benefits, from enhanced cooling and energy efficiency to long-term cost savings. By understanding the importance of CFM ratings and choosing a fan suited to your needs, you can create a more comfortable and sustainable living environment.

Ceiling Fans Jacksonville FL: Top Choices and Installation Tips

Ceiling fans are a staple in homes, providing both comfort and style. In Jacksonville, FL, where the climate is warm and humid, a ceiling fan is more than just a luxury—it’s a necessity. This article explores the benefits, types, and installation tips for Ceiling Fans Jacksonville FL, helping you make an informed choice to enhance your living space.

Ceiling Fans Jacksonville Fl

Why Choose Ceiling Fans Jacksonville FL?

Living in Jacksonville, FL, means experiencing a subtropical climate characterized by hot summers and mild winters. Here’s why Ceiling Fans Jacksonville FL are a must-have:

  1. Energy Efficiency: Ceiling fans help circulate air, reducing the need for air conditioning. This can significantly lower your energy bills.
  2. Year-Round Comfort: During summer, ceiling fans create a cooling breeze. In winter, they can be reversed to push warm air down from the ceiling, enhancing heating efficiency.
  3. Aesthetic Appeal: Modern ceiling fans come in various styles and finishes, adding a decorative element to any room.
  4. Versatility: Suitable for various spaces including living rooms, bedrooms, patios, and offices.
  5. Improved Air Quality: By promoting air circulation, ceiling fans can help reduce indoor air pollutants and allergens.

Choosing the Right Ceiling Fan for Your Home

Selecting the perfect Ceiling Fans Jacksonville FL involves considering several factors to ensure they meet your specific needs. Here are some key considerations:

  1. Room Size and Fan Size:
    • Small Rooms: For rooms up to 75 square feet, choose a fan with a blade span of 29 to 36 inches.
    • Medium Rooms: For rooms between 76 and 144 square feet, opt for a fan with a blade span of 36 to 42 inches.
    • Large Rooms: For rooms between 144 and 225 square feet, a fan with a blade span of 44 to 50 inches is ideal.
    • Extra-Large Rooms: For rooms over 225 square feet, consider a fan with a blade span of 50 to 72 inches.
  2. Ceiling Height:
    • Low Ceilings: For ceilings less than 8 feet high, a flush mount or hugger fan is recommended to ensure adequate clearance.
    • Standard Ceilings: For ceilings 8 to 9 feet high, use a fan with a standard downrod.
    • High Ceilings: For ceilings over 9 feet high, use an extended downrod to position the fan at the optimal height.
  3. Style and Finish:
    • Choose a style that complements your room’s décor. Options range from traditional and rustic to modern and minimalist designs.
    • Finishes include brushed nickel, bronze, matte black, white, and wood tones.
  4. Lighting Options:
    • Consider whether you need a fan with integrated lighting. This can provide both air circulation and illumination, eliminating the need for additional light fixtures.
  5. Control Options:
    • Decide on the type of controls you prefer, such as pull chains, wall switches, remote controls, or smart home compatibility.

Top Ceiling Fans Jacksonville FL: Our Recommendations

Here are some top-rated Ceiling Fans Jacksonville FL that combine functionality and style:

  1. Hunter Fan Company 52″ Ceiling Fan:
    • Features: WhisperWind motor, energy-efficient LED light kit, remote control.
    • Style: Available in multiple finishes, suitable for modern and traditional decors.
    • Ideal For: Medium to large rooms.
  2. Minka-Aire F844-DK Light Wave 52″ Ceiling Fan:
    • Features: Integrated dimmable LED light, remote control, contemporary design.
    • Style: Distressed Koa finish, ideal for modern and rustic interiors.
    • Ideal For: Living rooms, bedrooms, and dining areas.
  3. Harbor Breeze Mazon 44″ Ceiling Fan:
    • Features: Integrated matte opal glass light kit, remote control, compact design.
    • Style: Brushed nickel finish, perfect for small to medium rooms.
    • Ideal For: Bedrooms, home offices, and small living spaces.
  4. Casablanca Isotope 52″ Ceiling Fan:
    • Features: Direct Drive motor, integrated halogen light, wall control.
    • Style: Sleek, low-profile design, available in multiple finishes.
    • Ideal For: Contemporary and minimalist interiors.

Read too: Enhance Your Space with Acoustic Ceiling Tiles Paint: A Comprehensive Guide

Installing Your Ceiling Fan: A Step-by-Step Guide

Proper installation of your Ceiling Fans Jacksonville FL is crucial for optimal performance and safety. Here’s a step-by-step guide to help you through the process:

  1. Preparation:
    • Turn Off Power: Ensure the power to the circuit you will be working on is turned off at the breaker.
    • Gather Tools: You’ll need a ladder, screwdriver, pliers, wire strippers, and a voltage tester.
  2. Mounting Bracket Installation:
    • Install the Bracket: Attach the mounting bracket to the ceiling box. Ensure it is securely fastened to support the fan’s weight.
  3. Wiring the Fan:
    • Connect Wires: Match the fan wires to the corresponding house wires (black to black, white to white, green to ground). Use wire nuts to secure the connections.
    • Check Connections: Use a voltage tester to ensure there is no current before proceeding.
  4. Assembling the Fan:
    • Attach Fan Blades: Secure the fan blades to the motor housing.
    • Install Light Kit: If your fan has an integrated light, attach the light kit following the manufacturer’s instructions.
  5. Mount the Fan:
    • Secure the Fan: Attach the fan to the mounting bracket and ensure it is secure.
    • Test the Fan: Turn the power back on and test the fan and light to ensure they are working correctly.

Maintaining Your Ceiling Fan

Regular maintenance of your Ceiling Fans Jacksonville FL will ensure they remain functional and look great. Here are some maintenance tips:

  1. Regular Cleaning:
    • Dust Blades: Use a soft cloth or duster to remove dust from the fan blades regularly.
    • Clean Light Fixtures: If your fan has a light kit, clean the light fixtures to maintain brightness.
  2. Check for Balance:
    • Balance Blades: If your fan wobbles, use a balancing kit (usually included with the fan) to adjust the blades.
  3. Lubricate Moving Parts:
    • Lubricate Motor: Apply lubricant to the fan motor and other moving parts if they start to squeak or make noise.
  4. Inspect Wiring:
    • Check Connections: Periodically check the wiring and connections to ensure they are secure and in good condition.

Conclusion

Choosing the right Ceiling Fans Jacksonville FL can enhance your home’s comfort, efficiency, and style. Whether you’re looking for a fan with integrated lighting, a sleek modern design, or a traditional look, there are plenty of options available to suit your needs. By considering factors such as room size, ceiling height, and personal style preferences, you can find the perfect ceiling fan to complement your living space. With proper installation and maintenance, your ceiling fan will provide years of comfort and enjoyment.

Exploring Propane Heater Ceiling Mount Options: A Comprehensive Guide

Discover the versatility and benefits of Propane Heater Ceiling Mount for efficient heating solutions in various spaces.

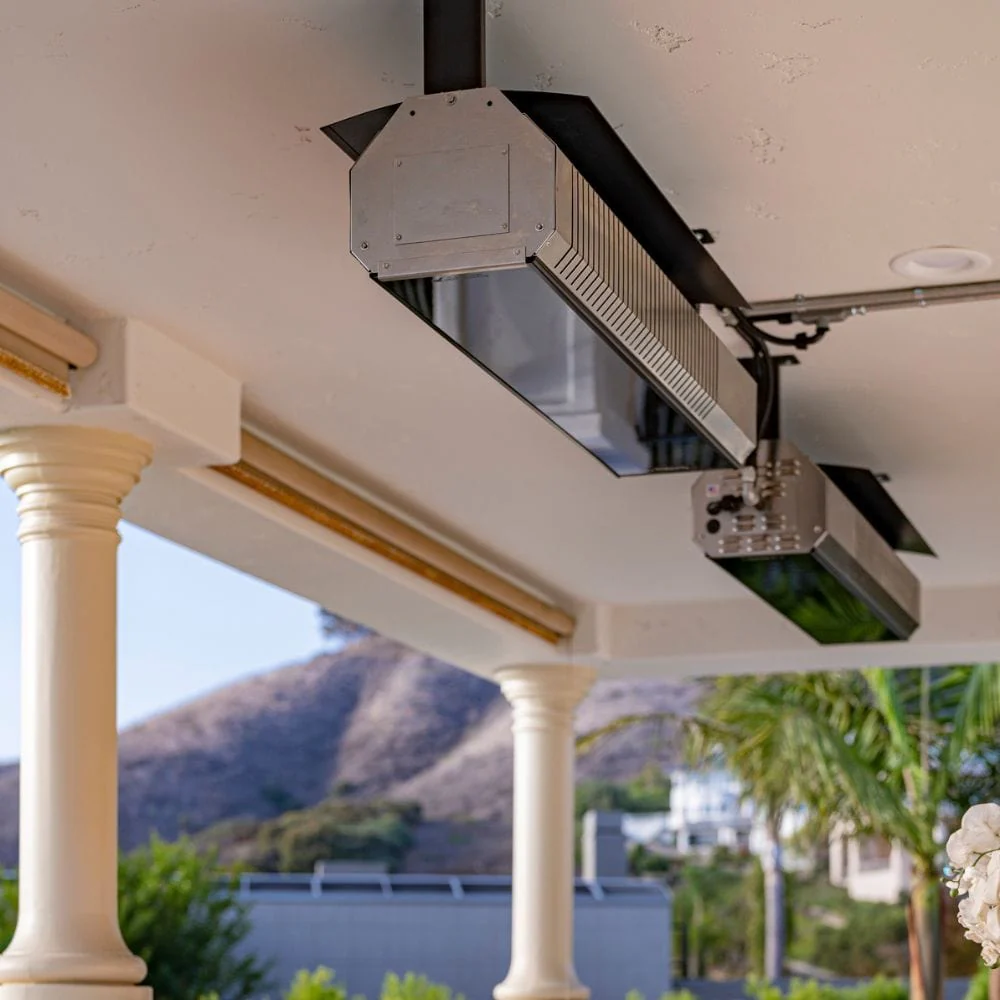
Propane Heater Ceiling Mount

Understanding Propane Heater Ceiling Mount

When it comes to heating your home or workspace efficiently, propane heaters mounted on ceilings offer a practical solution. They provide warmth without taking up valuable floor space, making them ideal for garages, workshops, warehouses, and outdoor patios.

Benefits of Propane Heater Ceiling Mount

Propane heaters designed for ceiling mounting come with several advantages:

  • Space Saving: By mounting heaters on the ceiling, you free up floor space for other uses, making them perfect for smaller areas.
  • Even Distribution: Ceiling-mounted propane heaters distribute heat evenly throughout the space, ensuring consistent warmth without cold spots.
  • Safety: Elevated placement reduces the risk of accidental contact, especially in areas with high foot traffic or where children and pets are present.
  • Versatility: Suitable for both indoor and outdoor applications, these heaters are adaptable to various environments and weather conditions.

Features to Consider

Before selecting a propane heater for ceiling mounting, consider the following features:

  • BTU Output: Determine the heater’s British Thermal Unit (BTU) rating to match it with the size and heating requirements of your space.
  • Ignition Type: Choose between manual ignition or electronic ignition for convenience and ease of use.
  • Installation Requirements: Ensure the heater is compatible with your ceiling structure and meets safety regulations for installation.

Types of Propane Heater Ceiling Mount

Propane heaters come in different configurations to suit various needs:

  • Radiant Heaters: Emit infrared heat that warms objects directly without heating the air, ideal for spot heating.
  • Convection Heaters: Circulate warm air throughout the space, suitable for larger areas needing consistent heating.
  • Combination Heaters: Offer both radiant and convection heating capabilities, providing flexibility in use.

Factors Influencing Propane Heater Ceiling Mount Prices

Several factors affect the cost of propane heaters suitable for ceiling mounting:

  • Size and BTU Output: Larger heaters with higher BTU outputs typically cost more due to their increased heating capacity.
  • Features: Additional features such as thermostat controls, remote operation, and safety sensors can influence the price.
  • Brand and Quality: Established brands with a reputation for durability and performance may command higher prices.

Choosing the Right Propane Heater Ceiling Mount

To make an informed decision, consider these tips:

  1. Evaluate Heating Needs: Determine the size of the area you need to heat and choose a heater with an appropriate BTU rating.
  2. Safety Features: Prioritize heaters with safety features like automatic shut-off in case of overheating or oxygen depletion.
  3. Energy Efficiency: Opt for models that offer energy-saving features to reduce operational costs over time.
  4. Installation Considerations: Ensure the heater is compatible with your ceiling structure and follow manufacturer guidelines for installation.

Maintenance and Care

Maintaining your propane heater ensures optimal performance and longevity:

  • Regular Inspection: Check for signs of wear and tear, and clean filters or vents as recommended by the manufacturer.
  • Safety Checks: Periodically inspect gas lines, valves, and ignition systems for leaks or malfunctions.
  • Professional Servicing: Schedule professional maintenance annually to keep your heater in top condition.

Read too: Discovering the Charm of Nautical Outdoor Ceiling Fans for Your Coastal Retreat: Sail into Style

Conclusion

Investing in a Propane Heater Ceiling Mount offers efficient heating solutions with space-saving benefits and safety features. Whether for residential, commercial, or outdoor use, these heaters provide reliable warmth and comfort in various settings.


72 Ceiling Fans With Light: Enhance Your Space with Stylish

In the realm of home décor, ceiling fans serve a dual purpose: they provide refreshing airflow and contribute to the aesthetic appeal of a room. When it comes to larger spaces or rooms with high ceilings, opting for a 72 ceiling fan with light can be both practical and visually striking. These fans not only circulate air efficiently but also come equipped with lighting solutions that enhance the ambiance of any room they adorn.

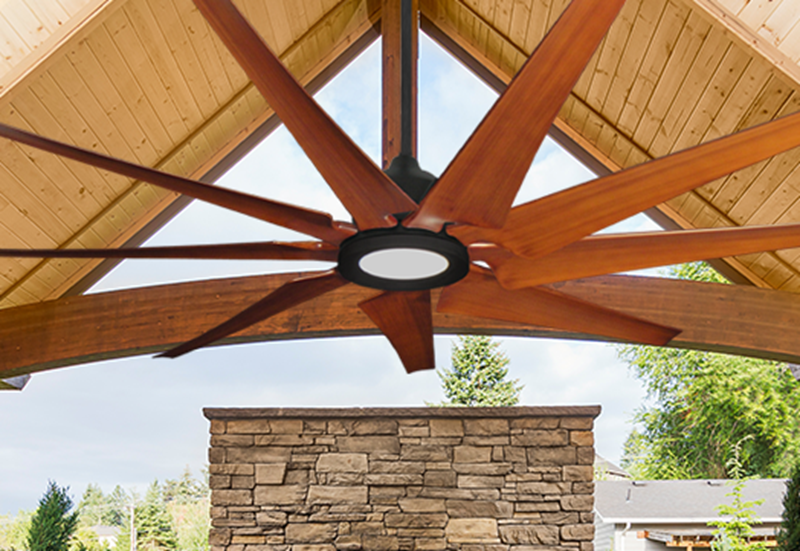
72 Ceiling Fans With Light

Why Choose 72 Ceiling Fans With Light?

Choosing the right ceiling fan goes beyond mere functionality; it’s about finding a fixture that complements your interior design while offering optimal performance. Here are several compelling reasons why opting for a 72 ceiling fan with integrated lighting can be advantageous:

  1. Efficient Air Circulation: With a larger blade span, 72 ceiling fans are designed to move air effectively in vast spaces. This helps in maintaining a comfortable environment throughout the room, especially during warmer months.
  2. Enhanced Illumination: Integrated lighting fixtures in these fans provide ample illumination, serving as a primary or supplementary light source depending on your needs. This dual-functionality eliminates the need for additional overhead lights, thus streamlining your room’s lighting design.
  3. Style and Design Variety: Available in a myriad of styles, from contemporary to rustic, 72 ceiling fans with light can effortlessly blend into any décor scheme. Whether you prefer sleek, modern finishes or classic wood designs, there’s a fan to suit every taste.
  4. Energy Efficiency: Many newer models come with energy-efficient LED lighting options, helping you reduce your carbon footprint while saving on energy costs. This eco-friendly feature makes them a sustainable choice for environmentally conscious consumers.
  5. Remote Control and Smart Options: Advanced models often include remote controls or can be integrated into smart home systems, offering convenience at your fingertips. Adjusting fan speed and light settings has never been easier.

Choosing the Best 72 Ceiling Fan With Light

When selecting a 72 ceiling fan with light for your space, consider the following factors to ensure you make the right choice:

  • Room Size: Larger rooms benefit from fans with wider blade spans to maximize air circulation.
  • Ceiling Height: For rooms with higher ceilings, choose a fan that hangs at an appropriate height to optimize air movement.
  • Design and Décor: Harmonize the fan’s style with your existing décor elements for a cohesive look.
  • Lighting Needs: Evaluate whether the fan’s lighting output matches your room’s illumination requirements.
  • Energy Efficiency: Look for Energy Star-rated models to save on utility bills and reduce environmental impact.

Installation and Maintenance Tips

Installing a ceiling fan with integrated lighting follows a similar process to standard ceiling fans. However, due to their larger size, it’s crucial to ensure proper support and wiring compatibility. Here are some tips for installation and maintenance:

  • Professional Installation: Consider hiring a licensed electrician for safe and efficient installation, especially if wiring adjustments are needed.
  • Regular Cleaning: Dust fan blades and light fixtures periodically to maintain optimal performance and prevent dust buildup.
  • Check for Balance: Use a balancing kit if the fan wobbles or makes noise during operation to ensure smooth, quiet rotation.
  • Replace Bulbs Promptly: If your fan uses replaceable bulbs, replace them promptly when they burn out to maintain consistent lighting.

Read too: Kitchen Lighting For A Vaulted Ceiling: Illuminating Your Space with Style and Functionality

Conclusion

In conclusion, 72 ceiling fans with light offer a blend of functionality, style, and energy efficiency suitable for larger rooms and high ceilings. Whether you prioritize air circulation, lighting versatility, or aesthetic appeal, these fans serve as a versatile addition to any home. By understanding their benefits and selecting the right model for your needs, you can enhance both comfort and ambiance in your living spaces.

Enhance your home’s comfort and style with a 72 ceiling fan with light today!

Effective Ways to Cover Insulation in Basement Ceiling for Improved Aesthetics and Efficiency

Cover Insulation in Basement Ceiling. Covering insulation in your basement ceiling not only enhances the visual appeal of the space but also improves energy efficiency and noise control. This guide explores various methods and considerations for effectively covering insulation in your basement ceiling.

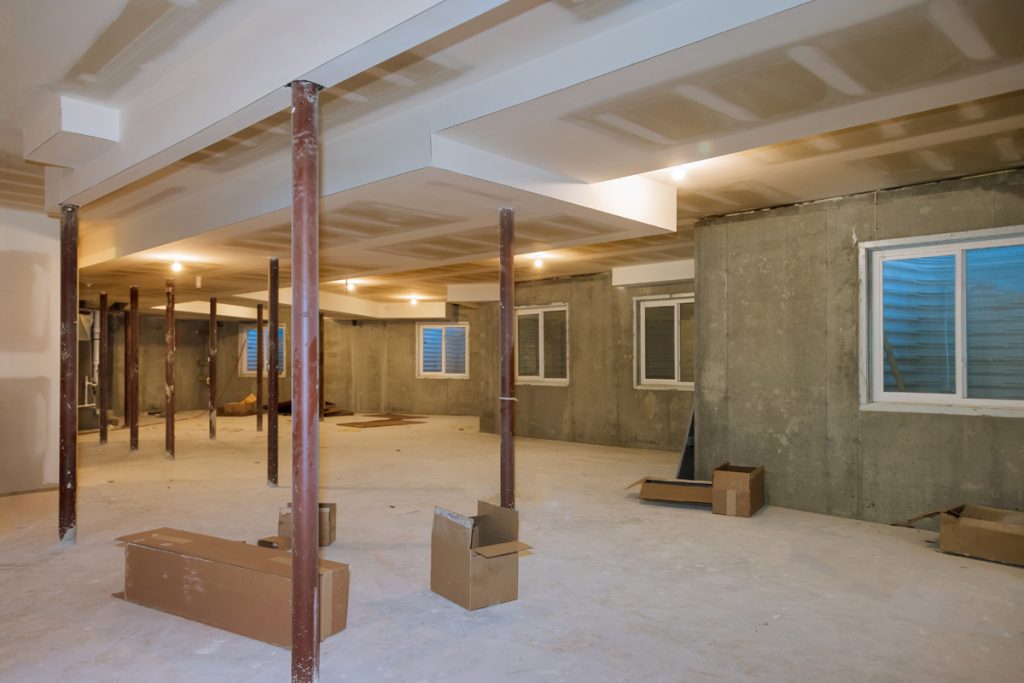
Cover Insulation In Basement Ceiling

Why Cover Insulation in Basement Ceiling?

Covering insulation in the basement ceiling offers several benefits:

  • Aesthetic Improvement: Creates a finished look that enhances the overall appearance of the basement.
  • Energy Efficiency: Helps in maintaining consistent indoor temperatures by reducing heat loss.
  • Noise Reduction: Acts as a sound barrier between floors, minimizing sound transmission.

Methods to Cover Insulation In Basement Ceiling

Installing Drywall or Ceiling Panels

Installing drywall or ceiling panels is a popular method for covering basement insulation:

  • Preparation: Ensure insulation is properly installed and any gaps are sealed.
  • Installation: Secure drywall or panels to ceiling joists using appropriate fasteners.
  • Finishing: Apply joint compound, sand, and paint for a polished finish.

Using Drop Ceiling Tiles

Drop ceiling tiles offer a versatile and accessible option for covering basement insulation:

  • Installation: Install a grid system and insert tiles for easy access to utilities and plumbing.
  • Variety: Choose from different tile materials and designs to suit your basement decor.
  • Maintenance: Easily replace damaged tiles or access utilities above the ceiling.

Spray Foam Insulation

Spray foam insulation can be applied directly to basement ceiling insulation:

  • Sealing Gaps: Helps in sealing gaps and cracks, improving energy efficiency.
  • Application: Professional application ensures even coverage and effectiveness.
  • Cost Consideration: Evaluate upfront costs versus long-term energy savings.

Considerations Before Covering Insulation in Basement Ceiling

Before proceeding, consider these factors:

  • Moisture Control: Ensure basement moisture issues are addressed to prevent mold or mildew.
  • Access Needs: Consider access points for utilities or future repairs when choosing a covering method.
  • Fire Safety: Follow local building codes regarding fire-resistant materials if applicable.

Pros and Cons of Different Covering Methods

Each method has its advantages and considerations:

  • Drywall: Provides a seamless finish but may reduce access to utilities.
  • Drop Ceiling: Offers easy access but may not provide the same aesthetic as drywall.
  • Spray Foam: Excellent for sealing but may require professional application.

Maintaining Covered Basement Ceilings

Maintain your covered basement ceiling to ensure longevity and performance:

  • Regular Inspection: Check for signs of moisture or damage.
  • Cleaning: Dust or vacuum as needed to keep the area clean.
  • Repairs: Promptly address any issues such as water leaks or cracks.

Cost Considerations

Costs vary based on materials, labor, and the complexity of the project:

  • Budget Planning: Estimate costs for materials, labor if hiring professionals, and any additional tools or supplies.

Read too: Striped Schoolhouse Ceiling Light Fixtures: Unveiling the Timeless Charm

Conclusion

Covering insulation in your basement ceiling is a beneficial step toward improving both the aesthetics and efficiency of your home. By understanding different methods, considerations, and maintenance tips, you can choose the best approach to achieve a comfortable and attractive basement environment.

Occupancy Sensor Ceiling Mount: Enhancing Efficiency and Comfort

Occupancy sensors are integral devices used in various settings to automate lighting and enhance energy efficiency. Learn all about occupancy sensor ceiling mounts, their benefits, installation tips, and applications in this comprehensive guide.

Occupancy Sensor Ceiling Mount

Understanding Occupancy Sensor Ceiling Mount

Occupancy sensors, particularly those mounted on ceilings, serve a critical role in modern building management systems. These sensors detect the presence or absence of people within a space and adjust lighting or HVAC systems accordingly. By eliminating the need for manual control, occupancy sensors contribute significantly to energy savings and convenience.

Benefits of Occupancy Sensor Ceiling Mount

Installing occupancy sensors on ceilings offers several advantages:

  • Energy Efficiency: Sensors ensure that lights are only on when needed, reducing unnecessary energy consumption.
  • Cost Savings: Lower energy bills due to reduced usage of lighting and HVAC systems.
  • Convenience: Automated control of lighting based on occupancy enhances user comfort and convenience.
  • Environmental Impact: Reduced carbon footprint by lowering energy usage.
  • Compliance: Many building codes and standards now require occupancy sensors to meet energy efficiency regulations.

Read too: Striped Schoolhouse Ceiling Light Fixtures: Unveiling the Timeless Charm

Types of Occupancy Sensors

Occupancy sensors come in various types, including passive infrared (PIR), ultrasonic, dual-technology (combination of PIR and ultrasonic), and microwave sensors. Each type has its strengths and is suitable for different environments and applications.

Applications of Occupancy Sensor Ceiling Mount

Occupancy sensor ceiling mounts find applications in:

  • Commercial Buildings: Offices, conference rooms, corridors, and restrooms.
  • Retail Stores: Aisles, storage rooms, and cashier areas.
  • Educational Institutions: Classrooms, libraries, and common areas.
  • Healthcare Facilities: Patient rooms, hallways, and waiting areas.
  • Residential Settings: Homes for enhanced convenience and energy savings.

Installation Tips for Occupancy Sensor Ceiling Mount

Proper installation is crucial for the effective operation of occupancy sensors. Follow these tips:

  • Placement: Install sensors in areas where they can detect motion effectively without obstruction.
  • Height: Position sensors according to manufacturer guidelines to optimize detection range.
  • Testing: Conduct thorough testing after installation to ensure sensors cover the intended area and operate correctly.
  • Compatibility: Ensure compatibility with existing lighting systems and control protocols.

Maintenance and Calibration

Regular maintenance and calibration of occupancy sensors are essential to maintain optimal performance. Factors such as dust accumulation or changes in environment can affect sensor accuracy over time. Follow manufacturer recommendations for cleaning and calibration intervals.

Choosing the Right Occupancy Sensor Ceiling Mount

When selecting an occupancy sensor ceiling mount, consider the following factors:

  • Detection Technology: Choose the technology (PIR, ultrasonic, dual-tech, microwave) based on the specific application and environment.
  • Coverage Area: Ensure the sensor covers the desired area effectively without blind spots.
  • Adjustability: Opt for sensors with adjustable settings for sensitivity and time delay to customize performance.
  • Integration: Check compatibility with existing building management systems or lighting controls.

Future Trends in Occupancy Sensor Technology

As technology advances, occupancy sensors continue to evolve with features such as:

  • Advanced Analytics: Sensors capable of collecting and analyzing occupancy data for space utilization and energy optimization.
  • Wireless Connectivity: Integration with IoT platforms for remote monitoring and control.
  • Smart Building Integration: Seamless integration with other building systems for holistic management.

Conclusion

Occupancy sensor ceiling mounts are indispensable tools for enhancing energy efficiency, convenience, and comfort in various settings. By understanding their benefits, applications, installation tips, and maintenance requirements, you can make informed decisions to optimize your building’s lighting and energy management systems.

Fluorescent Drop Ceiling Light Fixture: Illuminating Your Space Efficiently

Fluorescent drop ceiling light fixture offer practical and efficient lighting solutions for various spaces, blending functionality with modern aesthetics. Whether you’re looking to illuminate an office, a commercial setting, or even a residential area, these fixtures provide bright, even light distribution while optimizing energy efficiency. In this comprehensive guide, we explore the benefits, installation tips, maintenance considerations, and design versatility of fluorescent drop ceiling light fixtures.

Fluorescent Drop Ceiling Light Fixtures

Benefits of Fluorescent Drop Ceiling Light Fixtures

Fluorescent drop ceiling light fixtures are renowned for their energy efficiency and longevity. Compared to traditional incandescent bulbs, fluorescent lights consume significantly less energy, making them a sustainable choice for environmentally-conscious consumers. Moreover, these fixtures emit minimal heat, reducing cooling costs in spaces where air conditioning is necessary. Their long lifespan also translates to fewer replacements, lowering maintenance expenses over time.

Choosing the Right Fluorescent Drop Ceiling Light Fixtures

When selecting fluorescent drop ceiling light fixtures, several factors influence your decision. Consider the lumens output, color temperature, and CRI (Color Rendering Index) to ensure the lights meet your space’s illumination needs. Additionally, explore different fixture designs—from sleek modern panels to traditional tube configurations—to complement your interior décor while maximizing lighting efficiency.

Installation Tips for Fluorescent Drop Ceiling Light Fixtures

Installing fluorescent drop ceiling light fixtures requires attention to detail to achieve optimal performance. Begin by assessing ceiling strength and electrical wiring compatibility. Follow manufacturer guidelines for mounting heights and spacing to ensure uniform lighting distribution. Consider hiring a professional electrician for complex installations to guarantee safety and compliance with local building codes.

Maintenance Guidelines for Longevity

Maintaining fluorescent drop ceiling light fixtures prolongs their lifespan and ensures consistent performance. Regularly clean fixture surfaces and replace bulbs promptly to prevent light degradation. Inspect wiring connections and ballasts annually to detect any signs of wear or malfunction. By implementing a routine maintenance schedule, you can extend the efficiency and reliability of your lighting system.

Design Versatility in Different Environments

Fluorescent drop ceiling light fixtures are versatile, suitable for various environments such as offices, retail stores, healthcare facilities, and educational institutions. Their ability to provide bright, glare-free illumination makes them ideal for task lighting in workspaces while enhancing ambient lighting in commercial and residential settings. Explore adjustable color temperatures and dimming options to create customizable lighting solutions that cater to specific user preferences and requirements.

Sustainability and Environmental Impact

Concerns about environmental sustainability drive the popularity of fluorescent drop ceiling light fixtures. Their energy-efficient operation reduces carbon footprints compared to conventional lighting technologies. Additionally, advancements in fluorescent technology continue to improve efficiency and recyclability, aligning with global initiatives for sustainable building practices.

Read too: Discovering the Charm of Nautical Outdoor Ceiling Fans for Your Coastal Retreat: Sail into Style

Conclusion

Fluorescent drop ceiling light fixture remain a practical choice for anyone seeking efficient, reliable, and aesthetically pleasing lighting solutions. From their energy-saving benefits to their versatile applications in diverse settings, these fixtures embody the intersection of functionality and design. Whether you’re upgrading an existing space or planning a new installation, consider the advantages that fluorescent drop ceiling light fixtures offer in enhancing both illumination quality and environmental responsibility.

Insulation Solutions for 2X8 Ceiling Spaces: Maximizing Comfort and Efficiency

Upgrade your home’s comfort and energy efficiency with effective insulation for 2X8 ceiling spaces. Explore the benefits and options for insulating your 2X8 ceiling to create a more comfortable and cost-effective living environment.

Insulation For 2X8 Ceiling

Introduction

Good insulation keeps indoor spaces comfortable and cuts energy expenses. Choosing the right insulation and installation method is critical, especially for 2X8 ceiling spaces. This article discusses insulation’s importance and offers insights for selecting the best solutions.

Understanding Insulation for 2X8 Ceiling Spaces

Insulating a 2X8 ceiling involves adding material between the ceiling joists to prevent heat transfer between the interior and exterior of your home. This helps maintain a consistent indoor temperature, reduces energy consumption for heating and cooling, and improves overall comfort levels.

Insulation For 2X8 Ceiling: Types and Options

When selecting insulation for your 2X8 ceiling, consider the following options:

  1. Fiberglass Insulation: Fiberglass batts or rolls are a popular choice for insulating ceiling spaces. They are easy to install between the joists and provide effective thermal performance.
  2. Cellulose Insulation: Made from recycled paper fibers treated with fire retardants, cellulose insulation offers excellent thermal resistance and soundproofing properties.
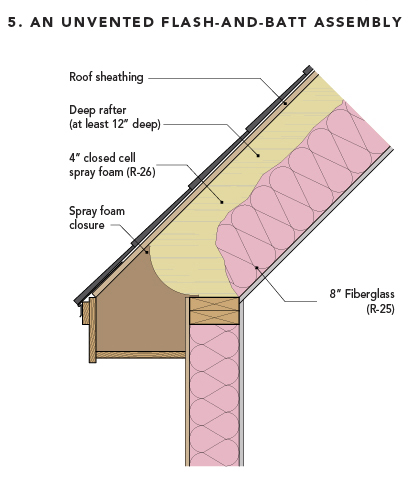
  3. Spray Foam Insulation: Spray foam insulation expands to fill gaps and cavities, creating an airtight seal and providing superior thermal performance. It is ideal for irregularly shaped or hard-to-reach areas.
  4. Mineral Wool Insulation: Mineral wool insulation, made from rock or slag fibers, is non-combustible and offers excellent fire resistance. It provides thermal and acoustic insulation properties.

Benefits of Insulating a 2X8 Ceiling

  1. Improved Energy Efficiency: Proper insulation reduces heat transfer, resulting in lower heating and cooling costs throughout the year.
  2. Enhanced Comfort: Insulating your 2X8 ceiling helps maintain a consistent indoor temperature, eliminating hot or cold spots and ensuring year-round comfort.
  3. Noise Reduction: Insulation materials with soundproofing properties can help reduce noise transmission between floors, creating a quieter and more peaceful living environment.
  4. Moisture Control: Effective insulation can help prevent condensation and moisture buildup in ceiling spaces, reducing the risk of mold and mildew growth.

Installing Insulation For 2X8 Ceiling

Proper installation is essential to maximize the effectiveness of your ceiling insulation. Follow these tips for a successful installation:

  • Measure Accurately: Measure the space between ceiling joists carefully to ensure a snug fit for the insulation material.
  • Wear Protective Gear: When handling insulation, wear protective clothing, gloves, and a mask to avoid skin irritation and respiratory issues.
  • Seal Gaps and Air Leaks: Use caulk or foam sealant to seal any gaps or air leaks around ceiling fixtures, electrical wires, and plumbing penetrations.
  • Consult a Professional: If you’re unsure about the installation process or need assistance, consult a professional insulation contractor for expert guidance and service.

Read too: Striped Schoolhouse Ceiling Light Fixtures: Unveiling the Timeless Charm

Conclusion

Investing in insulation for your 2X8 ceiling is a cost-effective way to improve energy efficiency, enhance comfort, and reduce noise levels in your home. Explore the various insulation options available and consult with a professional to determine the best solution for your specific needs. With proper insulation, you can create a more comfortable and efficient living environment for you and your family.

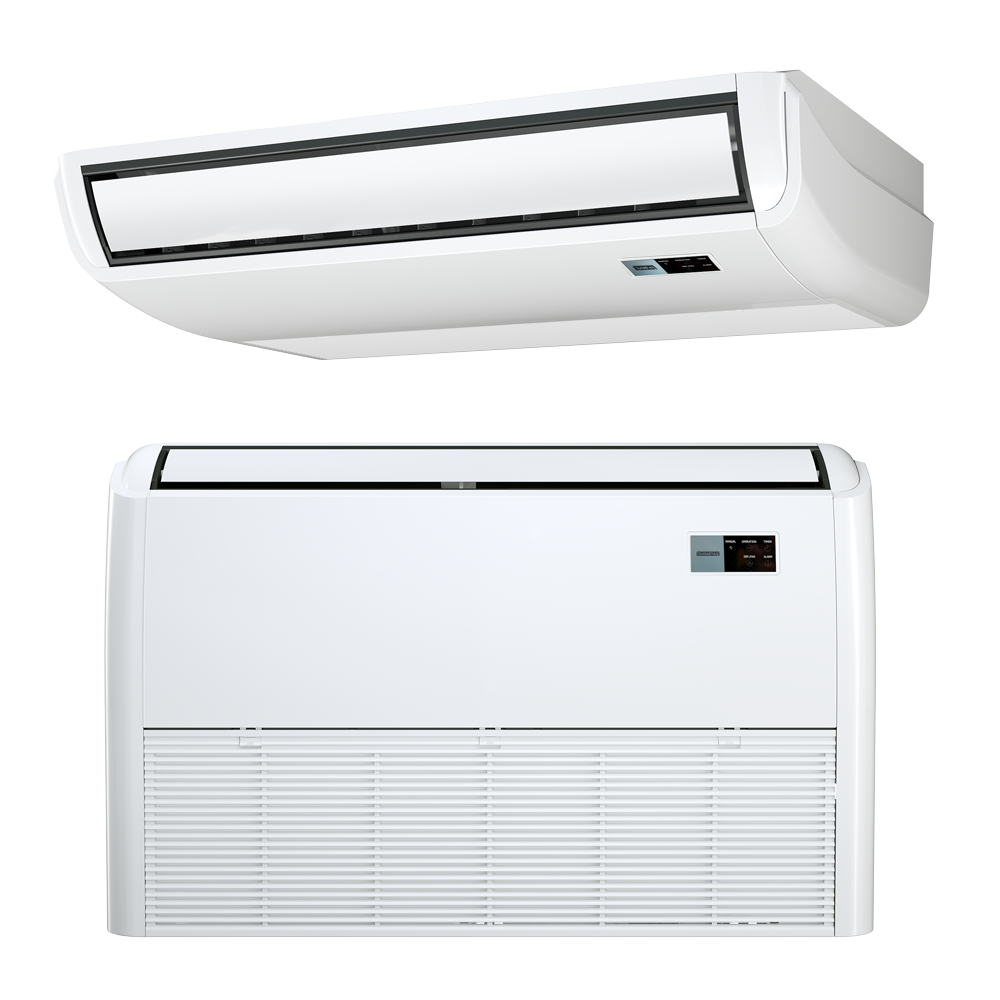
Ductless Ceiling Air Conditioner System: Enhance Comfort and Efficiency

Discover the ultimate cooling solution for your home or office with a cutting-edge ductless ceiling air conditioner. Say goodbye to bulky ductwork and hello to sleek, efficient cooling technology that keeps you comfortable year-round.

Ductless Ceiling Air Conditioner

Introduction

Traditional central air conditioning systems rely on ductwork to distribute cooled air throughout a building. While effective, ductwork can be costly to install and maintain, and it can also lead to energy loss through leaks and inefficiencies. Ductless ceiling air conditioners offer a modern alternative that provides targeted cooling without the need for ductwork, making them an increasingly popular choice for homeowners and businesses alike.

Understanding Ductless Ceiling Air Conditioners

Ductless Design

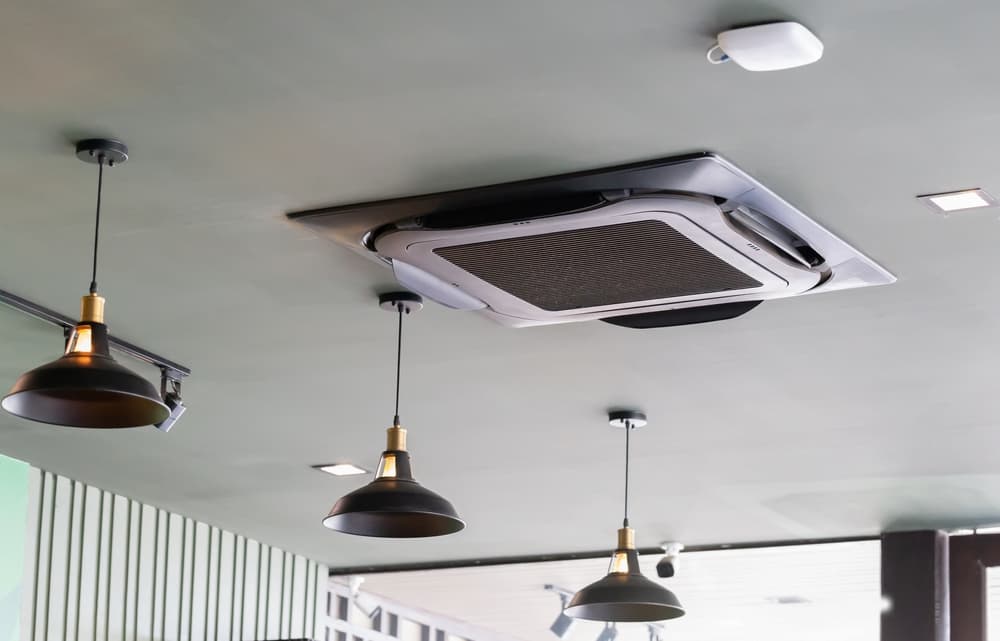
As the name suggests, ductless ceiling air conditioners do not require ductwork to operate. Instead, they consist of an indoor unit mounted on the ceiling or wall and an outdoor compressor unit. The indoor unit contains the evaporator coil, fan, and air filter, while the outdoor unit houses the compressor and condenser coil. Refrigerant lines connect the two units, allowing for the transfer of heat and the circulation of cooled air.

Zoned Cooling

One of the key benefits of ductless ceiling air conditioners is their ability to provide zoned cooling. With traditional central air conditioning systems, the entire building is cooled to the same temperature, regardless of individual preferences or usage patterns. Ductless systems, on the other hand, allow users to set different temperatures for each zone or room, providing personalized comfort and potentially reducing energy consumption.

Energy Efficiency

Ductless ceiling air conditioners are inherently more energy-efficient than traditional systems, primarily because they eliminate the energy losses associated with ductwork. Additionally, ductless systems use inverter-driven compressors, which adjust their speed based on the cooling demand, resulting in precise temperature control and reduced energy consumption. As a result, homeowners and businesses can enjoy lower utility bills and reduced environmental impact.

Advantages of Ductless Ceiling Air Conditioners

Space-Saving Design

The compact design of ductless ceiling air conditioners makes them ideal for spaces where traditional HVAC systems may be impractical or impossible to install. With no need for ductwork, these systems take up minimal space and can be mounted discreetly on the ceiling or wall, preserving valuable floor space for other uses.

Improved Indoor Air Quality

Traditional ductwork can accumulate dust, allergens, and other contaminants over time, leading to poor indoor air quality. Ductless ceiling air conditioners, however, feature advanced filtration systems that remove airborne particles, allergens, and odors, resulting in cleaner, healthier indoor air. This is especially beneficial for individuals with allergies, asthma, or other respiratory conditions.

Easy Installation and Maintenance

Installing a ductless ceiling air conditioner is relatively straightforward compared to traditional HVAC systems. Since there is no need for ductwork, installation is less invasive and can typically be completed in a fraction of the time. Additionally, routine maintenance is simpler and more cost-effective, as there are fewer components to inspect and clean.

Choosing the Right Ductless Ceiling Air Conditioner

When selecting a ductless ceiling air conditioner for your home or office, consider the following factors:

  1. Cooling Capacity: Choose a system with the appropriate cooling capacity to effectively cool the intended space.
  2. Energy Efficiency: Look for systems with high SEER (Seasonal Energy Efficiency Ratio) ratings to ensure optimal energy efficiency.
  3. Noise Level: Select a unit with a low noise level to minimize disruption to occupants.
  4. Additional Features: Consider additional features such as programmable thermostats, Wi-Fi connectivity, and remote control options for added convenience and control.

Installation and Maintenance

Installing a ductless ceiling air conditioner requires professional expertise to ensure proper installation and optimal performance. Here’s an overview of the installation process:

  1. Site Assessment: A qualified technician will assess the space and determine the optimal location for the indoor and outdoor units.
  2. Mounting: The indoor unit is mounted on the ceiling or wall, while the outdoor unit is placed in a suitable location outside the building.
  3. Refrigerant Lines: Refrigerant lines are installed to connect the indoor and outdoor units, along with any necessary electrical wiring.
  4. Testing: Once installation is complete, the system is tested to ensure proper operation and performance.

Routine maintenance for a ductless ceiling air conditioner typically involves cleaning or replacing the air filters, inspecting the refrigerant lines for leaks, and ensuring that the outdoor unit remains free of debris.

Conclusion

Ductless ceiling air conditioners offer a cost-effective, energy-efficient, and space-saving cooling solution for homes and businesses. With their zoned cooling capabilities, advanced filtration systems, and easy installation and maintenance, these systems provide personalized comfort and improved indoor air quality. Invest in a ductless ceiling air conditioner to enhance comfort and efficiency in your space, regardless of its size or layout.

Read too: Striped Schoolhouse Ceiling Light Fixtures: Unveiling the Timeless Charm

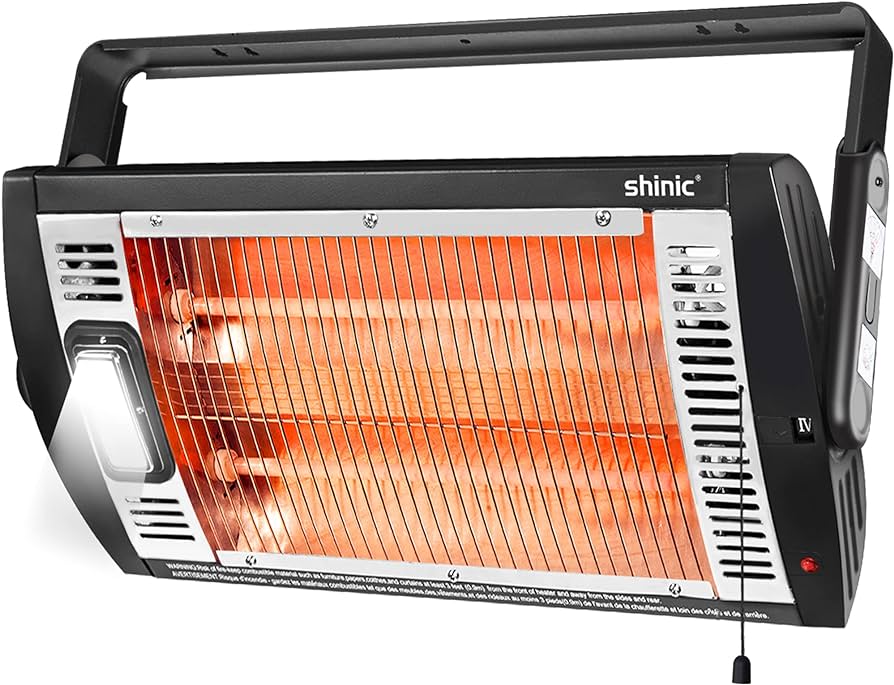
Electric Ceiling Panel Heaters: Efficient Heating Solutions

Discover the benefits and versatility of Electric Ceiling Panel Heaters for your home or office. Learn how these innovative heating solutions can provide efficient warmth while maximizing space and energy efficiency.

Electric Ceiling Panel Heaters

Understanding

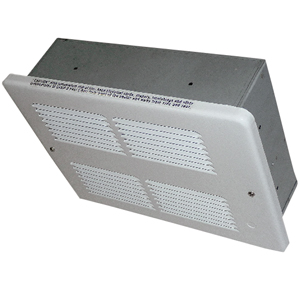
Electric ceiling panel heaters are modern heating appliances designed to be mounted on the ceiling, offering discreet and efficient heating for various spaces. Unlike traditional heaters, which take up floor space, ceiling panel heaters are installed overhead, freeing up valuable floor space and providing uniform warmth throughout the room.

Benefits of Electric Ceiling Panel Heaters

  1. Space-Saving Design: By mounting the heater on the ceiling, electric panel heaters eliminate the need for floor space, making them ideal for rooms with limited space or layout restrictions.
  2. Energy Efficiency: Ceiling panel heaters distribute heat evenly throughout the room, minimizing heat loss and reducing energy consumption compared to traditional heaters.
  3. Discreet Appearance: Electric ceiling panel heaters blend seamlessly into the ceiling, providing a sleek and modern appearance without disrupting the room’s decor.
  4. Quiet Operation: Unlike some heating systems that produce noise during operation, electric panel heaters operate silently, providing discreet and comfortable warmth without any distractions.
  5. Versatility: Electric ceiling panel heaters are suitable for a wide range of applications, including residential, commercial, and industrial settings. They can be installed in living rooms, bedrooms, offices, conference rooms, and more.

Choosing the Right Electric Ceiling Panel Heater

When selecting an electric ceiling panel heater for your space, consider the following factors:

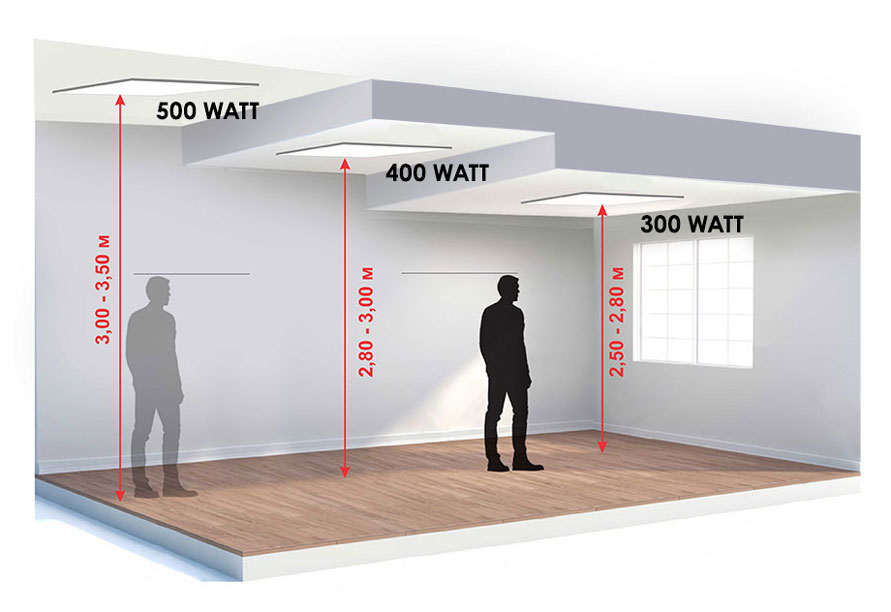
  1. Size and Heating Capacity: Determine the size and heating capacity required to effectively warm your space based on its square footage, ceiling height, insulation, and heating needs.
  2. Energy Efficiency: Look for heaters with high energy efficiency ratings and programmable thermostat settings to optimize energy savings and reduce heating costs.
  3. Installation Requirements: Consider the ease of installation and compatibility with your space’s electrical wiring and ceiling structure. Choose heaters that come with mounting brackets and hardware for easy installation.
  4. Safety Features: Select heaters with built-in safety features such as overheating protection, tip-over switches, and automatic shut-off functions to ensure safe operation.
  5. Warranty and Support: Choose heaters from reputable brands that offer reliable warranties and customer support to provide peace of mind and assistance in case of issues.

Maintaining Electric Ceiling Panel Heaters

To keep your electric ceiling panel heater operating efficiently, follow these maintenance tips:

  1. Regular Cleaning: Dust and debris can accumulate on the heater’s surface over time, affecting its performance. Clean the panel heater regularly with a soft brush or cloth to remove dirt and maintain optimal heating efficiency.
  2. Inspecting Components: Periodically inspect the heater’s components, including the heating element, thermostat, and wiring, for signs of wear or damage. Replace any worn or damaged parts promptly to ensure continued operation.
  3. Checking Mounting Hardware: Ensure secure fastening of mounting brackets and hardware to the ceiling to prevent the heater from becoming dislodged or falling.
  4. Testing Safety Features: Test the heater’s safety features, such as overheating protection and tip-over switches, to ensure they are functioning correctly and providing adequate protection.

Conclusion

Electric ceiling panel heaters offer efficient, space-saving heating solutions for a variety of residential and commercial applications. By understanding their benefits, choosing the right model, and performing regular maintenance, you can enjoy reliable warmth and comfort in any space.

Read too: Exploring the Efficiency of Radiant Ceiling Heater Electric: A Comprehensive Guide

Electric Ceiling Mount Heater: Efficient Heating Solutions for Any Space

Discover the convenience and efficiency of Electric Ceiling Mount Heater for your home or commercial space. Learn how these versatile heating solutions can provide warmth and comfort while maximizing floor space and energy efficiency.

Electric Ceiling Mount Heater

Understanding Electric Ceiling Mount Heaters

Electric ceiling mount heaters are innovative heating appliances designed to be mounted on the ceiling, providing targeted warmth to specific areas without taking up valuable floor space. These heaters are commonly used in garages, workshops, warehouses, and other commercial or industrial settings where space heating is needed.

Benefits of Electric Ceiling Mount Heaters

  1. Space-Saving Design: Mounting the heater on the ceiling frees up valuable floor space, making electric ceiling mount heaters ideal for areas with limited space.
  2. Efficient Heating: Electric ceiling mount heaters deliver warmth directly downward, minimizing heat loss and maximizing energy efficiency.
  3. Versatility: These heaters are suitable for various applications, including residential, commercial, and industrial settings. They can be installed in garages, workshops, warehouses, retail spaces, and more.
  4. Easy Installation: Electric ceiling mount heaters are typically straightforward to install, requiring minimal setup and wiring. Many models come with mounting brackets and hardware for easy installation.
  5. Customizable Settings: Some electric ceiling mount heaters feature adjustable thermostat settings, fan speeds, and directional airflow, allowing users to customize their heating experience according to their preferences.

Choosing the Right Electric Ceiling Mount Heater

When selecting an electric ceiling mount heater for your space, consider the following factors:

  1. Heating Capacity: Determine the heating capacity required to adequately warm your space based on its size, insulation, and heating needs.
  2. Safety Features: Look for heaters with built-in safety features such as overheat protection, tip-over switches, and automatic shut-off functions to ensure safe operation.
  3. Energy Efficiency: Choose energy-efficient models with high heating efficiency ratings to reduce energy consumption and lower heating costs.
  4. Installation Requirements: Consider the ease of installation and compatibility with your space’s electrical wiring and ceiling structure.
  5. Warranty and Support: Select heaters from reputable brands with reliable warranties and customer support to ensure peace of mind and assistance in case of issues.

Maintaining Electric Ceiling Mount Heaters

To keep your electric ceiling mount heater operating efficiently, follow these maintenance tips:

  1. Regular Cleaning: Dust and debris can accumulate on the heater’s surface and affect performance. Clean the unit regularly with a soft brush or cloth to remove dirt and maintain airflow.
  2. Inspecting Components: Periodically inspect the heater’s components, including the heating element, fan blades, and thermostat, for signs of wear or damage. Replace any worn or damaged parts promptly to ensure continued operation.
  3. Checking Mounting Hardware: Verify secure fastening of mounting brackets and hardware to the ceiling to prevent the heater from dislodging or falling.
  4. Testing Safety Features: Test the heater’s safety features, such as overheat protection and tip-over switches, to ensure they are functioning correctly and providing adequate protection.

Conclusion

Electric ceiling mount heaters offer efficient and space-saving heating solutions for a variety of residential, commercial, and industrial applications. Understanding benefits, selecting the right model, and maintaining regularly ensures reliable warmth and comfort in any space.

Read too: Exploring the Efficiency of Radiant Ceiling Heater Electric: A Comprehensive Guide

DC Ceiling Fan vs AC Ceiling Fan – Which One Should You Choose?

Choosing between a DC ceiling fan vs an AC ceiling fan can be a daunting task for homeowners. Dive into the comparison of these two popular types of ceiling fans to help you make an informed decision for your home.

Dc Ceiling Fan Vs Ac Ceiling Fan

Introduction

When it comes to selecting a ceiling fan for your home, there are two main types to consider: DC ceiling fans and AC ceiling fans. Each type has its own set of advantages and considerations. In this article, we’ll explore the differences between DC and AC ceiling fans to help you determine which one is the right choice for your needs.

Understanding DC Ceiling Fan

DC ceiling fans, or direct current ceiling fans, are known for their energy efficiency and quiet operation. Here are some key features of DC ceiling fans:

  • Energy Efficiency: DC ceiling fans consume less energy compared to AC ceiling fans, making them more cost-effective in the long run. They are ideal for homeowners looking to reduce their energy bills and minimize their environmental footprint.
  • Variable Speed Control: DC ceiling fans typically come with variable speed settings, allowing you to adjust the fan speed to your desired level of comfort. This feature provides greater flexibility and customization compared to traditional AC fans.
  • Quiet Operation: Due to their brushless motor design, DC ceiling fans operate quietly, making them suitable for bedrooms, living rooms, and other quiet spaces where noise is a concern.
  • Remote Control Options: Many DC ceiling fans come with remote control options, allowing you to conveniently adjust the fan speed and direction from anywhere in the room.

Understanding AC Ceiling Fan

AC ceiling fans, or alternating current ceiling fans, are the traditional type of ceiling fans found in most homes. Here are some key features of AC ceiling fans:

  • Affordability: AC ceiling fans are typically more affordable upfront compared to DC ceiling fans, making them a popular choice for budget-conscious homeowners.
  • Simple Installation: AC ceiling fans are easy to install and compatible with standard electrical wiring systems found in most homes. They are available in a wide range of styles, sizes, and designs to suit any decor.
  • Reliability: AC ceiling fans have been around for decades and are known for their reliability and durability. With proper maintenance, an AC ceiling fan can last for many years without any issues.
  • Limited Speed Options: Unlike DC ceiling fans, AC ceiling fans usually have limited speed options, typically controlled by a pull chain or wall switch.

Comparing DC Ceiling Fans vs AC Ceiling Fans

Now, let’s compare DC ceiling fans and AC ceiling fans across various factors:

  • Energy Efficiency: DC ceiling fans are more energy-efficient than AC ceiling fans, consuming up to 70% less energy. This can result in significant cost savings on your electricity bills over time.
  • Cost: While DC ceiling fans may have a higher upfront cost compared to AC ceiling fans, their energy efficiency can offset this initial investment in the long term.
  • Noise Level: DC ceiling fans operate more quietly than AC ceiling fans, making them a better choice for bedrooms, nurseries, and other quiet spaces.
  • Control Options: DC ceiling fans typically offer more control options, including remote control, wall control, and smartphone integration, compared to AC ceiling fans.
  • Installation: Both DC and AC ceiling fans are relatively easy to install, but AC ceiling fans may be more familiar to electricians and homeowners due to their widespread use.

Read too: Striped Schoolhouse Ceiling Light Fixtures: Unveiling the Timeless Charm

Conclusion

In conclusion, both DC ceiling fan vs AC ceiling fan have their own set of advantages and considerations. When choosing between the two, consider factors such as energy efficiency, cost, noise level, control options, and installation requirements. Ultimately, the right choice depends on your specific needs, preferences, and budget.

Ceiling Hung Electric Heaters: Exploring the Efficiency and Comfort

When it comes to keeping your home cozy and comfortable during the colder months, ceiling hung electric heaters offer an efficient and space-saving solution. In this article, we’ll delve into the world of ceiling hung electric heaters, exploring their benefits, installation process, and considerations for selecting the ideal heating solution for your space.

Ceiling Hung Electric Heaters

Understanding Ceiling Hung Electric Heaters

Ceiling Hung Electric Heaters: A Space-Saving Heating Solution

Ceiling hung electric heaters are designed to provide warmth and comfort while maximizing floor space. Installed directly onto the ceiling, these heaters offer uniform heat distribution throughout the room, making them ideal for areas where traditional heating systems may not be feasible or practical.

Benefits of Ceiling Hung Electric Heaters

  1. Space-Saving Design: By mounting directly onto the ceiling, these heaters free up valuable floor space, allowing for greater flexibility in room layout and furniture placement.
  2. Efficient Heating: Ceiling hung electric heaters deliver heat directly downward, minimizing heat loss and ensuring efficient warming of the space below.
  3. Versatility: Available in a range of sizes and wattages, these heaters can accommodate various room sizes and heating requirements, providing customizable comfort.
  4. Quiet Operation: Many ceiling hung electric heater operate quietly, without the noise associated with traditional heating systems, ensuring a peaceful environment.
  5. Energy Efficiency: With features such as programmable thermostats and adjustable heat settings, these heaters offer energy-efficient heating solutions, helping to reduce energy consumption and utility costs.

Read too: Exploring the Benefits and How-Tos of DIY Ceiling Cassette Mini Split Installation: Revolutionizing Comfort

Installation Process

Installing ceiling hung electric heater typically involves the following steps:

  1. Selecting the Right Heater: Choose a heater model and size that is suitable for the intended space and heating requirements.
  2. Locating Ceiling Joists: Identify the ceiling joists or support structures where the heater will be mounted.
  3. Mounting the Heater: Securely attach the heater to the ceiling using appropriate mounting hardware and follow the manufacturer’s instructions for installation.
  4. Electrical Wiring: Connect the heater to a dedicated electrical circuit, ensuring compliance with local building codes and safety standards.
  5. Testing and Adjustment: Once installed, test the heater to ensure proper operation and make any necessary adjustments to heat settings or thermostat controls.

Considerations for Choosing Ceiling Hung Electric Heater

Before selecting a ceiling hung electric heater for your space, consider the following factors:

  • Room Size: Choose a heater with sufficient heating capacity to effectively warm the intended area.
  • Ceiling Height: Ensure adequate clearance between the heater and the floor to optimize heat distribution.
  • Safety Features: Look for heaters with built-in safety features such as overheat protection and tip-over shut-off to prevent accidents.
  • Energy Efficiency: Select heaters with programmable thermostats and energy-saving modes to maximize efficiency and reduce operating costs.

Conclusion

Ceiling hung electric heater offer a practical and efficient heating solution for a variety of spaces, from residential homes to commercial establishments. With their space-saving design, customizable heating options, and energy-efficient operation, these heaters provide comfort and warmth while minimizing energy consumption. Whether you’re looking to supplement existing heating systems or create a cozy atmosphere in a specific area, consider the benefits of ceiling hung electric heater for your heating needs.

Insulation Solutions for Warehouse Ceiling: Maximizing Efficiency

In the realm of warehouse management, optimizing energy efficiency and maintaining a comfortable working environment are paramount. One often-overlooked aspect of achieving these goals is proper insulation for warehouse ceiling. In this comprehensive guide, we’ll delve into the importance of insulation for warehouse ceilings and explore various solutions to enhance energy efficiency and thermal comfort.

Insulation For Warehouse Ceiling

Understanding Insulation for Warehouse Ceiling

Why Insulation Matters

Insulating the ceiling of a warehouse serves multiple purposes, including:

  1. Temperature Regulation: Proper insulation helps maintain consistent indoor temperatures, reducing the need for excessive heating or cooling and consequently lowering energy costs.
  2. Condensation Control: Insulation can prevent condensation buildup on the ceiling, which can lead to moisture-related issues such as mold growth and structural damage.
  3. Noise Reduction: Insulation materials can absorb sound waves, minimizing noise pollution within the warehouse environment and improving overall acoustic comfort.

Types of Insulation Materials

1. Fiberglass Insulation

Fiberglass insulation, composed of fine glass fibers, is a popular choice for warehouse ceilings due to its affordability and effectiveness in thermal insulation.

2. Foam Board Insulation

Foam board insulation, made from rigid foam panels, offers excellent thermal resistance and moisture resistance, making it suitable for warehouse applications.

3. Spray Foam Insulation

Spray foam insulation expands upon application, filling gaps and crevices to create a seamless thermal barrier. It provides superior insulation performance but may require professional installation.

Factors to Consider When Choosing Insulation

1. R-Value

The R-value indicates the thermal resistance of insulation material. Higher R-values offer better insulation performance, so consider the climate and desired level of insulation when selecting materials.

2. Fire Resistance

Ensure that the chosen insulation materials comply with fire safety regulations to minimize the risk of fire hazards in the warehouse.

3. Installation Method

Consider the ease of installation and whether professional assistance is required, especially for complex insulation projects or hard-to-reach areas.

Installation Process

1. Preparation

Before installation, ensure that the ceiling surface is clean and free of debris. Address any existing moisture or structural issues to prevent future complications.

2. Application

Follow the manufacturer’s instructions for the chosen insulation material. Install the insulation evenly and securely to maximize its effectiveness.

3. Sealing

Seal any gaps or seams in the insulation to prevent air leakage and ensure optimal thermal performance.

Read too: Discovering the Charm of Nautical Outdoor Ceiling Fans for Your Coastal Retreat: Sail into Style

Conclusion

Proper insulation for warehouse ceilings is essential for maintaining energy efficiency, thermal comfort, and structural integrity. By understanding the importance of insulation and selecting the appropriate materials and installation methods, warehouse managers can create an optimized indoor environment conducive to productivity and employee well-being.

Floor Ceiling Mini Split Systems: Maximizing Comfort and Efficiency

In the realm of HVAC systems, versatility and efficiency are key considerations for homeowners and businesses alike. One innovative solution that addresses both these needs is the Floor Ceiling Mini Split system. Offering flexible installation options, energy-efficient operation, and precise temperature control, Floor Ceiling Mini Splits are becoming increasingly popular in both residential and commercial settings. In this comprehensive guide, we’ll delve into everything you need to know about Floor Ceiling Mini Split systems, from their features and benefits to installation tips and maintenance guidelines.

Floor Ceiling Mini Split

Understanding Floor Ceiling Mini Split Systems

What Are Floor Ceiling Mini Split Systems?

Floor Ceiling Mini Split systems, also known as ductless mini splits, are HVAC systems designed to provide both heating and cooling to indoor spaces without the need for ductwork. They consist of two main components: an outdoor condenser unit and one or more indoor air-handling units. Unlike traditional HVAC systems, which rely on ducts to distribute conditioned air, Floor Ceiling Mini Splits use refrigerant lines to transfer heat between the indoor and outdoor units.

Features of Floor Ceiling Mini Split Systems

  • Versatile Installation: Floor Ceiling Mini Splits can be installed in various configurations, including floor-mounted, ceiling-mounted, or even suspended from the ceiling, offering flexibility to suit different room layouts and aesthetic preferences.
  • Energy Efficiency: By eliminating ductwork and allowing for zone-specific temperature control, Floor Ceiling Mini Split systems can significantly reduce energy consumption and utility costs compared to central HVAC systems.
  • Quiet Operation: With their advanced compressor technology and variable-speed fans, Floor Ceiling Mini Splits operate quietly, minimizing noise disruption and providing a more comfortable indoor environment.
  • Precise Temperature Control: Floor Ceiling Mini Splits feature programmable thermostats and remote controls, allowing users to adjust temperature settings and airflow preferences for each individual zone or room.

Installing Floor Ceiling Mini Split Systems

Installing a Floor Ceilings Mini Split system requires careful planning and professional expertise to ensure optimal performance and efficiency. Here’s an overview of the typical installation process:

  1. Assessing Installation Location: Determine the ideal placement for the indoor and outdoor units, taking into account factors such as room size, layout, and accessibility.
  2. Mounting Indoor Units: Depending on the chosen configuration, mount the indoor units on the floor, ceiling, or wall, ensuring proper support and clearance as per manufacturer guidelines.
  3. Connecting Refrigerant Lines: Install and connect the refrigerant lines between the indoor and outdoor units, ensuring a secure and leak-free connection.
  4. Electrical Wiring: Connect the electrical wiring to the indoor and outdoor units, following local building codes and safety regulations.
  5. Testing and Commissioning: Once the installation is complete, test the system to ensure proper operation and performance, making any necessary adjustments or repairs as needed.

Benefits of Floor Ceilings Mini Split Systems

  • Space-Saving Design: Floor Ceiling Mini Splits require minimal space for installation, making them ideal for small or compact rooms where traditional HVAC systems may not be feasible.
  • Improved Indoor Air Quality: With their multi-stage filtration systems, Floor Ceiling Mini Splits can remove dust, allergens, and other airborne contaminants, improving indoor air quality and promoting a healthier living environment.
  • Customizable Comfort: By allowing for individual temperature control in each zone or room, Floor Ceiling Mini Splits offer personalized comfort settings, reducing energy waste and enhancing occupant satisfaction.
  • Enhanced Energy Efficiency: With their inverter-driven compressors and variable-speed fans, Floor Ceiling Mini Splits can adjust their output to match the heating or cooling demands of the space, optimizing energy efficiency and reducing utility costs.

Read too: Exploring the Efficiency of Radiant Ceiling Heater Electric: A Comprehensive Guide

Conclusion

Floor Ceilings Mini Split systems offer a versatile, energy-efficient, and space-saving solution for heating and cooling indoor spaces. With their flexible installation options, precise temperature control, and quiet operation, these systems provide homeowners and businesses with greater comfort, convenience, and cost savings. Whether you’re renovating an existing property or designing a new construction project, consider incorporating a Floor Ceilings Mini Split system to maximize comfort and efficiency in your space.

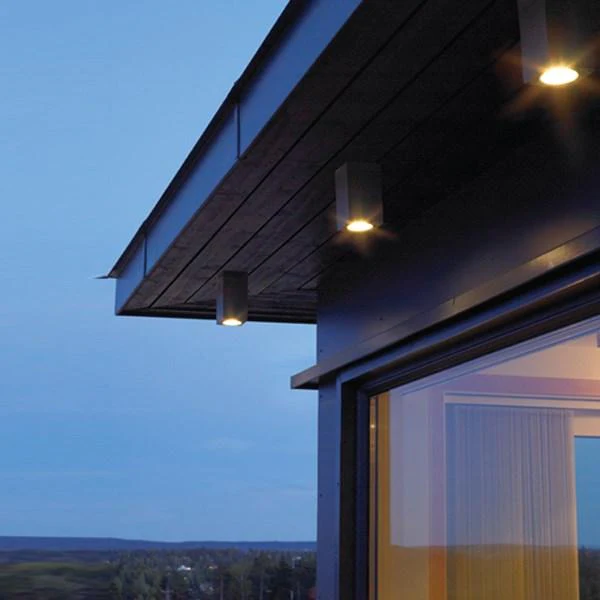
LED Exterior Ceiling Light: Illuminate Your Outdoor Space

Enhance the beauty and safety of your outdoor area with state-of-the-art LED exterior ceiling light. Discover the benefits, installation tips, and design options to brighten up your outdoor space in style.

Led Exterior Ceiling Lights

Introduction

LED exterior ceiling lights are revolutionizing outdoor lighting, offering energy-efficient solutions that enhance the ambiance and functionality of any outdoor space. From illuminating a patio or deck to providing security lighting for pathways and entryways, LED exterior ceiling lights offer versatility, durability, and unmatched performance. In this comprehensive guide, we’ll delve into the world of LED exterior ceiling lights, exploring their features, advantages, installation techniques, and design considerations.

Exploring LED Exterior Ceiling Lights

LED exterior ceiling light are fixtures designed to be mounted on outdoor ceilings, such as those found on porches, covered patios, gazebos, and carports. These lights provide both functional and aesthetic benefits, offering illumination for outdoor activities while also enhancing the visual appeal of the surrounding area. LED technology has transformed the outdoor lighting industry, providing brighter, more energy-efficient lighting solutions that require minimal maintenance and offer extended longevity.

Benefits of LED Exterior Ceiling Lights

  1. Energy Efficiency: LED lights consume significantly less energy than traditional incandescent or fluorescent bulbs, helping you reduce your energy bills while minimizing your carbon footprint.
  2. Longevity: LED bulbs have a much longer lifespan compared to conventional lighting options, lasting up to 25 times longer. This means fewer replacements and reduced maintenance costs over time.
  3. Durability: LED exterior ceiling lights are built to withstand harsh outdoor conditions, including rain, wind, and extreme temperatures. They are resistant to corrosion, rust, and fading, ensuring long-lasting performance in any climate.
  4. Instant On: Unlike traditional bulbs that may take a few moments to reach full brightness, LED lights illuminate instantly, providing immediate light when you need it.
  5. Versatility: LED exterior ceiling lights come in a variety of styles, sizes, and designs to suit any outdoor aesthetic. Whether you prefer sleek and modern fixtures or classic and traditional designs, there’s an LED option to match your preferences.

Installation Tips for LED Exterior Ceiling Lights

  1. Choose the Right Location: Before installing LED exterior ceiling lights, carefully consider the placement to ensure optimal illumination and aesthetic appeal. Position the lights strategically to cover key areas while minimizing glare and shadows.
  2. Ensure Proper Wiring: If you’re installing new LED exterior ceiling lights or replacing existing fixtures, ensure that the wiring is compatible with LED technology and meets local building codes and safety standards.
  3. Use Waterproof Fixtures: Since LED exterior ceiling lights will be exposed to the elements, it’s essential to choose waterproof fixtures rated for outdoor use. Look for lights with an IP65 or higher rating to ensure protection against moisture and dust.
  4. Secure Mounting: Ensure you properly secure the mounting hardware to firmly attach the LED lights to the ceiling, enabling them to withstand wind, vibration, and other environmental factors.

Design Considerations for LED Exterior Ceiling Lights

  1. Style and Finish: LED exterior ceiling lights come in a variety of styles, including flush mounts, semi-flush mounts, lanterns, and more. Choose a style and finish that complements your outdoor décor and architectural features.
  2. Brightness and Color Temperature: Consider the desired brightness level and color temperature for your outdoor space. Opt for warmer temperatures (2700-3000K) for a cozy ambiance or cooler temperatures (4000-5000K) for enhanced visibility and security.
  3. Smart Features: Explore LED exterior ceiling lights with smart features such as motion sensors, dusk-to-dawn sensors, and dimmable options for added convenience and energy savings.

Conclusion

LED exterior ceiling lights offer a versatile, energy-efficient, and stylish lighting solution for outdoor spaces of all sizes and styles. Whether you’re illuminating a cozy patio, a sprawling backyard, or a commercial outdoor area, LED lights provide unmatched performance, durability, and visual appeal.

Read too: Exploring the Efficiency of Radiant Ceiling Heater Electric: A Comprehensive Guide

Exploring the Best Ceiling Fans in Naples, FL: Enhance Your Home Comfort

When it comes to staying comfortable in the warm climate of Naples, FL, ceiling fans are a must-have addition to any home. In this comprehensive guide, we’ll explore the benefits of installing ceiling fans in Naples, FL, and highlight some of the best options available to help you beat the heat and enhance your home decor.

Ceiling Fans Naples Fl

Why Choose Ceiling Fans in Naples, FL

Naples, FL, is known for its tropical climate, with hot and humid weather prevalent throughout much of the year. Ceiling fans offer a cost-effective and energy-efficient way to stay cool and comfortable, providing a gentle breeze and helping to circulate air in your home. Whether you’re relaxing in the living room, cooking in the kitchen, or unwinding in the bedroom, ceiling fans can make a significant difference in your overall comfort level.

Benefits

  1. Energy Efficiency: Ceiling fans use significantly less energy than air conditioning systems, helping you reduce your energy consumption and lower your utility bills. By using ceiling fans to supplement your AC, you can maintain a comfortable temperature in your home while saving money on cooling costs.
  2. Improved Air Circulation: In addition to providing cooling benefits, ceiling fans help improve air circulation throughout your home. This can help alleviate stuffiness and reduce the risk of indoor air pollutants building up, promoting a healthier living environment for you and your family.
  3. Year-Round Comfort: While ceiling fans are often associated with cooling, many models are equipped with a reverse function that allows them to operate in reverse during the winter months. By running your ceiling fan in reverse at a low speed, you can help distribute warm air evenly throughout the room, improving overall comfort and reducing heating costs.
  4. Enhanced Home Decor: Ceiling fans come in a wide range of styles, sizes, and finishes, allowing you to find the perfect option to complement your home decor. Whether you prefer a sleek and modern look or a more traditional design, there’s a ceiling fan to suit your taste and aesthetic preferences.

Choosing the Right Ceiling Fan in Naples, FL

When selecting a ceiling fan for your home in Naples, FL, consider the following factors:

  1. Size: Choose a ceiling fan with an appropriate blade span for the size of your room. Larger rooms may require fans with longer blades to provide adequate air circulation, while smaller rooms can be effectively cooled with smaller fans.
  2. Style: Select a fan style that complements your home decor and personal taste. Options range from classic and traditional to contemporary and tropical, allowing you to find the perfect match for your interior design aesthetic.
  3. Features: Look for ceiling fans with desirable features such as adjustable speeds, reversible motor functions, integrated lighting, and remote control operation. These features can enhance convenience and functionality while ensuring optimal performance.
  4. Quality: Invest in a high-quality ceiling fan from a reputable manufacturer to ensure durability, reliability, and long-lasting performance. Quality construction and materials will help your fan withstand the rigors of daily use and maintain its appearance and functionality for years to come.

Top Ceiling Fans in Naples, FL

  1. Hunter Key Biscayne Ceiling Fan: This stylish ceiling fan features a tropical design with palm leaf blades, perfect for adding a touch of coastal charm to your Naples home.
  2. Emerson Carrera Grande Eco Ceiling Fan: With its energy-efficient DC motor and sleek contemporary design, this ceiling fan offers both style and performance for modern living spaces.
  3. Minka-Aire Artemis Ceiling Fan: The unique design of this ceiling fan, featuring aerodynamic blades and integrated LED lighting, makes it a stunning focal point in any room.

Conclusion

Ceiling fans are an essential addition to any home in Naples, FL, offering energy-efficient cooling, improved air circulation, and enhanced comfort year-round. With a wide range of styles and features to choose from, finding the perfect ceiling fan to complement your home decor and lifestyle is easier than ever. Invest in a quality ceiling fan today and enjoy the benefits of a cooler, more comfortable home in Naples, FL.

Read too: Exploring the Efficiency of Radiant Ceiling Heater Electric: A Comprehensive Guide

Hunter DC Motor Ceiling Fan: Discover the Superior Comfort and Efficiency

Experience unparalleled comfort and energy efficiency with Hunter DC Motor Ceiling Fan. Explore how these innovative ceiling fans revolutionize indoor air circulation while saving energy and enhancing the aesthetics of your space.

Hunter Dc Motor Ceiling Fans

Introduction

Ceiling fans are essential fixtures in any home, providing both functional benefits and aesthetic appeal. Hunter DC Motor Ceiling Fan stand out as industry leaders, known for their superior performance, energy efficiency, and innovative design. In this comprehensive guide, we’ll delve into the features, benefits, and installation considerations of Hunter DC Motor Ceiling Fans, and why they are a must-have addition to any home.

Exploring Hunter DC Motor Ceiling Fans

Hunter DC Motor Ceiling Fans feature cutting-edge DC (direct current) motors, offering several advantages over traditional AC (alternating current) motors. Designed to deliver exceptional airflow, quiet operation, and energy savings, these fans are an ideal choice for residential and commercial spaces alike. Let’s explore some of the key features of Hunter DC Motor Ceiling Fans:

  1. Energy Efficiency: One of the standout features of Hunter DC Motor Ceiling Fans is their energy-efficient operation. DC motors consume significantly less energy than traditional AC motors, resulting in lower electricity bills and reduced environmental impact.
  2. Quiet Operation: Hunter DC Motor Ceiling Fans deliver whisper-quiet performance, thanks to the precision engineering of their DC motors. Enjoy a peaceful and tranquil environment without the distracting noise often associated with conventional ceiling fans.
  3. Variable Speed Control: Unlike standard ceiling fans with limited speed settings, Hunter DC Motor Ceiling Fans offer variable speed control, allowing you to adjust the fan’s speed to your desired level of comfort. Choose from a wide range of speed settings to create the perfect airflow for any situation.
  4. Reverse Functionality: Many Hunter DC Motor Ceiling Fans come equipped with a reverse function, allowing you to change the direction of the fan blades seasonally. In the summer, set the fan to counterclockwise rotation for a cooling breeze, and in the winter, switch to clockwise rotation to recirculate warm air trapped near the ceiling.

Benefits of Hunter DC Motor Ceiling Fans

  1. Superior Air Circulation: Hunter DC Motor Ceiling Fans are designed to provide optimal air circulation, distributing cool air evenly throughout the room and eliminating hot spots. Enjoy consistent comfort and airflow in every corner of your space.
  2. Energy Savings: By reducing energy consumption and operating more efficiently than traditional ceiling fans, Hunter DC Motor Ceiling Fans help lower utility costs and contribute to a more sustainable environment. Switching to DC motor technology can lead to significant long-term savings on energy bills.
  3. Enhanced Comfort: With their variable speed control and quiet operation, Hunter DC Motor Ceiling Fans offer customizable comfort to suit your preferences. Whether you prefer a gentle breeze for relaxation or a brisk airflow for cooling, these fans deliver consistent performance without disrupting your peace and quiet.
  4. Longevity and Durability: Renowned for its commitment to quality and craftsmanship, Hunter ensures that Hunter DC Motor Ceiling Fans are no exception. Built to last, these fans are constructed from high-quality materials and undergo rigorous testing to ensure years of reliable performance.

Installing Hunter DC Motor Ceiling Fans

Installing a Hunter DC Motor Ceiling Fan is a straightforward process that can be completed by DIY enthusiasts or professional electricians. Here’s an overview of the installation process:

  1. Preparation: Start by turning off the power to the existing ceiling fan or light fixture at the circuit breaker. Gather all the necessary tools and materials, including a ladder, screwdriver, wire stripper, and electrical tape.
  2. Mounting: Attach the ceiling fan mounting bracket to the electrical box in the ceiling using the provided screws. Ensure that the bracket is securely anchored and level to support the weight of the fan.
  3. Wiring: Connect the wires from the ceiling fan to the corresponding wires in the electrical box, following the manufacturer’s instructions and local electrical codes. Use wire nuts to secure the connections and electrical tape to cover any exposed wires.
  4. Blade Installation: Attach the fan blades to the motor housing using the included hardware, ensuring that they are evenly spaced and securely fastened. Use a balancing kit if necessary to eliminate any wobbling or uneven rotation.
  5. Testing: Once the installation is complete, turn the power back on at the circuit breaker and test the fan to ensure proper operation. Check for any unusual noises or vibrations and make any necessary adjustments before securing the fan blades.

Maintaining Your Hunter DC Motor Ceiling Fan

To keep your Hunter DC Motor Ceiling Fan running smoothly and efficiently, follow these maintenance tips:

  • Regular Cleaning: Dust the fan blades and motor housing regularly to prevent buildup of dirt and debris that can affect performance. Use a soft cloth or brush to gently wipe away any dust, and avoid using abrasive cleaners or solvents.
  • Lubrication: Lubricate the bearings of the fan motor annually to ensure smooth and quiet operation. Use a few drops of lightweight household oil applied to the oil ports on the motor housing, following the manufacturer’s recommendations.
  • Check for Loose Parts: Periodically inspect the fan blades, mounting hardware, and electrical connections for any signs of looseness or wear. Tighten any loose screws or bolts as needed to maintain stability and safety.
  • Replace Batteries: If your Hunter DC Motor Ceiling Fan comes with a remote control, replace the batteries regularly to ensure reliable operation. Weak batteries can cause intermittent signal transmission and affect the fan’s performance.

Read too: Exploring the Innovation and Efficiency of Ceiling Mounted Surgical Light Solutions: Illuminating Precision

Conclusion

Hunter DC Motor Ceiling Fans offer a winning combination of performance, efficiency, and style, making them the ideal choice for any indoor space. With their energy-saving technology, quiet operation, and customizable features, these fans provide superior comfort and airflow while reducing energy costs and environmental impact. Upgrade your home with a Hunter DC Motor Ceiling Fan and enjoy years of reliable performance and comfort.

Exploring the Benefits of 220 Volts Ceiling Fan: Unleash Powerful Cooling:

Discover the superior cooling capabilities and energy efficiency of 220 volts ceiling fan, perfect for keeping your space comfortable and stylish. Explore the features, installation process, and advantages of these high-powered fixtures for optimal airflow and comfort.

220 Volts Ceiling Fans

Introduction

Ceiling fans are a staple in many homes and businesses, providing a cost-effective and energy-efficient solution for cooling and air circulation. While standard ceiling fans operate at 110 volts, 220 volts ceiling fans offer increased power and performance, making them ideal for larger rooms, commercial spaces, and areas with high ceilings. In this guide, we’ll delve into the benefits of 220 volts ceiling fans and why they’re the perfect choice for keeping your space cool and comfortable.

Understanding 220 Volts Ceiling Fans

220 volts ceiling fan, also known as high-voltage ceiling fans, are designed to operate at a higher voltage than standard ceiling fans. This increased voltage allows for greater motor power and efficiency, resulting in improved airflow and cooling performance. These fans are equipped with robust motors and larger blades, enabling them to circulate air more effectively in large or open spaces.

Read too: Exploring the Innovation and Efficiency of Ceiling Mounted Surgical Light Solutions: Illuminating Precision

Advantages of 220 Volts Ceiling Fans

  1. Enhanced Airflow: The higher voltage and motor power of 220 volts ceiling fans allow them to generate stronger airflow compared to standard fans. This increased circulation helps cool the room more efficiently, making it more comfortable, especially during hot summer months.
  2. Suitable for Large Spaces: 220 volts ceiling fans are particularly well-suited for larger rooms, high-ceilinged spaces, or areas with poor air circulation. Their powerful motors and larger blade spans ensure consistent airflow and cooling throughout the entire room.
  3. Energy Efficiency: Despite their higher voltage and power, 220 volts ceiling fans are still highly energy-efficient. By effectively circulating air and reducing the need for air conditioning, these fans can help lower energy consumption and utility costs, making them a sustainable cooling solution for any space.
  4. Quiet Operation: Despite their powerful motors, many 220 volts ceiling fans are designed to operate quietly, ensuring minimal disruption to your indoor environment. This makes them suitable for use in bedrooms, living rooms, offices, and other areas where noise levels need to be kept to a minimum.

Installation and Maintenance

Installing a 220 volts ceiling fan follows a similar process to that of standard ceiling fans. However, due to their larger size and increased power, it’s essential to ensure proper mounting and electrical wiring. Here are some tips for installation and maintenance:

  • Professional Installation: Consider hiring a licensed electrician or contractor to install your 220 volts ceiling fan, especially if you’re not experienced with electrical work. Proper installation is critical for safety and optimal performance.
  • Regular Maintenance: To keep your 220 volts ceiling fan operating smoothly, clean the blades regularly to remove dust and debris that can accumulate over time. Additionally, check the motor and electrical components periodically for signs of wear or damage.
  • Balance and Stability: Ensure that your ceiling fan is properly balanced and securely mounted to prevent wobbling or shaking during operation. Use a balancing kit if necessary to adjust the blades and improve stability.

Conclusion

220 volts ceiling fans offer a powerful and efficient cooling solution for spaces that require enhanced airflow and circulation. With their robust motors, larger blade spans, and energy-efficient operation, these fans are perfect for keeping your home, office, or commercial space comfortable and inviting. Whether you’re looking to cool a large room, improve air circulation, or reduce energy consumption, consider the benefits of 220 volts ceiling fans for your cooling needs.