Leak From Ceiling Light: Causes, Solutions, and Prevention Tips

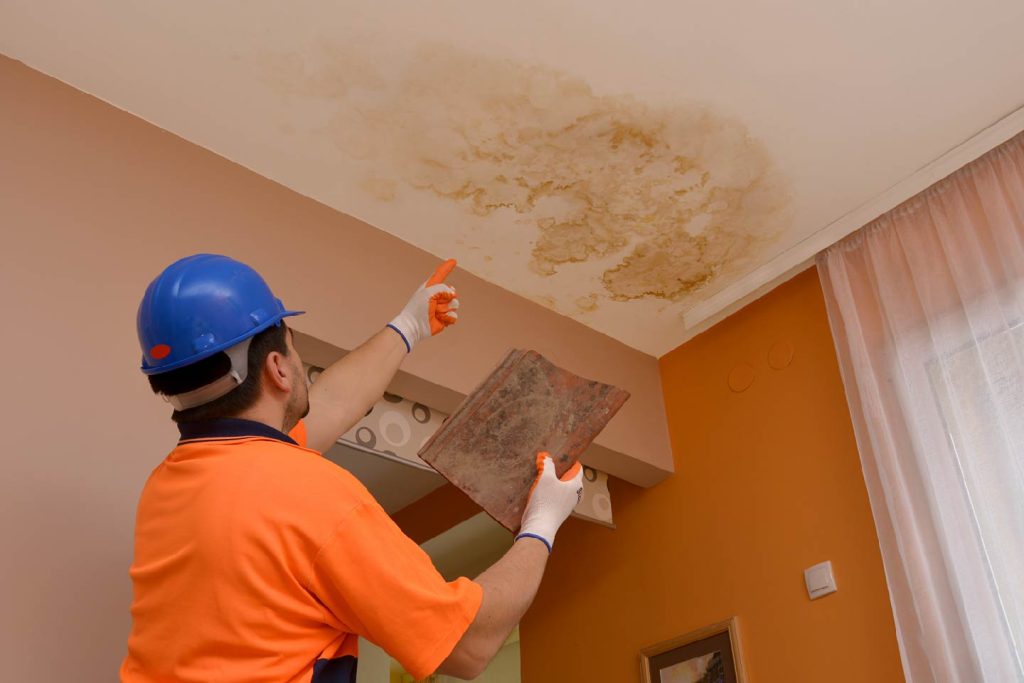
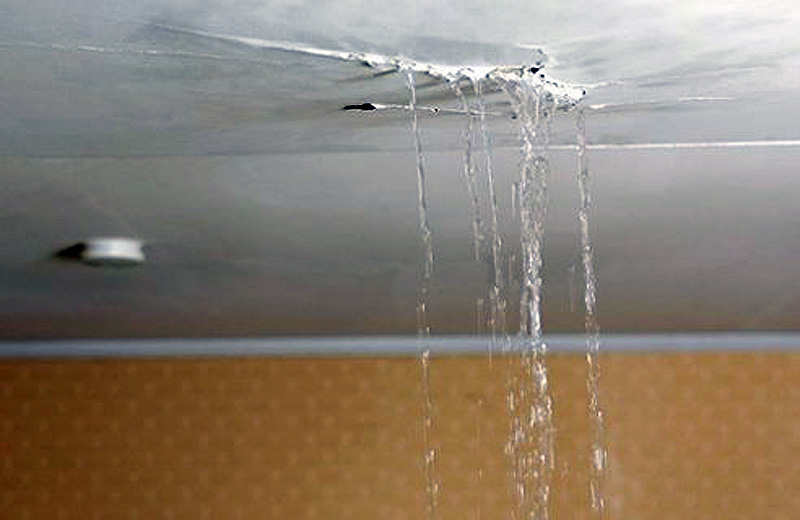
When you notice a leak from a ceiling light, it’s more than just an inconvenience; it’s a sign of a potentially serious issue that could lead to structural damage, electrical hazards, or even health risks from mold. In this guide, we’ll discuss common causes, troubleshooting steps, and solutions for dealing with water leaks from ceiling lights. We’ll also share tips on how to prevent leaks from happening in the future, making your home safer and more comfortable.

Leak From Ceiling Light

Understanding the Dangers of a Leak From Ceiling Light

A water leak from a ceiling light fixture can pose multiple dangers:

  1. Electrical Hazards: Water and electricity are a dangerous combination. A leak reaching your light fixture may result in short circuits, electrical shocks, or even fires.
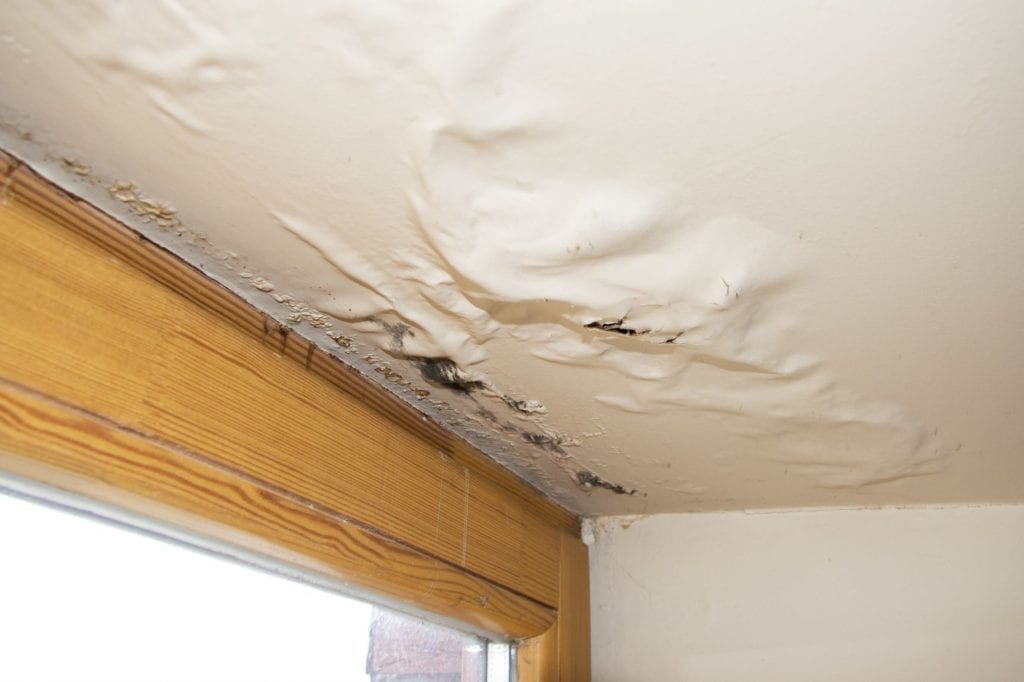
  2. Structural Damage: Continuous leaking can weaken ceiling materials, leading to stains, sagging, or eventual collapse if left untreated.
  3. Health Risks: Water leaks encourage mold growth, which can lead to respiratory issues, allergies, and other health problems, especially for those with preexisting conditions.

When you first notice a leak, it’s important to act quickly to minimize these risks. Below, we explore the common causes and immediate actions to take.

Read too: Shiplap Ceiling in Kitchen: A Timeless Trend for a Stylish and Cozy Space


Common Causes of Leak From Ceiling Light

Understanding the root cause of a ceiling light leak can help determine the best course of action. Here are some of the most common causes:

1. Plumbing Leaks

One of the most common reasons for a ceiling leak is a plumbing issue in the floor above. This could be due to a leaky pipe, loose connections, or a broken seal around a fixture. Bathroom fixtures like toilets, showers, and sinks are common culprits when leaks are near ceiling lights located beneath them.

2. Roof Damage

If the leak occurs during or after rain, the issue could stem from roof damage. Missing shingles, cracked flashing, or damaged gutters can allow water to seep into the ceiling cavity, eventually making its way to your light fixture.

3. Condensation Build-Up

In homes with high humidity, condensation can accumulate on pipes or ducts within the ceiling. Over time, this condensation can drip, especially when temperature differences between floors are significant. This often happens in areas near HVAC systems or unventilated bathrooms.

4. Clogged Gutters or Downspouts

Blocked gutters and downspouts can cause water to pool on the roof and seep into the attic or upper floors. This can lead to water making its way to lower floors, eventually causing leaks around light fixtures on the ceiling.


Steps to Take When You Notice a Leak From Ceiling Light

If you notice water leaking from a ceiling light fixture, follow these steps to protect yourself and your home:

1. Turn Off the Electricity

Safety first: Go to the circuit breaker and turn off the power to the affected room immediately. Do not attempt to touch or inspect the light fixture while the electricity is on, as this could result in electric shock.

2. Contain the Water

Place a bucket or container under the leak to catch dripping water and minimize floor damage. If the ceiling has started to sag, you may need to poke a small hole in the ceiling drywall to release the water buildup and prevent further damage.

3. Inspect the Ceiling

Carefully examine the area around the light fixture to locate the source of the leak. If you suspect the leak is coming from plumbing in an upper floor or the roof, this initial inspection can help you identify where the water is originating.

4. Contact a Professional

Once you’ve taken steps to contain the leak, it’s best to contact a licensed plumber, roofer, or electrician to help address the issue. Handling ceiling leaks requires professional expertise to ensure the problem is resolved safely and effectively.


Fixing a Leak From Ceiling Light

Depending on the source of the leak, the repair process may vary. Here are some solutions based on common causes:

Fixing Plumbing Issues

If the leak is due to plumbing, a plumber may need to inspect the pipes, joints, and seals above the ceiling. Common repairs include:

  • Tightening connections: Loose pipe connections can often cause small leaks.
  • Replacing damaged pipes or seals: Pipes with cracks or faulty seals can lead to steady drips that may eventually cause ceiling leaks.
  • Sealing fixtures: Caulking or sealing around bathroom fixtures can help prevent future leaks.

Repairing Roof Damage

If roof damage is the source, contact a roofer for an inspection. Some repairs may include:

  • Replacing damaged shingles: Broken or missing shingles can allow rainwater to enter the attic or ceiling.
  • Repairing flashing: Damaged flashing around chimneys or vents is a common culprit for leaks.
  • Cleaning and repairing gutters: Clearing debris from gutters and downspouts helps prevent water pooling on the roof.

Addressing Condensation Issues

For condensation-based leaks, solutions might include:

  • Improving ventilation: Installing vents or fans in the bathroom or attic helps to reduce humidity.
  • Insulating pipes: Adding insulation around pipes can reduce condensation, especially in areas where temperature variations are extreme.
  • Using dehumidifiers: In spaces where moisture buildup is common, dehumidifiers can reduce the risk of condensation.

Preventing a Future Leak From Ceiling Light

Once you’ve addressed the immediate issue, take these preventive measures to avoid future leaks from ceiling light fixtures.

1. Regular Roof Inspections

Schedule routine roof inspections, especially after severe weather. Checking for missing shingles, damaged flashing, and clogged gutters can help prevent water from entering your home.

2. Maintain Plumbing Fixtures

Check and maintain plumbing fixtures, especially in bathrooms located above ceiling lights. Tighten loose connections and replace worn seals to reduce the risk of leaks.

3. Improve Home Ventilation

Ensure that areas prone to humidity, such as bathrooms and kitchens, are well-ventilated. Install exhaust fans if necessary to prevent condensation buildup on ceilings and light fixtures.

4. Insulate Pipes and Ductwork

In areas with cold winters or hot summers, insulating pipes and ducts can help minimize condensation issues. This simple step can be especially helpful in preventing water buildup in ceiling cavities.

5. Clean Gutters Regularly

Ensure that your gutters and downspouts are clean and functional. Clogged gutters can cause water to back up onto the roof, leading to leaks and ceiling damage.


When to Seek Professional Help for a Ceiling Leak

While minor leaks may be manageable with a bit of DIY work, certain situations call for a professional:

  • Persistent Leaks: If the leak recurs after attempting repairs, consult a professional to diagnose and fix the root cause.
  • Electrical Hazards: Any leak involving a ceiling light fixture should be inspected by an electrician for safety.
  • Visible Mold Growth: If you see signs of mold, contact a mold remediation specialist, as mold can pose serious health risks if left untreated.

Conclusion

A leak from a ceiling light fixture is a serious issue that requires immediate attention. By identifying the cause, taking quick action, and implementing preventative measures, you can safeguard your home from further damage and ensure a safe, comfortable living environment. Don’t hesitate to seek professional help when dealing with leaks around electrical fixtures, as they can pose significant risks. Regular maintenance, inspections, and good ventilation can also go a long way in preventing leaks and preserving your home’s integrity.
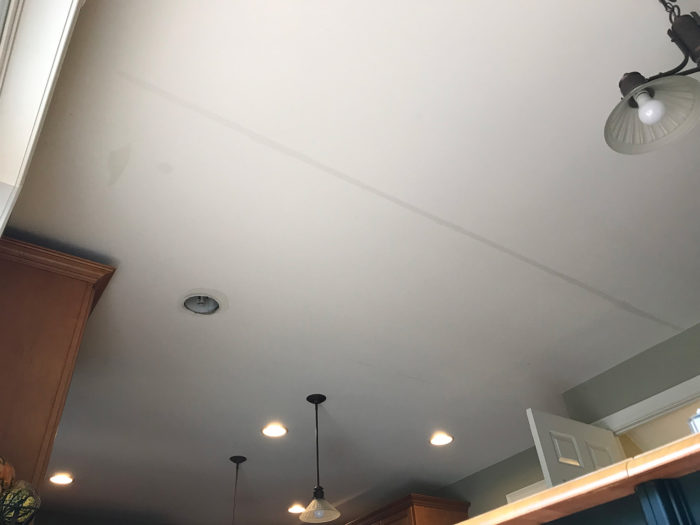
What to Do When Your Toilet Overflowed and Leaked Through the Ceiling? Dealing with the Aftermath

Experiencing a toilet overflow is not only inconvenient but can also lead to significant water damage, especially if it leaks through the ceiling. In this guide, we’ll explore what to do when your Toilet Overflowed And Leaked Through Ceiling, including steps to mitigate damage, safety precautions, and preventative measures to avoid future incidents.

Toilet Overflowed And Leaked Through Ceiling

Understanding the Risks of Toilet Overflowed and Leaked Through the Ceiling

A toilet overflow occurs when the bowl fills beyond its capacity and spills onto the floor. If left unchecked, the water can seep into the subflooring and surrounding areas, causing damage to walls, floors, and ceilings. When the water reaches the ceiling, it can create unsightly stains, weaken the structural integrity, and promote the growth of mold and mildew.

Identifying the Signs of Toilet Overflow and Ceiling Leakage

  • Water pooling around the base of the toilet: This is the most obvious sign of a toilet overflow. If you notice water pooling on the floor around the toilet, it’s essential to address the issue promptly to prevent further damage.
  • Water stains or discoloration on the ceiling: If you notice water stains or discoloration on the ceiling below the bathroom, it could indicate that water has leaked through from an overflowed toilet. In severe cases, you may even notice bulging or sagging in the ceiling.
  • Musty odor: Mold and mildew thrive in damp environments, so if you detect a musty odor in the bathroom or adjacent rooms, it could indicate hidden water damage caused by a toilet overflow.

Steps to Take When Your Toilet Overflowed And Leaked Through Ceiling

Step 1: Shut Off the Water Supply

The first step is to stop the flow of water by shutting off the toilet’s water supply valve. This valve is typically located behind or beside the toilet and can be turned off by turning it clockwise.

Step 2: Clean Up Standing Water

Use towels or a wet/dry vacuum to remove any standing water from the floor. Be sure to wear rubber gloves and protective clothing to avoid direct contact with contaminated water.

Step 3: Inspect the Ceiling for Damage

Carefully inspect the ceiling below the bathroom for signs of water damage, such as stains, discoloration, or sagging. If you notice any damage, it’s essential to address it promptly to prevent further deterioration.

Step 4: Dry Out the Affected Areas

Use fans, dehumidifiers, and open windows to help dry out the affected areas. This will help prevent mold and mildew growth and minimize the risk of further damage.

Step 5: Repair and Restore

Once the affected areas are dry, you can begin repairing any damage to the ceiling, walls, or flooring. This may involve patching holes, replacing damaged drywall, or refinishing surfaces as needed.

Preventative Measures to Avoid Future Incidents

To avoid future toilet overflows and ceiling leaks, consider implementing the following preventative measures:

  • Regular Maintenance: Schedule regular maintenance checks for your plumbing system, including the toilet, pipes, and water supply lines. Address any leaks or issues promptly to prevent them from escalating into larger problems.
  • Install a Toilet Overflow Prevention Device: Consider installing a toilet overflow prevention device, such as an overflow tube or sensor, to alert you if the water level in the toilet bowl is too high. This can help prevent overflows and minimize water damage.
  • Educate Household Members: Educate household members on proper toilet usage and maintenance practices, such as avoiding flushing large amounts of toilet paper or foreign objects down the toilet.
  • Keep an Emergency Kit: Keep an emergency kit on hand containing supplies such as towels, a wet/dry vacuum, and rubber gloves in case of a toilet overflow or water leak.

Conclusion

In conclusion, dealing with a toilet overflow that has leaked through the ceiling can be a stressful and challenging situation. However, by taking prompt action and following the steps outlined in this guide, you can mitigate damage, ensure safety, and prevent future incidents. Remember to address any plumbing issues promptly and implement preventative measures to safeguard your home against water damage caused by toilet overflows.

Read too: Exploring the Benefits and How-Tos of DIY Ceiling Cassette Mini Split Installation: Revolutionizing Comfort

Understanding and Preventing Mold from Ceiling Leak: Unveiling the Hidden Dangers

Mold from Ceiling Leak. Ceiling leaks are not just a nuisance that causes water damage; they can also pave the way for a more insidious problem — mold growth. In this comprehensive guide, we will delve into the intricacies of how ceiling leaks lead to mold formation, the dangers it poses, and effective preventive measures to keep your home mold-free.

Mold From Ceiling Leak
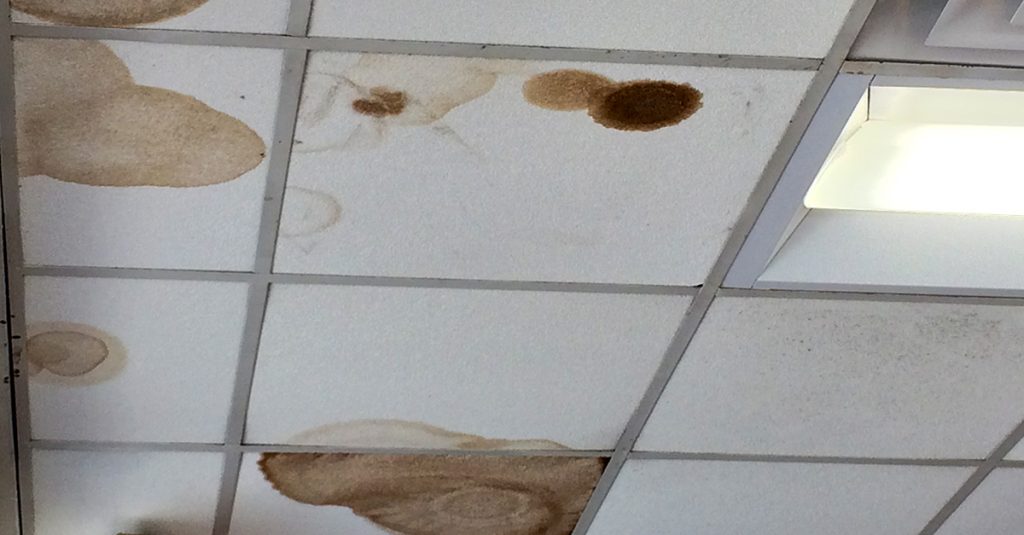
Water stains on ceiling tiles showing leaks above

Understanding the Link: Mold from Ceiling Leak

Ceiling leaks create an ideal environment for mold growth, fostering the development of spores that can compromise both the structural integrity of your home and the health of its occupants. Let’s explore how these leaks become a breeding ground for mold and the steps you can take to mitigate the risks.

The Process: How Mold Thrives from Ceiling Leaks

Ceiling leaks provide the moisture necessary for mold to flourish. As water infiltrates your home, it seeps into porous materials such as drywall and insulation, creating the perfect conditions for mold spores to activate and spread.

Signs of Mold Infestation

Identifying the presence of mold is crucial for timely intervention. Common signs include musty odors, discoloration on walls and ceilings, and respiratory issues among occupants. Understanding these indicators can prompt swift action, preventing further damage.

Preventing Mold from Ceiling Leaks: A Comprehensive Approach

Immediate Leak Remediation

The first line of defense against mold is addressing the source of the problem — the ceiling leak. Promptly fix any leaks, addressing both the visible damage and potential hidden issues within your home’s structure.

Proactive Leak Detection

Regular inspections of your home’s roof and ceilings can help detect leaks before they become severe. Early intervention not only prevents mold growth but also saves you from extensive repairs down the line.

Effective Ventilation Systems

Installing proper ventilation systems helps reduce excess moisture in your home, making it less hospitable for mold. Ensure that bathrooms, kitchens, and attics are adequately ventilated to prevent the accumulation of damp air.

Mold Remediation: Taking Action

In cases where mold has already taken hold, professional remediation may be necessary. DIY methods might not be sufficient, and improper removal can exacerbate the issue. Professional remediation services can ensure safe and thorough removal, addressing both visible and hidden mold.

Read too: Transforming Your Home’s Elegance with a Smooth Ceiling After Popcorn Removal: Elevate Your Space

Conclusion

Ceiling leaks are not only a structural concern but also a precursor to mold infestation, which poses risks to both your home and health. By understanding the link between ceiling leaks and mold, homeowners can take proactive measures to prevent these issues from arising. Regular inspections, immediate leak remediation, and investing in proper ventilation systems are key components of a comprehensive strategy to keep your home mold-free. Don’t let a seemingly minor ceiling leak turn into a major problem — stay informed and take action to protect your home and the well-being of its occupants.

Understanding Brown Water Leaking From Ceiling and How to Address It? Decoding the Dilemma

Have you ever been startled by the sight of brown water leaking from your ceiling? This alarming phenomenon can be a cause for concern, and it’s crucial to comprehend the potential causes and effective solutions. Join us as we unravel the mystery of “Brown Water Leaking From Ceiling” and explore the steps you can take to address this unexpected issue.

Brown Water Leaking From Ceiling

Unveiling the Issue: Brown Water Leaking From Ceiling

Introduction

The discovery of brown water dripping from the ceiling can be perplexing and, understandably, prompt a sense of urgency. To effectively address this issue, it’s essential to understand the possible reasons behind it and implement the right solutions.

Potential Causes

  1. Pipe Corrosion or Rust: One common cause of brown water is corrosion or rust within your plumbing system. When pipes corrode, it can lead to the presence of iron or other minerals in the water, resulting in a brownish tint.
  2. Sediment Accumulation in Water Heater: Sediment buildup in your water heater can cause discolored water. Over time, minerals and debris settle at the bottom of the tank, affecting water quality.
  3. Leaking Roof or Ceiling: Brown water may also be a consequence of a leaking roof or ceiling. If water is infiltrating your home from the outside, it can pick up impurities and discoloration along the way.
  4. Municipal Water Issues: Sometimes, the discoloration may be due to problems with the municipal water supply. Issues such as pipe corrosion in the water distribution system can impact water quality.

Addressing the Problem: Brown Water Leaking From Ceiling

1. Identify the Source

The first step in resolving the issue is to identify the source of the brown water. Check for leaks in the ceiling, inspect the plumbing, and examine the water heater for sediment buildup.

2. Check Plumbing and Water Heater

If the issue is related to your plumbing or water heater, consider having a professional inspection. Flushing the water heater to remove sediment and addressing pipe corrosion can improve water quality.

3. Inspect Roof and Ceiling

If a leaky roof or ceiling is the culprit, prompt repairs are essential. Fixing the source of the water infiltration will prevent further discoloration and potential damage to your home.

4. Contact the Water Supplier

If you suspect issues with the municipal water supply, contact your local water supplier. They can provide information on water quality and any ongoing maintenance or repairs.

Preventive Measures: Maintaining Clean Water

1. Regular Plumbing Maintenance

Schedule routine plumbing inspections to identify and address potential issues before they escalate. This can include checking for corrosion, leaks, and ensuring proper functioning of water heaters.

2. Roof and Ceiling Maintenance

Regularly inspect and maintain your roof and ceiling to prevent leaks. Addressing potential entry points for water can safeguard your home and maintain water quality.

3. Water Filtration Systems

Consider installing water filtration systems to improve overall water quality. These systems can help remove impurities and sediment, providing cleaner and clearer water.

Read too: A Step-by-Step Guide to Installing Rockwool Insulation in Your Ceiling: Unlock Energy Efficiency

Conclusion

In conclusion, the presence of brown water leaking from the ceiling is a situation that warrants prompt attention. By understanding the potential causes and taking proactive measures, you can address the issue effectively and prevent further complications. Regular maintenance of plumbing, water heaters, and home structures is key to ensuring the quality and safety of your water supply.

Remember, swift action and preventive measures are crucial when dealing with water-related issues. By staying informed and proactive, you can maintain a healthy and safe living environment for you and your family.

What Causes Water Leaks in Ceiling?

What Causes Water Leaks in Ceiling? Water leaks in ceiling can be a major inconvenience and even a safety hazard. They can cause damage to your home’s structure, mold growth, and even electrical problems. If you’re experiencing a water leak in your ceiling, it’s important to identify the cause of the leak as soon as possible so that you can take steps to repair it.

What Causes Water Leaks In Ceiling

The Problem

There are many things that can cause water leaks in ceilings. Some of the most common causes include:

  • Roof damage: This is the most common cause of water leaks in ceilings. Roof damage can be caused by storms, hail, or even just wear and tear.
  • Gutters and downspouts: Gutters and downspouts are designed to carry rainwater away from your home. If your gutters or downspouts are damaged or clogged, water can back up and leak into your home.
  • Ice dams: Ice dams form when snow melts on your roof and then refreezes at the edge of your roof. This can cause water to back up and leak into your home.
  • Plumbing leaks: Plumbing leaks can occur in your home’s pipes, fixtures, or appliances. If you have a plumbing leak, it can eventually lead to a water leak in your ceiling.
  • Appliance leaks: Appliances such as dishwashers, washing machines, and refrigerators can leak water if they are not properly installed or maintained.

Roof damage

This damage is the most common cause of water leaks in ceilings. Roof damage can be caused by storms, hail, or even just wear and tear. If your roof is damaged, water can seep through the roof and into your ceiling.

Here are some signs of roof damage:

  • Cracks, holes, or missing shingles
  • Wavy or sagging shingles
  • Loose or damaged flashing
  • Dirt, debris, or mold on your roof

If you see any of these signs, it’s important to have your roof inspected by a professional as soon as possible.

Gutters and downspouts

Properly functioning gutters and downspouts actively direct rainwater away from your home, ensuring it doesn’t collect near your property. If these components sustain damage or become clogged, water may accumulate and infiltrate your home.

Here are some signs of gutter or downspout damage:

  • Damaged or missing gutters or downspouts
  • Clogged gutters or downspouts
  • Debris or leaves in your gutters or downspouts

To prevent gutter and downspout leaks, it’s important to keep your gutters and downspouts clean and free of debris.

Ice dams

Ice dams form when snow melts on your roof and then refreezes at the edge of your roof. This can cause water to back up and leak into your home.

Here are some signs of ice dams:

  • A buildup of ice at the edge of your roof
  • Water dripping from your eaves
  • Wet spots on your ceiling

To prevent ice dams, it’s important to install insulation in your attic to prevent the snow from melting.

Read too: Can You Spray Foam Attic Ceiling

Plumbing leaks

Plumbing leaks can occur in your home’s pipes, fixtures, or appliances. If you have a plumbing leak, it can eventually lead to a water leak in your ceiling.

Here are some signs of plumbing leaks:

  • Puddles of water under your sinks, toilets, or appliances
  • Wet spots on your ceiling
  • Leaking faucets or toilets
  • Low water pressure

If you see any of these signs, it’s important to have your plumbing system inspected by a professional as soon as possible.

Appliance leaks

Improper installation or maintenance of appliances like dishwashers, washing machines, and refrigerators can lead to water leakage.

Here are some signs of appliance leaks:

  • Wet spots on your floor
  • Leaking hoses or connections
  • Low water pressure

If you see any of these signs, it’s important to have your appliances inspected by a professional as soon as possible.

Troubleshooting

If you’re experiencing a water leak in your ceiling, the first step is to identify the source of the leak. Once you know where the leak is coming from, you can take steps to repair it.

Water Leaking Through Ceiling After Bath: Causes, Solutions, and Prevention

Water leaking through the ceiling after a bath can be a frustrating and costly problem. It can cause damage to the ceiling, walls, and floor below, and it can also lead to mold and mildew growth. In some cases, it can even be a sign of a more serious underlying problem, such as a leaking roof or damaged pipes.

Water Leaking Through Ceiling After Bath

Causes of Water Leaks

There are a number of possible causes of water leaks through the ceiling after a bath. Some of the most common causes include:

  • Damaged pipes: Damaged pipes are a common cause of water leaks. This damage can be caused by a number of factors, including corrosion, wear and tear, or even a sudden impact.
  • Loose or damaged seals: Loose or damaged seals can allow water to seep through the pipes and into the ceiling. You can locate these seals at the joints between pipes, fittings, and fixtures.
  • Clogged drains: Clogged drains can cause water to back up and leak into the ceiling. This is often caused by hair, soap scum, or other debris that builds up in the drain.
  • Damaged roof or gutters: Damaged roofs or gutters can allow water to leak into the ceiling. Several factors, such as wind damage, hail, or ice dams, can cause this.

Solutions for Water Leaks

The solution for a water leak will depend on the cause of the leak. In certain instances, fixing the leak can be a straightforward process involving a few simple steps. In other cases, the leak may require professional assistance.

If damaged pipes are the root cause of the leak, you will need to repair or replace the pipes. This can be a difficult and time-consuming task, so it is best to hire a professional plumber.

If loose or damaged seals are the cause of the leak, you will need to replace the seals. Homeowners can easily accomplish this task.

If the leak is caused by clogged drains, the drains will need to be cleared. This can be done with a plunger or a drain snake.

If damage to the roof or gutters is responsible for the leak, you will need to repair the damage. This is a task that is best left to a professional roofer.

Preventing Water Leaks

There are a number of things that can be done to prevent water leaks through the ceiling after a bath. Some of the most important preventive measures include:

  • Regularly inspect the pipes and drains for damage. You can do this by inspecting for any indications of cracks, leaks, or corrosion.
  • Clean the gutters and downspouts regularly. This will help to prevent water from backing up and leaking into the house.
  • Use a plunger or drain snake to clear clogged drains. This will help to prevent water from backing up and leaking into the house.
  • Have the roof inspected regularly for damage. This is especially important if you live in an area with severe weather.

Read too: How To Fix Condensation On Ceiling

Additional Tips

In addition to the preventive measures listed above, there are a few additional tips that can help to prevent water leaking through the ceiling after a bath. These tips include:

  • Install a water leak detector. A water leak detector can alert you to a leak before it causes damage.
  • Use a shower curtain or liner. A shower curtain or liner can help to prevent water from splashing onto the floor and causing damage to the ceiling.
  • Turn off the water when you leave the bathroom. This will help to prevent leaks if a pipe bursts.

By following these tips, homeowners can help to keep their homes dry and safe.

Additional Content

Here are some additional tips for preventing water leaks through the ceiling after a bath:

  • Use a high-quality shower curtain or liner. A cheap shower curtain or liner is more likely to tear or leak.
  • Inspect the shower curtain or liner regularly for damage. If you see any tears or holes, replace the curtain or liner immediately.
  • Keep the shower curtain or liner clean. A dirty shower curtain or liner can harbor mold and mildew, which can damage the ceiling.
  • Clean the shower regularly. A dirty shower can lead to soap scum buildup, which can clog drains and cause leaks.
  • Use a plunger or drain snake regularly to clear clogged drains. A clogged drain can cause water to back up and leak into the ceiling.

By following these tips, homeowners can help to keep their homes dry and safe.

What Can Cause a Leak in the Ceiling

What can cause a leak in the ceiling? Discovering a leak in your ceiling can be a distressing experience for any homeowner. A ceiling leak not only damages your property but can also be a sign of more significant issues within your home’s structure. In this article, we will explore the various factors that can lead to a ceiling leak, how to identify the source of the problem, and what steps to take when you encounter this issue.

what can cause a leak in the ceiling

Understanding Ceiling Leaks

The Telltale Signs

A ceiling leak is typically characterized by the presence of water stains, drips, or bulging areas on your ceiling. It’s essential to address ceiling leaks promptly, as they can lead to structural damage, mold growth, and compromised safety.

Common Causes of Ceiling Leaks

Identifying the Culprits

Several factors can contribute to a ceiling leak. Here are some of the most common causes:

1. Roof Leaks

Roof leaks are a prevalent source of ceiling leaks. Damage to the roofing material, such as missing shingles, cracked flashing, or deteriorated sealant, can allow water to penetrate the roof and make its way into your home.

2. Plumbing Issues

Leaking or burst pipes can release a significant amount of water into your ceiling. This can occur in both supply pipes that carry freshwater and drain pipes that remove wastewater.

3. Condensation

In certain climates, high humidity levels can lead to condensation forming on the ceiling, particularly in areas with inadequate ventilation. Over time, this moisture buildup can result in a ceiling leak.

4. HVAC System Problems

Air conditioning units and heating systems produce condensation, which must be properly channeled away from your home. If the condensate drainage system malfunctions, it can lead to water damage and ceiling leaks.

5. Clogged Gutters and Downspouts

A buildup of leaves, debris, or ice in your gutters and downspouts can prevent water from properly draining away from your home. This can result in water overflowing and seeping into your ceiling.

6. Flashing Issues

Flashing is used to create a watertight seal around roof penetrations such as chimneys, skylights, or vents. If the flashing is damaged or improperly installed, it can allow water to infiltrate your home.

Identifying the Source of the Leak

Detective Work

When you encounter a ceiling leak, identifying the source is crucial. Here are steps to help you pinpoint the issue:

1. Inspect the Attic

Begin by checking your attic for signs of leaks. Look for wet insulation, water stains, or any visible damage to the roof structure.

2. Trace the Water Path

Trace the path of the water from the ceiling leak to its source. This will help you narrow down the potential causes.

3. Check the Roof

Inspect your roof for damaged or missing shingles, flashing problems, and any visible holes or gaps.

4. Examine Plumbing

Check the plumbing in the vicinity of the leak for any signs of leaks, corrosion, or damage.

5. HVAC and Condensation

Examine your HVAC system and the area around it for condensation, clogs, or malfunctioning drainage.

6. Gutters and Downspouts

Clear any debris from your gutters and downspouts and ensure they are directing water away from your home.

Taking Action on Ceiling Leaks

Addressing the Issue

Once you’ve identified the source of the ceiling leak, it’s time to take appropriate action:

1. Roof Repairs

If the source is a roof issue, contact a roofing professional to assess and repair the damage. Prompt repairs can prevent further water infiltration.

2. Plumbing Repairs

For plumbing-related leaks, a licensed plumber can fix the issue, whether it’s a leaking pipe, damaged connection, or a burst pipe.

3. HVAC Maintenance

Schedule routine HVAC maintenance to prevent condensation-related issues and ensure proper drainage of condensate.

4. Gutter and Downspout Maintenance

Regularly clean and maintain your gutters and downspouts to prevent water overflow and subsequent leaks.

5. Ceiling Repairs

After addressing the source of the leak, you may need to repair the damaged ceiling. This can include replacing drywall, repainting, and addressing any cosmetic or structural damage.

Conclusion

Ceiling leaks can be a homeowner’s nightmare, but identifying the source of the problem and taking prompt action are crucial steps to prevent further damage. By understanding the common causes of ceiling leaks and conducting a thorough inspection, you can effectively address the issue and protect your home from structural damage and related problems like mold growth.