Installing Shiplap on a Ceiling: A Step-by-Step Guide to Enhance Your Home’s Aesthetic

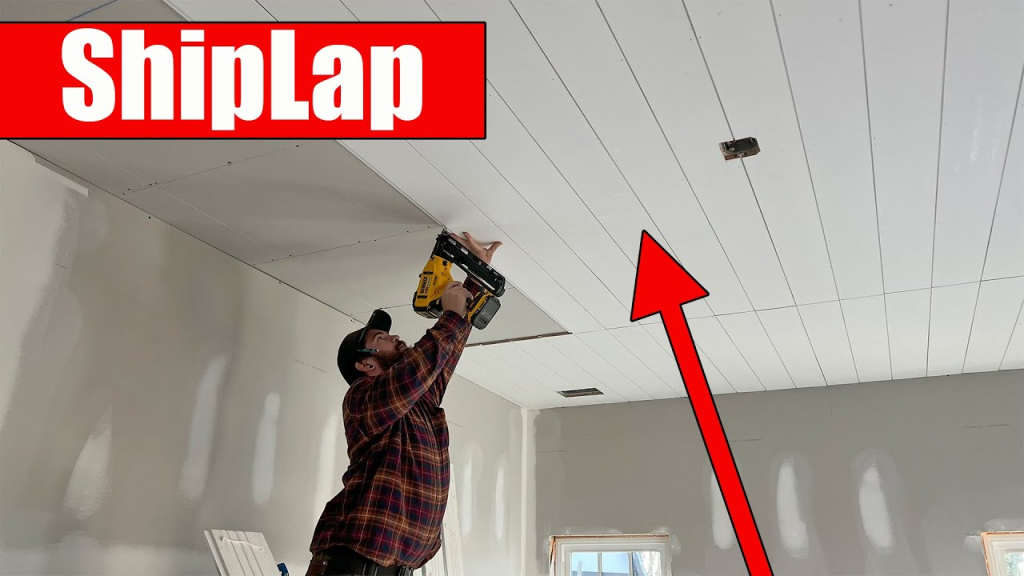
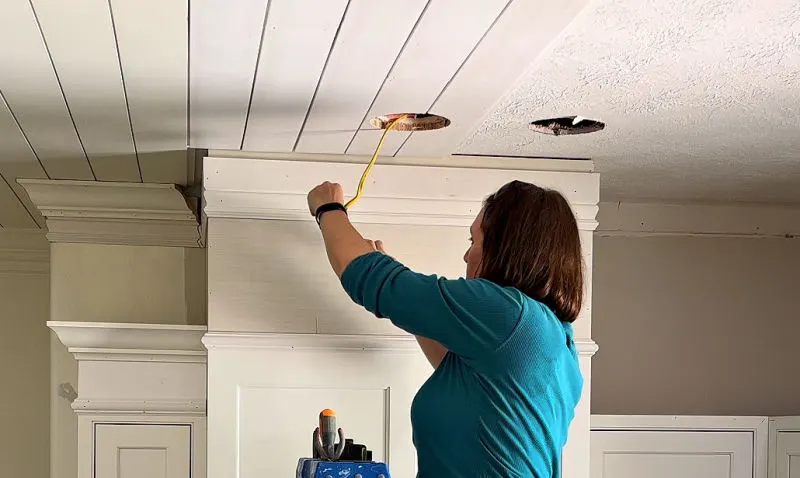
Shiplap has made a comeback in modern home design, offering a timeless, rustic charm to walls and ceilings alike. While it is traditionally used as cladding for walls, installing shiplap on a ceiling has gained popularity for its ability to elevate the aesthetic of a room. Whether you’re renovating your living room, kitchen, or bathroom, installing shiplap on a ceiling can add texture, warmth, and character to your space. In this guide, we will walk you through the process of installing shiplap on a ceiling, covering everything from preparation to finishing touches.

Installing Shiplap On A Ceiling

Why Install Shiplap on a Ceiling?

Before diving into the installation process, let’s explore why installing shiplap on a ceiling is a great idea:

  1. Aesthetic Appeal
    Shiplap creates a beautiful, clean, and rustic look that works well in both modern and farmhouse-inspired designs. Whether painted or left natural, the boards offer a texture that adds depth and interest to a flat, often overlooked, ceiling.
  2. Increased Home Value
    Homes with unique design elements like shiplap ceilings often have higher perceived value. It’s a simple and cost-effective way to update your space and create an attractive feature that potential buyers may find appealing.
  3. Hidden Imperfections
    If your ceiling has imperfections such as stains, cracks, or an uneven surface, shiplap can cover them, providing a fresh, polished appearance without the need for costly repairs.
  4. Brightens a Room
    Installing white or light-colored shiplap on the ceiling can help brighten a room by reflecting light. This makes it a great choice for small rooms or spaces that lack natural light.

Read too: Kitchen Lighting For A Vaulted Ceiling: Illuminating Your Space with Style and Functionality


Tools and Materials for Installing Shiplap on a Ceiling

Before you get started, it’s essential to gather all the necessary tools and materials to ensure a smooth installation process. Here’s a list of what you will need:

Tools:

  • Tape measure
  • Pencil
  • Level
  • Drill and screwdriver
  • Circular saw or miter saw
  • Brad nailer or finish nail gun
  • Safety goggles and ear protection
  • Ladder or scaffolding (for ceiling work)

Materials:

  • Shiplap boards (choose the material and finish you desire, such as wood or MDF)
  • Wood glue
  • Finish nails or brad nails
  • Wood filler (for nail holes)
  • Paint or stain (optional)
  • Primer (if using paint)

Preparing Your Space for Installation

Before starting the installation of your shiplap ceiling, preparation is key. Here’s how you can ensure your space is ready for the job:

1. Remove the Existing Ceiling Covering

If you’re installing shiplap over an existing ceiling covering (such as drywall or popcorn ceiling), you will need to remove the old material first. Use a crowbar or pry bar to pull down any existing ceiling tiles or drywall.

2. Inspect the Ceiling Structure

Once the old covering is removed, inspect the ceiling beams or studs to ensure they are in good condition. You should also check that the spacing between studs is appropriate for securing the shiplap boards. If the spacing is too wide, you may need to add extra furring strips for a more secure hold.

3. Clean the Ceiling Area

Clean the ceiling thoroughly to remove dust, dirt, and debris. This will help the adhesive and nails to hold more securely.


How to Install Shiplap on a Ceiling: A Step-by-Step Guide

Now that your space is prepped, it’s time to start installing shiplap on your ceiling. Follow these steps to get a professional-looking finish.

1. Measure and Plan the Layout

Start by measuring the ceiling to determine the number of shiplap boards you will need. If your ceiling has an irregular shape, make sure to account for any angles or corners. You should also plan whether you want your shiplap boards to run parallel to the longest side of the room or perpendicular to the joists.

2. Cutting the Shiplap Boards

Using a circular saw or miter saw, cut the shiplap boards to the desired length. You will need to make cuts for the boards that reach the edges of the room, especially in corners or near light fixtures. If the ceiling has beams or obstructions, plan for those cuts accordingly.

3. Install the First Row of Shiplap

Begin by installing the first row of shiplap at one end of the ceiling. Use a level to ensure the first board is perfectly straight. For better alignment, you can use a chalk line to mark a straight guide across the ceiling.

Apply wood glue to the back of the board, then use a brad nailer or finish nail gun to secure the board in place. Place nails along the edges of the board and into the ceiling joists. If your shiplap has tongue and groove edges, make sure the tongue fits into the groove of the previous row.

4. Continue Installing Additional Rows

Continue installing the shiplap rows, ensuring each board is level and fits snugly against the previous one. As you work across the ceiling, be sure to stagger the seams of the boards. This will give the ceiling a more natural, well-distributed appearance.

If you come to a corner, you may need to cut the boards to fit snugly, ensuring the edges are clean and even. For tight corners, a miter saw will help make precise cuts.

5. Secure the Boards with Nails

As you continue to install the shiplap, make sure each board is properly secured with nails or brads. Space the nails approximately 6 to 8 inches apart for a secure hold. For best results, aim to nail directly into the ceiling joists.

6. Finishing the Shiplap Ceiling

Once all the boards are installed, fill any visible nail holes with wood filler. Allow the filler to dry, then sand it down to create a smooth surface. If you’re painting the ceiling, apply a primer first, followed by your desired paint color.

If you prefer a natural wood look, you can stain or oil the shiplap for a rustic finish.


Tips for Installing Shiplap on a Ceiling

  • Work with a Partner: Installing shiplap on a ceiling can be challenging alone, especially with large boards. Having a partner to help with positioning and nailing can make the process easier.
  • Pre-Stain or Paint the Boards: If you plan to paint or stain your shiplap, consider doing this before installation. This will make the job easier and ensure a smoother finish.
  • Use a Nail Gun: A brad nailer or finish nail gun will speed up the process and ensure the nails are securely placed without splitting the wood.
  • Install a Ceiling Fan or Lighting Fixtures After: If you’re installing shiplap around a ceiling fan or light fixture, do so after the boards are installed to avoid any damage.

Conclusion: Installing Shiplap on a Ceiling Can Transform Your Space

Installing shiplap on a ceiling is an excellent way to enhance the aesthetic of any room in your home. Whether you prefer a rustic farmhouse look or a sleek, modern finish, shiplap can add texture, warmth, and charm to your ceilings. By following the steps outlined in this guide and using the right materials and tools, you can create a beautiful ceiling feature that will last for years to come.


Tongue And Groove PVC Ceilings: A Durable, Stylish Option for Your Home

When it comes to ceiling materials, homeowners and designers are increasingly turning to Tongue and Groove PVC Ceiling as an attractive and durable option. Known for its interlocking design, this type of ceiling offers many advantages, from its ease of installation to its long-lasting finish. In this article, we will explore everything you need to know about Tongue and Groove PVC Ceilings, including its benefits, installation process, and why it’s a top choice for modern interior design.

Tongue And Groove Pvc Ceiling

What is a Tongue And Groove PVC Ceiling?

Tongue and Groove PVC Ceiling is a popular ceiling material made from durable PVC (polyvinyl chloride) that features a unique tongue and groove design. This design allows the panels to interlock seamlessly, creating a smooth and cohesive ceiling without visible seams. Unlike traditional wooden tongue and groove ceilings, which require maintenance and can warp over time, PVC offers a low-maintenance and long-lasting alternative that is both functional and aesthetically pleasing.

Key Features of Tongue And Groove PVC Ceiling:

  1. Durability: PVC is resistant to moisture, mold, and mildew, making it an ideal choice for areas with high humidity, such as bathrooms, kitchens, and basements.
  2. Aesthetic Appeal: With a wide range of colors, finishes, and textures, PVC ceilings can be customized to match various interior design styles.
  3. Ease of Installation: The interlocking tongue and groove system makes installation quick and easy, especially when compared to traditional ceiling options.
  4. Low Maintenance: PVC ceilings are easy to clean and require little to no maintenance, making them a hassle-free option for homeowners.

Read too: Shiplap Ceiling in Kitchen: A Timeless Trend for a Stylish and Cozy Space


Benefits of Tongue And Groove PVC Ceiling

Choosing Tongue and Groove PVC Ceiling offers many benefits for homeowners and contractors alike. Let’s dive into the top reasons why this ceiling option is gaining popularity.

1. Water-Resistant and Moisture-Proof

One of the most significant advantages of Tongue and Groove PVC Ceiling is its ability to resist moisture. PVC is inherently water-resistant, which makes it perfect for installation in moisture-prone areas such as bathrooms, kitchens, and laundry rooms. Unlike wood or drywall, which can absorb moisture and lead to mold or rot, PVC stays dry and maintains its integrity.

This makes Tongue and Groove PVC Ceiling a great option for homeowners who want a durable, moisture-proof ceiling that requires minimal maintenance.

2. Easy to Clean and Maintain

Another advantage of PVC ceilings is their ease of cleaning and maintenance. Simply wipe down the panels with a damp cloth to remove dust, dirt, or grease. Unlike traditional wood ceilings, which may need to be refinished or repainted over time, Tongue and Groove PVC Ceiling panels retain their look for many years without the need for intensive care.

This is particularly beneficial for homeowners who want to reduce maintenance tasks and keep their ceilings looking pristine with minimal effort.

3. Long-Lasting and Durable

PVC is known for its strength and longevity. Tongue and Groove PVC Ceiling panels are not only durable but also resistant to cracking, peeling, and fading, even after years of exposure to sunlight and moisture. This makes them a great long-term investment for your home. Additionally, PVC does not warp or expand due to humidity, which is a common issue with wood ceilings.

If you’re looking for a ceiling material that will stand the test of time, Tongue and Groove PVC Ceiling is a solid choice.

4. Variety of Styles and Finishes

Whether you’re aiming for a contemporary, traditional, or rustic look, Tongue and Groove PVC Ceiling panels come in a wide range of styles, colors, and finishes to match any interior design. You can opt for smooth, glossy panels, or choose textured finishes that resemble wood or stone for a more natural appearance.

With such a variety of options, you can easily find the perfect style that complements the rest of your home’s décor.

5. Energy Efficient

Another benefit of installing a Tongue and Groove PVC Ceiling is its potential to improve the energy efficiency of your home. PVC has insulation properties, which can help regulate indoor temperatures by keeping rooms cooler in the summer and warmer in the winter. This can help reduce your reliance on heating and cooling systems, lowering your energy bills.


How to Install Tongue And Groove PVC Ceiling

Installing Tongue and Groove PVC Ceiling is a relatively straightforward process, especially compared to traditional ceiling options. Here’s a step-by-step guide to help you install your PVC ceiling panels like a pro:

Tools and Materials Needed:

  • Tongue and Groove PVC Ceiling Panels
  • Measuring Tape
  • Utility Knife or Saw
  • Ceiling Adhesive or Nails
  • Level
  • Drill (if using nails)
  • Safety Gear (gloves, goggles)

Step 1: Prepare the Ceiling

Before installing the Tongue and Groove PVC Ceiling, ensure that your ceiling is clean, dry, and free of any debris. You may need to remove any existing ceiling tiles or materials before proceeding.

Step 2: Measure the Ceiling

Use a measuring tape to determine the dimensions of the ceiling. This will help you figure out how many PVC panels you’ll need. It’s essential to measure both the length and width of the room to ensure a precise fit.

Step 3: Cut the Panels

Using a utility knife or saw, cut the PVC panels to the appropriate size. Be sure to leave a small gap between the edges of the panels and the walls to allow for expansion and contraction.

Step 4: Install the Panels

Start installing the Tongue and Groove PVC Ceiling panels by placing the first panel in the corner of the room. Align the tongue and groove of each panel to interlock securely. Use ceiling adhesive or nails to secure each panel in place, ensuring that the panels are level as you go.

Continue this process until the entire ceiling is covered. For the last row of panels, you may need to trim them to fit, but be sure to leave a small gap along the edges.

Step 5: Finish the Ceiling

Once all the panels are in place, check for any gaps or imperfections. Use caulk or trim molding around the edges of the ceiling to cover any exposed areas and create a finished look.


Where Can You Use Tongue And Groove PVC Ceiling?

Tongue and Groove PVC Ceiling can be installed in a variety of settings, both residential and commercial. Here are some common areas where PVC ceilings are a great choice:

1. Bathrooms

Due to its water-resistant properties, Tongue and Groove PVC Ceilings is perfect for high-humidity areas like bathrooms. It helps prevent mold and mildew growth and keeps the ceiling looking fresh and clean for years.

2. Kitchens

The kitchen is another high-moisture area where PVC ceilings work well. Whether you’re dealing with cooking steam or occasional spills, Tongue and Groove PVC Ceiling is a practical and attractive option.

3. Basements

Basements are often prone to dampness, and PVC ceilings are a great solution for these spaces. They can withstand the moisture and provide a clean, modern look without the worry of rotting or mold.

4. Living Rooms and Bedrooms

With the variety of finishes available, Tongue and Groove PVC Ceiling is also a great choice for more traditional rooms like living rooms and bedrooms. It adds elegance and a modern touch without compromising on durability.


Conclusion: Why Choose Tongue And Groove PVC Ceiling?

In conclusion, Tongue and Groove PVC Ceilings is a fantastic choice for homeowners looking for a durable, low-maintenance, and aesthetically pleasing ceiling solution. With its water-resistant properties, ease of installation, and wide variety of styles, it’s a great option for any room in the house.

Whether you’re renovating your kitchen, bathroom, basement, or living room, Tongue and Groove PVC Ceiling offers long-lasting performance and timeless beauty. By choosing this ceiling material, you’re making a wise investment in your home’s comfort and style.

Drop Ceiling In Garage: A Practical and Stylish Solution for Your Space

Garages are often some of the most overlooked spaces in a home when it comes to design and functionality. However, with the right improvements, a garage can be transformed from a simple storage area into a well-organized, usable, and visually appealing space. One such improvement that can make a significant difference is installing a Drop Ceiling In Garage.

Drop Ceiling In Garage

A drop ceiling, also known as a suspended ceiling, offers both practical and aesthetic benefits, from hiding unsightly pipes and wires to enhancing lighting and improving acoustics. This type of ceiling installation is a popular choice for basements, office spaces, and even garages. In this article, we will explore the advantages of installing a Drop Ceiling In Garage, how to install it, and the various options available for your garage renovation.


What is a Drop Ceiling?

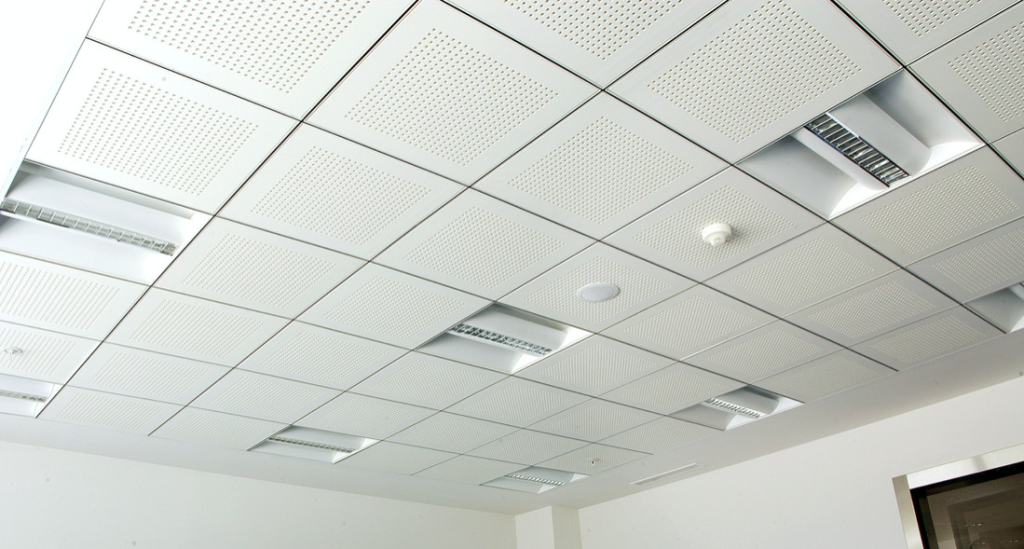
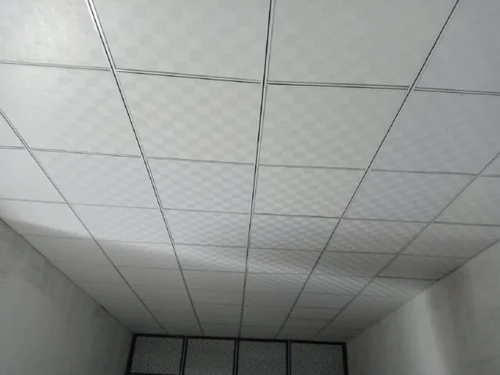
A Drop Ceiling In Garage is a ceiling system that is suspended below the main structural ceiling of a room, usually by metal grids and ceiling tiles. The tiles used for drop ceilings are lightweight and easy to replace, making maintenance relatively simple. Unlike traditional ceiling types, which are directly attached to the ceiling structure, drop ceilings leave a gap between the tiles and the original ceiling, allowing access to electrical wiring, plumbing, and HVAC systems without having to remove the entire ceiling.

These ceilings are particularly useful in spaces like garages where utility lines, pipes, or ducts are visible. A Drop Ceiling In Garage can effectively conceal these components, offering a cleaner, more organized look while still allowing easy access for repairs or adjustments.


Benefits of Installing a Drop Ceiling In Garage

1. Concealment of Utilities

One of the primary reasons homeowners opt for a Drop Ceiling In Garage is the ability to hide exposed pipes, wires, and ducts that may be running across the ceiling. This not only makes the space look more organized and tidy but also eliminates the eyesore of unsightly infrastructure. Whether you have air ducts, electrical wires, or water pipes in your garage, a drop ceiling can easily cover them up without hindering accessibility.

Read too: Discovering the Charm of Nautical Outdoor Ceiling Fans for Your Coastal Retreat: Sail into Style

2. Improved Aesthetics

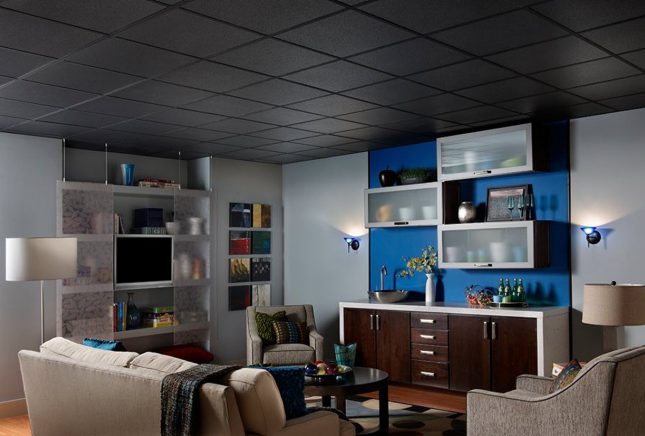
Garages are often considered utilitarian spaces, but a Drop Ceiling In Garage can dramatically improve the overall aesthetics of the room. The smooth, uniform surface created by the ceiling tiles gives the garage a clean and polished look. By choosing tiles in various colors, textures, and finishes, you can customize the ceiling to match the overall style of your home, making the garage feel like an integrated part of the living space rather than a neglected area.

3. Enhanced Lighting Options

Lighting can make a huge difference in the functionality of a garage. A Drop Ceiling In Garage allows you to install recessed lighting or LED fixtures, which can be more effective and energy-efficient than traditional light fixtures. The ceiling tiles can also be fitted with lighting panels that provide uniform illumination, ensuring that the entire garage is well-lit, whether you’re working on a project, parking your car, or storing items.

Additionally, drop ceilings often help diffuse light, reducing harsh shadows and creating a more evenly distributed light source, which is especially beneficial when working in the garage.

4. Improved Acoustic Performance

Garages can often be noisy environments due to their concrete floors, metal surfaces, and the sounds of car engines or tools in use. Installing a Drop Ceiling In Garage can help dampen noise by absorbing sound, making the space quieter. Ceiling tiles designed for soundproofing are available and can significantly reduce the noise level in your garage, making it a more comfortable place to work or spend time.

5. Easier Maintenance and Access

The space between the drop ceiling tiles and the original ceiling provides a convenient area to house electrical wiring, pipes, or other utilities. This allows for easy access in case of repairs, upgrades, or adjustments. Instead of cutting into the ceiling or tearing out drywall, you can simply lift the tiles to reach what’s behind them. Additionally, individual tiles can be easily replaced if they become damaged or stained, making maintenance a breeze.

6. Energy Efficiency

A drop ceiling can also help improve the energy efficiency of your garage. By installing insulation within the ceiling system, you can help regulate the temperature of the space, keeping it cooler in the summer and warmer in the winter. This can make a noticeable difference in energy bills, particularly if your garage is attached to your home and shares a wall with your living space.


How to Install a Drop Ceiling In Garage

While installing a Drop Ceiling In Garage is a manageable DIY project for those with some basic carpentry or construction experience, it’s important to approach it step by step. Here’s a basic overview of the installation process:

1. Prepare the Space

Before beginning the installation, clear out any items in your garage that may be in the way. Remove any existing light fixtures, ceiling fans, or other accessories. Measure the dimensions of your garage to determine how much material you’ll need.

2. Install the Suspension System

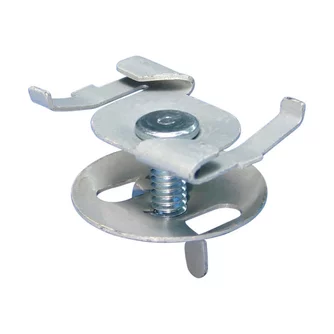
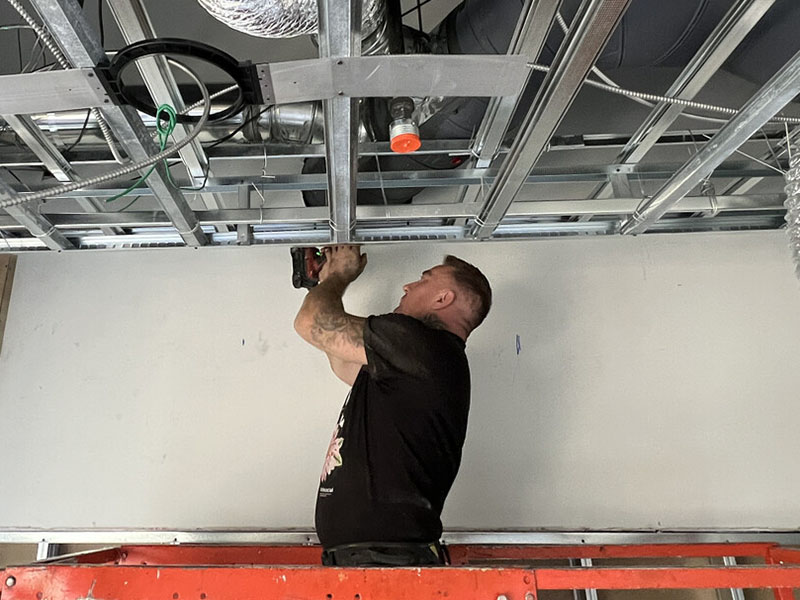
A drop ceiling is typically suspended from a metal grid system. The grid system is mounted to the ceiling using suspension wires or clips. The first step is to mark the position of the grid on the walls and ceiling, ensuring that it’s level. Then, install the suspension wires and hang the grid system according to the manufacturer’s instructions.

3. Cut and Install Ceiling Tiles

Once the grid system is in place, cut the ceiling tiles to fit the openings in the grid. The tiles should fit snugly within the grid, and any gaps should be minimal. Ceiling tiles come in various materials, such as mineral fiber, fiberglass, and PVC, each offering different aesthetic and performance features.

Install the tiles one by one by placing them into the grid, ensuring they are properly aligned. If you’re installing recessed lighting, make sure to cut out holes in the tiles where the light fixtures will be placed.

4. Install Lighting and Other Accessories

After the tiles are in place, you can install recessed lighting, ventilation fans, or any other fixtures that you want to incorporate into the ceiling system. Ensure that the electrical work is done safely, and consider hiring a licensed electrician if needed.

5. Final Touches

Once the tiles and lights are installed, do a final check to ensure everything is secure and functioning properly. Clean the tiles and remove any dust or debris that may have accumulated during the installation process.


Types of Drop Ceiling Tiles for Your Garage

When selecting ceiling tiles for your Drop Ceiling In Garage, there are several options to consider based on the look, durability, and performance features you want. Here are a few popular types:

1. Mineral Fiber Tiles

These are the most common type of ceiling tiles and offer a good balance of affordability, acoustic performance, and aesthetic appeal. Mineral fiber tiles are typically lightweight and easy to install, and they come in a variety of finishes, from smooth to textured.

2. Fiberglass Tiles

Fiberglass tiles are durable, moisture-resistant, and ideal for garages that may be prone to humidity or temperature fluctuations. They also offer good acoustic properties and come in a variety of designs.

3. PVC Tiles

PVC tiles are known for their durability and resistance to moisture, making them a great choice for garages with high humidity or exposure to the elements. They are also easy to clean and maintain, making them ideal for spaces that may accumulate dust and grime.

4. Acoustic Tiles

If noise reduction is a priority, consider installing acoustic tiles that are specifically designed to absorb sound. These tiles are ideal for reducing noise in a busy garage with tools, machines, and vehicles.


Conclusion

A Drop Ceiling In Garage is a practical and stylish solution for transforming your garage into a more organized and functional space. From concealing unsightly pipes and wires to improving lighting and acoustics, a drop ceiling offers numerous benefits for homeowners looking to upgrade their garage. Whether you’re planning a DIY installation or hiring a professional, a drop ceiling can significantly enhance both the aesthetics and functionality of your garage.

With a variety of tile options and design choices available, you can customize your Drop Ceiling In Garage to suit your needs and preferences, making it an investment that adds value and convenience to your home.

Ceilings Grid Hanger Wire: Features, Uses, and Installation Tips

When it comes to constructing or renovating a space, the ceilings grid hanger wire is an essential component often overlooked. Whether you’re working on a residential, commercial, or industrial project, understanding the role and functionality of ceiling grid hanger wires is crucial. This article will provide a comprehensive overview of ceiling grid hanger wire, including its features, benefits, installation methods, and tips for ensuring optimal performance.

Ceiling Grid Hanger Wire

What is Ceiling Grid Hanger Wire?

Ceiling grid hanger wire is a crucial element used to support and stabilize suspended ceiling systems. Typically made of galvanized steel or stainless steel, this wire is designed to carry the weight of ceiling panels, lights, HVAC systems, and other components that may be installed in a suspended ceiling grid system. The use of ceiling grid hanger wire helps ensure that these elements remain secure, providing a safe and aesthetically pleasing ceiling installation.

Key Features of Ceiling Grid Hanger Wire

  1. Material Composition:
    • Ceiling grid hanger wires are commonly made from high-strength materials, primarily galvanized or stainless steel. Galvanization offers corrosion resistance, making the wire suitable for various environments, including those with high humidity or exposure to moisture.
  2. Different Gauge Options:
    • These wires come in various gauges, which determine their strength and load-bearing capacity. Typically, a thicker gauge (lower number) can support more weight. It’s important to choose the appropriate gauge based on the specific requirements of your project.
  3. Flexible and Adjustable:
    • Ceiling grid hanger wire is designed to be flexible, allowing for easy adjustment during installation. This flexibility enables installers to make precise adjustments to the height and level of the suspended ceiling system.
  4. Easy Installation:
    • Installing ceiling grid hanger wires is generally straightforward, often requiring minimal tools and equipment. They can be cut to length and secured to the building structure using specialized fasteners, making them a convenient choice for contractors and DIY enthusiasts alike.
  5. Compatibility with Various Systems:
    • Ceiling grid hanger wires are compatible with different ceiling grid systems, including T-bar grids, drywall ceilings, and acoustic ceiling tiles. This versatility makes them a go-to solution for various applications.

Read too: Discovering the Charm of Nautical Outdoor Ceiling Fans for Your Coastal Retreat: Sail into Style

Benefits of Using Ceiling Grid Hanger Wire

1. Enhanced Stability and Safety

One of the primary benefits of using ceiling grid hanger wire is the enhanced stability it provides to suspended ceiling systems. By securing the ceiling panels and other elements, the wire helps prevent sagging, shifting, or collapse, ensuring safety in the workspace.

2. Cost-Effective Solution

Compared to other ceiling support systems, using ceiling grid hanger wire can be a cost-effective solution. The materials are generally inexpensive, and the ease of installation can save both time and labor costs during construction or renovation.

3. Versatile Applications

Ceiling grid hanger wire can be used in a wide variety of settings, from commercial offices to industrial warehouses. This versatility allows contractors to utilize the same product across different projects, simplifying inventory and reducing costs.

4. Aesthetic Appeal

A well-installed suspended ceiling can enhance the aesthetic appeal of a space. Ceiling grid hanger wire contributes to a clean, professional look, helping to create a polished finish in any environment.

5. Fire Safety Compliance

Many ceiling grid systems are designed to meet fire safety codes. Using quality ceiling grid hanger wire helps ensure that the entire ceiling assembly complies with relevant regulations, providing peace of mind for building owners and occupants.

Installation Process for Ceiling Grid Hanger Wire

Tools and Materials Needed

Before starting the installation, gather the necessary tools and materials:

  • Ceiling grid hanger wire (appropriate gauge)
  • Wire cutters
  • Pliers
  • Measuring tape
  • Level
  • Ceiling anchors or fasteners
  • Drill (if needed for anchors)

Step-by-Step Installation Guide

Step 1: Plan the Layout

Begin by planning the layout of your ceiling grid system. Measure the dimensions of the room and mark the locations for the main runners, cross tees, and any other components you’ll be installing.

Step 2: Determine Hanger Wire Spacing

Ceiling grid hanger wires should typically be spaced no more than 4 feet apart, but local building codes may vary. Check your local codes for specific requirements and adjust your plan accordingly.

Step 3: Attach Hanger Wires to the Structure

Using a drill or hammer, attach the ceiling grid hanger wires to the overhead structure. This may involve securing them to ceiling joists, beams, or existing structural elements. Ensure that the hangers are securely fastened and can support the weight of the ceiling grid.

Step 4: Cut and Install the Hanger Wire

Using wire cutters, cut the hanger wire to the desired length. Make sure to leave some extra length for adjustments. Attach one end of the wire to the ceiling grid, ensuring it’s secure.

Step 5: Adjust Height and Level

Once the wires are attached, adjust the height of the ceiling grid by pulling on the hanger wires as needed. Use a level to ensure that the grid is perfectly horizontal.

Step 6: Secure the Grid System

After leveling the grid, secure all components, including main runners and cross tees, to the hanger wires. Ensure all connections are tight and stable.

Safety Precautions

  • Always wear safety goggles when cutting or working with wire to protect your eyes from flying debris.
  • Ensure the workspace is clear of obstacles to prevent tripping or falling.
  • Double-check all connections and fasteners to ensure everything is secure before adding any load to the ceiling grid system.

Maintenance Tips for Ceiling Grid Hanger Wire

Proper maintenance of your ceiling grid hanger wire system will ensure its longevity and performance. Here are some essential maintenance tips:

1. Regular Inspections

Periodically inspect the ceiling grid and hanger wire for any signs of wear, corrosion, or damage. Check for loose connections and re-secure any components as necessary.

2. Keep it Clean

Dust and debris can accumulate on ceiling grids, affecting their appearance and functionality. Regularly clean the ceiling and surrounding areas to maintain a tidy space.

3. Monitor Load Capacity

Be mindful of the load capacity of your ceiling grid system. Avoid placing heavy objects on or above the ceiling grid that exceed the weight limit, as this can strain the hanger wire and other components.

4. Reinforce as Needed

If you notice sagging or instability in the ceiling grid, consider adding additional hanger wires or reinforcing existing ones to provide extra support.

Common Applications for Ceiling Grid Hanger Wire

1. Commercial Spaces

In offices, retail stores, and other commercial spaces, ceiling grid hanger wire is commonly used to create suspended ceilings. This allows for easy access to plumbing, electrical wiring, and HVAC systems while maintaining a professional appearance.

2. Educational Institutions

Schools and universities often utilize ceiling grid systems in classrooms, hallways, and auditoriums. The use of hanger wire helps ensure that ceiling tiles are securely in place, contributing to a safe and comfortable learning environment.

3. Industrial Facilities

In industrial settings, suspended ceilings are frequently used to conceal mechanical systems and provide a clean look. Ceiling grid hanger wire is essential in these applications to support heavy lighting fixtures and HVAC equipment.

4. Residential Homes

Many homeowners opt for suspended ceilings in basements, living rooms, and other areas to improve aesthetics and functionality. Ceiling grid hanger wire plays a vital role in ensuring the stability and safety of these installations.

Conclusion

Understanding the importance of ceilings grid hanger wire is crucial for anyone involved in construction or renovation projects. From its ability to provide enhanced stability and safety to its cost-effectiveness and versatility, this seemingly simple component plays a significant role in creating functional and attractive ceiling systems. By following proper installation techniques and maintenance practices, you can ensure that your suspended ceiling remains secure and visually appealing for years to come. Whether you are a contractor, DIY enthusiast, or homeowner, investing in quality ceiling grid hanger wire is a decision that will pay off in the long run.

Armstrong Ultima Ceiling Tile: A Guide to Superior Acoustic Solutions

When it comes to creating a polished and professional interior, ceiling design plays a pivotal role. One of the most reliable and aesthetically pleasing options available on the market is the Armstrong Ultima Ceiling Tile. Known for its excellent acoustical performance, durability, and sleek appearance, Armstrong Ultima Ceiling Tiles are widely used in commercial spaces such as offices, hospitals, schools, and retail environments.

Armstrong Ultima Ceiling Tile

This article will explore the benefits, features, and installation options of Armstrong Ultima Ceiling Tiles, along with helpful tips for selecting the right type for your space.

What is Armstrong Ultima Ceiling Tile?

The Armstrong Ultima Ceiling Tile is a high-performance ceiling solution, designed for both aesthetics and functionality. Manufactured by Armstrong World Industries, a leader in ceiling and wall solutions, Ultima ceiling tiles are specifically crafted to offer superior sound absorption, noise reduction, and durability. These tiles are made from mineral fiber, which gives them exceptional acoustic properties, while their textured, high-white finish enhances the overall look of any room.

Available in various sizes and styles, Ultima ceiling tiles are a top choice for environments that require noise control and visual appeal, such as offices, conference rooms, healthcare facilities, and educational settings.

Benefits of Armstrong Ultima Ceiling Tile

Choosing Armstrong Ultima Ceiling Tiles for your project comes with a wide range of benefits that make them stand out from other ceiling options.

Read too: Kitchen Lighting For A Vaulted Ceiling: Illuminating Your Space with Style and Functionality

1. Superior Acoustic Performance

One of the key features of Armstrong Ultima Ceiling Tiles is their exceptional acoustic control. They are designed to reduce noise levels within a room by absorbing sound, making them an ideal choice for spaces where speech clarity is important. Whether you’re outfitting an office where clear communication is essential, or a classroom where concentration is key, the sound absorption capabilities of Ultima tiles help create a more productive and comfortable environment.

The tiles offer both high Noise Reduction Coefficient (NRC) and Ceiling Attenuation Class (CAC) ratings, which means they effectively absorb sound within the room while also preventing noise from traveling between spaces.

2. Clean and Modern Aesthetic

In addition to their acoustic benefits, Armstrong Ultima Ceiling Tiles provide a clean and sophisticated appearance. Their bright, white finish helps reflect light and make spaces feel more open and airy. The fine-textured surface gives them a modern, sleek look, perfect for a wide range of design schemes, from minimalist to contemporary interiors.

These tiles are also available in different edge profiles, including square edge and beveled edge, allowing you to customize the appearance to suit your design needs.

3. Durability and Low Maintenance

Ultima tiles are highly durable and resistant to scratches, stains, and impacts, making them a long-lasting choice for high-traffic areas. Their high level of durability also makes them an ideal choice for environments that require regular cleaning or may face more wear and tear, such as healthcare settings or commercial buildings.

These tiles are easy to maintain, requiring minimal cleaning to keep them looking fresh and new. They are made with a washable surface that resists mold, mildew, and bacteria, contributing to a healthier and cleaner indoor environment.

4. Sustainability

Armstrong demonstrates its commitment to sustainability with the Ultima Ceiling Tile. This product contains a high percentage of recycled materials and is fully recyclable at the end of its lifecycle. By choosing Ultima tiles, you’re making an environmentally conscious choice that supports Armstrong’s goal of reducing waste and promoting sustainable building practices.

The tiles also contribute to LEED (Leadership in Energy and Environmental Design) certification, a popular rating system for green buildings. Using these tiles can help your project achieve LEED points for materials and resources.

Key Features of Armstrong Ultima Ceiling Tile

The Armstrong Ultima Ceiling Tile line comes with a variety of features designed to enhance the performance and appeal of your ceiling installation. Here are some key features to consider when selecting Ultima tiles:

1. High Light Reflectance

With a light reflectance (LR) value of 0.90, Ultima tiles help reflect more natural and artificial light, reducing the need for excessive lighting fixtures and cutting down on energy consumption. This makes them ideal for spaces where energy efficiency is a priority, such as offices and schools. The tiles’ ability to enhance lighting can create a brighter and more welcoming atmosphere, boosting productivity and improving the overall ambiance of the space.

2. BioBlock Technology

Armstrong Ultima Ceiling Tiles are equipped with BioBlock technology, a feature that prevents the growth of mold, mildew, and bacteria on the tile surface. This makes them an excellent choice for healthcare environments and any setting where hygiene is a top concern. BioBlock ensures that your ceiling tiles will remain cleaner and more sanitary over time, contributing to a healthier indoor environment.

3. Total Acoustics Performance

As part of Armstrong’s Total Acoustics collection, Ultima tiles combine sound absorption and sound blocking capabilities. With an NRC rating of 0.70 to 0.90, these tiles absorb unwanted sound within a room, while the CAC rating of 35 to 40 helps prevent sound from traveling between rooms. This makes them an ideal solution for open offices, private meeting rooms, and classrooms where controlling sound is essential.

4. Variety of Sizes and Shapes

Ultima tiles are available in multiple sizes and shapes, including standard 24″x24″ and 24″x48″ tiles. These options allow you to choose the size that best fits your ceiling grid system and design preferences. Some models even come in custom sizes or non-standard shapes, giving you more creative flexibility when designing your space.

5. Fire Performance

Ultima ceiling tiles are Class A fire-rated, meaning they meet the highest standards for fire safety. This makes them a safe option for public spaces and commercial environments where fire resistance is a critical concern.

How to Install Armstrong Ultima Ceiling Tile

Professional contractors or experienced DIY enthusiasts can easily install Armstrong Ultima Ceiling Tiles, depending on the project’s size and complexity. Here’s a basic guide on how to approach the installation:

1. Prepare the Space

Before installing the ceiling tiles, it’s important to ensure the space is properly prepared. This includes removing any old ceiling materials, checking for structural issues, and making sure the ceiling grid is securely in place. If you’re installing in a commercial space, be sure to check local building codes and regulations for specific requirements.

2. Install the Grid System

If you don’t already have a ceiling grid system in place, you’ll need to install one before adding the tiles. Armstrong offers a variety of grid systems, including Prelude and Suprafine, which are compatible with Ultima ceiling tiles. Measure and install the grid carefully according to your room’s layout, paying particular attention to corners and edges.

3. Install the Tiles

Once the grid is installed, you can begin placing the tiles. Start at one corner of the room and work your way across, making sure each tile fits snugly into the grid. Armstrong Ultima tiles are lightweight, making them easy to handle and position during installation. If you need to cut tiles to fit around fixtures or in tight spaces, use a sharp utility knife to create clean, precise cuts.

4. Finishing Touches

After all the tiles are in place, take a moment to ensure they are properly aligned and seated in the grid. If you’ve installed tiles with integrated lighting or vents, make sure these elements are securely in place and functioning properly. Finally, clean up any debris and wipe down the surface of the tiles to remove dust or fingerprints.

Conclusion: Why Armstrong Ultima Ceiling Tile is a Top Choice

The Armstrong Ultima Ceiling Tile is a versatile, high-performance solution for any space that requires both aesthetic appeal and acoustic control. With their superior sound absorption, clean modern design, and sustainable features, Ultima tiles are an excellent choice for commercial spaces like offices, hospitals, and schools.

Whether you’re installing them in a conference room to improve speech clarity, or in a healthcare setting to maintain a clean, sterile environment, Ultima ceiling tiles provide long-lasting durability and functionality.

Ceiling Grid Wire Hanger: Essential Guide for Installation and Maintenance

Ceiling grid wire hangers play a crucial role in the installation and maintenance of suspended ceiling systems. Whether you are setting up a new grid ceiling or repairing an existing one, understanding how to use and maintain these hangers effectively is vital. In this comprehensive guide, we’ll explore everything you need to know about ceiling grid wire hanger, including their types, installation methods, and maintenance tips.

Ceiling Grid Wire Hangers

What Are Ceiling Grid Wire Hangers?

Ceiling grid wire hangers are metal wires used to support and stabilize the framework of a suspended ceiling system. These hangers ensure that the ceiling grid remains securely in place and can handle the weight of ceiling tiles, lights, and other fixtures. Typically made from galvanized steel or other durable metals, ceiling grid wire hangers are essential for maintaining the structural integrity of ceiling installations.

Types of Ceiling Grid Wire Hangers

There are several types of ceiling grid wire hangers, each designed for specific purposes and installation scenarios:

  1. Pre-Cut Wire Hangers: Pre-cut wire hangers come in standardized lengths and are ready to use straight out of the package. They are ideal for quick installations where precise measurements are not critical.
  2. Adjustable Wire Hangers: Adjustable wire hangers offer flexibility in installation, allowing you to modify the length of the hanger to fit various ceiling heights. They are particularly useful in situations where exact measurements are required or when dealing with uneven ceiling surfaces.
  3. Drop Wire Hangers: Drop wire hangers are designed to provide vertical support to the ceiling grid. They are typically used in conjunction with other suspension systems, such as threaded rods, to secure the grid in place.
  4. J-Hooks: J-hooks are shaped like the letter “J” and are used to secure wires or cables along the ceiling grid. They help organize and support electrical and data cables, preventing them from sagging or becoming entangled.
  5. Loop Hangers: Loop hangers form a loop at the end of the wire and are used to anchor the ceiling grid to structural components, such as beams or rafters. They provide a stable attachment point for the grid system.

Installation of Ceiling Grid Wire Hangers

Proper installation of ceiling grid wire hangers is crucial for ensuring a stable and durable ceiling system. Follow these steps for an effective installation:

1. Plan and Measure

Before installing the ceiling grid wire hangers, it’s important to plan the layout of your ceiling grid. Measure the dimensions of the room and determine the placement of the grid system. Mark the locations where the hangers will be installed.

2. Install Main Tees

The main tees are the primary support beams of the ceiling grid. Secure them in place according to the manufacturer’s instructions. Ensure that they are level and properly aligned.

3. Attach Wire Hangers

  1. Determine Hanger Placement: Based on your measurements and the layout of the main tees, decide where to place the wire hangers. Typically, hangers should be spaced 4 to 6 feet apart along the length of the main tees.
  2. Cut and Position Wire: If using pre-cut wire hangers, position them vertically from the ceiling to the main tees. For adjustable hangers, cut the wire to the desired length and attach it to the ceiling and main tees.
  3. Secure the Wire: Use wire clips or fasteners to secure the wire hangers to the ceiling structure. Make sure the wire is tightly secured and does not move.
  4. Attach to Main Tees: Connect the wire hangers to the main tees using appropriate fasteners or clips. Ensure that the connection is secure and that the grid is properly supported.

4. Check Alignment and Stability

After attaching all the wire hangers, check the alignment and stability of the ceiling grid. Ensure that the grid is level and that there are no loose or wobbly sections. Adjust the hangers as needed to achieve proper alignment.

Read too: Bathroom Flooded Through the Ceiling: A Comprehensive Guide

Maintenance Tips for Ceiling Grid Wire Hangers

Regular maintenance of ceiling grid wire hangers is essential to ensure the long-term stability and safety of your ceiling system. Follow these tips for effective maintenance:

1. Inspect Regularly

Periodically inspect the ceiling grid wire hangers for signs of wear or damage. Check for rust, corrosion, or any signs of deterioration. Replace any damaged hangers immediately to prevent structural issues.

2. Tighten Loose Hangers

Check for any loose wire hangers and tighten them as needed. Loose hangers can cause the ceiling grid to sag or shift, leading to potential safety hazards.

3. Clear Debris

Keep the area around the ceiling grid clean and free of debris. Accumulated dust or debris can affect the performance of the hangers and the stability of the ceiling grid.

4. Address Water Damage

If you notice any signs of water damage or leaks, address the issue promptly. Water damage can weaken the ceiling grid and wire hanger, leading to potential structural problems.

5. Follow Manufacturer’s Guidelines

Always follow the manufacturer’s guidelines for installation and maintenance. Different ceiling grid systems may have specific requirements for wire hangers and their placement.

Conclusion

Ceiling grid wire hanger are a fundamental component of suspended ceiling systems, providing essential support and stability. Understanding the different types of hangers and how to install and maintain them is crucial for ensuring a secure and long-lasting ceiling installation. By following the guidelines and maintenance tips outlined in this article, you can ensure that your ceiling grid remains in excellent condition and performs effectively over time.


Drop Ceiling Tiles 24 X 48: Installation, Benefits, and Design Ideas

Drop ceiling tiles, also known as suspended ceiling tiles, are a popular choice for both residential and commercial spaces. Their versatility, ease of installation, and aesthetic appeal make them a go-to solution for many property owners. Among the various sizes available, Drop Ceiling Tiles 24 X 48 are particularly favored for their ability to cover large areas efficiently. This comprehensive guide will explore the benefits, installation process, and design ideas for Drop Ceiling Tiles 24 X 48, helping you transform any space effortlessly.

Drop Ceiling Tiles 24 X 48

What Are Drop Ceiling Tiles 24 X 48?

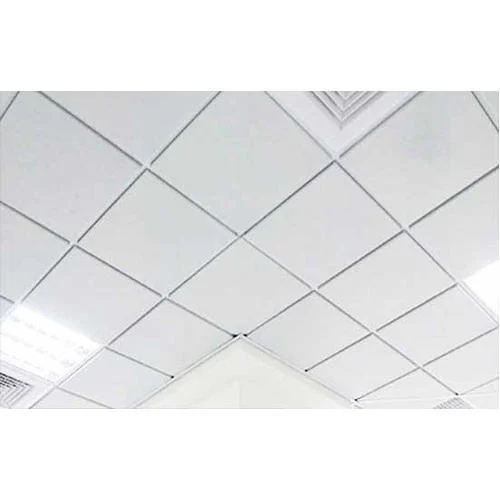
Drop ceiling tiles are panels designed to fit into a grid system suspended below the main structural ceiling. The 24 X 48 dimension refers to tiles that are 24 inches wide and 48 inches long, making them ideal for covering substantial areas with fewer seams and breaks.

Key Features:

  • Standard Size: The 24 X 48 dimension is a standard size in the industry, making it easy to find and replace tiles.
  • Material Variety: Available in various materials, including mineral fiber, fiberglass, metal, and PVC.
  • Aesthetic Versatility: Comes in different textures, patterns, and colors to suit diverse design preferences.

Benefits of Drop Ceiling Tiles 24 X 48

1. Easy Installation

One of the primary advantages of drop ceiling tiles is their straightforward installation process. The tiles are designed to fit into a grid system that can be installed quickly, even by DIY enthusiasts.

Installation Benefits:

  • Quick Setup: The grid system is easy to assemble, and the tiles simply drop into place.
  • Minimal Disruption: Installation can be done without significant disruptions to the existing space.
  • Accessibility: The tiles can be easily removed for access to electrical wiring, plumbing, and HVAC systems.

Read too: Kitchen Lighting For A Vaulted Ceiling: Illuminating Your Space with Style and Functionality

2. Aesthetic Appeal

Drop Ceiling Tiles 24 X 48 offer a wide range of design options, allowing you to create a polished and professional look in any room. Whether you prefer a classic, modern, or industrial style, there are tiles to match your vision.

Aesthetic Benefits:

  • Variety of Designs: Choose from smooth, textured, patterned, or metallic finishes.
  • Customizable: Paintable tiles offer further customization to match your interior decor.
  • Seamless Look: Larger tiles reduce the number of seams, creating a cleaner, more streamlined appearance.

3. Acoustic Performance

Many drop ceiling tiles are designed with sound-absorbing properties, making them an excellent choice for improving the acoustics of a room. This is particularly beneficial in offices, classrooms, and entertainment areas.

Acoustic Benefits:

  • Noise Reduction: Helps reduce noise levels and improve sound quality within a space.
  • Privacy: Enhances privacy by minimizing sound transmission between rooms.
  • Comfort: Creates a more comfortable and productive environment by reducing ambient noise.

4. Energy Efficiency

Drop ceiling tiles can also contribute to energy efficiency by providing an additional layer of insulation. This helps maintain a consistent temperature within a room, reducing heating and cooling costs.

Energy Benefits:

  • Thermal Insulation: Insulates the space, keeping it warmer in the winter and cooler in the summer.
  • Reflective Surfaces: Some tiles have reflective surfaces that enhance lighting efficiency, reducing the need for additional light sources.

5. Concealing Imperfections

Drop Ceiling Tiles 24 X 48 are perfect for concealing imperfections in the existing ceiling, such as cracks, stains, or unsightly wiring. They provide a quick and effective solution to improve the overall look of a room.

Concealment Benefits:

  • Hides Flaws: Covers up imperfections, giving the ceiling a smooth and clean appearance.
  • Improves Aesthetics: Enhances the overall aesthetic of the room without major renovations.
  • Functional: Allows easy access to hidden systems for maintenance and repairs.

Drop Ceiling Tiles 24 X 48: Installation Guide

Planning and Preparation

Proper planning and preparation are crucial for a successful drop ceiling installation. Here are the steps to get started:

  1. Measure the Space: Accurately measure the dimensions of the room to determine the number of tiles and grid components needed.
  2. Choose Materials: Select the type of tiles and grid system that best suits your design and functional requirements.
  3. Gather Tools: Ensure you have all the necessary tools, including a tape measure, level, drill, and cutting tools.

Installing the Grid System

The grid system forms the framework for the drop ceiling tiles. Follow these steps to install it:

  1. Mark the Perimeter: Use a level to mark the perimeter of the ceiling where the grid will be installed. Ensure the marks are even to maintain a level ceiling.
  2. Install Wall Angles: Attach wall angles along the perimeter marks. These will support the grid system.
  3. Install Main Runners: Install main runners across the room, securing them to the wall angles. Use a laser level to ensure they are perfectly straight.
  4. Install Cross Tees: Install cross tees perpendicular to the main runners to create a grid pattern. The intersections should form openings that match the size of your tiles.

Placing the Tiles

Once the grid system is in place, it’s time to install the tiles:

  1. Cut Tiles to Size: If necessary, cut the tiles to fit around fixtures or along the edges of the room.
  2. Place Tiles in Grid: Carefully lift each tile and place it into the grid opening. Ensure they are seated properly and lie flat.
  3. Adjust as Needed: Make any necessary adjustments to ensure the tiles fit snugly and the grid remains level.

Design Ideas for Drop Ceiling Tiles 24 X 48

1. Modern Minimalism

For a sleek, modern look, opt for smooth, white drop ceiling tiles. This design works well in contemporary spaces, providing a clean and uncluttered appearance.

Tips:

  • Pair with Recessed Lighting: Recessed lighting enhances the minimalist aesthetic and provides ample illumination.
  • Use Monochrome Color Scheme: Keep the color scheme simple and monochromatic for a cohesive look.

2. Industrial Chic

Metallic drop ceiling tiles can create an industrial chic vibe, perfect for lofts and urban spaces. Choose tiles with a metallic finish or exposed grid systems to achieve this look.

Tips:

  • Exposed Ductwork: Combine with exposed ductwork and brick walls for a true industrial feel.
  • Edison Bulb Lighting: Use Edison bulb lighting fixtures to add warmth and character to the space.

3. Classic Elegance

For a more traditional or elegant space, consider textured or patterned drop ceiling tiles. These tiles add depth and interest to the ceiling, enhancing the room’s overall decor.

Tips:

  • Crown Molding: Add crown molding around the edges for a refined touch.
  • Chandeliers: Install chandeliers or ornate light fixtures to complement the classic design.

4. Creative and Playful

In spaces like children’s rooms or creative studios, use colorful or patterned tiles to add a playful touch. Mix and match different designs to create a unique and lively environment.

Tips:

  • Bold Colors: Don’t be afraid to use bold, bright colors that make the space fun and inviting.
  • Interactive Elements: Consider incorporating interactive elements like magnetic or whiteboard tiles.

Maintaining Drop Ceiling Tiles 24 X 48

Maintaining drop ceiling tiles is relatively easy, ensuring they remain attractive and functional for years to come. Here are some maintenance tips:

Regular Cleaning

Dust and dirt can accumulate on ceiling tiles over time. Regular cleaning helps maintain their appearance and longevity.

Cleaning Tips:

  • Dust Regularly: Use a soft cloth or duster to remove dust from the surface of the tiles.
  • Spot Clean: For stubborn stains, use a mild detergent solution and a soft cloth to gently clean the affected area.
  • Avoid Excess Moisture: Be careful not to saturate the tiles with water, as excessive moisture can cause damage.

Inspection and Replacement

Regularly inspect the tiles and grid system for any signs of damage or wear.

Inspection Tips:

  • Check for Damage: Look for any cracked or sagging tiles and replace them promptly.
  • Inspect Grid System: Ensure the grid system remains securely fastened and in good condition.
  • Replace as Needed: Keep spare tiles on hand for quick replacements when necessary.

Conclusion

Drop Ceiling Tiles 24 X 48 are a versatile and practical solution for enhancing the aesthetics and functionality of any space. Whether you’re renovating an office, updating a retail store, or refreshing a room in your home, these tiles offer a range of benefits, including easy installation, aesthetic appeal, acoustic performance, energy efficiency, and the ability to conceal imperfections.

By following the installation guide and exploring various design ideas, you can create a ceiling that not only looks great but also meets your specific needs. Regular maintenance ensures your ceiling remains in top condition, providing lasting beauty and functionality.

Wood Plank Ceiling In Bathroom: A Stylish and Practical Guide

When it comes to home decor, the wood plank ceiling in bathroom trend has been gaining popularity for its timeless appeal and versatility. Wood plank ceilings add warmth, character, and a touch of nature to any space, including bathrooms. This article explores the benefits, challenges, installation tips, and maintenance of wood plank ceilings in bathrooms, helping you make an informed decision for your next renovation project.

Wood Plank Ceiling In Bathroom

Why Choose a Wood Plank Ceiling in the Bathroom?

Choosing a wood plank ceiling in the bathroom can be an excellent design choice for various reasons. Here’s why you might consider this option:

1. Aesthetic Appeal

Wood plank ceilings bring a natural, rustic charm to your bathroom. They can transform a standard space into a cozy retreat, adding texture and depth to the room. The natural variations in wood grain and color create a unique and elegant look that complements various design styles, from traditional to contemporary.

Read too: Discovering the Charm of Nautical Outdoor Ceiling Fans for Your Coastal Retreat: Sail into Style

2. Warmth and Comfort

Wood has inherent insulating properties that can make your bathroom feel warmer and more inviting. This added warmth is especially valuable in bathrooms where tile or other cold materials are commonly used.

3. Customization Options

Wood plank ceilings offer a wide range of customization options. You can choose from different wood species, finishes, and plank sizes to match your bathroom’s decor. Whether you prefer a sleek, modern finish or a more rustic, distressed look, there’s a wood plank option to fit your style.

4. Durability

When properly treated and installed, wood plank ceilings are quite durable. They can withstand the normal wear and tear of a bathroom environment, provided that moisture and humidity are managed effectively.

Challenges of Installing Wood Plank Ceilings in Bathrooms

While wood plank ceilings offer many benefits, there are also some challenges to consider. Being aware of these challenges will help you plan and execute your project more effectively.

1. Moisture Management

Bathrooms are inherently humid environments, which can pose a challenge for wood materials. Excess moisture can lead to warping, cracking, or mold growth if not properly managed. It’s crucial to address moisture issues to ensure the longevity of your wood plank ceiling.

2. Maintenance Requirements

Wood plank ceilings require regular maintenance to keep them looking their best. This includes cleaning and periodic sealing to protect the wood from moisture damage. Unlike more conventional ceiling materials, wood needs extra care to maintain its appearance and integrity.

3. Installation Complexity

Installing a wood plank ceiling can be more complex than other ceiling types. It often requires careful measuring, cutting, and fitting to ensure a seamless and professional finish. Additionally, the installation process may involve extra steps such as adding a vapor barrier to protect the wood from moisture.

Installing a Wood Plank Ceiling in Your Bathroom

Proper installation is key to the success of a wood plank ceiling in the bathroom. Here’s a step-by-step guide to help you with the installation process:

1. Prepare the Space

Before starting the installation, prepare the bathroom by removing any existing ceiling materials and ensuring the surface is clean and dry. Check for any signs of moisture damage or leaks and address these issues before proceeding.

2. Choose the Right Wood

Select a type of wood that is suitable for bathroom environments. Consider options like cedar or pine, which are more resistant to moisture. Additionally, choose a finish that will protect the wood from water damage and staining.

3. Install a Vapor Barrier

To protect the wood from moisture, install a vapor barrier on the ceiling before attaching the wood planks. This barrier will help prevent condensation from affecting the wood and reduce the risk of mold growth.

4. Plan and Measure

Carefully plan and measure the layout of the wood planks. Start by marking a reference line on the ceiling to ensure a straight and even installation. Measure the space to determine the number of planks needed and plan for any necessary cuts or adjustments.

5. Install the Planks

Begin installing the wood planks from one side of the room and work your way across. Use a level to ensure that each plank is aligned properly. Attach the planks to the ceiling using nails or adhesive, depending on the installation method you choose.

6. Finish the Installation

Once all the planks are installed, fill any gaps or nail holes with wood filler. Sand the ceiling to ensure a smooth surface and apply a finish or sealant to protect the wood from moisture and staining.

Maintaining Your Wood Plank Ceiling

To keep your wood plank ceiling in the bathroom looking beautiful and functioning well, regular maintenance is essential. Here are some tips for maintaining your wood ceiling:

1. Clean Regularly

Dust and clean the wood plank ceiling regularly to prevent the buildup of grime and dirt. Use a soft cloth or duster to avoid scratching the wood’s surface. For deeper cleaning, use a wood-safe cleaner that won’t damage the finish.

2. Monitor Moisture Levels

Keep an eye on the humidity levels in your bathroom to prevent excess moisture from affecting the wood. Use an exhaust fan to reduce humidity and address any leaks or water issues promptly.

3. Refinish as Needed

Over time, the finish on your wood planks may need to be reapplied to maintain protection against moisture and stains. Follow the manufacturer’s recommendations for refinishing and sealing the wood.

4. Inspect for Damage

Regularly inspect the wood plank ceiling for signs of damage, such as warping or mold growth. Address any issues immediately to prevent further damage and maintain the integrity of the ceiling.

Conclusion

A wood plank ceiling in the bathroom can be a stylish and functional addition to your home. It offers aesthetic appeal, warmth, and customization options while adding a unique touch to your bathroom. However, it’s important to be aware of and address potential challenges such as moisture management and maintenance requirements.

By following proper installation techniques and maintaining the wood plank ceiling regularly, you can enjoy its beauty and functionality for years to come. Whether you’re renovating an existing bathroom or designing a new one, consider the benefits of a wood plank ceiling as a way to enhance your space.

Gypsum Board Ceiling Tile: Benefits, Installation, and Maintenance

When it comes to enhancing the aesthetics and functionality of your interior spaces, Gypsum Board Ceiling Tile offer a sophisticated and practical solution. These tiles, often known for their durability and versatility, can transform any room while providing excellent performance. Whether you’re renovating an old space or designing a new one, understanding the benefits, installation, and maintenance of gypsum board ceiling tiles can help you make informed decisions and achieve the desired results.

Gypsum Board Ceiling Tiles

What Are Gypsum Board Ceiling Tiles?

Gypsum Board Ceiling Tiles are ceiling panels made from gypsum, a naturally occurring mineral. These tiles are often used in both residential and commercial settings to create smooth, clean, and visually appealing ceilings. Gypsum board, also known as drywall or plasterboard, is a popular choice due to its ease of installation, fire resistance, and soundproofing qualities.

Key Features of Gypsum Board Ceiling Tiles

  1. Durability: Gypsum board ceiling tiles are sturdy and long-lasting, making them a reliable choice for various applications.
  2. Fire Resistance: Gypsum is naturally fire-resistant, which helps improve the fire safety of a building.
  3. Soundproofing: Gypsum board tiles offer excellent sound insulation, reducing noise transmission between rooms.
  4. Aesthetic Appeal: These tiles provide a smooth and even surface that can be painted or textured to match your decor.
  5. Ease of Installation: Gypsum board ceiling tiles are relatively easy to install, making them a popular choice for both DIY enthusiasts and professionals.

Read too: Striped Schoolhouse Ceiling Light Fixtures: Unveiling the Timeless Charm

Benefits of Gypsum Board Ceiling Tiles

Gypsum Board Ceiling Tiles offer several advantages that make them a popular choice for both residential and commercial spaces. Here’s a closer look at their benefits:

1. Enhanced Aesthetics

Gypsum board ceiling tiles provide a sleek and modern look that enhances the overall appearance of a room. They create a smooth and uniform surface, which can be painted or finished in various ways to match your interior design.

2. Improved Fire Safety

One of the standout features of gypsum board is its fire-resistant properties. Gypsum contains water in its crystalline structure, which helps to slow down the spread of fire. This makes gypsum board ceiling tiles an excellent choice for improving the fire safety of your home or business.

3. Sound Insulation

Gypsum board ceiling tiles are effective at reducing noise between rooms. Their dense and solid structure helps to absorb and block sound, providing a quieter and more comfortable environment.

4. Cost-Effective

Compared to other ceiling materials, gypsum board ceiling tiles are relatively affordable. Their cost-effectiveness, combined with their durability and ease of installation, makes them a popular choice for many homeowners and businesses.

5. Low Maintenance

Gypsum board ceiling tiles are easy to maintain. They can be cleaned with a damp cloth or mild detergent, and any damage can often be repaired with a simple patching process. This low-maintenance quality contributes to their long-term appeal.

Types of Gypsum Board Ceiling Tiles

There are several types of gypsum board ceiling tiles available, each offering unique features and benefits. Understanding the different types can help you choose the best option for your needs.

1. Standard Gypsum Board Tiles

These are the most common type of gypsum board tiles. They are typically used for basic ceiling applications and provide a smooth, even surface that can be painted or textured.

2. Acoustic Gypsum Board Tiles

Acoustic gypsum board tiles are designed to enhance soundproofing in a room. They have special properties that help to absorb and reduce noise, making them ideal for spaces where sound control is important, such as offices or home theaters.

3. Fire-Resistant Gypsum Board Tiles

These tiles offer enhanced fire resistance, making them suitable for applications where fire safety is a priority. They are often used in commercial buildings and areas with strict fire safety regulations.

4. Moisture-Resistant Gypsum Board Tiles

Moisture-resistant gypsum board tiles are designed for use in areas with high humidity, such as bathrooms or kitchens. They are treated to resist moisture and prevent mold growth, ensuring durability and longevity in challenging environments.

How to Install Gypsum Board Ceiling Tiles

Installing gypsum board ceiling tiles can be a straightforward process, especially if you follow the correct steps and use the right tools. Here’s a step-by-step guide to help you with the installation:

1. Prepare the Area

Before installation, ensure that the ceiling surface is clean, dry, and free from any debris. Remove any existing ceiling tiles or fixtures that may obstruct the installation process.

2. Measure and Cut Tiles

Measure the dimensions of the ceiling and cut the gypsum board tiles to fit the space. Use a straightedge and utility knife to make clean, accurate cuts.

3. Install the Ceiling Grid

For a suspended ceiling, install a metal grid system that will support the gypsum board tiles. Follow the manufacturer’s instructions to ensure proper alignment and stability.

4. Attach the Tiles

Place the gypsum board tiles into the ceiling grid or directly onto the ceiling surface, depending on your installation method. Secure the tiles using appropriate fasteners, such as screws or adhesive, ensuring that they are properly aligned and level.

5. Finish and Paint

Once the tiles are installed, apply joint compound to any seams or joints and sand them smooth. Prime and paint the tiles as desired to achieve the final finish.

6. Install Fixtures

Reinstall any ceiling fixtures or fittings, such as lights or fans, once the tiles are securely in place and finished.

Maintenance and Care for Gypsum Board Ceiling Tiles

Maintaining gypsum board ceiling tiles is relatively simple, but regular care can help prolong their lifespan and keep them looking their best.

1. Regular Cleaning

Dust and dirt can accumulate on the surface of gypsum board ceiling tiles. Use a soft, dry cloth or a vacuum with a brush attachment to gently clean the tiles. For more stubborn stains, use a mild detergent and a damp cloth, but avoid excessive moisture.

2. Inspect for Damage

Periodically inspect your ceiling tiles for any signs of damage, such as cracks or dents. Address any issues promptly to prevent further damage and maintain the appearance of the tiles.

3. Repair Damage

Minor damage to gypsum board ceiling tiles can be repaired with joint compound and paint. For more significant damage, you may need to replace the affected tiles or seek professional assistance.

4. Monitor Humidity Levels

In areas with high humidity, such as bathrooms or kitchens, ensure that moisture levels are controlled to prevent mold growth and damage to the tiles. Use exhaust fans or dehumidifiers as needed.

Conclusion

Gypsum Board Ceiling Tile offer a practical and stylish solution for enhancing the look and functionality of your interior spaces. With their durability, fire resistance, and soundproofing qualities, these tiles are a popular choice for both residential and commercial applications. By understanding the benefits, types, and installation process of gypsum board ceiling tiles, you can make informed decisions and achieve a beautiful and functional ceiling in your home or business. Proper maintenance and care will help ensure that your ceiling tiles remain in excellent condition for years to come.

Drop Ceiling Air Diffuser: Enhance Indoor Air Quality

When it comes to creating a comfortable indoor environment, the importance of proper air distribution cannot be overstated. A drop ceiling air diffuser is a crucial component in modern HVAC systems, ensuring that air is evenly distributed throughout a room. This article explores the benefits, types, installation processes, and considerations for selecting the right drop ceiling air diffuser for your needs.

Drop Ceiling Air Diffuser

Why Choose a Drop Ceiling Air Diffuser?

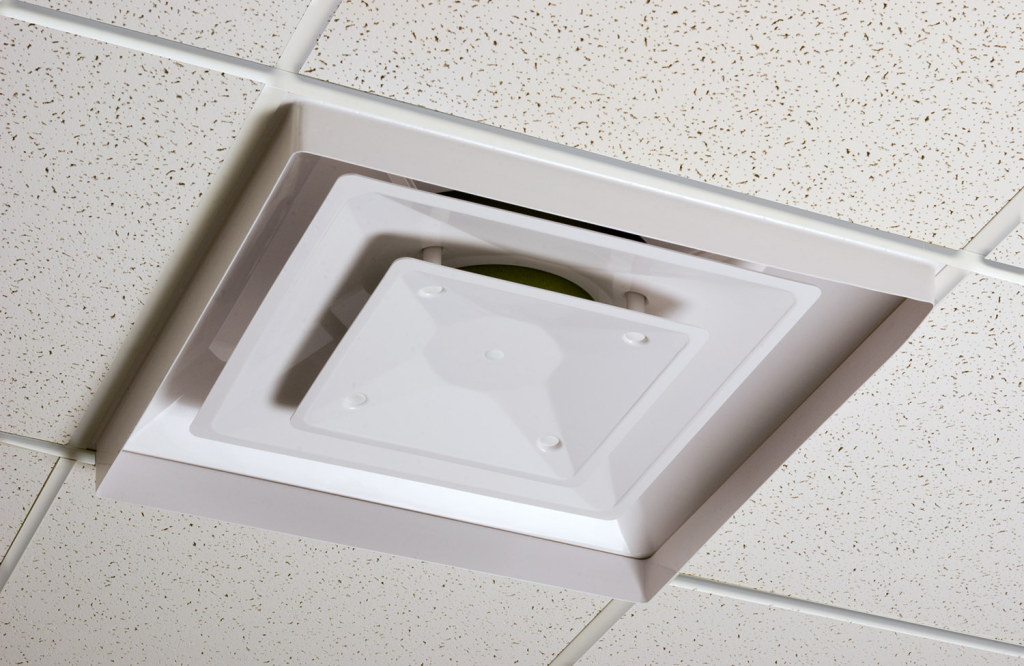
Drop ceiling air diffusers are designed to integrate seamlessly with suspended ceiling systems. Here are several reasons why these diffusers are an excellent choice for maintaining optimal indoor air quality:

1. Efficient Air Distribution

A drop ceiling air diffuser ensures that air is evenly distributed across the entire room. This helps maintain consistent temperatures and prevents hot or cold spots, leading to improved comfort.

2. Improved Air Quality

By promoting better air circulation, diffusers help reduce the concentration of pollutants and allergens in the air. This is particularly important in environments such as offices, schools, and healthcare facilities.

Read too: Striped Schoolhouse Ceiling Light Fixtures: Unveiling the Timeless Charm

3. Aesthetic Integration

Drop ceiling air diffusers are designed to blend in with the ceiling, maintaining the aesthetic appeal of the room. They are available in various styles and finishes to match the ceiling tiles.

4. Energy Efficiency

Proper air distribution can enhance the efficiency of your HVAC system, reducing energy consumption and lowering utility bills. This is because the system doesn’t have to work as hard to maintain the desired temperature.

5. Noise Reduction

High-quality diffusers are designed to operate quietly, minimizing noise levels and creating a more pleasant indoor environment. This is particularly beneficial in settings where noise can be a distraction, such as offices and classrooms.

Types of Drop Ceiling Air Diffusers

When selecting a drop ceiling air diffuser, it’s important to consider the different types available and their specific applications. Here are some common types of diffusers:

1. Square Ceiling Diffusers

These are the most common type of diffusers used in drop ceilings. They are typically designed with multiple directional slots to distribute air evenly across the room.

2. Round Ceiling Diffusers

Round diffusers are often used in spaces where a more even and 360-degree air distribution is required. They are ideal for larger rooms and open-plan areas.

3. Linear Slot Diffusers

Linear slot diffusers are used to create a sleek, modern look while providing effective air distribution. They are often used in commercial spaces and can be integrated into the architectural design.

4. Plaque Diffusers

Plaque diffusers feature a central plaque that directs air flow outward, providing a high level of air mixing and uniform temperature distribution. They are commonly used in offices and retail spaces.

How to Install a Drop Ceiling Air Diffuser

Installing a drop ceiling air diffuser is a straightforward process, but it requires careful planning and execution to ensure optimal performance. Here are the basic steps to guide you through the installation:

1. Preparation

  • Choose the Right Diffuser: Select the type and size of diffuser that best fits your needs and the layout of the room.
  • Gather Tools and Materials: You’ll need a ladder, measuring tape, cutting tools, ductwork, and screws or mounting brackets.

2. Mark the Location

  • Locate the HVAC Duct: Identify the location of the HVAC duct in the ceiling.
  • Measure and Mark: Measure the dimensions of the diffuser and mark the corresponding location on the ceiling tile.

3. Cut the Ceiling Tile

  • Remove the Tile: Carefully remove the ceiling tile where the diffuser will be installed.
  • Cut the Opening: Using a cutting tool, cut an opening in the tile according to the measurements. Make sure the cut is clean and precise.

4. Install the Diffuser

  • Attach the Diffuser: Secure the diffuser to the HVAC duct using screws or mounting brackets. Ensure it is firmly attached and aligned with the opening in the ceiling tile.
  • Replace the Tile: Place the modified ceiling tile back into the grid, ensuring the diffuser fits snugly into the opening.

5. Check for Airflow

  • Test the System: Turn on the HVAC system and check the airflow from the diffuser. Make any necessary adjustments to ensure optimal performance.

Tips for Choosing the Right Drop Ceiling Air Diffuser

Selecting the right diffuser can make a significant difference in the effectiveness of your HVAC system. Here are some tips to help you make the best choice:

1. Consider the Room Size

The size of the room will determine the type and number of diffusers needed. Larger rooms may require multiple diffusers to ensure even air distribution.

2. Match the Decor

Choose a diffuser that complements the aesthetic of the room. Consider the style, color, and finish to ensure it blends seamlessly with the ceiling tiles.

3. Evaluate Airflow Requirements

Consider the airflow requirements of the room. High-traffic areas or rooms with specific ventilation needs may require specialized diffusers.

4. Check for Noise Levels

Select a diffuser designed to minimize noise. This is particularly important in environments where quiet operation is essential.

5. Energy Efficiency

Look for energy-efficient diffusers that can help reduce energy consumption and lower utility bills. Proper air distribution can significantly improve the efficiency of your HVAC system.

Maintaining Your Drop Ceiling Air Diffuser

Regular maintenance is crucial to ensure the longevity and performance of your air diffusers. Here are some maintenance tips:

1. Regular Cleaning

Dust and clean the diffusers regularly to prevent the buildup of dust and debris. This can be done using a soft cloth or vacuum cleaner attachment.

2. Inspect for Damage

Periodically inspect the diffusers for any signs of damage or wear. Replace any damaged components promptly to maintain optimal performance.

3. Check Airflow

Regularly check the airflow from the diffusers to ensure they are functioning correctly. If you notice any issues, such as reduced airflow or unusual noises, investigate and address the problem immediately.

4. Adjust as Needed

Adjust the direction and flow of air from the diffusers as needed to maintain a comfortable indoor environment. This can be particularly important in changing seasons or varying room usage.

Enhancing Indoor Comfort with Additional Solutions

In addition to installing drop ceiling air diffusers, consider these additional solutions to enhance indoor comfort:

1. Thermostats

Install programmable thermostats to better control the temperature and energy usage in your space. This allows for more precise adjustments based on occupancy and time of day.

2. Air Purifiers

Consider using air purifiers to improve indoor air quality further. These devices can help remove pollutants and allergens, creating a healthier environment.

3. Ceiling Fans

Ceiling fans can work in conjunction with air diffusers to improve air circulation and maintain a consistent temperature throughout the room.

4. Insulation

Ensure your space is well-insulated to prevent energy loss and maintain a comfortable indoor environment. Proper insulation can work hand-in-hand with your HVAC system to enhance efficiency.

Conclusion

A drop ceiling air diffuser is a vital component for maintaining optimal indoor air quality and comfort. By selecting the right type, ensuring proper installation, and performing regular maintenance, you can significantly improve the performance of your HVAC system. Whether you’re upgrading an office, school, or healthcare facility, these diffusers provide an efficient and aesthetically pleasing solution for air distribution.

Gypsum Suspended Ceiling Tiles: Enhancing Interiors with Style and Functionality

When it comes to interior design and building construction, Gypsum Suspended Ceiling Tiles are a popular choice. These tiles offer a perfect blend of aesthetic appeal and practical benefits, making them an ideal solution for both residential and commercial spaces. This comprehensive guide will delve into the various aspects of Gypsum Suspended Ceiling Tiles, including their benefits, installation process, maintenance tips, and more.

Gypsum Suspended Ceiling Tiles

What Are Gypsum Suspended Ceiling Tiles?

Gypsum Suspended Ceiling Tiles are a type of ceiling system that consists of a metal grid suspended from the structural ceiling and lightweight gypsum tiles that are placed within this grid. These tiles are made from gypsum, a soft sulfate mineral composed of calcium sulfate dihydrate. Gypsum is widely used in construction due to its fire-resistant properties, ease of installation, and ability to create a smooth, uniform surface.

Benefits of Gypsum Suspended Ceiling Tiles

1. Aesthetic Appeal

Gypsum Suspended Ceiling Tiles offer a clean and modern look that enhances the overall aesthetic of any space. They come in various designs, textures, and finishes, allowing for customization to match the interior decor.

2. Acoustic Properties

These tiles are excellent at improving acoustics by absorbing sound, reducing echo, and minimizing noise levels. This makes them ideal for offices, schools, hospitals, and other environments where sound control is crucial.

3. Fire Resistance

One of the standout features of gypsum is its natural fire-resistant properties. Gypsum Suspended Ceiling Tiles provide an additional layer of fire protection, helping to prevent the spread of flames and providing valuable time for evacuation during emergencies.

Read too: Discovering the Charm of Nautical Outdoor Ceiling Fans for Your Coastal Retreat: Sail into Style

4. Easy Installation and Maintenance

Gypsum Suspended Ceiling Tiles are relatively easy to install and maintain. The suspension system allows for quick access to the space above the ceiling, making it convenient for repairs, upgrades, or maintenance of electrical and HVAC systems.

5. Thermal Insulation

These tiles offer good thermal insulation properties, helping to maintain a consistent indoor temperature and reducing energy costs.

Installation Process of Gypsum Suspended Ceiling Tiles

1. Planning and Preparation

Before installation, it’s essential to plan the layout and design of the suspended ceiling. Measurements of the room should be taken to determine the amount of material needed. Ensure all necessary tools and materials are on hand, including the suspension grid, gypsum tiles, and any additional components.

2. Installing the Suspension Grid

The first step in the installation process is to set up the suspension grid. This involves:

  • Marking the Ceiling: Use a laser level or chalk line to mark the desired height of the suspended ceiling on the walls.
  • Installing Wall Angles: Attach wall angles along the marked lines to provide support for the suspension grid.
  • Hanging Main Tees: Main tees are the primary support beams that run parallel to the longest walls. Hang them from the structural ceiling using wires or hangers.
  • Installing Cross Tees: Cross tees are placed perpendicular to the main tees, creating a grid pattern. They should be spaced according to the size of the gypsum tiles.

3. Placing the Gypsum Tiles

Once the grid is in place, the gypsum tiles can be installed. Simply lift the tiles and place them within the grid, ensuring they fit snugly and are level. Cut tiles as needed to fit around fixtures, vents, or other obstacles.

4. Finishing Touches

After all the tiles are in place, inspect the ceiling for any gaps or uneven areas. Make necessary adjustments to ensure a smooth, uniform appearance.

Maintenance Tips for Gypsum Suspended Ceiling Tiles

1. Regular Cleaning

Dust and dirt can accumulate on ceiling tiles over time. Regularly clean the tiles with a soft cloth or vacuum to maintain their appearance. For stubborn stains, use a mild detergent solution.

2. Inspect for Damage

Periodically inspect the ceiling tiles for any signs of damage, such as cracks, chips, or sagging. Replace any damaged tiles promptly to maintain the integrity and appearance of the ceiling.

3. Moisture Control

Gypsum tiles can be susceptible to moisture damage. Ensure that the space above the ceiling is well-ventilated and free from leaks. Address any moisture issues immediately to prevent damage to the tiles.

4. Avoid Heavy Loads

Avoid placing heavy objects on top of the suspended ceiling grid, as this can cause sagging or damage to the tiles.

Applications of Gypsum Suspended Ceiling Tiles

1. Residential Spaces

Gypsum Suspended Ceiling Tiles are a popular choice for residential spaces, including living rooms, kitchens, and basements. They provide a clean, modern look and offer practical benefits such as improved acoustics and fire resistance.

2. Commercial Spaces

In commercial settings, such as offices, retail stores, and restaurants, these tiles offer a professional appearance and enhance the overall ambiance. Their acoustic properties are particularly beneficial in open office environments where noise control is essential.

3. Educational Institutions

Schools and universities can benefit from the sound-absorbing qualities of Gypsum Suspended Ceiling Tile. They help create a conducive learning environment by reducing noise levels and improving speech clarity.

4. Healthcare Facilities

Hospitals and clinics require ceilings that are easy to clean, fire-resistant, and provide good acoustics. Gypsum Suspended Ceiling Tile meet these requirements, making them an ideal choice for healthcare facilities.

Conclusion

Gypsum Suspended Ceiling Tile are a versatile and practical solution for both residential and commercial spaces. Their aesthetic appeal, acoustic properties, fire resistance, and ease of installation make them a popular choice among homeowners and professionals alike. By understanding the benefits, installation process, and maintenance tips, you can make an informed decision when selecting Gypsum Suspended Ceiling Tile for your next project.

FRP Drop Ceiling Tile: Enhancing Durability and Aesthetics

When it comes to choosing the perfect ceiling solution for commercial and industrial spaces, FRP Drop Ceiling Tile stand out for their durability, ease of maintenance, and aesthetic appeal. In this comprehensive guide, we will delve into everything you need to know about FRP (Fiberglass Reinforced Plastic) drop ceiling tiles. From their benefits and installation process to maintenance tips and style options, this article will provide you with all the necessary information to make an informed decision for your ceiling needs.

Frp Drop Ceiling Tiles

What Are FRP Drop Ceiling Tiles?

FRP (Fiberglass Reinforced Plastic) drop ceiling tiles are a type of suspended ceiling system made from a composite material consisting of a polymer matrix reinforced with fibers. These tiles are designed to fit into a grid system, creating a false ceiling that is both functional and visually appealing. FRP drop ceiling tiles are known for their high strength, lightweight properties, and resistance to moisture, chemicals, and impact.

Benefits of FRP Drop Ceiling Tiles

FRP Drop Ceiling Tiles offer a multitude of advantages that make them an ideal choice for various settings:

Durability

One of the standout features of FRP drop ceiling tiles is their exceptional durability. The fiberglass reinforcement provides high impact resistance, making these tiles ideal for high-traffic areas or places where the ceiling may be subjected to occasional impacts.

Moisture and Mold Resistance

FRP materials are inherently resistant to moisture and mold, making these tiles an excellent option for environments with high humidity or where moisture is a concern. This includes spaces like bathrooms, kitchens, and basements.

Easy Maintenance

FRP drop ceiling tiles are easy to clean and maintain. Their smooth, non-porous surface allows for easy wiping and prevents the accumulation of dirt and grime. Regular cleaning with mild soap and water is usually sufficient to keep them looking pristine.

Fire Resistance

Many FRP drop ceiling tiles are manufactured to be fire-resistant, providing an added layer of safety. This makes them suitable for use in commercial buildings, schools, hospitals, and other public spaces where fire safety is a priority.

Aesthetic Appeal

Available in a variety of finishes and designs, FRP drop ceiling tiles can enhance the visual appeal of any space. Whether you prefer a sleek, modern look or a more traditional design, there are options to suit every aesthetic preference.

Lightweight and Easy Installation

Despite their strength, FRP tiles are lightweight, which simplifies the installation process. They can be easily cut to size and fit into standard grid systems, making them a convenient option for both new constructions and renovations.

Applications of FRP Drop Ceiling Tiles

Given their versatility and durability, FRP Drop Ceiling Tiles are suitable for a wide range of applications:

  • Commercial Spaces: Offices, retail stores, and restaurants can benefit from the clean, professional look and easy maintenance of FRP ceiling tiles.
  • Healthcare Facilities: Hospitals and clinics require hygienic, easy-to-clean surfaces, making FRP tiles an excellent choice.
  • Educational Institutions: Schools and universities can utilize FRP tiles in classrooms, labs, and hallways to withstand high usage.
  • Industrial Settings: Factories and warehouses need durable and fire-resistant ceiling solutions, which FRP tiles can provide.
  • Residential Areas: Homeowners can install FRP drop ceiling tiles in basements, kitchens, and bathrooms for added durability and moisture resistance.

Installation of FRP Drop Ceiling Tiles

Proper installation is crucial for the performance and longevity of FRP Drop Ceiling Tiles. Here’s a step-by-step guide to help you through the process:

Tools and Materials Needed

  • FRP drop ceiling tiles
  • Ceiling grid system
  • Tape measure
  • Level
  • Chalk line
  • Utility knife or tile cutter
  • Safety goggles and gloves
  • Ladder or scaffolding

Step-by-Step Installation Guide

  1. Measure the Space: Begin by measuring the dimensions of the room to determine the number of tiles and the layout of the grid system. Use a tape measure for accuracy.
  2. Install the Grid System: Mark the positions for the main runners and cross tees on the ceiling using a chalk line. Install the grid system according to the manufacturer’s instructions, ensuring it is level and securely fastened to the ceiling joists.
  3. Cut the Tiles to Size: Measure and cut the FRP tiles to fit into the grid system. Use a utility knife or tile cutter to make precise cuts. Always wear safety goggles and gloves when cutting the tiles.
  4. Place the Tiles: Once the grid system is in place and the tiles are cut to size, begin placing the FRP tiles into the grid. Start from one corner and work your way across the room, ensuring each tile is securely seated in the grid.
  5. Finishing Touches: After all the tiles are in place, inspect the ceiling for any gaps or misalignments. Make any necessary adjustments to ensure a seamless and professional finish.

Maintenance Tips for FRP Drop Ceiling Tiles

To keep your FRP Drop Ceiling Tiles looking their best and ensure their longevity, follow these maintenance tips:

Regular Cleaning

Dust the tiles regularly to prevent the buildup of dirt and grime. Use a soft cloth or duster to gently wipe the surface. For more thorough cleaning, use a mild soap and water solution. Avoid using abrasive cleaners or harsh chemicals that could damage the tiles.

Inspect for Damage

Periodically inspect the tiles for any signs of damage, such as cracks, chips, or stains. Promptly address any issues to prevent further damage and maintain the ceiling’s appearance and functionality.

Prevent Moisture Accumulation

While FRP tiles are moisture-resistant, it’s important to control humidity levels in the room to prevent mold and mildew growth. Ensure proper ventilation and use dehumidifiers if necessary.

Address Spills and Stains Promptly

If any spills occur, clean them up immediately to prevent staining. Use a damp cloth and mild detergent to gently remove any marks.

Choosing the Right FRP Drop Ceiling Tiles

When selecting FRP Drop Ceiling Tiles, consider the following factors to ensure you choose the right product for your needs:

Thickness and Size

FRP tiles come in various thicknesses and sizes. Thicker tiles generally offer better durability and sound insulation. Choose a size that fits your ceiling grid system and suits the room’s proportions.

Design and Finish

Select a design and finish that complements your space’s décor. FRP tiles are available in various colors, textures, and patterns, allowing you to customize the look of your ceiling.

Fire and Impact Ratings

Check the fire and impact ratings of the tiles to ensure they meet safety standards for your application. Higher ratings provide better protection and durability.

Manufacturer’s Warranty

Look for tiles that come with a manufacturer’s warranty. This indicates the quality and reliability of the product and provides peace of mind in case of defects or issues.

Read too: Exploring the Benefits and How-Tos of DIY Ceiling Cassette Mini Split Installation: Revolutionizing Comfort

Conclusion

FRP Drop Ceiling Tile are an excellent choice for anyone looking to enhance the durability, functionality, and aesthetic appeal of their ceiling. Their robust construction, moisture resistance, and ease of maintenance make them suitable for a wide range of applications, from commercial spaces to residential areas. By understanding the benefits, installation process, and maintenance tips, you can make an informed decision and enjoy the long-lasting performance of FRP ceiling tiles. Whether you’re renovating an existing space or designing a new one, FRP drop ceiling tiles offer a reliable and stylish solution.

Snap and Clip Ceiling: Transform Your Space

Ceiling design is a critical aspect of interior decoration that often goes unnoticed. However, innovative solutions like the Snap and Clip Ceiling system are changing the game, making ceiling installation and maintenance easier and more stylish than ever. This article delves into the benefits, installation process, and maintenance tips for the Snap and Clip Ceiling, providing you with all the information you need to transform your space.

Snap And Clip Ceiling

What is a Snap and Clip Ceiling?

The Snap and Clip Ceiling system is a modular ceiling solution that simplifies installation through a unique interlocking mechanism. This system allows for easy attachment and detachment of ceiling panels, making it an ideal choice for both residential and commercial spaces. The primary components include lightweight panels and clips that snap together securely, creating a seamless and polished look.

Read too: Exploring the Benefits and How-Tos of DIY Ceiling Cassette Mini Split Installation: Revolutionizing Comfort

Benefits

Opting for a Snap and Clip Ceiling comes with numerous advantages:

  1. Ease of Installation: The interlocking design significantly reduces installation time and complexity compared to traditional ceiling systems.
  2. Accessibility: The removable panels provide easy access to plumbing, electrical wiring, and other systems hidden above the ceiling.
  3. Aesthetic Appeal: With various designs and finishes available, these ceilings can enhance the visual appeal of any room.
  4. Durability: Made from high-quality materials, these panels are resistant to wear and tear, ensuring longevity.
  5. Sound Insulation: Many Snap and Clip Ceiling systems offer excellent acoustic properties, improving the sound quality within a room.

Applications of Snap and Clip Ceiling Systems

The versatility of the Snap and Clip Ceiling makes it suitable for a wide range of applications, including:

  • Residential Spaces: Ideal for living rooms, bedrooms, and kitchens, providing a modern and clean look.
  • Commercial Spaces: Perfect for offices, retail stores, and restaurants, offering both functional and aesthetic benefits.
  • Public Buildings: Used in schools, hospitals, and libraries, where easy access for maintenance is essential.

How to Install a Snap and Clip Ceiling

Installing a Snap and Clip Ceiling is straightforward, making it a favorite among DIY enthusiasts and professionals alike. Here’s a step-by-step guide to help you through the process:

Step 1: Prepare the Space

Before starting, ensure the ceiling area is clean and free from any obstructions. Measure the space accurately to determine the number of panels and clips needed.

Step 2: Install the Track System

The track system serves as the foundation for the ceiling panels. Secure the tracks to the ceiling, ensuring they are level and properly aligned.

Step 3: Attach the Clips

Once the track system is in place, attach the clips according to the manufacturer’s instructions. The clips are designed to hold the panels securely while allowing for easy removal when necessary.

Step 4: Snap in the Panels

Starting from one corner, begin snapping the panels into place. Ensure each panel is securely attached to the clips and sits flush against the previous panel for a seamless finish.

Step 5: Finish the Edges

Finally, install any trim or edge pieces to give the ceiling a polished and professional appearance.

Maintenance Tips for Snap and Clip Ceiling

Maintaining a Snap and Clip Ceiling is simple and hassle-free. Here are some tips to keep your ceiling looking its best:

  • Regular Cleaning: Dust the panels regularly using a soft cloth or a vacuum with a brush attachment.
  • Spot Cleaning: For any stains or marks, use a mild detergent and water. Avoid abrasive cleaners that could damage the panels.
  • Inspection: Periodically check for any loose panels or clips and secure them as needed to ensure the ceiling remains stable.
  • Repairs: In case of damage, the modular design allows for easy replacement of individual panels without the need to dismantle the entire ceiling.

Design Ideas for Snap and Clip Ceiling

The Snap and Clip Ceilings system is not just functional but also highly customizable. Here are some design ideas to inspire your next project:

  • Modern Minimalism: Choose sleek, flat panels in neutral colors for a clean and contemporary look.
  • Textured Panels: Opt for panels with textured finishes to add depth and interest to your ceiling.
  • Woodgrain Finish: For a warm and natural appearance, select panels that mimic the look of real wood.
  • Bold Colors: Make a statement with vibrant colored panels that can serve as a focal point in any room.

Why Choose Snap and Clip Ceiling Over Traditional Ceilings?

When compared to traditional ceiling systems, the Snap and Clip Ceiling offers several distinct advantages:

  1. Speed of Installation: Traditional ceilings often require more time and labor-intensive processes. The snap and clip method is quicker and cleaner.
  2. Flexibility: Unlike fixed ceilings, the modular nature allows for easy modifications and updates.
  3. Cost-Effective: Reduced installation time and minimal maintenance translate to cost savings over time.
  4. Eco-Friendly Options: Many manufacturers offer environmentally friendly panels made from recycled materials.

Common Myths

Despite their growing popularity, there are some misconceptions about Snap and Clip Ceilings:

  • Myth 1: They Are Not Durable: In reality, these ceilings are made from robust materials designed to last.
  • Myth 2: Limited Design Choices: There is a wide variety of styles, colors, and textures available to suit any decor.
  • Myth 3: Difficult to Install: The system is designed for ease of use, even for those with minimal DIY experience.

Conclusion

The Snap and Clip Ceiling system is revolutionizing how we approach ceiling installation and maintenance. With its ease of installation, aesthetic versatility, and practical benefits, it’s an excellent choice for anyone looking to upgrade their space. Whether you’re renovating your home or designing a new commercial space, consider the Snap and Clip Ceiling for a solution that combines style, functionality, and efficiency.

By following the guidance in this article, you can confidently transform any room with the innovative Snap and Clip Ceilings system. Enjoy the benefits of a beautiful, durable, and easy-to-maintain ceiling that meets all your needs.

Armstrong Black Ceilings Grid: The Ultimate Guide to Stylish Interior Design

When it comes to interior design, every detail matters – including the often-overlooked ceiling. Elevate your space to new heights of sophistication with Armstrong Black Ceilings Grid. In this comprehensive guide, we’ll explore the versatility, elegance, and practicality of Armstrong’s black ceiling grid systems, offering insights into their benefits, installation techniques, and design possibilities.

Armstrong Black Ceiling Grid

Understanding Armstrong Black Ceiling Grid

Unveiling Armstrong’s Black Ceiling Grid

Armstrong Black Ceiling Grid systems offer a contemporary twist on traditional ceiling designs, providing a sleek and stylish alternative to standard white grids. Designed to complement modern interiors, the black finish adds depth, drama, and sophistication to any space, making it a popular choice for commercial and residential projects alike.

Read too: Discovering the Charm of Nautical Outdoor Ceiling Fans for Your Coastal Retreat: Sail into Style

Benefits of Armstrong Black Ceiling Grid

  1. Visual Impact: The bold contrast of black against white or colored ceiling tiles creates a striking visual impact, instantly drawing the eye upward and adding architectural interest to the space.
  2. Versatility: Armstrong Black Ceiling Grid is compatible with a wide range of ceiling tiles, allowing for endless design possibilities. Whether you prefer classic white tiles for a timeless look or opt for bold colors or patterns to make a statement, the black grid provides a versatile backdrop that enhances any aesthetic.
  3. Durability: Constructed from high-quality materials, Armstrong Black Ceiling Grid systems are built to last. The sturdy construction ensures stability and support for ceiling tiles, while the durable black finish resists scratches, dents, and corrosion, maintaining its sleek appearance over time.
  4. Customization: Armstrong offers a variety of black ceiling grid profiles and accessories to suit different design preferences and installation requirements. From standard flat grids to more intricate designs with curved or angled components, there’s a solution to fit every project.

Installation Tips for Armstrong Black Ceiling Grid

1. Proper Planning

Before starting the installation process, carefully plan the layout of the ceiling grid to ensure optimal performance and aesthetics. Take accurate measurements of the space, mark the placement of grid lines, and consider factors such as lighting fixtures, air vents, and architectural features that may affect the layout.

2. Use Quality Materials

Invest in high-quality materials, including Armstrong Black Ceiling Grid components and compatible ceiling tiles, to ensure a professional-looking finish that stands the test of time. Choose grid systems with sturdy construction and a durable black finish that complements the chosen ceiling tiles.

3. Follow Manufacturer Guidelines

Refer to Armstrong’s installation instructions and guidelines for proper assembly and installation of the black ceiling grid system. Follow recommended techniques for cutting, connecting, and securing grid components, and use appropriate tools and hardware as specified by the manufacturer.


Design Inspirations with Armstrong Black Ceiling Grid

1. Industrial Chic

Embrace the urban appeal of industrial design by pairing Armstrong Black Ceiling Grid with exposed ductwork, concrete floors, and metal accents. Opt for sleek, minimalist ceiling tiles in neutral tones to complement the black grid and create a cohesive, contemporary look.

2. Modern Elegance

Achieve a sense of modern elegance with Armstrong Black Ceiling Grid by pairing it with luxurious finishes such as marble or hardwood flooring, plush furnishings, and statement lighting fixtures. Choose ceiling tiles with subtle texture or metallic accents to add depth and sophistication to the space.


Conclusion

In conclusion, Armstrong Black Ceilings Grid offers a stylish and practical solution for enhancing interior spaces with its bold design and versatile functionality. The black grid enhances the aesthetic of commercial offices, retail spaces, or residential homes, adding sophistication and architectural interest. By following installation tips and exploring design inspirations, you can create a stunning ceiling design that makes a lasting impression.

Transform your space with Armstrong Black Ceiling Grid and experience the timeless elegance of contemporary design.

Caddy Ceiling Grid Clip : Enhance Your Ceiling Installation with Versatile

When it comes to installing suspended ceilings, having the right tools and accessories can make all the difference. Caddy ceiling grid clip are essential components that provide secure attachment points for ceiling grid systems, ensuring a stable and professional installation. In this comprehensive guide, we’ll explore the features, benefits, and installation techniques of Caddy ceiling grid clips, helping you achieve outstanding results in your ceiling projects.

Caddy Ceiling Grid Clips

Understanding Caddy Ceiling Grid Clips

What are Caddy Ceiling Grid Clip?

Caddy ceiling grid clips are specially designed clips that are used to attach ceiling grid components to various substrates, including wood, concrete, metal, and drywall. These clips provide a secure and reliable connection, ensuring that the ceiling grid system remains stable and properly aligned. Caddy grid clips come in a variety of styles and configurations to accommodate different installation requirements and ceiling designs.

Benefits of Caddy Ceiling Grid Clips

Caddy ceiling grid clips offer several benefits, including:

  • Secure Attachment: These clips provide a strong and secure attachment point for ceiling grid components, preventing sagging, shifting, or separation over time.
  • Versatility: Caddy grid clips are compatible with a wide range of ceiling grid systems, including T-bar, exposed grid, and concealed grid designs. They can be used in various applications, such as commercial buildings, offices, schools, hospitals, and residential spaces.
  • Easy Installation: Caddy ceiling grid clips enable quick and easy installation, saving time and labor costs on the job site. They can be installed with standard tools and do not necessitate specialized equipment or skills.
  • Adjustability: Some Caddy grid clips feature adjustable arms or mounting brackets, allowing for precise positioning and alignment of ceiling grid components. This ensures a professional and uniform appearance across the entire ceiling system.

Read too: Understanding and Dealing with Ants in the Ceiling Spaces: Navigating the Intrusion

Types of Caddy Ceiling Grid Clips

1. T-Bar Clips

T-bar clips are designed to attach ceiling grid components to T-bar suspension systems commonly used in drop ceilings. These clips feature a spring-loaded mechanism that securely grips the T-bar, providing a reliable attachment point for ceiling tiles, light fixtures, and other accessories.

2. Screw-In Clips

Screw-in clips are versatile clips that users can attach directly to various substrates, including wood, metal, and concrete. These clips feature pre-drilled holes or threaded inserts for easy installation with screws or bolts, providing a secure mounting point for ceiling grid components.

3. Snap-On Clips

Snap-on clips snap onto the edges of ceiling grid components, providing a quick and secure connection without requiring screws or fasteners. These clips prove ideal for applications demanding rapid installation and disassembly, such as temporary structures or modular ceiling systems.

Installation Techniques

When installing Caddy ceiling grid clips, follow these techniques for best results:

  • Prepare the substrate: Ensure that the mounting surface is clean, dry, and free from any debris or contaminants before installing the clips.
  • Position the clips: Determine the spacing and layout of the clips according to the manufacturer’s recommendations and the design of the ceiling grid system.
  • Attach the clips: Use appropriate fasteners, such as screws, bolts, or adhesive, to securely attach the clips to the substrate. Ensure aligning and leveling the clips for a professional finish.
  • Install the ceiling grid: Once the clips are in place, install the ceiling grid components, such as main runners, cross tees, and perimeter trim, according to the manufacturer’s instructions.

Conclusion

Caddy ceiling grid clips are essential components for achieving a secure and professional installation in suspended ceiling projects. With their versatility, ease of installation, and reliable performance, these clips provide a convenient solution for attaching ceiling grid components to various substrates. By understanding the features, benefits, and installation techniques outlined in this guide, you can confidently incorporate Caddy ceiling grid clips into your ceiling projects and achieve outstanding results.

The Ultimate Guide to Hiring T Bar Ceiling Installer for Your Renovation Project

Are you planning a renovation project and in need of expert T Bar ceiling installer? Dive into our comprehensive guide to hiring T Bar ceiling installers and ensure a smooth and successful installation process. Learn about the qualifications, skills, and considerations to make when selecting the right professionals for your project.

T Bar Ceiling Installers

Understanding T Bar Ceiling Installers: What They Do

T Bar ceiling installers are skilled professionals responsible for installing suspended ceilings, also known as T Bar ceilings, in residential and commercial properties. These ceilings consist of a grid system of metal bars (T Bars) suspended from the main structural ceiling, with ceiling tiles placed within the grid to create a finished surface.

Qualifications and Skills

  • Construction Experience: T Bar ceiling installers typically have experience in the construction industry, with knowledge of building codes, safety regulations, and installation techniques.
  • Attention to Detail: Precision and attention to detail are essential qualities for T Bar ceiling installers, as they must ensure that the grid system is level and properly aligned to support the ceiling tiles.
  • Problem-Solving Skills: T Bar ceiling installers may encounter challenges such as uneven surfaces or obstacles during installation, requiring problem-solving skills to overcome these obstacles effectively.

Read too: Discovering the Charm of Nautical Outdoor Ceiling Fans for Your Coastal Retreat: Sail into Style

Hiring T Bar Ceiling Installers: Key Considerations

When hiring T Bar ceiling installers for your renovation project, consider the following factors to ensure a successful installation process:

1. Experience and Expertise

  • Look for T Bar ceiling installers with a proven track record of successful installations and extensive experience in the field. Ask for references and examples of past projects to assess their expertise.

2. Licensing and Certification

  • Verify that the T Bar ceiling installers are properly licensed and certified to perform ceiling installations in your area. This ensures that they have met the necessary qualifications and adhere to industry standards.

3. Quality of Materials and Workmanship

  • Inquire about the quality of materials and workmanship used by the T Bar ceiling installers. Ensure that they use durable, high-quality materials and employ best practices for installation to achieve long-lasting results.

Hiring T Bar Ceiling Installers: The Process

Follow these steps to hire T Bar ceiling installers for your renovation project:

1. Research and Shortlist

  • Conduct research online and ask for recommendations from friends, family, or colleagues to compile a list of potential T Bar ceiling installers in your area.

2. Request Quotes and Estimates

  • Contact each T Bar ceiling installer on your list and request quotes and estimates for your project. Compare prices, services offered, and timelines to make an informed decision.

3. Check References and Credentials

  • Ask for references from past clients and check online reviews to verify the reputation and reliability of the T Bar ceiling installers. Ensure that they are properly licensed and insured to protect yourself and your property.

Conclusion

In conclusion, hiring T Bar ceiling installer is a crucial step in ensuring the success of your renovation project. By understanding the qualifications, skills, and considerations involved in selecting the right professionals, you can make an informed decision and achieve the desired results for your T Bar ceiling installation. Remember to research, request quotes, and check references to hire the best T Bar ceiling installers for your project.

Shiplap Over Popcorn Ceiling: A Modern Update for Your Home

Popcorn ceilings were once a popular trend in home design, but they have since fallen out of favor. Many homeowners are now looking for ways to update their popcorn ceilings with a more modern look.

Shiplap Over Popcorn Ceiling

One option is to install shiplap over the popcorn ceiling. Shiplap is a type of wood paneling that is made up of narrow boards that are joined together. It can be installed on walls, ceilings, and even backsplashes.

Why Choose Shiplap Over Popcorn Ceiling?

There are several reasons why you might choose to install shiplap over a popcorn ceiling:

  • It’s a modern look: Shiplap is a popular trend in home design, and it can give your home a more modern look.
  • It’s easy to install: Shiplap is relatively easy to install, and it can be done as a DIY project.
  • It’s affordable: Shiplap is a relatively affordable option for updating your ceiling.
  • It’s versatile: Shiplap can be painted or stained to match your décor.

How to Install Shiplap Over Popcorn Ceiling

If you are interested in installing shiplap over your popcorn ceiling, there are a few things you will need to do:

  1. Remove the popcorn ceiling: The first step is to remove the popcorn ceiling. This can be done with a popcorn ceiling removal tool.
  2. Prepare the surface: Once the popcorn ceiling has been removed, you will need to prepare the surface for the shiplap. This includes sanding the surface and filling in any holes or cracks.
  3. Install the shiplap: Once the surface is prepared, you can begin installing the shiplap. Start by installing the furring strips, which will provide a base for the shiplap. Then, install the shiplap boards, starting at the bottom of the ceiling and working your way up.
  4. Finish the shiplap: Once the shiplap is installed, you can finish it by painting or staining it to match your décor.

Tips for Installing Shiplap Over Popcorn Ceiling

Here are a few tips for installing shiplap over a popcorn ceilings:

  • Use a popcorn ceiling removal tool: This will make the job of removing the popcorn ceiling much easier.
  • Prepare the surface carefully: This will ensure that the shiplap adheres properly to the ceiling.
  • Use a level: This will help you to install the shiplap straight.
  • Use a nail gun: This will make the job of installing the shiplap much faster and easier.
  • Finish the shiplap: This will protect the shiplap from the elements and give it a finished look.

Conclusion

Installing shiplap over a popcorn ceilings is a great way to update your home with a more modern look. It is a relatively easy and affordable project that can be done by a DIYer.

Read too: Exploring the Benefits and How-Tos of DIY Ceiling Cassette Mini Split Installation: Revolutionizing Comfort

Streamline Your Installation Process with T Bar Clips for Drop Ceilings Systems

Are you planning to install a drop ceilings in your space? Discover how T bar clips can streamline your installation process and provide a secure attachment for drop ceiling panels. In this comprehensive guide, we’ll explore everything you need to know about T bar clips for drop ceiling systems, from their features and benefits to installation tips and techniques.

T Bar Clips Drop Ceiling

Understanding T Bar Clips for Drop Ceiling

What are T Bar Clips for Drop Ceiling?

T bar clips for drop ceiling systems are metal fasteners designed to attach ceiling panels to the T bar grid framework. These clips play a crucial role in securing the panels in place and ensuring a stable and uniform ceiling surface.

Key Features

  1. Durable Construction: T bar clips for drop ceiling are typically made of sturdy materials such as steel or aluminum, ensuring durability and long-lasting performance.
  2. Versatile Design: These clips are compatible with various types of drop ceiling panels, including acoustic tiles, fiberglass panels, and PVC tiles, making them suitable for a wide range of applications.
  3. Easy Installation: T bar clips are designed for quick and easy installation, allowing for efficient attachment of ceiling panels without the need for specialized tools or equipment.
  4. Secure Attachment: Once installed, T bar clips provide a secure and stable attachment for drop ceiling panels, preventing sagging or shifting over time.

Read too: Exploring the Efficiency of Radiant Ceiling Heater Electric: A Comprehensive Guide

Benefits of Using T Bar Clips for Drop Ceiling

1. Simplified Installation Process

T bar clips streamline the installation process for drop ceilings, saving you time and labor compared to traditional installation methods. With their easy-to-use design, these clips allow for quick and efficient attachment of ceiling panels, reducing downtime and minimizing disruption to your space.

2. Secure Panel Attachment

T bar clips provide a reliable and secure attachment method for drop ceiling panels, ensuring that they remain firmly in place even in high-traffic areas. Whether you’re installing lightweight acoustic tiles or heavier fiberglass panels, these clips offer robust support and prevent panels from falling or shifting.

3. Enhanced Aesthetic Appeal

By eliminating the need for visible screws or fasteners, T bar clips create a clean and seamless appearance that enhances the overall aesthetic of your drop ceiling. With their discreet design, these clips allow ceiling panels to blend seamlessly into the surrounding environment, providing a polished and professional finish.

Installation Tips and Techniques

1. Prepare the T Bar Grid

Before installing T bar clips, ensure that the T bar grid framework is properly installed and level. Make any necessary adjustments to the grid to ensure that it provides a stable foundation for the drop ceiling panels.

2. Position the Clips

Determine T bar clip spacing and placement based on panel size and layout. Position the clips evenly along the T bar grid to provide adequate support and prevent sagging or unevenness.

3. Attach the Ceiling Panels

Once the clips are in place, carefully lower the drop ceiling panels onto the T bar grid, ensuring that they align properly with the clips. Press down firmly on the panels to secure them in place, ensuring a snug fit and uniform appearance.

Conclusion

In conclusion, T bar clips for drop ceiling systems offer a convenient and efficient solution for panel installation. With durable construction and easy, secure attachment, they provide a seamless finish, enhancing any room’s appeal. Whether for commercial renovation or home updates, T bar clips are a must-have for a polished ceiling installation.

Mastering the Art of Installing T Bar Ceiling Clip for a Seamless Ceiling Solution

Are you looking for a hassle-free solution to install ceiling panels in your space? Look no further than T bar ceiling clip. These innovative clips offer a simple and effective way to secure ceiling panels to T bar grid systems, providing a seamless and professional finish. In this comprehensive guide, we’ll explore everything you need to know about T bar ceiling clips, from their features and benefits to installation tips and techniques.

T Bar Ceiling Clips

Understanding T Bar Ceiling Clips

What are T Bar Ceiling Clips?

T bar ceiling clips, also known as T grid clips or T bar hangers, are metal fasteners designed to attach ceiling panels to T bar grid systems. These clips are typically made of durable materials such as steel or aluminum and feature a hook or clamp mechanism for securing the panels in place.

Key Features

  1. Versatility: T bar ceiling clips are compatible with various types of ceiling panels, including acoustic tiles, drop-in panels, and suspended ceilings.
  2. Ease of Installation: These clips are designed for quick and easy installation, allowing you to effortlessly secure ceiling panels without the need for specialized tools or equipment.
  3. Adjustability: Many T bar ceiling clips feature adjustable settings or mechanisms, allowing for precise positioning and alignment of the ceiling panels.
  4. Durable Construction: Made of high-quality materials, T bar ceiling clips are built to withstand the rigors of installation and provide long-lasting support for ceiling panels.

Benefits of Using T Bar Ceiling Clips

1. Time Savings

T bar ceiling clips streamline the installation process, saving you time and labor compared to traditional installation methods. With their simple and intuitive design, these clips allow for quick and efficient installation of ceiling panels, reducing downtime and minimizing disruption to your space.

2. Secure Attachment

T bar ceiling clips provide a secure and stable attachment method for ceiling panels, ensuring that they remain firmly in place over time. Whether you’re installing lightweight acoustic tiles or heavier drop-in panels, these clips offer reliable support and prevent sagging or shifting.

3. Aesthetic Appeal

By eliminating the need for visible screws or fasteners, T bar ceiling clips create a clean and seamless appearance that enhances the overall aesthetic of your space. With their discreet design, these clips allow ceiling panels to blend seamlessly into the surrounding environment, providing a polished and professional finish.

Read too: Exploring the Efficiency of Radiant Ceiling Heater Electric: A Comprehensive Guide

Installation Tips and Techniques

1. Prepare the T Bar Grid

Before installing T bar ceiling clips, ensure you have properly installed and leveled the T bar grid system. Make any necessary adjustments to the grid to ensure that it provides a stable foundation for the ceiling panels.

2. Position the Clips

Determine the spacing and placement of the T bar ceiling clips based on the size and layout of the ceiling panels. Position the clips evenly along the T bar grid to provide adequate support and prevent sagging or unevenness.

3. Attach the Ceiling Panels

Once the clips are in place, carefully lower the ceiling panels onto the T bar grid, ensuring that they align properly with the clips. Press down firmly on the panels to secure them in place, ensuring a snug fit and uniform appearance.

Conclusion

In conclusion, T bar ceiling clip offer a convenient and efficient solution for installing ceiling panels in a variety of spaces. With their versatility, ease of installation, and secure attachment, these clips provide a seamless and professional finish that enhances the aesthetic appeal of any room. Whether you’re renovating a commercial space or updating your home, T bar ceiling clips are a must-have accessory for achieving a polished and professional ceiling installation.

A Comprehensive Guide to Successful Suspended Ceiling Installation: Mastering Elegance

Embark on a journey of refinement as we unveil the art of “Suspended Ceiling Installation.” Discover the intricacies, benefits, and step-by-step process for achieving a sophisticated and functional suspended ceiling.

Suspended Ceiling Installation

Suspended Ceiling Installation: Elevating Spaces with Elegance

Introduction: The Allure of Suspended Ceilings

  1. Defining Elegance: Understanding the Appeal of Suspended CeilingsBegin your exploration by delving into the aesthetic and functional appeal of suspended ceilings. Uncover how these installations contribute to the overall ambiance of a space.
  2. Versatility Unleashed: Where and Why to Opt for Suspended CeilingsExplore the diverse environments where suspended ceilings excel. From commercial spaces to residential interiors, understand the versatility that makes them a popular choice.

Navigating the Installation Process: Mastering the Art

Essential Steps: A Blueprint for Success

  1. Preparation Phase: Setting the Foundation for a Flawless InstallationDive into the initial steps of preparation, including assessing the space and gathering the necessary tools and materials. Lay the foundation for a seamless installation process.
  2. Grid Installation: Constructing the Framework for EleganceLearn the art of installing the grid system, the backbone of a suspended ceiling. Understand the precision required to create a sturdy framework that enhances the overall structure.
  3. Panel Placement: Achieving Symmetry and Visual HarmonyExplore techniques for placing panels with precision. From ensuring symmetry to optimizing visual appeal, grasp the finer details that contribute to a visually stunning suspended ceiling.
  4. Finishing Touches: Edging and Trim for a Polished LookDelve into the finishing touches that elevate the aesthetics of your suspended ceiling. Master the art of edging and trim installation to achieve a polished and refined appearance.

Practical Considerations: Maximizing the Benefits

1. Acoustic Enhancement: Harnessing the Power of Suspended Ceilings

Uncover the acoustic benefits of suspended ceilings. Understand how these installations contribute to sound control and create environments conducive to focused work or relaxation.

2. Lighting Integration: Illuminating Spaces with Grace

Explore strategies for seamlessly integrating lighting fixtures into suspended ceilings. Discover how strategic placement enhances both functionality and visual appeal.

Read too: Unveiling the Essentials of Vaulted Ceiling Insulation Requirements: Elevate Your Space

Conclusion: Elevate Your Space with a Flawless Suspended Ceiling Installation

As we conclude our journey into the world of “Suspended Ceiling Installation,” you’ve gained insights into the art and science behind creating elegant and functional ceilings. Empower yourself with the knowledge to transform spaces with sophistication, making every installation a masterpiece.