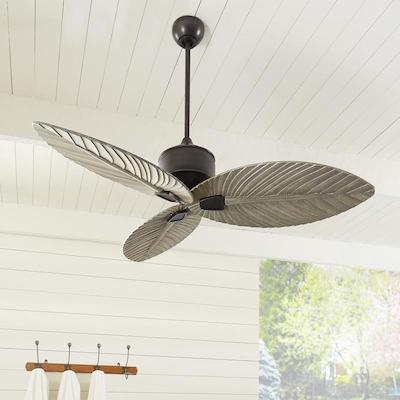
When it comes to enhancing the comfort and aesthetic of your living space, the Modern 3 Blade Ceiling Fan With Light stands out as an ideal choice. Combining sleek design with energy-efficient performance, this type of ceiling fan not only provides cooling but also adds a contemporary flair to any room. Whether you’re redesigning your home or simply looking to upgrade your current ceiling fan, the Modern 3 Blade Ceiling Fan With Light offers both practicality and style.
Why Choose a Modern 3 Blade Ceiling Fan With Light?
Ceiling fans have come a long way from being mere functional devices to becoming integral components of interior design. The Modern 3 Blade Ceiling Fan With Light epitomizes this evolution, offering a minimalist yet elegant design that complements modern homes. But beyond aesthetics, this ceiling fan is packed with features that make it a worthwhile investment.
1. Sleek and Stylish Design
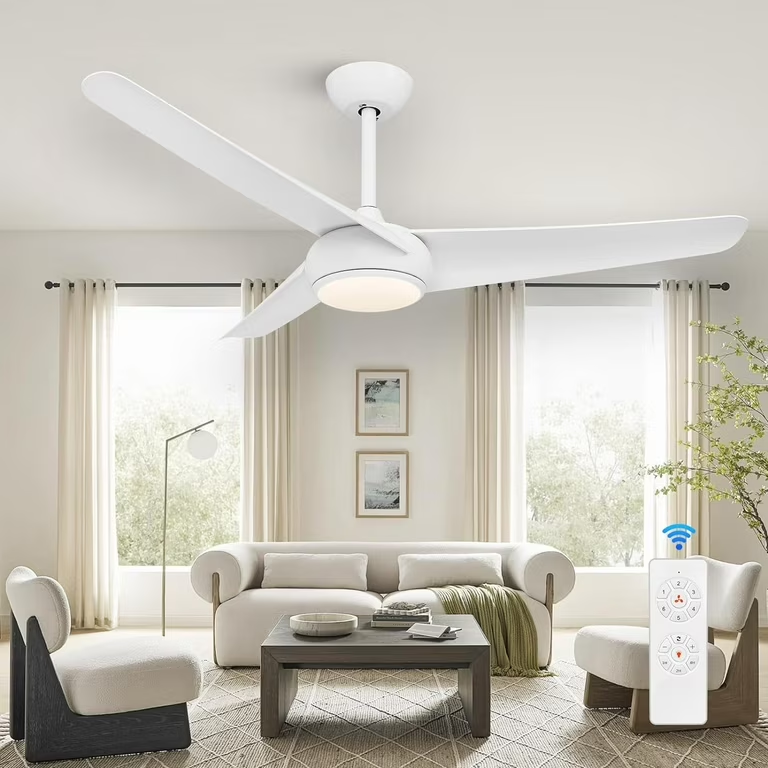
The Modern 3 Blade Ceiling Fan With Light is designed with contemporary aesthetics in mind. The three blades provide a clean and streamlined look, making it perfect for modern interiors that favor minimalism. Whether your home’s design leans towards industrial chic, Scandinavian simplicity, or urban modernity, this ceiling fan can seamlessly blend into the decor. The addition of a light fixture further enhances its utility, eliminating the need for separate lighting and making it a multifunctional centerpiece.
Read too: Bathroom Flooded Through the Ceiling: A Comprehensive Guide
2. Efficient Air Circulation
While the fan’s design is undoubtedly a draw, its primary function is to circulate air effectively. The three blades are aerodynamically shaped to provide optimal airflow, ensuring that the room remains cool and comfortable. Despite having fewer blades than traditional ceiling fans, the Modern 3 Blade Ceiling Fan With Light is engineered to deliver powerful air circulation while operating quietly, making it suitable for bedrooms, living rooms, and even home offices.
3. Energy Efficiency
In an age where energy efficiency is paramount, the Modern 3 Blade Ceiling Fan With Light stands out for its ability to reduce energy consumption. The fan is often equipped with a high-efficiency motor that requires less power to operate, helping to lower your electricity bills. Additionally, the integrated LED light fixture consumes significantly less energy than traditional incandescent bulbs, further contributing to energy savings.
4. Multi-Functional Lighting
The inclusion of a built-in light fixture makes this ceiling fan a dual-purpose fixture. Many models come with LED lights, which are not only energy-efficient but also have a longer lifespan compared to other types of bulbs. The lighting can be adjusted to different levels of brightness, allowing you to create the perfect ambiance in your room. Some models even offer color temperature adjustments, giving you control over the warmth or coolness of the light.
5. Easy Installation and Control
Many Modern 3 Blade Ceiling Fans With Light are designed for easy installation, often coming with detailed instructions and necessary hardware. Some models are also compatible with smart home systems, allowing you to control the fan and light settings via remote control, smartphone apps, or voice commands. This convenience adds another layer of comfort to your home, allowing you to adjust the fan speed or dim the lights without leaving your seat.
Key Features to Look For in a Modern 3 Blade Ceiling Fan With Light
When shopping for a Modern 3 Blade Ceiling Fan With Light, it’s essential to consider various features that will ensure you get the best value for your money.
1. Blade Material and Finish
The material and finish of the blades play a significant role in the fan’s durability and appearance. Common materials include wood, metal, and composite. For a sleek, modern look, opt for fans with metal or high-quality composite blades that come in finishes like brushed nickel, matte black, or even wood grain for a more natural feel.
2. Motor Quality
The motor is the heart of any ceiling fan, and its quality directly affects the fan’s performance. Look for a fan with a high-efficiency motor, such as a DC motor, which is known for being more energy-efficient and quieter than traditional AC motors. A good motor ensures smooth operation and a longer lifespan for the fan.
3. Light Fixture Specifications
Consider the specifications of the light fixture, including the type of bulb and its brightness. LED bulbs are highly recommended due to their energy efficiency and longevity. Check the lumen output to ensure the light is bright enough for your needs. Some models offer dimming features, which can be beneficial for adjusting the ambiance in the room.
4. Control Options
Modern ceiling fans often come with multiple control options. Standard models may include pull chains, while more advanced ones offer remote controls, wall-mounted controls, or smart home integration. If convenience is a priority, choose a fan that can be controlled via a smartphone app or a home automation system like Alexa or Google Assistant.
5. Reversible Motor
A reversible motor is a feature that allows you to change the direction of the fan blades. In the summer, the blades should rotate counterclockwise to create a cooling breeze. In the winter, switching the direction to clockwise can help circulate warm air that naturally rises to the ceiling, making your heating system more efficient.
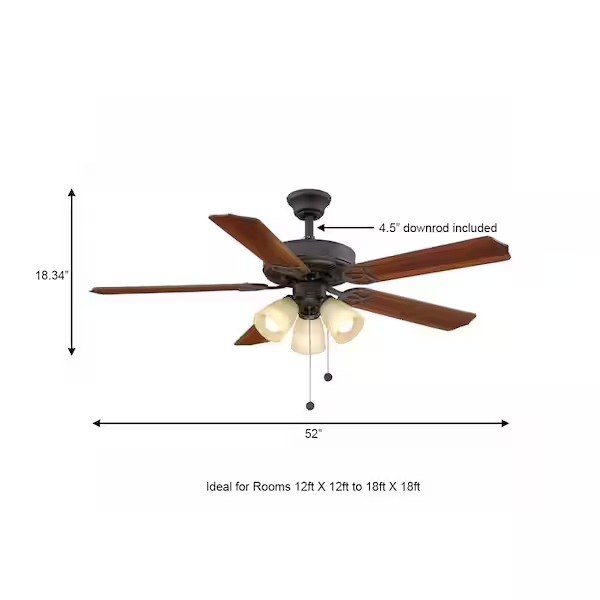
6. Size and Compatibility
Ensure that the fan is the right size for the room where it will be installed. Ceiling fans come in various sizes, typically measured by the blade span (diameter from blade tip to blade tip). For larger rooms, a fan with a larger blade span will be more effective at circulating air. Additionally, check that the fan is compatible with the ceiling height and whether it requires a downrod or is flush-mounted.
Installation Tips for a Modern 3 Blade Ceiling Fan With Light
Installing a Modern 3 Blade Ceiling Fan With Light can be a straightforward DIY project if you follow the right steps. Here are some tips to help you get started.
1. Gather the Necessary Tools
Before starting the installation, make sure you have all the necessary tools on hand. These typically include a screwdriver, a drill, a voltage tester, wire cutters, and a ladder. It’s also helpful to have a friend assist with the installation, especially when mounting the fan to the ceiling.
2. Turn Off the Power
Safety is paramount when working with electrical fixtures. Always turn off the power at the circuit breaker before starting the installation to prevent electrical shocks. Use a voltage tester to double-check that the power is off before handling any wiring.
3. Follow the Manufacturer’s Instructions
Each ceiling fan model may have specific installation requirements, so it’s important to follow the manufacturer’s instructions closely. Begin by assembling the fan components as instructed, then mount the bracket to the ceiling box. The ceiling box should be securely attached to a ceiling joist or beam to support the weight of the fan.
4. Connect the Wiring
Carefully connect the wiring according to the instructions. Typically, you’ll need to match the wires from the fan to the wires in the ceiling box—black to black (live), white to white (neutral), and green or bare copper to the ground wire. If your fan has a light fixture, there may be an additional wire to connect. Use wire nuts to secure the connections and tuck the wires into the ceiling box.
5. Mount the Fan
Once the wiring is complete, you can mount the fan motor to the bracket. Ensure all screws and bolts are securely tightened. Attach the fan blades according to the instructions, making sure they are evenly spaced and properly aligned. Finally, install the light fixture and bulbs, then attach the fan’s canopy to cover the wiring and bracket.
6. Test the Fan and Light
After completing the installation, restore power to the circuit and test the fan and light. Ensure that the fan operates smoothly at all speed settings and that the light functions as expected. If the fan wobbles, check that the blades are properly balanced and that all screws are tightened.
Conclusion
The Modern 3 Blade Ceiling Fan With Light is more than just a cooling device; it’s a stylish and functional addition to any modern home. With its sleek design, energy-efficient performance, and multi-functional features, this type of ceiling fan offers both aesthetic appeal and practical benefits. Whether you’re looking to improve air circulation, reduce energy costs, or simply enhance the look of your room, the Modern 3 Blade Ceiling Fan With Light is a smart choice that delivers on all fronts.
By carefully selecting the right model and following proper installation steps, you can enjoy the comfort and convenience of a ceiling fan that not only looks great but also meets your functional needs. Explore the range of Modern 3 Blade Ceiling Fans With Light available today, and take the first step towards a cooler, more stylish living space.