Water Leak Ceiling Bubble: Causes, Solutions, and Prevention Tips

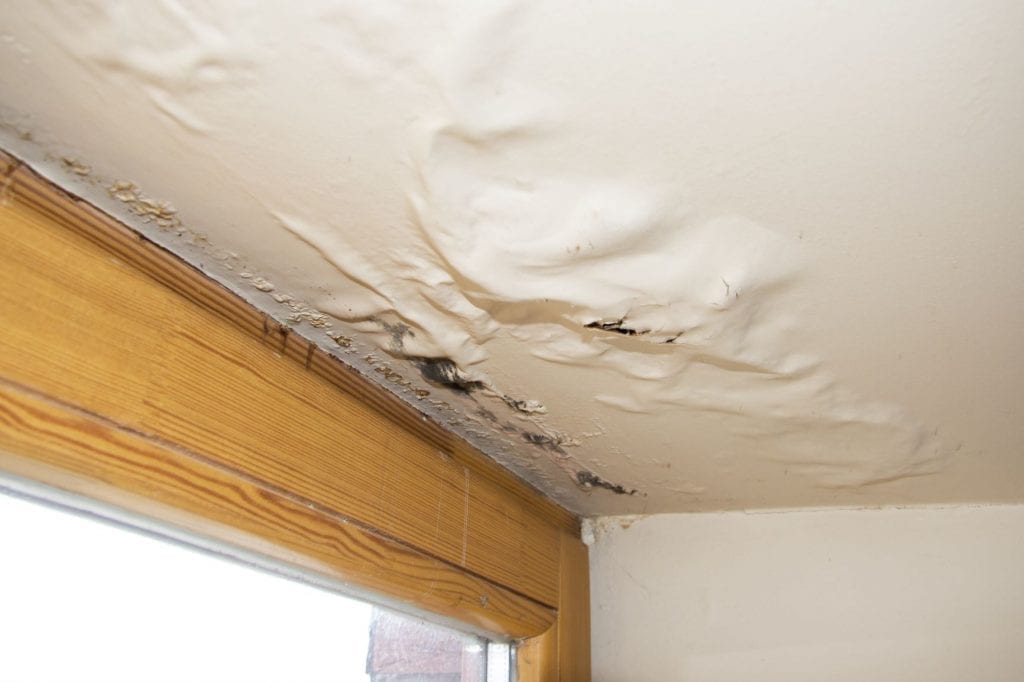
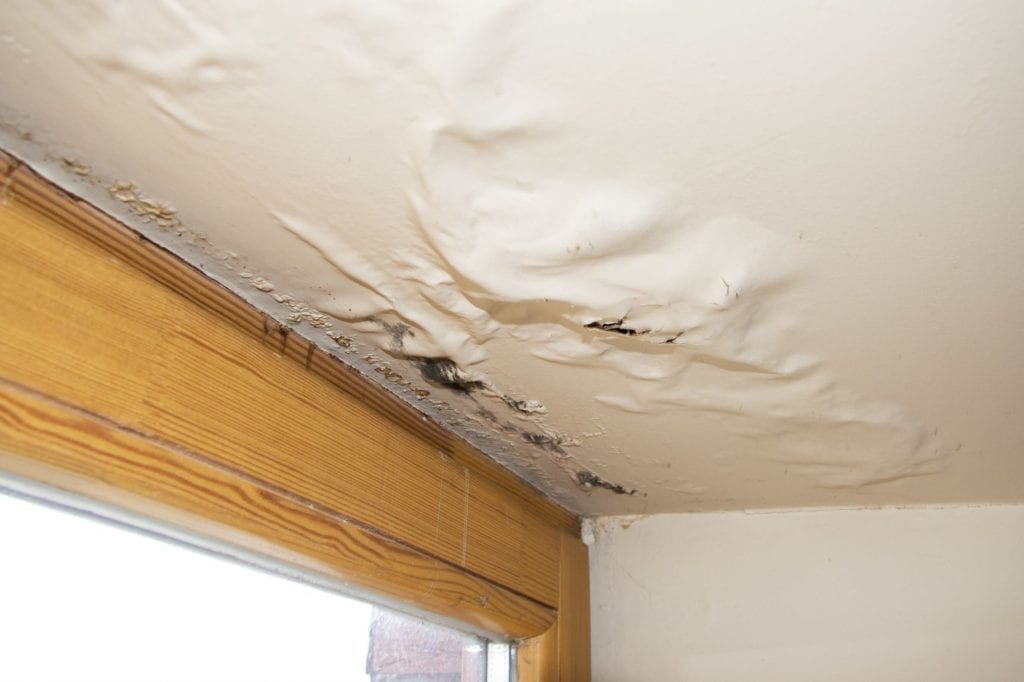
Water leaks in your ceiling can be alarming, and they often show up as ceiling bubbles—bulging, discolored spots that signify trapped moisture and impending damage. If you’ve found yourself staring at a water leak ceiling bubble, it’s essential to address it immediately to avoid further structural harm and costly repairs. In this guide, we’ll explain what causes ceiling bubbles, how to repair them, and ways to prevent water leaks from damaging your home in the future.

Water Leak Ceiling Bubble

What Causes a Water Leak Ceiling Bubble?

A water leak ceiling bubble is often the result of trapped moisture from leaks above, such as from a leaking roof, pipes, or even condensation. Understanding the root cause can help prevent future bubbles and ensure any repairs made are long-lasting. Here are some common sources of ceiling bubbles caused by water leaks:

  1. Roof Leaks
    Roof leaks are a primary source of ceiling water damage. When roofing material deteriorates due to age, weather, or physical damage, rainwater can seep through and cause leaks. Eventually, this moisture builds up in the ceiling, leading to a visible water bubble.
  2. Plumbing Leaks
    Another culprit behind ceiling bubbles is leaking pipes. If a pipe in an upper floor bursts or a pipe joint weakens, water may start leaking, slowly soaking the surrounding area. Over time, the moisture can gather in the ceiling below, forming a water bubble.
  3. Faulty Air Conditioning Units
    Air conditioning units, especially central systems, often have drainage lines to remove condensation. If these lines clog, overflow, or leak, the resulting water can collect in ceilings and walls, creating a water bubble in the ceiling.
  4. Humidity and Condensation
    In some climates, excessive humidity can lead to condensation forming on surfaces in the home. Areas like bathrooms, kitchens, or basements are prone to high humidity and can cause moisture buildup in ceilings, particularly if ventilation is poor.
  5. Improper Insulation
    Insufficient insulation, especially in areas like attics, can lead to condensation buildup as warm, moist air meets cooler surfaces. This can gradually seep into the ceiling, leading to bubbling, discoloration, and even mold growth.

Read too: Kitchen Lighting For A Vaulted Ceiling: Illuminating Your Space with Style and Functionality


Signs of a Water Leak Ceiling Bubble You Shouldn’t Ignore

Water leaks can sometimes go unnoticed until they’ve caused extensive damage, but recognizing the signs early can save you from costly repairs. Here are key signs that indicate a water leak may be causing a ceiling bubble:

  • Visible Bulging or Sagging
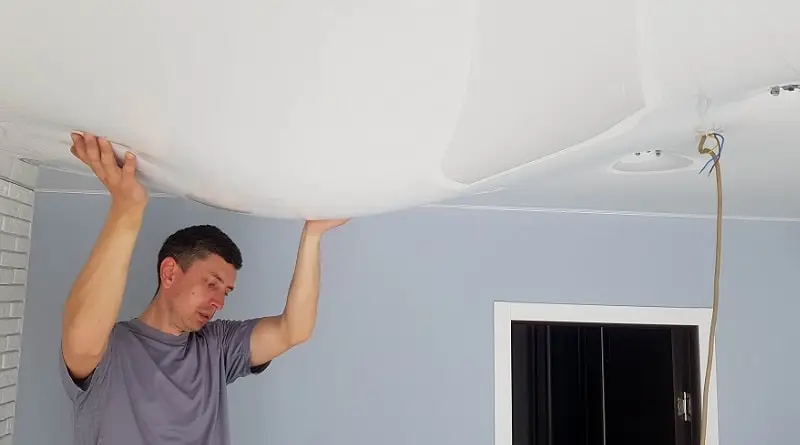
    A noticeable bulge or sag in the ceiling often indicates water is accumulating and putting pressure on the drywall or plaster.
  • Discoloration or Dark Spots
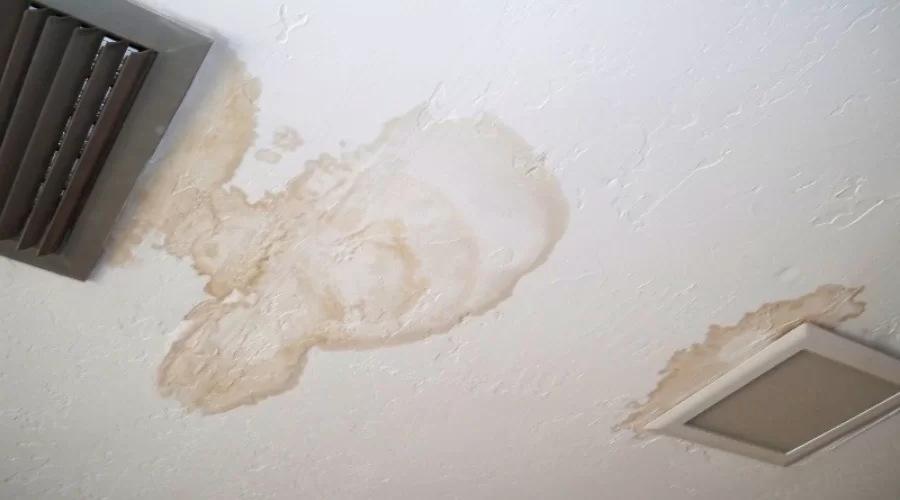
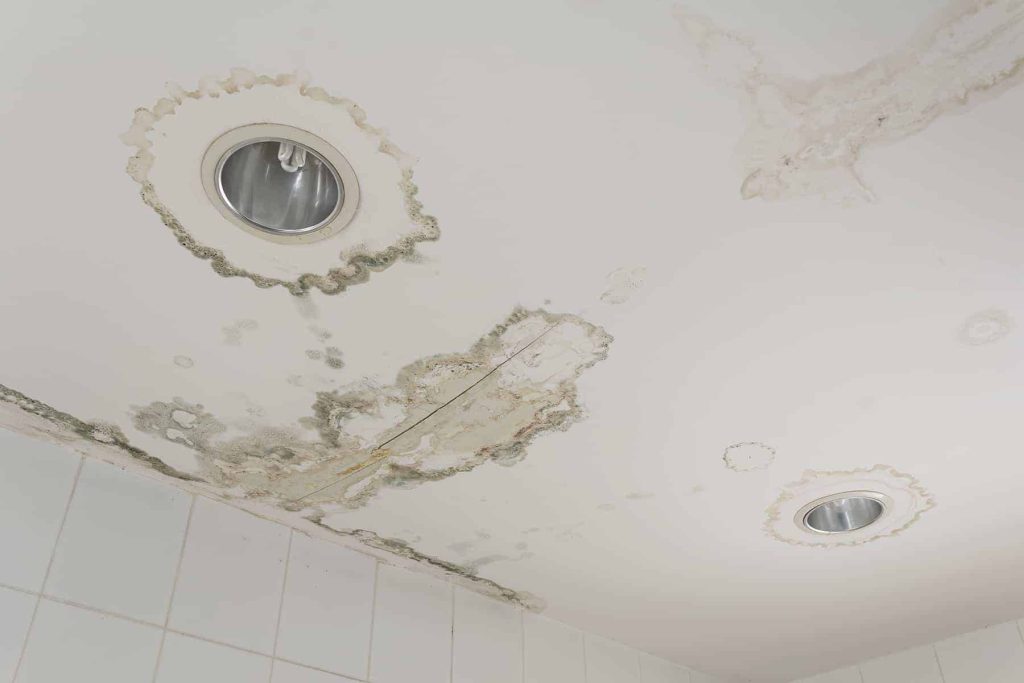
    A ceiling bubble may be accompanied by dark patches or yellow-brown stains, signifying water has seeped in.
  • Peeling or Cracked Paint
    Moisture buildup can cause paint to peel, crack, or blister. This can occur even if the water bubble isn’t highly visible yet.
  • Musty Odor
    Trapped moisture can lead to mold growth, which emits a distinct musty smell. This is often a sign that the problem has persisted for some time.

How to Fix a Water Leak Ceiling Bubble

Once you notice a water leak ceiling bubble, addressing the problem promptly is essential to minimize damage. Here’s a step-by-step guide to fixing a water bubble on your ceiling:

Step 1: Identify and Stop the Source of the Leak

First, find the origin of the leak. If it’s a roof leak, examine your attic or crawlspace for signs of water entry. For plumbing leaks, check pipes, joints, and any areas above the ceiling. If the leak is from a faulty appliance like an air conditioner, ensure the unit is turned off and the drainage lines are inspected.

Step 2: Drain the Water Bubble

To safely release the trapped water, use a small, sharp object (like a screwdriver or needle) to puncture the bubble’s lowest point. Place a bucket underneath to catch any dripping water. This helps relieve the pressure on the ceiling and prevents further sagging or damage.

Step 3: Remove Damaged Material

Once the ceiling has dried, it’s time to remove any damaged material. This may involve cutting out the affected drywall, scraping away peeling paint, or removing loose plaster. Ensure that the ceiling is completely dry before proceeding to prevent mold growth.

Step 4: Repair and Repaint

Patch the affected area using drywall compound or plaster. Once it’s smoothed out and dry, sand the surface to ensure it’s even. Afterward, apply primer and repaint the ceiling to restore its appearance.

Step 5: Inspect for Mold

After the repair, it’s essential to check for mold, which can be hazardous to your health. If you notice any mold spots, it may be wise to consult a professional for mold remediation.


How to Prevent Future Water Leak Ceiling Bubbles

Prevention is the key to avoiding water damage and ceiling bubbles in the future. Here are some steps you can take to keep your home leak-free:

1. Regular Roof Inspections

Inspect your roof annually or after heavy storms to identify missing shingles, cracks, or other signs of damage. If you spot any issues, have them repaired promptly to prevent water from entering your home.

2. Check Plumbing and Seals Regularly

Inspect all visible pipes, especially those running through walls or ceilings. Ensure that seals around fixtures like faucets and toilets are intact to avoid leaks. Regularly servicing your plumbing system can also help identify issues before they become significant problems.

3. Maintain Proper Ventilation

In areas prone to high humidity, such as bathrooms and kitchens, install exhaust fans to remove moisture from the air. Also, consider using a dehumidifier in rooms with poor ventilation to keep humidity levels in check.

4. Insulate Attic and Pipes

Proper attic insulation can prevent condensation from forming and dripping onto the ceiling. Similarly, insulating pipes, especially in cold climates, can prevent them from bursting or sweating, reducing the risk of leaks.

5. Monitor Air Conditioning Systems

Ensure that your air conditioning unit’s drainage lines remain clear and functional. Regularly inspect the unit for any signs of leaks or drips and service it as necessary to avoid condensation buildup in your ceiling.


When to Call a Professional

While minor ceiling water bubbles can be managed with DIY methods, significant leaks or signs of mold should be addressed by a professional. Professionals can accurately identify the source of a leak, thoroughly repair the damage, and ensure no mold or structural issues remain.


Conclusion

Dealing with a water leak ceiling bubble is a task that requires prompt attention and careful steps to avoid further damage. By understanding the causes, such as roof and plumbing leaks, and knowing how to fix the damage, you can protect your home from extensive repair costs. With regular maintenance, inspections, and proper ventilation, you can prevent ceiling bubbles and maintain a dry, safe living environment.

Ignoring signs of a ceiling bubble can lead to serious problems, including structural damage and health risks from mold. Addressing these signs early on can save you from major repair expenses and ensure a safer home. Don’t let water leaks go unnoticed—act quickly, repair effectively, and take preventative steps to avoid future problems.
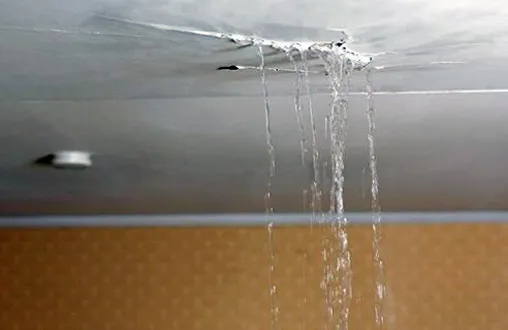
What to Do When Your Dream Ceiling Starts Leaking Water? Navigating Nightmares

Imagine waking up to the unexpected nightmare of finding water dripping from your dream ceiling. In this comprehensive guide, we’ll explore the distressing scenario of a dream ceiling leaking water, shedding light on potential causes, immediate actions, and long-term solutions.

Dream Ceiling Leaking Water

Understanding the Nightmare: Dream Ceiling Leaking Water

Your dream ceiling dripping water can be a shocking and worrisome experience. To effectively address the issue, let’s first explore the possible causes behind this unexpected predicament.

Investigating the Causes of Dream Ceiling Leaking Water

Identifying the root cause is essential for resolving the problem and preventing further damage. Here are common reasons your dream ceiling might start leaking water:

  1. Roof Leaks: Damaged shingles, cracked flashing, or an aging roof can allow rainwater to seep into your dream home, leading to water leaks.
  2. Plumbing Issues: A burst pipe, leaky faucet, or faulty plumbing within your dream abode can contribute to water leaking into the ceiling, creating an unsettling scenario.
  3. Condensation Concerns: In dream homes with poor ventilation, condensation can accumulate, leading to water droplets forming on the ceiling. This may mimic a leak, creating a confusing situation.

Consequences of Ignoring Dream Ceiling Leaks: Beyond the Nightmare

Ignoring water leaks in your dream ceiling can lead to more than just ruined aesthetics. Mold growth, structural damage, and compromised dream interiors are potential consequences of neglecting the issue.

Addressing the Nightmare: Immediate Actions

When faced with a dream ceiling leaking water, taking swift action is crucial to minimize damage. Consider the following immediate steps:

  1. Contain the Leak: Place buckets or containers under the leak to prevent water from spreading and causing further damage to your dream furnishings.
  2. Identify the Source: If safe to do so, try to identify the source of the leak. Is it coming from the roof, plumbing, or is it a result of condensation? Knowing the origin is key to effective resolution.
  3. Contact Professionals: In your dream home emergency, don’t hesitate to contact professionals – roofers, plumbers, or water damage restoration experts – to assess and address the issue promptly.

Read too: Understanding and Addressing a Condensation Leak in the Ceiling: Decoding the Drip

Long-Term Solutions for a Leak-Free Dream Ceiling

Once the immediate crisis is averted, it’s essential to implement long-term solutions to ensure your dream ceiling stays dry and intact.

  1. Roof Repairs: If the leak is stemming from your dream roof, investing in timely repairs or a roof replacement is crucial for maintaining the integrity of your dream home.
  2. Plumbing Overhaul: Conduct a thorough inspection of the dream plumbing system. Repair or replace any faulty pipes, fixtures, or connections to prevent future leaks.
  3. Enhance Ventilation: Improve ventilation in your dream home to reduce condensation. Adequate airflow can prevent water droplets from forming on the ceiling and causing a dream-like illusion of a leak.

Conclusion: Turning Nightmares into Sweet Dreams

In conclusion, a dream ceiling leaking water may seem like a nightmare, but with prompt action and strategic solutions, you can turn the situation around. By understanding the causes and consequences, and implementing both immediate and long-term measures, you can safeguard your dream home from the distress of unexpected water leaks.

Don’t let a dream ceiling leak turn into a recurring nightmare. Take control of the situation, address the root causes, and enjoy a home that remains dry and dream-worthy.

What Causes Water Leaks in Ceiling?

What Causes Water Leaks in Ceiling? Water leaks in ceiling can be a major inconvenience and even a safety hazard. They can cause damage to your home’s structure, mold growth, and even electrical problems. If you’re experiencing a water leak in your ceiling, it’s important to identify the cause of the leak as soon as possible so that you can take steps to repair it.

What Causes Water Leaks In Ceiling

The Problem

There are many things that can cause water leaks in ceilings. Some of the most common causes include:

  • Roof damage: This is the most common cause of water leaks in ceilings. Roof damage can be caused by storms, hail, or even just wear and tear.
  • Gutters and downspouts: Gutters and downspouts are designed to carry rainwater away from your home. If your gutters or downspouts are damaged or clogged, water can back up and leak into your home.
  • Ice dams: Ice dams form when snow melts on your roof and then refreezes at the edge of your roof. This can cause water to back up and leak into your home.
  • Plumbing leaks: Plumbing leaks can occur in your home’s pipes, fixtures, or appliances. If you have a plumbing leak, it can eventually lead to a water leak in your ceiling.
  • Appliance leaks: Appliances such as dishwashers, washing machines, and refrigerators can leak water if they are not properly installed or maintained.

Roof damage

This damage is the most common cause of water leaks in ceilings. Roof damage can be caused by storms, hail, or even just wear and tear. If your roof is damaged, water can seep through the roof and into your ceiling.

Here are some signs of roof damage:

  • Cracks, holes, or missing shingles
  • Wavy or sagging shingles
  • Loose or damaged flashing
  • Dirt, debris, or mold on your roof

If you see any of these signs, it’s important to have your roof inspected by a professional as soon as possible.

Gutters and downspouts

Properly functioning gutters and downspouts actively direct rainwater away from your home, ensuring it doesn’t collect near your property. If these components sustain damage or become clogged, water may accumulate and infiltrate your home.

Here are some signs of gutter or downspout damage:

  • Damaged or missing gutters or downspouts
  • Clogged gutters or downspouts
  • Debris or leaves in your gutters or downspouts

To prevent gutter and downspout leaks, it’s important to keep your gutters and downspouts clean and free of debris.

Ice dams

Ice dams form when snow melts on your roof and then refreezes at the edge of your roof. This can cause water to back up and leak into your home.

Here are some signs of ice dams:

  • A buildup of ice at the edge of your roof
  • Water dripping from your eaves
  • Wet spots on your ceiling

To prevent ice dams, it’s important to install insulation in your attic to prevent the snow from melting.

Read too: Can You Spray Foam Attic Ceiling

Plumbing leaks

Plumbing leaks can occur in your home’s pipes, fixtures, or appliances. If you have a plumbing leak, it can eventually lead to a water leak in your ceiling.

Here are some signs of plumbing leaks:

  • Puddles of water under your sinks, toilets, or appliances
  • Wet spots on your ceiling
  • Leaking faucets or toilets
  • Low water pressure

If you see any of these signs, it’s important to have your plumbing system inspected by a professional as soon as possible.

Appliance leaks

Improper installation or maintenance of appliances like dishwashers, washing machines, and refrigerators can lead to water leakage.

Here are some signs of appliance leaks:

  • Wet spots on your floor
  • Leaking hoses or connections
  • Low water pressure

If you see any of these signs, it’s important to have your appliances inspected by a professional as soon as possible.

Troubleshooting

If you’re experiencing a water leak in your ceiling, the first step is to identify the source of the leak. Once you know where the leak is coming from, you can take steps to repair it.

Water Leaking Through Ceiling After Bath: Causes, Solutions, and Prevention

Water leaking through the ceiling after a bath can be a frustrating and costly problem. It can cause damage to the ceiling, walls, and floor below, and it can also lead to mold and mildew growth. In some cases, it can even be a sign of a more serious underlying problem, such as a leaking roof or damaged pipes.

Water Leaking Through Ceiling After Bath

Causes of Water Leaks

There are a number of possible causes of water leaks through the ceiling after a bath. Some of the most common causes include:

  • Damaged pipes: Damaged pipes are a common cause of water leaks. This damage can be caused by a number of factors, including corrosion, wear and tear, or even a sudden impact.
  • Loose or damaged seals: Loose or damaged seals can allow water to seep through the pipes and into the ceiling. You can locate these seals at the joints between pipes, fittings, and fixtures.
  • Clogged drains: Clogged drains can cause water to back up and leak into the ceiling. This is often caused by hair, soap scum, or other debris that builds up in the drain.
  • Damaged roof or gutters: Damaged roofs or gutters can allow water to leak into the ceiling. Several factors, such as wind damage, hail, or ice dams, can cause this.

Solutions for Water Leaks

The solution for a water leak will depend on the cause of the leak. In certain instances, fixing the leak can be a straightforward process involving a few simple steps. In other cases, the leak may require professional assistance.

If damaged pipes are the root cause of the leak, you will need to repair or replace the pipes. This can be a difficult and time-consuming task, so it is best to hire a professional plumber.

If loose or damaged seals are the cause of the leak, you will need to replace the seals. Homeowners can easily accomplish this task.

If the leak is caused by clogged drains, the drains will need to be cleared. This can be done with a plunger or a drain snake.

If damage to the roof or gutters is responsible for the leak, you will need to repair the damage. This is a task that is best left to a professional roofer.

Preventing Water Leaks

There are a number of things that can be done to prevent water leaks through the ceiling after a bath. Some of the most important preventive measures include:

  • Regularly inspect the pipes and drains for damage. You can do this by inspecting for any indications of cracks, leaks, or corrosion.
  • Clean the gutters and downspouts regularly. This will help to prevent water from backing up and leaking into the house.
  • Use a plunger or drain snake to clear clogged drains. This will help to prevent water from backing up and leaking into the house.
  • Have the roof inspected regularly for damage. This is especially important if you live in an area with severe weather.

Read too: How To Fix Condensation On Ceiling

Additional Tips

In addition to the preventive measures listed above, there are a few additional tips that can help to prevent water leaking through the ceiling after a bath. These tips include:

  • Install a water leak detector. A water leak detector can alert you to a leak before it causes damage.
  • Use a shower curtain or liner. A shower curtain or liner can help to prevent water from splashing onto the floor and causing damage to the ceiling.
  • Turn off the water when you leave the bathroom. This will help to prevent leaks if a pipe bursts.

By following these tips, homeowners can help to keep their homes dry and safe.

Additional Content

Here are some additional tips for preventing water leaks through the ceiling after a bath:

  • Use a high-quality shower curtain or liner. A cheap shower curtain or liner is more likely to tear or leak.
  • Inspect the shower curtain or liner regularly for damage. If you see any tears or holes, replace the curtain or liner immediately.
  • Keep the shower curtain or liner clean. A dirty shower curtain or liner can harbor mold and mildew, which can damage the ceiling.
  • Clean the shower regularly. A dirty shower can lead to soap scum buildup, which can clog drains and cause leaks.
  • Use a plunger or drain snake regularly to clear clogged drains. A clogged drain can cause water to back up and leak into the ceiling.

By following these tips, homeowners can help to keep their homes dry and safe.

Dream of Water Leak From Ceiling: Meanings and Interpretations

Dreams about water leaks from the ceiling can be a disturbing experience. They can be a sign of financial problems, emotional turmoil, or even physical health issues.

In this article, we will explore the possible meanings and interpretations of dreams about water leaks from the ceiling. We will also provide some tips on how to cope with these dreams if they are causing you distress.

Dream Of Water Leak From Ceiling

What do dreams about water leaks from the ceiling mean?

There are many possible meanings and interpretations of dreams about water leaks from the ceiling. Some common interpretations include:

  • Financial problems: A water leak from the ceiling can symbolize financial problems. The water represents money, and the leak represents the loss of money. This type of dream may be a warning sign that you are spending too much money or that you are at risk of losing your job.

For example, you may dream of a water leak from the ceiling in your home. This could represent a financial problem, such as a debt that you are struggling to pay off. The water could represent the money that you are losing, and the leak could represent the fact that you are unable to control your finances.

  • Emotional turmoil: A water leak from the ceiling can also symbolize emotional turmoil. The water represents your emotions, and the leak represents the release of those emotions. This type of dream may be a sign that you are feeling stressed, anxious, or depressed.

For example, you may dream of a water leak from the ceiling in your workplace. This could represent emotional stress, such as feeling overwhelmed by your job. The water could represent your emotions, and the leak could represent the fact that you are feeling overwhelmed.

  • Physical health issues: In some cases, dreams about water leaks from the ceiling can be a sign of physical health issues. The water represents bodily fluids, and the leak represents a problem with your body. This type of dream may be a warning sign that you are experiencing a medical condition.

For example, you may dream of a water leak from the ceiling in your bathroom. This could represent a medical problem, such as a kidney infection. The water could represent the bodily fluids that are being released, and the leak could represent the problem with your body.

Of course, the meaning of a dream about a water leak from the ceiling will vary depending on the individual dreamer. It is important to consider your own personal circumstances and experiences when interpreting your dream.

How to cope with dreams about water leaks from the ceiling

If you are having dreams about water leaks from the ceiling that are causing you distress, there are a few things you can do to cope:

  • Talk to a therapist or counselor: A therapist can help you to understand the meaning of your dreams and develop coping mechanisms.

Talking to a therapist or counselor can be a helpful way to understand the meaning of your dreams and develop healthy coping mechanisms. A therapist can help you to identify the underlying causes of your dreams and develop strategies for dealing with them.

  • Keep a dream journal: Keeping a dream journal can help you to track your dreams and identify any patterns.

Writing down your dreams as soon as you wake up can help you to remember them in more detail. This can be helpful for identifying any patterns or themes in your dreams.

  • Practice relaxation techniques: Relaxation techniques such as deep breathing and meditation can help to reduce stress and anxiety.

Stress and anxiety can often contribute to nightmares. Practicing relaxation techniques can help to reduce stress and anxiety, which can make it less likely that you will have nightmares.

Read too: How To Paint A Basement Ceiling

Conclusion

Dreams about water leaks from the ceiling can be a disturbing experience, but they can also be a valuable source of insight. By understanding the possible meanings and interpretations of these dreams, you can gain a better understanding of yourself and your life.

Water Leaking from Ceiling AC Vent: Causes and Solutions

Discovering water leaking from your ceiling AC vent can be a cause for concern, as it indicates a potential issue with your air conditioning system. In this article, we will explore the various reasons why water may be leaking from your ceiling AC vent, the consequences of this problem, and the steps you can take to identify and resolve it.

Water Leaking From Ceiling Ac Vent

Read too: Are Floor To Ceiling Windows Expensive

Understanding Ceiling AC Vent Leaks

Ceiling AC vents are designed to distribute cool, conditioned air throughout your home. They are typically connected to a network of ducts that carry the air from your air conditioner. When water is observed leaking from an AC vent, it suggests that something has gone wrong in this system. Below are some common causes and solutions for this issue:

1. Condensation Buildup

Description: Condensation can form on the surface of AC vents when the cold air from the air conditioner meets the warm, humid air in your home. This condensation can eventually lead to water droplets forming and dripping from the vent.

Solution: To address condensation buildup, consider insulating the ducts and vents to prevent temperature differentials. Additionally, maintaining a comfortable indoor humidity level can help reduce condensation.

2. Clogged Drain Line

Description: AC units have drain lines designed to carry excess condensate away. When the drain line becomes clogged with dirt, debris, or algae, water can back up and leak from the AC vent.

Solution: Clean or unclog the drain line regularly to ensure proper drainage. A professional HVAC technician can assist with this task.

3. Refrigerant Leak

Description: A refrigerant leak can lead to a drop in temperature around the AC vent, causing condensation and water leakage.

Solution: If you suspect a refrigerant leak, it’s crucial to contact a professional HVAC technician to inspect and repair the issue.

4. Ductwork Issues

Description: Damaged or improperly sealed ducts can allow warm, humid air to infiltrate and mix with the cold air, resulting in condensation and leaks.

Solution: Inspect the ductwork for damage and ensure you seal all joints and connections correctly. Repair or replace damaged sections as needed.

5. Ice Formation

Description: In rare cases, ice can form on the AC unit’s coils, which can melt and cause water to leak from the vent.

Solution: Check for any obstructions or airflow issues around the AC unit, and consider increasing the temperature setting to prevent freezing.

6. Blocked Vents

Description: Blocking air vents with furniture, drapes, or other obstructions disrupts airflow and can lead to moisture buildup.

Solution: Ensure all vents are unobstructed to maintain proper airflow and temperature balance.

Consequences of Ceiling AC Vent Leaks

Ignoring water leaks from ceiling AC vents can lead to several issues, including:

  • Ceiling and Wall Damage: Prolonged leakage can damage your ceiling and walls, leading to costly repairs.
  • Mold and Mildew Growth: Moisture from AC vent leaks can promote mold and mildew growth, posing health risks.
  • Reduced Cooling Efficiency: Leaks may compromise your AC’s performance and energy efficiency.

Conclusion

Water leaking from a ceiling AC vent is a problem that should not be ignored. Identifying the root cause and addressing it promptly is essential to prevent further damage and maintain the efficiency of your cooling system. Regular maintenance, prompt repairs, and humidity control can help ensure your AC system operates smoothly, keeping your home comfortable and dry.

Troubleshooting a Water Leak in Ceiling from Washing Machine

Discovering a water leak in your ceiling can be a homeowner’s nightmare. If this leak originates from your washing machine, it’s essential to address it promptly to prevent further damage. In this article, we’ll explore the common causes of a water leak in the ceiling from a washing machine, how to identify the issue, and the steps to remedy it.

Water Leak In Ceiling From Washing Machine

Understanding the Causes

  1. Faulty Hoses
    • One of the most frequent culprits for a water leak from a washing machine is a damaged or loose hose. The hoses that connect your washing machine to the water supply can degrade over time, leading to leaks.
  2. Clogged Drainage
    • If your washing machine’s drainage system is blocked, excess water may not be able to escape, resulting in a backup and potential leakage.
  3. Worn Out Seals
    • Over time, the seals and gaskets in your washing machine can wear out. This can cause water to seep out during the wash or spin cycles.
  4. Overloading
    • Overloading the washing machine can lead to excessive vibration and movement, potentially causing water to spill over the sides and onto the floor, eventually seeping into the ceiling.

Identifying the Issue

If you notice water stains or bulging spots on your ceiling, you’ll want to investigate the problem promptly:

  1. Check the Washing Machine Area
    • Begin by examining the area around your washing machine. Look for puddles of water, dampness, or visible leaks. If you find any of these, follow the water’s path to identify the source.
  2. Inspect Hoses
    • Examine the hoses that connect your washing machine to the water supply and the drainage system. Tighten any loose connections and replace damaged hoses.
  3. Examine the Drainage System
    • Inspect the drainage system, including the drain hose and the standpipe or sink where the water drains. Ensure there are no clogs or blockages.
  4. Run a Test Cycle
    • To test if your washing machine is the source of the leak, run a small load of laundry. Observe the machine closely during the wash and spin cycles to identify any leakage.
  5. Check for Ceiling Damage
    • Finally, inspect your ceiling for signs of water damage. Look for water stains, discoloration, sagging, or peeling paint.

Remedying the Water Leak

Once you’ve identified the cause of the water leak in the ceiling from your washing machine, it’s time to take action:

  1. Replace Damaged Hoses
    • If the hoses are the problem, replace them with new ones. It’s a good practice to use stainless steel braided hoses, as they are more durable and less prone to leaks.
  2. Clear Drainage Blockages
    • If a clogged drainage system is to blame, clear the blockage by disconnecting the drain hose and removing any debris or buildup. You may need a plumber’s snake or a similar tool to clear obstructions in the pipes.
  3. Inspect and Replace Seals
    • For worn-out seals and gaskets, you may need to disassemble parts of your washing machine to access and replace them. Consult your washing machine’s manual for guidance, or consider seeking professional assistance.
  4. Proper Loading
    • To prevent leaks caused by overloading, make sure you’re not exceeding the recommended capacity of your washing machine. Distribute the load evenly inside the drum to minimize vibration.
  5. Ceiling Repairs
    • If your ceiling has sustained damage from the water leak, you’ll need to address it promptly. This might involve cutting out damaged sections, replacing insulation, and repainting. It’s advisable to consult a professional for ceiling repairs.

Preventing Future Leaks

To avoid a water leak in the ceiling from your washing machine in the future, consider the following preventive measures:

  1. Regular Maintenance
    • Perform routine maintenance on your washing machine, including checking hoses, seals, and drainage components. Replace any worn or damaged parts promptly.
  2. Use a Drain Pan
    • Placing a drain pan beneath your washing machine can help contain any potential leaks, preventing water from reaching the ceiling.
  3. Monitor Loads
    • Be mindful of the size and weight of your laundry loads. Overloading the machine can lead to excessive wear and tear.

Conclusion

A water leak in the ceiling from your washing machine can be a source of stress, but with the right knowledge and actions, you can address the issue and prevent future leaks. Regular maintenance, prompt identification of problems, and proper loading practices are essential for keeping your washing machine and your home in top condition. If you encounter a significant issue or are unsure about repairs, it’s always a good idea to consult with a professional for assistance.

Should I Pop A Water Bubble On My Ceiling?

Should i pop a water bubble on my ceiling? Finding a water bubble on your ceiling can be a concerning sight. It often raises the question: should I pop it? In this article, we’ll delve into the considerations and potential consequences of dealing with a water bubble on your ceiling.

should i pop a water bubble on my ceiling

Understanding Water Bubbles on Ceilings

Water bubbles on your ceiling usually result from a leak in the roof, plumbing, or a burst pipe. The bubble forms when water infiltrates the ceiling material, causing it to swell and create a visible bulge. While the immediate instinct may be to pop the bubble to release the trapped water, it’s essential to assess the situation carefully.

When to Pop a Water Bubble:

  1. Safety First: Before taking any action, ensure your safety. If the bubble is large or the ceiling material is sagging significantly, there’s a risk of it collapsing and causing injury. In such cases, it’s best to stay clear and avoid the area until professional help arrives.
  2. Small Bubbles: If the water bubble is relatively small, less than a few inches in diameter, it may be possible to address it carefully. You can use a small pin or needle to create a tiny hole at the bubble’s lowest point. This should allow the trapped water to drain slowly without causing further damage.
  3. Controlled Drainage: When popping a small water bubble, be prepared with a bucket or container to catch the draining water. This helps prevent water from splashing onto the floor or furnishings.

When Not to Pop a Water Bubble:

  1. Structural Damage: If the water bubble has caused significant structural damage to the ceiling, it’s best not to pop it. Popping it could lead to further damage, including a complete collapse of the ceiling.
  2. Electrical Hazards: Avoid popping a water bubble if it’s in close proximity to electrical fixtures, such as ceiling lights or fans. Water and electricity do not mix, and you could risk electrocution.
  3. Mold Concerns: Popping the bubble may release water that has seeped into the ceiling material. This can create an environment conducive to mold growth. To prevent mold issues, it’s essential to address the root cause of the leak and thoroughly dry the affected area.
  4. Professional Help: When in doubt or if the situation is complex, it’s best to seek professional assistance. A qualified contractor or restoration specialist can assess the damage, locate the source of the leak, and recommend the appropriate course of action.

Addressing the Root Cause

While addressing a water bubble on the ceiling is a temporary fix, the most crucial step is to determine and rectify the source of the leak. Once the leak is repaired, the ceiling can be properly restored or replaced.

Conclusion: Safety and Prevention

When faced with a water bubble on your ceiling, safety and prevention should be your top priorities. Carefully assess the size and condition of the bubble and consider the potential risks and consequences before deciding to pop it. In many cases, it’s best to consult with professionals who can address the root cause of the issue and ensure a safe and effective solution, preventing further damage and potential hazards in your home.