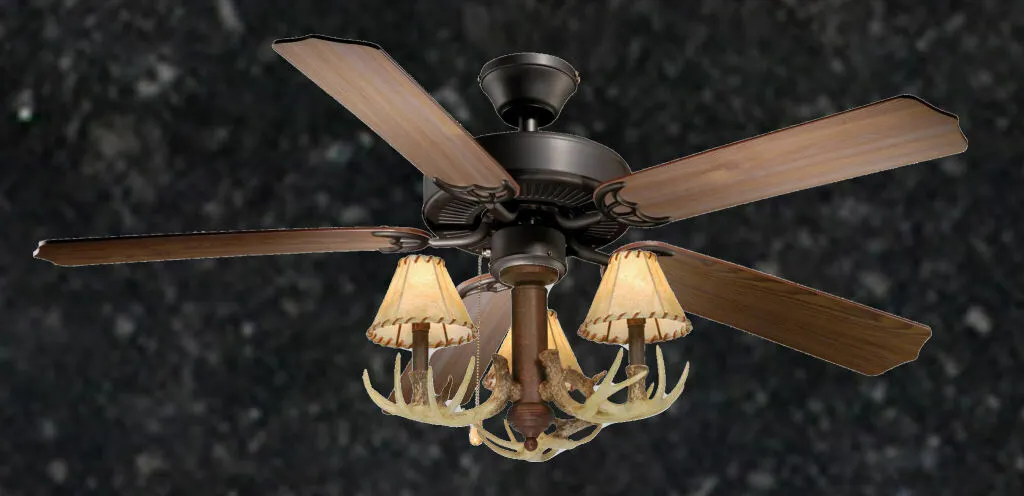
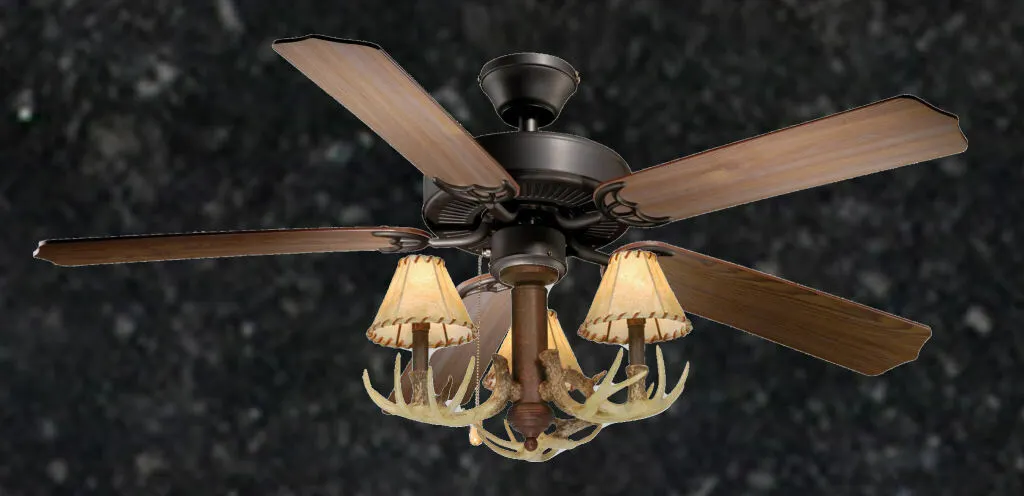
Rustic Ceiling Fan With Lights: Enhance Your Home Decor

In the world of home decor, few elements can transform a space quite like a ceiling fan. Beyond their practical function of providing cooling relief, ceiling fans can significantly enhance the aesthetic of a room. One particularly popular style is the rustic ceiling fan with lights. This design choice not only brings a cozy, warm atmosphere to your home but also integrates functional lighting solutions. Whether you’re aiming for a cabin-inspired look, a farmhouse aesthetic, or simply want to incorporate natural materials into your decor, rustic ceiling fans with lights offer an attractive and versatile option.

Rustic Ceiling Fan With Lights

What Is a Rustic Ceiling Fan With Lights?

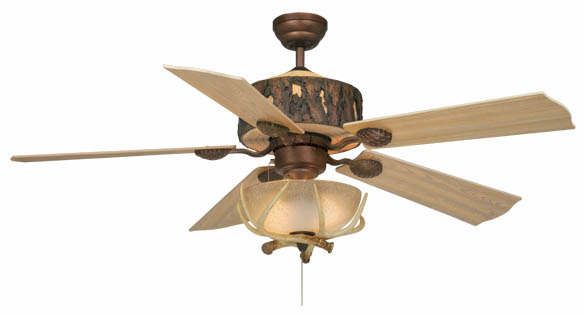
A rustic ceiling fan with lights combines the cooling functionality of a ceiling fan with the illumination of integrated lighting. Typically featuring wood or metal finishes, these fans embody the charm of rural design and are perfect for settings where a cozy, inviting atmosphere is desired. They often incorporate features like:

  • Natural Wood Blades: Fans may have blades made from reclaimed wood, offering unique grain patterns and textures that contribute to a rustic look.
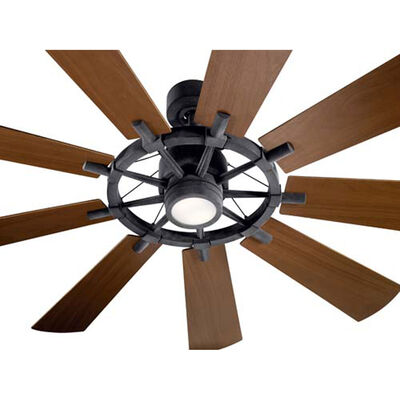
  • Industrial Metal Accents: Combining wood with iron or steel elements adds an industrial flair, balancing the warmth of wood with a rugged edge.
  • Integrated Lighting: Many models include built-in light fixtures that can serve as the primary light source in a room, making them practical as well as stylish.
  • Varied Styles: Rustic ceiling fans come in various styles, from vintage designs to more contemporary interpretations, ensuring there’s an option to fit your specific decor needs.

Read too: Kitchen Lighting For A Vaulted Ceiling: Illuminating Your Space with Style and Functionality


Benefits of Choosing a Rustic Ceiling Fan With Lights

1. Aesthetic Appeal

One of the most significant advantages of a rustic ceiling fan with lights is its ability to enhance the decor of a room. The blend of natural materials and stylish design creates a focal point that draws the eye. This makes it an ideal choice for living rooms, bedrooms, and even outdoor spaces like porches or patios.

2. Functional Lighting

In addition to cooling your space, these fans provide essential lighting. Many rustic ceiling fans come equipped with adjustable brightness settings and different light color options, allowing you to create the perfect ambiance for any occasion. Whether you need bright light for reading or a warm glow for a cozy evening, these fans can accommodate your needs.

3. Energy Efficiency

Rustic ceiling fans with lights often use energy-efficient LED bulbs, which consume less power than traditional incandescent bulbs. This means you can enjoy the benefits of both lighting and cooling while keeping your energy bills in check. Additionally, many ceiling fans can help circulate air, reducing the need for air conditioning in warmer months.

4. Versatility in Design

Rustic ceiling fans with lights can be integrated into various decor styles. Whether your home is designed in a country, farmhouse, industrial, or even a modern aesthetic, you can find a rustic fan that complements your overall theme. They blend well with other rustic decor elements, such as wooden furniture, stone accents, and warm color palettes.

5. Improved Air Circulation

Using a ceiling fan effectively can improve the air circulation in a room, making it feel more comfortable year-round. In winter, running the fan in reverse can help distribute warm air from heating sources, while in summer, it can create a cooling breeze. This functionality makes rustic ceiling fans an excellent choice for climate control in your home.


Choosing the Right Rustic Ceiling Fan With Lights

When selecting the perfect rustic ceiling fan with lights for your home, consider the following factors:

1. Room Size

The size of the room where you plan to install the fan is crucial. Larger rooms may require more powerful fans with larger blade spans, while smaller spaces may benefit from compact designs. Here’s a quick guide for blade size based on room size:

  • Small Rooms (up to 75 sq ft): 29″ to 36″ blade span
  • Medium Rooms (up to 144 sq ft): 36″ to 42″ blade span
  • Large Rooms (over 144 sq ft): 44″ or larger blade span

2. Style and Finish

Choose a fan that complements your existing decor. Consider materials, colors, and finishes. A fan with a distressed wood finish can add a rustic charm, while metal accents can enhance the industrial feel. Don’t hesitate to mix materials for a unique look that suits your style.

3. Lighting Options

Look for fans with integrated lighting features that fit your needs. Options may include adjustable brightness, dimmable lights, and various light color temperatures (warm, cool, or daylight). Make sure the light output is sufficient for the room’s size and intended use.

4. Noise Level

Consider the noise level of the fan. High-quality models typically operate quietly, ensuring you can enjoy a peaceful environment. If possible, test the fan before purchasing to gauge its sound level during operation.

5. Installation Requirements

Some ceiling fans can be more complicated to install than others. If you are not comfortable with electrical work, you might want to hire a professional to ensure a safe and proper installation. Check if the fan comes with clear installation instructions and all necessary hardware.


Installation of a Rustic Ceiling Fan With Lights

Installing a rustic ceiling fan with lights can be a rewarding DIY project if you have some basic skills. Here’s a step-by-step guide to help you through the process:

Tools and Materials Needed

  • Screwdriver (flat and Phillips head)
  • Ladder
  • Wire cutters/strippers
  • Electrical tape
  • Voltage tester
  • Rustic ceiling fan with lights

Step-by-Step Installation Guide

  1. Turn Off Power: Before starting, turn off the power at the circuit breaker to prevent any electrical accidents.
  2. Remove the Old Fixture: If you are replacing an existing light fixture, carefully remove it. Use a voltage tester to ensure that no electricity is flowing through the wires.
  3. Install the Mounting Bracket: Most ceiling fans come with a mounting bracket. Attach it securely to the ceiling using screws provided in the fan kit.
  4. Prepare the Wires: Strip about half an inch of insulation from the ends of the wires. Generally, you’ll have a black (live) wire, a white (neutral) wire, and a green or bare wire (ground).
  5. Connect the Wires:
    • Connect the black wire from the fan to the black wire in the ceiling.
    • Connect the white wire from the fan to the white wire in the ceiling.
    • Connect the green or bare wire from the fan to the ground wire in the ceiling.
    • Use wire nuts to secure each connection and wrap them with electrical tape for added safety.
  6. Attach the Fan: Lift the fan and attach it to the mounting bracket according to the manufacturer’s instructions. Ensure it is secured properly.
  7. Install the Light Kit: If your fan includes a light kit, install it following the provided instructions. This usually involves attaching the light fixture and connecting the corresponding wires.
  8. Final Adjustments: Adjust the fan blades if necessary and ensure everything is secure.
  9. Restore Power and Test: Turn the power back on at the circuit breaker. Test the fan and light to ensure they are functioning correctly.

Maintenance Tips for Your Rustic Ceiling Fan With Lights

To ensure your rustic ceiling fan with lights continues to perform well and look great, follow these maintenance tips:

1. Regular Dusting

Ceiling fans can accumulate dust, especially on the blades and light fixtures. Use a soft cloth or a duster to wipe down the blades and fixtures regularly to keep them looking clean and functioning efficiently.

2. Check for Wobbling

If your fan starts to wobble during operation, it may need adjustment. Tighten any loose screws and ensure the blades are correctly aligned. A level can help you check the alignment of the fan.

3. Lubricate Moving Parts

Consult the manufacturer’s instructions regarding lubrication. Some ceiling fans have specific lubrication points that should be maintained to keep the fan running smoothly.

4. Inspect Wiring Annually

Once a year, inspect the wiring and connections for any signs of wear or damage. If you notice any frayed wires or loose connections, address them immediately to prevent potential hazards.

5. Replace Bulbs as Needed

If the integrated lighting in your fan begins to flicker or goes out, replace the bulbs according to the specifications outlined in the product manual.


Conclusion

A rustic ceiling fan with lights is an excellent addition to any home, providing not only practical benefits like improved airflow and lighting but also enhancing the overall aesthetic appeal. By choosing the right fan for your space, you can create a warm, inviting atmosphere that reflects your personal style. With proper installation and maintenance, your rustic ceiling fan can serve as a beautiful and functional centerpiece in your home for years to come.

Whether you’re redecorating or starting from scratch, consider the charm and efficiency of a rustic ceiling fan with lights as an integral part of your home decor strategy.

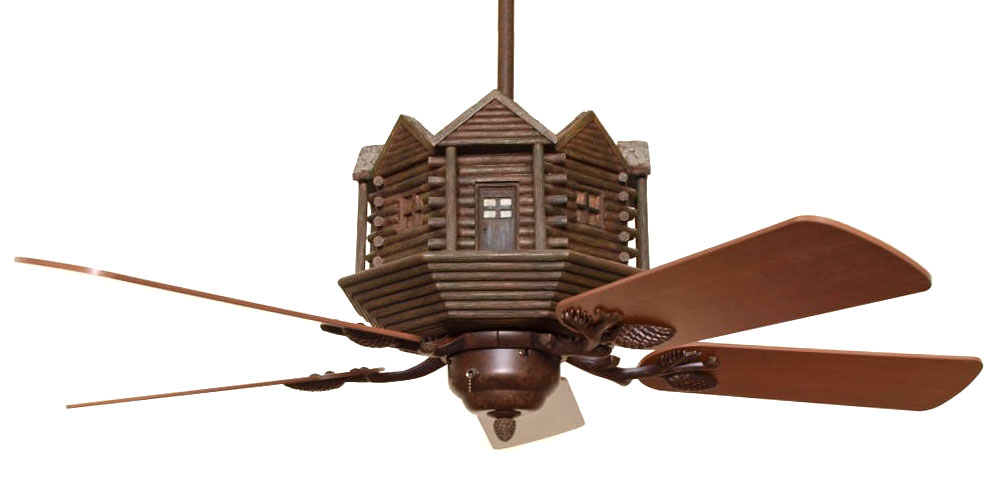
Rustic Wood Ceiling Beams: Tips and Ideas for a Cozy Aesthetic

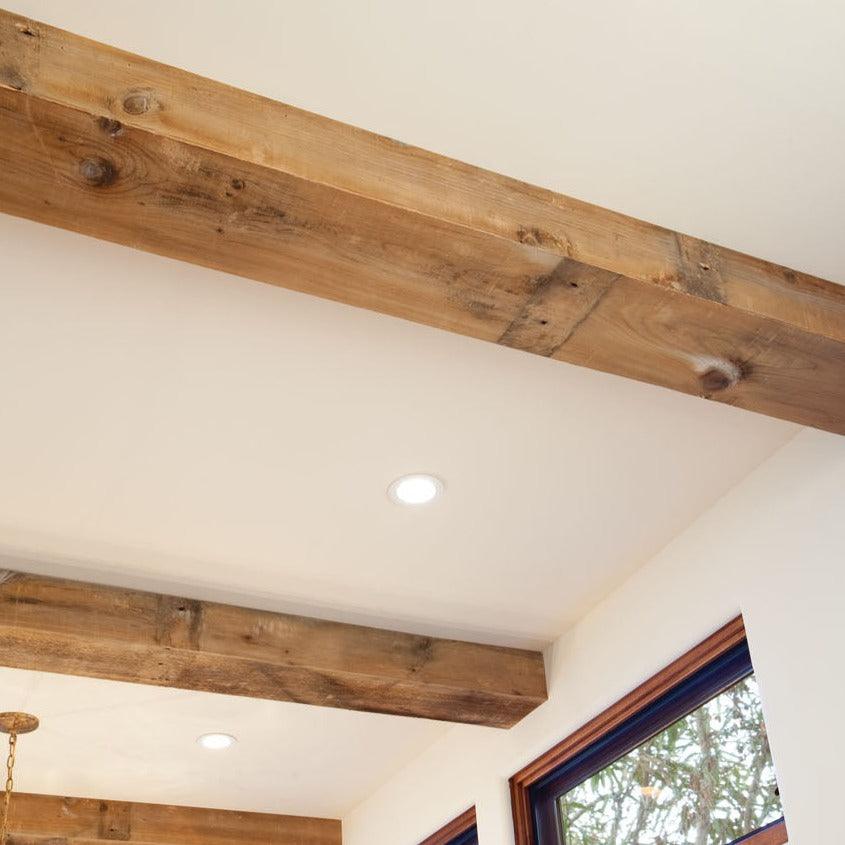
Rustic wood ceiling beams can dramatically elevate the look and feel of a space, infusing it with warmth, charm, and a touch of nostalgia. Whether you’re designing a cozy farmhouse living room or adding character to a modern loft, rustic wood ceiling beams bring a natural, organic element that enhances almost any decor style. This article will guide you through everything you need to know about incorporating rustic ceiling beams into your home, including design ideas, benefits, installation tips, and maintenance advice.

Rustic Wood Ceiling Beams

Why Choose Rustic Wood Ceiling Beams?

Rustic wood ceiling beams aren’t just structural; they’re a stylistic choice that makes a statement. Here’s why many homeowners and interior designers love them:

  1. Natural Aesthetic: Wood beams bring a natural texture that adds warmth and visual interest to ceilings.
  2. Timeless Appeal: Rustic ceiling beams never go out of style, fitting seamlessly into various decor themes, from modern farmhouse to industrial.
  3. Versatility: They can work with many types of architecture and decor, enhancing both traditional and contemporary designs.
  4. Enhanced Property Value: Adding high-quality, rustic elements like ceiling beams can boost the value of your property by creating a unique, desirable aesthetic.

Read too: Kitchen Lighting For A Vaulted Ceiling: Illuminating Your Space with Style and Functionality


Types of Rustic Wood Ceiling Beams

When it comes to selecting rustic wood ceiling beams, there are several options to consider based on material, style, and installation method.

1. Solid Wood Beams

Solid wood beams are the traditional choice for creating a rustic look. Made from high-quality hardwoods such as oak, cedar, or pine, they offer durability and an authentic appearance. However, solid wood beams can be heavy and often require professional installation, making them a more permanent but higher-cost investment.

2. Faux Wood Beams

Faux wood beams are an excellent alternative for those who want the look of wood without the weight. Typically made from high-density polyurethane, these beams are lightweight, affordable, and easy to install. Faux wood beams come in a variety of textures and finishes that mimic the look of real wood and are ideal for DIY enthusiasts.

3. Reclaimed Wood Beams

For an eco-friendly option, reclaimed wood beams are an excellent choice. These beams are sourced from old barns, factories, or other structures, giving them unique character and history. Each piece of reclaimed wood has its own natural variations, adding to the rustic charm. Reclaimed wood beams are perfect for homeowners looking to reduce waste while achieving a vintage aesthetic.

4. Box Beams

Box beams are hollow beams constructed from wood planks and are lighter than solid wood beams. They offer the same visual appeal without adding much weight, making them suitable for both new builds and renovations. Box beams are also customizable, allowing you to create the exact look you desire.


How to Incorporate Rustic Wood Ceiling Beams into Different Rooms

Whether you’re aiming for a grand, traditional style or a cozy, intimate atmosphere, rustic wood ceiling beams can be tailored to fit various spaces in your home.

Living Room

The living room is an ideal space to showcase rustic ceiling beams, as they can become the focal point of the room. Consider installing multiple beams across the ceiling to create a structured, eye-catching design. You could also add a central beam to highlight a high ceiling or a vaulted layout.

Kitchen

Rustic beams can add warmth to your kitchen, balancing the often utilitarian feel of stainless steel appliances and modern cabinetry. In open-concept kitchens, ceiling beams can help define the space while adding depth. Position beams over a kitchen island or dining area to make the space feel more inviting.

Bedroom

In a bedroom, wood ceiling beams contribute to a relaxing, tranquil environment. A pair of beams over the bed creates symmetry, while a single, central beam can add height to the room. Consider pairing rustic beams with soft lighting to further enhance the cozy feel.

Dining Room

For formal or informal dining areas, rustic beams create an ambiance that’s both welcoming and elegant. In rooms with low ceilings, box beams are an excellent option, as they add visual appeal without making the ceiling feel lower. For dining rooms with high or vaulted ceilings, solid wood beams add grandeur and create a unique focal point.


Installation Tips for Rustic Wood Ceiling Beams

Installing rustic wood ceiling beams requires careful planning and, in many cases, professional help. Here are some steps to guide you through the process:

Step 1: Choose the Right Type of Beam

Decide whether you want solid wood, faux wood, reclaimed wood, or box beams based on your budget, ceiling height, and personal preference.

Step 2: Measure and Plan

Measure your ceiling and mark where you want the beams to go. If you’re installing multiple beams, spacing them evenly creates a balanced look. Planning the placement is essential, especially if you’re incorporating beams into a room with lighting fixtures, as you may need to adjust the layout accordingly.

Step 3: Prepare the Ceiling

Ensure your ceiling is ready for installation by checking for structural support. Solid wood beams require sturdy support structures, especially in high-load areas.

Step 4: Install Mounting Brackets or Frames

Attach mounting brackets or frames to support the beams, particularly if you’re using heavier, solid wood beams. Faux or box beams may not need as robust a support system, but they should still be securely attached.

Step 5: Secure the Beams

Once the mounting brackets are in place, secure each beam to the ceiling. Take your time to ensure that each beam is level and securely fastened.

Step 6: Finish and Stain

After installation, you can finish the beams with a stain or sealant to protect the wood and enhance its appearance. Opt for finishes that match or contrast with your room’s decor for added visual impact.


Maintenance Tips for Rustic Wood Ceiling Beams

Keeping your rustic wood beams looking their best doesn’t require extensive upkeep, but regular maintenance helps preserve their natural beauty.

  1. Dust Regularly: Use a microfiber cloth to remove dust from the surface of the beams. Dusting prevents buildup that can dull the wood’s appearance.
  2. Apply Wood Polish: Every few months, apply a wood polish or conditioning oil to keep the wood hydrated and shiny.
  3. Inspect for Cracks or Damage: Check your beams periodically for cracks or signs of damage. Reclaimed wood beams may have natural imperfections, but it’s a good idea to address any structural issues as they arise.
  4. Avoid Excessive Moisture: Wood beams can warp if exposed to excessive moisture, so avoid using them in overly humid areas unless they are properly sealed.

Popular Design Ideas with Rustic Wood Ceiling Beams

1. Farmhouse Chic

For a classic farmhouse look, combine white walls with natural wood ceiling beams. Adding simple, rustic furniture and decor items completes this timeless style.

2. Industrial Loft

In an industrial-themed space, pair dark-stained wood beams with exposed brick walls and metal fixtures. This look works well in loft apartments or homes with high, open ceilings.

3. Scandinavian Minimalism

Use light-colored wood beams with a natural finish to bring a touch of warmth to a minimalist, Scandinavian-inspired space. Keep the decor simple, with neutral colors and uncluttered furnishings.

4. Modern Rustic

Blend rustic wood beams with sleek, modern furniture and fixtures for a balanced aesthetic. This combination works beautifully in open-concept spaces, where the beams add texture without overwhelming the room.


Conclusion

Adding rustic wood ceiling beams to your home can dramatically transform the atmosphere, bringing a touch of nature and an element of charm that few other design elements can match. Whether you choose reclaimed wood for a vintage feel, faux beams for a budget-friendly option, or solid wood for a lasting investment, rustic ceiling beams make a stylish and functional addition to any room.

With proper planning, installation, and maintenance, you can enjoy the timeless beauty and warmth that rustic wood ceiling beams bring to your home for years to come.

Log Home Comfort: Discovering the Best Log Home Ceiling Fans

A log home exudes natural beauty and tranquility, and choosing the right ceiling fans can enhance its charm while ensuring optimal air circulation and energy efficiency. Whether you’re building a new log home or renovating an existing one, selecting ceiling fans that blend seamlessly with the rustic ambiance is essential for both aesthetic appeal and practical comfort.

Log Home Ceiling Fans

Understanding Log Home Ceiling Fans

Log home ceiling fans are designed to complement the unique architectural features and natural materials typically found in log cabins and homes. They not only circulate air effectively but also contribute to the overall rustic decor, making them a functional and stylish addition to any log home interior or exterior space.

Factors to Consider When Choosing Log Home Ceiling Fans

  1. Design and Style: Opt for fans that feature rustic finishes such as wood, bronze, or iron. Consider fan blades crafted from materials that complement the log walls, such as wood or distressed finishes that mimic natural textures.
  2. Size and Blade Span: Choose a fan size appropriate for the room dimensions. Larger rooms may require fans with bigger blade spans to ensure sufficient air movement, while smaller rooms can benefit from smaller or dual-motor fans.
  3. Lighting Options: Many log home ceiling fans come with integrated light kits, offering both illumination and air circulation in one fixture. Select fans with dimmable lights to adjust brightness levels according to your needs.

Types of Log Home Ceiling Fans

  • Rustic Style Fans: Featuring designs that evoke a cabin or lodge atmosphere, these fans often include details like antler accents, pine cone motifs, or weathered finishes.
  • Outdoor Fans: For log homes with porches or outdoor living spaces, choose ceiling fans specifically rated for damp or wet locations. These fans are built to withstand varying weather conditions while providing comfort outdoors.
  • Energy Efficient Fans: Look for fans with Energy Star ratings or those equipped with LED light kits to maximize energy savings without compromising on performance.

Installation and Maintenance Tips

  • Ceiling Height Considerations: Ensure proper clearance between the fan blades and the ceiling or any obstructions for safe and effective operation.
  • Remote Control and Wall Controls: Opt for fans with remote controls or wall-mounted controls for convenience, especially in high-ceilinged log homes or outdoor areas.
  • Regular Maintenance: Keep fan blades clean and free of dust to maintain optimal air circulation and prevent wobbling. Lubricate moving parts as recommended by the manufacturer to extend the fan’s lifespan.

Conclusion

Choosing the best log home ceiling fan involves balancing aesthetics, functionality, and practical considerations specific to your log home environment. Whether you prefer a traditional rustic look or a more contemporary design, there are ceiling fan options available to suit every style and enhance the comfort of your log home living spaces.

Investing in high-quality log home ceiling fan ensures not only efficient air circulation but also adds to the overall ambiance of your log home retreat. Explore the variety of styles and features available to find the perfect ceiling fan that blend seamlessly with your log home decor.

Log Cabin Ceiling Fan With Lights: Enhance Your Log Cabin with a Rustic Charm

A log cabin exudes warmth and coziness, and choosing the right ceiling fan with lights can elevate its rustic charm while providing essential air circulation and illumination. Whether you’re renovating an existing cabin or planning a new build, selecting a ceiling fan that blends seamlessly with the log cabin aesthetic is key to achieving both style and functionality.

Log Cabin Ceiling Fan With Lights

Understanding the Appeal of Log Cabin Ceiling Fan With Lights

A log cabin ceiling fan with lights serves more than just a practical purpose. It becomes a focal point in the room, enhancing the overall ambiance and complementing the natural materials and textures typically found in log cabins. These fans are designed to withstand rustic environments while offering modern conveniences, making them ideal for both indoor and outdoor spaces in your cabin retreat.

Factors to Consider When Choosing a Log Cabin Ceiling Fan With Lights

  1. Design Aesthetics: Opt for fans that feature wood finishes, wrought iron accents, or antler-inspired designs to harmonize with the log cabin theme. The fan blades should complement the ceiling’s natural wood or timber tones.
  2. Size and Scale: Consider the size of your cabin space when selecting a ceiling fan. A larger room may require a fan with a bigger blade span to ensure effective air circulation, while smaller rooms may benefit from smaller or dual-motor fans.
  3. Lighting Options: Choose ceiling fans that offer customizable lighting options. Integrated light kits with dimmable features can provide both ambient lighting and task lighting, adapting to various activities and times of day.

Log Cabin Ceiling Fan With Lights: Types and Features

  • Rustic Style Fans: Featuring elements like distressed finishes, pine cone accents, or lantern-style lights, these fans blend seamlessly with a log cabin’s interior design.
  • Outdoor Durability: For cabins with outdoor living spaces, opt for ceiling fans rated for damp or wet locations. These fans are designed to withstand moisture and environmental elements without compromising performance.
  • Energy Efficiency: Look for fans with Energy Star ratings or LED light kits to maximize energy savings while reducing environmental impact.

Practical Considerations for Installation and Maintenance

  • Ceiling Height: Determine the optimal mounting height for your ceiling fan to ensure proper air circulation and safety.
  • Remote Control Options: Consider fans with remote controls or wall-mounted controls for ease of operation, especially in high-ceilinged cabins or outdoor areas.
  • Maintenance Tips: Regularly clean fan blades and light fixtures to prevent dust buildup and ensure efficient performance. Lubricate moving parts as recommended by the manufacturer to extend the fan’s lifespan.

Conclusion

Choosing a log cabin ceiling fan with lights involves balancing style, functionality, and practical considerations specific to your cabin’s environment. Whether you prefer a classic rustic look or a more modern interpretation of cabin decor, there are ceiling fan options available to suit every taste and budget. Invest in a fan that not only enhances your cabin’s aesthetic appeal but also provides reliable performance and comfort year-round.

Read too: Striped Schoolhouse Ceiling Light Fixtures: Unveiling the Timeless Charm

Discover the perfect log cabin ceiling fan with light that reflects your personal style while enhancing the natural beauty of your cabin retreat.

Reclaimed Wood Beams for Ceiling: Enhance Your Home’s Charm

Reclaimed wood beams for ceiling are becoming increasingly popular in interior design due to their rustic charm, sustainability, and unique character. These beams add warmth, texture, and history to any space, making them a sought-after feature in both traditional and contemporary homes. In this comprehensive guide, we will explore the benefits, styles, and installation tips for incorporating reclaimed wood beams into your ceiling design.

Reclaimed Wood Beams For Ceiling

Why Choose Reclaimed Wood Beams for Ceiling?

Reclaimed wood beams offer a multitude of benefits that go beyond their aesthetic appeal. Here are some key reasons why homeowners and designers are opting for reclaimed wood beams for ceiling:

  1. Sustainability: Using reclaimed wood reduces the demand for new timber, helping to preserve forests and reduce environmental impact. It promotes recycling and minimizes waste.
  2. Unique Character: Each piece of reclaimed wood has its own history, featuring unique markings, knots, and grain patterns that tell a story. This adds a layer of authenticity and character to your home.
  3. Durability: Reclaimed wood is often more durable than new wood because it has been seasoned and aged over time. This makes it a sturdy choice for structural and decorative purposes.
  4. Aesthetic Appeal: The natural patina and weathered look of reclaimed wood beams create a warm and inviting atmosphere. They can enhance various design styles, from rustic farmhouse to modern industrial.
  5. Versatility: Reclaimed wood beams can be used in various ways, such as faux beams for decorative purposes, structural support beams, or even as part of a coffered ceiling design.

Styles of Reclaimed Wood Beams for Ceiling

When considering reclaimed wood beams for ceiling, there are several styles to choose from, each offering a different look and feel:

  1. Rustic Beams: Featuring a rough, weathered texture, rustic beams are perfect for creating a cozy, cabin-like atmosphere. They often have visible saw marks, knots, and natural imperfections that add to their charm.
  2. Hand-Hewn Beams: These beams are manually shaped with an axe or chisel, giving them a rugged and authentic appearance. Hand-hewn beams are ideal for traditional and historic homes.
  3. Box Beams: Made from reclaimed wood, box beams are hollow and lighter than solid beams, making them easier to install. They are a great option for adding decorative elements without the weight of solid wood.
  4. Sandblasted Beams: This style involves sandblasting the surface of the reclaimed wood to enhance its texture and bring out the grain patterns. Sandblasted beams offer a blend of rustic and contemporary aesthetics.
  5. Smooth-Finished Beams: For a more polished look, smooth-finished beams are planed and sanded to remove rough edges and splinters. They work well in modern and transitional interiors.

Installation Tips for Reclaimed Wood Beams for Ceiling

Installing reclaimed wood beams for ceiling requires careful planning and execution to ensure a seamless and secure installation. Here are some tips to help you get started:

  1. Plan Your Design: Before purchasing reclaimed wood beams, plan the layout and design of your ceiling. Consider factors such as beam size, spacing, and orientation to achieve the desired look.
  2. Check Ceiling Structure: Ensure that your ceiling can support the weight of the reclaimed wood beams. If you’re installing faux beams, this is less of a concern, but structural beams require proper support.
  3. Measure and Cut: Measure the length and width of your ceiling space to determine the dimensions of the beams. Use a saw to cut the beams to the required length, making sure to account for any irregularities in the reclaimed wood.
  4. Secure Mounting: Use heavy-duty brackets or straps to secure the beams to the ceiling joists. Make sure the brackets are properly anchored and can support the weight of the beams.
  5. Finish and Seal: Depending on the look you want to achieve, you may need to finish and seal the beams. This can include staining, waxing, or applying a clear sealant to protect the wood and enhance its natural beauty.
  6. Coordinate with Lighting and Other Fixtures: If you plan to incorporate lighting or other fixtures into the beams, make sure to coordinate the installation process to ensure everything fits together seamlessly.

Maintaining Reclaimed Wood Beams for Ceiling

To keep your reclaimed wood beams looking their best, regular maintenance is essential. Here are some tips for maintaining reclaimed wood beams:

  1. Dust Regularly: Use a soft cloth or duster to remove dust and debris from the beams. Avoid using harsh chemicals that can damage the wood’s finish.
  2. Inspect for Pests: Reclaimed wood can sometimes harbor pests. Regularly inspect the beams for signs of insects or other pests and treat them promptly if needed.
  3. Control Humidity: Wood can expand and contract with changes in humidity. Use a humidifier or dehumidifier to maintain stable humidity levels in your home and prevent the beams from warping.
  4. Address Damage Promptly: If you notice any cracks, splits, or other damage to the beams, address it promptly to prevent further deterioration. Small cracks can often be filled with wood filler, while more significant damage may require professional repair.

Decorating with Reclaimed Wood Beams for Ceiling

Reclaimed wood beams can transform a space, adding warmth and character. Here are some ideas for decorating with reclaimed wood beams:

  1. Highlight Architectural Features: Use reclaimed wood beams to highlight architectural features such as vaulted ceilings, archways, or open floor plans.
  2. Create a Focal Point: Install a series of beams to create a focal point in the room, drawing the eye upward and adding visual interest.
  3. Incorporate Lighting: Integrate lighting fixtures such as pendant lights or chandeliers with the beams to enhance the ambiance and functionality of the space.
  4. Mix with Other Materials: Combine reclaimed wood beams with other materials such as metal, stone, or glass to create a balanced and cohesive design.
  5. Use in Unexpected Spaces: Don’t limit reclaimed wood beams to living rooms or dining areas. Consider using them in bedrooms, bathrooms, or even outdoor spaces for a unique touch.

Read too: Discovering the Charm of Nautical Outdoor Ceiling Fans for Your Coastal Retreat: Sail into Style

Conclusion

Reclaimed wood beams for ceiling are a timeless and eco-friendly choice that can enhance the beauty and functionality of any home. Whether you’re aiming for a rustic, traditional, or modern look, these beams offer endless possibilities for creative and impactful design. By choosing the right style, planning your installation carefully, and maintaining the beams properly, you can enjoy the unique charm and character that reclaimed wood brings to your space.

Installing Shiplap on Vaulted Ceiling for Rustic Charm: Enhancing Your Space

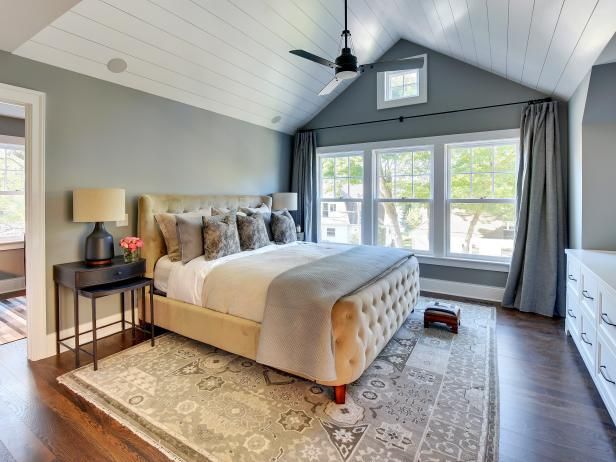
Adding shiplap to vaulted ceilings brings a rustic and inviting aesthetic to any space. In this comprehensive guide, we’ll explore the process of installing shiplap on vaulted ceiling, along with design tips and the advantages of incorporating this classic material into your home decor.

Shiplap On Vaulted Ceiling

Embracing Rustic Charm: Shiplap On Vaulted Ceilings

Shiplap is a type of wooden board commonly used in interior design to create a rustic, farmhouse-inspired look. When installed on vaulted ceilings, shiplap adds warmth and character to the space, enhancing its architectural features and creating a cozy atmosphere.

Installation Guide

Follow these steps to install shiplap on a vaulted ceiling:

1. Measure and Prepare the Ceiling

  • Measure the dimensions of the vaulted ceiling to determine the amount of shiplap needed.
  • Prepare the ceiling surface by removing any existing finishes or debris and ensuring it is clean and dry.

2. Choose the Right Materials

  • Select high-quality shiplap boards in your desired wood species and finish.
  • Consider factors such as board width, thickness, and tongue-and-groove design for seamless installation.

Read too: Discovering the Charm of Nautical Outdoor Ceiling Fans for Your Coastal Retreat: Sail into Style

3. Install Furring Strips

  • Attach furring strips perpendicular to the ceiling joists using screws or nails, spaced according to the width of the shiplap boards.
  • Ensure that the furring strips are level and securely fastened to provide a stable base for the shiplap installation.

4. Install Shiplap Boards

  • Begin installing shiplap boards at one end of the ceiling, starting from the bottom and working your way up.
  • Secure each board to the furring strips using nails or screws driven through the tongue at an angle.
  • Leave a small gap between each board to accommodate expansion and contraction.

5. Finish and Seal

  • Once all the shiplap boards are installed, fill any nail holes or gaps with wood filler and sand the surface smooth.
  • Apply a coat of wood stain or paint to enhance the natural beauty of the shiplap and protect it from moisture and wear.

Design Considerations for Shiplap On Vaulted Ceilings

When incorporating shiplap into your vaulted ceiling design, consider the following factors:

  • Color and Finish: Choose a stain or paint color that complements your existing decor and enhances the rustic charm of the shiplap.
  • Orientation: Decide whether to install the shiplap boards horizontally, vertically, or diagonally for different visual effects.
  • Accent Lighting: Explore options for incorporating recessed lighting or pendant fixtures into the shiplap ceiling to highlight its texture and create ambiance.

Benefits of Shiplap On Vaulted Ceilings

Adding shiplap to your vaulted ceilings offers several advantages, including:

  • Enhanced Aesthetic: Shiplap adds texture and visual interest to vaulted ceilings, creating a cozy and inviting atmosphere.
  • Increased Insulation: The added layer of wood provides additional insulation, helping to regulate indoor temperatures and improve energy efficiency.
  • Versatile Design: Shiplap is a versatile material that can be painted, stained, or left unfinished to suit a variety of design styles and preferences.

Conclusion

Installing shiplap on vaulted ceilings is a surefire way to infuse rustic charm and timeless elegance into your home decor. With its straightforward installation process, versatile design options, and numerous benefits, shiplap offers a simple yet impactful way to transform any space into a cozy retreat.

Enhance Your Log Cabin Retreat with a Rustic Log Cabin Ceiling Fan

Are you looking to elevate the ambiance of your log cabin retreat while improving air circulation and comfort? Consider installing a log cabin ceiling fan. In this guide, we’ll explore everything you need to know about log cabin ceiling fans, from their rustic design to their practical functionality, to help you choose the perfect fixture for your cozy getaway.

Log Cabin Ceiling Fan

Embracing Rustic Elegance: Log Cabin Ceiling Fan Designs

Log cabin ceiling fans are designed to complement the natural beauty and rustic charm of log cabin interiors. These fans often feature rugged materials like wood and wrought iron, along with finishes that mimic the look of weathered wood or aged metal. Whether you prefer a traditional, lodge-style fan or a more modern rustic design, there are plenty of options to suit your taste.

Choosing the Right Size and Style: Log Cabin Ceiling Fan

When selecting a log cabin ceiling fan, consider the size and style of your space. For smaller rooms or low ceilings, opt for a compact fan with a flush-mount design to maximize headroom. In larger rooms or spaces with high ceilings, choose a larger fan with longer blades to ensure adequate air circulation and cooling.

Read too: Exploring Craftsman Style Ceiling Fans for Your Home: Embracing Timeless Elegance

Features to Consider

Beyond aesthetics, there are several features to consider when choosing a log cabin ceiling fan:

  1. Blade Material: Look for blades made from natural wood or reclaimed lumber for an authentic rustic look. These blades can be stained or finished to complement your cabin’s decor.
  2. Lighting Options: Many log cabin ceiling fans come with integrated lights or light kits, providing both illumination and airflow in one fixture. Choose between traditional light fixtures or rustic-inspired designs like antler chandeliers or lanterns.
  3. Remote Control: Consider a fan with remote control capabilities for added convenience. Remote-controlled fans allow you to adjust the fan speed, direction, and lighting settings from anywhere in the room.
  4. Reversible Motor: Look for a fan with a reversible motor that allows you to switch between downdraft mode for cooling in the summer and updraft mode for circulating warm air in the winter, helping to improve energy efficiency year-round.

Installation and Maintenance Tips

Installing a log cabin ceiling fan is relatively straightforward, but it’s essential to follow the manufacturer’s instructions carefully. Make sure to balance the fan blades during installation to prevent wobbling and ensure smooth, quiet operation. Additionally, regular maintenance, such as dusting the blades and tightening screws, will help keep your fan running smoothly for years to come.

Conclusion

A log cabin ceiling fans is the perfect addition to any log cabin retreat, combining rustic charm with practical functionality. Whether you’re looking to improve air circulation, add lighting, or enhance the ambiance of your space, there’s a log cabin ceiling fan to suit your needs. Explore our selection of rustic log cabin ceiling fans and take your cabin to new heights of comfort and style.

Exquisite Antler Ceiling Fan With Light: A Complete Guide

When it comes to elevating the ambiance of your living space, every detail matters. From the furniture to the lighting fixtures, each element contributes to the overall aesthetic appeal and functionality of your home. One unique and captivating addition to any room is an antler ceiling fan with light. Combining rustic charm with modern functionality, these fixtures add a touch of elegance and sophistication to any interior decor scheme. In this comprehensive guide, we will explore the features, benefits, and installation tips for antler ceiling fans with lights, helping you make an informed decision for your home.

Antler Ceiling Fan With Light

Understanding Antler Ceiling Fans With Light

Antler ceiling fans with lights are inspired by the natural beauty of antlers and are designed to mimic their graceful curves and rustic appeal. These fixtures typically feature faux antlers crafted from high-quality materials such as resin or metal, combined with a ceiling fan and integrated lighting elements. The result is a stunning piece that not only provides gentle air circulation but also serves as a focal point in any room.

Features and Benefits

  1. Unique Design: One of the most prominent features of antler ceiling fans with lights is their distinctive design. Whether you opt for a single-tier or multi-tiered antler arrangement, these fixtures add a touch of wilderness-inspired elegance to your home.
  2. Dual Functionality: Antler ceiling fans with lights serve a dual purpose by providing both cooling airflow and illumination. This makes them ideal for spaces where both comfort and lighting are essential, such as living rooms, bedrooms, or cabins.
  3. Energy Efficiency: Many antler ceiling fans with lights are equipped with energy-efficient LED bulbs, helping you save on electricity costs while reducing your environmental footprint. Additionally, the fan’s efficient motor ensures optimal airflow without consuming excessive energy.
  4. Remote Control Options: To enhance convenience and ease of use, some antler ceiling fans with lights come with remote control capabilities. This allows you to adjust fan speed, light brightness, and direction without having to leave your seat.

Choosing the Right Antler Ceiling Fan With Light

When selecting an antler ceiling fan with light for your home, consider the following factors:

  1. Size and Scale: Ensure that the size of the fan complements the dimensions of the room. A larger room may require a fan with a wider blade span for effective air circulation.
  2. Style and Finish: Choose a fan that matches the existing decor style of your home. Whether you prefer a rustic, lodge-inspired look or a more contemporary design, there are plenty of options available to suit your taste.
  3. Lighting Features: Pay attention to the lighting features of the fan, such as the type of bulbs used and the brightness levels. Opt for LED bulbs for energy efficiency and consider dimmable options for customizable lighting.

Installation Tips

Installing an antler ceiling fan with light is relatively straightforward, but it’s essential to follow the manufacturer’s instructions carefully. Here are some tips to ensure a smooth installation process:

  1. Gather Tools and Materials: Before starting the installation, gather all the necessary tools and materials, including a ladder, screwdriver, wire strippers, and electrical tape.
  2. Turn Off Power: Prior to installing the fan, turn off the power to the existing ceiling fixture at the circuit breaker to prevent electrical accidents.
  3. Follow Instructions: Refer to the installation manual provided by the manufacturer and follow the step-by-step instructions carefully. If you’re not confident in your abilities, consider hiring a professional electrician to handle the installation.
  4. Test for Stability: Once the fan is installed, test it for stability and balance to ensure safe operation. Make any necessary adjustments to the blades or mounting hardware as needed.

Read too: Discovering the Charm of Nautical Outdoor Ceiling Fans for Your Coastal Retreat: Sail into Style

Conclusion

In conclusion, an antler ceiling fan with light is a stylish and functional addition to any home decor. With their unique design, dual functionality, and energy-efficient features, these fixtures provide both aesthetic appeal and practical benefits. Whether you’re looking to add a touch of rustic charm to your cabin retreat or elevate the ambiance of your living room, an antler ceiling fan with light is sure to make a statement.

Explore the Allure of a Ceiling Fan with Antlers: Embrace Rustic Elegance

Uncover the charm of combining nature-inspired design with modern comfort as we delve into the world of “Ceiling Fan with Antlers.” Elevate your interior spaces with the perfect blend of functionality and rustic elegance that these unique fans bring to any room.

Ceiling Fan With Antlers

Discovering the Timeless Appeal: Ceiling Fan with Antlers

Explore the beauty and sophistication of Ceiling Fan with Antlers, a design element that seamlessly merges the rustic charm of antlers with the practicality of a ceiling fan. From log cabins to modern homes seeking a touch of nature, these fans add a distinctive flair to interior decor.

Why Choose a Ceiling Fan with Antlers?

1. Unique Aesthetic: The standout feature of these fans is undoubtedly their unique aesthetic. The antler design adds a touch of the outdoors, making a bold statement and creating a focal point in any room.

2. Rustic Charm: For those who appreciate rustic or cabin-inspired decor, a Ceiling Fans with Antlers is an ideal addition. The antlers bring a sense of the wild indoors, creating a cozy and inviting atmosphere.

3. Versatile Designs: Contrary to what some may think, Ceiling Fans with Antlers come in various designs and finishes. Whether you prefer a more traditional, weathered look or a sleek and polished style, there’s a fan to match your taste.

Ceiling Fan with Antlers: A Closer Look

Let’s delve into the features and aspects that make Ceiling Fans with Antlers a standout choice for those looking to infuse their homes with a touch of nature.

Materials and Construction

Typically crafted from high-quality materials like resin or metal, the antlers are meticulously designed to resemble the real thing. This attention to detail ensures that the fan not only looks authentic but also stands the test of time.

Fan Blade Designs

The fan blades on Ceiling Fans with Antlers can vary in design, ranging from traditional wood finishes to more contemporary options. Some designs feature reversible blades, allowing you to switch between different finishes to suit your mood or seasonal decor changes.

Lighting Integration

Many Ceiling Fans with Antlers come equipped with integrated lights, adding to their functionality and providing both ambient and task lighting. This feature enhances the fan’s practicality, making it a multi-functional and stylish addition to any room.

Elevate Your Interior Design with a Ceiling Fan with Antlers

Explore the ways in which a Ceiling Fans with Antlers can become a statement piece, adding character and charm to your living spaces.

1. Ideal for Lodge-Inspired Decor

For homes with a lodge or cabin-inspired decor, a Ceiling Fans with Antlers becomes the perfect centerpiece. It complements wooden furniture, stone accents, and other rustic elements, creating a cohesive and inviting atmosphere.

2. Creating a Focal Point

In rooms where you want to create a focal point, a Ceiling Fans with Antlers becomes a functional work of art. It draws the eye upward, making a statement and becoming a conversation piece for guests.

3. Blending with Nature-Inspired Themes

Whether you’re designing a nature-inspired nursery or a cozy reading nook, the antler design of the fan seamlessly blends with various nature-themed decor. It brings a touch of the outdoors inside, creating a harmonious and calming ambiance.

Read too: Unveiling the Essentials of Vaulted Ceiling Insulation Requirements: Elevate Your Space