Decorative Acoustic Ceiling Tiles: A Complete Guide to Style and Functionality

When it comes to creating a space that is both functional and stylish, decorative acoustic ceiling tiles can provide the perfect solution. These tiles combine the best of both worlds: they not only enhance the aesthetic appeal of a room but also offer significant soundproofing benefits, making them ideal for a wide range of applications, from home theaters to office spaces.

Decorative Acoustic Ceiling Tiles

As more people look for ways to improve their interior design while also optimizing the acoustics of their spaces, decorative acoustic ceiling tiles have grown in popularity. These tiles help control sound reflection, absorption, and transmission, reducing unwanted noise and improving the overall sound quality in a room. Whether you’re trying to reduce noise in a busy office, enhance the acoustics in a home theater, or add a decorative touch to your ceiling, these tiles are an excellent choice.

In this guide, we will take a closer look at decorative acoustic ceiling tiles, their benefits, different styles, and how to choose and install them to create the perfect balance between beauty and function.


Benefits of Decorative Acoustic Ceiling Tiles

Decorative Acoustic Ceiling Tiles offer more than just an aesthetic upgrade to your space. Their ability to enhance acoustics while adding to the overall design makes them an essential feature in modern architecture and interior design. Below are some of the top benefits of using these tiles in your home or office:

1. Sound Control and Noise Reduction

One of the primary advantages of decorative acoustic ceiling tiles is their ability to reduce noise. These tiles are designed to absorb sound waves and reduce echoes, creating a quieter and more comfortable environment. This feature is especially useful in spaces like home theaters, conference rooms, or open-office layouts, where background noise can be disruptive.

The porous materials used in these tiles allow sound to be absorbed rather than reflected, improving speech clarity and reducing sound transmission from one room to another. In commercial spaces, this can lead to a more productive and less stressful work environment.

Read too: Discovering the Charm of Nautical Outdoor Ceiling Fans for Your Coastal Retreat: Sail into Style

2. Enhanced Aesthetic Appeal

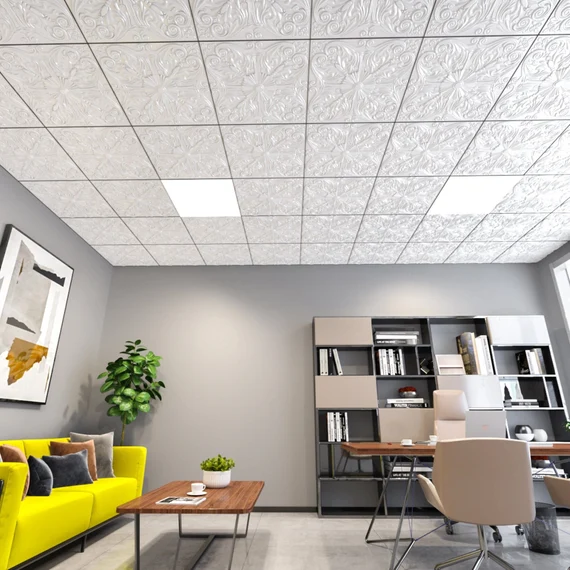
In addition to their functional properties, decorative acoustic ceiling tiles are also designed to complement the overall interior design of a space. These tiles come in a variety of colors, patterns, and textures, making it easy to incorporate them into different design schemes. Whether you’re looking for a sleek, modern design or a more traditional, vintage look, there’s an option for every style.

The ability to customize the tiles with various finishes, such as wood, metal, or fabric, adds a unique and stylish touch to your ceilings, helping to elevate the overall aesthetic of the room. Decorative ceiling tiles can enhance the appearance of both residential and commercial spaces by creating a polished and sophisticated look.

3. Easy Installation

Decorative Acoustic Ceiling Tiles are relatively easy to install, especially when compared to other soundproofing methods. Many acoustic tiles come with simple grid systems, which allow for quick and straightforward installation, making them a great DIY project for homeowners or a simple task for professional installers.

Additionally, some tiles are designed for drop ceilings or suspended ceiling systems, making them perfect for renovation projects or spaces where traditional ceiling solutions might be too complex or costly.

4. Improved Air Quality

Some decorative acoustic ceiling tiles are designed with materials that can contribute to better air quality. Tiles made from environmentally friendly and non-toxic materials, such as recycled content, help improve the overall indoor air quality. Additionally, certain tiles have moisture-resistant properties, which can prevent the growth of mold and mildew, making them a good choice for areas with high humidity, such as bathrooms and kitchens.

5. Durability and Long-Lasting Performance

When properly installed, decorative acoustic ceiling tiles are durable and long-lasting. Many tiles are resistant to fading, scratching, and staining, ensuring that they maintain their aesthetic appeal for years to come. Additionally, acoustic tiles often come with warranties to ensure that they continue to perform effectively over time.


Types of Decorative Acoustic Ceiling Tiles

When selecting decorative acoustic ceiling tiles, it’s essential to understand the different types and how they can affect the sound and look of your space. Below are some common types of acoustic tiles:

1. Mineral Fiber Tiles

Mineral fiber tiles are one of the most popular types of acoustic ceiling tiles. Made from a blend of natural minerals and fibers, these tiles are highly effective at absorbing sound and controlling noise. They are available in various textures, patterns, and colors, making them versatile and suitable for a wide range of applications.

These tiles are also relatively affordable and easy to install, which makes them a common choice for both residential and commercial spaces.

2. Fiberglass Tiles

Fiberglass acoustic ceiling tiles are known for their superior sound absorption capabilities. They are often used in spaces where sound control is a top priority, such as recording studios, concert halls, or conference rooms. Fiberglass tiles are lightweight, easy to handle, and highly effective at reducing noise.

These tiles come in various designs and finishes, and they are often used in combination with other acoustic treatments to optimize sound quality.

3. Wooden Acoustic Tiles

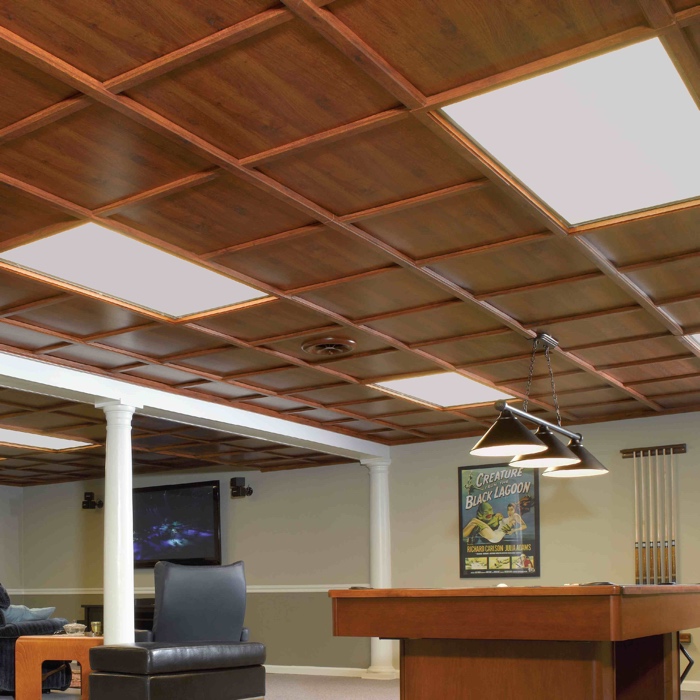
For those looking to add a touch of elegance and natural warmth to their ceilings, wooden acoustic tiles offer an excellent option. These tiles combine the beauty of wood with the sound-absorbing qualities of acoustic materials. Wooden tiles are available in various finishes and can be used in both modern and traditional interiors.

These tiles are typically used in areas where aesthetics are just as important as acoustics, such as living rooms, dining rooms, or high-end office spaces.

4. Fabric-Wrapped Acoustic Tiles

Fabric-wrapped acoustic tiles are another decorative option that provides excellent sound absorption while adding a soft, textured look to your ceiling. These tiles are typically wrapped in a variety of fabrics, including cotton, polyester, or acoustically transparent materials, and can be customized in different colors and patterns to match your decor.

These tiles are ideal for spaces where both acoustic performance and visual appeal are critical. They are often used in theaters, auditoriums, or commercial spaces where high-quality acoustics are required.


How to Choose the Right Decorative Acoustic Ceiling Tiles

Choosing the right decorative acoustic ceiling tiles involves considering various factors that will impact both the aesthetic and acoustic performance of your space. Here are some tips to help you make the best choice:

1. Consider the Size and Shape of Your Room

The size of your room will affect the sound absorption capabilities of the tiles. In larger spaces, you may need tiles that provide greater sound control to reduce echo and improve speech clarity. On the other hand, smaller rooms may benefit from tiles that are more lightweight and have a subtle acoustic impact.

2. Think About the Room’s Function

Consider how the room will be used. For example, a home theater or music studio may require more effective soundproofing tiles, while a conference room may prioritize both aesthetics and acoustics. Identify the primary function of the space to choose the best tile type and design.

3. Choose a Style That Complements Your Interior

Since decorative acoustic ceiling tiles can significantly impact the appearance of your space, it’s essential to choose a style that complements your overall interior design. Whether you prefer sleek and modern or warm and traditional, select tiles that blend seamlessly with your existing décor.

4. Budget and Installation Costs

Cost is an important consideration when selecting acoustic tiles. Some options, such as fiberglass or custom fabric-wrapped tiles, may be more expensive than others. Be sure to factor in installation costs as well, especially if you hire a professional to install the tiles.


Conclusion

Decorative acoustic ceiling tiles offer a unique blend of functionality and design that can improve the acoustics and aesthetics of your home or business. By selecting the right tiles for your needs, you can create a space that is both quieter and more visually appealing.

Whether you’re looking to reduce noise, enhance the sound quality of a room, or simply add a stylish touch to your ceiling, decorative acoustic ceiling tiles provide a versatile and effective solution. With numerous styles and materials available, these tiles can be customized to suit any interior design, making them a great investment for anyone looking to upgrade their space.

By considering the benefits, types, and installation process of acoustic ceiling tiles, you can make an informed decision and enjoy a more comfortable, quieter, and aesthetically pleasing environment for years to come.

Armstrong 280 Ceiling Tile: A Complete Guide

When it comes to home improvement, the ceiling is often overlooked, yet it plays a crucial role in the overall aesthetic of a room. If you’re looking to enhance the beauty and functionality of your ceiling, consider the Armstrong 280 Ceiling Tile. This article will delve into the features, benefits, installation process, and maintenance tips for Armstrong 280 ceiling tiles, helping you make an informed decision for your next home project.

Armstrong 280 Ceiling Tile

What is Armstrong 280 Ceiling Tile?

Overview of Armstrong 280 Ceiling Tile

The Armstrong 280 Ceiling Tile is a high-quality ceiling tile designed for residential and commercial applications. These tiles are known for their attractive design, durability, and excellent acoustic properties. Made from mineral fiber and backed with a lightweight structure, Armstrong 280 tiles are easy to install and maintain, making them a popular choice among homeowners and contractors alike.

Key Features

  1. Design Variety: The Armstrong 280 ceiling tiles come in various designs, textures, and colors, allowing you to select the perfect style for your space.
  2. Acoustic Performance: These tiles are engineered to provide excellent sound absorption, making them ideal for spaces where noise control is essential, such as offices and entertainment areas.
  3. Lightweight Construction: Weighing less than traditional ceiling materials, Armstrong 280 tiles are easy to handle and install.
  4. Moisture Resistance: Designed to resist moisture, these tiles are perfect for areas prone to humidity, such as kitchens and bathrooms.
  5. Sustainability: Armstrong is committed to sustainability, and their 280 ceiling tiles are made from recycled materials, contributing to a healthier environment.

Read too: Shiplap Ceiling in Kitchen: A Timeless Trend for a Stylish and Cozy Space

Benefits of Choosing Armstrong 280 Ceiling Tile

Enhanced Aesthetic Appeal

The visual impact of a ceiling can change the entire atmosphere of a room. The Armstrong 280 ceiling tiles are available in a variety of styles, from modern to classic designs, allowing you to create a unique look that complements your interior decor. The tiles can be painted, providing even more customization options to suit your personal taste.

Improved Acoustic Comfort

In commercial spaces, noise can significantly affect productivity and comfort. The Armstrong 280 ceiling tiles are specifically designed to absorb sound, reducing echo and creating a quieter environment. This is particularly beneficial in offices, restaurants, and schools, where noise levels can be disruptive.

Easy Installation Process

One of the standout features of Armstrong 280 ceiling tiles is their ease of installation. Whether you’re a DIY enthusiast or a professional contractor, these tiles can be installed quickly and efficiently. With proper planning and the right tools, you can achieve a stunning ceiling upgrade without the need for extensive renovation work.

Cost-Effective Solution

Replacing a ceiling can be a costly undertaking, but Armstrong 280 ceiling tiles provide an affordable solution. The tiles are reasonably priced, and their durability means you won’t have to worry about frequent replacements or repairs. Investing in quality ceiling tiles can enhance your property’s value while staying within budget.

The Installation Process for Armstrong 280 Ceiling Tile

Tools and Materials Needed

Before you begin the installation process, gather the following tools and materials:

  • Armstrong 280 ceiling tiles
  • Measuring tape
  • Level
  • Utility knife
  • T-square
  • Ceiling grid system (if applicable)
  • Adhesive (for direct application)
  • Safety goggles
  • Drop cloths (to protect floors)

Step-by-Step Installation Guide

1: Measure Your Space

Begin by measuring the dimensions of the room where you plan to install the Armstrong 280 ceiling tiles. Accurate measurements will help you determine how many tiles you will need and whether you will require any cuts to fit around edges or fixtures.

2: Prepare the Installation Area

Clear the area of any existing ceiling materials or debris. If you’re replacing old tiles, take them down carefully to avoid damaging the underlying structure. Inspect the ceiling for any signs of damage, such as leaks or mold, and make necessary repairs before proceeding.

3: Plan Your Layout

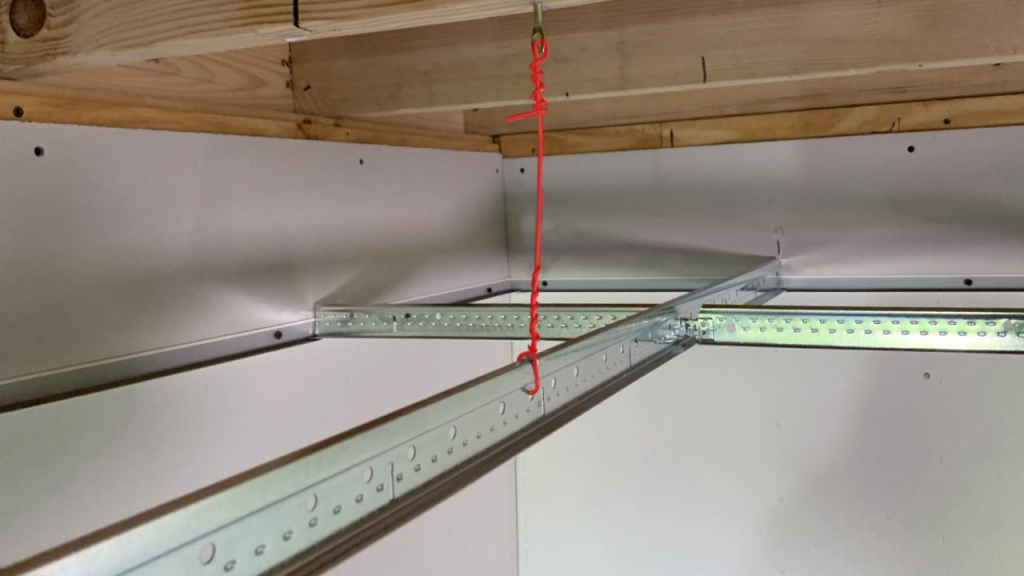
Plan the layout of your tiles. If using a grid system, mark where the main and cross tees will be installed. This will help you visualize how the tiles will fit into the space.

4: Install the Grid System (If Applicable)

  1. Install Main Tees: Attach the main tees to the ceiling joists using screws or anchors. Ensure they are level and spaced according to the manufacturer’s guidelines.
  2. Add Cross Tees: Install the cross tees between the main tees to create a grid layout. Again, make sure everything is level and secure.

5: Install Armstrong 280 Ceiling Tiles

  1. Check for Levelness: Ensure that your grid system (if applicable) is level before proceeding with the installation of the tiles.
  2. Start in the Corner: Begin by placing the first tile in one corner of the room. If you’re using a grid system, gently drop the tile into place. If applying tiles directly to the ceiling, apply adhesive to the back of the tile and press it firmly against the ceiling.
  3. Cut Tiles as Necessary: If tiles need to be cut to fit around edges or obstacles, measure the required dimensions and use a utility knife to cut them to size.
  4. Continue Installation: Continue placing tiles across the ceiling, ensuring that they fit snugly and are properly aligned. Regularly check for levelness as you work to ensure a clean and professional finish.

6: Final Touches

  1. Inspect Your Work: Once all tiles are installed, step back and inspect for any misaligned tiles or gaps that need addressing.
  2. Seal Edges: If there are gaps around the edges where the tiles meet the wall, use caulk to seal them, improving the aesthetics and insulation of the ceiling.
  3. Clean Up: Remove any dust and debris from the installation area and clean the floor to complete your project.

Maintenance Tips for Armstrong 280 Ceiling Tile

Regular Cleaning

To maintain the appearance of your Armstrong 280 ceiling tiles, regular cleaning is essential. Dust and dirt can accumulate over time, so use a soft cloth or a vacuum cleaner with a brush attachment to gently clean the surface. Avoid using abrasive cleaners or harsh chemicals, as they can damage the tiles.

Deep Cleaning

For a deeper clean, you can use a damp cloth with mild soap. Wipe down the tiles, ensuring you don’t oversaturate them, as excess moisture can lead to mold growth.

Inspect for Damage

Periodically inspect your ceiling tiles for any signs of damage, such as stains, cracks, or discoloration. Address any issues promptly to prevent further damage. If a tile is beyond repair, replacing it is typically a straightforward process.

Control Humidity Levels

Maintaining appropriate humidity levels in your home is crucial to preventing mold and mildew growth. Consider using a dehumidifier in damp areas, such as bathrooms and basements, to keep moisture levels in check.

Conclusion

The Armstrong 280 Ceiling Tile is an excellent choice for those looking to enhance the beauty and functionality of their space. With a variety of designs, easy installation, and excellent acoustic performance, these ceiling tiles can transform any room into a stylish and comfortable environment.

Whether you’re renovating your home or upgrading a commercial space, Armstrong 280 ceiling tiles offer a cost-effective solution that combines durability and aesthetic appeal. By following the installation and maintenance tips outlined in this guide, you can enjoy a beautiful ceiling for years to come.

Armstrong 266 Ceiling Tile Replacement: Elevate Your Space

If you’re considering a home renovation or simply looking to refresh your interior, replacing old or damaged ceiling tiles can significantly enhance the aesthetic appeal of your space. Among the many options available, Armstrong 266 Ceiling Tile Replacement stands out for its durability, design, and ease of installation. This article will delve into the ins and outs of replacing Armstrong 266 ceiling tiles, including the benefits, process, and maintenance tips to ensure your new ceiling tiles look great for years to come.

Armstrong 266 Ceiling Tile Replacement

Understanding Armstrong 266 Ceiling Tiles

What Are Armstrong 266 Ceiling Tiles?

Armstrong 266 ceiling tiles are a popular choice for both residential and commercial spaces. Known for their durability and attractive designs, these tiles are made from high-quality materials that resist moisture, mold, and mildew. They are lightweight, making them easy to handle and install. Armstrong 266 tiles are available in a variety of styles, textures, and colors, allowing you to customize your ceiling according to your taste and the overall theme of your space.

Read too: Shiplap Ceiling in Kitchen: A Timeless Trend for a Stylish and Cozy Space

Benefits of Armstrong 266 Ceiling Tiles

  1. Aesthetic Versatility: The Armstrong 266 tiles come in various designs, including contemporary and traditional styles, which can suit any interior décor.
  2. Durability: Made from high-quality materials, these tiles can withstand wear and tear over time, making them a long-lasting choice.
  3. Easy Installation: One of the most appealing features of Armstrong 266 ceiling tiles is their ease of installation. Homeowners can often complete the replacement themselves without hiring a professional.
  4. Sound Absorption: These tiles are designed to help absorb sound, making them ideal for spaces where noise reduction is a priority, such as offices or home theaters.
  5. Moisture Resistance: The tiles are designed to resist moisture, reducing the risk of mold and mildew in damp areas, such as kitchens and bathrooms.

Preparing for Armstrong 266 Ceiling Tile Replacement

Step 1: Gather Your Tools and Materials

Before you begin the replacement process, it’s essential to gather all the necessary tools and materials. Here’s a list to help you get started:

  • Armstrong 266 ceiling tiles: Ensure you have enough tiles for your ceiling area.
  • Measuring tape: For precise measurements.
  • Utility knife: For cutting tiles if necessary.
  • Level: To ensure your tiles are straight.
  • Adhesive or suspension system: Depending on whether you are installing the tiles directly or using a grid system.
  • Safety goggles: Protect your eyes during the installation process.
  • Drop cloths: To protect your floors from dust and debris.

Step 2: Measure the Ceiling Area

Accurate measurements are crucial for a successful replacement. Use the measuring tape to calculate the length and width of the ceiling area where you’ll be installing the Armstrong 266 tiles. This will help you determine how many tiles you’ll need and if any cuts are necessary.

Step 3: Prepare the Workspace

Before you begin installing the new tiles, prepare your workspace by removing any old tiles and debris. If you’re replacing tiles in a grid system, take down the old grid and inspect the underlying structure for any signs of damage. Repair any issues before proceeding.

The Process of Armstrong 266 Ceiling Tile Replacement

Step 1: Installing a Grid System (If Applicable)

If you are using a grid system for your Armstrong 266 ceiling tiles, follow these steps:

  1. Mark the Ceiling: Use a chalk line to mark where the grid will be installed. Make sure to account for the height of the tiles.
  2. Install the Main Tees: Start by installing the main tees, which will form the backbone of your grid system. Attach these to the ceiling joists using screws or anchors, ensuring they are level and spaced according to the manufacturer’s guidelines.
  3. Add Cross Tees: Next, install the cross tees between the main tees to form a grid pattern. Make sure they are securely attached and level.

Step 2: Installing Armstrong 266 Ceiling Tiles

Once your grid system is in place or if you’re installing tiles directly onto the ceiling, follow these steps:

  1. Check for Levelness: Before installing the tiles, check the levelness of the grid or ceiling surface. This will help ensure a smooth installation.
  2. Start in the Corner: Begin installing the Armstrong 266 tiles in one corner of the room. If using a grid, gently place each tile into the grid slots. If applying directly to the ceiling, spread adhesive on the back of the tile and press it firmly against the ceiling.
  3. Cutting Tiles: If you need to cut tiles to fit around edges or obstacles, measure the required dimensions, and use a utility knife to cut them to size.
  4. Continue Installation: Work your way across the ceiling, checking for levelness as you go. Make adjustments as necessary to ensure that the tiles are aligned properly.

Step 3: Finalizing the Installation

  1. Inspect Your Work: After all tiles are installed, take a step back and inspect your work. Look for any misaligned tiles or gaps that may need attention.
  2. Caulk Edges: If there are gaps around the edges where the tiles meet the wall, use caulk to seal them. This not only improves aesthetics but also helps with insulation.
  3. Clean Up: Remove any dust and debris from the installation area. If you used drop cloths, take them up and clean the floors.

Maintenance of Armstrong 266 Ceiling Tiles

To keep your new ceiling tiles looking fresh and new, follow these maintenance tips:

  1. Regular Cleaning: Dust your ceiling tiles regularly to prevent the buildup of dirt and grime. Use a soft cloth or a microfiber duster for this purpose.
  2. Deep Cleaning: For a deeper clean, use a damp cloth with mild soap. Avoid abrasive cleaners that may scratch the tile surface.
  3. Inspect for Damage: Periodically check your tiles for any signs of damage or wear. If you notice any issues, such as discoloration or cracks, consider replacing the affected tiles promptly.
  4. Address Moisture Issues: Since Armstrong 266 tiles are moisture-resistant, it’s still essential to address any leaks or moisture issues in your home. Ensure that your roof, plumbing, and HVAC systems are in good working order.
  5. Repaint if Necessary: If you choose to paint your tiles, ensure you use a paint that is suitable for metal surfaces to avoid chipping or peeling.

Conclusion

Replacing your ceiling tiles with Armstrong 266 Ceiling Tile Replacement is a straightforward way to enhance the aesthetic and functional aspects of your space. With their durability, design versatility, and easy installation, Armstrong 266 tiles can transform any room into a stylish and inviting area.

By following the steps outlined in this guide, you can achieve a successful installation that will provide lasting beauty and functionality. Whether you’re updating your home or working on a commercial project, Armstrong 266 tiles offer a timeless solution to ceiling design.

Suspended Ceiling Grid Clips: Everything You Need to Know

When it comes to creating a seamless and professional-looking suspended ceiling, every detail matters. One of the key components often overlooked is the suspended ceiling grid clips. These small yet essential accessories play a critical role in ensuring that your ceiling panels are securely fastened and properly aligned. In this article, we will explore the purpose, types, installation tips, and maintenance of suspended ceiling grid clips, giving you a comprehensive understanding of why they are vital for your suspended ceiling projects.

Suspended Ceiling Grid Clips

What Are Suspended Ceiling Grid Clips?

Suspended ceiling grid clips are specialized fasteners designed to secure ceiling tiles or panels within a suspended grid system. These clips attach to the main grid framework, holding the tiles in place while allowing for easy installation and removal. Typically made from durable materials like metal or plastic, grid clips are designed to withstand the weight of the tiles and any additional accessories, such as lights or air vents.

The main function of these clips is to maintain the integrity of the suspended ceiling, ensuring that the tiles remain flat and aligned over time. They prevent gaps, sagging, or shifting that can detract from the overall aesthetic and functionality of the ceiling.

Why Use Suspended Ceiling Grid Clips?

Using suspended ceiling grid clips provides several benefits that enhance the overall performance of your ceiling system. Here are some key reasons to consider incorporating these clips into your ceiling installation:

1. Stability and Support

One of the primary functions of suspended ceiling grid clips is to provide stability and support for ceiling tiles. By securing the tiles to the grid, these clips help prevent sagging and shifting that can occur over time, especially in environments with high humidity or temperature fluctuations.

Read too: Shiplap Ceiling in Kitchen: A Timeless Trend for a Stylish and Cozy Space

2. Easy Installation

Suspended ceiling grid clips simplify the installation process. With their user-friendly design, they allow for quick and efficient attachment of ceiling tiles, reducing the time and effort required for installation. This ease of use is particularly advantageous for DIY projects or large-scale installations.

3. Flexibility in Design

Suspended ceiling grid clips offer flexibility in design by accommodating various tile sizes and styles. Whether you’re working with standard acoustic tiles, decorative panels, or specialized tiles with integrated lighting, grid clips can adapt to your specific needs, making them versatile tools for any suspended ceiling project.

4. Cost-Effectiveness

Incorporating suspended ceiling grid clips into your installation can save money in the long run. By ensuring the tiles remain securely in place, these clips reduce the likelihood of damage or the need for repairs due to shifting or sagging tiles. This durability translates into fewer maintenance costs and a longer lifespan for your ceiling system.

Types of Suspended Ceiling Grid Clips

Suspended ceiling grid clips come in various types to accommodate different ceiling tile systems and installation requirements. Understanding the different types available can help you choose the right clips for your project. Here are some common types:

1. Standard Grid Clips

Standard grid clips are designed for general use in suspended ceiling installations. They feature a simple design that securely holds the ceiling tiles in place while allowing for easy removal when needed. These clips are typically made of metal or durable plastic and are suitable for various tile sizes.

2. Heavy-Duty Grid Clips

Heavy-duty grid clips are designed for applications requiring extra support. These clips are constructed from thicker materials and are ideal for larger tiles or situations where the ceiling may be subject to added stress, such as in commercial settings. Heavy-duty clips provide enhanced stability and can accommodate more weight.

3. Adjustable Grid Clips

Adjustable grid clips are versatile fasteners that allow for slight adjustments during installation. This feature is beneficial when dealing with irregular tile sizes or when precise alignment is critical. Adjustable clips enable installers to fine-tune the positioning of ceiling tiles for a perfect fit.

4. Integrated Clips

Some ceiling tiles come with integrated clips built into their design. These clips eliminate the need for separate fasteners, simplifying the installation process. Integrated clips are convenient for DIY projects and can streamline the installation of acoustic or decorative ceiling tiles.

How to Install Suspended Ceiling Grid Clips

Installing suspended ceiling grid clips is a straightforward process, but it’s essential to follow the correct steps to ensure a secure and professional finish. Here’s a step-by-step guide to help you through the installation:

Step 1: Gather Your Materials

Before you begin, ensure you have all necessary materials on hand, including:

  • Suspended ceiling tiles
  • Suspended ceiling grid system
  • Suspended ceiling grid clips
  • Measuring tape
  • Level
  • Utility knife
  • Safety glasses

Step 2: Measure and Mark

Start by measuring the area where you will install the suspended ceiling. Use a measuring tape to determine the dimensions and mark the locations for the grid system. It’s essential to ensure that your measurements are accurate to avoid any complications during installation.

Step 3: Install the Main Grid

Begin by installing the main grid framework according to the manufacturer’s instructions. Make sure the grid is level and securely fastened to the ceiling. Use a level to check that the grid is even, as this will directly affect the alignment of your ceiling tiles.

Step 4: Attach the Suspended Ceiling Grid Clips

Once the main grid is in place, it’s time to attach the suspended ceiling grid clips. Place the clips at regular intervals along the grid, following the tile manufacturer’s recommendations for spacing. Secure each clip firmly to the grid, ensuring that they are properly aligned.

Step 5: Insert the Ceiling Tiles

With the clips in place, carefully insert the ceiling tiles into the grid system. Make sure the tiles fit snugly against the clips, providing a tight seal. If you’re using adjustable clips, you may need to make slight adjustments to ensure the tiles are level and aligned.

Step 6: Final Checks

After all tiles are installed, step back and visually inspect the ceiling for any gaps or misalignments. Make any necessary adjustments to the clips or tiles to achieve a uniform appearance. Use a utility knife to trim any tiles if needed for a proper fit along the edges.

Maintenance Tips

Proper maintenance of suspended ceiling grid clips is essential for ensuring their longevity and effectiveness. Here are some maintenance tips to keep in mind:

1. Regular Inspections

Periodically inspect the ceiling tiles and grid clips for any signs of wear or damage. Look for loose clips, sagging tiles, or gaps between tiles. Address any issues promptly to prevent further damage or costly repairs.

2. Cleaning

Dust and debris can accumulate on suspended ceilings, affecting their appearance and performance. Regularly clean the ceiling tiles and grid system using a soft cloth or vacuum cleaner with a brush attachment. Avoid using harsh chemicals that could damage the tiles or clips.

3. Replacement of Damaged Clips

If you notice any damaged or broken clips, replace them immediately to ensure the continued stability of the ceiling tiles. Having a few extra clips on hand can make it easy to address any issues as they arise.

4. Monitor Humidity Levels

High humidity levels can affect the performance of suspended ceiling grid clips and tiles. Monitor the humidity levels in your space and take measures to reduce excess moisture, such as using dehumidifiers or improving ventilation.

Incorporating Suspended Ceiling Grid Clips in Design

Suspended ceiling grid clip not only serve a functional purpose but can also enhance the overall design of your space. Here are some tips for incorporating these clips into your ceiling design effectively:

1. Choose Complementary Tile Designs

Select ceiling tiles that complement your overall design aesthetic. Whether you prefer a modern look with sleek tiles or a traditional style with decorative patterns, choosing the right tiles can enhance the visual appeal of your suspended ceiling.

2. Consider Lighting Integration

Integrating lighting fixtures into your suspended ceiling can create a dynamic and inviting atmosphere. Use suspended ceiling grid clip to secure tiles around recessed lights or other fixtures, ensuring a seamless appearance while maximizing illumination.

3. Play with Textures

Experiment with different textures and finishes in your ceiling design. Mixing smooth tiles with textured options can add visual interest and depth to your space. Make sure to use clips that can accommodate various tile styles for a cohesive look.

4. Customize the Color Scheme

Consider painting your ceiling tiles or grid system to match your color scheme. This customization can create a unique look that ties the room together. Just ensure that the clips remain functional and secure after any modifications.

Conclusion

Suspended ceiling grid clip may seem like a small detail in the larger scheme of ceiling installation, but their importance cannot be overstated. They provide stability, support, and ease of installation, ensuring that your ceiling remains secure and visually appealing. By understanding the different types of clips available and following proper installation and maintenance practices, you can create a professional and attractive suspended ceiling that enhances your space.

Whether you’re undertaking a DIY project or working on a larger commercial installation, incorporating suspended ceiling grid clip is essential for achieving the best results. With the information provided in this guide, you can confidently approach your suspended ceiling project and enjoy the benefits of a well-designed and functional ceiling.

Standard Ceiling Tile Measurements: A Complete Guide for Homeowners

When considering a home renovation, especially in the realm of interior design, one often overlooked element is the ceiling. Many homeowners aim to enhance their living spaces through decorative features, and ceiling tiles have become a popular choice. Whether you are replacing old tiles or installing new ones, understanding Standard Ceiling Tile Measurements is crucial to ensure a seamless fit and aesthetically pleasing outcome.

Standard Ceiling Tile Measurements

In this article, we will dive deep into the standard measurements of ceiling tiles, their types, installation processes, and tips for selecting the right tiles for your space. By the end of this guide, you’ll have a comprehensive understanding of ceiling tile measurements and how to apply that knowledge effectively.


Why Ceiling Tile Measurements Matter

The importance of Standard Ceiling Tile Measurements cannot be overstated. Correct measurements not only guarantee a professional finish but also help in avoiding costly mistakes. Installing the wrong size tiles can lead to gaps, uneven finishes, and even structural issues.

Here are a few reasons why you should pay close attention to ceiling tile measurements:

  1. Aesthetic Appeal: Properly measured and installed ceiling tiles contribute to the overall design and ambiance of a room. Misfitting tiles can disrupt the visual flow, making the space appear chaotic.
  2. Efficiency: Correct measurements lead to fewer wasted materials and reduced installation time. This efficiency can save you money and effort in the long run.
  3. Compatibility: Knowing the standard measurements helps you choose tiles that fit well with other design elements, such as lighting fixtures, crown moldings, and wall heights.
  4. Value Addition: A well-finished ceiling enhances the value of your home. Prospective buyers are often attracted to spaces that appear well thought-out and meticulously designed.

Read too: A Comprehensive Mr Cool Ceiling Cassette Review: Unveiling Excellence


Common Standard Ceiling Tile Measurements

When it comes to Standard Ceiling Tile Measurements, several sizes are commonly used in residential and commercial spaces. Understanding these standard sizes will help you make informed choices when selecting tiles for your project.

1. Square Ceiling Tiles

Square ceiling tiles are one of the most common types, particularly for suspended ceilings. The standard measurements for square tiles include:

  • 12 x 12 inches: This size is often used in residential applications. It offers a classic look and is easy to handle during installation.
  • 24 x 24 inches: Common in commercial spaces, these larger tiles cover more area, making installation quicker. They are ideal for larger rooms or spaces where a more open look is desired.
  • 30 x 30 inches: Less common, these tiles provide a unique look and are often used in larger commercial environments. They can give a dramatic effect when combined with lighting.

2. Rectangular Ceiling Tiles

Rectangular tiles are also popular and can create a unique design. Standard measurements for rectangular tiles include:

  • 24 x 48 inches: Frequently used in commercial settings, these tiles provide a sleek, modern appearance and allow for fewer seams.
  • 12 x 48 inches: These tiles offer flexibility in design and can create interesting patterns on the ceiling.

3. Thickness of Ceiling Tiles

The thickness of ceiling tiles varies, which can impact their sound absorption, durability, and insulation properties. Common thickness measurements include:

  • 1/2 inch: This thickness is standard for lightweight tiles and is often used in residential applications.
  • 3/4 inch: Thicker tiles can provide better sound absorption and insulation, making them ideal for commercial spaces.

4. Height Considerations

While ceiling tile measurements primarily refer to width and length, it’s essential to consider the height of your ceiling. Standard residential ceilings typically range from 8 to 10 feet. In spaces with higher ceilings, such as foyers or great rooms, taller tiles or creative installations may be used to enhance the visual height of the space.


Different Types of Ceiling Tiles

Understanding the types of ceiling tiles available is just as important as knowing their measurements. Here are some common types of ceiling tiles that you might consider:

1. Acoustic Ceiling Tiles

These tiles are designed to reduce sound transmission, making them ideal for spaces like offices, theaters, and schools. They typically come in standard sizes like 12 x 12 inches or 24 x 24 inches.

2. Tin Ceiling Tiles

Tin tiles are known for their vintage aesthetic and intricate designs. They are often used in kitchens, dining areas, and commercial spaces. These tiles come in various sizes, including 12 x 12 inches and 24 x 24 inches.

3. Vinyl Ceiling Tiles

Vinyl tiles are moisture-resistant, making them a great choice for areas with high humidity, such as bathrooms and kitchens. They come in various standard sizes, including 12 x 12 inches and 24 x 24 inches.

4. Wood Ceiling Tiles

Wood tiles provide a warm, natural look and can be used in various settings. They are typically available in both square and rectangular measurements and can be stained or painted to match your decor.


Installation Process for Ceiling Tiles

Installing ceiling tiles can be a straightforward DIY project, but proper measurement and planning are essential. Here’s a step-by-step guide on how to install ceiling tiles:

Step 1: Measure the Ceiling

Start by measuring the length and width of the ceiling where you plan to install the tiles. Record these measurements to calculate how many tiles you will need.

Step 2: Choose the Right Tile Size

Based on your measurements, choose the appropriate size of ceiling tiles. Be mindful of how the tile size will affect the design and overall look of the ceiling.

Step 3: Prepare the Surface

Ensure the ceiling surface is clean, dry, and free from any debris. If you are installing tiles over an existing ceiling, check for any loose or damaged sections and repair them before proceeding.

Step 4: Mark the Grid

Using a chalk line or a level, mark the grid where the tiles will be installed. This grid will serve as a guide to keep your installation straight and even.

Step 5: Cut Tiles as Necessary

If you need to fit tiles around the edges or in corners, use a utility knife or a saw to cut the tiles to size. Make sure to wear safety goggles when cutting tiles to protect your eyes from debris.

Step 6: Install the Tiles

Begin installing the tiles according to the manufacturer’s instructions. For adhesive tiles, apply the adhesive to the back of the tile and press it firmly against the ceiling. For suspended tiles, place them into the grid you created.

Step 7: Finishing Touches

Once all tiles are installed, inspect the ceiling for any gaps or misaligned tiles. If necessary, use caulk to fill gaps and achieve a seamless look.


Maintenance Tips for Ceiling Tiles

To keep your ceiling tiles looking fresh and new, follow these maintenance tips:

  1. Regular Cleaning: Dust and dirt can accumulate on ceiling tiles over time. Use a soft broom or microfiber cloth to regularly dust the surface.
  2. Spot Cleaning: For any stains or spills, spot clean with a damp cloth and a mild cleaning solution. Avoid using abrasive cleaners that could damage the tile surface.
  3. Periodic Inspections: Inspect the tiles periodically for any signs of damage, such as cracks or warping. Early detection can help prevent more extensive repairs down the line.

Conclusion

Understanding Standard Ceiling Tile Measurements is essential for anyone looking to enhance their home’s interior through ceiling design. By knowing the common sizes, types, and installation methods, you can make informed decisions that not only improve the aesthetic of your space but also add value to your home.

Whether you’re a DIY enthusiast or hiring a professional, proper measurements and thoughtful design choices will ensure that your ceiling tiles contribute positively to your home’s overall charm and functionality.


White Drop Ceiling Tiles: Enhancing Your Space with Style and Functionality

Drop ceiling tiles, also known as suspended ceilings, have been a popular choice for commercial and residential spaces for decades. They offer a simple way to cover unsightly wires, pipes, and ductwork while providing easy access for repairs. Among the many options available, white drop ceiling tiles stand out as one of the most versatile and aesthetically pleasing choices for modern interiors.

White Drop Ceiling Tiles

In this article, we will explore everything you need to know about white drop ceiling tiles, including their benefits, different styles, installation process, and maintenance tips. Whether you’re renovating your home, office, or any other space, this guide will help you understand why white drop ceiling tiles might be the perfect solution for you.

What Are White Drop Ceiling Tiles?

White drop ceiling tiles are lightweight panels typically made of materials such as mineral fiber, gypsum, metal, or vinyl. These tiles are suspended from the actual ceiling using a metal grid system. The tiles rest inside the grid, creating a false ceiling that hides utilities like electrical wiring or air ducts while maintaining a clean and organized appearance.

Read too: Exploring the Innovation and Efficiency of Ceiling Mounted Surgical Light Solutions: Illuminating Precision

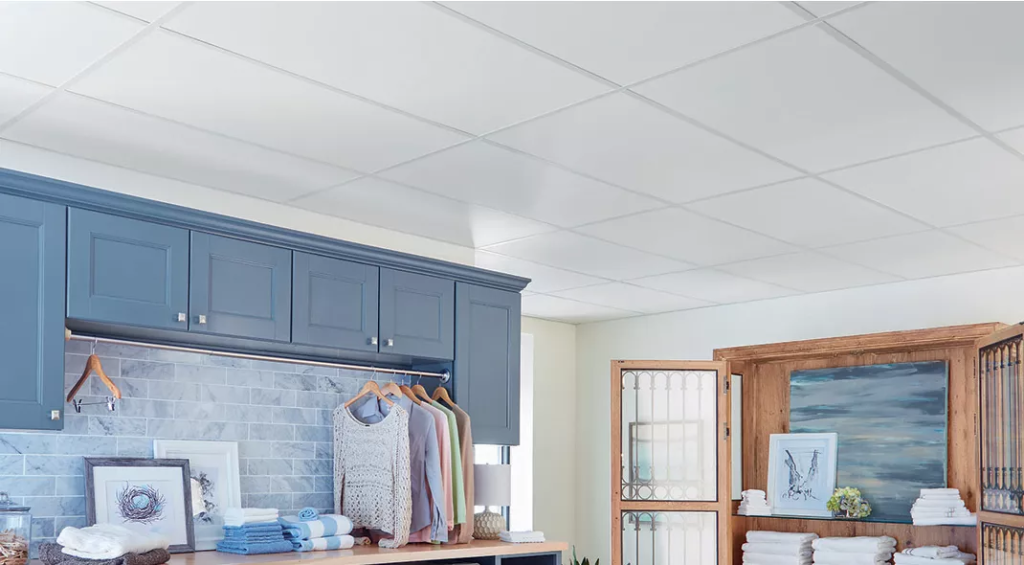
White is the most common color for drop ceiling tiles, as it reflects light well, making spaces appear brighter and more open. Whether used in an office, retail store, basement, or kitchen, white drop ceiling tiles provide a neutral, minimalist look that complements virtually any décor.

Benefits of White Drop Ceiling Tiles

There are several reasons why white drop ceiling tiles have remained a popular choice for both commercial and residential properties. Below are some key benefits that make them a preferred option for many people:

1. Enhanced Aesthetic Appeal

White drop ceiling tiles offer a clean, streamlined appearance that enhances the overall look of any room. Their smooth, bright surface can make a room feel more spacious, which is especially important in areas with lower ceilings. In addition, the neutral color of white tiles can easily blend with a wide range of design schemes, from modern to traditional.

2. Light Reflection

One of the main advantages of using white tiles in a ceiling is their ability to reflect light. This can help reduce the need for additional lighting fixtures, making spaces appear brighter without consuming more energy. White drop ceiling tiles are ideal for offices, retail stores, and basements where natural light might be limited.

3. Sound Absorption

Many white drop ceiling tiles are designed to absorb sound, which is especially beneficial in noisy environments like open-plan offices or large conference rooms. These tiles help reduce echo and background noise, creating a more comfortable environment for conversations and work.

4. Easy Access for Maintenance

One of the greatest advantages of using drop ceiling tiles is the easy access they provide to important building systems. By simply lifting the tiles, you can access pipes, electrical wiring, and HVAC ducts for repairs or maintenance. This makes them an excellent choice for commercial buildings, where regular access to these systems is often required.

5. Concealment of Utilities

White drop ceiling tiles offer an elegant solution for hiding unsightly utilities like exposed wires, pipes, and ductwork. Instead of dealing with the messy appearance of these elements, drop ceiling tiles create a smooth and seamless surface, improving the room’s overall appearance.

6. Cost-Effective

Compared to other ceiling options, drop ceilings are relatively affordable. The installation process is quick and simple, reducing labor costs. Additionally, white drop ceiling tiles are available in a variety of price points, allowing you to find a solution that fits your budget without sacrificing quality.

Types of White Drop Ceiling Tiles

When choosing white drop ceiling tiles, it’s essential to understand that they come in various materials, designs, and finishes. Each type of tile offers unique features, so selecting the right one for your specific needs can make all the difference.

1. Mineral Fiber Tiles

Mineral fiber tiles are one of the most common types of drop ceiling tiles. Made from natural and synthetic materials, they are lightweight, affordable, and offer excellent sound absorption properties. These tiles are ideal for offices, classrooms, and other spaces where controlling noise levels is essential.

2. Gypsum Ceiling Tiles

Gypsum tiles are another popular option for white drop ceilings. Known for their durability and fire-resistant properties, they are a great choice for both commercial and residential spaces. Gypsum tiles tend to have a more solid and smoother surface compared to mineral fiber tiles, offering a polished look that works well in modern interiors.

3. Vinyl or PVC Tiles

Vinyl tiles are often used in areas with high moisture levels, such as basements, kitchens, or bathrooms. These tiles are water-resistant and easy to clean, making them a practical solution for spaces that require frequent maintenance. They come in a wide range of textures and patterns, adding more design flexibility.

4. Metal Ceiling Tiles

For a more industrial or contemporary look, metal ceiling tiles are an excellent choice. Metal tiles are incredibly durable, resistant to moisture and damage, and provide a sleek, modern appearance. While metal tiles can be more expensive than other materials, they offer a distinct aesthetic that works well in trendy commercial spaces or loft-style homes.

5. Acoustic Ceiling Tiles

Acoustic tiles are specifically designed to reduce noise levels in a room. They are often made from mineral fibers and feature perforations or patterns that enhance their sound-absorbing capabilities. These tiles are commonly used in theaters, offices, and music studios to improve acoustics.

How to Install White Drop Ceiling Tiles

Installing white drop ceiling tile is a relatively straightforward process, especially for DIY enthusiasts. Below is a step-by-step guide to help you install drop ceiling tiles in your home or office:

Step 1: Measure the Room

Begin by measuring the dimensions of the room to determine how many tiles and how much grid material you will need. It’s essential to account for any fixtures or obstacles in the ceiling, such as lights or vents, which may require adjustments to the grid layout.

Step 2: Install the Wall Angles

The next step is to install wall angles around the perimeter of the room. These angles serve as the support for the edges of the ceiling grid. Use a level to ensure the angles are straight, and secure them to the wall with screws or nails.

Step 3: Assemble the Grid

Once the wall angles are in place, assemble the metal grid that will hold the tiles. The grid consists of main runners, cross tees, and connectors. Follow the manufacturer’s instructions for assembling the grid, ensuring that it is level and properly aligned.

Step 4: Cut and Install the Tiles

If needed, cut the white drop ceiling tiles to fit around obstacles or along the edges of the room. Use a sharp utility knife to make clean cuts. Once the tiles are cut to size, simply drop them into place within the grid. Be careful not to damage the edges of the tiles during installation.

Step 5: Add Lighting or Fixtures

If you’re installing lights, fans, or other fixtures, ensure they are properly supported by the ceiling grid. You may need to reinforce certain sections of the grid to accommodate heavier fixtures.

Maintenance Tips for White Drop Ceiling Tiles

Maintaining your white drop ceiling tiles is essential to keep them looking clean and fresh for years to come. Here are some tips to ensure their longevity:

1. Regular Dusting

Over time, ceiling tiles can accumulate dust and dirt, especially in commercial spaces. Regularly dust your tiles using a soft cloth or vacuum with a brush attachment to keep them looking bright.

2. Clean Stains Immediately

If your white drop ceiling tiles become stained, it’s important to clean them as soon as possible. Use a mild detergent mixed with water to gently scrub the stained area. Avoid using harsh chemicals that could damage the surface of the tiles.

3. Replace Damaged Tiles

If a tile becomes cracked or discolored beyond repair, it’s best to replace it with a new one. Fortunately, drop ceiling tiles are easy to remove and replace without disturbing the rest of the ceiling.

4. Inspect for Moisture Issues

If you notice discoloration or sagging in your ceiling tiles, it could indicate a moisture problem above the ceiling. Inspect the area for leaks, and address any plumbing or roof issues promptly to prevent further damage.

Conclusion

White drop ceiling tile offer a practical and stylish solution for covering unsightly ceilings while providing easy access to utilities. Their ability to brighten up a space, combined with their sound-absorbing properties, makes them an excellent choice for both residential and commercial applications. With a wide range of materials, textures, and styles available, you can find the perfect white drop ceiling tile to suit your needs.

Whether you’re looking to improve the acoustics in your office, create a clean look in your basement, or hide imperfections in your ceiling, white drop ceiling tile provide a cost-effective and versatile option. By following proper installation and maintenance practices, you can enjoy a beautiful and functional ceiling for years to come.

Restaurant Kitchen Ceiling Tiles: Enhancing Your Dining Experience

When it comes to designing a restaurant, every detail matters, and that includes the ceilings. Restaurant kitchen ceiling tiles may not be the first thing that comes to mind when considering the overall aesthetics and functionality of a dining space, but they play a crucial role in creating the right atmosphere. In this article, we will explore the various types of ceiling tiles suitable for restaurant kitchens, their benefits, installation methods, and maintenance tips, providing you with comprehensive knowledge to make informed decisions for your establishment.

Restaurant Kitchen Ceiling Tiles

Understanding the Role of Ceiling Tiles in Restaurant Kitchens

Ceiling tiles serve multiple purposes in a restaurant kitchen. They not only contribute to the aesthetic appeal but also enhance functionality, safety, and cleanliness. Here’s how:

  1. Aesthetic Enhancement: Ceiling tiles can dramatically change the look and feel of a restaurant. A well-chosen design can complement the overall theme of the restaurant, whether it be modern, rustic, or traditional.
  2. Acoustic Control: Many ceiling tiles are designed to reduce noise, making the dining experience more pleasant. This is particularly important in bustling environments where background noise can detract from the customer experience.
  3. Fire Safety: Certain ceiling tiles are made from fire-resistant materials, which can be crucial in kitchen environments where heat and flames are common.
  4. Ease of Cleaning: Kitchen ceilings can accumulate grease, smoke, and dust. Ceiling tiles designed for easy cleaning can help maintain hygiene standards, essential for any food establishment.
  5. Energy Efficiency: Insulated ceiling tiles can help in regulating the temperature of the restaurant, leading to potential savings in energy costs.

Read too: Kitchen Lighting For A Vaulted Ceiling: Illuminating Your Space with Style and Functionality

Types of Restaurant Kitchen Ceiling Tiles

1. Acoustic Ceiling Tiles

Acoustic ceiling tiles are a popular choice for restaurant kitchens, especially in areas where noise control is a priority. These tiles are designed to absorb sound, creating a quieter environment. They are often made from mineral fiber, fiberglass, or other sound-absorbing materials.

Benefits:

  • Reduces noise levels, enhancing the dining experience.
  • Available in various designs and colors to match the restaurant’s decor.

2. Vinyl Ceiling Tiles

Vinyl ceiling tiles are another excellent option for restaurant kitchens. They are highly durable, moisture-resistant, and easy to clean, making them ideal for environments that experience high humidity and grease accumulation.

Benefits:

  • Water-resistant and easy to wipe clean.
  • Wide variety of styles and textures to choose from.

3. Metal Ceiling Tiles

Metal ceiling tiles offer a modern and stylish look, adding a touch of elegance to restaurant kitchens. They are available in different metals such as aluminum, copper, and stainless steel, and can be finished in various colors.

Benefits:

  • Extremely durable and resistant to damage.
  • Fire-resistant and can withstand high temperatures.

4. Fiberglass Ceiling Tiles

Fiberglass ceiling tiles are lightweight and highly effective at sound absorption. They are also resistant to moisture, making them suitable for kitchens where humidity levels can be high.

Benefits:

  • Excellent thermal insulation properties.
  • Resistant to mold and mildew.

5. Mineral Fiber Ceiling Tiles

Mineral fiber tiles are one of the most commonly used types in commercial settings. They offer good sound absorption and are usually treated for fire resistance. They come in a variety of finishes and styles.

Benefits:

  • Cost-effective and easy to install.
  • Good acoustic properties and can be painted to match decor.

Factors to Consider When Choosing Restaurant Kitchen Ceiling Tiles

Choosing the right ceiling tiles for your restaurant kitchen requires careful consideration of several factors:

1. Hygiene and Cleanability

In a kitchen environment, hygiene is paramount. Look for tiles that are easy to clean and maintain. Vinyl and metal tiles are often easier to wipe down and resist grease buildup.

2. Durability

Restaurant kitchens can be harsh environments. Choose tiles that can withstand heat, moisture, and potential impacts from kitchen equipment.

3. Aesthetics

The visual appeal of the ceiling should match the overall design of the restaurant. Consider the colors, textures, and styles that will enhance the dining experience.

4. Sound Absorption

If your restaurant has an open kitchen or a bustling dining area, consider tiles that offer sound absorption to minimize noise levels.

5. Installation and Maintenance

Consider how easy the tiles are to install and how much maintenance they will require. Some tiles can be easily replaced if damaged, while others may require professional installation.

Installation of Restaurant Kitchen Ceiling Tiles

Installing restaurant kitchen ceiling tiles can be a straightforward process, but it’s essential to follow the right steps for a professional finish.

1. Preparation

Before installation, ensure that the ceiling is clean and free of any debris. Remove any old tiles if necessary and check for any damage to the ceiling structure.

2. Choose Your Layout

Determine the layout for your ceiling tiles. You can use a grid system or a direct glue-down method, depending on the type of tiles you’ve chosen.

3. Cutting Tiles

If needed, cut the tiles to fit your layout. Use a utility knife or tile cutter for clean edges, especially if you are working around fixtures like lights or vents.

4. Installing Tiles

  • Grid System: If using a grid system, assemble the grid on the ceiling first, ensuring it is level. Then, place the tiles into the grid.
  • Glue-Down Method: Apply adhesive to the back of each tile and press it firmly against the ceiling, ensuring they are aligned correctly.

5. Finishing Touches

Once all tiles are installed, inspect the ceiling for any gaps or unevenness. Address any issues to ensure a polished look.

Maintenance Tips for Restaurant Kitchen Ceiling Tiles

Proper maintenance of your restaurant kitchen ceiling tiles is essential for longevity and hygiene:

  1. Regular Cleaning: Clean the tiles regularly to prevent grease and dust buildup. Use a damp cloth for vinyl and metal tiles, and a mild detergent for more stubborn stains.
  2. Check for Damage: Periodically inspect the ceiling for any damage or sagging tiles. Replace any damaged tiles promptly to maintain a clean and professional appearance.
  3. Control Humidity: Use exhaust fans and dehumidifiers to control moisture levels in the kitchen, reducing the risk of mold and mildew on your ceiling tiles.
  4. Address Stains Immediately: If any spills occur, clean them immediately to prevent staining. For persistent stains, consider using a specialized cleaning product.
  5. Professional Inspections: Schedule regular inspections of your ceiling to ensure everything is in good condition, especially if you notice any issues.

Conclusion

Investing in the right restaurant kitchen ceiling tiles is essential for creating a safe, clean, and visually appealing dining environment. By understanding the different types of ceiling tiles available, their benefits, and the factors to consider when making your choice, you can enhance the overall experience for both your staff and customers. With proper installation and maintenance, your ceiling tiles will not only serve their practical purposes but also contribute to the inviting atmosphere of your restaurant.

2X2 Cortega Ceiling Tile: Enhance Your Space with Style and Functionality

When it comes to choosing the perfect ceiling tiles for your home or office, the 2X2 Cortega Ceiling Tile stands out as a popular and versatile option. Known for its simplicity, durability, and ease of installation, this ceiling tile offers a blend of aesthetic appeal and practical benefits. Whether you’re remodeling a room, upgrading your office space, or simply looking for a quick ceiling fix, 2X2 Cortega Ceiling Tiles can be the perfect solution.

2X2 Cortega Ceiling Tile

In this comprehensive guide, we’ll explore everything you need to know about 2X2 Cortega Ceiling Tiles—from their features and benefits to installation tips and design ideas. By the end of this article, you’ll have a clear understanding of why these tiles are a great choice for any space.

What Is a 2X2 Cortega Ceiling Tile?

Overview

2X2 Cortega Ceiling Tiles are acoustic ceiling panels designed to fit into a standard 2×2 ceiling grid. They are part of the Armstrong ceiling tile product line, which is well-known for offering high-quality, affordable ceiling solutions. These tiles are typically made of mineral fiber, which provides sound absorption and improves room acoustics. The “Cortega” style is characterized by its subtle texture and classic appearance, making it suitable for a variety of settings, from offices and classrooms to retail spaces and residential rooms.

Read too: Kitchen Lighting For A Vaulted Ceiling: Illuminating Your Space with Style and Functionality

Key Features

  • Size: Each tile measures 2 feet by 2 feet, making it compatible with most drop ceiling grid systems.
  • Acoustic Performance: Designed to reduce noise and enhance sound quality in the room.
  • Textured Surface: The tile features a subtle, non-directional texture that provides a clean, traditional look.
  • Durability: Made from durable materials that resist sagging and maintain their appearance over time.
  • Easy Installation: Lightweight and easy to handle, these tiles can be quickly installed in any drop ceiling system.

Benefits of 2X2 Cortega Ceiling Tiles

1. Improved Acoustics

One of the primary reasons people choose 2X2 Cortega Ceiling Tiles is their ability to improve room acoustics. These tiles are designed to absorb sound, reducing noise levels and preventing sound from bouncing off hard surfaces. This is particularly beneficial in environments where clear communication is essential, such as offices, classrooms, and conference rooms. By installing Cortega tiles, you can create a quieter, more comfortable space that enhances productivity and focus.

2. Versatile Design

The 2X2 Cortega Ceiling Tile features a subtle, non-directional texture that blends seamlessly with various interior design styles. Whether you prefer a modern, minimalist look or a more traditional aesthetic, these tiles can complement your existing décor. Their clean, white surface reflects light, helping to brighten up the room and create a more inviting atmosphere.

3. Cost-Effective Solution

Compared to other ceiling options, 2X2 Cortega Ceiling Tiles are an affordable choice that doesn’t compromise on quality. They offer a cost-effective way to enhance the appearance and functionality of your ceiling without breaking the bank. Additionally, their durability means they will last for years, providing excellent value for your investment.

4. Easy Maintenance

Maintaining 2X2 Cortega Ceiling Tiles is simple and hassle-free. The tiles are designed to resist sagging, warping, and staining, making them easy to clean and keep looking new. If a tile does get damaged or dirty, it can be easily removed and replaced without the need for professional help.

5. Quick and Easy Installation

One of the standout features of 2X2 Cortega Ceiling Tiles is their ease of installation. These tiles are lightweight and designed to fit into a standard drop ceiling grid, making the installation process straightforward and quick. Whether you’re a DIY enthusiast or hiring a contractor, you’ll appreciate how simple it is to achieve a professional-looking ceiling with these tiles.

How to Install 2X2 Cortega Ceiling Tiles

Step 1: Gather Your Tools and Materials

Before you begin the installation, make sure you have all the necessary tools and materials on hand. You will need:

  • 2X2 Cortega Ceiling Tiles
  • A ladder
  • A utility knife
  • Measuring tape
  • A pencil or marker
  • A drop ceiling grid system (if not already installed)

Step 2: Prepare the Ceiling Grid

If you’re installing a drop ceiling grid from scratch, follow the manufacturer’s instructions to assemble the grid system. Ensure that the grid is level and securely attached to the ceiling. Measure the space to ensure that the tiles will fit properly, making any necessary adjustments to the grid layout.

Step 3: Cut the Tiles to Size

Measure the space where each tile will be placed, particularly around the edges where full tiles may not fit. Use a utility knife to carefully cut the tiles to the correct size. Remember to mark your cutting lines on the back of the tile to avoid visible marks on the finished surface.

Step 4: Install the Tiles

Starting at one corner of the room, begin placing the 2X2 Cortega Ceiling Tiles into the grid system. Gently lift each tile and tilt it slightly to fit it into place. Once the tile is aligned with the grid, lower it into position. Repeat this process until all the tiles are installed.

Step 5: Check for Gaps and Adjust

After all the tiles are in place, step back and check for any gaps or misaligned tiles. Make any necessary adjustments to ensure a seamless finish. If you notice any tiles that are not sitting correctly, gently lift and reposition them.

Design Ideas for Using 2X2 Cortega Ceiling Tiles

1. Modern Office Spaces

2X2 Cortega Ceiling Tiles are an excellent choice for modern office environments. Their clean, white finish helps to create a bright, airy workspace that promotes productivity and focus. Consider pairing these tiles with LED lighting fixtures for a sleek, contemporary look.

2. Classrooms and Educational Settings

In classrooms, good acoustics are essential for effective learning. 2X2 Cortega Ceiling Tiles can help to reduce noise levels and create a more conducive learning environment. Their easy-to-clean surface also makes them ideal for busy educational settings where durability is key.

3. Retail Spaces

For retail spaces, the appearance of your ceiling can significantly impact the overall shopping experience. 2X2 Cortega Ceiling Tiles offer a polished, professional look that can enhance the aesthetics of your store. Their light-reflective surface also helps to brighten the space, making it more inviting for customers.

4. Residential Applications

While 2X2 Cortega Ceiling Tiles are often used in commercial settings, they’re also a great option for residential spaces. Use them in basements, home offices, or laundry rooms to create a clean, finished look. Their sound-absorbing properties can also help to reduce noise between floors, making your home quieter and more comfortable.

Maintenance Tips for 2X2 Cortega Ceiling Tiles

Regular Cleaning

To keep your 2X2 Cortega Ceiling Tiles looking their best, it’s important to clean them regularly. Use a soft, dry cloth or a vacuum cleaner with a brush attachment to remove dust and dirt. For tougher stains, a mild detergent and water can be used. Avoid using harsh chemicals that could damage the tiles.

Inspect for Damage

Periodically inspect your ceiling tiles for signs of damage, such as cracks, stains, or sagging. If you notice any issues, replace the affected tiles promptly to maintain the appearance and functionality of your ceiling.

Replace Damaged Tiles

If a tile becomes damaged, it’s easy to replace. Simply lift the damaged tile out of the grid and replace it with a new one. This quick and straightforward process ensures that your ceiling always looks its best.

Conclusion

2X2 Cortega Ceiling Tile offer a versatile, cost-effective solution for both commercial and residential spaces. Their ability to improve acoustics, enhance aesthetics, and simplify maintenance makes them an excellent choice for anyone looking to upgrade their ceiling. Whether you’re outfitting an office, classroom, retail store, or home, these tiles provide the perfect blend of style and functionality. With easy installation and long-lasting durability, 2X2 Cortega Ceiling Tiles are an investment that will serve you well for years to come.

How To Repair Ceiling Tiles With Water Damage: A Comprehensive Guide

Water damage is a common problem that can affect any part of your home, but ceiling tiles are particularly vulnerable. Whether caused by a leaking roof, burst pipe, or excessive humidity, water damage can lead to unsightly stains, warping, and even mold growth on your ceiling tiles. Fortunately, repairing ceiling tiles with water damage is a manageable task that can restore the appearance and integrity of your ceiling. In this comprehensive guide, we’ll walk you through the steps on how to repair ceiling tiles with water damage, offering practical tips and insights to help you get the job done right.

How To Repair Ceiling Tiles With Water Damage

Understanding Water Damage in Ceiling Tiles

Before diving into the repair process, it’s essential to understand the nature of water damage and its impact on ceiling tiles. Water can cause various types of damage depending on the material of your ceiling tiles, the extent of the water exposure, and how quickly the issue is addressed.

Common Types of Ceiling Tiles

  • Acoustic Tiles: Often found in commercial buildings, these tiles are designed to reduce noise. They are usually made from porous materials that can absorb water, leading to stains and mold.
  • Drywall Ceiling Tiles: Common in residential homes, these tiles are prone to warping, sagging, and staining when exposed to water.
  • Metal Ceiling Tiles: Less susceptible to water damage, but they can rust if exposed to moisture over time.
  • Mineral Fiber Ceiling Tiles: Made from a mix of mineral fibers, these tiles can absorb water and become discolored or warped.

Signs of Water Damage

  • Stains: Yellow or brown stains are often the first visible sign of water damage.
  • Warping: Ceiling tiles may bulge, warp, or sag due to water absorption.
  • Cracks: Excessive moisture can cause tiles to crack or break apart.
  • Mold Growth: In areas with high humidity, mold can develop on damp ceiling tiles, posing health risks.

Read too: Kitchen Lighting For A Vaulted Ceiling: Illuminating Your Space with Style and Functionality

How To Repair Ceiling Tiles With Water Damage

Repairing ceiling tiles with water damage involves several steps, from assessing the damage to replacing or restoring the affected tiles. Follow these instructions to ensure a successful repair.

1. Assess the Damage

Before you start any repairs, assess the extent of the damage:

  • Determine the Source: Identify where the water is coming from. It could be a leaky roof, plumbing issue, or condensation problem. Address the source of the water to prevent future damage.
  • Evaluate the Damage: Check how many tiles are affected and whether they are stained, warped, or cracked. If mold is present, take extra precautions, as mold can spread and cause health issues.

2. Remove the Damaged Tiles

If the damage is severe, you may need to remove and replace the damaged tiles:

  • Cut Around the Damaged Area: Use a utility knife to cut around the damaged tile if it’s a drywall or mineral fiber tile. For acoustic or metal tiles, you may be able to simply lift the tile out of the grid system.
  • Carefully Remove the Tile: Gently remove the tile to avoid damaging the surrounding tiles or ceiling structure. If the tile is wet, handle it with care as it may be fragile.

3. Dry and Clean the Area

Once the damaged tiles are removed, it’s crucial to dry and clean the area to prevent further issues:

  • Dry the Ceiling: Use fans or a dehumidifier to thoroughly dry the area where the tiles were removed. This step is vital to prevent mold growth.
  • Clean the Surrounding Area: Wipe down the ceiling structure with a damp cloth to remove any dust, debris, or mold spores. If mold is present, use a mixture of water and mild detergent or a specialized mold cleaner to disinfect the area.

4. Repair or Replace the Ceiling Tiles

Depending on the extent of the damage, you can either repair the existing tiles or replace them entirely.

Repairing Stained or Warped Tiles

If the tiles are only slightly stained or warped, you may be able to salvage them:

  • Stain Removal: For minor stains, apply a stain-blocking primer to the affected area before repainting. This will prevent the stain from bleeding through the new paint. Use a paintbrush or roller to apply a fresh coat of paint that matches the original color.
  • Flatten Warped Tiles: If the tiles are slightly warped, try to flatten them by placing a heavy object on top of the tile while it’s drying. Alternatively, dampen the back of the tile and gently press it flat before allowing it to dry completely.

Replacing the Tiles

For tiles that are beyond repair, replacement is the best option:

  • Measure and Cut New Tiles: Measure the size of the existing tiles and cut the new tiles to match. Ensure that the new tiles are the same material and thickness as the originals.
  • Install the New Tiles: For grid systems, simply drop the new tiles into place. For drywall or glued tiles, apply adhesive to the back of the tile and press it firmly onto the ceiling.

5. Prevent Future Water Damage

After repairing the ceiling tiles, take steps to prevent future water damage:

  • Fix Leaks: Ensure that any leaks in the roof or plumbing are repaired promptly to avoid further damage.
  • Improve Ventilation: In areas prone to high humidity, such as bathrooms or kitchens, improve ventilation by installing exhaust fans or using a dehumidifier.
  • Regular Inspections: Periodically inspect your ceiling for signs of water damage, especially after heavy rain or if you notice any leaks.

6. Repaint and Finish

Once the repairs are complete, finish the ceiling to restore its original appearance:

  • Repaint the Ceiling: Apply a fresh coat of paint to the entire ceiling for a uniform look. Use a paint that is resistant to moisture and stains to extend the life of your ceiling.
  • Reapply Texture: If your ceiling has a textured finish, use a texture spray or brush to reapply the texture to the repaired area.

How To Repair Ceiling Tiles With Water Damage: Additional Tips

1. Safety First

When dealing with water-damaged ceiling tiles, always prioritize safety:

  • Wear Protective Gear: Wear gloves, safety goggles, and a dust mask to protect yourself from mold spores and debris.
  • Turn Off Power: If the water damage is near electrical fixtures, turn off the power to the area to prevent electrical hazards.

2. Choose the Right Materials

Selecting the right materials for repair is crucial:

  • Water-Resistant Tiles: Consider using water-resistant ceiling tiles, especially in areas prone to moisture.
  • Stain-Resistant Paint: Use stain-resistant paint to help prevent future stains from appearing.

3. Consider Professional Help

If the water damage is extensive or if you’re dealing with mold, it may be wise to hire a professional. A contractor can provide expert advice and ensure that the repairs are done correctly.

Conclusion

Water damage to ceiling tiles can be a frustrating issue, but with the right approach, it can be effectively repaired. By following these steps on how to repair ceiling tiles with water damage, you can restore your ceiling’s appearance and prevent future problems. Whether you’re dealing with minor stains or extensive damage, taking prompt action and using the right materials will ensure a successful repair.

Call Don’t Fall Ceiling Tiles: An In-Depth Guide

When it comes to ceiling tiles, safety, durability, and aesthetics are paramount. Call Don’t Fall Ceiling Tiles have become a go-to option for those seeking a reliable solution that combines all these qualities. This article will explore why these ceiling tiles are a top choice for both residential and commercial spaces. We’ll cover their unique features, benefits, installation tips, and maintenance advice to help you make an informed decision.

Call Don'T Fall Ceiling Tiles

What Are Call Don’t Fall Ceiling Tiles?

Call Don’t Fall Ceiling Tiles are a specialized type of ceiling tile designed with safety and durability in mind. They are known for their robust construction and innovative features that set them apart from standard ceiling tiles. The name “Call Don’t Fall” reflects the tiles’ superior ability to stay securely in place, reducing the risk of accidents and enhancing the overall safety of a space.

Key Features of Call Don’t Fall Ceiling Tiles

1. High Durability

One of the standout features of Call Don’t Fall Ceiling Tiles is their durability. Made from high-quality materials, these tiles are designed to withstand various environmental conditions. They are resistant to impacts, moisture, and temperature fluctuations, making them ideal for both residential and commercial settings.

Read too: Bathroom Flooded Through the Ceiling: A Comprehensive Guide

2. Enhanced Safety

Safety is a top priority with these ceiling tiles. The unique design ensures that the tiles remain securely fixed in place, reducing the risk of them falling or becoming dislodged. This feature is particularly valuable in high-traffic areas or spaces where safety is a concern.

3. Aesthetic Variety

Despite their focus on safety and durability, Call Don’t Fall Ceiling Tiles do not compromise on aesthetics. They are available in a wide range of styles, colors, and finishes, allowing you to choose the perfect option to match your interior design.

4. Ease of Installation

Installation is straightforward with Call Don’t Fall Ceiling Tiles. They are designed for easy handling and quick installation, making them a practical choice for both DIY enthusiasts and professional installers.

5. Maintenance and Cleaning

Maintaining these ceiling tiles is simple. They are designed to be easy to clean and resistant to staining, ensuring that they continue to look good and perform well over time.

Benefits of Using Call Don’t Fall Ceiling Tiles

1. Improved Safety

The primary benefit of Call Don’t Fall Ceiling Tiles is their safety. Their secure installation reduces the risk of tiles falling, which can prevent potential accidents and injuries.

2. Long-Lasting Performance

Thanks to their durability, these tiles provide long-lasting performance, reducing the need for frequent replacements and repairs. This makes them a cost-effective choice in the long run.

3. Versatile Design Options

With a variety of styles and finishes available, Call Don’t Fall Ceiling Tiles can enhance the aesthetic appeal of any space. Whether you’re looking for a modern, classic, or contemporary look, there’s an option to suit your needs.

4. Low Maintenance

The tiles’ resistance to stains and easy cleaning requirements mean that they are low-maintenance, saving you time and effort in upkeep.

5. Cost-Effective

While the initial investment may be higher than standard ceiling tiles, the long-term benefits, including reduced maintenance costs and fewer replacements, make Call Don’t Fall Ceiling Tiles a cost-effective option.

How to Choose the Right Call Don’t Fall Ceiling Tiles

Choosing the right ceiling tiles involves several considerations:

1. Assess Your Needs

Consider the specific needs of your space. Are you looking for tiles that offer extra durability, improved safety, or specific aesthetic qualities? Understanding your requirements will help you choose the best option.

2. Check for Safety Features

Ensure that the tiles have the necessary safety features, such as secure installation systems and resistance to potential hazards.

3. Consider Design and Style

Choose a design and finish that complements your interior decor. With a variety of styles available, you can find tiles that enhance the overall look of your space.

4. Evaluate Installation Requirements

Consider whether you will be installing the tiles yourself or hiring a professional. Ensure that the tiles you choose are suitable for your installation method.

5. Review Maintenance Needs

Select tiles that align with your maintenance preferences. Easy-to-clean and low-maintenance options are ideal for busy spaces.

Installation Tips for Call Don’t Fall Ceiling Tiles

Proper installation is crucial for ensuring that Call Don’t Fall Ceiling Tiles perform at their best. Here are some tips to help you with the installation process:

1. Prepare the Area

Before installing the tiles, ensure that the ceiling surface is clean, dry, and free of debris. Any imperfections or moisture issues should be addressed to ensure a secure installation.

2. Follow Manufacturer Instructions

Always follow the manufacturer’s instructions for installation. This will ensure that the tiles are installed correctly and that any warranties remain valid.

3. Use the Right Tools

Use the appropriate tools for installation, including a measuring tape, level, and any specific tools recommended by the manufacturer.

4. Measure and Cut Carefully

Accurate measurements are essential for a proper fit. Measure and cut the tiles carefully to ensure they fit snugly into place.

5. Secure the Tiles Properly

Ensure that the tiles are secured correctly to avoid any risk of them falling or becoming dislodged. Follow the installation guidelines to achieve a secure fit.

6. Check for Proper Alignment

As you install the tiles, check for proper alignment and make any necessary adjustments to ensure a uniform appearance.

Maintenance and Care for Call Don’t Fall Ceiling Tiles

To keep your Call Don’t Fall Ceiling Tile looking and performing their best, follow these maintenance tips:

1. Regular Cleaning

Dust the tiles regularly using a soft, dry cloth. For more thorough cleaning, use a mild detergent and water. Avoid using harsh chemicals that could damage the tiles.

2. Inspect for Damage

Periodically inspect the tiles for any signs of damage or wear. Address any issues promptly to maintain safety and performance.

3. Address Stains Promptly

If stains occur, clean them as soon as possible to prevent them from setting. Use appropriate cleaning products based on the tile material.

4. Check Installation

Ensure that the tiles remain securely installed. If you notice any issues, address them promptly to prevent further problems.

Conclusion

Call Don’t Fall Ceiling Tiles are an excellent choice for anyone seeking a blend of safety, durability, and style. With their robust construction, versatile designs, and ease of maintenance, these tiles offer numerous benefits for both residential and commercial spaces. By following the tips provided in this guide, you can ensure that your ceiling tiles remain in top condition and continue to enhance the beauty and safety of your space.

Clean Room Ceiling Tile: Enhancing Hygiene and Functionality

When it comes to designing and maintaining a clean room, every detail matters—especially the ceiling tiles. Clean room ceiling tiles are not just another building material; they play a crucial role in maintaining the sterile environment required in various industries, such as pharmaceuticals, biotechnology, electronics, and healthcare. In this comprehensive guide, we will explore everything you need to know about clean room ceiling tile, from their importance and types to installation and maintenance tips.

Clean Room Ceiling Tiles

Understanding

Clean room environments are highly controlled spaces where the presence of airborne particles, microorganisms, and other contaminants must be minimized. The ceiling in a clean room is a critical component that directly impacts the room’s ability to maintain strict cleanliness standards. Here’s why clean room ceiling tiles are so important:

1. Contamination Control

One of the primary purposes of clean room ceiling tiles is to control contamination. These tiles are designed to prevent the shedding of particles, which can introduce contaminants into the clean room environment. The tiles are typically made from non-porous materials that do not harbor dust, microbes, or other particulates, ensuring a sterile environment.

2. Airflow Management

Clean room ceiling tiles play a vital role in the proper distribution of air within the clean room. Many clean rooms use ceiling-mounted HEPA (High-Efficiency Particulate Air) filters to provide a constant flow of clean air. The design and installation of the ceiling tiles must support this airflow, ensuring that clean air circulates effectively while maintaining the room’s pressurization.

3. Durability and Chemical Resistance

In clean room settings, the ceiling tiles must withstand regular cleaning with strong disinfectants and chemicals without degrading or losing their structural integrity. Clean room ceiling tiles are engineered to resist corrosion, staining, and chemical reactions, ensuring long-lasting performance.

4. Ease of Maintenance

Because clean rooms require frequent cleaning and maintenance, the ceiling tiles must be easy to clean and maintain. Tiles that are resistant to stains and chemical damage can significantly reduce the time and effort required to maintain a clean room, helping to minimize downtime and maintain high productivity.

Types of Clean Room Ceiling Tiles

There are several types of clean room ceiling tiles available, each designed to meet specific requirements depending on the level of cleanliness needed. Understanding these different types will help you choose the right tiles for your clean room environment.

1. Vinyl-Faced Gypsum Ceiling Tiles

Vinyl-faced gypsum tiles are among the most common types of clean room ceiling tiles. These tiles consist of a gypsum core covered with a durable vinyl surface, which is non-porous and easy to clean. The vinyl surface prevents dust and particles from accumulating, making it ideal for environments where cleanliness is critical. These tiles are often used in pharmaceutical and biotechnology clean rooms.

Read too: Bathroom Flooded Through the Ceiling: A Comprehensive Guide

2. Aluminum Ceiling Tiles

Aluminum clean room ceiling tiles are known for their durability and resistance to corrosion. They are lightweight, easy to install, and can be used in environments where chemical resistance is a priority. Aluminum tiles are also non-porous and do not support the growth of mold or bacteria, making them suitable for clean rooms in industries such as electronics and healthcare.

3. Fiberglass Ceiling Tiles

Fiberglass tiles are designed for clean rooms where superior sound absorption is required, in addition to cleanliness. These tiles have a fiberglass core that provides excellent acoustic performance, reducing noise levels in the clean room. The tiles are typically covered with a smooth, cleanable surface that resists dust and particles. Fiberglass tiles are commonly used in laboratories and research facilities.

4. PVC Ceiling Tiles

PVC (Polyvinyl Chloride) ceiling tiles are another popular choice for clean rooms. These tiles are completely non-porous, resistant to chemicals, and easy to clean, making them ideal for environments where frequent sanitization is required. PVC tiles are also lightweight and can be installed quickly, making them a cost-effective option for many clean room applications.

Choosing the Right Clean Room Ceiling Tiles

Selecting the right clean room ceiling tiles involves considering several factors, including the specific requirements of your clean room, the level of cleanliness needed, and the environmental conditions. Here are some key factors to consider:

1. Clean Room Classification

Clean rooms are classified based on the number of particles per cubic meter of air, with different industries requiring different levels of cleanliness. For example, an ISO Class 5 clean room requires fewer than 3,520 particles per cubic meter, while an ISO Class 8 clean room allows up to 3,520,000 particles. The classification of your clean room will determine the type of ceiling tiles you need. Higher classifications require more stringent contamination controls, meaning you will need tiles that are highly resistant to particle shedding and easy to sanitize.

2. Environmental Conditions

Consider the environmental conditions within the clean room, such as temperature, humidity, and chemical exposure. If your clean room operates in a high-humidity environment, you’ll need ceiling tiles that are resistant to moisture and mold. In environments where harsh chemicals are used, select tiles that can withstand frequent exposure to these substances without degrading.

3. Ease of Installation

The installation process for clean room ceiling tiles should be straightforward and efficient. Look for tiles that are easy to handle and can be installed with minimal disruption to the clean room environment. Some tiles are designed with interlocking edges or other features that simplify installation and ensure a tight, secure fit.

4. Maintenance Requirements

Clean room ceiling tiles should be low-maintenance, requiring only routine cleaning to maintain their appearance and functionality. Consider tiles that are resistant to staining and easy to wipe down, as this will reduce the time and effort needed for maintenance.

Installation Tips for Clean Room Ceiling Tiles

Proper installation of clean room ceiling tiles is essential for maintaining the integrity of the clean room environment. Here are some tips to ensure a successful installation:

1. Prepare the Space

Before installing clean room ceiling tiles, make sure the space is properly prepared. This includes cleaning the existing ceiling structure, ensuring that the air filtration system is functioning correctly, and verifying that all other construction activities are complete to avoid introducing contaminants.

2. Follow Manufacturer Guidelines

Always follow the manufacturer’s guidelines for installing clean room ceiling tiles. These guidelines will provide specific instructions on handling, cutting, and installing the tiles to ensure they meet the clean room’s contamination control requirements.

3. Seal All Gaps

Gaps between ceiling tiles can allow contaminants to enter the clean room. Use appropriate sealing materials to fill any gaps and ensure a tight, secure fit. This is particularly important in areas around light fixtures, air vents, and other penetrations in the ceiling.

4. Test for Integrity

After installation, it’s important to test the integrity of the ceiling to ensure it meets clean room standards. This may involve testing for air leaks, particle counts, and other factors that could compromise the clean room environment.

Maintaining Clean Room Ceiling Tiles

Maintaining clean room ceiling tiles is crucial for ensuring the ongoing cleanliness and functionality of the clean room. Here are some maintenance tips:

1. Regular Cleaning

Clean room ceiling tiles should be cleaned regularly using appropriate cleaning agents that do not damage the surface. Avoid abrasive cleaners that can scratch or degrade the tiles. Instead, use soft cloths or sponges with mild disinfectants to wipe down the tiles.

2. Routine Inspections

Conduct routine inspections of the ceiling tiles to check for any signs of damage, such as cracks, discoloration, or loose tiles. Address any issues immediately to prevent contaminants from entering the clean room.

3. Replace Damaged Tiles

If any ceiling tiles become damaged or compromised, replace them promptly. Damaged tiles can become a source of contamination, so it’s important to maintain the integrity of the clean room ceiling at all times.

Conclusion

Clean room ceiling tile are a vital component of any clean room, playing a key role in controlling contamination, managing airflow, and ensuring a sterile environment. By understanding the different types of clean room ceiling tiles, considering your clean room’s specific needs, and following best practices for installation and maintenance, you can ensure that your clean room remains a safe, clean, and efficient space for your operations. Whether you’re working in pharmaceuticals, electronics, or any other industry requiring a controlled environment, investing in high-quality clean room ceiling tiles is essential for maintaining the highest standards of cleanliness and safety.

Mold Resistant Ceiling Tiles: Benefits, Installation, and Maintenance

Mold-resistant ceiling tiles are a crucial component in maintaining a healthy indoor environment, especially in areas prone to moisture and humidity. These tiles not only help prevent mold growth but also contribute to the overall aesthetic and functionality of a space. In this comprehensive guide, we’ll explore the benefits of mold-resistant ceiling tiles, provide tips on installation, and offer maintenance advice to ensure long-lasting performance.

Mold Resistant Ceiling Tiles

What Are Mold Resistant Ceiling Tiles?

Definition and Purpose

Mold-resistant ceiling tiles are specially designed tiles that resist mold growth and mildew formation. Made from materials that inhibit moisture absorption, these tiles are ideal for use in high-humidity areas like bathrooms, kitchens, and basements. Their primary purpose is to enhance indoor air quality by preventing mold-related issues, which can lead to health problems and structural damage.

Types of Mold Resistant Ceiling Tiles

  1. Fiberglass Tiles: Made from woven fiberglass strands, these tiles are highly resistant to moisture and mold. They offer excellent durability and are often used in commercial settings.
  2. Vinyl-Coated Tiles: These tiles have a vinyl coating that protects against moisture. They are easy to clean and maintain, making them a popular choice for residential and commercial applications.
  3. Mineral Fiber Tiles: Composed of mineral fibers and often treated with antimicrobial agents, these tiles offer good mold resistance and are commonly used in office and educational environments.

Read too: Bathroom Flooded Through the Ceiling: A Comprehensive Guide

Benefits of Mold Resistant Ceiling Tiles

Prevention of Mold and Mildew

One of the most significant advantages of mold-resistant ceiling tiles is their ability to prevent mold and mildew growth. By resisting moisture, these tiles help maintain a dry and healthy environment, reducing the risk of mold-related health issues such as respiratory problems and allergies.

Improved Indoor Air Quality

Mold-resistant ceiling tiles contribute to better indoor air quality by preventing mold spores from becoming airborne. This is particularly important for individuals with asthma or other respiratory conditions. Cleaner air promotes overall health and well-being.

Enhanced Durability

These tiles are designed to withstand high levels of moisture and humidity, making them more durable compared to standard ceiling tiles. This increased durability means fewer replacements and lower maintenance costs over time.

Easy Maintenance

Mold-resistant ceiling tiles are generally easier to clean and maintain than traditional tiles. Their smooth surfaces can be wiped down with minimal effort, and many are resistant to staining and discoloration.

Aesthetic Versatility

Mold-resistant ceiling tiles come in various styles, colors, and finishes, allowing you to achieve the desired aesthetic for your space. Whether you prefer a modern, sleek look or a more traditional appearance, there is likely a mold-resistant tile that suits your needs.

How to Install Mold Resistant Ceiling Tiles

Preparation

  1. Measure the Area: Accurately measure the dimensions of the ceiling to determine the number of tiles required. Make sure to account for any irregularities or obstacles.
  2. Choose the Right Tiles: Select mold-resistant ceiling tiles that match your aesthetic preferences and functional needs. Ensure they are suitable for the specific conditions of the room.
  3. Gather Tools and Materials: You’ll need tools such as a measuring tape, utility knife, adhesive (if applicable), and a straightedge. For a drop ceiling, you may also need a grid system and suspension wires.

Installation Steps

  1. Prepare the Ceiling: Ensure the ceiling surface is clean, dry, and free from any old adhesive or debris. Repair any existing damage before installing the new tiles.
  2. Install the Grid System (For Drop Ceilings): If using a drop ceiling system, install the grid according to the manufacturer’s instructions. Ensure it is level and securely anchored.
  3. Cut the Tiles: Measure and cut the tiles to fit the dimensions of the ceiling. Use a utility knife and straightedge for precise cuts.
  4. Install the Tiles: For drop ceilings, place the tiles into the grid system. For direct application, apply adhesive to the back of each tile and press it firmly against the ceiling surface.
  5. Check Alignment: Ensure that all tiles are aligned properly and adjust as needed. Allow any adhesive to cure according to the manufacturer’s recommendations.

Tips for a Successful Installation

  • Follow Manufacturer Instructions: Always refer to the manufacturer’s installation guidelines to ensure proper setup and avoid potential issues.
  • Use Professional Help if Needed: If you’re unfamiliar with ceiling tile installation or if the project is complex, consider hiring a professional for a seamless result.
  • Allow for Expansion: In areas with significant temperature fluctuations, allow for some expansion and contraction of the tiles to prevent warping.

Maintenance and Care

Regular Cleaning

To maintain the appearance and performance of mold-resistant ceiling tiles, clean them regularly. Use a soft, damp cloth or sponge to wipe down the surface and remove any dust or debris. Avoid using abrasive cleaners or scrubbing too hard, as this can damage the tiles.

Inspect for Damage

Periodically inspect the ceiling tiles for any signs of damage, such as cracks or loose tiles. Address any issues promptly to prevent further deterioration or potential mold growth.

Address Leaks and Moisture Issues

If you notice any leaks or excessive moisture in the room, address the source of the problem immediately. Repair any plumbing leaks or address ventilation issues to prevent moisture buildup, which can compromise the effectiveness of mold-resistant tiles.

Advantages Over Standard Ceiling Tiles

Enhanced Protection

Mold-resistant ceiling tiles offer superior protection against moisture and mold compared to standard tiles. This added layer of protection is crucial in areas prone to high humidity and water exposure.

Longer Lifespan

Due to their enhanced durability and resistance to mold, these tiles typically have a longer lifespan compared to conventional ceiling tiles. This means fewer replacements and reduced long-term costs.

Better Health Outcomes

By preventing mold growth and improving indoor air quality, mold-resistant ceiling tile contribute to better health outcomes for occupants. This is particularly beneficial for those with respiratory conditions or allergies.

Conclusion

Mold-resistant ceiling tile are an excellent investment for maintaining a healthy and attractive indoor environment. With their ability to prevent mold growth, improve indoor air quality, and offer durability and aesthetic versatility, these tiles provide numerous benefits for both residential and commercial spaces. By following proper installation and maintenance practices, you can ensure that your https://homeceilingideas.com/mold-resistant-ceiling-tiles/ perform effectively and continue to enhance your space for years to come.

Commercial Kitchen Ceiling Tiles: Enhancing Functionality and Aesthetics

When designing or renovating a commercial kitchen, every detail counts. One often overlooked but critical component is the ceiling. Choosing the right ceiling tiles for your commercial kitchen can significantly impact both functionality and aesthetics. In this guide, we will explore the various aspects of commercial kitchen ceiling tiles, including their benefits, types, installation tips, and maintenance. Our goal is to provide you with the information needed to make an informed decision and optimize your kitchen environment.

Commercial Kitchen Ceiling Tiles

Why Choose Commercial Kitchen Ceiling Tiles?

Ceiling tiles designed specifically for commercial kitchens offer several benefits that are essential for maintaining a safe, clean, and efficient workspace. Here are some of the primary reasons to consider them:

Hygiene and Cleanliness

Commercial kitchens require stringent hygiene standards. Ceiling tiles in these environments must be easy to clean and resistant to mold, mildew, and bacteria. Many commercial kitchen ceiling tiles are designed with smooth, non-porous surfaces that can be wiped down easily, ensuring a hygienic environment.

Fire Resistance

Safety is paramount in any commercial kitchen. Ceiling tiles with fire-resistant properties help prevent the spread of fire and provide additional time for evacuation in case of an emergency. Look for tiles that meet industry standards for fire resistance to enhance the safety of your kitchen.

Moisture and Humidity Resistance

Kitchens are exposed to high levels of moisture and humidity, which can damage regular ceiling tiles. Commercial kitchen ceiling tiles are typically designed to withstand these conditions without warping, sagging, or deteriorating, ensuring longevity and maintaining a clean appearance.

Aesthetic Appeal

While functionality is crucial, aesthetics should not be ignored. Commercial kitchen ceiling tiles are available in various styles and finishes, allowing you to choose options that complement your kitchen’s design. A well-designed ceiling can enhance the overall ambiance of the space.

Acoustic Control

Noise control is essential in a busy commercial kitchen. Ceiling tiles with acoustic properties can help reduce noise levels, creating a more comfortable and efficient working environment. This is particularly important in open kitchen designs where noise can easily travel to dining areas.

Types of Commercial Kitchen Ceiling Tiles

There are several types of ceiling tiles suitable for commercial kitchens, each with its unique properties and benefits. Understanding the different options can help you select the best tiles for your needs.

Vinyl Faced Gypsum Ceiling Tiles

Vinyl faced gypsum ceiling tiles are a popular choice for commercial kitchens due to their durability and ease of maintenance. The vinyl surface is smooth and non-porous, making it easy to clean and resistant to moisture and bacteria. These tiles are also fire-resistant, adding an extra layer of safety.

Fiberglass Ceiling Tiles

Fiberglass ceiling tiles are lightweight and offer excellent sound absorption, making them ideal for noisy kitchen environments. They are resistant to moisture and mold, ensuring they remain in good condition even in humid conditions. The tiles can be easily cleaned with a damp cloth, maintaining hygiene standards.

Read too: Kitchen Lighting For A Vaulted Ceiling: Illuminating Your Space with Style and Functionality

Metal Ceiling Tiles

Metal ceiling tiles, such as aluminum or stainless steel, are highly durable and resistant to moisture, mold, and bacteria. They are easy to clean and maintain, making them a practical choice for commercial kitchens. Metal tiles also provide a sleek, modern aesthetic that can enhance the overall look of the kitchen.

PVC Ceiling Tiles

PVC ceiling tiles are another excellent option for commercial kitchens. They are lightweight, moisture-resistant, and easy to clean. PVC tiles are available in various styles and finishes, allowing you to achieve the desired look for your kitchen while maintaining functionality.

Mineral Fiber Ceiling Tiles

Mineral fiber ceiling tiles offer good acoustic properties and are fire-resistant, making them suitable for commercial kitchens. However, they may require more maintenance compared to other types of tiles, as they can be more susceptible to moisture damage.

Installation Tips for Commercial Kitchen Ceiling Tiles

Proper installation is crucial for ensuring the longevity and effectiveness of your ceiling tiles. Here are some tips to help you achieve a successful installation:

Prepare the Area

Before installation, ensure that the ceiling area is clean, dry, and free of any debris. This will help the tiles adhere properly and prevent any potential issues.

Measure Accurately

Accurate measurements are essential for ensuring that the tiles fit correctly. Measure the ceiling area carefully and cut the tiles to size if necessary. Having the right tools, such as a utility knife and a straight edge, can help achieve precise cuts.

Use the Right Adhesive

Using the appropriate adhesive is critical for ensuring that the tiles stay in place. Follow the manufacturer’s recommendations for the type of adhesive to use and apply it evenly to the back of each tile.

Follow a Grid Pattern

Installing the tiles in a grid pattern can help achieve a uniform and professional look. Start from the center of the ceiling and work your way outwards, ensuring that the tiles are aligned correctly.

Secure the Tiles

Make sure the tiles are securely attached to the ceiling. Press each tile firmly into place and ensure that there are no gaps or loose edges. This will help prevent any tiles from falling or shifting over time.

Maintenance of Commercial Kitchen Ceiling Tiles

Proper maintenance is essential for keeping your ceiling tiles in good condition and ensuring a hygienic environment. Here are some maintenance tips:

Regular Cleaning

Regularly clean the ceiling tiles to remove any dirt, grease, or grime. Use a mild detergent and a damp cloth to wipe down the tiles. For tougher stains, a soft-bristled brush may be used. Avoid using abrasive cleaners that could damage the tile surface.

Inspect for Damage

Periodically inspect the ceiling tiles for any signs of damage, such as cracks, warping, or discoloration. Replace any damaged tiles promptly to maintain the integrity of the ceiling and prevent further issues.

Check for Moisture

Ensure that the kitchen is well-ventilated to prevent moisture buildup, which can damage the tiles and promote mold growth. If you notice any signs of moisture damage, such as staining or sagging tiles, address the issue immediately.

Maintain Fire Safety

If your ceiling tiles have fire-resistant properties, ensure that they remain effective by following proper maintenance procedures. Do not paint over the tiles or apply any coatings that could compromise their fire resistance.

Design Ideas with Commercial Kitchen Ceiling Tiles

Commercial kitchen ceiling tiles can enhance the overall design and functionality of your space. Here are some design ideas to inspire you:

Modern Industrial

For a modern industrial look, consider metal ceiling tiles with a sleek finish. Pair them with exposed ductwork, stainless steel appliances, and concrete countertops for a contemporary and stylish kitchen.

Classic Elegance

Vinyl faced gypsum ceiling tiles in a neutral color can create a clean and elegant look. Combine them with white cabinetry, marble countertops, and classic lighting fixtures to achieve a timeless design.

Rustic Charm

Fiberglass or PVC ceiling tiles with a textured finish can add warmth and character to a rustic kitchen. Complement them with wooden beams, brick walls, and vintage-inspired decor for a cozy and inviting space.

Bold and Vibrant

For a bold and vibrant kitchen, choose ceiling tiles in bright colors or patterns. This can add a playful and dynamic element to the space. Pair them with colorful backsplashes, modern appliances, and unique lighting fixtures to create a lively atmosphere.

Conclusion

Choosing the right ceiling tiles for your commercial kitchen is crucial for maintaining a functional, safe, and aesthetically pleasing environment. Commercial kitchen ceiling tiles offer numerous benefits, including hygiene, fire resistance, moisture resistance, and acoustic control. By understanding the different types of tiles available and following proper installation and maintenance procedures, you can enhance the overall performance and appearance of your kitchen. Whether you prefer a modern, classic, rustic, or vibrant design, there are commercial kitchen ceiling tiles to suit your needs and style.

Size of a Ceiling Tile: A Comprehensive Guide

When planning any ceiling project, understanding the Size of a Ceiling Tile is crucial. Ceiling tiles come in various dimensions, and selecting the right size can significantly impact the overall aesthetics and functionality of a room. This guide will delve into everything you need to know about ceiling tile sizes, including standard dimensions, how to choose the right size, and the impact of tile size on your space.

Size Of A Ceiling Tile

Why the Size of a Ceiling Tile Matters

Choosing the correct size of a ceiling tile is important for several reasons:

  1. Aesthetics: The size of the tile affects the visual appeal of the ceiling. Large tiles can make a space feel more open and modern, while smaller tiles can create a classic, detailed look.
  2. Functionality: The right size ensures that the tiles fit properly without excessive cutting or waste. This can simplify installation and reduce material costs.
  3. Acoustics: Tile size can influence the acoustic properties of a room. Larger tiles can help in reducing noise levels, making them ideal for office spaces and classrooms.
  4. Maintenance: Smaller tiles might require more joints and grid work, which can affect ease of maintenance. Larger tiles tend to have fewer joints, making them easier to clean and maintain.

Standard Sizes of Ceiling Tiles

Common Dimensions

The most commonly used ceiling tile sizes include:

  1. 24 x 24 Inches (2 x 2 Feet): This is a standard size for many commercial and residential spaces. It offers a balanced look and is relatively easy to install.
  2. 24 x 48 Inches (2 x 4 Feet): Larger tiles are often used in commercial settings for a seamless, expansive look. They reduce the number of joints, enhancing the overall appearance.
  3. 12 x 12 Inches (1 x 1 Foot): Smaller tiles are typically used in decorative or detailed ceiling designs. They can create a classic, intricate pattern but may require more effort in installation.
  4. 20 x 60 Centimeters (8 x 24 Inches): These tiles are commonly used in Europe and offer a unique look for various applications.

Read too: Kitchen Lighting For A Vaulted Ceiling: Illuminating Your Space with Style and Functionality

Custom Sizes

In addition to standard sizes, ceiling tiles can also be custom-made to fit specific design requirements. Custom sizes are often used in unique architectural projects or where standard sizes do not fit.

How to Choose the Right Size of a Ceiling Tile

Consider the Room Size

  1. Small Rooms: In smaller rooms, such as bathrooms or closets, smaller tiles can make the space feel more detailed and proportionate. Larger tiles might overwhelm a small space.
  2. Large Rooms: For larger spaces like conference rooms or open-plan offices, larger tiles can create a sleek, uninterrupted look. They reduce the number of grid lines, making the ceiling appear more seamless.

Ceiling Height

  1. Low Ceilings: In rooms with low ceilings, smaller tiles can make the ceiling appear higher. Avoid large tiles that can make the ceiling feel lower and more oppressive.
  2. High Ceilings: High ceilings can accommodate larger tiles, creating a grand, open feel. They help maintain the scale and proportion of the room.

Design and Aesthetics

  1. Modern Design: For a modern, minimalist look, larger tiles are often preferred. They provide a clean, expansive feel with fewer visual interruptions.
  2. Traditional Design: Smaller tiles with intricate patterns suit traditional or classic designs. They add detail and texture to the ceiling, enhancing the overall decor.

Functionality

Consider the room’s primary use when selecting tile size:

  1. Acoustic Needs: In areas where sound control is important, such as offices or schools, larger acoustic tiles can help dampen noise and improve sound quality.
  2. Maintenance: Larger tiles with fewer joints are easier to clean and maintain. They are ideal for areas where hygiene is crucial, such as kitchens and hospitals.

Installation Considerations

Planning the Layout

Before starting the installation, plan the layout carefully. Measure the room dimensions and determine how many tiles will be needed. Consider the size of the tiles and the grid layout to minimize waste and ensure a balanced design.

Cutting and Fitting

  1. Cutting Tiles: Some tiles will need to be cut to fit around edges and fixtures. Ensure that the tiles are cut accurately to maintain a clean, professional look.
  2. Grid System: Choose a compatible grid system for the selected tile size. The grid should be sturdy enough to support the weight of the tiles and allow for easy installation and maintenance.

Lighting and Fixtures

Consider the placement of lighting and other fixtures when selecting tile size. Ensure that the tiles can accommodate the fixtures without excessive cutting or modification.

The Impact of Tile Size on Space

Visual Perception

The size of the ceiling tiles can significantly affect how a space is perceived:

  1. Large Tiles: Make a room feel more open and spacious. They are ideal for creating a modern, streamlined look.
  2. Small Tiles: Add detail and texture, making a space feel more intimate and cozy. They are suited for traditional or decorative designs.

Acoustic Properties

Tile size can influence the acoustic properties of a room. Larger tiles often have better sound-absorbing qualities, making them suitable for spaces where noise control is important.

Cost Efficiency

The size of the tiles can also affect the overall cost of the project. Larger tiles may reduce the amount of material needed for grid systems and minimize waste, potentially lowering installation costs.

Maintenance and Durability

Ease of Cleaning

Larger tiles with fewer joints are generally easier to clean and maintain. They reduce the number of crevices where dirt and dust can accumulate.

Durability

Rod iron ceiling tiles are known for their durability and longevity. Regular maintenance, such as cleaning and inspection for damage, can ensure that the tiles remain in good condition for years to come.

Conclusion: Finding the Perfect Size of a Ceiling Tile

Selecting the right Size of a Ceiling Tile is crucial for achieving the desired look and functionality of a space. Whether you prefer the seamless, modern appeal of large tiles or the detailed, classic look of smaller tiles, understanding the impact of tile size can help you make an informed decision. Consider the room size, ceiling height, design preferences, and functionality to choose the perfect ceiling tile size for your next project.

Wood Look Drop Ceiling Tile: Enhance Your Space with Stylish

When it comes to interior design, ceilings often play a significant role in shaping the overall ambiance and aesthetic appeal of a space. Wood look drop ceiling tiles offer a unique and stylish way to enhance the look and feel of any room while adding warmth and character. In this comprehensive guide, we’ll delve into the world of wood look drop ceiling tile, exploring their benefits, design options, installation techniques, and more.

Wood Look Drop Ceiling Tiles

Understanding Wood Look Drop Ceiling Tiles

What are Wood Look Drop Ceiling Tiles?

Wood look drop ceiling tiles are ceiling panels designed to mimic the appearance of real wood while offering the benefits of a drop ceiling system. These tiles are typically made from durable materials such as PVC or fiberglass, providing a lightweight and easy-to-install alternative to traditional wood planks.

Benefits of Wood Look Drop Ceiling Tiles

  • Aesthetic Appeal: Wood look drop ceiling tiles add a touch of sophistication and natural beauty to any space, creating a warm and inviting atmosphere.
  • Versatility: Available in a wide range of styles, colors, and finishes, wood look drop ceiling tiles offer endless design possibilities to suit any décor scheme.
  • Durability: Unlike real wood, wood look drop ceiling tiles are resistant to moisture, mold, and mildew, making them ideal for use in high-humidity environments such as bathrooms and basements.

Read too: Exploring Craftsman Style Ceiling Fans for Your Home: Embracing Timeless Elegance

Choosing the Right Wood Look Drop Ceiling Tiles

Consider Design and Finish

When selecting wood look drop ceiling tiles, consider the design and finish options available to find the perfect match for your space. Whether you prefer the rustic charm of reclaimed wood or the sleek sophistication of modern hardwoods, there’s a wood look tile to suit every style preference.

Evaluate Installation Methods

Wood look drop ceiling tiles can be installed using a variety of methods, including direct mount, grid mount, and adhesive mount. Consider the ease of installation and maintenance when choosing the right method for your project, ensuring a seamless and hassle-free process from start to finish.

Installation Tips for Wood Look Drop Ceiling Tiles

Prepare the Surface

Before installing wood look drop ceiling tiles, ensure that the surface is clean, dry, and free of any debris or contaminants. Use a level to ensure a straight and even installation, making any necessary adjustments to the substrate as needed.

Follow Manufacturer Guidelines

For best results, always follow the manufacturer’s installation instructions and guidelines when installing wood look drop ceiling tiles. This may include using specific adhesives or mounting hardware, as well as adhering to recommended spacing and layout patterns for a professional-looking finish.

Conclusion

Wood look drop ceiling tile offer a stylish and practical solution for enhancing the beauty and functionality of any space. By choosing the right tiles, considering installation methods, and following proper installation techniques, you can create a stunning ceiling design that complements your décor and reflects your personal style.

Exploring Cheap 2X2 Ceiling Tiles Options: Transform Your Space Affordably

In the realm of interior design, ceilings often play a significant role in shaping the overall look and feel of a space. However, achieving a stylish and aesthetically pleasing ceiling doesn’t have to break the bank. With the availability of cheap 2X2 ceiling tiles, homeowners and decorators can transform their spaces affordably. In this comprehensive guide, we’ll explore the world of cheap 2X2 ceiling tiles, including their benefits, installation process, and creative design ideas to help you achieve a stunning ceiling makeover without breaking the budget.

Cheap Ceiling Tiles 2X2

Exploring Cheap Ceiling Tiles 2X2

Understanding the Benefits

Cheap 2X2 ceiling tiles offer a cost-effective solution for enhancing the appearance of any room. Whether you’re renovating a residential space or updating a commercial property, these budget-friendly tiles provide a stylish alternative to traditional ceiling materials. In addition to their affordability, cheap 2X2 ceiling tiles are lightweight, easy to install, and available in a variety of colors, patterns, and finishes, allowing for endless design possibilities.

Read too: Exploring Craftsman Style Ceiling Fans for Your Home: Embracing Timeless Elegance

Installation Process

Installing cheap 2X2 ceiling tiles is a relatively straightforward process that can be completed by DIY enthusiasts or professional contractors. The tiles are designed to fit seamlessly into standard 2X2 grid systems, making them ideal for drop ceilings commonly found in homes, offices, and commercial buildings. With basic tools and minimal preparation, homeowners can achieve professional-looking results in a fraction of the time and cost of traditional ceiling renovations.

Creative Design Ideas

Despite their affordability, cheap 2X2 ceiling tiles offer ample opportunities for creativity and customization. From classic white tiles for a clean and timeless look to bold and colorful patterns for a statement ceiling, the design possibilities are endless. Consider mixing and matching different tile styles and finishes to create visual interest and dimension, or add decorative molding or trim for added elegance. Additionally, incorporating recessed lighting or pendant fixtures can further enhance the aesthetic appeal of the ceiling while providing functional illumination.

Advantages of Cheap Ceiling Tiles 2X2

Cost-Effective Solution

One of the most significant advantages of cheap 2X2 ceiling tile is their affordability. Compared to traditional ceiling materials such as drywall or plaster, these tiles are much more budget-friendly, making them ideal for homeowners and property managers looking to update their spaces without breaking the bank.

Easy Maintenance

In addition to their low cost, cheap 2X2 ceiling tile are also easy to maintain, requiring minimal upkeep to keep them looking their best. Unlike traditional ceiling materials that may require painting or patching over time, these tiles can be cleaned with a mild detergent and water solution, ensuring long-lasting beauty and durability.

Versatile Design Options

Despite their affordability, cheap 2X2 ceiling tile offer a wide range of design options to suit any aesthetic preference or decor style. Whether you prefer a sleek and modern look or a more traditional and elegant feel, there are plenty of tile styles, colors, and finishes to choose from, allowing you to customize your space to your exact specifications.

Conclusion

Cheap 2X2 ceiling tile offer a cost-effective and stylish solution for transforming any space. With their affordability, ease of installation, and versatile design options, these tiles provide homeowners and decorators with endless possibilities for creating a stunning and budget-friendly ceiling makeover. Whether you’re updating a residential property or renovating a commercial space, cheap 2X2 ceiling tile are sure to enhance the beauty and functionality of your interior environment.

Mid Century Modern Ceiling Tile: Elevate Your Space with Stylish

Transform your interior design with the timeless elegance of mid century modern ceiling tile, adding a touch of sophistication to any room.

Mid Century Modern Ceiling Tiles

Introduction

Ceilings are often overlooked when it comes to interior design, but they play a significant role in shaping the overall look and feel of a space. Mid century modern style, characterized by clean lines, organic shapes, and minimalist design, has experienced a resurgence in popularity in recent years. One way to incorporate this iconic aesthetic into your home is by installing mid century modern ceiling tiles. In this comprehensive guide, we’ll explore the world of mid century modern ceiling tiles, discussing their characteristics, benefits, and how to incorporate them into your interior design scheme.


Understanding Mid Century Modern Ceiling Tiles

Mid century modern ceiling tiles feature sleek, minimalist designs and geometric patterns, defining their characteristic style. Typically made from materials such as metal, fiberglass, or PVC, these tiles offer a variety of colors and finishes to complement any decor style. Whether you’re looking to add visual interest to a room or create a cohesive mid century modern aesthetic, these ceiling tiles offer a versatile and stylish solution.


Common Features of Mid Century Modern Ceiling Tiles

  1. Geometric Patterns: Mid century modern ceiling tiles often feature geometric patterns such as squares, rectangles, or triangles. These patterns create visual interest and add a sense of depth to the ceiling.
  2. Clean Lines: Clean lines are a hallmark of mid century modern design, and ceiling tiles in this style typically feature sleek, straight edges and minimal ornamentation.
  3. Organic Shapes: While mid century modern design is known for its clean lines and geometric forms, it also incorporates organic shapes inspired by nature. Some ceiling tiles may feature curves or asymmetrical patterns to add visual interest.
  4. Minimalist Design: Mid century modern ceiling tiles embrace the principles of minimalism, with a focus on simplicity and functionality. Designed to enhance the overall aesthetic of a space without overwhelming it, these tiles strike a perfect balance.

Incorporating Mid Century Modern Ceiling Tiles Into Your Home

Mid century modern ceiling tiles can be used in a variety of ways to enhance the style and functionality of your space.

  1. Living Room: Add a touch of mid century modern flair to your living room by installing ceiling tiles with geometric patterns or clean lines. These tiles can complement existing furniture and decor for a cohesive look.
  2. Kitchen: Create a sleek and stylish kitchen design by installing mid century modern ceiling tiles above the island or dining area. Opt for tiles in a neutral color palette to complement stainless steel appliances and minimalist cabinetry.
  3. Bedroom: Transform your bedroom into a tranquil retreat with mid century modern ceiling tiles in calming hues such as soft gray or pale blue. Choose tiles with subtle patterns or organic shapes to create a relaxing atmosphere.
  4. Home Office: Boost productivity and creativity in your home office by installing mid century modern ceiling tiles that inspire focus and concentration. Choose tiles in bold colors or graphic patterns to add visual interest to the space.

Read too: Discovering the Charm of Nautical Outdoor Ceiling Fans for Your Coastal Retreat: Sail into Style


Conclusion

Mid century modern ceiling tile offer a stylish and versatile solution for enhancing the aesthetic appeal of any room. With their clean lines, geometric patterns, and minimalist design, these tiles can transform your space into a sophisticated retreat reminiscent of the iconic design era. Whether you’re looking to add a touch of mid century modern flair to your living room, kitchen, bedroom, or home office, ceiling tiles in this style are sure to make a statement.

Industrial Drop Ceiling Tile: Transform Your Space with Durable and Stylish

Industrial spaces demand practical solutions that can withstand the rigors of daily use while maintaining a visually appealing environment. When it comes to ceiling options, industrial drop ceiling tile offer the perfect combination of durability, versatility, and aesthetic appeal. In this comprehensive guide, we explore the benefits, applications, and installation considerations of industrial drop ceiling tiles, empowering you to elevate your space with confidence.

Industrial Drop Ceiling Tiles

Introduction

The ceiling is often an overlooked aspect of interior design in industrial settings. However, the right choice of ceiling materials can significantly impact the functionality and aesthetics of the space. Industrial drop ceiling tiles are engineered to meet the unique requirements of industrial environments, providing superior performance and design versatility.

Read too: Exploring the Efficiency of Radiant Ceiling Heater Electric: A Comprehensive Guide

Understanding Industrial Drop Ceiling Tiles

Industrial drop ceiling tiles, also known as suspended ceiling tiles or acoustic ceiling panels, are modular panels designed to fit into a grid system suspended from the ceiling structure. These tiles are typically made from durable materials such as fiberglass, metal, or mineral fiber, offering excellent resistance to moisture, fire, and impact.

Benefits of Industrial Drop Ceiling Tiles

  1. Durability: Industrial environments often face heavy foot traffic, humidity, and temperature fluctuations. Industrial drop ceiling tiles are engineered to withstand these challenges, maintaining their structural integrity and appearance over time.
  2. Acoustic Performance: Proper acoustics are essential in industrial settings to reduce noise levels and improve communication. Many industrial drop ceiling tiles are designed with acoustic properties to absorb sound, creating a more comfortable and productive work environment.
  3. Design Versatility: From sleek and modern to rugged and industrial, industrial drop ceiling tiles are available in a wide range of styles, colors, and textures to suit various design preferences and architectural themes.
  4. Easy Installation and Maintenance: The modular nature of industrial drop ceiling tiles simplifies installation, allowing for quick and hassle-free upgrades or repairs. Routine maintenance, such as cleaning or replacing damaged tiles, can be performed with minimal disruption to daily operations.

Applications of Industrial Drop Ceiling Tiles

Industrial drop ceiling tiles find applications in various industrial settings, including:

  • Manufacturing facilities
  • Warehouses and distribution centers
  • Laboratories and clean rooms
  • Retail and commercial spaces
  • Educational institutions

Installing Industrial Drop Ceiling Tiles

Installing industrial drop ceiling tiles involves the following steps:

  1. Prepare the Ceiling: Ensure that the ceiling structure is clean, level, and free from any obstructions.
  2. Install the Grid System: Suspended ceiling grids are installed according to manufacturer guidelines, providing support for the ceiling tiles.
  3. Cut and Install Tiles: Measure and cut tiles to fit around perimeter walls and fixtures. Insert tiles into the grid system, starting from one corner and working across the ceiling.
  4. Secure Tiles: Secure tiles in place using clips or adhesive as recommended by the manufacturer.
  5. Finish and Inspect: Once all tiles are installed, inspect the ceiling for any gaps or irregularities. Make any necessary adjustments or replacements to ensure a seamless finish.

Conclusion

In conclusion, industrial drop ceiling tile offer a versatile and practical solution for enhancing the functionality and design of industrial spaces. With their durability, acoustic performance, and design versatility, these tiles provide an ideal ceiling solution for a wide range of applications. Whether you’re looking to improve the aesthetics of your warehouse, manufacturing facility, or retail space, industrial drop ceiling tiles deliver both style and substance.

Insulated Suspended Ceiling Tiles: Enhance Comfort and Efficiency

In the realm of interior design and building construction, suspended ceilings are a popular choice for their versatility and practicality. Among the various types of suspended ceiling tiles available, insulated options stand out for their ability to improve comfort and energy efficiency. In this article, we’ll explore the features, benefits, and applications of insulated suspended ceiling tiles, and how they can transform your space.

Insulated Suspended Ceiling Tiles

Introducing Insulated Suspended Ceiling Tiles

Understanding Insulation

Insulated suspended ceiling tiles are designed to provide thermal insulation, helping to regulate indoor temperatures and reduce energy consumption. These tiles typically feature a layer of insulation material, such as fiberglass or mineral wool, sandwiched between two layers of decorative facing material, such as vinyl or metal. This construction helps to minimize heat transfer between the interior and exterior of a building, creating a more comfortable indoor environment year-round.

The Benefits of Insulation

Improved Comfort

One of the primary benefits of insulated suspended ceiling tiles is their ability to enhance comfort levels within a space. By providing thermal insulation, these tiles help to maintain consistent temperatures and reduce drafts, creating a more comfortable environment for occupants. Whether used in commercial offices, residential spaces, or industrial facilities, insulated ceiling tiles can contribute to a more pleasant and productive indoor experience.

Energy Efficiency

In addition to enhancing comfort, insulated suspended ceiling tile can also lead to significant energy savings. By reducing heat loss in the winter and heat gain in the summer, these tiles help to lessen the workload on HVAC systems, resulting in lower energy bills and reduced carbon emissions. This makes them an environmentally friendly and cost-effective solution for building owners and operators seeking to improve energy efficiency.

Sound Absorption

In addition to thermal insulation, many insulated suspended ceiling tile also offer acoustic benefits, helping to absorb sound and reduce noise levels within a space. This is especially beneficial in environments where noise control is important, such as offices, classrooms, and healthcare facilities. By minimizing reverberation and echoes, insulated ceiling tiles can create a more peaceful and productive environment for occupants.

Read too: Exploring the Benefits and How-Tos of DIY Ceiling Cassette Mini Split Installation: Revolutionizing Comfort

Applications and Installation: Insulated Suspended Ceiling Tiles

Versatile Applications

Insulated suspended ceiling tiles are suitable for a wide range of applications, including:

  • Commercial office spaces
  • Retail stores and restaurants
  • Educational facilities
  • Healthcare settings
  • Residential buildings

Installation Considerations

When installing insulated suspended ceiling tile, it’s essential to follow manufacturer guidelines and industry best practices to ensure proper performance and longevity. This may include selecting the appropriate tile size and thickness, ensuring proper support structure and spacing, and using compatible installation accessories, such as suspension systems and edge trim.

Conclusion

Insulated suspended ceiling tile offer a host of benefits, from improved comfort and energy efficiency to enhanced acoustic performance. Whether used in commercial, residential, or institutional settings, these innovative tiles can help create a more comfortable, productive, and sustainable indoor environment for occupants.

Ceiling Tiles in Schools: Enhancing Learning Environments

Ceiling tiles may seem like a minor detail in school infrastructure, but their impact on the learning environment cannot be understated. From acoustics to aesthetics, ceiling tiles play a crucial role in creating conducive spaces for teaching and learning. In this comprehensive guide, we’ll explore the importance of ceiling tiles in schools, their benefits, considerations, and their overall contribution to enhancing educational settings.

Ceiling Tiles In Schools

Understanding Ceiling Tiles in Schools

Ceiling tiles, also known as drop or suspended ceilings, are panels that are used to cover the ceiling structure of a room. In schools, ceiling tiles serve multiple purposes beyond simply concealing the overhead infrastructure. They contribute to the overall design and functionality of classrooms, hallways, and other educational spaces.

Importance of Ceiling Tiles in Schools

  1. Acoustic Control: One of the primary functions of ceiling tiles in schools is to control sound and minimize noise levels. Properly selected and installed ceiling tiles can help absorb sound, reduce reverberation, and create a quieter learning environment conducive to concentration and focus.
  2. Aesthetic Appeal: Ceiling tiles come in a variety of designs, textures, and colors, allowing schools to customize the look and feel of their interior spaces. By choosing ceiling tiles that complement the overall design aesthetic of the school, administrators can create visually appealing environments that promote a positive atmosphere for students and staff.
  3. Insulation and Energy Efficiency: Ceiling tiles can help improve insulation and energy efficiency in school buildings by reducing heat loss and minimizing air leakage. This can lead to lower heating and cooling costs, resulting in significant savings for educational institutions over time.
  4. Light Reflectance: Some ceiling tiles actively reflect light to evenly distribute both natural and artificial light throughout the room. This can enhance visibility and reduce the need for additional lighting fixtures, contributing to energy savings and environmental sustainability.

Read too: How To Extend Kitchen Cabinets To The Ceiling: A Complete Guide for Maximizing Space and Style

Considerations for Choosing Ceiling Tiles in Schools

When choosing ceiling tiles for educational settings, it’s important to actively consider several factors:

  • Acoustic Performance: Choose ceiling tiles with appropriate acoustic properties to address the specific needs of classrooms, auditoriums, and other instructional spaces.
  • Durability: Opt for durable and easy-to-maintain ceiling tiles that can withstand the wear and tear of daily use in a school environment.
  • Fire Resistance: Ensure that the ceiling tiles meet fire safety standards and regulations to protect the safety of students and staff in the event of a fire emergency.
  • Environmental Impact: When considering ceiling tile options, look for environmentally friendly choices made from sustainable materials that actively contribute to green building initiatives.

Installation and Maintenance

Proper installation and maintenance of ceiling tiles are essential for maximizing their effectiveness and longevity. Work with experienced contractors to ensure that ceiling tiles are installed correctly and securely. Additionally, establish a regular maintenance schedule to inspect and clean ceiling tiles, addressing any issues such as water damage, mold, or discoloration promptly.

Conclusion

Ceiling tiles play a vital role in creating conducive and functional learning environments in schools. From controlling acoustics to enhancing aesthetics and improving energy efficiency, ceiling tiles contribute to the overall comfort, safety, and productivity of students and educators alike. By understanding the importance of ceiling tiles in schools and making informed decisions when selecting and maintaining them, educational institutions can create optimal environments for teaching and learning.