Ceiling Rainfall Shower System: Transform Your Bathroom

When it comes to elevating the ambiance and functionality of your bathroom, a Ceiling Rainfall Shower System stands out as a luxurious and practical choice. This type of shower system not only enhances your bathing experience but also adds a touch of modern elegance to your space. In this guide, we’ll explore the benefits of a ceiling rainfall shower system, provide tips for choosing the right one, and offer installation and maintenance advice to ensure you get the most out of your investment.

Ceiling Rainfall Shower System

What is a Ceiling Rainfall Shower System?

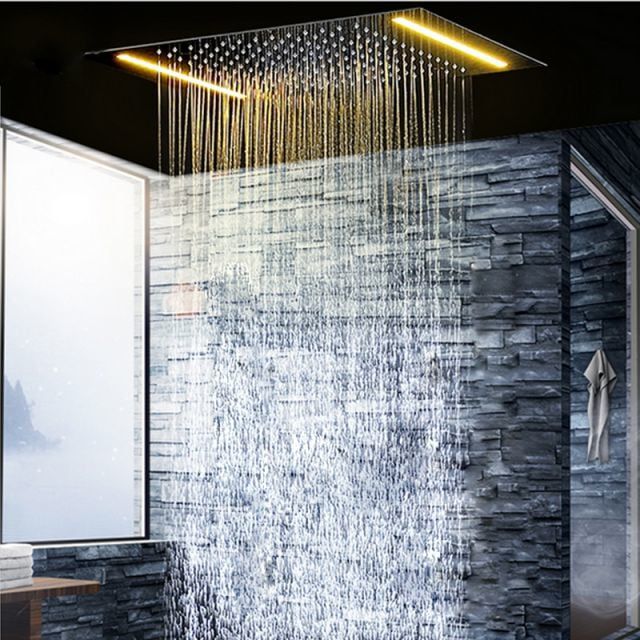
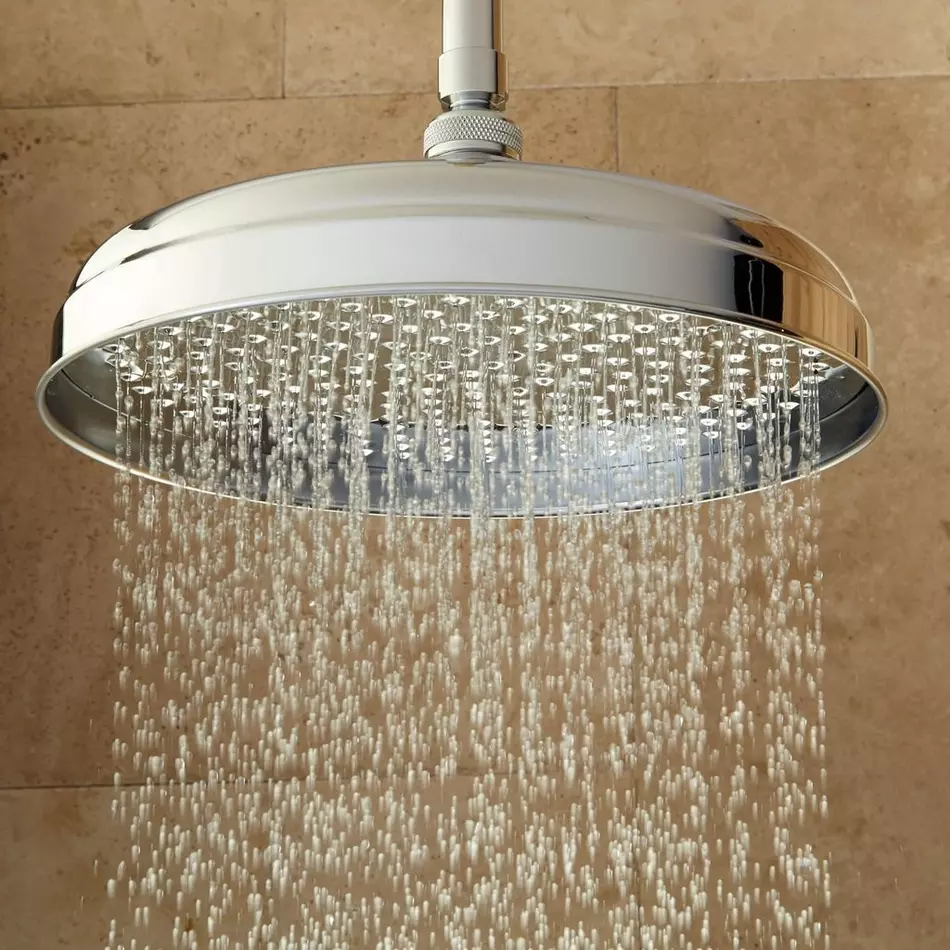
A Ceiling Rainfall Shower System is designed to provide a luxurious shower experience by simulating the feeling of standing under a gentle, cascading rain. Unlike traditional wall-mounted showerheads, this system is installed directly into the ceiling, allowing for a more immersive and relaxing shower experience. The design typically features a large, flat showerhead that distributes water evenly to mimic the sensation of rainfall.

Benefits of a Ceiling Rainfall Shower System

Choosing a Ceiling Rainfall Shower System comes with several benefits that can enhance your daily routine and overall bathroom experience:

  1. Enhanced Shower Experience: The primary benefit of a rainfall shower system is the luxurious and soothing shower experience it provides. The wide, even distribution of water creates a gentle and relaxing environment that mimics natural rainfall.
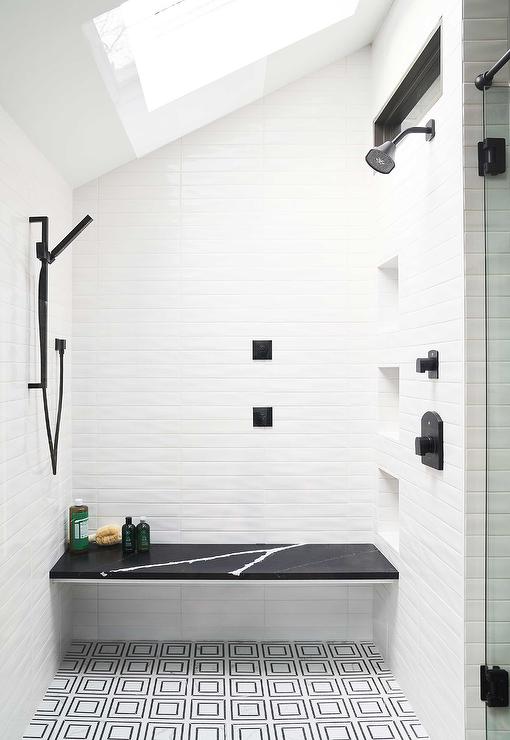
  2. Modern Aesthetic: A ceiling-mounted system offers a sleek, contemporary look that can transform your bathroom into a spa-like retreat. The minimalist design of the showerhead and the seamless integration with the ceiling contribute to a clean, modern appearance.
  3. Increased Coverage: Rainfall showerheads generally provide a larger coverage area compared to traditional showerheads. This ensures that water reaches every part of your body, offering a more thorough and satisfying shower experience.
  4. Space Efficiency: By mounting the showerhead on the ceiling, you free up wall space and avoid the clutter of traditional wall-mounted fixtures. This can make your bathroom appear larger and more open.
  5. Customizable Features: Many ceiling rainfall shower systems come with additional features such as adjustable water flow, temperature controls, and built-in lighting. These options allow you to tailor the shower experience to your preferences.

Read too: Exploring the Innovation and Efficiency of Ceiling Mounted Surgical Light Solutions: Illuminating Precision

Choosing the Right Ceiling Rainfall Shower System

Selecting the ideal Ceiling Rainfall Shower System involves considering several factors to ensure it meets your needs and complements your bathroom design. Here are some key aspects to consider:

1. Size and Shape of the Showerhead

Ceiling rainfall showerheads come in various sizes and shapes. Larger showerheads provide more extensive coverage and a more immersive experience, while smaller heads are ideal for bathrooms with limited space. Choose a size and shape that best fits your bathroom’s dimensions and your personal preferences.

2. Water Pressure Requirements

The performance of a ceiling rainfall shower system is influenced by the water pressure in your home. Rainfall showerheads typically require a higher water pressure to function effectively. Check the water pressure requirements of the system and ensure that your home’s plumbing can accommodate it. If your water pressure is low, you may need to install a pressure-boosting pump.

3. Material and Finish

The material and finish of the showerhead can impact both the aesthetics and durability of the system. Common materials include:

  • Stainless Steel: Known for its durability and resistance to corrosion, stainless steel is a popular choice for modern bathroom fixtures.
  • Brass: Brass fixtures offer a classic look and are highly durable.
  • Chrome: Chrome finishes provide a sleek, reflective appearance that complements contemporary bathroom designs.
  • Matte Black: For a bold, modern look, matte black finishes are becoming increasingly popular.

Choose a material and finish that complements the overall design of your bathroom and aligns with your personal style.

4. Installation Considerations

Proper installation is crucial for the performance and longevity of your ceiling rainfall shower system. Consider the following:

  • Ceiling Height: Ensure that the height of your ceiling is adequate for the installation of the showerhead. Most systems require a minimum ceiling height to ensure comfortable use.
  • Plumbing: Installation typically involves modifying existing plumbing to accommodate the ceiling-mounted system. It’s advisable to hire a professional plumber to ensure that the installation is done correctly and to avoid potential issues.

5. Additional Features

Many ceiling rainfall shower systems come with additional features such as:

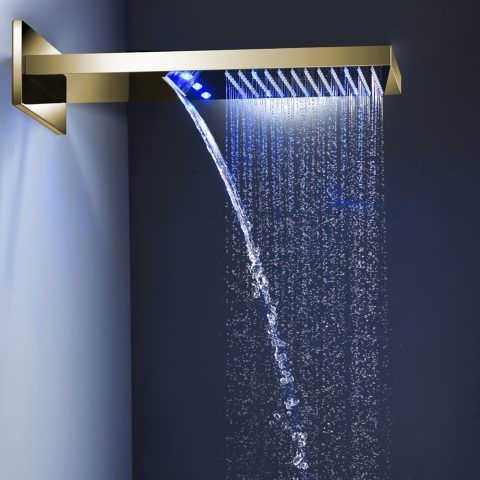
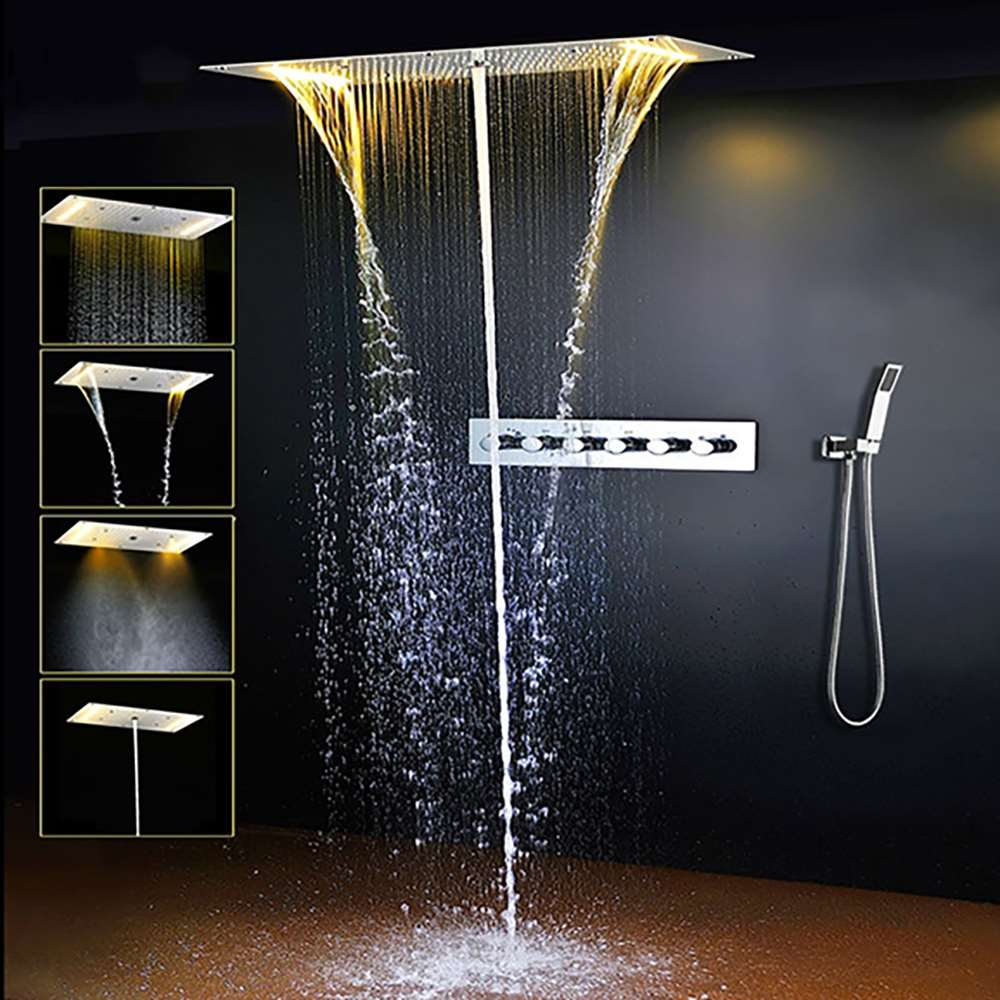
  • LED Lighting: Some systems include built-in LED lights that add ambiance and functionality to your shower space.
  • Temperature Controls: Adjustable temperature controls allow you to customize the water temperature for a comfortable shower experience.
  • Multi-Function Showerheads: Some systems offer multi-function capabilities, allowing you to switch between different spray patterns and settings.

Consider these features based on your preferences and the level of customization you desire.

Installation of a Ceiling Rainfall Shower System

Installing a ceiling rainfall shower system involves several steps to ensure a successful setup. Here’s a general guide to the installation process:

1. Planning and Measurement

Begin by measuring your bathroom and planning the location for the showerhead. Ensure that the ceiling height and space above the shower are adequate for the system’s installation. Mark the desired location for the showerhead and plan the necessary plumbing modifications.

2. Ceiling Preparation

Prepare the ceiling for installation by removing any existing fixtures or obstructions. Depending on your ceiling type, you may need to cut a hole to accommodate the showerhead and mounting hardware. Ensure that the ceiling structure is capable of supporting the weight of the showerhead.

3. Plumbing Modifications

Modify the existing plumbing to connect to the ceiling-mounted system. This may involve rerouting pipes or installing new fittings. Ensure that all connections are secure and leak-free. It’s highly recommended to hire a professional plumber for this step to ensure proper installation.

4. Mounting the Showerhead

Attach the ceiling bracket or mount to the ceiling, following the manufacturer’s instructions. Securely install the showerhead and ensure that it is properly aligned. Adjust the angle and positioning as needed to achieve optimal water coverage.

5. Connecting Water Supply

Connect the water supply to the showerhead and test the system for leaks. Check the water pressure and ensure that the showerhead functions correctly. Make any necessary adjustments to the flow rate or temperature settings.

6. Finishing Touches

Complete the installation by sealing any gaps or openings around the ceiling mount. Clean the showerhead and surrounding area to remove any debris from the installation process. Test the system again to ensure that it operates smoothly and meets your expectations.

Maintenance and Care for Ceiling Rainfall Shower Systems

Regular maintenance is essential for keeping your ceiling rainfall shower system in optimal condition. Here are some tips for maintaining and caring for your system:

1. Cleaning the Showerhead

Regularly clean the showerhead to prevent mineral buildup and maintain optimal water flow. Use a soft cloth and a mild cleaner to wipe down the surface. For stubborn deposits, soak the showerhead in a mixture of vinegar and water to dissolve mineral buildup.

2. Checking for Leaks

Periodically inspect the showerhead and plumbing connections for any signs of leaks. Address any leaks promptly to prevent water damage and ensure the system operates efficiently.

3. Maintaining Water Pressure

Monitor the water pressure in your home and ensure that it remains within the recommended range for the shower system. If you experience a decrease in water pressure, check for any blockages or issues in the plumbing.

4. Inspecting the Ceiling

Regularly inspect the ceiling area around the showerhead for any signs of water damage or mold. Address any issues promptly to prevent further damage and maintain a clean, safe bathroom environment.

Conclusion

A Ceiling Rainfall Shower System offers a luxurious and modern upgrade to your bathroom, providing an enhanced shower experience and a sleek, contemporary look. By considering factors such as size, water pressure, material, and installation requirements, you can select the perfect system to fit your needs and preferences. Proper installation and regular maintenance will ensure that your rainfall shower system remains a beautiful and functional addition to your bathroom for years to come. Embrace the benefits of a ceiling-mounted rainfall shower and enjoy a spa-like retreat right in your own home.

Wood Plank Ceiling In Bathroom: A Stylish and Practical Guide

When it comes to home decor, the wood plank ceiling in bathroom trend has been gaining popularity for its timeless appeal and versatility. Wood plank ceilings add warmth, character, and a touch of nature to any space, including bathrooms. This article explores the benefits, challenges, installation tips, and maintenance of wood plank ceilings in bathrooms, helping you make an informed decision for your next renovation project.

Wood Plank Ceiling In Bathroom

Why Choose a Wood Plank Ceiling in the Bathroom?

Choosing a wood plank ceiling in the bathroom can be an excellent design choice for various reasons. Here’s why you might consider this option:

1. Aesthetic Appeal

Wood plank ceilings bring a natural, rustic charm to your bathroom. They can transform a standard space into a cozy retreat, adding texture and depth to the room. The natural variations in wood grain and color create a unique and elegant look that complements various design styles, from traditional to contemporary.

Read too: Discovering the Charm of Nautical Outdoor Ceiling Fans for Your Coastal Retreat: Sail into Style

2. Warmth and Comfort

Wood has inherent insulating properties that can make your bathroom feel warmer and more inviting. This added warmth is especially valuable in bathrooms where tile or other cold materials are commonly used.

3. Customization Options

Wood plank ceilings offer a wide range of customization options. You can choose from different wood species, finishes, and plank sizes to match your bathroom’s decor. Whether you prefer a sleek, modern finish or a more rustic, distressed look, there’s a wood plank option to fit your style.

4. Durability

When properly treated and installed, wood plank ceilings are quite durable. They can withstand the normal wear and tear of a bathroom environment, provided that moisture and humidity are managed effectively.

Challenges of Installing Wood Plank Ceilings in Bathrooms

While wood plank ceilings offer many benefits, there are also some challenges to consider. Being aware of these challenges will help you plan and execute your project more effectively.

1. Moisture Management

Bathrooms are inherently humid environments, which can pose a challenge for wood materials. Excess moisture can lead to warping, cracking, or mold growth if not properly managed. It’s crucial to address moisture issues to ensure the longevity of your wood plank ceiling.

2. Maintenance Requirements

Wood plank ceilings require regular maintenance to keep them looking their best. This includes cleaning and periodic sealing to protect the wood from moisture damage. Unlike more conventional ceiling materials, wood needs extra care to maintain its appearance and integrity.

3. Installation Complexity

Installing a wood plank ceiling can be more complex than other ceiling types. It often requires careful measuring, cutting, and fitting to ensure a seamless and professional finish. Additionally, the installation process may involve extra steps such as adding a vapor barrier to protect the wood from moisture.

Installing a Wood Plank Ceiling in Your Bathroom

Proper installation is key to the success of a wood plank ceiling in the bathroom. Here’s a step-by-step guide to help you with the installation process:

1. Prepare the Space

Before starting the installation, prepare the bathroom by removing any existing ceiling materials and ensuring the surface is clean and dry. Check for any signs of moisture damage or leaks and address these issues before proceeding.

2. Choose the Right Wood

Select a type of wood that is suitable for bathroom environments. Consider options like cedar or pine, which are more resistant to moisture. Additionally, choose a finish that will protect the wood from water damage and staining.

3. Install a Vapor Barrier

To protect the wood from moisture, install a vapor barrier on the ceiling before attaching the wood planks. This barrier will help prevent condensation from affecting the wood and reduce the risk of mold growth.

4. Plan and Measure

Carefully plan and measure the layout of the wood planks. Start by marking a reference line on the ceiling to ensure a straight and even installation. Measure the space to determine the number of planks needed and plan for any necessary cuts or adjustments.

5. Install the Planks

Begin installing the wood planks from one side of the room and work your way across. Use a level to ensure that each plank is aligned properly. Attach the planks to the ceiling using nails or adhesive, depending on the installation method you choose.

6. Finish the Installation

Once all the planks are installed, fill any gaps or nail holes with wood filler. Sand the ceiling to ensure a smooth surface and apply a finish or sealant to protect the wood from moisture and staining.

Maintaining Your Wood Plank Ceiling

To keep your wood plank ceiling in the bathroom looking beautiful and functioning well, regular maintenance is essential. Here are some tips for maintaining your wood ceiling:

1. Clean Regularly

Dust and clean the wood plank ceiling regularly to prevent the buildup of grime and dirt. Use a soft cloth or duster to avoid scratching the wood’s surface. For deeper cleaning, use a wood-safe cleaner that won’t damage the finish.

2. Monitor Moisture Levels

Keep an eye on the humidity levels in your bathroom to prevent excess moisture from affecting the wood. Use an exhaust fan to reduce humidity and address any leaks or water issues promptly.

3. Refinish as Needed

Over time, the finish on your wood planks may need to be reapplied to maintain protection against moisture and stains. Follow the manufacturer’s recommendations for refinishing and sealing the wood.

4. Inspect for Damage

Regularly inspect the wood plank ceiling for signs of damage, such as warping or mold growth. Address any issues immediately to prevent further damage and maintain the integrity of the ceiling.

Conclusion

A wood plank ceiling in the bathroom can be a stylish and functional addition to your home. It offers aesthetic appeal, warmth, and customization options while adding a unique touch to your bathroom. However, it’s important to be aware of and address potential challenges such as moisture management and maintenance requirements.

By following proper installation techniques and maintaining the wood plank ceiling regularly, you can enjoy its beauty and functionality for years to come. Whether you’re renovating an existing bathroom or designing a new one, consider the benefits of a wood plank ceiling as a way to enhance your space.

Plank Ceiling in the Bathroom: Transform Your Space

If you’re looking to elevate the aesthetic of your bathroom, consider installing a plank ceiling. This versatile design choice can bring warmth, texture, and a touch of luxury to your space. In this comprehensive guide, we’ll explore the benefits of a plank ceiling in the bathroom, the types of materials you can use, installation tips, and design inspiration to help you create a stunning bathroom transformation.

Plank Ceiling In Bathroom

Why Choose a Plank Ceiling in the Bathroom?

A plank ceiling in the bathroom can significantly enhance the overall look and feel of the space. Here are some compelling reasons to consider this design option:

Aesthetic Appeal

Plank ceilings add a natural, rustic charm to bathrooms, creating a cozy and inviting atmosphere. The wood texture contrasts beautifully with smooth bathroom surfaces like tile and glass, adding visual interest and depth.

Versatility

Plank ceilings can be tailored to fit any bathroom style, from modern and minimalist to traditional and rustic. You can choose from a variety of wood types, finishes, and stains to match your desired look.

Durability

When properly sealed and maintained, wood planks can withstand the humid environment of a bathroom. Using moisture-resistant materials ensures that your ceiling remains beautiful and functional for years to come.

Value Addition

A well-designed plank ceiling can increase the value of your home. It adds a unique and desirable feature that potential buyers may find appealing, setting your home apart from others.

Types of Materials for a Plank Ceiling in the Bathroom

Selecting the right materials is crucial for the success of your plank ceiling project. Here are some popular options:

Wood

Wood is the most traditional and popular choice for plank ceilings. Different wood types offer various looks and characteristics:

  • Cedar: Naturally resistant to moisture and insects, cedar is a durable option for bathrooms. It has a pleasant aroma and a rich, warm color.
  • Pine: A more affordable option, pine can be stained or painted to match your decor. It’s versatile and widely available.
  • Teak: Known for its high oil content, teak is highly resistant to water and decay. It’s an excellent choice for a luxurious, long-lasting ceiling.

PVC

PVC planks are a practical alternative to wood. They are lightweight, easy to install, and resistant to moisture, making them ideal for bathrooms. PVC planks come in various finishes, including wood-like textures that mimic the appearance of real wood.

Composite Materials

Composite planks, made from a mixture of wood fibers and plastic, combine the best features of both materials. They are highly durable, moisture-resistant, and available in a range of styles and colors.

Installation Tips for a Plank Ceiling in the Bathroom

Installing a plank ceiling in your bathroom requires careful planning and execution. Here’s a step-by-step guide to help you through the process:

Step 1: Measure and Plan

Start by measuring the dimensions of your bathroom ceiling. This will help you determine how much material you need. Consider the direction you want the planks to run and the layout of any lighting fixtures or vents.

Step 2: Choose Your Materials

Select the type of planks you want to use and purchase enough to cover your ceiling area. Don’t forget to buy any additional materials needed for installation, such as nails, adhesive, and a vapor barrier.

Step 3: Prepare the Ceiling

Before installing the planks, ensure your ceiling is clean and free of any debris. If you’re installing over an existing ceiling, check for any damage or mold that needs to be addressed.

Step 4: Install a Vapor Barrier

Since bathrooms are prone to moisture, installing a vapor barrier is essential to protect your ceiling and the underlying structure. Attach the vapor barrier to the ceiling joists with staples or adhesive.

Step 5: Attach the Planks

Start installing the planks along one edge of the ceiling, making sure they are aligned and straight. Use nails or adhesive to secure each plank to the ceiling joists. If using nails, ensure they are countersunk to create a smooth surface. Continue this process until the entire ceiling is covered.

Step 6: Cut Around Fixtures

Carefully measure and cut planks to fit around any ceiling fixtures, such as lights or vents. Use a jigsaw or hole saw for precise cuts.

Step 7: Finish and Seal

Once all the planks are installed, apply a sealant to protect the wood from moisture. Choose a sealant that is suitable for bathrooms and follow the manufacturer’s instructions for application.

Design Inspiration for Your Bathroom Plank Ceiling

A plank ceiling can dramatically transform your bathroom’s look and feel. Here are some design ideas to inspire your project:

Coastal Retreat

Create a serene, beach-inspired bathroom by using light-colored wood planks, such as white-washed pine or bleached cedar. Pair the ceiling with soft blue or seafoam green walls, and add nautical accents like shells, starfish, and wicker baskets.

Rustic Charm

For a warm, rustic bathroom, choose rich, dark wood planks like walnut or teak. Complement the ceiling with stone or brick accents, wrought iron fixtures, and cozy textiles in earthy tones.

Modern Minimalism

Achieve a sleek, modern look by using smooth, evenly finished planks in a light or neutral color. Pair the ceiling with minimalist fixtures, clean lines, and a monochromatic color scheme to create a sophisticated, contemporary space.

Traditional Elegance

For a classic, elegant bathroom, opt for medium-toned wood planks with a refined finish. Complement the ceiling with traditional fixtures, such as brass or gold accents, marble countertops, and vintage-inspired accessories.

Maintenance Tips for Your Plank Ceiling in the Bathroom

Proper maintenance is crucial to keep your plank ceiling looking beautiful and functioning well. Here are some tips to help you maintain your ceiling:

Regular Cleaning

Dust and clean the ceiling regularly to prevent dirt and grime buildup. Use a soft cloth or duster to gently remove dust. For more thorough cleaning, use a damp cloth with mild soap and water. Avoid harsh chemicals that could damage the wood or finish.

Monitor for Moisture

Keep an eye on the humidity levels in your bathroom. Use a vent fan or dehumidifier to reduce moisture and prevent mold and mildew growth. Check the ceiling periodically for any signs of water damage, such as discoloration or warping.

Reseal as Needed

Over time, the sealant on your wood planks may wear off. Reseal the ceiling as needed to maintain its moisture resistance. Follow the manufacturer’s recommendations for reapplication and ensure the bathroom is well-ventilated during the process.

Address Damage Promptly

If you notice any damage, such as cracks or chips, address it promptly to prevent further deterioration. Small repairs can often be done with wood filler and touch-up stain or paint. For more significant damage, you may need to replace individual planks.

Conclusion

Installing a plank ceiling in the bathroom is a stylish and practical way to enhance your space. With various materials and design options, you can create a bathroom that reflects your personal style and adds value to your home. By following the installation and maintenance tips provided in this guide, you can enjoy a beautiful and functional plank ceiling for years to come. Whether you’re aiming for a rustic retreat, a modern oasis, or a traditional sanctuary, a plank ceiling can transform your bathroom into a truly special space.

Read too: Understanding and Dealing with Ants in the Ceiling Spaces: Navigating the Intrusion

Rain Shower Ceiling Mount: Elevate Your Shower Experience with a Luxurious

Imagine stepping into your shower and being enveloped by a gentle cascade of water, reminiscent of a tropical rainstorm. With a rain shower ceiling mount, you can turn this dream into a reality and elevate your daily shower routine to new heights of luxury and relaxation. In this comprehensive guide, we’ll explore everything you need to know about rain shower ceiling mounts, from their installation process to the benefits they bring to your bathroom oasis.

Rain Shower Ceiling Mount

Understanding the Luxury of Rain Shower Ceiling Mounts

Immersive Shower Experience

Rain shower ceiling mounts offer a spa-like shower experience, providing a wide, gentle stream of water that mimics the soothing sensation of rainfall. With their overhead placement, these showers envelop your entire body, offering a truly immersive and luxurious bathing experience.

Exploring the Features of Rain Shower Ceiling Mounts

Stylish Design Options

Rain shower ceiling mounts come in a variety of styles, finishes, and sizes to complement any bathroom decor and personal preference. Whether you prefer a sleek and modern design or a more traditional aesthetic, there’s a rain shower ceiling mount to suit your taste.

Read too: How To Extend Kitchen Cabinets To The Ceiling: A Complete Guide for Maximizing Space and Style

Installation Tips

Proper Placement and Plumbing

Follow these tips for a successful installation of your rain shower ceiling mount:

  1. Choose the Right Location: Determine the optimal placement for the shower head on the ceiling, taking into account factors such as shower size, water pressure, and aesthetic preferences.
  2. Ensure Proper Plumbing: Make sure that your bathroom’s plumbing system is compatible with a ceiling-mounted shower head and can provide adequate water flow and pressure for a satisfying shower experience.

Benefits of Rain Shower Ceiling Mounts

Relaxation and Stress Relief

The gentle, cascading water from a rain shower ceiling mount has a soothing effect on the body and mind, helping to relieve stress and promote relaxation. Whether you’re starting your day on a calm note or winding down in the evening, a rain shower provides a rejuvenating escape from the stresses of daily life.

Expert Recommendations for Rain Shower Ceiling Mounts

Consideration for Ceiling Height and Space

When installing a rain shower ceiling mount, consider factors such as ceiling height and available space to ensure optimal performance and functionality. Choose a shower head size and placement that allows for comfortable showering without feeling cramped or constrained.

Conclusion

Enhance your daily shower routine with the luxurious comfort of a rain shower ceiling mount. Whether you’re renovating your bathroom or simply looking to upgrade your shower experience, a ceiling-mounted rain shower adds a touch of elegance and indulgence to any space. Follow the installation tips and expert recommendations outlined in this guide to create your own private oasis of relaxation and rejuvenation.

Ceiling Mounted Rain Shower Heads: Elevate Your Shower Experience with a Luxurious

In the realm of bathroom luxury, few features evoke a sense of indulgence quite like a ceiling mounted rain shower head. Offering a spa-like experience right in the comfort of your own home, these shower heads provide a cascade of soothing water that envelops your body in relaxation. In this comprehensive guide, we’ll delve into everything you need to know about ceiling mounted rain shower heads, from installation tips to the benefits they bring to your daily routine.

Ceiling Mounted Rain Shower Head

Understanding the Appeal of Ceiling Mounted Rain Shower Head

A Touch of Luxury

Imagine stepping into your shower and being greeted by a gentle downpour of water from above, mimicking the sensation of standing beneath a warm summer rain. That’s the allure of a ceiling mounted rain shower head – it adds a touch of luxury and sophistication to any bathroom space.

Read too: How To Extend Kitchen Cabinets To The Ceiling: A Complete Guide for Maximizing Space and Style

Exploring the Features

Design and Functionality

Ceiling mounted rain shower heads come in a variety of styles, sizes, and finishes to suit any bathroom decor. From sleek and modern designs to more traditional options, there’s a rain shower head to complement every aesthetic preference.

Installation Tips

Ensuring Proper Installation

Installing a ceiling mounted rain shower head requires careful planning and precision to ensure optimal performance. Follow these tips for a successful installation:

  1. Choose the Right Location: Determine the ideal location for your shower head based on your shower layout and ceiling height. Ensure that there is sufficient space above the ceiling to accommodate the shower head and any necessary plumbing.
  2. Consider Water Pressure: Ceiling mounted rain shower heads typically require higher water pressure to deliver the desired rainfall effect. Make sure your plumbing system can provide adequate water flow to achieve optimal performance.

Benefits of Ceiling Mounted Rain Shower Head

Spa-like Experience

One of the primary benefits of a ceiling mounted rain shower head is the luxurious showering experience it provides. The gentle, evenly distributed flow of water mimics the sensation of standing beneath a natural rain shower, creating a soothing and immersive bathing experience.

Expert Recommendations for Ceiling Mounted Rain Shower Head

Choosing the Right Model

When selecting a ceiling mounted rain shower head for your bathroom, consider factors such as:

  • Size and Coverage: Choose a shower head with a size and shape that provides adequate coverage for your shower space.
  • Finish Options: Opt for a finish that complements your bathroom decor, whether it’s polished chrome, brushed nickel, or oil-rubbed bronze.

Conclusion

Elevate your daily shower routine to new heights of luxury and relaxation with a ceiling mounted rain shower heads. Whether you’re renovating your bathroom or simply looking to upgrade your shower experience, these stylish and functional fixtures offer a spa-like indulgence right in the comfort of your own home. Follow the tips and recommendations outlined in this guide to select, install, and enjoy the benefits of a ceiling mounted rain shower head in your bathroom sanctuary.

Choosing the Right Bathroom Exhaust Fan for Your Suspended Ceiling: A Comprehensive Guide

Are you planning to install a bathroom exhaust fan in a room with a suspended ceiling? Selecting the right fan for this type of ceiling is crucial for proper ventilation and optimal performance. In this guide, we’ll explore everything you need to know about choosing a bathroom exhaust fan for a suspended ceiling, from key features to installation tips.

Bathroom Exhaust Fan For Suspended Ceiling

Understanding Bathroom Exhaust Fans for Suspended Ceilings

Exploring the Benefits of a Bathroom Exhaust Fan for Suspended Ceilings

A bathroom exhaust fan plays a vital role in maintaining indoor air quality and preventing moisture-related issues in bathrooms. When it comes to suspended ceilings, there are specific considerations to keep in mind:

  1. Improved Ventilation: Suspended ceilings can sometimes restrict airflow, making proper ventilation even more essential. A well-chosen exhaust fan can help circulate air effectively, reducing the risk of mold, mildew, and odors.
  2. Space-Saving Design: Many bathroom exhaust fans designed for suspended ceilings feature a compact and low-profile design, making them ideal for rooms with limited space above the ceiling.
  3. Noise Reduction: Look for exhaust fans with quiet operation to ensure minimal disruption, especially in residential settings where noise levels can be a concern.

Key Features to Consider

Choosing the Right Bathroom Exhaust Fan for Your Suspended Ceiling

When selecting a bathroom exhaust fan for a suspended ceiling, consider the following key features:

  1. Airflow Capacity: Determine the size of the room and choose a fan with adequate airflow capacity to effectively remove moisture and odors.
  2. Installation Method: Look for a fan that is specifically designed for suspended ceilings and compatible with your ceiling grid system.
  3. Energy Efficiency: Opt for an energy-efficient model with features such as low-power consumption and automatic shut-off timers to save on energy costs.
  4. Noise Level: Consider the noise level of the fan, especially if the bathroom is located near bedrooms or other quiet areas.

Installation Tips Bathroom Exhaust Fan for Your Suspended Ceiling

Ensuring Proper Installation of Your Bathroom Exhaust Fan

Follow these tips for installing a bathroom exhaust fans in a suspended ceiling:

  1. Locate the Joists: Determine the location of the ceiling joists to ensure proper support for the fan.
  2. Cut an Opening: Carefully cut an opening in the ceiling tiles to accommodate the exhaust fan housing.
  3. Secure the Fan: Install the fan housing securely to the ceiling grid using appropriate hardware and brackets.
  4. Connect Ductwork: Connect the ductwork to the fan housing, ensuring a tight seal to prevent air leaks.

Conclusion

Choosing the right bathroom exhaust fans for a suspended ceiling is essential for maintaining proper ventilation and preventing moisture-related issues. By considering key features and following proper installation guidelines, you can ensure optimal performance and long-lasting durability for your bathroom exhaust fan.

Read too: Exploring the Efficiency of Radiant Ceiling Heater Electric: A Comprehensive Guide

Ideas for a Stunning Shower With Sloped Ceiling: Transform Your Bathroom

Are you faced with the challenge of designing a shower in a bathroom with a sloped ceiling? While sloped ceilings can pose design obstacles, they also offer unique opportunities to create a visually stunning and functional shower space. In this guide, we’ll explore creative ideas and practical solutions for designing a shower with a sloped ceiling that combines style and functionality seamlessly.

Shower With Sloped Ceiling

Understanding the Challenges and Opportunities

Designing a shower under a sloped ceiling presents both challenges and opportunities for homeowners and designers alike. While limited headroom and awkward angles may seem daunting, they can be leveraged to create a cozy and intimate shower experience. With thoughtful planning and innovative design solutions, you can transform your shower into a focal point of your bathroom.

Design Considerations for Shower With Sloped Ceiling

When planning a shower with a sloped ceiling, several key factors should be taken into account to ensure a successful design:

  1. Maximize Vertical Space: Since sloped ceilings limit vertical space, it’s essential to make the most of the available height. Consider installing taller shower doors or opting for a frameless glass enclosure to create a sense of openness and maximize natural light.
  2. Choose the Right Showerhead: Selecting the appropriate showerhead is crucial when working with a sloped ceiling. Opt for a wall-mounted or ceiling-mounted showerhead with adjustable height and spray settings to accommodate varying ceiling heights and ensure optimal water flow and coverage.
  3. Incorporate Built-In Storage: To optimize space and minimize clutter, consider integrating built-in storage solutions into your shower design. Recessed shelves or niches can be installed directly into the sloped walls to provide convenient storage for toiletries and bath essentials.
  4. Embrace Creative Lighting: Lighting plays a significant role in enhancing the ambiance of a shower with a sloped ceiling. Incorporate recessed lighting, LED strips, or waterproof sconces to illuminate the space effectively and create a spa-like atmosphere. Additionally, installing a skylight or a strategically placed window can introduce natural light and visually expand the shower area.
  5. Choose Durable and Waterproof Materials: Since showers are exposed to moisture and humidity, it’s essential to select durable and waterproof materials for the walls, floors, and ceiling. Opt for waterproof tile, stone, or glass surfaces that are easy to clean and maintain, ensuring longevity and performance in wet environments.

Inspirational Ideas for Shower With Sloped Ceiling

Now that we’ve covered the essential design considerations, let’s explore some inspirational ideas for creating a stunning shower with a sloped ceiling:

  1. Spa-Inspired Retreat: Transform your shower into a luxurious spa retreat by incorporating calming elements such as natural stone tile, rainfall showerhead, and built-in bench seating. Add a touch of elegance with a freestanding soaking tub and lush greenery for a serene and relaxing ambiance.
  2. Contemporary Elegance: Achieve a sleek and modern look with a monochromatic color scheme, minimalist fixtures, and geometric tile patterns. Install a linear drain along the shower floor for a seamless and stylish finish, complemented by recessed lighting and sleek glass partitions.
  3. Rustic Charm: Embrace the warmth and character of rustic design by incorporating reclaimed wood accents, exposed beams, and earthy textures. Opt for a walk-in shower with a stone or brick accent wall, paired with antique-inspired fixtures and vintage-style lighting for a cozy and inviting atmosphere.

Conclusion

Designing a shower with a sloped ceiling requires careful planning and attention to detail, but the results can be truly spectacular. By maximizing vertical space, incorporating built-in storage, embracing creative lighting, and choosing durable materials, you can create a shower that not only functions beautifully but also elevates the overall aesthetic of your bathroom.

Read too: Exploring the Efficiency of Radiant Ceiling Heater Electric: A Comprehensive Guide

Ceilings Waterfall Shower Head: Experience the Ultimate Relaxation

Elevate your daily shower routine to new heights of luxury and relaxation with a ceilings waterfall shower head. Discover the soothing sensation of cascading water from above and transform your bathroom into a spa-like oasis.

Ceiling Waterfall Shower Head

Introduction

In recent years, there has been a growing trend towards creating luxurious and spa-like bathrooms right in the comfort of our homes. A ceiling waterfall shower head is one of the key elements in achieving this goal, offering a unique and indulgent showering experience that rejuvenates the body and soothes the mind. In this comprehensive guide, we’ll explore the features, benefits, and installation considerations of a ceiling waterfall shower head, and how it can enhance your daily routine.

Unveiling the Beauty of a Ceiling Waterfall Shower Head

A ceiling waterfall shower head is a fixture mounted on the ceiling of the shower enclosure, from which water flows in a gentle cascade, mimicking the sensation of standing beneath a natural waterfall. These shower heads typically feature a large, flat design with multiple water outlets arranged to create a wide, uniform stream of water. The result is a luxurious and immersive showering experience that envelops the body in warmth and relaxation.

Benefits of a Ceiling Waterfall Shower Head

  1. Soothing Sensation: The gentle cascade of water from a ceiling waterfall shower head creates a sensation of being enveloped in a warm and soothing embrace. The continuous flow of water helps to relax tense muscles, alleviate stress, and promote overall well-being.
  2. Spa-like Experience: With its luxurious design and invigorating water flow, a ceiling waterfall shower head brings the spa experience into your own home. Transform your daily shower routine into a pampering session that leaves you feeling refreshed and rejuvenated.
  3. Enhanced Aesthetics: Beyond its functional benefits, a ceiling waterfall shower head adds a touch of elegance and sophistication to any bathroom. The sleek and modern design becomes a focal point of the space, elevating the overall aesthetics of the room.
  4. Customizable Features: Many ceiling waterfall shower heads come with customizable features such as adjustable water flow settings, built-in LED lighting, and integrated aromatherapy options. Tailor your shower experience to suit your preferences and create a personalized oasis of relaxation.

Installing a Ceiling Waterfall Shower Head

Installing a ceiling waterfall shower head requires careful planning and consideration to ensure optimal performance and safety. Here are some key steps to keep in mind:

  1. Location: Determine the ideal location for your ceiling waterfall shower head based on the layout of your bathroom and the desired coverage area. Consider factors such as ceiling height, water pressure, and proximity to other fixtures.
  2. Mounting: Properly mount the shower head to the ceiling using a sturdy and secure bracket or arm. Ensure that the installation is level and stable to prevent any wobbling or sagging over time.
  3. Water Supply: Connect the shower head to the existing water supply lines using flexible hoses or pipes. Ensure that the connections are watertight and leak-free to prevent any water damage to the ceiling or surrounding areas.
  4. Testing: Once the installation is complete, thoroughly test the shower head to ensure that it functions properly and delivers the desired water flow and temperature. Make any necessary adjustments to the settings or positioning as needed.

Maintenance and Care

To keep your ceiling waterfall shower head performing at its best, follow these maintenance tips:

  • Regular Cleaning: Clean the shower head regularly to remove any mineral deposits, soap scum, or debris that may accumulate over time. Use a mild detergent or vinegar solution and a soft brush to gently scrub the surface.
  • Check for Leaks: Periodically inspect the connections and fittings for any signs of leaks or corrosion. Address any issues promptly to prevent water damage and ensure the longevity of your shower head.
  • Replace Filters: If your ceiling waterfall shower head is equipped with a filter, replace it according to the manufacturer’s recommendations to maintain optimal water quality and flow.

Conclusion

A ceilings waterfall shower head offers a luxurious and indulgent showering experience that transforms your bathroom into a private oasis of relaxation and rejuvenation. With its soothing water flow, elegant design, and customizable features, this innovative fixture adds a touch of spa-like luxury to your daily routine. Explore the benefits of a ceiling waterfall shower head and elevate your shower experience to new heights of comfort and serenity.

Read too: Exploring the Innovation and Efficiency of Ceiling Mounted Surgical Light Solutions: Illuminating Precision

Elevate Your Bathroom Experience with a Luxurious Large Rain Shower Head Ceilings

A refreshing and invigorating shower can be the highlight of your day, and one way to enhance this experience is with a Large Rain Shower Head Ceilings. This luxurious bathroom fixture offers a spa-like ambiance and an immersive showering experience that will leave you feeling rejuvenated and relaxed. Let’s explore the features and benefits of a Large Rain Shower Head Ceiling and how it can transform your bathroom into a haven of comfort and luxury.

Large Rain Shower Head Ceiling

Embracing Luxury: The Appeal of a Large Rain Shower Head Ceiling

Spa-Like Experience

A Large Rain Shower Head Ceiling simulates the sensation of standing beneath a gentle rain shower, enveloping you in a cascade of warm water droplets. This immersive experience is akin to visiting a luxurious spa, allowing you to unwind and de-stress after a long day.

Generous Coverage

Unlike traditional showerheads, which emit a narrow stream of water, a Large Rain Shower Head Ceiling provides generous coverage, enveloping your entire body in a soothing waterfall effect. This wide dispersion of water ensures thorough rinsing and a more efficient showering experience.

Read too: Discovering the Charm of Nautical Outdoor Ceiling Fans for Your Coastal Retreat: Sail into Style

The Features of a Large Rain Shower Head Ceiling

Sleek Design

A Large Rain Shower Head Ceiling boasts a sleek and minimalist design that complements any bathroom décor. Whether installed flush with the ceiling or mounted on a sleek arm, this fixture adds a touch of sophistication and elegance to your shower space.

Adjustable Settings

Many Large Rain Shower Head Ceiling models come with adjustable settings, allowing you to customize the intensity and pattern of the water flow to suit your preferences. From gentle rainfall to invigorating massage jets, these settings offer versatility and flexibility for a personalized shower experience.

Incorporating a Large Rain Shower Head Ceiling into Your Bathroom

Spa-Inspired Retreat

Transform your bathroom into a spa-inspired retreat by installing a Large Rain Shower Head Ceiling. Pair it with natural stone tiles, soft lighting, and plush towels to create a serene and luxurious oasis where you can unwind and pamper yourself.

Modern Elegance

For a sleek and contemporary look, opt for a Large Rain Shower Head Ceiling with clean lines and minimalist styling. Pair it with modern fixtures and accessories for a cohesive and sophisticated bathroom design that exudes elegance and refinement.

Conclusion

A Large Rain Shower Head Ceilings offers the perfect combination of style, functionality, and luxury for your bathroom. With its spa-like experience, generous coverage, and sleek design, this fixture elevates your daily shower routine to new heights of comfort and relaxation.

By incorporating a Large Rain Shower Head Ceiling into your bathroom design, you can create a space that not only looks beautiful but also provides a rejuvenating and indulgent shower experience that leaves you feeling refreshed and revitalized.