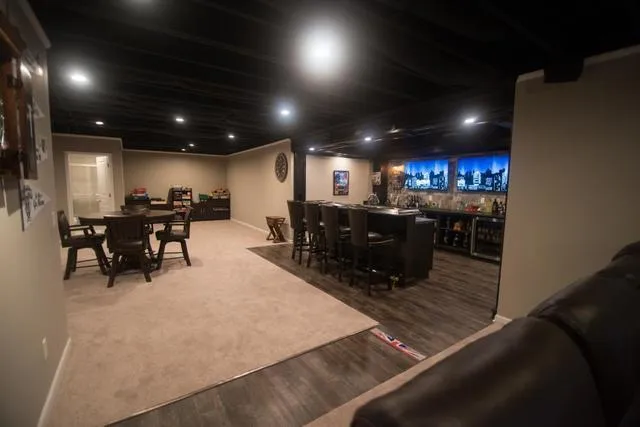
Insulation for Soundproofing Basement Ceiling: The Ultimate Guide for a Quieter Home

When it comes to improving the comfort of your home, one area that often goes overlooked is the basement ceiling. Many homeowners experience unwanted noise seeping through from the floor above or from the outside, and a great way to combat this is by using insulation for soundproofing basement ceiling. This type of insulation can significantly reduce sound transmission, helping to create a peaceful, quieter living environment. Whether you’re setting up a home theater, creating a home office, or simply looking to enhance the overall comfort of your basement, soundproofing the ceiling is an excellent choice.

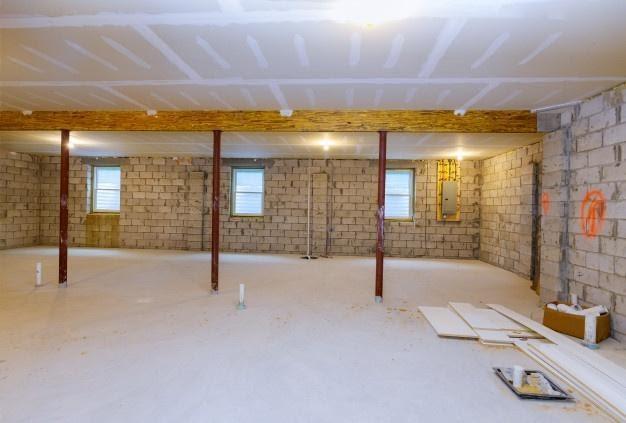
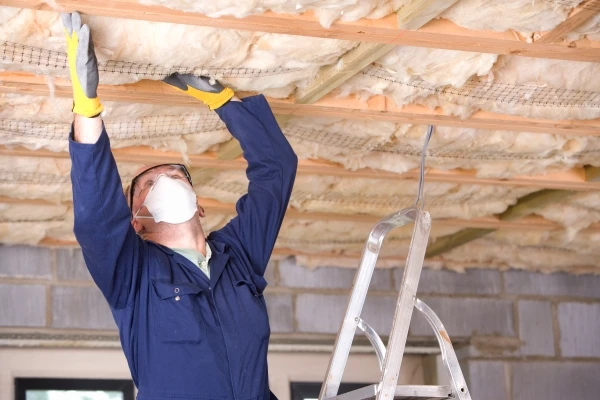
Insulation For Soundproofing Basement Ceiling

In this comprehensive guide, we will walk you through everything you need to know about insulation for soundproofing basement ceiling, from the benefits to the materials you should use and the installation process. By the end, you’ll be ready to transform your basement into a more peaceful, noise-free space.


Why Consider Soundproofing Your Basement Ceiling?

Before diving into the specific techniques and materials for soundproofing, it’s important to understand why soundproofing a basement ceiling is a worthwhile investment. Here are several key reasons why you might want to consider insulation for soundproofing your basement ceiling:

1. Noise Reduction from the Floor Above

If your basement is under a living space or frequently used area, you’ll likely experience sounds from walking, furniture movement, and everyday activities on the floor above. Soundproofing the basement ceiling can reduce these disturbances, creating a more peaceful environment below.

2. Improved Home Comfort

By reducing noise, you’re also improving the overall comfort of your basement. Whether it’s the sounds of footsteps, televisions, or conversations from the floors above, soundproofing can block out these distractions, allowing for a quieter, more relaxing atmosphere.

Read too: Kitchen Lighting For A Vaulted Ceiling: Illuminating Your Space with Style and Functionality

3. Increased Privacy

Soundproofing your basement ceiling not only helps reduce external noise but also increases privacy. If you use the basement as a home office or entertainment space, you’ll appreciate the added confidentiality, ensuring that sounds don’t travel up to the rooms above.

4. Enhanced Home Value

Investing in soundproofing your basement can also increase your home’s value. Soundproofed rooms are a desirable feature for many potential buyers who prioritize peace and quiet in their homes, especially if they plan to use the basement as a living or recreational space.


What Are the Best Insulation Materials for Soundproofing Basement Ceilings?

When it comes to selecting the right insulation for soundproofing your basement ceiling, there are several effective materials available. The key to good soundproofing is using materials that reduce sound transmission while also providing thermal insulation. Let’s take a look at some of the best options:

1. Fiberglass Insulation

Fiberglass is one of the most commonly used insulation materials. It’s affordable, easy to install, and has excellent sound-dampening properties. Fiberglass batt insulation is often used for soundproofing because it absorbs sound waves and helps reduce the amount of noise passing through the ceiling.

Pros of Fiberglass Insulation:

  • Effective at blocking sound transmission
  • Relatively easy to install
  • Available in different thicknesses and R-values for various insulation needs

Cons of Fiberglass Insulation:

  • Can irritate the skin and lungs if not handled properly
  • Must be installed carefully to avoid gaps that could reduce its effectiveness

2. Mineral Wool (Rockwool) Insulation

Mineral wool is another great option for soundproofing. It’s made from natural rock or slag and has excellent sound-absorbing qualities. Mineral wool is denser and heavier than fiberglass, which makes it even more effective at blocking sound.

Pros of Mineral Wool Insulation:

  • Superior soundproofing performance
  • Fire-resistant and non-combustible
  • Moisture-resistant and mold-resistant

Cons of Mineral Wool Insulation:

  • More expensive than fiberglass insulation
  • Heavier and may require more effort to install

3. Cellulose Insulation

Cellulose insulation is made from recycled paper products and is treated with fire-retardant chemicals. It’s an eco-friendly option that provides both thermal and soundproofing benefits. It’s especially effective in reducing airborne sound.

Pros of Cellulose Insulation:

  • Made from recycled materials, eco-friendly
  • Good soundproofing qualities
  • Fire-resistant

Cons of Cellulose Insulation:

  • Can settle over time, reducing its effectiveness
  • Installation can be more complex and require professional help

4. Spray Foam Insulation

Spray foam insulation is a highly effective soundproofing material. It expands upon application and creates an airtight seal that prevents sound from traveling through gaps and cracks. It also offers excellent thermal insulation.

Pros of Spray Foam Insulation:

  • Excellent at filling gaps and cracks, creating an airtight seal
  • Highly effective in reducing both airborne and impact noise
  • Provides high R-value for insulation

Cons of Spray Foam Insulation:

  • Expensive compared to other insulation materials
  • Requires professional installation due to its complexity

5. Mass Loaded Vinyl (MLV)

Mass-loaded vinyl is a dense, flexible material that can be applied to the basement ceiling to block sound. It’s often used in conjunction with other insulation materials to further improve soundproofing.

Pros of Mass Loaded Vinyl:

  • Highly effective at blocking sound transmission
  • Thin and flexible, making it easy to install over other materials
  • Works well in combination with other insulation materials

Cons of Mass Loaded Vinyl:

  • Can be more expensive than traditional insulation
  • Requires precise installation to ensure maximum soundproofing

How to Install Insulation for Soundproofing Basement Ceiling

Now that you understand the best insulation materials for soundproofing your basement ceiling, let’s walk through the installation process. While some insulation methods may require professional help, others can be done as a DIY project with the right tools and preparation.

Step 1: Prepare the Ceiling

Before you begin installing the insulation, ensure the ceiling is clean and free of debris. If there are any cracks or holes in the ceiling, repair them before proceeding. You may also want to remove any old insulation that’s no longer effective.

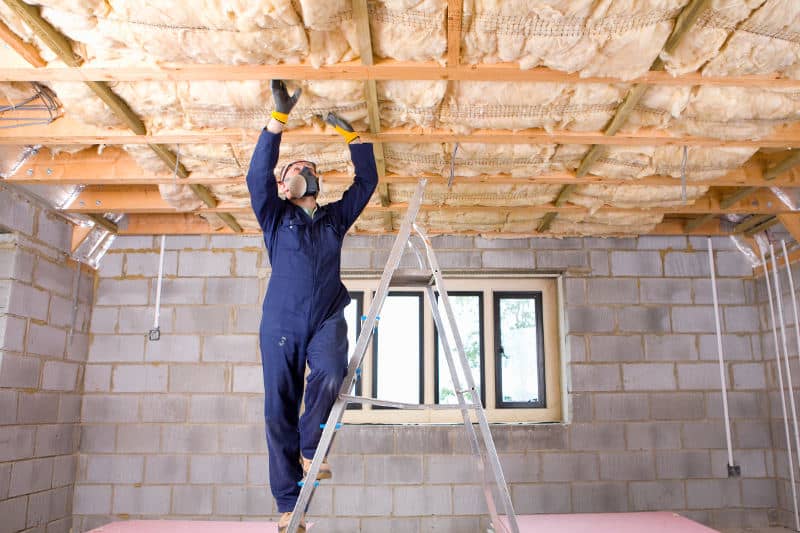
Step 2: Install the First Layer of Insulation

If you’re using fiberglass, mineral wool, or cellulose insulation, start by cutting the insulation to fit between the ceiling joists. For batt insulation, carefully press the material into the joists, ensuring there are no gaps. If you’re using spray foam, apply it to the ceiling to fill all gaps and cracks.

Step 3: Add Mass Loaded Vinyl (If Applicable)

If you’ve chosen to use mass-loaded vinyl (MLV), lay it over the first layer of insulation, making sure it covers the entire ceiling. Nail or staple the MLV into place, ensuring there are no gaps between the material and the ceiling.

Step 4: Install a Ceiling Barrier (Optional)

For additional soundproofing, you can install a soundproofing barrier or sound-damping board over the insulation. This step is particularly helpful in reducing impact noise, such as footsteps or furniture movement.

Step 5: Seal Gaps and Edges

Once the insulation and any additional barriers are in place, it’s important to seal any gaps along the edges of the ceiling. Use acoustic caulk or sealant to close any openings, ensuring a tight seal that prevents sound from leaking through.

Step 6: Install the Ceiling Finish

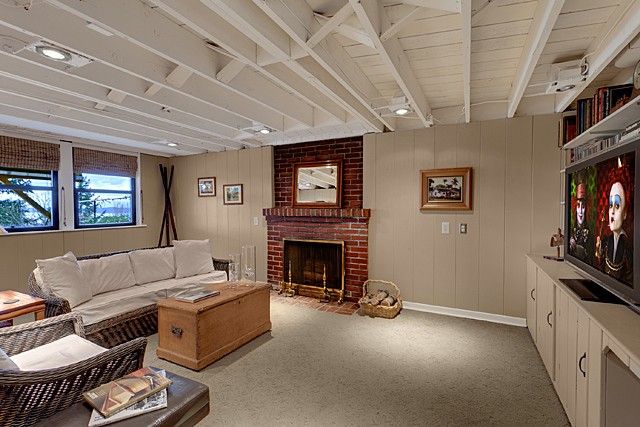
Finally, cover the insulation with a ceiling material of your choice. Drywall is commonly used, but if you prefer, you can install acoustic tiles, wood paneling, or other finishes. Just make sure the finish is securely attached to the ceiling and doesn’t disrupt the insulation.


Conclusion: Enjoy a Quieter Basement with Effective Soundproofing

Insulation for soundproofing basement ceiling is an excellent investment for anyone looking to reduce noise and enhance comfort in their home. By choosing the right materials and following the installation steps outlined above, you can create a peaceful, quiet space where you can relax or work without being disturbed by sounds from the floors above or external noise. Whether you’re using the basement as a home theater, an office, or a recreational area, soundproofing will help ensure the space remains serene and enjoyable for years to come.
Leaking Pipe in Basement Ceiling: Understanding and Addressing the Challenges

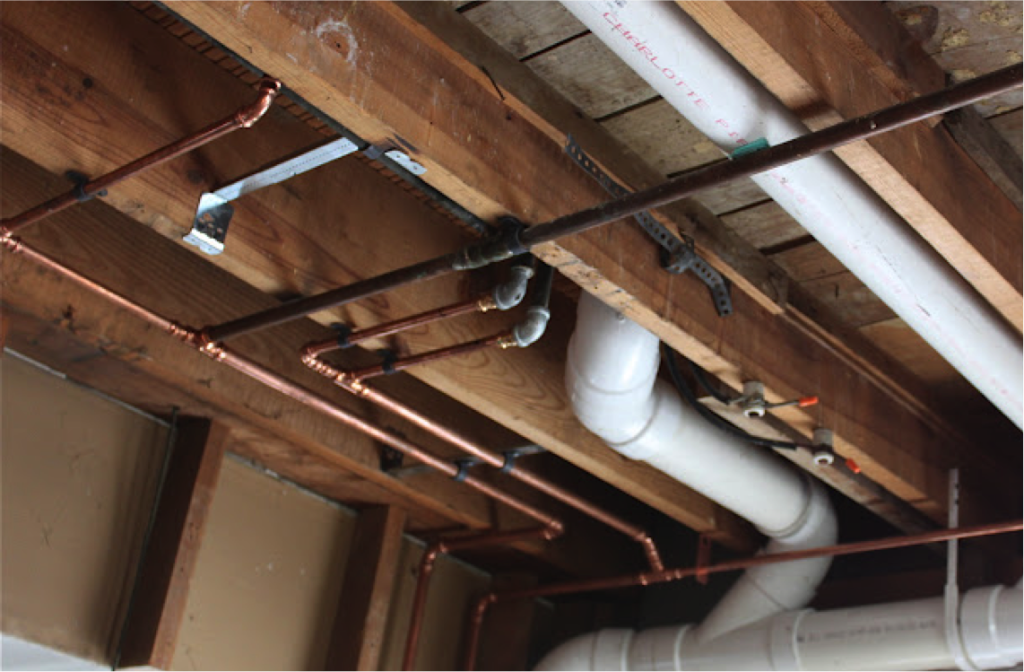
Dealing with a leaking pipe in the basement ceiling can be a homeowner’s worst nightmare. Not only does it pose immediate risks of water damage and mold growth, but it also indicates underlying plumbing issues that require urgent attention. In this comprehensive guide, we’ll delve into the common causes of leaking pipes in basement ceilings, how to identify the problem, and the best strategies for effective repair and prevention.

Leaking Pipe In Basement Ceiling

Understanding Leaking Pipe in Basement Ceiling

A leaking pipe in the basement ceiling can stem from various sources, including:

  • Burst or Cracked Pipes: Extreme temperatures, corrosion, or physical damage can cause pipes to burst or develop cracks, leading to water leakage.
  • Faulty Joints: Poorly sealed pipe joints or fittings can result in water seepage at connection points.
  • High Water Pressure: Excessive water pressure can put strain on pipes, causing them to leak or rupture.
  • Clogged Drains: Blocked drains can cause water to back up and overflow, putting pressure on pipes and causing leaks.
  • Foundation Settlement: Shifting or settling of the foundation can cause pipes to become misaligned or damaged, resulting in leaks.

Read too: How To Extend Kitchen Cabinets To The Ceiling: A Complete Guide for Maximizing Space and Style

Signs of a Leaking Pipe in Basement Ceiling

Identifying a leaking pipe in the basement ceiling early is crucial to prevent extensive water damage. Look out for the following signs:

  • Water Stains: Discoloration or water stains on the ceiling or walls may indicate water leakage from above.
  • Dripping Water: If you notice water dripping from the ceiling or pooling on the floor below, it’s a clear sign of a leak.
  • Mold or Mildew: The presence of mold or mildew on the ceiling or walls, accompanied by a musty odor, suggests excess moisture from a leak.
  • Decreased Water Pressure: A sudden drop in water pressure throughout the house may indicate a leak in the plumbing system.
  • Visible Damage: Bulging or sagging areas of the ceiling, peeling paint or wallpaper, or warped flooring are all signs of water damage caused by a leak.

Steps to Address a Leaking Pipe in Basement Ceiling

1. Shut Off Water Supply

As soon as you notice signs of a leaking pipe, turn off the main water supply to prevent further damage and flooding.

2. Identify the Source

Carefully inspect the basement ceiling for the source of the leak. Look for dripping water, wet spots, or signs of moisture along pipes or fittings.

3. Repair or Replace Pipe

Depending on the severity of the damage, you may need to repair or replace the leaking section of the pipe. If you’re not comfortable with DIY plumbing repairs, it’s best to hire a licensed plumber for professional assistance.

4. Dry Out the Area

Thoroughly dry out the affected area using fans, dehumidifiers, or a wet/dry vacuum to prevent mold growth and further damage to building materials.

5. Repair Water Damage

Once the leak has been addressed, repair any water damage to the ceiling, walls, or flooring. This may involve patching drywall, repainting, or replacing damaged materials.

Preventive Measures

To prevent future leaks in the basement ceiling, consider the following preventive measures:

  • Regular Maintenance: Inspect plumbing pipes and fittings for signs of corrosion, wear, or damage, and address any issues promptly.
  • Insulation: Properly insulate pipes to protect them from freezing and bursting during cold weather.
  • Pressure Regulation: Install a pressure regulator to control water pressure and prevent strain on pipes.
  • Drain Maintenance: Keep drains clear of debris and regularly clean gutters to prevent water backup and overflow.

Conclusion

A leaking pipe in the basement ceiling is a serious issue that requires immediate attention to prevent water damage and mold growth. By understanding the common causes, signs, and steps for addressing a leak, homeowners can take proactive measures to protect their property and ensure the integrity of their plumbing system.

Unlock the Secrets to Successful Framing of a Basement Ceiling: A Comprehensive Guide

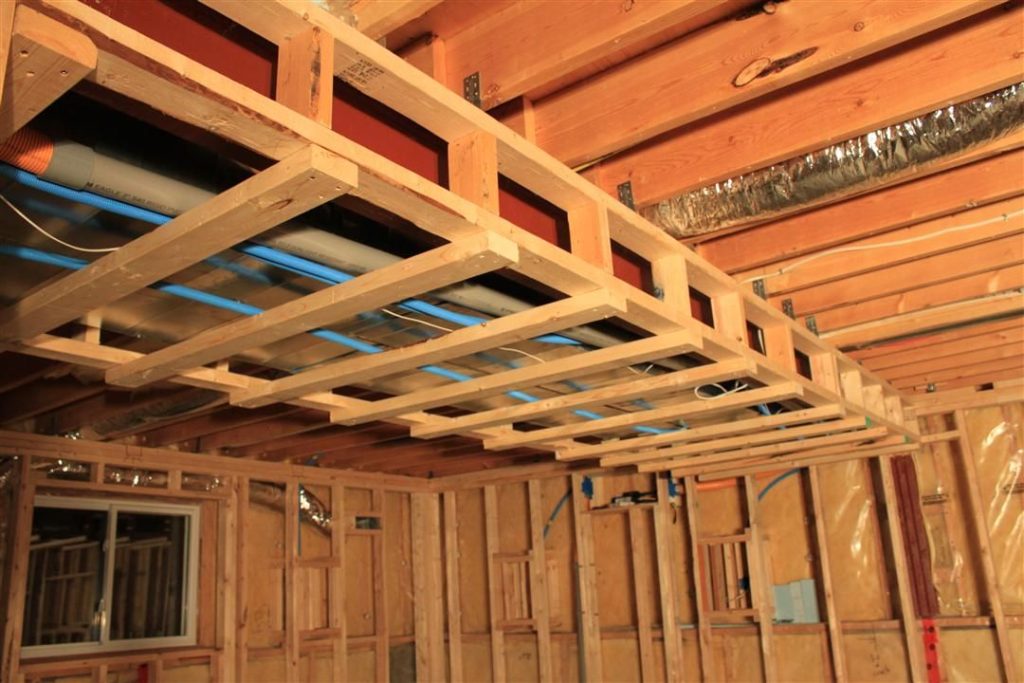
Basement renovations can be both exciting and challenging, and one crucial aspect that often requires careful consideration is framing the ceiling. In this comprehensive guide, we will delve into the intricacies of “Framing A Basement Ceiling,” providing you with invaluable insights and tips to ensure a successful and well-executed project.

Framing A Basement Ceiling

Understanding the Importance of Proper Basement Ceiling Framing

When it comes to basement renovations, framing the ceiling is a critical step that sets the foundation for the entire space. Proper framing not only enhances the structural integrity of the basement but also plays a pivotal role in creating a comfortable and aesthetically pleasing environment.

Key Components of Framing A Basement Ceiling

1. Planning and Preparation

Before diving into the framing process, meticulous planning is essential. Assess the structural elements of your basement and identify any potential challenges. Consider factors such as electrical wiring, plumbing, and ventilation systems. A well-thought-out plan will streamline the framing process and minimize unforeseen issues.

2. Materials Needed for Framing

Choosing the right materials is crucial for the success of your basement ceiling project. Opt for sturdy and moisture-resistant materials to prevent issues such as mold growth. Common materials include pressure-treated lumber, steel studs, and moisture-resistant drywall. Ensure that your chosen materials comply with local building codes.

3. Creating a Level Framework

Achieving a level framework is paramount for a professional-looking finish. Use a laser level to ensure accuracy throughout the framing process. This step is crucial for the installation of ceiling tiles or drywall, as any inconsistencies can result in an uneven appearance.

Step-by-Step Guide

1. Measure and Mark

Accurate measurements are the foundation of successful framing. Measure the dimensions of your basement ceiling and mark key reference points. This will guide you in determining the placement of framing elements and ensure a precise fit.

2. Install the Top and Bottom Plates

Begin by installing the top and bottom plates along the perimeter of the basement ceiling. These plates serve as the framework for the vertical studs. Use appropriate anchors to secure the plates to the existing structure, ensuring stability.

3. Space and Install Vertical Studs

Determine the spacing for the vertical studs based on your design and local building codes. Install the studs securely between the top and bottom plates, creating a sturdy framework. This step is crucial for supporting the weight of the ceiling materials.

Enhancing Aesthetics with Creative Ceiling Framing Designs

While the primary purpose of framing a basement ceiling is structural, there’s no reason why you can’t add a touch of creativity to enhance the overall aesthetics. Consider incorporating recessed lighting, coffered designs, or unique patterns to transform your basement into a stylish and inviting space.

Common Challenges and How to Overcome Them

Even with careful planning, basement ceiling framing may present challenges. Addressing issues such as uneven surfaces, obstructions, or irregularities in the existing structure requires adaptability. Be prepared to make adjustments and consult with a professional if needed.

Read too: Understanding and Addressing a Leaky Ceiling in Your Apartment: Navigating the Drips

Conclusion: Elevate Your Basement Renovation with Expert Ceiling Framing

In conclusion, “Framing A Basement Ceiling” is a pivotal step in any basement renovation project. By following a systematic approach, utilizing quality materials, and incorporating creative design elements, you can transform your basement into a functional and visually appealing space. Whether you are a seasoned DIY enthusiast or enlisting professional help, the key lies in understanding the nuances of basement ceiling framing to achieve a successful outcome.

Smart Strategies to Increase Basement Ceiling Height and Transform Your Living Area: Elevate Your Space

The ceiling height in a basement plays a crucial role in determining the overall ambiance of the space. If you’re yearning for a more open and airy basement, exploring ways to “Increase Basement Ceiling Height” can be a game-changer. In this comprehensive guide, we’ll uncover practical solutions and expert insights to help you elevate your basement living experience.

Increase Basement Ceiling Height

Increase Basement Ceiling Height: A Strategic Approach

Understanding the Impact of Ceiling Height

Before delving into strategies for increasing basement ceiling height, let’s explore why it matters. This section highlights the impact of ceiling height on aesthetics, functionality, and the overall perception of space.

Read too: How Gutters Causing Ceiling Leak Can Wreak Havoc in Your Home? Unveiling the Hidden Dangers

Assessing Your Basement’s Current Ceiling Height

This H2 heading emphasizes the importance of assessing your basement’s existing ceiling height. From measuring techniques to understanding the standard heights, we’ll guide you through the initial steps of evaluating your space.

Measuring Techniques:

Learn how to accurately measure your basement’s ceiling height, considering variations across different areas. This section provides tips for precise measurements, ensuring a solid foundation for your height-increasing endeavors.

Understanding Standard Heights:

Familiarize yourself with standard basement ceiling heights and how your space compares. This knowledge will aid in setting realistic expectations and determining the feasibility of height enhancement projects.

Strategic Design and Layout Adjustments: Increase Basement Ceiling Height

This heading explores design and layout adjustments to create the illusion of increased ceiling height. From color choices to furniture arrangements, discover practical strategies for optimizing the visual perception of space.

Lighting and Color Selection:

Explore the transformative effects of strategic lighting and color choices on the perceived height of your basement ceiling. This section provides insights into creating a well-lit and visually expansive environment.

Vertical Lines and Optical Illusions:

Utilize vertical lines and optical illusions to draw the eye upward, giving the impression of increased ceiling height. Learn how to incorporate design elements that contribute to the visual expansion of your basement space.

Structural Modifications for Ceiling Height Enhancement

This heading delves into more significant structural modifications for those seeking tangible increases in basement ceiling height. From lowering the floor to raising the ceiling, we’ll explore options that require careful planning and execution.

Raising the Ceiling:

Discover the feasibility of physically raising the basement ceiling and the potential challenges associated with this ambitious project. This section provides a realistic assessment for homeowners considering structural modifications.

Lowering the Floor:

Explore the option of lowering the basement floor to create additional headroom. This strategy involves excavation and careful consideration of factors like plumbing and foundation, and we’ll guide you through the decision-making process.

Conclusion:

In conclusion, increasing basement ceiling height is a multifaceted endeavor that can be achieved through a combination of design, layout adjustments, and, in some cases, structural modifications. By understanding the impact of ceiling height, assessing your space, and implementing strategic changes, you can transform your basement into a more inviting and spacious area.

Does Your Basement Ceiling Need Insulation for Ultimate Comfort? Unveiling the Truth

When it comes to creating a comfortable and energy-efficient home, homeowners often find themselves pondering over various aspects of insulation. One area that often gets overlooked is the basement ceiling. The question that arises is, “Does basement ceiling need insulation?” In this article, we will delve into the significance of insulating your basement ceiling and explore the benefits that come with it.

Does Basement Ceiling Need Insulation

Understanding the Basics: Does Basement Ceiling Need Insulation?

Does basement ceiling need insulation? This is a common question that homeowners ask when considering home improvement projects. To answer this, let’s first understand the role of insulation in a home. Insulation acts as a barrier that helps regulate temperature and conserve energy. It prevents heat loss in the winter and keeps your home cool in the summer.

When it comes to the basement, many homeowners focus on insulating walls and floors but neglect the ceiling. However, insulating the basement ceiling can offer several advantages. Let’s explore why it might be a crucial aspect of your home insulation strategy.

The Benefits

  1. Energy Efficiency: Insulating your basement ceiling helps in maintaining a consistent temperature throughout your home. This means less reliance on heating and cooling systems, leading to reduced energy consumption and lower utility bills.
  2. Improved Comfort: A well-insulated basement ceiling contributes to a more comfortable living environment. It prevents drafts and cold spots, ensuring that your basement space remains cozy year-round.
  3. Moisture Control: Insulation acts as a barrier against moisture, preventing dampness and mold growth. This is especially important in basements, where moisture-related issues are common.
  4. Soundproofing: Insulating the basement ceiling can also contribute to soundproofing your home. This is particularly beneficial if you use your basement as a living space, office, or entertainment area.
  5. Protecting Belongings: Proper insulation safeguards your belongings stored in the basement from extreme temperatures, ensuring they remain in good condition.

Choosing the Right Insulation for Your Basement Ceiling

Now that we’ve established the importance of insulating your basement ceiling, the next step is choosing the right insulation material. Several options are available, each with its own set of pros and cons. Some common choices include fiberglass batts, spray foam, and rigid foam boards.

Fiberglass batts are a cost-effective option and relatively easy to install. Spray foam provides excellent coverage and acts as an effective air barrier. Rigid foam boards offer high insulation value and moisture resistance.

Consider factors such as budget, climate, and installation complexity when selecting the insulation material that best suits your needs.

Read too: Help! My Ceiling Is Falling Down: Understanding Causes and Solutions for a Deteriorating Ceiling

DIY or Professional Installation?

While some homeowners may opt for a do-it-yourself approach, others may prefer professional installation. DIY insulation projects can be rewarding, but it’s crucial to ensure proper installation to reap the full benefits. Hiring professionals guarantees a thorough job, reducing the risk of potential issues down the line.

Conclusion: The Verdict on Basement Ceiling Insulation

In conclusion, the answer to “Does basement ceiling need insulation?” is a resounding yes. Insulating your basement ceiling is a worthwhile investment that pays off in terms of energy efficiency, comfort, and protection against various issues. Whether you choose to embark on a DIY project or enlist professional help, the benefits of a well-insulated basement ceiling are undeniable.

So, if you’ve been contemplating whether to insulate your basement ceiling, the answer is clear: it’s a smart move for a more comfortable and energy-efficient home. Don’t let your basement be an overlooked space; instead, transform it into an integral part of your cozy abode with proper insulation.

Effortless Transformation: Removing Insulation from Basement Ceiling – A Step-by-Step Guide for Home Improvement

Uncover the secrets of reclaiming space by learning “Removing Insulation from Basement Ceiling.” This detailed guide will walk you through the process, providing insights, tips, and considerations to make your home improvement journey seamless.

Removing Insulation From Basement Ceiling

Removing Insulation From Basement Ceiling: Why and How

Before diving into the removal process, it’s crucial to understand the reasons behind removing insulation from a basement ceiling. In this section, we’ll explore common motivations such as renovating, addressing moisture issues, or improving energy efficiency. We’ll also delve into the initial considerations to ensure a well-informed decision.

Key Considerations:

  1. Renovation Goals: Defining your objectives for the basement space.
  2. Moisture Concerns: Addressing potential issues and prevention.
  3. Energy Efficiency: Evaluating insulation choices for optimum efficiency.

Removing Insulation From Basement Ceiling: A Detailed Guide

This section, marked with an H2 heading, will break down the removal process step by step. From preparation to disposal, each stage will be explored, providing practical tips and precautions for a smooth execution.

Step-by-Step Process:

  1. Safety First: Ensuring proper protective gear and a well-ventilated space.
  2. Identifying Insulation Type: Recognizing the type of insulation in place.
  3. Preparation Steps: Clearing the area, shutting off utilities, and safeguarding valuables.
  4. Removal Techniques: Guiding you through safe insulation removal methods.
  5. Disposal Considerations: Eco-friendly options for discarding insulation material.

Potential Challenges and Solutions: Overcoming Obstacles

While removing insulation from a basement ceiling can be a straightforward process, challenges may arise. In this part of the guide, we’ll highlight potential obstacles such as old or damaged insulation, wiring complexities, or unexpected structural issues. Solutions and expert tips will be provided to help you navigate through these challenges effectively.

Handling Challenges:

  1. Old or Damaged Insulation: Safe removal without compromising indoor air quality.
  2. Dealing with Wiring: Navigating around electrical components in the ceiling.
  3. Structural Integrity: Assessing and reinforcing as needed during the process.

Post-Removal Considerations: Ensuring a Clean Finish

Once the insulation is successfully removed, the next step is preparing the basement ceiling for the desired finish. This section will offer insights into post-removal tasks, including cleaning, repairing, and preparing the space for the intended use.

Post-Removal Tasks:

  1. Ceiling Cleaning: Removing any residual dust or debris.
  2. Repairing Damages: Fixing any unintended damages during the removal.
  3. Preparing for Finishing: Assessing the surface for the next steps in your renovation.

Conclusion: Transforming Your Basement Space

In conclusion, removing insulation from a basement ceiling is a transformative step toward achieving your home improvement goals. Whether you’re creating a more open space, addressing moisture concerns, or enhancing energy efficiency, this guide equips you with the knowledge and steps needed for a successful project.

Remember, understanding the nuances of the removal process and potential challenges is key to a seamless transformation. By following the insights provided in this comprehensive guide, you can confidently embark on the journey of removing insulation, turning your vision into reality.

The Ultimate Guide: How Much To Paint Basement Ceiling Like a Pro

Painting your basement ceiling can be a transformative and cost-effective way to improve the overall look of your basement. However, before you dive into this DIY project, it’s essential to answer the question, “How much to paint basement ceiling?” In this comprehensive guide, we will walk you through the steps and considerations to help you determine the cost, materials, and techniques needed to achieve a professionally painted basement ceiling.

How Much To Paint Basement Ceiling

How Much To Paint Basement Ceiling: Factors to Consider

Estimating the Cost

The cost of painting your basement ceiling can vary widely based on several factors, including:

  1. Ceiling Size: The larger the area, the more paint you will need, and the longer the project will take. Measure the square footage of your ceiling to estimate the amount of paint required.
  2. Ceiling Height: Higher ceilings may require specialized equipment or additional labor, which can increase the cost.
  3. Ceiling Condition: If your basement ceiling has imperfections, such as water damage or cracks, it may require additional preparation and repair work, adding to the overall cost.
  4. Paint Type: The type of paint you choose, whether it’s a standard latex paint or a specialized basement ceiling paint, will affect the cost. Specialized paints may be more expensive but offer better coverage and durability.
  5. Labor: If you decide to hire a professional painter, labor costs will be a significant part of your budget. DIY painting will save on labor but may require more time and effort.
  6. Equipment and Supplies: Consider the cost of painting tools, including brushes, rollers, painter’s tape, drop cloths, and a paint sprayer if you plan to use one.

Preparing the Surface

Proper preparation is essential for a successful basement ceiling paint job. The steps include:

  1. Cleaning: Clean the ceiling thoroughly to remove dust, dirt, and any potential contaminants. This will ensure that the paint adheres well.
  2. Repairing: Address any ceiling imperfections. Fill cracks, holes, and water damage, and sand the surface to create a smooth canvas for painting.
  3. Priming: Applying a primer can help the paint adhere better and provide a more even finish. Choose a primer specifically designed for basement ceilings.

Choosing the Right Paint

Selecting the right type of paint for your basement ceiling is crucial. Consider these factors:

  1. Ceiling Height: If your basement ceiling is low, a lighter color can make the space feel more open and airy. Darker colors can add coziness but may make the room feel smaller.
  2. Finish: The finish of the paint affects the overall appearance. Flat or matte finishes can help hide imperfections, while semi-gloss or gloss finishes reflect more light and are easier to clean.
  3. Moisture Resistance: If your basement is prone to moisture or humidity, choose a paint with moisture-resistant properties to prevent mold and mildew growth.

DIY vs. Hiring a Professional

Deciding whether to paint your basement ceiling yourself or hire a professional depends on your budget and skills. Here are some considerations:

  1. DIY: Painting your basement ceiling yourself can save on labor costs, but it may require more time and effort. Make sure you have the necessary tools, skills, and patience for the job.
  2. Professional: Hiring a professional painter can ensure a high-quality finish, especially if your ceiling is challenging to access. Obtain quotes from multiple contractors and check their references before making a decision.

Conclusion

Painting your basement ceiling is a fantastic way to improve the aesthetics of your basement. By carefully considering factors such as ceiling size, height, condition, and paint type, you can estimate the cost and plan your project accordingly. Whether you decide to take on the DIY challenge or hire a professional, a beautifully painted basement ceiling can transform your space and make it more inviting for various activities. Remember, preparation is key to a successful paint job, so invest the time and effort into getting your basement ceiling looking its best.

How Much Does It Cost to Spray Paint a Basement Ceiling?

If you’re looking to update the look of your basement ceiling, spray painting is a great option. It’s a quick and easy way to give your basement a fresh new look, and it’s relatively inexpensive.

In this article, we’ll discuss the cost of spray painting a basement ceiling in detail. We’ll also cover some of the factors that can affect the cost, so you can get an accurate estimate for your project.

Cost To Spray Paint Basement Ceiling

Cost to Spray Paint a Basement Ceiling

The cost to spray paint a basement ceiling varies depending on a number of factors, including the size of the ceiling, the type of paint you use, the cost of labor in your area, and the level of difficulty of the project.

In general, you can expect to pay between $1 and $3 per square foot to have a basement ceiling painted. For a 1,000 square foot ceiling, this would cost between $1,000 and $3,000.

Factors that Affect Cost

The following factors can affect the cost of spray painting a basement ceiling:

  • Size of the ceiling: The larger the ceiling, the more expensive it will be to paint. For example, a 1,000 square foot ceiling will cost twice as much to paint as a 500 square foot ceiling.
  • Type of paint: Paints with higher quality finishes or special features, such as fire retardant paint, will cost more. For example, a paint with a high-gloss finish will cost more than a paint with a matte finish.
  • Cost of labor: Labor costs vary depending on your location and the availability of painters. For example, labor costs in a major metropolitan area will be higher than labor costs in a rural area.
  • Level of difficulty of the project: Some basement ceilings are more difficult to paint than others. For example, a ceiling with a lot of beams or other obstructions will be more difficult to paint than a smooth ceiling.

DIY vs. Professional

You can save money by painting your basement ceiling yourself. However, it’s important to note that spray painting can be a messy process. If you’re not comfortable working with spray paint, it’s best to hire a professional.

Tips for Saving Money

If you’re on a budget, there are a few things you can do to save money on your basement ceiling painting project:

  • Do it yourself: If you’re comfortable working with spray paint, you can save a significant amount of money by painting your basement ceiling yourself.
  • Choose a less expensive paint: There are a number of affordable paints available that will still give you a good finish.
  • Paint during the off-season: Labor rates are typically lower during the off-season.
  • Consider the level of difficulty of the project: If you’re not sure if you can handle the project yourself, it’s best to hire a professional.

Additional Information

  • Spray painting a basement ceiling is a relatively easy project that you can do yourself. However, it’s important to follow safety precautions when working with spray paint.
  • If you’re not comfortable working with spray paint, it’s best to hire a professional. A professional painter will have the experience and expertise to get the job done right.
  • There are a number of different types of paint available for basement ceilings. Choose a paint that is specifically designed for basements.
  • It’s important to prepare the surface before painting. This will help to ensure that the paint adheres properly.
  • Follow the manufacturer’s instructions when applying paint. This will help to ensure that you get the best results.
  • If you’re painting a dark ceiling, you may need to apply two coats of paint.
  • If you’re painting a textured ceiling, you may need to use a special type of paint.
  • Be sure to wear a respirator and goggles when painting.

Additional Tips

Here are a few additional tips for saving money on your basement ceiling painting project:

  • Get multiple estimates from different painters. This will help you to get the best price.
  • Ask about discounts for seniors or military personnel.
  • Consider painting the ceiling yourself if you’re comfortable working with spray paint.

Conclusion

Spray painting a basement ceiling is a great way to update the look of your basement. It’s relatively inexpensive, and it’s a quick and easy project. By considering the factors that affect cost, you can get an accurate estimate for your project and save money.

Unveiling the Secrets: How To Paint A Basement Ceiling

How to paint a basement ceiling? Your basement is a hidden gem in your home, offering valuable additional living space. However, many homeowners overlook the ceiling when it comes to renovation and design. A painted basement ceiling can add character and charm to the space, making it feel like an integral part of your home. In this article, we will guide you through the process of painting a basement ceiling, from preparation to execution, and reveal the magic of this transformation.

How To Paint A Basement Ceiling

The Importance of a Well-Designed Ceiling

Elevating the Aesthetics of Your Basement

The ceiling of your basement plays a crucial role in the overall aesthetics of the space. A well-designed ceiling can:

1. Enhance the Ambiance:

  • A carefully chosen color and design can make your basement feel warm and inviting.

2. Hide Imperfections:

  • A painted ceiling can conceal imperfections, pipes, wires, and ducts that are often present in basements.

3. Define Zones:

  • By using different colors or finishes, you can create distinct zones within your basement for various purposes.

Preparing for the Paint Job

Setting the Stage for Success

Before you dive into painting your basement ceiling, it’s essential to prepare adequately. Here are the steps to get you started:

1. Clean the Ceiling:

  • Dust and clean the ceiling to ensure that the paint adheres properly. Use a vacuum cleaner with a brush attachment or a duster to remove loose particles.

2. Repair Damage:

  • Inspect the ceiling for any damage, such as cracks or holes. Repair these issues using a suitable filler or patching compound.

3. Protect the Area:

  • Cover the floor and any items in your basement with drop cloths or plastic sheets to prevent paint splatters.

4. Choose the Right Paint:

  • Select a paint that is suitable for your ceiling’s material and your desired finish. Latex or water-based paints are typically recommended for basement ceilings.

Painting the Basement Ceiling

Turning Your Vision into Reality

Now that your basement ceiling is prepped and you’ve gathered the necessary materials, it’s time to start painting.

1. Start with a Primer:

  • Apply a coat of primer to the ceiling to create an even base for the paint. Primer helps the paint adhere better and provides a smoother finish.

2. Use a Roller:

  • A paint roller is an effective tool for applying paint to the ceiling. Use an extension pole to reach high or hard-to-access areas.

3. Work in Sections:

  • Divide the ceiling into manageable sections and work on one section at a time. This approach ensures even coverage and prevents the paint from drying too quickly.

4. Apply Multiple Coats:

  • Depending on the desired finish and the color you’re using, you may need to apply two or more coats of paint. Allow each coat to dry before applying the next.

5. Be Mindful of Drips:

  • Watch out for drips and streaks, especially when applying paint to an overhead surface. Correct any imperfections immediately.

Read too: How Much Ceiling Height For Treadmill

Finishing Touches and Ideas

Bringing Your Vision to Life

As you near the end of your basement ceiling painting project, consider these finishing touches and creative ideas:

1. Accent Colors:

2. Stencils or Patterns:

  • Add flair to your ceiling by using stencils or creating patterns that complement the overall design of your basement.

3. Incorporate Lighting:

  • Well-placed lighting fixtures can highlight your newly painted ceiling, creating a dynamic and appealing look.

Conclusion:

How to paint a basement ceiling? A painted basement ceiling can transform a neglected space into a captivating and functional part of your home. By following the steps outlined in this guide and considering creative ideas for your ceiling, you can achieve a unique and visually appealing basement that suits your style and needs. Don’t let your basement’s potential go to waste; start your ceiling painting project and unlock the beauty of this often-overlooked area.