Exploring Ceiling Fans With Uplights: Illuminate Your Space with Style

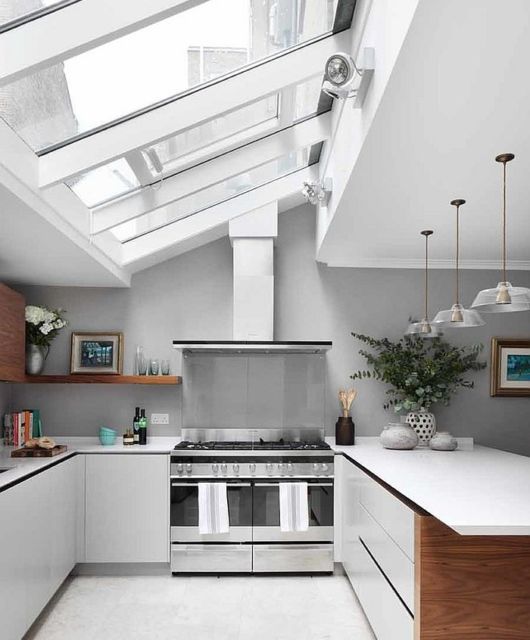
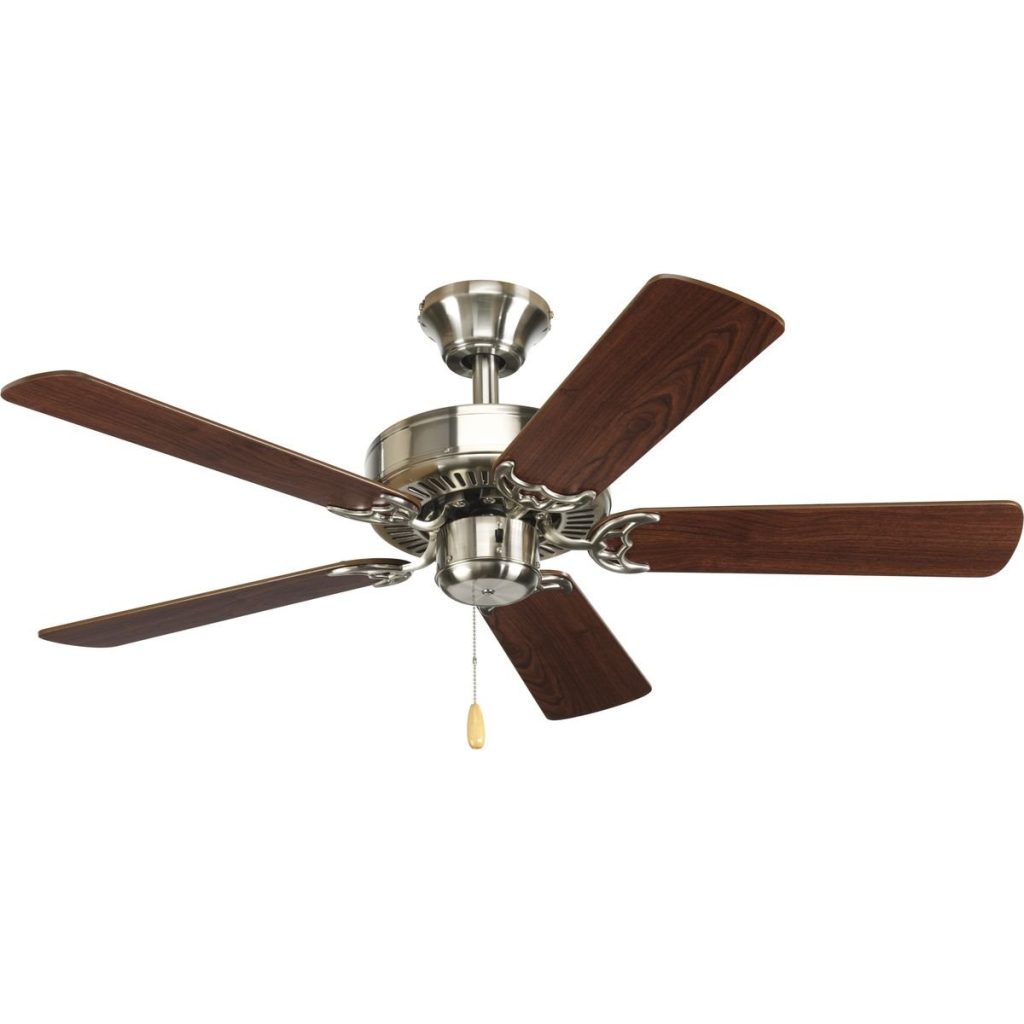
Ceiling fans are essential fixtures in any home, providing both comfort and style. But what if you could take your ceiling fan to the next level by adding ambient lighting to your space? That’s where ceiling fans with uplights come in. In this article, we’ll delve into the world of ceiling fans with uplights, exploring their features, benefits, and how they can elevate the ambiance of any room.

Ceiling Fans With Uplights

Introducing Ceiling Fans With Uplights

What are Ceiling Fans With Uplights?

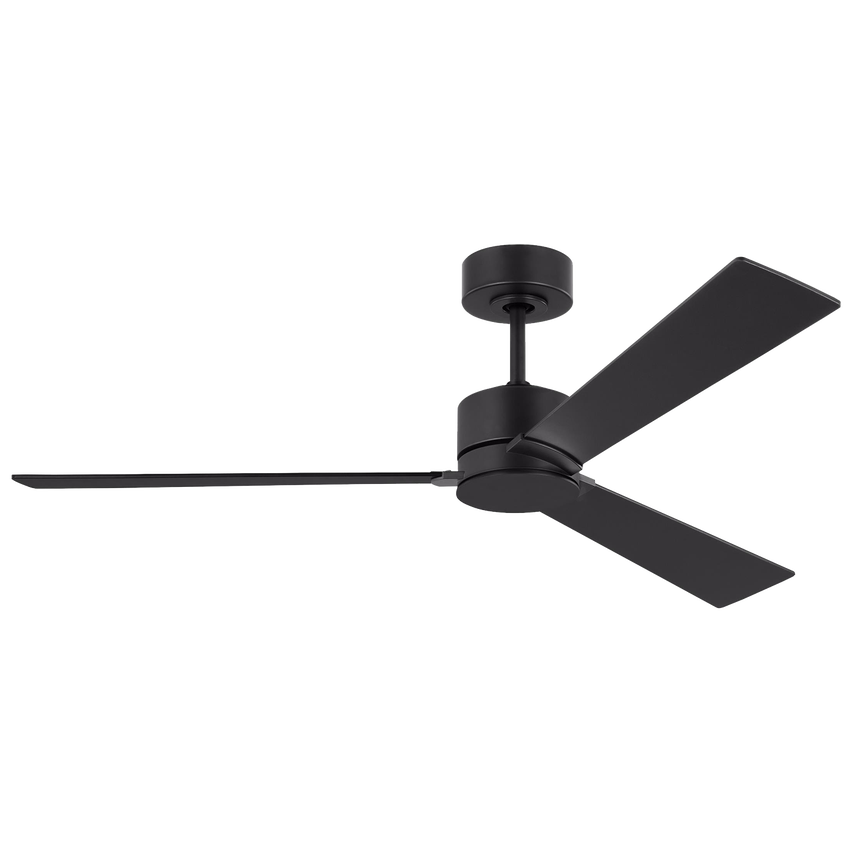
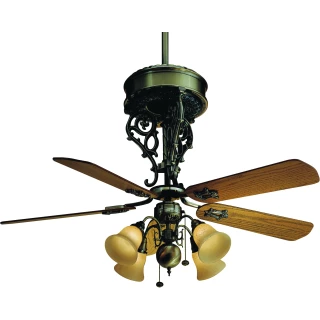
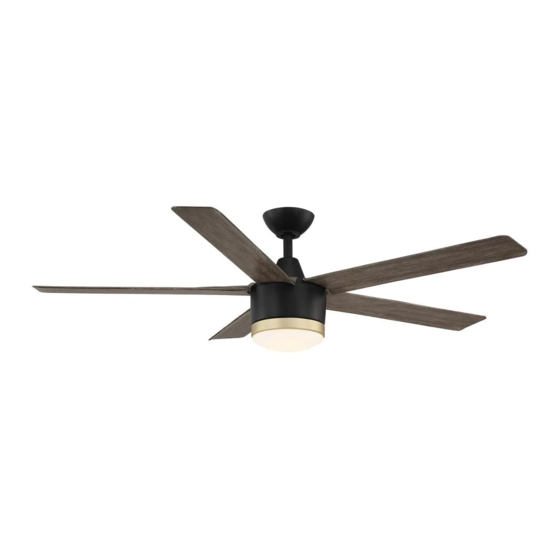
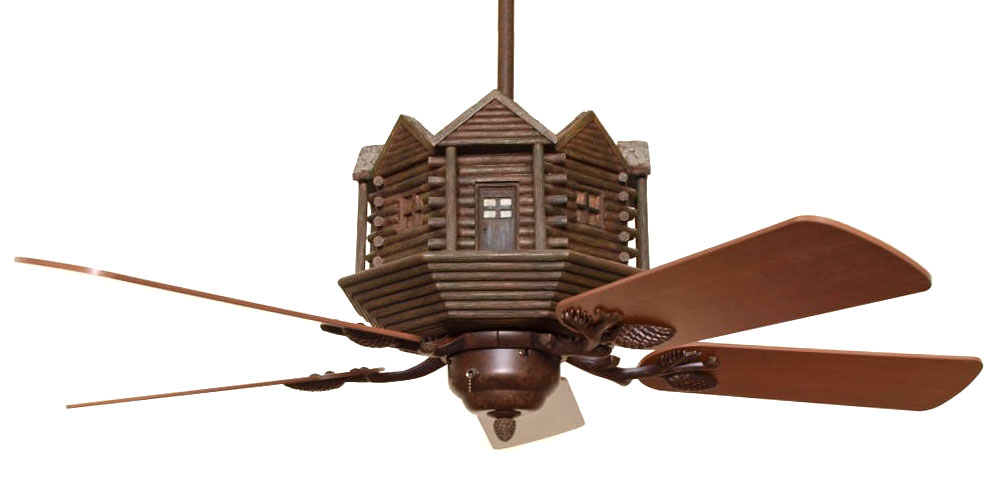
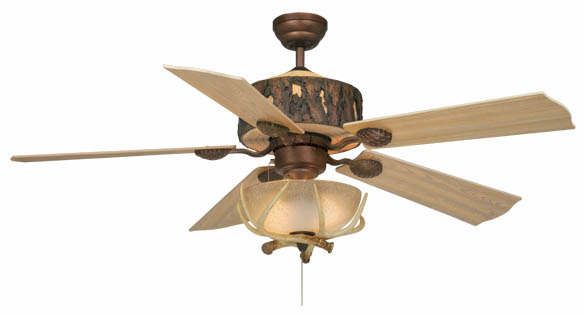
Ceiling fans with uplights are innovative fixtures that combine the functionality of a traditional ceiling fan with the added feature of built-in uplighting. Unlike standard ceiling fans that only provide downward lighting, ceiling fans with uplights feature additional lighting elements that are directed upwards, illuminating the ceiling and creating a warm and inviting ambiance in the room.

Benefits of Ceiling Fans With Uplights

Ceiling fans with uplights offer several advantages, including:

  • Enhanced Ambiance: The addition of uplighting creates a soft and diffused glow that enhances the ambiance of any space, making it feel more inviting and cozy.
  • Versatile Lighting Options: Ceiling fans with uplight often feature adjustable settings, allowing you to customize the brightness and color temperature of the uplighting to suit your preferences and mood.
  • Energy Efficiency: Many ceiling fans with uplight come equipped with energy-efficient LED bulbs, providing ample illumination while consuming minimal energy compared to traditional incandescent bulbs.
  • Space-Saving Design: By combining a ceiling fan and uplighting in one fixture, ceiling fans with uplight help save space and streamline the look of your room, eliminating the need for separate ceiling lights or lamps.

Read too: Understanding and Dealing with Ants in the Ceiling Spaces: Navigating the Intrusion

Exploring Features and Styles of Ceiling Fans With Uplights

Ceiling fans with uplight come in a variety of styles and designs to complement any decor scheme. Some common features and styles to consider include:

  • Blade Finish: Choose from a range of blade finishes, such as wood, metal, or plastic, to match your existing furniture and fixtures.
  • Light Fixture Design: Explore different uplighting designs, including frosted glass shades, decorative accents, or integrated LED strips, to add a touch of elegance to your space.
  • Remote Control: Opt for ceiling fans with remote control capabilities for added convenience, allowing you to adjust fan speed, lighting settings, and direction from anywhere in the room.
  • Size and Mounting Options: Select the appropriate size and mounting option for your space, whether you need a flush-mount fan for low ceilings or a larger fan for larger rooms.

Installation and Maintenance

Installing and maintaining a ceiling fan with uplights is similar to installing a standard ceiling fan. Follow these steps for successful installation and ongoing maintenance:

  1. Turn off the power: Before installing or servicing the fan, make sure to turn off the power at the circuit breaker to prevent electrical accidents.
  2. Mount the fan: Follow the manufacturer’s instructions to securely mount the fan to the ceiling, ensuring that it is properly supported and balanced.
  3. Connect the wiring: Carefully connect the fan’s wiring to the corresponding wires in the ceiling, making sure to match the colors correctly.
  4. Install the uplighting: If the fan comes with integrated uplighting, follow the instructions to install and secure the lighting elements in place.
  5. Test the fan: Once installed, test the fan and uplighting to ensure that they are functioning properly.
  6. Regular maintenance: Dust the fan blades and clean the uplighting fixtures regularly to maintain optimal performance and appearance.

Conclusion

Ceiling fans with uplight offer a stylish and functional lighting solution for any space, providing efficient cooling and ambient illumination in one convenient fixture. With their versatile features, energy-efficient design, and customizable options, these innovative fixtures can enhance the ambiance of your home while keeping you comfortable year-round. Whether you’re looking to add a touch of elegance to your living room or create a cozy atmosphere in the bedroom, ceiling fans with uplight are sure to impress.

Ceiling Fans in San Antonio: Beat the Heat with Stylish and Functional

As the temperatures rise in San Antonio, finding effective ways to stay cool becomes essential. One of the most efficient and stylish solutions is installing ceiling fans. Ceiling fans in San Antonio not only provide much-needed relief from the heat but also add a touch of elegance and comfort to any room. In this article, we’ll explore the benefits, styles, and considerations of ceiling fans in San Antonio, helping you choose the perfect option for your home.

Ceiling Fans San Antonio

Introducing Ceiling Fans San Antonio

What are Ceiling Fans?

Ceiling fans are electrical appliances suspended from the ceiling of a room, equipped with rotating blades that circulate air and create a cooling effect. In San Antonio, where temperatures can soar during the summer months, ceiling fans are indispensable for maintaining a comfortable indoor environment without relying solely on air conditioning.

Benefits of Ceiling Fans San Antonio

Ceiling fans offer several advantages for homeowners in San Antonio, including:

  • Efficient Cooling: Ceiling fans help distribute cool air evenly throughout a room, reducing the reliance on air conditioning and lowering energy costs.
  • Energy Savings: By using ceiling fans in conjunction with air conditioning, homeowners can set their thermostats higher and still feel comfortable, leading to significant energy savings.
  • Year-Round Comfort: Many ceiling fans come with a reversible motor, allowing them to operate in both clockwise and counterclockwise directions. In the summer, fans can be set to rotate counterclockwise to create a cooling breeze, while in the winter, they can be set to rotate clockwise to circulate warm air trapped near the ceiling.
  • Stylish Design: Ceiling fans are available in a wide range of styles, sizes, and finishes to complement any decor style, from traditional to modern and everything in between. Whether you prefer sleek and contemporary or rustic and farmhouse-inspired, there’s a ceiling fan to suit your taste.

Read too: Understanding and Dealing with Ants in the Ceiling Spaces: Navigating the Intrusion

Choosing the Right Ceiling Fan

When selecting a ceiling fan for your San Antonio home, consider the following factors:

  • Size: Choose a fan size appropriate for the room dimensions. For smaller rooms, opt for fans with blade spans of 42 inches or less, while larger rooms may require fans with blade spans of 52 inches or more.
  • Blade Material: Ceiling fan blades can be made from various materials, including wood, metal, and plastic. Consider the durability, style, and maintenance requirements of each material before making your selection.
  • Motor Quality: Invest in a ceiling fan with a high-quality motor for quiet and efficient operation. Look for fans with energy-efficient DC motors or powerful AC motors for optimal performance.
  • Lighting Options: Many ceiling fans come with integrated light kits or the option to add one. Decide whether you need additional lighting in the room and choose a fan with the appropriate lighting features.

Installation and Maintenance: Ceiling fans in San Antonio

Proper installation and maintenance are essential for ensuring the optimal performance and longevity of your ceiling fan. If you’re not comfortable installing the fan yourself, consider hiring a professional electrician to do the job safely and correctly. Additionally, regular cleaning and maintenance, such as dusting the blades and tightening screws, will help keep your ceiling fan running smoothly for years to come.

Conclusion

Ceiling fans are indispensable fixtures for homeowners in San Antonio, providing efficient cooling, energy savings, and year-round comfort. With a wide variety of styles and options to choose from, finding the perfect ceiling fan to suit your home’s decor and cooling needs is easier than ever. By considering factors such as size, blade material, motor quality, and lighting options, you can select the ideal ceiling fan to enhance your living space and beat the Texas heat in style.

Caddy Ceiling Grid Clip : Enhance Your Ceiling Installation with Versatile

When it comes to installing suspended ceilings, having the right tools and accessories can make all the difference. Caddy ceiling grid clip are essential components that provide secure attachment points for ceiling grid systems, ensuring a stable and professional installation. In this comprehensive guide, we’ll explore the features, benefits, and installation techniques of Caddy ceiling grid clips, helping you achieve outstanding results in your ceiling projects.

Caddy Ceiling Grid Clips

Understanding Caddy Ceiling Grid Clips

What are Caddy Ceiling Grid Clip?

Caddy ceiling grid clips are specially designed clips that are used to attach ceiling grid components to various substrates, including wood, concrete, metal, and drywall. These clips provide a secure and reliable connection, ensuring that the ceiling grid system remains stable and properly aligned. Caddy grid clips come in a variety of styles and configurations to accommodate different installation requirements and ceiling designs.

Benefits of Caddy Ceiling Grid Clips

Caddy ceiling grid clips offer several benefits, including:

  • Secure Attachment: These clips provide a strong and secure attachment point for ceiling grid components, preventing sagging, shifting, or separation over time.
  • Versatility: Caddy grid clips are compatible with a wide range of ceiling grid systems, including T-bar, exposed grid, and concealed grid designs. They can be used in various applications, such as commercial buildings, offices, schools, hospitals, and residential spaces.
  • Easy Installation: Caddy ceiling grid clips enable quick and easy installation, saving time and labor costs on the job site. They can be installed with standard tools and do not necessitate specialized equipment or skills.
  • Adjustability: Some Caddy grid clips feature adjustable arms or mounting brackets, allowing for precise positioning and alignment of ceiling grid components. This ensures a professional and uniform appearance across the entire ceiling system.

Read too: Understanding and Dealing with Ants in the Ceiling Spaces: Navigating the Intrusion

Types of Caddy Ceiling Grid Clips

1. T-Bar Clips

T-bar clips are designed to attach ceiling grid components to T-bar suspension systems commonly used in drop ceilings. These clips feature a spring-loaded mechanism that securely grips the T-bar, providing a reliable attachment point for ceiling tiles, light fixtures, and other accessories.

2. Screw-In Clips

Screw-in clips are versatile clips that users can attach directly to various substrates, including wood, metal, and concrete. These clips feature pre-drilled holes or threaded inserts for easy installation with screws or bolts, providing a secure mounting point for ceiling grid components.

3. Snap-On Clips

Snap-on clips snap onto the edges of ceiling grid components, providing a quick and secure connection without requiring screws or fasteners. These clips prove ideal for applications demanding rapid installation and disassembly, such as temporary structures or modular ceiling systems.

Installation Techniques

When installing Caddy ceiling grid clips, follow these techniques for best results:

  • Prepare the substrate: Ensure that the mounting surface is clean, dry, and free from any debris or contaminants before installing the clips.
  • Position the clips: Determine the spacing and layout of the clips according to the manufacturer’s recommendations and the design of the ceiling grid system.
  • Attach the clips: Use appropriate fasteners, such as screws, bolts, or adhesive, to securely attach the clips to the substrate. Ensure aligning and leveling the clips for a professional finish.
  • Install the ceiling grid: Once the clips are in place, install the ceiling grid components, such as main runners, cross tees, and perimeter trim, according to the manufacturer’s instructions.

Conclusion

Caddy ceiling grid clips are essential components for achieving a secure and professional installation in suspended ceiling projects. With their versatility, ease of installation, and reliable performance, these clips provide a convenient solution for attaching ceiling grid components to various substrates. By understanding the features, benefits, and installation techniques outlined in this guide, you can confidently incorporate Caddy ceiling grid clips into your ceiling projects and achieve outstanding results.

Acoustic Ceiling Tiles 2X2 – Improve Sound Quality and Aesthetics

Acoustic ceiling tiles 2X2 offer an effective solution for improving sound quality and enhancing the aesthetics of any room. These versatile tiles are designed to reduce noise levels, minimize echoes, and create a more comfortable and pleasant environment. In this comprehensive guide, we’ll explore the features, benefits, and installation considerations of acoustic ceiling tiles 2X2, helping you make informed decisions for your space.

Acoustic Ceiling Tiles 2X2

Understanding Acoustic Ceiling Tiles 2X2

What are Acoustic Ceiling Tiles 2X2?

Acoustic ceiling tiles 2X2, also known as acoustic panels or sound-absorbing tiles, are square-shaped tiles that are typically installed in a grid system suspended from the ceiling. These tiles consist of sound-absorbing materials such as fiberglass, mineral fiber, or foam, which actively absorb and dampen sound waves, thereby reducing noise levels and enhancing room acoustics.

Benefits of Acoustic Ceiling Tiles 2X2

Acoustic ceiling tiles 2X2 offer several benefits, including:

  • Noise Reduction: By absorbing and diffusing sound waves, these tiles help to reduce noise levels and minimize echoes, creating a quieter and more peaceful environment.
  • Improved Speech Intelligibility: The enhanced acoustics provided by acoustic ceiling tiles 2X2 can improve speech intelligibility, making it easier to communicate and understand conversations in the room.
  • Aesthetic Enhancement: In addition to their acoustic properties, these tiles also contribute to the overall aesthetics of the space. They are available in a variety of styles, colors, and textures, allowing you to create a customized look that complements your interior design.
  • Thermal Insulation: Some acoustic ceiling tile 2X2 also offer thermal insulation properties, helping to regulate temperature and reduce energy costs by improving heating and cooling efficiency.

Read too: Understanding and Dealing with Ants in the Ceiling Spaces: Navigating the Intrusion

Types of Acoustic Ceiling Tiles 2X2

1. Fiberglass Ceiling Tiles

Fiberglass acoustic ceiling tiles are constructed from lightweight fiberglass material, which offers excellent sound absorption properties. These tiles are durable, moisture-resistant, and fire-retardant, making them suitable for a wide range of applications, including offices, classrooms, and commercial spaces.

2. Mineral Fiber Ceiling Tiles

Mineral fiber acoustic ceiling tiles consist of compressed mineral wool fibers, offering superior sound absorption and thermal insulation properties. These tiles are available in a variety of textures and finishes, including smooth, textured, and decorative designs, allowing for versatile design options.

3. Foam Ceiling Tiles

Foam acoustic ceiling tiles consist of lightweight foam materials that offer excellent sound absorption properties. Users can easily install and customize these tiles by cutting them to size for specific applications. Foam ceiling tiles find frequent use in home theaters, recording studios, and other entertainment spaces where optimal sound quality is a priority.

Installation Considerations

When installing acoustic ceiling tile 2X2, consider the following factors:

  • Ceiling Condition: Ensure that the ceiling surface is clean, dry, and free from any debris or contaminants before installing the tiles.
  • Grid System: Use a sturdy grid system to support the weight of the tiles and provide a level surface for installation.
  • Lighting and Fixtures: Plan the layout of the tiles around lighting fixtures, air vents, and other ceiling-mounted features to ensure proper placement and alignment.
  • Acoustic Performance: Consider the desired level of sound absorption and noise reduction when selecting the type and thickness of acoustic ceiling tile 2X2 for your space.

Conclusion

Acoustic ceiling tile 2X2 offer a practical and effective solution for improving sound quality and enhancing the aesthetics of any room. Whether you’re looking to reduce noise levels in a busy office, improve acoustics in a classroom, or create a more immersive audio experience in a home theater, these versatile tiles provide a customizable and cost-effective solution. By understanding the features, benefits, and installation considerations outlined in this guide, you can select the perfect acoustic ceiling tile 2X2 to create a more comfortable and enjoyable environment in your space.

18 Inch Flush Mount Ceiling Light Fixtures: Illuminate Your Space with Style

Enhance the ambiance and functionality of your living space with the addition of 18 inch flush mount ceiling light fixtures. These versatile lighting fixtures offer a sleek and modern aesthetic while providing ample illumination to brighten any room. In this comprehensive guide, we’ll delve into the features, benefits, and design considerations of 18 inch flush mount ceiling lights, helping you elevate your interior lighting design to new heights.

18 Inch Flush Mount Ceiling Light

Understanding 18 Inch Flush Mount Ceiling Lights

What are 18 Inch Flush Mount Ceiling Lights?

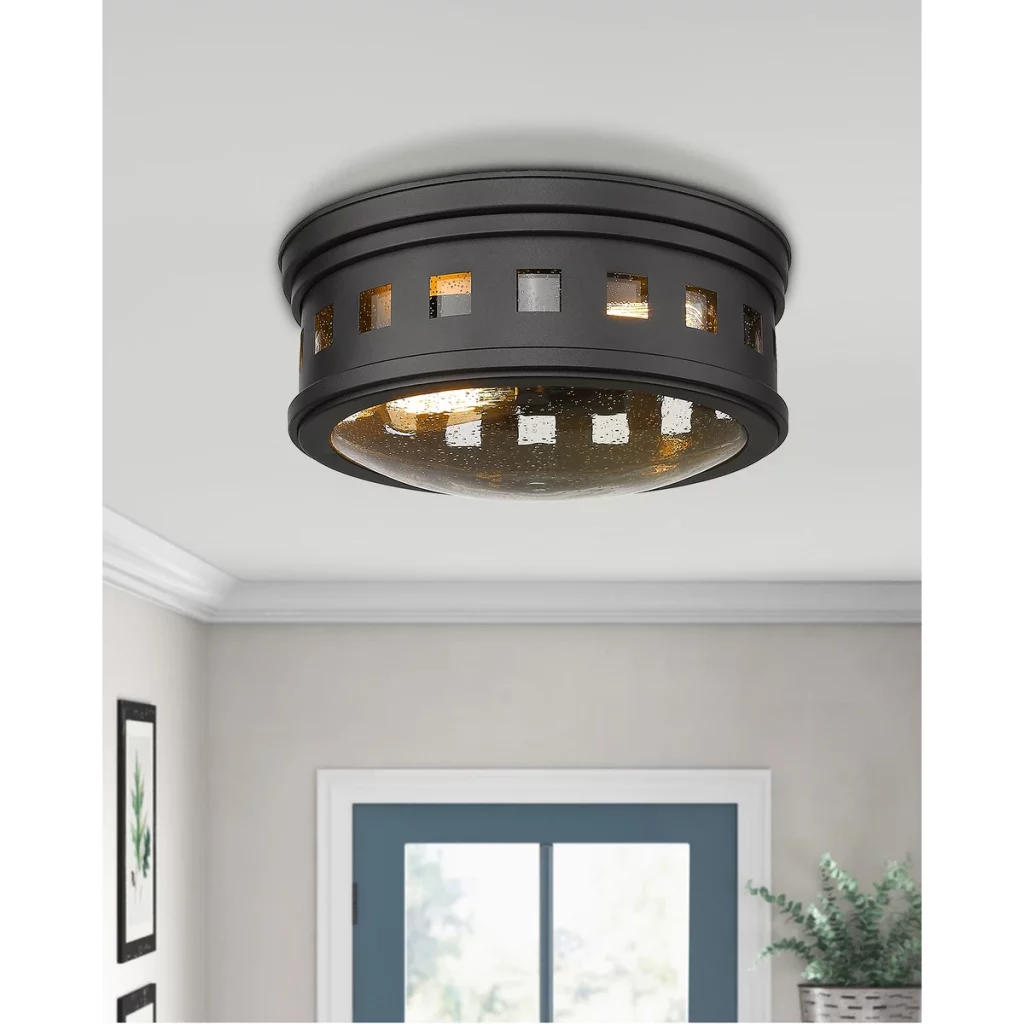
18 inch flush mount ceiling lights are compact lighting fixtures that are installed directly onto the ceiling surface, creating a seamless and streamlined appearance. These fixtures typically feature a low-profile design, with the light source positioned close to the ceiling to maximize headroom in the room below. They are available in a variety of styles, finishes, and light sources, allowing you to customize the look and functionality to suit your space.

Read too: Understanding and Dealing with Ants in the Ceiling Spaces: Navigating the Intrusion

Benefits of 18 Inch Flush Mount Ceiling Lights

18 inch flush mount ceiling lights offer several benefits, including:

  • Space-Saving Design: The flush mount design of these fixtures allows them to be installed in rooms with low ceilings or limited overhead space, maximizing headroom and creating a clean and uncluttered look.
  • Versatility: 18 inch flush mount ceiling lights are suitable for a wide range of applications, from living rooms and bedrooms to kitchens, hallways, and closets. They provide ambient lighting, task lighting, or accent lighting, depending on the style and placement.
  • Easy Installation: These fixtures are designed for simple and straightforward installation, making them suitable for DIY enthusiasts or professional electricians alike. With basic electrical wiring skills and tools, you can quickly and easily upgrade your lighting with 18 inch flush mount ceiling lights.
  • Energy Efficiency: Many 18-inch flush mount ceiling lights come equipped with energy-efficient LED bulbs, which help reduce energy consumption and lower utility bills. LED technology also provides long-lasting performance, minimizing the need for frequent bulb replacements.

Design Considerations of 18 Inch Flush Mount Ceiling Light

When selecting 18 inch flush mount ceiling lights for your space, consider the following design factors:

  • Style: Choose a fixture style that complements your existing decor and enhances the overall aesthetic of the room. Options include modern, traditional, contemporary, industrial, and transitional designs.
  • Finish: Select a finish that coordinates with other hardware and fixtures in the room, such as brushed nickel, oil-rubbed bronze, chrome, or matte black.
  • Light Source: Decide on the type of light source that best meets your needs, whether it’s LED, incandescent, fluorescent, or integrated smart lighting technology.
  • Size and Shape: Consider the size and shape of the fixture in relation to the room size and ceiling height. Opt for an 18 inch diameter for medium-sized rooms or clusters of multiple fixtures for larger spaces.

Installation Tips

When installing 18 inch flush mount ceiling lights, follow these tips for a successful installation:

  • Turn off power to the existing light fixture at the circuit breaker before beginning installation.
  • Follow the manufacturer’s instructions for mounting the fixture to the ceiling and connecting the electrical wiring.
  • Use appropriate tools and materials, such as a screwdriver, wire stripper, and wire nuts, to ensure a secure and safe installation.
  • Test the fixture to ensure it is working properly before completing the installation and turning the power back on.

Conclusion

18 inch flush mount ceiling lights offer a stylish, space-saving, and practical lighting solution for any room in your home. With their versatile design, energy-efficient technology, and easy installation, these fixtures provide both form and function to enhance your interior lighting design. By considering the features, benefits, and design considerations outlined in this guide, you can select the perfect 18 inch flush mount ceiling lights to illuminate your space with style and sophistication.

Water Resistant Ceiling Tiles: Upgrade Your Space with Durable and Stylish

When it comes to enhancing the aesthetics and functionality of your space, investing in water resistant ceiling tiles is a smart choice. These versatile tiles offer durability, style, and practicality, making them ideal for a wide range of applications. In this comprehensive guide, we’ll delve into the features, benefits, and installation considerations of water resistant ceiling tiles, helping you make informed decisions for your ceiling renovation projects.

Water Resistant Ceiling Tiles

Understanding Water Resistant Ceiling Tiles

What are Water Resistant Ceiling Tiles?

Water resistant ceiling tiles are specially designed tiles that are engineered to withstand moisture and humidity. These tiles are typically made from materials such as PVC, fiberglass, or mineral fiber, which are inherently resistant to water damage. They are commonly used in areas prone to moisture, such as bathrooms, kitchens, basements, and commercial spaces where humidity levels may be high.

Benefits of Water Resistant Ceiling Tiles

Water resistant ceiling tiles offer several benefits, including:

  • Durability: These tiles are built to last and can withstand exposure to moisture without warping, sagging, or discoloration.
  • Mold and Mildew Resistance: The moisture-resistant properties of water resistant ceiling tile make them highly resistant to mold and mildew growth, helping to maintain a healthy indoor environment.
  • Easy Maintenance: Unlike traditional ceiling materials such as drywall or wood, water resistant ceiling tiles are easy to clean and maintain. They can be wiped down with a damp cloth or mild detergent to remove dirt, dust, and stains.
  • Aesthetic Appeal: Water resistant ceiling tile are available in a variety of styles, colors, and textures, allowing you to achieve the desired look for your space. Whether you prefer a sleek and modern aesthetic or a more traditional look, there are water resistant ceiling tile to suit your taste.

Types of Water Resistant Ceiling Tiles

1. PVC Ceiling Tiles

PVC (polyvinyl chloride) ceiling tiles are lightweight, durable, and easy to install. They are available in a wide range of designs, including smooth, textured, and embossed patterns. PVC ceiling tiles are resistant to moisture, mold, and mildew, making them suitable for humid environments such as bathrooms and kitchens.

2. Fiberglass Ceiling Tiles

Fiberglass ceiling tiles are made from reinforced fiberglass material, making them exceptionally durable and resistant to moisture. These tiles are ideal for use in commercial spaces, such as restaurants, hospitals, and swimming pools, where high humidity levels are common.

Read too: Understanding and Dealing with Ants in the Ceiling Spaces: Navigating the Intrusion

3. Mineral Fiber Ceiling Tiles

Mineral fiber ceiling tiles are composed of recycled materials, such as mineral wool and cellulose fibers, bound together with starch or resin. These tiles are highly absorbent and resistant to moisture, making them an excellent choice for areas prone to water exposure.

Installation Considerations

When installing water resistant ceiling tile, consider the following factors:

Surface Preparation: Ensure that the ceiling surface is clean, dry, and free from any debris or contaminants before installing the tiles.

  • Adhesive Selection: Use a suitable adhesive recommended by the manufacturer to ensure proper adhesion of the tiles to the ceiling surface.
  • Cutting and Trimming: Measure and cut the tiles to fit around obstacles such as light fixtures, vents, and ceiling fans using a sharp utility knife or scissors.
  • Sealing Joints: Seal the joints between tiles with a waterproof caulk or sealant to prevent water infiltration and ensure a seamless finish.

Conclusion

Water resistant ceiling tile offer a durable, stylish, and practical solution for enhancing the aesthetics and functionality of your space. Whether you’re renovating a residential bathroom, a commercial kitchen, or a hospitality venue, these versatile tiles provide long-lasting performance and peace of mind. By understanding their features, benefits, and installation considerations, you can make informed decisions for your ceiling renovation projects and enjoy a beautiful and resilient ceiling for years to come.

Rain Ceiling Shower Head – Transform Your Bathroom Oasis!

Transform your daily shower routine into a luxurious spa-like experience with the addition of a rain ceiling shower head. Offering a cascade of water reminiscent of a gentle rainfall, these shower fixtures provide an unparalleled sensation of relaxation and indulgence. In this comprehensive guide, we’ll explore the features, benefits, and installation considerations of rain ceiling shower heads, helping you create the ultimate bathroom oasis in your home.

Rain Ceiling Shower Head

Understanding Rain Ceiling Shower Heads

What is a Rain Ceiling Shower Head?

A rain ceiling shower head is a large, flat shower fixture that is typically installed flush with the ceiling of the shower enclosure. These shower heads feature numerous small nozzles that disperse water over a wide area, simulating the sensation of standing beneath a gentle rain shower. The result is a luxurious and immersive shower experience that provides complete coverage and relaxation.

Read too: Understanding and Dealing with Ants in the Ceiling Spaces: Navigating the Intrusion

How Do Rain Ceiling Shower Heads Work?

Rain ceiling shower heads work by channeling water through a network of nozzles positioned across the surface of the shower head. The water is distributed evenly and gently, creating a soothing cascade that envelops the bather in warmth and comfort. Many rain ceiling shower heads also feature adjustable settings, allowing users to customize the intensity and pattern of the water flow to suit their preferences.

Benefits of Rain Ceiling Shower Heads

1. Luxurious Shower Experience

The primary benefit of a rain ceiling shower head is the luxurious shower experience it provides. The gentle rainfall-like sensation of the water falling from above creates a feeling of relaxation and indulgence, allowing users to unwind and destress after a long day.

2. Complete Coverage

Unlike traditional shower heads that spray water from a single point, rain ceiling shower heads offer complete coverage of the body. The wide dispersal of water ensures that every inch of the bather’s skin is thoroughly cleansed and refreshed, providing a thorough and invigorating shower experience.

3. Aesthetic Appeal

In addition to their functional benefits, rain ceiling shower heads also add a touch of elegance and sophistication to any bathroom. Their sleek and modern design enhances the overall aesthetic of the space, creating a focal point that enhances the beauty and ambiance of the room.

Installation Considerations

When installing a rain ceiling shower head, there are several factors to consider:

  • Ceiling Height: Ensure that the ceiling height in your shower enclosure is sufficient to accommodate the shower head without impeding movement or causing discomfort.
  • Water Pressure: Check the water pressure in your home to ensure that it is adequate to support the flow of water from the shower head.
  • Plumbing Compatibility: Confirm that your existing plumbing is compatible with the installation of a rain ceiling shower head, or consult with a professional plumber for assistance.

Conclusion

Rain ceiling shower heads offer a luxurious and immersive shower experience that transforms your bathroom into a tranquil oasis. With their gentle rainfall-like sensation, complete coverage, and aesthetic appeal, these shower fixtures provide the ultimate combination of relaxation and indulgence. Whether you’re renovating your bathroom or simply looking to upgrade your shower, consider the benefits of a rain ceilings shower head for an unparalleled bathing experience.

One Way Ceilings Cassette Systems for Efficient Air Conditioning: Explore the Benefits

When it comes to efficient and discreet air conditioning solutions, one way ceiling cassette systems stand out as a popular choice for both residential and commercial spaces. These innovative HVAC systems offer several benefits, including effective cooling or heating, space-saving design, and minimal visual impact. In this comprehensive guide, we’ll delve into the features, advantages, and applications of one way ceilings cassette systems, helping you understand why they’re an excellent option for your cooling and heating needs.

One Way Ceiling Cassette

Understanding One Way Ceiling Cassette Systems

What are One Way Ceiling Cassette Systems?

One way ceiling cassette systems, also known as single-directional ceiling cassettes, are ceiling-mounted air conditioning units designed to provide efficient cooling or heating to a specific area or room. These systems feature a sleek and compact design, with a single air outlet located on the bottom of the unit. The one-way airflow pattern allows for uniform distribution of conditioned air throughout the space, ensuring optimal comfort for occupants.

How Do One Way Ceiling Cassette Systems Work?

One way ceiling cassette systems work by drawing in air from the room, passing it through the unit’s internal components for conditioning, and then redistributing the conditioned air back into the space through the bottom-mounted air outlet. The system’s fan and compressor work together to regulate temperature and humidity levels, providing consistent and reliable cooling or heating performance.

Advantages of One Way Ceiling Cassette Systems

1. Efficient Cooling or Heating

One way ceiling cassette systems offer efficient cooling or heating performance, thanks to their advanced technology and design. The single-directional airflow pattern ensures that conditioned air is evenly distributed throughout the room, eliminating hot or cold spots and maintaining consistent temperature levels.

Read too: Understanding and Dealing with Ants in the Ceiling Spaces: Navigating the Intrusion

2. Space-Saving Design

One of the key advantages of one way ceiling cassette systems is their space-saving design. Unlike traditional air conditioning units that require floor or wall space, ceiling cassette systems are mounted flush with the ceiling, freeing up valuable floor space and maintaining a clean and uncluttered aesthetic.

3. Minimal Visual Impact

Another benefit of one way ceiling cassette systems is their minimal visual impact on the surrounding space. The units are discreetly mounted in the ceiling, with only the bottom air outlet visible to occupants. This streamlined design blends seamlessly with any interior decor, allowing the focus to remain on the room’s aesthetics rather than the HVAC system.

Applications of One Way Ceiling Cassette Systems

One way ceiling cassette systems are suitable for a variety of applications, including:

  • Residential living spaces
  • Offices and commercial buildings
  • Retail stores and restaurants
  • Hotels and hospitality venues
  • Educational institutions and healthcare facilities

Conclusion

One way ceilings cassette systems offer efficient, space-saving, and aesthetically pleasing air conditioning solutions for residential and commercial spaces. With their innovative design and advanced technology, these systems provide consistent cooling or heating performance while minimizing visual impact. Whether you’re looking to upgrade your home’s HVAC system or enhance comfort in a commercial setting, consider the benefits of one way ceiling cassette systems for your cooling and heating needs.

Enhance Your Outdoor Space with 60 Outdoor Ceiling Fans – Stay Cool and Stylish!

Adding a 60 outdoor ceiling fan to your outdoor living space can transform it into a comfortable and stylish retreat. Whether you’re lounging on the patio, dining al fresco, or entertaining guests, a ceiling fan can provide much-needed airflow and relief from the heat. In this guide, we’ll explore the benefits of 60 outdoor ceiling fans, highlight key features to consider, and recommend some top-rated options to help you make the most of your outdoor oasis.

60 Outdoor Ceiling Fans

Why Choose 60 Outdoor Ceiling Fans?

1. Enhanced Air Circulation

Outdoor spaces can become stiflingly hot during the summer months, making it uncomfortable to spend time outdoors. A 60 outdoor ceiling fan helps circulate air, creating a gentle breeze that cools the surrounding area and provides relief from the heat. This improved airflow can make your outdoor space more enjoyable and inviting, allowing you to relax and unwind in comfort.

2. Stylish Addition to Outdoor Decor

In addition to their practical benefits, 60 outdoor ceiling fans can also enhance the aesthetic appeal of your outdoor living space. Available in a variety of styles, finishes, and blade designs, these fans can complement any outdoor decor scheme, from traditional to modern. Whether you prefer a sleek and contemporary look or a rustic and farmhouse-inspired vibe, there’s a 60 outdoor ceiling fan to suit your taste and preferences.

Read too: Understanding and Dealing with Ants in the Ceiling Spaces: Navigating the Intrusion

3. Year-Round Comfort

While outdoor ceiling fans are often associated with cooling relief during the warmer months, they can also be beneficial year-round. In colder climates, ceiling fans can help distribute heat more evenly throughout outdoor spaces, allowing you to extend the usability of your patio or deck into the cooler seasons. Some outdoor ceiling fans also come equipped with integrated lighting, providing both functionality and ambiance after the sun goes down.

Key Features to Consider

When selecting a 60 outdoor ceiling fan for your outdoor space, consider the following features:

  • Size: Ensure that the fan’s blades are proportionate to the size of your outdoor area to maximize airflow and coverage.
  • Material: Choose a fan constructed from durable, weather-resistant materials such as stainless steel or ABS plastic to withstand outdoor conditions.
  • Motor Power: Opt for a fan with a powerful motor that can effectively circulate air while operating quietly and efficiently.
  • Blade Design: Select blades that are designed to optimize airflow and minimize noise, such as aerodynamically shaped blades or those with a slight pitch.

Top-Rated 60 Outdoor Ceiling Fans

Here are some top-rated 60 outdoor ceiling fans to consider for your outdoor living space:

  • Featuring a weather-resistant design and powerful motor, this fan is perfect for large outdoor areas.
  • With stylish blades and integrated LED lighting, this fan adds both beauty and functionality to any outdoor space.
  • Designed for maximum airflow and efficiency, this fan is ideal for hot summer days and nights on the patio.

Conclusion

Adding a 60 outdoor ceiling fan to your outdoor living space can enhance both comfort and style, allowing you to make the most of your patio, deck, or porch year-round. By choosing a fan with the right features and design to suit your outdoor decor and climate, you can create a welcoming and enjoyable environment for relaxing, entertaining, and spending time with family and friends.

The Ultimate Guide to Wood Blade Ceiling Fans – Enhance Your Home’s Style and Comfort!

Wood blade ceiling fans are not only functional but also add a touch of elegance and warmth to any room. Whether you’re looking to improve air circulation, enhance your home’s aesthetic appeal, or create a cozy atmosphere, wood blade ceiling fans are an excellent choice. In this comprehensive guide, we’ll explore everything you need to know about wood blade ceiling fans, from their design and features to installation tips and maintenance.

Wood Blade Ceiling Fans

Understanding Wood Blade Ceiling Fans

Wood blade ceiling fans are distinguished by their blades made of wood, which can vary in color, finish, and style. These fans come in a variety of designs, including traditional, rustic, and contemporary, allowing you to find the perfect match for your home’s decor. Wood blade ceiling fans offer both functionality and visual appeal, making them a popular choice for homeowners seeking to enhance their living spaces.

Benefits of Wood Blade Ceiling Fans

1. Aesthetic Appeal

One of the primary benefits of wood blade ceiling fans is their aesthetic appeal. The natural beauty of wood adds warmth and character to any room, creating a welcoming atmosphere. Whether you prefer a sleek, modern look or a rustic, farmhouse feel, there’s a wood blade ceiling fan to suit your style.

Read too: Understanding and Dealing with Ants in the Ceiling Spaces: Navigating the Intrusion

2. Versatility

Wood blade ceiling fan are versatile and can complement a wide range of interior design styles. Whether you’re decorating a traditional living room, a coastal-inspired bedroom, or a contemporary kitchen, a wood blade ceiling fan can tie the room together and enhance its overall aesthetic.

3. Energy Efficiency

Many wood blade ceiling fan are equipped with energy-efficient motors and blades, helping to reduce energy consumption and lower utility bills. By circulating air effectively, these fans can help maintain a comfortable temperature in your home year-round, allowing you to rely less on heating and cooling systems.

Features to Consider

When choosing a wood blade ceiling fan for your home, consider the following features:

  • Blade Material: Opt for high-quality wood blades that are durable and resistant to warping or bending.
  • Motor Type: Look for fans with efficient, reliable motors that provide quiet operation and optimal performance.
  • Size: Select a fan size appropriate for the room’s dimensions to ensure adequate airflow and proper circulation.
  • Finish: Choose a finish that complements your home’s decor, whether it’s a natural wood grain, a stained finish, or a painted surface.

Installation and Maintenance Tips

Installing a wood blade ceiling fan is relatively straightforward, but it’s essential to follow the manufacturer’s instructions carefully. Here are some tips to ensure a successful installation:

  • Choose a location where the fan will provide optimal airflow and circulation.
  • Use a sturdy ceiling mount and ensure proper support for the fan’s weight.
  • Balance the fan blades to minimize wobbling and noise during operation.
  • Regularly clean and dust the fan blades to maintain optimal performance and appearance.

Conclusion

Wood blade ceiling fan offer a perfect blend of style, functionality, and energy efficiency for any home. Whether you’re looking to improve air circulation, enhance your home’s aesthetic appeal, or create a cozy atmosphere, wood blade ceiling fan are an excellent choice. By considering their features, benefits, and installation tips outlined in this guide, you can select the perfect wood blade ceiling fan to elevate your living space.

Exploring the Benefits of Ceiling Mounted Basketball Hoop for Home Courts: Elevate Your Game

In recent years, the trend of installing home basketball courts has gained popularity among sports enthusiasts and families alike. With the advancement of technology and design, one innovative solution that stands out is the ceiling mounted basketball hoop. In this comprehensive guide, we’ll delve into the benefits, installation process, and considerations of ceiling mounted basketball hoops, helping you elevate your game to new heights.

Ceiling Mounted Basketball Hoop

Understanding Ceiling Mounted Basketball Hoops

What Are Ceiling Mounted Basketball Hoops?

Ceiling mounted basketball hoops are a space-saving alternative to traditional, ground-mounted hoops. As the name suggests, these hoops securely mount to the ceiling of a room or indoor space, allowing gameplay without requiring a dedicated ground-level basketball court.

Components of Ceiling Mounted Basketball Hoops

A typical ceiling mounted basketball hoop consists of several key components, including the backboard, rim, support structure, and mounting hardware. These hoops are designed to withstand rigorous play while providing a realistic basketball experience.

Read too: Discovering the Charm of Nautical Outdoor Ceiling Fans for Your Coastal Retreat: Sail into Style

Benefits of Ceiling Mounted Basketball Hoops

Space Optimization

One of the primary advantages of ceiling mounted basketball hoops is their ability to maximize space utilization. By eliminating the need for a ground-level court, homeowners can utilize existing indoor spaces such as garages, basements, or recreational rooms for basketball gameplay.

Safety and Durability

Ceiling mounted basketball hoops are engineered for durability and safety. With sturdy construction and high-quality materials, these hoops offer reliable performance and can withstand aggressive play without the risk of tipping over or causing damage to the surrounding area.

Installation Process

Professional Installation

While some DIY enthusiasts may attempt to install ceiling mounted basketball hoops themselves, it’s recommended to hire a professional for installation. A qualified installer will ensure proper mounting and alignment, minimizing the risk of accidents and ensuring optimal performance.

Structural Considerations

Before installing a ceiling mounted basketball hoop, it’s essential to assess the structural integrity of the mounting surface. The ceiling should be able to support the weight of the hoop, backboard, and players during gameplay. Consultation with a structural engineer may be necessary for certain installations.

Conclusion

Ceiling mounted basketball hoops offer a practical and space-saving solution for home basketball courts. With their innovative design, durability, and safety features, these hoops provide an excellent option for basketball enthusiasts looking to enjoy the game without the need for a dedicated outdoor court. Consider installing a ceiling mounted basketball hoop to elevate your playing experience and make the most of your available space.

Innovative Ideas for Shower With Slanted Ceiling: Making the Most of Your Space

Are you struggling to design a shower in a bathroom with a slanted ceiling? Don’t let the challenge of limited space dampen your creativity. In this comprehensive guide, we’ll explore innovative ideas and practical tips for creating a stunning shower area under a slanted ceiling that maximizes both functionality and aesthetics.

Shower With Slanted Ceiling

Understanding Showers With Slanted Ceiling

What Are Showers With Slanted Ceilings?

Showers with slanted ceilings, also known as attic showers or sloped ceiling showers, are common in bathrooms located in attic spaces or rooms with angled ceilings. While they present unique design challenges, they also offer an opportunity to create a cozy and intimate showering experience.

Considerations for Shower With Slanted Ceilings

When designing a shower with a slanted ceiling, several factors need to be taken into account, including the angle and height of the ceiling, water drainage, ventilation, and waterproofing. By addressing these considerations early in the design process, you can ensure a successful and functional shower space.

Design Ideas for Shower With Slanted Ceiling

Glass Enclosures

Opt for a glass enclosure for your shower to maintain an open and spacious feel, despite the constraints of a slanted ceiling. Frameless glass doors and walls can create a seamless transition between the shower area and the rest of the bathroom, allowing natural light to penetrate and visually expand the space.

Built-In Storage Solutions

Maximize the use of vertical space by incorporating built-in storage solutions into the design of your shower. Recessed shelves or niches can be installed directly into the slanted walls, providing convenient storage for toiletries, bath essentials, and decorative accents without encroaching on the showering area.

Read too: Discovering the Charm of Nautical Outdoor Ceiling Fans for Your Coastal Retreat: Sail into Style

Waterproofing and Drainage Considerations

Waterproof Membrane Installation

Ensure proper waterproofing of the shower area to prevent water damage and mold growth in the sloped ceiling. Install a waterproof membrane on the walls and ceiling of the shower enclosure, extending it beyond the shower area to create a seamless barrier against moisture infiltration.

Sloped Shower Pan

Choose a sloped shower pan that matches the angle of the ceiling to facilitate proper drainage and minimize standing water. This ensures that water flows efficiently toward the drain, reducing the risk of leaks or water pooling on the shower floor.

Conclusion

Designing a shower with a slanted ceiling may pose unique challenges, but with careful planning and creative solutions, you can transform this space into a functional and stylish oasis. By considering factors such as layout, waterproofing, and storage, you can optimize your shower area to make the most of your bathroom’s architectural features.

Everything You Need to Know About Standard Ceiling Tile Size: Unveiling the Essentials

When it comes to creating a functional and aesthetically pleasing interior space, every detail matters, including the size of your ceiling tiles. In this comprehensive guide, we’ll explore the ins and outs of Standard Ceiling Tile Size, providing you with valuable information to help you make informed decisions for your next project.

Standard Ceiling Tile Size

Understanding Standard Ceiling Tile Size

Standard Ceiling Tile Size refers to the typical dimensions of ceiling tiles commonly used in residential and commercial applications. These tiles are designed to fit into standard grid systems, making installation straightforward and efficient. While variations in size may exist depending on the manufacturer and specific requirements of a project, certain dimensions are considered standard across the industry.

The Importance of Standard Ceiling Tile Size

Choosing the right size ceiling tiles is essential for achieving a balanced and cohesive look in your space. Tiles that are too large or too small can disrupt the visual harmony of a room and may not fit properly within the grid system, leading to installation challenges. By adhering to Standard Ceiling Tile Size guidelines, you can ensure compatibility with existing grid systems and achieve professional-looking results.

Read too: Discovering the Charm of Nautical Outdoor Ceiling Fans for Your Coastal Retreat: Sail into Style

Common Standard Ceiling Tile Sizes

1. 2′ x 2′ Tiles

2′ x 2′ tiles are among the most common standard sizes used in both residential and commercial settings. These tiles are versatile and well-suited for a wide range of applications, including offices, classrooms, and retail spaces. Their square shape allows for easy installation and replacement, making them a popular choice for ceiling renovations.

2. 2′ x 4′ Tiles

Another standard size commonly found in commercial buildings and larger spaces is 2′ x 4′ tiles. These rectangular tiles provide ample coverage and are often used in areas with high ceilings or expansive layouts. Their elongated shape can help visually elongate a room and create a sense of continuity across the ceiling surface.

3. 1′ x 1′ Tiles

For smaller areas or decorative accents, 1′ x 1′ tiles offer a compact and versatile solution. These smaller tiles are often used in residential kitchens, bathrooms, or utility rooms, where precise sizing is necessary to accommodate fixtures and appliances. Additionally, 1′ x 1′ tiles can be combined with larger tiles to create intricate patterns or custom designs.

Factors to Consider When Choosing Ceiling Tiles

1. Room Size and Layout

Consider the size and layout of the room when selecting ceiling tiles. Larger rooms may benefit from larger tiles to minimize the number of seams and create a cohesive appearance, while smaller rooms may require smaller tiles for proportional coverage.

2. Acoustic Properties

Certain ceiling tiles are designed to improve acoustics by reducing noise and sound transmission within a space. If acoustic performance is a priority, consider selecting tiles with built-in sound-absorbing properties or explore additional acoustic treatments for optimal results.

3. Aesthetic Preferences

Beyond size, consider the aesthetic qualities of the ceiling tiles, including texture, color, and pattern. Choose tiles that complement the overall design scheme of the room and contribute to the desired atmosphere, whether it’s modern and minimalist or classic and ornate.

Conclusion

Standard Ceiling Tile Size plays a crucial role in the design and functionality of interior spaces. By understanding the dimensions, applications, and considerations associated with ceiling tiles, you can make informed decisions that enhance the beauty and functionality of your home or commercial environment. Whether you’re renovating an existing space or embarking on a new construction project, selecting the right ceiling tiles is key to achieving your design goals.

Exploring the Versatility of Round Flush Mount Ceiling Light: Illuminate Your Space

In the realm of interior design, lighting plays a crucial role in setting the mood and ambiance of a space. Among the myriad options available, Round Flush Mount Ceiling Light stand out for their sleek design and versatility. In this article, we’ll delve into the world of Round Flush Mount Ceiling Lights, exploring their features, benefits, and how they can elevate the aesthetics of any room.

Round Flush Mount Ceiling Light

Understanding Round Flush Mount Ceiling Lights

Round Flush Mount Ceiling Lights mount directly against the ceiling surface without leaving any gaps or spaces between the fixture and the ceiling. This seamless integration creates a clean and contemporary look, making them ideal for spaces with low ceilings or where a minimalist aesthetic is desired. These lights typically feature a round shape, offering a soft and diffused illumination that evenly fills the room.

The Benefits

Space-Saving Design

One of the primary advantages of Round Flush Mount Ceiling Lights is their space-saving design. Unlike pendant or chandelier lights that hang from the ceiling, flush mount fixtures hug the ceiling closely, making them perfect for rooms with limited overhead clearance. This makes them particularly suitable for areas such as hallways, bathrooms, or bedrooms where space optimization is essential.

Versatility in Style

Round Flush Mount Ceiling Lights come in a wide range of styles, from sleek and modern designs to more traditional and ornate fixtures. This versatility allows them to complement any interior decor scheme, whether it’s contemporary, rustic, or transitional. Additionally, these lights are available in various finishes, including brushed nickel, oil-rubbed bronze, and matte black, ensuring there’s an option to suit every taste and preference.

Soft, Ambient Illumination

Another key benefit of Round Flush Mount Ceiling Lights is their ability to provide soft and ambient illumination. Unlike harsh overhead lighting or glaring spotlights, flush mount fixtures emit a gentle glow that fills the room with warmth and coziness. This makes them ideal for creating inviting atmospheres in living rooms, dining areas, or bedrooms, where comfort and relaxation are paramount.

Read too: Discovering the Charm of Nautical Outdoor Ceiling Fans for Your Coastal Retreat: Sail into Style

Easy Installation and Maintenance

Installing Round Flush Mount Ceiling Lights is a straightforward process that can typically be done without the need for professional assistance. Most fixtures come with mounting hardware and instructions, allowing homeowners to easily replace existing fixtures or add new lighting to their space. Additionally, maintenance is minimal, with occasional dusting or cleaning to keep the fixtures looking their best.

Enhancing Your Space with Round Flush Mount Ceiling Lights

Whether you’re updating your home’s lighting or embarking on a new design project, Round Flush Mount Ceiling Light offer a stylish and practical solution for illuminating any room. Their space-saving design, versatility in style, and soft, ambient illumination make them a popular choice among homeowners and designers alike. Consider incorporating these sleek fixtures into your space and experience the transformative power of lighting done right.

Understanding the Benefits of Radiant Heat Ceiling Panels for Your Home: Unlocking the Comfort

In today’s quest for energy-efficient and comfortable heating solutions, Radiant Heat Ceiling Panels have emerged as a game-changer. These innovative panels offer a host of benefits that go beyond traditional heating methods. From enhanced comfort to reduced energy consumption, let’s delve into the world of Radiant Heat Ceiling Panels and uncover why they are becoming increasingly popular among homeowners.

Radiant Heat Ceiling Panels

Understanding Radiant Heat Ceiling Panels

Radiant Heat Ceiling Panels utilize the principles of radiant heating to efficiently warm spaces. Unlike conventional forced-air systems that rely on blowing hot air through vents, radiant panels emit infrared radiation, which directly heats objects and occupants in the room. This method of heating creates a more consistent and comfortable environment, eliminating the uneven distribution of heat often associated with traditional systems.

The Benefits of Radiant Heat Ceiling Panels

Enhanced Comfort

One of the primary advantages of Radiant Heat Ceiling Panels is the unparalleled comfort they provide. By warming objects and surfaces in the room, rather than just the air, these panels eliminate cold spots and drafts, ensuring a cozy atmosphere throughout the space. Whether you’re relaxing in the living room or preparing a meal in the kitchen, you’ll experience consistent warmth from floor to ceiling.

Energy Efficiency

Radiant Heat Ceiling Panels are renowned for their energy efficiency. Unlike forced-air systems that can lose heat through ductwork or encounter inefficiencies during distribution, radiant panels operate with minimal heat loss. Additionally, because they heat objects directly, rather than the entire volume of air in a room, they require less energy to maintain comfortable temperatures, leading to lower utility bills and reduced environmental impact.

Space-Saving Design

Another benefit of Radiant Heat Ceiling Panel is their space-saving design. Unlike bulky radiators or ductwork associated with traditional heating systems, these panels are discreetly installed in the ceiling, allowing for more flexibility in room layout and design. This makes them particularly suitable for modern homes where space optimization is crucial.

Silent Operation

Unlike forced-air systems that can produce noisy operation, Radiant Heat Ceiling Panel operate silently. Without the need for fans or blowers to circulate air, these panels create a peaceful environment, free from the distractions of typical heating systems. Whether you’re working, studying, or simply enjoying a quiet evening at home, you’ll appreciate the serene ambiance provided by radiant heating.

Read too: Discovering the Charm of Nautical Outdoor Ceiling Fans for Your Coastal Retreat: Sail into Style

Installation and Maintenance

Installing Radiant Heat Ceiling Panel is a straightforward process, especially when integrated into new construction or major renovations. However, retrofitting existing spaces with these panels is also possible with careful planning and professional installation. Once in place, radiant panels require minimal maintenance, with no moving parts or filters to replace. This translates to long-term cost savings and peace of mind for homeowners.

Conclusion

Radiant Heat Ceiling Panel offer a revolutionary approach to heating homes, combining superior comfort, energy efficiency, and space-saving design. Whether you’re building a new home or upgrading your existing heating system, consider the many benefits that these panels can provide. With their silent operation, even heat distribution, and minimal maintenance requirements, Radiant Heat Ceiling Panel are a smart choice for modern living.

Transform Your Space with Innovative Melt Away Ceiling Tiles: A Complete Guide

Are you tired of staring at dull and outdated ceilings? Say goodbye to conventional ceiling options and welcome the future of interior design with melt away ceiling tiles! In this comprehensive guide, we’ll explore everything you need to know about these revolutionary tiles, from their benefits to installation techniques and design inspirations.

Melt Away Ceiling Tiles

Understanding Melt Away Ceiling Tiles

What Are Melt Away Ceiling Tiles?

Melt away ceiling tiles, also known as disappearing or retractable ceiling tiles, are innovative solutions designed to seamlessly blend into the ceiling when not in use. These tiles feature a retractable mechanism that allows them to disappear into the ceiling cavity with the push of a button or the pull of a cord, revealing the underlying structure or allowing access to utilities such as lighting fixtures or HVAC systems.

Read too: Discovering the Charm of Nautical Outdoor Ceiling Fans for Your Coastal Retreat: Sail into Style

How Do Melt Away Ceiling Tiles Work?

Melt away ceiling tiles operate on a simple yet ingenious mechanism. When activated, either manually or through a motorized system, the tiles retract into the ceiling, leaving behind a smooth, uninterrupted surface. This functionality makes them ideal for spaces where aesthetic appeal and functionality are equally important, such as residential living rooms, commercial offices, or hospitality settings.

Benefits of Melt Away Ceiling Tiles

Enhanced Aesthetics

One of the primary benefits of melt away ceiling tiles is their ability to enhance the aesthetics of any space. By seamlessly blending into the ceiling when not in use, these tiles create a clean and modern look that complements any interior design style. Additionally, their customizable design options allow for endless creative possibilities, from minimalist white tiles to bold and vibrant patterns.

Space Optimization

Melt away ceiling tiles are also ideal for optimizing space utilization in both residential and commercial settings. By retracting into the ceiling, they free up valuable overhead space that can be used for other purposes, such as installing overhead lighting, incorporating decorative elements, or accessing utility systems without the need for bulky access panels.

Installation and Maintenance

Installation Process

The installation process for melt away ceiling tiles varies depending on the specific design and functionality of the tiles. In most cases, professional installation is recommended to ensure proper alignment, functionality, and safety. However, some DIY-friendly options are available for homeowners with basic carpentry skills and tools.

Maintenance Tips

Maintaining melt away ceiling tile is relatively straightforward and requires minimal effort. Regular dusting or vacuuming can help keep the tiles clean and free of debris, while occasional lubrication of the retractable mechanism can ensure smooth operation over time. Additionally, it’s essential to follow any manufacturer guidelines for maintenance and inspection to prolong the lifespan of the tiles.

Design Ideas and Inspiration

Ambient Lighting Effects

Enhance the ambiance of any room with melt away ceiling tile equipped with built-in LED lighting. Create custom lighting effects, such as soft ambient glow or dynamic color-changing patterns, to set the mood for different occasions and activities.

Hidden Storage Solutions

Incorporate melt away ceiling tile in areas where additional storage space is needed, such as kitchens, living rooms, or home offices. By concealing storage compartments or shelving within the ceiling cavity, you can maximize space while maintaining a clutter-free environment.

Conclusion

Melt away ceiling tile offer a versatile and innovative solution for modern interior design challenges. Whether you’re looking to enhance aesthetics, optimize space utilization, or incorporate functional features seamlessly into your space, these tiles provide endless possibilities for creativity and customization. Explore the options available and transform your space with the magic of melt away ceiling tile.

Enhance Your Space with Innovative Drop Ceiling Curtain Track Systems

Are you looking to add privacy, enhance acoustics, or divide spaces in your home or office? Explore the possibilities of drop ceiling curtain track systems! In this comprehensive guide, we’ll delve into the world of drop ceiling curtain tracks, from their functionality and versatility to installation tips and design ideas.

Drop Ceiling Curtain Track

Exploring Drop Ceiling Curtain Track Systems

Understanding Drop Ceiling Curtain Tracks

Drop ceiling curtain tracks are innovative systems designed to provide a sleek and functional solution for hanging curtains or draperies from a suspended ceiling. These tracks are typically installed flush with the ceiling grid, allowing curtains to hang seamlessly without obstructing the view or interfering with the ceiling’s aesthetic.

Versatility and Functionality

One of the key advantages of drop ceiling curtain tracks is their versatility. Whether you’re looking to create private spaces in an open-concept office, divide a large room into smaller sections, or add visual interest to a space, these systems offer flexible solutions to meet your needs. Additionally, drop ceiling curtain tracks can be used to control light, improve acoustics, and enhance the overall ambiance of a room.

Read too: Discovering the Charm of Nautical Outdoor Ceiling Fans for Your Coastal Retreat: Sail into Style

Advantages of Drop Ceiling Curtain Tracks

Space Optimization

Drop ceiling curtain tracks are an ideal solution for maximizing space utilization in both residential and commercial settings. By dividing large areas into smaller zones, you can create separate work areas, meeting spaces, or relaxation areas without the need for permanent walls or partitions.

Easy Installation

Unlike traditional curtain rods or tracks that require wall mounting, drop ceiling curtain tracks are installed directly into the ceiling grid, making for a quick and hassle-free installation process. With the right tools and instructions, DIY enthusiasts and professionals alike can easily install these systems in a fraction of the time it takes to install traditional curtain tracks.

Design Ideas for Drop Ceiling Curtain Tracks

Office Privacy Solutions

Create private workspaces or meeting areas in an open-concept office environment using drop ceiling curtain tracks. Opt for opaque or sound-absorbing curtains to enhance privacy and improve acoustics, allowing employees to focus and collaborate more effectively.

Room Dividers

Divide a large room into smaller sections with drop ceiling curtain tracks. This is particularly useful in multifunctional spaces such as living rooms or studio apartments, where you can easily separate sleeping areas from living areas or create temporary guest quarters when needed.

Decorative Accents

Use drop ceiling curtain tracks as decorative accents to add texture, color, and visual interest to a room. Choose curtains with bold patterns, vibrant colors, or luxurious fabrics to make a statement and elevate the overall aesthetic of your space.

Installation Tips

Measure Twice, Cut Once

Before installing drop ceiling curtain tracks, carefully measure the length and width of the space to determine the required track length and placement. Double-check your measurements to ensure accuracy before making any cuts or modifications to the tracks.

Use Proper Tools and Hardware

Ensure that you have the necessary tools and hardware on hand before beginning the installation process. This may involve using a drill, screws, anchors, and a level to ensure installing the tracks securely and evenly.

Conclusion

Drop ceiling curtain tracks offer a versatile, functional, and stylish solution for a variety of design challenges. Whether you’re looking to create private spaces, divide rooms, or add decorative accents, these innovative systems provide endless possibilities for enhancing your space. Explore the options available and transform your home or office with drop ceiling curtain tracks.

Discover the Best Quality and Craftsmanship with Ceiling Fans Made In USA

Are you in search of high-quality ceiling fans that are not only stylish and functional but also made with superior craftsmanship? Look no further than Ceiling Fans Made In USA. In this comprehensive guide, we’ll delve into the advantages of choosing American-made ceiling fans, explore the features and options available, and help you find the perfect fan for your space.

Ceiling Fans Made In Usa

Exploring Ceiling Fans Made In USA

The Pride of American Craftsmanship

Crafted with meticulous attention to detail and a commitment to quality, Ceiling Fans Made In USA reflect the pride of American craftsmanship. Manufacturers craft each fan using the finest materials and components, ensuring durability, reliability, and long-lasting performance.

Read too: Discovering the Charm of Nautical Outdoor Ceiling Fans for Your Coastal Retreat: Sail into Style

Superior Quality and Durability

When you choose a ceiling fan made in the USA, you can trust that you’re investing in a product of superior quality and durability. American-made fans are built to withstand the rigors of daily use and are backed by warranties that provide peace of mind and assurance of reliability.

Benefits of Ceiling Fans Made In USA

Support for Local Economy

By purchasing a ceiling fan made in the USA, you’re not only investing in a high-quality product but also supporting the local economy and American manufacturing jobs. Your purchase contributes to the growth and sustainability of domestic industries, helping to strengthen communities and promote economic prosperity.

Environmental Responsibility

Ceiling Fans Made In USA are often manufactured with a focus on sustainability and environmental responsibility. Many American companies prioritize eco-friendly practices and use energy-efficient materials and production methods to minimize their carbon footprint and reduce environmental impact.

Features and Options

Variety of Styles and Designs

Ceiling Fans Made In USA are available in a wide range of styles, designs, and finishes to suit any decor preference. Whether you prefer traditional, modern, or rustic aesthetics, there’s a fan made in the USA to complement your space and enhance its visual appeal.

Customization Options

Many American-made ceiling fan manufacturers offer customization options, allowing you to tailor the fan to your specific needs and preferences. From blade finishes and motor finishes to light kit options and control mechanisms, you can create a personalized fan that perfectly suits your space.

Conclusion

Ceiling Fans Made In USA offer unmatched quality, craftsmanship, and reliability that make them a smart choice for any space. By choosing an American-made fan, you’re not only investing in a superior product but also supporting local economies and promoting environmental responsibility. Elevate your space with a ceiling fan made in the USA and enjoy years of reliable, stylish, and energy-efficient cooling.

Art Deco Flush Mount Ceiling Light Fixtures: Elevate Your Space

Are you searching for a lighting solution that combines elegance, sophistication, and timeless style? Look no further than Art Deco Flush Mount Ceiling Light fixtures. In this comprehensive guide, we’ll delve into the allure of Art Deco design, explore the characteristics of flush mount ceiling lights, and provide inspiration for incorporating these stunning fixtures into your space.

Art Deco Flush Mount Ceiling Light

Exploring Art Deco Flush Mount Ceiling Light Fixtures

Understanding Art Deco Style

Art Deco emerged in the early 20th century as a luxurious and glamorous design movement characterized by geometric shapes, bold colors, and lavish ornamentation. Inspired by the modern advancements of the time, Art Deco celebrates innovation, elegance, and opulence.

Characteristics of Flush Mount Ceiling Lights

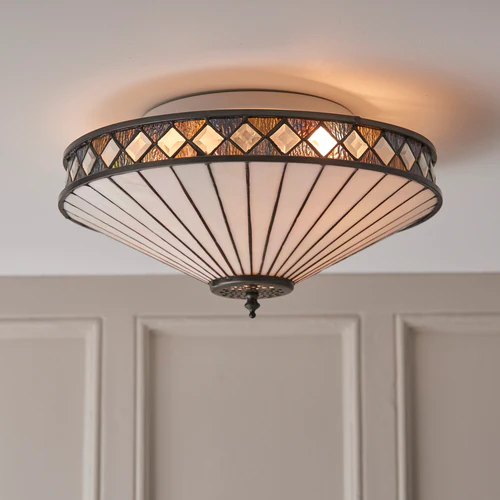
Flush mount ceiling lights are fixtures that are mounted directly against the ceiling, providing a seamless and streamlined appearance. These fixtures are ideal for rooms with low ceilings or where a minimalist aesthetic is desired. Art Deco Flush Mount Ceiling Lights often feature geometric patterns, sleek metallic finishes, and frosted glass diffusers, reflecting the iconic style of the era.

Advantages of Art Deco Flush Mount Ceiling Lights

Timeless Elegance

Art Deco Flush Mount Ceiling Lights exude timeless elegance and sophistication, making them a perfect choice for both traditional and contemporary spaces. Their sleek lines and geometric motifs add a touch of glamour to any room, creating a focal point that commands attention.

Versatility

Flush mount ceiling lights are highly versatile and can be used in a variety of settings, from entryways and hallways to bedrooms, living rooms, and dining areas. Their low-profile design makes them suitable for rooms with limited ceiling height, while their stylish appearance complements a range of interior styles.

Design Ideas for Incorporating Art Deco Flush Mount Ceiling Lights

Entryway Elegance

Make a grand entrance with an Art Deco Flush Mount Ceiling Light fixture in your entryway. Choose a statement-making design with intricate metalwork and frosted glass panels to create a dramatic first impression.

Chic Dining Room Illumination

Add a touch of glamour to your dining room with a series of Art Deco Flush Mount Ceiling Lights positioned above the table. Opt for fixtures with geometric shapes and metallic finishes to enhance the sophistication of the space.

Stylish Bedroom Ambiance

Create a relaxing and stylish ambiance in your bedroom with an Art Deco Flush Mount Ceiling Light fixture. Choose a design with soft, diffused lighting to promote relaxation and complement your bedroom decor.

Installation Tips

Proper Placement

When installing Art Deco Flush Mount Ceiling Lights, consider the size and layout of the room to determine the optimal placement. Position the fixtures evenly to ensure balanced illumination throughout the space.

Read too: Discovering the Charm of Nautical Outdoor Ceiling Fans for Your Coastal Retreat: Sail into Style

Secure Mounting

Ensure securely mounting the fixtures to the ceiling to prevent accidents and ensure long-term durability. Follow the manufacturer’s instructions carefully and use appropriate mounting hardware for a safe and secure installation.

Conclusion

Art Deco Flush Mount Ceiling Lights are more than just lighting fixtures—they’re timeless works of art that elevate the ambiance and style of any space. Whether you’re drawn to the geometric motifs, sleek finishes, or soft diffused lighting, these iconic fixtures are sure to make a statement in your home or business. Explore the possibilities of Art Deco design and transform your space with the elegance and sophistication of Art Deco Flush Mount Ceiling Lights.

Enhance Your Space with Stylish Black Ceiling Tiles 2X4: A Complete Guide

Are you looking to add a touch of sophistication and modernity to your space? Consider installing black ceiling tiles 2X4 to elevate the aesthetic appeal of any room. In this comprehensive guide, we’ll explore the versatility, installation process, benefits, and design ideas for black ceiling tiles 2X4, helping you create a stylish and inviting atmosphere.

Black Ceiling Tiles 2X4

Exploring Black Ceiling Tiles 2X4

Versatility and Style

Black ceiling tiles 2X4 offer a sleek and contemporary look that complements a variety of interior design styles. Whether you prefer a minimalist, industrial, or luxurious aesthetic, black ceiling tiles can enhance the visual appeal of any space.

Material and Construction

Black ceiling tiles are typically made from durable materials such as PVC, fiberglass, or metal. These materials are lightweight, easy to install, and resistant to moisture and humidity, making them suitable for use in kitchens, bathrooms, and other high-moisture areas.

Benefits of Black Ceiling Tiles 2X4

Enhanced Aesthetic Appeal

The deep, rich color of black ceiling tiles adds depth and drama to any room, creating a striking focal point that draws the eye upward. Black ceilings can make a space feel more intimate and cozy or create a sense of sophistication and luxury, depending on the overall design aesthetic.

Concealment of Imperfections

Black ceiling tiles are excellent for concealing imperfections such as cracks, stains, or uneven surfaces. The dark color helps to mask flaws and creates a seamless, uniform appearance, giving your ceiling a polished and professional look.

Installation Process

Preparation

Before installing black ceiling tiles, ensure that the ceiling surface is clean, dry, and free of any debris or obstructions. Measure the dimensions of the room and calculate the number of tiles needed for complete coverage.

Installation

Begin by locating the center of the room and marking it as a reference point. Install the first row of tiles along the centerline, working outward toward the walls. Use adhesive or nails to secure the tiles in place, ensuring that they are aligned and evenly spaced.

Design Ideas for Black Ceiling Tiles 2X4

Modern Minimalism

Achieve a sleek and minimalist look by pairing black ceiling tiles with clean lines, neutral colors, and minimalist furnishings. Opt for simple, geometric patterns or solid black tiles for a contemporary aesthetic.

Industrial Chic

Embrace the industrial trend by incorporating black ceiling tiles into a loft-style space. Pair the tiles with exposed brick walls, metal accents, and vintage-inspired furniture for an edgy and urban vibe.

Luxurious Sophistication

Create a sense of luxury and opulence with black ceiling tiles in a formal dining room or living area. Pair the tiles with plush furnishings, crystal chandeliers, and metallic accents for a glamorous and sophisticated look.

Read too: Discovering the Charm of Nautical Outdoor Ceiling Fans for Your Coastal Retreat: Sail into Style

Conclusion

Black ceiling tiles 2X4 offer a stylish and versatile solution for enhancing any space. Whether you’re aiming for a modern, industrial, or luxurious aesthetic, black ceiling tiles can help you achieve your design goals with ease. From installation tips to design inspiration, this guide has everything you need to know to incorporate black ceiling tiles into your home or commercial space.