Unveiling the Secrets Behind Drywall Seam Cracks in Ceiling: Causes, Fixes, and Prevention Strategies

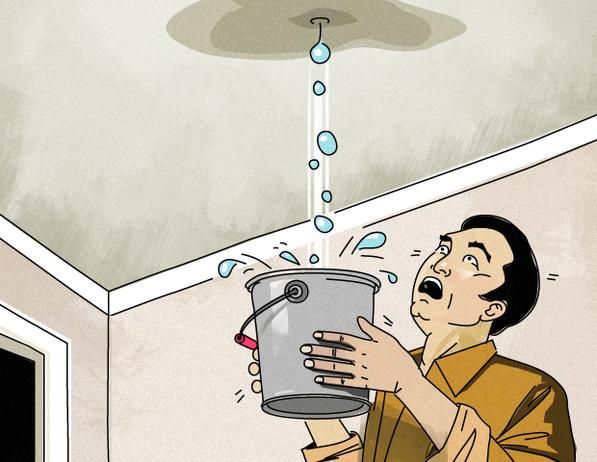
Homeowners often encounter the pesky issue of drywall seam cracks in the ceiling. The question that arises is, “How do you deal with drywall seam cracks in the ceiling?” In this comprehensive guide, we will explore the causes behind these cracks, effective solutions, and preventive measures to keep your ceiling in pristine condition.

Drywall Seam Cracks In Ceiling

Understanding Drywall Seam Cracks in Ceiling

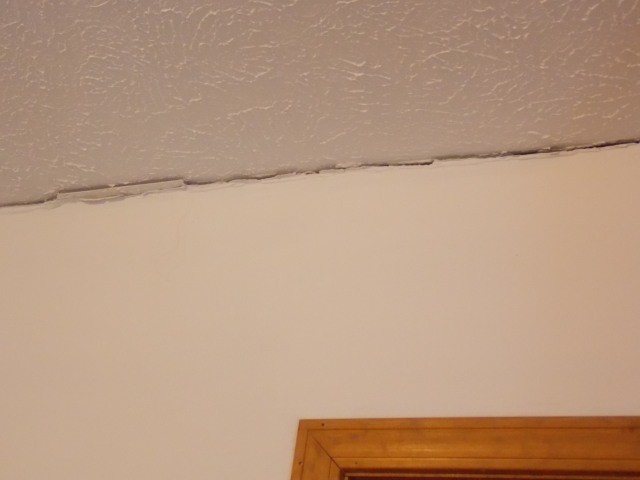
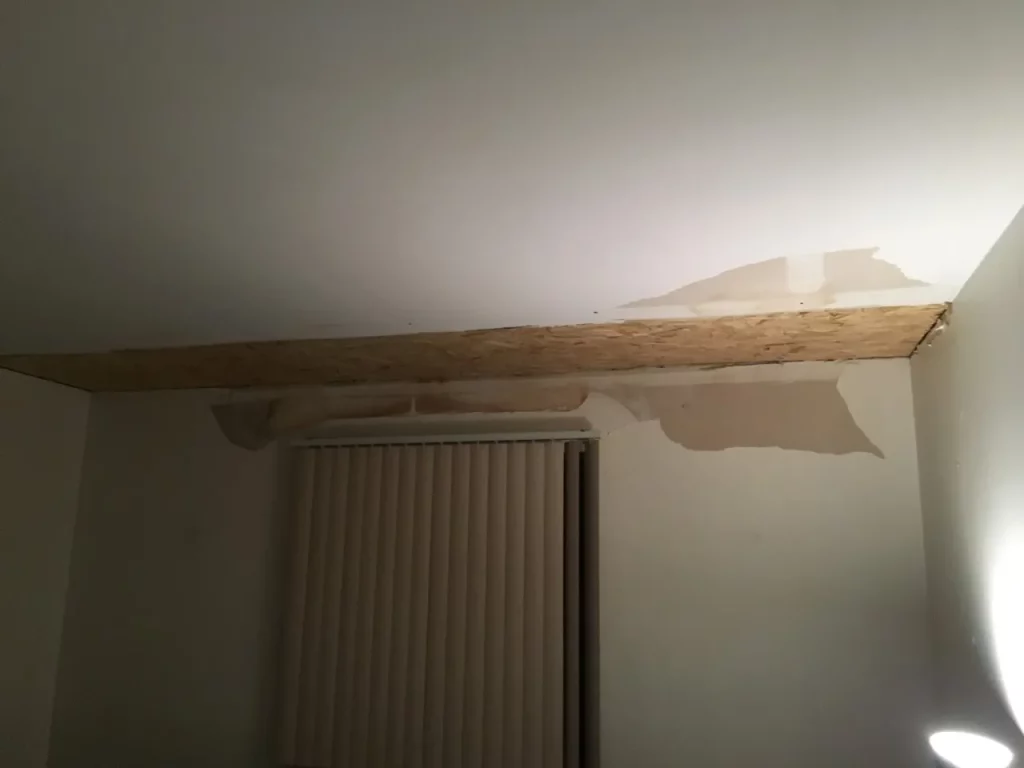
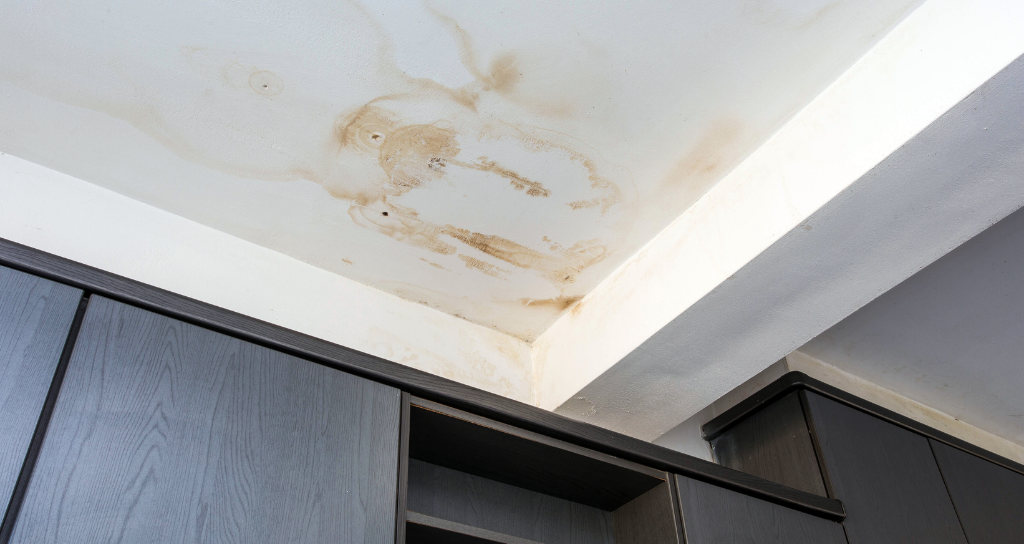
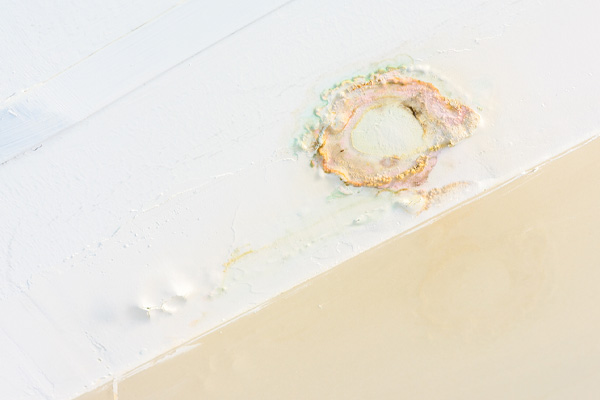
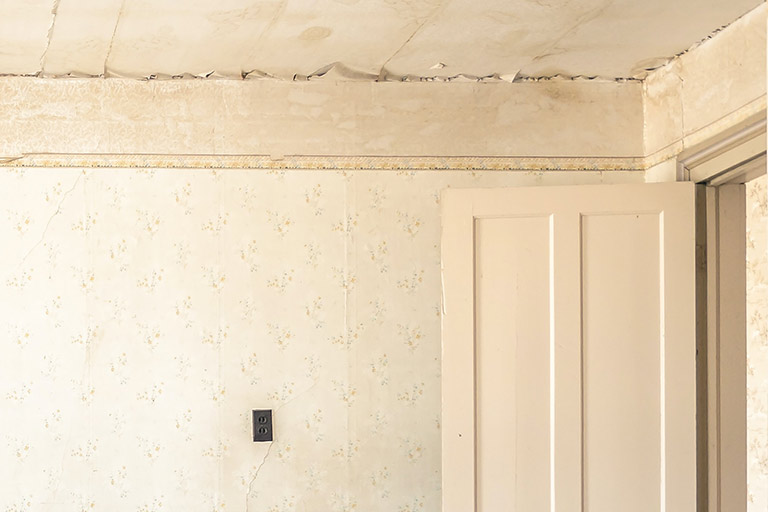
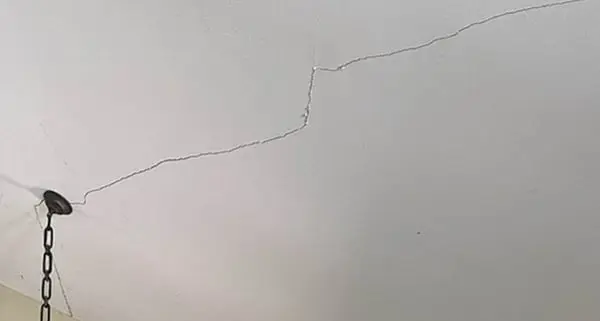
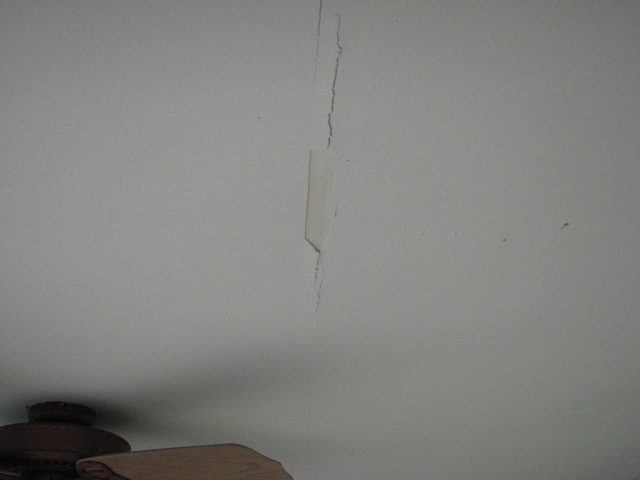
Drywall seam cracks in ceiling are not uncommon, and they can be a source of frustration for homeowners. These cracks typically occur at the seams where two drywall sheets meet. They may start small but can gradually worsen over time, leading to aesthetic concerns and potential structural issues.

Causes of Drywall Seam Cracks in Ceiling

  1. Settling of the House: Over time, houses settle, causing shifts in the foundation. These shifts can manifest as cracks in the ceiling seams.
  2. Humidity Changes: Fluctuations in humidity levels can impact the moisture content of the drywall, leading to expansion and contraction. This continuous movement can result in seam cracks.
  3. Poor Installation: Improper installation of drywall, including inadequate taping and mudding, can contribute to seam cracks over time.
  4. Temperature Changes: Extreme temperature changes can cause the materials in the ceiling to expand and contract, creating stress on the drywall seams.

Dealing with Drywall Seam Cracks in Ceiling: Fixes and Solutions

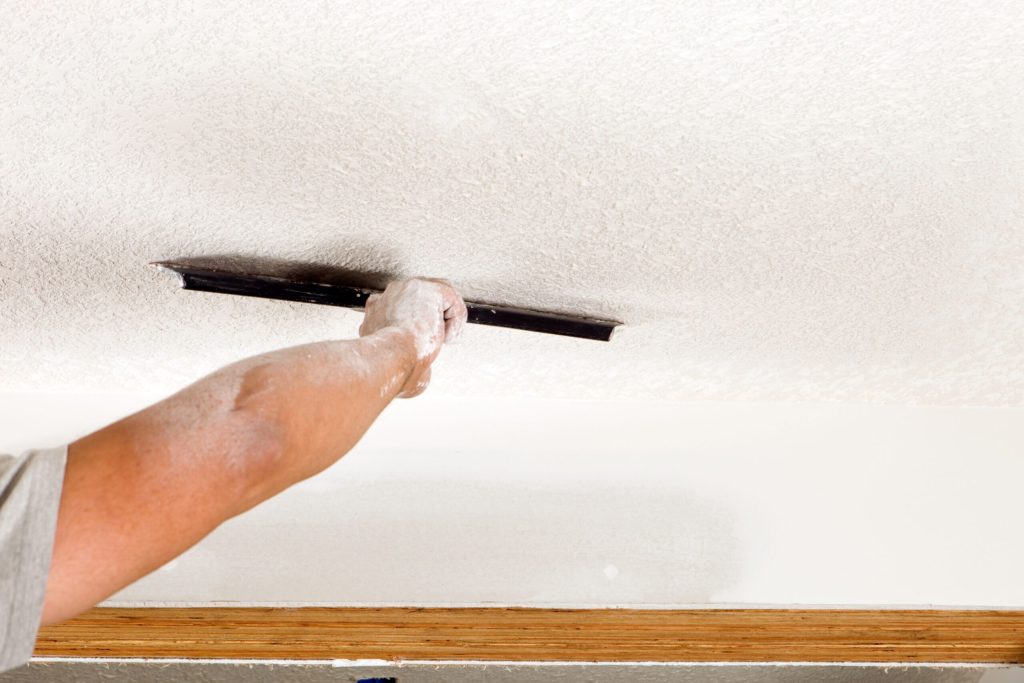
  1. Patch and Repaint: For minor cracks, patching the affected area with joint compound and repainting can provide a quick and cost-effective solution.
  2. Re-Taping and Mudding: In cases where the cracks are more significant, re-taping and mudding the seams may be necessary. This involves removing the damaged tape, applying new tape, and adding layers of joint compound.
  3. Addressing Underlying Issues: To prevent recurring cracks, it’s crucial to address any underlying issues such as foundation problems, inadequate support, or poor installation.
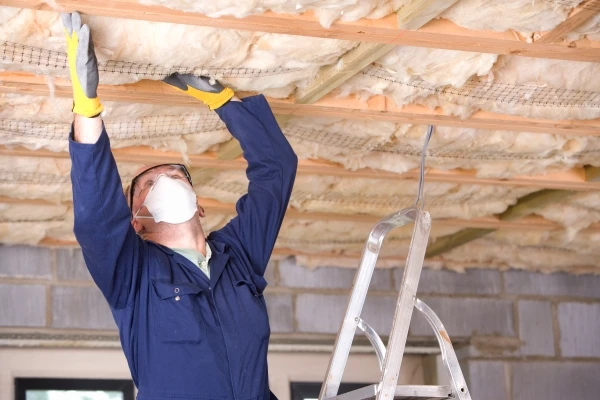
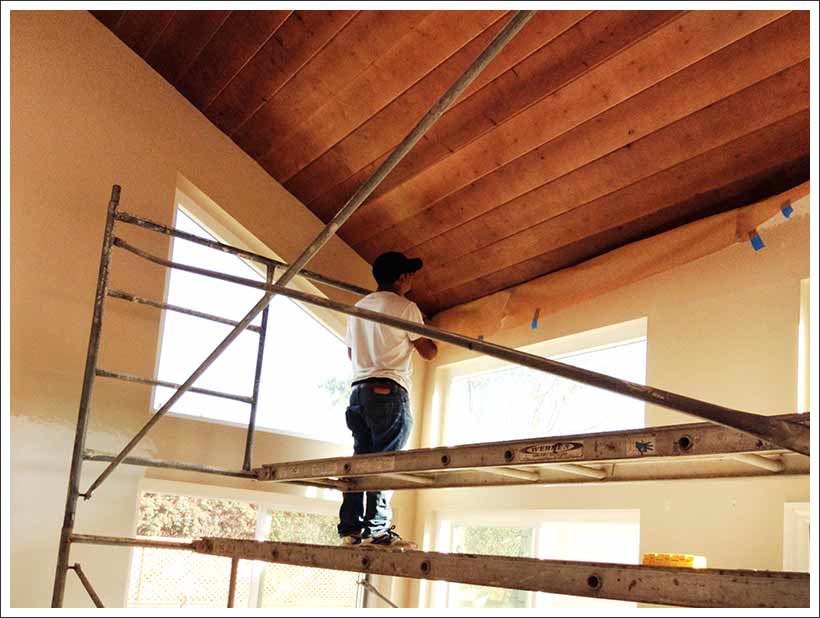
  4. Professional Assistance: In severe cases, seeking professional help is advisable. A qualified contractor can assess the extent of the damage and provide a tailored solution.

Preventing Future

  1. Proper Installation: Ensure that drywall is installed by professionals using proper techniques to minimize the risk of future cracks.
  2. Humidity Control: Maintain consistent humidity levels in your home to prevent the expansion and contraction of drywall materials.
  3. Regular Inspections: Periodically inspect your ceiling for any signs of cracks or damage. Addressing issues early can prevent them from worsening.
  4. Foundation Maintenance: Addressing foundation issues promptly can prevent settling-related cracks in the ceiling.

Read too: Help! My Ceiling Is Falling Down: Understanding Causes and Solutions for a Deteriorating Ceiling

Conclusion: A Crack-Free Future for Your Ceiling

In conclusion, understanding the causes, fixes, and prevention strategies for drywall seam cracks in the ceiling is essential for maintaining the structural integrity and aesthetics of your home. Whether you opt for DIY solutions or seek professional assistance, addressing the issue promptly can save you from more extensive repairs in the long run.

Don’t let drywall seam cracks be a cause of stress. Equip yourself with the knowledge to tackle this common issue and ensure a crack-free and visually appealing ceiling for years to come.

Does Your Basement Ceiling Need Insulation for Ultimate Comfort? Unveiling the Truth

When it comes to creating a comfortable and energy-efficient home, homeowners often find themselves pondering over various aspects of insulation. One area that often gets overlooked is the basement ceiling. The question that arises is, “Does basement ceiling need insulation?” In this article, we will delve into the significance of insulating your basement ceiling and explore the benefits that come with it.

Does Basement Ceiling Need Insulation

Understanding the Basics: Does Basement Ceiling Need Insulation?

Does basement ceiling need insulation? This is a common question that homeowners ask when considering home improvement projects. To answer this, let’s first understand the role of insulation in a home. Insulation acts as a barrier that helps regulate temperature and conserve energy. It prevents heat loss in the winter and keeps your home cool in the summer.

When it comes to the basement, many homeowners focus on insulating walls and floors but neglect the ceiling. However, insulating the basement ceiling can offer several advantages. Let’s explore why it might be a crucial aspect of your home insulation strategy.

The Benefits

  1. Energy Efficiency: Insulating your basement ceiling helps in maintaining a consistent temperature throughout your home. This means less reliance on heating and cooling systems, leading to reduced energy consumption and lower utility bills.
  2. Improved Comfort: A well-insulated basement ceiling contributes to a more comfortable living environment. It prevents drafts and cold spots, ensuring that your basement space remains cozy year-round.
  3. Moisture Control: Insulation acts as a barrier against moisture, preventing dampness and mold growth. This is especially important in basements, where moisture-related issues are common.
  4. Soundproofing: Insulating the basement ceiling can also contribute to soundproofing your home. This is particularly beneficial if you use your basement as a living space, office, or entertainment area.
  5. Protecting Belongings: Proper insulation safeguards your belongings stored in the basement from extreme temperatures, ensuring they remain in good condition.

Choosing the Right Insulation for Your Basement Ceiling

Now that we’ve established the importance of insulating your basement ceiling, the next step is choosing the right insulation material. Several options are available, each with its own set of pros and cons. Some common choices include fiberglass batts, spray foam, and rigid foam boards.

Fiberglass batts are a cost-effective option and relatively easy to install. Spray foam provides excellent coverage and acts as an effective air barrier. Rigid foam boards offer high insulation value and moisture resistance.

Consider factors such as budget, climate, and installation complexity when selecting the insulation material that best suits your needs.

Read too: Help! My Ceiling Is Falling Down: Understanding Causes and Solutions for a Deteriorating Ceiling

DIY or Professional Installation?

While some homeowners may opt for a do-it-yourself approach, others may prefer professional installation. DIY insulation projects can be rewarding, but it’s crucial to ensure proper installation to reap the full benefits. Hiring professionals guarantees a thorough job, reducing the risk of potential issues down the line.

Conclusion: The Verdict on Basement Ceiling Insulation

In conclusion, the answer to “Does basement ceiling need insulation?” is a resounding yes. Insulating your basement ceiling is a worthwhile investment that pays off in terms of energy efficiency, comfort, and protection against various issues. Whether you choose to embark on a DIY project or enlist professional help, the benefits of a well-insulated basement ceiling are undeniable.

So, if you’ve been contemplating whether to insulate your basement ceiling, the answer is clear: it’s a smart move for a more comfortable and energy-efficient home. Don’t let your basement be an overlooked space; instead, transform it into an integral part of your cozy abode with proper insulation.

Unveiling the Causes and Solutions for a Crack Along Wall and Ceiling – A Comprehensive Guide

Cracks along your wall and ceiling can be disconcerting, hinting at underlying issues that need attention. In this informative guide, we explore the common causes, potential dangers, and effective solutions for a Crack Along Wall and Ceiling, ensuring you have the knowledge to address this concern in your home.

Crack Along Wall And Ceiling

Understanding the Significance: Crack Along Wall and Ceiling

Why Does a Crack Along Wall and Ceiling Occur?

Cracks in these areas can result from various factors, ranging from natural settling to more serious structural issues. Identifying the root cause is crucial for effective resolution.

Common Causes of a Crack Along Wall and Ceiling

1. Settling of the Foundation

Over time, a house undergoes settling, causing shifts in its foundation. These shifts can manifest as cracks along the wall and ceiling. While some settling is normal, excessive movement may lead to more severe structural problems.

2. Temperature and Humidity Fluctuations

Extreme weather conditions, especially in regions with significant temperature variations, can cause materials to expand and contract. This constant movement can result in cracks over time.

3. Water Damage

Water leaks, whether from plumbing issues or roof damage, can weaken the structure of your walls and ceiling. The resulting moisture can lead to the development of cracks as the materials lose their integrity.

4. Poor Construction or Materials

Inadequate construction practices or the use of subpar materials during the building process can contribute to cracks. This emphasizes the importance of quality construction to prevent future issues.

Assessing the Severity

Evaluating the Impact of a Crack Along Wall and Ceiling

Understanding the severity of the crack is essential before implementing any solutions. Here are some key indicators to consider:

  1. Size and Width:
    • Small, hairline cracks are typically less concerning.
    • Larger, wider cracks may signify more significant structural problems.
  2. Vertical vs. Horizontal Cracks:
    • Vertical cracks are often a result of settling and may be less severe.
    • Horizontal cracks may indicate more serious issues, such as foundation problems.
  3. Associated Symptoms:
    • Check for additional signs like uneven floors, doors or windows that stick, or visible gaps. These can provide insights into the root cause.

Read too: Help! My Ceiling Is Falling Down: Understanding Causes and Solutions for a Deteriorating Ceiling

Effective Solutions for Repair

Addressing the Root Cause

Before repairing the visible crack, it’s essential to address the underlying issue to prevent future recurrence. This may involve consulting with a structural engineer to identify and resolve foundational or structural problems.

Repairing the Crack

  1. Small Cracks:
    • Hairline cracks can often be repaired with a simple application of joint compound or patching plaster.
  2. Larger Cracks:
    • For more extensive cracks, using mesh tape and joint compound provides added strength and durability.
  3. Structural Repairs:
    • In cases of severe structural issues, professional assistance is crucial. This may involve foundation repairs, addressing water damage, or even reevaluating the construction of the affected area.

Conclusion: Ensuring a Structurally Sound Home

In conclusion, a Crack Along Wall and Ceiling is not just a cosmetic concern; it can be indicative of more significant problems. Understanding the causes and severity is the first step toward effective resolution.

Regular inspections, prompt repairs, and, if necessary, consultation with professionals can ensure that your home remains structurally sound. By addressing the issue at its root, you can enjoy a safe and stable living environment for years to come.

Exploring the Cost To Refinish Wood Ceiling and Transforming Your Space: Unlocking the Elegance

Refinishing the wood ceiling of your space can breathe new life into your surroundings, adding a touch of elegance and warmth. However, before embarking on this transformative journey, it’s crucial to understand the intricacies and, more importantly, the Cost To Refinish Wood Ceiling. In this comprehensive guide, we’ll delve into the various aspects of refinishing wood ceilings, providing you with valuable insights to make an informed decision.

Cost To Refinish Wood Ceiling

Understanding the Significance: Cost To Refinish Wood Ceiling

Why Refinish Wood Ceilings?

Wooden ceilings, when properly maintained, exude timeless beauty and charm. Over time, though, they may show signs of wear and tear – from scratches to discoloration. Refinishing becomes a necessity to restore the original glory of your wood ceiling, preserving its aesthetic appeal and structural integrity.

Factors Influencing the Cost To Refinish Wood Ceiling

1. Ceiling Size and Complexity

The dimensions and intricacy of your ceiling play a pivotal role in determining the overall cost. High ceilings or those with intricate designs may require more time and effort, consequently impacting the cost.

2. Type of Wood

The type of wood used for your ceiling is a significant cost factor. Exotic woods might cost more to refinish compared to common varieties. Additionally, the condition of the wood and any repairs needed can influence the overall cost.

3. Extent of Damage

Assessing the extent of damage to your wood ceiling is crucial. Superficial scratches may be easier and less expensive to address compared to deep gouges or water damage. A thorough inspection is essential to estimate the scope of the refinishing process.

4. Finish Type

The choice of finish also impacts the overall cost. Whether you opt for a basic sealant or a more intricate staining process, each option comes with its own price tag. Discussing your preferences with a professional can help you find the right balance between aesthetics and budget.

5. Professional Labor Costs

While some might consider a DIY approach, hiring a professional is often recommended for optimal results. Skilled craftsmen bring expertise and efficiency to the table, ensuring a high-quality finish. Labor costs, therefore, contribute significantly to the overall Cost To Refinish Wood Ceiling.

Evaluating the Cost: A Detailed Breakdown

Unveiling the Cost To Refinish Wood Ceiling

To give you a clearer picture, let’s break down the costs involved in refinishing a wood ceiling. Keep in mind that these figures are approximate and can vary based on your specific circumstances.

  1. Material Costs:
    • Sandpaper, sealants, and stains: $100 – $500
    • Wood filler for repairs: $50 – $200
  2. Professional Labor Costs:
    • Basic refinishing: $3 – $5 per square foot
    • Intricate designs or high ceilings: $5 – $8 per square foot
  3. Additional Costs:
    • Repairs: $200 – $1,000 (depending on the extent)
    • Stain application: $1 – $3 per square foot

Making Informed Decisions

When contemplating the Cost To Refinish Wood Ceiling, it’s crucial to weigh the expenses against the long-term benefits. A professionally refinished wood ceiling not only enhances the visual appeal of your space but also adds value to your property.

Read too: Help! My Ceiling Is Falling Down: Understanding Causes and Solutions for a Deteriorating Ceiling

DIY vs. Professional Refinishing

While a DIY approach might seem cost-effective initially, the intricacies involved in wood ceiling refinishing often necessitate professional expertise. DIY efforts may lead to uneven finishes or overlook hidden damage, ultimately costing more in the long run.

Conclusion: Investing in Timeless Elegance

In conclusion, understanding the Cost To Refinish Wood Ceiling is essential for anyone considering this transformative endeavor. By factoring in the size, type of wood, and the extent of repairs needed, you can make informed decisions that align with your budget and aesthetic preferences.

Transforming your space with a beautifully refinished wood ceiling is an investment in timeless elegance. As you embark on this journey, remember that the right balance of craftsmanship and quality materials will result in a stunning outcome that stands the test of time.

Why Are My Ceilings Cracking and How to Address the Issue? Decoding the Dilemma

Ceiling cracks can be disconcerting, raising concerns about the structural integrity of your home. In this comprehensive guide, we will delve into the common reasons behind “Why Are My Ceilings Cracking” and provide insights into preventive measures and solutions to address this prevalent issue.

Why Are My Ceilings Cracking
Cracks on the wall at the house or residence. The crack in the cement wall at the window sill, caused by the subsidence of the ground, caused a slit at an oblique angle.

Understanding the Puzzling Phenomenon: Why Are My Ceilings Cracking?

Before we explore the solutions, let’s unravel the mystery behind why ceilings develop cracks. Ceilings are susceptible to various factors that can lead to cracking, and understanding these triggers is the first step in effective resolution.

Read too: Help! My Ceiling Is Falling Down: Understanding Causes and Solutions for a Deteriorating Ceiling

Identifying the Culprits – Why Are My Ceilings Cracking?

Ceiling cracks can result from a combination of internal and external factors. In this section, we’ll dissect the common culprits contributing to ceiling cracks and shed light on their impact.

1. Settlement and Foundation Movements:

  • The natural settling of a house over time can lead to foundation movements. These movements may cause stress on the ceiling, resulting in visible cracks. We’ll discuss how to differentiate settlement cracks from other types.

2. Temperature and Humidity Fluctuations:

  • Extreme temperature changes and humidity fluctuations can cause materials to expand and contract. This continual movement can lead to cracks in the ceiling. Learn how to manage indoor climate conditions to minimize the impact.

3. Structural Issues:

  • Structural issues, such as inadequate support or load-bearing problems, can manifest as ceiling cracks. We’ll explore the signs of structural concerns and when to consult a professional for assessment.

4. Drywall Installation and Joint Compounds:

  • Improper drywall installation or the use of insufficient joint compounds can result in cracks. Discover best practices for drywall installation and maintenance to prevent these issues.

Addressing the Issue: Solutions for Cracked Ceilings

Now that we’ve identified the common culprits, let’s delve into practical solutions for addressing cracked ceilings and restoring the structural integrity of your home.

1. Crack Repair Techniques:

  • Explore various crack repair techniques, including the use of joint compound, mesh tape, and sanding. We’ll provide a step-by-step guide for DIY repairs.

2. Foundation and Structural Repairs:

  • If the cracks are indicative of underlying structural issues, professional intervention may be required. Learn about the process of foundation repairs and when to seek expert assistance.

3. Preventive Measures:

  • Implement preventive measures to minimize the likelihood of future ceiling cracks. This includes proper home maintenance, addressing humidity issues, and periodic inspections.

Conclusion: Navigating the Complexity of Cracked Ceilings

In conclusion, understanding “Why Are My Ceilings Cracking” is crucial for homeowners seeking to maintain a safe and aesthetically pleasing living environment. By identifying the culprits and implementing appropriate solutions, you can address ceiling cracks effectively. Whether through DIY repairs or professional intervention, timely action is key to preventing further damage and ensuring the longevity of your home’s structure. Remember, regular maintenance and vigilance can go a long way in safeguarding your ceilings against the perils of cracking.

Tips and Tricks for Remodeling Basement With Low Ceiling Height: Elevate Your Space

Embarking on the journey of “Remodeling Basement With Low Ceiling” can be both a challenge and an opportunity for creative transformation. In this comprehensive guide, we’ll explore practical strategies, design ideas, and expert insights to help you make the most of your basement space, even with limited ceiling height.

Remodeling Basement With Low Ceiling

The Appeal of Transforming Low Ceiling Basements: A Design Adventure

Before delving into the specifics, let’s understand the allure of transforming a basement with low ceilings. While challenges may exist, low ceilings offer a cozy and intimate atmosphere, providing a unique canvas for creative remodeling. Whether you envision a functional living space, a home office, or an entertainment hub, strategic design can turn limitations into innovative design features.

Read too: Help! My Ceiling Is Falling Down: Understanding Causes and Solutions for a Deteriorating Ceiling

Navigating the Process – Remodeling Basement With Low Ceiling

Undertaking a basement remodel with low ceilings requires thoughtful planning and design considerations. In this section, we’ll guide you through key aspects, from layout considerations to lighting solutions, to ensure a successful transformation.

Optimizing Layout for Low Ceilings: Remodeling Basement With Low Ceiling

  1. Open Concept Design:
    • Embrace an open concept layout to create a sense of spaciousness. Remove unnecessary partitions and consider multifunctional furniture to maximize space.
  2. Strategic Furniture Placement:
    • Position furniture strategically to draw the eye upward and create the illusion of higher ceilings. Avoid bulky or tall furniture that may emphasize the low ceiling height.

Incorporating Lighting Solutions:

  1. Recessed Lighting:
    • Recessed lighting is an excellent choice for low ceilings, providing ambient illumination without intruding on valuable headspace. Explore different designs to complement your aesthetic.
  2. Wall Sconces and Floor Lamps:
    • Supplement overhead lighting with wall sconces and floor lamps. These fixtures add layers of light and contribute to a cozy ambiance.

Creative Ceiling Design Ideas:

  1. Coffered Ceilings:
    • Consider coffered ceiling designs to add architectural interest. This technique creates a grid pattern, diverting attention from the low height and adding a touch of sophistication.
  2. Exposed Beams:
    • Embrace exposed ceiling beams for an industrial or rustic look. This design choice not only adds character but also emphasizes the intentional use of the low ceiling height.

Selecting Low-Profile Finishes:

  1. Low-Profile Furniture:
    • Choose low-profile furniture that complements the scale of the space. This creates a harmonious flow and prevents the room from feeling cramped.
  2. Low Pile Carpets:
    • Opt for low pile or flat-weave carpets to maintain a seamless look and avoid overwhelming the space with bulky floor coverings.

Conclusion: Crafting a Unique and Functional Low Ceiling Basement

In conclusion, “Remodeling Basement With Low Ceiling” is an opportunity to unleash your creativity and design prowess. By strategically optimizing the layout, incorporating effective lighting solutions, exploring creative ceiling designs, and selecting low-profile finishes, you can transform your basement into a functional and visually appealing space. Remember, the key is to embrace the uniqueness of low ceilings and use design elements that complement rather than compete with the space. With the insights gained from this guide, you’re well on your way to crafting a basement that exceeds expectations despite its low ceiling height.

Does Popcorn Ceilings Contain Asbestos? Understanding the Risks and Solutions

The charm of popcorn ceilings in homes often conceals a potential danger – asbestos. In this in-depth exploration, we will unravel the question, “Does Popcorn Ceilings Contain Asbestos,” shedding light on the associated risks, identifying signs, and offering insights into safe removal or management.

Does Popcorn Ceilings Contain Asbestos

The Allure of Popcorn Ceilings: A Hidden Hazard?

Before we delve into the asbestos concern, let’s understand why popcorn ceilings were once popular. Textured popcorn ceilings were widely used in mid-20th-century homes for their acoustic properties and ability to hide imperfections. However, their appeal has waned due to changing aesthetic preferences and, more importantly, health and safety concerns.

Does Popcorn Ceilings Contain Asbestos: A Grave Concern?

Understanding Asbestos:

Asbestos is a naturally occurring mineral known for its heat-resistant and insulating properties. Once a common component in construction materials, its use has significantly declined due to health risks.

Popcorn Ceiling and Asbestos:

Many popcorn ceilings installed before the 1980s contain asbestos. The asbestos fibers were added to enhance the material’s durability and fire-resistant characteristics. This raises concerns, especially for older homes.

Evaluating the Risk

Understanding the risk associated with asbestos is crucial for homeowners. In this section, we’ll explore the factors influencing asbestos presence, signs of contamination, and steps for evaluation.

Factors Influencing Asbestos Presence:

  1. Age of the Ceiling:
    • Popcorn ceilings installed before the 1980s are more likely to contain asbestos. Homes built between the 1930s and 1950s have a higher risk due to increased asbestos use during this period.
  2. Construction Materials:
    • Assess the materials used in the popcorn ceiling. Homes constructed during the peak asbestos era may have used asbestos-containing vermiculite in the ceiling texture.

Signs of Asbestos Contamination:

  1. Lab Testing:
    • The only definitive way to determine asbestos presence is through lab testing. Learn about the testing process and when to consider professional assistance.
  2. Visual Inspection:
    • While not foolproof, visual inspection can provide initial clues. Discoloration, water damage, or deterioration of the ceiling texture may warrant further investigation.

Addressing the Concern: Safe Removal or Management

Professional Abatement:

If asbestos is confirmed, professional abatement is the safest approach. Certified asbestos abatement professionals follow strict protocols to minimize exposure.

Encapsulation and Enclosure:

In cases where removal is not immediately possible, encapsulation or enclosure methods can help contain asbestos fibers, reducing the risk of exposure.

Read too: Help! My Ceiling Is Falling Down: Understanding Causes and Solutions for a Deteriorating Ceiling

Conclusion: Navigating the Asbestos Conundrum in Popcorn Ceilings

In conclusion, the question, “Does Popcorn Ceilings Contain Asbestos,” is a critical consideration for homeowners, especially in older homes. Recognizing the potential risks and understanding the factors influencing asbestos presence empowers homeowners to make informed decisions. Whether opting for professional removal, encapsulation, or simply managing the existing popcorn ceiling, safety should be the top priority. Regular inspections, testing, and, when necessary, professional assistance can ensure a safe living environment while preserving the unique charm of your home.

Apartment Ceiling Leaking From Rain – Causes, Solutions, and Prevention: Unveiling the Dilemma

Discovering a leaking ceiling in your apartment during a rainstorm can be both alarming and stressful. In this comprehensive guide, we will delve into the challenges posed by an “Apartment Ceiling Leaking From Rain.” From understanding the potential causes to implementing effective solutions and preventive measures, this article aims to equip you with the knowledge needed to address this common issue and safeguard your living space.

Apartment Ceiling Leaking From Rain

The Perils of a Leaking Ceiling: Understanding the Impact

Before we delve into the specifics, it’s crucial to recognize the potential consequences of a leaking ceiling. Beyond the immediate inconvenience, a leaking ceiling can lead to water damage, compromised structural integrity, and even health hazards such as mold growth. Prompt attention and action are essential to mitigate these risks.

Apartment Ceiling Leaking From Rain: Identifying the Culprits

  1. Roof Damage:
    • A damaged or aging roof is a common culprit. We’ll explore how issues such as missing shingles, deteriorated flashing, or damaged roof vents can result in leaks.
  2. Poorly Sealed Windows:
    • Windows that are improperly sealed or have deteriorated caulking can allow rainwater to infiltrate. Learn how to identify and address these issues.
  3. Faulty Gutters and Downspouts:
    • Inadequate drainage due to clogged gutters or malfunctioning downspouts can lead to water pooling on the roof. Discover the impact of these issues and how to rectify them.
  4. Condensation and Humidity:
    • In some cases, internal factors such as condensation or high humidity levels can mimic a ceiling leak. We’ll discuss how to differentiate between external and internal causes.

Read too: Help! My Ceiling Is Falling Down: Understanding Causes and Solutions for a Deteriorating Ceiling

Addressing the Issue – Apartment Ceiling Leaking From Rain

Understanding the causes is the first step, but addressing the issue promptly is equally crucial. In this section, we’ll outline effective solutions to stop the leaks and prevent further damage to your apartment ceiling.

Steps to Stop the Leak:

  1. Temporary Measures:
    • Explore temporary solutions to stop the immediate leakage, such as placing buckets to catch dripping water and using tarps or plastic sheeting.
  2. Professional Roof Inspection:
    • Engage a roofing professional to conduct a thorough inspection. We’ll guide you on what to expect during the inspection process.
  3. Roof Repairs or Replacement:
    • Depending on the severity of the damage, repairs or a roof replacement may be necessary. Understand the factors influencing this decision.
  4. Sealing Windows and Doors:
    • Learn how to properly seal windows and doors to prevent rainwater infiltration. This step is crucial for long-term leak prevention.

Preventive Measures: Safeguarding Your Apartment

  1. Regular Roof Maintenance:
    • Implement a routine roof maintenance schedule to identify and address potential issues before they escalate.
  2. Gutter and Downspout Maintenance:
    • Keep gutters and downspouts clear of debris to ensure proper drainage and prevent water from pooling on the roof.
  3. Interior Humidity Control:
    • Manage interior humidity levels to reduce the likelihood of condensation-related issues mimicking a ceiling leak.

Conclusion: Ensuring a Dry and Secure Living Space

In conclusion, addressing an “Apartment Ceiling Leaking From Rain” requires a combination of understanding the causes, implementing effective solutions, and adopting preventive measures. By following the insights provided in this guide, you can navigate the challenges posed by a leaking ceiling and safeguard your apartment from potential water damage. Remember, timely action is paramount, and regular maintenance plays a key role in ensuring a dry and secure living space, even during the heaviest rainstorms.

Understanding the Labor Cost to Texture Ceiling and Enhance Your Home: Unveiling the Secrets

Embarking on a home improvement project often involves various considerations, and one significant aspect is the cost associated with texture ceiling application. In this comprehensive guide, we will delve into the intricacies of “Labor Cost To Texture Ceiling,” providing you with valuable insights into the factors influencing these costs and tips to make informed decisions for your next home upgrade.

Labor Cost To Texture Ceiling

Why Texture Ceilings? Aesthetic Appeal and Beyond

Before we delve into the labor costs, it’s essential to understand why homeowners opt for textured ceilings. Beyond the aesthetic appeal, textured ceilings can hide imperfections, add depth to a room, and even contribute to sound absorption. Whether you’re considering a popcorn, knockdown, or another texture style, the labor cost to achieve the desired result plays a pivotal role.

Labor Cost To Texture Ceiling: What Influences the Pricing?

  1. Ceiling Size and Height:
    • The larger and higher your ceiling, the more labor-intensive the texturing process becomes. Understand how these factors impact the overall labor cost.
  2. Type of Texture:
    • Different texture styles require varying techniques and expertise. Explore popular options such as popcorn, orange peel, and knockdown, and learn how each influences the labor cost.
  3. Ceiling Condition:
    • The existing condition of your ceiling can impact the labor required. We’ll discuss how repairs or preparation work can influence the overall cost.
  4. Labor Rates in Your Area:
    • Labor rates vary regionally. Discover how the cost of living and demand for skilled labor in your area can affect the labor cost to texture the ceiling.

Calculating Labor Cost To Texture Ceiling: A Practical Guide

Understanding the Square Footage:

  • Measure the square footage of your ceiling to estimate the amount of material and time required. We’ll provide a step-by-step guide for accurate measurements.

Obtaining Contractor Quotes:

  • Reach out to contractors for quotes tailored to your project. Learn what factors contractors consider when providing estimates and how to compare quotes effectively.

Incorporating Material Costs:

  • While the focus is on labor costs, understanding the role of materials is crucial. Explore the types of materials needed for different texture styles and their associated costs.

Navigating the Labor Cost Landscape for Texture Ceiling Installation

Understanding the intricacies of “Labor Cost To Texture Ceiling” is essential for making informed decisions. Here, we’ll delve into the specifics of what contributes to the labor cost and how you can navigate this landscape to ensure a fair and reasonable investment in your home improvement project.

Tips for Managing Labor Costs:

  1. Obtain Multiple Quotes:
    • Don’t settle for the first quote you receive. Gather quotes from multiple contractors to ensure a competitive and reasonable labor cost.
  2. Clarify the Scope of Work:
    • Clearly communicate your expectations and the scope of work to contractors. This avoids misunderstandings and ensures accurate estimates.
  3. Consider DIY Options:
    • Depending on your skill level, you might explore the option of tackling some aspects of the project yourself to reduce labor costs.

Read too: Help! My Ceiling Is Falling Down: Understanding Causes and Solutions for a Deteriorating Ceiling

Conclusion: Making Informed Decisions for Your Ceiling Texture Project

In conclusion, understanding the labor cost to texture the ceiling is crucial for homeowners seeking to enhance the visual appeal of their living spaces. By considering factors such as ceiling size, texture type, and regional labor rates, you can make informed decisions that align with your budget and expectations. This guide aims to empower you with the knowledge needed to embark on your texture ceiling project confidently. Whether you choose a textured ceiling for aesthetic reasons or practical benefits, the insights provided here will guide you through the decision-making process.

How to Effectively Fix a Noisy Ceiling Fan and Enjoy Peaceful Comfort: Quieting the Breeze

Ceiling fans are a staple in many homes, providing both comfort and energy efficiency. However, a noisy ceiling fan can disrupt the tranquility of your living space. In this comprehensive guide, we will explore practical and informative solutions on how to fix a noisy ceiling fan, allowing you to enjoy the cool breeze without the accompanying racket.

Fix A Noisy Ceiling Fan

Understanding the Causes of a Noisy Ceiling Fan

Before delving into the solutions, it’s crucial to understand the potential causes of a noisy ceiling fan. Common culprits include loose screws, unbalanced blades, worn-out bearings, and issues with the motor. Identifying the root cause is the first step toward effective and lasting solutions.

Fixing Loose Screws: A Simple DIY Solution

One of the most common reasons for a noisy ceiling fan is loose screws. The constant rotation of the blades can cause screws to gradually come undone, resulting in irritating sounds. To address this, turn off the fan and carefully tighten all visible screws, including those connecting the blades to the brackets and the brackets to the motor. This straightforward DIY fix can make a significant difference in noise reduction.

Balancing Act: Ensuring Proper Blade Alignment

Unbalanced blades can also contribute to the racket produced by a ceiling fan. To check for balance issues, use a blade-balancing kit or a yardstick. Turn off the fan and place the yardstick diagonally across each blade. If the blades are unbalanced, they will tilt in one direction. Attach a balancing clip to the top of the misaligned blade, repeating the process until all blades are balanced. This simple adjustment can eliminate wobbling and noise.

Addressing Worn-out Bearings: Fix a Noisy Ceiling Fan

Over time, the bearings in the motor may wear out, causing a distinct humming or grinding noise. Lubricating the bearings is a straightforward solution to this problem. Most ceiling fans have oil ports on the motor casing. Use a non-detergent motor oil to lubricate these ports, following the manufacturer’s guidelines. Regular lubrication can extend the lifespan of your fan and keep it running quietly.

Motor Malfunctions: When Professional Help Is Needed

If the noise persists despite DIY efforts, there may be underlying motor issues that require professional attention. A licensed electrician or a ceiling fan technician can inspect the motor, diagnose the problem, and perform the necessary repairs. While this may involve a cost, it ensures a thorough and accurate resolution, preventing further damage to the fan.

Other Tips: Fix a Noisy Ceiling Fan

In addition to the specific fixes mentioned above, there are general tips to maintain a quiet ceiling fan. Keep the fan clean by dusting the blades regularly to prevent the accumulation of debris. Tighten any loose parts, including the light fixture if your fan has one. Ensure that the downrod is securely attached to prevent unnecessary movement and noise.

Read too: Understanding the Labor Cost to Texture Ceiling and Enhance Your Home: Unveiling the Secrets

Conclusion: Enjoying Serenity with a Quieter Ceiling Fan

In conclusion, a noisy ceiling fan is a common issue with various potential solutions. Whether you opt for simple DIY fixes or seek professional assistance, addressing the problem promptly will enhance your comfort and the overall atmosphere of your home. Regular maintenance and attention to detail can keep your ceiling fan operating quietly, allowing you to bask in the cool breeze without the unwanted soundtrack. Say goodbye to the noise and hello to peaceful comfort with these effective tips to fix a noisy ceiling fan.

Understanding and Addressing Cracks Between Ceiling and Wall: Unveiling the Mystery

The structural integrity of our homes is paramount, and one common issue that often raises concerns among homeowners is the presence of cracks between the ceiling and wall. These fissures, though seemingly innocuous at first glance, may indicate underlying problems that require attention. In this comprehensive guide, we will delve into the causes, implications, and effective solutions for addressing cracks between the ceiling and wall.

Cracks Between Ceiling And Wall

Understanding the Causes: Cracks Between Ceiling and Wall

Cracks between the ceiling and wall can manifest for various reasons, and a crucial step in resolving the issue is identifying the root cause. One primary factor is settling, where a house adjusts to its surroundings over time. This natural settling can create stress on the structure, leading to visible cracks. Additionally, temperature fluctuations, humidity levels, and even the type of construction materials used can contribute to the formation of these cracks.

The Implications: Cracks Between Ceiling and Wall

While cracks between the ceiling and wall may seem minor initially, they can have significant implications if left unattended. Water seepage, pests, and compromised structural integrity are just a few of the potential consequences. It is essential to recognize the warning signs and take proactive measures to prevent further damage.

Detecting Cracks: A Homeowner’s Guide

Detecting cracks between the ceiling and wall requires a keen eye and attention to detail. Inspect your home regularly, paying close attention to areas where the ceiling meets the walls. Look for visible cracks, no matter how small, and monitor their progression over time. Additionally, be alert to any changes in the paint or wallpaper, as these can be indicators of underlying issues.

Addressing the Issue: DIY Solutions

For minor cracks, homeowners can undertake simple do-it-yourself (DIY) solutions to address the problem. Start by cleaning the affected area and removing any loose debris. Use a high-quality caulk to fill in the cracks, ensuring a smooth and even application. Sand the area once the caulk has dried to create a seamless finish. While these DIY solutions are effective for small cracks, it’s crucial to know when professional intervention is necessary.

Professional Solutions for Persistent Cracks

Persistent or large cracks may require the expertise of a professional. Consulting with a structural engineer or a qualified contractor can help identify the underlying issues and develop a targeted solution. This may involve more extensive repairs, such as reinforcing the structure, installing support beams, or addressing foundational concerns. While the cost of professional intervention may be higher, it ensures a long-lasting and effective resolution to the problem.

Read too: Understanding the Labor Cost to Texture Ceiling and Enhance Your Home: Unveiling the Secrets

Preventive Measures: Safeguarding Your Home

Taking preventive measures is key to avoiding cracks between the ceiling and wall in the first place. Ensure that your home is properly ventilated to regulate humidity levels, as excessive moisture can contribute to structural issues. Regularly inspect the exterior of your home for signs of settling or shifting, and address any issues promptly. Investing in high-quality construction materials and professional installation can also mitigate the risk of cracks forming.

Conclusion: A Solid Solution for a Solid Home

In conclusion, cracks between the ceiling and wall are not merely cosmetic issues; they can be indicative of underlying structural concerns. Regular inspection, prompt detection, and appropriate action are essential for maintaining the integrity of your home. Whether opting for a DIY solution or seeking professional assistance, addressing cracks promptly is an investment in the longevity and safety of your living space. Remember, a proactive approach to home maintenance can save you time, money, and stress in the long run.

Water Leaking From Ceiling Dream Insights and Interpretations: Navigating the Unexpected

Water Leaking From Ceiling Dream. Dreams have long been a mysterious realm where our subconscious communicates with us. If you’ve ever experienced a dream about water leaking from the ceiling, you’re not alone. In this article, we’ll unravel the symbolism behind the dream and explore potential interpretations.

Water Leaking From Ceiling Dream

Unveiling the Symbolism: Water Leaking From Ceiling Dream

Understanding Dream Symbolism

Dreams often communicate through symbols, and water is a recurring motif with various meanings. It represents emotions, the subconscious, and the flow of life. When coupled with the image of water leaking from the ceiling, the dream takes on a unique significance.

The Symbolic Landscape

Water as Emotions

In dream analysis, water frequently symbolizes emotions and the depths of the subconscious mind. Leaking water adds a layer of complexity, suggesting emotions that may be seeping into consciousness or situations that are not being contained.

Ceiling as Limitations

The ceiling in dreams is often associated with limitations or barriers. Water leaking from this barrier can be interpreted as emotions or situations breaking through constraints, urging the dreamer to confront or address something they may have been suppressing.

Possible Interpretations

Emotional Overflow

A dream about water leaking from the ceiling could indicate an emotional overflow. It might be a sign that the dreamer is grappling with unexpressed feelings that are beginning to surface. Exploring and understanding these emotions could lead to personal growth and resolution.

Warning Sign

In some cases, the dream may serve as a symbolic warning. The leaking water could represent an issue or challenge in waking life that requires immediate attention. It encourages the dreamer to address potential problems before they escalate.

Desire for Change

Water leaking from the ceiling might also signify a desire for change or a need to break free from limitations. It could be a subconscious urging to explore new possibilities and overcome self-imposed barriers.

Recurring Themes

If the dream of water leaking from the ceiling recurs, it may indicate that the underlying emotions or situations persist. Paying attention to the details of each occurrence can offer deeper insights into the unresolved aspects of the dreamer’s life.

What To Do After the Dream

After experiencing a dream about water leaking from the ceiling, take some time for reflection. Consider the emotions and situations in your waking life that may parallel the dream. Journaling can be a helpful tool for unraveling the complexities of your subconscious mind.

Addressing Emotional Health

If the dream points to emotional overflow or unresolved issues, consider seeking support from friends, family, or a mental health professional. Acknowledging and addressing your emotions is a crucial step toward maintaining emotional well-being.

Read too: Understanding the Labor Cost to Texture Ceiling and Enhance Your Home: Unveiling the Secrets

Conclusion

Dreams, including those about water leaking from the ceiling, serve as a rich tapestry of symbols that offer insights into our inner worlds. While dream interpretation is subjective, understanding the potential meanings behind such dreams can provide valuable perspectives for personal growth. Whether seen as a symbolic warning, a call for change, or a manifestation of emotions, these dreams invite us to explore the depths of our subconscious and navigate the unexpected waters of our inner landscapes.

Understanding and Remedying the Issue of Black Mold on Popcorn Ceiling: A Comprehensive Guide

Black Mold on Popcorn Ceiling. Popcorn ceilings were once a popular design choice, but their textured surface can create an environment conducive to mold growth, particularly black mold. In this article, we’ll delve into the challenges associated with black mold on popcorn ceilings, providing valuable insights and solutions for homeowners.

Black Mold On Popcorn Ceiling

The Menace of Black Mold on Popcorn Ceiling

Identifying Black Mold

Black mold, scientifically known as Stachybotrys chartarum, is a type of toxic mold that can thrive in damp and humid environments. Popcorn ceilings, with their porous nature, can become a breeding ground for mold if the conditions are right. Identifying black mold early is crucial, as it poses health risks and can compromise the structural integrity of the ceiling.

Recognizing the Signs

Musty Odor

One of the first signs of black mold on popcorn ceilings is a musty, unpleasant odor. This odor is a result of the mycotoxins produced by the mold, which can have adverse effects on respiratory health.

Discoloration

Black mold often manifests as dark patches on the ceiling. These patches can spread rapidly if left unaddressed, leading to a visually unappealing and potentially hazardous situation.

Respiratory Symptoms

Individuals exposed to black mold may experience respiratory symptoms such as coughing, sneezing, and difficulty breathing. Those with existing respiratory conditions may be particularly vulnerable.

Read too: Understanding the Labor Cost to Texture Ceiling and Enhance Your Home: Unveiling the Secrets

Understanding the Causes

Moisture Accumulation

The primary factor contributing to black mold growth on popcorn ceilings is moisture accumulation. Leaks from the roof or plumbing, high humidity levels, or inadequate ventilation can create the perfect conditions for mold to flourish.

Popcorn Ceiling Texture

The textured surface of popcorn ceilings, while aesthetically pleasing to some, can trap moisture and provide an ideal habitat for mold. The small crevices and irregularities in the texture create hiding spots for spores to proliferate.

Dealing with Black Mold on Popcorn Ceiling

Safety Precautions

Before attempting any mold remediation, it’s essential to prioritize safety. Wear protective gear, including a mask, gloves, and goggles, to minimize exposure to mold spores.

Moisture Source Identification

Address the source of moisture to prevent future mold growth. This may involve repairing leaks, improving ventilation, or addressing any water damage.

Cleaning and Removal

For small areas of black mold, a mixture of water and mild detergent can be used to clean the surface. However, extensive or recurring mold issues may require professional remediation to ensure thorough removal.

Preventive Measures

Proper Ventilation

Improving ventilation in the home can help prevent moisture buildup. Ensure that bathrooms, kitchens, and other areas prone to humidity have adequate ventilation systems in place.

Regular Inspections

Regularly inspect your popcorn ceiling for any signs of water damage, leaks, or mold growth. Early detection can save you from more extensive remediation efforts later on.

Consider Popcorn Ceiling Removal

If the mold problem persists, consider removing the popcorn ceiling altogether. This not only eliminates the mold-friendly texture but also provides an opportunity to address any underlying issues in the ceiling structure.

Conclusion

Black mold on popcorn ceilings is a serious issue that requires prompt attention. By understanding the signs, causes, and effective remediation strategies, homeowners can safeguard their health and property. Remember, prevention is key, and addressing moisture sources is fundamental to keeping black mold at bay. If you suspect black mold in your home, take action promptly to create a safe and healthy living environment.

Ceiling Fan Wiring Red Wire – A Comprehensive Guide: Unlocking the Mystery

Ceiling fans are essential fixtures in many homes, providing comfort and energy efficiency. However, understanding the intricate details of ceiling fan installation, especially when it comes to wiring, can be a daunting task. In this guide, we’ll delve into the often mystifying world of ceiling fan wiring, with a special focus on the enigmatic red wire.

Ceiling Fan Wiring Red Wire

Demystifying Ceiling Fan Wiring: An Overview

Ceiling fan installation involves several wires, each serving a specific purpose. Among these, the red wire stands out, often leaving homeowners puzzled. It’s crucial to unravel the mystery behind the ceiling fan wiring red wire to ensure a safe and effective installation.

Understanding the Basics: Ceiling Fan Wiring Red Wire

Before diving into the specifics of the red wire, let’s briefly review the fundamental components of ceiling fan wiring. Typically, the wires include black (hot), white (neutral), green or bare (ground), and, of course, the elusive red wire. Each of these wires plays a crucial role in the fan’s operation and safety.

The Role of the Red Wire

The ceiling fan wiring red wire is often associated with the fan’s light kit. In most cases, it is the wire that supplies power to the light. However, the exact function of the red wire can vary depending on the fan’s design and features. It’s essential to consult the fan’s manual for precise information tailored to your specific model.

Deciphering Different Scenarios

Ceiling fan installations can differ, and so can the role of the red wire. In some cases, it might be used for a dual-switch setup, allowing independent control of the fan and light. Alternatively, it could be part of a single-switch configuration where the red wire serves both the fan and light. Understanding your specific wiring setup is crucial to a successful installation.

Step-by-Step Guide: Ceiling Fan Wiring Red Wire

Now that we’ve laid the groundwork, let’s walk through a step-by-step guide on how to wire a ceiling fan, with a specific focus on the red wire.

1. Turn Off Power

Safety should always be a top priority. Before you begin, turn off the power to the circuit where you’ll be working. This can usually be done at the circuit breaker.

2. Identify Wires

Carefully identify each wire, paying close attention to the red wire. Use a voltage tester to ensure that the power is indeed off before proceeding.

3. Consult the Manual

Refer to the ceiling fan’s manual to understand the role of the red wire in your specific model. Manufacturers often provide detailed instructions tailored to their products.

4. Connect Wires

Follow the manual’s guidance to connect the wires correctly. This may involve connecting the red wire to the light kit or following a specific configuration for dual-switch setups.

5. Secure Connections

Ensure all connections are secure and well-insulated. Use wire nuts to fasten the wires together and electrical tape to provide an extra layer of protection.

6. Test the Installation

Once all the wires are connected, turn the power back on and test the fan and light to ensure everything is functioning as expected.

Troubleshooting Tips

Even with careful planning, issues may arise during installation. Here are some common troubleshooting tips related to the ceiling fan wiring red wire:

  • Check for Loose Connections: Ensure all wire connections are tight and secure.
  • Verify Switch Settings: If using a dual-switch setup, confirm that the switches are set correctly.
  • Consult Customer Support: If you encounter difficulties, don’t hesitate to contact the manufacturer’s customer support for assistance.

Read too: Understanding the Labor Cost to Texture Ceiling and Enhance Your Home: Unveiling the Secrets

Conclusion

Ceiling fan wiring, especially when it involves the red wire, may seem complex at first glance. However, armed with the right information and a methodical approach, you can successfully navigate the wiring process and enjoy the comfort and functionality of your ceiling fan. Remember, consulting the manual and prioritizing safety are key to a smooth installation process. Happy wiring!

Yellow Water Dripping From Ceiling – Causes, Concerns, and Solutions: Unveiling the Mystery

Water dripping from the ceiling is a concern in itself, but when it’s tinged yellow, it adds a layer of complexity. In this comprehensive guide, we will explore the phenomenon of “Yellow Water Dripping From Ceiling,” unraveling the causes behind it and providing valuable insights into addressing and preventing this unusual issue.

Yellow Water Dripping From Ceiling

Understanding

The sight of yellow water dripping can be alarming. To effectively tackle this issue, it’s crucial to comprehend the potential causes. This article aims to shed light on the various factors that contribute to this phenomenon and equip readers with the knowledge needed to take appropriate action.

Possible Causes of Yellow Water Dripping From Ceiling

  1. Pipe Corrosion and Rust: Over time, pipes can corrode or rust, leading to discoloration of the water flowing through them. This can result in yellow water making its way to your ceiling.
  2. Water Contamination: External factors such as soil or debris entering the water supply can cause discoloration. Understanding the source of contamination is essential in resolving the issue.
  3. Sediment Buildup in Water Heater: Sediment accumulation in your water heater can also cause yellow water. Regular maintenance and flushing of the water heater can mitigate this problem.
  4. Microbial Growth: The presence of certain microorganisms in the water supply can lead to discoloration. Testing the water for microbial contamination is a crucial step in identifying this cause.

Addressing Yellow Water Dripping From Ceiling

Once the cause has been identified, addressing the issue becomes paramount. Whether it’s replacing corroded pipes, purifying the water supply, or cleaning the water heater, targeted solutions can restore the water quality and prevent further discoloration.

Preventive Measures to Safeguard Your Water

  1. Regular Plumbing Inspections: Routine checks of your plumbing system can help identify and address issues before they escalate, preventing yellow water incidents.
  2. Water Quality Testing: Periodically testing your water for impurities, contaminants, and microbial growth ensures early detection of potential problems.
  3. Water Heater Maintenance: Flushing your water heater regularly to remove sediment buildup is a simple yet effective preventive measure.

This section delves deeper into the causes and consequences of yellow water dripping. Understanding the intricacies of this issue is crucial in implementing targeted solutions.

Read too: Understanding the Labor Cost to Texture Ceiling and Enhance Your Home: Unveiling the Secrets

Conclusion: Taking Control

In conclusion, discovering yellow water dripping from your ceiling may be unnerving, but armed with knowledge, you can navigate through the possible causes and find effective solutions. Regular maintenance, proactive measures, and timely repairs are the keys to ensuring the water in your home remains clear and safe. Don’t let the mystery of yellow water persist – take control and safeguard the quality of water flowing through your pipes and fixtures.

Incorporating these practices into your home maintenance routine will not only address the immediate issue but also contribute to the long-term well-being of your plumbing system, ensuring that “Yellow Water Dripping From Ceiling” becomes a problem of the past.

Troubleshooting Water Through Ceiling From Bathroom: Causes, Fixes, and Prevention Tips

Water damage is a homeowner’s nightmare, and one of the most distressing scenarios is discovering water seeping through the ceiling from the bathroom. This unexpected issue not only poses immediate concerns but also demands swift action to prevent further damage. In this article, we will delve into the causes behind “Water Through Ceiling From Bathroom,” offering insights into troubleshooting, fixing the issue, and providing prevention tips to safeguard your home.

Water Through Ceiling From Bathroom

Understanding the Causes of Water Through Ceiling From Bathroom

One of the primary steps in addressing this problem is identifying the root causes. Leaks, poor waterproofing, and plumbing issues are often culprits. A leaking pipe or a faulty seal around the shower can allow water to infiltrate the ceiling, leading to visible stains and structural damage over time.

Dealing with Plumbing Leaks: Water Through Ceiling From Bathroom

Plumbing leaks are a common source of water-related problems in households. Inspecting the pipes in and around your bathroom can reveal issues such as corrosion, rust, or visible leaks. If left unattended, these can result in water seeping through the ceiling. Regular maintenance and timely repairs can help mitigate this risk.

Shower and Bath Seal Inspection

Faulty seals around showers and baths are notorious for causing water damage. Over time, seals can deteriorate, leading to water escaping and causing damage to the surrounding areas. Checking and replacing these seals as part of routine maintenance can prevent water infiltration and subsequent ceiling issues.

Identifying and Repairing Roof Leaks

Sometimes, the source of the problem may not be within the bathroom itself but rather a roof leak that manifests as water through the ceiling. Conducting a thorough inspection of your roof, especially after heavy rains or storms, is crucial. Repairing any damaged or missing shingles and addressing other roof issues promptly can prevent water from entering your home.

Fixing Water Damage and Stains on Ceilings

Addressing the aftermath of water damage is as important as preventing it. If you notice water stains on your ceiling, it’s essential to take prompt action. Begin by locating the source of the leak and fixing it. Once the issue is resolved, you can focus on repairing the damaged ceiling. This may involve removing affected drywall, applying a stain-blocking primer, and repainting the area.

Prevention Tips for Water Through Ceiling From Bathroom

Prevention is undoubtedly the best approach when it comes to water damage. Implementing the following tips can help safeguard your home from “Water Through Ceiling From Bathroom”:

  1. Regular Inspections: Conduct routine inspections of your bathroom plumbing, including pipes and seals, to catch potential issues before they escalate.
  2. Proactive Maintenance: Address any leaks or plumbing issues promptly. Don’t delay repairs, as even minor leaks can lead to significant water damage over time.
  3. Waterproofing: Ensure proper waterproofing in areas prone to water exposure, such as around showers and baths. This can involve reapplying sealant and checking for gaps regularly.
  4. Roof Maintenance: Keep your roof in good condition by addressing any damage promptly. Regularly clean gutters to prevent water from pooling and causing leaks.
  5. Proper Ventilation: Ensure your bathroom has adequate ventilation to prevent moisture buildup, which can contribute to mold growth and damage over time.

Read too: Understanding the Labor Cost to Texture Ceiling and Enhance Your Home: Unveiling the Secrets

Conclusion

Discovering water through the ceiling from the bathroom can be a stressful situation, but understanding the causes and implementing preventative measures can save you from extensive damage. Regular inspections, proactive maintenance, and timely repairs are key to keeping your home dry and secure. By following these guidelines, you can maintain a watertight home and enjoy peace of mind, knowing that you’re taking steps to prevent “Water Through Ceiling From Bathroom” issues.

Exploring How Do Ceiling Sprinklers Work to Safeguard Your Space: Unveiling the Mechanics

Have you ever wondered about the intricate workings of fire protection in buildings? In this detailed exploration, we’ll unravel the mysteries behind “How Do Ceiling Sprinklers Work” to provide you with a comprehensive understanding of their functionality, significance, and the role they play in ensuring the safety of your environment.

How Do Ceiling Sprinklers Work

Understanding the Basics: How Do Ceiling Sprinklers Work

When it comes to fire safety, ceiling sprinklers are a crucial component of a building’s defense mechanism. Let’s delve into the inner workings of these fire protection systems to comprehend how they operate and contribute to the prevention and suppression of fires.

The Anatomy of Ceiling Sprinklers: How Do They Operate?

  1. Activation Mechanism: Ceiling sprinklers are designed to activate automatically in the presence of heat. Each sprinkler head contains a heat-sensitive element, typically a glass bulb filled with a heat-sensitive liquid. When the temperature in the vicinity of the sprinkler rises significantly, the bulb bursts, triggering the sprinkler to activate.
  2. Individual Activation: Contrary to common misconceptions, not all sprinklers activate simultaneously. Each sprinkler head operates independently, responding only to the heat in its immediate vicinity. This individual activation ensures that water is directed precisely where it’s needed, minimizing water damage.
  3. Water Release: Once activated, the sprinkler releases pressurized water. The force of the water discharge is calculated to control the fire effectively while minimizing water damage to the surroundings. The goal is to provide an immediate and targeted response to the specific area affected by the fire.

How Are They Configured?

  1. Standard Pendant Sprinklers: These are the most common type of sprinklers and are often seen in commercial and residential buildings. They hang down from the ceiling and release water in a downward spray pattern.
  2. Upright Sprinklers: Upright sprinklers, installed vertically, are ideal where obstructions could disrupt pendant sprinkler spray patterns.
  3. Side Wall Sprinklers: Side wall sprinklers are mounted on the walls and are designed for spaces where a pendant or upright sprinkler might not be suitable, such as in narrow corridors or confined spaces.

Read too: Understanding the Labor Cost to Texture Ceiling and Enhance Your Home: Unveiling the Secrets

How Do They Mitigate Damage?

  1. Immediate Response: The automatic activation of ceiling sprinklers ensures an immediate response to the onset of a fire. This quick reaction time is crucial in preventing the escalation of the fire and containing it to the smallest possible area.
  2. Controlled Water Discharge: The design of ceiling sprinklers allows for controlled water discharge, ensuring that the fire is suppressed effectively without causing excessive water damage to the surrounding areas. This balance is crucial for minimizing property loss.
  3. Protection of Occupants: Ceiling sprinklers play a vital role in protecting the occupants of a building by providing a swift response to fire emergencies. Their automatic activation reduces the reliance on human intervention, allowing for a timely and efficient response.

Conclusion

Understanding how ceiling sprinklers work is essential for appreciating their role in fire safety. These systems are not just passive components; they are active defenders, poised to respond swiftly to the threat of fire. By comprehending the mechanics of ceiling sprinklers, we can better appreciate the significance of these systems in safeguarding lives and property.

In conclusion, “How Do Ceiling Sprinklers Work” is not just a question of curiosity; it’s a fundamental aspect of fire safety knowledge that empowers us to create safer environments for ourselves and those around us.

Dealing with a Hole in the Ceiling from the Attic: Patching Up the Puzzle

Discovering a hole in the ceiling from the attic can be a homeowner’s nightmare. In this comprehensive guide, we’ll delve into the complexities of addressing a “Hole in Ceiling from Attic,” exploring the potential causes, assessing the damage, and providing step-by-step solutions to restore your home’s integrity.

Hole In Ceiling From Attic

Understanding the Dilemma: Hole in Ceiling from Attic

A hole in the ceiling not only compromises the aesthetic appeal of your home but also poses potential structural and safety concerns. Whether it’s a small puncture or a more significant breach, addressing the issue promptly is crucial. Let’s delve into the various aspects of a hole in the ceiling from the attic, unraveling its causes and offering practical insights into remediation.

Common Causes of a Hole in Ceiling from Attic

  1. Water Damage: Water leaks from the roof can gradually weaken the ceiling materials, leading to the formation of a hole. This is often exacerbated by long-term neglect or unnoticed leaks.
  2. Pest Infestation: Insects or rodents nesting in the attic can burrow through ceiling materials, creating holes. Identifying and addressing the pest issue is vital to prevent further damage.
  3. Structural Issues: If the attic floor joists are compromised or if there’s excessive weight on the ceiling, it can result in structural damage, including the formation of holes.
  4. Wear and Tear: Aging homes may experience wear and tear, causing the ceiling materials to weaken and develop holes. This is common in properties with outdated or poorly maintained ceilings.

Assessing the Severity of a Hole in Ceiling from Attic

  1. Size and Location: Measure the size of the hole and note its location. Larger holes or those closer to structural components may require more extensive repairs.
  2. Potential Structural Damage: Assess the area around the hole for any signs of structural damage. Sagging, cracks, or additional holes may indicate broader issues that need attention.
  3. Inspect Attic Conditions: Examine the attic to identify the root cause of the hole. Look for leaks, pests, or structural problems that may have contributed to the damage.

Read too: Understanding the Labor Cost to Texture Ceiling and Enhance Your Home: Unveiling the Secrets

Step-by-Step Solutions

  1. Temporary Patching: For immediate relief, use a temporary patch to cover the hole. This can include using plywood, drywall, or a combination of materials to secure the area until a permanent fix is implemented.
  2. Identify and Repair the Cause: Investigate the attic to identify and address the root cause. Fix any water leaks, eliminate pests, and reinforce structural components to prevent further damage.
  3. Permanent Patching: Once the cause is resolved, proceed with a permanent patch for the hole. Cut out the damaged section, replace it with new material, and seal the area with joint compound.
  4. Ceiling Finishing: After patching, sand the repaired area and apply a primer and paint to match the surrounding ceiling. This ensures a seamless finish that blends with the existing aesthetics.

Preventive Measures for Future Holes in Ceiling from Attic

  1. Regular Inspections: Conduct regular attic inspections to identify and address issues before they escalate. Look for signs of leaks, pests, or structural concerns.
  2. Proactive Maintenance: Implement proactive maintenance measures, including roof inspections, pest control, and reinforcing attic structures, to prevent future holes from forming.
  3. Prompt Repairs: Address any signs of damage or wear and tear promptly. Timely repairs can prevent small issues from developing into more significant problems.

Conclusion

A hole in the ceiling from the attic demands immediate attention to safeguard your home’s structural integrity and aesthetics. By understanding the potential causes, assessing the severity of the damage, and following the step-by-step solutions provided in this guide, you can navigate the challenge of a hole in the ceiling with confidence. Remember, proactive maintenance and timely intervention are essential for ensuring the longevity and safety of your home.

Understanding and Addressing Cracks at Ceiling and Wall: Navigating the Signs

Dealing with cracks at ceiling and wall can be concerning. In this comprehensive guide, we’ll delve into the complexities of “Cracks at Ceiling and Wall,” exploring the potential causes, assessing the severity of the issue, and providing practical solutions for effective repair and prevention.

Cracks At Ceiling And Wall

Understanding the Dilemma: Cracks at Ceiling and Wall

The appearance of cracks at the junction of the ceiling and wall is not uncommon in homes. However, the key lies in deciphering the type of crack and its potential implications. Let’s dive into the various aspects of cracks, unraveling their causes and offering insights into how to navigate this structural challenge.

Common Causes of Cracks at Ceiling and Wall

  1. Structural Movements: Natural settling of a house over time can result in structural movements, leading to cracks at the ceiling and wall interface.
  2. Temperature and Humidity Fluctuations: Seasonal changes and variations in humidity levels can cause materials to expand and contract, contributing to the development of cracks.
  3. Foundation Issues: Problems with the foundation, such as settling or shifting, can create stress points in the structure, manifesting as cracks along the ceiling and wall.
  4. Water Damage: Infiltration of water through leaks, seepage, or inadequate drainage can weaken the structure, causing cracks at the vulnerable junction.

Assessing the Severity

  1. Width and Depth: Measure the width and depth of the cracks. Generally, wider and deeper cracks may indicate more significant structural issues.
  2. Direction of Cracks: The direction of the cracks can provide insights. Vertical cracks might be related to settling, while horizontal cracks could signal foundation problems.
  3. Additional Symptoms: Look for additional symptoms such as door or window misalignment, uneven floors, or gaps between walls and floors, as these can indicate underlying issues.

Addressing Cracks at Ceiling and Wall: Practical Solutions

  1. Fill and Paint: For minor cracks, filling with a quality patching compound and repainting can provide a cosmetic fix. However, this may not address underlying structural concerns.
  2. Sealant for Minor Gaps: Use a flexible sealant for minor gaps. This helps prevent moisture intrusion and can be a temporary solution for small, non-structural cracks.
  3. Consult a Professional: For significant or recurring cracks, consult with a structural engineer or a professional contractor. They can assess the severity of the issue and recommend appropriate solutions.
  4. Foundation Repair: If foundation issues are identified, foundation repair may be necessary. This could involve underpinning, reinforcing, or stabilizing the foundation to prevent further movement.
  5. Proactive Maintenance: Implement proactive maintenance measures, including proper drainage, regular inspection for water leaks, and addressing any signs of structural movements promptly.

Preventive Measures

  1. Maintain Consistent Indoor Conditions: Control indoor temperature and humidity levels to minimize the impact of expansion and contraction on building materials.
  2. Regular Inspections: Conduct regular inspections of the foundation, walls, and ceiling. Identify and address potential issues before they escalate.
  3. Proper Drainage: Ensure proper drainage around the property to prevent water accumulation, which can contribute to foundation issues.

Read too: Understanding the Labor Cost to Texture Ceiling and Enhance Your Home: Unveiling the Secrets

Conclusion

Cracks at the ceiling and wall junction can be indicative of various underlying problems, ranging from minor settling to significant structural issues. By understanding the potential causes, assessing the severity of the cracks, and implementing appropriate solutions, homeowners can navigate this challenge effectively. Remember, proactive maintenance and timely intervention are key to ensuring the long-term stability and integrity of your home.

Exploring What Causes a Crack in the Ceiling and How to Address It: Unveiling the Mystery

Have you ever wondered, “What Causes a Crack in the Ceiling?” In this in-depth exploration, we’ll unravel the factors behind ceiling cracks, providing insights into their origins and offering practical solutions for prevention and repair.

What Causes Crack In Ceiling

Understanding the Dilemma: What Causes a Crack in the Ceiling

Ceiling cracks can be a source of concern for homeowners, signaling potential structural issues or environmental factors that need attention. Let’s delve into the various causes of cracks in the ceiling and understand how each factor contributes to this common problem.

Common Causes of Ceiling Cracks

  1. Settling and Foundation Issues: One of the primary causes of ceiling cracks is the natural settling of a building over time. As a house or structure settles into its foundation, stress can be exerted on the ceiling, resulting in cracks.
  2. Temperature and Humidity Fluctuations: Extreme temperature changes and fluctuations in humidity levels can cause materials in the ceiling to expand and contract. This continuous movement can lead to the development of cracks.
  3. Structural Movements: Structural movements, such as the shifting of load-bearing walls or the settling of support beams, can create stress points in the ceiling, leading to the formation of cracks.
  4. Water Damage: Roof, plumbing, or condensation leaks can infiltrate the ceiling, weakening its integrity and causing cracks. Water damage is a common contributor to ceiling issues.
  5. Poor Construction Practices: Subpar materials or improper installation during construction can lead to a compromised ceiling prone to cracking.

Addressing the Causes: What to Do About a Crack in the Ceiling

  1. Inspect and Assess: Begin by inspecting the crack to determine its severity and identify any potential underlying issues. Assess whether the crack is superficial or indicative of a more significant problem.
  2. Foundation Evaluation: If settling or foundation issues are suspected, consult with a structural engineer to evaluate the foundation. Addressing foundational concerns can prevent further damage to the ceiling.
  3. Temperature and Humidity Control: Implement measures to control indoor temperature and humidity levels. Proper insulation, ventilation, and the use of dehumidifiers can help minimize the impact of environmental fluctuations.
  4. Structural Repairs: If structural movements are identified, enlist the expertise of a contractor or structural engineer to assess and repair the underlying issues. This may involve reinforcing support beams or walls.
  5. Address Water Intrusion: Identify and repair sources of water intrusion promptly. Fix roof leaks, address plumbing issues, and ensure proper drainage to prevent ongoing water damage to the ceiling.

Read too: Understanding the Labor Cost to Texture Ceiling and Enhance Your Home: Unveiling the Secrets

Preventive Measures to Avoid Ceiling Cracks

  1. Proper Construction Practices: Ensure that construction work adheres to industry standards and uses quality materials. Proper installation and craftsmanship play a crucial role in preventing future ceiling issues.
  2. Regular Maintenance: Conduct regular inspections of the roof, plumbing, and other potential sources of water damage. Timely maintenance can help identify and address issues before they lead to cracks.
  3. Foundation Maintenance: Implement preventive measures for foundation maintenance, including proper grading for water runoff and avoiding overloading structural components.

Conclusion

Understanding what causes a crack in the ceiling is the first step towards effective prevention and resolution. Address settling and foundation issues, manage environmental factors, and implement preventive measures to proactively safeguard your home from potential hazards linked to ceiling cracks. By combining thorough inspections, targeted repairs, and ongoing maintenance, you can ensure the longevity and structural integrity of your ceiling, providing peace of mind for you and your family.