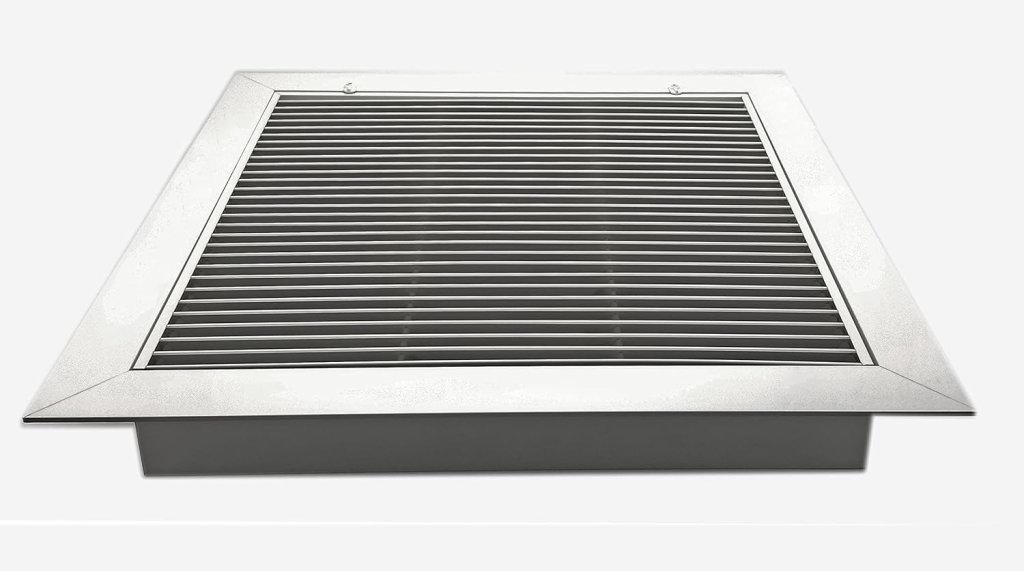
LED Drop Ceiling Tiles: Maximizing Efficiency and Style

Lighting plays a crucial role in any interior space, whether it’s a home, office, or commercial environment. Among the modern lighting solutions gaining popularity, LED drop ceiling tiles stand out for their ability to enhance lighting efficiency while maintaining a sleek, professional appearance. These innovative tiles seamlessly combine form and function, offering both high-quality illumination and an aesthetically pleasing ceiling design.

Led Drop Ceiling Tiles

In this article, we will explore everything you need to know about LED drop ceiling tiles, including their benefits, installation process, and how they can transform your space. Whether you’re updating a residential room or enhancing a large commercial area, LED drop ceiling tiles are a practical solution worth considering.

What Are LED Drop Ceiling Tiles?

LED drop ceiling tiles are integrated lighting fixtures designed to fit into suspended or “drop” ceilings, often found in offices, commercial spaces, and modern homes. These tiles replace standard ceiling panels, with LED lights embedded within the tile itself. This design not only brightens the room but also maintains a clean and cohesive ceiling appearance.

Drop ceilings, also known as suspended ceilings, are commonly made up of a grid framework where ceiling panels (typically made of materials like mineral fiber or fiberglass) are placed. Instead of using traditional panels, LED drop ceiling tiles serve the dual purpose of filling the grid slot while also providing a light source, eliminating the need for separate light fixtures.

Why Choose LED Drop Ceiling Tiles?

In recent years, LED lighting has become the preferred choice over traditional incandescent or fluorescent bulbs due to its energy efficiency, long lifespan, and minimal maintenance requirements. LED drop ceiling tiles go a step further by offering an all-in-one solution that combines lighting with ceiling aesthetics. Here are a few reasons why they have become so popular:

  • Energy Efficiency: LED lights use significantly less energy than traditional lighting, helping you reduce energy costs while providing brighter illumination.
  • Long Lifespan: LEDs can last up to 50,000 hours, which means you won’t have to worry about frequent replacements. This is especially beneficial in commercial spaces where continuous operation is common.
  • Slim and Sleek Design: LED drop ceiling tiles are designed to blend seamlessly with your ceiling grid, providing a streamlined look without the need for bulky lighting fixtures.
  • Uniform Light Distribution: The tiles are engineered to provide even lighting across the space, eliminating shadows and dark spots.
  • Customizable Appearance: Many LED drop ceiling tiles are available in various sizes, shapes, and colors, making it easier to match your ceiling design and overall decor.

Read too: Shiplap Ceiling in Kitchen: A Timeless Trend for a Stylish and Cozy Space

Benefits of Using LED Drop Ceiling Tiles

Choosing LED drop ceiling tiles for your space comes with numerous advantages, ranging from their aesthetic appeal to their high functionality. Below are some of the top benefits of installing LED drop ceiling tiles:

1. Energy Savings and Efficiency

One of the most compelling reasons to opt for LED drop ceiling tiles is the energy savings. LED technology is known for its ability to produce bright light while consuming a fraction of the energy that traditional lighting uses. This can lead to substantial cost savings, especially in large commercial spaces where lights are used for extended periods.

Additionally, LED drop ceiling tiles often come with dimming features or motion sensors, further optimizing energy use by adjusting the lighting based on the room’s occupancy and needs.

2. Improved Aesthetic Appeal

Unlike bulky lighting fixtures, LED drop ceiling tiles integrate directly into the ceiling, offering a more streamlined and modern look. Whether you’re designing an office or updating a home, LED tiles can significantly enhance the appearance of the room. They are especially useful in professional settings where a clean, minimalist look is desired.

Moreover, many LED tiles can be customized to match or complement existing ceiling panels. Some even come with decorative patterns or textures that can add a unique touch to your interior design.

3. Easy Installation and Maintenance

The installation process for LED drop ceiling tiles is straightforward, especially if you already have a suspended ceiling system in place. The tiles are designed to fit seamlessly into the ceiling grid, and many models come with plug-and-play systems, making them easy to connect to existing wiring.

In terms of maintenance, LED lights are highly durable and long-lasting. Unlike traditional bulbs that need frequent replacement, LED drop ceiling tiles can last for many years with minimal upkeep. This makes them an ideal choice for both residential and commercial environments where reducing maintenance costs is a priority.

4. Enhanced Lighting Quality

LEDs provide superior lighting quality compared to older lighting technologies. LED drop ceiling tiles offer uniform light distribution, reducing glare and creating a more comfortable working or living environment. These tiles also have better color rendering, making colors appear more vibrant and true to life. Whether you’re working in an office or relaxing at home, LED tiles can significantly improve the overall atmosphere of a room.

5. Eco-Friendly Option

As sustainability becomes a more pressing concern, LED drop ceiling tiles are a great choice for those looking to reduce their carbon footprint. LEDs consume less energy and produce less heat than traditional lighting options, making them more environmentally friendly. Additionally, they contain no harmful materials like mercury, which is commonly found in fluorescent lighting, making them safer for the environment when they reach the end of their lifespan.

How to Choose the Right LED Drop Ceiling Tiles for Your Space

When selecting LED drop ceiling tiles, there are a few factors to keep in mind to ensure you make the right choice for your specific needs.

1. Tile Size and Compatibility

Ensure that the LED drop ceiling tiles you choose are compatible with your existing ceiling grid. Standard ceiling grids usually accommodate 2×2 or 2×4-foot tiles, but it’s important to measure your space accurately before making a purchase.

2. Brightness and Color Temperature

LED tiles come in various brightness levels, measured in lumens, as well as different color temperatures, ranging from warm white (2700K) to cool white (5000K) and daylight (above 5000K). Choose a brightness level and color temperature that fits your space’s function. For example, cool white or daylight is often ideal for offices and workspaces, while warmer tones are better for residential areas like living rooms and bedrooms.

3. Dimming and Control Options

Some LED drop ceiling tiles come with dimming features, allowing you to adjust the brightness as needed. This is a particularly useful feature in multi-purpose rooms or conference rooms where different lighting levels may be required. Consider whether you want dimmable lights and whether you prefer manual controls or integration with a smart lighting system.

4. Certifications and Warranty

Check for certifications like ENERGY STAR or UL listings, which indicate the product has met safety and energy efficiency standards. It’s also a good idea to check the warranty offered by the manufacturer, as this can give you peace of mind regarding the product’s durability.

Installation Process for LED Drop Ceiling Tiles

While it’s possible to install LED drop ceiling tiles on your own, it’s always recommended to consult with an electrician if you’re not familiar with electrical wiring. Here is a general overview of the installation process:

Tools and Materials Needed:

  • LED drop ceiling tiles
  • Wire connectors
  • Ladder or scaffold
  • Measuring tape
  • Screwdriver
  • Electrical wiring (if not already present)

Installation Steps:

  1. Turn Off the Power: Before starting, ensure that the power to the room is turned off to avoid electrical hazards.
  2. Measure and Prepare: Measure the ceiling grid and ensure that your LED tiles fit properly. Adjust the grid if necessary, and remove any existing panels where the LED tiles will be placed.
  3. Wiring: If you’re installing new wiring, run it along the ceiling grid. Connect the wiring from the power source to the LED tiles using wire connectors.
  4. Insert the Tiles: Gently insert the LED drop ceiling tiles into the grid, ensuring that they sit securely.
  5. Test the Lights: After installation, turn the power back on and test the lights to ensure they work correctly.

Conclusion: LED Drop Ceiling Tiles – The Smart Choice for Modern Spaces

LED drop ceiling tiles offer a versatile, energy-efficient, and aesthetically pleasing lighting solution for a variety of environments. Whether you’re upgrading an office, retail space, or residential room, these tiles can significantly improve both the lighting quality and the appearance of your ceiling. With easy installation, low maintenance, and a range of customization options, LED drop ceiling tiles are a smart choice for anyone looking to enhance their interior space.

Kitchen Lights for High Ceilings: Illuminate Your Space with Style

When designing a kitchen, lighting plays a critical role in both functionality and aesthetics. In homes with high ceilings, selecting the right kitchen lights for high ceilings can transform an ordinary kitchen into an inviting and stylish space. Whether you’re planning a complete renovation or simply updating your fixtures, understanding the various lighting options available is essential for creating a well-lit and attractive kitchen.

Kitchen Lights For High Ceilings

Understanding the Importance of Proper Lighting

Lighting is not merely a functional necessity; it also significantly impacts the mood and ambiance of a room. In kitchens, especially those with high ceilings, the right lighting can:

  1. Enhance Visibility: Good lighting ensures that work areas are well-illuminated, making cooking and food preparation safer and more efficient.
  2. Create a Welcoming Atmosphere: The right fixtures and lighting techniques can turn your kitchen into a warm gathering space for family and friends.
  3. Highlight Architectural Features: High ceilings often come with unique architectural details. Proper lighting can accentuate these features, adding character to your kitchen.
  4. Influence Design Choices: The type of lighting you choose can complement your overall kitchen design, whether it’s modern, traditional, or somewhere in between.

Read too: Shiplap Ceiling in Kitchen: A Timeless Trend for a Stylish and Cozy Space

Types of Kitchen Lights for High Ceilings

When choosing kitchen lights for high ceilings, it’s crucial to understand the different types of lighting available and how they can work together. Below are the main types of lighting to consider:

1. Ambient Lighting

Ambient lighting provides the general illumination necessary for navigating and working in the kitchen. It sets the overall mood and tone of the space. For high ceilings, consider the following options:

  • Chandeliers: A striking chandelier can serve as a stunning centerpiece while providing ample light. Choose one that complements your kitchen’s style and is proportionate to the ceiling height.
  • Pendant Lights: Hang pendant lights over islands or dining areas. These fixtures can add a decorative element while providing focused light. Select adjustable models to control the height according to your ceiling.
  • Recessed Lighting: Installed into the ceiling, recessed lights offer a clean and unobtrusive look. They can be used in combination with other light sources to create a well-lit environment without overwhelming the space.

2. Task Lighting

Task lighting focuses on specific areas where activities are performed, such as food preparation and cooking. This type of lighting is essential in a kitchen for practicality. Here are some effective task lighting options:

  • Under-Cabinet Lighting: LED strips or puck lights installed under cabinets illuminate countertops, making cooking and preparation easier and safer.
  • Directional Track Lighting: Track lighting can be adjusted to shine light on work areas, making it an excellent option for high ceilings. This flexibility allows you to direct light exactly where it’s needed.
  • Hanging Fixtures: Consider using adjustable pendant lights above islands or workstations to provide direct illumination for cooking and preparation tasks.

3. Accent Lighting

Accent lighting adds visual interest and depth to your kitchen. It can highlight architectural features, artwork, or decorative elements. For high ceilings, consider:

  • Wall Sconces: Install sconces to accentuate features like cabinetry or artwork. They can add a warm glow and enhance the overall ambiance of the kitchen.
  • Spotlights: Use adjustable spotlights to focus on particular areas, such as open shelving or a feature wall.
  • Cove Lighting: If your kitchen design allows, cove lighting can be installed along the perimeter of the ceiling. This indirect lighting creates a soft glow that enhances the feeling of space.

Choosing the Right Fixtures

When selecting kitchen lights for high ceilings, consider the following factors to ensure you make the best choices:

1. Scale and Proportion

The scale of your lighting fixtures is critical, especially in a kitchen with high ceilings. Large chandeliers or pendant lights can create a dramatic effect, while smaller fixtures might get lost in the space. Always consider the proportions of the room when selecting fixtures.

2. Style and Design

Your lighting fixtures should complement your kitchen’s overall design aesthetic. Whether you opt for modern, rustic, traditional, or industrial styles, ensure that your lighting choices align with your kitchen’s decor.

3. Color Temperature

The color temperature of your bulbs affects the mood of your kitchen. Warmer tones (around 2700K to 3000K) create a cozy atmosphere, while cooler tones (around 4000K to 5000K) offer a more modern and energetic feel. Choose a color temperature that aligns with the ambiance you wish to create.

4. Energy Efficiency

With the increasing focus on sustainability, consider energy-efficient options like LED lighting. LEDs consume less energy, have a longer lifespan, and are available in various styles to suit your design preferences.

Installation Considerations

Installing kitchen lights for high ceilings can be a bit more complex than standard installations. Here are some tips to consider:

1. Professional Installation

For high ceilings, it’s often best to hire a professional electrician. They have the tools and expertise to safely install fixtures and ensure proper wiring.

2. Accessibility

Consider how easy it will be to change bulbs or perform maintenance on your fixtures. Opt for fixtures that are accessible or easily adjustable to make upkeep simpler.

3. Wiring and Outlets

Ensure that your kitchen has sufficient outlets and that the wiring can handle the additional load if you plan to add multiple fixtures. It’s important for safety and functionality.

Creative Ideas for Kitchen Lights in High Ceilings

Incorporating lighting in a kitchen with high ceilings opens up various creative opportunities. Here are some inspiring ideas:

1. Layered Lighting

Layering different types of lighting—ambient, task, and accent—can create a balanced and visually interesting kitchen. Use a combination of fixtures to achieve the perfect ambiance.

2. Statement Pieces

Invest in a stunning chandelier or a group of eye-catching pendant lights to serve as a focal point in your kitchen. This can enhance the space’s visual interest and provide a conversation starter.

3. Dimmers and Controls

Install dimmers to control the intensity of your lighting. This allows you to create different moods for various occasions, from bright lighting for cooking to soft lighting for dining.

4. Highlight Architectural Features

Use lighting to accentuate the unique features of your kitchen, such as a vaulted ceiling, exposed beams, or intricate cabinetry. This draws attention to these details and enhances the overall design.

Maintenance Tips for Your Kitchen Lighting

To keep your kitchen lights for high ceilings looking and functioning their best, consider these maintenance tips:

1. Regular Cleaning

Dust and debris can accumulate on fixtures, diminishing their effectiveness. Regularly clean your lights to ensure maximum brightness.

2. Replace Burned-Out Bulbs Promptly

When bulbs burn out, replace them as soon as possible. This ensures that your kitchen remains well-lit and functional.

3. Inspect Wiring and Connections

Periodically check the wiring and connections for signs of wear or damage. Address any issues immediately to ensure safety.

4. Consider Seasonal Changes

Adjust your lighting choices based on seasonal changes. In summer, you might prefer cooler light tones, while warmer tones can enhance coziness in winter.

Conclusion

Selecting the right kitchen lights for high ceilings is essential for creating a functional, stylish, and inviting culinary space. By understanding the various types of lighting available, considering the scale and style of your fixtures, and implementing proper installation techniques, you can significantly enhance your kitchen’s ambiance. Whether you prefer a rustic charm, modern minimalism, or traditional elegance, the right lighting will illuminate your kitchen beautifully.

Kitchen Lighting for Vaulted Ceilings: Elevate Your Space with Style and Functionality

When it comes to designing a kitchen, lighting plays a pivotal role in enhancing both the aesthetics and functionality of the space. This is especially true for kitchens with vaulted ceilings, which offer unique architectural features and challenges. Properly designed kitchen lighting for vaulted ceilings not only illuminates the area effectively but also complements the overall decor. In this article, we’ll explore the different types of lighting suitable for vaulted ceilings, tips for effective installation, and design ideas to create a stunning culinary space.

Kitchen Lighting For Vaulted Ceilings

Understanding the Importance of Lighting in Kitchens with Vaulted Ceilings

A kitchen with vaulted ceilings has a distinctive charm that can create an open and airy feeling. However, the height can make it difficult to achieve a well-lit environment. Adequate kitchen lighting for vaulted ceilings is essential for a few reasons:

  1. Enhanced Visibility: Cooking and food preparation require sufficient lighting to ensure safety and efficiency. Inadequate lighting can lead to accidents and make tasks cumbersome.
  2. Aesthetic Appeal: Good lighting can highlight architectural features, enhance the color scheme, and create a warm and inviting atmosphere.
  3. Functionality: A well-lit kitchen can make the space more functional, allowing you to focus on specific areas such as the countertop, sink, or dining area.
  4. Mood Setting: Lighting can influence the mood of a space. A well-designed lighting plan can transform your kitchen from a functional area to a welcoming space for family and friends.

Read too: Shiplap Ceiling in Kitchen: A Timeless Trend for a Stylish and Cozy Space

Types of Kitchen Lighting for Vaulted Ceilings

When considering kitchen lighting for vaulted ceilings, it’s important to understand the different types of lighting available and how they can work together. Here are the three primary types of lighting you should consider:

1. Ambient Lighting

Ambient lighting is the general illumination that fills the room. It provides a uniform level of brightness and serves as the foundation of your kitchen lighting design. For vaulted ceilings, ambient lighting can be achieved through:

  • Recessed Lighting: Installed directly into the ceiling, recessed lights can be placed strategically to illuminate the kitchen evenly. Opt for adjustable fixtures to direct light where it’s needed most.
  • Flush Mount Ceiling Fixtures: These fixtures are installed close to the ceiling and are ideal for lower vaulted ceilings. They come in various designs, making it easy to find one that complements your kitchen decor.
  • Pendant Lights: Hanging pendant lights can provide ambient lighting while also serving as decorative elements. They can be hung above an island or dining area to create a focal point.

2. Task Lighting

Task lighting focuses on specific areas where you perform activities such as cooking, chopping, and reading recipes. This type of lighting is essential in a kitchen with vaulted ceilings for its practical benefits. Options include:

  • Under-Cabinet Lighting: LED strips or puck lights installed beneath cabinets can illuminate countertops, making food preparation safer and easier.
  • Pendant Lights Over Workspaces: Hang pendant lights over the kitchen island or other work areas to provide direct lighting where it’s needed most.
  • Track Lighting: Adjustable track lighting allows you to direct light to specific areas, providing excellent task lighting for cooking and prep areas.

3. Accent Lighting

Accent lighting adds visual interest and highlights architectural features, artwork, or decorative elements in your kitchen. For vaulted ceilings, consider:

  • Wall Sconces: Installing sconces on walls can draw attention to features like stonework or cabinetry, adding depth and character to your kitchen.
  • Spotlights: Use adjustable spotlights to highlight artwork or unique architectural elements in your kitchen.
  • Decorative Fixtures: Statement fixtures, such as a large chandelier or an eye-catching pendant light, can serve as both ambient and accent lighting, becoming a central piece of decor.

Design Ideas for Kitchen Lighting with Vaulted Ceilings

When designing kitchen lighting for vaulted ceilings, consider the overall style of your kitchen. Here are some design ideas to inspire your lighting choices:

1. Rustic Charm

For a rustic kitchen, opt for wrought iron or wooden fixtures that echo the natural materials used in the space. Pendant lights with warm bulbs can enhance the cozy atmosphere. Recessed lighting can be used to provide ambient light without detracting from the rustic aesthetic.

2. Modern Minimalism

In a modern kitchen, sleek and simple fixtures are ideal. Choose pendant lights with clean lines and metallic finishes. Consider using recessed lighting to maintain a clutter-free look while providing ample ambient light.

3. Industrial Style

Industrial kitchens often feature exposed beams and raw materials. Choose large, bold pendant lights made of metal or glass to complement the industrial aesthetic. Use track lighting to highlight specific areas, like open shelving or workspaces.

4. Traditional Elegance

For a traditional kitchen, chandeliers or ornate pendant lights can add an elegant touch. Pair them with recessed lighting for practicality. Wall sconces can also enhance the overall ambiance and provide additional light.

Tips for Installing Kitchen Lighting for Vaulted Ceilings

Installing lighting in a kitchen with vaulted ceilings requires careful planning and consideration. Here are some tips to ensure effective and safe installation:

1. Plan Your Layout

Before purchasing fixtures, sketch a layout of your kitchen and determine where you need light the most. Consider the workflow in your kitchen and how lighting can enhance your cooking and prep areas.

2. Choose the Right Fixtures

Select fixtures that not only provide adequate lighting but also fit the scale of your kitchen. Large chandeliers can look stunning in high-ceiling spaces, while smaller pendant lights may get lost in the space.

3. Use Dimmer Switches

Install dimmer switches to allow for adjustable lighting levels. This is particularly useful for creating ambiance during gatherings or intimate dinners.

4. Consider Professional Help

If you’re unsure about the electrical work involved, consider hiring a professional electrician to ensure safe and proper installation of your lighting fixtures.

Maintenance of Kitchen Lighting Fixtures

To keep your kitchen lighting for vaulted ceilings looking and functioning their best, regular maintenance is essential:

  1. Dust Regularly: Dust and debris can accumulate on fixtures, affecting their performance. Regularly wipe down all light fixtures to keep them clean.
  2. Replace Bulbs Promptly: When a bulb burns out, replace it as soon as possible to maintain consistent lighting levels.
  3. Check Wiring and Connections: Periodically inspect the wiring and connections for any signs of wear or damage. Address any issues immediately to ensure safety.
  4. Adjust as Needed: If you find certain areas of your kitchen are under-illuminated, consider adding additional fixtures or adjusting the positioning of existing lights.

Conclusion

Selecting the right kitchen lighting for vaulted ceilings is crucial for creating a functional and inviting culinary space. By understanding the different types of lighting, exploring various design ideas, and implementing smart installation tips, you can enhance the beauty and functionality of your kitchen. Whether your style is rustic, modern, or traditional, the right lighting will illuminate your kitchen and create a warm atmosphere for cooking and entertaining.

Kichler Outdoor Ceiling Fan: The Perfect Blend of Style and Functionality for Your Outdoor Spaces

When it comes to enhancing the comfort and aesthetic appeal of your outdoor spaces, few solutions rival the elegance and utility of a Kichler Outdoor Ceiling Fan. Renowned for its combination of style, efficiency, and durability, Kichler fans have become a popular choice for homeowners looking to elevate their patios, decks, or porches. In this article, we’ll explore the various features, benefits, and styles of Kichler outdoor ceiling fans, helping you make an informed decision about your next home improvement project.

Kichler Outdoor Ceiling Fan

Why Choose a Kichler Outdoor Ceiling Fan?

Kichler has established itself as a leading brand in the lighting and ceiling fan industry, known for its commitment to quality and innovation. Here are several reasons why a Kichler Outdoor Ceiling Fan might be the perfect addition to your home:

1. Stylish Designs

Kichler outdoor ceiling fans come in a wide variety of styles, colors, and finishes. Whether you prefer a sleek modern look, a classic rustic charm, or a tropical flair, Kichler offers designs that can seamlessly integrate into any outdoor decor. This versatility allows homeowners to enhance their outdoor aesthetics while enjoying the benefits of a ceiling fan.

2. Durable Construction

Designed specifically for outdoor use, Kichler fans are constructed from high-quality materials that can withstand the elements. Many models feature weather-resistant finishes and materials such as stainless steel and durable plastics that resist corrosion, ensuring your fan remains in excellent condition even in harsh weather conditions.

3. Energy Efficiency

With energy efficiency being a crucial consideration for many homeowners, Kichler outdoor ceiling fans are designed to move air effectively while consuming minimal electricity. This not only helps keep outdoor areas comfortable during hot summer months but also reduces energy costs associated with cooling your home.

Read too: Shiplap Ceiling in Kitchen: A Timeless Trend for a Stylish and Cozy Space

4. Quiet Operation

Noise can be a significant factor when it comes to ceiling fans, especially in outdoor settings where peace and tranquility are desired. Kichler fans are engineered for quiet operation, allowing you to enjoy the gentle breeze without disruptive sounds. This feature is particularly important for spaces meant for relaxation and entertaining.

5. Versatile Mounting Options

Kichler offers various mounting options, including flush mount, downrod, and angled ceiling mounts. This versatility allows you to install the fan in virtually any outdoor space, ensuring optimal airflow regardless of the ceiling height or angle.

Key Features of Kichler Outdoor Ceiling Fans

Weather Resistance

As outdoor fans, Kichler models are designed to endure varying weather conditions. Most fans feature wet or damp ratings, meaning they can handle direct exposure to rain and humidity. This feature ensures longevity and reliable performance in outdoor environments.

Motor Technology

Kichler outdoor ceiling fans are equipped with powerful motors that provide optimal airflow. Many models use DC motors, which are not only energy-efficient but also offer multiple speed settings for customizable comfort. This technology helps circulate air effectively, making outdoor spaces more enjoyable.

Lighting Options

Some Kichler outdoor ceiling fans come with integrated lighting options, allowing you to illuminate your outdoor areas while enjoying a cooling breeze. Whether you need bright light for evening gatherings or soft ambient lighting for intimate dinners, Kichler offers a variety of lighting options to suit your needs.

Easy Installation

Kichler designs its fans with user-friendly installation in mind. Many models come with straightforward instructions and mounting hardware, making it easier for homeowners or contractors to install the fan without professional help. This DIY-friendly approach saves both time and money.

Popular Kichler Outdoor Ceiling Fan Models

To help you understand the diverse offerings from Kichler, here are a few popular models that stand out for their performance and aesthetics:

1. Kichler Canfield 52-Inch Outdoor Ceiling Fan

The Kichler Canfield model is an excellent choice for those looking for a stylish yet functional fan. With its classic design and integrated light kit, it fits perfectly in any outdoor setting. The Canfield fan offers a weather-resistant finish, making it ideal for patios and porches.

2. Kichler Kellen 52-Inch Outdoor Ceiling Fan

The Kellen model features a contemporary design with sleek lines and a brushed nickel finish. Its powerful motor provides ample airflow, making it perfect for large outdoor spaces. The Kellen fan is also compatible with Kichler’s remote control system, allowing you to adjust the settings from anywhere in your outdoor area.

3. Kichler Galvanized Outdoor Ceiling Fan

The Galvanized fan combines rustic charm with modern performance. Featuring a galvanized finish and wooden blades, this fan is perfect for outdoor spaces that embrace a farmhouse or industrial theme. Its durable construction ensures it can handle outdoor conditions while providing a stylish focal point.

4. Kichler Evere 56-Inch Outdoor Ceiling Fan

The Evere model offers a more robust option for larger spaces. With a 56-inch blade span and multiple speed settings, it delivers powerful airflow while maintaining energy efficiency. The Evere fan is designed with a unique aesthetic that complements contemporary and transitional outdoor styles.

Installation and Maintenance Tips for Kichler Outdoor Ceiling Fans

Installation Steps

Installing a Kichler Outdoor Ceiling Fan can be straightforward, especially with the right tools and preparations. Here’s a quick overview of the installation process:

  1. Choose the Right Location: Select a suitable location for your fan, ensuring there’s enough clearance from furniture and structures.
  2. Install the Mounting Bracket: Attach the mounting bracket to the ceiling junction box, ensuring it’s secure and properly aligned.
  3. Connect the Wires: Follow the wiring instructions provided by Kichler to connect the fan’s motor to the electrical supply. Ensure all connections are secure.
  4. Attach the Fan Blades: Once the motor is installed, attach the fan blades according to the manufacturer’s instructions.
  5. Install the Light Kit (if applicable): If your model includes a light kit, attach it following the instructions provided.
  6. Test the Fan: Once everything is installed, turn on the power and test the fan to ensure it operates correctly.

Maintenance Tips

To ensure your Kichler outdoor ceiling fan remains in top condition, follow these maintenance tips:

  • Regular Cleaning: Dust and debris can accumulate on fan blades, affecting performance. Regularly wipe down the blades with a damp cloth to keep them clean.
  • Inspect for Wear and Tear: Periodically check for signs of wear, such as loose blades or frayed wiring. Address any issues promptly to ensure safety and efficiency.
  • Lubricate the Motor: If your model requires it, lubricate the motor according to the manufacturer’s instructions. This will help keep the fan running smoothly.
  • Prepare for Winter: If you live in an area with harsh winters, consider covering or removing the fan during the cold months to prevent damage.

Conclusion

Investing in a Kichler Outdoor Ceiling Fan is a fantastic way to enhance the comfort, aesthetics, and functionality of your outdoor spaces. With a wide range of styles, durable construction, and energy-efficient performance, Kichler fans offer everything you need to enjoy your patio, deck, or porch to the fullest. By following the installation and maintenance tips provided in this article, you can ensure that your Kichler outdoor ceiling fan continues to deliver comfort and elegance for years to come.

Insulation Above Garage Ceiling: A Comprehensive Guide to Comfort and Efficiency

When considering home improvement projects, Insulation Above Garage Ceiling is often overlooked. However, properly insulating the garage ceiling is essential for maintaining comfort in your home, improving energy efficiency, and reducing noise pollution. In this comprehensive guide, we will explore the benefits, methods, and best practices for insulating the area above your garage ceiling, ensuring your living space remains comfortable year-round.

Insulation Above Garage Ceiling

Why Insulate Above the Garage Ceiling?

Before delving into the specifics of insulation types and installation methods, let’s examine why insulating above your garage ceiling is important.

1. Energy Efficiency

Insulation helps prevent heat transfer, which is crucial for energy efficiency. Without proper insulation, your home may experience significant temperature fluctuations. Heat can escape in winter, while hot air can seep in during summer, leading to increased heating and cooling costs. By adding Insulation Above Garage Ceiling, you can maintain a stable indoor temperature and reduce your energy bills.

2. Comfort and Climate Control

Garages often fluctuate in temperature, impacting the comfort of the rooms above them. An uninsulated garage can lead to uncomfortable living conditions, with cold drafts in the winter and excessive heat in the summer. Insulation acts as a barrier, providing a more consistent and comfortable climate in your home.

Read too: Shiplap Ceiling in Kitchen: A Timeless Trend for a Stylish and Cozy Space

3. Soundproofing

Garages can be noisy spaces, especially if you use them for workshops or storage. Insulating the ceiling can help reduce noise transmission from the garage to the living areas above, creating a quieter and more peaceful environment in your home.

4. Increased Home Value

Upgrading your home’s insulation can enhance its overall value. Prospective buyers often look for homes that are energy-efficient and comfortable. A well-insulated garage ceiling can be a strong selling point.

Types of Insulation for Garage Ceilings

When it comes to Insulation Above Garage Ceiling, several insulation materials are available, each with its unique benefits. Here are the most common types:

1. Fiberglass Batts

Fiberglass batts are one of the most widely used insulation materials due to their effectiveness and affordability. They come in pre-cut panels that fit snugly between ceiling joists. Here are some key points about fiberglass batts:

  • Easy to Install: They can be easily cut to size and installed between joists.
  • Cost-Effective: Fiberglass batts are generally more affordable than other insulation types.
  • Vapor Barrier: Make sure to use batts with a vapor barrier if your garage has high humidity levels.

2. Spray Foam Insulation

Spray foam insulation is a more advanced option that provides excellent insulation properties. It is applied as a liquid and expands to fill gaps and cracks, creating an airtight seal. Here’s why spray foam is a great choice:

  • Air Sealant: Spray foam acts as both an insulator and an air barrier, preventing drafts and moisture.
  • High R-Value: It has a higher R-value (a measure of insulation effectiveness) compared to fiberglass, meaning it offers better thermal resistance.

3. Rigid Foam Board

Rigid foam board insulation consists of solid foam panels that can be cut to fit between joists. This type of insulation is beneficial for various reasons:

  • High Insulating Value: It provides good thermal resistance, making it effective for garage ceilings.
  • Moisture Resistant: Rigid foam boards resist moisture, which is ideal for garages that may experience humidity.

4. Cellulose Insulation

Cellulose insulation is an eco-friendly option made from recycled paper products. It is blown into place, creating a dense insulation layer. Here are some of its advantages:

  • Sustainable Choice: Made from recycled materials, cellulose is an environmentally friendly option.
  • Effective Sound Absorption: It provides excellent soundproofing, making it a great choice for noise-sensitive areas.

Benefits of Insulating Above Garage Ceiling

1. Improved Temperature Control

Proper insulation allows you to maintain a comfortable temperature throughout your home, regardless of the season. This is particularly important for families with living spaces directly above the garage, as they can experience significant temperature fluctuations.

2. Reduced Energy Costs

By insulating above your garage ceiling, you can reduce your energy consumption. With a stable temperature in your home, your heating and cooling systems won’t have to work as hard, leading to lower utility bills.

3. Enhanced Comfort

An insulated garage ceiling helps create a more pleasant living environment. Homeowners can enjoy consistent indoor temperatures, reducing the discomfort caused by cold drafts or excessive heat.

4. Noise Reduction

For those who use their garages for activities that generate noise, such as woodworking or tinkering with vehicles, insulating the garage ceiling can significantly reduce sound transmission to the rooms above, allowing for a quieter home.

Installation Process for Insulation Above Garage Ceiling

Now that you understand the benefits of insulating above your garage ceiling, let’s look at the installation process.

Step 1: Gather Materials and Tools

Before you begin, make sure you have all the necessary materials and tools:

  • Insulation Material: Choose between fiberglass batts, spray foam, rigid foam boards, or cellulose insulation.
  • Measuring Tape: For accurate measurements.
  • Utility Knife: For cutting insulation materials to size.
  • Safety Gear: Gloves, mask, and goggles to protect yourself during installation.
  • Vapor Barrier: If needed, to prevent moisture penetration.

Step 2: Prepare the Garage

Prepare your garage by removing any items that may obstruct your work. Ensure the area is clean and dry. If there are any gaps or cracks in the ceiling, seal them before proceeding to the insulation installation.

Step 3: Install Vapor Barrier (if necessary)

If your garage has a high humidity level, consider installing a vapor barrier. This barrier prevents moisture from seeping through the insulation, protecting it from mold and rot.

Step 4: Install Insulation

The installation method will depend on the type of insulation you choose:

  • Fiberglass Batts: Cut the batts to fit snugly between the joists. Place them with the vapor barrier facing down toward the living space. Ensure there are no gaps or compression in the insulation.
  • Spray Foam: Apply the spray foam according to the manufacturer’s instructions. Ensure to cover all gaps and seams for an airtight seal.
  • Rigid Foam Board: Cut the foam boards to fit between the joists and attach them using adhesive or mechanical fasteners. Seal the edges with tape to prevent air leakage.
  • Cellulose Insulation: Use a blowing machine to fill the ceiling cavity with cellulose. Make sure it is evenly distributed for maximum effectiveness.

Step 5: Seal Gaps and Cracks

Once the insulation is installed, go through the garage ceiling and seal any remaining gaps or cracks. Use caulk or expanding foam to ensure an airtight seal.

Step 6: Inspect the Installation

After completing the installation, inspect your work to ensure there are no exposed areas and that the insulation is evenly distributed.

Maintenance of Insulated Garage Ceiling

After you have insulated your garage ceiling, regular maintenance will help ensure its longevity and effectiveness. Here are some tips:

1. Inspect Regularly

Conduct regular inspections of your insulation to check for any signs of moisture, mold, or damage. If you notice any issues, address them immediately to prevent further damage.

2. Maintain Proper Ventilation

Ensure that your garage has adequate ventilation. This is particularly important if you use the space for activities that generate moisture. Proper airflow will help reduce humidity levels and prevent mold growth.

3. Monitor Temperature

Keep an eye on the temperature fluctuations in your garage and living space. If you notice significant changes, it may indicate a problem with your insulation or ventilation.

Conclusion

Insulation Above Garage Ceiling is a crucial aspect of home insulation that often goes unnoticed. By taking the time to properly insulate your garage ceiling, you can enhance energy efficiency, improve comfort, and reduce noise in your home. With various insulation options available, it’s essential to choose the right material for your needs and follow proper installation techniques. Investing in insulation will provide long-term benefits for your home, creating a comfortable and energy-efficient living environment for you and your family.

Insulating Garage Ceiling Below Living Space: A Comprehensive Guide to Comfort and Efficiency

When it comes to home insulation, many homeowners often overlook the garage, especially if it is situated below a living space. However, Insulating Garage Ceiling Below Living Space is essential for maintaining comfort, energy efficiency, and soundproofing in your home. This guide will explore the benefits, methods, and best practices for insulating your garage ceiling effectively.

Insulating Garage Ceiling Below Living Space

Understanding the Importance of Insulation

Insulation plays a critical role in regulating temperature and sound levels within a home. When it comes to garages located directly beneath living spaces, proper insulation becomes even more vital. Here are some reasons why:

1. Temperature Regulation

An uninsulated garage can lead to significant temperature fluctuations. During summer, heat from the garage can seep into the living space above, making it uncomfortable. Conversely, during winter, cold air can enter the home, increasing heating costs and affecting indoor comfort. Insulating Garage Ceiling Below Living Space helps maintain a consistent temperature throughout your home, reducing energy costs.

2. Energy Efficiency

Proper insulation can significantly enhance your home’s energy efficiency. By reducing the amount of heat transfer between your garage and living space, you can lower heating and cooling costs, resulting in long-term savings on your energy bills.

Read too: Shiplap Ceiling in Kitchen: A Timeless Trend for a Stylish and Cozy Space

3. Noise Reduction

Garages can be noisy places, with sounds from machinery, cars, and general activity. Insulating the garage ceiling can help minimize sound transmission to the living space above, providing a more peaceful and quiet environment in your home.

4. Increased Home Value

Upgrading your home’s insulation, including the garage ceiling, can increase its market value. Potential buyers often look for homes with energy-efficient features, and a well-insulated garage can be an attractive selling point.

Methods for Insulating Garage Ceiling Below Living Space

1. Fiberglass Batts

One of the most common insulation materials, fiberglass batts, consists of fibrous glass, which traps air and provides excellent thermal resistance. Here’s how to install fiberglass batts in your garage ceiling:

  • Measure and Cut: Measure the spaces between your garage joists and cut the batts to fit.
  • Install: Place the batts between the joists, ensuring they fit snugly without compressing. Leave the paper or foil vapor barrier facing the living space to prevent moisture accumulation.

2. Spray Foam Insulation

Spray foam insulation offers superior performance compared to traditional batts. It expands upon application, filling gaps and cracks that may allow air leakage. Here’s how to use spray foam insulation:

  • Preparation: Ensure the garage is clean and dry. Wear appropriate protective gear, including gloves and a mask.
  • Application: Use a spray foam kit, following the manufacturer’s instructions to apply the foam to the garage ceiling. Allow the foam to cure as recommended.

3. Rigid Foam Board

Rigid foam boards provide excellent insulation and can be installed directly beneath the ceiling. They are particularly effective for areas with limited space. To install rigid foam board:

  • Cut Boards: Measure and cut the foam boards to fit between the joists.
  • Install: Attach the boards to the garage ceiling using adhesive or mechanical fasteners, ensuring there are no gaps.

4. Cellulose Insulation

Cellulose insulation is an eco-friendly option made from recycled paper products. It is blown into place, making it an effective solution for insulating garage ceilings. Here’s how to use cellulose insulation:

  • Preparation: Seal any gaps in the garage ceiling before applying cellulose.
  • Blowing In: Use a cellulose blowing machine to fill the ceiling cavity. This method allows for a dense and uniform insulation layer.

Factors to Consider When Insulating Garage Ceiling Below Living Space

1. Ventilation

Proper ventilation is crucial in garages to prevent moisture buildup. Before insulating, assess the existing ventilation system. You may need to install vents or exhaust fans to ensure airflow, especially if you plan to use the garage for activities that generate moisture, such as laundry or woodworking.

2. Moisture Barriers

In areas with high humidity, installing a vapor barrier is essential to prevent moisture from penetrating the insulation and causing mold or rot. Consider using a plastic sheet as a vapor barrier before installing insulation materials.

3. Local Building Codes

Before undertaking any insulation project, check your local building codes and regulations. Some areas may have specific requirements regarding insulation materials, R-values (a measure of insulation effectiveness), and fire safety.

4. Cost Considerations

The cost of insulating your garage ceiling can vary based on the materials used and the size of the garage. While fiberglass batts are typically the most cost-effective option, investing in spray foam or rigid foam can offer better long-term benefits in terms of energy savings.

Steps to Insulate Your Garage Ceiling

Step 1: Gather Materials and Tools

Before starting your insulation project, gather all necessary materials and tools, including:

  • Insulation material (fiberglass batts, spray foam, rigid foam boards, or cellulose)
  • Utility knife
  • Measuring tape
  • Safety gear (gloves, mask, goggles)
  • Vapor barrier (if needed)
  • Adhesive or fasteners (if using rigid foam)

Step 2: Prepare the Garage

Ensure your garage is clean and dry. Remove any items that may obstruct your work area. If necessary, repair any cracks or gaps in the ceiling to ensure a smooth insulation process.

Step 3: Install Vapor Barrier (if needed)

If your garage is prone to moisture, install a vapor barrier before adding insulation. This step helps prevent moisture from damaging your insulation over time.

Step 4: Install Insulation

Follow the instructions specific to the type of insulation you are using. Be diligent about ensuring there are no gaps or compression in the insulation, as this can reduce its effectiveness.

Step 5: Seal Gaps

Once the insulation is installed, seal any gaps or cracks in the garage ceiling. Use caulk or expanding foam to fill in any voids, preventing air leakage.

Step 6: Inspect and Finish

Conduct a final inspection to ensure the insulation is properly installed and there are no exposed areas. If necessary, finish the ceiling with drywall or another material for aesthetics and added protection.

Maintaining Your Insulated Garage Ceiling

Once you’ve successfully insulated your garage ceiling, regular maintenance will help ensure its longevity and effectiveness. Here are some tips:

1. Regular Inspections

Conduct annual inspections of your garage ceiling insulation. Look for signs of moisture, mold, or damage, and address any issues promptly.

2. Monitor Ventilation

Ensure that your garage’s ventilation system is functioning correctly. Adjust as needed to maintain proper airflow and prevent moisture buildup.

3. Maintain the Garage Environment

If you use your garage for activities that generate moisture, such as washing cars or drying laundry, consider using dehumidifiers to maintain optimal humidity levels.

Conclusion

Insulating Garage Ceiling Below Living Space is a crucial step toward improving your home’s comfort, energy efficiency, and overall value. With various insulation options available, it’s essential to choose the right method for your needs and follow proper installation techniques. By investing in your garage ceiling insulation, you’ll create a more pleasant living environment while reducing energy costs and enhancing the functionality of your home.

Take the first step toward a more comfortable living space by considering insulation for your garage ceiling today!

Indirect Ceiling Lighting Fixtures: Transforming Your Space with Elegant Illumination

Lighting plays a crucial role in the design and functionality of any space. Whether you’re illuminating a home, office, or commercial building, the way light interacts with your environment impacts everything from aesthetics to productivity. Among the various lighting options available, indirect ceiling lighting fixtures stand out as a sophisticated and modern choice for creating a soft, ambient glow. This article delves into what indirect ceiling lighting fixtures are, their benefits, types, and how they can enhance your space.

Indirect Ceiling Lighting Fixtures

What Are Indirect Ceiling Lighting Fixtures?

Indirect ceiling lighting fixtures refer to lighting systems where the light source is concealed or directed toward a surface such as a ceiling or wall, rather than shining directly into a room. This method of lighting creates a soft, diffused illumination by bouncing light off reflective surfaces. The result is a more even distribution of light, reducing harsh shadows and glare, and providing a more comfortable and visually appealing environment.

Indirect lighting fixtures are often used in both residential and commercial settings. They are a popular choice for spaces where the goal is to create a calm, welcoming atmosphere, such as living rooms, offices, retail spaces, and even hotel lobbies.

Read too: Shiplap Ceiling in Kitchen: A Timeless Trend for a Stylish and Cozy Space

Benefits of Indirect Ceiling Lighting Fixtures

If you’re considering upgrading your lighting system, here are several reasons why indirect ceiling lighting fixtures may be the right choice:

1. Even Lighting Distribution

One of the most significant advantages of indirect lighting is its ability to provide uniform light distribution. Traditional direct lighting can create bright spots and shadows, which can be harsh on the eyes. Indirect lighting, on the other hand, produces a soft, even glow by bouncing light off walls or ceilings, making the entire space feel well-lit without overexposing certain areas.

2. Enhanced Aesthetics

Indirect ceiling lighting fixtures can significantly elevate the look of a room. Because the light source is often hidden, the focus is on the effect of the light rather than the fixture itself. This makes indirect lighting perfect for modern, minimalist spaces where the design is sleek and understated. Whether used in a home or commercial space, indirect lighting adds an element of elegance and sophistication.

3. Reduced Glare

Glare can be a significant issue in spaces with screens, such as offices or entertainment areas. Indirect lighting minimizes glare by not shining directly into your eyes, creating a more comfortable and functional space. This makes indirect ceiling lighting fixtures an excellent choice for rooms where people work, watch television, or relax for extended periods.

4. Energy Efficiency

Indirect lighting systems, especially when paired with LED bulbs, can be highly energy-efficient. LED bulbs consume less power and last longer than traditional incandescent bulbs, making them ideal for indirect lighting applications. Additionally, because indirect lighting tends to create an overall softer, more widespread light, fewer fixtures may be required to achieve the desired effect, further reducing energy consumption.

5. Versatility

Indirect ceiling lighting fixtures are incredibly versatile and can be adapted to suit various design preferences and functional requirements. They can be installed in a wide range of environments, from residential living rooms and bedrooms to commercial offices and restaurants. They can also be combined with other lighting types, such as task or accent lighting, to create a layered and dynamic lighting scheme.

Types of Indirect Ceiling Lighting Fixtures

When considering indirect ceiling lighting fixtures, there are several options to choose from. Each type has its own set of characteristics and is suited for different spaces and design preferences.

1. Cove Lighting

Cove lighting is one of the most popular forms of indirect ceiling lighting. It involves installing a light fixture within a recess or ledge near the ceiling, with the light directed upward toward the ceiling. This creates a soft, diffused glow that can highlight architectural details or provide general ambient lighting. Cove lighting is often used in living rooms, dining areas, and hallways, and can be combined with dimmers to adjust the lighting intensity for different moods.

2. Tray Ceiling Lighting

Similar to cove lighting, tray ceiling lighting is installed within a recessed ceiling area, with the light directed upward. The difference lies in the design of the ceiling, where a “tray” or inverted recess is built into the ceiling structure. This type of lighting is commonly used in bedrooms and formal dining rooms, where it adds depth and drama to the space.

3. Recessed Lighting

Recessed lighting, often called can lights or downlights, can also be adapted for indirect lighting purposes. By angling the light towards walls or ceilings instead of directly down into the room, recessed lights can create a subtle, indirect effect. This is especially useful in spaces with lower ceilings or where a cleaner, more contemporary look is desired.

4. Pendant and Suspended Fixtures

Pendant lights and suspended fixtures can also be used as indirect lighting solutions when designed to direct light upward. These fixtures are often installed in high-ceiling areas, such as entryways or staircases, and are a great way to add both style and function. The upward-facing light reflects off the ceiling, creating a softer, indirect illumination throughout the space.

5. Wall Washers

While not technically a ceiling fixture, wall washers can contribute to an indirect lighting scheme by illuminating walls and casting light upward toward the ceiling. These fixtures are typically installed along the edges of walls and can highlight architectural features or artwork while providing a subtle, ambient glow to the room.

How to Choose the Right Indirect Ceiling Lighting Fixtures for Your Space

Selecting the right indirect ceiling lighting fixtures for your space involves several factors. Consider the following when making your decision:

1. Room Functionality

The purpose of the room will play a significant role in determining the type and amount of lighting you need. For example, a living room may require a softer, more ambient light for relaxation, while a kitchen or workspace might need a combination of indirect and task lighting for better visibility.

2. Ceiling Height

Ceiling height can affect both the type of fixture and the intensity of the light required. For high ceilings, recessed or suspended fixtures may work best, as they can disperse light more evenly across a larger area. Lower ceilings might benefit from cove lighting or flush-mounted fixtures that maximize the available space without overwhelming the room.

3. Lighting Temperature

Lighting temperature, measured in Kelvin, determines whether the light will appear warm or cool. Warm lighting (around 2700K to 3000K) tends to create a cozy, inviting atmosphere and is often used in living rooms and bedrooms. Cooler lighting (4000K to 5000K) provides a more energetic and focused environment, which is ideal for workspaces or kitchens.

4. Dimmer Controls

Dimmer controls can greatly enhance the versatility of your indirect ceiling lighting fixtures. By allowing you to adjust the light intensity, dimmers enable you to create different moods and adapt the lighting to different activities. Whether you want a bright, cheerful room during the day or a soft, romantic glow at night, dimmers offer flexibility and control.

5. Budget

Indirect ceiling lighting fixtures can vary widely in price, depending on the type of fixture, installation complexity, and the quality of the materials used. It’s important to consider both the upfront costs of purchasing and installing the fixtures, as well as the long-term energy savings provided by more efficient lighting options like LEDs.

Installation Tips for Indirect Ceiling Lighting Fixtures

Installing indirect ceiling lighting fixtures can be a straightforward process for some types, while others may require the expertise of a professional electrician. Here are a few tips to ensure your installation goes smoothly:

  • Plan Your Layout: Before beginning the installation, carefully plan out where each fixture will go. Consider the direction of the light, the height of the ceiling, and the placement of other design elements such as furniture or artwork.
  • Work with a Professional: If you’re not experienced with electrical work, it’s best to hire a licensed electrician to handle the installation, particularly for more complex systems like recessed or tray ceiling lighting.
  • Use LED Bulbs: For the best energy efficiency and longevity, use LED bulbs in your indirect lighting fixtures. LEDs produce less heat, use less energy, and last much longer than traditional incandescent or fluorescent bulbs.
  • Test Lighting Before Finalizing: Once the fixtures are in place, test the lighting to ensure it provides the desired effect. If necessary, make adjustments to the angle of the light or the placement of fixtures before completing the installation.

Conclusion

Indirect ceiling lighting fixtures offer a versatile, aesthetically pleasing solution for lighting any space. Whether you’re aiming for a soft, ambient glow or looking to highlight architectural features, indirect lighting can transform the atmosphere of your home or office. By understanding the different types of indirect lighting fixtures and how to choose the right one for your needs, you can create a space that is both functional and visually stunning.


In Ceiling Mini Split AC: A Comprehensive Guide to Efficient Cooling Solutions

When it comes to achieving comfort and energy efficiency in your home or office, a mini-split air conditioning system can be one of the best choices available. Among the different types, the in-ceiling mini split AC offers a sleek and effective solution to cool or heat your space without taking up any wall or floor space. This guide will explore everything you need to know about these units, including their benefits, how they work, and whether they might be the right fit for your home or commercial space.

In Ceiling Mini Split Ac

What is an In Ceiling Mini Split AC?

An in-ceiling mini split AC is a type of ductless air conditioning system that mounts directly into the ceiling rather than the more traditional wall-mounted units. Like other mini split systems, it consists of an indoor and outdoor unit that is connected via refrigerant lines. The indoor unit is recessed into the ceiling, offering a nearly invisible cooling solution.

Read too: Shiplap Ceiling in Kitchen: A Timeless Trend for a Stylish and Cozy Space

This system is perfect for rooms where wall space is limited or in spaces where you want a more streamlined look without bulky units. These air conditioners are becoming increasingly popular for residential and commercial applications because of their efficiency, versatility, and discreet design.

How Does an In Ceiling Mini Split AC Work?

The in-ceiling mini split AC operates on the same basic principles as other ductless mini split systems. Here’s how it works:

  1. Outdoor Unit: The outdoor compressor/condenser is installed outside your home or building. This unit is responsible for pumping refrigerant into the indoor unit.
  2. Indoor Unit: The indoor unit, mounted in the ceiling, contains the evaporator coil. This unit absorbs the heat from inside the room, and the refrigerant carries the heat outside.
  3. Refrigerant Lines: These lines connect the indoor and outdoor units, allowing the refrigerant to move between them.
  4. Thermostat Control: The system is controlled by a thermostat or remote control, allowing you to adjust the temperature as needed.

What sets in-ceiling mini split AC systems apart is their discreet design, as they are flush-mounted within the ceiling. The cool air is dispersed through vents or ducts hidden from view, which helps maintain a clean, unobtrusive look.

Benefits of Installing an In Ceiling Mini Split AC

If you’re considering an in-ceiling mini split AC, it’s important to understand the many advantages that this system offers. Below are some of the key benefits:

1. Discreet Appearance

One of the primary reasons homeowners and business owners choose an in-ceiling system is for its minimalistic design. Unlike wall-mounted units, the indoor component of an in-ceiling mini split is largely hidden from view, which helps maintain the aesthetic of your space. The only visible part is a small vent on the ceiling, which blends in much more easily than traditional units.

2. Energy Efficiency

Mini split systems, including in-ceiling versions, are known for their high energy efficiency. They operate on a zone-based system, which allows you to heat or cool individual rooms without wasting energy on unused spaces. Many in-ceiling mini split AC units also come equipped with inverter technology, which allows the compressor to adjust its speed based on the cooling needs, further reducing energy consumption and leading to lower electricity bills.

3. Quiet Operation

Another significant advantage is the quiet operation of these units. Since the noisy components of the system, like the compressor, are located outside, and the ceiling installation offers better noise insulation, indoor noise levels remain extremely low. This makes an in-ceiling mini split AC ideal for bedrooms, offices, or any space where a quiet environment is essential.

4. Flexibility in Design and Installation

Because the indoor unit is mounted in the ceiling, in-ceiling mini split ACs offer much more flexibility in terms of room layout. You’re not confined to placing the unit on a wall, which can sometimes interfere with furniture placement or wall décor. This makes it an excellent choice for rooms with high ceilings, open layouts, or architectural features that don’t lend themselves to wall-mounted units.

5. No Ductwork Required

One of the biggest advantages of any mini-split system is that it does not require the extensive ductwork needed by central air systems. Ductless systems reduce energy loss that often occurs in ducts and are easier to install, particularly in older buildings that may not have existing ductwork.

6. Heating and Cooling Capabilities

Many in-ceiling mini split AC units come with both heating and cooling capabilities, making them an ideal year-round solution. This dual function is especially useful in regions that experience significant seasonal variations in temperature, offering a convenient, all-in-one climate control system.

Challenges of Using an In Ceiling Mini Split AC

While the benefits are numerous, there are also a few challenges associated with using in-ceiling mini split AC systems:

1. Installation Cost

In-ceiling units are generally more expensive to install compared to wall-mounted systems. This is because the installation process involves more work, such as cutting into the ceiling and possibly reinforcing it to hold the weight of the unit. Additionally, if your ceiling doesn’t have enough space for the unit, modifications might be needed, which can increase costs.

2. Maintenance Access

Since the unit is mounted in the ceiling, routine maintenance and repairs can be more difficult to access. While this is not a dealbreaker for most people, it’s important to consider that you may need professional help to service or repair the unit, as opposed to a wall-mounted system that is easier to reach.

3. Limited Applications

In-ceiling units are best suited for spaces with dropped ceilings or areas where the ceiling cavity is large enough to accommodate the unit. For homes or businesses without sufficient ceiling space, other mini split options, like wall-mounted units, may be more appropriate.

Installation Process of an In Ceiling Mini Split AC

Here’s a brief overview of what you can expect during the installation of an in-ceiling mini split AC:

Step 1: Site Assessment

A professional technician will assess your space to determine the best location for both the indoor and outdoor units. This is particularly important with in-ceiling units, as they require sufficient ceiling space and access to the outside for the refrigerant lines.

Step 2: Preparing the Ceiling

If necessary, the ceiling will need to be cut or modified to accommodate the indoor unit. This may include reinforcing the ceiling or installing brackets to support the weight of the system.

Step 3: Mounting the Indoor Unit

The indoor unit is installed into the ceiling cavity, and the refrigerant lines are run from the indoor unit to the outdoor compressor. Electrical wiring is also connected at this stage to power the unit and enable thermostat control.

Step 4: Installing the Outdoor Unit

The outdoor compressor is installed in a location outside your home, typically on a flat surface like a concrete pad or mounted on the wall. The outdoor unit will be connected to the indoor unit via the refrigerant lines.

Step 5: Finishing Touches

Once both units are installed, the system will be tested to ensure it’s functioning correctly. Any vents or grills that cover the indoor unit will be installed to complete the sleek look.

How to Choose the Best In Ceiling Mini Split AC

There are several factors to consider when choosing the right in-ceiling mini split AC for your space:

  1. Size of the Room: Choose a unit with the appropriate BTU rating based on the square footage of the room. A unit that is too small will struggle to cool the space, while a unit that is too large will cycle on and off too frequently, leading to inefficiency.
  2. Energy Efficiency: Look for units with a high SEER (Seasonal Energy Efficiency Ratio) rating. The higher the SEER rating, the more energy-efficient the unit is, which will save you money on your utility bills over time.
  3. Noise Level: Since some rooms, like bedrooms and offices, require a quiet environment, check the decibel rating of the indoor unit to ensure it operates quietly.
  4. Heating Capabilities: If you need a unit that provides heating as well as cooling, make sure to choose a model with heat pump functionality. This allows the unit to efficiently heat your space in the colder months.
  5. Warranty: Make sure the system you choose comes with a strong warranty. This will protect your investment and provide peace of mind in case of any issues.

Conclusion

An in-ceiling mini split AC is an excellent choice for homeowners or business owners looking to cool their space efficiently while maintaining a clean, unobtrusive design. With energy-saving features, quiet operation, and no need for ductwork, this system offers a range of benefits for those looking to improve their indoor comfort. While installation may require some upfront costs and planning, the long-term savings and sleek appearance make it well worth the investment.

By understanding the features, installation process, and considerations of an in-ceiling mini split AC, you’ll be better equipped to make the best choice for your cooling needs.

Highest Lumen Ceiling Fan: Brightness and Comfort Combined

When it comes to choosing a ceiling fan, most people think about airflow, aesthetics, and size. However, the lighting that accompanies the fan is equally important, especially if you’re looking for a combination of illumination and air circulation in one fixture. This is where the search for the highest lumen ceiling fan becomes essential. A ceiling fan that offers high lumens ensures that your space is well-lit while also maintaining comfort through air circulation.

Highest Lumen Ceiling Fan

In this article, we will cover everything you need to know about selecting the highest lumen ceiling fan, from understanding lumens and their importance, to identifying the best models on the market. If you’re looking to upgrade your home with a ceiling fan that provides both powerful lighting and effective air movement, you’re in the right place.

What Are Lumens and Why Do They Matter?

Before diving into the world of the highest lumen ceiling fans, it’s important to understand what lumens are and how they differ from other units of light measurement, such as watts.

Understanding Lumens

Lumens measure the amount of light emitted from a source, which directly indicates how bright the light will appear. The higher the lumen rating, the brighter the light. Unlike watts, which measure the energy consumption of a bulb, lumens focus solely on the brightness output.

Why Are Lumens Important for Ceiling Fans?

Many ceiling fans are equipped with built-in lights, and the brightness of these lights can vary greatly. In spaces like living rooms, kitchens, or bedrooms where both cooling and lighting are essential, a ceiling fan with high lumens ensures your room is brightly lit while saving ceiling space by combining two functions in one fixture.

Read too: Shiplap Ceiling in Kitchen: A Timeless Trend for a Stylish and Cozy Space

Choosing a ceiling fan with the highest lumens available can eliminate the need for additional light fixtures and can be ideal for larger rooms or areas that require more intense lighting, such as workspaces, garages, or kitchens.

The Benefits of a Highest Lumen Ceiling Fan

1. Effective Dual Functionality

By opting for a highest lumen ceiling fan, you get two essential functions in one device: efficient cooling and powerful lighting. This eliminates the need for multiple fixtures and keeps your space organized, functional, and energy-efficient.

2. Energy Efficiency

A ceiling fan with high lumens doesn’t necessarily consume more energy. Many modern ceiling fans come equipped with LED lighting, which produces more lumens per watt compared to traditional incandescent bulbs. This means you can get bright lighting without driving up your energy bill.

3. Ideal for Large Rooms

In large living spaces, such as open-plan living rooms or high-ceiling rooms, a ceiling fan with higher lumens can provide adequate lighting. It’s a great way to ensure that every corner of the room receives enough light, particularly if the fan is centrally installed.

4. Better Aesthetic Appeal

Choosing a ceiling fan that combines great airflow with strong lighting allows you to keep your home design cohesive. There’s no need for clunky floor lamps or additional ceiling fixtures. Instead, you can rely on your fan to provide both ambient light and airflow, all while maintaining a sleek and stylish look.

How to Choose the Highest Lumen Ceiling Fan for Your Space

Selecting the right highest lumen ceiling fan involves more than just looking at the lumen output. You’ll need to consider other factors, including the size of your space, the fan’s design, energy efficiency, and control options. Here’s what to consider when making your choice.

1. Determine Your Lumen Requirements

The amount of light you need from your ceiling fan depends on the size of the room. Here’s a quick guideline for determining the necessary lumens:

  • Small Rooms (100-200 sq. ft.): 1,000-3,000 lumens
  • Medium Rooms (200-300 sq. ft.): 2,500-4,000 lumens
  • Large Rooms (300-400 sq. ft. or larger): 3,500-6,000 lumens

For example, if you’re installing a ceiling fan in a kitchen or workspace, you may want to opt for a fan that offers upwards of 4,000 lumens to ensure you have enough light to perform tasks. On the other hand, bedrooms or living rooms may require fewer lumens for a more ambient setting.

2. Choose Energy-Efficient Lighting

When searching for the highest lumen ceiling fan, look for models that use LED lighting. LEDs are much more energy-efficient than traditional incandescent or halogen bulbs, producing more lumens while consuming less electricity. LEDs also have a longer lifespan, meaning you’ll spend less time changing bulbs.

3. Consider Fan Size and Blade Span

The blade span of your ceiling fan should be proportional to the size of the room. Here’s a general guide:

  • Up to 75 sq. ft.: 29″ to 36″ blade span
  • 76-144 sq. ft.: 36″ to 42″ blade span
  • 144-225 sq. ft.: 44″ to 50″ blade span
  • 225-400 sq. ft.: 50″ to 54″ blade span

Larger fans with wider blades will not only cool the space more effectively but can also distribute the light more evenly.

4. Control Options

Modern ceiling fans come with various control options, including remote controls, wall-mounted switches, and even smart home integration. If you want a fan that adjusts the light brightness or speed remotely, look for models that include a dimmer function, which allows you to control the lumens emitted depending on your needs.

5. Style and Aesthetic

Don’t forget to factor in the aesthetic appeal of the ceiling fan. The best highest lumen ceiling fan for your space should complement the existing decor. Whether your home has a contemporary, industrial, or classic design, there are countless options on the market to suit your taste.

Best Models of Highest Lumen Ceiling Fans

If you’re ready to shop for a highest lumen ceiling fan, here are some top-rated models that provide powerful illumination and exceptional air circulation:

1. Minka-Aire Light Wave Ceiling Fan

  • Lumens: 3,000 lumens
  • Features: LED light kit, dimmable, remote control, energy-efficient
  • Best For: Modern spaces with a need for bright ambient lighting. Its sleek design is ideal for contemporary homes.

2. Hunter Dempsey Low Profile Ceiling Fan

  • Lumens: 2,400 lumens
  • Features: LED light kit, dimmable, remote control
  • Best For: Bedrooms or living rooms. Its low-profile design makes it suitable for rooms with lower ceilings.

3. Casa Vieja Windmill Ceiling Fan

  • Lumens: 3,500 lumens
  • Features: Integrated LED light kit, large blade span, remote control
  • Best For: Large, open spaces. The rustic windmill-style design is perfect for farmhouse or industrial decor.

4. Honeywell Xerxes Ceiling Fan

  • Lumens: 2,700 lumens
  • Features: LED light kit, dimmable, remote control, dual-finish reversible blades
  • Best For: Mid-sized to large rooms. The fan’s reversible blades add versatility to your decor options.

How to Install a Highest Lumen Ceiling Fan

Once you’ve chosen the perfect ceiling fan with high lumens for your space, the next step is installation. Here’s a basic guide to help you install your new ceiling fan with lighting.

Step 1: Gather Your Tools

You’ll need the following tools for installation:

  • A ladder
  • Screwdriver
  • Wire nuts
  • Voltage tester
  • Mounting bracket (if not included with the fan)

Step 2: Turn Off the Power

Before beginning any installation, make sure to turn off the power to the circuit that controls the fan. Use a voltage tester to confirm that there is no power in the wires.

Step 3: Mount the Ceiling Bracket

Most ceiling fans come with a mounting bracket that attaches to the electrical box in the ceiling. Secure the bracket using the provided screws, ensuring it is tightly fastened.

Step 4: Connect the Wires

Follow the wiring diagram provided in the fan’s instruction manual. Typically, you’ll connect the black wire (fan power) to the house’s black wire, the white wire (neutral) to the white wire, and the green wire (ground) to the green/bare wire. Use wire nuts to secure the connections.

Step 5: Attach the Fan Blades and Light Fixture

Once the fan body is securely attached to the ceiling, install the fan blades according to the instructions. After that, attach the light fixture or bulb assembly, ensuring that the wires are properly connected.

Step 6: Test the Fan and Light

After everything is installed, turn the power back on and test the fan and light to make sure they are working correctly. Use the remote control (if included) to adjust the light brightness and fan speed.

Maintenance Tips for Highest Lumen Ceiling Fans

1. Clean the Fan Blades Regularly

Dust accumulation on fan blades can reduce airflow and cause the fan to wobble. Clean the blades regularly to ensure optimal performance.

2. Replace LED Bulbs as Needed

If your ceiling fan uses LED bulbs, they should last for many years. However, if the light output starts to dim, it may be time to replace the bulbs.

3. Tighten Screws Periodically

Ceiling fans can become loose over time due to vibration. Check and tighten screws, especially around the mounting bracket and fan blades, to ensure the fan remains secure.

Conclusion: The Power of the Highest Lumen Ceiling Fan

A highest lumen ceiling fan is the perfect solution for homeowners who want bright, energy-efficient lighting combined with effective air circulation. Whether you’re lighting up a large living room or improving the ambiance in a bedroom, selecting a ceiling fan with high lumens ensures your space is both comfortable and well-lit. Consider factors like room size, energy efficiency, and style when making your decision to find the perfect fan for your home.

Hanging Drying Rack Ceiling: Space-Saving and Efficient

When it comes to maximizing space in your laundry room or any area in your home where you need to air dry clothes, installing a hanging drying rack ceiling is one of the best solutions available. These ceiling-mounted racks are practical, convenient, and perfect for anyone looking to conserve space while efficiently drying clothes indoors.

Hanging Drying Rack Ceiling

In this article, we’ll walk you through everything you need to know about hanging drying racks for ceilings—from the benefits and types available to installation tips and how to choose the right one for your home.

Why Choose a Hanging Drying Rack Ceiling?

Before diving into the specifics of installation and different models available, let’s explore why a hanging drying rack ceiling is a fantastic addition to any household. Here are some of the top reasons:

1. Space Efficiency

One of the primary benefits of installing a ceiling-mounted drying rack is the space-saving design. By utilizing the ceiling, you free up valuable floor space, which is especially important in smaller homes, apartments, or laundry rooms where space is often at a premium.

2. Energy Savings

Ceiling drying racks are an eco-friendly solution that helps reduce your carbon footprint. Instead of using an electric dryer, which consumes energy and can be harsh on fabrics, you can air dry your clothes naturally. This is not only better for the environment but also for your energy bills.

Read too: Shiplap Ceiling in Kitchen: A Timeless Trend for a Stylish and Cozy Space

3. Gentler on Clothes

Hanging clothes to dry on a ceiling rack is much gentler on fabrics compared to the high heat of a tumble dryer. Air drying helps to preserve the quality of your clothes, extending their lifespan and keeping delicate fabrics, such as wool, cashmere, and linen, in better condition.

4. Versatile Use

In addition to clothes, hanging drying racks can be used for a variety of household items such as towels, bed linens, and even shoes. They are particularly helpful during colder or rainy months when outdoor drying is not an option.

Types of Hanging Drying Rack Ceiling Options

When looking for the perfect hanging drying rack for your ceiling, you’ll find that there are several types available. Each type has its own advantages, so it’s important to choose one that suits your space and drying needs.

1. Pulley Systems

One of the most popular options for hanging drying rack ceilings is the pulley system. Pulley racks can be raised and lowered easily, allowing you to load clothes at a comfortable height and then hoist them back up to the ceiling to dry. This design is ideal for homes with higher ceilings and can support a significant amount of laundry.

2. Retractable Ceiling Racks

Retractable ceiling racks feature adjustable rods or lines that can be pulled out when needed and retracted when not in use. This design offers flexibility and is great for homes where the drying rack might need to be “hidden” when not in use, as the retractable feature allows for minimal intrusion into your space.

3. Fixed Ceiling Racks

Fixed ceiling racks are permanently mounted to the ceiling and do not feature moving parts. These models are often more stable and sturdy, making them ideal for heavier items or larger loads of laundry. However, they are less flexible than pulley or retractable systems, so you need to make sure you have enough clearance to comfortably hang your clothes.

4. Wall-to-Ceiling Mounted Racks

Some drying racks are mounted to both the wall and ceiling, offering added stability and load-bearing capabilities. This option is excellent if you’re looking to dry heavier items like blankets or comforters and want the extra support provided by dual mounting points.

How to Choose the Right Hanging Drying Rack Ceiling for Your Space

Choosing the right hanging drying rack ceiling system depends on several factors, including the amount of laundry you need to dry, the available space in your home, and the ease of use. Here are some considerations to help you decide:

1. Available Space

Before purchasing a ceiling drying rack, measure the available space in your laundry room, bathroom, or wherever you plan to install the rack. Make sure the dimensions of the drying rack are suitable for the area and leave enough clearance for loading and unloading clothes.

2. Ceiling Height

The height of your ceiling is another important factor. Pulley systems are ideal for higher ceilings, while retractable and fixed racks work well with standard ceiling heights. If you have a particularly low ceiling, a wall-mounted drying rack may be a better fit.

3. Load Capacity

Consider how much laundry you typically air dry at one time. If you regularly wash large loads or heavy items like towels and bedding, choose a drying rack that has a higher load capacity. Fixed and pulley drying racks are usually the most durable options for heavy-duty use.

4. Material and Durability

Hanging drying racks come in various materials, including wood, metal, and plastic. Metal racks are generally more durable and can support heavier items, while wood adds a more aesthetic, traditional look but may not hold as much weight. Choose a material that matches both your practical and aesthetic needs.

5. Ease of Installation

Some ceiling-mounted drying racks require professional installation, while others can be installed as a DIY project. Pulley and retractable racks, in particular, may require more complex installation steps, including securing brackets and pulleys to the ceiling joists. Consider your comfort level with DIY projects and the necessary tools before purchasing.

How to Install a Hanging Drying Rack Ceiling

Once you’ve chosen the perfect hanging drying rack, it’s time to install it. While the exact installation steps will depend on the type of rack you choose, here’s a general guide to help you get started:

Step 1: Gather Your Tools

For most ceiling drying racks, you’ll need a few basic tools:

  • A drill
  • Screws and anchors (if not provided)
  • A stud finder
  • A measuring tape
  • A level

Step 2: Locate the Ceiling Joists

Use a stud finder to locate the ceiling joists, which will provide the necessary support for the drying rack. Ceiling joists are the most secure place to anchor the drying rack, especially for heavy loads. Mark the joist locations with a pencil.

Step 3: Mark the Installation Points

Measure the distance between the installation brackets or mounts on your drying rack and mark the points on the ceiling. Ensure these marks align with the ceiling joists. Use a level to make sure your measurements are straight.

Step 4: Drill Pilot Holes

Drill pilot holes into the ceiling joists at the marked points. These holes will make it easier to insert the screws and ensure the rack is securely attached to the ceiling.

Step 5: Install the Brackets

Attach the brackets or mounting points of the drying rack to the ceiling using the screws and anchors provided. Make sure the brackets are tightly secured to support the weight of the clothes.

Step 6: Attach the Drying Rack

Once the brackets are securely fastened, you can attach the drying rack to the ceiling. If you’re installing a pulley system, this is the point where you’ll set up the pulleys and ropes as per the manufacturer’s instructions.

Step 7: Test the Rack

Test the rack by loading a few lightweight items to ensure it is secure and functions properly. If you’ve installed a pulley system, check that the ropes glide smoothly and that the rack raises and lowers without any issues.

Hanging Drying Rack Ceiling: Tips for Use and Maintenance

1. Don’t Overload the Rack

While it can be tempting to hang as many clothes as possible, overloading the drying rack can strain the ceiling mounts and reduce the effectiveness of air circulation, which prolongs drying time.

2. Ensure Proper Ventilation

Ensure that the room where you install the drying rack is well-ventilated. If your clothes are drying too slowly, consider using a fan or opening windows to increase airflow.

3. Regularly Check the Mounts

Check the brackets and mounts regularly for any signs of wear or loosening, especially if you hang heavy items frequently. Tighten any screws or replace parts if necessary to prevent accidents.

4. Use Clothespins for Delicate Items

For delicate items like lingerie or fine fabrics, use clothespins to gently attach the garments to the rack without stretching or damaging them.

Conclusion: The Convenience and Efficiency of a Hanging Drying Rack Ceiling

A hanging drying rack ceiling offers a perfect combination of space-saving convenience and energy efficiency, making it an excellent addition to any home. Whether you’re looking to save space in a small apartment or reduce your energy bills, a ceiling-mounted drying rack is an effective solution for air-drying clothes. With various styles and materials to choose from, you can find a drying rack that fits your needs and complements your home’s aesthetic.

Floor to Ceiling Shelf System: Maximizing Space and Style

In the world of interior design and organization, maximizing space while maintaining aesthetic appeal is a common challenge. One solution that has gained popularity in recent years is the Floor to Ceiling Shelf System. This versatile shelving design not only provides ample storage but also enhances the overall look of any room. Whether you’re dealing with a small apartment, a spacious home, or a bustling office, a floor-to-ceiling shelving system can be a game-changer. In this article, we will explore what a Floor to Ceiling Shelf System is, its benefits, design ideas, and tips for successful implementation.

Floor To Ceiling Shelf System

What is a Floor to Ceiling Shelf System?

Understanding the Concept

A Floor to Ceiling Shelf System is a shelving solution that extends from the floor all the way up to the ceiling. This design takes full advantage of vertical space, making it an ideal choice for areas where floor space is limited. Typically composed of multiple shelves, these systems can be built-in or freestanding and are often used in various settings such as homes, offices, and retail spaces.

Read too: Bathroom Flooded Through the Ceiling: A Comprehensive Guide

The versatility of a floor-to-ceiling shelf system allows it to serve multiple functions, including:

  • Storage: Offering ample space for books, decorative items, or office supplies.
  • Display: Showcasing art, photographs, or collectibles in an aesthetically pleasing manner.
  • Organization: Keeping items neatly arranged and easily accessible.

Benefits of a Floor to Ceiling Shelf System

1. Maximizes Vertical Space

One of the most significant advantages of a Floor to Ceiling Shelf System is its ability to maximize vertical space. Traditional shelving often falls short of utilizing the full height of a room, leaving valuable space above shelves unused. By extending shelves to the ceiling, you can effectively create additional storage and display areas without occupying more floor space.

2. Increases Storage Capacity

With a floor-to-ceiling approach, the storage capacity of a room increases dramatically. Whether you need to store books, decorative items, or office supplies, this shelving solution can accommodate a wide range of items. The higher shelves can be utilized for less frequently used items, while lower shelves can house everyday essentials.

3. Enhances Aesthetic Appeal

A Floor to Ceiling Shelf System adds a modern and sophisticated touch to any room. These systems can be customized to fit your style, whether you prefer a sleek and minimalist design or a more eclectic look. Additionally, they can serve as a focal point in a room, drawing the eye upwards and creating an illusion of height and space.

4. Improves Organization

Having a dedicated shelving system helps keep your space organized. With a floor-to-ceiling setup, you can categorize items based on usage, size, or style. This organization makes it easier to find what you need, reducing clutter and making your environment more enjoyable.

5. Versatile Design Options

The design versatility of a Floor to Ceiling Shelf System means it can fit seamlessly into various styles and spaces. Whether you’re aiming for a modern, rustic, or industrial look, there are countless options to choose from. You can mix and match materials, colors, and finishes to create a personalized shelving solution that complements your interior design.

Implementing a Floor to Ceiling Shelf System

1. Assess Your Space

Before diving into the installation of a Floor to Ceiling Shelf System, it’s essential to assess your space. Consider the following:

  • Room Size: Measure the dimensions of the room to determine how many shelves can fit comfortably.
  • Ceiling Height: Note the height of your ceilings to ensure that your shelves will be proportionate and not overwhelming.
  • Existing Furniture: Take into account the other furniture in the room to ensure that your shelving system harmonizes with the overall layout.

2. Choose the Right Materials

Selecting the appropriate materials for your shelving system is crucial. Here are some popular options:

  • Wood: Classic and versatile, wood can be stained or painted to match your decor. It’s durable and can hold a significant amount of weight.
  • Metal: For a modern and industrial look, metal shelves are a fantastic choice. They are sturdy and can support heavy items, making them ideal for office spaces or kitchens.
  • Glass: Glass shelves create an open feel, allowing light to pass through. They work well for displaying decorative items without appearing bulky.

3. Decide on a Design

A well-thought-out design can make or break your Floor to Ceiling Shelf System. Consider the following design elements:

  • Shelf Spacing: Determine how much space you need between shelves based on the items you plan to store.
  • Style: Choose a design style that complements your existing decor. For example, a modern minimalist design may involve simple lines and neutral colors, while a rustic design might feature reclaimed wood and vintage accents.
  • Lighting: Integrate lighting into your shelving design to enhance visibility and highlight display items. LED strip lights or spotlights can add a warm ambiance to your space.

4. Professional Installation vs. DIY

Depending on your skills and the complexity of your Floor to Ceiling Shelf System, you may want to consider either a professional installation or a DIY approach.

  • Professional Installation: If you’re not comfortable with construction or lack the necessary tools, hiring a professional can ensure a clean and safe installation. They can also help with custom designs tailored to your specific needs.
  • DIY Installation: If you’re handy and enjoy a challenge, a DIY approach can be rewarding. Be sure to follow safety guidelines and instructions carefully to ensure a successful outcome.

5. Maintaining Your Floor to Ceiling Shelf System

After installing your shelving system, regular maintenance is key to keeping it looking great:

  • Dusting: Regularly dust the shelves to prevent the buildup of dirt and allergens.
  • Organization: Periodically assess the items on your shelves and reorganize as necessary. This will help maintain a tidy and functional space.
  • Repairs: Address any signs of wear and tear, such as loose shelves or damaged materials, promptly to prevent further issues.

Design Ideas for a Floor to Ceiling Shelf System

1. Library-Style Shelving

Create a cozy reading nook with a library-style floor-to-ceiling shelf system. Include a ladder for easy access to higher shelves, and add comfortable seating nearby for a perfect reading space.

2. Home Office Organization

Incorporate a Floor to Ceiling Shelf System into your home office for improved organization. Designate specific shelves for files, books, and office supplies to keep everything within reach while maintaining a clean workspace.

3. Decorative Display

Use a floor-to-ceiling shelving unit as a decorative display. Showcase artwork, plants, and collectibles, mixing various sizes and styles for an eclectic yet cohesive look.

4. Kitchen Storage

Transform your kitchen with a Floor to Ceilings Shelf System that provides ample storage for dishes, cookbooks, and kitchen gadgets. Consider adding open shelving for a more inviting and accessible look.

5. Child’s Room

In a child’s room, a floor-to-ceilings shelf system can be used to store toys, books, and clothing. Use colorful bins or baskets to keep items organized and easily accessible for little ones.

Conclusion

A Floor to Ceilings Shelf System is a fantastic solution for anyone looking to maximize space while enhancing the overall style of their home or office. With numerous benefits such as increased storage capacity, improved organization, and aesthetic appeal, it’s no wonder this design approach has gained popularity. By carefully assessing your space, choosing the right materials, and implementing thoughtful design elements, you can create a functional and stylish shelving solution that transforms your environment.

Floor to Ceiling Hayward Solutions: Exploring the Versatility and Style

In today’s design landscape, homeowners and commercial property owners alike are increasingly looking for innovative ways to maximize space while enhancing aesthetic appeal. One of the most popular trends that has emerged is the Floor to Ceiling Hayward solution. This design approach not only creates an open and airy feel but also provides functional advantages in terms of storage, light, and overall style. In this article, we’ll delve into what Floor to Ceiling Hayward entails, its benefits, applications, and tips for integrating it into your space.

Floor To Ceiling Hayward

What is Floor to Ceiling Hayward?

Defining Floor to Ceiling Hayward

Floor to Ceiling Hayward refers to a specific design and architectural solution that utilizes vertical space efficiently, particularly in areas such as homes, offices, and retail environments. It typically involves the installation of features—such as cabinetry, shelving, or windows—that extend from the floor all the way to the ceiling, creating a seamless and modern look.

This approach can apply to various elements within a space, including:

  • Windows: Tall windows that extend from the floor to the ceiling, allowing natural light to flood into a room.
  • Cabinetry: Custom cabinetry that utilizes vertical space for storage, often used in kitchens and living areas.
  • Shelving: Open shelving that showcases books, decorative items, or kitchenware, providing both functionality and style.

The Hayward design style embodies a clean and minimalist aesthetic, making it a favorite choice for contemporary interiors.

Read too: Bathroom Flooded Through the Ceiling: A Comprehensive Guide

Benefits of Floor to Ceiling Hayward Solutions

1. Maximizing Space

One of the most significant advantages of Floor to Ceiling Hayward designs is the ability to maximize vertical space. In smaller homes or offices, this design approach can make a room feel larger and more open. By drawing the eye upwards, these features create an illusion of height, making spaces feel more expansive.

2. Enhanced Natural Light

Tall windows and open shelving that stretch to the ceiling allow for increased natural light to enter a room. This not only makes the space more inviting but also reduces the need for artificial lighting during the day, which can contribute to energy savings.

3. Improved Storage Solutions

Utilizing vertical space for storage is particularly beneficial in smaller areas. Floor to Ceiling Hayward cabinetry and shelving systems offer ample storage without taking up valuable floor space. This is especially useful in kitchens, bathrooms, and living rooms, where clutter can easily accumulate.

4. Aesthetic Appeal

The modern and streamlined look of Floor to Ceiling Hayward solutions adds a touch of sophistication to any interior. These designs can enhance the overall aesthetic of a room, creating a cohesive and stylish appearance. Whether you prefer a minimalist vibe or a more eclectic style, this approach can be tailored to fit your vision.

5. Versatility in Design

Another key benefit of the Floor to Ceiling Hayward approach is its versatility. It can be adapted to various styles and functions, from sleek modern spaces to cozy traditional homes. This flexibility makes it an excellent choice for a wide range of applications, including residential, commercial, and retail environments.

Implementing Floor to Ceiling Hayward in Your Space

1. Choosing the Right Materials

When considering Floor to Ceiling Hayward designs, selecting the right materials is crucial. Common options include:

  • Wood: Warm and inviting, wood is a popular choice for cabinetry and shelving. It can be stained or painted to match your desired aesthetic.
  • Metal: Sleek and modern, metal shelves and cabinetry can add an industrial touch to your space.
  • Glass: Floor to ceiling glass windows or shelving can create an open feel while allowing natural light to flood in.
  • Laminate: Affordable and versatile, laminate finishes can mimic the appearance of more expensive materials without the associated costs.

2. Designing with Purpose

When designing a Floor to Ceiling Hayward solution, it’s important to consider the purpose of the space. For example, in a kitchen, cabinetry that reaches the ceiling can provide additional storage for less frequently used items, while in a living room, open shelving can showcase decorative pieces.

3. Incorporating Lighting

Effective lighting can enhance the impact of Floor to Ceiling Hayward designs. Consider installing under-cabinet lighting in kitchens or using pendant lights that hang from the ceiling to illuminate specific areas. The combination of natural and artificial lighting will create a warm and inviting atmosphere.

4. Maintaining Balance

While utilizing vertical space is important, achieving balance in design is equally essential. Avoid overcrowding shelves with too many items, as this can create a cluttered appearance. Instead, curate your decor to include a mix of functional items and decorative pieces.

5. Professional Installation

For more complex installations, especially those involving cabinetry or large windows, it may be beneficial to hire a professional. They can ensure that everything is properly installed and meets any local building codes.

Applications of Floor to Ceiling Hayward

1. Residential Spaces

In homes, Floor to Ceiling Hayward solutions can be applied in various rooms:

  • Kitchens: Tall cabinetry can provide abundant storage while also showcasing beautiful dishware or cookbooks on open shelves.
  • Living Rooms: Floor to ceiling bookshelves can act as a stunning focal point while offering ample storage for books and decorative items.
  • Bedrooms: Floor to ceiling closets maximize storage without occupying too much floor space, keeping the room organized and stylish.

2. Commercial Spaces

In commercial environments, this design approach can significantly enhance functionality and aesthetics:

  • Retail Stores: Floor to ceiling displays can highlight products effectively, drawing customers’ attention and maximizing sales space.
  • Offices: Open shelving systems can create an organized workspace while also allowing for the display of company branding and culture.
  • Restaurants: Large windows and open shelving can create an inviting atmosphere, making diners feel comfortable and engaged.

3. Hospitality

Hotels and resorts can benefit from Floor to Ceiling Hayward designs as well. Spacious lobbies with floor to ceiling windows provide breathtaking views and natural light, while guest rooms with tall headboards and cabinetry can create a luxurious feel.

Tips for Choosing the Right Floor to Ceiling Hayward Solution

1. Assess Your Space

Before implementing a Floor to Ceiling Hayward solution, assess your space to determine the best approach. Consider factors such as ceiling height, room size, and overall design aesthetic.

2. Create a Cohesive Design

Ensure that your Floor to Ceiling Hayward solution complements the overall design of your space. This can be achieved by matching colors, materials, and styles with existing furniture and decor.

3. Plan for Functionality

Consider how you will use the space and select features that enhance functionality. Whether it’s for storage, display, or light, having a clear plan will help you make informed decisions.

4. Don’t Overlook Details

Details matter when it comes to design. Pay attention to hardware, finishes, and trim work to ensure that every element of your Floor to Ceiling Hayward solution enhances the overall aesthetic.

5. Seek Inspiration

Look for inspiration in design magazines, online platforms like Pinterest, or even in showrooms. Seeing various applications of Floor to Ceiling Hayward designs can help spark your creativity and inform your choices.

Conclusion

Floor to Ceilings Hayward solutions represent a modern approach to maximizing space and enhancing the aesthetic appeal of various environments. By utilizing vertical space effectively, these designs not only provide practical benefits such as increased storage and natural light but also contribute to a sophisticated and cohesive look. Whether you are renovating your home, designing a commercial space, or simply looking for new ways to enhance your existing environment, considering Floor to Ceilings Hayward options can lead to beautiful and functional results.

Fire Rated Ceiling Tiles for Commercial Kitchen Safety

When it comes to designing and constructing a commercial kitchen, safety is paramount. One of the most crucial aspects of ensuring safety in such environments is the use of fire rated ceiling tiles for commercial kitchen applications. These specialized tiles are not only integral to the aesthetics of a kitchen but also play a vital role in fire prevention and safety compliance. In this article, we will explore what fire rated ceiling tiles are, their benefits, installation considerations, and how they contribute to creating a safe working environment in commercial kitchens.

Fire Rated Ceiling Tiles For Commercial Kitchen

Understanding Fire Rated Ceiling Tiles

What Are Fire Rated Ceiling Tiles?

Fire rated ceiling tiles for commercial kitchen use are designed to resist the spread of fire and provide a certain level of protection during a fire incident. These tiles are constructed from materials that can withstand high temperatures and are often tested under specific standards to ensure their effectiveness.

Read too: Bathroom Flooded Through the Ceiling: A Comprehensive Guide

The fire rating of ceiling tiles is typically measured in terms of minutes, which indicates how long the tiles can withstand exposure to flames without compromising the ceiling’s structural integrity. Common fire ratings for ceiling tiles include 1-hour, 2-hour, and 4-hour ratings, with higher ratings providing better protection.

Why Are Fire Rated Ceiling Tiles Important in Commercial Kitchens?

In a commercial kitchen, the risk of fire is significantly higher due to the presence of cooking equipment, flammable materials, and high heat. Here are a few reasons why fire rated ceiling tiles are essential in these environments:

  1. Fire Safety Compliance: Many local building codes and regulations require commercial kitchens to use fire rated materials, including ceiling tiles. Compliance helps ensure that the kitchen meets safety standards and reduces liability.
  2. Protection Against Smoke and Flames: Fire rated ceiling tiles help contain flames and smoke, providing more time for occupants to evacuate safely in the event of a fire. This containment can also protect the rest of the building from fire damage.
  3. Insurance Benefits: Utilizing fire rated materials can potentially lower insurance premiums for commercial kitchen operators. Insurance companies often offer discounts for businesses that take proactive measures to enhance safety.
  4. Enhanced Aesthetics: Modern fire rated ceiling tiles come in various styles and finishes, allowing for a visually appealing kitchen design without compromising safety.

Features of Fire Rated Ceiling Tiles for Commercial Kitchen

When selecting fire rated ceiling tiles for commercial kitchen use, it’s essential to consider several features that will enhance safety, durability, and aesthetics:

1. Fire Resistance Ratings

As mentioned earlier, fire resistance ratings are crucial. Choose tiles with a fire rating that meets or exceeds local building codes. A rating of at least 1-hour is often recommended for commercial kitchens.

2. Material Composition

The materials used in fire rated ceiling tiles significantly influence their performance. Common materials include:

  • Mineral Fiber: Often treated to be fire resistant, mineral fiber tiles are popular for commercial kitchens due to their acoustic properties and ease of installation.
  • Gypsum Board: This material has inherent fire-resistant properties and is often used in ceiling systems that require additional support.
  • Metal: Metal ceiling tiles are not only fire resistant but also provide a modern look and excellent durability.

3. Aesthetic Options

Fire rated ceiling tiles are available in various styles, colors, and textures, enabling you to choose options that complement your kitchen’s overall design. Consider tiles that match the style of the kitchen while adhering to safety standards.

4. Sound Absorption

Commercial kitchens can be noisy environments, and choosing fire rated ceiling tiles with sound-absorbing properties can help reduce noise levels. Look for tiles with acoustic ratings to improve the overall work environment.

5. Ease of Maintenance

Choose fire rated ceiling tiles that are easy to clean and maintain, as commercial kitchens are subject to grease and stains. Tiles with a smooth finish are often easier to wipe down and keep looking clean.

Benefits of Using Fire Rated Ceiling Tiles in Commercial Kitchens

Incorporating fire rated ceiling tiles for commercial kitchen environments offers several benefits beyond mere compliance with safety regulations:

1. Enhanced Safety

The primary benefit of fire rated ceiling tiles is the increased safety they provide. In the event of a fire, these tiles can delay the spread of flames and smoke, giving kitchen staff precious minutes to evacuate and alert others.

2. Improved Fire Control

Fire rated tiles can help contain a fire, allowing fire suppression systems to operate effectively. This containment reduces the risk of a small kitchen fire spreading to other areas of the building.

3. Lower Insurance Costs

As mentioned previously, utilizing fire rated materials can potentially lead to lower insurance premiums. Insurance companies recognize the reduced risk associated with commercial kitchens that implement safety measures.

4. Versatile Design Options

With advancements in design, fire rated ceiling tiles are now available in a range of styles and finishes. This versatility allows kitchen operators to maintain a professional appearance while ensuring safety.

5. Compliance with Health Codes

In many jurisdictions, fire rated ceiling tiles are required to meet health and safety codes. Using these tiles ensures that your kitchen adheres to regulations, minimizing the risk of penalties or closures.

Installation Considerations for Fire Rated Ceiling Tiles

When installing fire rated ceiling tiles for commercial kitchen applications, certain factors must be considered to ensure proper performance and compliance:

1. Professional Installation

While some ceiling tiles may be suitable for DIY installation, it’s often best to hire professionals experienced in commercial kitchen installations. They can ensure that the tiles are installed correctly and meet local fire safety codes.

2. Proper Support Structure

Ensure that the ceiling’s structural framework can support the weight of fire rated tiles. Some heavier tiles may require additional support or specific installation methods.

3. Sealing and Gaps

All seams and gaps between tiles should be sealed appropriately to prevent the spread of smoke and flames. Use fire-rated caulking or other materials to fill any voids, ensuring a complete barrier.

4. Compatibility with Existing Systems

If you are retrofitting fire rated ceiling tiles into an existing kitchen, ensure they are compatible with other systems such as lighting and ventilation. Consult with a professional if you’re uncertain about compatibility.

5. Regular Inspection and Maintenance

Once installed, regular inspections are necessary to ensure that the tiles remain in good condition. Look for any signs of damage or wear and address issues promptly to maintain safety standards.

Top Brands of Fire Rated Ceiling Tiles for Commercial Kitchen

There are several reputable manufacturers that specialize in producing fire rated ceiling tiles for commercial kitchens. Here are a few of the most recognized brands:

1. Armstrong Ceilings

Armstrong is a well-known name in the ceiling tile industry, offering a wide range of fire rated ceiling tiles designed for commercial kitchens. Their products combine aesthetics with safety, making them a popular choice among kitchen designers.

2. USG Corporation

USG provides a variety of fire rated ceiling systems that are specifically engineered for commercial kitchen applications. Their tiles are known for their durability and performance, ensuring compliance with fire safety codes.

3. CertainTeed

CertainTeed offers fire rated ceiling tiles that combine functionality with design. Their products include various materials and finishes, catering to diverse aesthetic preferences while maintaining safety standards.

4. Ceilings Plus

Ceilings Plus specializes in custom ceiling solutions, including fire rated tiles suitable for commercial kitchens. They focus on innovation and quality, making them a reliable choice for unique kitchen designs.

Conclusion

In conclusion, selecting fire rated ceiling tiles for commercial kitchen use is an essential aspect of creating a safe and compliant cooking environment. These tiles not only enhance safety by containing potential fires but also provide aesthetic benefits and sound absorption properties. When choosing the right tiles for your commercial kitchen, consider factors such as fire ratings, materials, aesthetics, and ease of maintenance. By investing in high-quality fire rated ceiling tiles and ensuring proper installation, you can create a safer workplace that meets local regulations and enhances the overall design of your kitchen.

Fasco Industries Ceiling Fans: Explore the Elegance and Efficiency

When it comes to enhancing comfort and style in your home, Fasco Industries ceiling fans stand out as a top choice. With a rich history of craftsmanship and innovation, Fasco Industries has been delivering high-quality ceiling fans that cater to various tastes and needs. In this article, we will explore the unique features, benefits, styles, and maintenance tips for Fasco Industries ceiling fans, helping you make an informed decision for your living space.

Fasco Industries Ceiling Fans

Introduction to Fasco Industries

Fasco Industries has built a reputation for producing reliable and stylish ceiling fans since its inception. Known for their durability and aesthetic appeal, Fasco ceiling fans are designed to complement various interior styles, from traditional to contemporary. The brand is committed to energy efficiency and innovation, making their fans a smart choice for environmentally-conscious consumers.

Why Choose Fasco Industries Ceiling Fans?

When selecting a ceiling fan, it’s essential to consider several factors: design, performance, efficiency, and maintenance. Fasco Industries ceiling fans excel in all these aspects, ensuring you receive a product that meets your expectations. Here are some reasons to choose Fasco:

  1. High-Quality Materials: Fasco ceiling fans are constructed using premium materials, ensuring longevity and performance. Whether you opt for wood, metal, or a combination, you can be confident in your fan’s durability.
  2. Energy Efficiency: Many models are designed with energy-saving features, allowing homeowners to enjoy comfortable airflow without excessive energy costs. This not only helps the environment but also reduces utility bills.
  3. Wide Range of Styles: Fasco offers a vast selection of ceiling fans in various styles, sizes, and finishes. Whether you are looking for something modern and sleek or classic and ornate, Fasco has a fan that will fit your décor.
  4. Quiet Operation: The engineering behind Fasco ceiling fans ensures quiet performance, making them ideal for bedrooms, living rooms, and offices where noise can be a distraction.
  5. Easy Installation: Most Fasco fans are designed for easy installation, allowing homeowners to set them up without needing professional assistance.

Read too: Bathroom Flooded Through the Ceiling: A Comprehensive Guide

Features of Fasco Industries Ceiling Fans

Understanding the unique features of Fasco Industries ceiling fans will help you make an informed decision. Here are some key features that set these fans apart:

1. Stylish Designs

Fasco ceiling fans come in various styles, including:

  • Traditional: These fans often feature intricate designs, rich wood finishes, and ornate details that complement classic home décor.
  • Contemporary: Sleek lines, minimalist designs, and modern materials characterize contemporary fans, making them perfect for modern interiors.
  • Rustic: If your home has a country or farmhouse theme, Fasco offers fans that capture the essence of rustic charm, featuring distressed wood and vintage finishes.

2. Variety of Sizes

Fasco understands that different spaces require different fan sizes. They offer ceiling fans in a range of diameters, from small fans for cozy rooms to large fans for spacious living areas. This ensures that you can find the perfect size for your space.

3. Efficient Airflow

One of the standout features of Fasco Industries ceiling fans is their ability to circulate air effectively. Many models are equipped with powerful motors that provide adjustable speed settings, allowing you to customize the airflow to your liking. This feature is particularly useful during extreme weather conditions, whether it’s hot summer days or chilly winter nights.

4. Reversible Motor

Most Fasco ceiling fans come with a reversible motor, which allows the fan blades to rotate in both directions. In the summer, you can set the fan to rotate counterclockwise, creating a cooling breeze. In the winter, switching to a clockwise rotation helps circulate warm air that rises to the ceiling, making your space more comfortable year-round.

5. Integrated Lighting

Many Fasco Industries ceiling fans feature integrated lighting options, providing both illumination and airflow. Whether you prefer a soft glow or bright light, these fans can enhance the ambiance of your room while keeping it well-lit.

Benefits of Fasco Industries Ceiling Fans

Investing in Fasco Industries ceiling fans comes with numerous advantages that extend beyond aesthetics. Here are some of the key benefits:

1. Improved Comfort

Fasco ceiling fans help regulate room temperature by promoting better air circulation. This leads to a more comfortable environment, reducing the need for excessive heating or cooling.

2. Energy Savings

By using ceiling fans in conjunction with your heating and cooling systems, you can reduce energy consumption. During summer months, ceiling fans help cool your space, allowing you to raise the thermostat by a few degrees without sacrificing comfort. In winter, the reversible motor can circulate warm air, reducing the workload on your heating system.

3. Enhanced Décor

With a variety of styles, colors, and finishes available, Fasco Industries ceiling fans can serve as stunning focal points in any room. They can enhance your home’s overall aesthetic and bring together various design elements.

4. Low Maintenance

Fasco ceiling fans are designed for durability and ease of maintenance. A simple dusting and occasional cleaning of the blades are usually all that’s required to keep your fan looking and functioning at its best.

5. Increased Home Value

Quality ceiling fans can add value to your home. Potential buyers often appreciate the comfort and aesthetic appeal of stylish, functional ceiling fans, making your home more attractive on the market.

Popular Models of Fasco Industries Ceiling Fans

Fasco Industries offers a variety of models to cater to different needs and preferences. Here are a few popular models that you might consider:

1. Fasco Industries F76301

The Fasco Industries F76301 ceiling fan features a classic design with a beautiful wood finish. Its three-speed motor and reversible function make it a versatile choice for any season. The elegant style complements traditional and rustic decors, making it a timeless addition to your home.

2. Fasco Industries 52″ Roto Ceiling Fan

The 52″ Roto Ceiling Fan is known for its contemporary design and powerful airflow. With its sleek lines and minimalist style, it fits perfectly in modern spaces. The integrated LED light provides excellent illumination, making it a practical choice for living areas and kitchens.

3. Fasco Industries 44″ Eberle Ceiling Fan

If you’re looking for something compact, the 44″ Eberle Ceiling Fan is an excellent option. This fan is ideal for smaller rooms and features a stylish design that doesn’t compromise on performance. Its quiet operation and energy-efficient motor make it a popular choice for bedrooms.

Installation Tips for Fasco Industries Ceiling Fans

Installing a Fasco Industries ceiling fan can be a straightforward process if you follow the right steps. Here’s a quick guide to help you with the installation:

Step 1: Gather Your Tools

Before you begin, ensure you have the necessary tools, such as:

  • Screwdriver
  • Ladder
  • Wire cutters
  • Voltage tester
  • Wire connectors

Step 2: Turn Off Power

Safety is paramount. Before starting, turn off the power to the existing ceiling fan or light fixture at the circuit breaker.

Step 3: Remove the Old Fixture

If replacing an existing fan, carefully remove it by unscrewing the mounting bracket and disconnecting the wiring.

Step 4: Assemble the Fan

Follow the instructions included with your Fasco Industries ceiling fan to assemble the unit. This usually involves attaching the blades to the motor and securing the light fixture if applicable.

Step 5: Mount the Fan

Attach the mounting bracket to the ceiling and secure the fan’s motor assembly to the bracket. Ensure that it is level and stable.

Step 6: Connect the Wiring

Carefully connect the wires following the color coding: typically, black to black (power), white to white (neutral), and green or copper to the ground wire. Use wire connectors for safety.

Step 7: Test the Fan

Once all connections are secure, restore power at the circuit breaker and test the fan to ensure it operates correctly.

Maintenance Tips for Fasco Industries Ceiling Fans

To keep your Fasco Industries ceiling fans running smoothly, regular maintenance is crucial. Here are some tips:

1. Clean the Blades

Dust accumulation can affect performance and air quality. Use a soft cloth or duster to clean the fan blades regularly. For hard-to-reach areas, an extendable duster works well.

2. Check for Wobbling

If your fan wobbles during operation, it could indicate loose screws or imbalanced blades. Turn off the fan, tighten all screws, and ensure the blades are evenly spaced.

3. Lubricate the Motor

Depending on the model, some Fasco fans may require occasional lubrication of the motor to maintain optimal performance. Refer to the manufacturer’s instructions for specifics.

4. Inspect the Wiring

Periodically check the wiring for signs of wear or damage. If you notice any issues, consult a qualified electrician for repairs.

Conclusion

Fasco Industries ceiling fans offer a perfect blend of style, efficiency, and functionality. With a variety of designs, materials, and sizes available, there’s a Fasco fan to suit every home and lifestyle. By understanding the features, benefits, and maintenance tips, you can make a well-informed decision when selecting the right ceiling fan for your space. Whether you’re upgrading an existing fan or installing a new one, Fasco Industries ceiling fans will undoubtedly enhance your home’s comfort and aesthetic appeal.

Fanimation Zonix Ceiling Fan: Discover the Elegance and Performance

Ceiling fans are essential for maintaining a comfortable living space, especially during hot summer months. With a variety of designs and functionalities available in the market, finding the right ceiling fan can be a daunting task. One fan that stands out in terms of aesthetics and performance is the Fanimation Zonix Ceiling Fan. This fan combines sleek design with energy-efficient technology, making it a popular choice among homeowners and interior designers alike. In this article, we will delve into the features, benefits, installation process, and maintenance tips for the Fanimation Zonix Ceiling Fan.

Fanimation Zonix Ceiling Fan

Understanding the Fanimation Zonix Ceiling Fan

The Fanimation Zonix Ceiling Fan is known for its modern design and unique blade configuration, making it a stylish addition to any room. This fan is not just about looks; it also offers advanced technology and functionality that enhances its performance. With a focus on energy efficiency, the Zonix ceiling fan aims to provide a comfortable atmosphere while reducing electricity costs.

Read too: Bathroom Flooded Through the Ceiling: A Comprehensive Guide

Design Features

The Fanimation Zonix Ceiling Fan boasts a contemporary look with a variety of finishes and color options. Its unique, multi-blade design allows for maximum airflow and aesthetic appeal. The fan typically features:

  • Aerodynamic Blades: The fan’s blades are designed to create a more efficient airflow, ensuring that your space remains comfortable without excessive energy use.
  • LED Lighting: Many Zonix models come equipped with integrated LED lighting, providing both illumination and energy efficiency.
  • Remote Control: A convenient remote control feature allows users to easily adjust fan speed and lighting from anywhere in the room.

Performance and Efficiency

When it comes to performance, the Fanimation Zonix Ceiling Fan does not disappoint. Here are some key performance features that enhance its efficiency:

  • Energy Star Rated: The Zonix ceiling fan often meets or exceeds the Energy Star rating, indicating that it uses significantly less energy compared to traditional fans. This not only helps the environment but also lowers your utility bills.
  • Quiet Operation: Unlike some ceiling fans that produce disruptive noise, the Zonix operates quietly, making it perfect for bedrooms, home offices, or any space where tranquility is desired.
  • Reversible Motor: The reversible motor allows for year-round comfort. In the summer, the fan can create a cool breeze, while in winter, reversing the motor helps circulate warm air from heating systems.

Benefits of the Fanimation Zonix Ceiling Fan

The Fanimation Zonix Ceiling Fan comes with numerous benefits, making it a popular choice for many homeowners. Here are some key advantages:

1. Versatile Style Options

The Fanimation Zonix Ceiling Fan is designed to complement various interior styles, from modern to transitional. The available finishes include matte black, brushed nickel, and white, allowing you to choose a fan that matches your home decor.

2. Increased Comfort

With its efficient airflow and quiet operation, the Zonix fan ensures a comfortable living environment. It can effectively lower the perceived temperature in a room, allowing you to set your thermostat higher and save on cooling costs.

3. Eco-Friendly Choice

The energy efficiency of the Fanimation Zonix Ceiling Fan makes it an environmentally friendly choice. By using less energy, it contributes to a reduction in greenhouse gas emissions, making it a sustainable option for conscientious consumers.

4. Easy Installation

The Fanimation Zonix Ceiling Fan is designed for straightforward installation, allowing homeowners to set it up without requiring professional help. Most models come with detailed instructions, making the process user-friendly.

Installation Process for the Fanimation Zonix Ceiling Fan

Installing the Fanimation Zonix Ceiling Fans can be done as a DIY project or with the help of a professional electrician. Here are the general steps for installation:

Step 1: Gather Your Tools and Materials

Before beginning the installation, gather the necessary tools, including:

  • Screwdriver
  • Ladder
  • Wire cutters
  • Electrical tape
  • Voltage tester

Step 2: Turn Off Power

Always turn off the power to the existing ceiling fan or light fixture at the circuit breaker to ensure safety during installation.

Step 3: Remove the Existing Fixture

If you’re replacing an existing fan or light fixture, carefully remove it by unscrewing the mounting bracket and disconnecting the wiring.

Step 4: Assemble the Fan

Follow the instructions provided by Fanimation to assemble the Zonix ceiling fan. This typically includes attaching the blades to the motor and securing the light fixture if applicable.

Step 5: Mount the Fan

Attach the mounting bracket to the ceiling and securely fasten the fan’s motor assembly to the bracket. Ensure that it is level and stable.

Step 6: Connect the Wiring

Carefully connect the wires according to the color coding: usually, black to black (power), white to white (neutral), and green or copper to the ground wire. Use wire connectors and electrical tape for safety.

Step 7: Test the Fan

After securing all connections and ensuring everything is mounted correctly, turn the power back on at the circuit breaker. Test the fan and lights to confirm they operate properly.

Maintenance Tips for the Fanimation Zonix Ceiling Fan

To keep your Fanimation Zonix Ceiling Fans running smoothly and efficiently, regular maintenance is essential. Here are some simple tips:

1. Dust Regularly

Dust accumulation can hinder performance and affect air quality. Use a soft cloth or a duster to clean the fan blades and motor housing regularly. For hard-to-reach areas, consider using an extendable duster.

2. Check for Wobbling

If the fan wobbles during operation, it could indicate loose screws or an imbalance in the blades. Turn off the fan, tighten all screws, and ensure the blades are evenly spaced.

3. Lubricate the Motor

If your model requires it, lubricate the motor according to the manufacturer’s instructions. This can help reduce noise and improve the fan’s lifespan.

4. Inspect the Wiring

Periodically inspect the wiring for signs of wear or damage. If you notice any issues, consult a professional electrician for repairs.

Why Choose Fanimation Zonix Ceiling Fan Over Other Brands?

When considering various ceiling fan options, the Fanimation Zonix Ceiling Fan holds several advantages that set it apart from competitors:

1. Innovative Design

Fanimation is known for its commitment to modern design and functionality. The Zonix ceiling fan combines form and function, ensuring that it looks good while delivering exceptional performance.

2. High-Quality Materials

Fanimation fans are constructed from high-quality materials designed to withstand wear and tear, ensuring longevity. The attention to detail in construction means you’ll have a reliable product for years to come.

3. Customer Support

Fanimation offers excellent customer support, including installation guides and troubleshooting tips. This ensures that you’ll have assistance whenever you need it.

4. Variety of Options

Fanimation provides a wide range of ceiling fan styles and sizes, making it easy to find the perfect fit for your specific needs and preferences.

Conclusion

The Fanimation Zonix Ceiling Fans is a standout choice for those seeking a blend of style, efficiency, and functionality. Its modern design, energy-saving features, and quiet operation make it an ideal addition to any home. By understanding the features, installation process, and maintenance tips for this fan, you can make an informed decision that enhances your living space. Whether you’re upgrading an existing fan or installing a new one, the Zonix ceiling fan will undoubtedly elevate your home’s comfort and aesthetic appeal.

Drop Ceiling LED Panel: A Comprehensive Guide

In recent years, drop ceiling LED panel have gained significant popularity in both residential and commercial spaces. These innovative lighting solutions provide a sleek, modern look while also enhancing energy efficiency and functionality. If you’re considering upgrading your lighting system, this comprehensive guide will explore everything you need to know about drop ceiling LED panels, including their benefits, installation process, design options, and maintenance tips.

Drop Ceiling Led Panels

What Are Drop Ceiling LED Panels?

Drop ceiling LED panels are flat, rectangular light fixtures designed to fit seamlessly into a drop ceiling grid. Unlike traditional ceiling lights, these panels are thin and lightweight, making them an excellent choice for spaces with limited ceiling height. Available in various sizes, shapes, and color temperatures, drop ceiling LED panels are versatile and can easily be integrated into any design aesthetic.

These panels often replace fluorescent tube lights, providing a more modern and efficient lighting solution. The result is an even distribution of light that enhances visibility and comfort while reducing glare.

Read too: Shiplap Ceiling in Kitchen: A Timeless Trend for a Stylish and Cozy Space

Benefits of Using Drop Ceiling LED Panels

1. Energy Efficiency

One of the most significant advantages of drop ceiling LED panels is their energy efficiency. LED lights consume significantly less electricity than traditional fluorescent bulbs, leading to lower energy bills. Additionally, LEDs have a longer lifespan, which means fewer replacements and reduced waste.

2. Improved Lighting Quality

Drop ceiling LED panels provide bright, consistent lighting that enhances visibility. Unlike fluorescent lights, which can flicker and create uneven lighting, LED panels offer a smooth light output, reducing eye strain and improving overall comfort in the space.

3. Sleek and Modern Design

With their slim profile and clean lines, drop ceiling LED panels can enhance the aesthetics of any room. Available in various styles and finishes, these panels can complement a wide range of interior designs, from contemporary to industrial.

4. Easy Installation

Installing drop ceiling LED panels is a straightforward process that typically requires minimal tools. Most panels are designed to fit directly into existing drop ceiling grids, allowing for quick and hassle-free installation.

5. Versatile Applications

Drop ceiling LED panels are suitable for various applications, including offices, retail spaces, schools, hospitals, and even residential homes. Their versatility makes them an ideal choice for anyone looking to upgrade their lighting.

Choosing the Right Drop Ceiling LED Panels

When selecting drop ceiling LED panels, consider the following factors:

1. Size and Shape

Drop ceiling LED panels come in various sizes, typically ranging from 1×1 feet to 2×4 feet. Choose a size that fits your existing ceiling grid and complements the dimensions of your space. Additionally, consider the shape of the panel; rectangular panels are the most common, but square options are also available.

2. Color Temperature

The color temperature of LED lights is measured in Kelvin (K) and affects the ambiance of the space. Common color temperatures for drop ceiling LED panels include:

  • Warm White (2700K-3000K): Creates a cozy, inviting atmosphere, ideal for residential spaces.
  • Neutral White (3500K-4100K): Provides a balanced, natural light suitable for various environments.
  • Cool White (5000K-6500K): Offers bright, clear light that enhances visibility, making it perfect for offices and commercial spaces.

3. Lumens Output

Lumens measure the brightness of a light source. When selecting drop ceiling LED panels, consider the lumens output to ensure you achieve the desired brightness in your space. Higher lumens mean brighter light, but also take into account the size of the room and the amount of natural light it receives.

4. Energy Efficiency Rating

Look for LED panels with high energy efficiency ratings, such as ENERGY STAR certification. These products meet strict energy efficiency guidelines set by the U.S. Environmental Protection Agency, ensuring optimal performance and reduced energy consumption.

5. Dimming Capability

If you want to control the brightness of your lights, consider choosing dimmable drop ceiling LED panels. This feature allows you to adjust the light output based on the time of day or the specific activities in the space, providing greater flexibility and comfort.

Installation Process for Drop Ceiling LED Panels

Installing drop ceiling LED panels is a relatively simple process. Here’s a step-by-step guide to help you through the installation:

1: Gather Your Materials

Before you begin the installation, ensure you have all the necessary materials, including:

  • Drop ceiling LED panels
  • Ceiling grid clips (if not included)
  • Electrical tools (screwdriver, wire stripper, etc.)
  • Safety goggles and gloves

2: Turn Off Power

Safety first! Before starting the installation, turn off the power to the existing lighting fixture at the circuit breaker. This precaution will prevent any electrical hazards during the installation.

3: Remove Existing Lights

If you’re replacing existing lighting fixtures, carefully remove them from the ceiling. Disconnect the wiring and ensure the area is clear for the installation of the new LED panels.

4: Prepare the Ceiling Grid

If necessary, adjust the existing ceiling grid to ensure a proper fit for the new drop ceiling LED panels. Ensure that the grid is clean and free of any debris.

5: Install the Panels

  1. If your LED panels come with clips, attach them to the panels according to the manufacturer’s instructions.
  2. Align the panels with the ceiling grid and carefully place them into the grid. Ensure they are level and securely fit into the frame.

6: Connect the Wiring

  1. Follow the manufacturer’s instructions to connect the wiring. This may involve connecting the LED panel wires to the existing electrical wires in the ceiling.
  2. Use wire connectors to secure the connections and ensure that there are no exposed wires.

7: Restore Power and Test

Once everything is securely connected, turn the power back on at the circuit breaker. Test the drop ceiling LED panels to ensure they are functioning correctly.

Maintenance Tips for Drop Ceiling LED Panels

To keep your drop ceiling LED panels in optimal condition, follow these maintenance tips:

1. Regular Cleaning

Dust and dirt can accumulate on the surface of LED panels, reducing their brightness. Use a soft cloth or duster to clean the panels regularly. For stubborn stains, a damp cloth with mild soap can be used, but ensure the panels are turned off and cooled down before cleaning.

2. Check for Flickering Lights

If you notice flickering lights, it could be a sign of a loose connection or an issue with the electrical supply. Inspect the wiring connections and ensure they are secure. If the problem persists, consult a professional electrician for assistance.

3. Monitor Energy Usage

Keep an eye on your energy bills to track the efficiency of your LED panels. If you notice a significant increase, it may indicate an issue with the panels or the electrical system.

4. Replace Faulty Panels

Although LED panels have a long lifespan, they can occasionally fail. If you notice any panels that are not functioning, replace them promptly to maintain even lighting throughout your space.

Conclusion

Drop ceiling LED panel offer a modern and efficient lighting solution for various applications. With their sleek design, energy efficiency, and ease of installation, they can transform any space while enhancing its overall aesthetics. By understanding the benefits, selection criteria, installation process, and maintenance tips, you can confidently upgrade your lighting system and enjoy the many advantages these panels provide.

Whether you’re renovating your home or designing a new commercial space, drop ceiling LED panels are an excellent choice to illuminate your environment with style and efficiency.

Decorating With Tin Ceiling Tiles: Transform Your Space

Decorating your home or commercial space can often feel like a daunting task. However, the right design elements can significantly enhance the aesthetic and ambiance of a room. One such element that has made a remarkable comeback in recent years is tin ceiling tiles. Whether you’re looking to create a vintage look or simply add a touch of elegance, decorating with tin ceiling tiles can be an effective way to achieve your design goals. In this guide, we will explore the history, benefits, installation methods, and creative ideas for using tin ceiling tiles in your decorating projects.

Decorating With Tin Ceiling Tiles

The History of Tin Ceiling Tiles

Tin ceiling tiles were first introduced in the mid-19th century as an affordable alternative to plaster ceilings. During this period, they gained immense popularity in commercial buildings, such as theaters, hotels, and restaurants, due to their ability to mimic the intricate designs of traditional plasterwork without the hefty price tag. Tin ceilings offered a practical solution for enhancing the interior aesthetics of various spaces, and their lightweight nature made them easy to install.

As architectural styles evolved, tin ceilings fell out of favor in the mid-20th century. However, they have recently experienced a revival in popularity, thanks to their unique charm, versatility, and durability. Today, tin ceiling tiles are available in various styles, colors, and finishes, making them an ideal choice for both traditional and modern interiors.

Benefits of Using Tin Ceiling Tiles

When considering decorating with tin ceiling tiles, it’s essential to understand the numerous benefits they bring to a space:

  1. Aesthetic Appeal: Tin ceiling tiles can instantly elevate the visual appeal of a room. With various patterns and finishes available, they can complement various design styles, from rustic to contemporary.
  2. Durability: Tin ceiling tiles are highly durable and resistant to wear and tear. Unlike traditional plaster, they won’t crack or chip over time, ensuring that your investment lasts for years.
  3. Easy Maintenance: Cleaning tin ceiling tiles is a breeze. A simple wipe-down with a damp cloth is usually sufficient to keep them looking pristine.
  4. Sound Insulation: Tin ceilings can help reduce noise levels within a room, making them an excellent choice for busy households or commercial spaces.
  5. Versatile Applications: Tin ceiling tiles can be used in various settings, including kitchens, dining rooms, offices, and even outdoor spaces like patios.

Read too: Shiplap Ceiling in Kitchen: A Timeless Trend for a Stylish and Cozy Space

Decorating With Tin Ceiling Tiles: Getting Started

Now that you understand the history and benefits of tin ceiling tiles, let’s delve into decorating with tin ceiling tiles in your space. Here are some essential considerations and tips for incorporating tin tiles into your interior design.

Choosing the Right Style and Finish

When it comes to decorating with tin ceiling tiles, selecting the right style and finish is crucial. Here are some popular options to consider:

  • Traditional Patterns: If you’re aiming for a classic look, consider tiles with intricate designs, such as floral motifs, geometric patterns, or ornate details. These tiles work well in historical homes or spaces designed to evoke nostalgia.
  • Modern Finishes: For a contemporary aesthetic, opt for sleek, minimalist tiles with clean lines. Brushed aluminum or copper finishes can add a modern touch while maintaining the unique charm of tin.
  • Painted Tiles: Don’t be afraid to experiment with colors! Painting your tin ceiling tiles can allow you to personalize your space and achieve the desired ambiance. Soft pastels can create a calming effect, while bold colors can add energy and excitement.

Preparing for Installation

Before you begin installing your tin ceiling tiles, it’s essential to prepare your space properly:

  1. Choose the Right Tools: You will need a few basic tools for installation, including a measuring tape, level, utility knife, adhesive, and safety gear.
  2. Measure Your Space: Measure the ceiling area where you plan to install the tiles. This will help you determine how many tiles you need to purchase and identify any necessary cuts.
  3. Prepare the Surface: Ensure the ceiling surface is clean, dry, and free of any debris. If you are installing over an existing ceiling, make sure it is stable and secure.

Installation Methods

There are several methods for installing tin ceiling tiles, depending on your skill level and the type of tiles you choose. Here are two common installation methods:

1. Glue-Up Installation

  • Apply Adhesive: Use a strong adhesive specifically designed for ceiling tiles. Apply the adhesive to the back of the tile or directly to the ceiling.
  • Press and Hold: Carefully press the tile into place, ensuring it is level. Hold for a few seconds to allow the adhesive to set.
  • Continue: Repeat the process for each tile, working your way across the ceiling. Use a utility knife to cut tiles to fit around edges or fixtures as needed.

2. Nail-Up Installation

  • Prepare the Framework: If you prefer a more secure installation, consider creating a framework with furring strips on the ceiling.
  • Position the Tiles: Position each tile on the framework, ensuring it is aligned correctly.
  • Secure with Nails: Use finishing nails or staples to secure the tiles in place. Be sure to place nails in the corners and along the edges for added stability.

Decorating Ideas with Tin Ceiling Tiles

Once your tin ceiling tiles are installed, it’s time to explore creative ways to enhance your space. Here are some decorating ideas to inspire you:

1. Create a Focal Point

Consider making the ceiling the focal point of your room by using a unique pattern or contrasting color. For example, a bold, patterned tin ceiling can draw the eye upward, creating a sense of grandeur in the room.

2. Pair with Statement Lighting

Complement your tin ceiling with stylish light fixtures that enhance the overall aesthetic. Consider pendant lights or chandeliers that echo the elegance of the tin tiles. This combination can create a warm, inviting atmosphere in dining rooms or kitchens.

3. Use as Backsplash

Tin ceiling tiles can also serve as a stunning backsplash in kitchens or bathrooms. Their unique textures and patterns can add depth and character to these spaces, making them stand out.

4. Mix and Match with Other Materials

Don’t be afraid to mix tin ceiling tiles with other materials, such as wood beams, exposed brick, or concrete. This contrast can add visual interest and create a layered look in your design.

5. Incorporate Wall Panels

Extend the beauty of tin tiles beyond the ceiling by using them as wall panels. This can create a cohesive look throughout the space and add a touch of elegance to your decor.

Maintenance Tips for Tin Ceiling Tiles

To ensure your tin ceiling tiles remain in excellent condition, follow these maintenance tips:

  • Regular Cleaning: Dust and clean your tin tiles regularly with a soft cloth or duster. For deeper cleaning, use a mild soap solution and a damp cloth.
  • Avoid Harsh Chemicals: Refrain from using harsh chemicals or abrasive cleaners, as they can damage the finish of the tiles.
  • Inspect for Damage: Periodically check for any signs of damage, such as rust or corrosion. If you notice any issues, address them promptly to prevent further deterioration.

Conclusion

Decorating with tin ceiling tiles offers a fantastic opportunity to transform your space into a stylish and inviting environment. With their rich history, aesthetic appeal, and versatility, tin ceiling tiles can complement various design styles and elevate the overall look of your home or business. Whether you opt for a classic or modern approach, these tiles will undoubtedly add character and charm to your interiors.

By understanding the benefits, installation methods, and creative decorating ideas, you can confidently incorporate tin ceiling tiles into your design projects. So, unleash your creativity, and let tin ceiling tiles become a stunning feature in your decor!

Commercial Warehouse Ceiling Insulation: A Comprehensive Guide

When it comes to operating a successful business, maintaining an optimal environment within a commercial warehouse is crucial. One significant factor that can impact both energy efficiency and employee comfort is the Commercial Warehouse Ceiling Insulation. Proper insulation not only regulates temperatures but also contributes to energy savings, noise reduction, and overall building integrity. In this article, we will delve into the importance of ceiling insulation, the various types available, installation methods, and the benefits it brings to commercial warehouses.

Commercial Warehouse Ceiling Insulation

Understanding the Importance of Commercial Warehouse Ceiling Insulation

What is Commercial Warehouse Ceiling Insulation?

Commercial Warehouse Ceiling Insulation refers to the materials and techniques used to insulate the ceilings of large warehouse spaces. This type of insulation helps to minimize heat transfer between the interior of the building and the outside environment. In simpler terms, it keeps the warehouse warm in the winter and cool in the summer, thus enhancing energy efficiency and comfort.

Why is Insulation Necessary?

Insulation is essential for several reasons:

  1. Energy Efficiency: Proper insulation reduces the amount of energy required for heating and cooling. This translates to lower utility bills and a smaller carbon footprint.
  2. Comfort: Insulated warehouses maintain a more consistent temperature, which is vital for employee comfort and productivity.
  3. Noise Reduction: Insulation can dampen sound transmission, making the workspace quieter, which is especially important in environments with heavy machinery or high noise levels.
  4. Moisture Control: Insulation helps control moisture levels, preventing mold and mildew growth, which can be harmful to both employees and stored products.
  5. Building Longevity: Proper insulation protects the building’s structural integrity by preventing temperature fluctuations that can cause materials to expand and contract.

Read too: Shiplap Ceiling in Kitchen: A Timeless Trend for a Stylish and Cozy Space

Types of Commercial Warehouse Ceiling Insulation

When considering Commercial Warehouse Ceiling Insulation, it’s important to choose the right type for your specific needs. Here are some common types of insulation used in commercial warehouses:

1. Fiberglass Insulation

Fiberglass insulation is one of the most popular choices for commercial applications. It consists of fine glass fibers that trap air, providing excellent thermal resistance.

  • Pros: Cost-effective, widely available, and easy to install.
  • Cons: Can be less effective in moist environments, and installation requires protective gear to avoid skin irritation.

2. Spray Foam Insulation

Spray foam insulation expands upon application, filling gaps and creating an airtight seal. It offers excellent thermal resistance and moisture control.

  • Pros: Provides superior insulation, fills gaps and cracks, and acts as a vapor barrier.
  • Cons: More expensive than other options, and installation requires professional expertise.

3. Rigid Foam Board Insulation

Rigid foam board insulation consists of solid foam boards that provide high insulating values with minimal thickness.

  • Pros: Lightweight, easy to handle, and offers good moisture resistance.
  • Cons: Can be more expensive than fiberglass and may require additional framing support.

4. Mineral Wool Insulation

Mineral wool, also known as rock wool, is made from natural stone and offers excellent fire resistance and soundproofing qualities.

  • Pros: Fire-resistant, water-repellent, and provides sound insulation.
  • Cons: Heavier and can be more expensive than fiberglass.

5. Cellulose Insulation

Made from recycled paper products, cellulose insulation is a green option that provides effective thermal performance.

  • Pros: Environmentally friendly, effective at controlling air leakage, and good soundproofing properties.
  • Cons: Can settle over time, reducing its effectiveness, and may require a vapor barrier.

How to Install Commercial Warehouse Ceiling Insulation

1. Preparing for Installation

Before starting the installation of Commercial Warehouse Ceiling Insulation, it’s important to prepare the space:

  • Clear the Area: Remove any items stored in the ceiling space to allow easy access.
  • Inspect for Damage: Check the ceiling structure for any signs of water damage or mold. Repair any issues before insulation installation.
  • Gather Materials: Choose the insulation type and gather necessary tools, such as safety goggles, gloves, a utility knife, and a measuring tape.

2. Choosing the Right R-Value

The R-value measures the insulation’s effectiveness in resisting heat flow. The higher the R-value, the better the insulation performance. For commercial warehouses, an R-value of 25 to 38 is typically recommended, depending on the local climate and building codes.

3. Installation Methods

Fiberglass Insulation Installation

  1. Measure and Cut: Cut fiberglass batts to fit snugly between the ceiling joists.
  2. Insert Batts: Place the batts between the joists, ensuring they fit tightly without compressing the material.
  3. Seal Gaps: Use foil tape or caulk to seal any gaps between the batts and the ceiling.

Spray Foam Insulation Installation

  1. Prepare the Area: Ensure the area is well-ventilated and the temperature is appropriate for application.
  2. Apply Foam: Using a professional spray foam applicator, spray the foam evenly across the ceiling, filling all gaps.
  3. Allow to Cure: Let the foam cure as per manufacturer instructions before applying any finishing materials.

Rigid Foam Board Installation

  1. Cut Boards: Measure and cut foam boards to fit the ceiling.
  2. Attach Boards: Use construction adhesive or screws to attach the boards to the ceiling joists.
  3. Seal Edges: Use foam sealant to fill any gaps between the boards.

Benefits of Commercial Warehouse Ceiling Insulation

1. Energy Savings

By preventing heat transfer, insulated ceilings significantly reduce the energy required for heating and cooling, leading to substantial cost savings on utility bills.

2. Enhanced Comfort

A comfortable temperature in a commercial warehouse is crucial for maintaining employee morale and productivity. Insulation helps create a stable environment throughout the year.

3. Improved Air Quality

Insulation can help control humidity and reduce moisture build-up, which in turn minimizes the risk of mold and mildew. This contributes to a healthier workspace.

4. Sound Dampening

Insulated ceilings reduce sound transmission, which is particularly beneficial in warehouses where machinery operates or multiple activities occur simultaneously.

5. Increased Property Value

Proper insulation not only improves energy efficiency but can also enhance the overall value of the property. Insulated buildings are more attractive to potential buyers or renters.

Conclusion

Investing in Commercial Warehouse Ceiling Insulation is a smart move for any business looking to improve energy efficiency, comfort, and overall productivity. With various insulation types available, businesses can choose the most suitable option based on their specific needs and budget. Proper installation and maintenance of insulation will ensure long-term benefits, from reduced energy costs to enhanced employee satisfaction. By prioritizing insulation, you create a healthier, more efficient workspace that supports both your business goals and the well-being of your employees.

Commercial Ceiling Air Purifier: Enhance Air Quality and Employee Health

In today’s world, where air quality plays a crucial role in our overall health and productivity, businesses are increasingly investing in air purification solutions. One effective option that has gained popularity is the Commercial Ceiling Air Purifier. This innovative device not only improves indoor air quality but also seamlessly integrates into the workspace, providing an unobtrusive yet powerful solution for cleaner air. In this article, we will explore the benefits, features, installation, and maintenance of commercial ceiling air purifiers, helping you understand why they are essential for your business.

Commercial Ceiling Air Purifier

Understanding Commercial Ceiling Air Purifiers

What is a Commercial Ceiling Air Purifier?

A Commercial Ceiling Air Purifier is a specialized air purification system designed to be installed in commercial spaces such as offices, restaurants, schools, and hospitals. Unlike traditional portable air purifiers, these units are mounted directly into the ceiling, making them a discreet option that doesn’t take up valuable floor space. They work by circulating and filtering the air in the environment to remove pollutants, allergens, and other harmful particles, thereby improving indoor air quality.

Read too: Shiplap Ceiling in Kitchen: A Timeless Trend for a Stylish and Cozy Space

How Do They Work?

Commercial ceiling air purifiers utilize advanced filtration technologies to purify the air. They often include:

  • HEPA Filters: These filters capture 99.97% of particles as small as 0.3 microns, including dust, pollen, mold spores, and pet dander.
  • Activated Carbon Filters: These filters absorb odors, volatile organic compounds (VOCs), and other gaseous pollutants, improving overall air quality.
  • UV-C Light Technology: Some models incorporate UV-C light to eliminate bacteria, viruses, and mold, ensuring a healthier environment.

The air purifier circulates the indoor air, forcing it through these filters to remove contaminants before releasing clean air back into the space.

Benefits of Using a Commercial Ceiling Air Purifier

Investing in a Commercial Ceiling Air Purifier offers numerous advantages for businesses, including:

1. Improved Indoor Air Quality

Poor indoor air quality can lead to a range of health issues, including allergies, asthma, and respiratory problems. By removing harmful pollutants, commercial ceiling air purifiers create a healthier environment for employees and customers.

2. Enhanced Employee Productivity

Clean air has been linked to improved cognitive function and productivity. Employees are less likely to experience fatigue and headaches in well-ventilated spaces, which can lead to increased efficiency and job satisfaction.

3. Discreet Design

Unlike traditional air purifiers that take up floor space, ceiling-mounted models blend seamlessly into the ceiling, maintaining the aesthetics of your workspace while providing effective air purification.

4. Reduced Odors

Commercial spaces can accumulate unpleasant odors from cooking, cleaning, and daily activities. Air purifiers with activated carbon filters effectively neutralize these odors, ensuring a more pleasant atmosphere.

5. Cost-Effective Solution

While the initial investment may be higher than portable air purifiers, the long-term savings from reduced healthcare costs, increased productivity, and lower absenteeism make commercial ceiling air purifiers a wise choice.

Choosing the Right Commercial Ceiling Air Purifier

When selecting a commercial ceiling air purifier, consider the following factors:

1. Size of the Space

The effectiveness of an air purifier largely depends on its capacity to filter air in relation to the size of the room. Check the manufacturer’s specifications for the recommended coverage area.

2. Filtration Technology

Look for models that feature HEPA and activated carbon filters for comprehensive air purification. UV-C light technology is also beneficial for killing airborne pathogens.

3. Noise Level

Since these units will be installed in workspaces, consider the noise level. Look for models specifically designed for quiet operation, as excessive noise can be distracting.

4. Maintenance Requirements

Evaluate how easy it is to change filters and perform regular maintenance on the air purifier. Some models offer indicator lights that notify you when it’s time for a filter change, making maintenance hassle-free.

Installation of Commercial Ceiling Air Purifiers

Preparing for Installation

Before installing your Commercial Ceiling Air Purifier, follow these steps:

  1. Select the Location: Identify an optimal location in the ceiling for installation, ensuring the unit will be effective in circulating air throughout the space.
  2. Check Electrical Requirements: Ensure the location has the necessary electrical connections and that you have access to a power source.
  3. Review Local Building Codes: Familiarize yourself with local regulations regarding installation and electrical work to ensure compliance.

Installation Process

While installation may vary by model, here is a general guide:

  1. Turn Off Power: Before starting, turn off the power supply to the area where you will be working.
  2. Mount the Unit: Follow the manufacturer’s instructions for securely mounting the air purifier in the ceiling. This may involve using brackets or screws to attach the unit.
  3. Connect Power: Carefully connect the air purifier to the electrical supply, ensuring all connections are secure.
  4. Test the Unit: Once installed, turn the power back on and test the air purifier to ensure it operates correctly.

Professional Installation

For those who are unsure about the installation process or prefer a professional touch, hiring an HVAC technician is recommended. They can ensure proper installation, adherence to safety standards, and optimal placement for effective air purification.

Maintenance of Commercial Ceiling Air Purifiers

Regular maintenance is essential to keep your commercial ceiling air purifier functioning efficiently. Here are some maintenance tips:

1. Replace Filters Regularly

Check the manufacturer’s guidelines for recommended filter replacement intervals. Generally, HEPA filters should be replaced every 6 to 12 months, while activated carbon filters may need changing more frequently depending on usage.

2. Clean the Unit

Dust and debris can accumulate on the exterior and around the intake and exhaust vents. Use a soft cloth to wipe down the unit regularly.

3. Inspect Electrical Connections

Periodically check electrical connections to ensure they are secure and functioning properly. This can prevent potential issues that may arise from loose connections.

4. Schedule Professional Maintenance

Consider scheduling annual maintenance with an HVAC technician to ensure your air purifier operates at peak efficiency. They can perform a thorough inspection and address any potential issues.

Conclusion

Investing in a Commercial Ceiling Air Purifier is a proactive step towards enhancing the air quality of your business environment. By providing cleaner air, you promote the health and well-being of your employees and customers, ultimately leading to a more productive and pleasant atmosphere. With various models available, consider factors such as space size, filtration technology, and maintenance requirements when choosing the right unit for your needs. Regular maintenance will ensure your investment continues to deliver benefits for years to come.

Cleaning Suspended Ceiling Tiles: Tips and Techniques for a Fresh Look

Suspended ceiling tiles are an excellent choice for many commercial and residential spaces. They offer acoustic benefits, aesthetic appeal, and can hide unsightly wiring and ductwork. However, over time, dust, dirt, and stains can accumulate on these tiles, detracting from their appearance and overall cleanliness. If you’re looking for effective methods to keep your suspended ceiling tiles looking new, this guide will provide valuable insights and practical tips for Cleaning Suspended Ceiling Tiles.

Cleaning Suspended Ceiling Tiles

Understanding Suspended Ceiling Tiles

What Are Suspended Ceiling Tiles?

Suspended ceiling tiles, also known as drop ceiling tiles, are lightweight panels that hang below the structural ceiling. They are typically made from materials like mineral fiber, metal, or PVC, and are installed in a grid system. This design allows for easy access to the space above the ceiling, making it an ideal choice for offices, schools, and homes.

Read too: Shiplap Ceiling in Kitchen: A Timeless Trend for a Stylish and Cozy Space

Benefits of Suspended Ceiling Tiles

  1. Acoustic Control: Many suspended ceiling tiles are designed to absorb sound, making them ideal for offices and conference rooms where noise control is essential.
  2. Aesthetic Variety: They come in a wide range of designs, colors, and finishes, allowing you to customize your space according to your style.
  3. Easy Access: The grid system allows for easy removal of tiles, providing convenient access to plumbing, wiring, and ductwork above the ceiling.
  4. Cost-Effective: Installing suspended ceiling tiles is often more affordable than other ceiling options, and they can be replaced individually if damaged.
  5. Insulation: Some tiles also provide thermal insulation, helping to maintain temperature and reduce energy costs.

Why Clean Suspended Ceiling Tiles?

Over time, suspended ceiling tiles can accumulate dust, grime, and stains, making them look dull and unappealing. Regular cleaning is essential for several reasons:

  • Aesthetic Appeal: Clean tiles enhance the overall appearance of your space, creating a welcoming atmosphere for employees and visitors.
  • Health and Hygiene: Dust and allergens can build up on ceiling tiles, potentially affecting indoor air quality. Cleaning helps minimize these health risks.
  • Longevity: Regular maintenance can extend the lifespan of your ceiling tiles, preventing the need for premature replacement.
  • Cost Efficiency: Keeping your tiles clean can reduce long-term maintenance costs and improve the efficiency of your HVAC system.

Cleaning Suspended Ceiling Tiles: Step-by-Step Guide

1. Gather Your Cleaning Supplies

Before you start the cleaning process, gather the necessary supplies:

  • Soft-bristle broom or vacuum with a brush attachment
  • Mild detergent or all-purpose cleaner
  • Bucket
  • Warm water
  • Sponge or soft cloth
  • Ladder (if necessary)
  • Protective gear (gloves, mask)

2. Prepare the Area

  1. Clear the Space: Remove any furniture or items under the area you will be cleaning to provide clear access.
  2. Dust the Tiles: Use a soft-bristle broom or a vacuum with a brush attachment to gently remove dust and cobwebs from the surface of the tiles. Be careful not to damage the tiles during this process.

3. Create a Cleaning Solution

  1. Mix the Cleaner: In a bucket, mix a mild detergent or all-purpose cleaner with warm water. Avoid harsh chemicals that can damage the tiles or leave residues.
  2. Test the Solution: Before applying the solution to the entire surface, test it on a small, inconspicuous area of the tile to ensure it does not cause discoloration or damage.

4. Clean the Tiles

  1. Wipe the Tiles: Using a sponge or soft cloth, dip it in the cleaning solution and wring it out to remove excess liquid. Wipe the tiles gently, working in small sections to avoid saturating them.
  2. Rinse the Tiles: After cleaning, rinse the sponge or cloth in clean water and wipe the tiles again to remove any soapy residue.
  3. Dry the Tiles: Use a dry cloth to wipe down the tiles and remove any moisture. This step is crucial to prevent mold or mildew growth.

5. Address Stains

  1. Identify the Stain: Different stains may require different cleaning approaches. Common stains include water marks, smoke stains, and grease.
  2. Tackle Stubborn Stains: For tough stains, you may need to use a specialized cleaner or a mixture of vinegar and water. Apply the solution to the stained area, let it sit for a few minutes, then gently scrub with a soft brush.
  3. Repeat as Necessary: If the stain persists, repeat the process until it is removed. Be patient, as some stains may take multiple attempts to eliminate completely.

6. Inspect and Replace

After cleaning, inspect your tiles for any signs of damage, such as cracks or water stains. If you notice any severely damaged tiles, consider replacing them to maintain the appearance and integrity of your ceiling.

Maintenance Tips for Suspended Ceiling Tiles

Regular Dusting

To minimize the buildup of dirt and dust, regularly dust your suspended ceiling tiles using a soft broom or vacuum. This will make your deep cleaning sessions easier and less frequent.

Monitor Humidity Levels

High humidity can lead to mold and mildew growth. Keep an eye on humidity levels in your space, and use dehumidifiers if necessary to maintain a dry environment.

Inspect for Leaks

Check for water stains or leaks from above the ceiling tiles. Address any plumbing or roofing issues promptly to prevent damage to the tiles.

Use Ceiling Tile Protectants

Consider applying a ceiling tile protectant that can help repel dust and moisture, making future cleaning easier.

Professional Cleaning Services

If your suspended ceiling tiles require extensive cleaning or if you are unsure about the cleaning process, consider hiring professional cleaning services. They have specialized tools and techniques to restore your tiles effectively.

Conclusion

Cleaning suspended ceiling tiles may seem daunting, but with the right approach and tools, it can be a straightforward task. Regular maintenance and cleaning will not only enhance the appearance of your space but also improve indoor air quality and extend the life of your tiles. By following the tips and techniques outlined in this guide, you can ensure that your suspended ceiling tiles remain clean, fresh, and inviting for years to come.