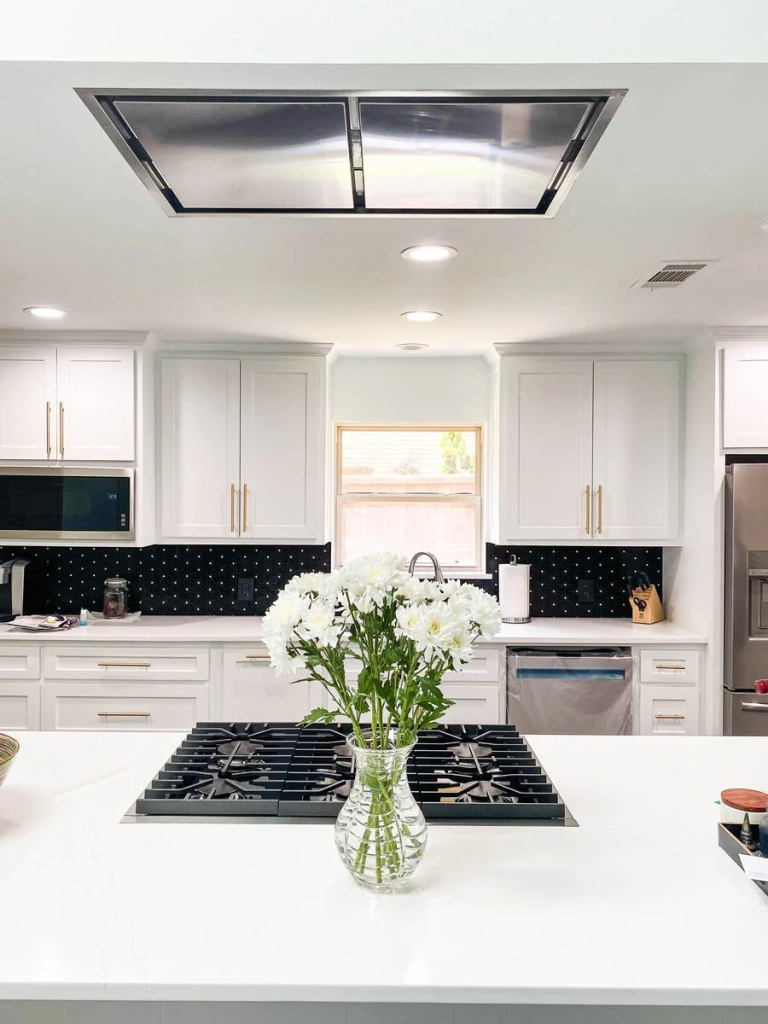
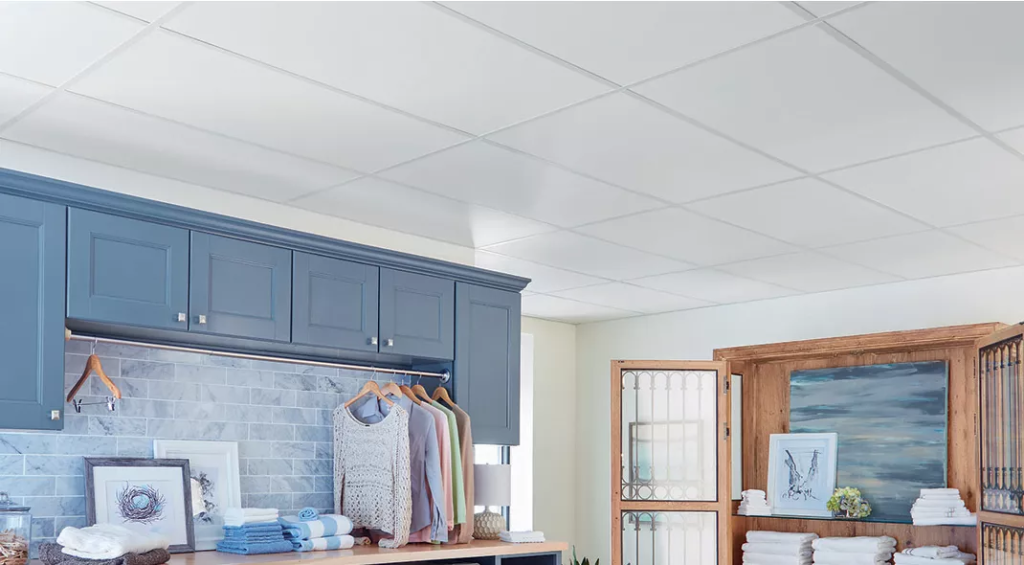
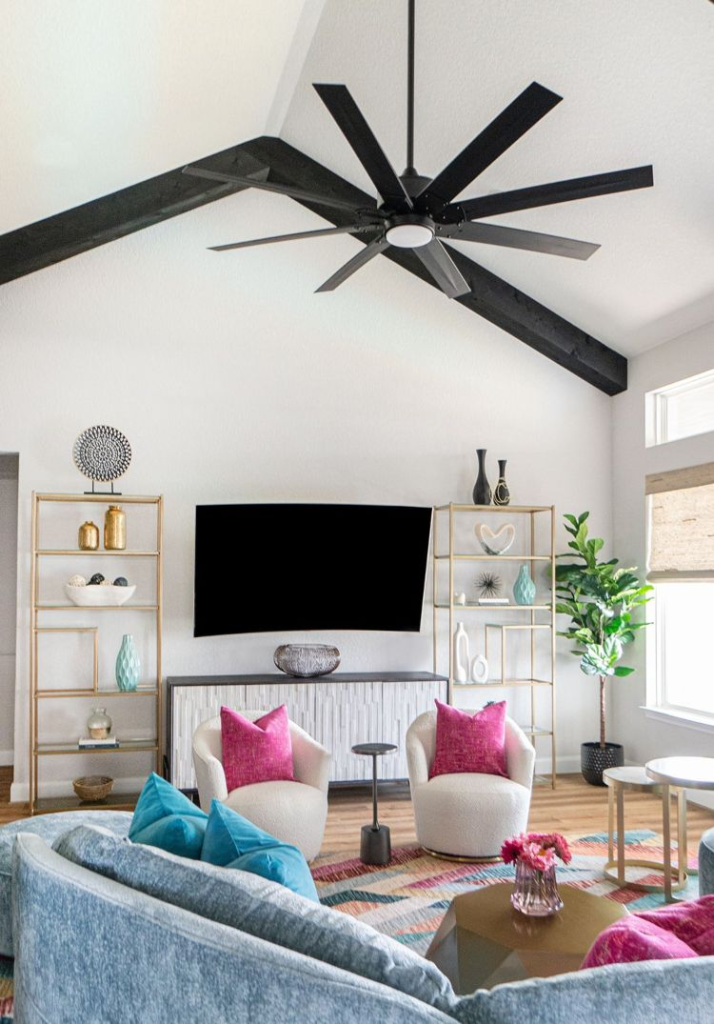
White Drop Ceiling Tiles: Enhancing Your Space with Style and Functionality

Drop ceiling tiles, also known as suspended ceilings, have been a popular choice for commercial and residential spaces for decades. They offer a simple way to cover unsightly wires, pipes, and ductwork while providing easy access for repairs. Among the many options available, white drop ceiling tiles stand out as one of the most versatile and aesthetically pleasing choices for modern interiors.

White Drop Ceiling Tiles

In this article, we will explore everything you need to know about white drop ceiling tiles, including their benefits, different styles, installation process, and maintenance tips. Whether you’re renovating your home, office, or any other space, this guide will help you understand why white drop ceiling tiles might be the perfect solution for you.

What Are White Drop Ceiling Tiles?

White drop ceiling tiles are lightweight panels typically made of materials such as mineral fiber, gypsum, metal, or vinyl. These tiles are suspended from the actual ceiling using a metal grid system. The tiles rest inside the grid, creating a false ceiling that hides utilities like electrical wiring or air ducts while maintaining a clean and organized appearance.

Read too: Exploring the Innovation and Efficiency of Ceiling Mounted Surgical Light Solutions: Illuminating Precision

White is the most common color for drop ceiling tiles, as it reflects light well, making spaces appear brighter and more open. Whether used in an office, retail store, basement, or kitchen, white drop ceiling tiles provide a neutral, minimalist look that complements virtually any décor.

Benefits of White Drop Ceiling Tiles

There are several reasons why white drop ceiling tiles have remained a popular choice for both commercial and residential properties. Below are some key benefits that make them a preferred option for many people:

1. Enhanced Aesthetic Appeal

White drop ceiling tiles offer a clean, streamlined appearance that enhances the overall look of any room. Their smooth, bright surface can make a room feel more spacious, which is especially important in areas with lower ceilings. In addition, the neutral color of white tiles can easily blend with a wide range of design schemes, from modern to traditional.

2. Light Reflection

One of the main advantages of using white tiles in a ceiling is their ability to reflect light. This can help reduce the need for additional lighting fixtures, making spaces appear brighter without consuming more energy. White drop ceiling tiles are ideal for offices, retail stores, and basements where natural light might be limited.

3. Sound Absorption

Many white drop ceiling tiles are designed to absorb sound, which is especially beneficial in noisy environments like open-plan offices or large conference rooms. These tiles help reduce echo and background noise, creating a more comfortable environment for conversations and work.

4. Easy Access for Maintenance

One of the greatest advantages of using drop ceiling tiles is the easy access they provide to important building systems. By simply lifting the tiles, you can access pipes, electrical wiring, and HVAC ducts for repairs or maintenance. This makes them an excellent choice for commercial buildings, where regular access to these systems is often required.

5. Concealment of Utilities

White drop ceiling tiles offer an elegant solution for hiding unsightly utilities like exposed wires, pipes, and ductwork. Instead of dealing with the messy appearance of these elements, drop ceiling tiles create a smooth and seamless surface, improving the room’s overall appearance.

6. Cost-Effective

Compared to other ceiling options, drop ceilings are relatively affordable. The installation process is quick and simple, reducing labor costs. Additionally, white drop ceiling tiles are available in a variety of price points, allowing you to find a solution that fits your budget without sacrificing quality.

Types of White Drop Ceiling Tiles

When choosing white drop ceiling tiles, it’s essential to understand that they come in various materials, designs, and finishes. Each type of tile offers unique features, so selecting the right one for your specific needs can make all the difference.

1. Mineral Fiber Tiles

Mineral fiber tiles are one of the most common types of drop ceiling tiles. Made from natural and synthetic materials, they are lightweight, affordable, and offer excellent sound absorption properties. These tiles are ideal for offices, classrooms, and other spaces where controlling noise levels is essential.

2. Gypsum Ceiling Tiles

Gypsum tiles are another popular option for white drop ceilings. Known for their durability and fire-resistant properties, they are a great choice for both commercial and residential spaces. Gypsum tiles tend to have a more solid and smoother surface compared to mineral fiber tiles, offering a polished look that works well in modern interiors.

3. Vinyl or PVC Tiles

Vinyl tiles are often used in areas with high moisture levels, such as basements, kitchens, or bathrooms. These tiles are water-resistant and easy to clean, making them a practical solution for spaces that require frequent maintenance. They come in a wide range of textures and patterns, adding more design flexibility.

4. Metal Ceiling Tiles

For a more industrial or contemporary look, metal ceiling tiles are an excellent choice. Metal tiles are incredibly durable, resistant to moisture and damage, and provide a sleek, modern appearance. While metal tiles can be more expensive than other materials, they offer a distinct aesthetic that works well in trendy commercial spaces or loft-style homes.

5. Acoustic Ceiling Tiles

Acoustic tiles are specifically designed to reduce noise levels in a room. They are often made from mineral fibers and feature perforations or patterns that enhance their sound-absorbing capabilities. These tiles are commonly used in theaters, offices, and music studios to improve acoustics.

How to Install White Drop Ceiling Tiles

Installing white drop ceiling tile is a relatively straightforward process, especially for DIY enthusiasts. Below is a step-by-step guide to help you install drop ceiling tiles in your home or office:

Step 1: Measure the Room

Begin by measuring the dimensions of the room to determine how many tiles and how much grid material you will need. It’s essential to account for any fixtures or obstacles in the ceiling, such as lights or vents, which may require adjustments to the grid layout.

Step 2: Install the Wall Angles

The next step is to install wall angles around the perimeter of the room. These angles serve as the support for the edges of the ceiling grid. Use a level to ensure the angles are straight, and secure them to the wall with screws or nails.

Step 3: Assemble the Grid

Once the wall angles are in place, assemble the metal grid that will hold the tiles. The grid consists of main runners, cross tees, and connectors. Follow the manufacturer’s instructions for assembling the grid, ensuring that it is level and properly aligned.

Step 4: Cut and Install the Tiles

If needed, cut the white drop ceiling tiles to fit around obstacles or along the edges of the room. Use a sharp utility knife to make clean cuts. Once the tiles are cut to size, simply drop them into place within the grid. Be careful not to damage the edges of the tiles during installation.

Step 5: Add Lighting or Fixtures

If you’re installing lights, fans, or other fixtures, ensure they are properly supported by the ceiling grid. You may need to reinforce certain sections of the grid to accommodate heavier fixtures.

Maintenance Tips for White Drop Ceiling Tiles

Maintaining your white drop ceiling tiles is essential to keep them looking clean and fresh for years to come. Here are some tips to ensure their longevity:

1. Regular Dusting

Over time, ceiling tiles can accumulate dust and dirt, especially in commercial spaces. Regularly dust your tiles using a soft cloth or vacuum with a brush attachment to keep them looking bright.

2. Clean Stains Immediately

If your white drop ceiling tiles become stained, it’s important to clean them as soon as possible. Use a mild detergent mixed with water to gently scrub the stained area. Avoid using harsh chemicals that could damage the surface of the tiles.

3. Replace Damaged Tiles

If a tile becomes cracked or discolored beyond repair, it’s best to replace it with a new one. Fortunately, drop ceiling tiles are easy to remove and replace without disturbing the rest of the ceiling.

4. Inspect for Moisture Issues

If you notice discoloration or sagging in your ceiling tiles, it could indicate a moisture problem above the ceiling. Inspect the area for leaks, and address any plumbing or roof issues promptly to prevent further damage.

Conclusion

White drop ceiling tile offer a practical and stylish solution for covering unsightly ceilings while providing easy access to utilities. Their ability to brighten up a space, combined with their sound-absorbing properties, makes them an excellent choice for both residential and commercial applications. With a wide range of materials, textures, and styles available, you can find the perfect white drop ceiling tile to suit your needs.

Whether you’re looking to improve the acoustics in your office, create a clean look in your basement, or hide imperfections in your ceiling, white drop ceiling tile provide a cost-effective and versatile option. By following proper installation and maintenance practices, you can enjoy a beautiful and functional ceiling for years to come.

Modern Drop Ceiling Lighting: Elevating Your Space with Style and Functionality

Modern interior design is all about blending aesthetics with functionality, and one of the key elements in achieving this is the lighting you choose for your home or office. Modern Drop Ceiling Lighting has become increasingly popular in recent years due to its sleek design and ability to enhance the ambiance of a space. Whether you’re remodeling a room, designing a new office, or simply upgrading your home lighting, drop ceiling lighting offers versatile and stylish options that suit various design preferences.

Modern Drop Ceiling Lighting

In this comprehensive guide, we’ll explore the different types of modern drop ceilings lighting, their benefits, installation considerations, and how they can transform the look and feel of any room. Whether you’re a homeowner looking to refresh your living space or a business owner hoping to improve the atmosphere of your office, modern drop ceiling lighting can offer the perfect solution.

What Is Modern Drop Ceiling Lighting?

Modern drop ceiling lighting refers to lighting fixtures that are installed in or alongside a suspended (or drop) ceiling, which is a secondary ceiling hung below the main structural ceiling. Drop ceilings, also known as suspended ceilings, are common in commercial spaces but are increasingly being used in residential settings due to their practicality and design potential.

Drop ceilings are composed of a grid system that holds individual tiles, allowing for easy installation of lighting, HVAC systems, and other utilities. Modern drop ceiling lighting takes advantage of this setup, offering a range of fixtures that fit seamlessly into the ceiling grid while providing both functionality and a modern aesthetic.

Read too: Exploring the Innovation and Efficiency of Ceiling Mounted Surgical Light Solutions: Illuminating Precision

Benefits of Modern Drop Ceiling Lighting

1. Sleek and Minimalist Design

One of the main appeals of Modern Drop Ceiling Lighting is its ability to create a sleek, minimalist look. In modern design, simplicity and clean lines are highly valued, and drop ceiling lighting delivers just that. The lights are often recessed or flush with the ceiling, reducing visual clutter and making the room feel more open and airy.

2. Improved Lighting Control

With modern drop ceiling lighting, you have greater control over the lighting distribution in your space. Depending on the type of fixture you choose, you can direct light precisely where it’s needed, whether that’s over a workspace, a dining table, or an entertainment area. This helps create a more functional and comfortable environment, especially in rooms where proper lighting is essential.

3. Energy Efficiency

Many modern drop ceiling lighting solutions use LED technology, which is significantly more energy-efficient than traditional incandescent or fluorescent lights. LED lights not only consume less power but also have a longer lifespan, meaning fewer replacements and lower energy bills over time. Given the emphasis on sustainability in modern design, energy-efficient lighting is a perfect match.

4. Versatility

Modern drop ceiling lighting comes in a wide variety of styles, sizes, and configurations, making it versatile enough to fit any room or design theme. Whether you’re looking for soft ambient lighting or bright task lighting, there’s a drop ceiling fixture to suit your needs. It’s also a great option for multi-purpose spaces, such as home offices that double as guest rooms.

5. Easy Maintenance

Since drop ceiling lighting fixtures are often modular, they are easy to replace or maintain. If a light fixture or tile needs to be changed, it can be done quickly without disrupting the entire ceiling structure. This is particularly beneficial in commercial or office spaces, where time and convenience are important factors.

Types of Modern Drop Ceiling Lighting

There are several different types of modern drop ceiling lighting to choose from, each with its own benefits and ideal applications. Let’s take a closer look at some of the most popular options.

1. Recessed Lighting

Recessed lighting, also known as can lights or downlights, is one of the most popular options for Modern Drop Ceiling Lighting. These lights are installed into the ceiling itself, creating a flush and streamlined appearance. Recessed lights work well for general lighting, task lighting, and even accent lighting, depending on their placement and brightness level.

The minimalistic look of recessed lighting makes it perfect for modern, minimalist interiors. It provides uniform illumination without taking up visual space, which can make rooms feel larger and less cluttered.

2. LED Panel Lights

LED panel lights are another excellent choice for drop ceilings, especially in offices or commercial environments. These large, flat fixtures fit directly into the ceiling grid and provide bright, even illumination across a wide area. Modern Drop Ceiling Lighting with LED panels is highly energy-efficient and offers a sleek, modern look that works well in spaces that require a lot of light, such as conference rooms or retail stores.

3. Track Lighting

Track lighting is a more flexible option that can be used with drop ceilings. This type of lighting involves a series of light fixtures attached to a track, which can be mounted on the ceiling grid. The direction of the lights can be adjusted, making track lighting ideal for areas where you want to highlight specific features, such as artwork or architectural elements.

Track lighting also adds a contemporary feel to any room, making it a favorite choice for modern homes and galleries.

4. Pendant Lighting

Pendant lights are a stylish option that can add a touch of elegance to any room. While pendant lights are often associated with traditional ceilings, they can be installed in a drop ceiling with the right adjustments. Pendants hang from the ceiling, making them great for creating a focal point above a kitchen island, dining table, or seating area.

For a modern twist, choose sleek pendant lights with minimalist designs or geometric shapes. These can enhance the overall look of the room while providing targeted lighting.

5. Cove Lighting

Cove lighting is an indirect lighting option that creates a soft, ambient glow by hiding light fixtures along the perimeter of a drop ceiling. This type of lighting is often used in living rooms, bedrooms, and other spaces where a relaxed and cozy atmosphere is desired.

Modern cove lighting typically uses LED strips, which are energy-efficient and can change color to suit different moods or times of day. It’s an excellent way to add a modern touch without overwhelming the space with bright, direct lighting.

Installing Modern Drop Ceiling Lighting

The installation process for modern drop ceiling lighting is relatively straightforward, but it does require careful planning and execution. Here are some key steps to keep in mind when installing drop ceiling lights.

1. Plan the Layout

Before installing any lighting fixtures, it’s essential to plan out the layout. Consider where you need the most light and how the fixtures will be spaced throughout the room. If you’re working with recessed lights, for example, you may want to position them in a grid to ensure even illumination across the entire space.

2. Choose the Right Fixtures

Once you have a layout in mind, select the appropriate fixtures for your needs. For task lighting, such as in a kitchen or office, brighter lights like LED panels or recessed lighting might be ideal. For accent lighting or to create a more relaxed ambiance, consider cove lighting or pendants.

3. Hire a Professional

While some homeowners may be comfortable with basic lighting installation, modern drop ceiling lighting is best handled by a professional. Electricians with experience in ceiling lighting can ensure that everything is installed correctly and safely, especially when working with recessed lighting or wiring in a suspended ceiling.

4. Test the Lighting

Once the fixtures are installed, test them out to ensure everything is working properly and providing the desired amount of light. Adjust the direction or brightness as needed, especially if you’re using adjustable fixtures like track lighting.

How Modern Drop Ceiling Lighting Can Enhance Different Spaces

Modern Drop Ceiling Lighting is highly adaptable, making it suitable for various spaces throughout your home or office. Here are some common areas where drop ceiling lighting can make a big impact.

Living Room

In the living room, modern drop ceiling lighting can create a warm, inviting atmosphere. Recessed lights paired with cove lighting can provide general illumination, while pendant lights can be used to highlight key areas, such as above a coffee table or seating arrangement.

Kitchen

Kitchens benefit from bright, functional lighting, and drop ceiling fixtures like LED panels or recessed lighting work perfectly in this space. These options provide ample light for cooking, cleaning, and other tasks. Adding pendant lights over an island or breakfast bar can also create an appealing focal point.

Office Spaces

In both home offices and commercial workspaces, drop ceiling lighting is essential for productivity. LED panels and track lighting are ideal choices, offering bright, energy-efficient illumination that reduces eye strain and enhances focus.

Bedroom

For bedrooms, softer lighting is often preferred. Cove lighting, combined with recessed lights, can create a calming ambiance that’s perfect for winding down at the end of the day. You can even incorporate dimmers to adjust the brightness based on your needs.

Conclusion

In conclusion, Modern Drop Ceiling Lighting offers a versatile, stylish, and functional solution for enhancing any space. Whether you’re looking to brighten up your kitchen, living room, or office, the wide range of lighting options available ensures you’ll find the perfect fit for your design needs. With energy-efficient LED technology, customizable layouts, and sleek, modern fixtures, drop ceiling lighting is the ideal choice for any contemporary interior.

By planning the layout carefully and selecting the right fixtures, you can create a well-lit space that’s both practical and visually appealing. Don’t hesitate to hire a professional for the installation process to ensure the best results and a seamless integration with your existing ceiling.

Light Fixtures For Tall Ceilings: Illuminating Spaces

When it comes to designing a home with tall ceilings, the right lighting can make all the difference. Light fixtures for tall ceilings not only serve the practical purpose of illuminating your space but also enhance its aesthetic appeal. Choosing the right fixtures can highlight architectural features, create a cozy atmosphere, and even act as a statement piece in your room. In this comprehensive guide, we will explore the various types of light fixtures suitable for tall ceilings, their benefits, design tips, and considerations to ensure you make the best choice for your home.

Light Fixtures For Tall Ceilings

Understanding the Need for Proper Lighting in Tall Ceilings

1. Aesthetic Enhancement

High ceilings can often make a space feel empty or uninviting. Using the right light fixtures can fill that vertical space, creating a sense of balance and proportion in your room. Whether you prefer contemporary designs or classic elegance, the right fixture can elevate your room’s aesthetic.

Read too: Discovering the Charm of Nautical Outdoor Ceiling Fans for Your Coastal Retreat: Sail into Style

2. Functional Lighting

Tall ceilings often require more powerful light sources to effectively illuminate the room. Standard fixtures may not provide adequate light in these spaces, making it essential to select fixtures designed for higher placements.

3. Creating Ambiance

Lighting plays a crucial role in setting the mood of a room. Different fixtures can create various atmospheres, from bright and energizing to warm and cozy. With tall ceilings, you have the opportunity to experiment with layers of light to achieve your desired ambiance.

Types of Light Fixtures For Tall Ceilings

When selecting light fixtures for tall ceilings, it’s essential to consider the different styles and types available. Here are some popular options:

1. Chandeliers

Chandeliers are one of the most popular choices for tall ceilings. These fixtures add a touch of luxury and grandeur to any room. Here are some points to consider:

  • Size and Scale: Choose a chandelier that is proportionate to your room’s size. A large chandelier can become a stunning focal point in a spacious room.
  • Height Consideration: Hang the chandelier at an appropriate height—generally, at least 7 feet above the floor to allow for safe clearance.
  • Styles: From modern to traditional, chandeliers come in various designs, including crystal, metal, and glass, allowing you to match the fixture to your room’s décor.

2. Pendant Lights

Pendant lights are versatile fixtures that can work beautifully in rooms with tall ceilings. They can be used alone or in clusters to create a unique design.

  • Multiple Pendants: Group several pendants at varying heights for a dramatic effect, especially in dining areas or kitchens.
  • Variety of Designs: Available in various shapes, sizes, and colors, pendant lights can be selected to complement your existing décor.
  • Adjustable Heights: Many pendant fixtures come with adjustable cables, allowing you to customize their height based on your space.

3. Wall Sconces

Wall sconces can be an excellent addition to rooms with tall ceilings, especially when paired with other fixtures. They provide additional lighting while enhancing the room’s overall design.

  • Height Placement: Install sconces at eye level or higher to create a balanced look. This can draw the eye upward and emphasize the height of the ceiling.
  • Accent Lighting: Use sconces to highlight artwork, architectural features, or even as part of a layered lighting scheme.
  • Variety of Styles: Wall sconces come in many styles, from minimalist to ornate, allowing you to find options that align with your design vision.

4. Recessed Lighting

Recessed lighting can provide a clean and modern look for tall ceilings. These fixtures are embedded into the ceiling, offering unobtrusive illumination.

  • Layered Lighting: Combine recessed lights with other fixtures for a well-rounded lighting design. This approach allows you to control brightness and ambiance effectively.
  • Directional Lighting: Many recessed lights can be angled to highlight specific areas or features in the room, enhancing its overall appearance.
  • Energy Efficiency: LED recessed lights are energy-efficient and long-lasting, making them a practical choice for larger spaces.

5. Track Lighting

Track lighting is another great option for tall ceilings, offering flexibility and versatility in illuminating your space.

  • Adjustable Positioning: Track lights can be adjusted to highlight different areas of the room or specific features, allowing you to customize your lighting.
  • Contemporary Aesthetic: This style works well in modern or industrial settings and can add an artistic touch to your decor.
  • Variety of Bulbs: You can use different types of bulbs in track lighting, including LED and halogen, depending on your brightness preferences.

Tips for Choosing Light Fixtures For Tall Ceilings

When selecting light fixtures for tall ceilings, there are several key factors to keep in mind:

1. Room Dimensions

Consider the size of your room when choosing light fixtures. Larger rooms may require multiple fixtures or larger-scale designs to adequately light the space. Measure the height of your ceilings to determine the appropriate length for hanging fixtures.

2. Style and Theme

Select light fixtures that complement the overall style of your room. Whether you prefer a modern, rustic, or traditional aesthetic, there are light fixtures available in various designs and finishes to match your vision.

3. Lighting Needs

Assess your lighting needs based on how you use the space. Do you need bright, task-oriented lighting, or do you prefer softer, ambient lighting? This will guide you in choosing the right fixtures and bulbs.

4. Dimmers and Controls

Installing dimmer switches allows you to adjust the brightness of your fixtures, providing flexibility for different activities and moods. Consider smart lighting options that can be controlled via mobile apps or voice commands for added convenience.

5. Safety and Maintenance

Ensure that your light fixtures are installed safely, especially when dealing with high ceilings. Regular maintenance, such as cleaning and bulb replacement, will keep your fixtures looking great and functioning effectively.

Maintenance Tips for Light Fixtures For Tall Ceilings

Proper maintenance is essential to keep your light fixtures for tall ceilings in good condition. Here are some maintenance tips:

1. Regular Dusting

Dust can accumulate on light fixtures, especially those installed at height. Use a microfiber cloth or a feather duster to wipe down your fixtures regularly to keep them looking clean.

2. Bulb Replacement

Check your bulbs regularly and replace any that are burnt out. For hard-to-reach fixtures, consider using a long-handled bulb changer or enlisting the help of a professional.

3. Inspect Electrical Components

Periodically inspect the electrical components of your fixtures for any signs of wear or damage. If you notice any issues, consult an electrician to address them.

4. Professional Cleaning

For larger or more complex fixtures, consider hiring a professional cleaning service to ensure that they are cleaned safely and thoroughly.

Conclusion

Choosing the right light fixtures for tall ceilings can dramatically transform the look and feel of your space. From elegant chandeliers to modern pendant lights, the options are endless. By considering the type of fixture, room size, and your personal style preferences, you can find lighting solutions that enhance both the functionality and aesthetics of your home. Remember to keep safety and maintenance in mind to ensure that your fixtures remain beautiful and effective for years to come.

Hunter Brass Ceiling Fans: Style and Functionality Combined

When it comes to choosing the perfect ceiling fan for your home, the Hunter Brass Ceiling Fan stands out as a timeless choice. Combining elegant design with exceptional functionality, these ceiling fans not only enhance the aesthetic of any room but also provide effective air circulation, ensuring a comfortable living space. In this comprehensive guide, we’ll explore the benefits, features, and maintenance of the Hunter Brass Ceiling Fan, along with tips on how to choose the right model for your needs.

Hunter Brass Ceiling Fan

Why Choose a Hunter Brass Ceiling Fan?

1. Classic Design

The Hunter Brass Ceiling Fan is known for its classic and sophisticated appearance. The rich brass finish adds a touch of elegance to any room, making it a perfect fit for various interior styles, from traditional to contemporary. The warm hue of the brass can complement wooden furniture, vintage decor, and modern aesthetics alike.

2. Efficient Air Circulation

One of the primary reasons to invest in a ceiling fan is its ability to enhance air circulation. The Hunter Brass Ceiling Fan features powerful motors and aerodynamically designed blades, allowing it to efficiently circulate air throughout the room. This not only helps to cool down the space during the hot summer months but also assists in distributing heat during colder months, making it a year-round solution for comfort.

Read too: Discovering the Charm of Nautical Outdoor Ceiling Fans for Your Coastal Retreat: Sail into Style

3. Energy Efficiency

Using a Hunter Brass Ceiling Fan can help reduce energy consumption. By circulating air effectively, ceiling fans can reduce the reliance on air conditioning systems, leading to lower energy bills. Many Hunter fans are equipped with energy-efficient motors that operate quietly and consume less electricity, providing both comfort and savings.

4. Versatile Installation Options

Hunter offers a range of ceiling fan designs, ensuring that you can find the perfect fit for your room’s size and style. Whether you need a fan for a small bedroom or a large living room, there’s a Hunter Brass Ceiling Fan model that will suit your needs. Additionally, many models come with various mounting options, including flush mount, downrod, and angled mount, making installation straightforward in any setting.

5. Durability and Longevity

Hunter has a reputation for producing high-quality ceiling fans that are built to last. The Hunter Brass Ceiling Fan is crafted with durable materials, ensuring that it can withstand the test of time. With proper maintenance, these fans can provide comfort and style for years.

Features of the Hunter Brass Ceiling Fan

When selecting a Hunter Brass Ceiling Fan, consider the following features that contribute to its appeal:

1. Blade Design and Size

The blade design plays a crucial role in a fan’s performance. Hunter fans typically feature wide, curved blades that maximize airflow. Depending on the model, blade spans can range from 44 inches to over 60 inches, making it easy to find a fan that suits the dimensions of your room. Larger blades move more air, making them ideal for spacious areas, while smaller blades work well in compact rooms.

2. Motor Quality

The motor is the heart of any ceiling fan, and Hunter fans are equipped with high-quality motors that deliver reliable performance. Many models come with WhisperWind technology, which ensures a quiet operation while providing powerful airflow. This feature is especially beneficial for bedrooms and living areas where noise can be disruptive.

3. Lighting Options

Many Hunter Brass Ceiling Fan models come with integrated lighting options, making them multifunctional. These fans may feature a light kit with stylish bulbs that can brighten your space while adding a decorative touch. Whether you prefer warm or cool lighting, you can find a fan that matches your preferences.

4. Smart Technology Integration

As smart home technology continues to grow in popularity, some Hunter ceiling fans offer smart features. This includes compatibility with Wi-Fi or Bluetooth, allowing you to control the fan remotely via a smartphone app or voice commands through smart home devices. This convenience can enhance your overall experience, especially if you enjoy coming home to a pre-cooled space.

Choosing the Right Hunter Brass Ceiling Fan for Your Home

When it comes to selecting the ideal Hunter Brass Ceiling Fan for your space, consider the following tips:

1. Assess Your Room Size

Before purchasing a ceiling fan, it’s essential to measure the size of the room. A small fan in a large room will struggle to provide sufficient airflow, while a large fan in a small room may feel overwhelming. As a general rule, choose a fan with a blade span of:

  • 36 to 44 inches for small rooms (up to 100 sq. ft.)
  • 44 to 54 inches for medium-sized rooms (100 to 250 sq. ft.)
  • 56 inches or more for large rooms (over 250 sq. ft.)

2. Consider Ceiling Height

The height of your ceiling will influence the mounting options you choose for your Hunter Brass Ceiling Fan. For ceilings 8 feet high, a flush mount is ideal, while higher ceilings may require a downrod for optimal airflow. Ensure the fan blades are positioned 8 to 9 feet above the floor for maximum effectiveness.

3. Choose a Style That Complements Your Décor

Since the Hunter Brass Ceiling Fan is a visible part of your room’s design, choose a style that complements your existing décor. Consider the finish, blade color, and overall design to ensure it enhances the aesthetic appeal of your space.

4. Evaluate Additional Features

Think about any additional features that may enhance your experience. For instance, if you often work or relax in a specific room, consider a model with integrated lighting. If you want the convenience of controlling the fan from anywhere, look for smart technology options.

Installation and Maintenance Tips for Hunter Brass Ceiling Fans

To enjoy your Hunter Brass Ceiling Fan for years to come, proper installation and maintenance are key. Here are some tips:

1. Installation

  • Hire a Professional: If you’re not comfortable with electrical work, consider hiring a professional to install your fan. They can ensure that it’s safely and securely mounted.
  • Follow the Instructions: If you’re installing it yourself, carefully follow the manufacturer’s instructions provided in the packaging.
  • Ensure Proper Balance: Make sure the fan is level during installation to prevent wobbling, which can lead to noise and affect performance.

2. Regular Cleaning

Dust and debris can accumulate on the fan blades over time, impacting its performance and appearance. Clean the blades regularly using a soft cloth or a feather duster. For more thorough cleaning, consider using a damp cloth, but be sure to turn off the fan and allow it to dry completely before using it again.

3. Check for Loose Screws

Periodically inspect your Hunter Brass Ceiling Fan for any loose screws or components. Tighten any that may have come loose over time to ensure optimal performance and safety.

4. Lubricate the Motor

If your fan is equipped with a traditional motor (not a sealed motor), it may require occasional lubrication. Consult the user manual for specific recommendations on how to lubricate the fan motor properly.

5. Seasonal Usage

To maximize comfort and efficiency, adjust the fan’s direction based on the season. In the summer, set the fan to spin counterclockwise to create a cooling breeze. In winter, switch it to clockwise to circulate warm air trapped near the ceiling.

Conclusion

The Hunter Brass Ceiling Fan is an exceptional choice for those seeking a blend of style, efficiency, and comfort. With its timeless design, effective air circulation, and energy-saving capabilities, it can enhance any living space. Whether you’re looking to cool down during hot summer months or distribute warmth in winter, a Hunter ceiling fan provides year-round comfort. By considering factors like room size, ceiling height, and additional features, you can find the perfect fan to complement your home. With proper installation and maintenance, your Hunter Brass Ceiling Fan can provide a beautiful and functional addition to your home for years to come.

High Output Ceiling Fan for Your Home: The Ultimate Guide to Choose

If you’re searching for an efficient way to cool your home, a high output ceiling fan may be the perfect solution. Designed to deliver superior airflow, these powerful ceiling fans are ideal for large spaces, high ceilings, or rooms where effective air circulation is essential. In this guide, we’ll break down what makes a high output ceiling fan special, explore the various factors to consider when choosing one, and offer advice on installation and maintenance to ensure you get the most out of your fan.

High Output Ceiling Fan

Why Choose a High Output Ceiling Fan?

A high output ceiling fan is more than just a decorative fixture—it’s a functional tool that can dramatically improve comfort in your living space. Unlike standard fans, high output ceiling fans are specifically designed to move larger volumes of air, making them perfect for spaces where normal fans simply won’t cut it.

Here’s why you should consider investing in a high output ceiling fan:

  1. Superior Airflow: These fans are engineered to move more air than typical ceiling fans, which means they are perfect for large rooms, open-concept spaces, and areas with high ceilings.
  2. Energy Efficiency: By circulating air more effectively, high output ceiling fans help regulate room temperature, allowing you to rely less on air conditioning. This can lead to significant energy savings.
  3. Improved Comfort: Whether you’re dealing with hot summer days or simply want to improve the airflow in a room, a high output fan ensures that your space stays comfortable all year long.
  4. Versatility: High output ceiling fans are available in a wide range of designs, sizes, and finishes, meaning you can find one that complements your home’s décor while also providing exceptional performance.

Key Features of High Output Ceiling Fans

When shopping for a high output ceiling fan, there are several key features you should keep in mind. These features will not only help you find the most efficient fan but also ensure that it suits your specific needs.

Read too: Discovering the Charm of Nautical Outdoor Ceiling Fans for Your Coastal Retreat: Sail into Style

1. CFM Rating (Cubic Feet per Minute)

CFM is the most important factor to consider when evaluating a high output ceiling fan. And CFM measures the amount of air a fan moves in a minute. The higher the CFM rating, the more powerful the fan. For large spaces, aim for a fan with a high CFM (over 4,000), while for very large rooms or industrial settings, you may want to consider a fan with a CFM rating of 7,000 or more.

2. Blade Pitch

Blade pitch refers to the angle of the fan blades. A higher blade pitch allows the fan to move more air. Typically, a blade pitch between 12 and 15 degrees is considered optimal for high output fans. However, it’s not just about the angle—the motor needs to be strong enough to support the increased air movement without overworking.

3. Fan Size

Size matters when it comes to choosing a high output ceiling fan. For larger rooms, you’ll need a bigger fan—fans with blade spans of 52 to 60 inches are ideal for most spaces. However, for very large rooms or spaces with high ceilings, you may need a fan with an even larger blade span, such as 70 inches or more.

4. Motor Quality

A high-quality motor is critical for high output fans. Look for fans with DC motors, which are more energy-efficient and tend to run quieter than their AC counterparts. These motors also tend to offer smoother operation and are more durable in the long run.

5. Mounting Options

If your room has particularly high or low ceilings, you’ll want to choose a fan that can be adjusted accordingly. High output ceiling fans typically come with downrod mounting options for high ceilings, ensuring the fan is positioned at the optimal height for maximum airflow. For lower ceilings, consider a flush mount or a low-profile design.

Choosing the Right High Output Ceiling Fan for Your Space

With so many options available, it can be difficult to choose the right high output ceiling fan. Here are some tips to help guide your decision-making process:

1. Room Size

The size of the room is one of the most important factors when selecting a ceiling fan. Larger rooms require fans with larger blade spans and higher CFM ratings. A fan that is too small for a room won’t provide adequate airflow, while a fan that is too large may overpower the space aesthetically.

  • Small Rooms (up to 75 sq. ft.): Opt for a fan with a blade span of 29 to 36 inches.
  • Medium Rooms (76 to 144 sq. ft.): A blade span of 36 to 42 inches should suffice.
  • Large Rooms (145 to 225 sq. ft.): Choose a fan with a blade span of 44 to 54 inches.
  • Very Large Rooms (over 225 sq. ft.): Look for a fan with a blade span of 55 inches or more, and ensure it has a high CFM rating for optimal airflow.

2. Ceiling Height

The height of your ceiling will affect the type of mounting option you choose for your fan. High output ceiling fans often need to be mounted lower than standard fans to ensure efficient air circulation in rooms with high ceilings. For ceilings taller than 9 feet, a downrod extension will be necessary to position the fan correctly.

For rooms with low ceilings, consider a low-profile or flush-mount fan to avoid the blades hanging too low.

3. Style and Design

Functionality is crucial, but that doesn’t mean you have to sacrifice style. High output ceiling fans come in a variety of designs—from modern, sleek fans with minimalistic blades to more traditional, ornate models. Consider the overall aesthetic of your room and choose a fan that complements your existing décor.

Additionally, many high output ceiling fans offer integrated lighting fixtures, which can add both functionality and style to your space.

High Output Ceiling Fan Installation Tips

While many homeowners choose to install their ceiling fans themselves, it’s important to ensure proper installation for both safety and performance. Here are a few tips to keep in mind:

1. Turn Off Power

Before beginning installation, make sure to turn off the power at the circuit breaker to avoid any electrical hazards.

2. Choose the Right Mounting Bracket

A high output ceiling fan can be heavier than standard fans, so it’s crucial to use the right mounting bracket that can support the fan’s weight. Many high output fans come with reinforced mounting hardware.

3. Follow the Instructions Carefully

Every fan model is slightly different, so be sure to read the manufacturer’s instructions thoroughly. Pay special attention to details such as wiring connections and mounting procedures.

4. Ensure Proper Balance

An unbalanced fan can wobble and make noise, which will affect its efficiency and longevity. Most high output ceiling fans come with balancing kits to help you fine-tune the balance after installation.

5. Consider Professional Installation

If you’re unsure about installing a high output ceiling fan, consider hiring a professional. Improper installation can lead to electrical issues or even damage the fan over time.

Maintenance Tips for High Output Ceiling Fans

Proper maintenance is key to keeping your high output ceiling fan running smoothly for years. Here are some basic maintenance tips:

  1. Regular Cleaning: Dust and dirt can accumulate on the fan blades, affecting performance. Clean the blades regularly with a soft cloth and avoid using harsh chemicals.
  2. Check the Balance: Over time, a fan can become unbalanced, leading to wobbling. If you notice this, use a balancing kit to correct the issue.
  3. Lubricate Moving Parts: If your fan has mechanical moving parts, check the manufacturer’s guidelines for lubrication. Some fans may require periodic oiling to keep the motor running smoothly.
  4. Inspect for Wear and Tear: Periodically inspect your fan for any signs of damage or wear, especially around the mounting bracket and electrical connections.

Conclusion

A high output ceiling fan is an excellent investment for anyone looking to improve airflow and comfort in larger spaces. By understanding the key features like CFM rating, blade pitch, and motor quality, and considering your room size and ceiling height, you can find the perfect fan to suit your needs. With proper installation and regular maintenance, your high output ceiling fan will keep your home cool and comfortable for years to come.

High Ceiling Kitchen Lighting Ideas: How to Illuminate Your Space Efficiently and Stylishly

Lighting is an essential element in any kitchen, but it becomes even more critical when you’re dealing with a room that has high ceilings. A kitchen with a lofty ceiling presents unique challenges and opportunities when it comes to lighting design. High ceiling kitchen lighting requires careful planning to ensure that every area of the room is illuminated effectively while enhancing the overall aesthetic appeal. In this article, we’ll explore different types of lighting that work best for kitchens with high ceilings and provide tips on how to create a well-lit and stylish space.

High Ceiling Kitchen Lighting

Why High Ceiling Kitchen Lighting is Important

In kitchens with high ceilings, the lighting design needs to go beyond simply providing illumination for tasks like cooking or cleaning. It also plays a crucial role in enhancing the overall atmosphere and showcasing architectural details. Since high ceilings create a more spacious and airy feel, proper lighting can accentuate that sense of openness, making the kitchen feel even more expansive. Without the right lighting fixtures, however, high ceilings can leave parts of the room feeling dark and under-lit, which can disrupt both functionality and ambiance.

Read too: Kitchen Lighting For A Vaulted Ceiling: Illuminating Your Space with Style and Functionality

Factors to Consider When Choosing High Ceiling Kitchen Lighting

Before selecting specific light fixtures, it’s essential to evaluate the key factors that will impact your kitchen lighting plan. These considerations will help you make informed choices and ensure that your high ceiling kitchen lighting is both practical and stylish.

1. Ceiling Height

Ceiling height is the most obvious consideration when choosing lighting for your kitchen. The higher the ceiling, the greater the distance between the light source and the surfaces you need to illuminate, like countertops and kitchen islands. This means you’ll need to choose fixtures that cast light over a longer range or adjust the hanging length of pendant lights or chandeliers.

2. Task Lighting vs. Ambient Lighting

In any kitchen, there are two primary types of lighting you need to account for: task lighting and ambient lighting. Task lighting is necessary for work areas like countertops, sinks, and stovetops, where precision is key. Ambient lighting provides overall illumination and helps balance the brightness of the room. When dealing with high ceilings, you’ll likely need multiple layers of lighting to create the right balance between task and ambient lighting.

3. Light Distribution

The higher the light source, the wider the area it can illuminate. However, this can also reduce the intensity of the light in specific areas. Make sure to select fixtures that can distribute light evenly across the kitchen, avoiding harsh shadows or overly dim corners.

4. Lighting Control and Dimmers

High ceilings often call for more lighting fixtures, which means more electricity consumption. To ensure energy efficiency and greater control over the ambiance, consider installing dimmer switches. Dimmers allow you to adjust the brightness according to the time of day or activity, creating flexibility in your lighting design.

Types of High Ceiling Kitchen Lighting Fixtures

Now that you have a better understanding of the factors that influence lighting design in a high-ceiling kitchen, let’s dive into the types of light fixtures that work best in these spaces.

1. Pendant Lights

One of the most popular choices for high ceiling kitchen lighting is pendant lights. These hanging fixtures add a decorative touch while also providing focused light for tasks like preparing meals or dining. Pendants are often used over kitchen islands, counters, or dining tables, offering both functionality and style.

When choosing pendant lights for a kitchen with high ceilings, opt for larger or multiple pendants to ensure sufficient lighting. You can also adjust the height of the pendants to bring the light source closer to your work area. For modern kitchens, sleek, minimalist pendants in metal or glass are ideal, while rustic kitchens may benefit from more traditional or industrial-style pendants with warm finishes.

2. Chandeliers

Chandeliers are often associated with formal dining rooms, but they can also be a stunning addition to kitchens with high ceilings. A chandelier in the kitchen can serve as both a primary light source and a statement piece, adding a sense of grandeur and luxury to the room.

When selecting a chandelier for a kitchen, choose one that complements the overall style of the space. For example, a modern kitchen may look best with a minimalist or geometric chandelier, while a farmhouse-style kitchen could benefit from a more ornate fixture with natural materials like wood or wrought iron. Make sure the chandelier is proportional to the room’s size and ceiling height.

3. Recessed Lighting

Recessed lights are a great option for kitchens with high ceilings, especially if you prefer a more understated and streamlined look. These lights are installed directly into the ceiling, creating a clean and modern appearance. Recessed lighting can provide ample ambient light for the entire kitchen without taking up any visual space.

However, since recessed lights tend to cast a narrow beam, they should be spaced strategically to cover the entire room. Additionally, you may want to combine recessed lighting with other fixtures like pendants or under-cabinet lighting to ensure adequate illumination for task areas.

4. Track Lighting

Track lighting offers flexibility and versatility, making it an excellent choice for high ceilings. With track lighting, you can direct individual light fixtures toward specific areas, such as countertops, cabinets, or artwork, ensuring that every part of the kitchen is well-lit.

Track lighting also comes in a variety of styles, from modern and industrial to minimalist, allowing you to customize the look to suit your kitchen’s aesthetic. This type of lighting works especially well in kitchens with irregular shapes or large open spaces that need focused illumination.

5. Skylights or Ceiling Windows

If you’re looking for a natural lighting solution, skylights or ceiling windows can be an excellent addition to a high-ceiling kitchen. These fixtures allow sunlight to flood into the room, creating a bright and inviting space during the day. Skylights also enhance the sense of openness and height in the room, making it feel even more spacious.

While skylights provide plenty of natural light, they should be paired with artificial lighting for nighttime or cloudy days. Combining skylights with recessed lighting or pendants can create a harmonious blend of natural and artificial light.

How to Layer Lighting in a High Ceiling Kitchen

When it comes to high ceiling kitchen lighting, it’s essential to use a layered approach. This means incorporating multiple types of lighting to ensure that every corner of the kitchen is adequately illuminated. Here are the key layers to consider:

1. Ambient Lighting

Ambient lighting provides the overall illumination for the room. In kitchens with high ceilings, recessed lights, chandeliers, or large pendant lights are excellent sources of ambient light. The goal is to fill the space with enough light so that the room is functional and inviting.

2. Task Lighting

Task lighting focuses on specific areas where you need concentrated light, such as countertops, the stove, and the sink. Pendant lights or under-cabinet lights are ideal for task lighting, ensuring that you have sufficient illumination for chopping, cooking, and cleaning.

3. Accent Lighting

Accent lighting is used to highlight architectural features, artwork, or decorative elements in the kitchen. In a kitchen with high ceilings, you can use wall sconces, track lighting, or even LED strip lights to draw attention to certain areas and create a visually interesting space.

4. Decorative Lighting

While functional lighting is crucial, don’t overlook the importance of decorative lighting. Chandeliers, pendant lights, and even some types of recessed lighting can serve as focal points, adding character and style to your kitchen. Decorative lighting should complement the overall design of the room while still providing necessary illumination.

Tips for Maximizing High Ceiling Kitchen Lighting

Here are some additional tips to help you get the most out of your high ceiling kitchen lighting design:

1. Use Reflective Surfaces

In kitchens with high ceilings, reflective surfaces such as glossy countertops, glass cabinet doors, and stainless steel appliances can help bounce light around the room, making it feel brighter and more open.

2. Incorporate Dimmers

Dimmers are an essential tool for controlling the amount of light in the kitchen. With dimmer switches, you can easily adjust the lighting to suit different tasks or moods, creating a more versatile and energy-efficient kitchen environment.

3. Consider Color Temperature

The color temperature of your light bulbs can significantly impact the feel of the room. Warmer light (around 2700K to 3000K) is more inviting and cozy, while cooler light (4000K to 5000K) is better for task-oriented spaces like kitchens. Choose bulbs that align with your lighting goals.

4. Space Fixtures Evenly

When installing multiple lighting fixtures, make sure they are evenly spaced to avoid dark spots or overly bright areas. Proper spacing ensures that light is distributed evenly across the entire kitchen, providing balanced illumination.

Conclusion

Choosing the right high ceiling kitchen lighting is essential for creating a well-lit, functional, and visually appealing kitchen. By considering factors such as ceiling height, task vs. ambient lighting, and light distribution, you can select the best fixtures for your space. Whether you opt for pendant lights, chandeliers, recessed lighting, or a combination of these, make sure to layer your lighting for maximum effectiveness. With the right high ceiling lighting, your kitchen will not only be a place for preparing meals but also a stylish and welcoming gathering spot for family and friends.

Glass Semi Flush Mount Ceiling Light: The Ultimate Lighting Guide

Lighting is one of the most critical elements in home design. Not only does it provide essential functionality, but it also enhances the overall ambiance of any room. One lighting solution that offers both practicality and style is the glass semi flush mount ceiling light. This type of lighting is a popular choice for homeowners looking to add sophistication and a warm glow to their space without the bulk of a full chandelier or pendant. In this guide, we will explore everything you need to know about glass semi flush mount ceiling lights, including how to choose the perfect one for your home and tips for installation and maintenance.

Glass Semi Flush Mount Ceiling Light

What is a Glass Semi Flush Mount Ceiling Light?

A glass semi flush mount ceiling light is a type of ceiling fixture that is installed close to the ceiling but hangs slightly down, typically by a few inches. Unlike flush mount lights, which sit directly against the ceiling, semi flush mount fixtures allow for a small gap, offering a more decorative appearance while maintaining a low profile.

The addition of glass in these fixtures elevates the look, adding elegance and transparency that can diffuse light beautifully across the room. Whether you’re upgrading a hallway, dining room, bedroom, or even a kitchen, glass semi flush mount ceiling lights are versatile enough to suit various design preferences, from traditional to modern.

Read too: Kitchen Lighting For A Vaulted Ceiling: Illuminating Your Space with Style and Functionality

Why Choose a Glass Semi Flush Mount Ceiling Light?

Opting for a glass semi flush mount ceiling light offers several advantages, making it a preferred choice for many interior designers and homeowners alike. Here are a few key benefits:

1. Space-Saving Design

One of the primary reasons people choose a glass semi flush mount ceiling light is its compact size. If you have low ceilings or small rooms, a full chandelier or pendant light may overwhelm the space. Semi flush mounts provide the best of both worlds, offering a decorative design element without occupying too much vertical space.

2. Versatile Aesthetic

Glass fixtures have a timeless appeal. Whether your home décor leans toward modern, industrial, or vintage, a glass semi flush mount light can complement your style. The glass component also allows the fixture to blend seamlessly with other materials, such as metal or wood, to match any interior theme.

3. Balanced Light Distribution

Glass semi flush mount fixtures are designed to emit light both upwards and downwards, providing a balanced, diffused glow throughout the room. This makes them ideal for spaces where you need general lighting, such as foyers, hallways, or living rooms. The glass shade further softens the light, reducing glare and creating a pleasant ambiance.

4. Cost-Effective

Compared to more elaborate lighting options like chandeliers or large pendant lights, semi flush mounts are typically more affordable, while still offering a high-end appearance. Their combination of style, functionality, and price point makes them an excellent value for homeowners looking to upgrade their lighting on a budget.

5. Easy Installation

Since these fixtures don’t hang too far from the ceiling, they’re generally easier to install than more complex lighting options. Many glass semi flush mount ceiling lights are designed for straightforward installation, even for those with limited DIY skills.

Choosing the Right Glass Semi Flush Mount Ceiling Light for Your Home

With so many styles and features available, selecting the right glass semi flush mount ceiling light can feel overwhelming. To simplify the process, here are a few considerations to keep in mind when making your decision.

1. Room Size and Ceiling Height

One of the most important factors to consider is the size of the room and the height of the ceiling. Semi flush mount lights work well in spaces with standard-height ceilings, typically between 8 to 10 feet. If your room has a lower ceiling, opt for a light fixture with a compact profile to avoid making the space feel cramped. For larger rooms, choose a fixture with a wider diameter or multiple bulbs to ensure adequate light distribution.

2. Fixture Style and Finish

Think about the overall design style of your home. Do you prefer sleek, modern fixtures or something more ornate and traditional? The style of the light fixture should align with the existing décor. For example, a frosted glass semi flush mount ceiling light with brushed nickel hardware would complement a modern or contemporary room, while a clear glass fixture with bronze or antique brass accents might work better in a rustic or vintage-inspired space.

3. Light Bulb Type and Wattage

Consider the type of bulb that the fixture requires. Many modern semi flush mount lights are compatible with energy-efficient LED bulbs, which not only last longer but also reduce energy consumption. Additionally, check the wattage capacity to ensure the light will provide sufficient brightness for the intended space. Some glass fixtures can accommodate dimmable bulbs, which allow you to adjust the lighting intensity to suit your mood or activity.

4. Glass Shade Type

The type of glass used in the fixture can dramatically affect the look and lighting effect. Clear glass offers a more vibrant and direct light, while frosted or tinted glass provides a softer, diffused glow. Ribbed or etched glass adds texture and can serve as a decorative feature, enhancing the visual appeal of the fixture.

5. Color Temperature

The color temperature of the bulbs you choose can also influence the atmosphere in the room. Warm white (2700K-3000K) creates a cozy, inviting feel, perfect for living rooms or bedrooms. Cool white (4000K-5000K) is more energizing and crisp, making it suitable for kitchens, bathrooms, or offices.

How to Install a Glass Semi Flush Mount Ceiling Light

Installing a glass semi flush mount ceiling light is a relatively simple process, but if you’re unfamiliar with electrical work, it’s always best to consult with a professional. If you feel confident doing it yourself, here’s a general step-by-step guide to help you through the installation process:

1. Turn Off the Power

Before starting, ensure the power to the light fixture is turned off at the breaker box to avoid any accidents.

2. Remove the Old Fixture

If you’re replacing an old light, carefully remove the fixture by unscrewing it from the ceiling. Disconnect the wires from the old light fixture and set it aside.

3. Attach the Mounting Bracket

Most glass semi flush mount ceiling lights come with a mounting bracket. Attach this bracket to the ceiling box using the screws provided in the installation kit.

4. Connect the Wires

Connect the wires from the new fixture to the corresponding wires in the ceiling box (usually black to black, white to white, and ground wire to ground). Secure the connections with wire nuts.

5. Attach the Fixture

Once the wires are connected, carefully secure the fixture to the mounting bracket, ensuring it’s flush against the ceiling. Use screws to hold the fixture in place.

6. Install the Glass Shade

Attach the glass shade to the fixture, following the manufacturer’s instructions. Some fixtures use screws, while others may have a locking mechanism.

7. Turn the Power Back On

After everything is securely in place, turn the power back on at the breaker box. Test the light to make sure it’s functioning properly.

Maintaining Your Glass Semi Flush Mount Ceiling Light

To keep your glass semi flush mount ceiling light looking beautiful and working efficiently, regular maintenance is essential. Here are some tips for maintaining your fixture:

1. Regular Cleaning

Dust and dirt can accumulate on both the glass shade and the light fixture itself. Clean the glass regularly with a soft, damp cloth to remove any debris. For more stubborn grime, use a mild glass cleaner, but be sure to avoid harsh chemicals that could damage the finish.

2. Check for Loose Components

Periodically check the fixture to ensure that all components, including the glass shade, screws, and mounting bracket, are secure. This will prevent any rattling or potential damage.

3. Replace Burnt-Out Bulbs Promptly

When a bulb burns out, replace it as soon as possible to maintain the desired level of brightness in the room. If you’re using LED bulbs, this will happen less frequently, but it’s still important to check periodically.

Best Places to Use a Glass Semi Flush Mount Ceiling Light

Thanks to their versatility and stylish design, glass semi flush mount ceiling lights can be used in various spaces around the home. Here are some ideal locations:

  • Hallways and Entryways: A semi flush mount light with a glass shade can create a welcoming atmosphere in narrow spaces while offering plenty of illumination.
  • Bedrooms: These lights add a touch of elegance without overwhelming the room, making them perfect for master bedrooms or guest rooms.
  • Kitchens: Semi flush mounts provide excellent task lighting in kitchens, especially over islands or breakfast nooks.
  • Living Rooms: Add a statement piece to your living room with a decorative glass semi flush mount light that enhances both the style and functionality of the space.

Conclusion

A glass semi flush mount ceiling light is an ideal lighting solution for homeowners seeking a stylish yet practical fixture. It combines the elegance of glass with the functionality of a ceiling-mounted light, making it suitable for various spaces, including bedrooms, hallways, and kitchens. By carefully choosing the right style, size, and type of glass, you can transform your room into a well-lit, aesthetically pleasing area. With proper installation and maintenance, your semi flush mount ceiling light will serve you beautifully for years to come.


Ceiling Mounted Heaters Electric: Efficient Heating Solutions for Your Space

When winter arrives, many homeowners and business owners begin searching for efficient, reliable ways to keep their indoor spaces warm. One such solution that has gained popularity over the years is Ceiling Mounted Heaters Electric. These innovative devices not only offer excellent heat distribution but also save valuable floor space, making them an ideal choice for a variety of environments, from garages and workshops to patios and even indoor living spaces.

Ceiling Mounted Heaters Electric

In this article, we will take a closer look at the benefits of Ceiling Mounted Heaters Electric, explore how they work, and provide guidance on choosing the right model for your space. Whether you’re looking to heat a small room or a large open area, understanding the options available and how these heaters function will help you make an informed decision.


What Are Ceiling Mounted Heaters Electric?

Ceiling Mounted Heaters Electric are heating units that are installed on the ceiling of a room or outdoor space. Unlike traditional space heaters that sit on the floor or wall-mounted heaters, ceiling-mounted heaters are designed to radiate heat downwards, efficiently warming the area below. They are typically used in spaces where wall or floor space is limited, or where there’s a need for an unobstructed flow of heat.

Read too: Kitchen Lighting For A Vaulted Ceiling: Illuminating Your Space with Style and Functionality

How They Work

These heaters use electricity to generate heat, often through heating elements such as coils or infrared technology. The heat is then either radiated or circulated through fans, warming the room from above. Since heat naturally rises, ceiling-mounted heaters work efficiently by counteracting this upward movement, pushing the heat downward to ensure a consistent temperature throughout the room.

The key advantage of Ceiling Mounted Heaters Electric is that they do not take up valuable floor or wall space, making them perfect for small spaces, garages, warehouses, and patios where space is at a premium.


Advantages of Ceiling Mounted Heaters Electric

There are several benefits to using Ceiling Mounted Heaters Electric, making them a popular choice among homeowners, businesses, and even outdoor enthusiasts. Let’s explore some of the top advantages of these heaters:

1. Space Saving

One of the most significant advantages of ceiling-mounted heaters is their ability to save space. Since they are installed on the ceiling, you don’t have to worry about them taking up floor or wall space. This feature is especially useful in small rooms, garages, workshops, or even patios, where floor space is often at a premium.

2. Efficient Heat Distribution

Ceiling Mounted Heaters Electric distribute heat more evenly than many traditional heating methods. Because the heat is generated from above, it can cover a larger area more uniformly. This even heat distribution is ideal for heating large spaces like garages or workshops where traditional heaters may leave cold spots.

3. Safety

Since they are mounted on the ceiling and away from the reach of children or pets, these heaters provide an added level of safety compared to floor-standing models. You also don’t have to worry about accidental knocks or tipping, which can be a concern with portable heaters.

4. Energy Efficient

Many ceiling-mounted electric heaters are designed with energy efficiency in mind. Some models offer features like adjustable thermostats, timers, and multiple heat settings, which allow you to control the temperature and power usage more precisely. This can result in reduced energy costs, especially in large spaces where constant heating is required.

5. Quiet Operation

Most ceiling-mounted heaters operate quietly, making them ideal for spaces where noise might be an issue, such as bedrooms, offices, or study areas. This quiet operation ensures a comfortable environment without the constant hum of a traditional space heater.

6. Versatile Installation

Ceiling-mounted electric heaters can be installed in a variety of locations. Whether you’re looking to heat a garage, patio, or living room, these heaters can be installed easily in areas where traditional heaters may not be suitable. Many models are even rated for both indoor and outdoor use, providing versatility for homeowners.


Types of Ceiling Mounted Heaters Electric

There are various types of ceiling-mounted electric heaters available, each with its own unique features and benefits. Depending on your specific heating needs, one type may be more suitable than another. Here’s an overview of the most common types:

1. Infrared Heaters

Infrared ceiling-mounted heaters use infrared radiation to directly heat objects and people in the room, rather than warming the air. This method is incredibly efficient and provides instant heat, making it ideal for outdoor spaces like patios or garages. The heat from infrared heaters is also not affected by wind or drafts, ensuring consistent warmth in open areas.

2. Fan-Forced Heaters

Fan-forced heaters work by heating air and then using a fan to circulate the warm air throughout the room. These heaters are excellent for larger indoor spaces that require uniform heating. While fan-forced heaters may take slightly longer to warm up a space compared to infrared models, they are great for maintaining consistent temperatures over extended periods.

3. Convection Heaters

Convection heaters work by heating the air in the room, which then circulates naturally without the use of a fan. These heaters provide steady, even heat and are often used in living rooms, bedrooms, or offices where quiet operation is desired. Although they may take longer to heat up a space, they maintain a comfortable temperature over time.

4. Radiant Heaters

Radiant heaters operate similarly to infrared models but focus on heating objects and surfaces rather than the air. This type of heater is ideal for garages, warehouses, or workshops where direct heat is needed for specific tasks or areas. Radiant ceiling-mounted heaters can also be used outdoors for patios and seating areas.


How to Choose the Best Ceiling Mounted Heaters Electric for Your Space

When choosing the best Ceiling Mounted Heaters Electric, it’s essential to consider a few key factors to ensure you get the right model for your specific needs. Here are some tips to guide your decision:

1. Heating Capacity

The first thing to consider is the size of the space you need to heat. Most electric heaters will list their heating capacity in BTUs (British Thermal Units) or watts. The higher the BTU or wattage, the more powerful the heater. For small rooms, a lower-wattage heater may be sufficient, while larger spaces like garages or workshops may require a more powerful unit.

2. Indoor vs. Outdoor Use

Consider where you plan to install the heater. If you’re heating an outdoor space, such as a patio, make sure the heater is rated for outdoor use and can withstand elements like wind and moisture. Indoor heaters may not be equipped to handle these conditions, so selecting the appropriate model for your environment is crucial.

3. Control Options

Look for heaters that offer adjustable thermostats, multiple heat settings, or even remote controls. These features will allow you to customize the heating levels based on your needs and preferences, improving both comfort and energy efficiency.

4. Installation Requirements

Some ceiling-mounted heaters require professional installation, especially if they need to be hardwired into your electrical system. Others may simply plug into a standard outlet. Make sure you understand the installation requirements before purchasing, and consider whether you’ll need professional help to complete the installation.

5. Energy Efficiency

Look for models that offer energy-saving features such as timers, programmable thermostats, or eco modes. These features can help you reduce energy consumption and lower heating costs over time.


Installation Tips for Ceiling Mounted Heaters Electric

Proper installation is key to maximizing the efficiency and safety of your Ceiling Mounted Heaters Electric. Follow these tips to ensure a smooth and effective installation process:

1. Choose the Right Location

Ensure that the heater is installed in a location where it can effectively heat the desired area. Avoid placing it too close to walls or ceilings to prevent overheating, and make sure it’s positioned so that the heat can spread evenly throughout the room.

2. Follow Manufacturer Guidelines

Always follow the manufacturer’s installation instructions, particularly when it comes to electrical wiring. If the heater requires hardwiring, consult a licensed electrician to ensure it’s installed correctly and safely.

3. Check Ceiling Height

Make sure that your ceiling is high enough to accommodate the heater without interfering with other fixtures or creating a hazard. Most ceiling-mounted heaters are designed for ceilings that are at least 8 feet high, but check the product specifications for the exact requirements.


Conclusion

Ceiling Mounted Heaters Electric provide a practical, space-saving solution for heating a variety of indoor and outdoor spaces. With their efficient heat distribution, safety, and energy-saving features, these heaters are an excellent choice for anyone looking to enhance comfort during the colder months. Whether you’re heating a garage, patio, or home, understanding the different types of heaters available and how to choose the right one for your space will help you make a smart investment.

By carefully considering factors like heating capacity, installation requirements, and energy efficiency, you can enjoy the benefits of a well-heated space without the hassle of traditional space heaters.

Ceiling Mount Motion Sensor Light Outdoor: Illuminate Your Outdoors

When it comes to enhancing your outdoor spaces, safety and functionality are key considerations. One of the best ways to achieve this is by installing a Ceiling Mount Motion Sensor Light Outdoor. This innovative lighting solution not only illuminates your exterior areas but also provides enhanced security and energy efficiency. In this comprehensive guide, we will explore the features, benefits, installation processes, and the top models of ceiling mount motion sensor lights, ensuring you have all the information you need to make an informed decision.

Ceiling Mount Motion Sensor Light Outdoor

What is a Ceiling Mount Motion Sensor Light Outdoor?

A Ceiling Mount Motion Sensor Light Outdoor is a lighting fixture that combines motion sensor technology with a ceiling-mounted design. This type of lighting is specifically designed for outdoor use, making it ideal for porches, patios, garages, and entryways. The motion sensor detects movement within a certain range and automatically turns the light on, providing illumination when it’s needed most.

Key Features of Ceiling Mount Motion Sensor Lights

  1. Motion Detection:
    • Equipped with sensors that detect motion, these lights automatically activate when someone approaches, providing hands-free convenience and enhancing security.
  2. Energy Efficiency:
    • Many models use LED technology, which consumes less energy compared to traditional lighting options. This means lower electricity bills and a reduced environmental footprint.
  3. Weather Resistance:
    • Designed for outdoor use, these fixtures are typically built to withstand various weather conditions, including rain, snow, and extreme temperatures.
  4. Adjustable Settings:
    • Many ceiling mount motion sensor lights allow you to customize settings such as sensitivity, light duration, and even the range of the sensor, giving you control over how and when they operate.
  5. Stylish Designs:
    • Available in various styles and finishes, these lights can enhance the aesthetic appeal of your outdoor space while providing essential lighting.

Read too: Discovering the Charm of Nautical Outdoor Ceiling Fans for Your Coastal Retreat: Sail into Style

Benefits of Installing Ceiling Mount Motion Sensor Lights Outdoors

1. Enhanced Security

One of the primary reasons homeowners choose to install Ceiling Mount Motion Sensor Lights Outdoor is to enhance security. These lights deter potential intruders by illuminating areas around your home when they detect movement. A well-lit exterior can make it less likely for burglars to target your home.

2. Convenience and Safety

Imagine arriving home late at night and having the lights automatically turn on as you approach. This convenience not only makes it easier to navigate your property but also reduces the risk of accidents in the dark.

3. Energy Savings

Traditional outdoor lights often remain on all night, wasting energy. With motion sensor lights, you only use electricity when needed. This smart technology helps lower your energy consumption, making it an eco-friendly option.

4. Versatility

Ceiling mount motion sensor lights can be installed in various outdoor locations. From garages and patios to front porches and backyards, they provide versatile lighting solutions that can fit any outdoor space.

5. Low Maintenance

LED lights have a long lifespan and require minimal maintenance. Additionally, many motion sensor lights are designed to be easy to install and require little upkeep, allowing you to enjoy your lighting without hassle.

Installation Process for Ceiling Mount Motion Sensor Lights

Installing a Ceiling Mount Motion Sensor Light Outdoor is a manageable DIY project if you follow the right steps. Here’s a simple guide to help you through the process:

Tools and Materials Needed

  • Ceiling mount motion sensor light
  • Screwdriver
  • Drill
  • Wire connectors
  • Electrical tape
  • Safety goggles
  • Ladder

Step-by-Step Installation Guide

Step 1: Choose the Location

Identify the best location for your motion sensor light. Ideal spots include entryways, garages, and outdoor patios where illumination is needed most. Ensure the location allows for optimal motion detection coverage.

Step 2: Turn Off Power

Safety first! Before beginning the installation, turn off the power to the existing light fixture (if applicable) at the circuit breaker. Use a voltage tester to ensure no electricity is flowing to the wires.

Step 3: Remove Existing Fixture

If you are replacing an existing light fixture, carefully remove it by unscrewing it from the mounting plate. Disconnect the wiring and set the old fixture aside.

Step 4: Prepare the New Fixture

Follow the manufacturer’s instructions to prepare your new ceiling mount motion sensor light for installation. This may involve assembling parts or adjusting settings.

Step 5: Connect the Wires

Connect the wires from the ceiling to the corresponding wires on the motion sensor light. Typically, this will include connecting the black (hot) wire, white (neutral) wire, and green or bare (ground) wire. Use wire connectors and electrical tape to secure the connections.

Step 6: Secure the Light Fixture

Attach the new motion sensor light to the mounting plate and secure it according to the manufacturer’s instructions. Ensure it is firmly in place and level.

Step 7: Restore Power and Test

Once the installation is complete, restore power at the circuit breaker. Test the motion sensor by walking within its range to ensure it activates correctly.

Maintenance Tips for Ceiling Mount Motion Sensor Lights

To ensure your Ceiling Mount Motion Sensor Light Outdoor functions optimally, follow these maintenance tips:

1. Regularly Clean the Fixture

Dirt and debris can obstruct the motion sensor’s view. Clean the fixture periodically with a soft cloth and mild soap to ensure clear visibility.

2. Check Sensor Settings

If you notice the light isn’t activating as expected, check the sensor settings. Adjust the sensitivity and duration settings if necessary to ensure optimal performance.

3. Replace Bulbs as Needed

If your motion sensor light uses replaceable bulbs, monitor their lifespan and replace them when they begin to dim or burn out.

4. Inspect Wiring

Periodically check the wiring for signs of wear or damage. If you notice any fraying or exposed wires, consult a professional for repairs.

Top Models of Ceiling Mount Motion Sensor Lights

1. Lithonia Lighting Motion Sensor Ceiling Light

This model is highly regarded for its durability and efficiency. It features a wide detection range, making it ideal for larger outdoor areas. The integrated LED technology provides bright illumination while saving energy.

2. Hykolity LED Ceiling Mount Motion Sensor Light

The Hykolity model combines stylish design with functionality. It features a sleek, modern look and is weather-resistant, making it perfect for outdoor installations. The adjustable sensor allows for customization of sensitivity and duration.

3. Leviton Decora Motion Sensor Ceiling Light

The Leviton Decora is known for its ease of installation and user-friendly design. This model is perfect for residential use, offering reliable performance and an attractive appearance that complements any home.

4. Westinghouse Lighting Motion Sensor Light

The Westinghouse model is praised for its reliability and effectiveness. It features a robust sensor that detects movement from a considerable distance, making it suitable for larger outdoor spaces.

Conclusion

A Ceiling Mount Motion Sensor Light Outdoor is an excellent investment for enhancing your outdoor spaces. With improved security, energy savings, and convenience, these fixtures offer numerous benefits for homeowners. Whether you choose a model with advanced features or a simple, efficient design, you’ll find that motion sensor lights not only brighten your exterior areas but also provide peace of mind.

By following the installation and maintenance tips outlined in this guide, you can ensure that your outdoor lighting remains effective and functional for years to come. Illuminate your surroundings and enjoy the many advantages of ceiling mount motion sensor lights today!

Ceiling Mount Air Purifier: Benefits, Installation, and Best Models

In an age where indoor air quality is more important than ever, the Ceiling Mount Air Purifier has emerged as a practical solution for enhancing the air you breathe. Whether you’re in a commercial space, a large home, or even an educational institution, a ceiling-mounted air purifier can effectively eliminate allergens, dust, and pollutants. This article will explore the features, benefits, installation process, and some of the best models available, ensuring you make an informed decision for your air purification needs.

Ceiling Mount Air Purifier

What is a Ceiling Mount Air Purifier?

A Ceiling Mount Air Purifier is an air cleaning device designed to be installed on the ceiling of a room. Unlike traditional air purifiers that sit on the floor or on furniture, ceiling-mounted options save space and can be more effective in larger areas. These devices are particularly beneficial in commercial settings, such as offices, schools, and hospitals, where air quality can significantly impact health and productivity.

Key Features of Ceiling Mount Air Purifiers

  1. Space-Saving Design:
    • The most obvious benefit of a ceiling-mounted air purifier is its ability to save floor space. This is particularly advantageous in smaller rooms where every square foot counts.
  2. Effective Air Circulation:
    • Positioned on the ceiling, these purifiers can effectively circulate air throughout the entire room, capturing airborne particles that may be missed by floor models.
  3. Advanced Filtration Systems:
    • Many ceiling-mounted purifiers come equipped with HEPA filters, activated carbon filters, and UV-C light technology to provide comprehensive air cleaning. This multi-layer filtration system effectively removes dust, allergens, and even harmful microorganisms.
  4. Quiet Operation:
    • Ceiling mount air purifiers are often designed to operate quietly, making them suitable for environments where noise levels need to be kept to a minimum, such as classrooms or offices.
  5. Remote Control and Smart Features:
    • Many modern units come with remote control options, allowing users to adjust settings without having to physically reach the unit. Some also feature smart technology that enables monitoring and control via smartphone apps.

Read too: Discovering the Charm of Nautical Outdoor Ceiling Fans for Your Coastal Retreat: Sail into Style

Benefits of Using a Ceiling Mount Air Purifier

1. Improved Indoor Air Quality

One of the most compelling reasons to install a ceiling mount air purifier is the improvement in indoor air quality. These units help to eliminate:

  • Dust and pollen
  • Mold spores
  • Pet dander
  • Volatile organic compounds (VOCs)
  • Bacteria and viruses

By significantly reducing these pollutants, a ceiling mount air purifier creates a healthier indoor environment.

2. Convenience and Accessibility

Having an air purifier mounted on the ceiling can make it easier to manage air quality without taking up valuable floor space. This is particularly useful in commercial settings, where multiple units can be strategically placed to cover larger areas effectively.

3. Energy Efficiency

Many ceiling-mounted air purifiers are designed to be energy-efficient, utilizing less power than traditional floor models. With advanced technology and better air circulation, these devices can clean the air more effectively while consuming less energy.

4. Aesthetics and Design Flexibility

Ceiling mount air purifiers can blend seamlessly with a room’s design, as they are often less intrusive than floor models. This allows for greater flexibility in interior design, making them an attractive option for both residential and commercial spaces.

5. Reduced Noise Levels

The quiet operation of ceiling-mounted air purifiers makes them ideal for spaces where noise could be disruptive. This makes them suitable for offices, schools, and hospitals where a peaceful environment is necessary.

Installation Process for Ceiling Mount Air Purifiers

Installing a Ceiling Mount Air Purifier requires careful planning and some basic tools. Here’s a step-by-step guide to help you through the installation process:

Tools and Materials Needed

  • Ceiling mount air purifier unit
  • Stud finder
  • Screwdriver
  • Drill
  • Measuring tape
  • Level
  • Ladder
  • Safety goggles
  • Electrical wiring (if needed)

Step-by-Step Installation Guide

Step 1: Choose the Location

Decide on the best location for your ceiling mount air purifier. Consider factors such as airflow, accessibility, and proximity to power sources. The center of the room is often an ideal location for even air distribution.

Step 2: Locate Ceiling Joists

Using a stud finder, locate the ceiling joists where you will attach the unit. Mark the locations with a pencil to ensure you secure the unit properly.

Step 3: Prepare the Mounting Bracket

Most ceiling mount air purifiers come with a mounting bracket. Follow the manufacturer’s instructions to attach the bracket to the ceiling, ensuring that it is level.

Step 4: Connect the Wiring

If your air purifier requires electrical connections, carefully follow the manufacturer’s wiring instructions. If you’re not comfortable doing this yourself, it’s advisable to hire a licensed electrician.

Step 5: Mount the Unit

Once the wiring is connected (if applicable), carefully lift the air purifier and attach it to the mounting bracket. Ensure that it is securely fastened and level.

Step 6: Test the Unit

After installation, turn on the air purifier to test its functionality. Ensure that it operates quietly and that air is circulating properly throughout the room.

Maintenance Tips for Ceiling Mount Air Purifiers

To ensure optimal performance and longevity of your Ceiling Mount Air Purifier, regular maintenance is crucial. Here are some tips to keep in mind:

1. Regular Filter Changes

Most air purifiers require filter changes every 3 to 6 months, depending on usage and the environment. Always check the manufacturer’s recommendations for your specific model.

2. Keep the Unit Clean

Dust and debris can accumulate on the unit over time, impacting its performance. Regularly wipe down the exterior of the air purifier with a damp cloth.

3. Check for Blockages

Periodically inspect the intake and exhaust areas of the air purifier to ensure they are not obstructed. Clear away any dust or objects that may hinder airflow.

4. Monitor Performance

Keep an eye on the performance of your air purifier. If you notice a decrease in airflow or an increase in noise levels, it may be time to check the filters or consult the manufacturer for assistance.

Best Ceiling Mount Air Purifier Models

1. Fantech PB Series Air Purifier

The Fantech PB Series is designed for commercial applications and features a robust filtration system that includes a pre-filter, HEPA filter, and activated carbon filter. It’s known for its quiet operation and efficient airflow.

2. Airgle AG800

The Airgle AG800 is a high-performance air purifier that offers advanced filtration technologies, including a patented titanium dioxide filter. It’s ideal for large spaces and features smart controls for easy operation.

3. Honeywell HPA300

While primarily a floor model, the Honeywell HPA300 can be adapted for ceiling mounting with the right installation kit. It boasts a powerful HEPA filter and is capable of purifying larger rooms effectively.

4. Alen BreatheSmart 75i

The Alen BreatheSmart 75i is known for its sleek design and customizable panel options. It features a HEPA filter and is perfect for residential and small commercial applications.

Conclusion

A Ceiling Mount Air Purifier is an effective solution for improving indoor air quality while saving space. With various options available on the market, you can choose a model that best fits your needs. From enhancing the aesthetic appeal of your space to ensuring a healthier environment, ceiling-mounted air purifiers offer numerous benefits. By following proper installation and maintenance practices, you can enjoy cleaner, fresher air for years to come.

Investing in a ceiling-mounted air purifier is not just a choice; it’s a commitment to better health and comfort for you and your loved ones.

60 Industrial Ceiling Fan for Your Space: Discover the Benefits and Features

When it comes to enhancing airflow and comfort in large spaces, the 60 industrial ceiling fan stands out as a top choice. Whether you’re looking to cool down a warehouse, an open-concept living area, or an industrial workspace, these fans offer impressive performance, durability, and aesthetic appeal. In this comprehensive guide, we’ll delve into the features, benefits, installation tips, and maintenance of the 60 industrial ceiling fan, helping you make an informed decision for your environment.

60 Industrial Ceiling Fan

What is a 60 Industrial Ceiling Fan?

A 60 industrial ceiling fan is specifically designed for large spaces, offering a blade span of approximately 60 inches. These fans are engineered to move a significant volume of air efficiently, making them ideal for commercial settings, large homes, and industrial environments. With robust construction and powerful motors, industrial ceiling fans can effectively regulate temperature, improve air circulation, and enhance overall comfort.

Key Features of 60 Industrial Ceiling Fans

  1. Powerful Motor:
    • The heart of any industrial ceiling fan is its motor. A 60 industrial ceiling fan is equipped with a powerful motor that ensures high airflow and reliability. Most models are designed for continuous operation, making them perfect for spaces that require consistent air movement.
  2. Large Blade Span:
    • With a blade span of 60 inches, these fans can cover larger areas effectively. The larger blades allow for improved airflow distribution, creating a comfortable environment even in expansive spaces.
  3. Durable Materials:
    • Industrial ceiling fans are typically constructed from durable materials, such as metal and high-grade plastic. This ensures that they can withstand the rigors of industrial environments and continue to perform optimally for years.
  4. Energy Efficiency:
    • Many modern industrial ceiling fans are designed with energy efficiency in mind. Utilizing advanced motor technology, they can provide substantial airflow while consuming less energy than traditional fans.
  5. Versatile Design Options:
    • A variety of designs and finishes are available, allowing you to choose a fan that complements the aesthetics of your space. From sleek and modern to classic industrial styles, there’s a fan for every taste.
  6. Remote Control and Smart Features:
    • Many 60 industrial ceiling fans come equipped with remote controls or smart technology, allowing you to adjust speed settings, direction, and lighting from the comfort of your seat.

Read too: Discovering the Charm of Nautical Outdoor Ceiling Fans for Your Coastal Retreat: Sail into Style

Benefits of Installing a 60 Industrial Ceiling Fan

1. Enhanced Air Circulation

One of the most significant advantages of a 60 industrial ceiling fan is its ability to enhance air circulation in large spaces. By moving a considerable volume of air, these fans help maintain a consistent temperature and eliminate hot or cold spots, improving overall comfort.

2. Energy Savings

Using a 60 industrial ceiling fan can lead to energy savings, especially in larger spaces that require climate control. By improving air circulation, you can reduce reliance on air conditioning systems, which can significantly decrease energy costs.

3. Increased Comfort Levels

In commercial or industrial environments, employee comfort is crucial for productivity. A well-placed industrial ceiling fan can create a comfortable atmosphere, reducing heat stress and improving overall workplace conditions.

4. Versatility of Use

These fans are not limited to industrial settings. Many homeowners are now using 60 industrial ceiling fans in open-concept living areas, patios, and high-ceiling spaces. Their versatility makes them suitable for various applications, from homes to warehouses.

5. Stylish Aesthetics

Gone are the days when industrial fans were purely functional and unattractive. Today’s 60 industrial ceiling fans come in various designs and finishes, allowing you to choose a fan that enhances the overall look of your space.

6. Low Maintenance

Most industrial ceiling fans are designed for minimal maintenance. With durable construction and high-quality materials, they require little more than occasional dusting to keep them in good working order.

Choosing the Right 60 Industrial Ceiling Fan

When selecting the ideal 60 industrial ceiling fan for your space, consider the following factors:

1. Room Size

The size of the room is critical when choosing a ceiling fan. A 60-inch fan is suitable for spaces ranging from 300 to 450 square feet. Ensure that the fan you select matches the dimensions of your area for optimal performance.

2. Ceiling Height

Consider the height of your ceiling when installing a ceiling fan. For optimal airflow, the fan should be installed at least 7 to 8 feet above the floor. If your ceilings are particularly high, you may need a downrod to extend the fan lower.

3. Fan Speed Settings

Look for a fan that offers multiple speed settings. This allows you to adjust airflow based on your needs and the time of year. Many modern fans also have reverse functions to change the airflow direction for winter heating.

4. Lighting Options

Some 60 industrial ceiling fans come with integrated lighting. If you need additional illumination in your space, consider a model that includes light fixtures or is compatible with ceiling fan light kits.

5. Installation Requirements

Check whether the fan requires professional installation or if it’s a straightforward DIY project. Most industrial fans come with installation instructions, but it’s essential to ensure you have the necessary tools and experience.

Installation Tips for 60 Industrial Ceiling Fans

Installing a 60 industrial ceiling fan can be a manageable task if you follow the right steps. Here’s a guide to help you through the installation process:

Step 1: Gather Your Tools

Before starting, ensure you have the necessary tools on hand, including:

  • Screwdriver
  • Ladder
  • Wire stripper
  • Voltage tester
  • Wrench

Step 2: Turn Off Power

Safety first! Ensure the power is turned off at the circuit breaker to avoid any electrical hazards during installation.

Step 3: Install the Mounting Bracket

Attach the mounting bracket to the ceiling. Ensure it is securely fastened, as this will support the weight of the fan.

Step 4: Assemble the Fan

Follow the manufacturer’s instructions to assemble the fan components. Most fans will come with detailed assembly steps, making the process straightforward.

Step 5: Connect the Wires

Carefully connect the wiring from the fan to the corresponding wires in the ceiling. Typically, you’ll connect the black wire (live) to the black wire and the white wire (neutral) to the white wire. If there is a ground wire, connect it to the green or bare copper wire.

Step 6: Attach the Fan Blades

Once the wiring is securely connected, attach the fan blades to the motor. Ensure they are properly secured, as loose blades can cause wobbling during operation.

Step 7: Test the Fan

After installation, restore power at the circuit breaker and test the fan to ensure it operates correctly. Check the speed settings and lighting options, if applicable.

Maintenance Tips for 60 Industrial Ceiling Fans

Proper maintenance will help prolong the lifespan of your 60 industrial ceiling fan and ensure it operates efficiently. Here are some maintenance tips to keep in mind:

1. Regular Dusting

Dust can accumulate on fan blades, affecting performance and air quality. Regularly dust the blades and the motor housing using a soft cloth or duster.

2. Check for Wobbling

If your fan starts to wobble during operation, check to ensure the blades are securely fastened and the mounting bracket is tight. Wobbling can cause wear and tear over time.

3. Inspect Wiring and Connections

Periodically inspect the wiring and connections for any signs of wear or damage. If you notice any issues, consult a professional for repairs.

4. Lubricate Moving Parts

If your fan has moving parts, such as a motor, apply a few drops of lubricant as recommended by the manufacturer to ensure smooth operation.

5. Seasonal Adjustments

Consider changing the fan direction seasonally. In summer, run the fan counterclockwise to create a cooling breeze. In winter, run it clockwise to circulate warm air trapped near the ceiling.

Conclusion

The 60 industrial ceiling fan is a powerful and stylish solution for improving air circulation and comfort in large spaces. With their energy efficiency, durability, and versatility, these fans are a wise investment for both residential and commercial applications. By understanding the benefits, features, installation tips, and maintenance practices, you can make an informed choice that enhances your environment while providing years of reliable service. Upgrade your space today with a 60 industrial ceiling fan and enjoy the refreshing benefits it brings.

4 LED Surface Mount Ceiling Lights: Brighten Your Space

When it comes to enhancing the lighting in your home or office, choosing the right fixtures is essential. One popular choice among homeowners and designers alike is the 4 LED surface mount ceiling lights. These fixtures offer a modern aesthetic, excellent energy efficiency, and versatility for various applications. In this article, we will explore the benefits, styles, installation options, and maintenance tips for 4 LED surface mount ceiling lights, helping you make an informed decision for your lighting needs.

4 Led Surface Mount Ceiling Lights

Understanding 4 LED Surface Mount Ceiling Lights

4 LED surface mount ceiling lights are fixtures designed to be installed directly onto the ceiling surface rather than being recessed into the ceiling. They are an excellent option for rooms with limited ceiling space or where recessed lighting is not practical. Typically, these fixtures contain four LED bulbs, providing ample illumination for various areas in your home or workplace.

Read too: Discovering the Charm of Nautical Outdoor Ceiling Fans for Your Coastal Retreat: Sail into Style

Benefits of 4 LED Surface Mount Ceiling Lights

  1. Energy Efficiency:
    • One of the primary advantages of LED lighting is its energy efficiency. LED bulbs consume significantly less power than traditional incandescent bulbs, allowing you to reduce your electricity bills while minimizing your environmental impact.
  2. Long Lifespan:
    • LED lights have a much longer lifespan than traditional lighting options. Most LED bulbs can last up to 25,000 hours or more, which means less frequent replacements and reduced waste.
  3. Versatile Design Options:
    • The design of 4 LED surface mount ceiling lights comes in various styles, shapes, and finishes, allowing you to choose fixtures that match your home’s décor. Whether you prefer a modern, industrial, or traditional aesthetic, there is a surface mount light that will suit your style.
  4. Easy Installation:
    • Surface mount lights are typically easier to install than recessed lighting. They require less complicated electrical work, making them an excellent option for DIY enthusiasts.
  5. Enhanced Brightness:
    • With four LED bulbs, these fixtures provide bright and even lighting, making them ideal for areas like kitchens, living rooms, and office spaces where good visibility is essential.

Key Features to Look For

When selecting 4 LED surface mount ceiling lights, there are several features to consider to ensure you get the best fixture for your space:

  • Lumens:
    • This measures the brightness of the light. The higher the lumens, the brighter the light. Consider how much light you need for the specific area where the fixture will be installed.
  • Color Temperature:
    • LED lights come in various color temperatures, typically measured in Kelvin (K). Warmer tones (2700K-3000K) create a cozy atmosphere, while cooler tones (4000K-5000K) offer a more energizing feel. Choose a color temperature that complements your space.
  • Dimmable Options:
    • Some 4 LED surface mount ceiling lights are compatible with dimmer switches, allowing you to adjust the brightness according to your mood or activity.
  • Style and Finish:
    • Consider the overall design and finish of the light fixture. Options include flush mounts, semi-flush mounts, and various materials like metal, glass, or plastic.
  • Energy Star Rating:
    • Look for fixtures with an Energy Star rating, which indicates they meet energy efficiency guidelines set by the U.S. Environmental Protection Agency.

Popular Styles of 4 LED Surface Mount Ceiling Lights

1. Flush Mount Lights

Flush mount lights sit directly against the ceiling, providing a sleek and unobtrusive look. They are perfect for low ceilings and can fit into any room, from bathrooms to bedrooms. Flush mount fixtures often come in modern designs and finishes, making them suitable for contemporary spaces.

2. Semi-Flush Mount Lights

Semi-flush mount lights hang slightly lower than flush mounts, providing a bit of depth and visual interest. These fixtures work well in dining rooms, hallways, and entryways, adding a touch of elegance to your space.

3. Industrial Style

Industrial-style 4 LED surface mount ceiling lights often feature exposed bulbs, metal finishes, and rugged designs. These fixtures are perfect for lofts or modern homes with an industrial aesthetic, providing both style and functionality.

4. Transitional Style

Transitional fixtures blend traditional and contemporary designs, offering versatility for various home styles. These lights typically incorporate clean lines and subtle details, making them suitable for almost any space.

Installation Tips for 4 LED Surface Mount Ceiling Lights

Installing 4 LED surface mount ceiling lights can be a straightforward process, but it’s essential to follow the proper steps to ensure safety and effectiveness. Here’s a guide to help you through the installation process:

Step 1: Gather Tools and Materials

Before you start, make sure you have the necessary tools and materials, including:

  • Screwdriver
  • Wire cutters/strippers
  • Electrical tape
  • Voltage tester
  • Mounting bracket (if included with the fixture)

Step 2: Turn Off the Power

Before working on any electrical fixture, ensure that the power is turned off at the circuit breaker. Use a voltage tester to confirm that the wires are not live.

Step 3: Remove the Old Fixture

If you are replacing an existing light fixture, carefully remove it by unscrewing it from the ceiling. Disconnect the wires, taking note of how they are connected for reference when installing the new fixture.

Step 4: Connect the Wires

Connect the wires from the ceiling to the wires on the new 4 LED surface mount ceiling lights. Typically, you will connect black (or red) wires together for the live connection, white wires together for the neutral connection, and connect the green or bare copper wire to the ground screw.

Step 5: Secure the Mounting Bracket

If your fixture includes a mounting bracket, secure it to the ceiling using screws. Ensure it is level and securely attached.

Step 6: Attach the Fixture

Carefully attach the new light fixture to the mounting bracket. Make sure it is aligned correctly and secure it according to the manufacturer’s instructions.

Step 7: Turn On the Power

Once the fixture is installed, turn the power back on at the circuit breaker. Test the lights to ensure everything is functioning correctly.

Step 8: Dispose of Old Fixtures Properly

If you replaced an old fixture, dispose of it properly according to local regulations. Many communities have recycling programs for old lighting fixtures.

Maintenance Tips for 4 LED Surface Mount Ceiling Lights

Keeping your 4 LED surface mount ceiling lights in good condition is essential for optimal performance and longevity. Here are some maintenance tips:

1. Regular Cleaning

Dust and dirt can accumulate on light fixtures, affecting their brightness and appearance. Regularly clean the fixtures using a soft cloth or duster to maintain their shine.

2. Check for Flickering Lights

If you notice flickering lights, it could indicate a problem with the bulb or wiring. Check to ensure the bulbs are securely in place and consider replacing them if necessary.

3. Inspect for Damage

Periodically inspect the fixtures for any signs of damage, such as cracked glass or frayed wiring. If you notice any issues, address them immediately to avoid potential hazards.

4. Replace Bulbs as Needed

Although LED bulbs last significantly longer than traditional bulbs, they will eventually need to be replaced. Keep spare bulbs on hand to ensure your lighting remains consistent.

Energy Efficiency and Environmental Impact

Switching to 4 LED surface mount ceiling light can significantly impact your energy consumption and environmental footprint. LED lights are known for their low energy usage and reduced carbon emissions compared to traditional incandescent bulbs. By making the switch, you can help contribute to a more sustainable future while enjoying the benefits of modern lighting technology.

Energy Savings

Using LED lights can save you money on your energy bills. LED bulbs consume up to 80% less energy than incandescent bulbs, translating to substantial savings over time. Additionally, with their long lifespan, you will spend less on replacements.

Reduced Heat Emission

LED lights emit very little heat compared to traditional bulbs, reducing the need for additional cooling in warmer months. This can further lower your energy consumption and improve indoor comfort.

Conclusion

4 LED surface mount ceiling light offer a stylish, energy-efficient lighting solution for any room in your home or office. With various styles and designs available, you can find fixtures that not only provide ample illumination but also enhance your décor. By understanding the benefits, installation process, and maintenance tips for these lighting fixtures, you can make an informed choice that meets your lighting needs while being mindful of energy consumption and environmental impact. Brighten your space today with 4 LED surface mount ceiling light and enjoy the perfect blend of functionality and style.

Valspar Color Changing Ceiling Paint: Transform Your Space

When it comes to home improvement, one of the simplest yet most effective ways to refresh a space is through painting. Among the various options available in the market, Valspar Color Changing Ceiling Paint stands out for its unique ability to transform the atmosphere of a room. This innovative product not only enhances aesthetics but also adds functionality. In this article, we’ll explore what Valspar Color Changing Ceiling Paint is, its benefits, application techniques, and tips for achieving the best results.

Valspar Color Changing Ceiling Paint

What is Valspar Color Changing Ceiling Paint?

Valspar Color Changing Ceiling Paint is a specialized paint designed specifically for ceilings. It features a unique technology that allows it to change color as it dries, providing a visual cue to homeowners and professionals alike about where they have painted. This innovative feature makes the painting process more straightforward, helping users avoid missed spots and ensuring an even coat.

The paint initially goes on in a blue color, which fades to white as it dries. This two-tone system not only helps in achieving a perfect finish but also adds a level of fun to the painting experience.

Benefits of Valspar Color Changing Ceiling Paint

Using Valspar Color Changing Ceiling Paint offers several advantages:

1. Ease of Use

The color-changing feature makes it easy for both novice and experienced painters to see where they have applied the paint. This minimizes the chance of missed spots or uneven application, making the painting process smoother and more efficient.

Read too: Kitchen Lighting For A Vaulted Ceiling: Illuminating Your Space with Style and Functionality

2. High-Quality Finish

Valspar is known for its commitment to quality, and this paint is no exception. It dries to a smooth, white finish that complements any room’s decor. Whether your style is modern, traditional, or somewhere in between, this paint can enhance your ceiling without detracting from other design elements.

3. Quick Drying Time

This ceiling paint dries relatively quickly, allowing you to complete your painting project in a shorter amount of time. The quick drying time is particularly advantageous when working on large spaces or when you need to complete a project within a tight timeframe.

4. Low VOC Formula

Valspar Color Changing Ceiling Paint has a low volatile organic compound (VOC) formula, which means it emits fewer harmful chemicals into the air. This makes it a safer choice for indoor painting, especially in homes with children or pets.

5. Versatile Application

While specifically designed for ceilings, this paint can also be used on other surfaces if you’re looking for a unique finish. Its adaptability allows for creative design possibilities throughout your home.

How to Apply Valspar Color Changing Ceiling Paint

Applying Valspar Color Changing Ceiling Paint is a straightforward process, but following some tips and techniques will help you achieve the best results. Here’s a step-by-step guide to get you started:

1. Prepare the Room

Before you begin painting, it’s essential to prepare the room properly:

  • Clear the Area: Remove any furniture or items that might obstruct your painting. If that’s not possible, cover them with drop cloths to protect against splatters.
  • Clean the Ceiling: Dust and dirt can affect paint adhesion. Wipe down the ceiling with a damp cloth to remove any debris.
  • Repair Imperfections: Inspect the ceiling for cracks or holes. Fill in any gaps with spackle or joint compound, then sand the area smooth once it’s dry.

2. Gather Your Supplies

You’ll need the following supplies:

  • Valspar Color Changing Ceiling Paint
  • A paint roller with an extension handle
  • A paint tray
  • A brush for edges and corners
  • Painter’s tape for clean lines
  • Drop cloths or plastic sheeting
  • A ladder or step stool

3. Apply Painter’s Tape

For a clean finish, apply painter’s tape along the edges where the ceiling meets the walls. This will help prevent any paint from getting on the walls and ensure a sharp line.

4. Start Painting

  • Cut In: Use a brush to paint around the edges and corners of the ceiling first. This is known as “cutting in” and helps ensure that you have a clean line where the ceiling meets the walls.
  • Roll On the Paint: Once you have cut in the edges, use a roller to apply the paint to the larger areas of the ceiling. Start at one corner and work your way across the ceiling in sections.
  • Watch for Color Change: As you apply the paint, keep an eye on the color-changing feature. Initially, the paint will be blue, and as it dries, it will transition to white.

5. Second Coat (if needed)

Once the first coat has dried, check if you need a second coat. If the blue color is still visible in some areas, apply a second coat following the same process.

6. Remove Painter’s Tape

After the final coat has dried, carefully remove the painter’s tape while the paint is still slightly wet to ensure clean edges.

7. Clean Up

Finally, clean your brushes and rollers with soap and water. Make sure to seal any leftover paint in its original container for future touch-ups.

Tips for Achieving the Best Results with Valspar Color Changing Ceiling Paint

To ensure your project goes smoothly and yields the best possible outcome, consider the following tips:

1. Choose the Right Time to Paint

It’s best to paint when the weather is dry and mild. High humidity or extreme temperatures can affect the drying process and the final appearance of the paint.

2. Use Proper Lighting

Ensure the room is well-lit while painting. This will help you see the color change more clearly and identify any missed spots.

3. Avoid Overworking the Paint

When using a roller, avoid going back and forth too much on the same area. This can cause the paint to lift and result in an uneven finish. Instead, roll in one direction and blend as you go.

4. Ventilation

Ensure proper ventilation while painting to dissipate any fumes. Open windows and doors, or use fans to keep the air circulating.

5. Be Patient

Allow sufficient drying time between coats. Rushing the process can lead to uneven application and a less-than-desirable finish.

Maintenance of Valspar Color Changing Ceiling Paint

After your painting project is complete, it’s essential to maintain the ceiling to keep it looking fresh:

  1. Regular Cleaning: Dust the ceiling periodically with a microfiber cloth or a vacuum with a brush attachment to prevent buildup.
  2. Spot Cleaning: For any stains or marks, use a damp cloth and a mild detergent to clean the affected area. Avoid harsh chemicals that could damage the paint.
  3. Touch-Ups: Keep leftover paint for touch-ups. If you notice any imperfections over time, apply a small amount of the Valspar paint to maintain the ceiling’s appearance.

Conclusion

Valspar Color Changing Ceiling Paint offers a unique blend of functionality and aesthetic appeal. Its innovative color-changing technology simplifies the painting process, ensuring a professional finish for homeowners and contractors alike. By following the steps and tips outlined in this article, you can transform your space and enjoy the benefits of a beautifully painted ceiling.

Restaurant Kitchen Ceiling Tiles: Enhancing Your Dining Experience

When it comes to designing a restaurant, every detail matters, and that includes the ceilings. Restaurant kitchen ceiling tiles may not be the first thing that comes to mind when considering the overall aesthetics and functionality of a dining space, but they play a crucial role in creating the right atmosphere. In this article, we will explore the various types of ceiling tiles suitable for restaurant kitchens, their benefits, installation methods, and maintenance tips, providing you with comprehensive knowledge to make informed decisions for your establishment.

Restaurant Kitchen Ceiling Tiles

Understanding the Role of Ceiling Tiles in Restaurant Kitchens

Ceiling tiles serve multiple purposes in a restaurant kitchen. They not only contribute to the aesthetic appeal but also enhance functionality, safety, and cleanliness. Here’s how:

  1. Aesthetic Enhancement: Ceiling tiles can dramatically change the look and feel of a restaurant. A well-chosen design can complement the overall theme of the restaurant, whether it be modern, rustic, or traditional.
  2. Acoustic Control: Many ceiling tiles are designed to reduce noise, making the dining experience more pleasant. This is particularly important in bustling environments where background noise can detract from the customer experience.
  3. Fire Safety: Certain ceiling tiles are made from fire-resistant materials, which can be crucial in kitchen environments where heat and flames are common.
  4. Ease of Cleaning: Kitchen ceilings can accumulate grease, smoke, and dust. Ceiling tiles designed for easy cleaning can help maintain hygiene standards, essential for any food establishment.
  5. Energy Efficiency: Insulated ceiling tiles can help in regulating the temperature of the restaurant, leading to potential savings in energy costs.

Read too: Kitchen Lighting For A Vaulted Ceiling: Illuminating Your Space with Style and Functionality

Types of Restaurant Kitchen Ceiling Tiles

1. Acoustic Ceiling Tiles

Acoustic ceiling tiles are a popular choice for restaurant kitchens, especially in areas where noise control is a priority. These tiles are designed to absorb sound, creating a quieter environment. They are often made from mineral fiber, fiberglass, or other sound-absorbing materials.

Benefits:

  • Reduces noise levels, enhancing the dining experience.
  • Available in various designs and colors to match the restaurant’s decor.

2. Vinyl Ceiling Tiles

Vinyl ceiling tiles are another excellent option for restaurant kitchens. They are highly durable, moisture-resistant, and easy to clean, making them ideal for environments that experience high humidity and grease accumulation.

Benefits:

  • Water-resistant and easy to wipe clean.
  • Wide variety of styles and textures to choose from.

3. Metal Ceiling Tiles

Metal ceiling tiles offer a modern and stylish look, adding a touch of elegance to restaurant kitchens. They are available in different metals such as aluminum, copper, and stainless steel, and can be finished in various colors.

Benefits:

  • Extremely durable and resistant to damage.
  • Fire-resistant and can withstand high temperatures.

4. Fiberglass Ceiling Tiles

Fiberglass ceiling tiles are lightweight and highly effective at sound absorption. They are also resistant to moisture, making them suitable for kitchens where humidity levels can be high.

Benefits:

  • Excellent thermal insulation properties.
  • Resistant to mold and mildew.

5. Mineral Fiber Ceiling Tiles

Mineral fiber tiles are one of the most commonly used types in commercial settings. They offer good sound absorption and are usually treated for fire resistance. They come in a variety of finishes and styles.

Benefits:

  • Cost-effective and easy to install.
  • Good acoustic properties and can be painted to match decor.

Factors to Consider When Choosing Restaurant Kitchen Ceiling Tiles

Choosing the right ceiling tiles for your restaurant kitchen requires careful consideration of several factors:

1. Hygiene and Cleanability

In a kitchen environment, hygiene is paramount. Look for tiles that are easy to clean and maintain. Vinyl and metal tiles are often easier to wipe down and resist grease buildup.

2. Durability

Restaurant kitchens can be harsh environments. Choose tiles that can withstand heat, moisture, and potential impacts from kitchen equipment.

3. Aesthetics

The visual appeal of the ceiling should match the overall design of the restaurant. Consider the colors, textures, and styles that will enhance the dining experience.

4. Sound Absorption

If your restaurant has an open kitchen or a bustling dining area, consider tiles that offer sound absorption to minimize noise levels.

5. Installation and Maintenance

Consider how easy the tiles are to install and how much maintenance they will require. Some tiles can be easily replaced if damaged, while others may require professional installation.

Installation of Restaurant Kitchen Ceiling Tiles

Installing restaurant kitchen ceiling tiles can be a straightforward process, but it’s essential to follow the right steps for a professional finish.

1. Preparation

Before installation, ensure that the ceiling is clean and free of any debris. Remove any old tiles if necessary and check for any damage to the ceiling structure.

2. Choose Your Layout

Determine the layout for your ceiling tiles. You can use a grid system or a direct glue-down method, depending on the type of tiles you’ve chosen.

3. Cutting Tiles

If needed, cut the tiles to fit your layout. Use a utility knife or tile cutter for clean edges, especially if you are working around fixtures like lights or vents.

4. Installing Tiles

  • Grid System: If using a grid system, assemble the grid on the ceiling first, ensuring it is level. Then, place the tiles into the grid.
  • Glue-Down Method: Apply adhesive to the back of each tile and press it firmly against the ceiling, ensuring they are aligned correctly.

5. Finishing Touches

Once all tiles are installed, inspect the ceiling for any gaps or unevenness. Address any issues to ensure a polished look.

Maintenance Tips for Restaurant Kitchen Ceiling Tiles

Proper maintenance of your restaurant kitchen ceiling tiles is essential for longevity and hygiene:

  1. Regular Cleaning: Clean the tiles regularly to prevent grease and dust buildup. Use a damp cloth for vinyl and metal tiles, and a mild detergent for more stubborn stains.
  2. Check for Damage: Periodically inspect the ceiling for any damage or sagging tiles. Replace any damaged tiles promptly to maintain a clean and professional appearance.
  3. Control Humidity: Use exhaust fans and dehumidifiers to control moisture levels in the kitchen, reducing the risk of mold and mildew on your ceiling tiles.
  4. Address Stains Immediately: If any spills occur, clean them immediately to prevent staining. For persistent stains, consider using a specialized cleaning product.
  5. Professional Inspections: Schedule regular inspections of your ceiling to ensure everything is in good condition, especially if you notice any issues.

Conclusion

Investing in the right restaurant kitchen ceiling tiles is essential for creating a safe, clean, and visually appealing dining environment. By understanding the different types of ceiling tiles available, their benefits, and the factors to consider when making your choice, you can enhance the overall experience for both your staff and customers. With proper installation and maintenance, your ceiling tiles will not only serve their practical purposes but also contribute to the inviting atmosphere of your restaurant.

Modern 3 Blade Ceiling Fan: Style, Efficiency, and Functionality

In the world of interior design and home comfort, the ceiling fan has evolved from a mere utility item to a stylish accessory that enhances the aesthetics of any room. Among the various designs available, the modern 3 blade ceiling fan stands out for its sleek look, efficiency, and performance. This article delves into the features, benefits, and considerations of modern 3 blade ceiling fans, guiding you in making the right choice for your space.

Modern 3 Blade Ceiling Fan

What is a Modern 3 Blade Ceiling Fan?

A modern 3 blade ceiling fan typically features three blades that rotate to create airflow, helping to cool down spaces and improve ventilation. Unlike traditional fans, which may have five or more blades, modern designs emphasize simplicity and elegance. These fans can seamlessly blend into a variety of interior styles, from minimalist to contemporary.

The Aesthetic Appeal

One of the most compelling aspects of modern 3 blade ceiling fans is their aesthetic versatility. With clean lines and minimalistic designs, these fans can enhance the decor of any room, whether it’s a living area, bedroom, or office. Available in various finishes such as brushed nickel, matte black, and even vibrant colors, you can easily find a fan that complements your existing decor.

Read too: Kitchen Lighting For A Vaulted Ceiling: Illuminating Your Space with Style and Functionality

Key Features of Modern 3 Blade Ceiling Fans

  1. Aerodynamic Blades: Modern 3 blade ceiling fans are designed with aerodynamic blades that reduce drag, allowing them to operate quietly while maximizing airflow.
  2. Energy Efficiency: Many modern ceiling fans are designed to be energy-efficient. With advancements in motor technology, you can enjoy substantial savings on your electricity bill while maintaining comfort.
  3. Smart Technology: Some models come equipped with smart technology, allowing you to control the fan with your smartphone or voice-activated devices. This feature enhances convenience and allows for customizable settings.
  4. Integrated Lighting: Many modern 3 blade ceiling fans also feature integrated lighting options, providing illumination while offering the functionality of a fan.

Advantages of a Modern 3 Blade Ceiling Fan

1. Enhanced Airflow and Cooling

The primary function of any ceiling fan is to circulate air effectively. Modern 3 blade ceiling fans are engineered to provide optimal airflow, making them highly effective in cooling down rooms. The fewer blades may seem counterintuitive, but when designed aerodynamically, these fans can move a significant volume of air.

2. Noise Reduction

Older fans with multiple blades often produce more noise due to the increased friction. However, modern 3 blade ceiling fans are designed to operate quietly, making them suitable for bedrooms and spaces where tranquility is essential.

3. Space-Saving Design

With their sleek design, modern 3 blade ceiling fans often take up less visual space compared to bulkier models. This feature is particularly beneficial in rooms with low ceilings or smaller areas, allowing for an unobtrusive yet functional addition to the decor.

4. Easy Installation and Maintenance

Modern fans are typically easier to install than traditional models, often featuring a simple mounting system. Additionally, maintenance is straightforward, with many fans designed for easy access to blades and motors for cleaning and servicing.

5. Style Versatility

Whether you are looking for a fan for a rustic cabin, a sleek urban loft, or a cozy beach house, modern 3 blade ceiling fans come in styles and finishes to suit any aesthetic. Their design allows them to blend into various environments while providing the necessary functionality.

Choosing the Right Modern 3 Blade Ceiling Fan

1. Consider Room Size

When selecting a modern 3 blade ceiling fan, the size of the room is crucial. For larger spaces, consider a fan with a larger blade span to ensure adequate airflow. Conversely, a smaller fan may be ideal for compact areas.

2. Motor Type

Ceiling fans come with different types of motors, and the motor type can significantly affect performance. Look for fans with DC motors, as they are generally more energy-efficient and quieter compared to AC motors.

3. Style and Finish

Choose a fan that complements your decor style. Whether you prefer a sleek metallic finish or a rustic wooden look, selecting the right finish can enhance the overall aesthetic of your space.

4. Light Kit Options

If you require additional lighting, consider fans with integrated light kits. These fans can provide both airflow and illumination, making them practical for various settings.

5. Additional Features

Evaluate any additional features you may want, such as remote control, smart technology compatibility, or reversible motors for seasonal airflow adjustment. These features can enhance usability and comfort throughout the year.

Installation Tips for Modern 3 Blade Ceiling Fans

Installing a modern 3 blade ceiling fan can be a straightforward process if done correctly. Here are some tips to consider:

  1. Read the Instructions: Before starting the installation, carefully read the manufacturer’s instructions. Each fan may have specific requirements.
  2. Select the Right Location: Choose a central location in the room for the fan, ensuring it is at least 7 feet above the floor for optimal airflow.
  3. Use the Right Tools: Make sure you have all necessary tools on hand, such as screwdrivers, pliers, and a ladder.
  4. Secure Mounting: Ensure that the fan is securely mounted to the ceiling joists or an appropriate electrical box to prevent any accidents.
  5. Test the Fan: After installation, turn on the fan and check for stability, noise, and airflow to ensure everything is functioning correctly.

Maintenance for Longevity

To ensure your modern 3 blade ceiling fan operates efficiently for years, regular maintenance is essential:

  1. Dust the Blades: Clean the fan blades regularly to remove dust and debris, which can hinder performance. Use a microfiber cloth or a fan blade cleaner.
  2. Check for Tightness: Periodically check that all screws and connections are secure to prevent wobbling and noise.
  3. Inspect the Motor: If you notice any unusual noises, inspect the motor and lubricate it if necessary according to the manufacturer’s guidelines.
  4. Balance the Fan: If the fan wobbles, you can purchase a fan balancing kit to ensure even operation.
  5. Professional Service: If you encounter any electrical issues or are unsure about maintenance, consider hiring a professional for servicing.

Conclusion

A modern 3 blade ceiling fan is not just a functional appliance but also a stylish addition to any home. With their efficient performance, sleek designs, and versatility, these fans offer an excellent solution for enhancing airflow and comfort in your living spaces. By understanding the advantages, features, and maintenance tips outlined in this article, you can make an informed decision that elevates your home’s comfort and aesthetic appeal.

Hunter Gallatin Smart LED 54 Ceiling Fan: Features, Benefits, and Installation

In today’s fast-paced world, creating a comfortable home environment is essential. One key component that can enhance the ambiance of any space is a ceiling fan. The Hunter Gallatin Smart LED 54 Ceiling Fan stands out as an excellent choice for those looking to combine modern technology with style. In this comprehensive guide, we will explore the features, benefits, installation process, and maintenance of the Hunter Gallatin Smart LED 54 Ceiling Fan.

Hunter Gallatin Smart Led 54 Ceiling Fan

What is the Hunter Gallatin Smart LED 54 Ceiling Fan?

The Hunter Gallatin Smart LED 54 Ceiling Fan is a state-of-the-art ceiling fan designed to provide efficient cooling and lighting for medium to large rooms. With its sleek design and smart technology integration, this ceiling fan not only enhances the aesthetics of your space but also improves air circulation. Here’s a closer look at what makes the Hunter Gallatin unique.

Key Features

  1. Smart Technology: The Hunter Gallatin is equipped with Wi-Fi capabilities, allowing you to control the fan through a smartphone app or voice commands via smart home devices like Amazon Alexa or Google Assistant.
  2. LED Lighting: It features a powerful yet energy-efficient LED light kit that provides bright illumination while consuming less energy compared to traditional bulbs.
  3. 54-Inch Blade Span: The 54-inch blade span makes it suitable for medium to large rooms, ensuring effective airflow and comfort.
  4. Three Speed Settings: With multiple speed settings, you can easily adjust the airflow to suit your comfort level, whether you want a gentle breeze or powerful cooling.
  5. Reversible Motor: The reversible motor allows you to change the direction of the blades, making it useful for both summer and winter. In summer, the fan should rotate counterclockwise to create a wind-chill effect, while in winter, it should rotate clockwise to circulate warm air.
  6. Stylish Design: Available in various finishes, the Hunter Gallatin complements any decor, from traditional to modern.

Read too: Kitchen Lighting For A Vaulted Ceiling: Illuminating Your Space with Style and Functionality

Benefits of the Hunter Gallatin Smart LED 54 Ceiling Fan

1. Energy Efficiency

One of the primary benefits of using the Hunter Gallatin is its energy efficiency. The LED light kit consumes significantly less energy than traditional incandescent bulbs, which can lead to lower electricity bills. Additionally, by using the fan instead of air conditioning during mild weather, you can save even more energy.

2. Convenient Smart Control

The integration of smart technology allows for convenient control over your ceiling fan. You can adjust the fan speed, turn the light on or off, or set schedules—all from your smartphone or through voice commands. This feature is especially useful for those who want to adjust their environment without getting up.

3. Improved Air Circulation

The Hunter Gallatin’s powerful motor and well-designed blades ensure efficient air circulation. This can help maintain a comfortable temperature in your home and reduce the reliance on heating and cooling systems.

4. Enhanced Aesthetic Appeal

With its sleek design and various finish options, the Hunter Gallatin can enhance the overall aesthetic of your space. Whether you’re looking to complement your modern decor or add a touch of elegance to a traditional setting, this fan fits seamlessly into any interior design scheme.

5. Easy Installation

The Hunter Gallatin Smart LED 54 Ceiling Fan is designed for easy installation. Many users can set it up without the need for professional help, saving both time and money.

How to Install the Hunter Gallatin Smart LED 54 Ceiling Fan

Installing the Hunter Gallatin Smart LED 54 Ceiling Fan is a straightforward process, especially for those familiar with basic electrical work. However, if you’re not comfortable with electrical installations, it’s best to hire a professional. Below is a step-by-step guide to help you with the installation.

Tools You Will Need

  • Screwdriver
  • Wrench
  • Ladder
  • Wire stripper
  • Voltage tester
  • Electrical tape

Installation Steps

1. Turn Off Power

Before you begin, ensure that the power to the existing ceiling fan or light fixture is turned off at the circuit breaker. Use a voltage tester to confirm that the power is off.

2. Remove Existing Fixture

Carefully remove the existing ceiling fan or light fixture by unscrewing it from the ceiling. Disconnect the wires and set the old fixture aside.

3. Install the Mounting Bracket

Attach the provided mounting bracket to the ceiling using the screws provided. Ensure it is securely fastened, as this will support the weight of the fan.

4. Assemble the Fan

Follow the manufacturer’s instructions to assemble the fan components, including the blades and light kit. Make sure to keep the screws and other small parts organized.

5. Connect the Wires

Using a wire stripper, strip the ends of the wires (if needed). Connect the wires from the ceiling to the fan using wire nuts. Typically, you will connect:

  • Black (fan) to black (ceiling)
  • White (fan) to white (ceiling)
  • Green or copper (ground) to the green or bare wire in the ceiling

Wrap electrical tape around the wire nuts for extra security.

6. Attach the Fan to the Mounting Bracket

Carefully lift the assembled fan and attach it to the mounting bracket. Make sure it is securely fastened.

7. Install the Light Kit

If your model includes a light kit, follow the instructions to attach it to the fan. Connect the wires as indicated in the manual.

8. Turn the Power Back On

Once everything is installed, turn the power back on at the circuit breaker. Test the fan and light to ensure they are functioning correctly.

9. Connect to Wi-Fi

Download the Hunter Fan app on your smartphone and follow the instructions to connect your fan to Wi-Fi. This step will enable you to control your fan remotely.

Maintenance Tips for the Hunter Gallatin Smart LED 54 Ceiling Fan

To keep your Hunter Gallatin Smart LED 54 Ceiling Fan in optimal condition, follow these maintenance tips:

1. Regular Dusting

Ceiling fans can accumulate dust and dirt, which can affect their performance. Regularly dust the blades using a microfiber cloth or a duster to maintain cleanliness.

2. Check and Tighten Screws

Periodically check all screws and connections to ensure they are tight. Loose screws can cause wobbling and affect the fan’s efficiency.

3. Lubricate the Motor

If the fan is making unusual noises, it might need lubrication. Check the manufacturer’s guidelines for the appropriate lubricant to use.

4. Inspect Electrical Connections

Every few months, inspect the electrical connections to ensure they remain secure and free from corrosion.

5. Change Bulbs as Needed

If the LED lights begin to dim or flicker, replace them as needed. Consult the user manual for instructions on changing the bulbs.

Frequently Asked Questions

1. What size room is suitable for the Hunter Gallatin Smart LED 54 Ceiling Fan?

The 54-inch blade span makes this fan ideal for medium to large rooms, such as living rooms, bedrooms, and dining areas.

2. Can I install the fan on a sloped ceiling?

Yes, the Hunter Gallatin is compatible with sloped ceilings. Ensure you use the appropriate mounting kit for sloped ceilings.

3. What is the warranty for the Hunter Gallatin?

Hunter offers a limited lifetime warranty on their ceiling fans, covering defects in materials and workmanship.

4. Does the fan work with smart home systems?

Yes, the Hunter Gallatin is compatible with both Amazon Alexa and Google Assistant for voice control.

5. How energy-efficient is the Hunter Gallatin?

The LED light kit is designed to be energy-efficient, consuming significantly less energy than traditional incandescent bulbs, which can help reduce electricity bills.

Conclusion

The Hunter Gallatin Smart LED 54 Ceiling Fan is an exceptional choice for anyone looking to enhance their home’s comfort and style. With its combination of advanced features, energy efficiency, and aesthetic appeal, it is sure to be a valuable addition to your living space. Whether you are seeking to improve air circulation, reduce energy costs, or simply add a modern touch to your home decor, the Hunter Gallatin delivers on all fronts.

With proper installation and maintenance, you can enjoy the benefits of your Hunter Gallatin fan for years to come, making it a smart investment for any homeowner.

High Gloss Ceiling Paint: A Comprehensive Guide

When it comes to home improvement, the ceiling is often overlooked. Most homeowners focus on wall colors, flooring, and furnishings, leaving the ceiling plain and unadorned. However, using High Gloss Ceiling Paint can dramatically elevate the aesthetic appeal of any room. This guide explores the benefits, application techniques, and maintenance tips for high gloss ceiling paint, ensuring you make an informed decision for your next home project.

High Gloss Ceiling Paint

What is High Gloss Ceiling Paint?

High gloss ceiling paint is a specialized paint designed to provide a shiny, reflective finish on ceilings. Unlike traditional ceiling paints, which are usually flat or matte, high gloss paints offer a smooth, shiny surface that can reflect light and enhance the overall brightness of a room.

Key Features of High Gloss Ceiling Paint

  1. Reflective Finish: The most noticeable feature of high gloss ceiling paint is its ability to reflect light. This can make a room feel more spacious and airy, while also adding a touch of elegance.
  2. Durability: High gloss paints are typically more resistant to wear and tear than their matte counterparts. They are less likely to show stains or marks, making them an ideal choice for high-traffic areas.
  3. Easy Cleaning: The smooth surface of high gloss paint makes it easy to wipe clean. This is particularly useful in kitchens or bathrooms, where moisture and grease can be a concern.
  4. Versatile Color Options: High gloss ceiling paints come in various colors, allowing homeowners to customize their spaces creatively.

Read too: Kitchen Lighting For A Vaulted Ceiling: Illuminating Your Space with Style and Functionality

Benefits of Using High Gloss Ceiling Paint

1. Enhanced Light Reflection

One of the main advantages of high gloss ceiling paint is its ability to reflect light. This characteristic can be particularly beneficial in rooms with limited natural light, as it can make the space feel brighter and more inviting. By bouncing light around the room, you can create an illusion of height and space.

2. Aesthetic Appeal

High gloss finishes add a modern and sophisticated touch to any room. Whether you’re aiming for a contemporary look or a more classic style, high gloss ceiling paint can enhance your design vision. It can also accentuate architectural features, such as beams or crown moldings, drawing attention to the details.

3. Durability and Longevity

High gloss paints are known for their durability. They withstand wear and tear better than flat paints, making them ideal for high-traffic areas. Additionally, the hard surface is less prone to chipping or peeling, ensuring your ceilings maintain their beauty for years to come.

4. Mold and Mildew Resistance

Many high gloss ceiling paints are formulated to resist mold and mildew, which is especially important in humid areas such as kitchens and bathrooms. This resistance not only keeps your ceiling looking fresh but also contributes to a healthier living environment.

5. Easy Maintenance

Cleaning high gloss ceilings is a breeze. Unlike flat paints that can absorb stains and dirt, high gloss finishes allow for easy wiping and cleaning. This is particularly advantageous in spaces that are prone to spills or splatters.

How to Choose the Right High Gloss Ceiling Paint

Choosing the right high gloss ceiling paint involves considering several factors, including the type of paint, color, and finish. Here’s a guide to help you make the best choice:

1. Types of Paint

High gloss ceiling paints come in different formulations, including latex and oil-based options.

  • Latex Paint: Water-based latex paints are popular due to their ease of use, quick drying time, and low odor. They are also easier to clean up and less toxic than oil-based paints.
  • Oil-Based Paint: These paints tend to provide a smoother finish and greater durability, making them ideal for high-traffic areas. However, they have a longer drying time and require solvents for clean-up.

2. Color Selection

When selecting a color for your high gloss ceiling paint, consider the overall color scheme of the room. Lighter colors can make a space feel larger and more open, while darker colors can add depth and drama.

  • Classic Whites and Off-Whites: These colors are timeless and work well with almost any decor.
  • Bold Colors: For a more dramatic look, consider using a bold color on the ceiling. This can create a striking focal point and enhance the overall design.

3. Finish Options

While the term “high gloss” indicates a shiny finish, there can be variations in sheen levels. Some paints may offer a semi-gloss finish, which is slightly less reflective but still provides a polished look.

  • High Gloss: Provides the highest level of shine and reflects the most light.
  • Semi-Gloss: Offers a moderate sheen, which can be a great option for those who want some shine without the full gloss effect.

Application Techniques for High Gloss Ceiling Paint

1. Preparation

Before applying high gloss ceiling paint, proper preparation is essential. Here’s how to get started:

  • Clean the Surface: Remove any dust, dirt, or grease from the ceiling using a damp cloth. If the surface is particularly dirty, you may need to wash it with a mild detergent solution.
  • Repair Imperfections: Inspect the ceiling for any cracks, holes, or imperfections. Use a patching compound to fill in any gaps, and sand the area smooth once dry.
  • Prime if Necessary: If you’re painting over a dark color or a surface with stains, consider applying a primer specifically designed for high gloss finishes. This will help improve adhesion and ensure an even color.

2. Painting

When it comes to applying high gloss ceiling paint, there are a few methods to consider:

  • Roller Method: Using a paint roller is the most efficient way to cover large areas quickly. Opt for a roller with a short nap to achieve a smooth finish.
  • Brush Method: Use a high-quality angled brush for cutting in around edges, corners, and fixtures. This allows for more precision and control in detailed areas.
  • Spray Method: For a flawless finish, consider using a paint sprayer. This method can provide an even coat without brush or roller marks, but it requires more preparation to protect surrounding areas.

3. Multiple Coats

Depending on the color and type of paint, you may need to apply multiple coats. Allow each coat to dry fully before applying the next. This is especially important for high gloss paints, as they can sometimes show brush strokes or roller marks more than flat paints.

Tips for Successful Application

  • Work in Sections: Divide the ceiling into manageable sections to ensure even coverage and prevent the paint from drying before you finish.
  • Use Proper Lighting: Good lighting is crucial when painting ceilings. Consider using portable work lights to help you see the paint application clearly.
  • Maintain a Wet Edge: To avoid visible lines or seams, always maintain a wet edge while painting. This means working quickly and overlapping wet paint with each stroke.

Maintenance of High Gloss Ceiling Paint

Maintaining high gloss ceiling paint is relatively simple, thanks to its durability and ease of cleaning. Here are some tips for keeping your painted ceilings looking fresh:

1. Regular Dusting

Dust can accumulate on ceilings, so regular dusting with a microfiber cloth or duster will help maintain a clean appearance.

2. Spot Cleaning

For any stains or marks, use a damp cloth and mild soap to gently wipe the area. Avoid harsh chemicals that could damage the paint finish.

3. Periodic Touch-Ups

If you notice any chips or scratches over time, consider doing touch-up work to keep your ceiling looking pristine. Use the same high gloss paint and apply it with a small brush.

Conclusion

Using High Gloss Ceiling Paint can dramatically transform your living space, offering both aesthetic appeal and functional benefits. From enhancing light reflection to providing a durable and easy-to-clean surface, high gloss paint is a smart choice for homeowners looking to elevate their interiors. By choosing the right type of paint, colors, and application techniques, you can achieve a stunning finish that complements your design vision.

Whether you are updating a single room or undertaking a complete renovation, high gloss ceiling paint can be a game-changer, adding sophistication and brightness to your home.

Delta Rain Shower Head Ceiling Mount: Transform Your Bathroom Experience

When it comes to creating a luxurious and relaxing shower experience, the right fixtures can make all the difference. The Delta Rain Shower Head Ceiling Mount is a prime example of a product designed to elevate your daily routine into something special. This innovative shower head not only provides a refreshing rain-like experience but also enhances the overall aesthetic of your bathroom. In this article, we will explore the features, benefits, and installation process of the Delta Rain Shower Head Ceiling Mount, along with tips on how to maintain it for optimal performance.

Delta Rain Shower Head Ceiling Mount

What is a Delta Rain Shower Head Ceiling Mount?

The Delta Rain Shower Head Ceilings Mount is a type of shower head designed to be installed directly on the ceiling, offering a unique and immersive shower experience. Unlike traditional wall-mounted shower heads, ceiling-mounted models simulate the feeling of standing in a warm rain shower, allowing water to cascade down from above. This design provides a more enveloping and soothing sensation, making it a popular choice for those looking to upgrade their bathroom fixtures.

Key Features of the Delta Rain Shower Head Ceiling Mount

  1. Rainfall Experience
    The Delta Rain Shower Head is engineered to deliver a soft, steady flow of water that mimics the feeling of natural rainfall. With larger spray coverage compared to standard shower heads, it envelops the body in warmth and relaxation.
  2. Adjustable Settings
    Many models come with various spray settings, allowing users to customize their shower experience. From a gentle mist to a powerful downpour, the versatility of this shower head caters to personal preferences.
  3. Stylish Design
    The sleek and modern design of the Delta Rain Shower Head complements any bathroom decor. Available in various finishes, including chrome, stainless steel, and matte black, it can seamlessly blend into your existing fixtures or become a standout focal point.
  4. Easy Installation
    Designed for straightforward installation, many Delta Rain Shower Heads come with clear instructions and all necessary hardware. Whether you’re a DIY enthusiast or hiring a professional, installing this fixture can be a hassle-free process.
  5. Durable Materials
    Delta products are known for their durability. The shower head is often made from high-quality materials that resist corrosion and tarnishing, ensuring it remains a beautiful part of your bathroom for years to come.
  6. Water-Efficient Technology
    Many Delta shower heads are designed with water-saving features, allowing you to enjoy a luxurious shower experience without excessive water consumption. This eco-friendly approach can help lower your utility bills while being kind to the environment.

Read too: Kitchen Lighting For A Vaulted Ceiling: Illuminating Your Space with Style and Functionality

Benefits of Using a Delta Rain Shower Head Ceiling Mount

1. Enhanced Relaxation

Using a Delta Rain Shower Head Ceilings Mount can transform your shower routine into a spa-like experience. The gentle cascade of water can help relieve stress, soothe sore muscles, and create a calming environment, making it the perfect end to a long day.

2. Improved Water Coverage

With its ceiling-mounted design, this shower head provides an expansive spray pattern that effectively covers your entire body. This means fewer cold spots and a more consistent temperature throughout your shower, ensuring a comfortable experience from start to finish.

3. Space-Saving Design

Ceiling-mounted shower heads are an excellent option for smaller bathrooms. By positioning the shower head overhead, you can free up wall space for additional storage, towel racks, or decorative elements. This clever design choice can make your bathroom feel more open and inviting.

4. Increased Home Value

Upgrading your bathroom fixtures can significantly enhance the overall value of your home. The stylish and modern look of a Delta Rain Shower Head Ceiling Mount can be appealing to potential buyers, making it a worthwhile investment.

5. Customizable Shower Experience

With multiple spray settings, the Delta Rain Shower Head allows users to adjust the water flow to suit their mood or needs. Whether you prefer a gentle rain or a more vigorous spray, this flexibility makes it a versatile addition to your bathroom.

6. Aesthetic Appeal

The sleek design of the Delta Rain Shower Head Ceiling Mount adds a touch of elegance to any bathroom. Its modern look can elevate the overall aesthetic, turning an ordinary bathroom into a luxurious retreat.

Installation Process for Delta Rain Shower Head Ceiling Mount

Installing a Delta Rain Shower Head Ceiling Mount may seem daunting, but with the right tools and instructions, it can be a straightforward process. Here’s a step-by-step guide to help you with the installation:

Tools Needed:

  • Adjustable wrench
  • Screwdriver
  • Pipe wrench
  • Teflon tape (plumber’s tape)
  • Ladder (if needed)

Step 1: Gather Your Tools

Before starting, gather all the necessary tools and materials. Ensure you have a clear workspace and take safety precautions as needed.

Step 2: Remove the Old Shower Head

If you are replacing an existing shower head, start by removing it. Use a wrench to unscrew the old shower head from the shower arm. Make sure to keep the shower arm intact for the new installation.

Step 3: Prepare the Shower Arm

Inspect the shower arm for any damage. If necessary, wrap Teflon tape around the threads of the shower arm to create a watertight seal. This step is essential to prevent leaks.

Step 4: Attach the Ceiling Mount

Carefully follow the manufacturer’s instructions for attaching the ceiling mount to the shower arm. Secure it tightly using the adjustable wrench, but be cautious not to overtighten and damage the fixture.

Step 5: Install the Delta Rain Shower Head

Once the ceiling mount is securely in place, attach the Delta Rain Shower Head. Again, use Teflon tape on the threads if recommended by the manufacturer. Hand-tighten the shower head and then use the wrench for a snug fit.

Step 6: Test for Leaks

After installation, turn on the water supply and check for any leaks around the connections. If you notice any leaks, tighten the fittings as needed. Ensure that everything is secure before finishing the installation.

Step 7: Enjoy Your New Shower Experience

With the Delta Rain Shower Head Ceiling Mount installed, step into your new shower and enjoy the luxurious experience it offers.

Maintenance Tips for Your Delta Rain Shower Head Ceiling Mount

To keep your Delta Rain Shower Head Ceilings Mount functioning optimally and looking great, follow these maintenance tips:

1. Regular Cleaning

Over time, mineral deposits can build up on your shower head, affecting water flow and spray patterns. Clean the shower head regularly using a mixture of vinegar and water or a mild cleaning solution to remove any buildup. Rinse thoroughly and wipe dry with a soft cloth.

2. Inspect for Damage

Periodically inspect your shower head and its connections for any signs of wear or damage. If you notice leaks or cracks, address them promptly to prevent further issues.

3. Check Water Pressure

Ensure that your home’s water pressure is within the recommended range for your Delta shower head. Low water pressure can affect performance, so consult a plumber if you suspect issues.

4. Replace Filters as Needed

If your Delta Rain Shower Head has a filter, check it regularly and replace it as needed. A clean filter ensures optimal water flow and helps maintain the quality of your shower experience.

5. Avoid Harsh Chemicals

When cleaning your shower head, avoid abrasive cleaners or harsh chemicals that can damage the finish. Stick to gentle cleaning solutions to keep your shower head looking its best.

Conclusion

The Delta Rain Shower Head Ceiling Mount is an excellent investment for anyone looking to enhance their shower experience. With its stylish design, versatile functionality, and luxurious rainfall experience, it transforms an everyday routine into a moment of indulgence. By following the installation and maintenance tips outlined in this article, you can enjoy the benefits of your new shower head for years to come.

Brushed Nickel Ceiling Fan Light Kit: Illuminate Your Space with Style

When it comes to home lighting and ventilation, a Brushed Nickel Ceiling Fan Light Kit combines both functionality and aesthetics. These kits are not just about keeping the air cool during those hot summer months; they also add a touch of elegance to any room’s decor. With various styles, finishes, and functionalities, choosing the right ceiling fan light kit can significantly impact your home’s ambiance.

Brushed Nickel Ceiling Fan Light Kit

In this comprehensive guide, we will explore everything you need to know about Brushed Nickel Ceiling Fan Light Kits—from their benefits to installation, maintenance, and design options. If you’re looking to enhance your home with a stylish lighting solution, read on!

What is a Brushed Nickel Ceiling Fan Light Kit?

A Brushed Nickel Ceiling Fan Light Kit is an accessory that can be attached to a ceiling fan to provide additional lighting. Brushed nickel is a popular finish that gives a sleek, modern look while being versatile enough to complement various decor styles. This finish is created by polishing the nickel metal and then applying a brushing technique, resulting in a subtle sheen and a warm, inviting appearance.

These kits typically include light fixtures, shades, and necessary hardware to connect them to the ceiling fan. Depending on the design, they can come with different types of bulbs, including LED, incandescent, or CFL, allowing you to choose the most energy-efficient or ambiance-creating options.

Read too: Kitchen Lighting For A Vaulted Ceiling: Illuminating Your Space with Style and Functionality

Benefits of Using Brushed Nickel Ceiling Fan Light Kits

1. Enhanced Aesthetics

One of the primary reasons homeowners choose Brushed Nickel Ceiling Fan Light Kits is the aesthetic appeal. The brushed nickel finish adds a modern and elegant touch to any room. Whether your home decor is contemporary, industrial, or traditional, these kits blend seamlessly into your interior design.

2. Functional Lighting

In addition to providing cooling effects, ceiling fan light kits offer functional lighting for various tasks. From reading in the living room to illuminating the dining area, the right light kit can enhance the usability of your space. Depending on the type of bulbs used, you can also adjust the brightness to suit different activities.

3. Energy Efficiency

Many modern Brushed Nickel Ceiling Fan Light Kits are designed with energy-efficient bulbs, such as LEDs. These bulbs consume less electricity and have a longer lifespan compared to traditional incandescent bulbs, making them a cost-effective choice in the long run.

4. Improved Air Circulation

A ceiling fan, combined with a light kit, not only improves lighting but also enhances air circulation. This is particularly beneficial in rooms that tend to retain heat, making your space more comfortable without relying heavily on air conditioning.

5. Versatility and Options

Brushed nickel light kits come in various styles, sizes, and designs, making it easy to find one that fits your specific needs. Whether you prefer a minimalist approach or a more elaborate design, there’s a light kit to suit your taste.

Choosing the Right Brushed Nickel Ceiling Fan Light Kit

1. Size and Scale

When selecting a Brushed Nickel Ceiling Fan Light Kit, consider the size of the room where it will be installed. Larger rooms may require bigger fans and light fixtures to ensure proper air circulation and adequate lighting. Conversely, smaller spaces can benefit from more compact options.

2. Style and Design

Choose a design that complements your existing decor. Brushed nickel light kits are available in various styles, including:

  • Modern: Sleek lines and minimalist designs.
  • Traditional: Classic shapes with ornate details.
  • Industrial: Rugged designs with exposed bulbs and metal finishes.

3. Type of Bulbs

Consider the type of bulbs you want in your light kit. Options include:

  • LED: Energy-efficient and long-lasting, with various color temperatures.
  • Incandescent: Provides warm light, but consumes more energy.
  • CFL: A middle ground between LED and incandescent in terms of energy use and warmth.

4. Brightness and Wattage

The brightness of your light kit will affect the atmosphere of the room. Check the wattage and lumen output to ensure it meets your lighting needs. A combination of multiple light fixtures may also provide balanced illumination.

5. Dimming Options

If you want flexibility in lighting, consider a light kit with dimming capabilities. This feature allows you to adjust the brightness based on the time of day or the activity taking place in the room.

Installing Your Brushed Nickel Ceiling Fan Light Kit

Installing a Brushed Nickel Ceiling Fan Light Kit is a relatively straightforward process that can usually be completed in a few steps. However, it’s important to follow safety guidelines and manufacturer instructions.

Tools and Materials Needed

  • Screwdriver
  • Wire nuts
  • Electrical tape
  • Voltage tester (optional)

Installation Steps

  1. Turn Off Power: Always turn off the power at the circuit breaker before starting any electrical work to avoid shock.
  2. Remove Existing Light Fixture: If your ceiling fan already has a light fixture, carefully remove it by unscrewing it from the base.
  3. Connect Wiring: Follow the wiring diagram included with your light kit. Connect the corresponding wires (usually black to black, white to white, and ground to ground) using wire nuts. Secure with electrical tape for safety.
  4. Attach the Light Kit: Once the wiring is securely connected, attach the light kit to the ceiling fan according to the manufacturer’s instructions.
  5. Install Bulbs: Insert the appropriate bulbs into the light fixtures.
  6. Restore Power: Once everything is securely installed, turn the power back on at the circuit breaker and test the light.

Safety Precautions

  • Always follow the manufacturer’s instructions for your specific light kit.
  • If you’re uncomfortable working with electrical systems, consider hiring a professional electrician for the installation.

Maintaining Your Brushed Nickel Ceiling Fan Light Kit

To keep your Brushed Nickel Ceiling Fan Light Kit looking great and functioning effectively, regular maintenance is essential. Here are some tips:

1. Dust Regularly

Ceiling fan light kits can accumulate dust over time, so it’s a good idea to wipe them down with a soft, damp cloth regularly. Use a microfiber cloth to avoid scratching the brushed nickel finish.

2. Check Bulbs and Fixtures

Periodically check the bulbs and fixtures to ensure everything is working correctly. Replace any burnt-out bulbs promptly to maintain proper lighting levels.

3. Inspect Wiring and Connections

Every few months, inspect the wiring and connections for any signs of wear or damage. If you notice frayed wires or loose connections, turn off the power and fix the issues immediately.

4. Deep Cleaning

For a more thorough cleaning, you can remove the light fixtures and clean them with a gentle soap solution. Ensure everything is completely dry before reassembling.

Design Ideas Featuring Brushed Nickel Ceiling Fan Light Kits

1. Modern Minimalism

If you favor a minimalist approach, choose a sleek brushed nickel ceiling fan light kit with clean lines and simple shapes. Pair it with neutral colors and modern furniture to create a cohesive and uncluttered space.

2. Industrial Chic

For an industrial-style room, consider a light kit with exposed bulbs and a rugged finish. Pair it with raw materials such as reclaimed wood and metal accents to achieve an urban, trendy vibe.

3. Cozy Traditional

In a more traditional setting, opt for a light kit with classic shades and ornate details. Combine it with warm color palettes and classic furnishings to create a cozy and inviting atmosphere.

4. Contemporary Glam

For a glamorous look, choose a light kit with crystal accents or unique shapes. Pair it with bold colors, luxurious textiles, and elegant decor to create a sophisticated ambiance.

Conclusion

A Brushed Nickel Ceiling Fan Light Kit is more than just a functional addition to your home; it’s an opportunity to elevate your interior design. With their elegant appearance, energy efficiency, and versatility, these light kits can enhance any room while providing much-needed illumination and air circulation.

Whether you are upgrading an existing ceiling fan or installing a new one, the right Brushed Nickel Ceiling Fan Light Kit can make a significant difference in your home’s overall look and feel. Consider your style preferences, the size of your space, and your lighting needs to find the perfect match.

Black Suspended Ceiling Tiles: A Modern Design Solution

When it comes to redesigning your interior space, ceilings are often overlooked. However, they can be a game-changer in creating the perfect aesthetic for any environment, whether it’s a modern office, a trendy restaurant, or a contemporary home. One of the most versatile and bold options is Black Suspended Ceiling Tiles. These tiles offer a sleek, stylish, and functional solution that can completely transform your ceiling space while adding an air of sophistication to the room.

Black Suspended Ceiling Tiles

In this article, we’ll explore the advantages, design ideas, installation process, and how you can incorporate Black Suspended Ceiling Tiles into your design. Whether you’re looking to improve acoustics, enhance lighting, or create a dramatic effect, these tiles are a top choice for modern interiors.

What are Black Suspended Ceiling Tiles?

Black Suspended Ceiling Tiles are a type of drop ceiling system where the tiles are installed in a grid that is suspended from the structural ceiling. These ceiling tiles are typically made from materials like mineral fiber, fiberglass, PVC, or metal and are designed to be both functional and decorative. The black finish of these tiles adds a bold visual contrast and can make any room feel more modern and high-end.

Unlike traditional white ceiling tiles, which reflect light and create a more open feel, black ceiling tiles absorb light, creating a more intimate, dramatic atmosphere. These tiles are often used in commercial spaces like theaters, bars, and high-end retail stores but are becoming increasingly popular in residential homes for basements, media rooms, and even living spaces.

Benefits of Black Suspended Ceiling Tiles

There are many reasons why Black Suspended Ceiling Tiles are becoming a favorite choice for designers and homeowners alike. Here’s a look at some of the most significant advantages:

1. Sleek and Modern Aesthetic

The deep, rich color of black ceiling tiles adds an element of sophistication and modernity to any space. Black ceilings have become increasingly popular in contemporary interior design because they create a striking contrast against lighter walls and floors. Whether you’re designing a high-end restaurant or a chic home theater, black ceiling tiles can help you achieve that sleek, modern look.

2. Improved Acoustics

Black Suspended Ceiling Tiles are excellent for improving the acoustics of a room. Many black ceiling tiles are designed with sound absorption in mind, making them ideal for environments where noise control is important. If you’re installing these tiles in a media room, music studio, or office space, their sound-absorbing properties will help reduce echoes and enhance sound clarity.

Read too: Kitchen Lighting For A Vaulted Ceiling: Illuminating Your Space with Style and Functionality

The acoustic performance of these tiles makes them a top choice for businesses such as cinemas, restaurants, or conference rooms where managing sound is crucial.

3. Light Absorption for a Cozy Atmosphere

Black tiles absorb light rather than reflect it, making them perfect for creating a more intimate and cozy atmosphere. This feature is especially useful in environments where you want to control lighting to set a specific mood, such as in home theaters, restaurants, or retail spaces. The dark ceiling tiles can make the room feel more contained, drawing focus to the décor and furnishings below.

If you prefer a low-key lighting effect, pairing black tiles with dimmable, recessed lights can create a comfortable, ambient setting.

4. Versatility in Design

Despite their bold appearance, Black Suspended Ceiling Tiles are highly versatile and can complement a wide variety of design schemes. They work well in both industrial-style spaces with exposed piping and ducts and more polished, modern environments. Additionally, they can be paired with different grid systems or integrated with other ceiling elements such as lighting fixtures, speakers, or air vents.

For a more dynamic design, black ceiling tiles can also be mixed with other colors or finishes, such as metallic or wood-patterned tiles.

5. Easy Installation and Maintenance

One of the great benefits of suspended ceiling tiles, in general, is their ease of installation and maintenance. Black suspended ceiling tiles are no exception. The suspended grid system allows easy access to wiring, plumbing, or other components hidden above the tiles. If a tile becomes damaged, it can be replaced individually without the need to tear down the entire ceiling.

These tiles are also relatively low-maintenance. Most types of black ceiling tiles are resistant to stains, moisture, and mold, making them suitable for environments with high humidity or where cleanliness is essential, such as commercial kitchens or bathrooms.

Best Uses for Black Suspended Ceiling Tiles

Black Suspended Ceiling Tiles are a versatile design element that can be used in a variety of settings. Below are some of the best environments where black ceiling tiles can make a significant impact:

1. Home Theaters

If you’re designing a home theater or media room, black ceiling tiles are a must. Their ability to absorb light enhances the viewing experience by reducing glare and reflections from the ceiling. Additionally, their sound-absorbing properties help improve the acoustics, making your audio system sound clearer and more immersive.

2. Bars and Restaurants

Black ceilings are a popular choice in bars, restaurants, and lounges that want to create a moody, upscale atmosphere. The dark ceiling tiles can make the space feel more intimate and exclusive. Paired with ambient lighting, the black ceiling tiles can enhance the overall experience for guests.

3. Offices and Conference Rooms

In office environments, Black Suspended Ceiling Tiles can add a modern, professional aesthetic while also helping to control noise. Conference rooms, in particular, benefit from the acoustic properties of these tiles, making meetings more productive by reducing outside noise and echoes within the room.

4. Retail Spaces

High-end retail stores often use black ceiling tiles to create a luxurious shopping environment. The dark ceiling contrasts with merchandise displays and lighting, drawing customers’ attention to the products. The sleek look of black ceilings also helps elevate the overall store design, making the space feel more exclusive and polished.

5. Residential Basements

Basements are another great place to install black ceiling tiles, especially if you’re transforming the area into a home theater, game room, or lounge. The dark ceiling will help make the space feel cozier, while the suspended tile system allows for easy access to wiring, pipes, and other systems that are often present in basements.

How to Choose the Right Black Suspended Ceiling Tiles

When selecting the perfect Black Suspended Ceiling Tiles for your space, there are several factors to consider to ensure you get the best results:

1. Material

Black suspended ceiling tiles come in a variety of materials, including mineral fiber, fiberglass, PVC, and metal. Each material offers different benefits. For example, mineral fiber tiles are excellent for sound absorption, while metal tiles are durable and resistant to moisture. Consider the specific needs of your space when choosing the material.

2. Acoustic Performance

If sound control is a priority in your space, look for black ceiling tiles with high acoustic ratings. The Noise Reduction Coefficient (NRC) measures how well the tile absorbs sound, while the Ceiling Attenuation Class (CAC) measures how well it blocks sound from traveling to adjacent rooms. A higher NRC or CAC rating is ideal for spaces like offices, theaters, and conference rooms.

3. Grid Compatibility

Ensure that the black ceiling tiles you select are compatible with the grid system you plan to use. Most suspended ceiling tiles come in standard sizes (such as 24” x 24” or 24” x 48”), but it’s essential to confirm that the tiles will fit securely in your chosen grid. Some tiles also have different edge profiles, such as square or beveled edges, which can impact the overall look.

4. Maintenance Requirements

Consider the maintenance requirements of the black ceiling tiles, especially if you’re installing them in a high-traffic or high-moisture area. Some materials, like PVC or metal, are more resistant to moisture, mold, and stains, making them easier to clean and maintain in environments like bathrooms or kitchens.

Conclusion: Elevate Your Space with Black Suspended Ceiling Tiles

Black Suspended Ceiling Tiles offer a unique and stylish way to enhance your space, whether you’re aiming for a modern, industrial, or intimate atmosphere. Their sleek appearance, acoustic benefits, and versatility make them a top choice for commercial and residential spaces alike. With easy installation and low maintenance, these tiles can transform any room, from home theaters to upscale retail stores.

If you’re looking to make a bold design statement while improving functionality, Black Suspended Ceiling Tiles may be the perfect solution for your next project.